Summer days are long and bright, and I find myself craving simple crafts that fit into our sunny afternoons. Kids want to be outside, but we still need ideas that are easy to prep and safe. This post came from a messy kitchen table full of glue and glitter and from a wish to help families make the most of warm days. I pulled together 29 summer crafts for kids that are friendly to little hands, quick to finish, and ready to enjoy under the sky.
If you are a parent, grandparent, caregiver, or teacher planning busy days, this is for you. If you care about affordable activities that you can set up in minutes, you will find it helpful. There are craft ideas for outdoor play and for cozy indoor corners. All of them are safe, simple, and designed to fit a range of ages.
Inside you will find 29 DIY projects for bright sunny days. Most use common kid supplies like paper, tape, glue, markers, and paint. Many take 20 minutes or less, and there are bigger projects you can stretch over a weekend. Each idea comes with clear steps and room to add your own color.
You will see crafts that use nature finds, recycled bits, and everyday items. The mix helps with focus, fine motor skills, and a sense of pride when the piece is done. I include practical tips to keep things tidy and to protect clothes. There are safety reminders and ways to adapt each idea for younger builders.
To get the most from this post, pick a couple of ideas for the week and line up supplies. Create a small craft corner on a sunny porch or near a kitchen table. Gather paper plates, cardboard, clothespins, string, scissors (with supervision), tape, and paint ahead. Let kids choose colors and shapes so each project feels personal.
Not every craft will be perfect, and that is okay. If rain moves you inside, you can swap in a napkin drawing or a paper weaving. This guide aims to be practical, not perfect, and it gives you real ways to fill quiet moments with imagination. Now, grab some sun and your supplies and start exploring these 29 summer crafts for kids.
1. Painted Rock Animals
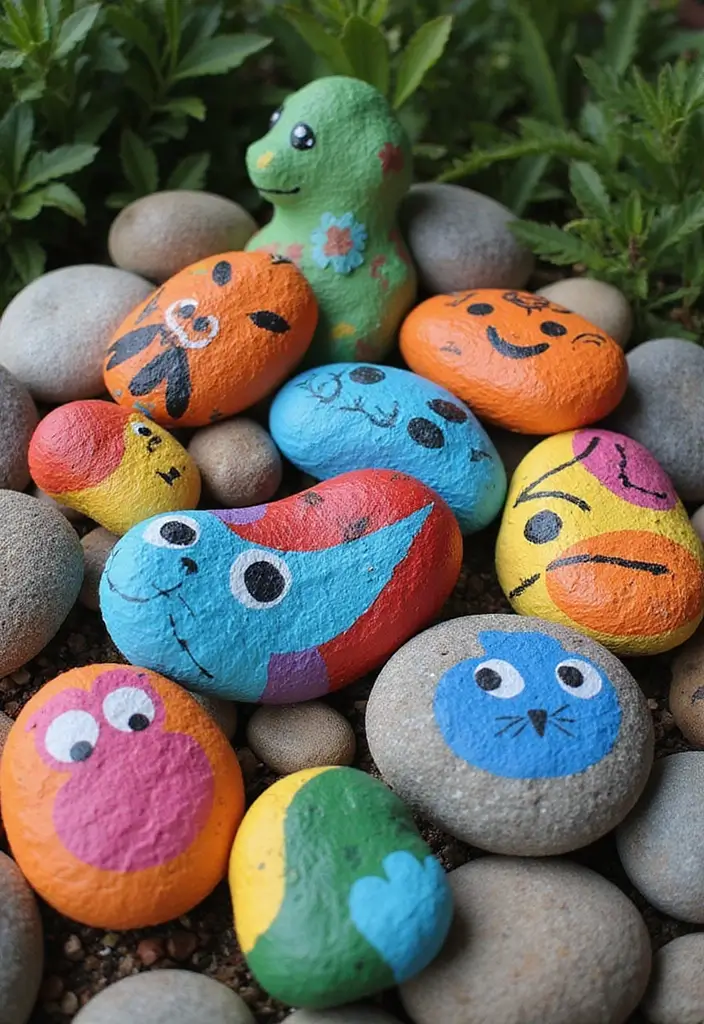
Looking for a sunny, simple outdoor craft? Painted rock animals fit the bill. Kids turn plain stones into rock painting creatures using basic supplies.
What You’ll Need:
– Smooth rocks
– Non-toxic acrylic paints
– Paint brushes
– Sealant (optional)
How to Do It:
– Find smooth rocks at the park, in your yard, or along a trail. Pick ones that feel good in your hand.
– Wash them and let them dry completely. Clean rocks paint better and stay brighter.
– Plan a simple animal picture. Start with a solid base color, then add ears, eyes, and a smile. Use small brushes for tiny details.
– Let the paint dry fully. If you want the rocks to live outside, add a coat of sealant.
– If you want more challenge, add patterns, stripes, or tiny faces.
– They can keep growing with new animals each week.
Tips:
– Do this on a sunny day outside to keep mess contained.
– Use a tray and water cup to rinse brushes. Dry brushes well between colors.
– If you paint gifts, wrap a note with the rock’s story.
These painted stones work as garden decorations or thoughtful gifts. Your child learns color, form, and care for the environment while making something unique. Your kids will feel proud of each painted rock.
@media(max-width:480px){
2. Nature Collage Masterpieces
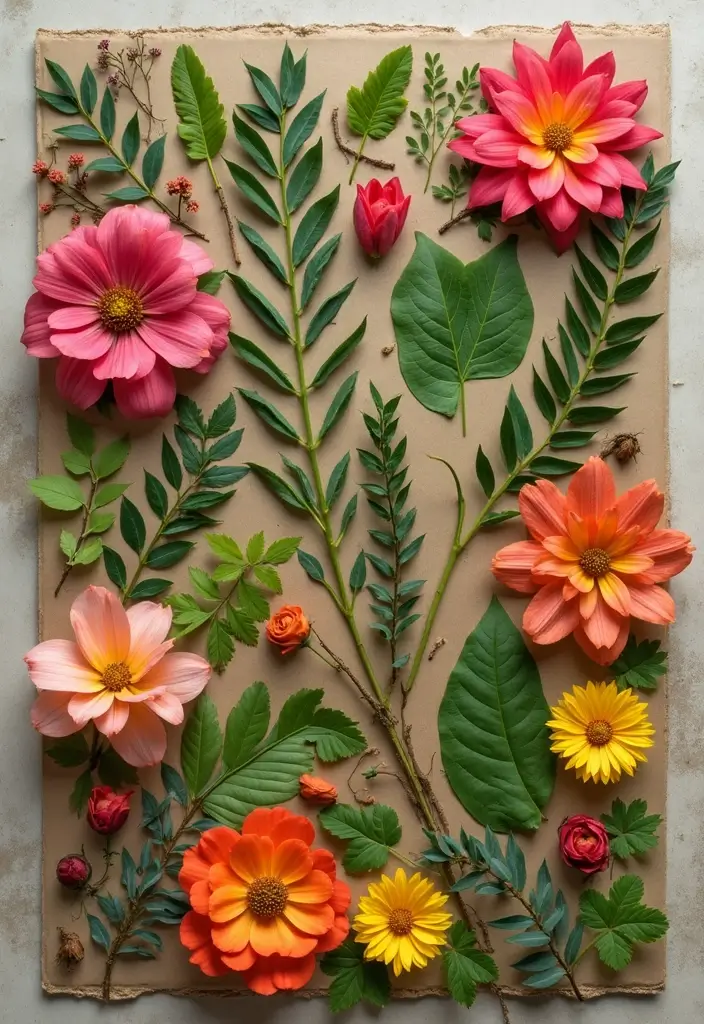
If you want a calm, creative activity that uses what you find outside, try a nature collage. This project invites kids to collect leaves, flowers, and twigs and turn them into art. It shows how beauty can come from simple things and helps kids notice nature up close.
What You’ll Need:
– Cardstock or cardboard
– Glue
– Natural materials (leaves, flowers, twigs)
– Scissors (for adults to use)
How to Create:
1) Take a short walk in a park or your yard to gather materials.
2) Lay the items on the backing first. Move them around to form patterns, shapes, or even small scenes.
3) Glue them down. Press gently to secure each piece so the collage lasts. Let it dry before you display it.
This activity builds fine motor skills as little fingers pick up, place, and press each piece. It also teaches kids to respect nature by handling materials gently and returning what they can’t use.
Here is why this works: you get a quiet, creative moment together, and your child practices planning and balance as they arrange textures and colors.
Next steps: hang the collage where light can pass through the leaves, or seal it with a thin coat of clear glue or wax for a simple keepsake.
@media(max-width:480px){
3. DIY Butterfly Feeders
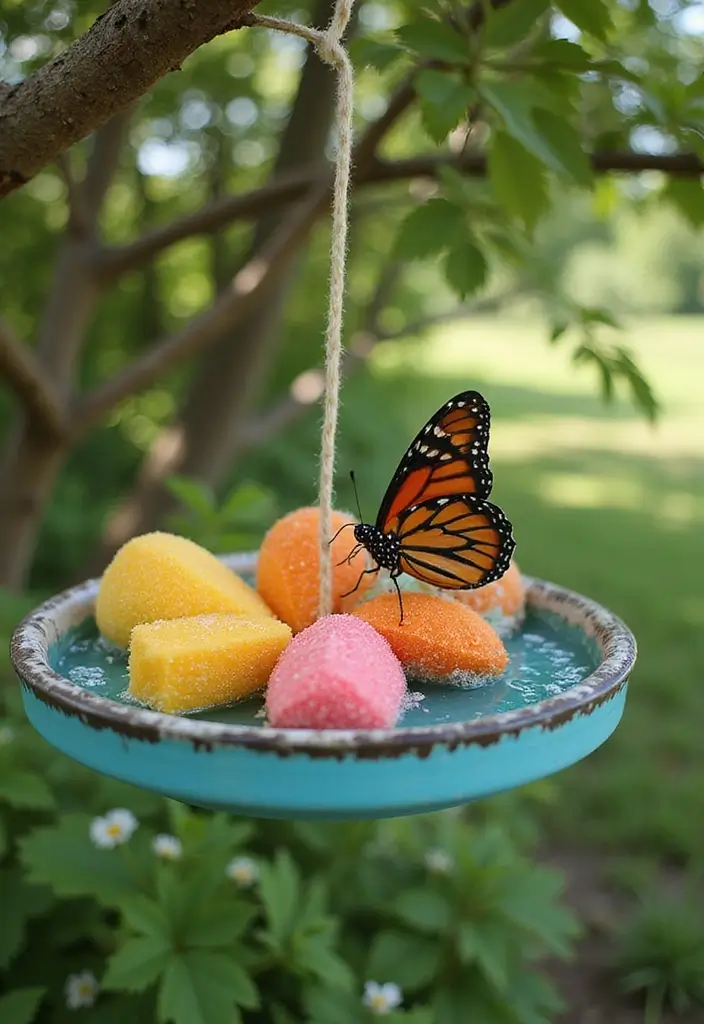
If you want a quick project that brightens your garden and teaches kids about nature, try a DIY butterfly feeder. It’s small, simple, and fun to do together this summer.
What You’ll Need:
– A shallow dish or jar lid
– Sugar water (1 part sugar to 4 parts water)
– String or yarn
– Sponges or cotton balls (optional)
Instructions:
1. Mix the sugar and water until the sugar fully dissolves. Soak the sponges or cotton balls in the sweet liquid.
2. Place the soaked sponges in the dish or lid. They act as a tiny raft to hold the liquid.
3. Tie a piece of string to the dish and hang it from a tree branch. Watch as bright wings dip in to sip.
Watching butterflies visit is a quiet, magical moment. Here is why this works: butterflies seek nectar, and the simple feeder gives them a easy stop in your yard. This setup also gives your kids a live lesson in ecology and patience.
Bonus: start a simple nature journal. Jot down the butterfly colors, sizes, and how long they stay. A quick sketch or note each day makes this project last longer and keeps curiosity alive.
If you want more ideas, try moving the feeder to different spots or adding a second dish at a lower height for younger helpers. That gives you more chances to observe and learn together.
@media(max-width:480px){
4. Upcycled T-Shirt Tote Bags
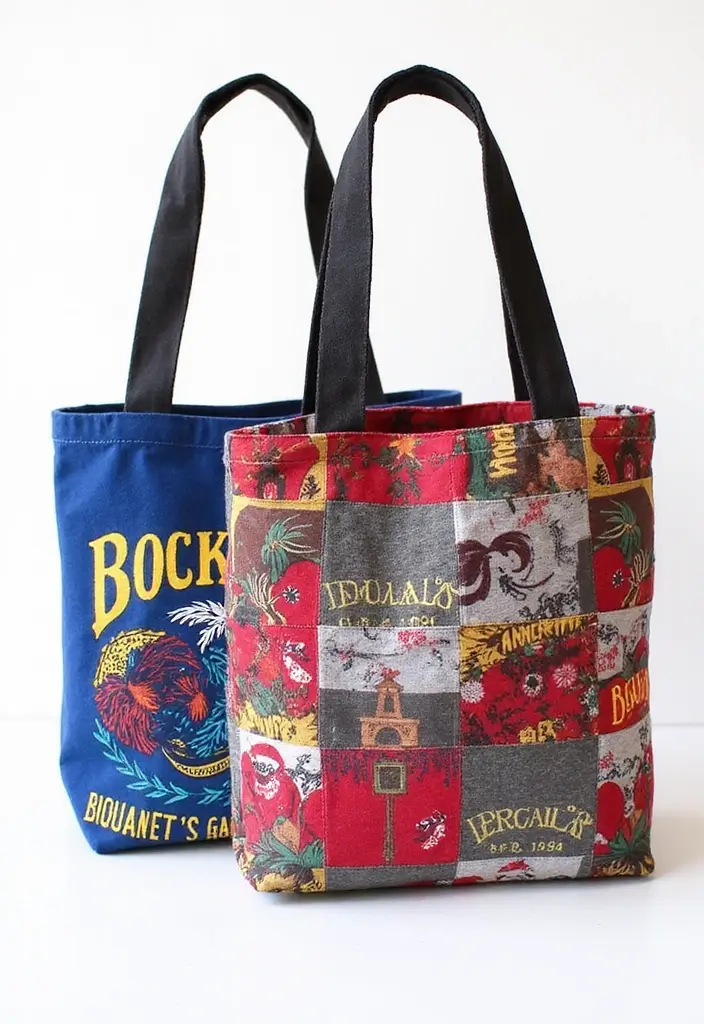
Looking for a simple craft that saves waste and gives your kid a real, useful tote? Try upcycled t-shirt tote bags. They work for park trips, beach snacks, or library runs. Kids see a worn shirt become a handy bag, and they learn a quick recycling lesson with hands-on effort.
What You’ll Need:
– Old t-shirts
– Scissors
– Optional: fabric markers for decoration
Steps to Make:
1. Cut the sleeves and the neckline to open the top of the shirt.
2. Make fringe at the bottom about 6 inches long, then tie the fringe pieces together to form the bag’s bottom.
3. Let kids decorate their tote bags with fabric markers for a personal touch.
Here is why this idea works. It uses items you already have and keeps plastic waste out of landfills. It takes only a few minutes, and you can adjust the size by picking a bigger or smaller shirt. A tote like this is light, sturdy, and easy to wash after a sunny day at the park or beach.
Next steps: wash the bag, then try a second shirt to make a matching set for siblings or friends. They’ll use the bags to carry books, snacks, toys, or art supplies on every summer adventure.
Pro tip: pick bright colors or bold stripes to make each bag feel unique and fun. A simple project like this adds a quick win to your summer crafts for kids.
@media(max-width:480px){
5. DIY Solar Ovens
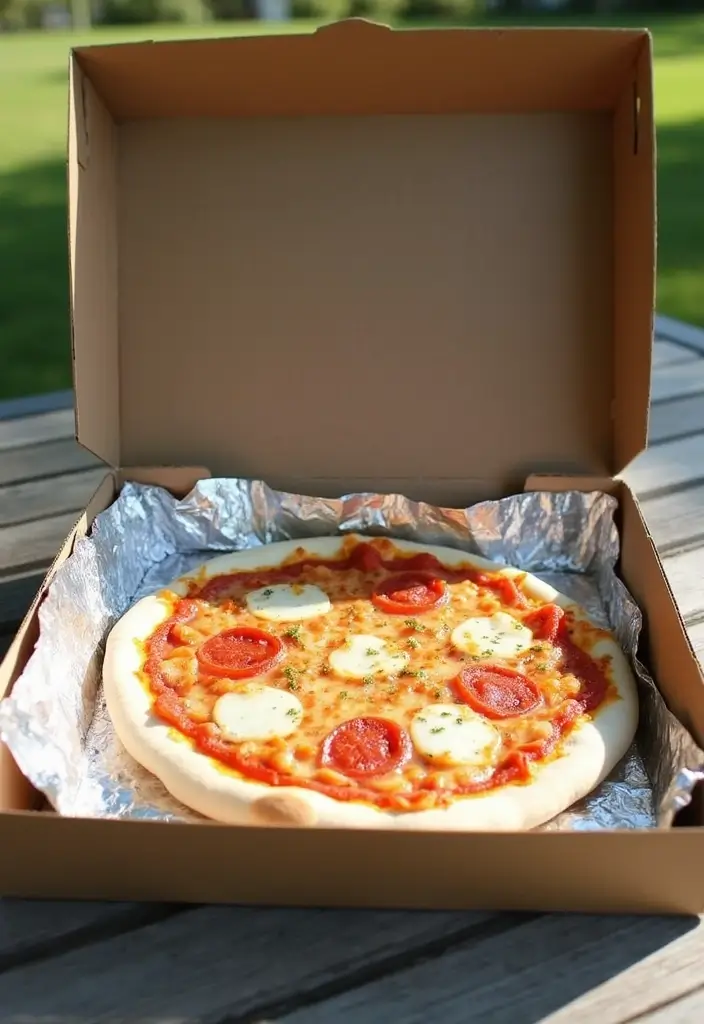
Sunny days give you a chance to learn and eat at the same time. A DIY solar oven uses only sun power to warm up tasty s’mores. You see energy in action, and you get a sweet treat at the end. It’s a sun powered cooking project you can do with simple materials.
What You’ll Need:
– Pizza box or similar cardboard box
– Aluminum foil
– Plastic wrap
– Black construction paper
– Marshmallows, chocolate, and graham crackers
– Tape
– Scissors
How to Create:
1) Cut a straight flap in the lid of the box. Fold the flap up and line the inside with shiny aluminum foil to bounce sunlight onto the box.
2) Place a strip of black construction paper at the bottom. It soaks up heat so your items warm faster.
3) Cover the opening with plastic wrap. Seal the edges with tape to trap heat inside.
4) Put the s’more ingredients on a small tray inside, near the center so they heat evenly.
5) Set the oven in a sunny spot. Tilt the lid flap a bit to catch the best sun during the afternoon.
6) Wait and watch as the foil reflects light, heat climbs, and the marshmallows begin to melt.
7) When the chocolate is soft, peek carefully and enjoy your solar-cooked treat.
This craft blends science with cooking. You’ll learn how sunlight becomes heat and how a simple box can do real work. Share your results with friends and try different foods.
6. Flower Pressing Art
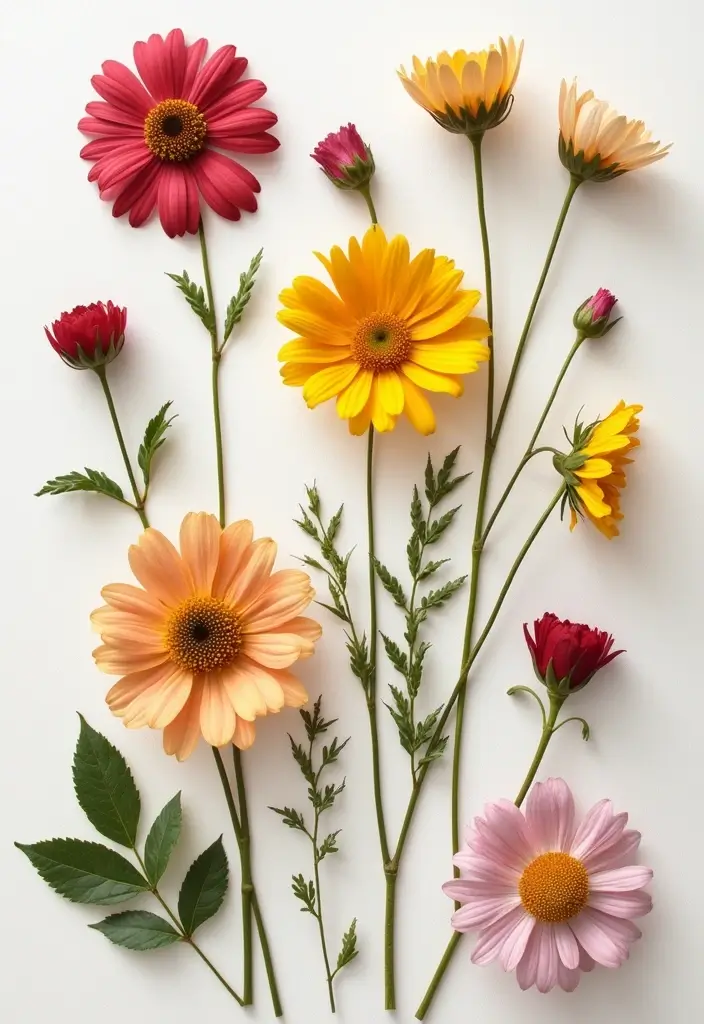
You want a calm, creative way to keep summer blooms. Flower pressing turns fresh flowers into lasting art you can display or gift. It’s simple, slow, and satisfying.
What You’ll Need:
– Fresh, flat flowers
– A flower press or a couple of heavy books with clean paper between
– Cardstock or watercolor paper
– Optional: clear contact paper to seal and protect
Steps to Follow:
1. Choose small, flat flowers. Daisies, violets, and buttercups work well.
2. Put the blooms between sheets of clean paper inside the press or book.
3. Close the press and leave it alone for about one to two weeks. Check the pages every few days to keep them flat.
4. When the petals feel dry and stiff, take the flowers out carefully.
5. Lay them on cardstock or watercolor paper. Glue them down gently to keep their shape.
6. For extra protection, cover the finished piece with a sheet of clear contact paper.
This craft teaches patience and design. You’ll see how colors and shapes press differently. Try a grid, a border, or a small bouquet. The final art lights up a room and makes a thoughtful, handmade gift.
@media(max-width:480px){
7. DIY Wind Chimes
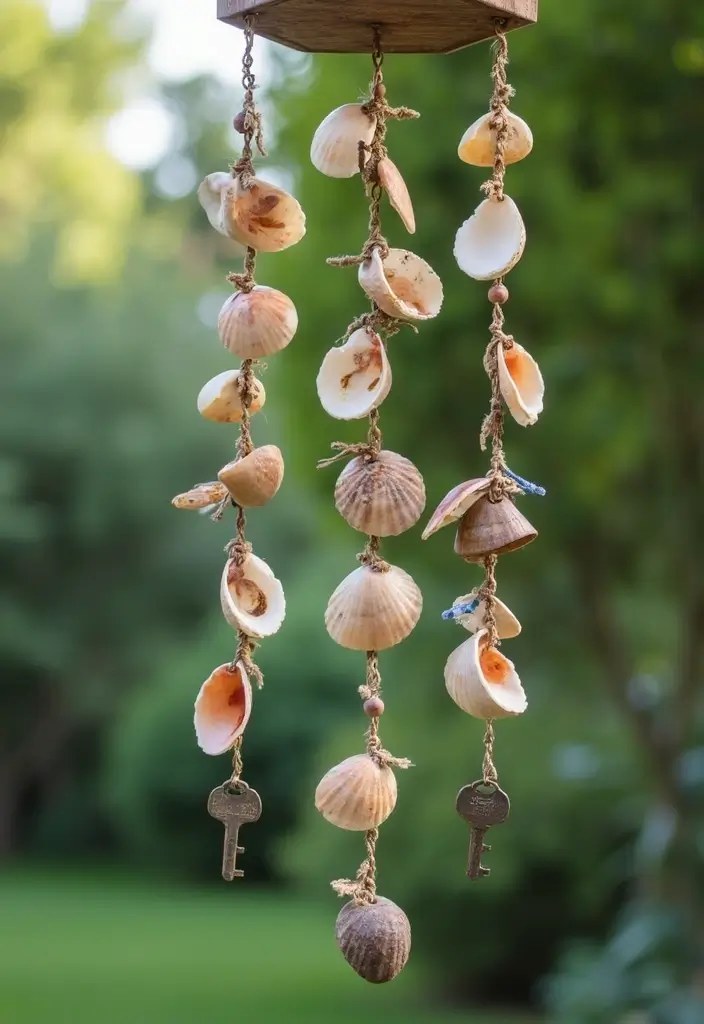
Want a quick, kid-friendly project that adds music to your outdoor days? DIY wind chimes fit the bill. They’re simple, use stuff you already have, and turn a light breeze into tiny tunes. You’ll see creativity shine as your child picks objects and decides how they hang.
What You’ll Need:
– Wooden dowel or a strong branch
– String or fishing line
– Upcycled objects (keys, shells, beads, bottle caps)
– Scissors
Instructions:
1. Tie strings to each object so they hang freely and can swing without touching each other.
2. Attach the other end of each string to the dowel or branch. Space the pieces so they don’t tangle.
3. Hang your wind chimes in a breezy spot and listen to the soft music they make when the air moves.
Kids love making their own sound makers. You can explain how weight, length, and placement affect the tones. The wind becomes a partner in the craft, not just a background breeze. Plus, each wind chime shows a little piece of the maker’s personality.
Next steps: try longer and shorter strings for more variation, add color with paint or beads, or swap in new found objects to change the sound.
@media(max-width:480px){
@media (max-width: 600px) {
.normal-quiz-iframe { min-height: 570px !important; height: 570px !important; }
}
8. DIY Nature Journals
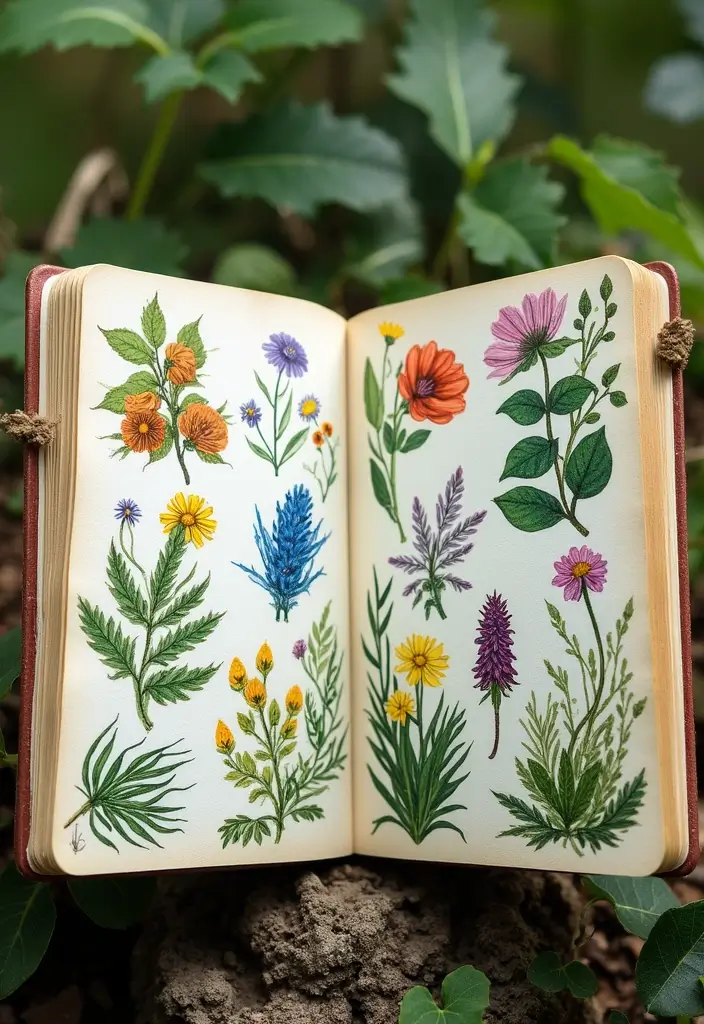
If your kids love the outdoors but spend more time on screens, a nature journal can bring them back outside. It gives them a simple goal, a place to record what they notice, and a reason to look closely. The act of writing helps focus attention and memory. They will hear birds, feel the breeze, and spot tiny details they would miss otherwise.
What You’ll Need:
– Blank notebooks or recycled paper
– Cardstock for covers
– Markers, stickers, or simple decorations
– Optional: a hole punch and string to bind
How to Create:
1. Let your child decorate the cover with nature stickers or drawings.
2. Leave a section of pages blank for sketches or notes about plants and animals.
3. Take the journals on a nature walk. They record what they see, hear, and smell.
Here is why this works. A cover that feels personal makes the journal inviting. Blank pages invite free sketches and quick notes. Regular walks turn small trips into big lessons.
Let’s break it down further. Use quick prompts to guide entries, like “What plant is this?”, “What color is the sky now?”, or “What sounds do you hear?” Keep entries short. A sentence or two is enough.
Next steps. Keep the habit steady by choosing a day for a short stroll each week. The journals become cherished keepsakes as you watch curiosity grow and careful observation rise.
9. Sun Prints
Want a calm, creative activity that blends art with a little science? Sun prints light up a sunny day and give you gallery-worthy pictures with almost no mess.
Here is why you should try it. Sunlight powers a chemical on sun-sensitive paper. The longer the paper sits in the light, the stronger the print becomes. When you rinse it, the white shapes of leaves and flowers appear in a bright blue tone. It is simple, and the results feel magical.
What You’ll Need:
– Sun-sensitive paper (found at most craft stores)
– Leaves and petals in different shapes
– A flat workspace you can rinse and dry on
– Optional frame or string to display your art
Steps to Make:
1. Arrange your leaves and flowers on the sun-sensitive paper.
2. Set the paper in direct sun for a few minutes, until the design looks clear.
3. Rinse the paper with water to reveal the vivid prints, then let it dry flat.
Here is why the steps work. The sun darkens the areas not blocked by plants, and the water stops the chemical action so your prints stay bright. The whole process takes just a short planning moment and a few quiet minutes of waiting.
Next steps. Try different plant shapes to save as a set of keepsakes. You can trim prints and place them in frames, or hang a small gallery wall in a sunny corner. These sun prints make friendly gifts for family and friends, and they spark curiosity about light, color, and nature.
@media(max-width:480px){
10. DIY Seed Bombs

Are you trying to give kids a quick, fun garden project that brings color to sunny days? Seed bombs mix dirt, seeds, and clay into little balls that spark life fast. Kids can roll, toss, and watch flowers bloom.
Here is why seed bombs work: they travel well, they are simple to make, and they spark color in bare spots.
What You’ll Need
– Native wildflower seeds suited to your area
– Clay powder or fine garden soil
– Water
– Optional: a small mixing bowl
How to Make
1. Combine seeds with clay powder or soil. Add just enough water to form a soft dough.
2. Roll the dough into marble-sized balls. Put them on a tray and let them dry in sun for 24 hours or until firm.
3. Toss the balls into sunny patches or plant them by pressing lightly into the soil.
This hands-on project connects kids with nature and teaches care for the yard. They will see color burst as flowers rise in the warm air. Next steps: pick a sunny area, gather friends, and start dropping seed bombs around your yard, a park, or a school garden.
11. Nature-Inspired Paint Brushes
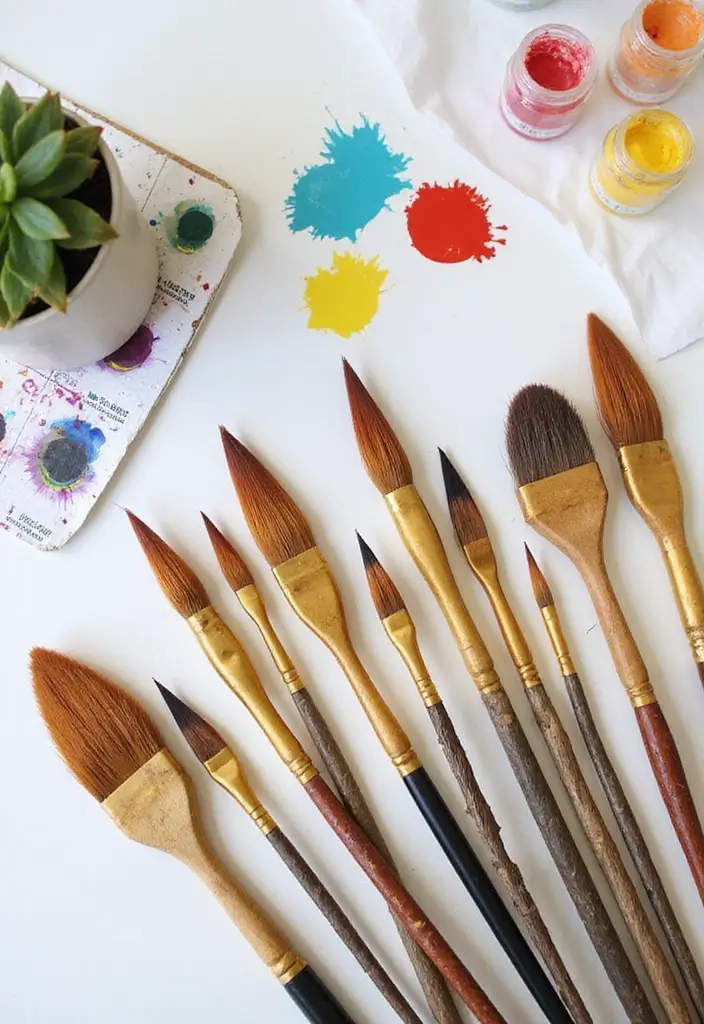
You’re looking for a simple, hands-on art project that sparks creativity. Nature-inspired paint brushes do that. They let kids mix art with outdoor exploration and discover new textures on paper.
What You’ll Need:
– Twigs or sturdy stems
– Natural materials (leaves, grass, pine needles)
– String or rubber bands
– Non-toxic paint
Steps to Create:
1) Gather sticks and tie natural bits to the ends with string or rubber bands to form brush heads.
2) Dip the brushes in paint and try them on plain paper.
3) Experiment with texture—press, drag, and tap to see different marks.
Here is why this works: leaves lay flat for broad strokes, while pine needles make fine, speckled lines. Rough bark on a twig adds bold, jagged edges. You can change the look by widening or narrowing the brush head or by wrapping more materials around the end.
Tips for Great Results:
– Experiment with different blends of natural bits to find your child’s preferred textures.
– Clean brushes between colors so you don’t mix muddy shades.
– Let the kids name their brushes; it boosts ownership.
Safety note: choose non-toxic paints and supervise brush assembly and cleanup.
Next steps: Add a nature theme day. Try painting with twigs outdoors, then translate the scene to a home artwork. This activity invites curiosity and turns a simple walk into art time.
@media(max-width:480px){
12. Homemade Bird Feeders
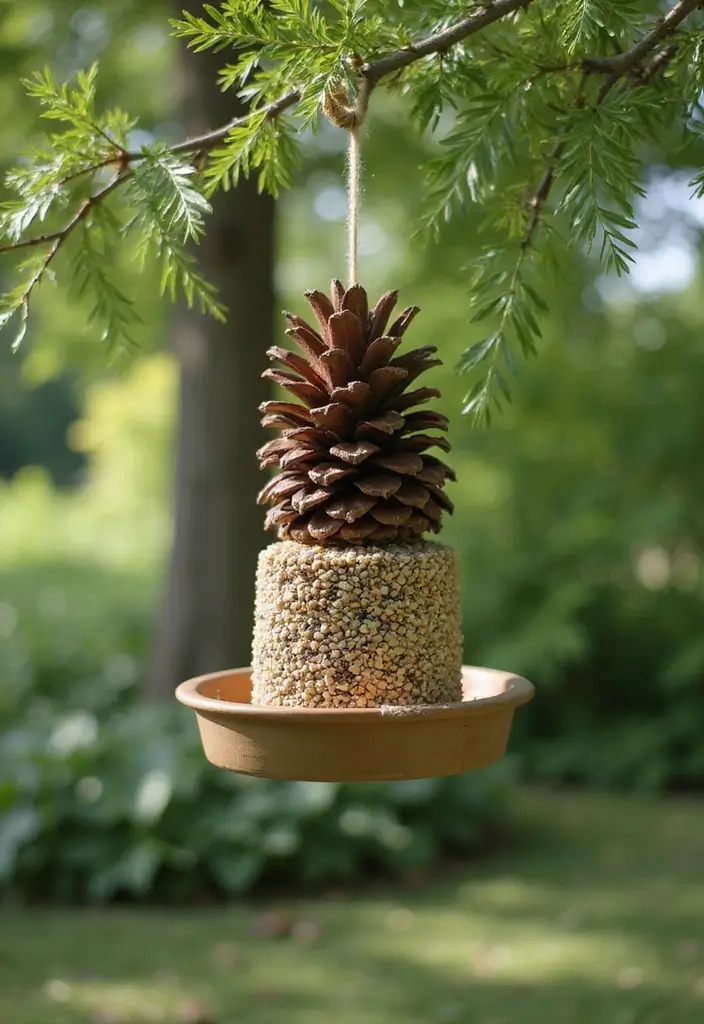
Do you want a kid-friendly craft that attracts birds and teaches about nature? A homemade bird feeder fits that need.
What You’ll Need:
– Pinecones or cardboard tubes
– Peanut butter or lard
– Birdseed
– String
Instructions:
1. Coat the pinecone or cardboard tube with peanut butter or lard.
2. Roll it in birdseed until it is well covered.
3. Tie a string and hang it from a tree branch.
Here is why this works. The scent draws birds, and the seeds catch their eye. Kids learn by doing. They see birds up close and notice colors, songs, and habits. Let them observe how birds come and go and how different species act.
Let’s break it down. This craft keeps steps simple. You can swap pinecones for cardboard tubes to make more feeders. You can try different seeds to attract a variety of birds.
Next steps. Place the feeder where you can watch from a window. Keep it dry and clean. Check the string for wear and replace it if needed. Most important, have fun and talk about what you notice with your kids.
13. DIY Tie-Dye Sun Hats

Summer days beg for a hat that helps shade you and show off color. DIY tie-dye sun hats do just that. They’re simple, and kids love the bright patterns they create. Here is why this is a great choice for your sunny days.
What you’ll need:
– White cotton sun hats
– Fabric dye or tie-dye kits
– Rubber bands
– Gloves
– Old sheet or plastic to guard your workspace
Creating your design:
1. Pick a pattern. You can twist it into a spiral, make bold stripes, or craft a simple circle shape. The goal is to trap color inside the bands for a cool look.
2. Wrap sections of the hat with rubber bands. The bands act as tiny color cages. Don’t worry if your first try isn’t perfect.
3. Dye the hat. Squeeze or dab color onto the tied sections in the colors you like. Use multiple colors for a splashy effect.
4. Let it set. Leave the hat as directed by the dye kit. This step helps the color bond with the fabric.
5. Rinse and dry. Rinse until the water runs clear, then air dry in the sun or shade.
Next steps: wear your one-of-a-kind hat on hot days, show off your pattern, and try new color combos next time. This simple craft keeps kids cool and lets them carry summer style with them.
14. DIY Garden Markers
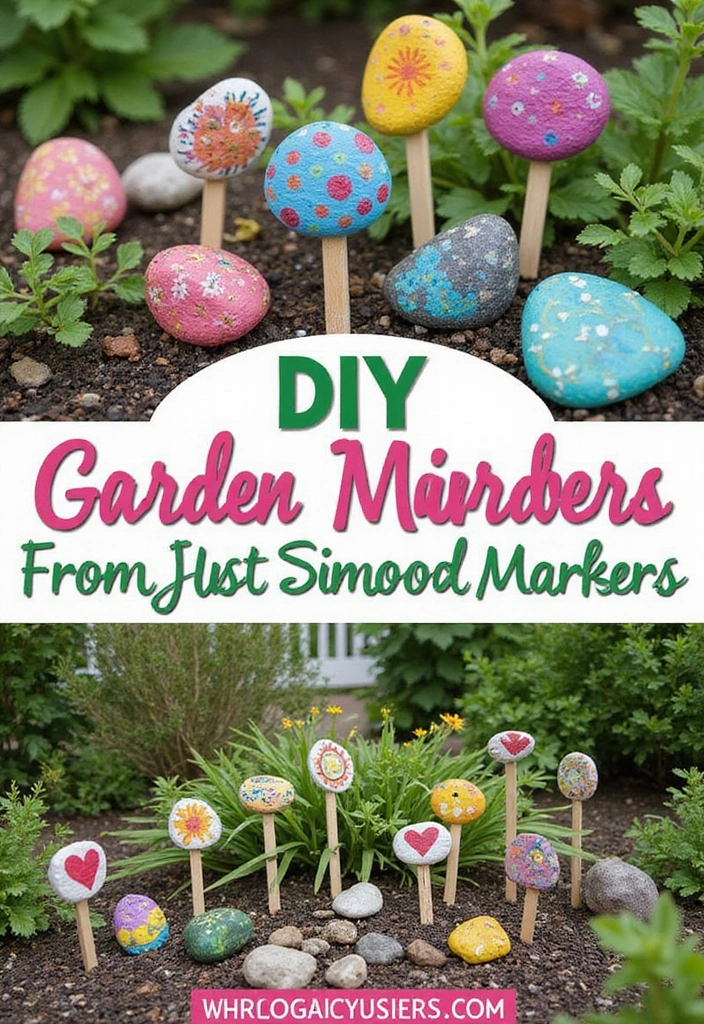
Feeling a bit overwhelmed by your garden tasks? DIY Garden Markers offer a quick, kid-friendly way to label plants and spark a little garden learning. You get a bright outdoor project and clear labels so your plants stay organized. Let’s break it down and get you started.
What You’ll Need:
– Smooth stones or wooden popsicle sticks
– Paint or permanent markers
– Optional: sealer for protection
Steps to Create:
1. Pick your base: flat stones or sturdy sticks work best.
2. Write the plant names in bold letters so they’re easy to read from a few feet away.
3. Add simple designs or color blocks to make each marker stand out.
4. Let the drawings dry, then seal the surface if you have sealer.
5. Place markers next to the matching plants, in a spot where kids can see them while they water.
Here is why this works: kids connect care with labels. They learn plant names, and they remember where each plant lives. The markers also spark curiosity about how gardens grow.
Next steps for stronger learning: choose a color code for sun lovers, herbs, or veggies. Let kids trade designs or even make note cards with plant tips. Keep a small box of markers nearby for quick changes as plants grow.
This simple craft adds color and order to your space while teaching responsibility and garden know-how.
@media(max-width:480px){
15. Nature Bracelet Craft
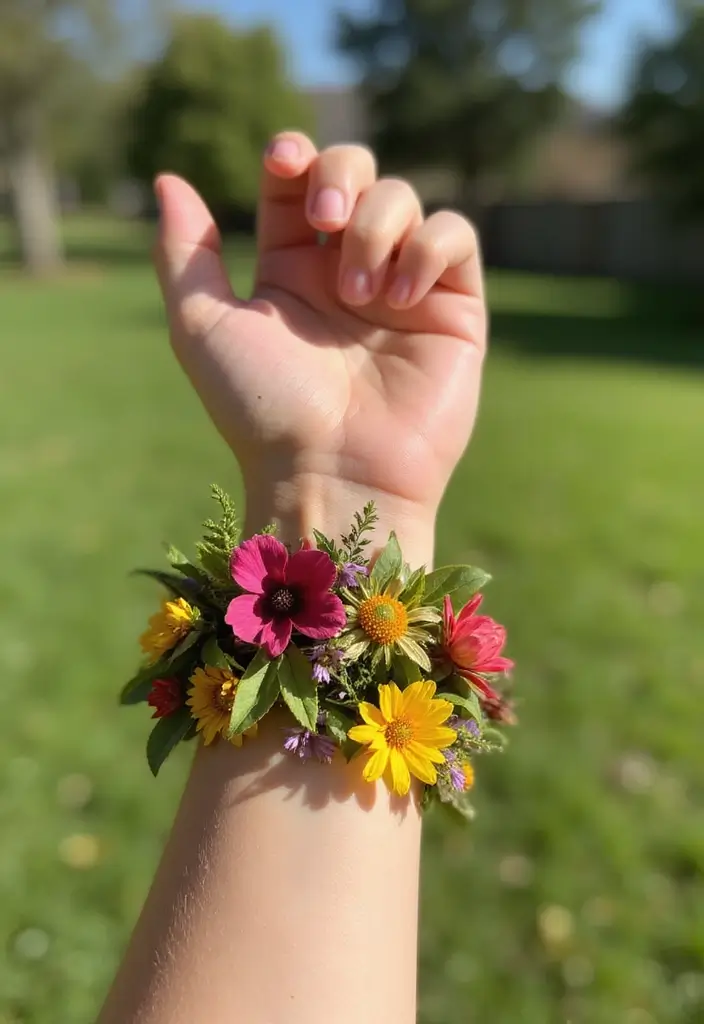
Nature bracelet craft
Looking for a simple, screen-free activity that lets kids connect with nature? This nature bracelet craft is easy, fun, and portable. It works on a sunny day or after a nature walk. You’ll enjoy watching your child notice tiny details.
What You’ll Need:
– String or yarn
– Natural materials (flowers, leaves, beads)
Steps to Make:
1. During a short walk, pick small, sturdy items. Choose things that won’t break easily.
2. Thread the items onto the string. Space them so colors and shapes show.
3. Tie the ends to fit the wrist. Trim any extra string.
Next steps: let your kid wear the bracelet right away or trade with a friend.
Here is why this helps: kids practice observation as they choose what to add. They learn fine motor skills as they thread beads and leaves. The project also turns a walk into a tiny treasure hunt.
Tips and variations:
– Try a color pattern by lining up items from light to dark.
– Add a safe bead or a button for a different look.
– Make a set of bracelets for siblings or friends.
Limitations and care: the bracelet can fray or snag on rough surfaces. If it gets wet, it may stretch a bit. That’s fine for a sunny day craft.
This nature bracelet craft stays light, quick, and ready for outdoor play.
16. DIY Water Balloon Pinatas
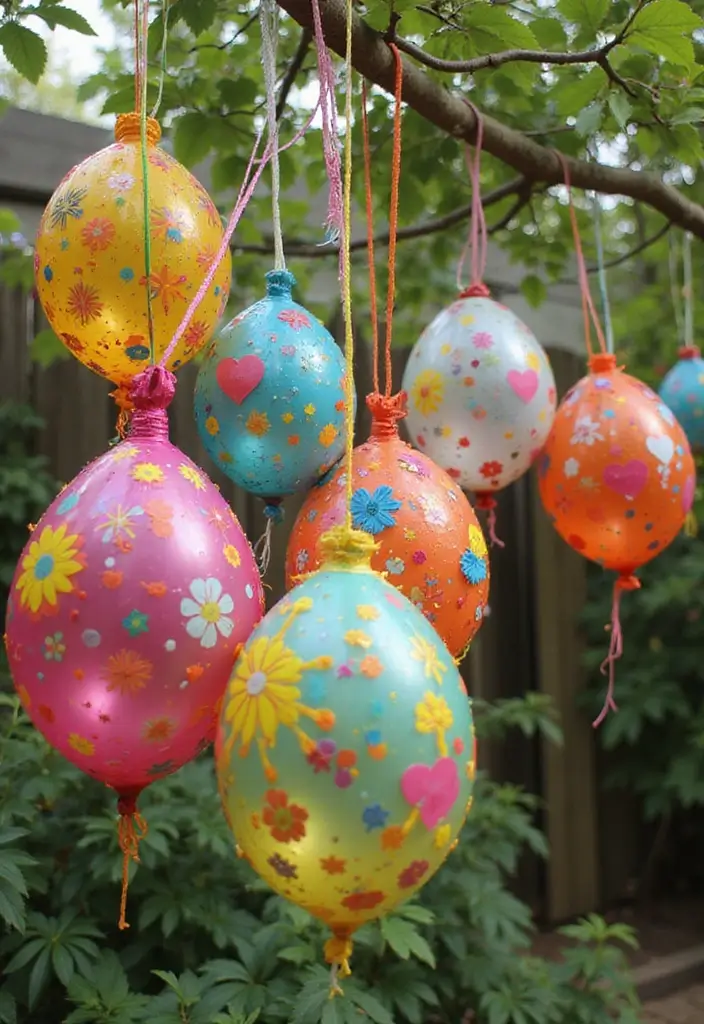
Summer heat has you looking for simple ways to have fun. Water balloon piñatas give a fresh twist on a classic game. You color, hang, and splash in one easy activity that kids love.
What You’ll Need:
– Water balloons
– Non-toxic paint or markers
– String or yarn
– Optional: small treats to fill balloons
Instructions:
1. Blow up the balloons to a size that fits small hands. Let kids pick colors and decorate with paint or markers. Use washable paints to keep cleanup quick.
2. Let the decorations dry completely. Tie a string to each balloon and hang them from a sturdy spot like a tree branch, a clothes rack, or a picnic line.
3. When everything is hung, give kids a safe stick and let them take turns tapping the balloons. A soft pop sends a splash of colored water into the air. Keep a towel nearby and watch the smiles spread.
Why this works for summer:
– It cools you down fast. Water bursts mix with bold colors for a tiny party.
– It builds creativity. Kids choose colors, patterns, and where to hang each balloon.
– It stays safe. Use light sticks, soft taps, and a clear play area.
Setup tips to avoid mess:
– Lay down a tarp or old sheet.
– Pick a shaded spot to slow drying and keep kids comfy.
– Have a quick cleanup plan with towels and a bucket of water.
Next steps: try this at a family picnic or a neighborhood outdoor playdate for big, giggly fun.
@media(max-width:480px){
17. Leaf Rubbings
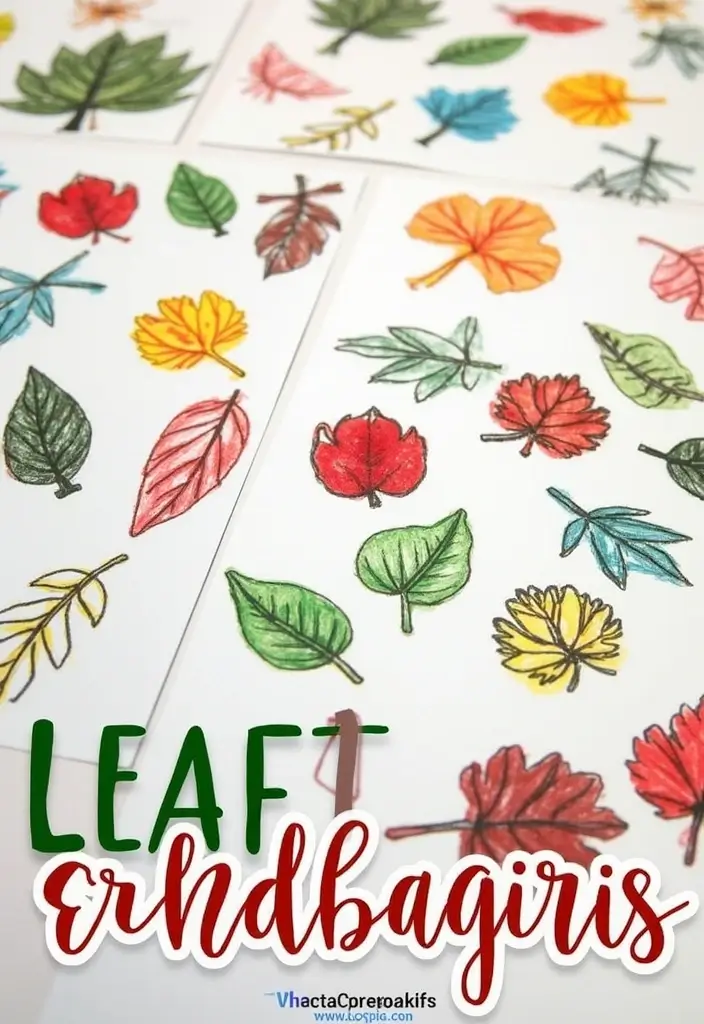
Leaf rubbings let you see nature up close. Press a leaf on paper and lift its shape and texture with a quick stroke. The art is easy and fast for kids.
What you’ll need:
– Fresh leaves in different shapes
– Paper (plain or colored)
– Crayons or colored pencils
How to Create:
1. Place a leaf under the paper and hold it flat.
2. Rub a crayon or pencil over the paper. The leaf’s veins and edges pop as you move.
3. Try many leaves and colors. Layer papers for bolder looks. Younger kids can keep it simple; older kids can push for darker lines.
Here is why this activity works: the rubbing captures texture and line, not just color. Kids notice curves, tiny veins, and the edge shapes. It stays calm and builds focus.
Let’s break it down with these tips: Use a clean sheet of paper under each leaf to avoid smudges. Start with smooth leaves, then try jagged ones for variety.
Next steps: hang the art on a wall, start a small nature gallery, or gift a leaf print. Save rubbings in a folder to build a tiny nature sketchbook.
Tips for success: keep leaves dry and not too brittle. Press lightly at first, then a bit harder for bolder lines. If you want, swap a plain background for colored paper to make prints pop.
This keeps kids curious and gives you easy keepsakes.
@media(max-width:480px){
@media (max-width: 600px) {
.visual-quiz-iframe { min-height: 995px !important; height: 1100px !important; }
}
18. DIY Candle Holders from Mason Jars
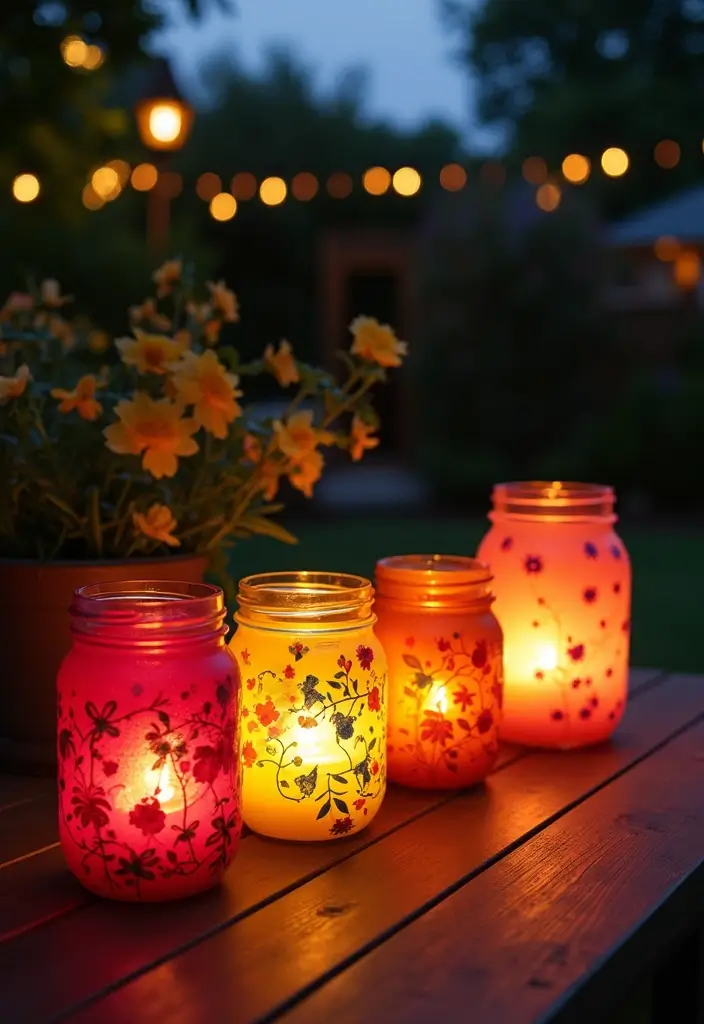
Want a simple, kid-friendly craft that lights up your summer nights? Mason jar candle holders are a perfect fit. They turn ordinary jars into cozy outdoor lanterns your family will love.
What You’ll Need:
– Mason jars
– Non-toxic paint or Mod Podge
– Tissue paper or natural accents like twigs, leaves, or pressed flowers
– Tea light candles or LED tea lights
Creating Candle Holders:
1) Wash the jars and dry them completely. A clean surface helps the colors stick.
2) Decorate the inside of each jar with paint or glue on tissue paper to make a pattern.
3) If you use tissue paper, seal the design with a thin layer of Mod Podge so it lasts through a few summer evenings.
4) Place a tea light inside. Turn on the LED version for a safe, kid-friendly glow. Set the jar on a sturdy table away from wind and dry leaves.
These candle holders give a warm glow that makes outdoor dinners, games, and chats feel special. Kids can mix colors, try stripes or circles, and choose natural bits that match your yard. It’s a simple project with a big, cozy payoff.
Next steps and ideas: wrap the neck with twine for texture, add a small label, or group jars of different heights for a table centerpiece. You can also use them as party lanterns or porch lighting.
Safety notes: always use LED candles around kids, and never leave flame candles unattended. Place holders on heat-safe surfaces and away from flammable stuff.
@media(max-width:480px){
19. DIY Mosaic Art
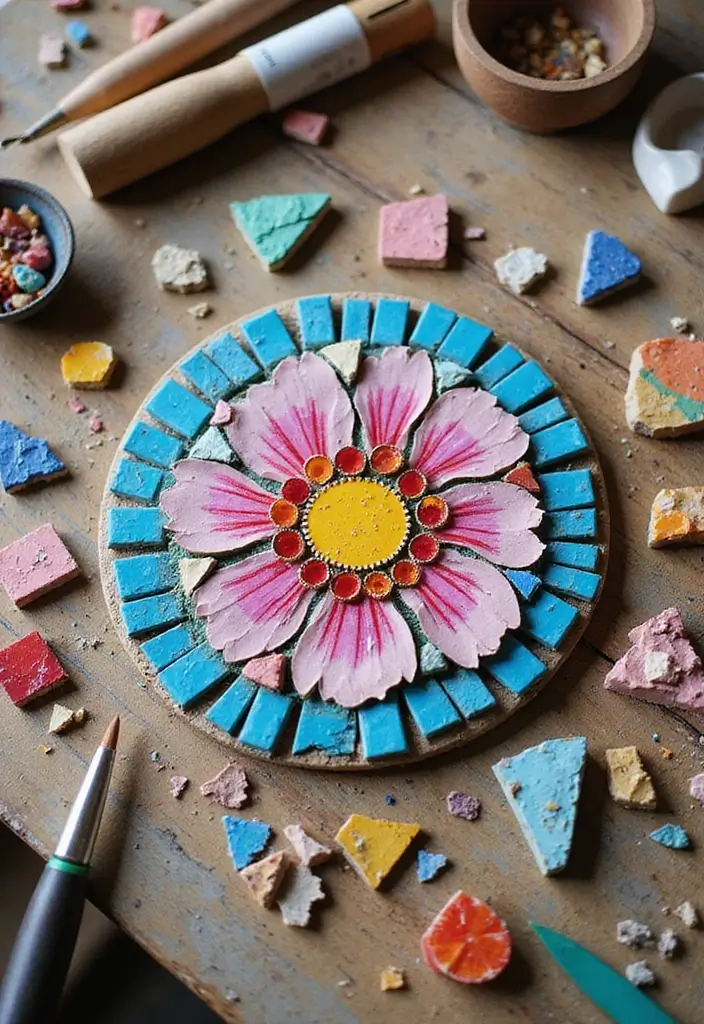
Want a fun, kid-friendly art project for sunny days? DIY mosaic art lets you turn scraps into bright pictures you can mix and match. You’ll discover color, shape, and pattern as you build.
What You’ll Need:
– Broken tiles, glass, or colored paper
– Cardboard or wooden base
– Glue that dries clear
– Grout (optional for a smooth, finished look)
– Gloves or an old apron for clean, safe hands
Steps to Craft:
1. Pick a simple design. Think sun, heart, or fish to start easy.
2. Lay out pieces on the base to test your idea. Tweak the layout until you’re happy with the look.
3. Glue pieces down one by one. Press firmly so they don’t lift.
4. If you use grout, spread it between the pieces and wipe away the extra. Let it set before handling.
Here is why this works: kids get instant results as colors come together into a scene they created. It builds focus and steady hands while sparking imagination. When you’re done, hang the mosaic on a wall or prop it on a shelf. For outdoor use, a simple seal helps weather a bit of sun and rain. Keep guidance nearby and enjoy the colorful, tactile art you made with your own hands.
20. DIY Suncatchers
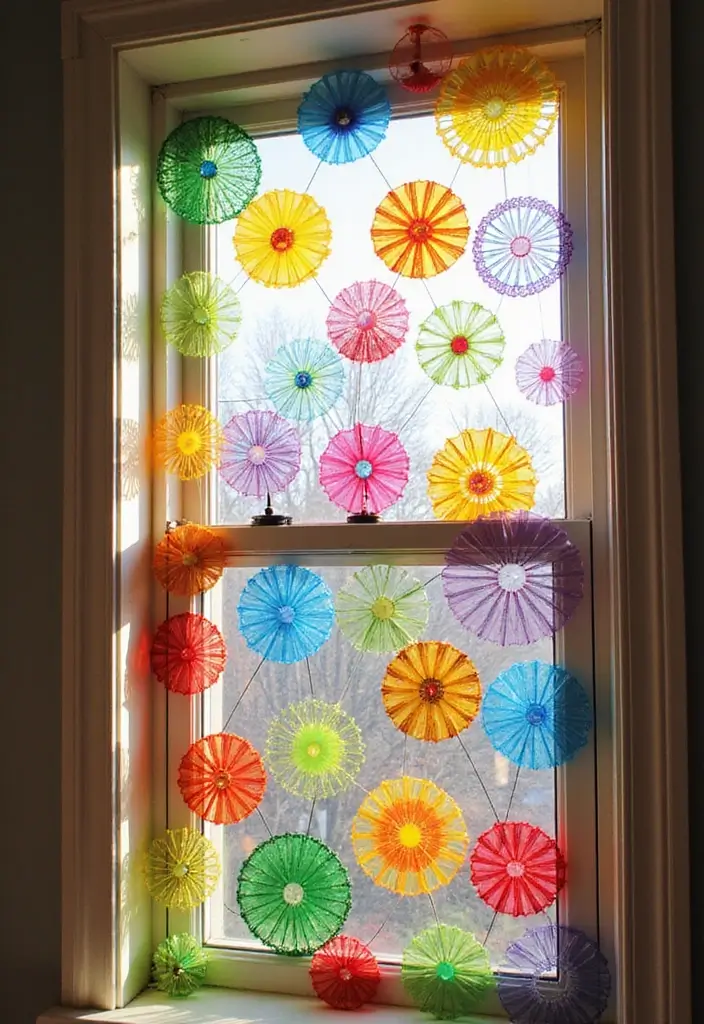
You want a simple, sunlit craft for kids that lights up a room. Suncatchers fit the bill. They mix art with a touch of science. When the sun hits them, colors glow on the walls. No special tools are needed.
Here is why this works. Thin tissue colors pass light. You press them between clear sheets. The sun shines through, and the colors bloom across the glass.
What You’ll Need:
– Clear contact paper or wax paper
– Tissue paper (various colors)
– Scissors
– String for hanging
How to Create:
1. Cut out shapes from tissue paper and lay them on contact paper.
2. Cover with another layer of contact paper to seal.
3. Cut around edges and punch a small hole for hanging.
Next steps: Let kids pick a palette. Mix big and small shapes. Use a longer strip of paper for a sun catcher that hangs in a door frame. You can pre-cut shapes to speed things up. If you have older kids, try layering three colors for depth.
Hang the piece in a sunny window. The light fills the color gaps and the room feels warmer. This simple project invites kids to make, share, and enjoy a bright home. It’s easy to store and pull out again next summer.
@media(max-width:480px){
21. DIY Garden Gnomes
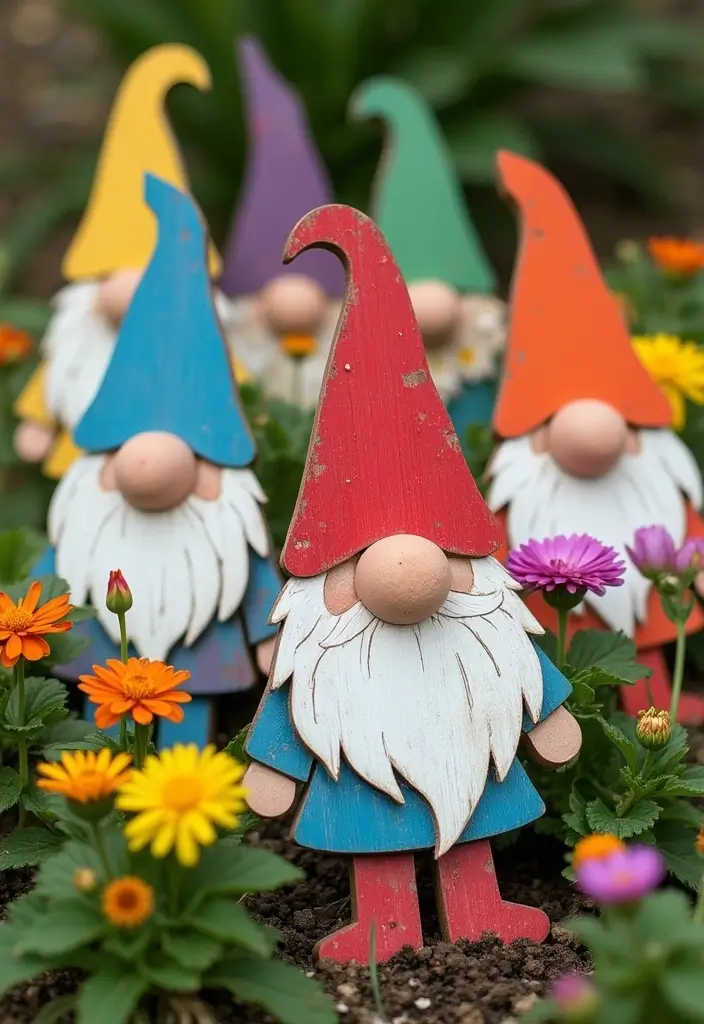
Want a quick, fun project that brightens your garden and keeps kids busy? DIY garden gnomes are a great fit. You can create little friends that add color and life to outdoor spaces.
What You’ll Need:
– Unfinished wooden gnome cutouts or air-dry clay
– Acrylic paint
– Paintbrushes
– Optional: outdoor sealer
Creating Your Gnomes:
1) Paint the gnomes in bold colors. Give each one a tiny personality.
2) Let the paint dry. If they live outside, seal them with a light coat of outdoor sealer.
3) Place the gnomes around the yard. Move them now and then to see new scenes and stories.
This craft adds character to your outdoor spaces. It also helps kids practice color mixing, steady hands, and storytelling. When you finish, you have a small, personal garden decor piece that can spark imagination on every visit to the yard.
Next steps: set up a painting station, pick three color schemes, and invite friends to join. You can make a whole crew of gnomes for a themed display. With simple supplies and clear steps, this kid craft stays easy, safe, and fun.
Tips to keep it easy: keep paints in a tray, wash brushes after, and store clay in airtight containers. If you run out of ideas, try different hats, beards, or garden props on your gnomes.
@media(max-width:480px){
22. DIY Pet Rock Creatures
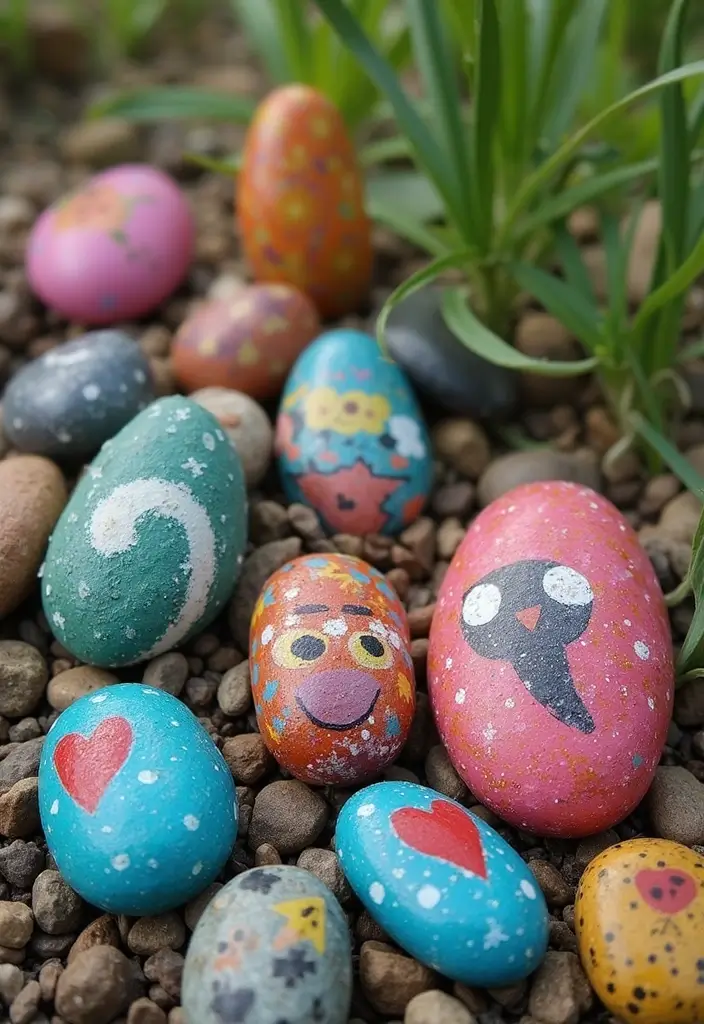
Feeling bored with the same summer routines? A quick, creative project can spark big smiles. DIY pet rock creatures are easy, affordable, and full of personality. You paint, you decorate, and you watch a plain rock turn into a tiny friend.
What You’ll Need:
– Smooth rocks
– Non-toxic paint and brushes
– Googly eyes, pom-poms, buttons, shells, or natural decorations
– Clear sealant (optional, for outdoor display)
Steps to Create:
1. Wash the rocks and let them dry. A clean base helps paint stick well.
2. Paint the rocks in bright colors and fun patterns. Try stripes, spots, or a solid color as a body.
3. Add eyes and features. Glue on googly eyes or draw a face. Finish with buttons, pom-poms, or shells to give each creature its own charm.
4. Let everything dry completely. If you plan to keep them outside, spray a light coat of sealant.
This project is simple but powerful. It boosts creativity and invites storytelling. A tiny painted friend can spark kids to invent scenes, games, and adventures around the house or garden.
Next steps: line up a little “pet rock zoo” on a shelf, plant a mini rock garden, or hide rocks for a DIY scavenger hunt. It’s a calm, engaging activity that stays within reach and grows with your ideas.
@media(max-width:480px){
23. DIY String Art
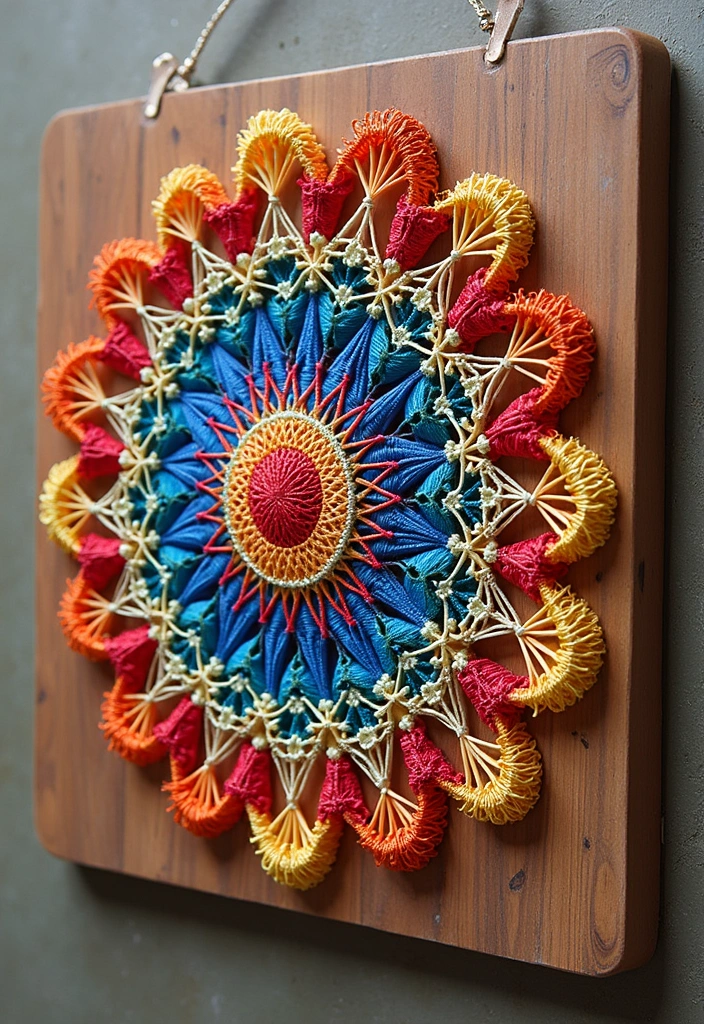
Are you looking for a kid-friendly craft that makes a real wall piece? DIY string art fits. It turns simple yarn into bright shapes and neat lines. It helps fine motor skills and sparks imagination. Plus, you get a keepsake you can hang up.
What You’ll Need:
– Wooden board or canvas
– Nails or push pins
– String or yarn
– Hammer (for adults)
Here is why this works. A clear outline guides little hands. The nails act as anchors, and the string becomes color and texture. It feels satisfying to see the pattern grow with every wrap.
Crafting Process:
1. Pick a shape you like and lightly trace it on the board.
2. Place nails around the edge, about half an inch apart.
3. Have an adult drive the nails in with a hammer. Tie the string to a starting nail, then wrap it to form the outline.
4. Fill the shape by crisscrossing and looping the string between nails. Try different colors and patterns.
Here is how to finish well. You can leave it as is, or trim the string ends and frame the piece. Hang it in a bedroom or play space to show off your kid’s work.
Next steps:
– Try a heart, star, or name word-art.
– Swap colors to match a room theme.
@media(max-width:480px){
24. DIY Nature Hats
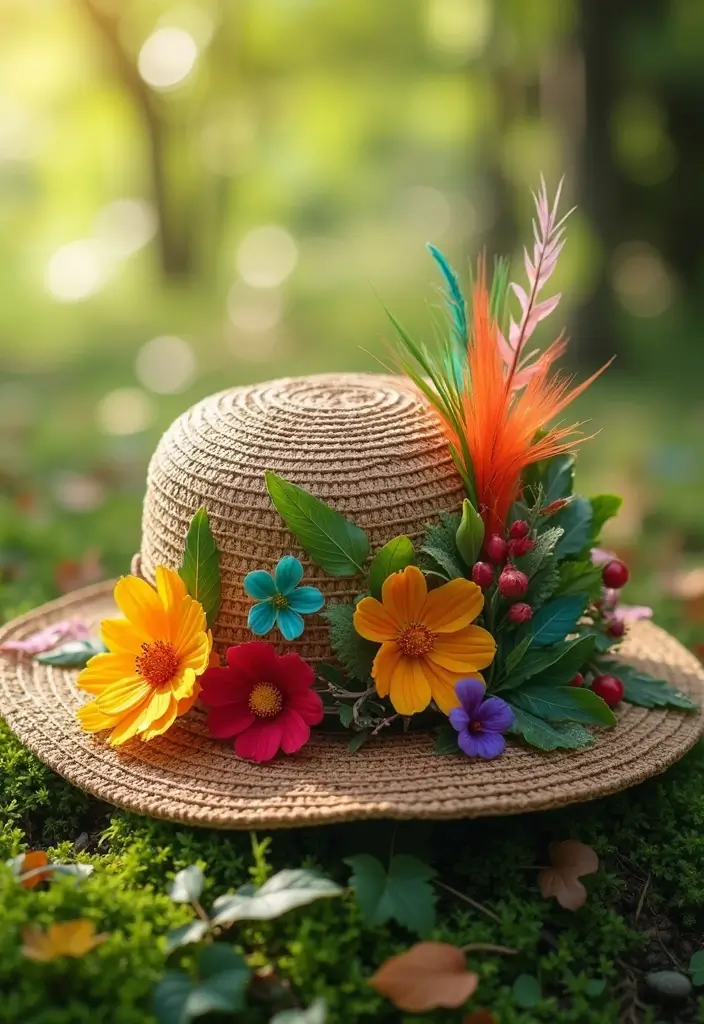
Are you looking for a quick, sunny-day activity that feeds curiosity and creativity? DIY Nature Hats lets kids turn a plain cap into a small outdoor art piece. It blends exploration with a touch of personal style, and you get to wear the results on walks.
What You’ll Need:
– Plain hats (baseball caps or sun hats)
– Natural materials (flowers, leaves, feathers, seeds)
– Hot glue gun (for adults)
Creating Nature Hats:
1) On a short nature walk, collect items you love. Look for color, texture, and scent.
2) Dry everything well. Set pieces on a clean surface and plan your design.
3) Attach items with glue. Let each piece set before adding the next. Let your child pick spots and press firmly.
Wear and enjoy. On a sunny trail, these hats spark conversation about what nature offers.
This project builds observation skills and lets kids show their personality. It stays simple and fun, with a real outdoors feel. Safety note: use the hot glue gun only with adult supervision. For a kid-friendly option, try fabric glue or pins for temporary looks.
Next steps: take photos, swap designs, and try new patterns on your next nature walk.
@media(max-width:480px){
25. DIY Watercolor Resist Art
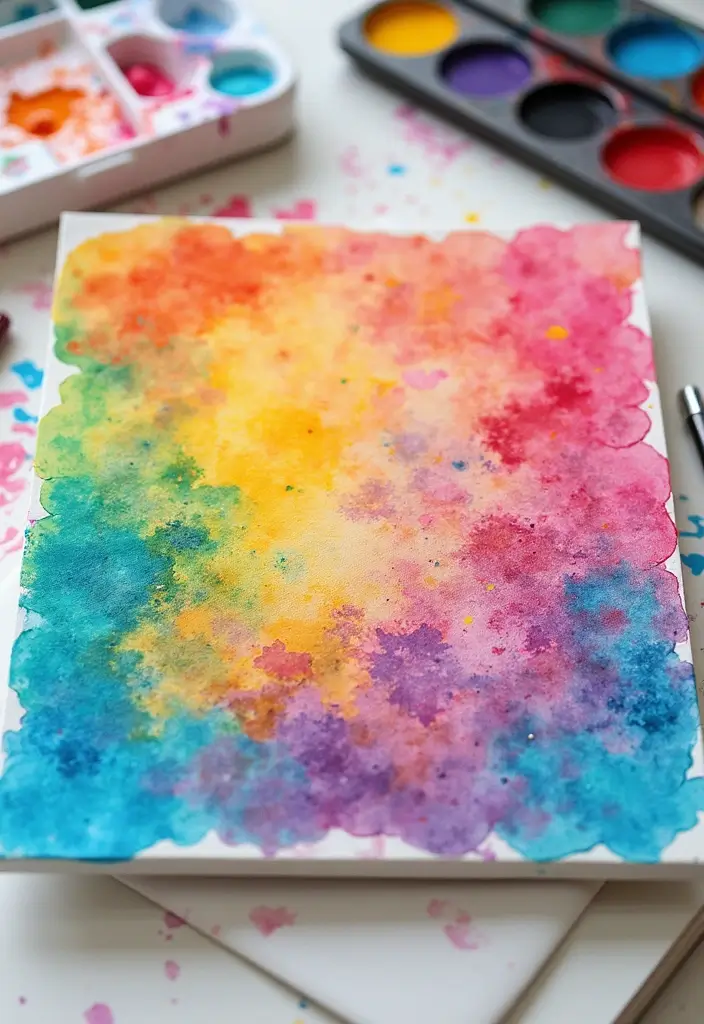
Here is why you should try watercolor resist art. It blends science and art in a simple, hands-on way. You see color move around a hidden line. The process is clear and fun for curious kids.
What You’ll Need:
– Watercolor paper
– White crayon
– Watercolor paints
– Brushes
Steps to Create:
1. Use the white crayon to draw designs on the paper. Try thin lines, big shapes, and letters. Press softly for pale lines or press harder for bold ones.
2. Paint over the page with watercolor paints. Move the brush slowly. Watch how colors bloom around the crayon lines.
3. Let it dry. Add more color in layers if you want. You can paint a lighter wash over everything for depth.
This craft helps kids learn how resist works and how colors mix. The results vary with every try, which makes each piece feel special. You can hang the finished art on a wall or frame a favorite section. Take a photo to share with family.
Next steps: keep a small sketchbook and test new shapes, rulers, or letters with resist color. The more you practice, the more you see color play.
@media(max-width:480px){
26. DIY Egg Carton Bugs
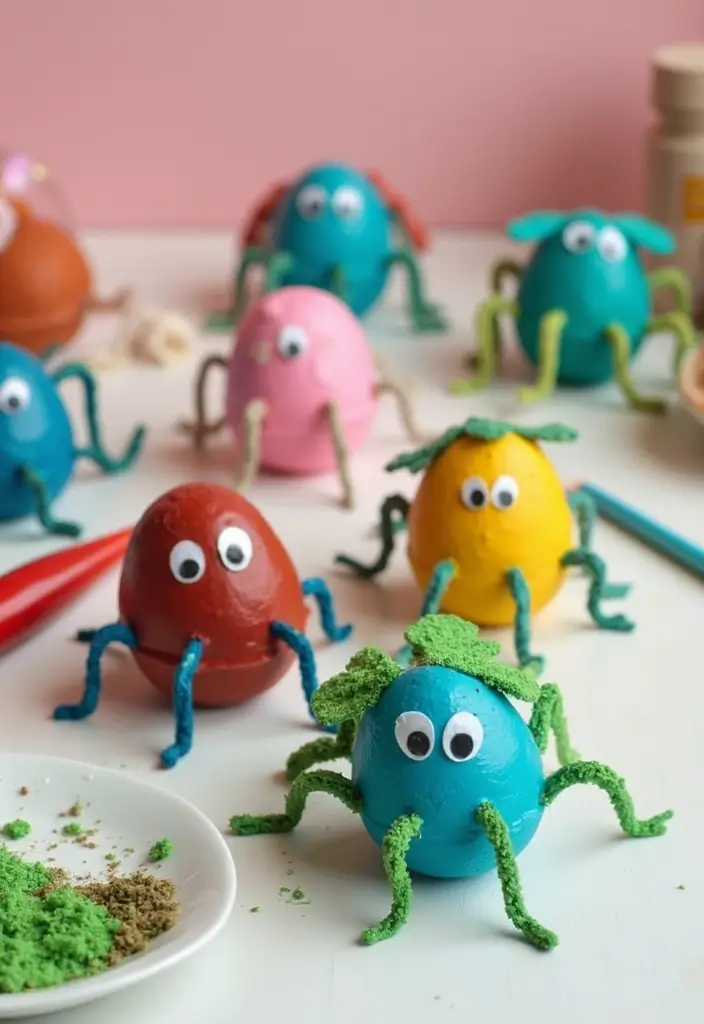
Here is how to start a simple, kid-friendly recycling project that yields a yard of giggles. DIY Egg Carton Bugs turn scraps into cheerful critters. You see waste become art, and your child learns to reuse with joy.
What You’ll Need:
– Clean egg cartons (cardboard works best)
– Bright paints and small brushes
– Googly eyes
– Pipe cleaners for antennae
– Scissors or kid-safe craft scissors
Steps to Create:
1. Cut a carton section to form a small bug body.
2. Paint it in a bold color or two. Let the surface dry completely.
3. Glue on eyes. Twist a pipe cleaner into two short antennae and attach.
Now, you have a little army of bugs ready for play or display. This easy project shows how simple materials can become fun, not waste. Kids practice cutting, painting, and gluing, all in one session.
Here is how to level it up. Try these ideas:
– Add tiny legs with thin strips of paper or yarn.
– Put spots or stripes on the body with markers.
– Create a tiny bug village on a poster board.
Next steps: set the bugs on a window ledge, fridge, or a garden seed tray for a mini display. You can also hang them as a mobile using a string.
@media(max-width:480px){
27. DIY Handprint Art
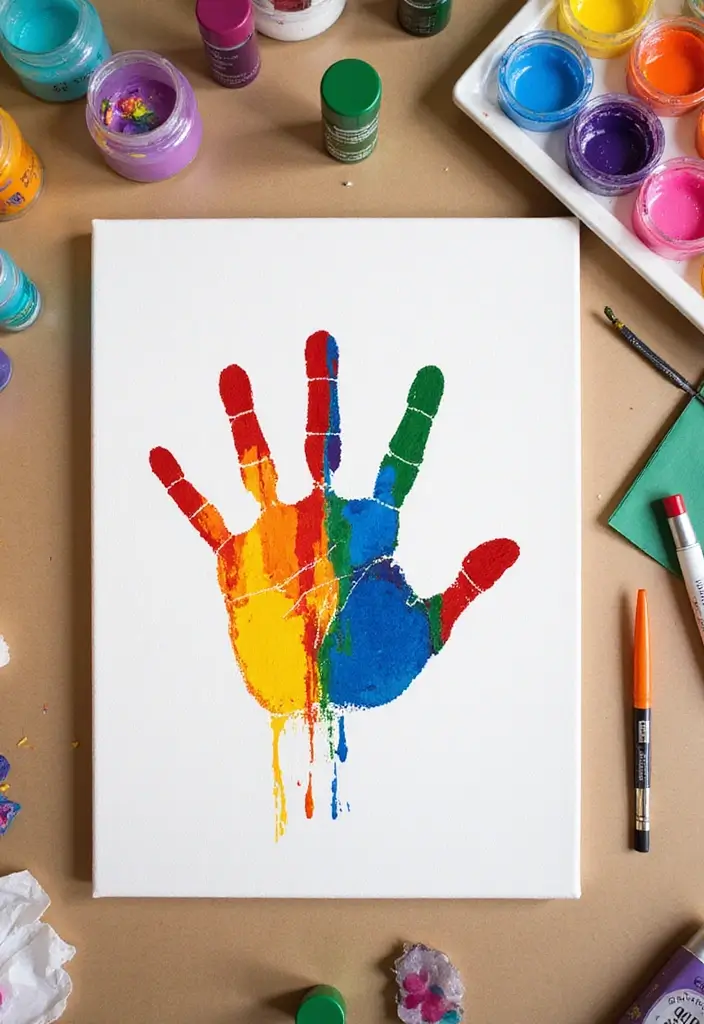
Summer memories stick best on the wall. DIY handprint art is a simple, joyful way to keep them. You get bright color, a little mess, and a keepsake you can hold up and admire. Let’s break it down so you can do this today.
What You’ll Need:
– Non-toxic paint
– Canvas or thick paper
– Optional: frame for finished pieces
Steps to Create:
1) Squeeze a line of non-toxic paint on a tray. Have your child dip their hand and gently press it onto the canvas. Lift straight up and pause to let the print set a moment.
2) Let the prints dry a bit. Then invite your child to add details around the handprints—flowers, animals, sun, or bubbles. Keep it simple so their vision shines.
3) Try different colors or sizes. A big print with small ones around it can look playful and bright.
4) When the art is completely dry, frame the piece or hang it as a colorful wall banner. This keeps the memory safe and ready to share.
Here is why this works: kids stay engaged, new art appears fast, and you end with a personal keepsake you can treasure for years. Next steps? Gather colors, pick a theme, and start creating together. Your wall will thank you.
28. DIY Garden Bug Hotels
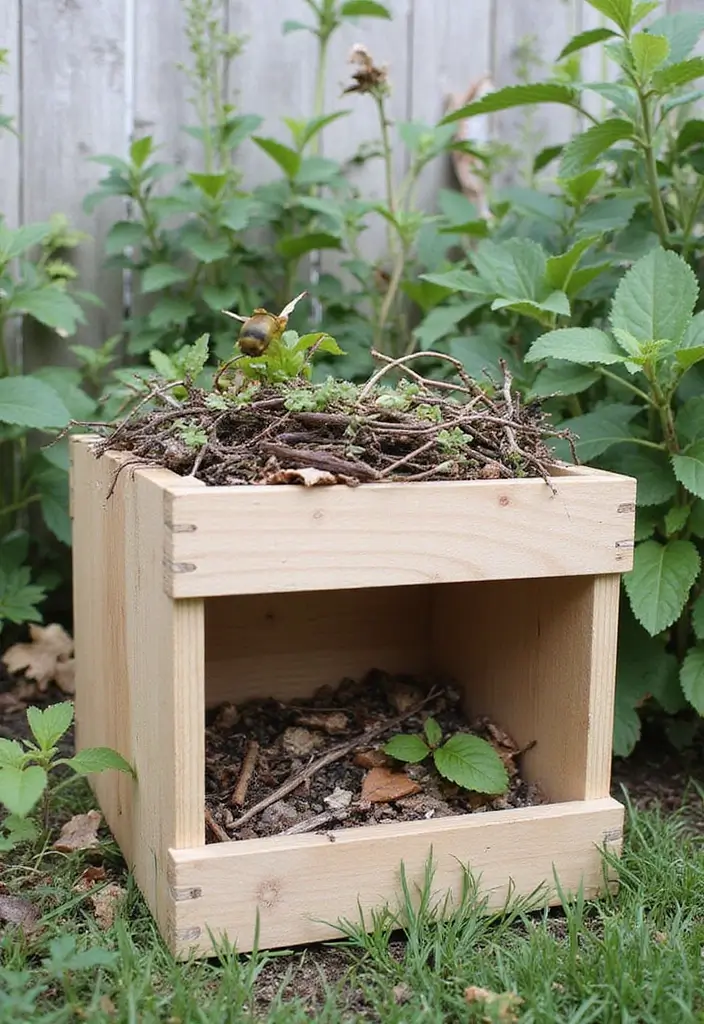
Want a simple project that helps your garden and teaches kids about bugs? DIY garden bug hotels invite insects to visit and turn your yard into a tiny science lab.
Here is why it works: bugs help pollinate flowers, break down waste, and keep pests in check. You can build a small hotel from common things you already have around the house.
What you’ll need:
– Small wooden crates or old plant pots
– Dry materials like straw, twigs, pine needles, or pinecones
– Leaves, bark, and other natural bits
Steps to Create:
1. Line the crate or pot with a mix of natural materials to give bugs cozy hideouts.
2. Tuck in different textures and gaps to make tiny habitats for beetles, caterpillars, and spiders.
3. Set the hotels in a shady, sheltered spot in the garden so rain won’t wash them away.
For extra variety, use more than one hotel. Try different heights and shapes. A taller crate can welcome larger bugs, while a shallow pot suits smaller visitors. Make sure each spot stays dry and protected from heavy rain.
Kids will love watching visitors arrive and explore the tiny rooms you’ve built. This activity sparks curiosity and helps you talk about biodiversity in plain terms.
Next steps: keep the hotels in good shape. Dry out damp spots, replace worn materials, and move them a bit to find the best microclimate. You can also add a simple observation log so your child notes what bugs come by and when.
@media(max-width:480px){
29. DIY Ice Cream Cone Planters
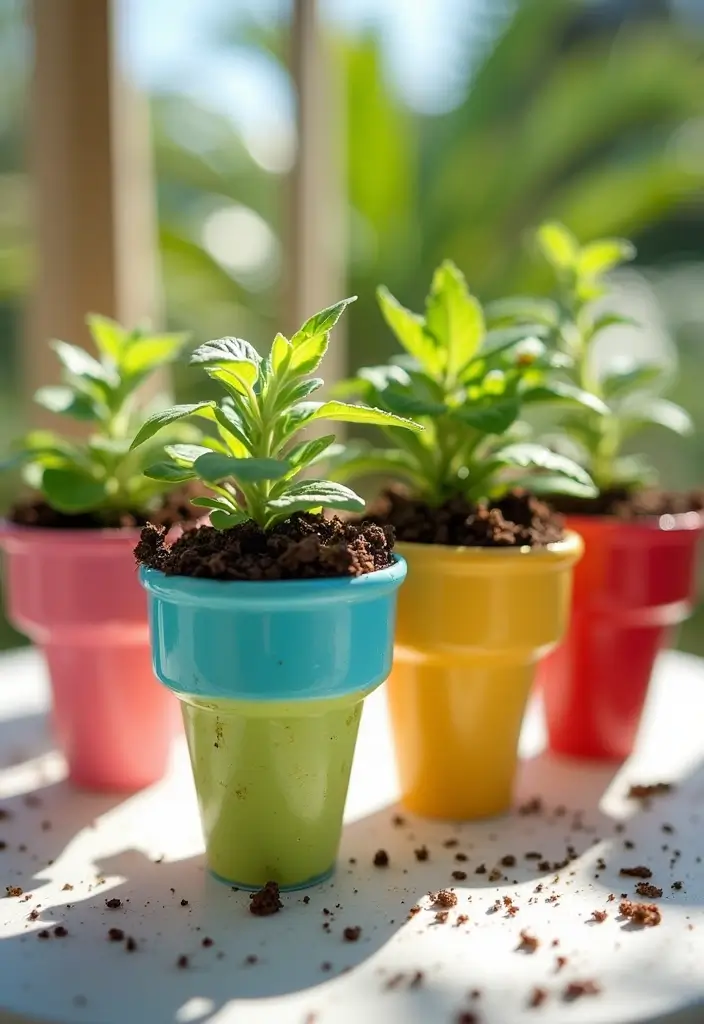
Looking for a quick, kid-friendly craft that teaches about plants? DIY Ice Cream Cone Planters turn a simple snack into a tiny garden you can grow at home.
Here is why this idea works. Kids see seeds wake up. They learn how soil holds moisture. They watch roots spread. This makes learning feel like play.
What You’ll Need:
– Clean, dry ice cream cones (or sturdy cardboard cones)
– Potting soil
– Flower seeds or small seedlings
– A small tray or platter to catch spills
– A spray bottle or watering can
Steps to Create:
1. Line the cone with a liner if you use cups inside, then fill with soil and tap lightly to settle.
2. Plant seeds about 1/4 to 1/2 inch deep. Or place a seedling gently in the soil.
3. Water softly and place the cone where it will get sun each day.
4. Move it if the plant grows big. Keep the soil evenly moist.
This playful project teaches patience and care. It also makes a bright, garden-like display on a windowsill or table.
Next steps: decorate the cones with sticker labels. Or switch to colored liners for a pop of color. Keep an eye on moisture; cones dry out fast in hot weather, so check them daily.
@media(max-width:480px){
Conclusion
Crafting during the summer is a delightful way for kids to express themselves creatively while spending time outdoors. Each of these eco-friendly summer crafts promotes exploration, imagination, and connection with nature, making every moment a cherished memory.
Encouraging kids to engage in DIY projects not only instills a sense of achievement but also fosters a love for the environment. Grab your supplies, gather some friends, and let the summer crafting adventures begin!
Note: We aim to provide accurate product links, but some may occasionally expire or become unavailable. If this happens, please search directly on Amazon for the product or a suitable alternative.
This post contains Amazon affiliate links, meaning I may earn a small commission if you purchase through my links, at no extra cost to you.
Related Topics
summer crafts
kids DIY
outdoor activities
eco-friendly crafts
easy projects
creative ideas
nature crafts
family fun
educational activities
sustainable crafting
quick crafts
hands-on learning