
This cozy reading season has me craving simple, playful ways to mark my place in a book. I wanted to help readers who love crafts but want something quick. So I pulled together 27 DIY bookmarks that feel personal, charming, and totally doable.
Who is this for? If you love easy crafts and book lists, this one’s for you. Teachers, students, book club folks, and gift givers will find ideas that fit. If you want small, thoughtful projects you can finish in an afternoon, you will enjoy these.
Here’s what you’ll get from this post. A mix of 27 bookmark ideas that cover bold, cozy, cute, and clean styles. They use simple materials like cardstock, scrap paper, ribbon, and glue. Most take under 15 minutes, and you can swap color to match any book. You’ll also find tips to protect pages and store your finished bookmarks.
From origami folds and fabric patches to upcycled finds and tiny charms, there is a bookmark for every reader. You can make them with supplies you already have at home. The ideas range from tiny pocket designs to bigger keepsakes that feel like small gifts.
This guide blends style with practicality. It shows you how to mix patterns, textures, and colors so your bookmarks stand out without making a mess. You can pair a bookmark with a note or a small card to give as a present, or keep a set for classroom swaps.
Ready to start? Gather a few scraps, scissors, glue, markers, and your current read. Next steps are simple: pick a design, follow a quick tip, and make one bookmark today. If you try one idea and want more, keep scrolling for the rest or adapt them to your own taste. Happy reading and crafting.
1. Nature-Inspired Pressed Flower Bookmark

You crave a bookmark that brings nature to your pages. A pressed flower bookmark does just that and lasts. It’s a small, real reminder of a walk in the park.
What you need
– Dried flowers from your garden or park
– A heavy book or a flower press
– Parchment paper and a clean surface
– Cardstock or watercolor paper
– Clear contact paper or a lamination sheet
– Scissors and tweezers
Here is how you make it. First, press the flowers. Place blooms between parchment sheets in a heavy book. Close the book and add a few more on top. Leave for about a week until they are flat and dry.
Next, plan the look. Arrange the blooms on your cardstock. Use tweezers to place them just where you want. For color, mix a few tiny flowers.
Seal it. Cover the design with clear contact paper or laminate it. Smooth out bubbles. Trim to bookmark size.
Care and use. Keep away from direct sun. Store in a shielded sleeve. A dry spot helps the colors stay bright.
Why it helps. You get a durable, nature-filled reading companion. It also makes a thoughtful gift.
Next steps. Try different flowers, add a label with the date, or tie a ribbon.
Recommended Products

DIY Bookmark Kit: Contains 125 pressed flowers (5 exquisite styles, 25 pieces each), 100 laminating films (1.96 x 5.9'', 12mils), 100 colorful tassels with 20 colors and 1 hole puncher. Note: This set does not include a laminator, bookmark set needs to be applied with a laminator

Package Information: you will get 91 pieces of transparent dried flower bookmarks in total, including 10 pieces of butterflies, 20 pieces of clear floral bookmarks, 40 pieces of dried flowers, 20 pieces of colorful tassels, and a tweezer; Sufficient quantity will meet your using needs, and you can share them with your families

[DIY Bookmark Making Kit]: Easily make your own bookmarks with pressed flowers. This kit includes 50 pcs 5-mil laminating sheets measuring 2.4 x 6.3 inches, 242 pressed flowers, 50 colorful tassels, 1 tweezer and 1 hole punch. Perfect for most ages and skill levels
2. Colorful Origami Bookmarks
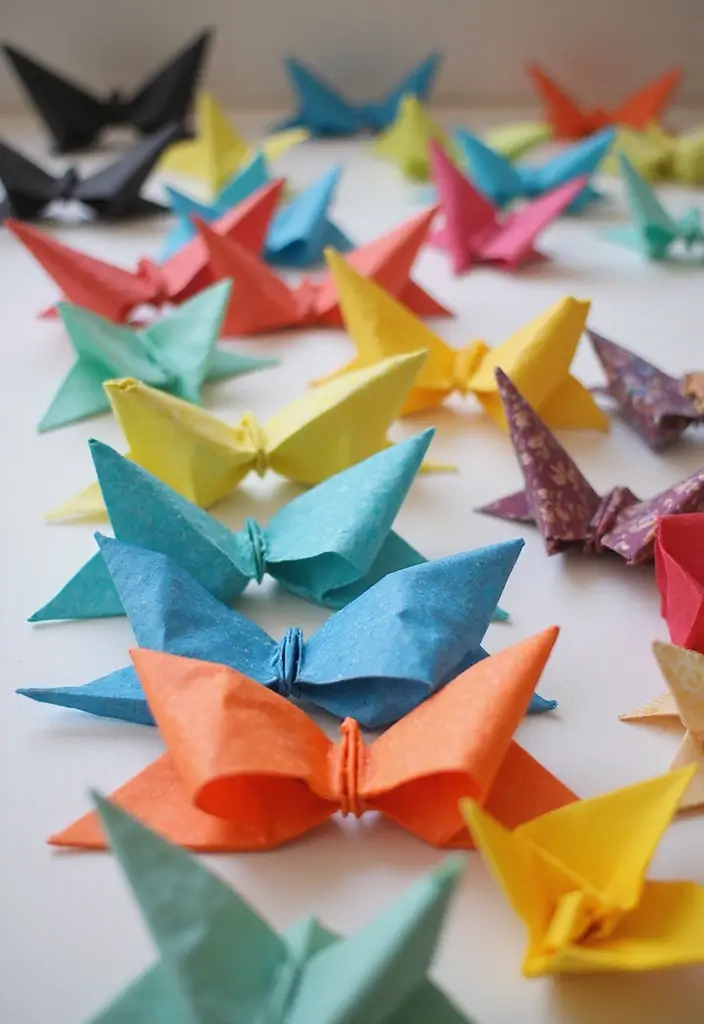
Colorful origami bookmarks add a touch of whimsy to any book. They mark your place and give your reading a small grin. Best of all, they’re simple to make and use plain or recycled paper.
Here is why this idea works for readers. It’s fast, fun, and you create a tiny piece of art you can carry in your pocket.
Materials
– Square paper (about 6×6 cm; any size you prefer)
– A bit of string or twine for a tassel
– Optional: recycled paper, washi tape, or a hole punch for extra flair
– Your favorite color choices
Steps
1. Start with a fresh square sheet. Fold it in half to form a triangle and press the crease clean.
2. Bring the corners toward the center to make a neat tab. You can keep it simple or fold again to shape a small animal or geometric form.
3. Attach a short string or tassel at the top. Tape or glue it so it stays sturdy.
4. Let the bookmark rest a moment if you used tape. Trim any loose edges so it sits neat.
Design ideas
– Try a bold crane, a smiling animal, or a tiny heart. Use two colors for contrast.
– Use scrap or recycled paper for a greener option.
– Line up a few bookmarks in matching colors but different shapes to suit different moods of your books.
Care tips
– Store bookmarks flat and away from damp spots.
– A light coat of clear tape at the edges helps with wear.
– Replace tassels when they fray to keep them looking fresh.
Recommended Products
![Amazing Origami Kit: Traditional Japanese Folding Papers and Projects [144 Origami Papers with Book, 17 Projects]](https://m.media-amazon.com/images/I/51uEuHVJ-PL._SL500_.jpg)


Package include: Our origami kit includes 220 sheets of colored origami papers, 1 step-by-step guide manual, making it easy for beginners to learn and create beautiful origami creations.
3. Watercolor Painted Bookmarks

You want a bookmark that pops with color and lasts through many reads. Watercolor painted bookmarks let you carry a tiny piece of art in your book. This simple project uses common supplies and gives you a unique result every time. Ready to try it? Here is how.
What you need
– Watercolor paper (about 140 lb or heavier)
– Watercolors or pan paints
– A few brushes
– Pencil and a ruler
– Scissors or a craft knife
– Masking tape for a tidy edge
– Optional: a clear sealer for protection
Step by step
1) Cut a 2 by 6 inch strip from watercolor paper.
2) Lightly mist the surface to start a soft wash.
3) Paint in broad strokes, then add small marks while damp.
4) Let colors blend into shapes, abstract or simple.
5) Dry completely, trim to size, and round corners if you like.
6) Optional seal to reduce smudging.
Pro tips
– Flick extra color onto the wet paint for texture.
– Test color combos on scrap paper before you begin.
– Work from light to dark so you keep control.
– Use a clean brush and fresh water for cleaner blends.
Watercolor bookmarks are easy to customize. Each piece is personal and unique. Keep a stack ready for gifts.
If you want more ideas, try gradients or tiny doodles.
Recommended Products

Abundant quantity: there are 40 pieces colorful ribbons in the package, comes with 10 different colors, 4 pieces for each color, suitable to add or replace book mark ribbons in your novels or school books, large amounts for sharing with your friends and families

Scripture Ribbons- 5 individual ribbons in each package. Add or Replace Book Mark Ribbons in your Bible or Scriptures. Use with Other Hardback Books - like Novels or School Books. One Size Fits All. Established since 1978

Package Include: You will receive 10 yards vintage fabric ribbon in 5 colors, 2 yards/color. 1-7/8 inch(49mm) wide. This is non‑elastic ribbon with no stretch, 10 yards ribbon trim offers plenty of material for a wide range of DIY crafts. Different colors can be suitable for different decoration
4. Vintage Book Page Bookmarks
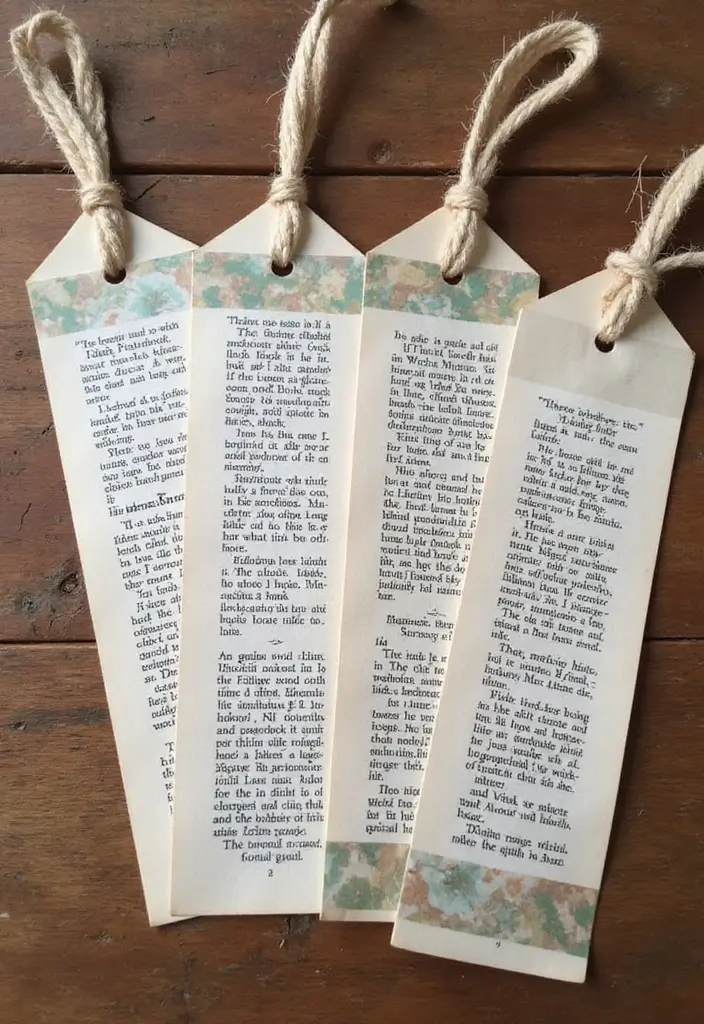
Want a quick, affordable bookmark that fits a vintage vibe? Use a page from an old book. It saves paper and adds charm to your readings.
Choose the right pages
Pick pages with a pretty illustration or bold text you like. Use pages from books you won’t miss or duplicates. Choose pages sturdy enough to last through many reads.
Shape and cut
Cut a simple shape, like a rectangle or tag. Aim for about 2 by 6 inches. Round the corners to prevent snags. Use clean scissors for neat edges.
Add a personal touch
Add a strip of washi tape along the edge. Stick a tiny sticker or stamp for flair. Punch a hole at the top and thread twine or ribbon through it. Tie a small knot to finish.
Make it last
If the page is thin, cover the front with clear tape to guard the print. You can seal with a light laminate, if you like. Keep the design simple so it sits flat in the book.
Why this works
These vintage book page bookmarks reuse pages you might throw away. It creates a cozy, vintage look in your library. It’s a quick craft you can finish in one sitting.
What you need
– old book page
– scissors
– ruler and pencil
– washi tape or stickers
– a hole punch and twine
Recommended Products

3 in 1 Chamfer Corner Punch: Create perfectly finished paper crafts or scrapbooks with this 3 way corner punch. Designed to punch three different chamfer corners, this corner punch is the perfect tool for giving extra vitality to your creations.

Package Includes: This bookmark set includes 60pcs white blank bookmarks, 40pcs brown blank paper bookmarks, 20pcs clear acrylic bookmarks, and 120pcs colorful tassels. The tassels are of random colors

Package includes 25pcs white blank paper book page marks and 25pcs book page marks tassel in 5 colors
5. Personalized Photo Bookmarks
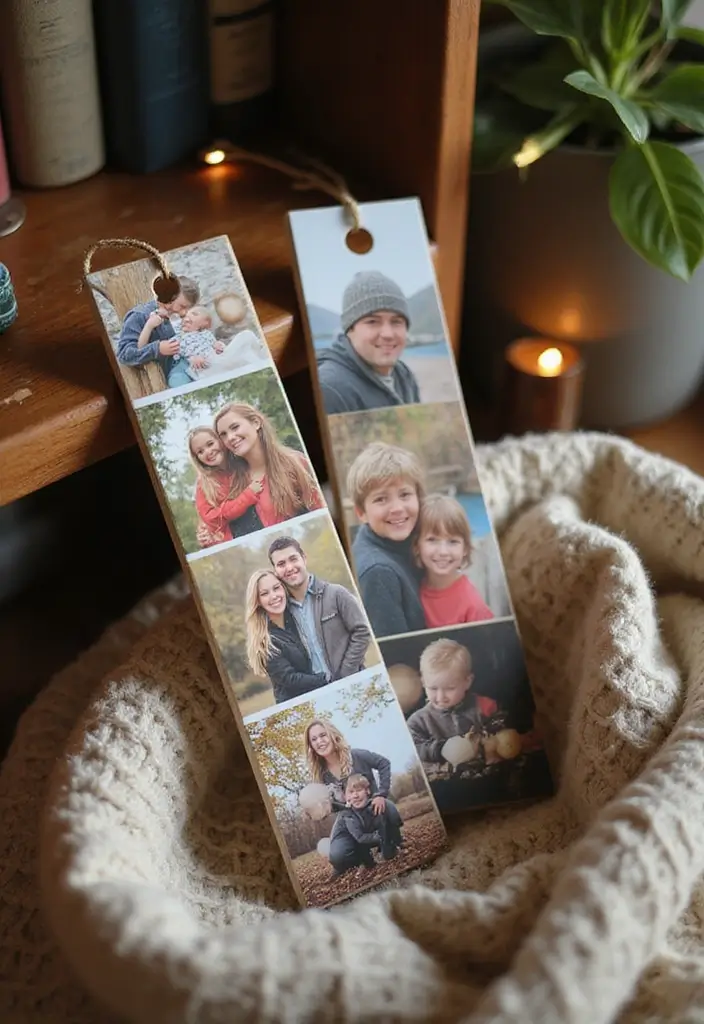
Personalized Photo Bookmarks
Crave a tiny keepsake that fits in your book? Personalized photo bookmarks do the job. They mark pages and spark a memory as you read.
What you need to get started
– Pick 3 to 5 photos that fit the book you read today.
– Print them on thick cardstock or photo paper.
– Cut them into a standard bookmark shape, or try a rounded rectangle.
– Add a border with washi tape or a simple pen line.
– Laminate them for durability or slip them into a clear sleeve.
– Punch a hole and tie a ribbon or tassel for a quick gift.
These DIY photo bookmarks make nice small gifts for friends and family. They also work as keepsakes from trips, weddings, or family days you want to remember while you read.
Tips for best results
– Choose images that match the mood of your book. Calm stories fit soft colors; exciting tales look bold.
– Aim for a page-friendly size, about 2 by 6 inches.
If you want more ideas, you can print a few extra copies in different sizes. Keep a small stack ready as gifts for friends who love to read.
Next steps: gather supplies, print at home or a shop, and start cutting. You’ll finish with a simple, heartfelt bookmark that stands out in any collection.
This small craft adds a personal touch to your shelf and makes reading feel shared.
Recommended Products

【Abundant Variety】Get 20 antique sword and knife bookmark charms in distinct styles This generous quantity allows for personal use or sharing with family, friends, and classmates.

Package: You will get 1 mini cat daisy keychain & 1 thank-you card with “Thank you for helping me grow”

Material: The charms are made of alloy, they are durable and sturdy, anti rust and hard to break. The color is shinny and not easy to fade away. It's perfect for jewelry making due to it's unbreakable quality. You can use them to make jewelry you like. Beyond jewelry, they can also be used to decorate phone cases, shoes charms, wallets, hats, etc. Add a touch of charm to your daily items and make them stand out.
6. Unique Shaped Bookmarks Using Scissors
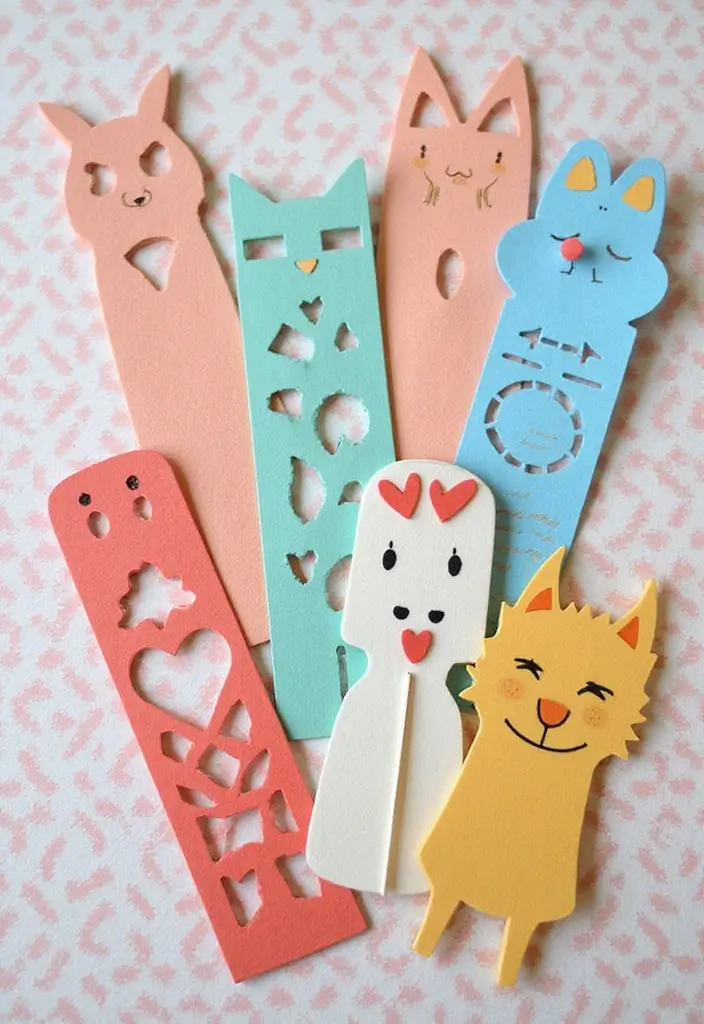
– Turn a plain bookmark into a tiny art piece You want something that stands out in a stack. Use scissors to cut a bold shape instead of a plain rectangle.
– Materials that work best Choose sturdy paper like cardstock or heavy scrap. You can layer colors for a vivid look. Thicker paper helps the bookmark last a long time.
– Shape ideas to try Stars, hearts, animals, or leaves work well. Pick a theme that fits your book or mood. Simple silhouettes are easy to cut and still look cool.
– Cutting and embellishment tips Cut slowly and follow curves with care. If you mess up, trim and try again. Add a touch of glitter, washi tape, or tiny stickers so it shines, but keep the front readable. A light coat of clear glue keeps flecks in place.
– Strengthen and finish Glue two shapes back-to-back or laminate the piece for extra durability. Punch a small hole at the top and loop a ribbon or string for easy grabbing.
– Care and sharing ideas Store flat to avoid bending. Gift a shaped bookmark with a note. You can reuse scraps for future shapes.
Recommended Products

Package Information: you will get 91 pieces of transparent dried flower bookmarks in total, including 10 pieces of butterflies, 20 pieces of clear floral bookmarks, 40 pieces of dried flowers, 20 pieces of colorful tassels, and a tweezer; Sufficient quantity will meet your using needs, and you can share them with your families

【440 PCS COMPLETE SET】: Includes 120 bookmark blanks, 130 laminating pouches, 120 elegant pink tassels, 67 dried flowers, 1 puncher, and 2 tweezers. Generous materials for endless DIY creations

【All-in-One DIY Bookmark Set】 Includes 40 transparent photo frame cards in 5 unique styles (each style comes with 8 cards), plus 20 open stickers to easily peel and seal. Each card measures 3.9" × 5.5". Compatible with dried flowers, pressed leaves, or photos (plants NOT included).
7. Inspirational Quote Bookmarks
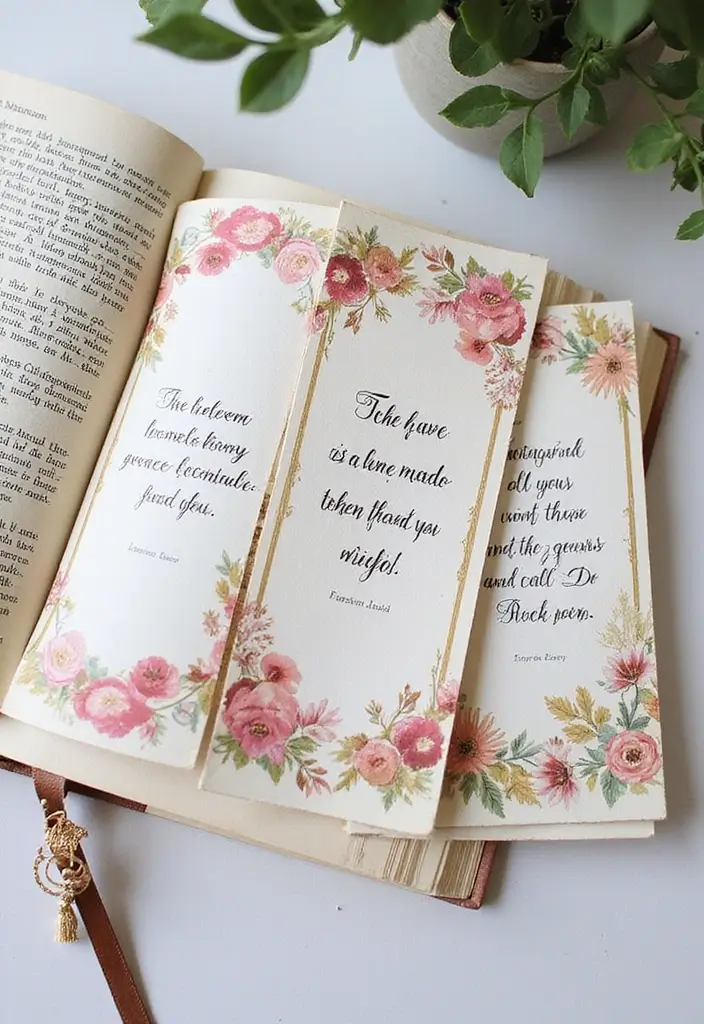
If you want a quick, uplifting project for readers you love, try inspirational quote bookmarks.
They keep a favorite line close at hand and make reading feel special. With a few simple steps, you get a keepsake that lasts. You can use printable quotes for bigger sets or one-off gifts.
Here is why this idea works: it turns favorite quotes into a tiny keepsake you can carry or gift.
– Choose a quote you truly love to set the bookmark’s heart and guide your color.
– Pick sturdy paper that lasts in a book and resists wear.
– Design the text with a clear, readable font and comfortable line breaks.
– Add the author name and a small decorative line that won’t crowd the quote.
– Decorate the edges with tiny icons to match the quote and add charm.
– Mix textures by using smooth paper with a light textured layer for depth.
– Plan the layout by centering the text and leaving trimming space.
– Finish neatly by cutting to about 2 by 6 inches for a handy size.
– Protect the art with light lamination or clear tape to extend life.
– Make it useful by adding a tassel or small clip that stays in place.
These DIY bookmarks shine when you use printable quotes or color themes that fit a book or reader. A small batch makes a thoughtful gift for any reader.
Recommended Products


Creative Origami: folding origami is also a great way for you to spend quality time ,express yourself in creative and imaginative ways with this fun and rewarding hobby!
8. Fabric and Paper Combo Bookmarks

If you love a soft touch and a one-of-a-kind look, fabric and paper bookmarks are for you. They blend warm fabric with sturdy card stock to make a textured, durable read companion.
Here is why this works.
– Base and fabric size Choose a sturdy base with thick paper or card stock so it lasts.
– Fabric cut Cut a fabric strip long enough to cover the base edge.
– Attachment method Attach the fabric with glue for a quick fix, or sew for a neat finish.
– Top finish Add a small tab, lace, or a button for a touch of charm.
– Strength plan Apply a light coat of glue to seal loose threads, or add a thin interfacing behind the fabric before attaching.
– Pattern choice Pick patterns that fit you, like floral prints, stripes, or book-themed designs.
– Optional detail Tie a short ribbon or a tiny tassel at the top for easy flipping.
– Care tips Let glue dry fully and store away from moisture.
Next steps: gather fabric scraps, cut a couple of base sizes, and try these bookmarks in your next favorite read.
Recommended Products

Product Packaging: Each package contains 2 of our bible ribbon bookmarks, each bookmark comes with 5 different colors of ribbon - black, green, yellow, pink, and blue in vibrant colors, meeting your different packaging and decoration needs. The bible ribbons with bright colors are suitable for everyday reading.
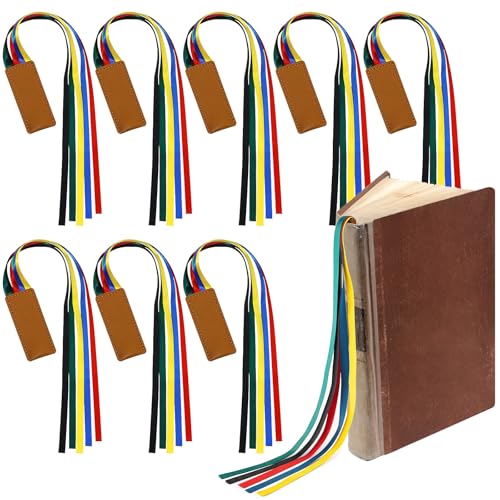
Wide applications: Our artificial leather bookmark with colorful ribbons can be applied for novel,school books and more,with colorful ribbons,it is ideal to indicate different purposes and mark different references,suitable to share your faith

Package Includes: this package comes with 3 pieces ribbon bookmarks in different colors, such as black, yellow, red, blue and so on, with vivid colors and enough quantity, it will satisfy your different packing and decorating needs
9. Recycled Paper Bookmarks with a Twist
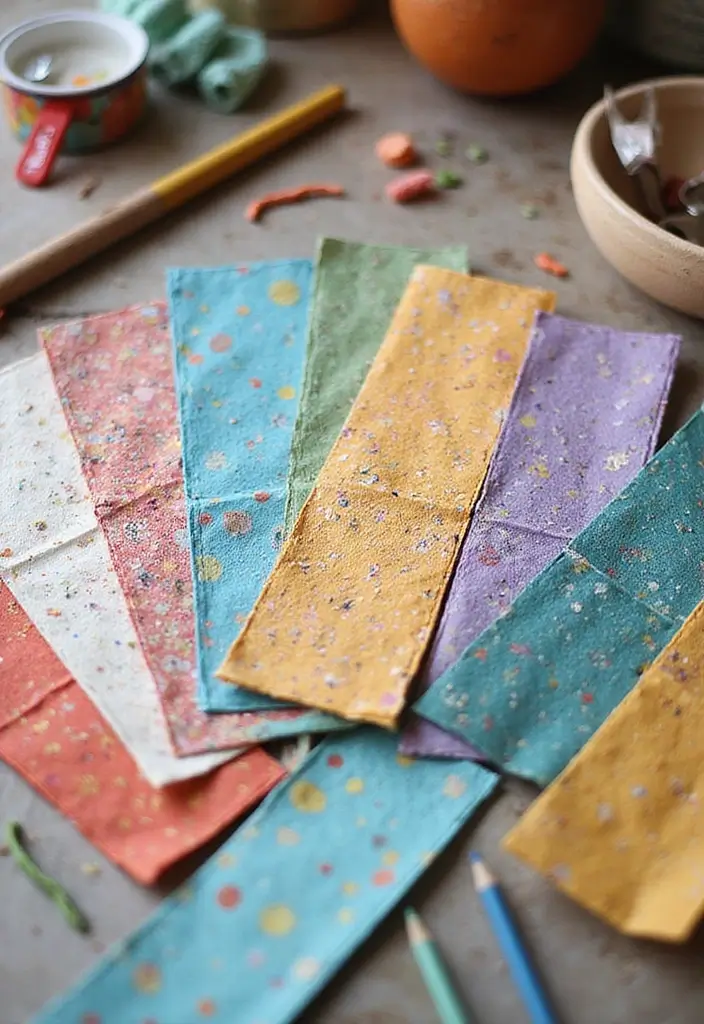
Here is why recycled paper bookmarks work for you. They use scraps you already have and turn them into something useful. Let’s break it down.
What you’ll gather:
– Old wrapping paper
– Magazine pages
– Used notebooks or the sides of junk mail
Steps:
1) Cut pieces into standard bookmark size, about 2 by 6 inches. Trim any rough edges.
2) Lay out colors and patterns. Try a collage with three to five strips for a bold look.
3) Glue pieces down one by one. Press flat so there are no raised parts.
4) Add a seal. Brush on Mod Podge in thin coats. Let each coat dry before the next.
Finishing touches:
– Round the corners with a small punch for a neat frame.
– Punch a hole near the top. Thread a ribbon, twine, or a bead to give it a personal touch.
– For extra protection, back the bookmark with a backing sheet or a scrap of cardstock.
Care and use:
– Store flat to avoid bending.
– Wipe with a dry cloth if dust gathers.
– Avoid soaking the bookmarks in water.
Next steps:
– Try different papers like glossy magazine pages or textured craft paper.
– Experiment with layering to create depth.
– Keep a small stash for quick gifts.
– You can make a dozen quick gifts at once.
Recommended Products
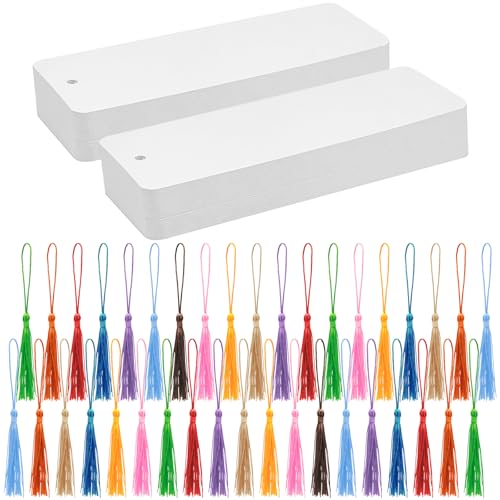
Tassel Bookmarks Bulk: You will get 100 pieces white cardstock bookmark blanks and 100 pieces colorful tassels for making your own bookmarks

These oil painting bookmarks are a charming blend of practicality and elegance. The base is a sturdy cardstock, which makes them durable and long-lasting. The hot stamping process on the surface adds a touch of sophistication and nostalgia.

【DIY BOOKMARK KIT】Includes 120 blank white bookmarks and 100 colorful tassels. Each white cardstock bookmark features a pre-punched hole for easy tassel attachment. The extra bookmarks provide flexibility for practice, backup, or classroom reading reward projects
10. Seasonal-Themed Bookmarks
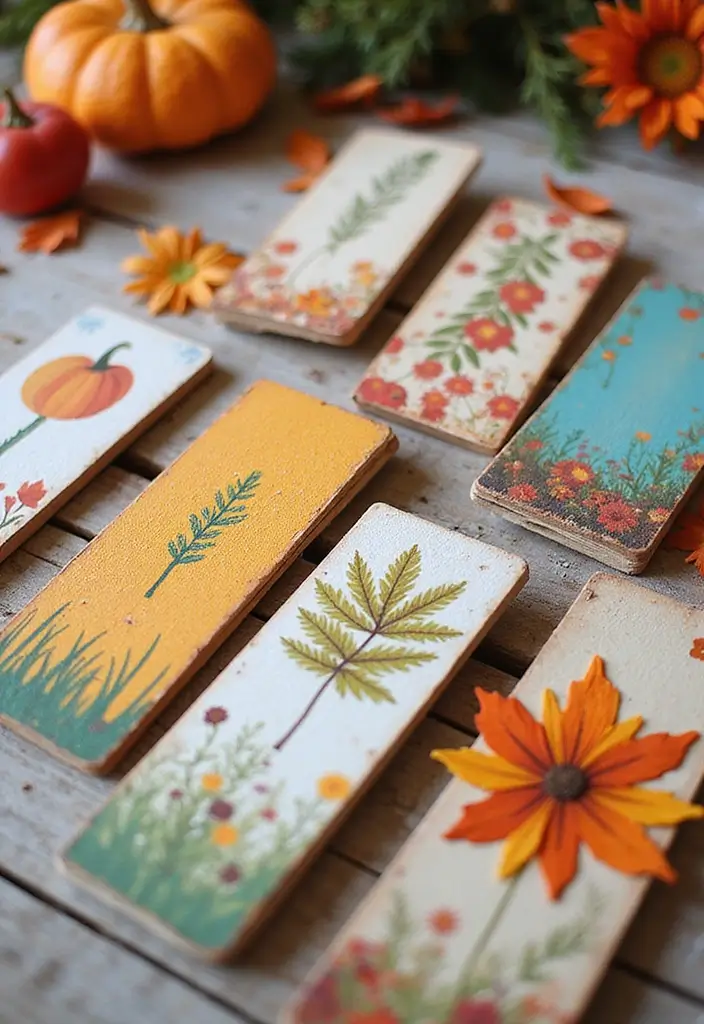
Want a simple, affordable way to mark pages and ride the seasons? Seasonal-themed bookmarks fit the bill.
Here is why they work: they bring a little mood to your reading and help you swap styles as the weather changes.
Materials
– Cardstock or thick craft paper to cut bookmarks from.
– Colored pencils, markers, or watercolor pencils for color.
– Optional pressed leaves or small flowers for texture.
– Clear tape or a laminator to protect the design.
– Scissors and a hole punch for finishing touches.
– Ribbon or string to add a tidy tassel.
Steps
– Cut a piece of cardstock into 2 by 6 inches.
– Draw seasonal motifs with colors that fit the season.
– Press leaves onto the surface or glue small flowers for texture.
– Seal the surface with clear tape or laminate.
– Punch a hole and string a ribbon if you like.
Season ideas
– Spring: blossoms, birds, raindrops in bright greens and pinks.
– Summer: sun shapes, waves, beach hats, or ice cream colors.
– Autumn: falling leaves, acorns, warm oranges and browns.
– Winter: snowflakes, mittens, pine needles for a cozy look.
Care and storage
Store them in a drawer or a seasonal box so you can swap often.
Label sets by season to stay organized.
With these DIY bookmarks, your reading feels brighter all year.
Recommended Products
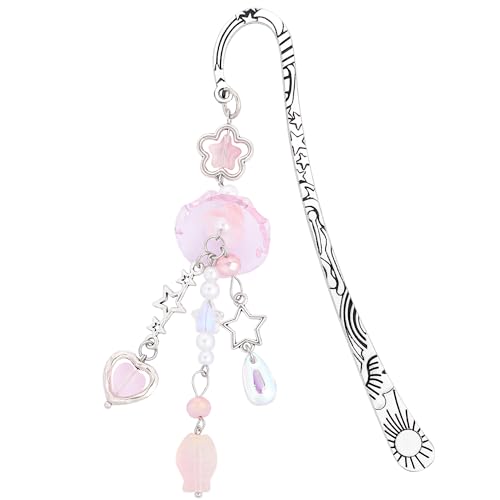
Perfect Size: The charm bookmark size is 5.51 × 1.97 × 0.59 inches. The overall length of the pendant is moderate, which is both beautiful and easy to flip through. It will not easily slip off or damage the pages. Gift box packaging, very exquisite for gift giving or personal use
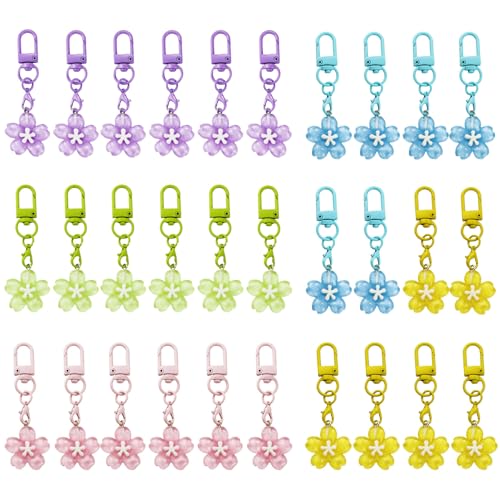
You Will Get: 18 Packs butterfly keychain.The size is 2.46inch x1inch.

Cute Purse Charms Set - Package includes: Cherry Bag Charm *1, Strawberry Bag Keychain *1, Flower Charm Key Chain *1, Balloon Dog Keychain *1
11. Laminated Botanical Print Bookmarks
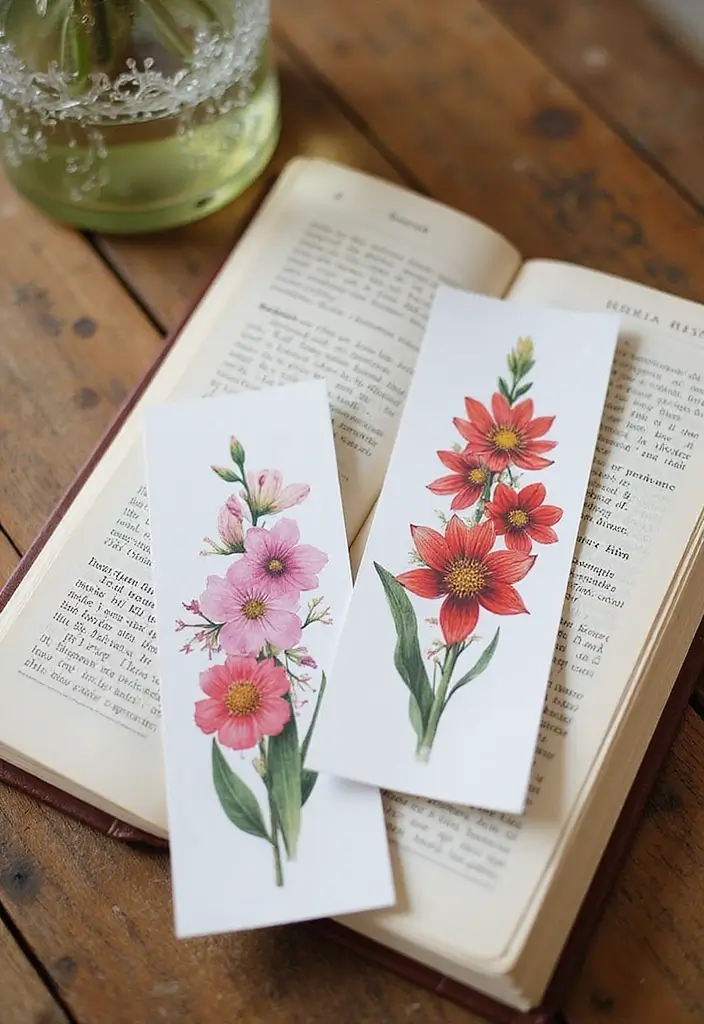
If you want a clean, long-lasting bookmark, laminated botanical prints fit the bill. They stay sharp, resist wear, and lift any book they rest on. Here is why this DIY shines: it gives you a professional look with simple steps.
Here is the plan to make them in minutes:
– Pick botanical images you love. Grab leaves, flowers, or tiny plants. Use high-res pictures so the details stay crisp.
– Print on sturdy paper. Thick card stock or heavy photo paper helps the lamination hold strong.
– Laminate for protection. Use clear laminating pouches and a home laminator. Feed slowly to avoid wrinkles.
– Trim and finish. Round the corners with a punch for a neat edge that feels good in the hand.
– Optional touch. Punch a small hole and thread a thin ribbon or cord for style.
Next steps: Build a matching set. Use a consistent color family or plant type so the group looks cohesive on a bookshelf.
What you gain: Laminated bookmarks become water resistant, tear resistant, and easy to wipe clean. They survive beach trips, travel, and busy classrooms.
Tips: keep your image files organized in a folder named “Botanical bookmarks.” If you want a softer vibe, choose pastel plants and a matte laminate.
12. Simple Cardstock Bookmarks with Doodles
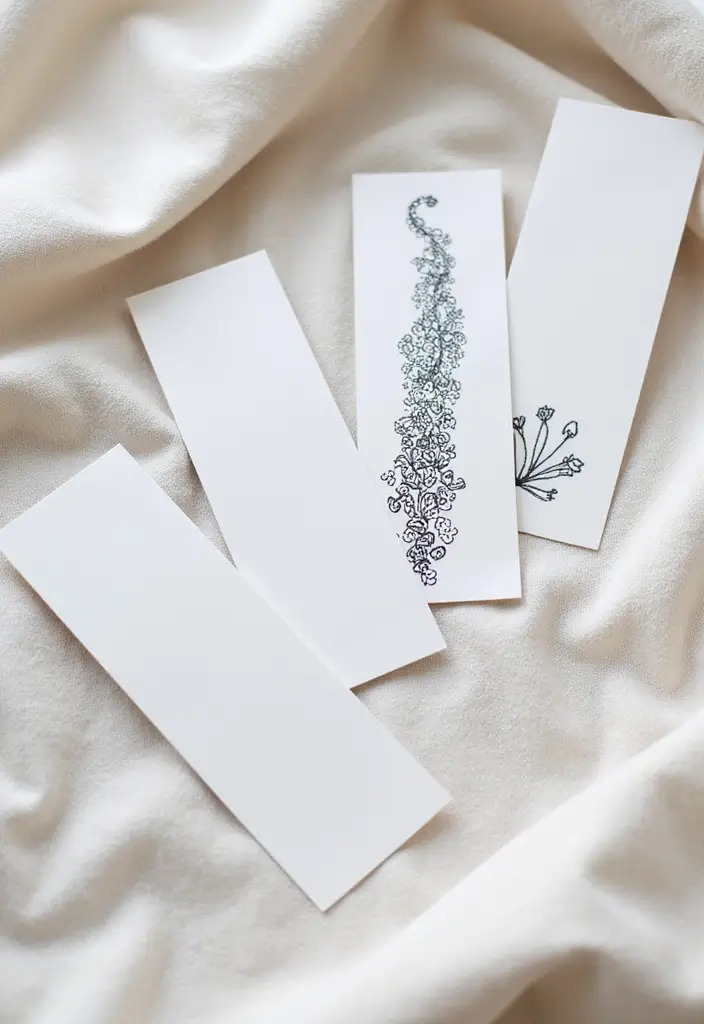
Simple Cardstock Bookmarks with Doodles
You want a quick, budget-friendly bookmark that feels personal. Simple cardstock with doodles can be charming and easy to make.
What you need
– Cardstock scraps in colors you like
– A fine-tip marker or pen
– Scissors and a ruler (optional)
Keep a small tray of scraps handy to mix colors.
Here is how to do it
– Cut a strip about 2 inches by 6 inches. You can adjust the size to your taste.
– Lightly sketch a small doodle area. Draw flowers, stars, waves, or simple shapes.
– Light pencil guidelines help. This helps you keep doodles neat.
– Go over your doodles with bold lines. Add color with colored pencils or markers.
– Write your name, a date, or a short quote at the bottom.
– Let it dry, then seal the back with clear tape or a light laminate for durability. If you laminate, trim edges after.
Ways to mix it up
– Use different color cardstock for varied looks.
– Create a double-sided design by doodling on both sides.
– Add a decorative border with washi tape.
– Punch a small hole and add a tassel for a fun finish.
– Try a themed set like sea life, forest, or retro dots.
Next steps
– Make a mini set for a book club or a friend. Try nature doodles, space shapes, or cute icons to match your reading mood.
– Share your set on social media.
13. Interactive Bookmarks with Pockets
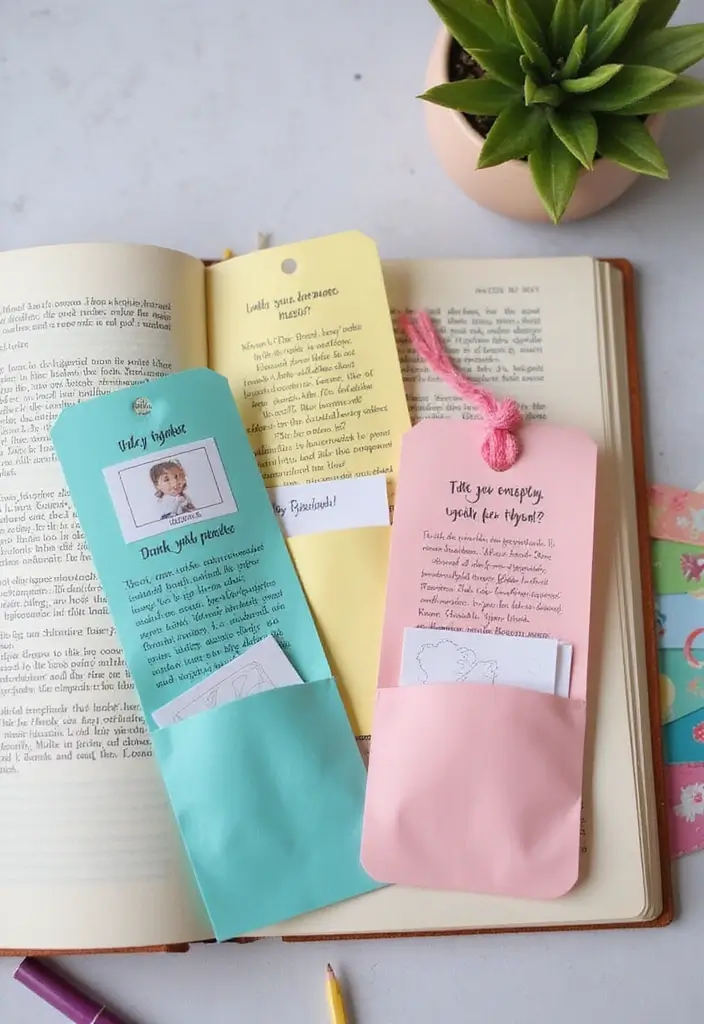
You want a bookmark that does more than mark a page. Pocket bookmarks give you a tiny space for notes. They feel playful as you read. These are interactive bookmarks with pockets that invite you to jot notes.
Here is how you can make them and how to use them.
Materials
– sturdy paper or lightweight card stock
– glue or double-sided tape
– a ruler and scissors
– decorative elements like stickers, stamps, or washi tape
– a pencil for quick notes
Steps
– Cut a rectangle of paper to the book’s size, plus extra for the pocket.
– Fold to form a pocket at the bottom or along the edge.
– Glue the sides, leaving an opening for notes.
– Let it dry before you slide it into a book.
Tips for use
– Write a favorite line or quote on a note card.
– Slip in tiny sketches or reminders for later.
– Create different sizes for novels, cookbooks, or magazines.
Try some styles with pockets in front, back, or both. Color them, add stickers, or print tiny messages. They hold small notes and keep your place. In a small space, you can save a quote you love and plan what to read next. Pocket bookmarks make reading a little more personal and fun.
They are easy to swap into any book.
14. Interactive Puzzle Bookmarks

Interactive Puzzle Bookmarks
You want a bookmark that makes reading feel like a tiny game. Interactive puzzle bookmarks turn every break into a fun challenge.
– How they work: design shapes that fit together like a simple jigsaw. Cut the shapes from thick paper so they last in your pages. Each piece is a bookmark on its own. When you join them, they reveal a tiny picture or pattern.
– Materials to use: start with 300–350 gsm cardstock or thick printable paper. A ruler and a craft knife or sharp scissors help. A scoring tool makes neat joining lines. Optional: a thin laminate sheet for extra wear. A pouch or small envelope stores the pieces.
– Easy design ideas: choose a theme from your favorite book. Draw a ship, creature, or map. Make two to four pieces that fit together. Add color with markers or colored pencils.
– Step-by-step: sketch your layout on paper. Print on thick paper. Cut the pieces with some space around. Score the joining edges. Test-fit and adjust. Store in a small sleeve.
– Pro tips: keep tabs on tiny pieces. Use a simple color code so you know which piece goes where. Handle the bookmarks gently to last longer.
Here’s why it helps readers: it adds a playful habit to your reading routine and protects the page at the same time.
15. Fuzzy Felt Bookmarks
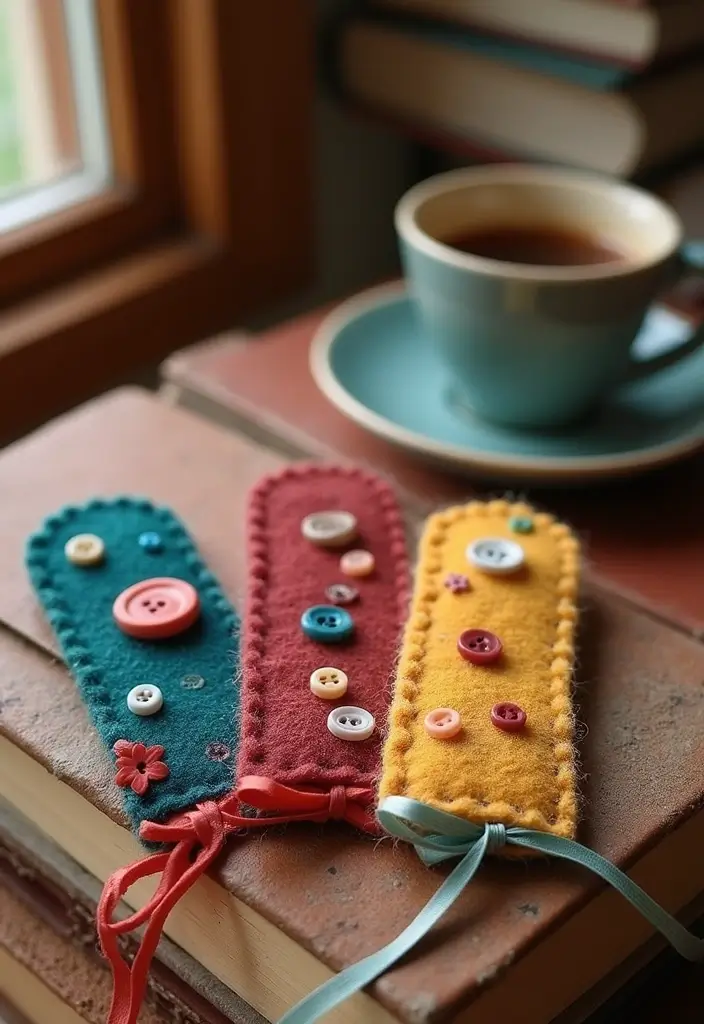
Your reading time should feel cozy, not flimsy. Fuzzy felt bookmarks give a soft touch and a playful look you can carry everywhere.
What you need
– Gather felt in a few colors you love.
– Pick a simple bookmark shape, like a rectangle or a heart.
– Glue or sew on small accents such as buttons, fabric flowers, or tiny ribbons.
– Have scissors and fabric glue or a needle and thread handy.
How to make
– Cut the felt to your chosen shape.
– Attach your decorations with glue or a few stitches. Here is why: secure edges last longer.
– If you want a loop, sew or glue a short strand at the top.
Tips for durability
– Use a tight stitch or strong glue on edges.
– Seal buttons with a dab of glue so they don’t pop off.
– Make a small border around the edge to stop fraying.
Style ideas
– Create a mixed set with many colors for a mood-friendly shelf.
– Try mini flowers, stars, or animals for different readers.
– Keep a few plain pieces for clean, classic looks.
Common questions
– Are felt bookmarks easy to clean? Yes, you can wipe them with a damp cloth.
– Do they hold up to daily use? They last well when you reinforce edges.
Next steps: gather colors, cut shapes, and finish a few bookmarks this weekend.
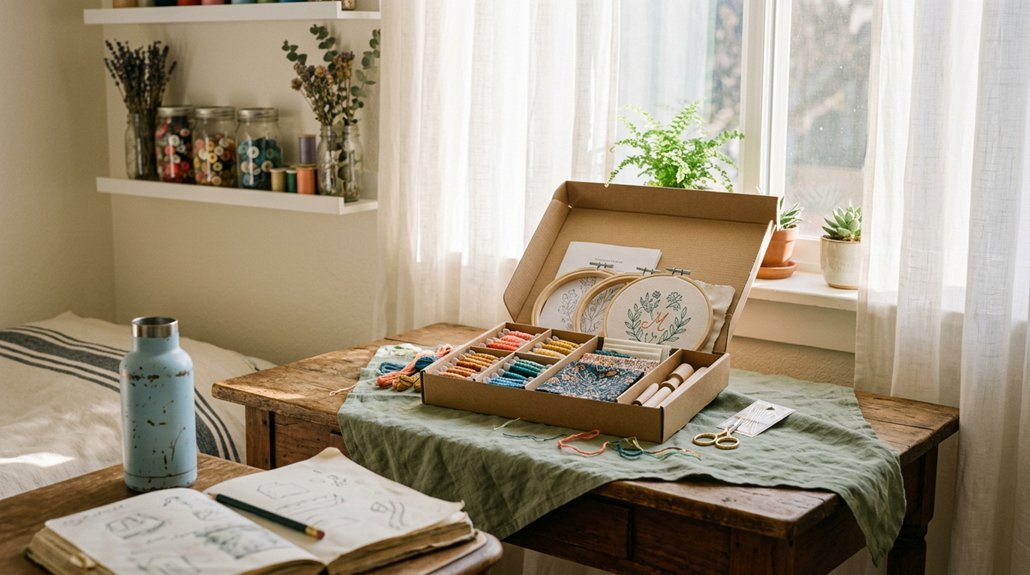
16. Embroidered Bookmarks
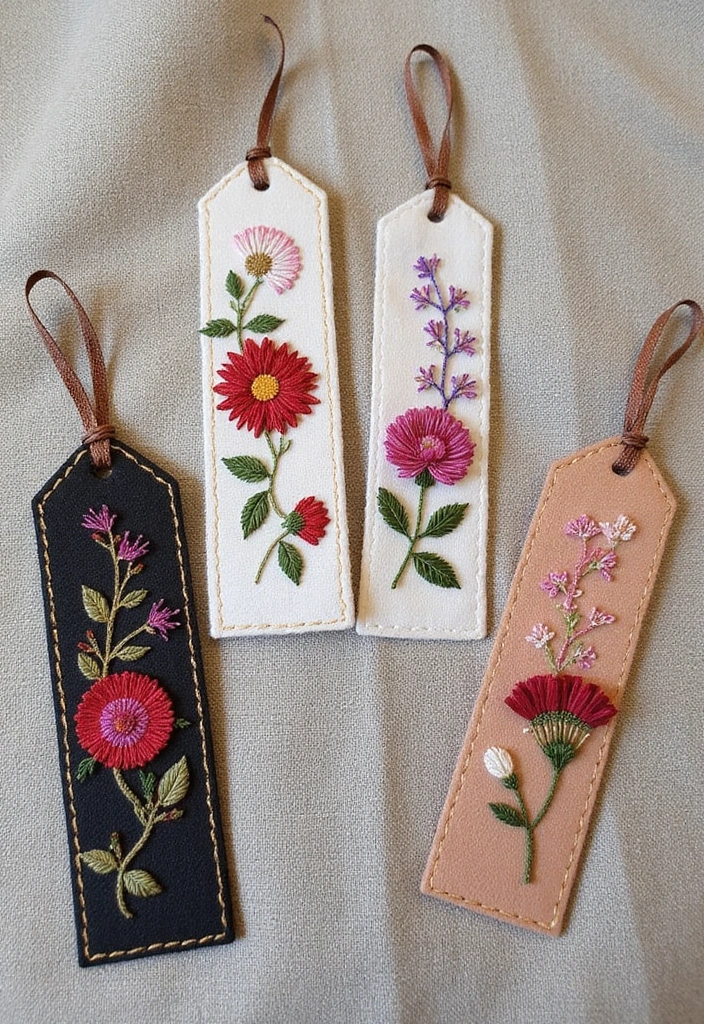
Embroidered bookmarks turn plain pages into tiny keepsakes you can touch. If you sew, you can add texture and color that lasts. You can stitch by hand or with a machine. The fabric should be small enough to fit a book. This craft asks for patience, but the feel of thread on cloth makes each piece special. The texture and color mix gives every bookmark its own charm. Choose thread colors that contrast with your fabric so the design pops.
– Materials you need: cotton or linen fabric about 6 by 11 inches. An embroidery hoop. Floss in 2–4 colors. A fine needle. Scissors. A soft backing like felt.
– Design ideas: simple shapes, short quotes, or tiny flowers. Size near 1.5 by 6 inches. Mark the design with a water-soluble pen.
– Stitching tips: hoop the fabric tight. Use backstitch for outlines. Use satin stitch to fill areas. Keep stitches even and not too dense. Let the thread contrast with the fabric.
– Finishing touches: trim close to the edge. Back with felt. Stitch a neat edge. Add a tassel, ribbon, or bead if you like.
– Quick notes: this is beginner-friendly. It can take a couple of sessions. The result is a sturdy, pretty bookmark you will reach for again and again.
17. Collage Bookmarks
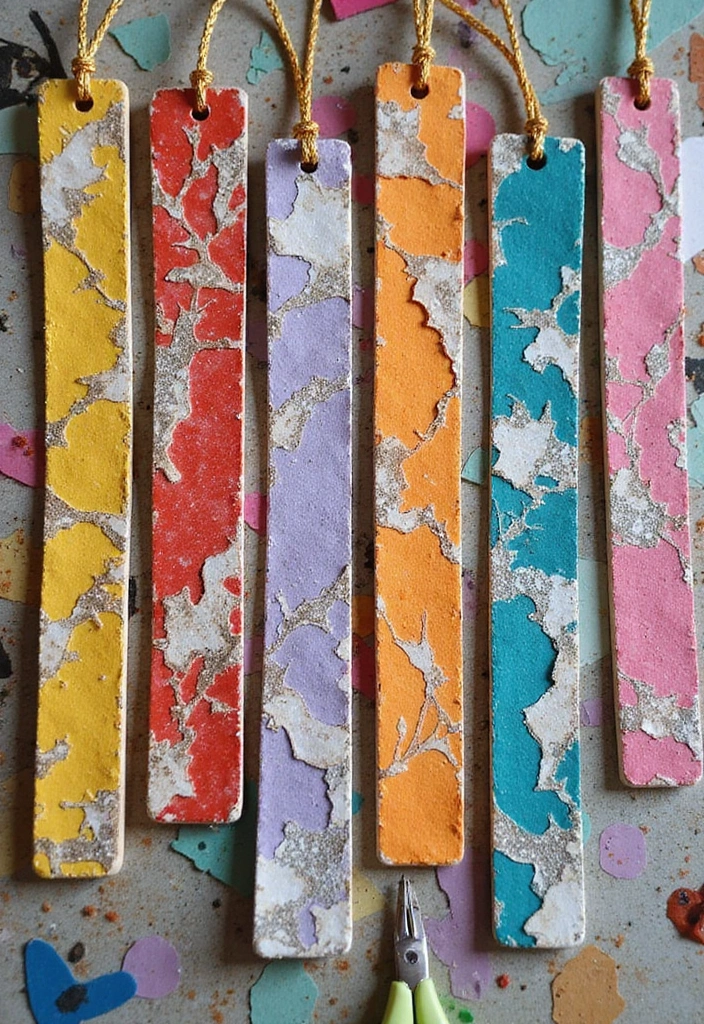
Looking for a bookmark that fits your mood and your book? Collage bookmarks are a simple DIY project that mix colors, images, and textures into a tiny piece of art. You can touch them and use them every day.
Here is why they work: you pick scraps from magazines, scrap paper, or printed photos, and turn them into a bookmark that feels like you.
Materials you’ll use
– Thick cardstock or sturdy paper as the base
– Old magazines, scrap paper, or printed pictures
– Scissors and glue or a glue stick
– Mod Podge or clear sealant
– A paintbrush or sponge for the sealant
– Optional: ribbon, stickers, or a pen to sign your name
How to make it
– Cut a bookmark shape from the base
– Cut out small images and patterns that fit your theme
– Lay the pieces on the card to plan the look
– Glue them in place one by one, keeping edges neat
– Brush on a thin layer of Mod Podge to seal the surface
– Let it dry completely before you slide it into a page
Make it yours
– Pick a focal image that draws the eye and leave a small space to write your name
– Choose colors from your favorite series to guide the look
– Make a few at once to build a small set you can swap
Next steps: grab your scissors and start collecting scraps today. Your new bookmark will be ready in one sitting or less.
18. Geometric Pattern Bookmarks
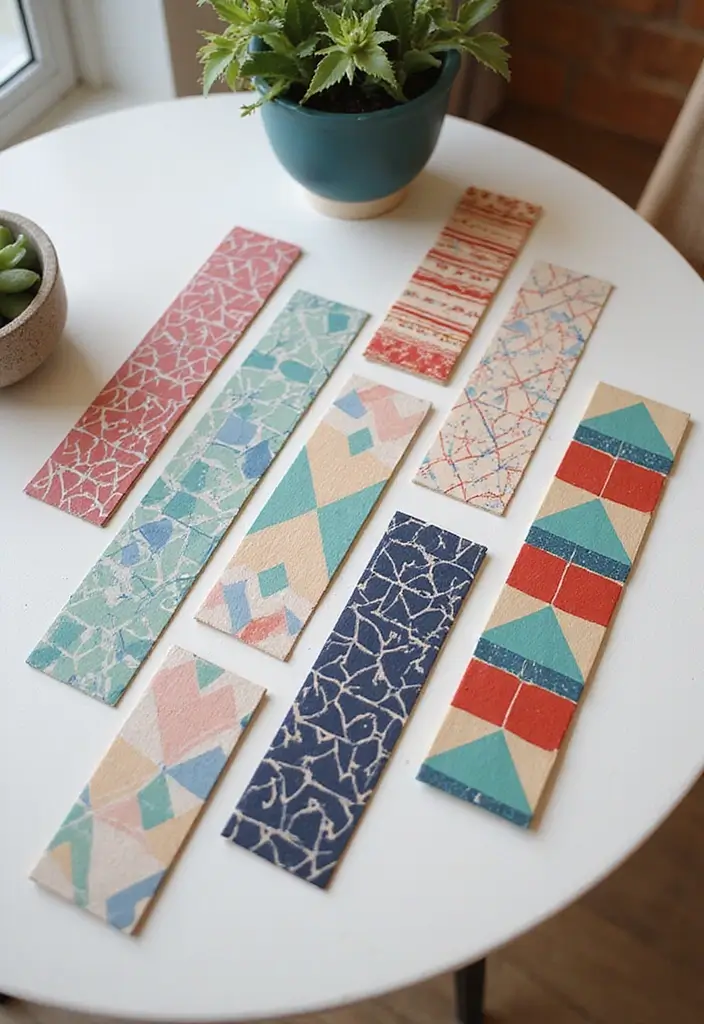
Geometric Pattern Bookmarks
If you want a bookmark that looks clean and modern, geometric pattern bookmarks fit the bill. You get a crisp, stylish touch that fits any book. Here is how you make them.
– Gather 3 to 5 colored papers in bold hues. Try a base of thick cardstock the size of a standard bookmark.
– Cut shapes: small triangles, circles, and squares. Make 6 to 12 pieces in different sizes.
– Lay out a pattern on the base. Mix bright shapes with calm spaces. Try a diagonal line of triangles, or a checker of circles and squares.
– Glue the pieces in place with tiny dots. Press firmly so they don’t lift.
– Add a splash of shine. Use metallic paper or a patterned sheet for one or two shapes.
– Finish the edge. You can wrap a thin strip of washi tape around the base or seal the surface with a light clear coat.
– Optional: laminate the bookmark for extra durability. Cut again to size after laminating.
Want more variety? Swap in hexagons, diamonds, or a mix of shapes. Leave a light blank stripe where you can write the book title or your initials. For care, keep these bookmarks dry and store them flat in a drawer.
19. Mini Notebook Bookmarks
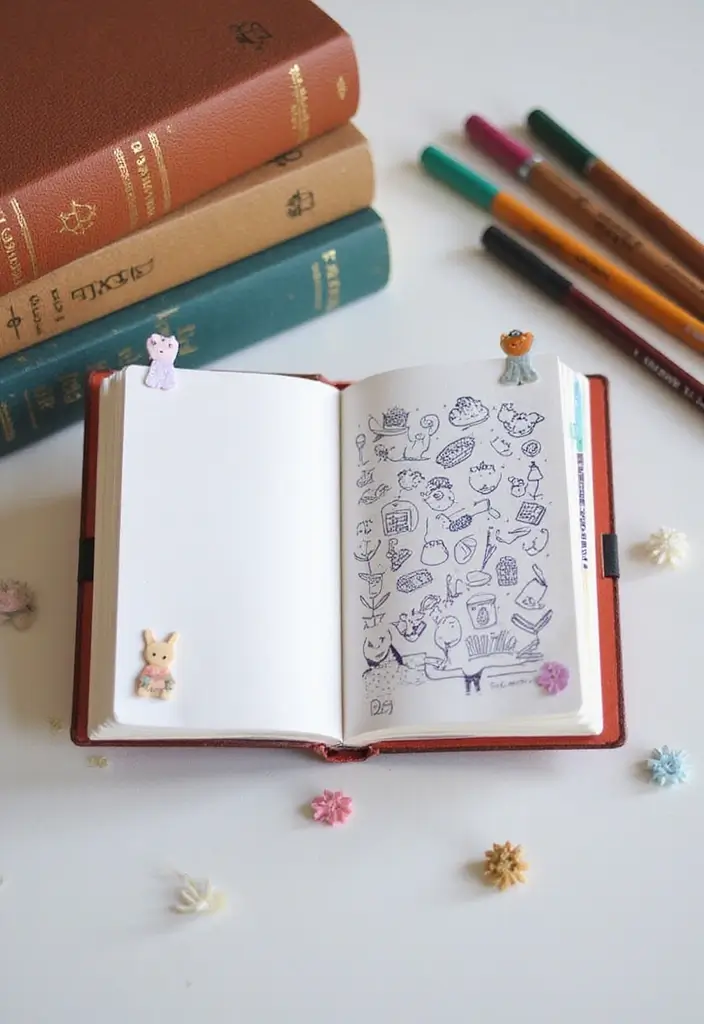
You want a bookmark that also holds your notes. A mini notebook bookmark gives you both in one tiny package.
Materials
– Cardstock for the bookmark base
– A sheet of light paper for the pages
– Scissors and a hole punch
– A small binder ring, brad, or tiny stapler
– Decoration like stickers or washi tape
Steps
1. Cut a bookmark base about 7 by 2 inches.
2. Cut two or three mini pages around 4 by 2 inches.
3. Stack the pages and line up the edges.
4. Punch two holes near the left edge and bind with the ring, brad, or staples.
5. Attach the booklet to the bookmark with a glue dot or a small slot.
Decorate
Add color with markers, stickers, or tape on the cover. This makes the little book easy to spot.
Usage
– Write quotes, page numbers, or quick thoughts on the pages.
– Flip the booklet to jot notes as you read.
– Change the pages when you finish a book.
Tips
– Try a slim vertical layout for a fresh look.
– Use thin paper to avoid bulk.
– If you want more pages, add another folded sheet.
Next steps: grab a sheet of cardstock and start your tiny notebook today.
20. Faux Leather Bookmarks

Want a bookmark that looks sharp and lasts through many reads? Faux leather is a chic, sturdy choice you can make at home.
Why try faux leather? It’s durable, easy to work with, and easy on the wallet. You can cut it into any shape you like and it holds up to daily use. The surface takes color well, so you can match it to your book covers for a coordinated vibe.
What you’ll need:
– A sheet of craft faux leather in your chosen color
– A hole punch or awl
– Strong thread or a thick needle
– Scissors
– Optional: ribbon, tassel cord, or decorative beads
Steps to make your bookmark:
1) Pick a size you like. A common choice is about 6 by 2 inches.
2) Cut the shape with a clean edge. Round the corners for a softer look.
3) Create a small hole at the top for a tassel or cord.
4) Add a border stitch or simple decorative stitch around the edge.
5) Tie a ribbon or leather cord through the hole for a finishing tassel.
6) Add a tiny embellishment if you want, like a stitched initial or a stud.
Care and tips: wipe with a damp cloth to clean. Keep it away from direct heat to prevent cracking. If your piece feels too thin, back it with a light fabric for extra strength.
Common questions: shapes can be rectangles, teardrops, or rounded rectangles. You can emboss a pattern or leave it plain for a minimal look. This craft gives you a stylish, long-lasting option that fits your taste and shelves.
Next steps: pick colors that match your book world, gather tools, and start cutting. Your new faux leather bookmark is ready to travel from page to page.
21. Infographic Bookmarks

Want a bookmark that helps you learn as you read? An infographic bookmark turns a simple page marker into a tiny study tool you can see at a glance.
Infographic bookmarks present a topic with quick visuals. They keep facts handy and make reading feel more interactive. Bright colors and clear icons help you remember ideas long after you close the book.
Here is why it works: you map ideas to pictures, you show the flow of steps, and you get easy memory cues. If you like fast wins, this is a smart choice. Next steps are simple.
Materials to gather
– Cardstock or thick paper
– Scissors and a ruler
– A black pen and colored pencils
– A printer or clear tape for adding images
– A hole punch for the bookmark loop
Design tips
– Keep the layout clean with three to five blocks of color
– Use short labels and big icons
– Choose a readable font if you print text
– Aim for about 2 by 6 inches to fit a book spine
– Add a simple legend so each icon means something
Topic ideas
– A tiny timeline of events from the book
– A quick glossary of key terms
– A character map showing who links to whom
– A step-by-step process or method from the story
– A mini map or setting sketch
How to make it
1) Pick a topic you want to remember
2) Sketch a rough layout on paper
3) Fill in icons, colors, and short labels
4) Print and cut to size
5) Laminate or tape for durability, then punch a hole
Usage and limits
Use the bookmark as a quick cheat sheet while you read. It helps you stay focused and retain facts. Don’t cram too much on one card; keep it readable. If a topic changes, swap in a new mini infographic.
Give this a try this week. Start with a simple topic and build from there. Your future notes will thank you.
22. DIY Magnetic Bookmarks
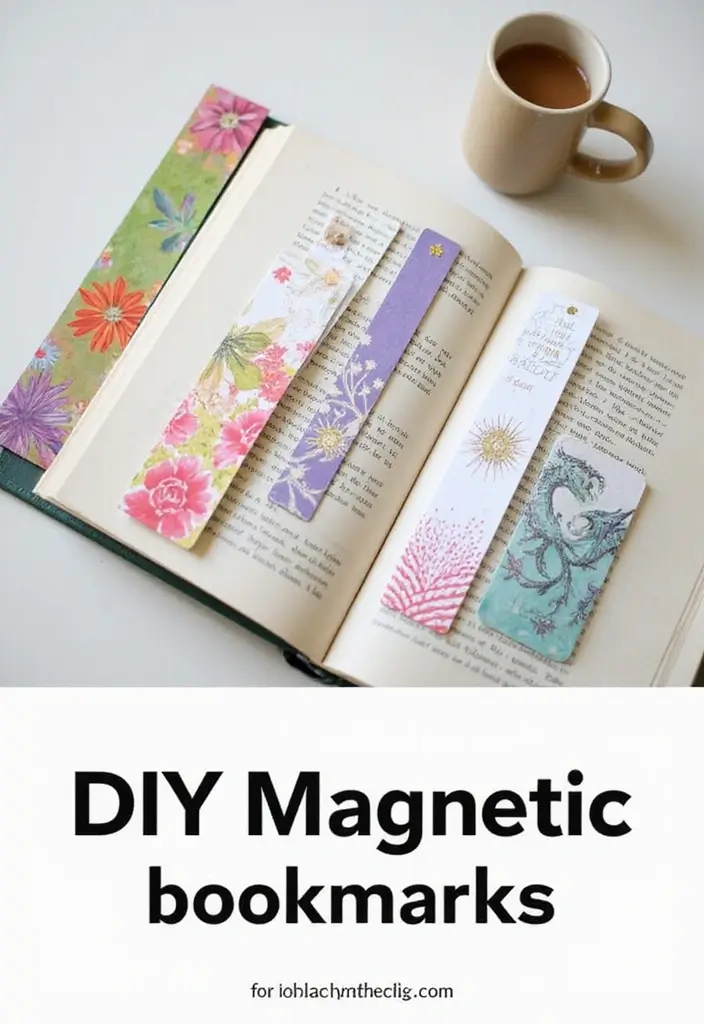
If you hate how bookmarks bend pages or leave marks, this one is for you. Magnetic bookmarks grip your place without ink on the paper. They’re simple, sturdy, and easy to customize.
What you need
– Thick cardstock in colors you like
– Adhesive magnets or small magnetic discs
– Scissors or a craft knife
– Double-sided tape or craft glue
– Optional stickers, markers, or washi tape for decorations
How to make them
– Cut two strips from cardstock, about 4 inches by 1 inch each. These are the bookmark bodies.
– Put a magnet at one end of each strip. Attach them with double-sided tape or glue. Make sure the magnets face the same direction so they attract.
– Place the two magnets so they meet when you slide the page between them. The page should be held firmly, with no crease.
– Let the glue dry fully before you use them. Then add drawings or stickers to dress them up.
Design ideas you can try
– Paint tiny scenes or quotes on the front.
– Add stickers or doodles to show your mood or favorite book.
– Use patterned washi tape to make a playful edge.
– Create sets in different colors for a quick page marker system.
Tips for better hold
– Choose strong magnets that really grip.
– Keep the bookmark thin to avoid page bulges.
– Test on a few pages first, especially if your book has glossy or coated paper.
– Keep magnets away from cards and electronics.
Next steps: grab your supplies, try a couple of styles, and save time in your next read.
23. Seasonal Gift Bookmark Sets
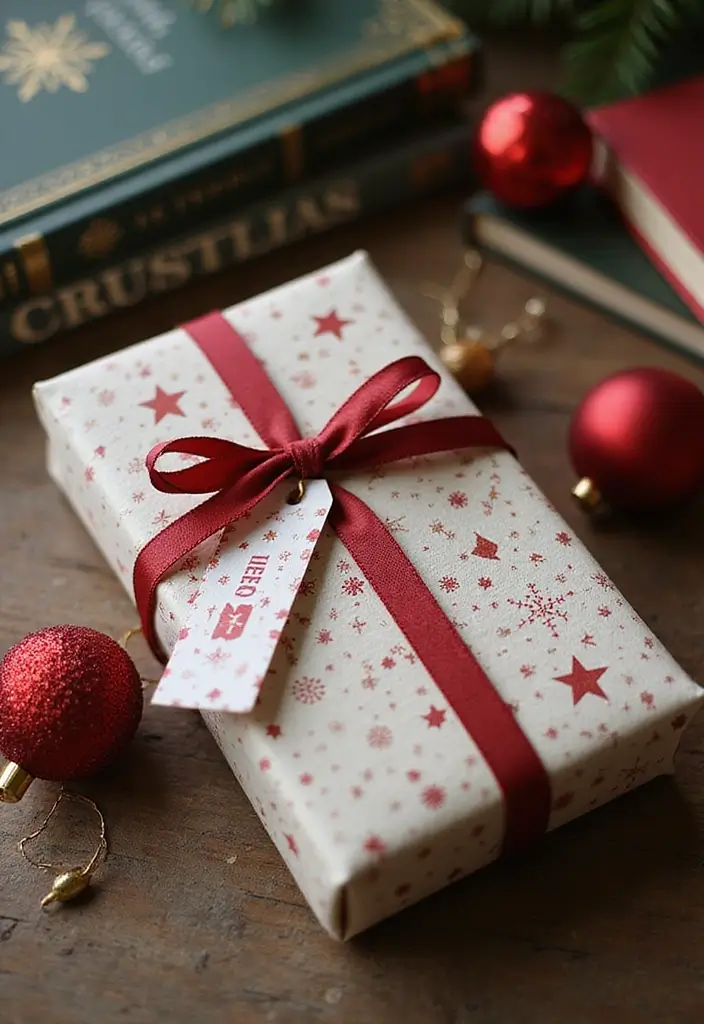
Seasonal Gift Bookmark Sets
If you want a small, thoughtful gift for a reader, this idea fits perfectly. Seasonal bookmark sets mix care with a touch of holiday charm. You can build one for winter, spring, summer, and autumn. Here’s how to make them and why they work.
– Seasonal designs – Create four distinct looks. Winter uses snowflakes and cool blues. Spring shines with blossoms and soft greens. Summer brings sun, seashells, and bright yellows. Autumn features leaves, gourds, and warm rust tones.
– Materials to gather – Thick cardstock or sturdy paper. Decorative paper or friendly doodles. A laminator or clear seal. Ribbon, twine, or a small box. A short note card for each bookmark.
– Steps to assemble – Cut each bookmark to about 2 x 6 inches. Add the design with markers, stamps, or printouts. Laminate or seal for durability. Punch a hole and tie a ribbon or string.
– Packaging ideas – Bundle 3 to 5 bookmarks per set. Place them in a tiny decorative box or wrap in kraft paper with a ribbon. Slip in the note that explains the idea behind each piece.
– Inspiration notes – Include a line that links the design to a moment in the season. For example, “Let winter reads warm your heart.”
Next steps: start with one season, then grow the set as you gain supplies and time. These little gifts feel personal, easy to share, and easy to store.
24. Interactive Scratch Bookmarks
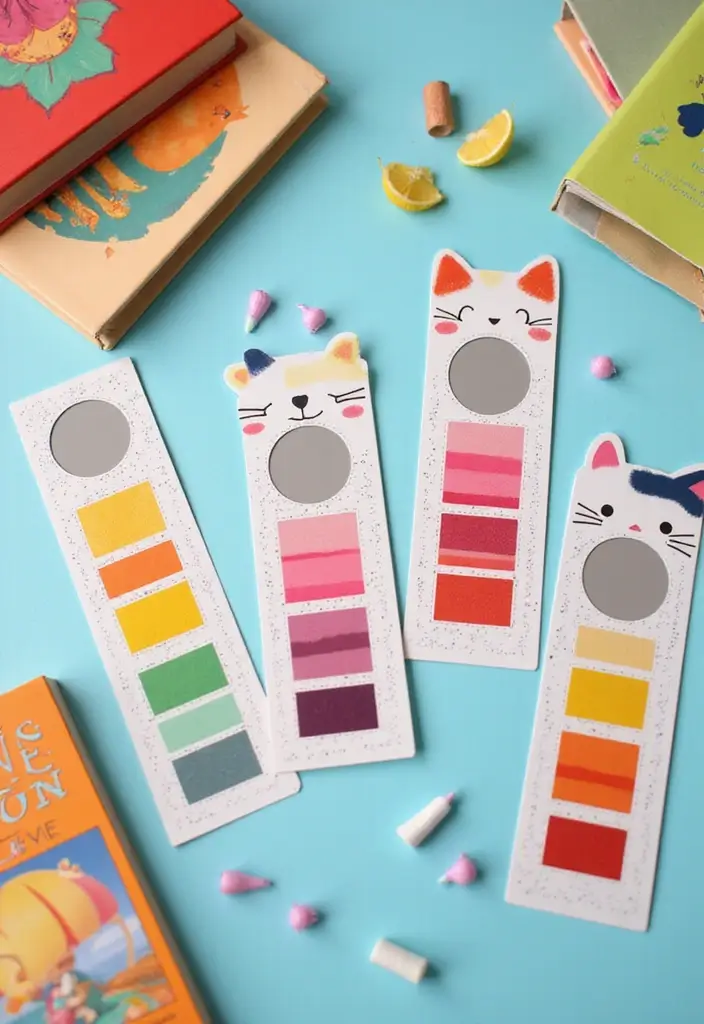
If you want a bookmark that makes reading feel like a tiny game, try interactive scratch bookmarks. You cover parts of the card with scratch-off material and readers reveal a hidden quote or fun fact as they go. This small reveal can keep focus and bring a smile, especially for younger readers. Use bright colors to make the scratch areas stand out.
Materials
– sturdy bookmark base (card stock)
– scratch-off material or sticker sheets
– bold markers or paints for color
– clear sealant or tape to secure edges
– printed quotes or facts on paper
– scissors and a craft knife (adult supervision)
Steps
– Cut the base into a familiar bookmark size.
– Mark the areas you want to hide with a design or shape.
– Apply the scratch-off layer over those areas.
– Write the quotes or facts on the under layer where they will appear.
– Add color to the uncovered parts so the reveal looks lively.
– Seal the edges and let everything dry before use.
How to use
– Let readers scratch with a coin or small tool to reveal the message.
– Match colors to each book or chapter for a themed feel.
– Store the bookmarks flat to keep the scratch layer intact.
Tips
– Try different shapes like stars or hearts to add charm.
– Pair quotes with short facts for quick rewards.
– Keep spare sheets on hand for quick swaps during long reads.
25. Easy Ribbon and Paper Bookmarks

Here’s a quick way to make bookmarks you’ll love. You want something simple and easy to finish in one sitting. This ribbon and paper idea gives you that. Here is how you do it.
– Choose sturdy paper, like card stock. Cut it to a 2 by 6 inch size.
– Add a ribbon at the top to make a tassel. Thread the ribbon through a small hole or glue it to the back edge. A tassel adds a nice touch.
– Decorate with a small design. Draw a tiny pattern, write a short line from a quote, or add a tiny photo or sticker. Keep the art flat so it stays neat in the book.
– Try different looks. Use satin, grosgrain, or sheer ribbon. Vary the width from thin to wide. Add a border with washi tape or color the edge.
– Quick tips. Punch a hole for a clean tassel. If you don’t want a hole, tape the ribbon to the back with clear tape.
– Practical uses. These bookmarks work as gifts, party favors, or classroom crafts. Kids can help with simple shapes.
Next steps: pick a craft day, gather supplies, and make a set you can use or share.
26. Reusable Clip-on Bookmarks
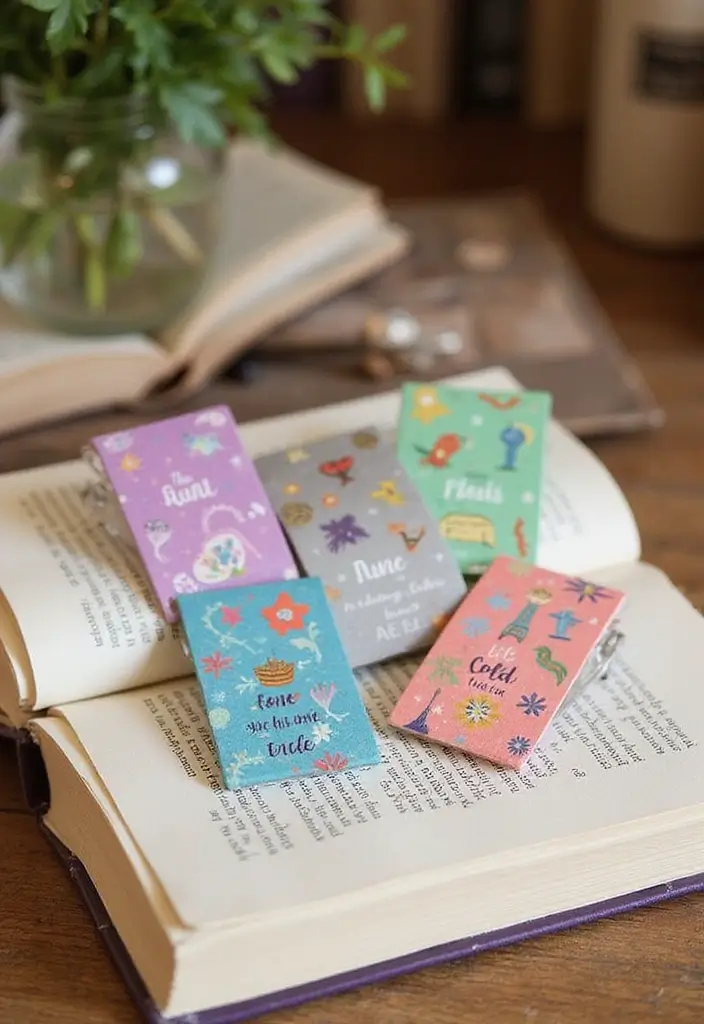
You want a bookmark you can move from book to book without harming pages. Clip-on designs grip the edge of a page and come off cleanly.
Here is why these work: the clip holds tight enough to stay in place, yet you can lift it without tearing the page. They are easy to make and swap.
Here is how to make them:
– Materials: thin cardstock or printer paper, a few small paper clips, scissors, and optional decorative tape or markers.
– Cut a small tab: about 1.5 by 0.75 inches keeps the weight light.
– Decorate lightly: add a simple pattern or tiny drawing so it’s easy to find in a stack.
– Attach the clip: place the paper clip on the back of the tab. The clip grabs the page edge when you slide it on.
– Optional hold: if the clip slips, add a tiny piece of clear tape on the back to fix it. Don’t overdo it.
Next, test on a spare page. Check that the clip grips without bending the paper. If pages feel pinched, use lighter paper or a shorter tab.
Tips for best results:
– Keep materials light to protect pages.
– Use color blocks to mark chapters or genres.
– Store several designs in a pouch for quick swaps.
Common questions:
– Will this harm thin pages? Not when you use light paper and a gentle clip.
– How many can I stack? A few designs work well.
Try three styles today and see which one you grab first. Share photos of your clips with friends.
27. A Book Lover’s Bookmark Collection

If you love to read, you can build a small bookmarks collection that shows your taste. This keeps your pages marked and your shelves lively. Here is a simple plan you can finish in a weekend.
Plan for a genre-inspired bookmark collection
– Choose four genres that fit your taste: fiction, non-fiction, fantasy, and romance, and plan colors, fonts, and symbols that match each vibe.
– For design ideas, imagine a fiction bookmark with a bold skyline, a non-fiction one with a tidy chart, a fantasy bookmark with moons and dragons, and a romance bookmark with soft hearts.
– Use sturdy cardstock, a simple lamination or clear sleeve, and a punch hole so each DIY bookmark lasts through many rereads.
– Store them in a decorative box or wooden tray, and label the sections clearly so you can grab your favorite genre in a pinch.
– Keep the collection safe by avoiding moisture, direct sun, and sharp edges; rotate prints every few months to keep colors bright.
– Share the idea with friends or start a small swap to grow your collection and spark reading conversations.
Next steps: gather supplies, sketch ideas, print, cut, and finish your set.
Conclusion
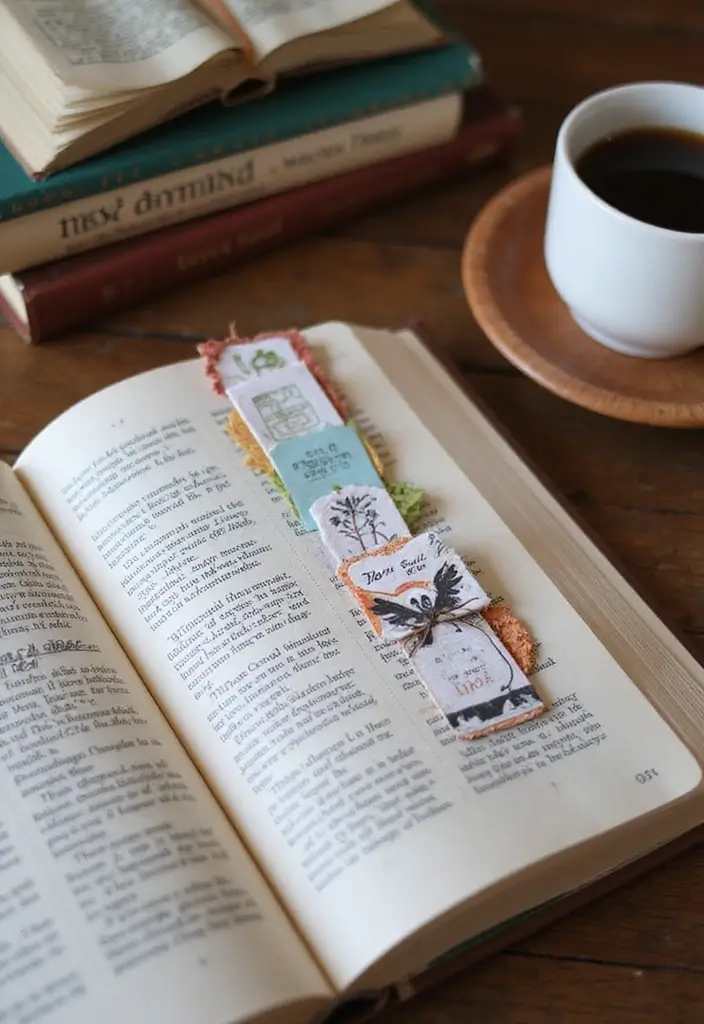
Crafting your own DIY bookmarks not only adds a personal touch to your reading experience but also allows you to unleash your creativity.
With the variety of ideas presented, you can choose to make bookmarks that resonate with your style, eco-friendly ethos, and love for literature.
Dive into these crafts, and let your bookmarks reflect your passion for reading while sharing your creativity with the world!
Note: We aim to provide accurate product links, but some may occasionally expire or become unavailable. If this happens, please search directly on Amazon for the product or a suitable alternative.
This post contains Amazon affiliate links, meaning I may earn a small commission if you purchase through my links, at no extra cost to you.
Related Topics