

I’ve spent way too many weekends wrestling with tools that pretended to be beginner-friendly. When you’re starting out, the wrong miter saw will either scare you off or collect dust in your garage.
That’s why I narrowed 2026’s options down to five that actually respect your learning curve. Some pack surprising power for their price, others prioritize safety features I wish I’d had starting out.
The real question isn’t which saw cuts best, it’s which one you’ll actually use without frustration. Stick around and I’ll walk you through the picks, plus what “single bevel” and “sliding rail” actually mean for your projects.
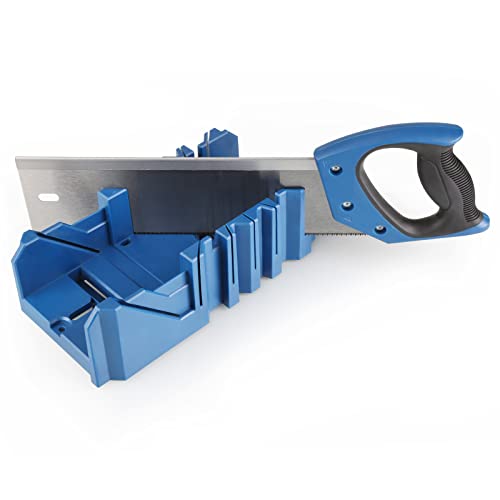
Stanley 1-20-600 Saw Storage Miter Box with Saw, Black
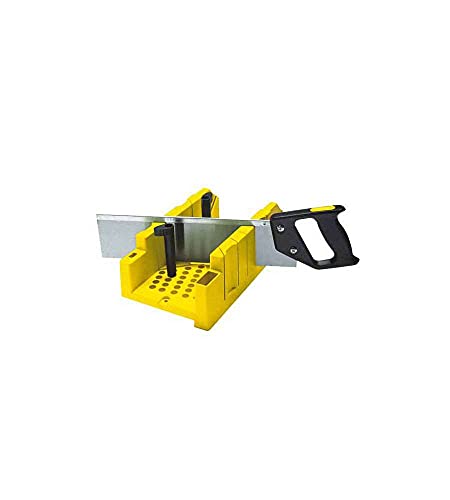
90°, 45° and 22.5° slots 11.81in length with a patented storage system for the saw Material: aluminum
So, who actually needs a miter box instead of a power saw? I do, sometimes. You might too.
The Stanley 1-20-600 isn’t fancy, and that’s exactly why I like it for beginners. No cords, no noise complaints from neighbors, no terrifying blade guards. Just an aluminum box with slots at 90°, 45°, and 22.5° angles, plus a saw that stores right inside. Brilliant.
At 11.81 inches, it’s compact enough for apartment workshops. The patented storage system actually works, I checked. No more hunting for misplaced tools.
Here’s what you sacrifice: speed. Cutting molding by hand takes patience. But you gain control, safety, and a price tag that won’t ruin your week if you hate woodworking.
Who’s this for? Hobbyists, occasional DIYers, anyone scared of power tools. Not for pros framing houses.
Verdict: Start here if you’re curious but cautious.
Best For: Hobbyists, occasional DIYers, and beginners who want a safe, affordable, and quiet way to make precise miter cuts without investing in power tools.
Pros:
- No cords, batteries, or noise—ideal for apartment workshops and noise-sensitive environments
- Integrated saw storage system keeps tools organized and prevents misplacement
- Extremely affordable, making it low-risk for curious beginners
Cons:
- Significantly slower than power saws, requiring patience for cutting tasks
- Limited to three fixed angles (90°, 45°, 22.5°), reducing versatility for complex projects
- Not suitable for professional use or heavy-duty framing work
Recommended Products

ACCURACY: The hand miter saw has cam-shaped pins twist and lock with honeycomb base to secure work for accurate cuts MULTIPLE CUT ANGLES: Cuts mitres on 45-degree and...
Metabo HPT 10-Inch Single Bevel Compound Miter Saw (C10FCG2)
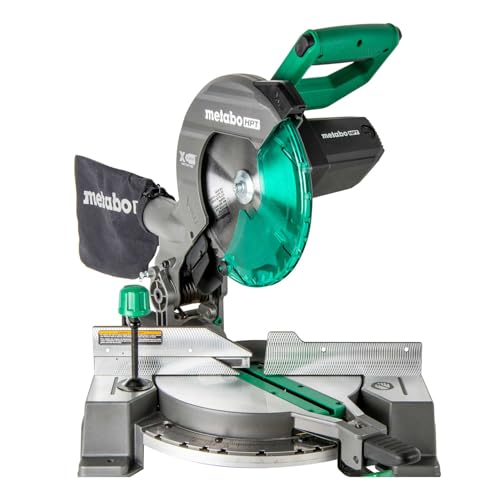
POWERFUL AND PRECISE: This 10-inch single bevel compound miter saw features a 15-Amp motor delivering high power for effortless cuts. The power saw generates a no-load speed...
Who needs a miter saw that won’t break my back?
I found my answer in the Metabo HPT C10FCG2. At just 24 pounds, this thing practically begs to travel with me from garage to job site. Don’t let the weight fool you though, that 15-amp motor spins up to 5,000 RPM and cuts through lumber like it’s butter.
What stands out
The miter scale got a redesign, and I actually trust it now. No more squinting and guessing. The bevel only tilts left (that’s the “single bevel” part), but honestly, for most beginner projects, you’ll barely notice. You still get 0-52° miter angles both ways, which covers crown molding, picture frames, baseboards, the works.
Real talk
The included 40-tooth blade isn’t garbage, rare for a budget saw. The large table and vice clamping system keep boards steady, so my cuts stay square. Five-year warranty? Metabo HPT isn’t messing around.
Verdict
Perfect if you’re starting out, need portability, and want professional features without the professional price tag. I’d skip this only if you absolutely need dual bevel capability.
Best For: DIY enthusiasts and beginner woodworkers who need a portable, affordable miter saw with professional-grade cutting power for home projects and light job site work.
Pros:
- Extremely lightweight at 24 lbs for easy transport between workshop and job site
- Redesigned miter scale provides accurate, easy-to-read measurements without guesswork
- 5-year warranty and quality 40-tooth included blade offer exceptional value
Cons:
- Single bevel design limits versatility for complex angled cuts requiring dual bevel capability
- Bevel only tilts left, which may require workarounds for certain cutting scenarios
- 10-inch blade size restricts maximum cutting capacity compared to larger 12-inch models
Recommended Products
POWERFUL AND PRECISE: This 10-inch single bevel compound miter saw features a 15-Amp motor delivering high power for effortless cuts. The power saw generates a no-load speed up to 5,000 RPM, ensuring precise cuts for all your woodworking projects.

Stainless-steel miter detent plate of the 10-inch miter saw blade comes with 14 positive stops
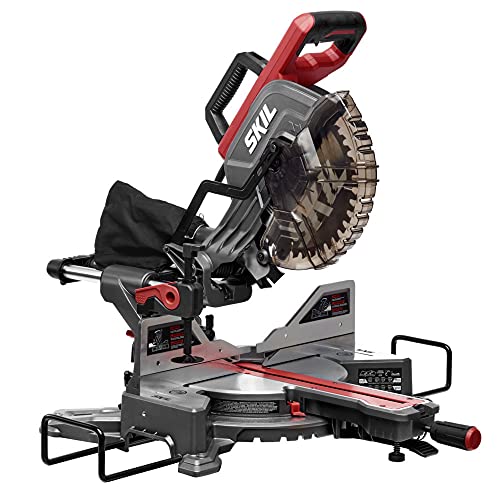
POWERFUL 15 AMP MOTOR - Delivers 4,800 RPM for quick, detailed cuts
How To Use a Miter Saw for Beginners
I’m a weekend DIYer who’s battled wobbly baseboards and crooked picture frames, so I know exactly why you’re here. You bought the saw, now you need to actually use it without losing fingers or your sanity.
Start with setup. Clamp your workpiece, check the blade alignment, and never, ever freehand anything. I learned that the hard way on crown molding that looked like abstract art.
For clean miters, mark your cut line clearly and let the blade reach full speed before dropping it smoothly. Crosscuts? Simple. Bevels? Tilt the head, lock it tight. Compound cuts combine both, so double-check your angles.
Support long boards with stands or you’ll fight gravity and lose. Measure twice, cut once sounds tired because it’s true.
Blade selection matters. More teeth equal smoother cuts in trim; fewer teeth rip faster through framing. Check your blade for wobble or dullness, or you’ll burn wood and patience simultaneously.
The Majosta guide nails this with photos that actually show hand placement, not just the finished cut. Fifty-six pages, no fluff, just step-by-step visuals for real beginners.
My verdict: read it before your first cut, not after your first mistake.
Best For: Weekend DIYers and beginners who want safe, visual, step-by-step guidance on setting up and using a miter saw accurately for trim work, framing, and compound cuts.
Pros:
- Highly visual format with photos and diagrams showing actual hand placement and technique, not just finished results
- Compact 56-page length with no fluff, delivering practical, safety-first instructions
- Covers essential cut types (miter, bevel, crosscut, compound) with actionable tips on blade selection and workpiece support
Cons:
- Limited to beginner-level content; experienced woodworkers may find coverage too basic
- Published independently with established brand backing, so availability and print quality may vary
- At 56 pages, depth on advanced techniques or troubleshooting is minimal
Recommended Products


Powerful 15 Amp, 3,800 rpm motor delivers extended power and durability

10" slide miter saw with the Crown molding cutting capacity (6-5/8" nested) of a 12" miter saw
Marvtool 10-Inch Compound Miter Saw (5000RPM, 15 Amp)

Powerful Motor - The compound miter saw is equipped with a robust 15-amp motor, delivering exceptional performance with a no-load speed of up to 5000 RPM. This ensures...
Looking for a miter saw that won’t break your back? I found one that weighs just 20.5 pounds, the Marvtool 10-Inch Compound Miter Saw, and I actually carried it up my basement stairs without regretting every life choice I’d ever made.
The 15-amp motor spins at 5000 RPM, which, translation: plenty of power for wood, metal, laminates, or that plastic trim you forgot you needed to cut. The single bevel tilts 0–45°, and you’ve got compound angle capability through dual guidance.
The transparent blade guard lets you see your cut line, unlike those opaque nightmares I’ve wrestled with before.
Portability perks matter here. Two extension tables give you extra support for longer boards, and the head-lock release knob keeps everything secure when you’re moving between job sites. Or, you know, from the garage to the driveway.
The included 36T blade handles general cutting fine, though I’d upgrade for fine furniture work. You also get an Allen key, vise clamp, dust bag, plus 24/7 support and a 2-year warranty.
Verdict: Perfect for renters, apartment dwellers, or anyone who values their spine. Not for pros cutting 12-inch crown daily. For that, spend more.
Best For: DIYers, renters, apartment dwellers, and hobbyists who need a lightweight, portable miter saw for occasional projects without professional-grade demands.
Pros:
- Weighs only 20.5 lbs, making it exceptionally portable and easy to move between job sites or storage locations
- 15-amp, 5000 RPM motor provides sufficient power for cutting wood, metal, laminates, and plastics
- Includes useful accessories like extension tables, vise clamp, dust bag, and comes with 24/7 support plus a 2-year warranty
Cons:
- Single bevel design limits compound cutting flexibility compared to dual bevel saws
- Included 36T blade is adequate for general cutting but requires upgrading for fine furniture work
- 10-inch blade and compact design cannot handle large materials like 12-inch crown molding or heavy daily professional use
Recommended Products

Miter saw crow stop accurately positions crown molding vertically against the saw fence

The Right Cut: Beautiful, seamless-fitting crown molding takes the guesswork out of crown molding

Precise Angle Measurer: The BORA MiteriX is specially designed to ensure that you measure the perfect angle for any corner, and it transfers that exact angle to your Miter saw for precise cuts. There’s no math, and it saves time and wasted material
CRAFTSMAN Mitre Saw, 12-Inch Saw & Clamping Box (CMHT20600)
ACCURACY: The hand miter saw has cam-shaped pins twist and lock with honeycomb base to secure work for accurate cuts MULTIPLE CUT ANGLES: Cuts mitres on 45-degree and...
Why wrestle with power tools when you’re just starting out? I’ve watched too many beginners burn money on bulky compound miter saws they’ll never fully master.
The CRAFTSMAN CMHT20600 takes a different path entirely, it’s a manual mitre saw and clamping box combo that trades electricity for control.
The 12-inch blade sits in a honeycomb base with cam-shaped pins that twist and lock your workpiece dead steady. No wobble, no tear-out, just clean cuts at the angles you actually need: 45 and 90 degrees for standard miters, plus 22.5 degrees when you’re tackling octagonal frames or decorative trim.
The built-in saw stop prevents you from accidentally slicing into the box itself, a small detail that saves the tool’s life. I appreciate the extended lip that anchors everything during cutting, and those molded storage bins keep cam pins and your pencil from vanishing into workshop oblivion. It’s refreshingly simple.
Verdict: Grab this if you want precision without the learning curve, noise, or maintenance headaches. Perfect for trim work, small projects, or anyone who values accuracy over speed.
Best For: Beginners, DIY enthusiasts, and anyone seeking precise manual cuts for trim work and small projects without the complexity, noise, or maintenance of power tools.
Pros:
- Cam-shaped pins twist and lock workpieces securely to the honeycomb base for accurate, wobble-free cuts
- Built-in saw stop prevents damage to the mitre box by stopping the blade before contact
- Molded storage bins keep cam pins and pencil organized and easily accessible
Cons:
- Limited to manual cutting, making it slower than powered alternatives for large or repetitive jobs
- Restricted to 12-inch blade capacity and specific preset angles (45°, 90°, 22.5°)
- Not suitable for heavy-duty or professional-grade production work requiring speed and power
Recommended Products

Dual Jaws for Versatile Use: Equipped with 2.5" serrated jaws and 1.5" smooth jaws, ideal for securely gripping pipes, tubes, woodworking projects, metalworking tasks, and precision DIY applications

Built to Last: The swivel vise is forged from sturdy 60,000 PSI ductile iron, with a powder coating on the surface for a rust-proof finish. High-quality nuts and screws increase durability. Replaceable serrated jaw plates are made of premium carbon steel for superior grip. Go above and beyond and knock out all those tough projects!

Universal Vise: Maximum opening of jaw is up to 2.79'', jaw width 3.2''. Base clamping range increased to 4'' for various thicknesses. Designed for home, workshop, professional use, general purpose and light work, and ideal for woodworking, cutting conduit, drilling, gluing, metalworking, sanding or planing, sawing, and more!
Factors to Consider When Choosing a Miter Saw for Beginners
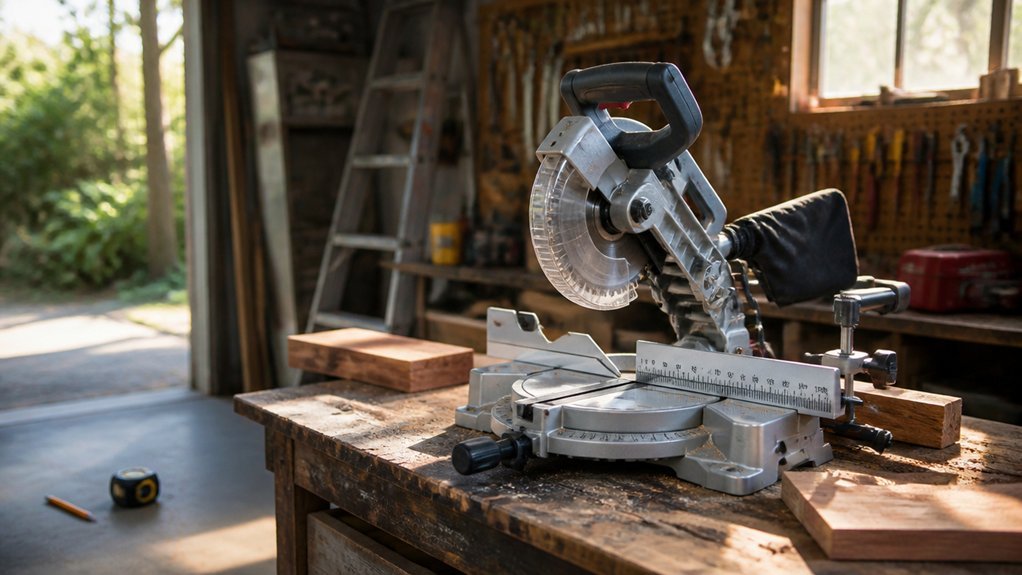
I know you’re staring at five different miter saws and wondering which one won’t collect dust in your garage, so let’s break down what actually matters when you’re starting out. You’ll need to weigh miter saw types, sliding vs. compound, that whole thing, blade sizes that match your projects, and safety features that’ll keep your fingers attached.
Plus, consider how heavy you want this thing to be when you’re lugging it around. Trust me, I’ve bought tools that were too big, too small, and way too expensive, and I’m going to save you from making those same mistakes.
Recommended Products
PERFECT FOR WOODWORK: This woodwork tool set is the perfect pack for helping you to complete your wood work craft projects. Use the precision cutting tool to create angles for wooden frames, shelves and more!

【 Cutting in Accurate 3 Angle Use 】for accurate miters, features slots for three 45°, 90°, and 135 ° cutting angles. The maximum thickness of blade is 2 mm (0.08 inch)

PRECISION CUTS, ZERO GUESSWORK: Crooked trim and splinters disappear. The 6" mitre box guides the 5" 46 TPI pull saw through fixed 45° and 90° slots for clean angles on wood, plastic, and soft metals—ideal for frames, molding, and models.
Miter Saw Types
When you’re staring at a wall of miter saws at the hardware store, it’s easy to feel overwhelmed. Let me break this down into bite-sized pieces.
The Three Main Players
You’ve got standard non-sliding saws with fixed heads, sliding compound models, and dual-bevel sliding compounds for the ambitious. The difference? Cut capacity and angle flexibility.
Single-bevel saws tilt one way only. Dual-bevel tilts both ways, so you’re not flipping boards constantly. Compound miter saws combine miter and bevel cuts in one pass, pure miter saws force you to improvise.
Sliding rails extend your reach dramatically. Wider crown molding? Longer boards? No problem.
My Take for Beginners
Start basic. A non-sliding or standard sliding model teaches fundamentals without intimidation. Master the basics, then upgrade to compound or dual-bevel versatility when your projects demand it.
Blade Size Options
So here’s where things get interesting: blade size.
Most miter saws come in 10-inch or 12-inch options. I started with a 10-inch, and honestly? It was the right call. They’re lighter, cheaper, and the blades won’t drain your wallet when you need replacements.
Here’s the trade-off: 10-inch blades cut about 3 inches deep at 90 degrees. That’s plenty for trim work and most DIY projects. But if you’re tackling thick framing lumber or chunky baseboards, a 12-inch saw gives you that extra reach.
The catch? Bigger blades need more power, spin up slower, and can bite back harder if you rush the cut. For beginners, that extra kickback risk matters.
My advice: grab 10-inch for learning. Upgrade later if your projects demand it.
Safety Features Essential
Blade size matters, sure, but I learned fast that safety features matter more when you’re still figuring out which end of the board to cut.
I won’t touch a saw without a transparent blade guard. You need to see exactly where that blade meets your workpiece, no exceptions. A solid vise or clamping system keeps everything locked down tight. Trust me, kickback is not the surprise you want.
Built-in dust collection saves your lungs and your sanity. You’ll actually see your cut lines.
Clear bevel and miter stops with marked detents, those little preset angles, keep you from guessing wrong and ruining your board. A safety switch or trigger lock stops accidental starts. A sturdy base with extension supports prevents embarrassing (and dangerous) tipping mid-cut.
Portability and Weight
The first miter saw I lugged up a flight of stairs taught me that weight isn’t just a number on a spec sheet, it’s a relationship you’ll have with that tool every single day. I learned this the hard way.
Finding Your Sweet Spot
Lighter saws, around 24 pounds, let me carry one-handed or sling over my shoulder. That’s huge when you’re moving between job sites or just clearing garage space for the car.
Foldable extension tables help too; less bulk means fewer headaches.
But here’s the catch: I once bought a featherweight model that danced across my workbench mid-cut. Stability matters. Look for solid bases and clamps, even if they add ounces.
The Trade-Off
Lighter tools sometimes skimp on dust collection and safety guards. I ask myself: will I actually move this saw, or does it live in one spot? Your answer shapes everything.
Budget-Friendly Choices
Where do you even start when every miter saw claims to be “perfect for beginners” but carries a price tag that makes your wallet flinch? I stick to 10-inch or smaller saws with basic miter and bevel capabilities, covering 0–45° angles without the premium price.
I look for lightweight models around 20–25 pounds with portable designs. Built-in handles save money on extra gear.
Essential accessories matter: included blades, clamps, and extension tables prevent surprise spending. I check for simple, durable fences with clear scales. No upgrades needed.
Basic safety features and solid warranties (2–5 years) protect against replacement costs during early projects. Smart budgeting means buying what you’ll actually use, not every bell and whistle.
Learning Resources Available
When you’re staring down a brand-new miter saw, that instruction manual might as well be written in another language. I always tell beginners to hunt down guides that break down basic setup, safe operation, and those fundamental cuts: miter, bevel, and crosscut. Look for step-by-step instructions with photos or diagrams you can actually follow.
Visual aids matter more than you’d think. You need clear labels pointing to the blade, fence, and those tiny adjustment scales. I prefer tutorials that walk through measuring, marking, and clamping, plus blade selection tips for practice cuts.
Find resources with practice projects that build your confidence gradually. And please, don’t skip the safety content: PPE, blade changes, maintenance routines, and troubleshooting common problems before you even plug the thing in.