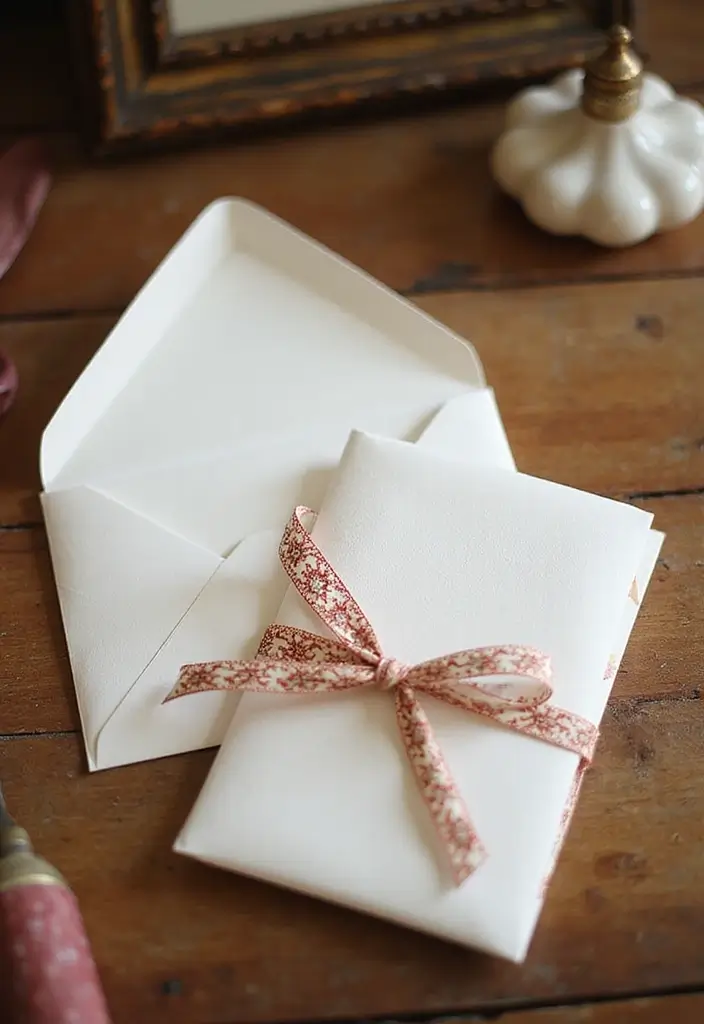
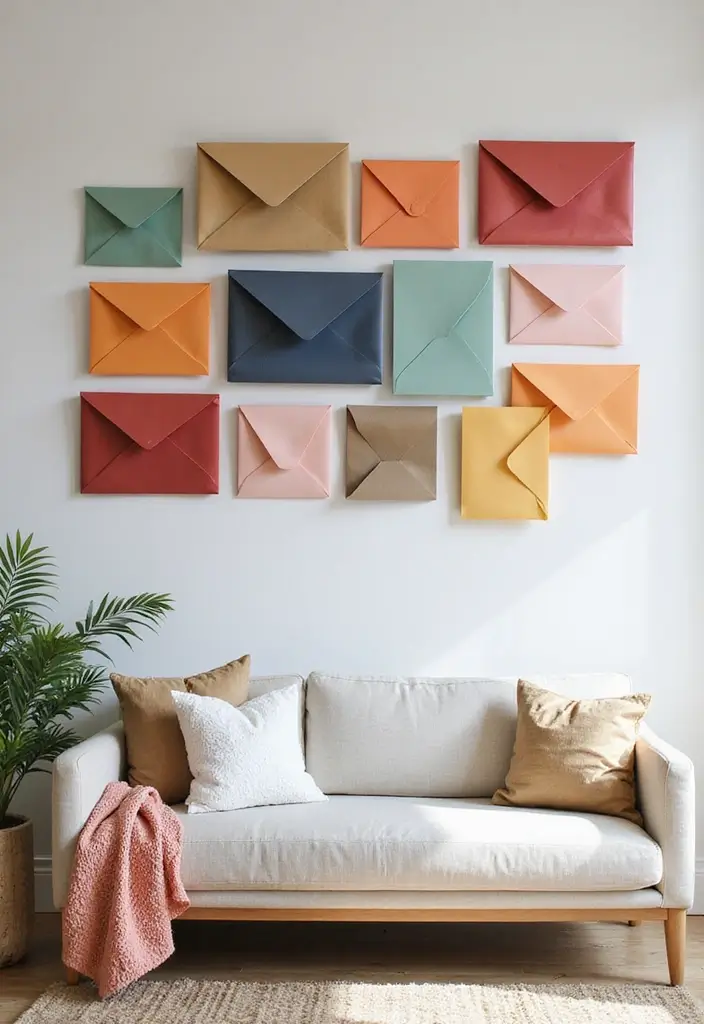
Envelopes are getting a second life in my craft room. I love how a plain square can turn into a tiny gift, a pocket for receipts, or a sweet note holder. I put this post together because I want to share simple, real life ideas that make everyday paper feel special and useful. You probably have the basics at home, and these ideas need only a few quick steps.
Who it’s for: If you like DIY projects, quick wins, school crafts, or planning your week with a little whimsy, this one is for you. Teachers, students, party hosts, crafters at any level, and people who love small gifts will find something they can use.
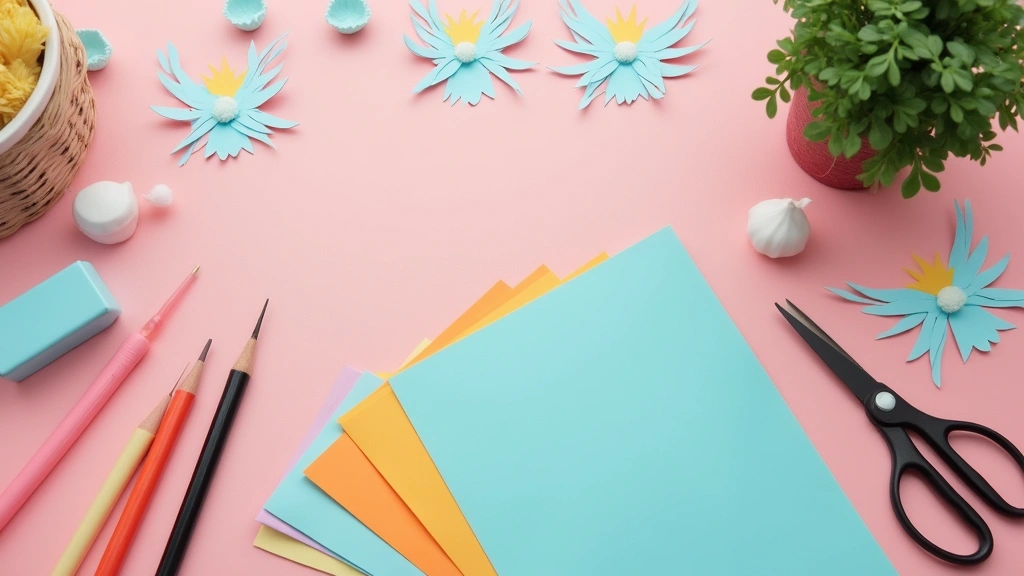
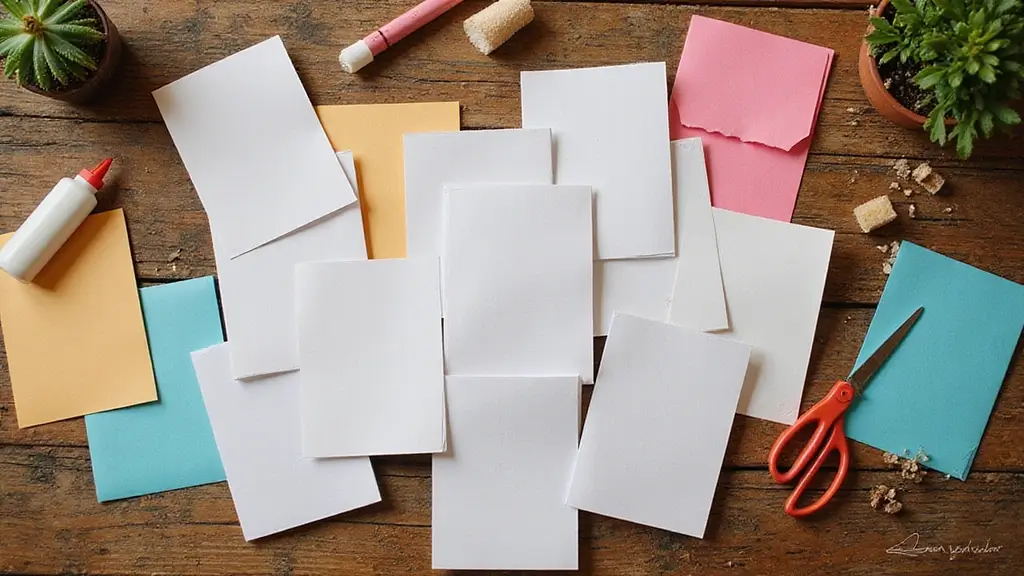
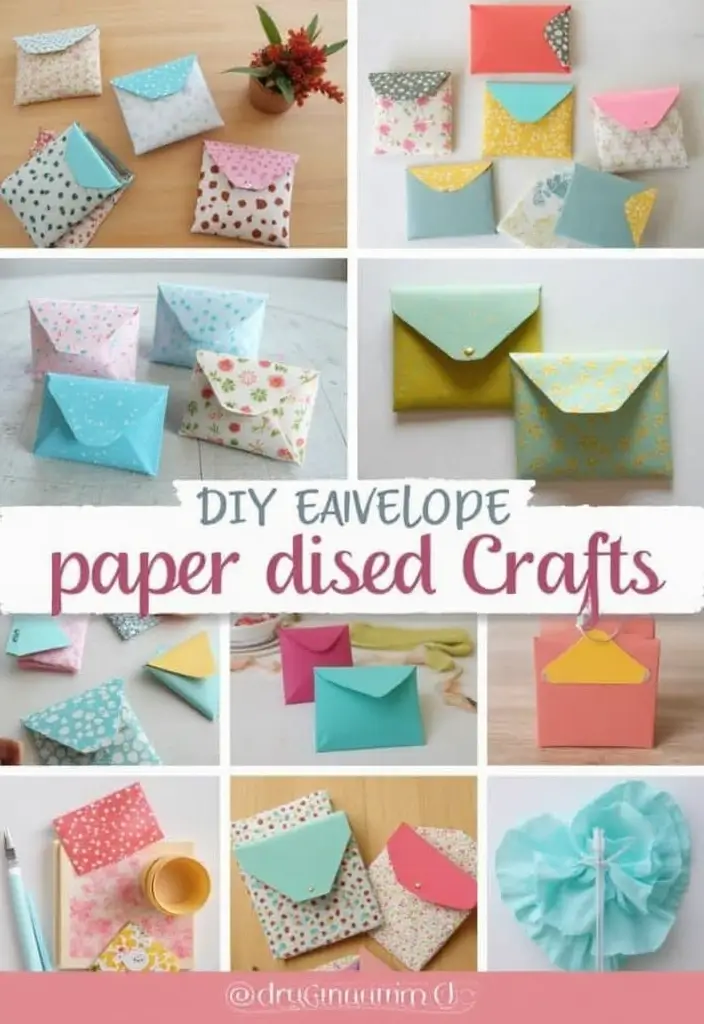
What you’ll get: 29 ideas that are cute and practical. These ideas cover decorating envelopes for gift wrap, turning envelopes into mini gift card holders, making tiny notepads, and creating simple organizers. I kept materials simple: plain envelopes, scissors, glue, washi tape, markers, stamps, and a splash of color. You can customize to your colors or theme.
Each idea is described in plain steps. Start with clean envelopes, pick a color palette, and add a touch of texture with tape or ribbons. You can do a quick decorated edge, a sticker anchor, or a small pocket that holds a note card.
Real talk about what you get: these are quick projects that fit into a busy day. They work for gift wrapping, party favors, or classroom notes. You can finish many in under 15 minutes. If you want to stretch one idea, try layering stamps, paint, or a dab of glitter glue for a soft shine.
Ready to start? Grab a stack of envelopes and a few tools. Pick two ideas to try this weekend. You can share your results and swap tips with friends. These envelope paper crafts blend charm with function, letting you add a personal touch to gifts, notes, and everyday organization.
1. Customized Greeting Cards

You want a personal touch that fits your budget. Customized greeting cards do that well. Here is why they work: you pick colors, you write a message, and your card feels truly yours. Lets break it down.
– Materials: Pick bright paper that fits the occasion. Use plain or colored envelopes to match the mood.
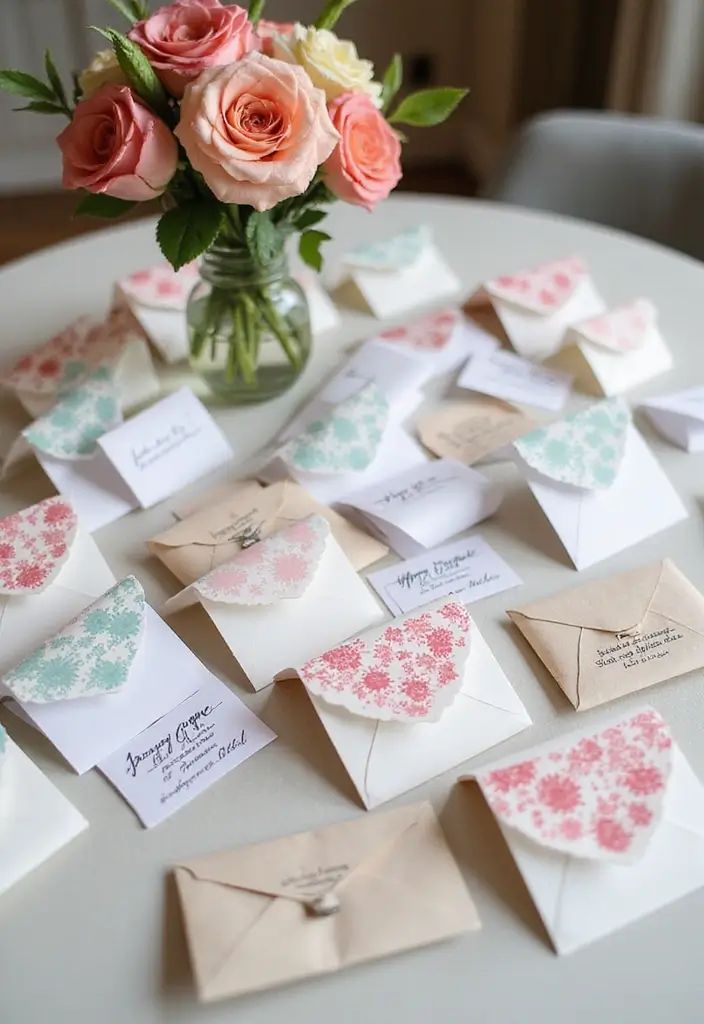
– Shapes: Cut envelopes into hearts, tags, or banners. These simple cuts add charm.
– Decor: Add drawings, stickers, washi tape, or a few dried flowers. Small accents go a long way.
– Pop-up idea: Try a tiny pop-up inside for a surprise. Start with a flat fold that rises when opened.
– Scraps: Save small scraps for mini cards or gift tags later. Reuse saves money and waste.
– Message: Write a short, warm note. Use a fine-tip pen for tidy, legible text.
– Finishing: Let glue dry fully. Press the card flat under a heavy book so it stays neat.
– Final touch: Add the envelope label or stamp to finish. This small detail completes the look.
– Next steps: Gather supplies, test one idea this weekend, and share your card with a friend.
With these ideas you can make several cards for birthdays, thank-yous, or just to say you care. Take a photo when you finish each card so you can copy the look later. Practice helps you improve quickly.
Recommended Products

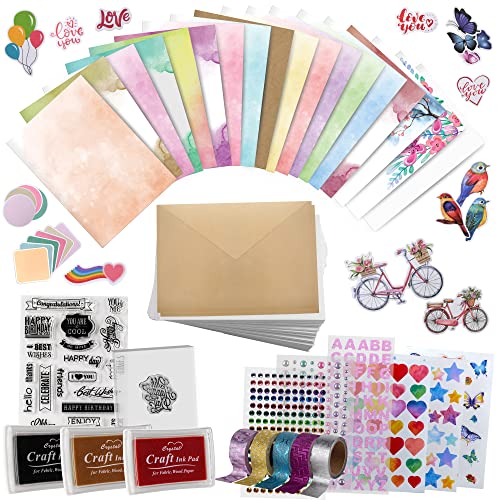
Complete Card Making Kit for Adults:Everything you need to create handmade greeting cards. Includes multi-color paper, stickers, envelopes, and decorations. No extra supplies required
𝐄𝐧𝐭𝐞𝐫𝐭𝐚𝐢𝐧𝐦𝐞𝐧𝐭 𝐄𝐱𝐩𝐞𝐫𝐢𝐞𝐧𝐜𝐞:Very suitable for stimulating the creativity of creators! These toolkits allow us to participate while cultivating our sense of color, imagination, and hands-on abilities Make us have a very joyful production experience

Versatile Set for Every Occasion:Elevate your greetings with our Blank Cards and Envelopes Set, featuring 100 white cards paired with 100 matching envelopes. Ideal for various occasions, these 4x6-inch cards offer a blank canvas for your personalized messages and creative expressions.
2. Envelope Mini Albums
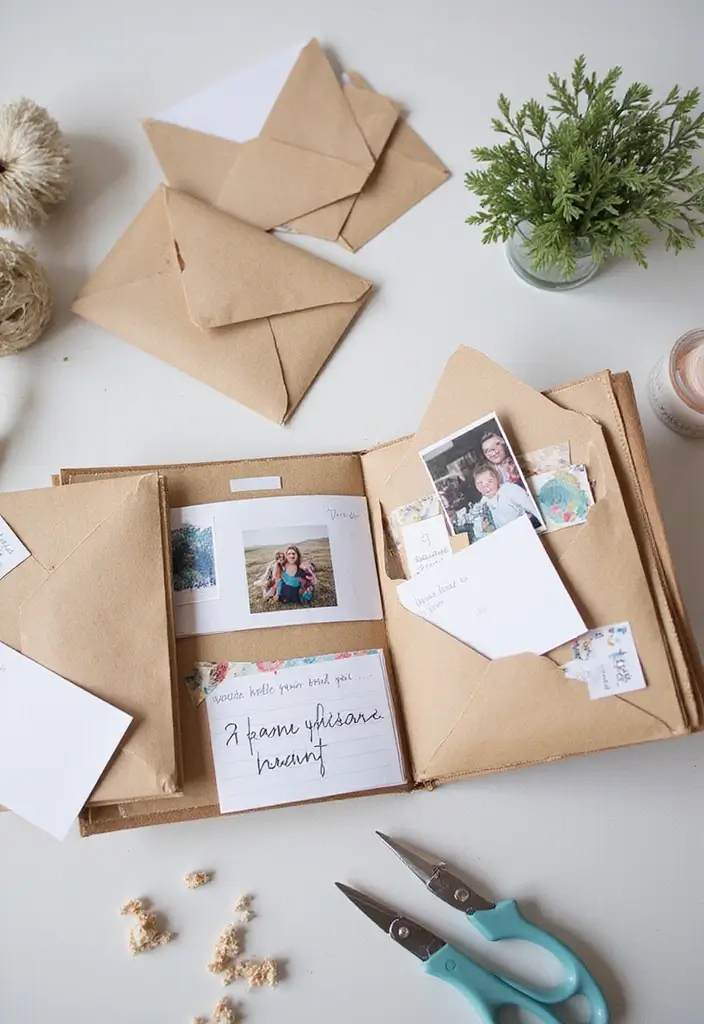
Need a tiny, easy way to store photos, notes, and mementos? An envelope mini album gives you a cute, portable gallery you can build yourself. Here is how you do it.
What you’ll need
– A string of envelopes in different sizes
– Glue or double-sided tape
– Decorative paper, fabric scraps, or recycled wrap
– Scissors, markers, stamps
– Small photos or notes to tuck inside
How to build it
– Lay the envelopes in a line, back-to-back or side-by-side, to form pages.
– Glue the edges lightly so the pages stay together but still fold like a book.
– Slide photos or notes into each pocket and use the flap to hold tiny keepsakes.
Make it yours
– Decorate each page with simple patterns, doodles, or washi tape.
– Personalize the cover with a fabric patch, a pretty paper, or a scrap of recycled wrap.
– Try different sizes for depth. A big page next to a small one creates visual interest.
Tips and ideas
– Add a ribbon or string to mimic a real mini album spine.
– Score the folds before you crease to keep pages flat.
– This project makes a thoughtful gift or a keepsake you can flip through often.
Next steps: grab supplies and start with three envelopes. Fill it with your best memories and give it life.
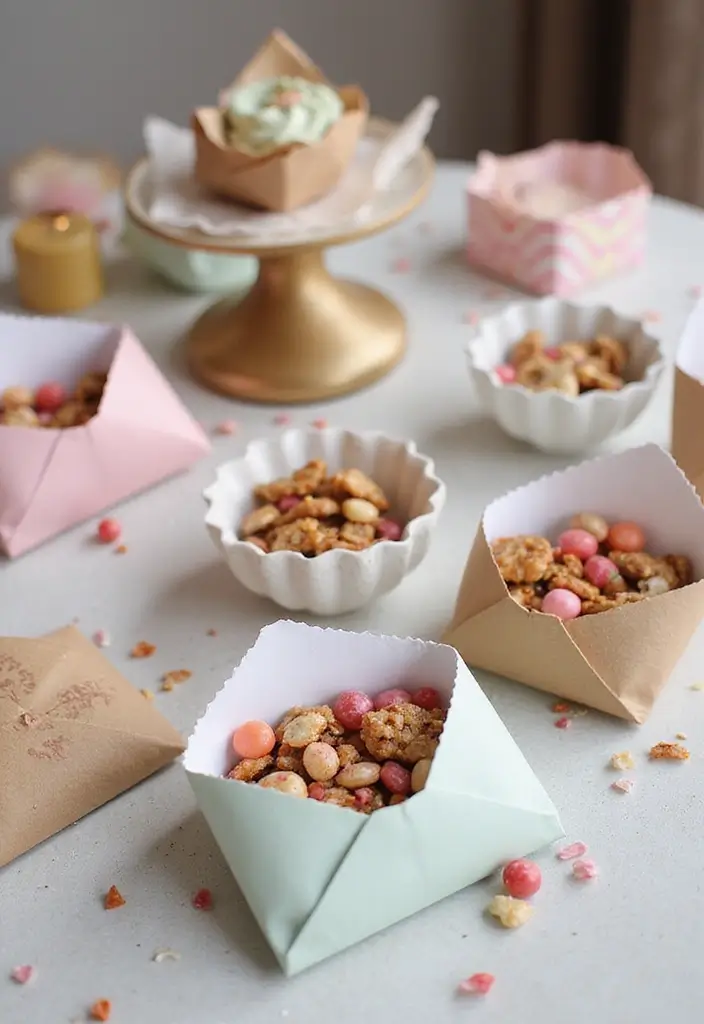
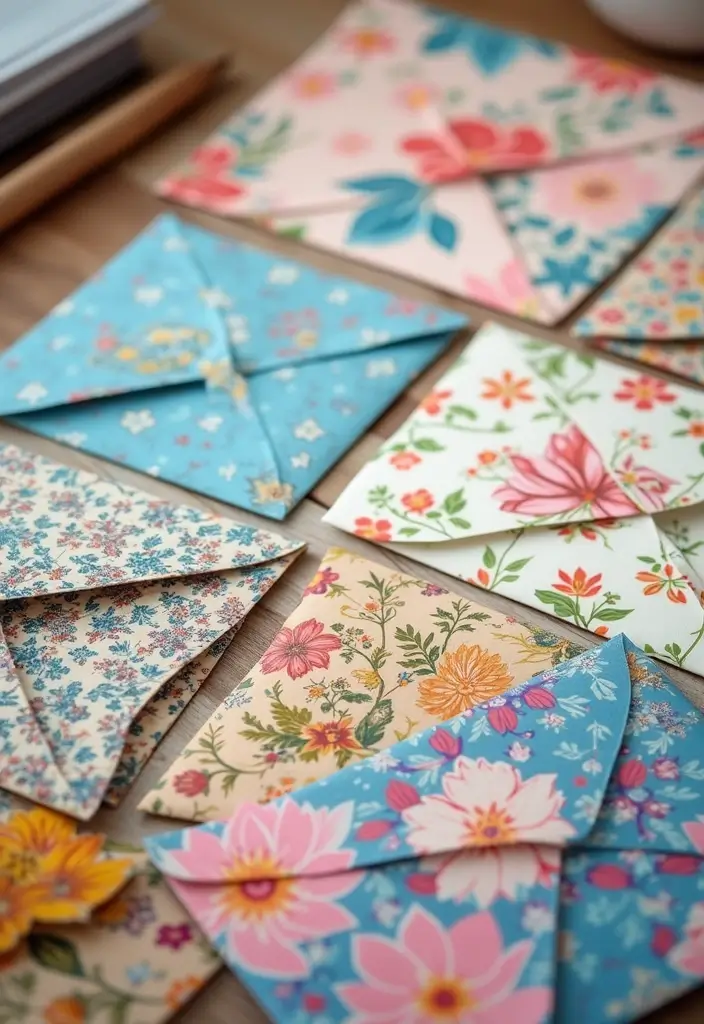
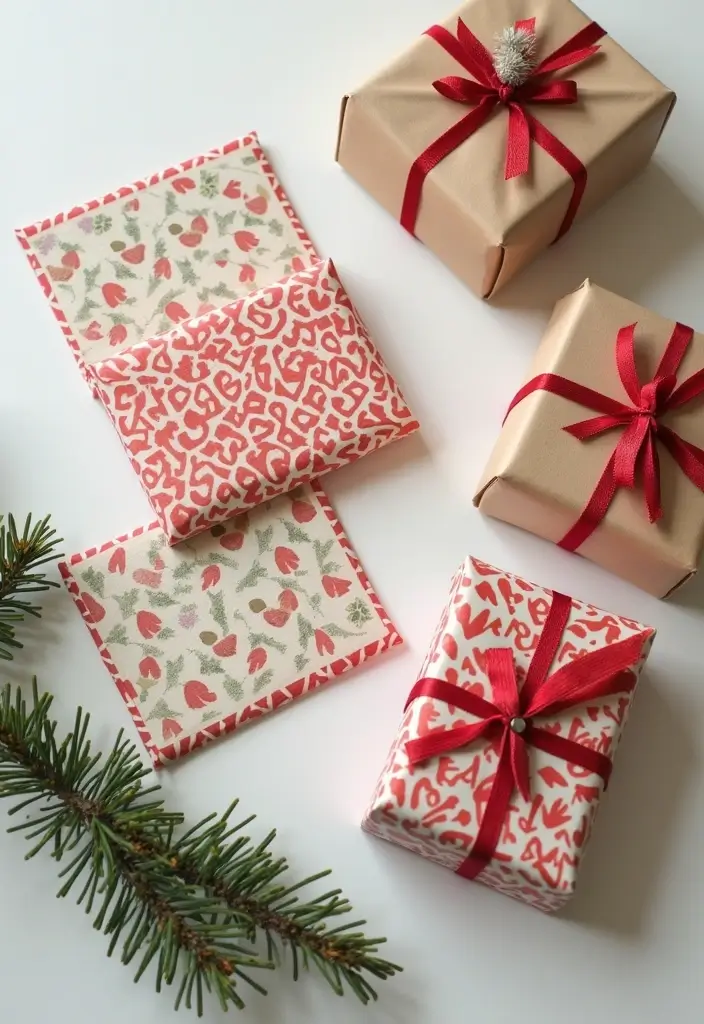
3. Lovely Gift Wrap

Here is why homemade envelopes work as gift wrap. You get a personal look and less waste.
– Size it right. Pick envelopes bigger than the gift or use a few different sizes for a mix. A sturdy envelope keeps fragile items safe.
– Decorate simply. Choose a look for the occasion. Paint a few dots, use a stencil, or clip images from magazines. You can stamp a small pattern or add markers. Keep colors harmonious with the gift.
– Wrap and seal. Slide the gift in, seal with a sticker or a light ribbon, and tie a tiny bow. Add a short, handwritten tag.
– Eco bonus. The envelope can be saved and used again. Friends and family may reuse it for their own crafts.
– Smart tips. Store envelopes flat in a box. For bulky items, place the gift in a thin pouch first, then go into the envelope.
– Common questions. Will it protect the gift? Flat or slim items work best. For larger gifts, use a sturdy inner wrap inside the envelope.
– Ready-to-wrap ideas. Keep blank envelopes, a sheet of craft paper for backing, a roll of ribbon, a white gel pen, and a few stamps or stickers. This makes wrapping quick on busy days.
Give it a try this weekend and see the difference.
@media(max-width:480px){
4. Stationery Sets
Do you want a cute, practical way to write letters at home? Try a DIY stationery set. You design a set of envelopes that matches your writing sheets. It looks neat, and it helps you stay organized.
Here is why this works: you reuse scraps, you have a ready gift, and you pick a style you love.
Here is a way to use it: make a project. Pick a season and change colors. This set works for letters, or gift tags.
Supplies
– Envelopes in one or two sizes that fit your paper
– Writing sheets designed to slide inside
– Watercolors or soft washes for a calm look
– Rubber stamps or pattern stamps
– Ink pads, scissors, glue
– Ribbon or twine for packaging
– Washi tape for accents
Design ideas
– Choose a color theme: pastels, bold lines, or earthy tones
– Decorate envelopes with a light watercolor wash
– Add a short quote on the sheets
– Keep edges neat
Step-by-step
– Create a matching range by painting or stamping all sheets
– Trim edges so pages slide in
– Let paints dry
– Fold in
– Tie with a ribbon
Finish and tips
– Finish with a ribbon and a tiny tag
– Store in a drawer or gift them
– It reuses scraps and cuts waste
@media(max-width:480px){
Recommended Products

Exquisite Design and Perfect Size: Our vintage stationery set includes 30 sheets of beautifully designed letter paper and 60 matching envelopes, totaling 90 pieces. Each piece measures 10.2 x 7.25 inches, offering ample space for your thoughts and messages while adding a touch of nostalgia to your correspondence.

Complete Stationery Supplies Kit: ZICOTO’s 66-piece stationary set with letter and envelopes package includes everything needed for beautiful, genuine handwritten notes. Spark meaningful connections with this cute stationary kit and share love, gratitude, and creativity

Mr. Pen stationery writing paper set includes 30 beautifully designed letter papers and 18 matching envelopes, perfect for personal correspondence or special occasions.
5. Decorative Organizers
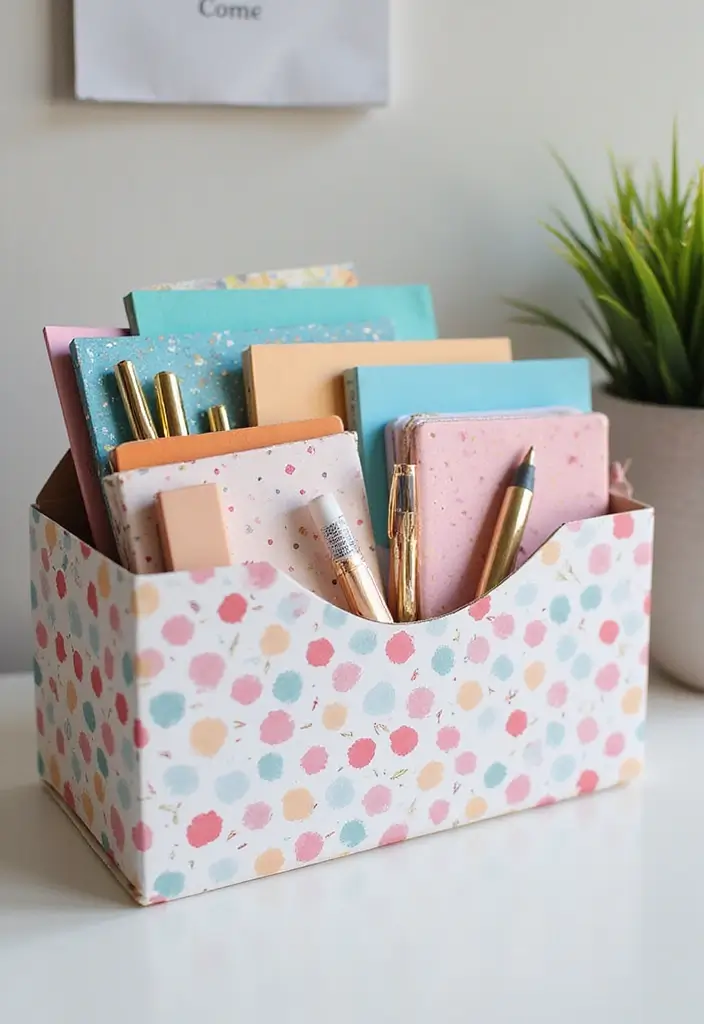
Decorative Organizers
Is your desk a maze of receipts, pens, and small clips? You can fix that with envelope crafts. Make a decorative organizer that holds pens, clips, or business cards. It is simple, cheap, and quick.
Here is why this works. Envelopes stack neatly and can be dressed up to fit your style. They use little space and keep small items in reach.
– Build a two or three envelope tray. Take 2–3 envelopes that match. Glue them edge to edge to form a shallow tray. Add a base from a cereal box or thin cardboard so it does not slide.
– Try a vertical file. Glue envelopes into a small column so papers stand up. Add a card at the top for a label.
– Decorate. Wrap with washi tape, splash with a little paint, or stamp a simple pattern. Let it dry before you load it up.
– Personalize by category. Label sections like “Bills,” “To-dos,” and “Receipts.” Use small tags or sticky notes.
– Reuse and recycle. Use clean envelopes and scraps. It cuts clutter and helps the room feel calmer.
Next steps: place your new organizer where you reach for supplies. Keep it near your computer or on a drawer pull. A tidy spot makes work feel easier.
6. Fun Party Favors
Here is why you want to swap plain goodie bags for envelope favors, and how to do it without a lot of stress.
– Choose the right envelopes
Pick bright or pastel envelopes. Look for recycled paper if you can. They are sturdy, and they set the theme the moment guests see them.
– Fill with small gifts
Stuff each envelope with a few candies, a tiny toy, or a themed trinket. Add a short thank-you note inside. A personal line like “Glad you came” makes it warm.
– Decorate for the party
Use stickers, stamps, or a bit of washi tape. Match colors to the party style. This step costs little but pays off.
– Make it personal
Write a quick message for each guest. A name, a joke, or a memory from the night adds charm. You can print tiny notes to save time.
– Keep it easy and eco-friendly
Reuse envelopes if you already have them. Skip extra wrap so waste stays low. Consider seed paper inserts that bloom after the party.
– Delivery tips
Plan how guests will receive them. Place envelopes at each seat or hand them out at the end. A neat reveal adds a fun moment.
Next steps: pick a simple color plan, gather a few supplies, and test one design before the big day. With a tiny envelope craft, your party will feel extra special.
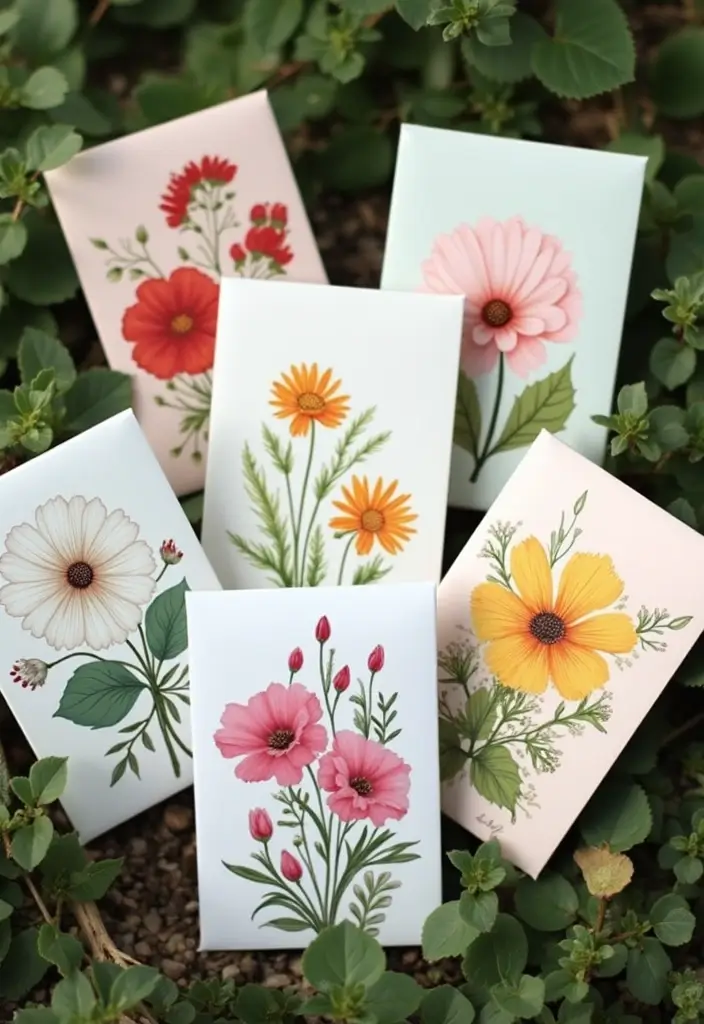
7. Seed Envelopes
Seed envelopes give you a tidy way to store your garden seeds or share them with friends. They keep seeds safe and neat. Here is why this idea works: it is cheap, easy, and friendly to the planet.
Let’s break it down.
– Materials: Use thin, biodegradable or recycled paper. You can repurpose old envelopes or scrap paper. A small pair of scissors, a little glue or a sticker, and a pencil for labels.
– Making the envelope: Cut a square or rectangle. Fold the edges and seal. It should be just big enough for a handful of seeds.
– Decorating: Add simple floral doodles or tiny drawings that show the seed inside. Use colors that match the plant.
– Labeling: Write the seed name and year on the back. Add quick planting tips. You can stamp a date so you know what you have.
– Storing and gifting: Keep seeds dry in a cool spot. These envelopes work well for seed swaps or gifts for gardeners.
Next steps: grab paper, cut a few envelopes, and try a small seed batch. You’ll have a quick, eco-friendly project that pays off in late spring.
@media(max-width:480px){
8. Travel Journals
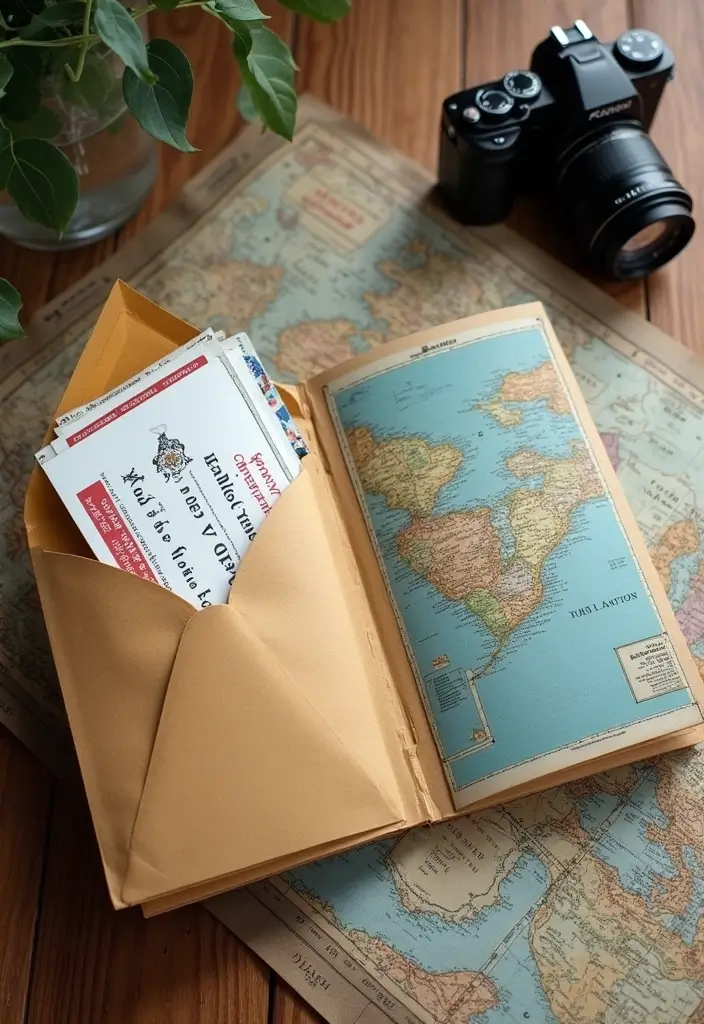
Travel memories should stay vivid without wasting space. Build a travel journal from envelopes and keep every moment alive. This DIY keepsake is portable, sturdy, and easy to add to as you go.
What you’ll need
– A few larger envelopes for the cover and sections
– Several small envelopes for tickets, maps, notes
– Glue, scissors, markers, and a pencil
– Washi tape, stickers, stamps, and watercolor pencils
– A simple binding method (staples, string, or rings)
Here is why this works: the cover shows your style, and each pocket holds a memory.
Let’s break it down
– Start with the cover: take one big envelope. decorate with travel stickers or a drawing. Write the trip name and dates clearly.
– Make zones inside: use smaller envelopes as folders by city or day. Label them with a word or icon.
– Save items: place tickets, tiny maps, and receipts into their envelopes. tuck in short notes about what you did that day.
– Add art: draw a quick scene, color a route on a map, or paste a photo if you have one. This makes memories pop.
Practical tips
– Keep it light and flat so it fits in your bag for the trip.
– Protect drawings with a light sealant if you want them to last.
– Let it grow with your trip; add pages as you travel.
Next steps: carry it, fill it, and enjoy your own portable memory book.
9. Mail Art
Here is why mail art works: it adds personality to your letters and makes the unboxing feel special. A small design can spark a smile before the letter is read.
– What you need: a clean envelope, colors (watercolors or markers), stamps or a stencil, scissors and glue, a fine liner pen, and a strip of decorative tape. Optional collage pieces from magazines.
– Simple techniques: start with a soft color wash. Add a repeating stamp pattern or a simple stencil shape. Glue on a tiny collage image for color. Draw a short quote or doodle a tiny scene. Leave space for the address.
– Quick ideas: a pale border, a single focal sticker near the corner, or a little scene along the edge. Frame the design with washi tape to stay light.
– Personal touch that helps: pick a theme your friend will love. Write a short note by hand. A small flourish like a leaf or heart adds charm.
– Practical tips: plan on scrap paper first. Let glue dry before stacking. If ink bleeds, switch to waterproof ink.
– Next steps: plan one mail-art envelope this week and bring a little joy to someone you care about. Perfect for birthdays and pen pals alike.
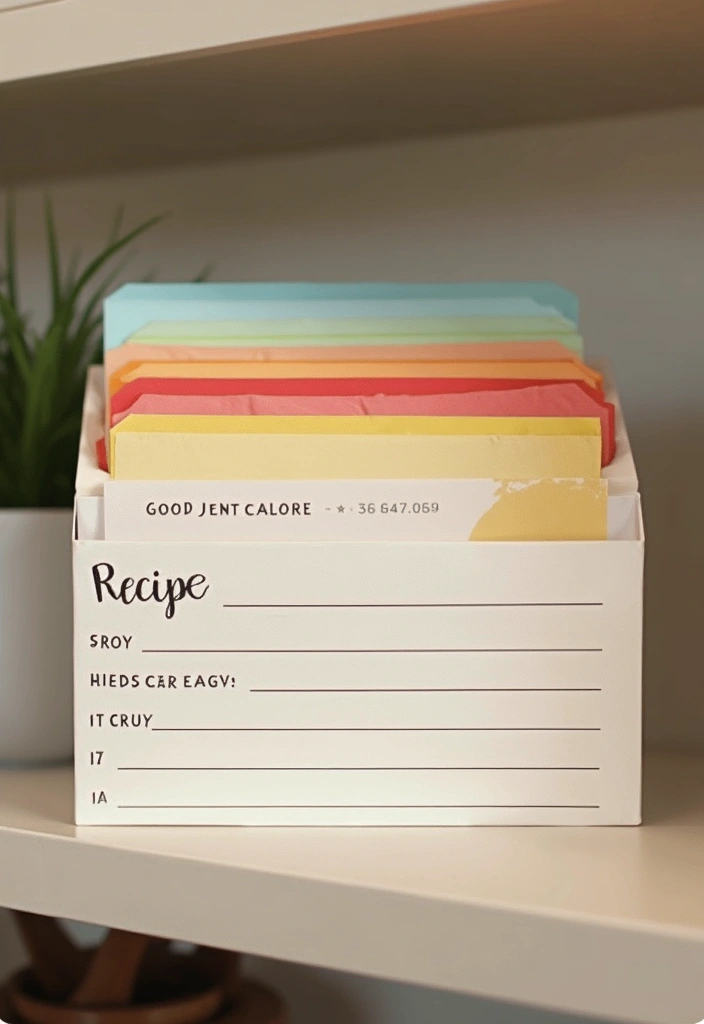
10. Recipe Envelopes
If you love cooking, you might keep losing track of your best recipes. A handy DIY recipe envelope set can fix that. These little pockets hold your cards in a neat, easy-to-find way. You get order and a warm look in one simple idea.
What you’ll need
– Sturdy paper or cardstock for the cards
– Decorative paper or envelopes that fit your cards
– Scissors, glue or tape
– A pen or printer to write or print recipes
– Labels or stickers to mark cuisine or course
– A small box or binder to store them
Steps to create
– Write or print each recipe on a decorative card.
– Trim the card to fit your envelope size.
– Slip the card into a matching envelope.
– Color code sets by cuisine or course.
– Add a tiny tip card or spice note for fun.
– Stack envelopes in a box or binder so you can flip through quickly.
Smart uses
– Organize family favorites and keeper recipes in one place
– Gift a set to a friend who loves to cook
– Create themed sets for new cooks, students, or guests
Tips you can use
– Use a consistent size so envelopes stack neatly
– Add a date or revision note to keep tips fresh
– Seal envelopes with a little wax sticker for charm
– Add a ribbon or stamp for extra charm
@media(max-width:480px){
11. Interactive Advent Calendar
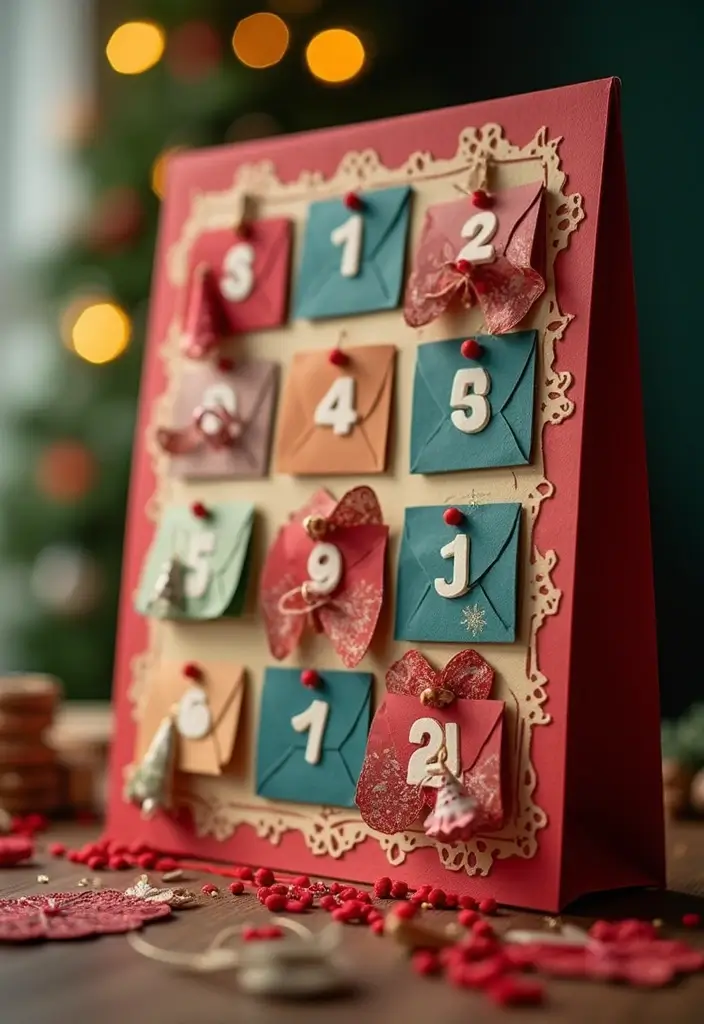
You want a holiday ritual that builds joy day by day without a big mess. An interactive advent calendar made from envelopes fits that need. It gives a new surprise each day and stays budget-friendly.
Here is why this approach works: you reuse plain envelopes or pretty ones, fill them with small treats or notes, and tailor it to your family traditions.
What you need
– Envelopes: regular or decorative
– A length of twine or ribbon
– A cork board or a wall to pin or clip to
– Small surprises: notes, candy, tiny gifts that fit the days
How to build
– Number the envelopes from 1 to 24 (or 1 to 12 if you want a shorter run)
– Fill each envelope with something small and thoughtful
– Attach envelopes to the string with clothespins or pin them to the board
Make it personal
– Add a quick memory note tied to a family tradition
– Include a tiny joke, a photo, or a favorite recipe card
– Mix in tiny tasks like a 5-minute story time or a quick holiday song
Daily use
– Each day, open the next envelope and read the message
– Let the note set the mood for the day or start a small family activity
– Keep it flexible—switch days around if needed
Next steps: this simple setup brightens December, brings everyone together, and can be kept year after year.
@media(max-width:480px){
12. Bookmark Envelopes
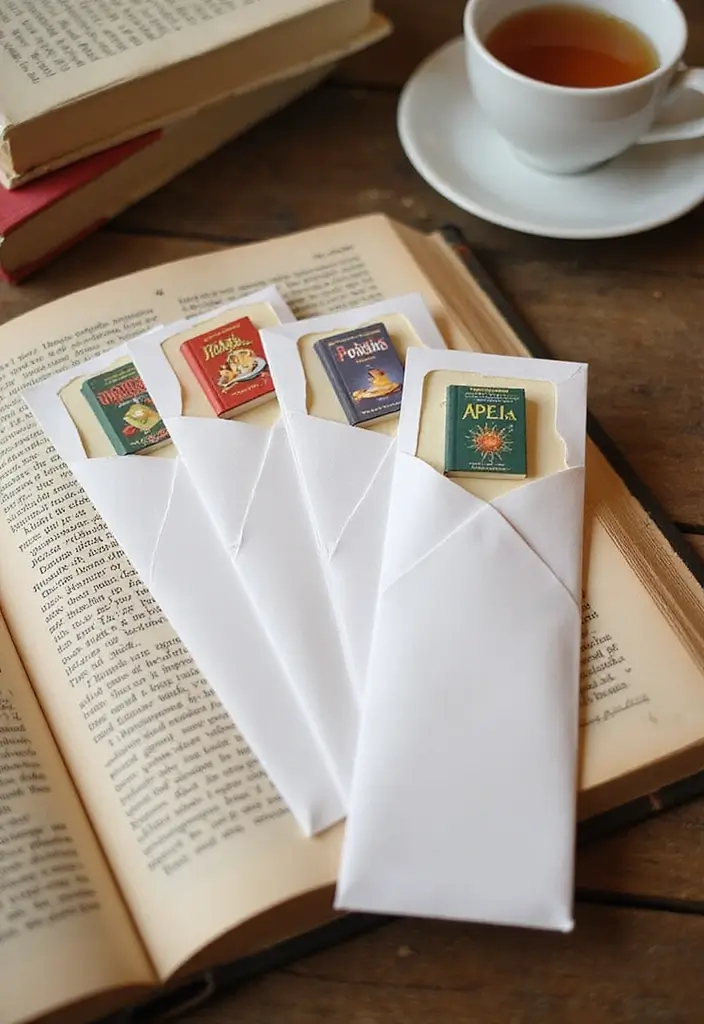
If you want a tidy way to store bookmarks, try bookmark envelopes. These tiny paper pockets hold your bookmarks and add a pop of color to your reading space. Here is why they work and how to make them fast.
– Materials: sturdy paper or cardstock, scissors, a glue stick or tape, a ruler, and a pen or markers. Optional: stickers or bookish quotes.
– Quick build: cut a 3 by 3 inch square. Fold the bottom edge up to form a pocket, then seal the sides with glue or tape.
– Decorate: add a short quote, a simple doodle, or a tiny image of a book cover. Choose colors that match your shelves for a cohesive look.
– Personalize by genre: make one envelope per genre, like mystery, fantasy, or poetry. Label the front so you can grab the right bookmark fast.
– Extra uses: use the envelopes to store notes you jot while you read, ideas for future books, or a reminder of a scene you want to revisit.
– Placement and care: keep a small stack in a reading tray or inside your current book. Re-seal glue if it loosens over time.
Next steps: make a few sets for yourself or as gifts. They keep bookmarks handy and cut desk clutter.
@media(max-width:480px){
13. Dreams and Goals Envelopes
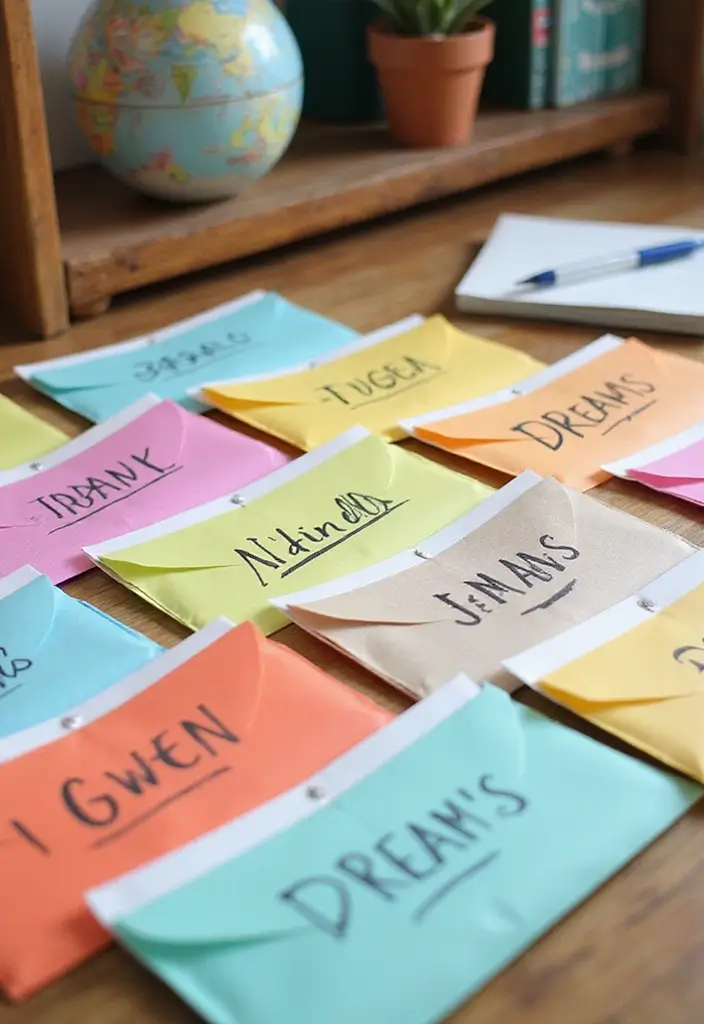
You want a simple way to turn big dreams into real steps. Dreams and goals envelopes give you a clear, visible system. You pick what matters and keep it where you can see it. Here is a practical way to set it up.
What you need
– 6–8 envelopes
– decorative paper, markers, stickers
– small notes or cards
– glue and scissors
– a wall or board you’ll see every day
How to set it up
1) Choose 6–8 goals. Include travel, work, health, and learning. Name each goal clearly.
2) Make an envelope for each goal. Write the goal on the outside; put one short step inside, like “Save $10 weekly.”
3) Decorate each envelope with a tiny image or quote. Use color to match the mood.
4) Place a note inside and seal the envelope. Label it with the goal.
5) Put the set where you view it daily, such as near your desk or kitchen wall.
6) Check it monthly. Review progress, move finished notes to a done area, and add new steps.
Here is why: small, clear steps stay in your mind. Next steps keep you moving.
This setup also works as a light mood board you can update with the seasons.
14. Envelopes for Kids’ Art
Struggling with art made by your kids piling up around the house? Here’s a simple fix that saves space and feeds creativity: envelopes for kids’ art.
Here is why this works. Envelopes keep each piece flat and neat. They make it easy to look back year after year. When the art is organized, your child feels proud and cared for.
What you’ll need
– Large, sturdy envelopes and a few smaller ones for doodles or sketches
– Markers, stickers, and tape
– Labels or a plain pen for writing names and dates
Steps you can take now
– Let your child help pick the envelopes. Have them decorate the outside with drawings and stickers to make it personal.
– Label each envelope with the child’s name and the date. You can add a short note like the year or a favorite memory from the art.
– Create an ‘art of the month’ envelope. After a new master piece arrives, choose the best work and keep it in this special folder.
– Use color coding. Assign one color per child or per year so you can grab a box of keepsakes quickly.
Practical tips
– Photograph or scan artwork before tucking it away. Save a digital copy and keep the originals in envelopes.
– Don’t keep every piece. Pick favorites and rotate them to stay fresh.
– When a month or year fills up, move older envelopes to a keepsake box for long-term storage.
Next steps
Set up a quick art station today, gather supplies, and start building your kid’s art library one envelope at a time.
@media(max-width:480px){
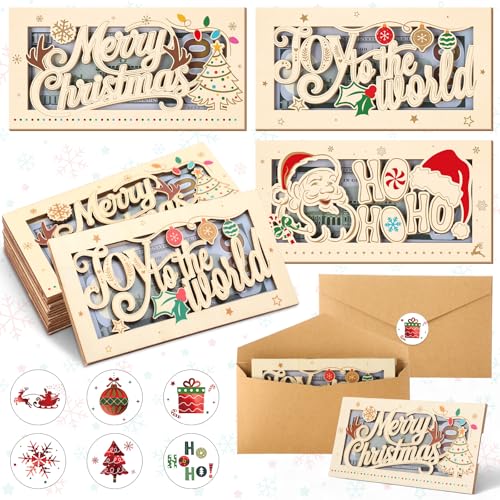
15. Holiday Cards and Envelopes
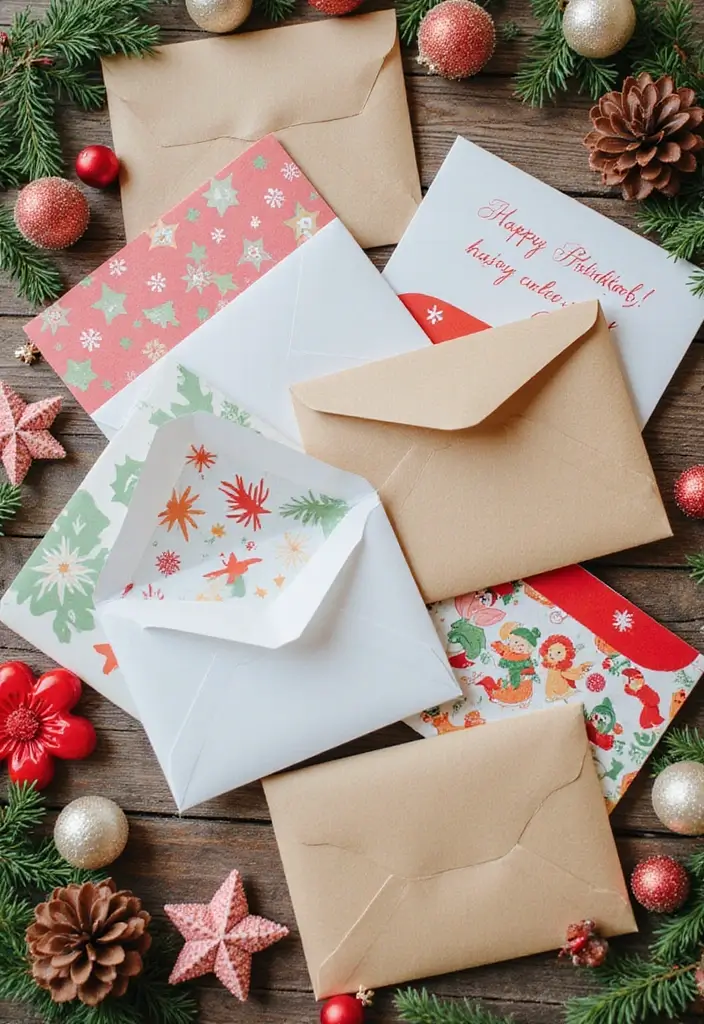
Here is why you should try DIY envelope crafts for holiday cards. You gain a personal keepsake, not just a note. Ink adds color.
Here is how to do it in simple steps:
– Choose a theme. Pick Christmas, Halloween, or Valentine colors that feel right.
– Make matching envelopes. Cut envelopes from paper or reuse old ones with fresh seals.
– Create the card. Fold a sheet of paper, add a cut-out, or a friendly sketch.
– Decorate. Add glitter, a ribbon, or a small sticker. Keep it neat so it lasts.
– Keep it eco. Reuse scraps, repurpose old cards, recycle when done.
Here are practical tips to help you finish fast:
– Score edges before folding for clean lines.
– Use glue or tape to attach shapes firmly.
– Put a light coat of glue to keep glitter from shedding.
– Write your message with a smooth pen that won’t smear.
Holiday ideas you can try
– Christmas: red and green layers with simple snowflakes.
– Halloween: orange and black plus a smiling ghost.
– Valentine’s Day: pink hearts and a warm note.
Next steps: gather papers, pick a theme, and start today. Your handmade cards save money and add warmth to the season.
@media(max-width:480px){
Recommended Products
What You Get : 18 happy holiday cards, 18 sticker sheets and 18 envelopes. The size of card is 4x6 inches
Enchant your recipients with one-of-a-kind handmade cards they’ll treasure forever. There is nothing like a homemade greeting card to delight and excite the special someone in your life.

Huralona DIY Handmade Greeting Card Kits including 16 cards,16 envelopes and various of decoration accessories, decorations include colored rhinestones and ribbons.
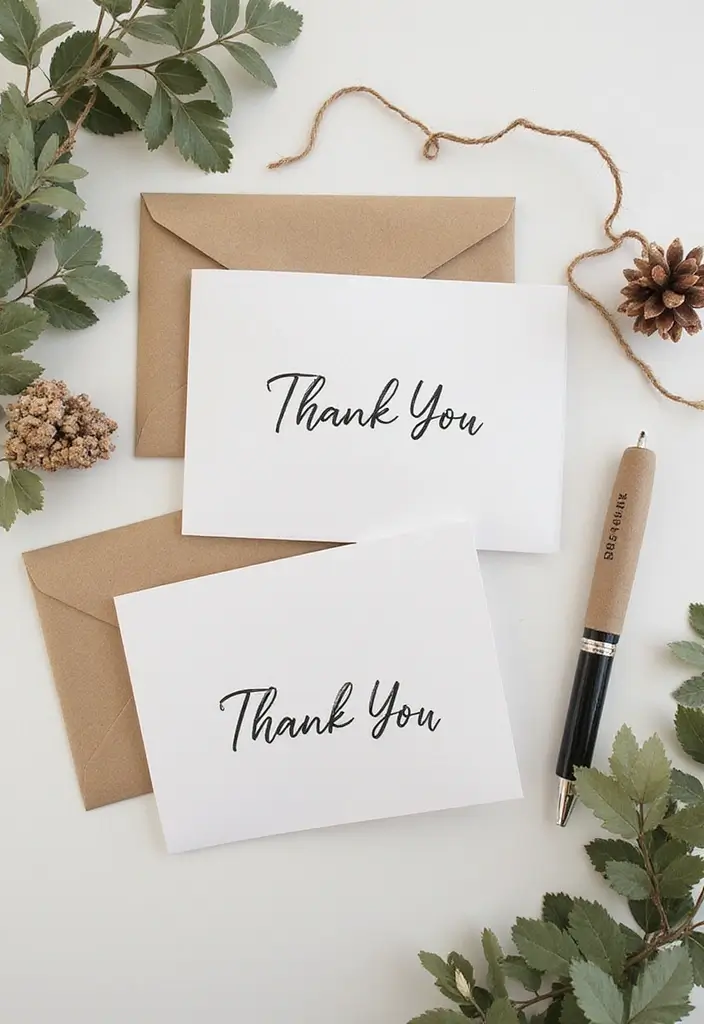
16. Thank You Notes
Feeling stuck on how to say thanks? A handmade thank-you note tucked into a decorated envelope can brighten any day. DIY envelope thank-you notes pair warmth with a craft. You gain a personal touch, and making it can stay with you.
Here is why it works:
– It shows you care. A note from you beats a generic one.
– It respects the planet. Use recycled paper and simple stamps.
– It fits any event, from weddings to gestures.
How to make it in six steps:
– Gather supplies: envelopes, recycled paper or card stock, colored pens, stickers, stamps, and a token if you wish.
– Decorate the envelope: draw a tiny scene, add a sticker, or wrap a ribbon. Keep it neat so it will feel special.
– Write the note: two to four genuine sentences, talk about what you appreciated.
– Include a small token: a pressed flower, a tea bag, or a favorite bookmark can be tucked inside.
– Seal with care: use eco glue or a wax seal for a classy finish.
– Deliver with a smile: hand it to them, or drop it in the mail.
Next steps: you can keep a stash ready for any occasion. This habit makes thanks easy and memorable.
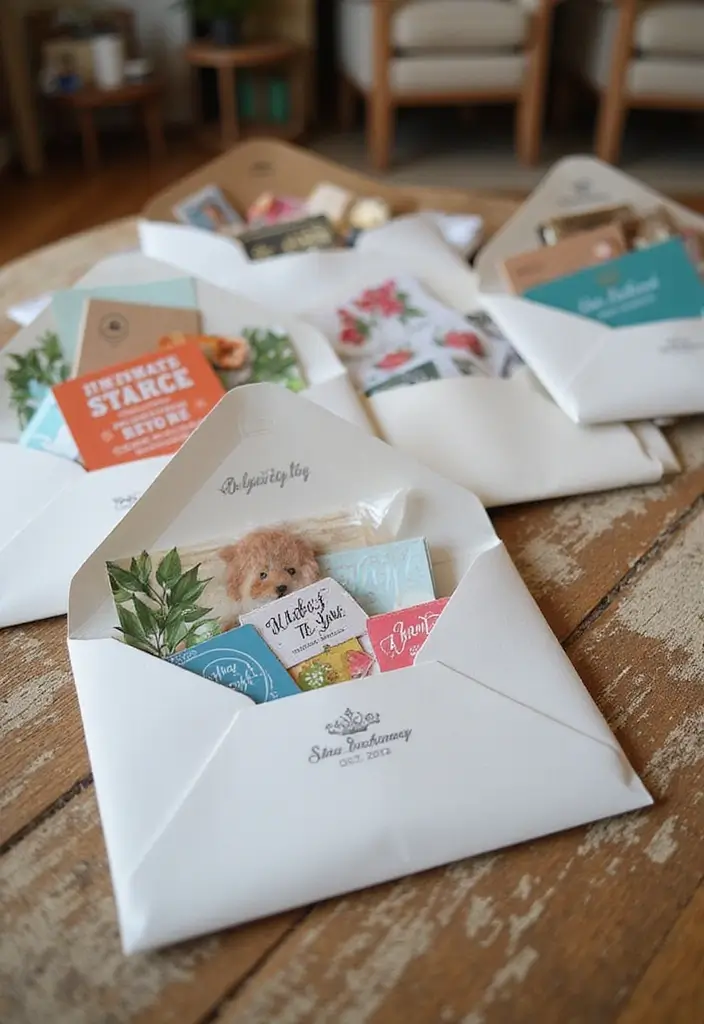
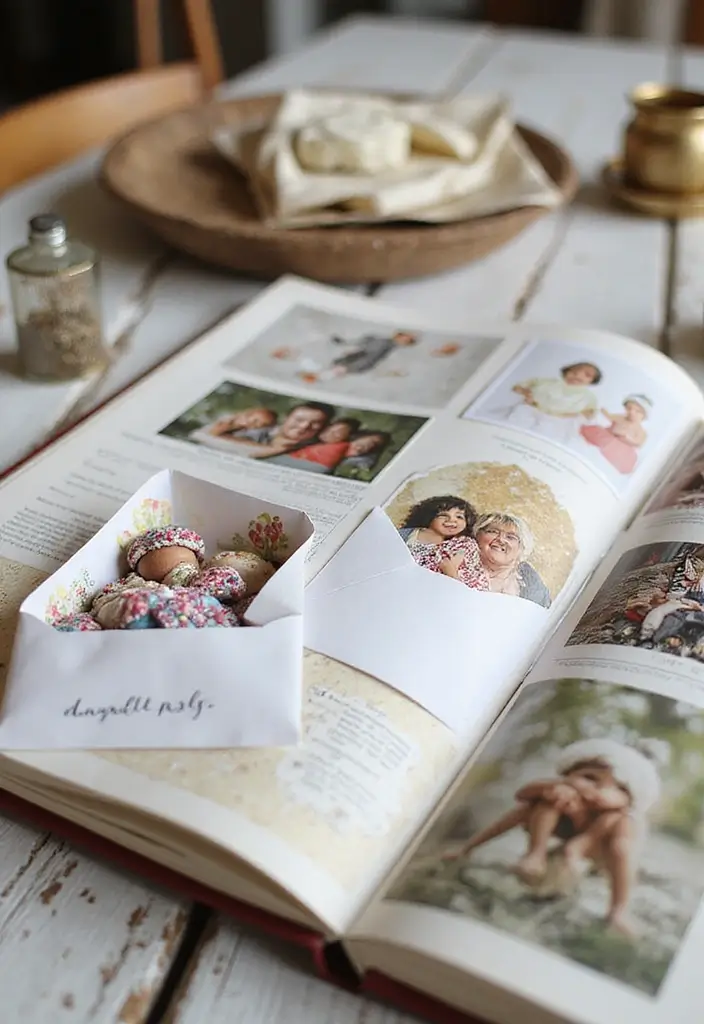
17. Memory Envelopes
Memory Envelopes
You want to keep memories steady without clutter. Memory envelopes fix that. They hold mementos from birthdays, weddings, or trips in one neat place. You get a clear view of each moment when you open them.
Here is why memory envelopes work for you. You can gather small items, flip through them, and feel the day again.
Let’s break it down.
– Gather items: ticket stubs, photos, handwritten notes, a pressed leaf, or a tiny souvenir.
– Pick envelopes: decorated kraft envelopes or small colored ones that fit your event.
– Decorate to fit the theme: choose colors, stickers, stamps, and a simple border. On the outside, write the date and a quick highlight.
– Pack the contents: place items flat, fold photos if needed, and tuck a short caption card.
– Label and seal: add the event name, date, and place. Keep similar years together.
– Store: put the envelopes in a small memory box or a drawer. Keep them away from sun and moisture.
Tips to boost durability and use:
– Use acid-free paper and photo-safe glue so colors stay true.
– Add tissue between photos to avoid scratches.
– Include a one-line note for context like who was there or a moment you want to remember.
– Create a quick index card listing contents.
Next steps: pick a theme, collect items from a recent event, and make your first memory envelope today.
18. Coupons and Vouchers Holder

Struggling to keep track of coupons and vouchers? They clutter wallets and slip from sight. You need a simple plan that stays put. This DIY Coupons and Vouchers Holder keeps every deal easy to spot and easy to use.
Materials
– 6 to 8 small envelopes or repurposed mail envelopes
– A marker or pen
– Sticky labels or colored tape
– Scissors
– A binder ring, small box, or shallow tray
– Optional: a label sticker kit for icons
Setup
– Color code envelopes for categories like Groceries, Dining, Gas, Entertainment, and Online Deals. This helps you scan fast.
– Decorate the front with a simple color or icon. Keep it neat and readable.
– Write expiry dates on the front or inside each envelope.
– Slide a short note inside with savings you plan to chase.
– Keep the envelopes bound or stored in a small tray on a kitchen counter.
Usage
– When you clip or save a coupon, drop it into the matching envelope.
– Before shopping, flip through the envelopes to plan your savings.
– Remove expired coupons each month to avoid clutter.
– Reuse envelopes when the round of deals ends.
Tips
– Reuse old mail envelopes to stay eco friendly.
– Put the holder on the fridge or in a drawer for quick access.
– Add a quick photo of the label on your phone as a backup reference.
Next steps: make this coupon organizer today and start saving with less mess.
@media(max-width:480px){
19. Holiday Gift Tags
Need a simple way to add a warm, handmade touch to your gifts? Turn plain envelopes into holiday gift tags.
Here is why these tags work: they are cheap, eco-friendly, and totally personal.
Fast setup means you can tag gifts in minutes.
– Grab scraps from decorative envelopes, scissors, a hole punch, twine or ribbon, and a pen.
– Cut small pieces about 2 by 3 inches to form sturdy, easy-to-read tags.
– Punch a neat hole near the top edge and thread twine or ribbon through.
– Write a warm message or doodle a tiny picture that matches the gift and colors.
– Tie the tag to the package snugly, so it stays with the bow.
– Add a simple border, sticker, or stamp to give it extra charm without clutter.
– If the envelope is thin, glue a small backing card to stiffen it before cutting.
– Let the ink dry to avoid smudges and keep the tag looking neat.
– This small craft cuts waste, saves money, and adds a personal touch every holiday.
Keep a small stash of ready tags in a drawer for quick, personal gift wrapping.
Next steps: grab scraps and try a batch this week.
@media(max-width:480px){
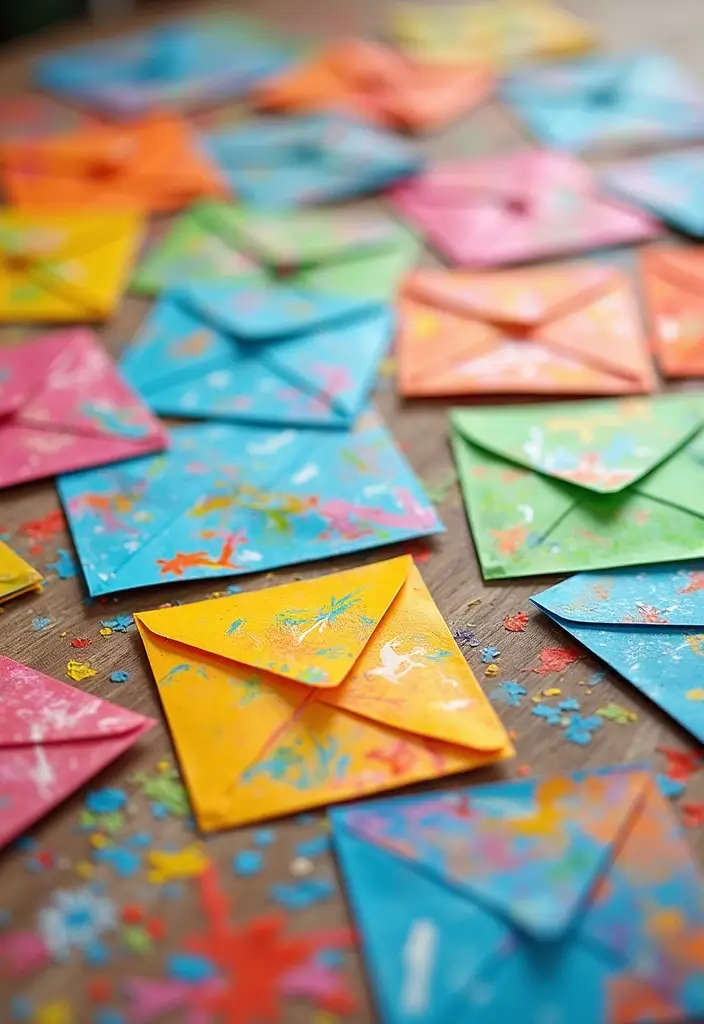
20. Envelope Collage Art
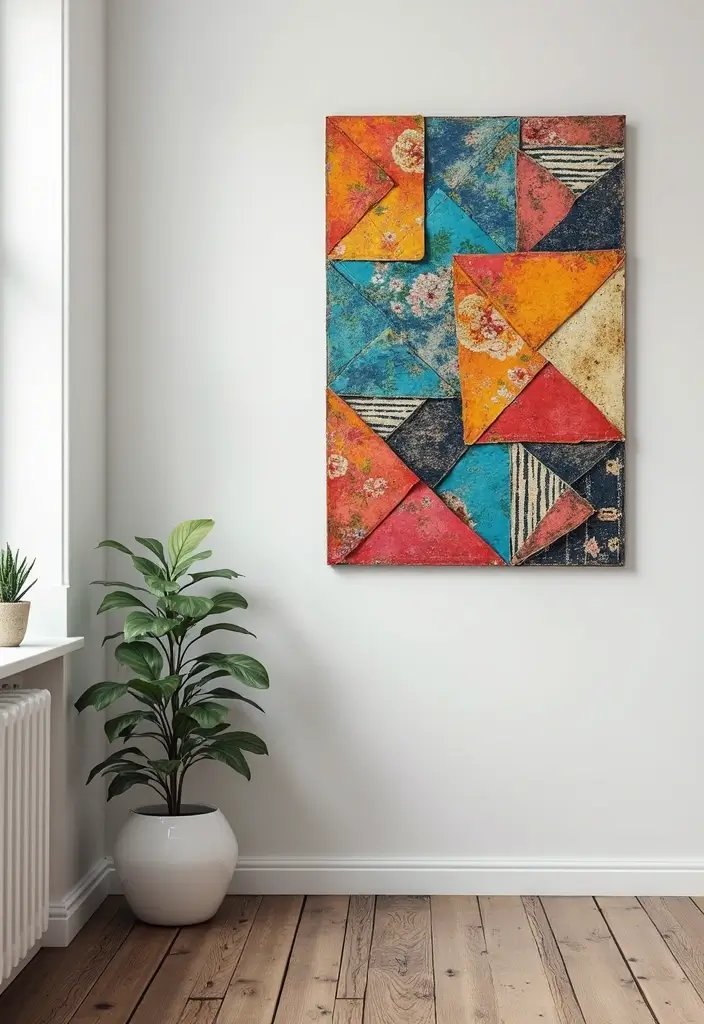
Here is why this works. Envelope collage art turns scraps into DIY wall decor you can be proud of. Gather old, recycled envelopes in different colors and textures. Choose a sturdy base like a plain canvas or thick cardboard. You will also need scissors, a glue stick or craft glue, a ruler, and a pencil.
Let’s break it down. Plan your layout first. Lay pieces on the base and try a neat grid or a free, flowing shape. Trace light shapes to guide you. Cut envelopes into simple shapes: rectangles, triangles, circles. Keep some whole envelopes for bigger blocks.
Next steps. Glue pieces down in layers. Start with background colors, then add accents on top. Press each piece to seal it and avoid loose edges. If you want, tuck photos or small keepsakes under a clear glue so they stay flat.
Care and display. Let the glue dry fully before moving. If you like, seal with a light clear spray to help it last. Hang on a wall with nails or a slim frame.
Creative tips. Stick to a color family for a clean look. Mix bold patterns with calm tones. Use envelopes of different sizes for texture. This keeps the piece lively but affordable.
End with a quick recap.
@media(max-width:480px){
21. Envelopes for Kids’ Learning

Here’s a simple way to boost kids’ learning with envelopes you can make at home. They marry craft with study and feel like small wins.
– Why this helps: Envelopes hold quick tasks. They’re colorful and fun, so your child stays focused. You can target math, science, or language arts.
– What you’ll build: Use sturdy paper or cardstock. Decorate with bright colors. Each envelope hides one mini lesson or a set of flashcards.
– What goes inside: Short math drills, science facts, or spelling prompts. Add a tiny timer or a short checklist to mark done.
– How to use: Open one envelope a day. Do the task, then place it in a done pile. Turn it into a scorecard game with stickers.
– Materials: Colored craft paper, scissors, glue, markers, stickers, index cards, tape or a stapler.
– Tips: Use card stock for durability. Laminate cards if you want repeats. Color-code envelopes by subject. Keep tasks short and clear.
– Quick ideas:
– Math envelopes with flashcards;
– Science envelopes with simple experiments;
– Language arts envelopes with new vocabulary.
Want a theme this week? Pick one and start making a set. Your kids learn by doing and love the colorful envelopes. See their smiles grow every day.
@media(max-width:480px){
22. Vision Board Envelopes
Need a visual way to keep your goals in sight? Try vision board envelopes. This idea uses simple envelopes on a board to hold your dreams and steps. It gives you a quick, colorful reminder to move forward. You can swap in new images and words as you grow. Watching the board change can feel like progress in real time.
What you need
– Envelopes in a few sizes
– A cork board, bulletin board, or plain wall
– Scissors, glue, tape, and markers
– Magazines or printouts with goal images
– Labels or sticky notes
How to make it
– Pick 4 to 8 goals and write a short phrase on each envelope
– Decorate each envelope with color and a few cut-out pictures
– Add 1–2 words that push you to act, like “start today” or “save now”
– Arrange the envelopes on the board where you will see them daily
How to use it
– Put a tiny note in an envelope when you take a step toward the goal
– Move or open an envelope when you reach a milestone
– Update the images as your plan grows
Tips for staying on track
– Do a quick monthly check-in
– Take a photo of your board to save progress
– Keep the layout simple so it stays easy to read
This simple setup helps you see chances to grow every day.
@media(max-width:480px){
23. Personalized Holiday Cards

Want holiday cards that feel warm and personal? You can make personalized holiday cards from envelopes. This simple idea blends art with a real note, and it stands out in a stack of store-bought cards.
Here is why it works. A festive envelope sets the tone before the card is even opened. A hand-crafted card shows you cared enough to spend time and thought. You can reuse envelopes or mix colors to match each person’s style. And yes, it’s a greener choice than buying new cards every year.
Next steps to make your own personalized holiday cards:
– Pick your envelopes. Red, green, gold foil, or kraft brown—pick what fits your theme.
– Create the card. Draw snowflakes, Christmas trees, or a simple star. You can print a design or doodle with colored pens.
– Add a personal touch. Write a short, heartfelt message for each person. A memory, a kind wish, or a funny line makes it feel special.
– Finish with tiny extras. A wax seal, a ribbon, or a sticker seal gives a neat final touch.
Tips to make it easy:
– Use a few repeating designs to save time.
– Keep messages legible with clear writing or a neat print.
– Batch-work in a couple of sessions to stay organized.
With these steps, you’ll craft eco-friendly, handmade holiday cards that feel truly you.
@media(max-width:480px){
Recommended Products

Card Making Kit/Supplies: Includes 32pcs watercolor blank cards with envelopes, 150 of non-repetitive stylish stickers, 2 sets of reusable stamps, and more. With this treasure trove, you’ll have everything you need to create heartfelt, one-of-a-kind handmade cards.
Festive Christmas Design: Crafted with classic holiday elements like Santa Claus, Christmas trees, and snowflakes, each money holder instantly delivers a joyful Christmas atmosphere. The vibrant prints and seasonal greetings make your gift feel more personal and memorable

Thoughtful Holiday Greetings: begin your festive journey with a heartwarming holiday greeting that sets the tone for a memorable Christmas; This gift card book is not just a gift; It's an experience, making every recipient feel special from the 36 different covers
24. Recipe Cards Organizer
You want a simple way to keep recipe ideas in one place. A recipe cards organizer made from envelopes fits that need. It keeps your favorites easy to find and makes weeknight cooking flow smoother.
– Gather supplies: two large envelopes, blank recipe cards, labels, a marker, and decorative tape or stickers.
– Decide your categories: Breakfast, Lunch, Dinner, Desserts, Sides, and Beverages. Add a cuisine tag if you like.
– Label and decorate: write the category on the envelope and add a small sticker or color dot. A quick look tells you where to search.
– Sort your cards: tuck each recipe card into the matching envelope. Use tabs or small dividers to mark sub groups like quick meals or family favorites.
– Create themed packs: make envelopes for holidays, potlucks, or party menus. This helps you plan faster.
Smart tips:
– Color code by color and keep a tiny index card in each envelope with the recipe name and date you tried it.
– Protect cards with a plastic sleeve if you cook near the stove or if the kitchen is humid.
– Add a backup list in a small notebook or digital note so you never lose a favorite recipe.
Next steps: place the set on a shelf or in a labeled box. Review every season.
@media(max-width:480px){
25. Eco-Friendly Thank You Cards
Are you looking for a kind way to say thanks that wastes less? Eco-friendly thank you cards can help. Use the flap of a recycled envelope to make a simple card. Add dried flowers or pressed leaves for a natural touch. This method cuts waste and gives a personal note that feels special. You save money, too, because you reuse something you already own.
What you need
– Recycled envelope flaps
– Scissors
– Glue or double-sided tape
– Natural decorations like dried flowers, leaves, or small twigs
– A pen or fine marker
– Optional: ribbon or a small stamp
Steps
Here is how to do it:
1) Save a flap from a clean envelope.
2) Fold it into a card or glue it to a sturdy backing.
3) Add a few natural decorations with glue.
4) Write a warm message inside.
5) Let it dry flat before you handle it.
6) If you want, add a ribbon or stamp for a finished look.
Tips
– Keep decorations light so the card fits a regular mail envelope.
– Use water-based ink to avoid smudges.
Limitations
These cards are delicate and may not be waterproof. They can bend in mail if you add heavy pieces.
Can you mail them? Yes. Use a sturdy outer envelope and keep the design simple so it travels well.
@media(max-width:480px){
26. Scrapbook Envelopes
You want a simple way to store memories on a scrapbook page. Scrapbook envelopes do that. They turn plain pages into small memory homes.
Each envelope holds a photo, a ticket stub, or a short memory note. Decorate them to fit a theme like travel, family, or a big event. This adds a personal touch without adding a lot of clutter.
What you need:
– plain envelopes
– scrapbook paper or colorful scrap pieces
– scissors and glue or tape
– markers or pens
– stamps or stickers
– washi tape
Here is how to do it:
1) Pick a theme and a color set.
2) Decorate each envelope with simple shapes, stickers, or cut papers.
3) Write a memory, caption, or quote inside, then seal it with a sticker or a tiny ribbon.
4) Attach the envelopes to the scrapbook page next to a photo or memory line. Let one envelope peek out so the page feels balanced.
5) Add dates or short notes on the outside of each envelope for quick memory checks.
Tips: plan a sequence on the page so the story flows. If space is tight, use a fold-out sheet with a few envelopes to keep things neat.
Ready to start? Grab three envelopes and try this today.
@media(max-width:480px){
@media (max-width: 600px) {
.visual-quiz-iframe { min-height: 995px !important; height: 1100px !important; }
}
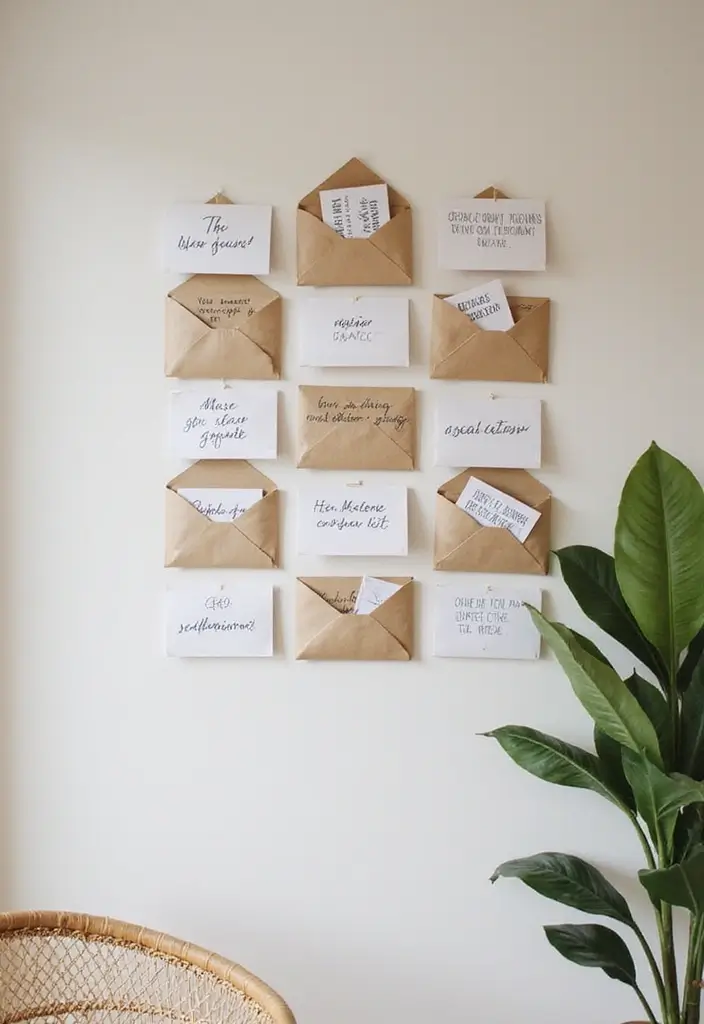
27. Monthly Journals
What you’ll gain
Want a simple way to remember your year? Try monthly journals made from envelopes. Give each month its own envelope and fill it with photos, notes, and little keepsakes that show what mattered to you. Decorate each pocket to match the month’s mood, with colors, stickers, or doodles. When you flip through them, you’ll see a year in your own handwriting.
How to assemble
Here is how to set it up:
– Gather 12 sturdy envelopes you love.
– Label each one with a month and add a small date sticker.
– Drop in photos, ticket stubs, a note about a big moment, and a small trinket.
– Decorate with washi tape, stamps, and simple drawings.
Display ideas
Show it off: you can keep the envelopes in a binder with clear pockets, or hang them on a line with a string and clothespins. Both setups are easy to update. This method makes memory keeping cheap, portable, and fun for anyone who wants a visual year in review.
Next steps
Next steps: pick a month to start, pick a theme, and collect tiny items as they happen. That pace keeps you going through the year. If you miss a month, you can add it later without a big rush.
@media(max-width:480px){
@media (max-width: 600px) {
.normal-quiz-iframe { min-height: 570px !important; height: 570px !important; }
}
28. Personalized Business Envelopes

Personalized Business Envelopes You Can Trust
Here is why personalized business envelopes matter. They set the tone before your words are read. They show you care about your brand. You make a professional first impression that lasts.
– Design that fits your logo. Start with a simple design that fits your logo. Use your brand colors and a clean font. Keep it readable. Your envelope should feel like it came from your office.
– Use the right materials. Choose recycled stock for a sturdy feel. Eco-friendly options can still look sharp. A white or soft gray base with a bold color trim looks premium.
– Place your logo wisely. Add your logo where it won’t overwhelm the address. A small logo on the corner or back flap works well. If you mail often, use a return address stamp to save time.
– Include a personal note. Include a short line inside. A brief hello or thank you humanizes the contact. Sign it by hand for warmth.
– Finish with small details. A colored liner, a matching seal, or a subtle pattern adds character without noise. Keep it aligned with your brand identity.
– Check before you print. Do a test run with a sample sheet. Make sure the address is easy to read. Check color on screen and on print.
Next steps: choose a style, order a small batch, and watch your mail stand out in the inbox.
@media(max-width:480px){
Recommended Products

WHAT YOU GET WITH YOUR CUSTOM CARDS: Price shown is for 10 FOLDED A2 (4.25 x 5.5 inch) personalized cards and blank envelopes. This personalized stationery set is great for adding your unique touch. Need more? Click "Customize" to adjust sizes, quantities, or add extras. The price updates automatically, so you always get the custom stationery set that fits your needs—perfect for personalized note cards with envelopes with your logo.

ITEM DETAILS - Your select number of flat 110 lb heavyweight cardstock note cards with euro flap envelopes, 5.5 x 4.25 inches (A2 Size).

ITEM DETAILS - Your select number of custom double-sided heavyweight flat note cards with euro flap envelopes, monogrammed with a name and border, 5.5 x 4.25 inches (A2 Size).
29. DIY Envelope Art
You want fresh wall decor that fits your style and budget. DIY envelope art lets you turn simple envelopes into bright wall pieces. You can mix colors, sizes, and patterns to create a mural that feels like you. Let’s break it down so you can start today.
Materials
– Envelopes in different colors and sizes
– A sturdy base board or poster board
– Craft glue or double sided tape
– Scissors, ruler, and pencil
– Optional: washi tape, string, or a simple frame
How to create it
– Plan a pattern. Decide on a look like checker, spiral, or random mosaic.
– Lay out the pieces first. This helps you see the balance before you glue.
– Glue the envelopes in place. Start at the center and move outward.
– Add depth by layering a few envelopes on top of others.
– Finish by framing the board or attaching the art to the wall with tape or hooks.
Tips and ideas
– Try a nature theme with greens and blues for a calming feel.
– Use a single color family for a clean, modern vibe.
– Mix shapes to keep the art lively and fun.
Display and care
– Hang away from direct sun to prevent color fade.
– Dust gently with a soft brush or cloth.
– Rotate pieces seasonally to refresh your space.
@media(max-width:480px){
Conclusion
Crafting with envelopes is not just a creative outlet; it’s a way to turn everyday items into something special and useful. Each of these DIY envelope paper crafts opens the door to eco-friendly creativity and allows you to personalize your world.
Whether you’re looking to organize, decorate, or share, there’s an envelope craft for you! So gather your supplies, unleash your creativity, and let these delightful projects inspire you to craft joyfully.
Note: We aim to provide accurate product links, but some may occasionally expire or become unavailable. If this happens, please search directly on Amazon for the product or a suitable alternative.
This post contains Amazon affiliate links, meaning I may earn a small commission if you purchase through my links, at no extra cost to you.
Related Topics
diy envelope crafts
eco-friendly crafts
creative stationery
personalized gifts
easy paper crafts
crafting for kids
budget-friendly projects
holiday crafts
custom greeting cards
interactive crafts
home organization
quick crafts