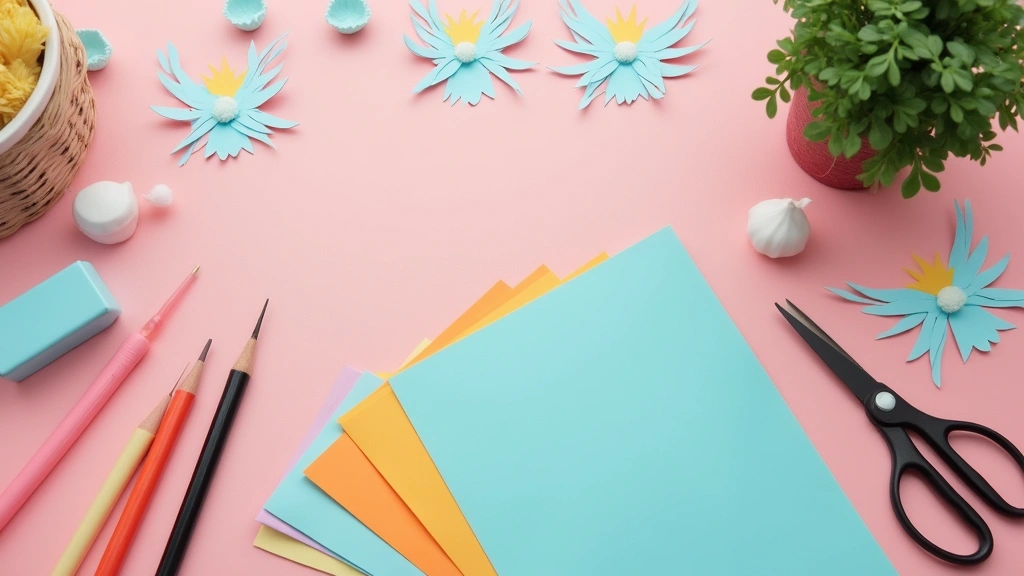
Lately 3D paper crafts have me obsessed with turning flat sheets into pieces that feel alive. Here is why I made this post. I wanted a simple way to share ideas that are easy to start but satisfying to finish. This collection helps you see how cardstock, glue, and a little patience can make eye-catching art.
If you’re into DIY decor, party ideas, or handmade gifts, this one’s for you. If you love projects that are manageable yet bold, you’re in the right place.
You’ll get 30 ideas that span playful to elegant. Each idea comes with a simple how to and tips to adapt size, color, and layers. Tools stay basic—cardstock, scissors, glue, a ruler, and some thin tape.
Some ideas bloom into 3D florals that pop from a card. Others become layered animals, floating lanterns, or mini paper scenes. They work with colors you already have.
These projects sharpen skills like clean cuts, careful scoring, and neat folding. They also teach you when to use foam tape for lift and when to keep it flat. If you need templates, I include simple patterns you can print and trace. You can start with one piece and scale up as you get the hang of it.
Start small this weekend and see how a single sheet can grow. Bookmark the ideas and come back with your own color twists. Share what you make and keep exploring new layers. Next steps are simple: pick a project that fits your mood and gather your supplies.
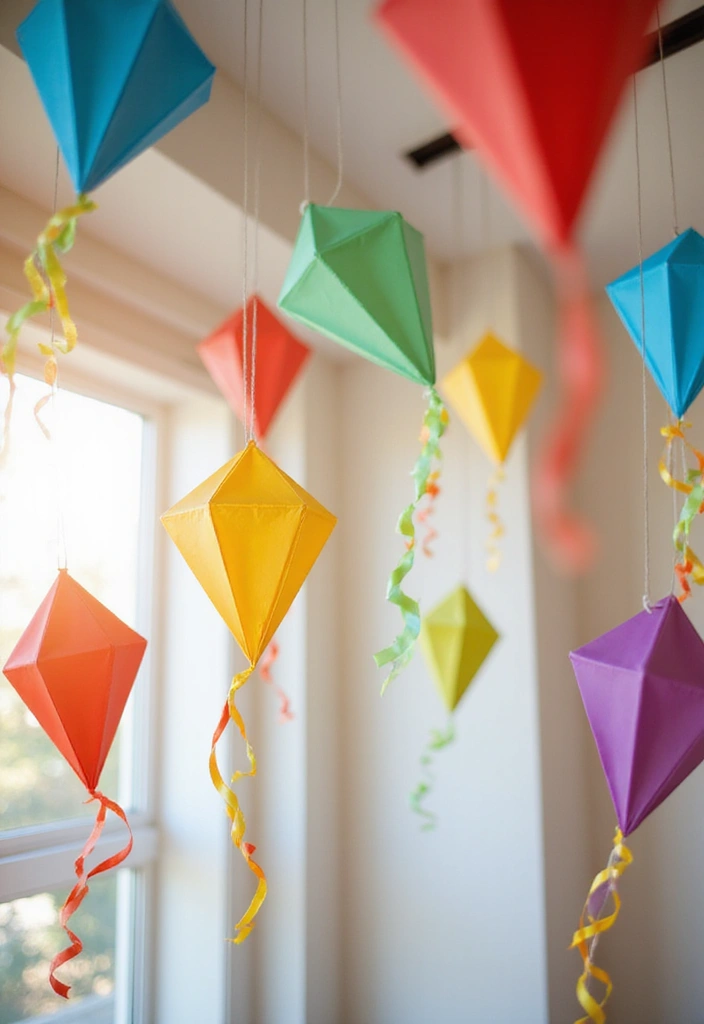
1. Geometric Paper Wall Art
You want wall art that catches the eye without a big price tag. Geometric paper wall art uses simple shapes to build bold patterns. Pick a color plan that fits your room. Cut triangles, hexagons, and squares from bright cardstock. Arrange them on a canvas or directly on the wall in a mosaic. Layer a few pieces to add depth and a hint of 3D.
What you need
– Colorful cardstock
– A canvas or clean wall
– A sharp craft knife and cutting mat
– A ruler, pencil, and scissors
– Tape or lightweight glue
– Mounting squares or foam dots for lift
How to do it
1) Plan on paper first. Use a simple grid so shapes sit evenly.
2) Cut your shapes with clean edges.
3) Lay them out on the surface to preview the look before sticking.
4) Secure with tape or glue. For lift, add foam dots under chosen pieces.
5) Press pieces flat, then tweak spacing until the pattern feels balanced.
6) Check how light hits the art. Shadows from raised pieces add depth.
Tips for success:
– Keep edges sharp with a steady hand.
– Vary sizes and tilt shapes to keep the pattern lively.
– Elevate several pieces to cast soft shadows.
This quick project gives you a standout wall piece without heavy work. It’s friendly for beginners and something you can tint to your taste.
@media(max-width:480px){
2. 3D Paper Flowers
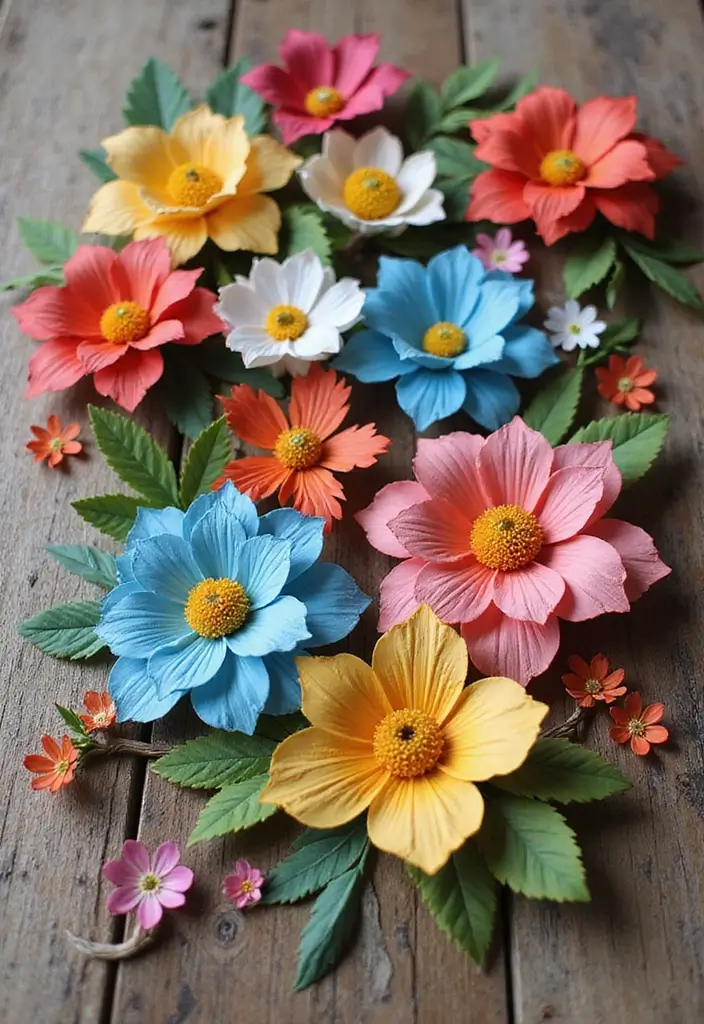
You want bold decor that lasts without daily care. These 3D paper flowers hit the mark. They stay bright, require no watering, and you can mix colors to fit any season. Here is why this works: paper blooms give a real look with layers and texture.
What you’ll need
– Colored paper or cardstock in your chosen shades
– Scissors and a glue stick
– Thin wire or wooden stems
– Tape or hot glue
– Paint, glitter, or stamps for extra detail
How to build them
– Cut several petal shapes in different sizes from your paper.
– Layer the petals, then glue them onto a stem to form a bloom.
– Bend the outer petals slightly to mimic real flowers.
– Add a bit of color at the edges with paint, or sparkle with glitter.
– Let glue dry before you handle the flower.
Tips for real-looking depth
– Use two or three paper textures to mimic natural petals.
– Vary petal sizes for roses, peonies, or sunflowers.
– Build a small bouquet in a vase or create a flower wall by mounting them on the wall.
Design ideas and uses
– Try a soft pastel vase as a centerpiece.
– Mix many colors for a cheerful table display.
– Match colors to seasons or events to fit any room.
Next steps: start with one bloom, then add layers for a mini garden on your wall.
3. 3D Paper Stars
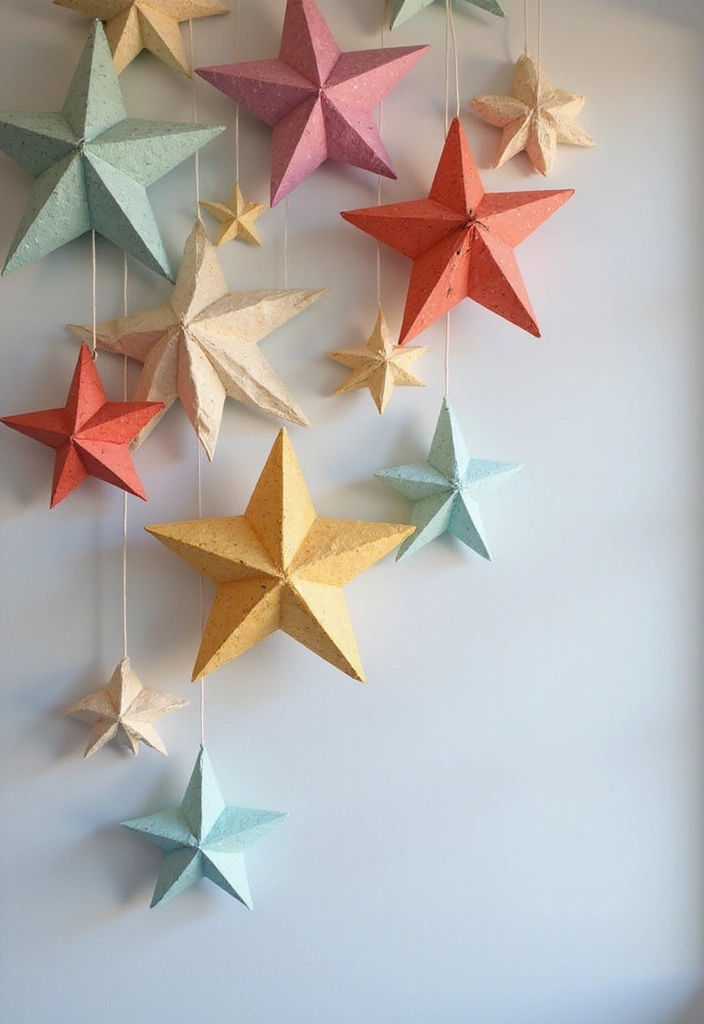
Here’s a fresh take on 3D paper stars that brightens any room. You gain a light, playful glow that fits both big parties and quiet corners.
What you need
– Cardstock or thick paper in colors or patterns
– Scissors and a ruler
– Pencil and glue
– Pattern paper, glitter, and sequins
– Fishing line or clear thread
– Tape or a hot glue gun (kid-safe)
– Optional: a small punch for clean holes
How to make them
Start by cutting star shapes. Choose one size or mix several for variety. Fold along the edges to push the points forward. Glue the edges to keep the star sturdy. For a layered look, glue a second star inside the first and offset the points.
If you want color and pattern, glue a patterned paper cutout to the front. Add a touch of sparkle with glitter or sequins. Let the glue dry completely. Make a tiny loop at the top and tie on a length of fishing line.
Ways to use 3D paper stars
– Hang a garland of smaller stars for a dreamy backdrop
– Cluster stars from the ceiling for a party or holiday feel
– Set a few on tabletops to catch light softly
Tips to get a wow result
– Use different sizes and stacked layers for depth
– Mix plain and patterned papers for contrast
– Keep the strings light so stars float and don’t tilt
Here’s why this craft shines: it adds movement and sparkle without costing much. Next steps: try a few colors, then mix in white stars for balance.
4. Paper Mache Bowls
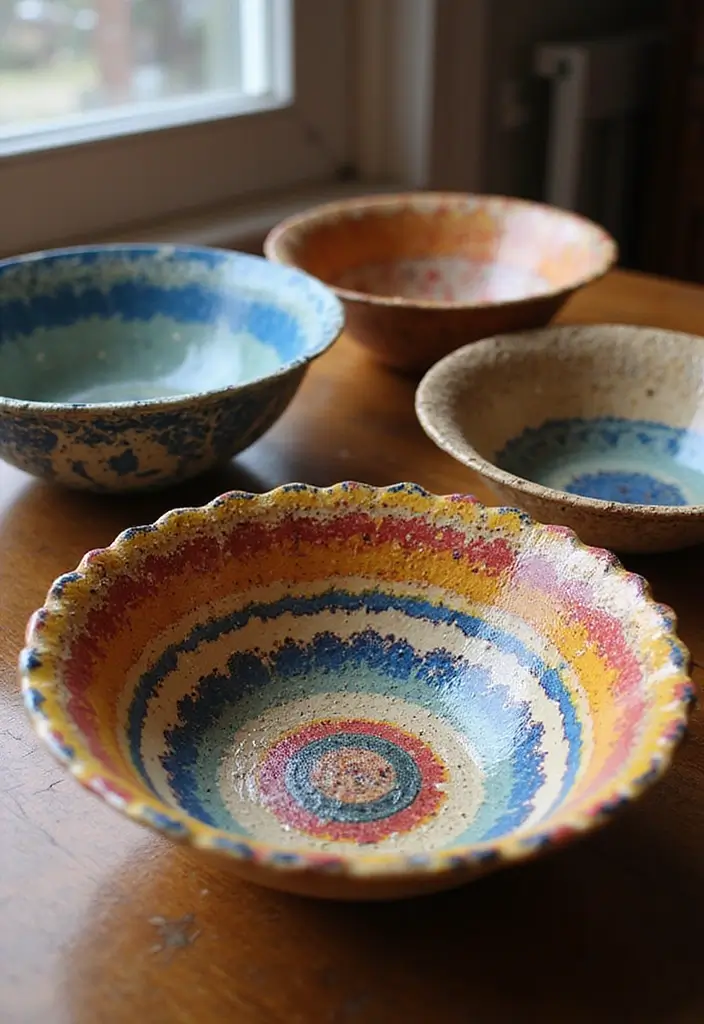
Want a bowl that doubles as art? Paper mache bowls are simple to make and fit any room. You guide the look with color and texture, and you see your idea come to life.
Materials
– Paper strips or old newspaper
– White glue or wallpaper paste mixed with water
– A bowl to use as your mold
– Acrylic paints, brushes, and a clear sealant
– Scissors and tape
Steps
1. Choose a bowl as your mold and set it on your work surface.
2. Mix glue and water until smooth.
3. Dip a strip in the paste, wipe off the excess, and lay it on the mold.
4. Smooth the strip to remove bubbles, then add more strips in different directions.
5. Let each layer dry before adding another, building up thickness.
6. When sturdy, gently remove the bowl from the mold and let it dry fully.
Uses
– Store keys, jewelry, or small trinkets.
– Create a bold centerpiece on a table or shelf.
– Make a small set of bowls in varying sizes for balance.
Tips
– Mix in colorful paper or fabric scraps for texture.
– Metallic paints give a chic shine.
– Vary sizes to keep the display interesting.
Recommended Products
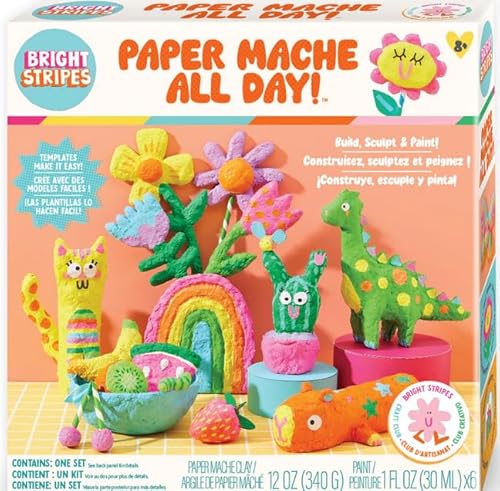
A MODERN CLASSIC CAMP CRAFT – A fresh update on traditional paper mâché projects, redesigned with easy-to-use forms and templates that help kids create with confidence.

Artisan Made, each item is handmade with high quality ingredients and design. Colors may vary slightly because this is a hand made peice.

Paper mache catch-all bowl.
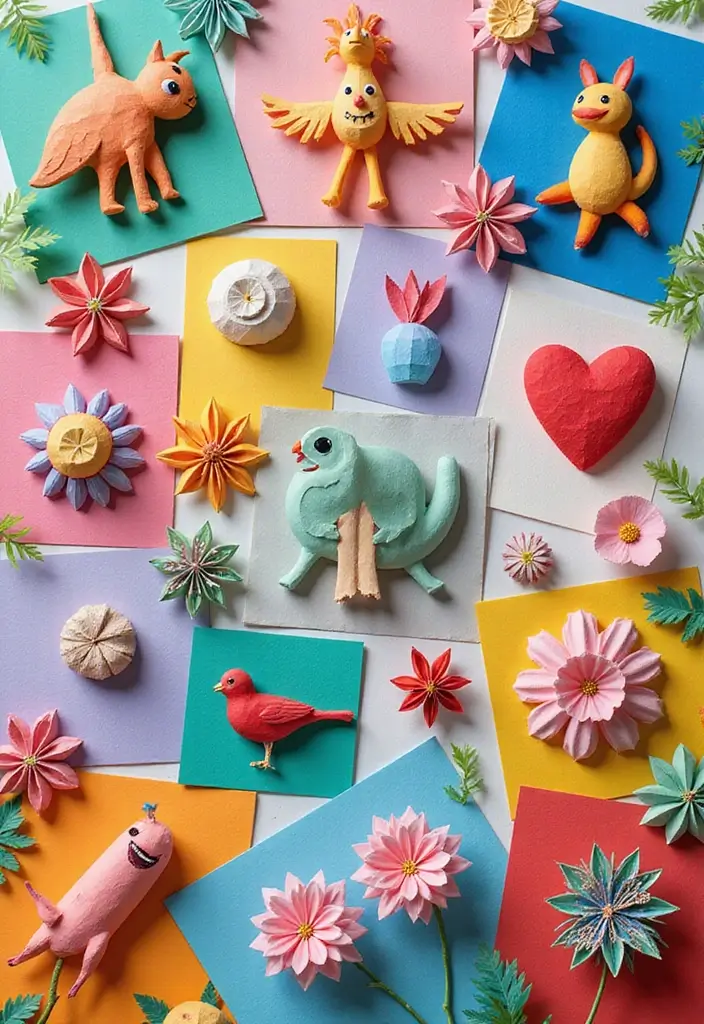
5. 3D Paper Animals
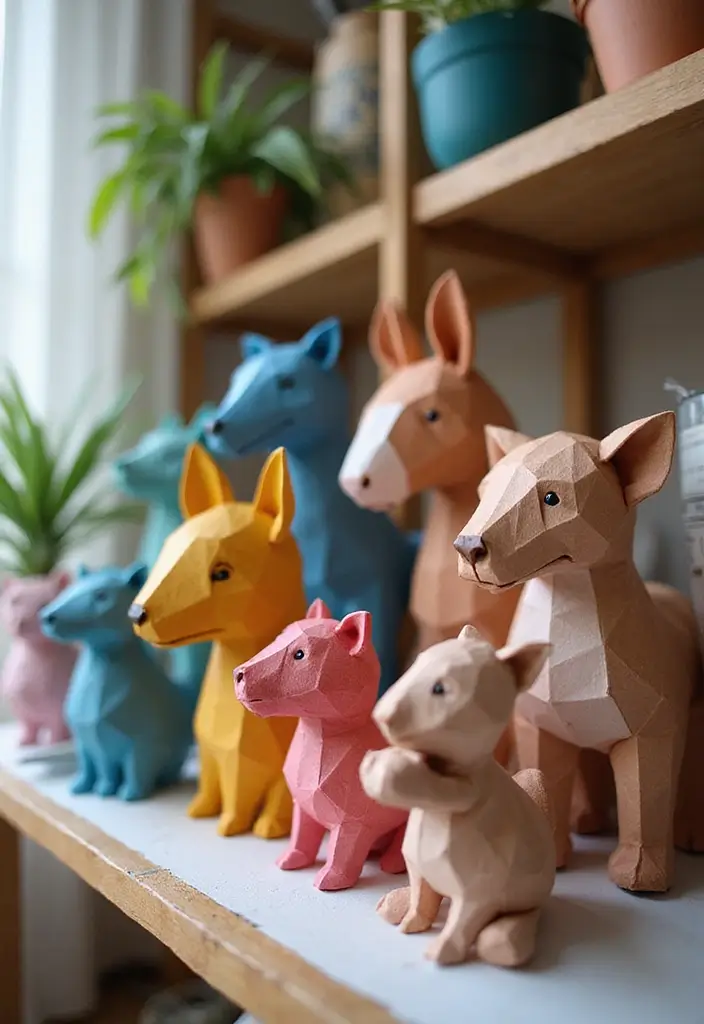
You want a simple craft that adds life to a room. 3D paper animals fit the bill. They stand on shelves and spark imagination in kids’ spaces. Pick a favorite animal. Find a template or draw your own.
Here is why this works: you use basic supplies, and you can finish fast.
How to make them:
– Print on sturdy cardstock for a durable frame.
– Cut along clean lines, then score the folding lines.
– Fold and glue the pieces to form the head, body, and limbs.
– Add texture with patterned paper or a quick paint wash.
– Finish with tiny details like eyes or whiskers using markers or small paper bits.
Next steps:
To bring your menagerie to life, try different animals. Dinosaurs, rabbits, cats, or birds all work. Vary sizes to create a mini parade. You can mount them on a small base or let them balance on a shelf.
Tips to boost your creations:
– Use cardstock for a strong structure.
– Add eyes, whiskers, and spots with markers or cut tiny papers.
– Try bold colors or soft pastels to fit your space.
Your home gains charm with these friendly paper critters. Hang one on a wall too. They glow in sunlight.
6. Paper-Crafted Light Fixtures
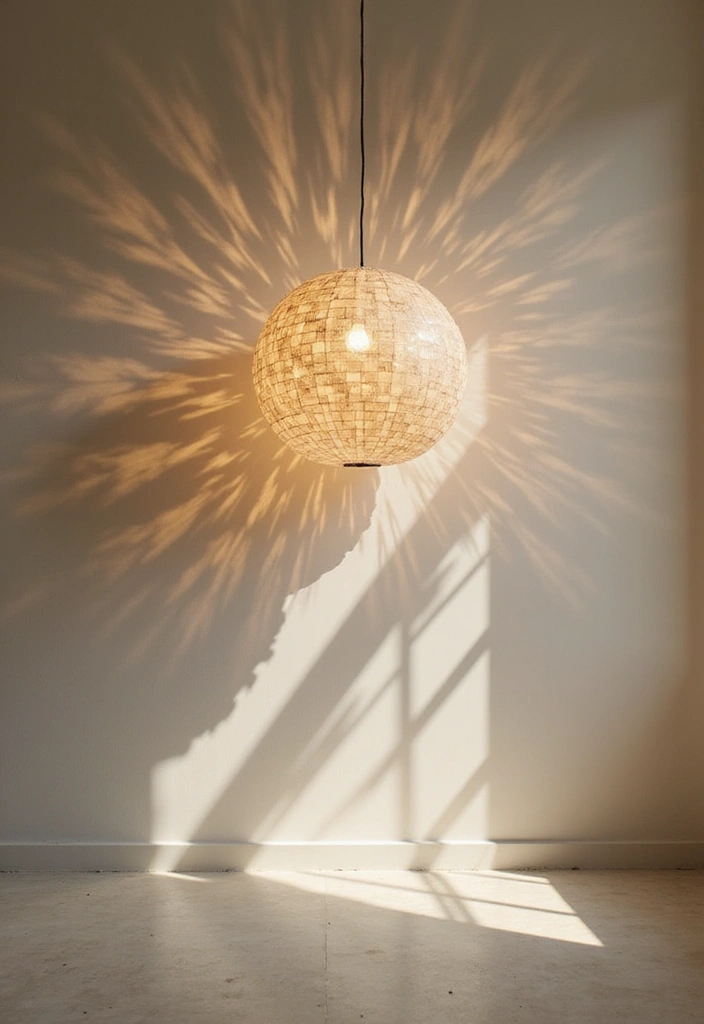
Want a warmer room without buying lamps? Paper light fixtures can do the job. They turn a bulb into a charming centerpiece. Here is how you make them.
– Design options: Choose lanterns, pendants, or shades. Lanterns add volume, pendants hang gracefully, shades soften the light. Pick a style that matches your space and mood.
– Materials: Use sturdy paper that holds its shape. Grab a simple wire frame or thick cardboard to form the core. Have scissors, glue or tape, a ruler, and a LED bulb ready. Patterns or perforations add glow.
– How to build: Cut your pattern, fold along score lines, and shape around the frame. Attach the paper with glue or tape. Add cutouts or dents for a dramatic light effect. Let the edges dry flat.
– Safety and light: Use LED bulbs that stay cool. Test the fixture with the lamp on to see how light passes through. Try different shapes to learn what glow you like.
– Installation and care: Slip the shade over an existing fixture or hang it from a ceiling hook. Clean with a dry cloth and keep it away from moisture.
With a little time, you gain a stylish, personal glow that fits your room.
Recommended Products

DIY DECO: The puzzle lamp in art deco style looks great in a modern or industrial space or even in an older space to give it a contemporary feel. The lamp can be paired with our kwmobile light cord (sold separately) for hanging as a chandelier.
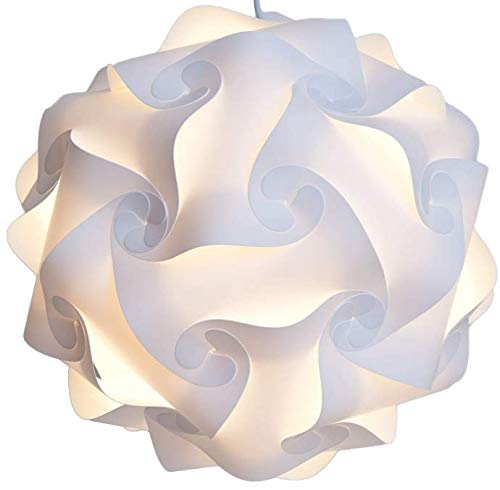
Material: Durable PP plastic
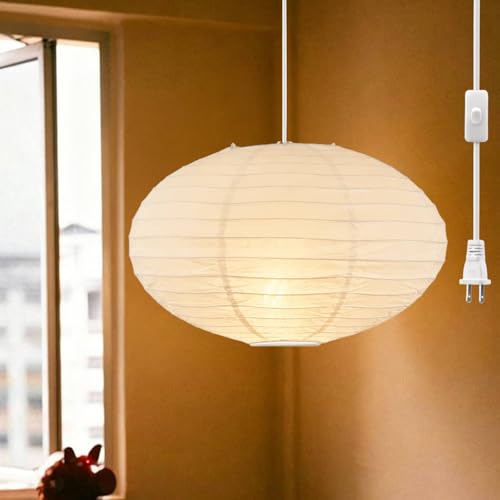
【Elegant Design & Size】This 16"x16"x9" white hanging paper lantern with plug and cord blends UFO-shaped for a Oval paper style that brings authentic Oriental elegance to your space, fostering a warm and inviting atmosphere.
7. 3D Paper Frames

Looking to make your photos pop without a big project? 3D paper frames add depth and style to any image, and they’re easy to build.
Begin with a simple frame. Layer colors or patterns of paper to create a little sculpture around your photo. Use foam tape to lift each layer so it stands off the wall or glass. Try soft waves or small peaks for a friendly, modern look. The result is a frame that catches the eye.
Personalize with small touches. Add ribbons, stickers, or a strip of metallic paper for sparkle. Mix hues that match your room, or group several frames for a cohesive gallery feel. Keep a balance so the photo remains the star.
Crafting tips:
– Make matching frames for a tidy set.
– Choose thick paper like card stock for stability.
– Experiment with dimensions; shadow box styles give extra depth.
Use these frames on mantels, shelves, or walls. They suit family photos, art prints, or travel shots. Here is why you should try this today: 3D frames make simple memories feel special and ready to share.
Next steps: pick a photo, grab sturdy paper, cut a few shapes, and stack them with foam tape. Start small, and you’ll soon have a mini gallery you can rotate.
8. 3D Paper Letters
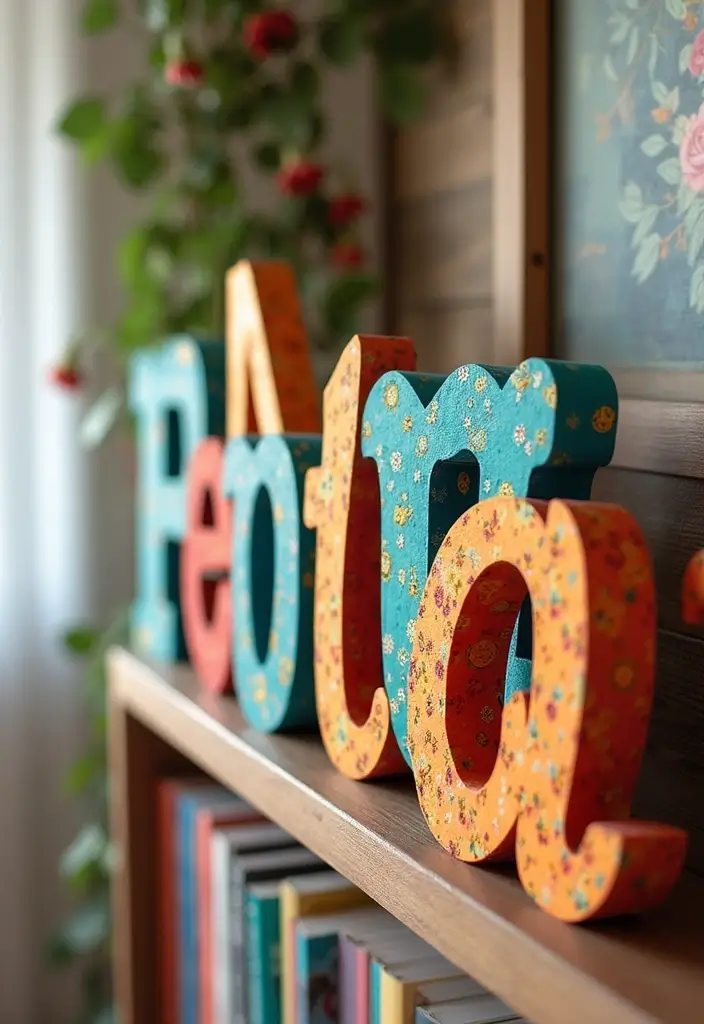
Want a personal touch for your space? 3D paper letters fit any room. They are simple to make and big on charm. You can set them on a shelf or put them on a wall as a bold statement.
Start with cardboard or thick cardstock to keep the letters strong. For extra stiffness, use a thin foam board. Pick a font that matches your decor, print the letters, and cut them out.
Glue two or three layers to add depth. Glue the pieces to make a 3D effect. Paint with acrylics or wrap in decorative paper. Try a simple clean look or a busy pattern. Seal with a clear spray if you want more protection.
Place the letters on a shelf, desk, or mount with picture-hanging strips.
Ways to spice them up
– Add fairy lights inside for a warm glow.
– Cover with patterned paper for texture.
– Create a short quote to boost mood.
To switch up later, use removable mounting strips and swap words with the season. You can repaint the letters or swap in new paper wraps. For kids’ rooms, bright colors help attract the eye. For a calm space, choose soft tones and clean lines. Next steps.
9. Paper Cactus Sculptures
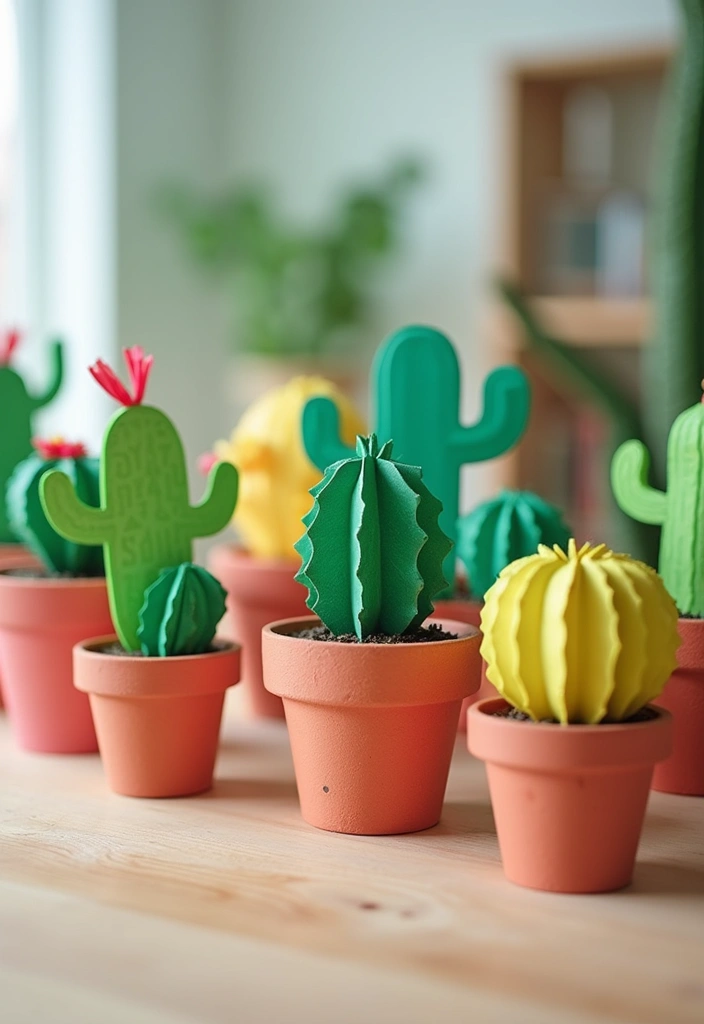
If you want a desert vibe without real plants, try paper cactus sculptures. They fit any shelf, window, or desk, and you can make them in minutes. These 3D paper crafts feel playful yet stylish. You can do them with kids or by yourself. Here is why they work: simple shapes turn into surprising depth.
What you’ll need
– Green paper or cardstock, plus a patterned sheet for texture
– Scissors and glue
– Small pot and foam or clay to hold the base
– Decorative rocks or pebbles
– Beads or yarn for spines
– Optional: templates or stencil
Here is how to make them
– Cut shapes to form cacti. Use cylinders for tall types and ovals or rounds for barrel cacti.
– Score light lines along the sides to simulate ribs. Fold these lines to add depth.
– Layer pieces and glue them into a stack. This creates a true 3D look.
– Put a dab of glue in the pot, then press in a foam piece or a small stick so the cactus sits solid.
– Dress up the surface. Paint with a darker green or wrap with patterned paper for texture.
– Add tiny details. Glue small beads or yarn for spines.
Creative ideas to try
– Add small rocks at the base for a real touch.
– Try different cactus styles, like tall saguaro or short barrel cacti.
– Pair with other paper plants for a green corner.
These paper cacti give you a fun, easy decor win.
10. Folded Paper Ornaments
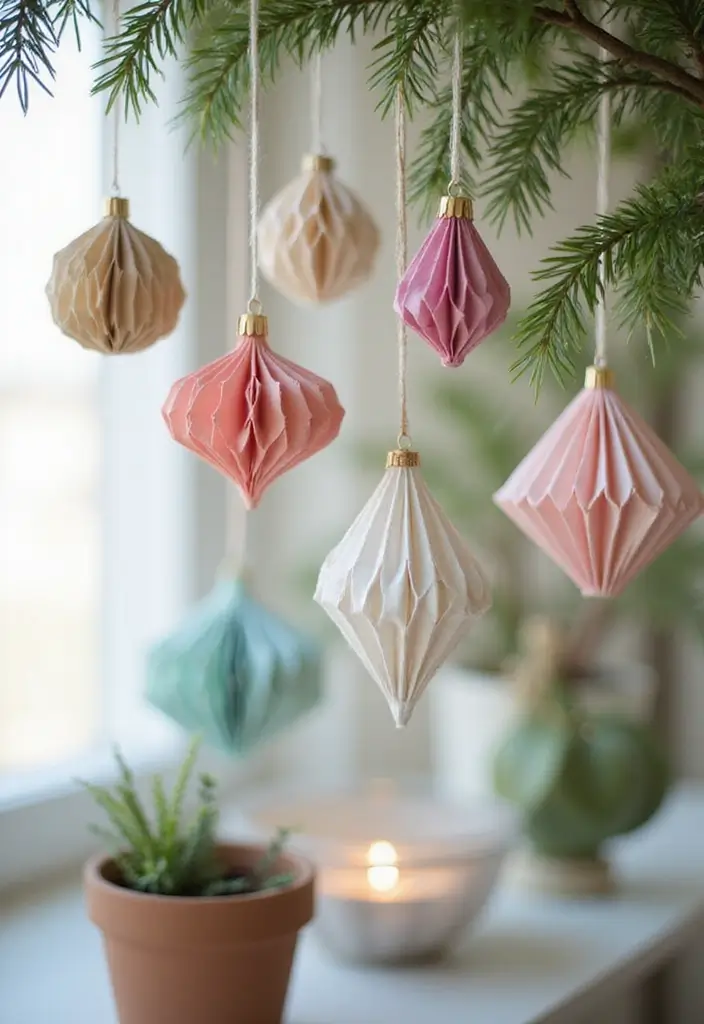
Folded paper ornaments turn simple scraps into eye catching decor. You can use origami folds to make stars, hearts, or other shapes. These pieces shine on a Christmas tree, sit as small table accents, or string into a garland for a party. With different papers you can craft a whole set that matches your theme. Metallic papers catch the light. Patterned paper gives a festive look.
What you’ll need
– sturdy origami or craft paper
– scissors for shaping
– clear glue or double sided tape
– thin string or fishing line
– optional glitter or rhinestones
How to start
– Pick a shape. Start with a simple star.
– Fold cleanly. Crease well so the piece holds its form.
– Attach string. Leave a small loop at the top.
Tips for best results
– Make larger sizes for more impact.
– Add a touch of glitter or rhinestones to catch the light.
– Try different shapes to create a cohesive look.
These ornaments bring a splash of craft charm to any event. They are quick to finish, but they feel special and handmade.
Try mixing textures by using paper with a bit of fabric or ribbon on the edge. You can add tiny tassels for extra flair. After you finish, store the ornaments flat in a box so they stay crisp. For a wintry look, pair them with snowflakes.
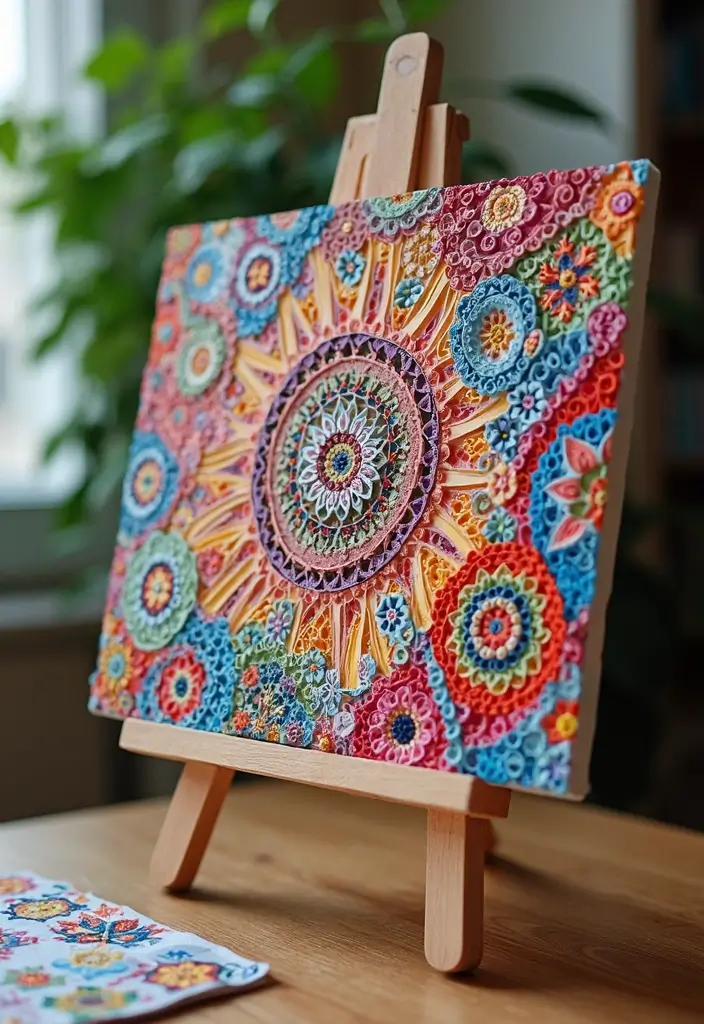
11. Paper Quilling Projects
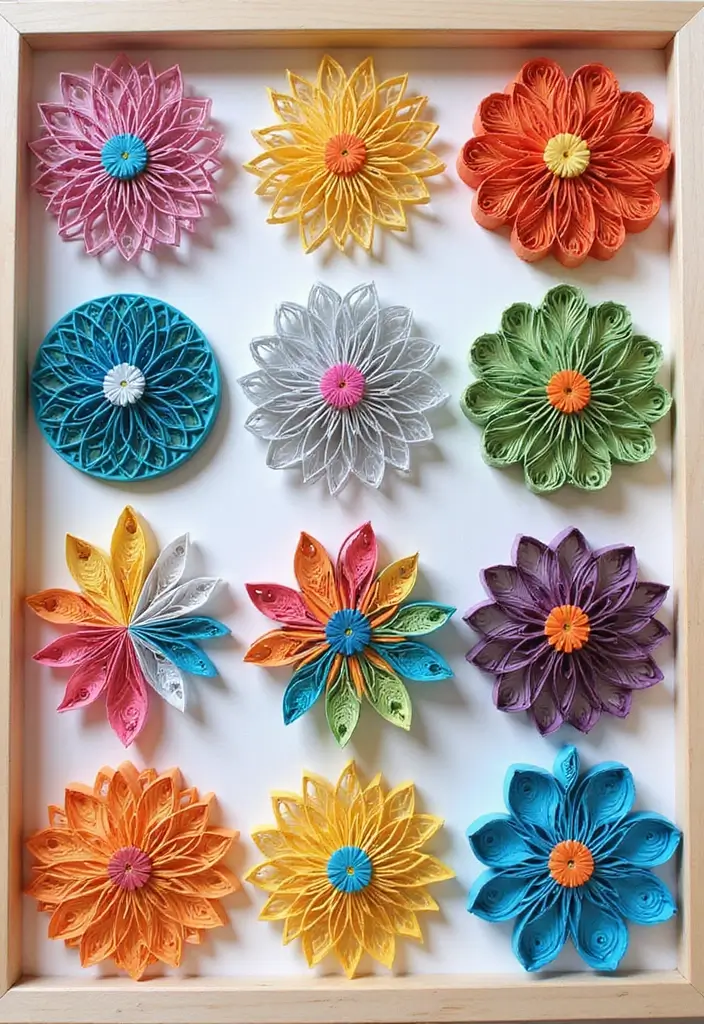
Want a craft that looks polished but is easy to finish at home? Paper quilling can give you tiny art you can frame or send on a card.
Here is why it works. Thin strips roll into graceful shapes that catch the light. Small coils and curves add delicate texture. You choose colors to suit your space or gift.
What you need
– Paper quilling strips in several colors
– A quilling tool or a safe pin
– White glue that dries clear
– Scissors and tweezers
– A base, mat, or frame for display
Let’s break it down
– Roll a strip into a tight coil.
– Loosen the coil a little to form a teardrop or swirl.
– Pinch and shape to make petals, leaves, or circles.
– Glue the end to keep the shape. Let it dry a moment.
Put it together
– Lay out shapes on card stock or a small frame. Move them until you like the look.
– Glue pieces in place and press gently to set.
Next steps
– Start with one simple design, like a single flower. Mount it on a card or frame for wall art.
– Layer colors for depth. Place a light shade behind a darker one.
– Mix quilled pieces with stickers or cut paper for texture.
With a little practice, you can make thoughtful gifts and charming home accents.
Recommended Products

STANDARD 120 GSM PAPER STRIPS – 30 colors, 20 strips each (600 total), 390 mm / 15.35 in long; strong paper keeps coils tight and colors vibrant

Complete Paper Quilling Starter Kit for Beginners and Creative Users — This all-in-one paper quilling kit includes 1860 paper strips in 3 widths, an electric quilling pen, shaping tools, a template board, and essential accessories, making it a complete starter set for beginners, adults, hobby crafters, art teachers, and DIY lovers who want to start creating right away.

Paper Strips: Approx 45 colors 900 strips, enough quilling paper strips colors to meet your needs
12. Paper Jewelry
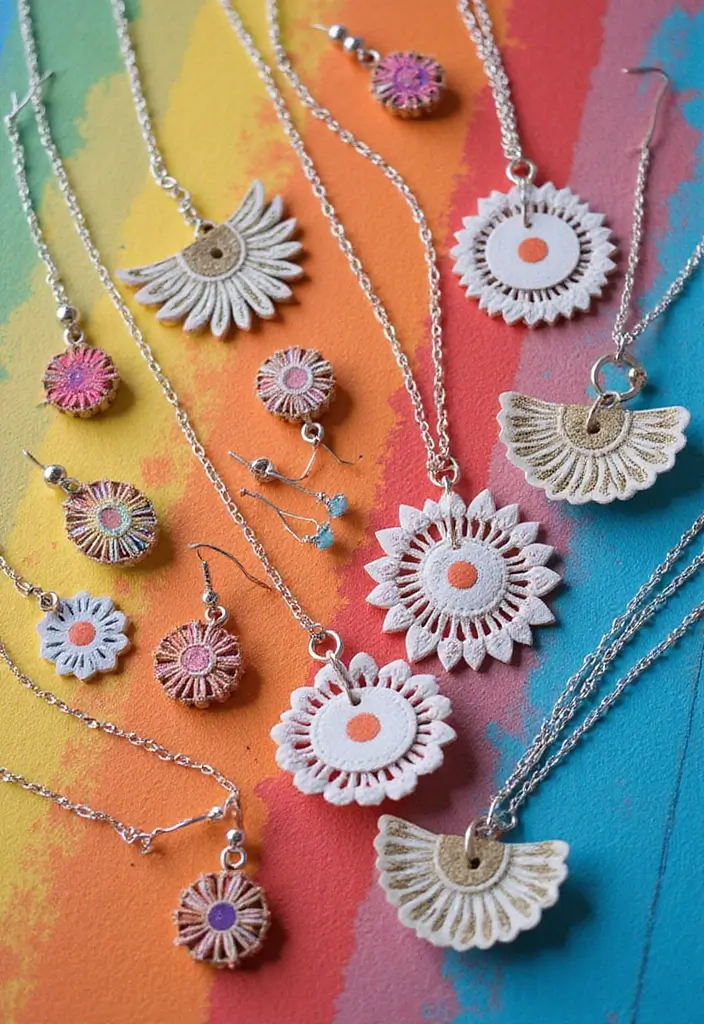
You need a fun, fast way to make jewelry that pops. Paper jewelry lets you wear art you made yourself. Earrings, necklaces, and bracelets can come alive with color and pattern. It feels good to see plain paper become portable art.
Here is how to start quickly:
– Choose sturdy paper like cardstock, craft paper, or thick origami sheets.
– Cut into beads, discs, or long strips for weaving.
– Punch a hole or two for threading.
– Wrap or glue shapes to add strength.
Next, add color and texture. You can paint, color with markers, or use washi tape to create stripes and dots. Let pieces dry, then thread them on lightweight cord or jewelry wire. A clear varnish or Mod Podge coat helps them last longer.
Ideas for customization:
– Mix papers for different textures and looks.
– Seal with a clear gloss to protect colors.
– Pair with small beads or metal findings for a mixed-media feel.
Crafted with care, your paper jewelry will be light, unique, and eye-catching. Wear them with casual outfits or dress up a simple tee. With practice, you can plan sets to match your outfits and moods.
As you try new colors, you will find styles that fit your vibe. Start with one project this week to practice.
@media(max-width:480px){
Recommended Products
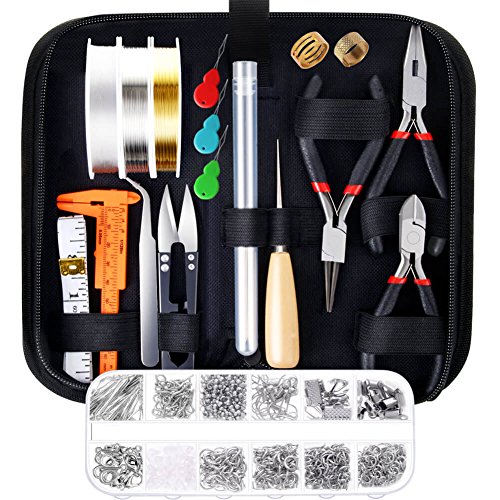
Please Note: If the pliers you received have some oil on the head that make it look like dirty, please do not worry. The jewelry pliers are coated with oil to prevent rust. Please wipe them clean with a cloth before use and apply oil to them before storage, which will help the pliers keep anti-rust.
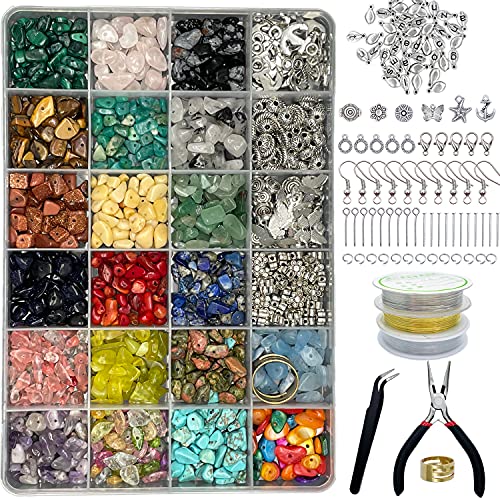
[All-in-one Jewelry Making Kit] The jewelry making kit includes about 1200 PCS chips gemstone beads of 20 assorted colors, 170 PCS silver cute pendants (7 Kind of Shape) , 50 x Earring Hooks, 50 x T-Head Pins, 50 x 9-Head Pins, 10 x Lobster Clasps, 50 x Silver Jump Rings, 3 x Jewelry Wire(Clear/Silver/Gold) and 1 x Tweezers, 1 x Jump Ring Opener Tool, 1 x Flat Nose Pliers, packed in a 24 grids box, it's a perfect bracelet making kit for adults, girls

[You Will Get]: The DIY charm bracelet kits provides you 5 pieces silver snake bracelet chains with heart lobster clasp extender chain, 20 x charm pendants, 30 x charm beads, 30 x color charm beads, which enough for you to DIY your own jewelry craft
13. 3D Paper Houses
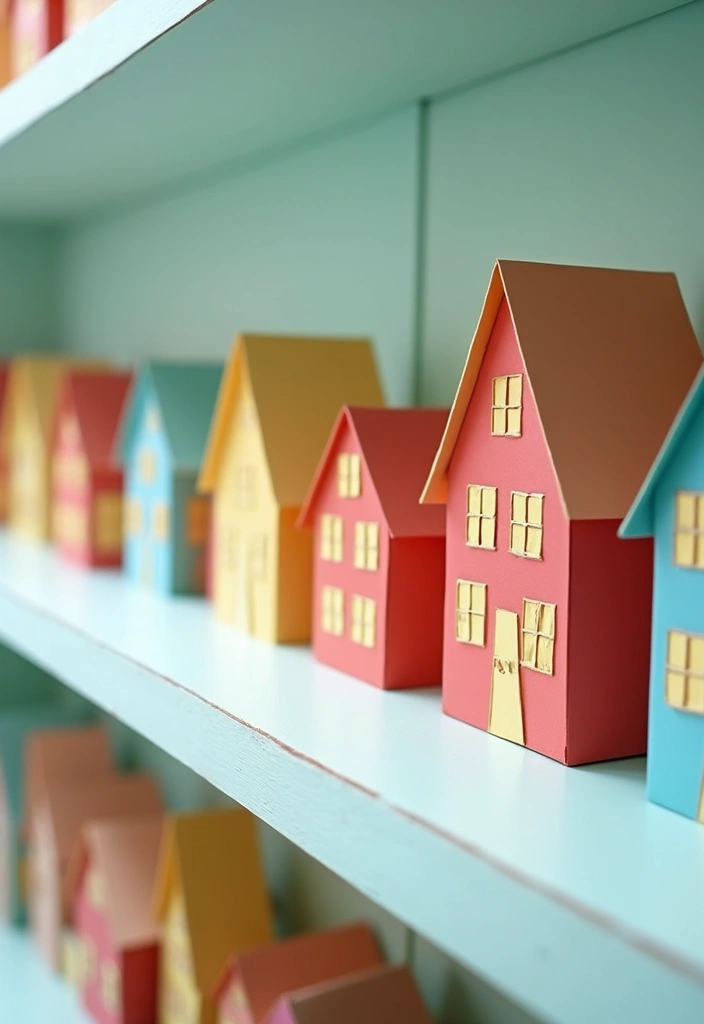
You want a cute, eye catching display. 3D paper houses fit that goal with simple steps.
Here is how you do it:
– Materials: sturdy cardstock, scissors, ruler, pencil, glue or tape, markers or paints, and a small LED light if you want glow.
– Steps: you choose a size. Cut walls, roofs, doors, and windows from a template. Score the fold lines. Fold and glue to form a box, then add the roof. Glue on doors and windows. Paint or color, then add tiny details like window boxes.
– Decorating ideas: pick bold colors or soft pastels. Build a little winter village by adding a snowy base. Place lights inside for a warm glow. Mix different styles to form a tiny neighborhood.
– Tips: a scoring tool helps crisp folds. Tape edges first, then glue for a stronger hold. Use battery lights for safe, steady glow.
Next steps: set your houses on a mantel, shelf, or table as a centerpiece or accent.
Common questions: Do you need fancy tools? Not really. Scissors, ruler, and glue work fine. Will they last? Cardstock stays sturdy if you handle them gently.
Recommended Products
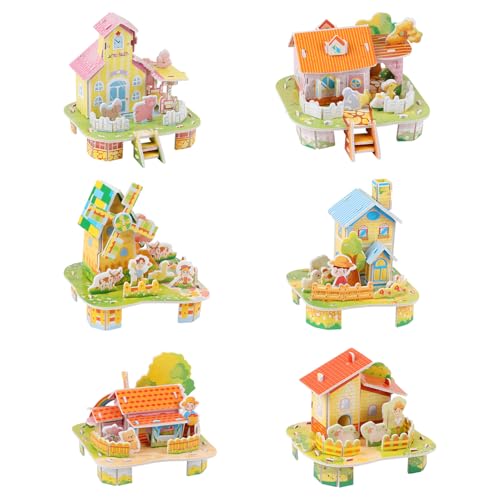
3D Cartoon Puzzles include:You will get 6 different kinds of house puzzles, including country house, small farm, zoo, farm house, garden house, forest house. A variety of styles to meet your DIY needs.

【CLASSIC DESIGN】Cathy's Flower House features a transparent, pointed-arch structure and a variety of plants, creating a lush, botanical greenhouse. The inspiration for the complex and elegant design comes from classic aesthetics and the beauty of nature, making it a captivating addition to any decor.

14. Interactive Paper Models
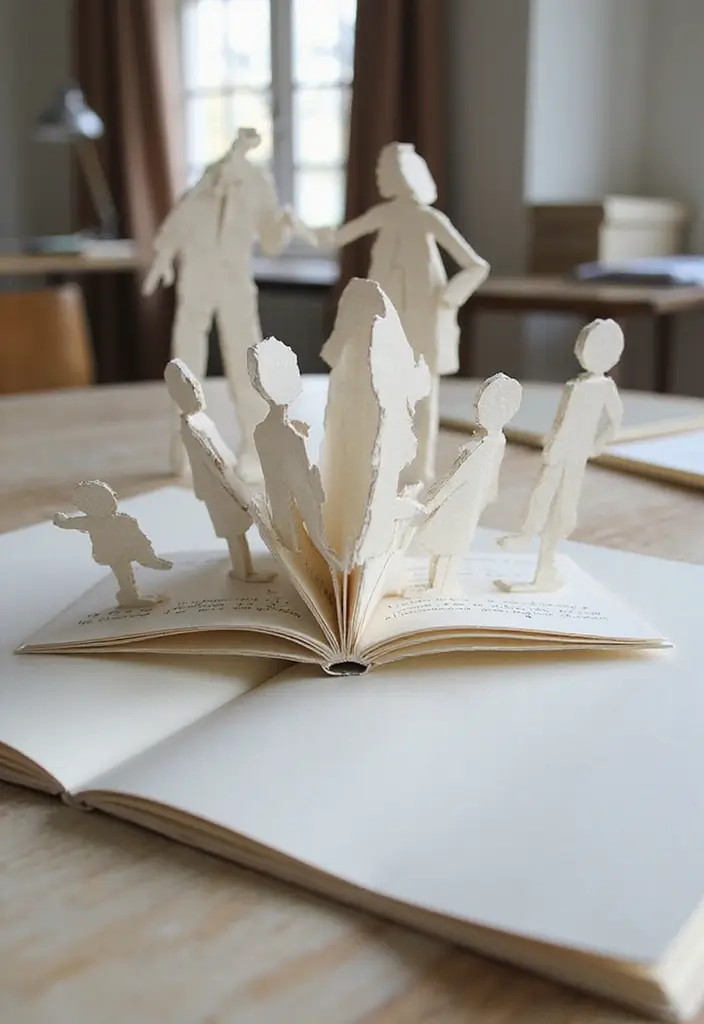
You want a way to add depth to your space without long projects. Interactive paper models do that. They pop up, fold out, or move as you touch them. Made from cardstock, they turn flat sheets into small, eye catching pieces you can view from any angle.
– What to make Start with a simple pop-up card or a small movable sculpture you can finish in one sitting, then grow the idea later.
– Materials and tools Stock cardstock, white glue, scissors, a scoring tool or bone folder, a ruler, and a pencil for neat marks.
– How to assemble Draft a clean plan on paper, cut parts, score each fold, then glue tabs with light pressure and let glue set.
– Theme ideas Nature scenes, city skylines, or a tiny fantasy world keep the project fresh and give you bright color on a shelf.
– Tips for clean folds Score first, run the ruler along fold lines, and press edges flat for crisp, neat folds.
– Movement you can add Use simple hinges or tabs to let sections swing, slide, or pop up as you view from different angles.
– Why it helps your space These models add depth and texture to a desk or shelf, catching light and inviting touch.
– Next steps Choose a model, lay out pieces on cardstock, cut carefully, and start a practice run this weekend.
15. 3D Paper Christmas Trees
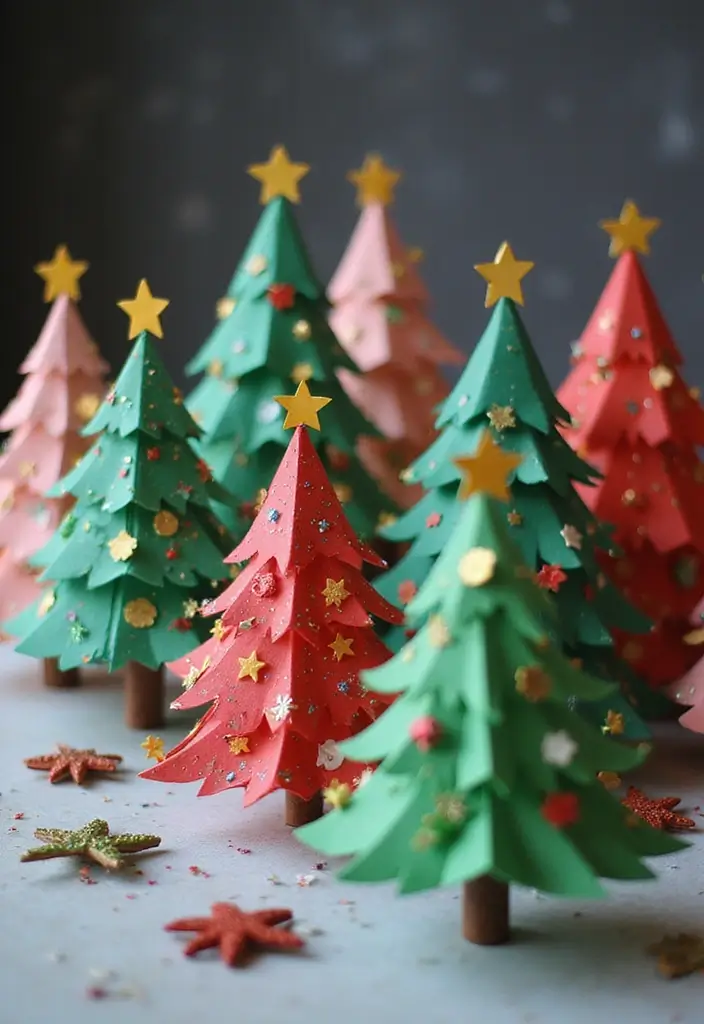
If you want holiday decor that is easy to make and hard to ignore, try 3D paper Christmas trees. They add charm to any room and work from small desk accents to large centerpieces. You can use green paper, or try metallic foil or patterned sheets for a bold twist. A little glitter or tiny ornaments makes them shine.
Here is how to build them. You have two simple options. The cone method gives a classic look. The layered method stacks flat shapes to form a full tree. Both work with ordinary craft paper and a dab of glue.
Crafting tips:
– Choose sturdy paper so the tree keeps its shape.
– For the cone, cut a circle and notch a wedge before rolling into a cone.
– For layered trees, cut several triangles or trapezoids in increasing sizes and glue them up the stem.
– Glue a small base, like a folded strip of cardboard, so it can stand.
– Add decor with mini ornaments, beads, or glitter.
– If you want lights, tuck in a tiny LED at the base.
Display ideas
– Mantels and shelves make a simple backdrop.
– Window sills and tables work well for a mini forest.
– Use a small group as a festive centerpiece.
Care and reuse
Store them in a sturdy box after the season. If you made layer trees, you can dismantle and store flat for next year.
16. Paper Butterflies
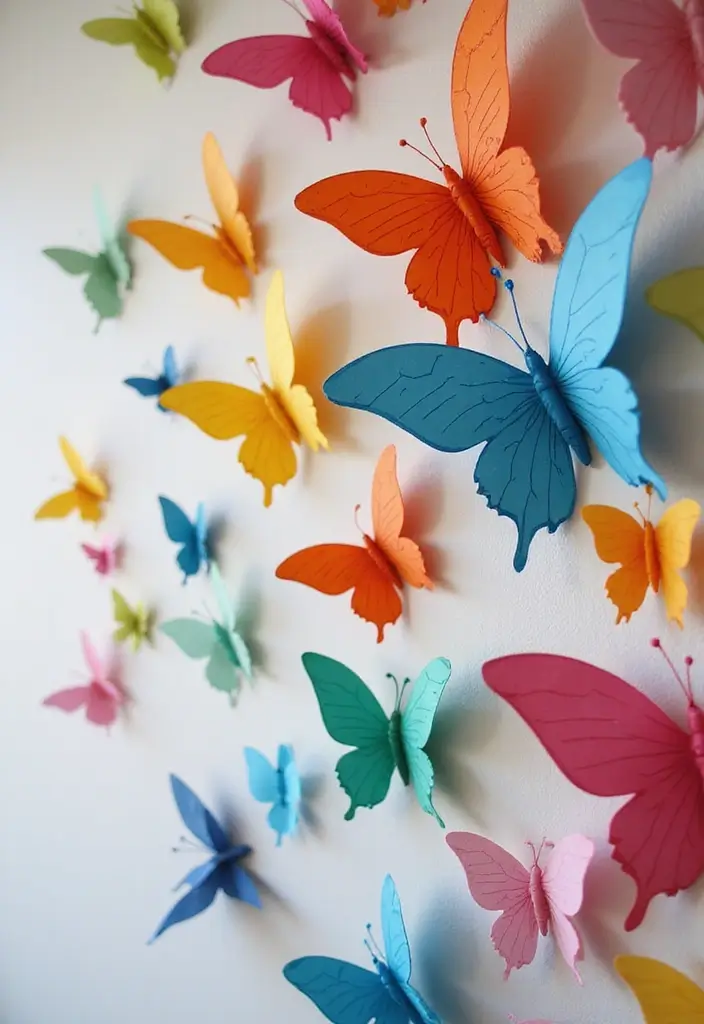
Want a light, nature-inspired look in your space? Paper butterflies are a quick, budget-friendly way to bring life to walls, tables, or shelves.
Here is how you make them and use them.
What you need
– Colored craft paper in a couple of shades
– Scissors and a pencil
– A ruler or a bone folder for clean folds
– Thin wire or wooden sticks
– Glue or tape
– Optional: acrylic paint or fine glitter for extra pop
Steps to craft
– Draw a simple butterfly shape and cut it out. Keep the wings wide for a bold look.
– Fold the center of the butterfly slightly to create a little lift.
– Add a tiny body with a short strip of paper or a small dab of ink.
– Attach the butterfly to a wire or stick with glue. Let it dry so the form holds.
– If you like, brush a touch of paint or sprinkle glitter on the wings for a subtle sparkle.
Ideas for use
– Make a butterfly garland to brighten a wall or door.
– Add them to a nursery or kid’s room for a playful touch.
– Mix different sizes and colors on a feature wall for depth and charm.
Here’s why this works: the 3D fold catches light and creates gentle shadows, which makes a simple craft feel lively. Keep a small set on hand for quick decor switches.
Tips for best results
– Choose double-sided paper so both sides show color.
– Use invisible thread or fine wire for a floating look.
– Pick lightweight papers for easier folding and bending.
Next steps: start with 6 to 12 butterflies, then expand to a full garland or a big wall display as you get more confident. These paper butterflies add a light, bright touch without crowding your space.
17. Paper Frames with 3D Accents
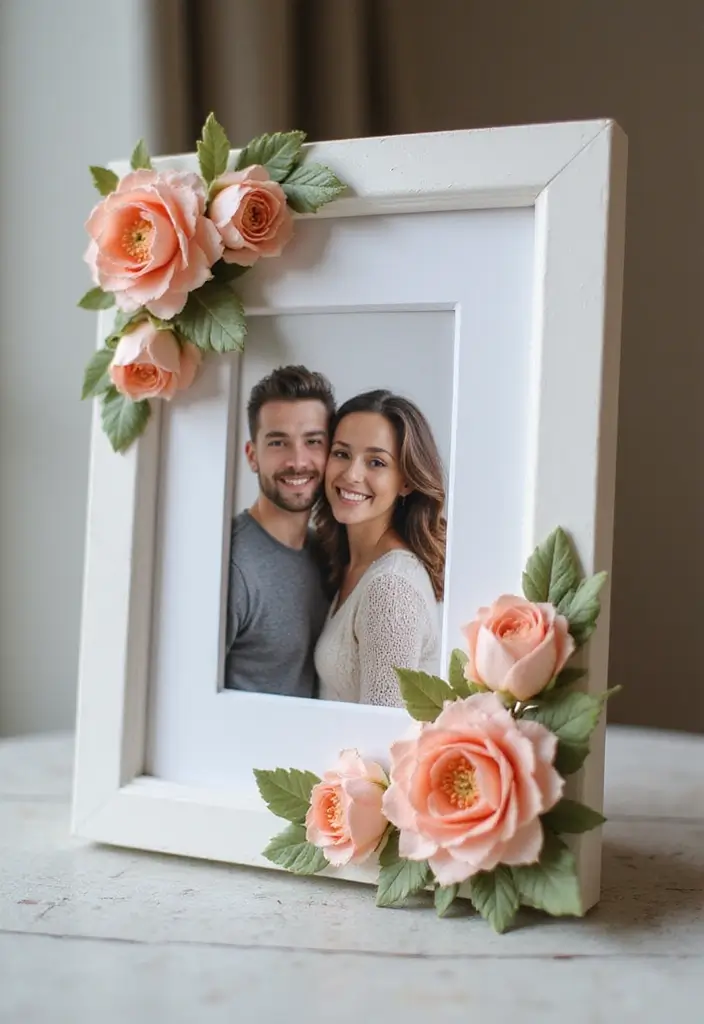
Want frames that make your photos look alive? Start with a simple base frame and add 3D accents that pop. Think tiny flowers, curling leaves, or delicate butterflies. Layering the pieces gives depth, like a mini scene behind glass. Use bright colors for a bold look or a soft, coordinated palette for calm spaces. These frames fit family photos, art prints, or special moments.
Here is how to do it:
– Choose a base frame that fits your photo and space.
– Cut shapes from sturdy paper or cardstock.
– Glue or stack pieces with foam tape to lift each layer.
– Vary textures with torn edges, vellum, or a subtle sheen.
– Pick a color scheme that matches your room.
– If you want a clean look, use a clear frame and keep the background simple.
Display ideas:
Put a row of 3D frames on a shelf, build a mini gallery wall, or place one on a desk as a focal point. The layered pieces catch light and invite a second look. For a modern twist, choose clear frames and plenty of white space between layers.
Crafting tips:
– Secure layers well to keep the scene sturdy.
– Play with textures to add depth.
– Consider using clear frames for a modern twist.
With a little practice, these paper frames will make your memories stand out and shine on any wall.
@media(max-width:480px){
18. 3D Paper Clouds

You want decor that feels dreamy but is simple to make. 3D paper clouds give that soft look and gentle depth. They lift a room and add quiet charm.
Materials
– White or pastel paper
– Card stock for sturdier clouds
– Scissors and pencil
– Glue or glue dots
– String or clear thread
– Optional: a touch of glitter
Step-by-step
1) Draw 3 to 4 cloud shapes on your paper. Round the edges for a fluffy feel.
2) Cut out the shapes.
3) Glue the clouds in a staggered stack. Leave small gaps so light shows through.
4) Tie short strings between some layers for subtle motion.
5) Hang from the ceiling, or attach to a wall with removable putty.
Ideas to try
– White clouds for a calm look, or pale colors for a nursery.
– Glitter on a few edges for a tiny sparkle.
– Pair with paper raindrops for a weather scene.
– Use different sizes to get a drifting look.
Where to use
– Above a crib for a soft vibe
– As a party backdrop or photo wall
– In a reading nook for a cozy ceiling feature
Next steps
Experiment with sizes and heights to find your best cloud drift.
@media(max-width:480px){
19. 3D Paper Banners
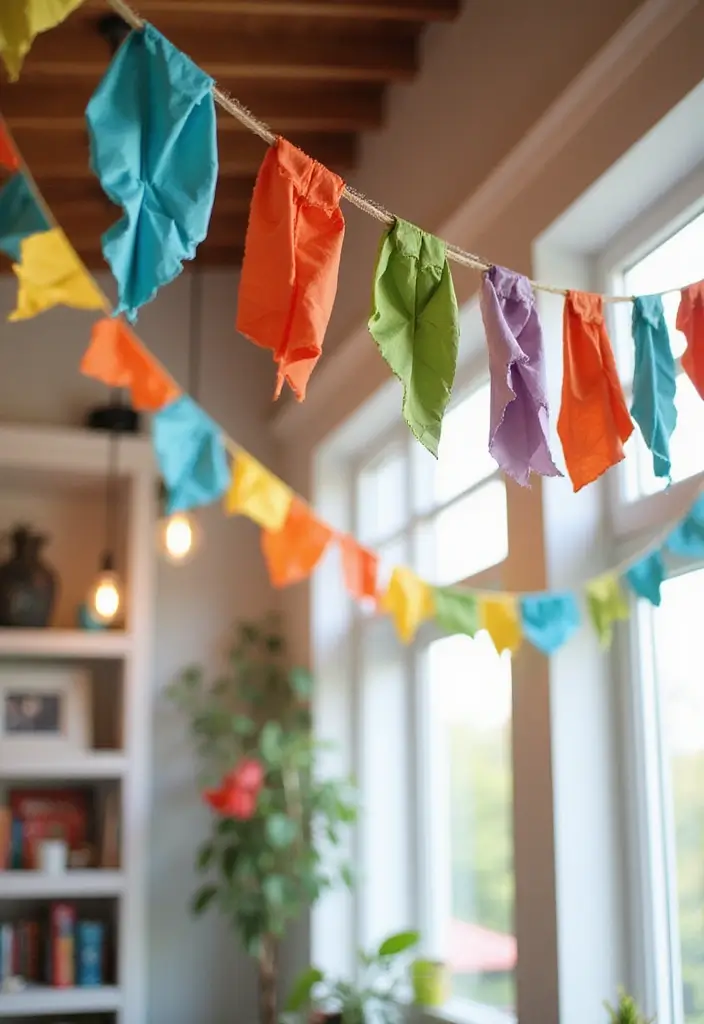
Need a simple decor trick that makes a room feel ready for a celebration. 3D paper banners do just that. They suit birthdays, weddings, or any holiday. You cut shapes from bright paper, stack them in layers, and thread them onto a string. The result catches light and adds real depth to your space.
Materials
– Colorful paper or cardstock in 2–3 coordinating shades
– Scissors and a bit of patience
– Craft glue or double‑sided tape
– String, twine, or lightweight ribbon
– A hole punch or needle for easy threading
– Optional: tassels, foil accents, or textured papers for extra charm
Steps
– Pick a color theme and decide how many banners you want.
– Cut shapes you like—circles, stars, hearts, or letters.
– Cut a second piece of the same shape in a lighter or darker shade to layer.
– Glue the layers with a small gap between them to create a 3D look.
– Add holes at the top or punch holes and thread each shape onto the string.
– Space pieces about 4–6 inches apart. Then hang across a wall, mantel, or table.
Tips
– Use a plain backdrop to make colors pop.
– Mix papers with different textures for more depth.
– Spell out a message with letters and alternate shapes for rhythm.
– Try a diagonal or curved layout for variety.
Here is why this works: quick to make, easy to store, and you can reuse the banners later. Next steps: pick a theme, gather supplies, and start crafting. Your next party decor is ready in no time.
@media (max-width: 600px) {
.visual-quiz-iframe { min-height: 995px !important; height: 1100px !important; }
}
20. Paper Wreaths
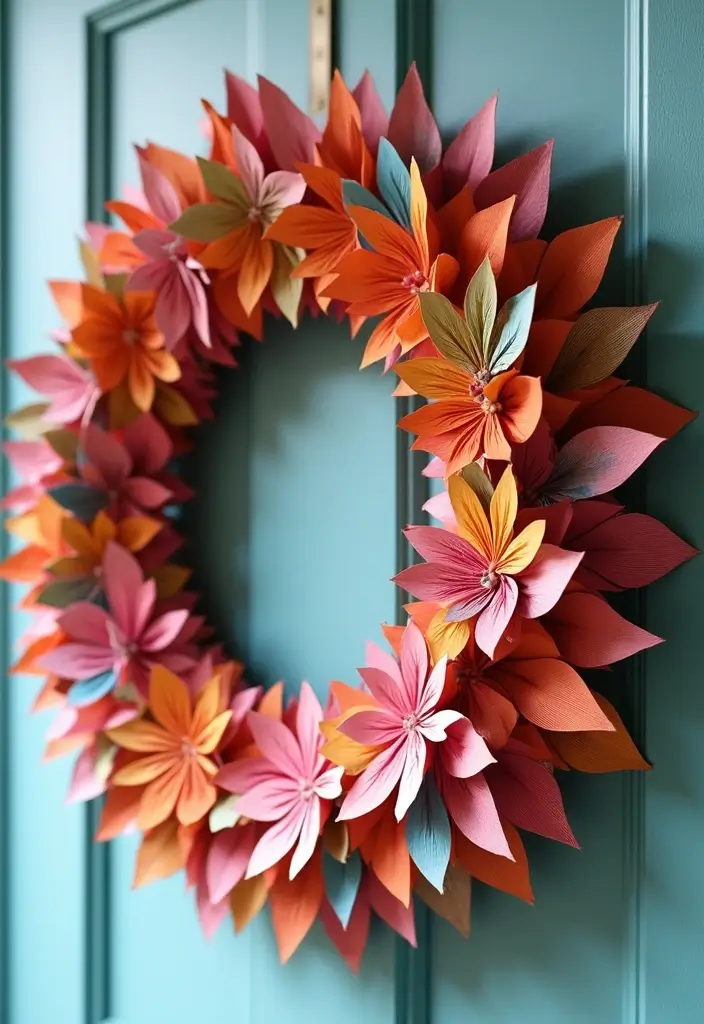
Want a warm, welcoming entrance without spending a lot? Paper wreaths make that easy. They add color and texture to your door or wall. Start with a sturdy base circle cut from cardboard. Attach layers of paper pieces to it. You can use leaves, flowers, or small fruit shapes. Keep some pieces raised a bit to give a 3D look.
Crafting ideas
– Use recycled paper for a greener option.
– Add ribbons or tiny ornaments for extra charm.
– Make mini wreaths for a unique table centerpiece.
Here is why this works. Paper is light and simple to cut. It dries quickly when glued. You can swap colors with the season to refresh your decor.
Next steps make it easy. Gather a cardboard circle, printer paper, magazines, and scraps. Cut shapes in varying sizes. Layer them from the inside out. Glue or tape each piece in place. Hang your wreath with a string or ribbon.
Other tips to improve your wreath. Try a mixed palette of pastels for spring or bold reds and greens for winter. Use a border of tiny leaves around the edge for extra depth. If you want a longer display, seal with a clear spray to keep colors bright.
With these ideas, your paper wreaths become a warm touch on your home’s entrance or a cozy wall accent.
@media(max-width:480px){
21. 3D Paper Nautical Decor
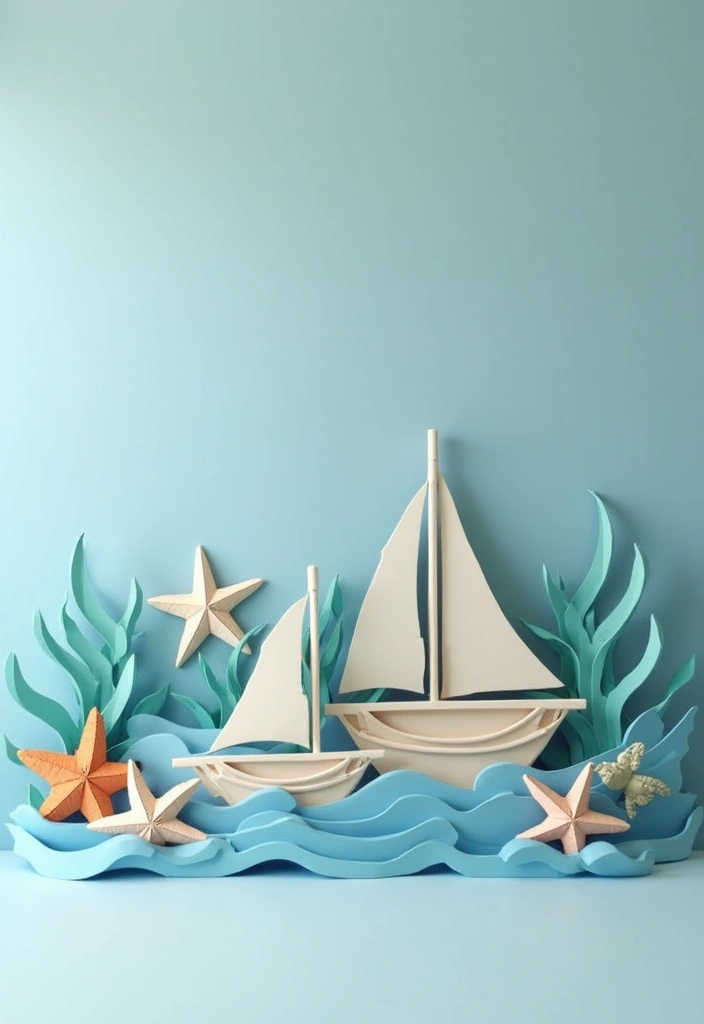
Here is a simple way to add a coastal vibe using 3D paper nautical decor.
What to make
– Boats, anchors, and starfish from sturdy paper. Cut, fold, and glue to add depth.
– Layer pieces so each figure has shadow and height.
Color and finish
– Stick to blue, white, and sandy tones. A touch of navy or teal boosts contrast.
– Lightly ink the edges for a worn, beachy feel.
Display ideas
– Set pieces on a shelf to build a calm seaside vignette.
– Mount a small group on a wall for a mini sea scene.
– Pair with shells, driftwood, or rope trim for a finished look.
How to get the 3D effect
– Use glue tabs to stack layers and create thickness.
– Use thin twine or fishing line to hang a mobile from a hoop.
Practical tips
– Choose clear-drying glue. Press until set.
– Keep projects in a dry spot to avoid warping.
– Start with one small piece, then expand.
Next steps
– Gather a few supplies, pick a wall or shelf, and start crafting. You’ll enjoy a calm, adventurous space without a lot of fuss.
This approach keeps DIY doable. You can rotate pieces with seasons. If you want more texture, try mixed media by gluing a thin strip of fabric or sand to the edges. It stays light, inexpensive, and fun to share with friends.
22. Paper Crepe Flowers
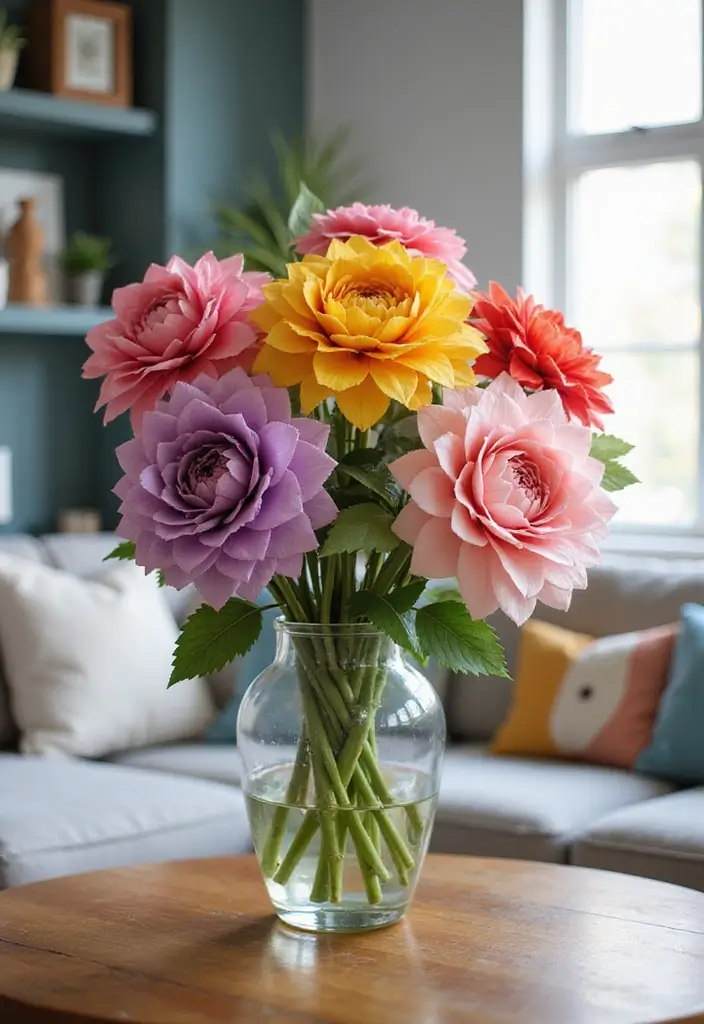
Here is why crepe paper flowers make sense for home decor. They bring color without the mess. They last and last, and you can move them around easily.
Make your own petals and stems. Cut crepe paper into petal shapes. Vary the sizes so the bloom looks natural. Curl the petal edges with your fingers for a soft curve. Layer petals on a thin wire stem to build a flower bud. Add leaves by cutting simple leaf shapes and gluing or taping them to the stem. Wrap the base with floral tape to hold everything tight. If you want a fuller bloom, add more layers.
Use these flowers in many ways. Create a bouquet that never wilts. Make a centerpiece with three or four stems. Put one tall stem in a vase as an accent. You can also gift a small bouquet that lasts.
Tips
– Mix colors for a lively bouquet.
– Use floral tape to secure stems and leaves.
– Try shapes like peonies or daisies for variety.
Next steps: pick a color palette, gather your supplies, and start cutting. With a little practice, your crepe paper flowers will add a cheerful touch to any room.
23. 3D Paper House Cards
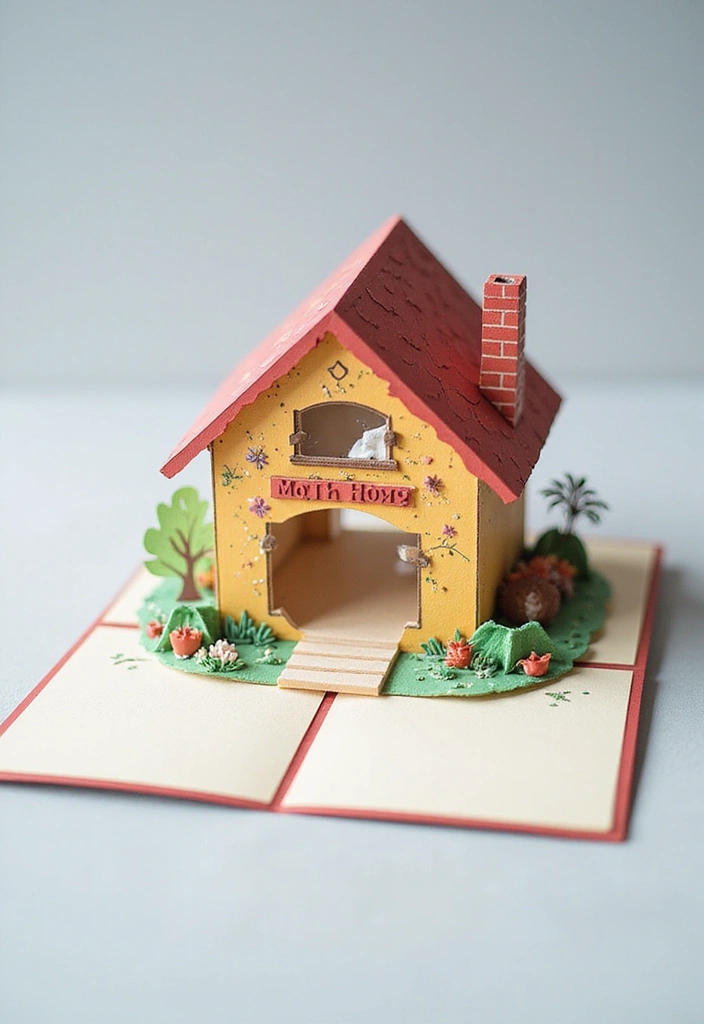
Want a card that feels warm and personal? 3D paper house cards add a touch of magic to any message. When your friend opens the envelope, a tiny house lifts up and reveals a cozy scene. Colorful paper, careful cuts, and gentle folds give depth that flat cards just can’t match.
What you’ll need
– Colorful cardstock in 2 or 3 shades
– Patterned paper for walls and roof
– Scissors and a craft knife
– Ruler and scoring tool
– Glue or double-sided tape
– Fine-tip pen for tiny details
How to make it
1) Draw a simple house on sturdy paper
2) Cut two identical shapes that will form the pop up
3) Score and fold a small flap to build the lift mechanism
4) Glue the flap to the card base so the house rises when opened
5) Add windows, doors, and roof lines with a pen
Design ideas
– A cozy cottage with a chimney
– A clean, modern boxy house
– A tiny town scene with several little houses
Tips for a polished finish
– Mix patterns on walls and roof for texture
– Write a short message inside to personalize it
– Try different house shapes to fit the recipient
– Practice on scrap paper before the final card
These 3D paper house cards stand out and become keepsakes that loved ones will remember.
@media(max-width:480px){
24. 3D Paper Snowflakes

Bring winter charm into your home with 3D paper snowflakes. Hang them in windows or from the ceiling to create a cozy, magical scene. Cut intricate designs from white or colored paper and fold them to stand out in three dimensions. Mix different sizes and styles for a layered, frosty display.
What you will need
– White or colored paper (thin or lightweight works best)
– Sharp scissors or a craft knife
– Ruler and pencil
– Clear thread or thin fishing line
– Glue or tape
– Optional: tiny LED string lights for a warm glow
How to make them
1) Start with a square sheet. Fold it in half diagonally to form a triangle.
2) Fold again to a smaller triangle.
3) Draw simple patterns on the edges, keeping a small border so it stays whole.
4) Cut away sections along the lines. Do not cut through the edge.
5) Unfold to reveal a flat snowflake.
6) To turn it 3D, gently push some points outward or glue two snowflakes together for depth.
7) Add a length of string if you want to hang several at different heights.
Here is why it works: the layered pieces catch light at different angles, giving your space depth and a frosty shimmer.
Crafting tips:
– Try different patterns for unique looks.
– Use white plus metallic paper for extra sparkle.
– Add a strand of lights to make the snowflakes glow.
Next steps: hang a small bouquet of snowflakes in a window and enjoy a simple, festive touch.
@media(max-width:480px){
@media (max-width: 600px) {
.normal-quiz-iframe { min-height: 570px !important; height: 570px !important; }
}
25. Paper Mosaic Art
Paper mosaic art lets you turn small colored pieces into a big, eye catching picture. You plan, cut, and glue blocks of color onto a sturdy base to create depth and texture. It’s simple to start and fun to finish.
Materials
– Colored paper or magazine scraps
– A solid base such as canvas, wood, or thick cardboard
– Scissors and a craft knife
– White glue or glue stick plus a small brush
– Pencil, ruler, and a clean workspace
– Clear sealant or Mod Podge to protect the finished piece
Here is why these supplies help: they stay neat, let you mix shades, and keep pieces level.
What to do
Next steps: plan your layout on the base, then start placing.
– Pick a theme, like a simple landscape or abstract shapes
– Lightly draw a soft outline
– Cut many small shapes in various colors
– Test-fit pieces before gluing
– Glue slowly, press each piece flat, and work row by row
– Let glue dry fully; add a thin coat of sealant for shine
Tips
– Use light and dark tones to add depth
– Vary piece sizes for texture
– Work in small sections to prevent shifting
– If a piece lifts, add a touch more glue and press again
– Hang away from direct sun to protect colors
Each mosaic shows your choices in color and shape, and you can use it for wall art, greeting cards, or a thoughtful gift.
@media(max-width:480px){
26. Paper Kites
Paper Kites You Can Make at Home
Paper kites add motion and color to your space. They can hang on a wall as decor. They can fly outside on a breezy day. Kites are easy to make. You can customize them to match your room.
What you need
– You need lightweight paper like printer paper or origami paper.
– You will use lightweight sticks such as bamboo for the frame.
– You should have clear tape to hold the frame and the paper.
– Scissors help you cut the kite shape.
– Decorations can be markers, stickers, or bold patterns.
How to build your kite
– Create a cross frame with two light sticks and tape them firmly.
– Place the paper over the frame and tape the edges flat.
– Add a string at the center so the kite can fly when you pull it.
– Attach a tail on the bottom edge to help balance in the wind.
Shape ideas
– Try a classic diamond shape for easy flying.
– Try a delta shape for a sleek look.
– Try a box kite for steady flight.
Decoration tips
– Decorate before attaching to the frame so the design stays flat.
– Use markers or stickers to add bright patterns that pop in sunlight.
– Try a bold mix of colors.
Next steps
Hang your kite indoors as a wall piece or take it outside to watch it glide on a gentle breeze.
@media(max-width:480px){
27. Paper Silhouettes
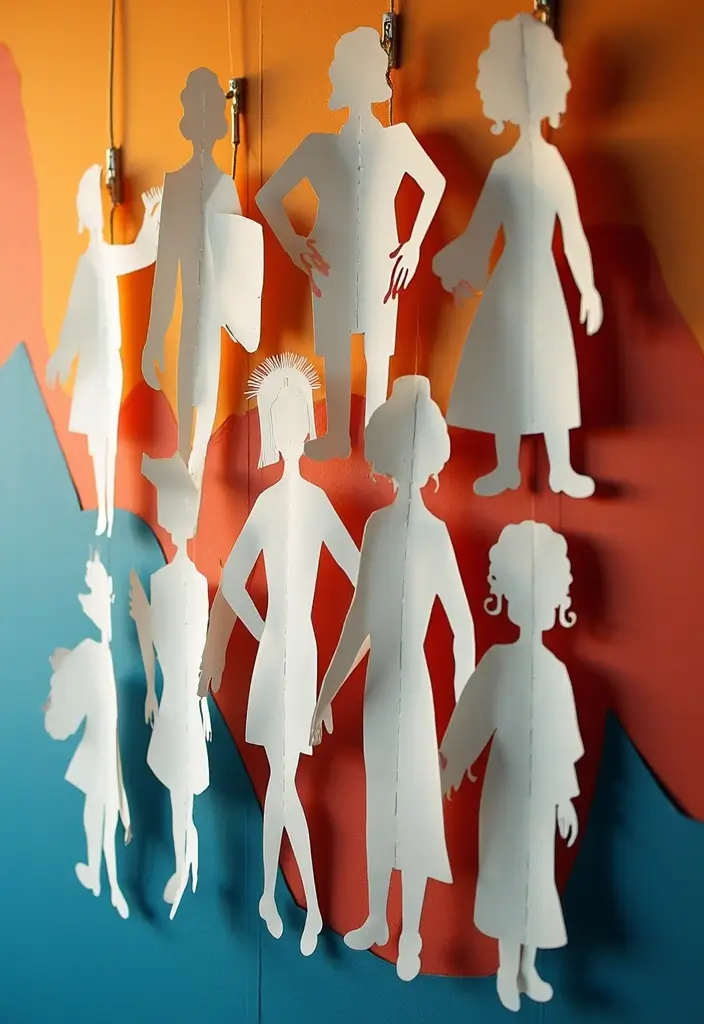
You want wall art that tells a story without loud colors. Paper silhouettes give strong shapes and a calm look. You control color, size, and layout, so the result fits your room.
What you’ll need:
– Sturdy paper or cardstock in chosen colors
– A sharp knife or craft scissors
– A cutting mat
– A background board
– Double-sided tape or mounting corners
– Optional: small LED lights behind your art
Design ideas:
– Pick a theme like nature or animals
– Place a dark cutout on a bright background for contrast
– Layer two silhouettes to add depth
– Mix flat and shiny papers for texture
Tips for impact:
– Keep lines clean and clear
– Add light from behind for a halo
– Vary sizes and arrange in a grid or cluster
How to make it:
– Trace and cut your silhouette
– Mount the cutout with top tape so it floats
– For a shadow effect, cut a lighter second silhouette and offset it behind
Display ideas:
– Hang at eye level in a group
– Use a slim frame or shadow box
– Create a wall story by lining several pieces
Care:
– Keep away from moisture; paper can warp
– Protect from direct sun to avoid fading
Ready to start? This project is beginner friendly and quick to finish.
@media(max-width:480px){
28. 3D Paper Sculpture Vases
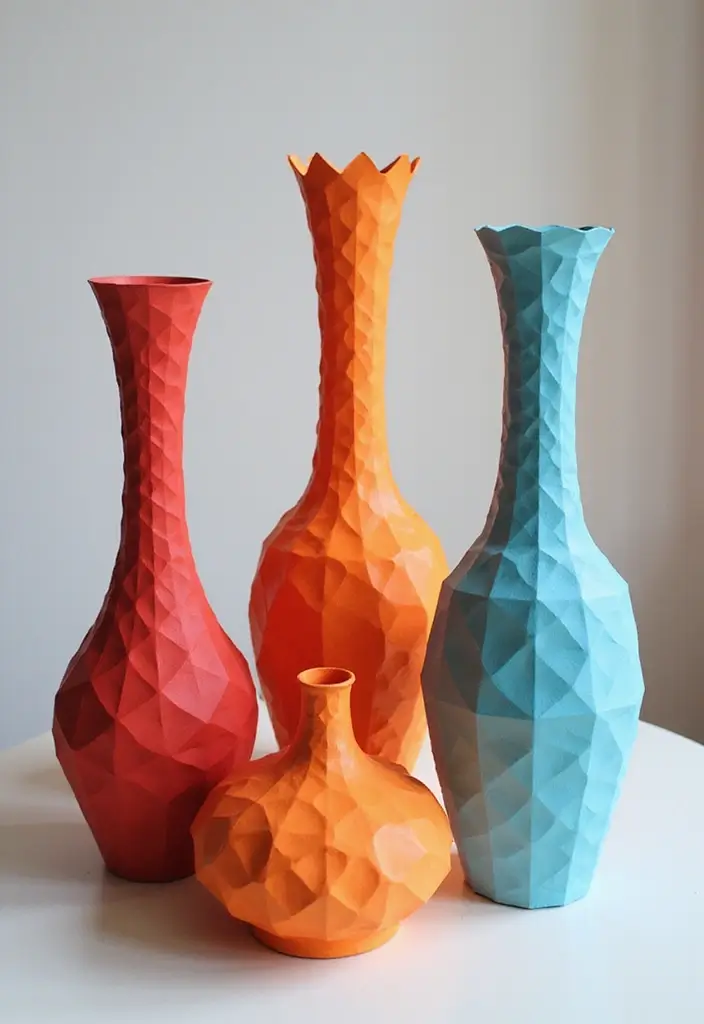
Looking for a fresh way to display flowers? A 3D paper sculpture vase can turn a simple stems display into a tiny piece of art. These vases add texture and light to a room. They can stand alone or hold real blooms if you seal them well. They are lightweight and easy to move.
What you need to know
– Plan a shape you love. Try spirals, stacked rings, or jagged panels.
– Build with layers. Cut thin sheets, stack them, and glue along the edges.
– Make a sturdy base and a mouth that fits your flowers.
– If you plan to use real flowers, seal the inside with a waterproof coating so water won’t warp the paper.
– Decorate with color blocks or soft tones to match your space.
Crafting tips:
– Try odd shapes for a bold look.
– Choose recycled paper to keep waste low.
– Mix several colors for a lively, eye-catching piece.
Next steps: let your hands guide the design. Start small with a simple vase, then push toward more complex forms. When you finish, place it where light can catch the folds. Place it on a shelf with soft light to show the folds. This keeps your flowers safe and your art ready to admire.
@media(max-width:480px){
29. 3D Paper Decals
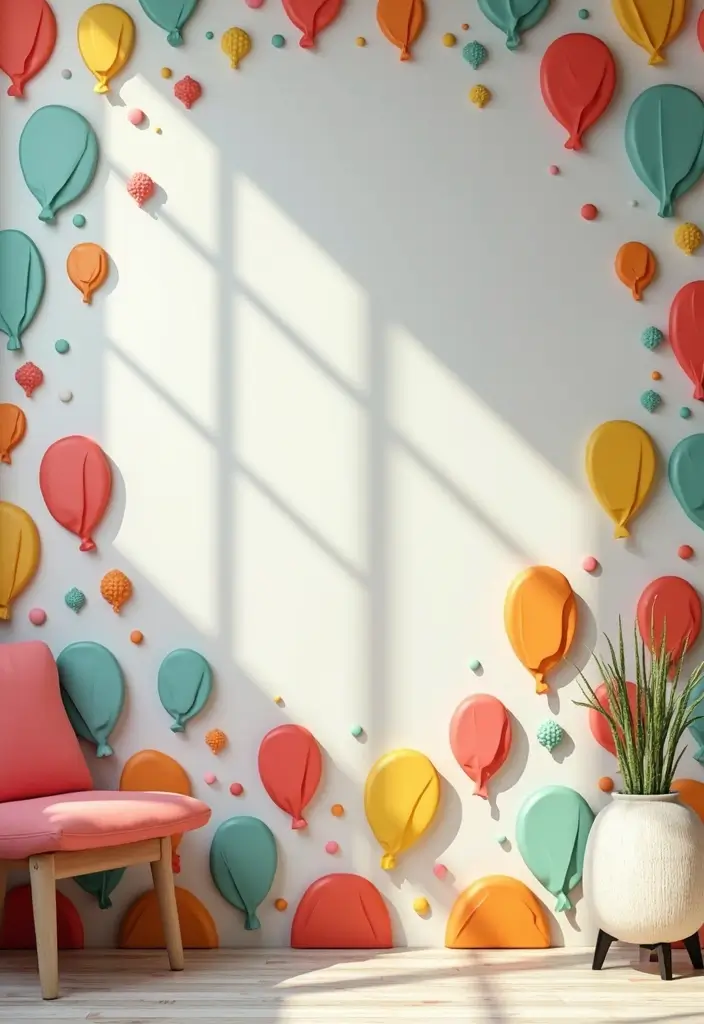
Want a fresh look on your walls without a big project? 3D paper decals give you that pop. They are cut into any shape: flowers, animals, abstract forms. Stick them with double-sided tape to walls, mirrors, doors, or furniture for a quick texture boost. If you swap themes often, these decals are your champion.
Here is why they work: they add depth, catch light, and change a room in minutes. They are light and easy to remove, so you can repaint or try a new theme anytime.
Design tips:
– Mix different sizes and angles for an eclectic feel
– Use removable adhesive so you can move pieces without damage
– Try seasonal themes to keep decor fresh
Here is how to get started:
– Plan a simple layout on the wall you want to decorate
– Choose 3 shapes in varying sizes
– Tape them in place, then step back and adjust
– Switch in new pieces when you want a fresh look
Next steps: set aside 15 minutes, gather a few sheets of paper shapes, and begin. With a little practice, you’ll have eye-catching decor that updates with your mood and the season.
You can layer pieces to create shadows as light moves. Start small and grow.
30. 3D Paper Art Installations
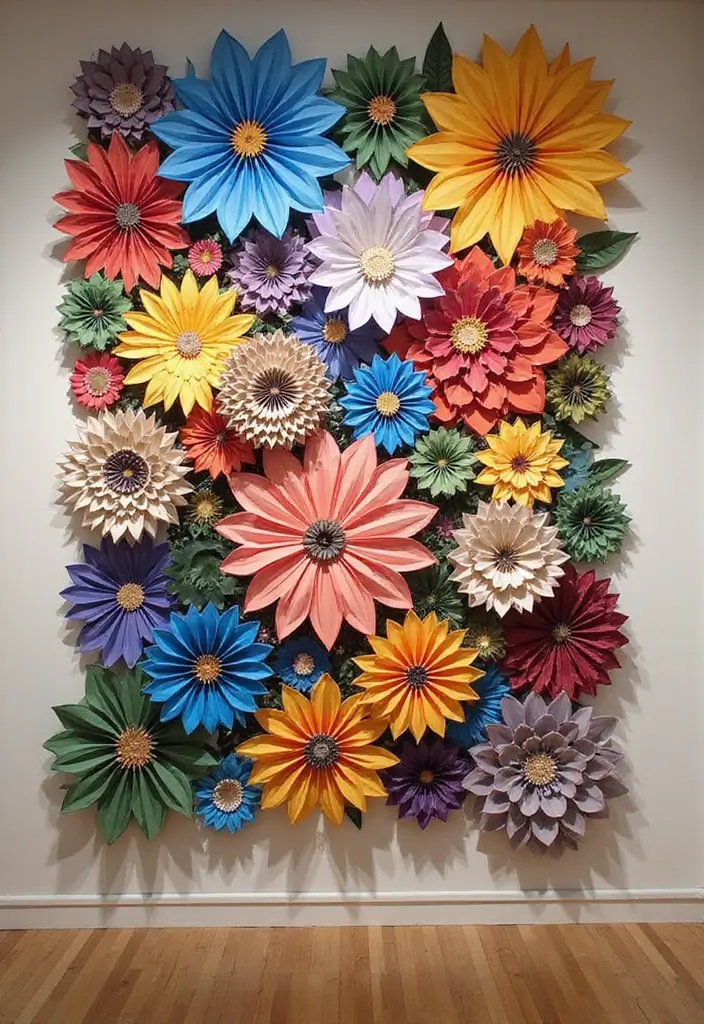
You want a bold, eye-catching display. 3D paper art installations give you that. They work as big centerpieces or wall art that changes a room. Use large paper panels to build depth with layers and textures. A giant paper flower or a sprawling paper landscape can leave a memory in the room. Check the space first and decide what message you want.
Crafting tips:
– Work in a roomy area so you can move around your design.
– Use strong adhesives and solid support structures to keep shapes in place.
– Try color gradients to add depth and flow.
Here is why this helps: big, layered pieces catch light from different angles. Shadow and texture add motion even when still. Next steps follow a simple plan.
– Step 1 plan your scale and theme.
– Step 2 gather materials like heavy-weight paper, cardstock, foam core, glue, tape, and light tubes or dowels for support.
– Step 3 build modular pieces you can assemble on site.
– Step 4 attach to a wall or stand on a base so it stays safe.
This kind of 3D paper art doubles as decor and an activity. Guests can explore layers, spot hidden shapes, or help with simple assembly. Space, time, and careful handling matter.
@media(max-width:480px){
Conclusion
3D paper crafts offer endless opportunities to infuse creativity into your home decor.
With just a few materials, you can create stunning pieces that reflect your personality and style. Whether it’s whimsical animals, elegant wall art, or festive decorations, there’s something for everyone to enjoy. Don’t hesitate to dive into these projects—your home will thank you!
Note: We aim to provide accurate product links, but some may occasionally expire or become unavailable. If this happens, please search directly on Amazon for the product or a suitable alternative.
This post contains Amazon affiliate links, meaning I may earn a small commission if you purchase through my links, at no extra cost to you.
Related Topics
3D paper crafts
DIY decor
creative paper design
paper sculpture
easy crafts
home decor
budget friendly
paper art techniques
kids crafts
seasonal decor
geometric art
interactive models