This season of cozy afternoons and old photos makes me crave simple, heartfelt crafts. I keep thinking about how a tiny paper frame can turn a memory into something you want to touch every day. I made this post because I love the idea of easy, affordable ways to put memories on display. With just paper, a few scissors, and a splash of color, you can create frames that feel warm and personal.
If you enjoy keeping memories close, decorating a small space, or making thoughtful gifts, this one’s for you. If your shelves need a bit of life or your dorm wall could use a smile, these ideas fit. You care about simple materials, a friendly price, and a finished look that doesn’t shout, but whispers. You want projects you can finish in an afternoon and still be proud of.
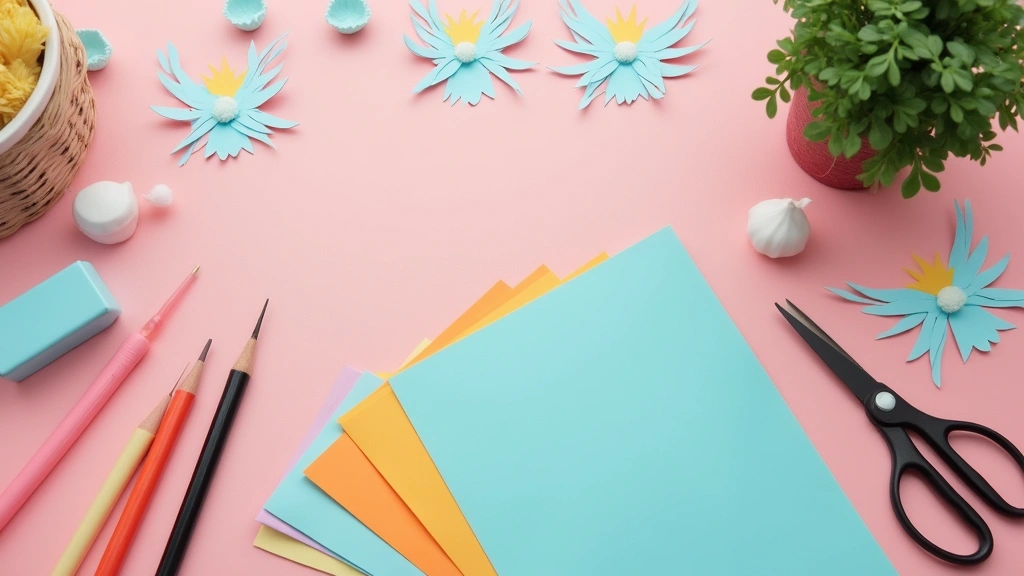
Here are 28 paper photo frame ideas that capture memories beautifully. They cover a range of styles from delicate mini frames to bold gallery pairs. Each idea uses common supplies like sturdy cardstock, patterned paper, glue, scissors, and a ruler. They are quick to finish, and you can swap photos anytime to refresh the display.
You’ll find frames that glow with color, frames that fold into a tiny cube, and frames you can hang with just a string. Some use an origami twist, others sit flat on a desk. All are designed to be beginner friendly yet satisfying for seasoned crafters. These projects let you build a display that makes memories feel close at hand.
Think about where your photos live in your home. A bright staircase wall, a cozy mantel, or a fridge door. Pick colors that harmonize with the space. Update the frames as memories change. The process is tactile—feel the paper, fold along the lines, and watch the image appear.
These ideas are designed to be approachable. They won’t need fancy tools. If you want a sturdier frame, you can mount on card and add a back support. They are not weatherproof, so best indoors. If you get stuck, you can adjust size and colors easily.
Ready to turn your photos into beautiful paper frames? Start with color and a single idea to get going. Use a photo that fits the frame size and print it clearly. Once you finish one, you may want to make more and mix them into a tiny wall of memories.
1. Upcycled Magazine Page Frame
You want a frame that looks great and helps the planet. Upcycle magazines into a frame that tells your own story. Here is how to do it simply.
– Materials needed: Old magazines, sturdy cardboard, scissors, glue, and a bottle of clear sealant.
– Step 1: Measure your photo and cut a rectangle from the cardboard that is just a bit larger than the picture.
– Step 2: Cut magazine pages with colors and images that match your photo’s mood.
– Step 3: Glue the cutouts along the edge, overlapping for a layered look.
– Step 4: Seal the surface with a thin coat of clear glue to protect the print.
– Step 5: Optional back finish with another piece of cardboard and add a mount.
– Tip: Pick themes for your frame based on the photo, like travel for vacation photos or nature for outdoor shots.
– Creative insight: Look for bold typography in magazine pages to add a textual accent to your design.
This approach uses scraps and gives your memories a personal frame.
You can swap in seasonal images to match holidays or moods. Take your time and let the layers dry. A simple twist can change the whole look. Experiment and enjoy. You will love the result.
@media(max-width:480px){
Recommended Products

High Quality Kraft Paper 40 frames + 40 mini wooden clips + 4 hemp cords

Festive Paper Frames: Juvale Paper Picture Frames provide a vibrant way to display cherished memories in a colorful and artistic manner. These versatile paper frames are ideal for creating a hanging photo display with clips in any home or office setting
2. Cardboard Box Frame

Want a cheap, chic photo frame you can tailor to any room? A cardboard box can become a stylish centerpiece for your memories. Cardboard is easy to cut, light to move, and ready for color.
Here is why this idea works. You get a frame that fits any photo. It’s a quick project you can finish in an afternoon. Best of all, you can swap in new pictures anytime.
– Materials you’ll need: Cardboard box, scissors or a craft knife, ruler, pencil, paint or patterned paper, glue or tape, and a few embellishments like buttons, ribbons, or fabric.
– How to do it:
1) Pick a sturdy box with solid sides.
2) Decide the photo size and draw a rectangle on the box to guide your cut.
3) Cut a window for the photo, leaving a frame around the edges.
4) Decorate the edges with paint or wrap them in patterned paper.
5) Add small details with your chosen embellishments.
6) Attach the photo to the back so it shows through the opening.
– Tips you can use:
– Use a sturdy box for a durable frame.
– Seal edges with glue or tape to keep things steady.
– If you want a kid-friendly project, invite friends for a frame-decorating party.
– Style ideas:
– Rustic kraft with twine
– Bright colors with buttons
– Subtle metallic accents for a modern look
Next steps: test different color schemes, pick a photo, and display your new handmade frame where your family will notice it first.
3. Paper Plate Frame
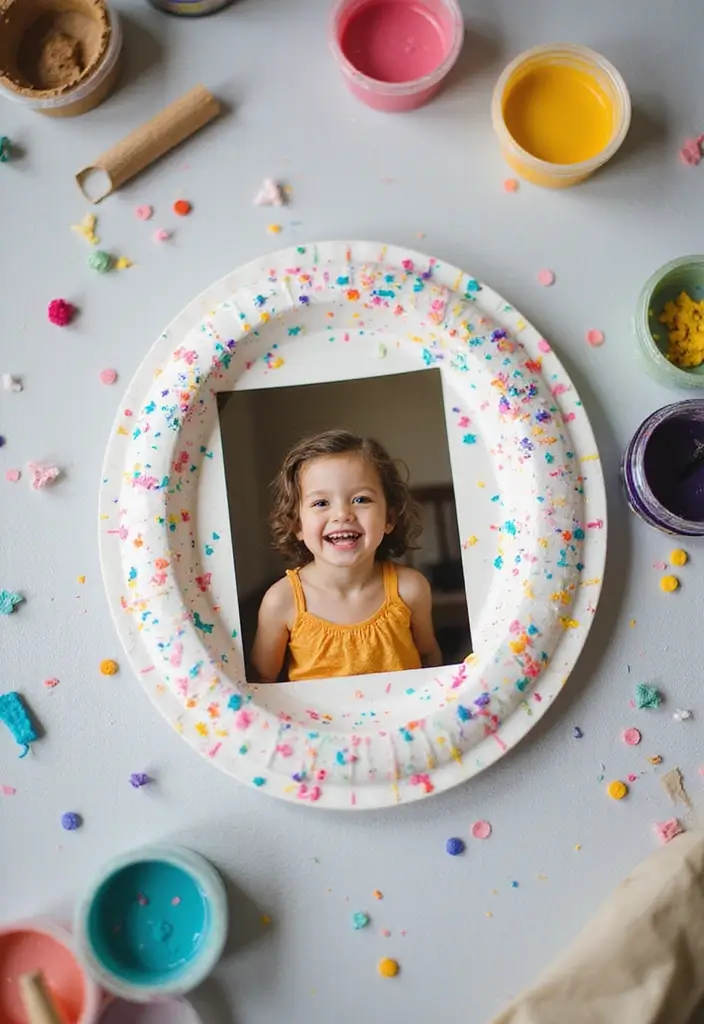
You want a simple, cheap way to save a memory. A paper plate frame does the trick. It is kid friendly and fast to finish.
Here is why it works. It uses supplies you likely have. It turns a plain plate into a tiny art piece.
How to make it
– Step 1: Cut the center of a sturdy paper plate to make a round opening. Keep the rim for the frame.
– Step 2: Paint the inner circle or the whole plate. You can add glitter for sparkle. Let the color dry.
– Step 3: Add texture. Glue on dried flowers, washi tape, or bits of fabric for a rustic look.
– Step 4: Dress up the edge. Glue on beads, sequins, or pom-poms in a pattern you like.
– Step 5: Add a photo. Tape or glue a photo to the back so it shows through the opening. You can prop the frame on a desk or hang it on a wall with string or a stand.
Materials Needed
– Paper plates
– Paint and brushes
– Glue or tape
– Glitter, beads, pom-poms
– Optional dried flowers
– A small photo
Tips and insights
– This is great for birthday parties or school projects. It uses recycled materials and sparks creativity.
– It’s easy for kids to do with adult supervision. Let them pick colors and patterns to reflect their style.
Next steps: keep a few plates on hand for quick gifts or classroom decorating. This project stays friendly to young makers and gives you a cute framed memory in no time.
4. Watercolor Paper Frame
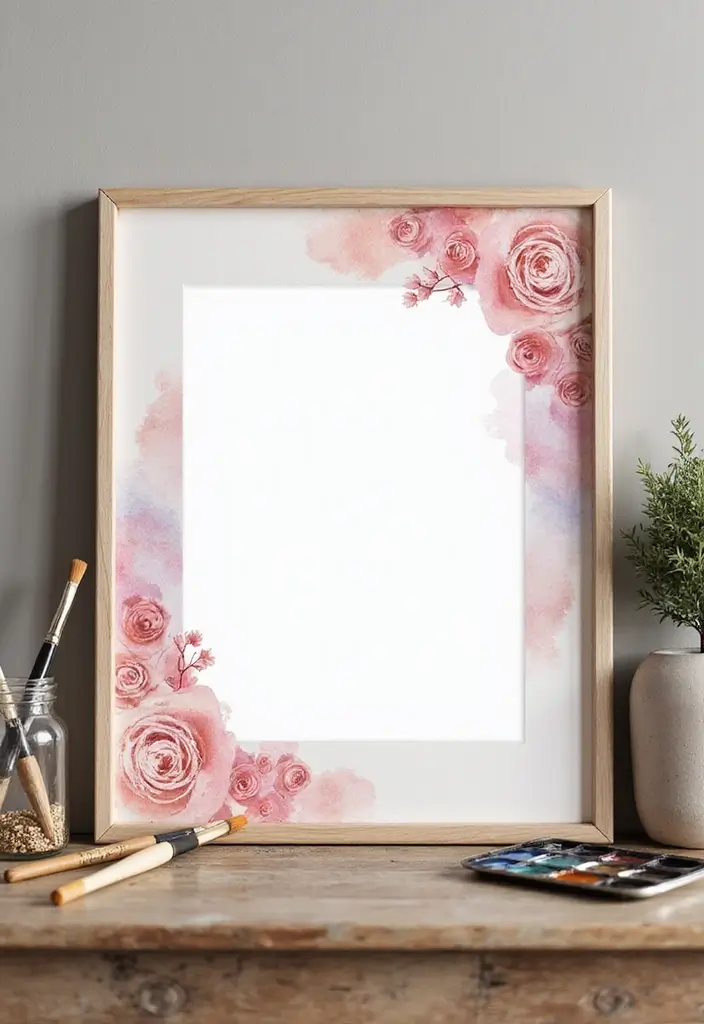
If you want a frame that feels like art, try a watercolor paper frame. It adds color and a soft touch that makes photos pop. You can see brush strokes without covering the image.
Materials
– Watercolor paper
– Watercolors and brushes
– Pencil and ruler
– Scissors or a craft knife
– Glue or double-sided tape
– Your photo, sized to fit
Steps
1) Draw the outer frame and the photo window on the watercolor paper.
2) Paint with light washes. Try wet-on-wet for smooth blends.
3) Let the paper dry fully.
4) Cut out the window. Place your photo behind the frame and secure it with tape.
5) Mount the finished frame on a backing so it can sit or hang.
Tips
– Test color on scrap first.
– Keep edges neat with careful cutting.
– Build layers slowly for richer color.
– For extra texture, dab with a clean sponge while the paint is wet.
Why this works
Watercolor on paper gives depth and a gallery feel. The frame becomes part of art, not a plain border.
Here’s next step: choose a frame shape you like and start with a small photo to test the look. This approach keeps costs low and lets you customize colors to fit your room.
5. Origami Frame
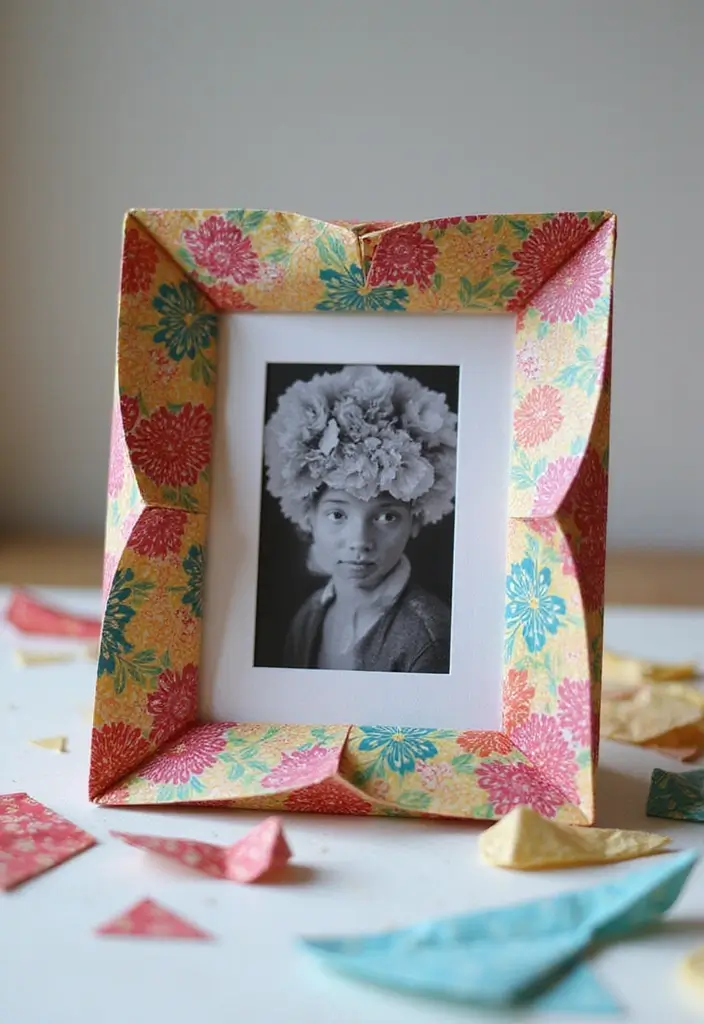
You want a frame that feels special. Origami photo frames can do that by turning a simple sheet into art you can hang or place on a shelf, in your living room, bedroom, or office.
– Materials: origami paper (square works best) or thick craft paper, a basic folding guide, glue or double-sided tape, and your photo.
– How to make it: 1) Pick a photo size (4×6 or 5×7). 2) Choose two colors to give depth. 3) Fold the paper to form a shallow 3D frame. 4) Slip your photo behind the front lip and keep it in place with a small dab of glue or tape. 5) Press the folds so the frame sits flat.
– Tips: Use double-sided origami paper for color on both sides. Keep edges aligned with a ruler. Add a thin strip of washi tape for a clean border. If you want to hang it, attach a tiny string or ribbon.
– Why it helps: This adds texture and light catches the folds, making the photo look lively.
– Next steps: Make a set in different colors to build a small gallery on a shelf.
– Note: This frame works best for light, indoor photos. It’s a fun way to share a bit of Japanese craft in your home.
@media(max-width:480px){
6. Duct Tape Frame

Looking for a frame that pops and lasts? A duct tape frame could be the answer. It’s strong, colorful, and easy to customize. Perfect for kids and teens who want bold art. Start with a simple cardboard base, then wrap it with tape in your favorite colors. Layer patterns to create a fun look. Cut a window for your photo and secure it at the back. This quick project turns a plain photo into a real display piece. Grab the tape, hear the swish as you lay it down, and feel the sticky grip on cardboard.
– Materials Needed: Cardboard, duct tape in several colors.
– Steps:
1) Cut a rectangle a bit larger than your photo. Leave about an inch of edge.
2) Cut out a window in the center.
3) Wrap the front with tape. Press firmly and cover every edge. Try different colors to highlight the border.
4) Tape the photo to the back with small tabs so the front stays clean.
5) Add a back stand or a hanging option. A folded strip of cardboard can keep it upright; a small hook works for wall use.
– Tips:
– Mix patterns for a one of a kind look.
– Make several frames at once to build a gallery wall.
Next steps: place your photo in the window, secure the back, and show off your new frame.
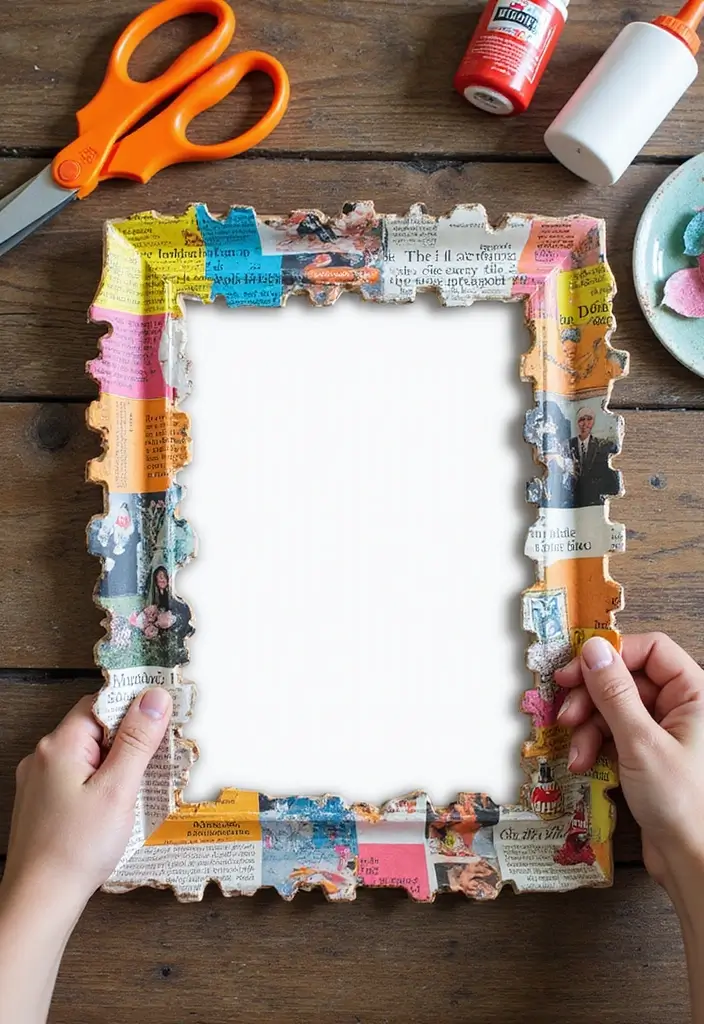
7. Newspaper Frame
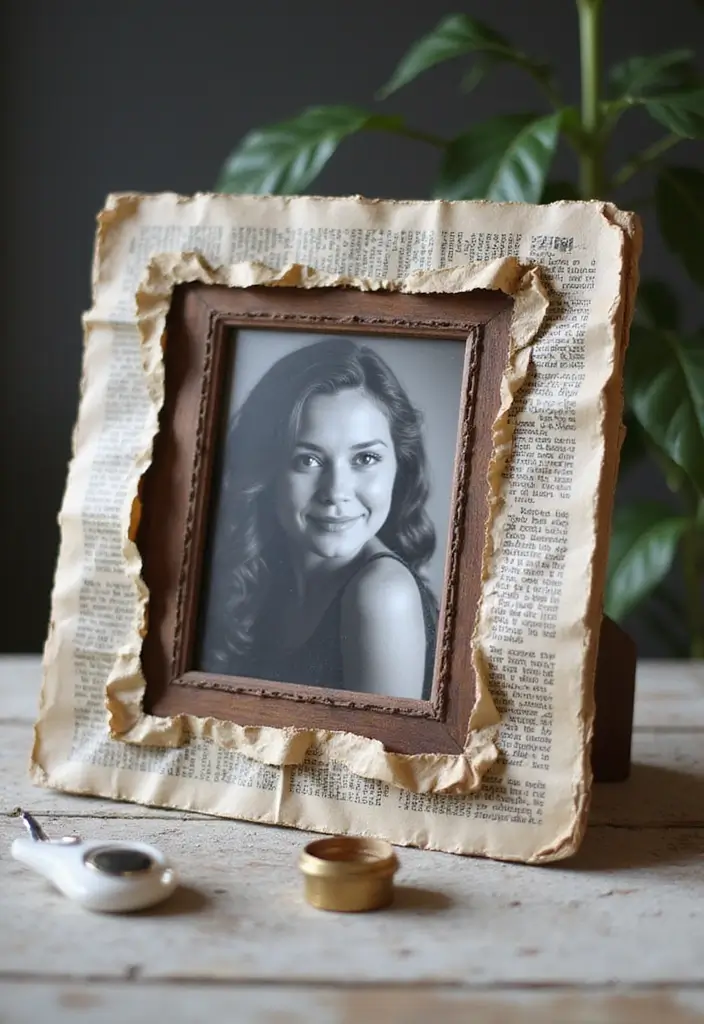
Looking for a cheap, stylish way to show off your photos? A newspaper frame fits the bill. You recycle old paper and get a warm, vintage feel for your room. Here’s why this works: it uses scrap paper, costs almost nothing, and adds texture to the frame.
Materials you need
– Newspapers
– Cardboard
– Glue
– Scissors
– Ruler
– Clear sealant or decoupage glue
How to build it
1) Cut a frame shape from cardboard and carve out a window.
2) Brush on glue and lay strips of newspaper over the frame, then press to smooth.
3) Let it dry, then seal with a decoupage coat to keep it sturdy.
4) Add a final layer of glue and press again if needed.
Display ideas
Black and white photos look especially good with this frame. The soft newsprint makes memories feel timeless. It dries clear and stays strong. It also makes a nice gift for a friend. Try a few sizes for a mini gallery.
Tips to elevate the look
– Choose headlines or pages with bright colors to catch the eye.
– Mix plain pages with bold text for contrast.
– Add small embellishments like buttons or ribbons to personalize.
This frame is light and easy to move. It works in dorms, on shelves, or on a wall. Give it a try this weekend. You will see photos glow in a new light.
8. Embroidery Hoop Frame

If you want a frame that feels handmade, try an embroidery hoop photo frame. It blends sewing with your photo and fits any room. Here is how you do it. This frame keeps your photos safe and lets colors shine.
Materials you need
– Embroidery hoop (choose a size that fits your photo)
– Fabric to cover the hoop
– Thread and a needle
– Scissors and tape or glue
– A photo and a backer or cardboard
– Optional decorations: beads, small trims, or floss for embroidery
Steps
1) Loosen the hoop screw, lay fabric over the inner ring, then tighten so the fabric is tight.
2) Cut a circle in the fabric center large enough to show your photo.
3) Place your photo behind the fabric window or tape it to the back.
4) Add simple embroidery or embellishments around the edge for a frame look.
5) Hang the hoop on the wall or place it on a shelf as a mini gallery piece.
Tips
– Pick fabric that matches your photo theme.
– Use light colors to let the picture pop.
– Keep embellishments small so the photo stays the star.
– Ensure the back is neat; use a backer to hide wires or loose threads.
This easy frame adds texture and charm to a gallery wall.
Recommended Products

Multiple sizes: our embroidery hoop, each set has 6 different sizes of embroidery hoops and a bag of needles (16 pieces/bag); The size (diameter) of the embroidery hoop: 9.2 cm (about 3.6 in), 12.3 cm (about 4.8 in), 16 cm (about 6.3 in), 20 cm (about 7.9 in), 24.2 cm (about 9.5 in), and 27.1 cm (about 10.7 in).

Package Includes: You will receive floral frame themed pre printed embroidery cloth, embroidery floss, needles, threader,scissors, embroidery hoops (7.9x7.9inch/20x20cm), English instructions. Each kit is fully stocked with all the necessary supplies

[Everything is Included] Out kit includes everything that you need: 2 Bamboo Embroidery Hoops (8 inch), 2 pre-printed Pattern Fabric, 12 Full Seins Embroidery Floss, 9 Needles, 1 Needle Thread, 1 Seam Ripper, 1 pair of Scissors and 6 Pages Clearly Written Guidelines that you can refer to. We also provide tutorial videos to help you with detail stitch tips and basic embroidery knowledge.
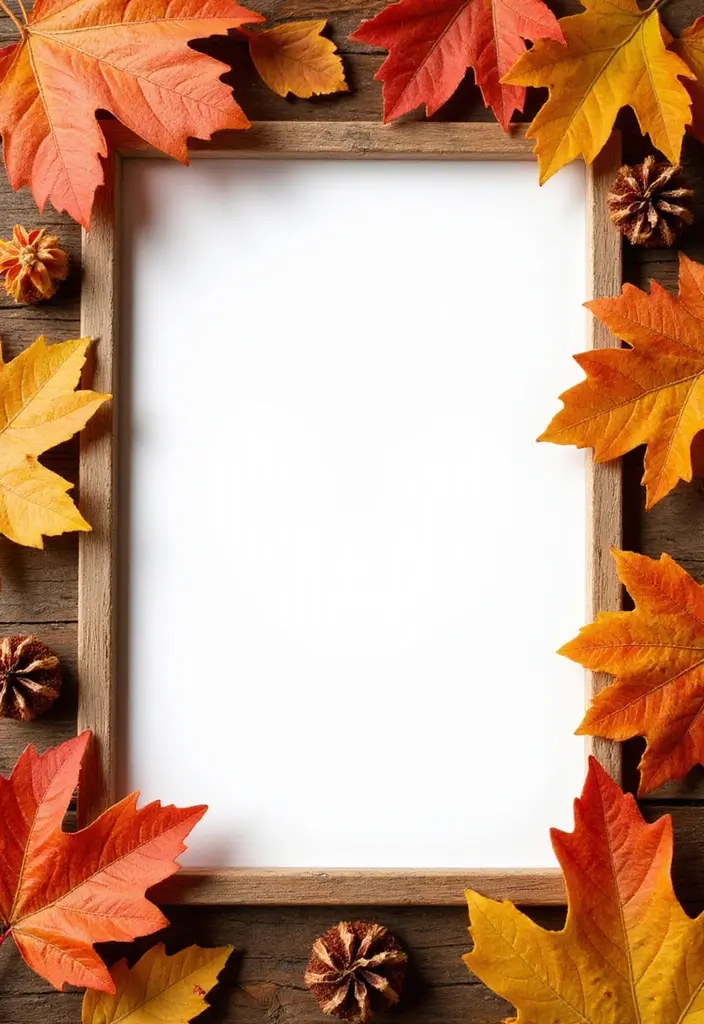
9. Leafy Nature Frame
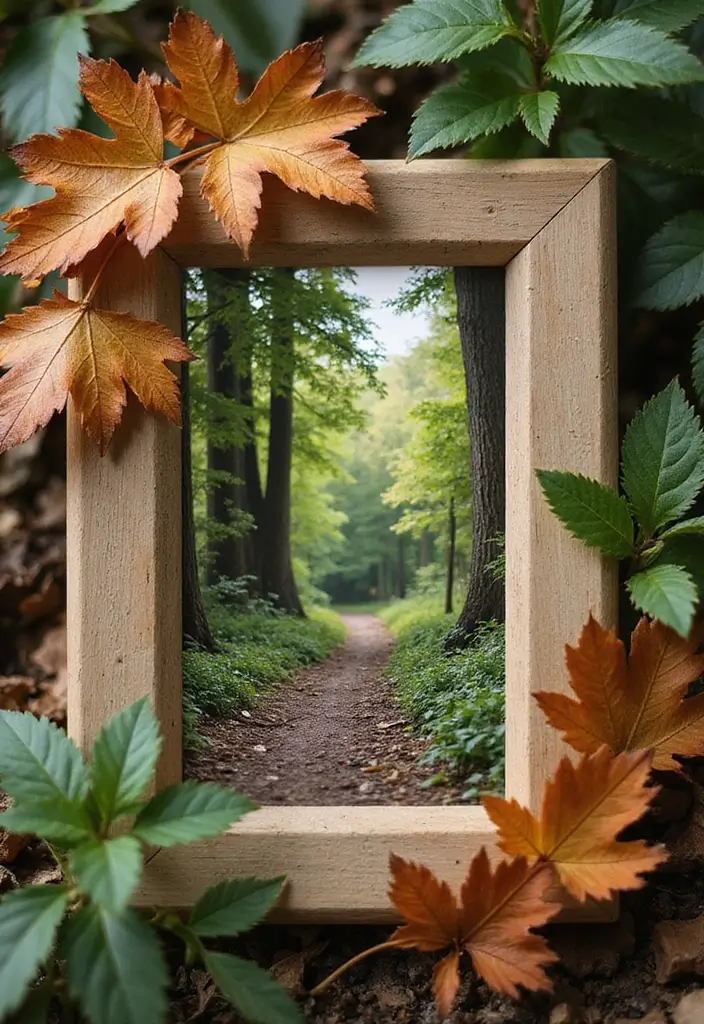
Here is a natural way to show your memories. You want a frame that looks fresh and easy to make. A leafy nature frame fits. It uses dried leaves and a plain cardboard base to keep your photos clear and calm.
What you’ll need
– Cardboard base with a window for your photo
– Dried leaves and a few tiny flowers
– Clear glue
– Scissors
Here is why this works. The leaves add texture and color without hiding the picture.
Next steps
1) Gather leaves on a walk.
2) Press them between heavy books for a day.
3) Cut a simple frame with a window.
4) Glue leaves from edge to edge.
5) Brush a thin coat of sealant. Let it dry.
Tips
– Choose leaves with similar colors for a cohesive look.
– Add a few pressed petals for a pop of color.
Why it fits
This leaf frame pairs well with nature photos, travel shots, or outdoor family pictures. It brings a calm, natural vibe to a shelf or desk.
Next steps. Swap in new photos for a quick refresh. If you want a stronger hold, apply a light brush of Mod Podge.
@media(max-width:480px){
10. Quilted Fabric Frame

If you want a frame that feels warm and handmade, try a quilted fabric frame. This project adds texture and color to your walls. Here is why it works. You turn fabric scraps into a soft patchwork that frames a photo. The surface can glow with lace, small beads, or tiny buttons. It gives your room a cozy, crafty look.
Here is how to start. Materials Needed: Fabric scraps, a sewing machine, sharp scissors, thread, and a few embellishments like lace or buttons. Style Tips: Pick fabrics that match your home decor and comfort level. Crafting Insight: Quilted frames make thoughtful gifts for friends who love handmade items.
Next, make the base. Sew the scraps together to form a patchwork panel. Press it flat so it lies smooth. Cut a centered opening for your photo. Secure a backing behind the patchwork. Glue or sew the patchwork to a sturdy frame or card stock. Add any final embellishments if you want extra charm.
Here is the result. It highlights your photos. It shows your hands-on craft. Use it on a memory wall or give it as a thoughtful gift. Next steps: choose a photo, pick fabrics, and start stitching.
11. Felt Photo Frame
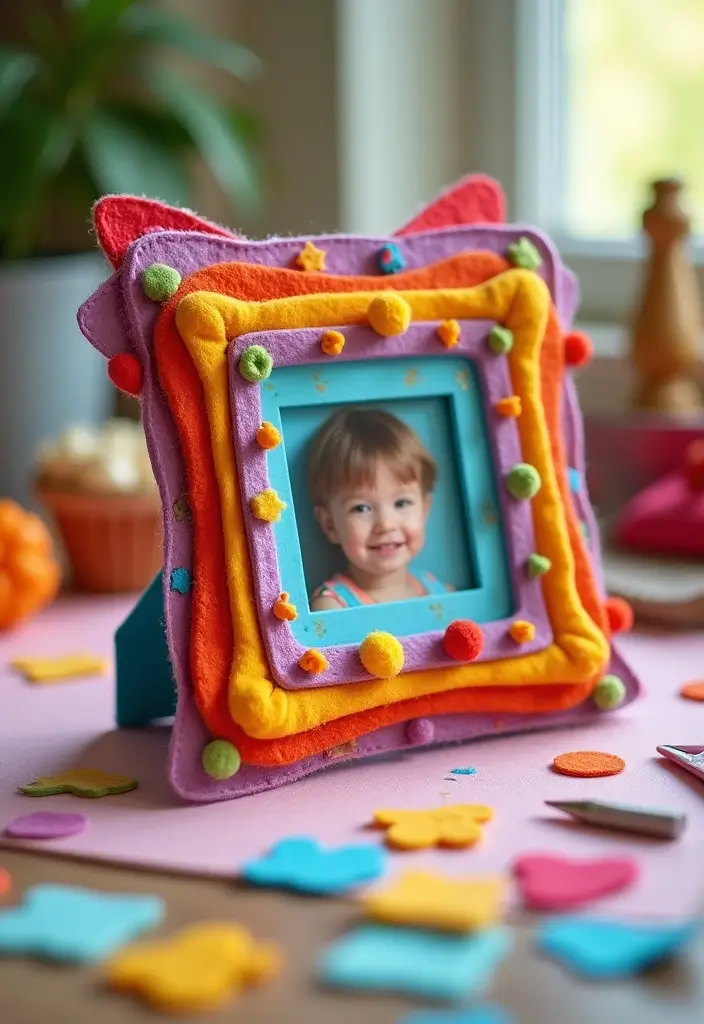
Here is a cozy way to display photos with a DIY felt photo frame. Felt frames are soft, easy to cut, and kid-friendly. You get color, texture, and a warm, handmade vibe.
Materials Needed
– Felt sheets in your choice of colors
– A sturdy cardboard base
– Scissors
– Glue (hot glue for a strong bond)
– Optional embellishments: fabric flowers, felt stars, buttons
Step-by-step
1. Cut a cardboard rectangle to fit your photo.
2. Cut felt to wrap the edges, leaving a bit of edge for a frame.
3. Glue the felt around the card. Layer colors for depth.
4. Add 3D pieces like flowers or stars on top for a playful look.
5. Glue the photo to the back or slide it into a simple pocket.
Tips and tricks
– Use hot glue for chunky decorations so they stay put.
– Try a monochrome palette for a calm frame, or bright combos for a cheerful display.
– Create a set of frames in different shapes: circle, square, heart.
Kid-friendly note
This project invites kids to choose colors, arrange shapes, and learn glue safety.
Felt is soft and safe for kids. Choose colors to match your room. Clip the frame to a cork board or stand it on a shelf.
Next steps
Let the frame dry, then hang or prop it on a shelf.
@media(max-width:480px){
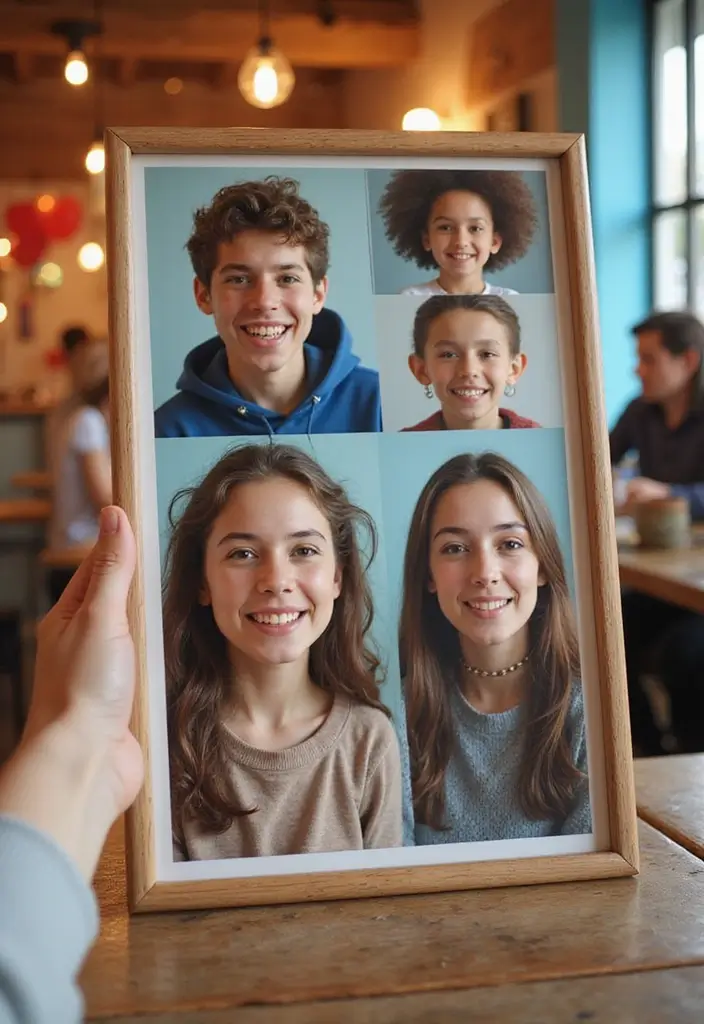
12. Photo Collage Frame
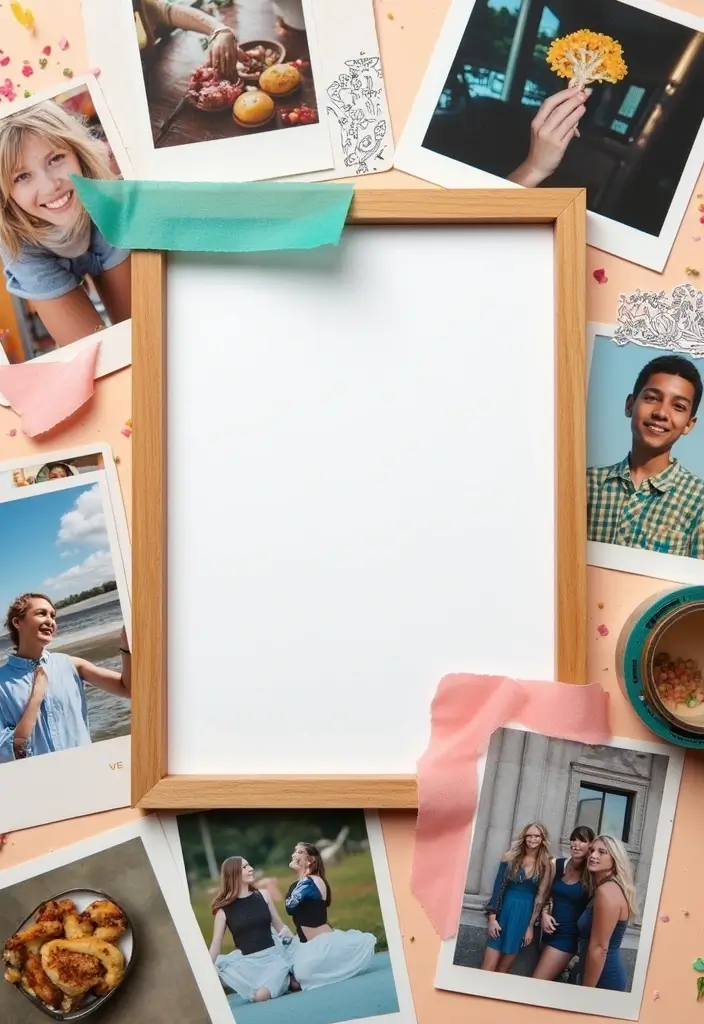
You want a frame that holds many memories at once. A photo collage frame does this in a simple, neat way. Here is how to build one.
– Materials You’ll Need
– Use a large base frame that fits your space and photo count.
– Cut smaller pieces of cardboard or stiff paper to act as photo mats.
– Have glue ready to attach the mats to the base frame.
– Gather washi tape to decorate the edges.
– If you want extra color, keep a little paint or markers.
– Plan the Layout
– Lay out mats and photos on the base frame without glue first.
– Try different sizes and shapes for a varied look.
– Step back and check the balance from a distance.
– Assemble
– Glue the mats to the base frame one by one.
– Place photos on the mats and press until secure.
– Let the glue dry before handling.
– Finishing Touches
– Run a strip of washi tape along the edges for a clean finish.
– Add a small caption tag if you want to name the moment.
– Memory Insight
– This collage frame works well for weddings, family reunions, or milestone days.
– It keeps many memories in one place and makes a thoughtful gift.
– Next Steps
– Hang the frame on the wall or set it on a shelf.
– Swap in new photos when you want a fresh look.
@media(max-width:480px){
Recommended Products

GALLERY STYLE 4x6 PICTURE FRAME: Luna is a multi picture frame and photo collage frame that makes it easy for you to instantly create a custom photo collage showcasing 9 individual 4 x 6 inch photos

Capture Your Memories: From the faces of your loved ones to great times with friends and family get-togethers, this collage photo frame lets you display an array of wonderful moments. It features 12 frames, each perfectly sized for 4x6 photos
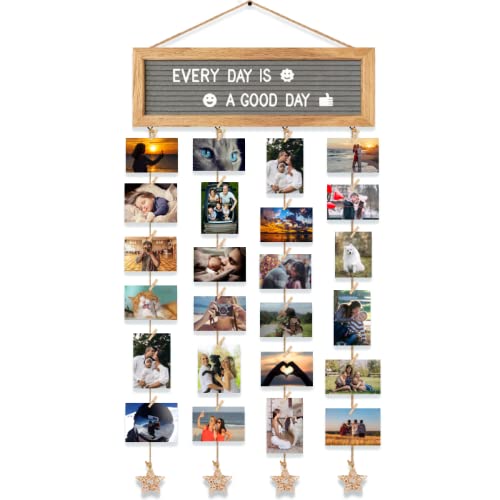
DIY CREATIVE PICTURE FRAMES COLLAGE SET- This hanging photo display comes with a felt letter board, pre-cut 340 letters in a cloth bag, 30 clips, and 4 hemp ropes with star-shaped rattan. Easily replace your favorite letters and symbols on the board, adjust the length of the hemp rope, and the clips for changing the photo, a simple and creative way of DIY decoration.
13. Stenciled Frame
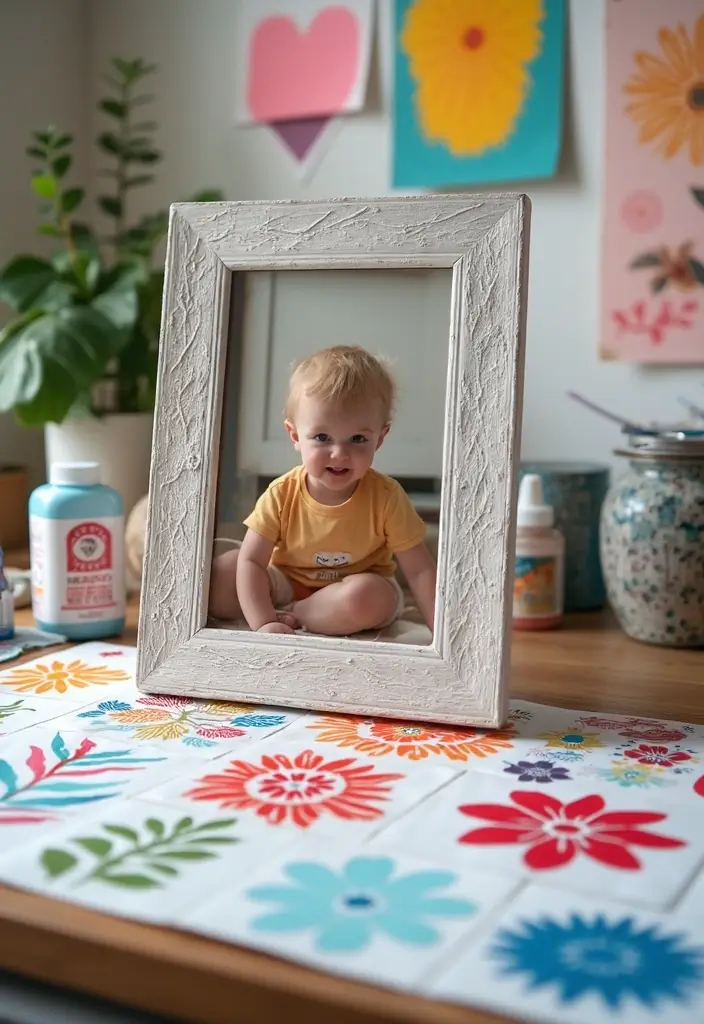
You want a frame that feels personal. A stenciled frame adds clean lines and your own style.
What you need
– Cardboard or plain wooden frame
– Stencils that fit your theme
– Paint or ink
– A small brush or sponge
– Tape or stencil adhesive
– Optional: clear sealant for protection
Here is how to do it
– Start with a clean frame. Wipe away dust so the design sits right.
– Pick a stencil pattern that matches your photo. Simpler shapes work best on small frames.
– Tape the stencil in place. Keep it flat so edges stay sharp.
– Tap paint onto the stencil. Use a light touch and avoid dragging the brush.
– Let the paint dry fully. If you see bleeds, wait and touch up later.
– Lift the stencil. If a line is off, fix small areas with a fine brush.
– Add a second color or a thin outline if you want depth. Finish with a sealant if you like.
Tips to try
– Layer colors for more depth.
– Use a contrasting color for the outline so the design pops.
– For special occasions, add a metallic or glitter edge.
– Keep extra stencils on hand for future frames.
Why this works
Stenciling lets you repeat a motif without painting freehand. It gives a neat look that fits many events, from birthdays to holidays.
Next steps
Gather your frame and a stencil. Try a simple pattern first, then experiment with colors. Share your finished piece and your photo inside to inspire others.
@media(max-width:480px){
@media (max-width: 600px) {
.normal-quiz-iframe { min-height: 570px !important; height: 570px !important; }
}
14. Mosaic Frame
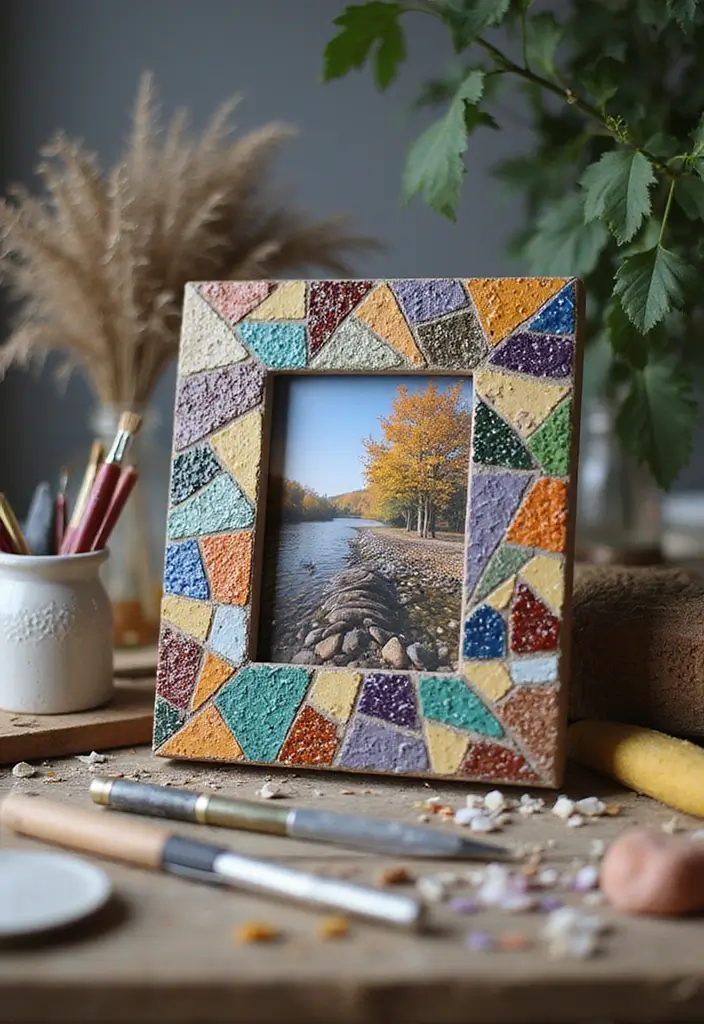
Here is why a mosaic frame fits your memory photos. It adds color and texture, and it feels handmade. You can reuse scraps you already have, which makes it friendly to any budget.
Materials Needed
– Cardboard or other sturdy base
– Mosaic materials: tiles, glass, or cut paper
– Glue
– Scissors
– Optional sealant for protection
Let’s break it down
1) Cut a base the photo size you want. Add a small lip to hold the image.
2) Plan the edge first. Place a few pieces along the border so the look stays tidy.
3) Glue piece by piece. Press firm and wipe away any glue splatters.
4) Fill gaps with small scraps. Let it dry.
5) Attach the photo and backing. Add a stand or a wall hanger if you like.
Tips to make it pop
– Choose a color family so the frame feels calm.
– Mix shiny glass with matte paper for depth.
– Work in small pockets to stay neat.
– Use tweezers for tiny pieces.
– Seal the surface if it will get lots of handling.
Variations and care
– Try a single color story, like all blues, for a serene look.
– Make a travel frame with mini scraps from your trips.
Next steps: gather scraps, pick a photo, and start placing pieces.
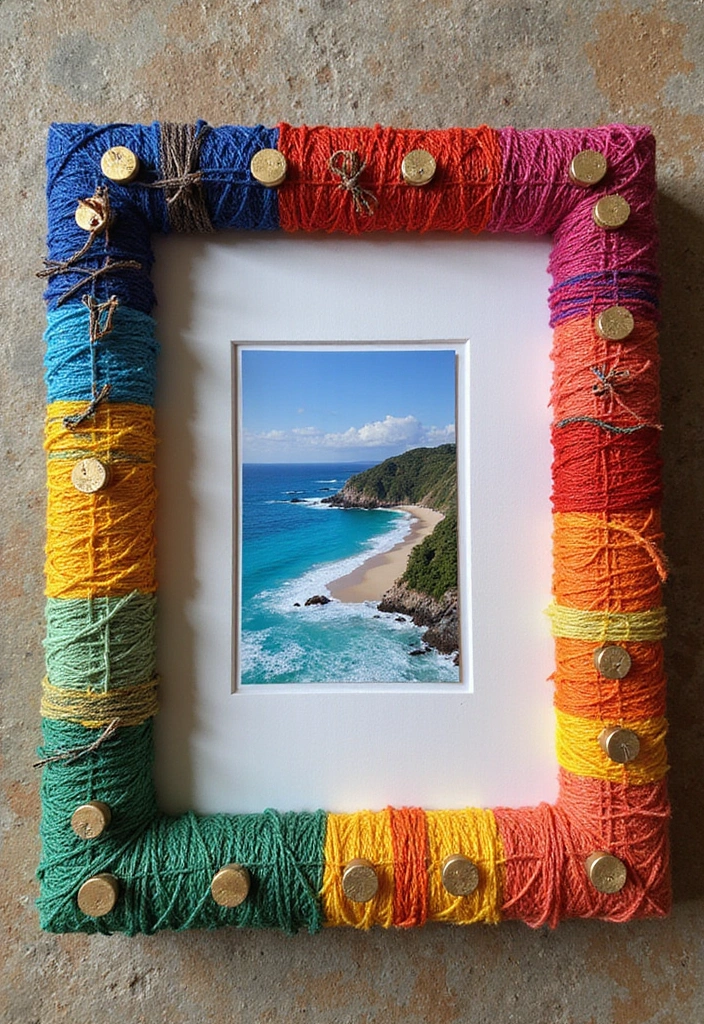
15. Twine Wrapped Frame

You want a frame that adds a natural touch to your photos. A twine wrapped frame does that job well. It looks simple, yet it adds warmth.
Materials Needed
– Cardboard frame (an old box works)
– Twine or jute
– Glue, preferably hot glue
– Embellishments: dried flowers, small trinkets, shells, feathers
How to make it
1) Ready your frame. Clean it and remove any sharp edges.
2) Start at a corner. Apply a dab of glue, then press the twine down.
3) Wrap with even tension. Work around the edges in a steady scroll.
4) Glue the twine as you go to hold it tight.
5) When you reach a corner, trim and tuck the ends.
6) Add your embellishments for hits of character. Let the glue dry.
Tips
– Use different twine textures. Hemp, jute, and cotton look varied.
– Mix light and dark strands for depth.
– Leave tiny gaps for a rustic vibe.
– This style shines with nature photos or wedding pictures.
Why it works
– It adds a soft, natural frame that suits outdoor shots.
– It pairs with earthy tones and simple outfits.
– It’s inexpensive and quick to finish.
Next steps
Try a mini version on a travel photo or a gift tag. Change up colors for seasonal vibes. Give it a try with a travel photo or a family portrait to see how the twine mood changes.
@media(max-width:480px){
16. Glitter Frame
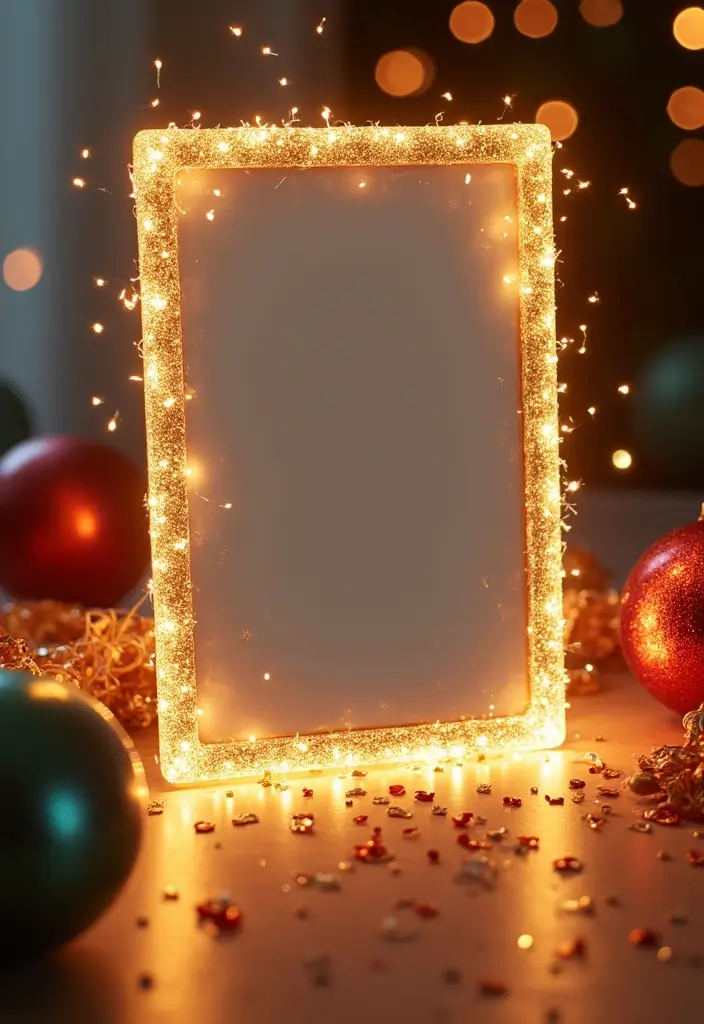
Want a photo frame that shines at a glance? A glitter frame adds sparkle to memories and is fun for kids and adults. The steps are simple, so you get shine without a big mess.
Materials You Need
– Cardboard frame or a sturdy backer from an old frame
– Glue (white school glue works well)
– Glitter in your favorite colors
– Newspaper or a drop cloth to catch spills
– Optional clear sealant to lock in sparkle
Steps to Make It
1. Protect your area with newspaper and place the frame.
2. Spread a thin line of glue along the outer edge.
3. Sprinkle glitter on the glue and press lightly.
4. Tap to remove excess glitter and let dry.
5. If you like extra hold, spray a clear sealant after it dries.
6. Choose a moment to set the seal.
Tips for a Great Look
– Use two or three glitter colors for a festive effect.
– Apply glitter in stages for a layered glow.
– Work over a tray to keep glitter off the table.
– This makes a nice party favor or gift.
Styling and Care
– Place the frame on a shelf or wall where light catches the glitter.
– Wipe softly with a dry cloth to avoid rubbing off loose sparkle.
– A spray sealant helps keep the glitter where it belongs.
It is great for a photo wall.
@media(max-width:480px){
17. Vintage Frame
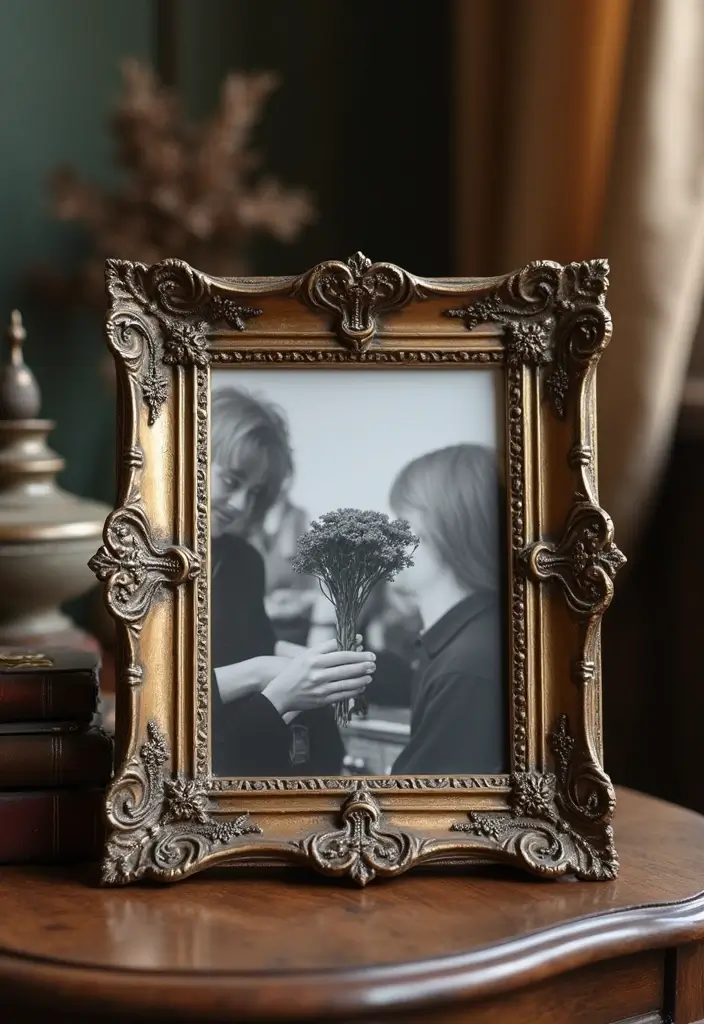
Want to give your photos a classic, timeless look. This vintage frame DIY adds charm to any picture.
Here is why this approach works. A worn edge and soft paint catch light gently and make your image feel older than it is.
– Materials needed: old wooden frame, paint in a soft color, fine sandpaper, and wax.
– Optional extras: a clean cloth and a small brush for touch ups.
Next steps:
– Clean the frame and remove any glass if needed.
– Lightly sand the surface to expose some wood grain.
– Paint with a soft color and let it dry.
– Distress the edges with light sanding for a worn feel.
– Apply wax, then buff until smooth.
Tips:
– If you lack an old frame, shop thrift stores. Pick a sturdy, simple design.
– Pair the finished frame with black and white photos for extra impact.
Next steps:
– Hang your frame where light rolls across it to highlight the texture.
@media(max-width:480px){
18. Geometric Frame
Here is why you might love a geometric frame. It looks modern and keeps your photos in the spotlight. You make it from simple scraps and still get a big style punch.
– Materials needed: Cardboard, scissors, glue, paint or markers. Optional: masking tape and a clear sealant.
– What you do: Cut smart shapes like triangles, squares, and circles from cardboard. Place them on a sturdy base and glue them flat or with a touch of lift for depth.
– Step-by-step: 1) Plan your layout on the base. 2) Glue pieces in place. 3) Add color with bold paint or keep a natural look with wood tones. 4) Seal with a clear coat if you want it to last.
– Design notes: This frame fits modern or minimalist rooms. Keep the background simple so shapes shout. Try a neutral base with bright shapes, or go all in with one bold color.
– Practical tips: Mix different shapes for a playful vibe. Use masking tape for clean edges. Reuse scraps to save money.
– Where to use: Mantel, shelf, or gallery wall. It’s light, easy to move, and you can swap photos as seasons change.
– Next steps: Gather scraps, sketch a plan, and start cutting. Have fun and make it yours. If you want a bigger look, widen the base or add extra layers. This frame stays light enough to hang with a simple photo hook. Now you are ready to display your memories in a chic, handmade piece.
@media(max-width:480px){
@media (max-width: 600px) {
.visual-quiz-iframe { min-height: 995px !important; height: 1100px !important; }
}
19. Seasonal Frame
Want a simple way to match your home to the season? A seasonal photo frame is a quick, fun update you can do in minutes.
Here is why it works. You swap a few decorations and a photo, then you’re done. The frame stays the same, and your mood and space change with the weather.
Materials you need
– Basic frame
– Seasonal decorations (leaves for fall, snowflakes for winter, flowers for spring, seashells for summer)
– Glue
– Optional: small magnets or removable adhesive for easy swap
Here is what to keep in mind. Choose decorations that don’t weigh the frame down. Use light glue that dries clear. Think about a simple color theme for the season to keep things coordinated.
How to set it up
1. Pick a frame you already own.
2. Decide on a season theme and lay out the decor first.
3. Glue the pieces to the frame. Start at the corners, then fill in gaps.
4. Slide in a seasonal photo or a nature picture behind the glass.
Next steps: switch the look when the season changes, and store the old decor so you can reuse it later.
Tips to keep it fresh
– Change decor with the calendar or personal favorites.
– Update the photo as needed to reflect the season.
– Use removable glue or magnets for quick swaps.
Seasonal insight: this setup works well for family photos that capture the season or for nature shots.
If you want a simple, inexpensive way to refresh your walls, try a seasonal frame. It keeps your decor alive all year long.
20. Macrame Frame

Want a frame that adds texture and a handmade vibe? A macrame photo frame gives memories a warm, tactile display on your wall.
Materials and setup
You need a few things: macrame cord, scissors, and a frame. A wooden frame works well for a natural look, or use a sturdy cardboard base for a quick project.
– Materials: macrame cord, scissors, frame
– Optional extras: beads, color
How to build
Here’s how to start. Pick a frame base. Choose a wide airy weave or a tight pattern. Cut enough cord to work with. Longer cords knot easier, but trim later. Tie a small loop at the top to anchor your work.
Knots and attachment
Make rows of knots across the width. Try square knots for a clean look. Add lark’s head knots to attach cords to the frame. For texture, weave in a second color or use thicker cords. When knotting feels done, trim the ends and secure.
Insert and display
Open the frame, slide in your photo, and fasten the back. Hang it on a wall or prop it on a shelf.
Tips
Mix knot styles for texture. Use natural colors to match boho decor or nature photos. Keep the fibers dry to slow wear.
Next steps
This DIY frame is affordable and fun to make. It brings a cozy, crafted touch to any room.
@media(max-width:480px){
21. Puzzle Piece Frame

Want a fresh, kid-friendly frame that uses up old puzzle pieces? The puzzle piece photo frame is a playful way to display memories. It adds color, texture, and a little story to any wall.
– Materials Needed: Old puzzle pieces, cardboard, glue. Scissors (optional), acrylic paint or markers (optional), clear sealant (optional).
– Steps to build:
1) Cut a simple cardboard frame that fits your photo size. A basic rectangle works fine.
2) Lay out puzzle pieces around the edge to plan the look. Mix colors and shapes for a lively border.
3) Glue the pieces in place. Start at one corner and work your way around. Let the glue dry completely.
4) Decide how you want the finish. You can paint the pieces before gluing for bold colors, or paint after for a softer look.
5) Mount your photo in the center. Use clear tape or a small backing board so the image stays secure.
6) Add a hanger or stand. A simple back strip helps it sit on a shelf or hang on a wall.
– Tips:
Choose puzzles with bright colors or interesting patterns to make the frame pop. Vary piece sizes to create texture. If you have many small pieces, fill gaps with tiny scraps for a fuller border.
– Why it works:
This frame is creative, easy, and eco-friendly. It makes a kid’s room feel lively and unique.
22. Twisted Paper Frame

Want a paper photo frame that looks creative and saves scrap paper at the same time? The twisted paper frame is a playful option you can finish in one afternoon.
What you get is a frame with texture and motion. Narrow strips of paper curl and weave around a cardboard base. The result is a bold, artsy backdrop for your photos.
Materials You Need
– Scrap paper
– Cardboard
– Glue
How to make it
1) Cut paper into even strips, about 1/4 to 1/2 inch wide and 8 to 12 inches long.
2) Twist each strip into a small spiral, loop, or wave. This gives you variety with minimal effort.
3) Glue the ends to a cardboard frame, building a loose network of twists across the front.
4) Layer different colors and patterns. Press firmly so the twists stay in place.
5) Attach your photo to the back or tuck it under the twists before the glue dries. Let it dry fully.
Tips for texture and color
– Mix matte, glossy, and tissue papers for contrast.
– Use a color scheme that matches your room or the photo vibe.
– Leave some gaps to let the photo show through in places.
Finally, this twisted paper frame works great for quirky art photos or memories you want to celebrate. Next steps: choose a photo, trim the backing, and mount it so your twisty frame can shine.
@media(max-width:480px){
23. Floral Frame
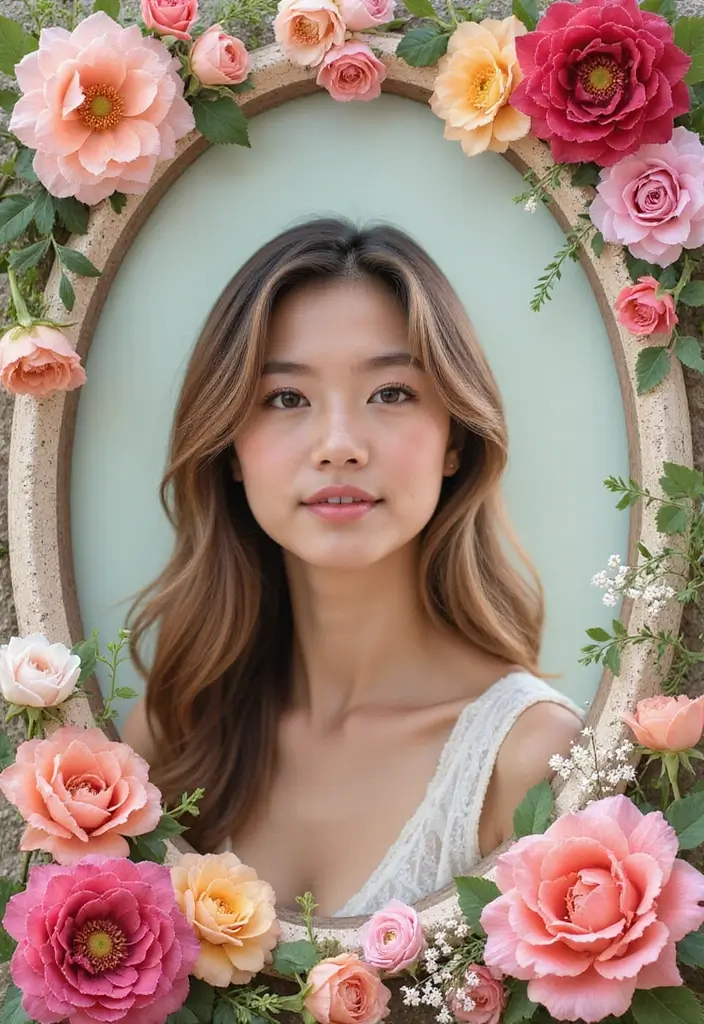
Want a frame that feels alive? A floral frame brings color, texture, and a quiet nature touch to your space.
You can use artificial blooms for a lasting look or pressed flowers for a gentle, delicate feel. This project works with wedding photos or nature memories.
Materials
– Basic frame
– Artificial flowers or pressed flowers
– Glue
Start by centering your frame.
Glue flowers around the edges.
Press and hold each bloom until it sticks.
Let the glue dry fully before you place the photo.
If the frame needs extra depth, tuck a few stems along the corners.
Tips
– Pick colors that match your room so it blends in.
– Mix bloom sizes for a layered effect.
– Try dried petals for a vintage vibe.
Why it helps
This frame highlights memories in a natural way.
It makes wedding photos or nature moments stand out.
Next steps
– Place your favorite photo in the frame.
– Change the look with season flowers.
@media(max-width:480px){
24. Fabric Scrap Frame
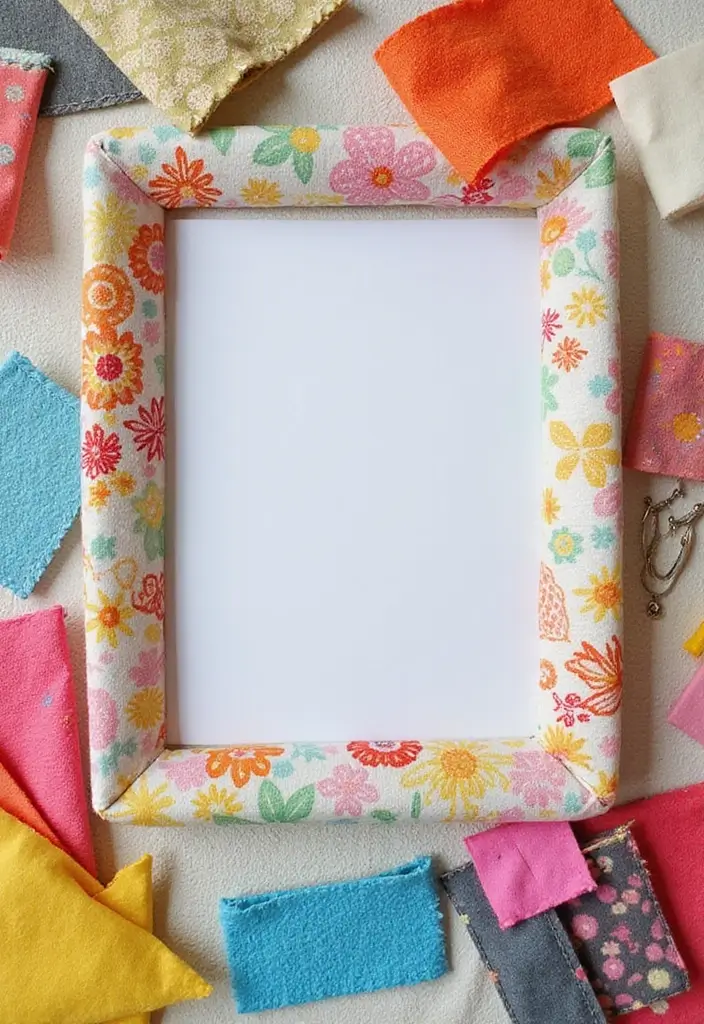
You want a frame that adds color to your photos without a big price tag. A fabric scrap frame fits that need. It uses leftover cloth and a simple cardboard base, and it stays light enough to move around.
Here is why it works. Each fabric piece adds texture and a playful mix of color. You control the look by choosing fabrics you love. You can swap scraps later for a fresh style.
Let’s break it down. Next steps.
Materials Needed
Fabric scraps for color and texture.
Cardboard as the frame base.
Glue to secure pieces.
Scissors, a ruler, and a pencil for shaping and measuring.
Steps to Build
1) Cut fabric into small shapes such as squares, circles, and triangles, using sharp scissors for clean edges.
2) Plan a balance of colors on the cardboard to keep the frame lively.
3) Glue each piece in place, pressing firmly and smoothing the edges so nothing peels.
4) Let the glue dry completely before adding the photo or a backer to keep the surface flat.
Tips to Sharpen the Look
Mix fabrics with different textures for depth.
Choose a color theme that matches your room.
Add tiny details like buttons or ribbon to small scraps.
Keep a light touch so the design feels intentional.
Display Ideas
Hang the frame in a kid’s room, along a hallway, or on a gallery wall. It makes a cheerful focal point.
25. String Art Frame
You want a frame that adds texture and charm. String art makes that easy. This project blends craft with art. You can create bold patterns that highlight your photos.
Materials Needed
– Wooden frame
– Nails
– String
Here is how to start
First, plan a simple shape. A star, circle, or grid helps. Then mark the nail spots along the frame edge. Hammer nails with steady taps. Leave space for the string to lie cleanly. Next, tie a starting knot and wrap string around the nails. Stretch the string tight to avoid sagging. Move from nail to nail to form lines and shapes. Finish by tying off the last strand and trimming excess string.
Tips for a bold look
– Use contrasting colors so the design pops.
– Try thin and thick lines for depth.
– Keep nails evenly spaced for clean geometry.
– Work in layers to create a subtle gradient.
Design ideas and style
– Go geometric for a modern room.
– Try a freeform web for a boho vibe.
– Pair a string art frame with a black-and-white photo for impact.
Next steps
This frame adds texture without big effort. It’s sturdy and easy to update with new strings. Your photos will stand out in a fresh, handmade frame. Grab a frame, plan a shape, and start tonight. Soon you will see your space glow.
@media(max-width:480px){
Recommended Products
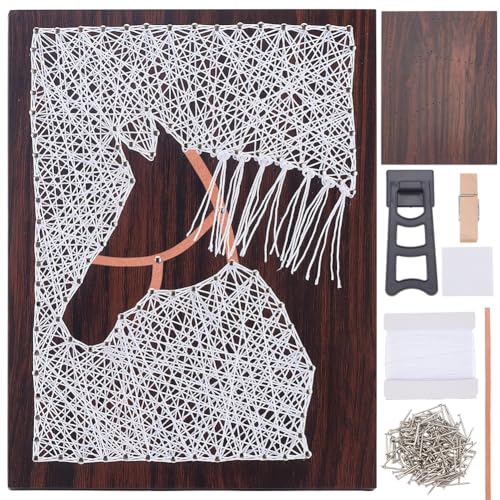
PACKAGE AND SIZE: You will receive a complete set of horse string art kit with all the accessories, including a wooden picture frame (20cm x 15cm) with a thickness of 0.9cm, plenty of white thread, 1 packet of nails, 1 wooden clamp, double sided adhesive tape and other tools, as well as a detailed instruction manual, to make sure that you can successfully complete the DIY crafts and enjoy the fun of DIY handmade creations

Creative Art Kit: Its body is a pre-punched board, you simply drive nails into the holes and wrap the wire around it. You can experience a sense of achievement and strart a new hobby.

[COMPLETE DIY NAIL STRING ART KIT]: Our string art kit includes display photo frames, shelves, a bag of nails, wooden clips, double-sided tape, and long enough thread. Through these things, you can make a panda string art painting by yourself.
26. Holiday Themed Frame

Holiday Themed Frame
Want a simple way to keep holiday memories on display? This project helps you switch decor with the seasons. Start with a plain frame and let the season guide your decorating. Add a few small elements that speak to the holiday, such as ornaments for Christmas, leaves for Thanksgiving, or bunnies for Easter. Keep the overall look clean so the photo remains the star.
– Materials Needed: Basic frame, holiday decorations, craft glue.
– Step-by-step: 1) Choose a frame that fits your photo. 2) Glue on a small set of seasonal pieces. 3) Insert your memory and hang.
– Storage Tip: Put the seasonal pieces in a labeled box so you can swap them in a snap year after year.
– Design tip: Keep the theme cohesive by sticking to two or three colors that match your photos.
– Festive Insight: This frame works well for holiday family photos or snapshots from gatherings. It adds warmth without crowding the page.
– Extra idea: Try a Halloween pumpkin, a spring bloom, or a summer motif to expand the theme.
Next steps: Make it a small tradition. Each season, switch the pieces, snap a new photo, and watch your wall evolve with your family. Best of all, it is fast to change and fits any room.
@media(max-width:480px){
27. Personal Photo Frame
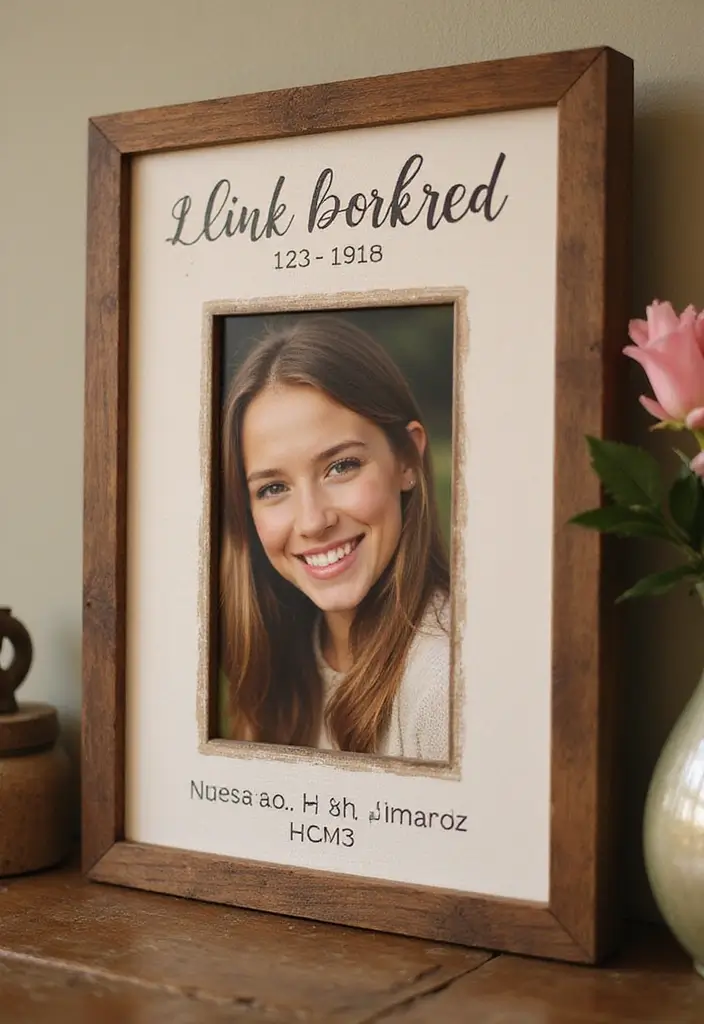
You want a photo frame that tells your story. A personal photo frame can do that. With a few simple supplies, you turn a plain frame into a keepsake.
Materials
– Basic frame, optionally with glass you can take out to paint the back
– Stencils or stickers for names, dates, or quotes
– Acrylic paints in 2–3 colors
– Paintbrushes, a pencil, a ruler, and a clear sealant
Steps
1. Pick a memory. Decide what to show: names, a date, a line you love.
2. Prep the frame. Clean it well. If you paint the back, remove the glass first and roughen the surface a touch.
3. Plan your design. Place stencils, mark spacing, and write your words lightly with a pencil.
4. Paint carefully. Apply the main color for letters and a faint shade for accents. Let every layer dry before adding more.
5. Seal and finish. A clear top coat protects your work. Reassemble with your photo and hang it up.
Tips
– Choose quotes that spark the memory you want to share.
– Check spacing on a scrap piece of paper before painting.
– This simple frame makes a warm gift for a loved one.
Your photo goes in, and you hang it up. A frame like this keeps your memories close. Everywhere you go.
@media(max-width:480px){
Recommended Products

Package Include: Come with 5pcs of blank 6’’x8’’ photo frames with stand, 2 sets of color paints (8 colors, 2.5ml each), 1set paint brushes, 80pcs Hearts Stars EVA Stickers, will maximize kid's fun and interest.

Detailed Size: The wooden picture frame is 7.44" x 5.5" in outer size and 5.5" x 3.54" in inner size, suitable for photos or cards with a length of 5.5" to 6.29" and a width of 3.54" to 4.33"

Value package: you will receive 12 pack DIY wood picture frames, each blank unfinished wooden frames outer size measures 7.5 x 5.5 inch, and the inner frame measures 5.5 x 3.5 inch, a proper size to hold your many photos, enough to meet a variety of photo frame decorative need
28. Interactive Photo Frame
Here’s a frame idea that stays fresh. You want a display you can update in seconds. An interactive frame gives you that power.
Materials
– A basic frame
– Clips or a small hanging system
– Optional cork board backing or string with mini clothespins
How to build
1) Attach clips on the frame’s inside edge or on a small strip behind it.
2) For a bulletin-board vibe, glue a cork panel to the backing and pin photos with push pins.
3) Or run a thin line across the frame and clip photos with tiny clothespins.
How to use
– Choose a memory from a trip or event.
– Swap it in a few seconds when you want a new look.
– Do a weekly rotation to keep the display lively.
Tips
– A bulletin board style makes swaps quick.
– Store photos in a labeled pouch so you can grab fresh ones fast.
– Pick a neutral frame color to fit any room.
Creative ideas
– Make a rotating gallery for kid art and school pics.
– Add seasonal paper behind the photos to change the mood.
Benefits
– Keeps memories visible without extra clutter.
– Low-cost and easy to maintain.
Next steps
– Pick a frame size, gather supplies, and set swap schedule.
Conclusion

These 28 paper photo frame DIY ideas are full of creativity and resourcefulness, perfect for anyone wanting to capture memories beautifully.
Whether you’re crafting with kids or looking for a personalized gift, there’s something here for everyone. Dive into these fun projects and let your imagination run wild with recycled materials!
Note: We aim to provide accurate product links, but some may occasionally expire or become unavailable. If this happens, please search directly on Amazon for the product or a suitable alternative.
This post contains Amazon affiliate links, meaning I may earn a small commission if you purchase through my links, at no extra cost to you.
Related Topics
paper photo frame diy
upcycled crafts
handmade decor
creative gifts
kids craft projects
easy DIY
personalized memories
seasonal decor
recycled materials
budget friendly
colorful frames
interactive displays