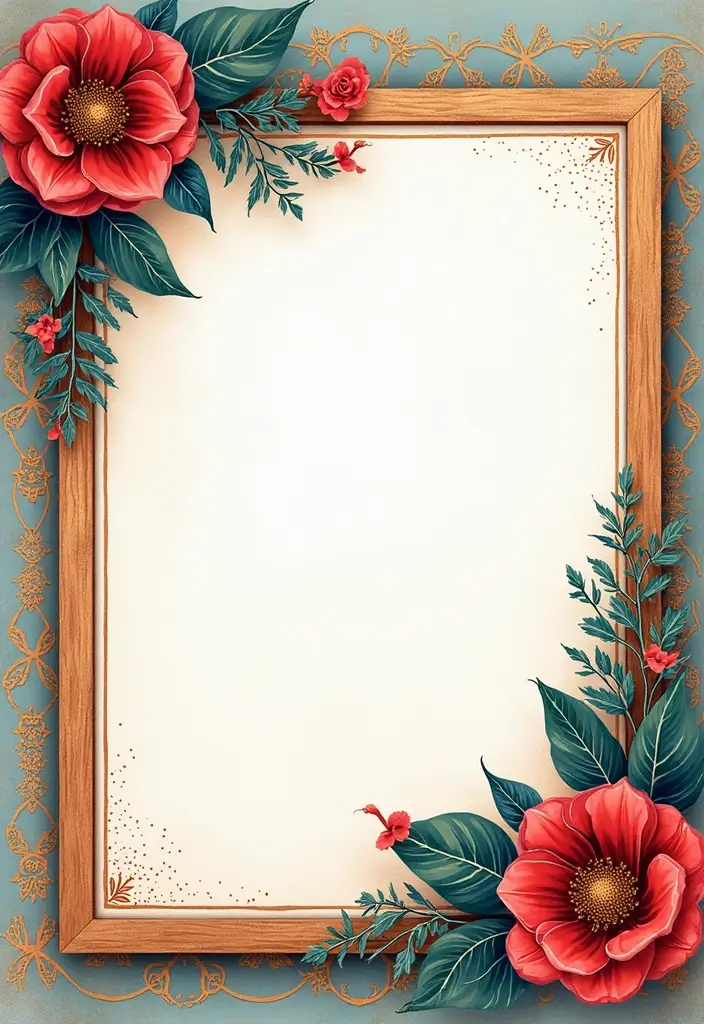
Here is why I made this post. Simple frames can feel plain and forgettable. I was decorating a shelf and wanted a touch that felt like me. Paper frame making lets you add a personal spark with just a few scraps, some glue, and a steady hand.
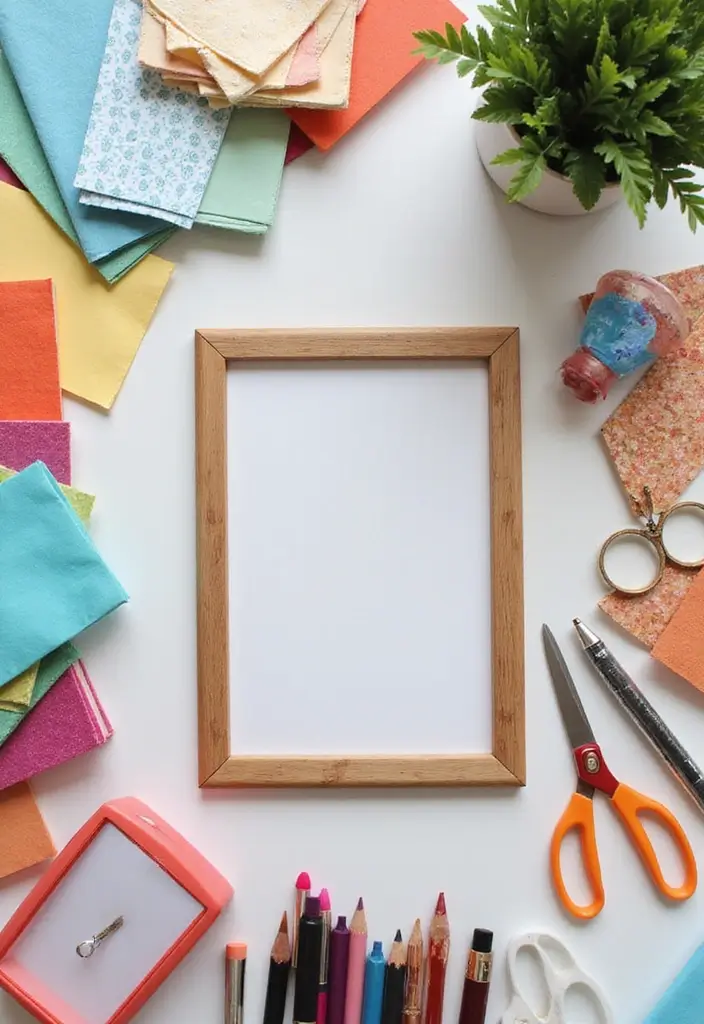
If you love quick crafts, budget decor, or gifts that feel thoughtful, this one is for you. Whether you are new to making things or you like easy weekend projects, you will find ideas that fit your pace and space. This is for people who want to celebrate memories and small details in a real, doable way.
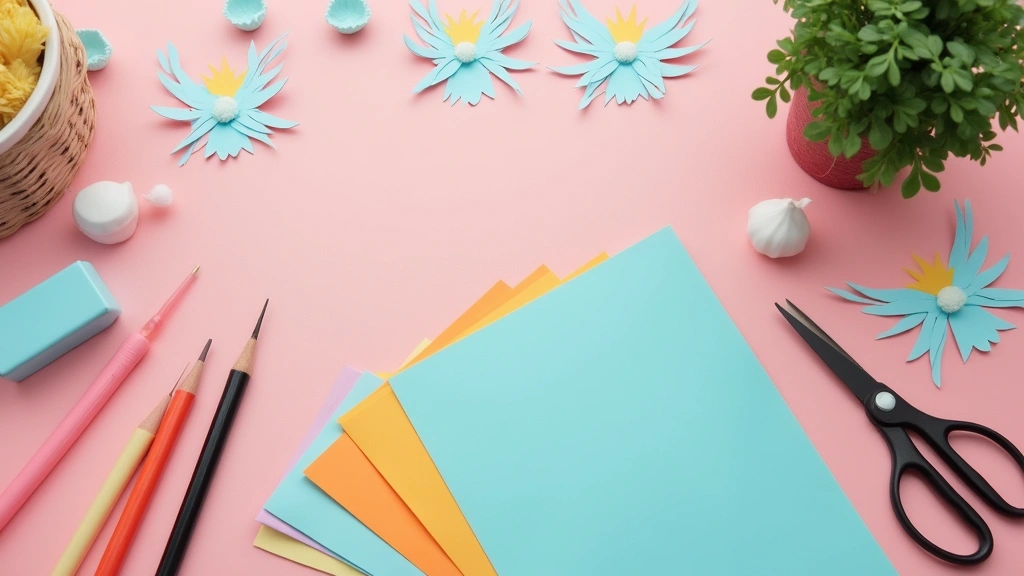
I pulled together 27 paper frame making DIY projects for personalized touches. Each idea comes with practical tips and simple steps you can follow. You will see options that are clean and modern, warm and cozy, or playful and bold. The goal is to give you a toolbox you can reach for when you want to refresh a wall or desk fast.
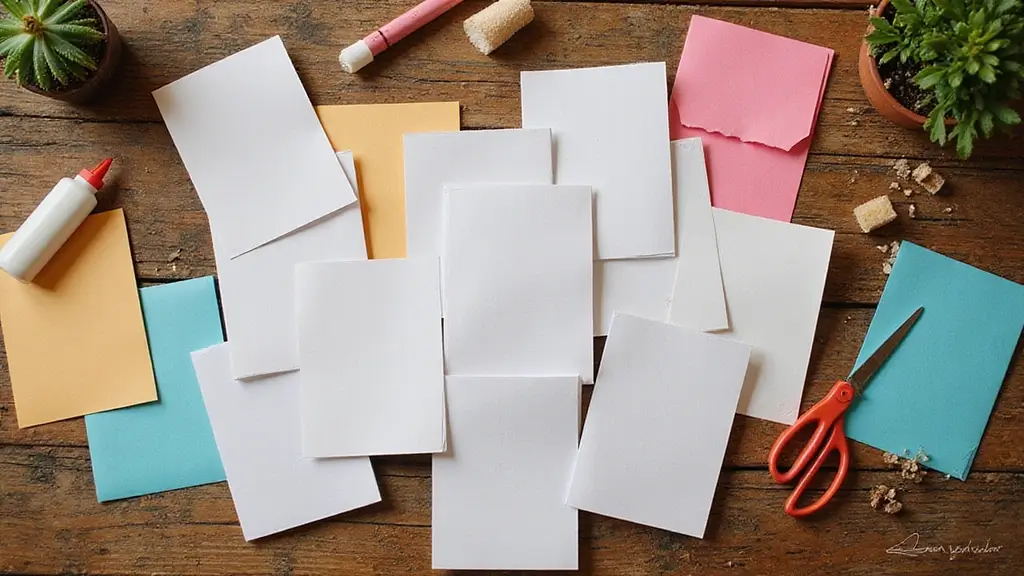
Here is what you will get. Clear, bite sized steps for every project. Materials lists that use items you likely already have. Tweaks to tailor the look to your color scheme, home style, or a gift idea. The projects cover framing photos, postcards, pressed leaves, or tiny handmade art.
Keep in mind that not every idea fits every space. Some frames look best with a photo, others with a small art print or a piece of paper art. Most projects take a short session to finish; a few might stretch into a cozy afternoon. You can mix and match to build a wall collage or a memory garland.
Next steps are easy. Pick one idea, grab your materials, and start small. As you go, adjust colors, textures, and sizes to fit your space. If you try something, tell me how it went or share a photo.
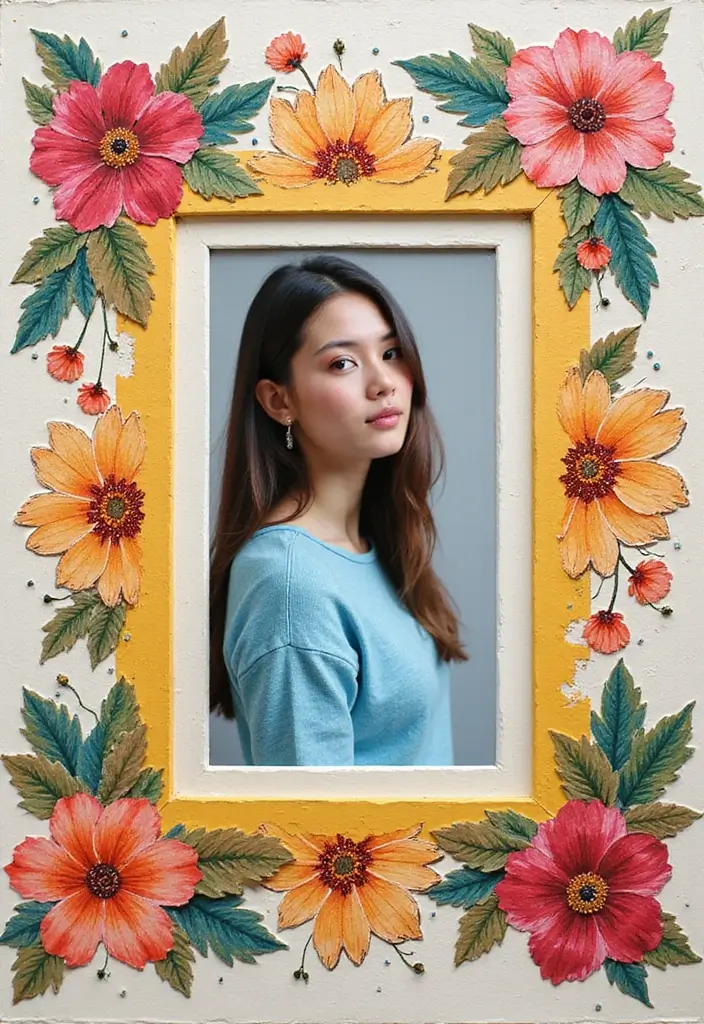
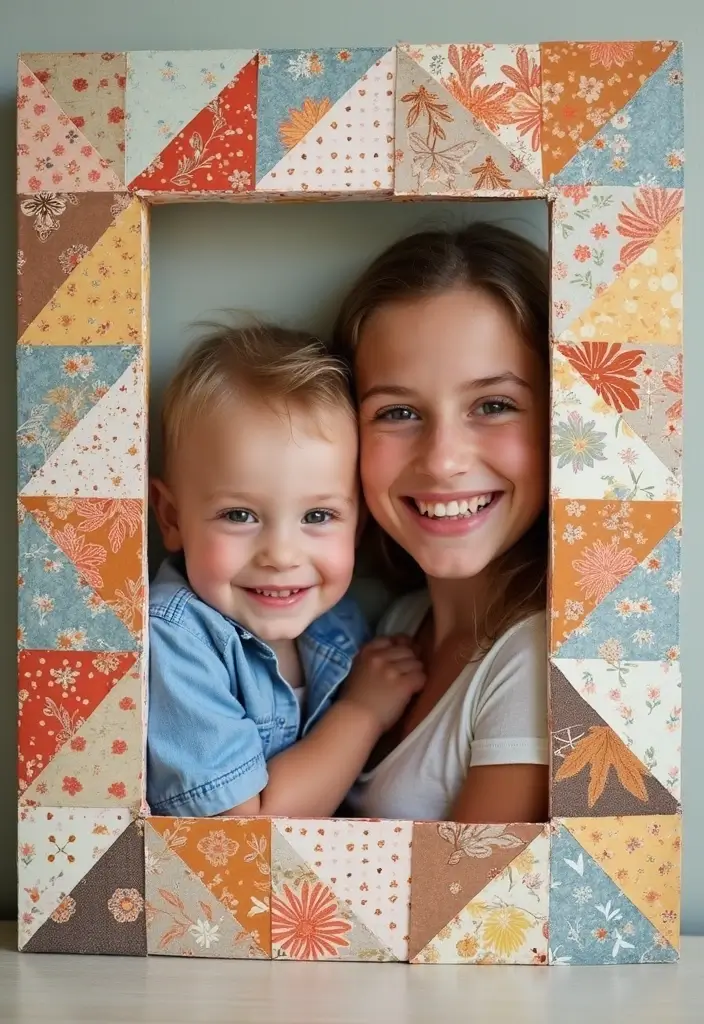
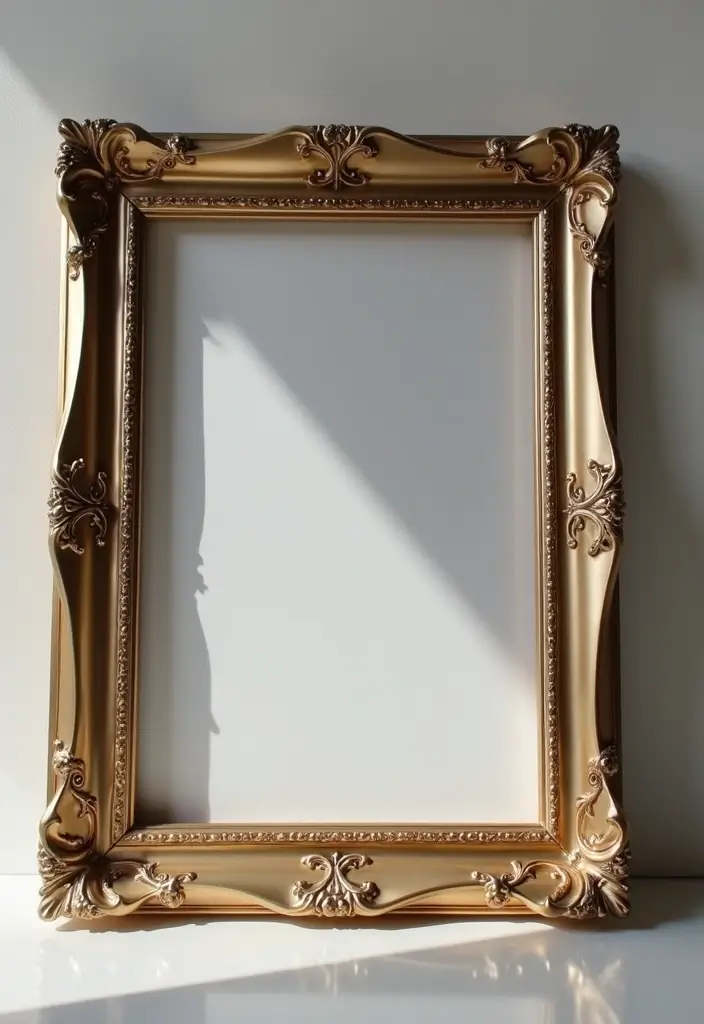
1. Vintage Floral Paper Frame

Want a warm, old‑time feeling for your photos? A vintage floral paper frame can give it to you with simple scraps. You grab a plain frame and pages from an old book or a colorful magazine. The result is a frame that hugs the photo with soft flowers along the edge. Here is why you should try this: the page colors set the mood and the paper flowers add texture you can see and touch. Next steps.
Materials
– Old book pages or magazines with gentle illustrations
– A plain frame you already own
– Scissors and glue
– Pencil and ruler for measuring
– Scrap paper for making flowers
Steps
– Pick a frame and a page that match your photo
– Cut a border from the page so the edge sits neatly around the frame opening
– Glue the border to the front of the frame and trim any excess
– Cut simple paper flowers from colored scraps
– Glue the flowers along the edge, placing larger blooms at corners and smaller ones along sides
– Slide in your photo and hang the finished piece
This approach gives a cozy, vintage vibe. It works for family shots, art prints, or small keepsakes. It’s easy, affordable, and ready to do several frames at once.
@media (max-width: 600px) {
.normal-quiz-iframe { min-height: 570px !important; height: 570px !important; }
}
Recommended Products

COMPLETE SCRAPBOOK KIT: Includes 4 themed packs with 120 sheets of floral, gingham, and animal scrapbook paper, 40 embossed scrapbook window frames, and 20 animal & lifestyle scrapbooking stickers—ideal for junk journals, scrapbooking, and card makingplanners


【VARIOUS NATURAL COLLECTION SERIES】Package Size: 4.9 inch *6.9 inch,The vintage papers and stickers set total 200 pcs,Includes: 80 pcs of washi stickers(2 pieces of each pattern) + 120sheets scrapbook decoration paper(2 pieces of each pattern)
2. Geometric Pattern Frame

Geometric pattern frames add a clean, modern vibe to any wall. You can reuse patterned paper or make your own designs with markers and stencils. Cut shapes into triangles, squares, and circles. Then you arrange them around a simple frame base.
Materials
– Frame base and plain or patterned paper
– Markers, stencils, scissors, rulers
– Strong glue or double-stick tape
– Optional clear sealant for durability
Steps
– Plan your layout with a mix of shapes and sizes.
– Cut out triangles, squares, and circles to fit your frame.
– Lay the pieces on the base without glue to check the look.
– Glue pieces in place, one by one, pressing firmly so they don’t peel.
– Let the glue dry, then add a light coat of sealant if you want more shine or protection.
Design tips
– Try bright colors for a bold statement or a monochrome palette for chic restraint.
– Layer shapes to create depth and movement.
– Keep some negative space around edges to echo the frame.
– Align edges for a neat, professional finish.
Why this works
– It offers a custom look without buying new art.
– It fits modern and minimal spaces and holds up well with light framing.
– It’s easy to customize for seasons or moods.
Plus, it takes just an afternoon to complete. Your space will feel personal and ready for guests.
@media(max-width:480px){
3. Burlap and Paper Mix Frame
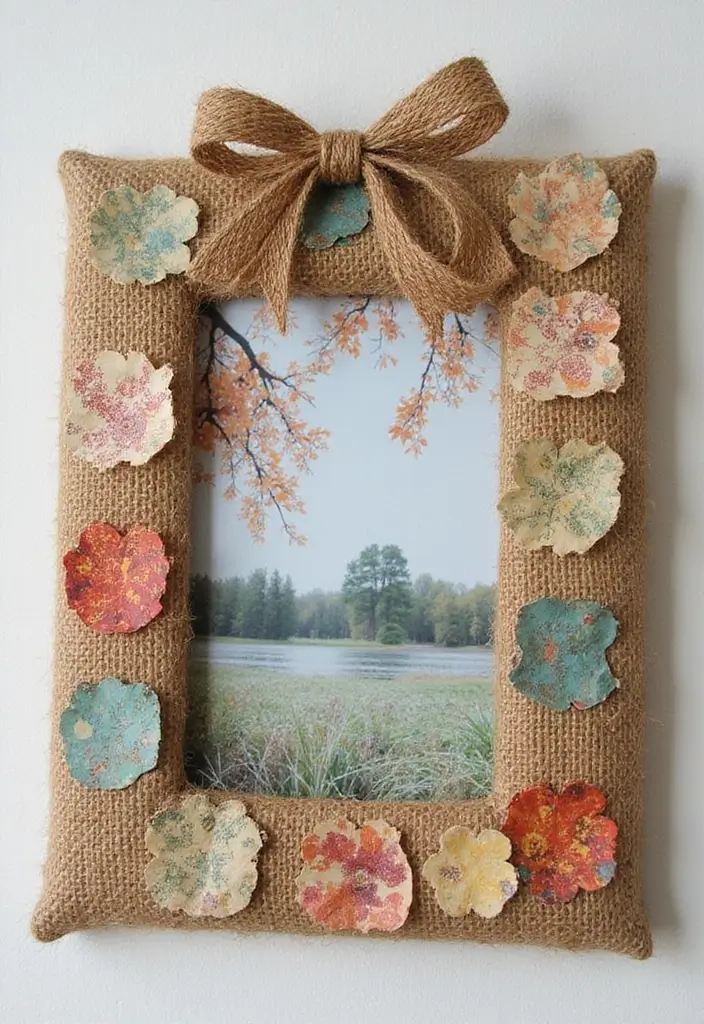
What you’ll create
Here is why this Burlap and Paper Mix Frame works for your space. Burlap adds warmth. Paper brings color and life. The combo feels cozy and artsy at once.
– Start with a wooden frame. Cut burlap a touch larger and wrap the frame. Glue the edges secure and smooth.
– Layer simple paper cutouts on the burlap. Try leaves, circles, or stripes. Press flat so they stick well.
– Choose warm colors that pop against the tan burlap. Think burnt orange, brick red, mustard, or forest green.
– Glue every piece down. Let the frame dry before you add photos.
– Add a jute twine bow for a rustic finish. Tie it and glue it to a corner or center.
This frame works well for wedding photos or nature art. It looks great in a kitchen, living room, or entry hall. Swap in seasonal papers to refresh the look. For a cleaner style, trim pieces evenly and keep gaps even.
Next steps: test this idea on a small frame first, then try a larger one. You get a sturdy, warm frame with little effort.
@media(max-width:480px){
Recommended Products

High quality kraft paper set: 30 pieces frames, 30 pieces mini wooden clips, 3 pieces hemp rope

Stylish & Versatile: Decorate any space with these 30 elegant Brown cardboard frames, perfect for displaying your favorite 4x6 inch photos in homes, parties, or offices,you can hang it on anywhere.

Novelty Bank's paper photo frames are simple designed, but will set your pictures off to advantage
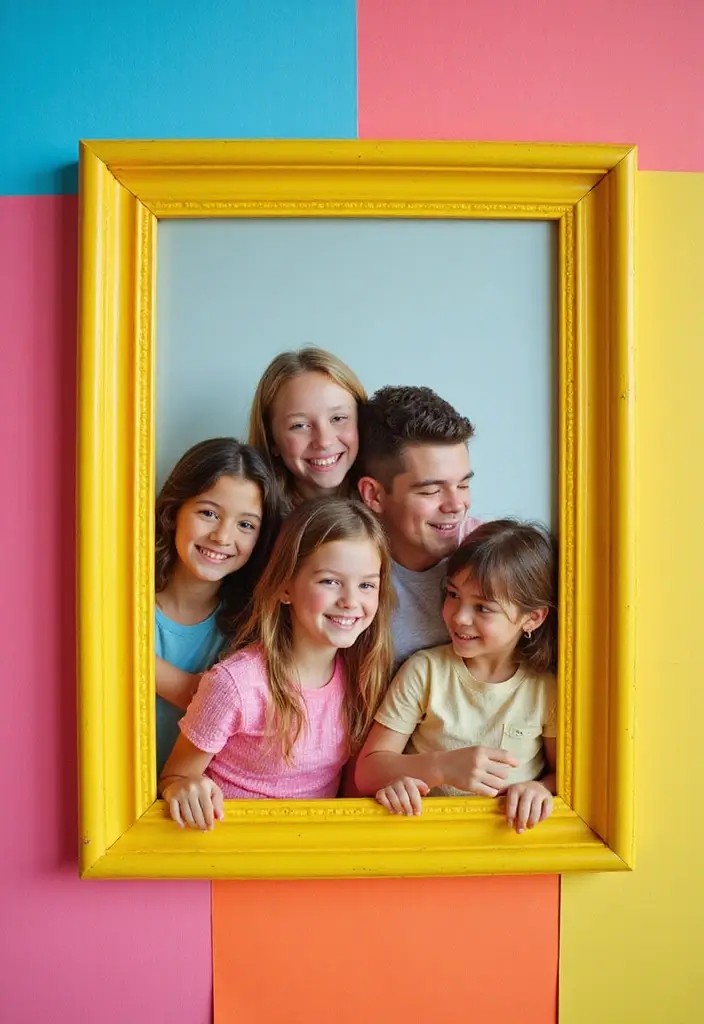
4. Kids’ Artwork Frame
Want to celebrate your child’s art without clutter? Turn their own drawings into a bright, ready-to-hang frame. It feels personal and can be a thoughtful gift too.
Here is how to do it:
– Choose 3 to 5 bold pieces. Look for colors that light up the room and make you smile.
– Cut them into a frame shape that fits the art. Trim a border from each piece so the border surrounds the image you want to show. The result is a colorful frame made from their work.
– Mount and swap with ease. Use a sturdy backing like thick cardboard. Place the artwork in the frame and secure the border with double-sided tape. The tape lets you switch in new art whenever your child creates a fresh masterpiece.
– Optional tip: a clear protective sheet keeps colors bright and the display tidy over time.
– Display anywhere. Hang it on the wall, set it on a shelf, or give it as a personalized gift. A frame born from their art adds joy to any room.
Next steps: keep a small pile of favorite drawings ready. When you want a new look, swap in the newest piece. This keeps memories fresh and your space lively.
Recommended Products
【180°Front-Open Design】Kids' art frames are designed with a magnetic closure system and a 180º opening design, making it easy and safe to swap out artwork without damaging either the frame or the masterpiece inside. You can open the frame directly to replace the artwork without taking it off the wall. The front-opening design adds convenience, especially for families who frequently update their displays, providing a solution that’s both functional and visually appealing
Turn every drawing, doodle, and masterpiece into a gallery-worthy showcase with our frames for kids' artwork. Matted for 8.5x11 or fits 10x12.5 without the mat (8x10.5 display area). Sleek 2" molding adds sophistication to your child’s artistry.

Turn every drawing, doodle, and masterpiece into a gallery-worthy showcase with our frames for kids' artwork. Matted for 8.5x11 or fits 10x12.5 without the mat (8x10.5 display area). Sleek 2" molding adds sophistication to your child’s artistry.
5. Recycled Cardboard Frame
Want a quick, low-cost frame that is kind to the planet? Turn thin cardboard into a stylish display for photos. It cuts waste and adds character to any wall. This simple DIY fits any room. It stays light and easy to hang.
Here’s how you do it:
– Measure your photo to know the frame size.
– Cut the cardboard to that size with a ruler and a sharp knife.
– Cover the front with colorful washi tape or leftover wrapping paper.
– Layer the tape in different directions for texture.
– Decide how to stand or hang it. For a stand, glue a small cardboard easel on the back.
– For wall mounting, punch holes and add a string, or tape a simple hanger.
Tips
– Use two cardboard pieces back to back for extra strength.
– Trim edges with a border strip of tape.
– If you swap photos often, leave the back easy to open.
– Mind humidity; cardboard can warp in damp rooms.
Why you’ll love it
Eco-friendly, budget-friendly, and fully customizable. Mix colors, sizes, and styles to match any photo. It also makes a great gift frame and a seasonal display. You can swap art anytime. No glue is needed for many setups. Try different color tapes to match seasons.
6. Fabric and Paper Frame
Want a frame that tells a story? This Fabric and Paper Frame blends soft texture with bold color to hold your memories. You pick fabric scraps that remind you of moments, then press them onto a sturdy cardboard backing. A patterned paper edge finishes the look.
Materials
– Fabric scraps that spark a memory
– Cardboard backing cut to your photo size
– Patterned paper for the edge
– Glue gun or strong craft glue
– Scissors
– Embellishments like buttons, ribbons, or lace
Steps
1. Cut the backing to the photo size you want.
2. Attach the fabric to the cardboard with a steady bead of glue.
3. Smooth the fabric, trimming any loose edges.
4. Adhere patterned paper around the edges to frame the fabric. Press flat.
5. Add small embellishments for extra flair.
6. Secure a photo to the back and set the frame on a shelf or hang it.
Tips
– Mix textures for depth: soft fabric with smooth paper works well.
– Choose colors that match your room or the photo mood.
– For baby pics, go with light fabrics and tiny accents.
– Want a cleaner look? Add a slim paper inner border.
Here’s how to use it: try this with travel photos or a favorite quote page. This frame makes memories feel warm on any wall.
7. Lattice Design Frame
Here is a timeless DIY frame idea for your photos. A lattice design frame adds a classic touch to any room.
Here is why it works: the grid keeps things tidy, the layered strips add texture, and the photo sits in the center with emphasis.
What you need
– Solid paper backing to fit your frame
– Thin paper strips in colors you like
– White glue or craft glue
– Scissors or a craft knife
– A ruler and pencil
– A photo you want to show
– Optional sealant for a shine
How to build it
1) Prepare the backing, keeping it flat and clean.
2) Cut narrow strips about 3 to 5 mm wide.
3) Lay the first layer as a vertical grid. Glue them in place.
4) Add a second layer across to make a lattice. Let strips cross for depth.
5) Center your photo and secure the edges with glue.
6) Try a color touch or stick to a monochrome look.
Here is a tip for even spacing: mark light pencil lines with the ruler so gaps stay even.
Next steps: press the frame flat and let it dry completely. Trim any overhangs.
This lattice frame works in formal spaces or as a bold statement piece in any room.
Give it a try this weekend.
8. Seasonal Decor Frame
Seasonal Decor Frame
You want a frame you can change with the seasons. A rotating decor frame makes that quick and fun.
– Build a simple, lightweight frame. A 5×7 or 8×10 size is easy to swap.
– Create removable decorations: leaves for fall, snowflakes for winter, flowers for spring, sun shapes for summer.
– Use light materials like paper, cardstock, or thin felt to keep updates fast.
– Attach with removable adhesives. Try dots or putty that lifts clean.
– Store the pieces in a labeled bag or folder so you can grab and go.
– Plan color sets for each season. Match mood with the season and keep it steady.
Style tips: add a thin mat or border to make the scene pop without crowding.
If you want more texture, layer vellum for snow or a metallic accent for sun.
This frame stays fresh all year with little work and cost.
Ready to start? Gather paper, a frame, and dots. Make fall leaves first, then rotate as the year turns.
Storage and care help your frame last. Keep decorations flat in a folder away from moisture. Put the frame out of direct sunlight to slow fading. With these steps, you switch styles in minutes.
Enjoy updating it through the year.
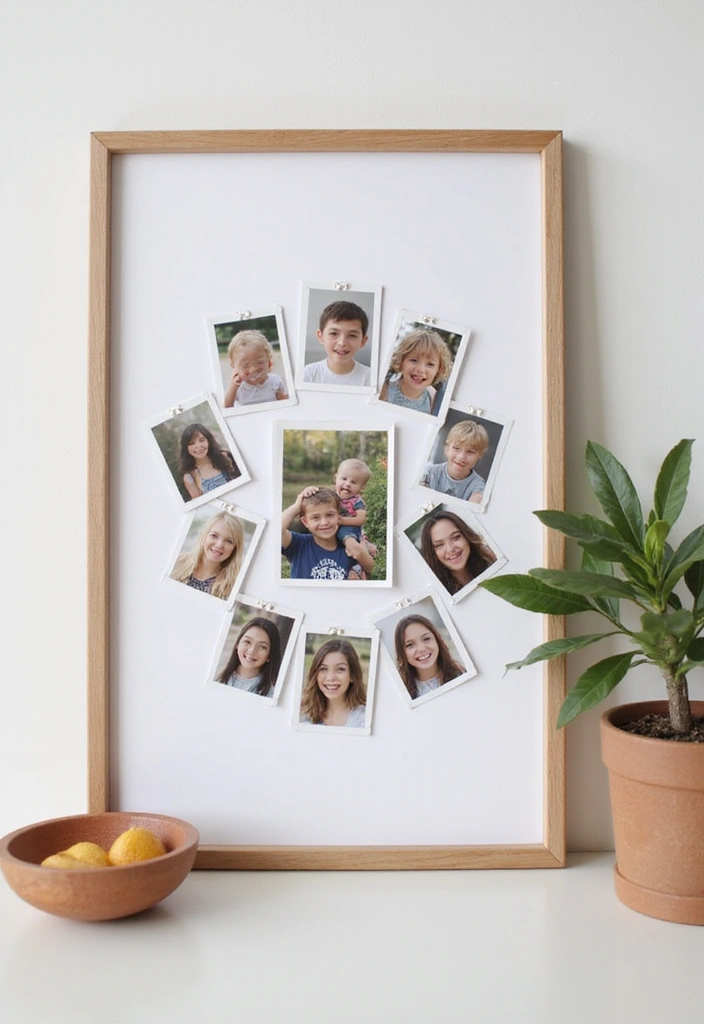
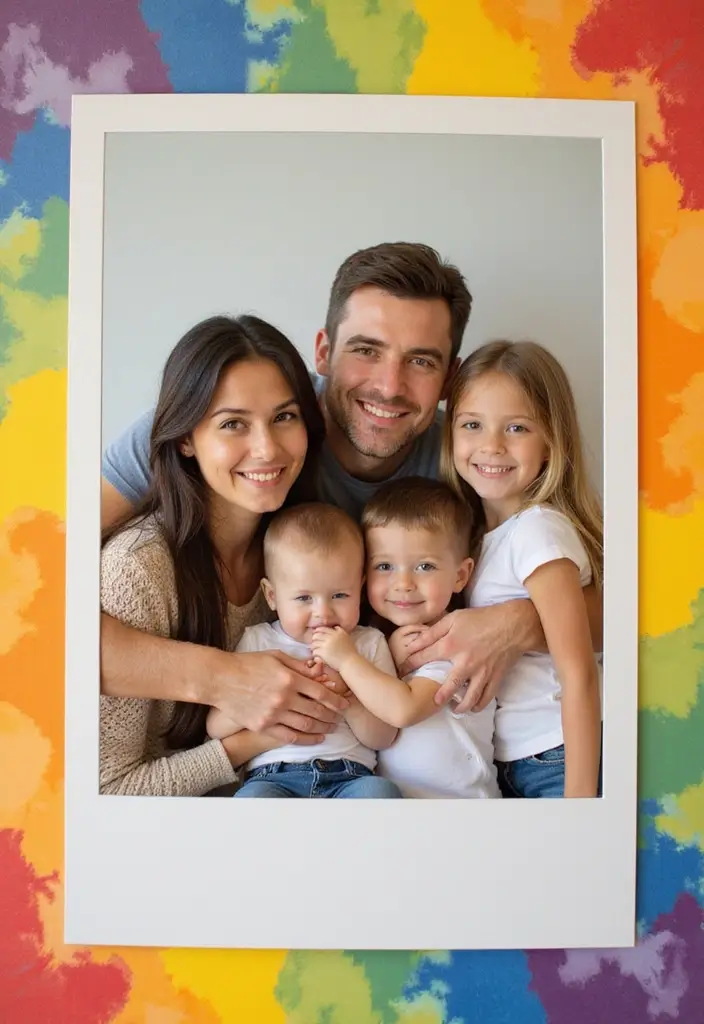
9. Photo Collage Frame

Can’t pick just one photo? A collage frame lets you show several memories at once. This DIY photo collage frame uses simple paper and glue to bring many images together in one display. Here is why this works.
– Materials you’ll need include a backing board, colored or patterned paper, scissors, glue, a ruler, a pencil, photos, and optional embellishments.
– Plan the layout by laying out the photos on the board before glue to find an interesting mix of sizes.
– Arrange sizes and spacing by using different paper sizes and keeping even gaps for a tidy look.
– Add texture with small touches like washi tape, stickers, or buttons on a few frames.
– Assemble and finish by gluing the pieces in place and letting them dry.
When you hang this collage, you create a single piece that holds many memories. It’s a practical, friendly way to refresh a wall or shelf. Place it where you can see it daily.
@media(max-width:480px){
10. Layered Paper Frame

You want depth in a plain frame. A layered paper frame adds depth and a subtle 3D look. It adds texture and a fresh feel to your photos.
Here is why it works. Stacked sheets throw tiny shadows. Those shadows help your photo stand out. Color shifts meet at new angles, creating visual interest.
Here is how you can make one.
– Materials: Papers with different weights, a sharp craft knife, a ruler, and strong glue or tape.
– Cut shapes: Cut several frame outlines in different sizes to build the layers.
– Assemble: Stack the pieces and glue them, keeping centers aligned so it stays neat.
– Finish: Add your photo on the top layer or place a mat behind the view. Frame the piece in a simple frame so the layers shine.
Design ideas to try
– Mix dark and light tones from the same family for depth.
– Leave a small gap between layers for a soft border.
– Try bold contrasts, like white with black or soft pastels with one bright layer.
Care and tips
– Use fresh glue and press flat until dry.
– Trim edges neatly to keep clean lines.
Next steps
This project can brighten a wall or desk. Start with one small frame and build a mini gallery over time.
@media(max-width:480px){
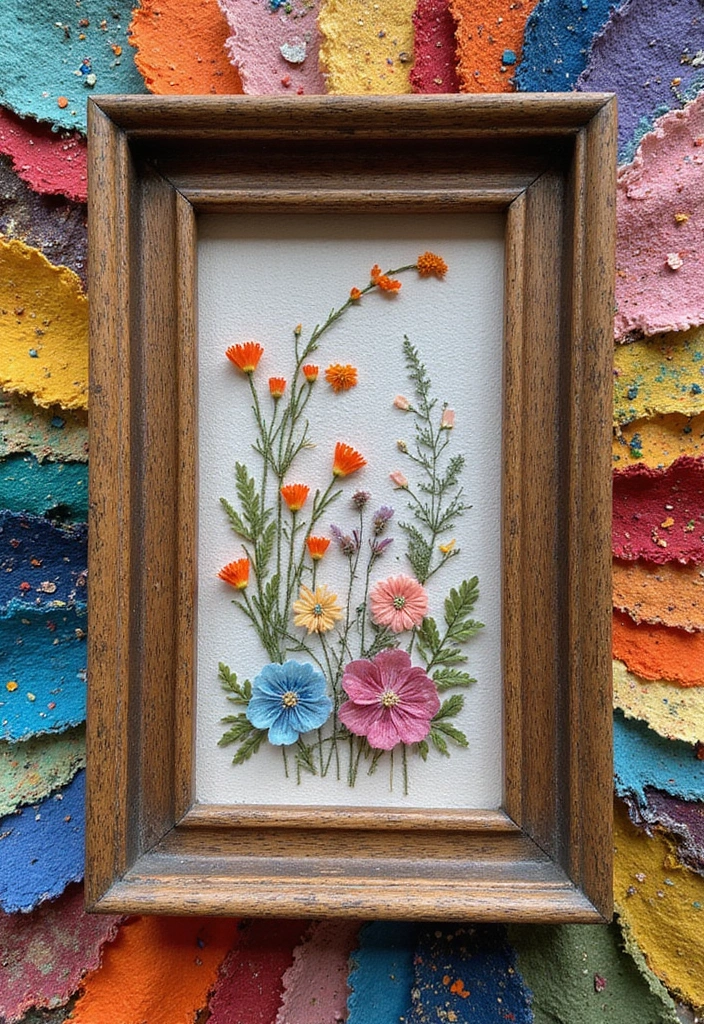
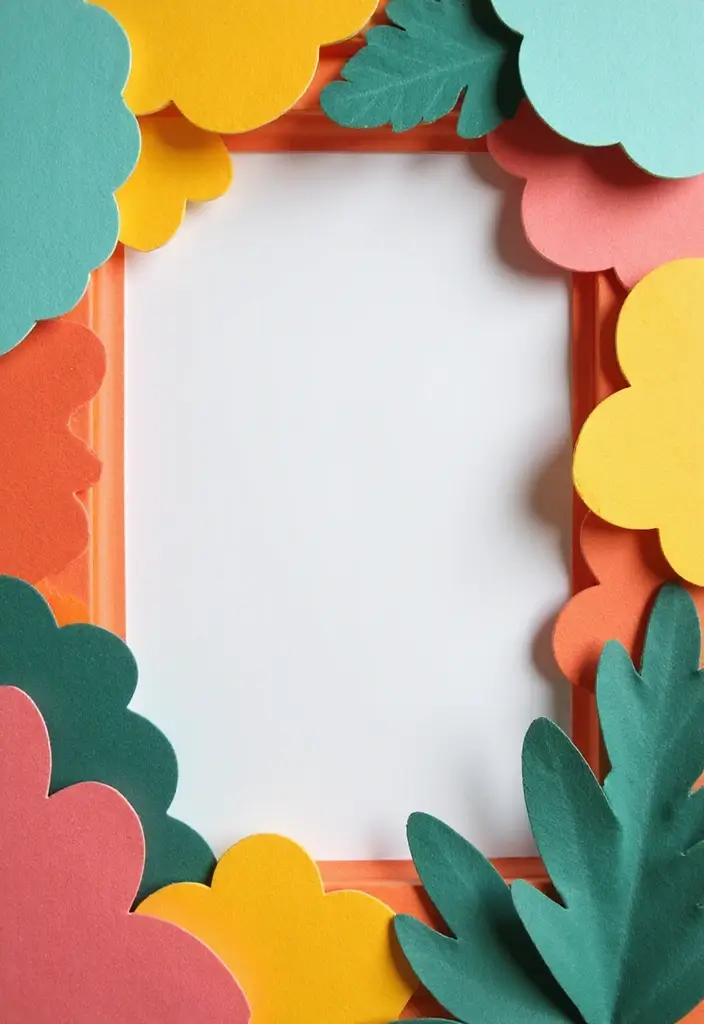
11. Nature-Inspired Frame
A nature-inspired frame does that for little. It adds texture and color to your photos. Here is why it works. You get a natural look that blends with many styles.
– Gather materials. Look for leaves, flowers, and small twigs that lie flat. Dry them by pressing between heavy books for 24 hours.
– Prep the frame. Use a sturdy frame or thick backing. If you plan to seal in the pieces, remove any glass first.
– Plan the layout. Place items on the backing and try a few layouts. Aim for balance, not clutter.
– Seal for a smooth finish. Use a clear, acid-free glue or a glue sheet. Apply in a thin, even coat and press until flat. Let it dry fully.
– Protect and display. Keep the frame out of direct sun and high humidity. A light spray of protective sealant is OK if you choose it.
– Pair with your art. This frame is great for nature photos or drawings of landscapes.
– Want it to last longer? Use preserved botanicals or a laminate sheet. It helps colors stay and keeps the natural look.
Next steps: finish a project this weekend. Gather items, pick a frame, and start crafting. Enjoy your handmade keepsake.
@media(max-width:480px){
12. Ombre Paper Frame

Looking to give a plain frame a fresh look? An Ombre Paper Frame adds quiet drama with color that fades from light to dark.
What you need
– A basic frame
– Paper strips in the same color family, from light to dark
– Scissors, glue, a cloth for pressing
How to do it
– Pick a color family. Try blues, pinks, or greens.
– Cut strips in different widths and lengths. Mix long and short to add texture.
– Start at one edge of the frame. Glue strips in a gentle line so the colors shift smoothly.
– When you reach the other side, trim any excess and press the edges flat.
– Keep transitions even. If a gap looks rough, slide in a mid shade to soften the move.
Why it helps your space
– It draws the eye without shouting.
– It pairs with photos or art that share the same color family.
– It fits many rooms, from modern to cozy.
Tips
– Matte finishes look soft; gloss adds a pop.
– Make this with one color family or two for a bolder look.
– Place it where natural light hits to show off the gradient.
With a little patience, you get a unique frame that fits any wall.
@media(max-width:480px){
13. Minimalist Paper Frame
Minimalist frames let your photo shine. They bring a calm, modern touch without crowding the room. Let’s break down a simple way to make one. Here is why it works: clean lines and a quiet palette keep the focus on the image.
What you need
– Thick white card stock or matte mat board that stays flat
– A sharp craft knife or sturdy scissors for clean cuts
– A metal ruler and a pencil for straight, precise lines
– White glue or double-sided tape to secure without bumps
– A single color mat or a soft pastel for a gentle frame
– Optional glass or clear sheet for extra protection in bright rooms
Steps
1. Choose an outer size, and a photo window that is a touch smaller.
2. Cut the outer shape with clean edges.
3. Cut the window opening with even borders.
4. Tack the photo behind the frame so it shows through the window.
5. Add the frame pieces and press flat until set.
Tips
– Use one color to keep the look cohesive and calm.
– Keep the border thin so the image stays the star.
– Let the photo guide the feel; this style suits modern rooms, offices, and hallways.
Next steps
Hang your frame in a bright spot or prop it on a shelf with other simple pieces. Change the photo as you like to refresh the look.
14. Stenciled Frame
If you want frames that feel personal, try a stenciled frame. It adds a simple art touch that fits any room.
Here is why this works. Stencil patterns stay neat, and you can mix styles to match your vibe. You control the look.
Materials
– Gather sturdy paper, a favorite stencil, a small sponge or paintbrush, and acrylic paints or ink. Pick colors that go with your wall art. A ruler and scissors or a craft knife are handy for trimming.
Steps
– Pick a stencil pattern, like one large bloom for a bold look or several small shapes for a busy pattern.
– Apply the paint by tapping the sponge or dabbing with the brush. Keep the pressure light to keep edges clean.
– Let the paint dry completely before moving on.
– Cut the frame shape from the painted paper with a steady hand.
– Fit your art into the frame and secure it.
– Add a clear cover for protection if you want extra durability.
Tips
– Test the stencil on scrap paper before using it on your project.
– Clean the stencil after each color.
– If you want more durability, seal the finished piece with a light spray.
This project invites creativity and is friendly for all ages. You can frame photos, cards, or small prints for gifts. Try new colors, mix sizes, or layer patterns to make frames that feel truly yours.
@media(max-width:480px){
Recommended Products

【Inspirational Word Stencils Set】This word stencils set includes 16 pieces of different inspirational word templates. And each motivational template measures 20 x 20 cm/ 7.87 x 7.87 inches. Multiple style can meet a variety of your DIY craft needs.

Artist-Quality Acrylic Paint Set: This set features 24 premium acrylic colors, each in a 60ml/2oz bottle. It also includes 12 versatile painting brushes & a palette and a beginner's user guide with a color wheel. Perfect for both novices and experienced artists.Friendly reminder:Remove Inner Seal Before Use.

✅【Chalk Paste Paint for Stencils】BOOLOOEN Chalk Stencils Paste is a mixture of acrylic paint and chalk. Easy to clean with soap and water, no odors or solvents. Gift for fall, halloween, christmas, easter, birthday, wedding, ladies, girls, family, couple, wife or any event
15. Travel Map Frame
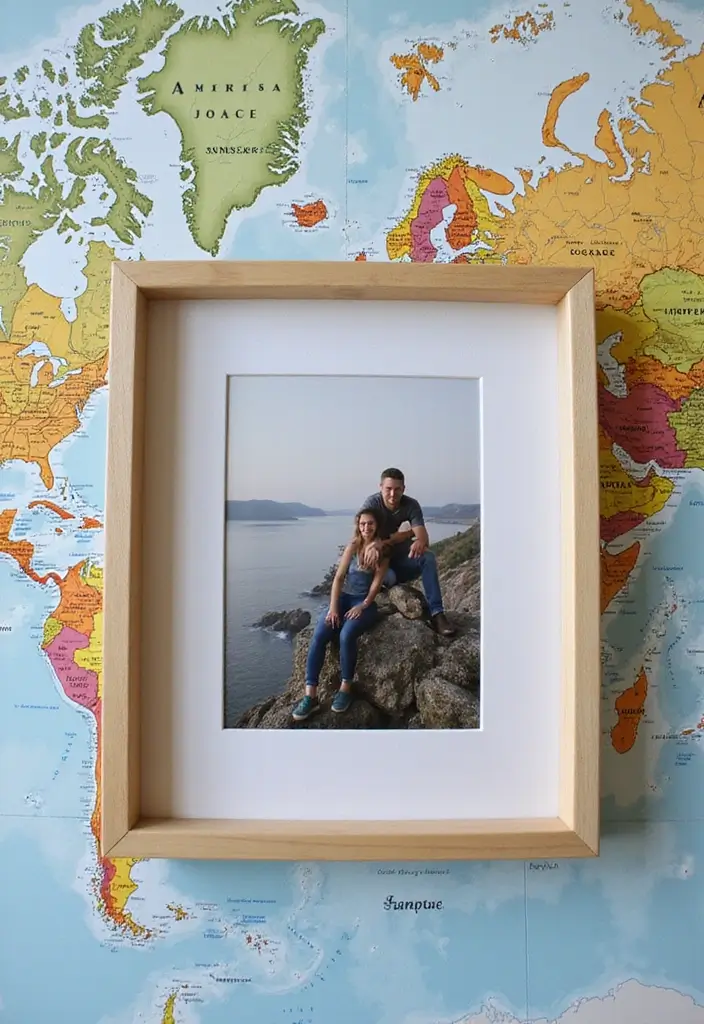
Want a wall piece that shows your travel stories? A travel map frame keeps memories alive and adds a personal touch to any room. You will see your adventures every day. It starts conversations and inspires future trips. Let us build it now.
Materials
– Old maps or travel printouts you already own
– A simple frame or shadow box that fits your wall
– Glue, tape, and small pins or safety pins
– Colorful flags or mini push pins for markers
– Scissors and a ruler for clean cuts
Make the frame
– Cut the map to highlight places or routes you love
– Place the map inside the frame and check the fit
– Mark locations with pins or flags for quick visuals
– Use bold map colors to draw the eye and add interest
– If you like, draw a light line to trace a route
Finish and decorate
– Tie in small photos or travel captions near key pins
– Add a simple label with the trip years for context
– Choose a frame color that matches your space
Tips and ideas
– Try different map styles, like vintage or modern, for mood
– Mix maps from different regions to tell a bigger story
– Keep it simple; a clean frame helps the map shine
This project is budget friendly and easy to swap as you travel more. You can update it anytime with new pins and photos. Your wall becomes a living map of your journeys.
16. Color Block Frame
Color Block Frame DIY
Here is why you might want a color block frame. It makes art and photos stand out without expensive framing.
– Let’s break it down. Gather your supplies: a plain frame, colored craft paper in 5–6 shades, scissors, ruler, and double-sided tape or glue.
– Cut blocks evenly. Aim for square blocks about 2×2 inches so the layout stays tidy.
– Plan your layout first. On a flat surface, lay blocks in a checker or random mosaic. Leave even gaps for a clean look.
– Attach the blocks to the frame. Start from the middle and work outward, or line up edges for a neat border.
– Add photos or artwork. Place a picture on one block or let color blocks form a backdrop behind the piece.
– Finish and hang. Press blocks down well so they stay put. If you want, add a thin sheet of clear plastic to protect the surface.
– Try variations. Use bigger blocks for a bold strip, or mix solid colors with a few patterned papers. Create a warm gradient by light-to-dark shades.
– Next steps: rotate colors with the season to refresh the look.
This style works well in kids’ rooms, play areas, or hallway decor. It’s simple to change with the season.
@media(max-width:480px){
17. Fabric Swatches Frame
Here is why this Fabric Swatches Frame fits your home. It keeps your photos close and adds a soft, cozy touch. You get a playful display without buying new art. Feel the soft fabrics as you choose each piece.
What you’ll need
– A frame with glass
– A sturdy paper backing
– Fabric swatches in colors you love
– Scissors, craft glue, a ruler
– Optional: a short quote card
How to build it
– Plan your layout. Decide if you want a neat grid or a freeform collage.
– Lightly draw a grid on the backing. Cut small holes or slots so each fabric fits.
– Slide each swatch through its slot and press the edges flat.
– Secure the pieces with a dab of glue at the corners.
– Place the backing back in the frame and fasten.
Tips for best results
– Pick fabrics that match your room and mood.
– Use fabrics with similar weight so edges stay even.
– Iron to remove wrinkles before you place them.
– Add a short quote or tiny art in the center for focus.
What you get: a handmade frame that tells a story with color and texture. It works for photos, quotes, or small art pieces.
Next steps: gather fabrics, plan a color story, and start your collage.
@media(max-width:480px){
18. Twisted Rope Frame

Want a simple way to give your beach photos a personal touch? A twisted rope frame does that with ease. You wrap thick twine around a plain wooden frame and glue it in place. The result is a warm, rustic look that fits seaside decor and vacation memories.
What you’ll need
– Wooden frame
– Thick rope or twine (jute, cotton, or sisal)
– Clear craft glue or hot glue
– Scissors
– Small shells or starfish (optional)
– Clear sealant or varnish (optional)
How to do it
– Start at a corner. Put glue on the edge and press the rope in place.
– Wrap the rope tightly as you go. Keep the lines neat and even.
– When you reach a corner, trim and glue the end so it stays flat.
– If you want a touch of shine, seal the rope with a clear coat after it dries.
– Add shells or starfish with a dab of glue for a mini beach scene.
Tips and variations
– Try different rope textures for unique effects.
– Paint the frame first for a bold contrast, like white or navy.
– Use natural colors for a calm, coastal look.
– Mix in beads or charms along the rope for a playful touch.
Care and placement
– Keep the frame dry to prevent glue from loosening.
– Hang it where sun won’t fade the rope.
Next steps: pair this frame with a favorite beach photo to instantly warm up a room.
19. Craft Paper Quilt Frame
If you want a photo frame that feels warm and handmade, try a craft paper quilt frame. It blends the look of a quilt with a snapshot you love.
Here is why it helps: it turns a flat image into a cozy piece of wall art. You can swap photos to match the season or mood.
What you need:
– Craft paper in different colors and patterns
– A photo and a backing board
– Strong glue or tape
– Scissors or a craft knife
– Optional frame or a sturdy base
How to build it
1) Plan your quilt. Pick a simple color story. Mix patterns but keep a shared tone.
2) Cut shapes. Make equal squares or triangles.
3) Arrange around the photo. Create a quilt-like border with even gaps.
4) Attach the layers. Glue the shapes to the backing, then place the photo in the middle.
5) Mount or frame. Use a cardboard frame or slide the piece into a ready-made frame.
Tips for success
– Make clean cuts with a sharp blade.
– Press pieces flat as you glue so they stay neat.
– A thin border helps the photo stand out.
– This frame sits nicely in a country-style room with wood accents.
Care and limits
– Paper can fade in bright sun. Keep it away from moisture.
– It’s best for occasional displays, not heavy daily use.
Next steps: start with a small frame first. Then try a larger version for a gallery wall.
20. Hand-painted Frame

Want a frame that truly fits your style and photo? A hand-painted frame can do that. You paint on the plain paper frame with acrylics or watercolors. It adds your touch to the display.
Here is why it helps your space feel personal. It uses simple tools and costs little. You get a one-of-a-kind piece that tells your story.
What you need
– Plain paper frame ready for color.
– Acrylic paints or watercolors.
– Small brushes for details.
– Optional sealant to protect the art.
Next steps
Plan a simple color story before you start. Pick two to three shades that match your room and photo. Make a quick sketch on scrap material to guide you.
Steps
1) Apply a base coat for a clean background.
2) Add your design with a brush or stamps.
3) Try splatter or stripes to add texture.
4) Let each layer dry before adding more.
5) Seal lightly if you want protection, then insert your photo.
Techniques to try
– Splatter for a lively feel.
– Clean lines with painter’s tape.
– Soft washes for a calm look.
Care and finishing
– Let the frame dry fully before handling.
– Remove dust gently and store flat while it cures.
Why it matters
A hand-painted frame feels personal. It makes gifts memorable and makes your photos pop in any space. It’s a quick way to add warmth and character.
21. 3D Pop-Up Frame
Make a Photo Come Alive with a 3D Pop-Up Frame
Want a frame that grabs attention? A 3D pop-up frame makes a flat picture feel bold. You set up layers that rise off the page and draw the eye.
– Use foam tape to lift elements.
– Add cutouts like flowers, stars, or tiny shapes that circle the image and feel ready to pop.
– Pick colors that match the photo or the room for a playful look.
Plan how the pieces fit. You only need paper, scissors, glue, and a little patience. Next steps.
How to build it in simple steps
1) Choose your photo and decide which parts will be raised.
2) Cut multiple paper layers that sit behind the photo.
3) Attach the layers with foam tape at key spots so they stand up.
4) Add pop-out shapes around the edges.
5) Mount everything in a frame or on a sturdy base.
Tips for great results
– Keep shapes lightweight so they don’t sag.
– Use bold colors for a kid-friendly vibe.
– Seal fragile edges with light glue to prevent peeling.
Design ideas you can try
– For nature shots, add leaf shapes and tiny petals around the edge.
– For birthday pics, use bright color blocks and star cutouts.
This frame adds fun without masking the photo. It turns a simple memory into a small gallery piece.
@media (max-width: 600px) {
.visual-quiz-iframe { min-height: 995px !important; height: 1100px !important; }
}
22. Interactive Slide Frame
Tired of seeing the same photos on your wall? A slide frame lets you swap in new memories in seconds. It keeps your space fresh and invites talk.
What you need
– A sturdy base (wood, cardboard, or foam)
– Smooth sliding rails or a sleeve system
– Clear covers to protect prints
– Photos printed the same size
– Glue dots or magnets for easy changes
– Decorate the outside with paint or paper
Let’s break it down
– Build the base. Make it strong and flat.
– Create the sliding area. Use slots or a pocket system so photos slide in and out easily.
– Set the photos. Align edges.
– Assemble the frame. Attach the sliding piece to the base.
– Decorate the edge. Keep the sliding area clear.
Here is why this helps
– You can switch photos for holidays, birthdays, or daily memories.
– It starts conversations when people notice the changing display.
– It stores many memories without extra clutter.
Next steps
– Test the motion with a few photos and adjust.
– Label slots for quick picks.
– Place it where light makes colors pop.
See how quick it is to change.
Give it a try this weekend.
This DIY slide frame becomes an interactive photo frame that adds a touch to any room and stays simple to use.
23. Eco-Friendly Seed Paper Frame
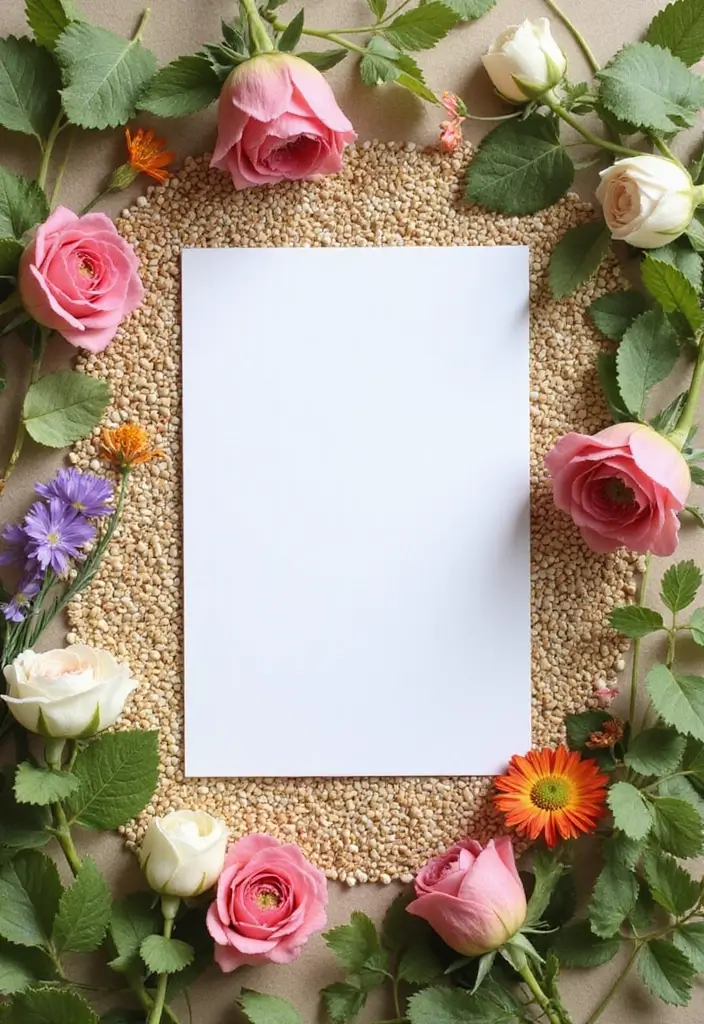
Here you want a frame that looks nice and helps nature. An eco-friendly option is a seed paper frame. It saves paper waste and lets flowers grow after the photo lives in it.
Seed paper holds tiny flower seeds. Plant the frame when you are done and it turns into soil that nourishes new blooms.
Why this frame helps you now: it blends memory with nature. It works as a small garden you can move to any room. It makes a thoughtful gift for birthdays, anniversaries, or a simple act of kindness.
How to build it
– Pick seed paper frames that fit your photo. Check the seed mix so you know what will bloom in your area.
– Cut the frame from the seed paper with a sharp blade. Leave room for your photo in the center.
– Decorate with light touches. Try a border with twine, pressed leaves, or a small sticker. Let glue dry before placing the photo.
– Attach your photo using photo corners or a small peg. Make sure you can remove it later.
– Display the frame or gift it. After use, plant the entire frame in soil and water gently.
– Care tips: keep it in sun and water regularly until sprouts appear. Expect flowers in a few weeks to a couple of months, depending on seed mix.
Next steps. This frame turns memories into living plants and fits eco-friendly decor and gift ideas.
@media(max-width:480px){
24. Metallic Foil Frame
Metallic Foil Frame
If you want a touch of glam without a big project, this is your go-to. A metallic foil frame catches light and makes simple photos look fancy. It adds luxury that stays affordable and easy to finish.
– Gather these tools: a plain frame, metallic foil sheets or foil paper, craft glue or transfer adhesive, scissors, and a clear seal spray.
– Start by cleaning the frame so foil sticks well.
– To cover fully, cut metallic paper to fit the frame backing and wrap the edges.
– For a simple look, add foil accents in key spots like corners or along the edge.
– Try gold foils.
– Try silver foils.
– Try rose gold foils.
– A mix with a matte frame creates strong contrast.
– Apply the foil using a gentle tap with the adhesive or use a transfer foil tool.
– Press evenly and peel away to reveal a sharp edge.
– Seal with a light spray to keep the foil in place and resist wear.
– Use the finished frame on walls, desks, shelves, or as a gift wrap highlight.
Next steps: choose your color, grab a plain frame, and bring some luxe shine to your photos.
Recommended Products

A5 & A4 SIZE FOIL TEXTURED FABRIC: Get 20 sheets of premium A5(5.8" x 8.3") & A4(8.3" x 11.7") colorful foil textured fabric art paper perfect for enhancing your scrapbooking and craft projects. Each sheet offers versatility in size, making it ideal for various crafts such as junk journaling, card making, and art journals. The durable material ensures longevity in your projects, giving you endless creative possibilities

A5 SIZE FOIL TEXTURED FABRIC – 20 SHEETS: This set includes 20 sheets of A5(5.8 x 8.3 inches) size colorful foil textured fabric art paper, providing a perfect foundation for your creative projects. Ideal for junk journaling, card making, and scrapbooking, these sheets are versatile and easy to use. Their manageable size allows for a wide range of crafting possibilities, making them suitable for both beginners and experienced crafters
PERFECT FOR ARTISTS - Hygloss Metallic Foil Paper Sheets are great for adding brilliance & dimension to your art projects!
25. Button Embellished Frame
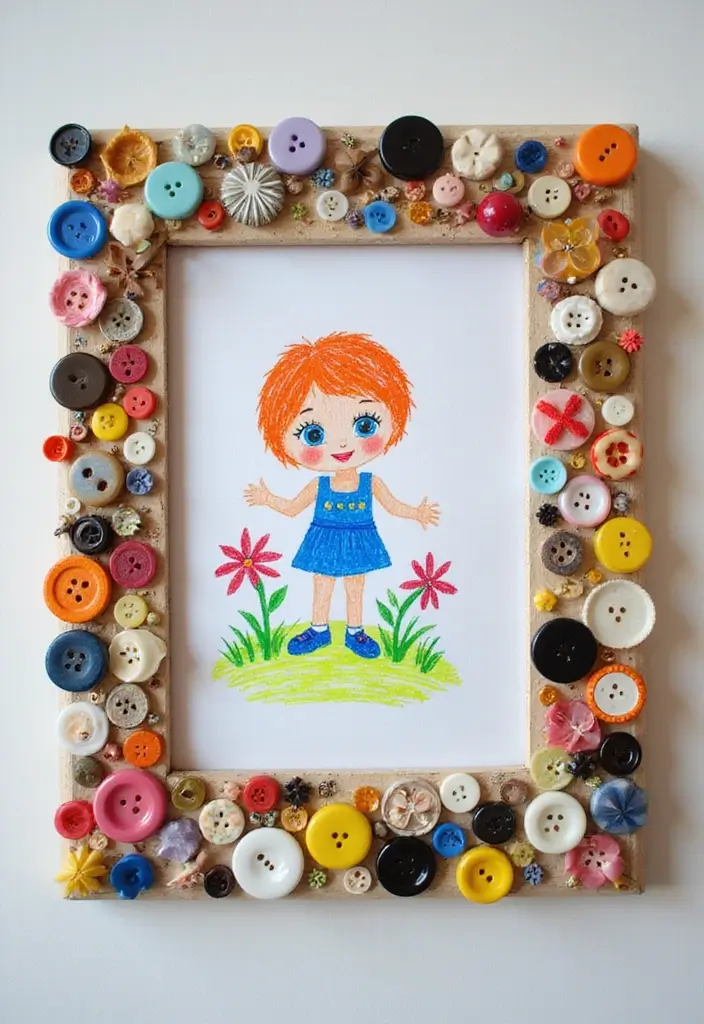
Want a frame that adds texture and charm to photos or kids’ art? A button frame turns old buttons into a bright, tactile display you can touch and enjoy. Here is why this project fits many spaces: it’s quick, cheap, and easy to tailor to your style.
What you’ll need
– Cardboard frame
– Assorted buttons in different sizes and colors
– Strong craft glue
How to make it
– Start with the frame and lay out the buttons around the edge to plan the look.
– Glue each button in place, press firmly, and let the glue set.
– Adjust the pattern as you go, keeping a loose rhythm rather than a strict grid.
– Mix flat buttons with rounded ones to add texture; toss in a few beads if you like.
– If you want extra protection, add a thin clear coat of glue or sealant after it dries.
– Hang the finished frame or prop it up on a shelf with your kid’s art.
Tips and ideas
– This frame works well for kid art and playful photos in a bedroom or craft room.
– It also makes a thoughtful, budget-friendly gift for family or teachers.
Next steps: swap out the art as you grow your collection and color the wall with simple, personal touches.
26. Rainbow Paper Frame
Is your space feeling a little dull? A rainbow paper frame can brighten it in minutes. You get color, texture, and a special home for your favorite photo.
Here is why this project fits a busy DIY plan: it uses simple supplies, spreads creativity, and yields a striking result with almost no mess. Let’s break it down.
What you need
– Construction paper in rainbow shades
– A lightweight frame or sturdy cardboard base
– Scissors, glue or clear tape
– Ruler and pencil
– Optional: patterns, textures, or washi tape for extra flair
How to make it
1) Cut several equal-width strips in different colors.
2) Lay them out in rainbow order to preview the look.
3) Glue the strips onto the frame base, one at a time.
4) Trim the edges so the frame keeps a clean border.
5) Slide in your photo and secure with a touch of tape or a thin layer of glue.
Tips and ideas
– Add patterns or textures to each strip for depth.
– Mix wide and narrow strips for a dynamic effect.
– Try diagonal or curved layouts for a fresh vibe.
Why it’s worth it
– It makes a joyful gift for family and friends.
– It brightens bedrooms, desks, or study spaces.
– It’s a keepsake that celebrates happy moments.
Next steps: gather colors, cut, glue, and proudly display your rainbow paper frame anywhere you like.
27. Inspirational Quote Frame
Want a small piece that lifts your mood every day? A quote frame does this with little cost and effort. It becomes a personal decor item you can update as your taste changes.
Here is why it helps: a favorite line anchors a space and sparks a smile when you pass. You can swap quotes to match holidays, moods, or guests.
– What you need Frame, background paper, a printed or handwritten quote, scissors, ruler, glue or tape, and a pen or marker.
– Choose your quote Pick a short line that fits your mood and room.
– Style and lettering Try calligraphy or decorative lettering, or print a neat font and trace it lightly.
– Put it together Plan the layout first, then mount the paper neatly in the frame.
– Display tips Place the frame where light hits it and swap quotes seasonally to keep the look fresh.
– Color and frame Pick a frame color that matches your room and ink.
– Background ideas Use light background paper that makes the letters pop.
– Care tips Keep glass clean and avoid direct sun to keep it bright.
– Seasonal swaps Change the quote to refresh the look.
– Placement ideas Put the frame at eye level on a desk or shelf.
Next steps: seal the piece for long life, or swap in a new line when you feel inspired. Enjoy your new look.
Conclusion
Crafting your own paper frames can be a fun and rewarding experience, allowing you to express your creativity and personality.
With a plethora of styles and techniques to choose from, there’s a project here for everyone, whether you’re looking to decorate your home or give a thoughtful gift.
Gather your supplies, spark your imagination, and let your crafting journey begin!
Note: We aim to provide accurate product links, but some may occasionally expire or become unavailable. If this happens, please search directly on Amazon for the product or a suitable alternative.
This post contains Amazon affiliate links, meaning I may earn a small commission if you purchase through my links, at no extra cost to you.
Related Topics
paper frame making
DIY home decor
upcycled crafts
personalized gifts
kids' artwork
eco-friendly crafts
beginner friendly
vintage style
modern design
seasonal decor
easy DIY projects
craft paper techniques