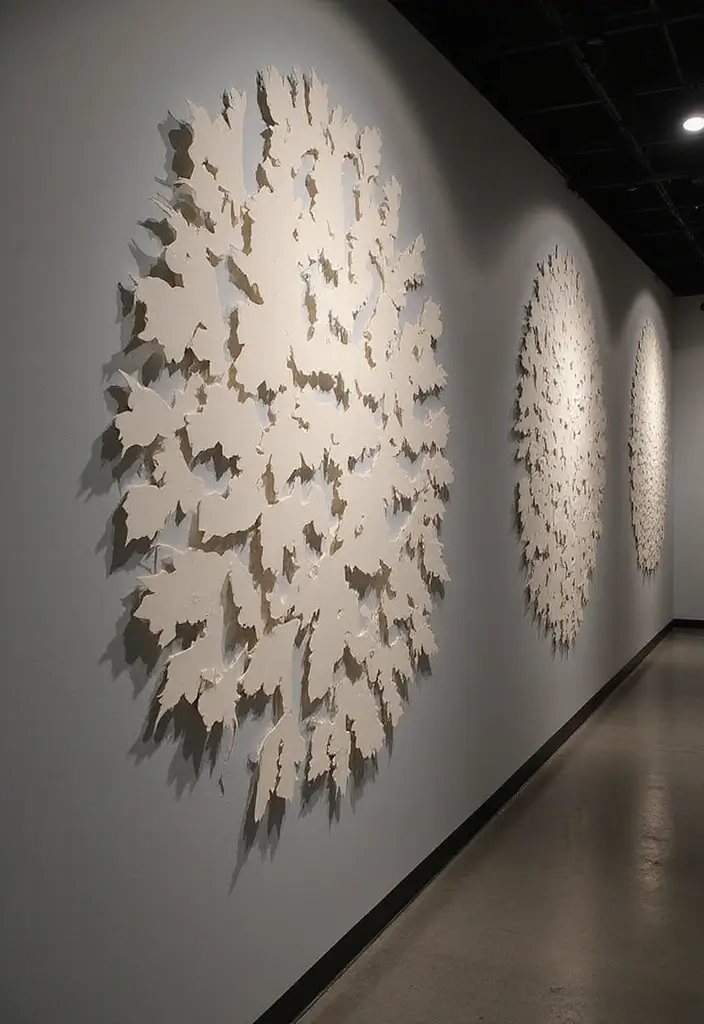
I put this together because blank walls have a way of making a room feel less inviting. I wanted a simple, affordable way to add character without a big project or a big budget. Paper wall art hits that sweet spot: you can make something striking in a weekend while keeping things light and flexible.
If you love a space that looks personal and handmade, this one’s for you. This post is for apartment dwellers, students, new homeowners, and anyone who wants fresh decor without a heavy commitment. If DIY spirit excites you but you need ideas that are doable, stay with me.
Here you’ll find 25 paper wall art designs that you can actually make. From bold geometric patterns to soft botanical looks, there are options for modern and cozy rooms alike. Each idea comes with simple steps, a quick materials list, and tips to adapt it to your walls.
Next, the guide shows easy ways to assemble and display. Learn how to pick color palettes that match your furniture, cut clean shapes, and mount pieces so they sit flat. You’ll see how to vary sizes, mix textures, and create a small gallery wall that looks intentional.
Think of this as a toolkit you can dip into whenever you want to refresh a space. Start with a couple of small pieces for a coffee nook, then add larger ones to a hallway or entry. You can go monochrome for calm, or play with bold contrasts for a fun punch.
A quick heads up: paper can curl if it gets hot or humid. Framing or sealing edges helps a lot, and I share budget-friendly ways to protect your art. If you try one or two designs now, you’ll see how easy it is to change your mood with paper.
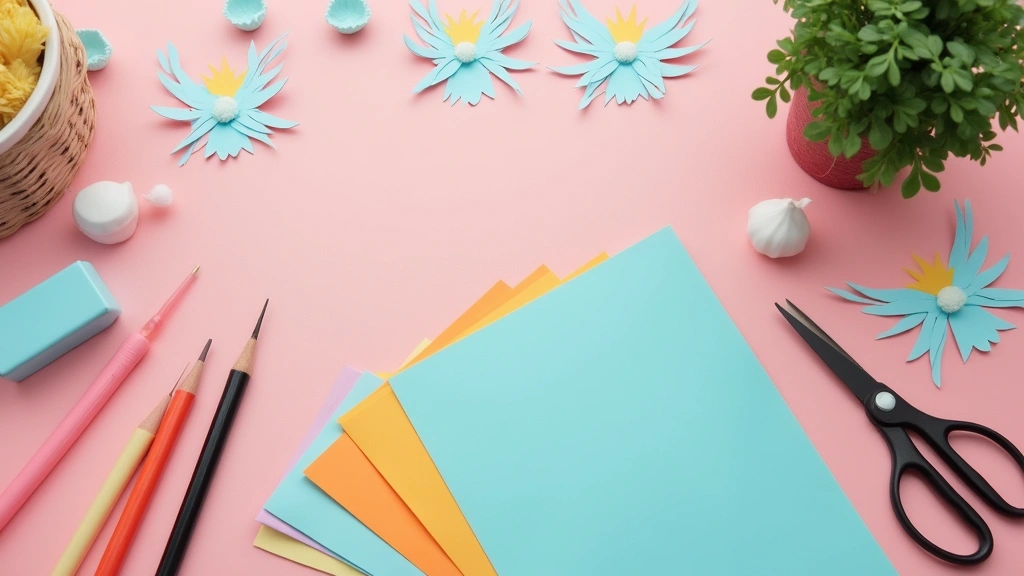
1. Whimsical Paper Flowers
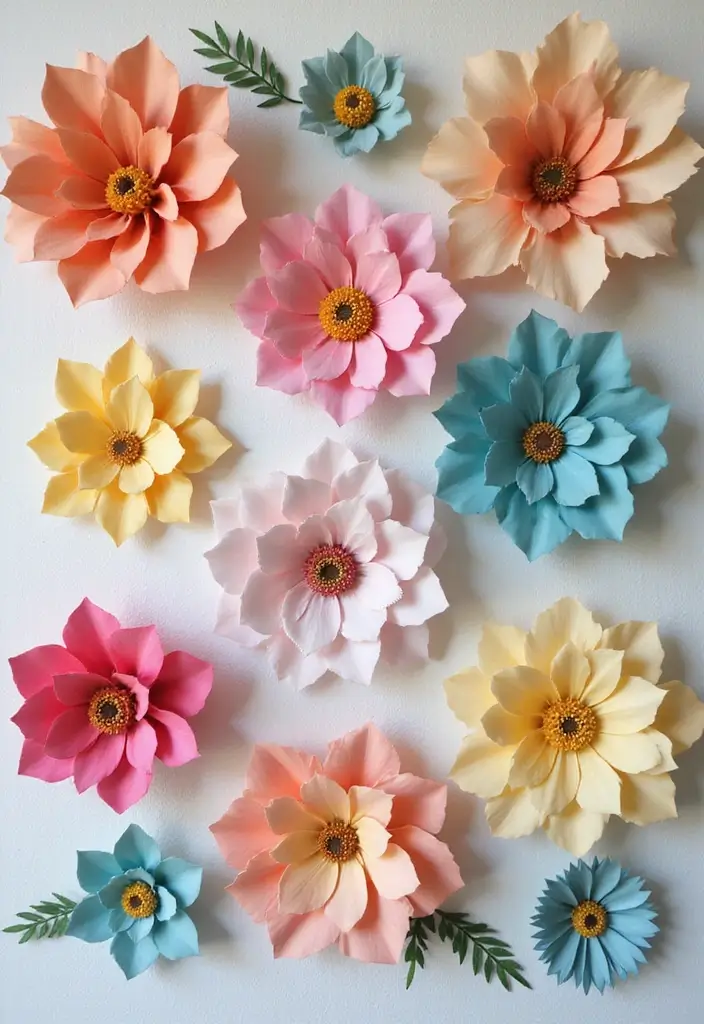
You’re after a bright, friendly wall feature you can make with simple supplies. Whimsical Paper Flowers is a DIY idea that brings the outdoors inside without fuss.
Materials you’ll need: colored paper, scissors, glue, and a few green scraps for leaves. Optional: a pencil for tracing.
Here is why this works: paper blooms are light, so you can layer petals to build a soft 3D look on any surface. Start by cutting petal shapes in small, medium, and large sizes. Stack several petals and glue at the base to form a full bloom. Add a couple of leaves to finish the natural feel. You can glue the flowers directly to the wall for a mural, or group them in a vase on a shelf for a portable display.
Tips:
– Use patterned paper for texture.
– Mix sizes for depth.
– Hang them at different heights for movement.
Next steps are simple. Pick a wall and plan your colors. Mark a few spots with a pencil. Place the biggest blooms in the center and line up smaller ones outward. Add a leaf here and there to fill gaps. If you want to move pieces later, use removable tape.
This craft is kid-friendly, sparks color play, and leaves you with a cheerful corner you can rework anytime. When finished, step back and choose a spot that catches light. A little sunlight makes the petals glow.
@media(max-width:480px){
2. Origami Animal Parade
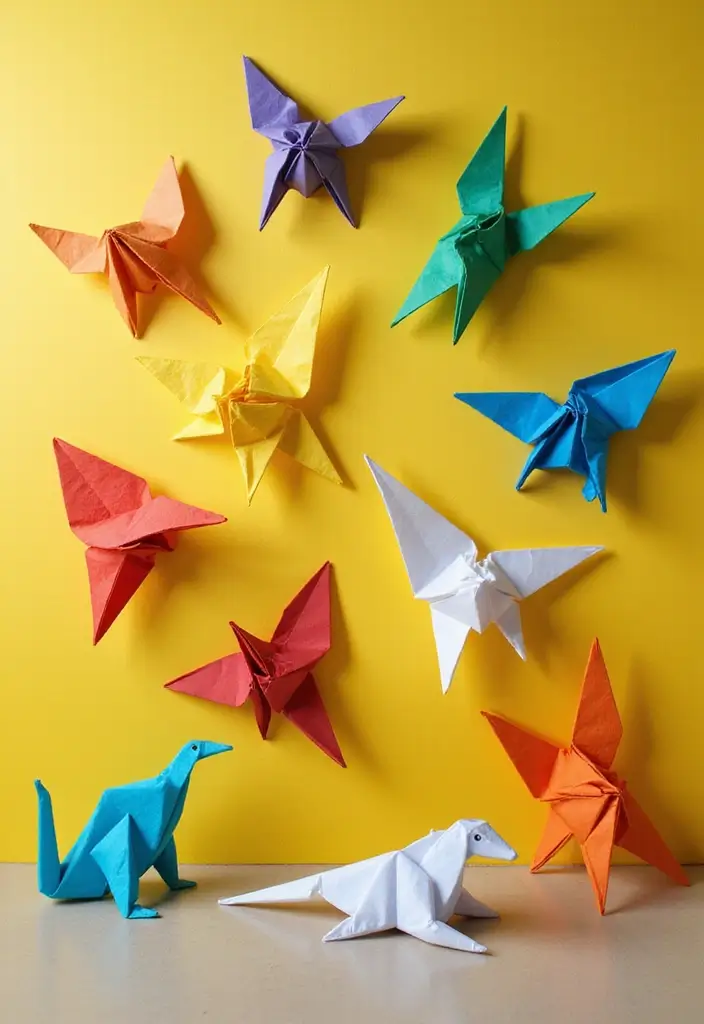
Here is why you should try a wall of origami animals. It adds color and life to a room. It costs little and is easy to set up. You can turn a simple idea into a bold, playful display.
Let’s break it down.
– Pick 3 to 4 easy shapes. Cranes, fish, a dinosaur, or a rabbit work well. Keep sizes small to medium so you can fold several in one session.
– Gather supplies. Colored origami paper, markers for faces, washi tape to attach, and a length of string for a garland or mobile.
– Plan a folding session. Choose a cozy space. Lay out papers and a few simple folds you can teach quickly. Keep the pace calm so kids stay excited.
– Display ideas. Hang a string across a wall for a garland. Clip pieces to the line with washi tape. Or press them directly on the wall for a bold, colorful look.
– Theme and benefits. Try safari or ocean animals to tell a tiny story. Mix sizes and colors. The activity builds fine motor skills and sparks creativity.
When you switch designs, remove tape gently and wipe the wall clean. Start folding tonight, friend. Nice work.
@media(max-width:480px){
3. Layered Paper Shapes
If you want a bold wall piece you can finish in an afternoon, try layered paper shapes. You get texture and color, plus real depth, with almost no mess. Here is why this idea works for any room and any skill level.
Materials
– Colored paper in circles, stars, and hearts
– Scissors, pencil
– Glue and foam tape or small foam dots
– Sturdy backing such as poster board
– Optional glitter paper or a light color gradient
What to do
1) Cut shapes in three sizes and two colors for each shape.
2) Lay out a simple design on the backing. A heart makes a focal point, or try a scatter.
3) Use foam tape to lift some pieces for a 3D look.
4) Add sparkle with glitter or a soft gradient. Doodle borders if you like.
5) Press everything flat and hang the piece with tape or mounting strips.
Tips
– Try a single color family for a clean feel.
– Mix pastels or bold tones for a lively mood.
– Keep the layout loose at first and adjust as needed.
Next steps
– Snap a photo when it’s done.
– Swap in new shapes after a few weeks to refresh the piece.
@media(max-width:480px){
@media (max-width: 600px) {
.normal-quiz-iframe { min-height: 570px !important; height: 570px !important; }
}
4. Paper Mache Wall Art

Want wall decor that feels personal and easy on the wallet? Paper mache wall art lets you turn ideas into real pieces you can hang in minutes.
Materials
– Balloons or sturdy cardboard for the base shape
– Newspaper strips or torn paper
– Glue or flour paste mixed with water
– A bowl and a brush for applying paste
– Acrylic paints in your chosen colors
– Brushes, markers, and any small tools for details
– Clear sealer or varnish (optional)
– Strong wall hooks or screws for hanging
Steps
1) Inflate a balloon to shape or cut cardboard into the form you want.
2) Dip strips in paste, then smooth them onto the form to cover it.
3) Layer two to four coats for a solid surface.
4) Let the piece dry completely, usually a day or two.
5) Remove the balloon or flatten the cardboard and trim rough edges.
6) Paint with bright colors and add simple details for character.
7) Finish with a clear coat if you plan to keep it long term.
8) Hang it on the wall with strong hooks or screws.
Tips and ideas
– Try shapes like animals, fluffy clouds, or geometric blobs for a cute group wall.
– Keep a cohesive color plan to tie several pieces together.
– Work in a dry space so layers dry evenly and don’t warp.
This craft stays light, affordable, and satisfying to finish. It gives you real texture and a handmade feel you won’t get from store decor.
5. Interactive Wall Maps
You want a wall piece that grabs attention and teaches at the same time. An interactive wall map can do that. Start with large sheets of paper and draw a world map or a treasure route. Let your kids jump in. They can color oceans blue, lands green, and mountains brown. They can add stickers, trace paths, and draw new routes. Best of all, they can mark places they’ve visited or dream about visiting. The map becomes a living story right on your wall.
– Use color to show different terrains: oceans, forests, deserts, and cities.
– Clip or glue small envelopes for notes, photos, or tickets from trips.
– Invite kids to add landmarks and tell their own travel tales.
This setup blends art, geography, and storytelling. It keeps little hands busy and big imaginations active. Here is why it works: you give shape to learning and a canvas for memory.
Next steps:
1) Mount the map with easy-to-remove tape so you can swap pieces as you go.
2) Keep a stash of stickers, stamps, and colored pencils nearby.
3) Do a monthly update where everyone adds a new place or detail.
Tips to keep it fresh:
– Change themes with the season. A rain forest this spring, a coast line this fall.
– Add a simple legend card to explain color choices.
– Use removable tape to move figures without tearing paper.
– Place a tiny envelope on the edge for trip tales or notes from friends.
– Ask your child to pick a spot and share its story.
The result is a playful tool that makes geography feel real and reachable.
6. Balloon Garland
You want a bright wall feature that is easy to make and kind to your wallet. A paper balloon garland does the job. It uses simple shapes to form a festive wall piece you can tailor for any room or party. Here is why it works. This is a safe, kid-friendly project you can do with supervision.
Materials
– colored craft paper in two sizes
– scissors
– string or twine
– tape or glue dots
– optional tassels and battery lights
Steps
1) Cut circles in two sizes to add depth.
2) Curl the edges to form a soft dome.
3) Glue the edges to hold the shape and add a tiny knot at the bottom.
4) Punch a small hole or tie a loop at the top, then hang on the twine.
5) Space the balloons along the line. If you have lights, place them behind the garland.
Tips
– Plan your color palette before you cut.
– Use removable tape so you can reuse pieces later.
Next steps: this craft builds planning and hand control while giving you a ready-made party backdrop. It stores flat for future use and works well for birthdays, baby showers, or cozy room corners. Store the parts flat; you can reuse them for another party.
7. Paper Collage Mural

You want wall art that is easy, kid-friendly, and unique. Try a paper collage mural. It uses scraps of color to tell a story or make a scene. Here is why this works. It uses scraps, so you save money and reduce waste.
What you need
– Collect colorful paper scraps from magazines, wrapping paper, and old cards.
– Keep a glue stick or white glue handy.
– Have scissors ready for cutting shapes.
– Choose a backing sheet such as sturdy paper, cardboard, or a small canvas.
– Use Washi tape to frame the piece neatly.
Steps to make it
1. Pick a theme. Decide on nature, underwater, or a city scene.
2. Cut simple shapes. Think circles, triangles, leaves, and waves.
3. Place pieces first on the backing. Move them around until you like the layout.
4. Glue pieces in place. Start with big shapes, then add smaller bits.
5. Layer for depth. Slip a shape under another a bit to create shadows.
6. Add tiny details. A sun, eyes, bubbles, or birds.
Finish
– When the glue is dry, frame the mural with washi tape. It gives a clean edge.
Tips
– Use plenty of color contrast so the scene pops.
– Let kids help with the cutting and placement.
– Keep a scrap box handy for quick edits.
Why this works
– It teaches collage basics. It builds fine motor skills. It yields a unique wall piece you can be proud of.
Variations
– Create a monochrome piece using different shades.
– Do a seasonal mural with themed colors.
Care
– Hang away from direct sun to keep colors bright.
– Use removable mounting if you want to change later.
Next steps: hang your mural and share photos.
@media (max-width: 600px) {
.visual-quiz-iframe { min-height: 995px !important; height: 1100px !important; }
}
8. Shadow Box Frames

Here is why you want shadow box frames for your paper wall art. They add depth, color, and a personal touch without taking up extra space. You’ll see layered shapes, tiny details, and a glow night after night. Let’s break it down into steps you can follow.
– Choose a deep frame. Look for 2 to 3 inches of depth. That space lets you stack three or more paper layers.
– Plan your scene. Pick a theme like a forest, a coral reef, or a quiet street. Sketch a quick layout on paper.
– Build in layers. Cut a background for the back, mid-ground shapes for the middle, and a foreground piece for the front. Glue each layer with a little space between them.
– Add small extras. Photos, tiny figurines, or pressed leaves make it yours.
– Mix patterns and colors. Use bold and soft tones, but keep a shared color family so it reads as one piece.
– Light it up. Add a tiny LED backlight or place the frame near a soft lamp. It makes the pieces pop after dark.
– Fix and finish. Use foam dots to lift layers, seal the glass, and hang with secure cords.
Next steps: hang your art where people will notice it and swap layers for a fresh look. These keepsakes help kids see how art is shown and displayed.
@media(max-width:480px){
9. DIY Paper Banners
If you want an instant burst of cheer in a kid’s room, DIY paper banners are a simple, kid-friendly fix. They are quick to make, easy to swap, and light on the wallet. You can match colors to the season, a favorite character, or a birthday theme. The build itself becomes a small party for you and your child. Kids can help cut shapes and choose colors. It teaches planning and fine motor skills. Here is why banners work and how you can use them day after day.
Materials
– Colored or patterned paper in a few sizes
– String, twine, or ribbon long enough to span a wall
– Scissors, glue, and a hole punch
– Tape or clips to hang and adjust
Steps
– Cut shapes you like, such as triangles, circles, or squares
– Decorate each piece with letters, simple drawings, or stickers
– Punch holes and thread the pieces onto the string
– Hang the banner where it will be seen, like above a bed, a desk, or a doorway
Tips
– Mix bold patterns for a lively look
– Use clothespins or Velcro to swap banners easily
– Keep extra shapes in a folder for future parties or seasonal changes
Next steps: store your banner flat when not in use and swap in new colors to fit the mood.
@media(max-width:480px){
10. Paper Weaving Art

If you want wall art that feels alive without expensive supplies, try paper weaving. It adds texture and color to a plain wall. Start with strips of paper in many colors and widths. Weave them using a simple over-under pattern. When you finish, mount the weave on a small canvas or frame it to stand out on the wall.
What you need
– Paper strips in different colors and widths
– Scissors and a bit of glue or tape
– A frame or small canvas
– Optional: beads, yarn, or buttons for extra texture
Here is how to do it
– Cut several strips. Mix thick and thin pieces for contrast.
– Plan a pattern you like. It can be a checker, a diagonal, or a casual design.
– Weave the strips one by one. Keep edges neat so the piece stays flat.
– Secure the ends at the back with a dab of glue or tape.
– Attach the finished piece to the frame or canvas. Press gently to flatten.
Tips to boost the look
– Use contrasting colors for a bold statement.
– Add beads or small charms to catch light.
– Try different weaving orders, like multiple layers or staggered strands.
Why this helps you: it builds finger control and focus while making something you can be proud of. Next steps: mix in patterned paper, or try a larger piece for a dramatic wall touch.
@media(max-width:480px){
11. Paper Mosaic Art

Why paper mosaic art works for your space
Here is why paper mosaic art fits a busy home. It makes an image from tiny pieces. You cut colored paper into small squares or shapes and arrange them to form a bigger picture. You choose the scene, from a playful animal to a calm landscape. When you finish, frame it or mount it on the wall for a display.
Let’s break it down.
– Gather basics: colored paper, scissors, white glue, a sturdy base, and a frame or wall mount.
– Pick a simple design to start. A 6 by 8 inch area works well.
– Cut lots of small pieces. Use the same shapes to speed up laying them down.
– Plan the layout first. A rough grid helps you see how the pieces fit.
– Glue each piece in place. Press gently so edges stay flat.
– Seal with a thin clear coat if you want extra shine and durability.
Next steps.
– Play with color. Use warm colors on one area and cool colors on another.
– Talk about famous mosaics and art history while you work. It makes the project a learning moment.
This activity builds patience and fine motor skills. It also shows how many small pieces come together to form a big scene.
This paper mosaic art fits many spaces. It works in a craft corner, a hallway, or a kid’s room.
– Try a larger base to build a wall panel later.
– Mix matte and gloss finishes for texture.
– Create a small series of 2–3 pieces.
– Store scraps in a labeled box for easy reuse.
12. DIY Paper Sun Catchers

Need a quick, kid-friendly craft that brightens a window? Try DIY paper sun catchers. They glow when the sun hits them, and they are easy to make.
What you need
– Wax paper
– Colored tissue paper
– Scissors
– Clear tape or glue
– Clear contact paper (optional)
– String for hanging
Here is why this works
– Light shines through the colors.
– The result is a sunny piece of art that moves with the day.
Let’s break it down
1) Lay wax paper on a table.
2) Tear or cut tissue into small shapes.
3) Glue or tape shapes onto the wax paper. Layer colors for a glassy look.
4) For more strength, cover with clear contact paper and press flat.
5) Trim edges and punch a hole or tie on a string.
Next steps
– Hang your sun catchers in a bright window and enjoy the color when the sun comes through.
– Try a seasonal set next, like flowers for spring or snowflakes for winter.
Tips
– Use bright colors for a stronger glow.
– Keep pieces light so they hang nicely.
Extra note
This craft fits any room and makes a quick after-school project.
Limitations
– Paper can tear in wind or heat. Swap in a sturdier base if you need.
Give it a try today.
@media(max-width:480px){
13. Paper Chain Art
Need quick wall art that is bright, easy, and budget-friendly. Paper chain art fits. It looks cheerful, you can make it fast, and you can tailor it to any room.
Here is why
– It uses simple supplies.
– It can be short or long.
– It gives kids a tiny counting and measuring project.
What you need
– Colored or patterned paper
– Scissors
– Glue or tape
– Ruler or string to keep links even
– A wall hook or tape for hanging
How to make it
– Cut several strips. A good size is 1 inch by 6 inches, but bigger works too.
– Make a link by curling one end and threading it through the next strip. Glue the ends to seal.
– Repeat to form a chain. Make as many chains as you like.
– Link chains together or lay them end to end to cover more wall space.
Tips and ideas
– Use patterned paper for extra flair.
– Mix colors for a rainbow effect.
– Vary chain lengths to add rhythm.
– Space links evenly with a ruler for a neat line.
Ways to use
– Hang across a wall for birthdays or classroom displays.
– Drape along a mantle or doorway to brighten a hallway.
Next steps
– Pick a color scheme, cut the strips, and start linking. You can finish and hang today.
14. Paper Feather Wall Art

You want wall art that feels soft and fresh. Paper feather wall art fits. It adds color and motion without heavy frames. This DIY is easy and works with boho or nature vibes.
What you need
– Colored paper in a few shades
– Scissors, pencil, and a ruler
– Glue or tape
– String or clear thread
– Optional: paint, glitter, or markers for extra shine
Here is why this setup helps you. The papers are light, so you can move pieces around until the wall feels just right. You can swap colors anytime to refresh the look.
How to build your feather art
– Cut feather shapes in different sizes from your colored papers.
– Make a small stack of feathers and lay them out to see a gradient from light to dark.
– Arrange them on the wall as a cluster or slide strings across a dowel for a mobile feel.
– Attach each feather with glue or tape, or hang the strings with removable hooks.
– Add light sparkle by brushing a bit of glitter or metallic marker on the tips.
Next steps are simple. Start with a 1–2 foot wide group in a calm color palette. Then you can grow the piece by adding more feathers over time.
Display ideas
– Create a vertical row along a hallway or above a sideboard.
– Form a loose bouquet on an empty wall space.
– Mix with natural textures like wood accents for a balanced look.
Care and tips
– Paper can fade in strong sun or warp in humidity. Keep it away from direct heat and moisture.
– If a feather bends, flatten it gently with light pressure under a stack of books.
– Use removable adhesive hooks so you can move the art without damage.
Next steps
Try this project this weekend. Start with eight feathers, then expand if you love the look. This paper feather wall art stays light, stylish, and easy to refresh.
@media(max-width:480px){
15. Fun Paper Frames

You want a lively wall that shows your child’s art without buying heavy frames. Paper frames are affordable, playful, and easy to change. Here’s how to make a small gallery that grows with your kid.
– Materials you’ll need. Colored paper, scissors, tape or glue, stickers or glitter, washi tape, and a string with clips or small backings to hold art.
– Make the frames. Cut paper into simple frame shapes. Try 4×6 and 5×7 sizes for variety. Leave a window in the center where the art will show.
– Decorate the frames. Add a border with glitter, stickers, or cool tape. Keep it simple so the art stands out.
– Add the art. Slip the kid’s drawings or photos into the frame window. Tape the artwork in place or use a light glue dot so you can swap it later.
– Hang it up. Lay out frames on the wall first. Then mount them with tape, or string a line and clip frames along it for an adjustable look.
– Tips for a dynamic display.
– Mix different frame sizes for an eclectic vibe.
– Let your child pick which art goes in each frame.
– Change the art every week or month to keep the wall fresh.
– Seasonal art fits nicely, from spring doodles to holiday crafts.
Next steps: grab supplies, cut frames, decorate, and start your own art gallery at home.
16. Colorful Paper Stars
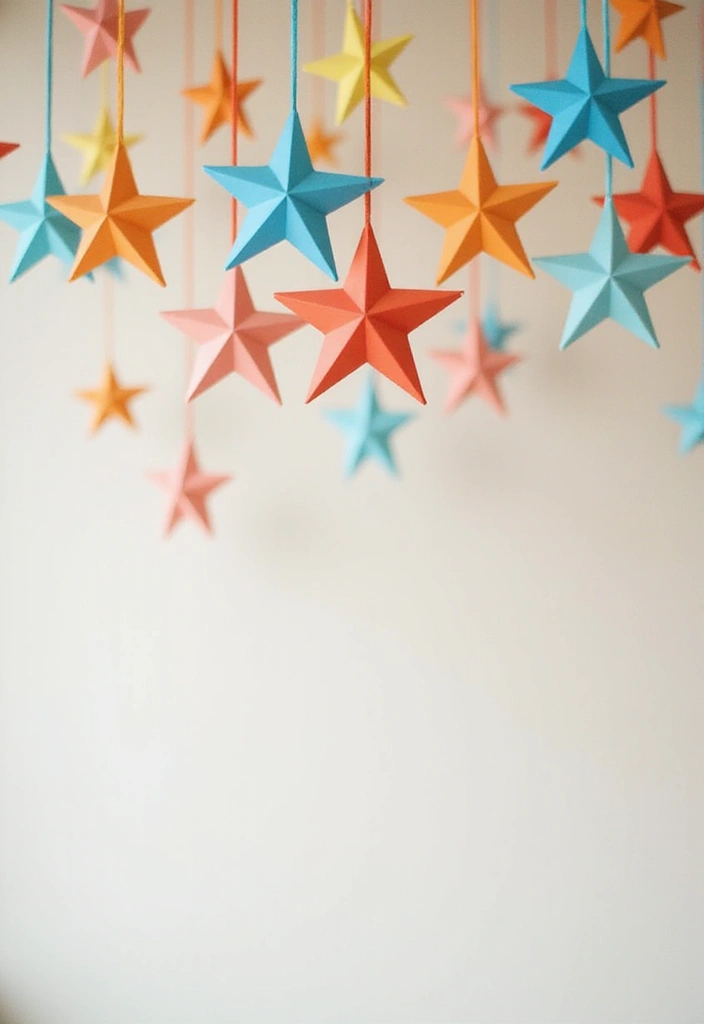
You want a fun, easy way to warm up a kid’s room. Colorful paper stars do that with light and color. They’re affordable, safe for little hands, and quick to make. Hang a few from the ceiling or place a trio on the wall to spark imagination. Here is why they work: simple to make, safe for kids, and easy to customize.
Materials
– Colored craft paper in three to six shades
– Scissors
– Clear fishing line or string
– Tape or glue
– Optional: glow-in-the-dark paper
– Optional: glitter or metallic papers
Steps
– Cut star shapes in three sizes.
– For depth, pinch or fold each star, then glue two together.
– Poke a small hole or tie a loop at the top of each star.
– Thread stars onto clear line, spacing them at different heights.
– Hang from the ceiling or on a wall grid to create a star wall.
Tips
– Group stars in a cluster above a bed or reading nook.
– Pick colors that fit the room’s palette.
– Vary string lengths for a playful cascade.
– Keep strings away from small hands for safety.
Next steps: choose a color mix, gather supplies, and start your paper star project.
@media(max-width:480px){
17. Interactive Paper Art Board
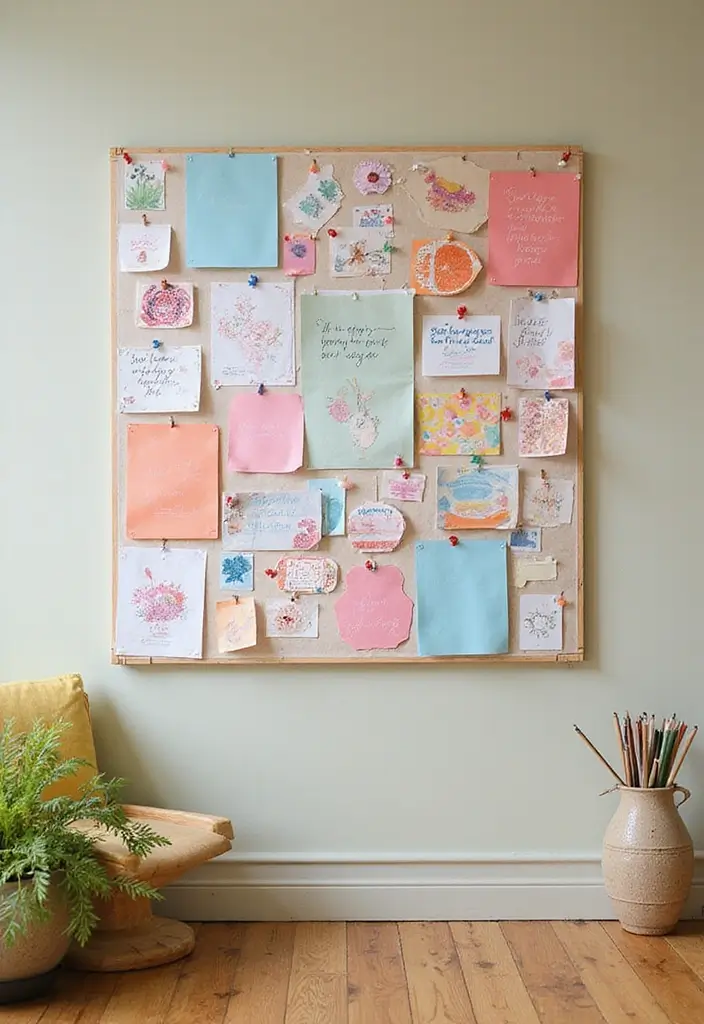
Interactive Paper Art Board is a simple way to turn wall art into a living display.
– Start with a corkboard or a light frame. Use removable pins or glue dots so pieces can move.
– Gather paper crafts. Include flowers, animals, shapes, and seasonal pieces.
– Sort pieces by theme or color for easy swaps.
How you use it. You and your child can refresh the board any day. Move pieces to tell a new story or mark the season. Keep the board at a kid-friendly height so little hands can reach.
What you gain. The board teaches choice and planning. It sparks quick wins and shows how small changes change the room.
Practical tips. Label each piece with a note like Spring or Winter. Use color stickers to signal seasons. Draw a simple plan on the back to keep swaps neat.
Maintenance. Swap one or two pieces each week. Store extras in a folder for later use.
Reality check. It does not replace big art projects. It adds daily chances to create and learn. It’s a low-cost decor idea that grows with your child.
This setup is easy to start and grows with your space.
18. Colorful Geometric Wall Art
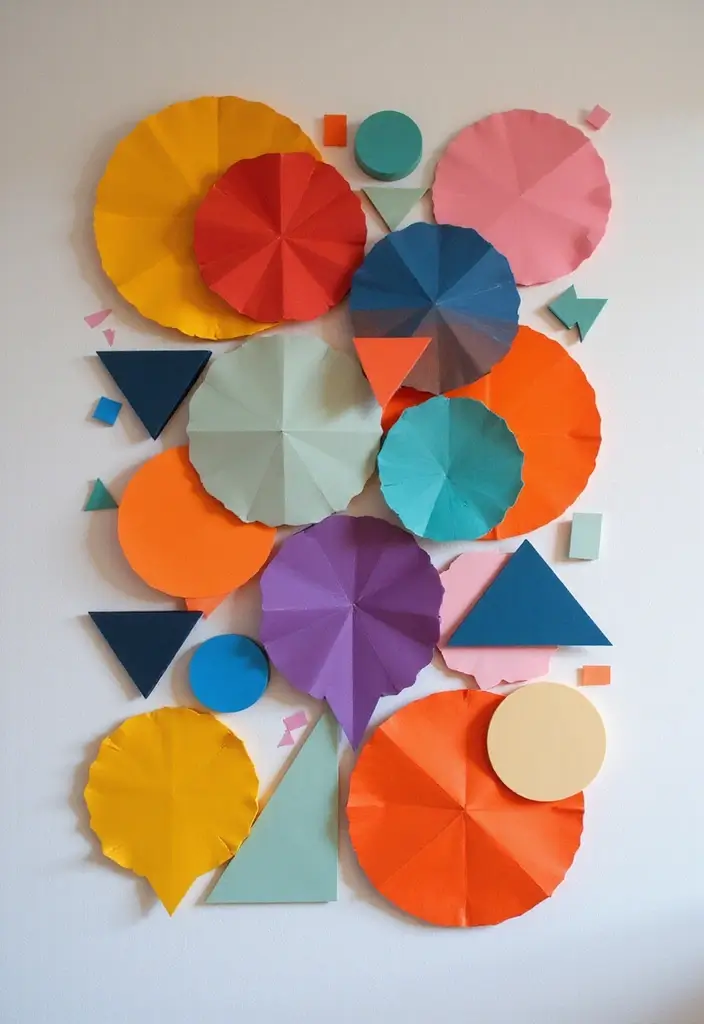
Want a bright wall that’s easy to make and fun for kids? Colorful geometric wall art cut from paper can do that in minutes. Shape a bold look with triangles, squares, and hexagons in lively colors. Put them on the wall in a pattern or in a free, abstract spread.
Here is why this works. It’s simple to cut, easy to change later, and a quick project you can do together. It teaches shapes and how a small change in color or placement shifts the mood of a space. Plus, it fits any wall size and can grow with you over time.
What you need
– Colored paper in a few tones that go together
– Scissors and a ruler for clean cuts
– Tape or washi tape to hold pieces in place
– A clean, flat wall area to work on
Steps
1. Pick a color scheme you love and stick to it for a cohesive look.
2. Cut shapes in 3 or 4 sizes from your paper.
3. Lay the pieces on the floor to test a pattern or gradient before sticking.
4. Attach with tape, keeping even spacing for a tidy finish.
Design ideas
– Create a color gradient from light to dark.
– Form a loose grid for a modern, orderly feel.
– Build a freeform mosaic that wraps around a corner or window.
Next steps: grab your supplies, plan your layout, and start sticking. Your space will feel fresh and personal.
@media(max-width:480px){
19. DIY Paper Silhouettes
You want easy wall art that feels personal. DIY paper silhouettes fit the bill. They’re simple to make, yet they look intentional. Start with a plan. Pick a theme like animals, trees, or simple shapes. Turn that idea into a cut-out on paper. Let’s break it down.
– Materials: black or colored paper, scissors or a craft knife, a cutting mat, a sturdy background, glue or tape, and masking tape for mounting.
Here is why this works: it’s quick, cheap, and you can change it anytime.
Next steps:
– Draw or trace your shape.
– Cut slowly along the lines.
– Mount on a contrasting background. White behind dark shapes is classic.
– For depth, add a second silhouette on a slightly smaller or lighter backdrop.
– Hang with tape or a small frame. Swap shapes when you want a new look.
Tips: keep edges clean, cut extra shapes for quick swaps, and involve kids by tracing and naming shapes. These silhouettes can spark stories and imagination in any room.
If space is tight, use one large silhouette. On a gallery wall, mix a few sizes for rhythm.
20. Hanging Paper Planes
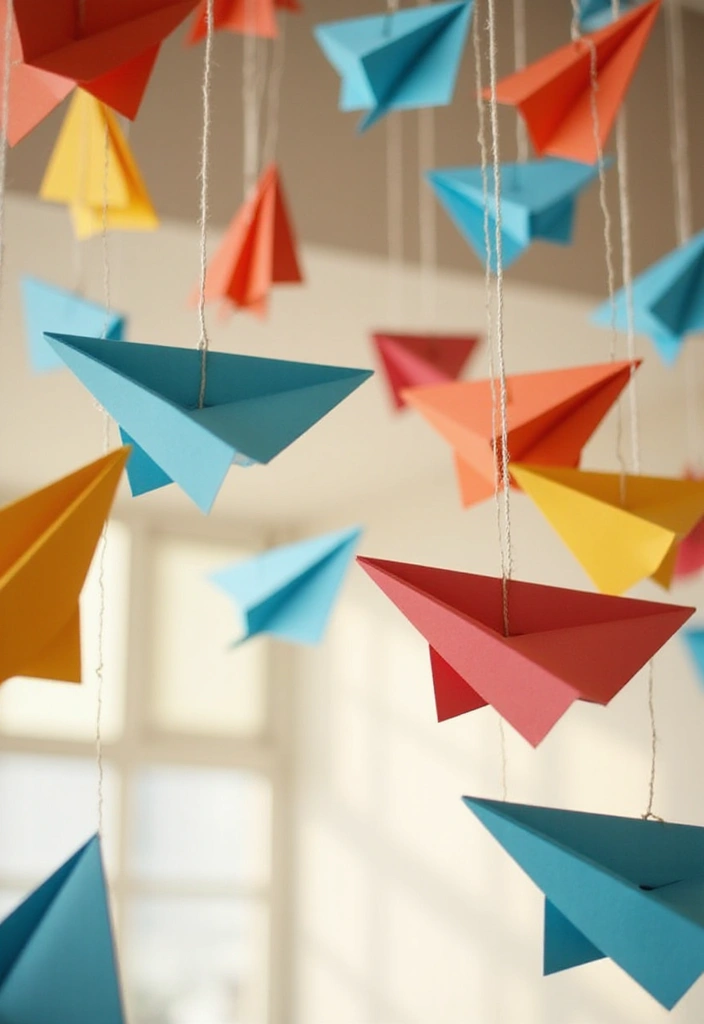
Want a playful ceiling that catches the eye in your child’s room? Hanging paper planes are an easy DIY option. They add motion and color without crowding the floor. You fold simple planes, string them up, and the space feels lighter and full of imagination. Here is why this idea works: it turns a plain ceiling into a moving mural.
Materials
– Colored paper in a few shades
– Scissors
– Ruler
– Pencil
– Clear tape or glue dots
– Thread or thin fishing line
– Small ceiling clips or lightweight hooks
Steps to hang your planes
– Start with two easy plane designs: a classic dart and a wide glider.
– Fold each plane with a few simple creases.
– Thread a short piece of string through a tiny hole or tape a small strip to the nose.
– Tie the other end to a ceiling clip or hook.
– Repeat to make several planes at different heights.
Arrangement tips
– Space planes at various angles for a sense of movement.
– Vary the sizes to create a playful cascade.
– Use colors that match or brighten the room’s palette.
Safety and care
– Keep lines away from lights and fans.
– Check the knots and holders every so often.
– Dust gently with a soft cloth.
Next steps
Want more glow? Try glow-in-the-dark or neon paper for a nighttime surprise. This simple wall art doubles as a learning moment about flight and design.
21. DIY Paper Wall Calendar
If you want a calendar you can touch and use every day, try a DIY paper wall calendar. It stays useful and adds a small craft moment to your routine.
Materials
– Colorful paper for each month
– A sturdy sheet for the grid
– Ruler, pencil, scissors, glue
– Stickers or simple drawings
– Removable adhesive like poster putty or removable tape
Setup
– Draw a clean month grid on the sheet
– Add the days of the week at the top
– Color each month or add small illustrations
Make it kid friendly
– Let kids decorate with drawings and stickers
– They can mark birthdays, tests, and big moments
– Use different colors to show events
How to use
– Put numbers with removable adhesive so you can shift dates
– Hang it where you see it daily, like the kitchen or hall
– Keep a cloth handy to wipe smudges
Why it helps
– Decorating teaches planning and responsibility
– It becomes a steady part of your daily routine
Space and size
– Space matters for comfort. For a small wall, try one page per month on a long strip
– If you have room, lay out two pages side by side for more writing space
– A flat, clean surface helps you wipe dates and plans without fuss
Next steps
– If you want a cleaner look, print a ready grid and decorate around it
– Try color codes for months to spot dates fast
@media(max-width:480px){
22. Paper String Art
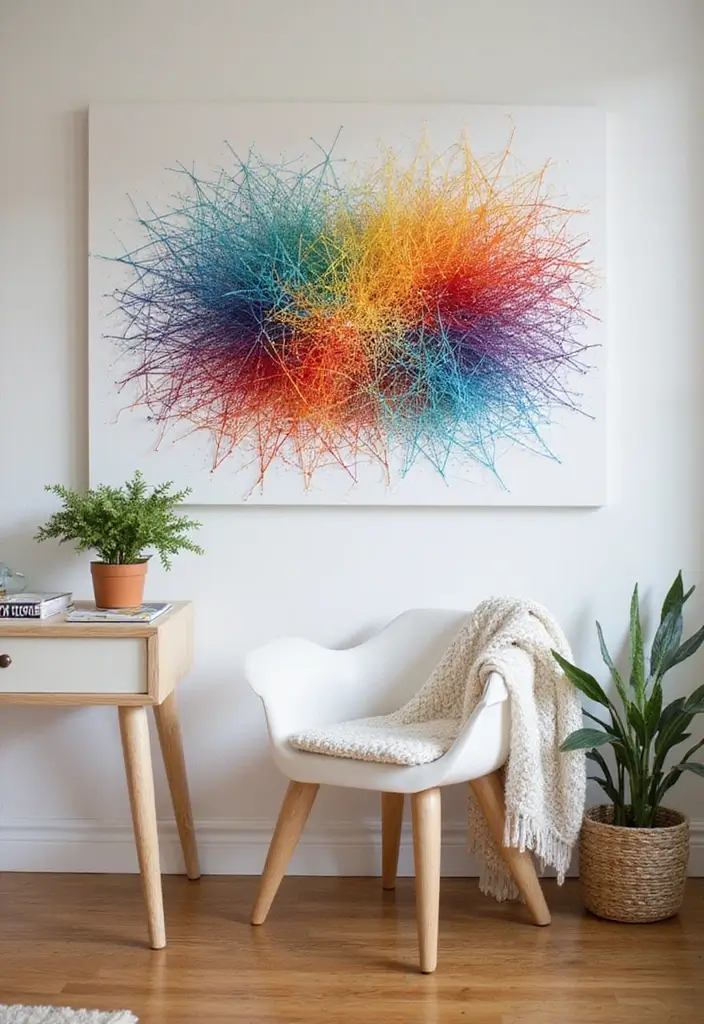
You want DIY wall art that’s simple to make and looks cool. Paper string art lets you do that. It uses a cutout shape and string to build a textured, colorful image without heavy tools. Here is why it fits many spaces.
These shapes fit any space. You can size the pieces to fit a small shelf or a wide wall.
– Materials
– Thick paper or cardboard for the shape
– Colored string, embroidery floss, or thin yarn
– Scissors, tape, and glue
– A pin or safe push pin to make holes
– A sturdy backing board or cork board
– Optional: a simple frame to finish
– Steps
– 1. Cut a basic shape such as a heart, star, or simple animal silhouette.
– 2. Poke evenly spaced holes along the outline.
– 3. Fasten the shape to the backing board with a little tape.
– 4. Thread string from hole to hole. Outline first, then fill the area with cross hatching or diagonal lines.
– 5. Tie off ends and trim. Press gently to flatten.
– Tips
– Pick two or three colors that pop against your paper.
– Keep hole spacing even for neat lines.
– Start with a simple shape before trying complex ones.
– Let kids pick colors to boost pride and creativity.
Next steps: hang your finished piece and try a new shape on your next craft night.
@media(max-width:480px){
23. Paper Animal Masks
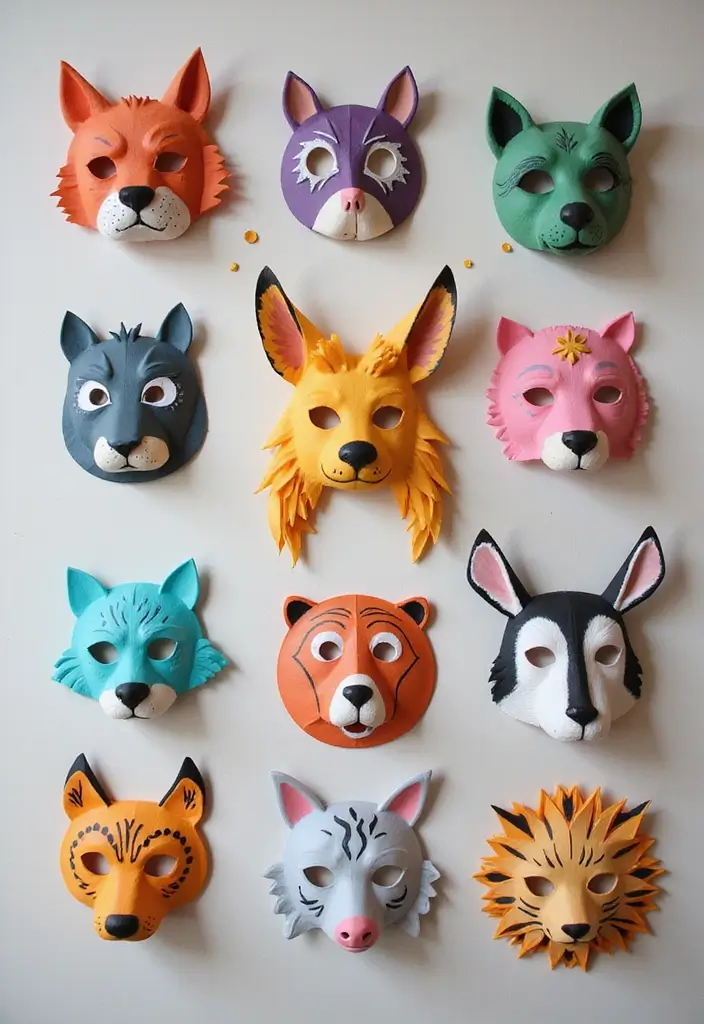
Are you looking for a quick, kid-friendly craft? Paper animal masks fit that need. They turn simple colored sheets into friendly faces. You can finish one mask in about 20 to 30 minutes, even with little helpers.
What you need to start
Grab sturdy colored paper, kid-safe scissors, non-toxic glue, elastic or string, and markers or stickers.
Let’s break it down.
1) Choose an animal your child loves and sketch a simple mask shape.
2) Cut out the mask and the eye holes.
3) Decorate with color, patterns, feathers, stickers, and a bit of glitter.
4) Punch two holes on the sides and thread elastic, or tie a string.
5) Try the mask on and adjust the fit if needed.
6) Store finished masks flat in a folder for later use.
These masks spark dress-up play and help kids tell stories. They also make great party favors or classroom activities.
Tips for great masks
– Use cardstock or thicker craft paper for sturdiness.
– Let glue dry so pieces stay put.
– Keep scissors kid-safe and supervise.
– If you use glitter, apply a light coat of glue first to reduce mess.
– Pick bold colors to make the masks pop.
Ready to begin? Gather supplies and dive in. Share photos of your masks and ideas.
@media(max-width:480px){
24. Paper Wreaths
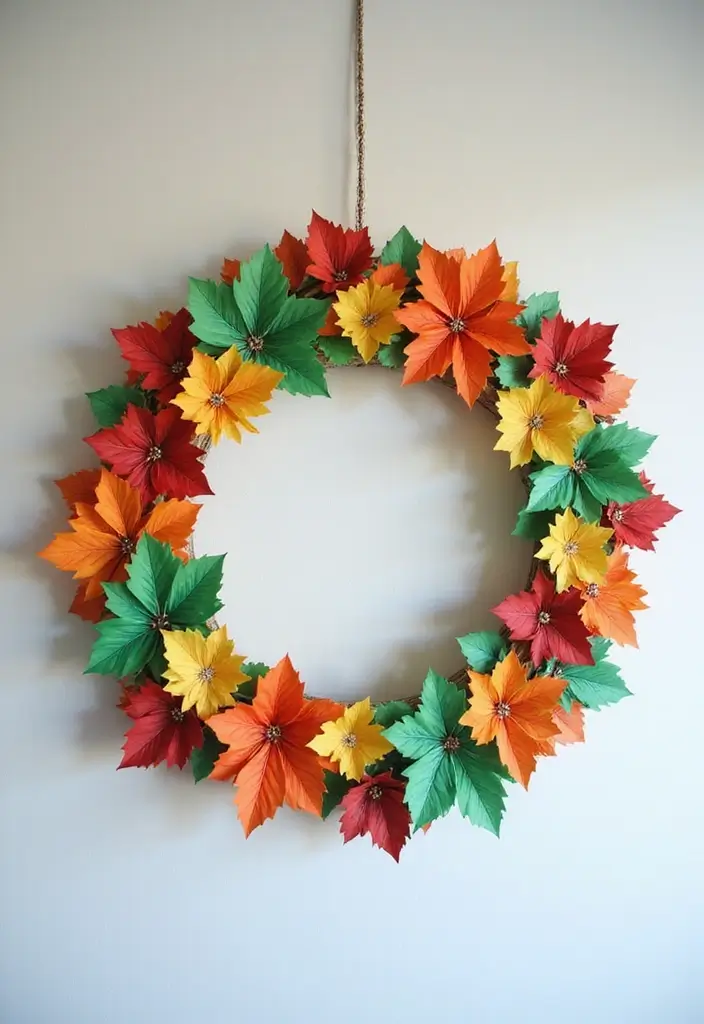
Here is why you should try paper wreaths. They greet guests with a soft, friendly look. Use colored or patterned paper to make leaves and petals. Shape them into a circle on a simple base. Pick a season or event to guide your colors. Kids enjoy choosing papers and trying new shapes.
– Use recycled paper for an eco-friendly twist.
– Hang the wreath on a door or wall for a cheerful welcome.
– This craft builds creativity and resourcefulness.
Here is how to do it. Gather a circular base (foam, cardboard, or a sturdy ring), scissors, glue, and your chosen papers. Cut lots of leaf shapes and flower shapes. Place large pieces around the ring first, then fill in with smaller pieces. Layer petals to add depth. Add texture with a ribbon, twine, or a button for a final touch.
Next steps: finish with a bow, and pick a spot near the entry. Hang with a nail or a strong hook. Change colors with the seasons to keep your space fresh all year.
You can try different bases, like a cardboard cutout or a foam ring. Make a tiny bow for a finish.
That’s it. A simple project that changes a room.
@media(max-width:480px){
25. DIY Paper Animals Wall Decals
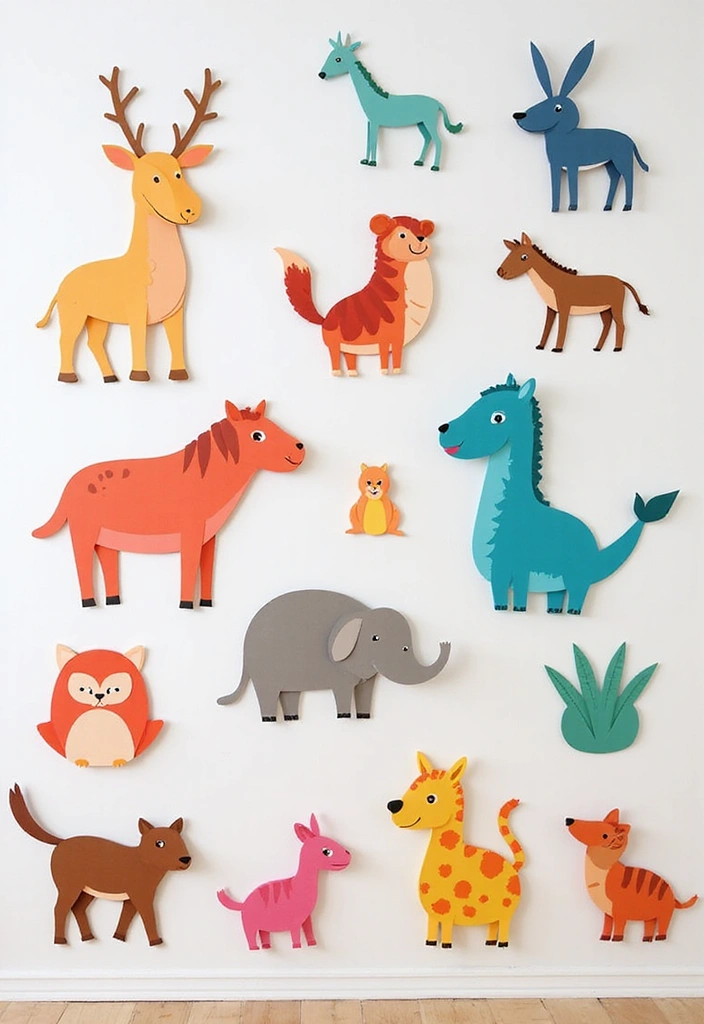
Here is why DIY paper animal wall decals can solve your wall art problem. You want something cute, easy to update, and not permanent. These decals fit. They add life to a room and stay light on walls. You can mix plain white shapes with colored pieces to fit any room.
– Create a safari scene, jungle, or ocean theme based on your interests.
– Use removable adhesive so you can move pieces easily.
– This project helps you learn animal names and traits.
These decals cut and place quickly. They stick to smooth walls and come off without damage.
Materials you’ll need
– Sturdy paper and scissors
– Low-tack adhesive like poster putty
– A flat space to plan your layout
Let’s break it down
– Cut simple animal shapes with clear edges.
– Lay out on the floor first, then place on wall.
Tips
– Keep pieces small and balanced.
– If a piece lifts, press again or add a dab of removable adhesive.
Next steps
– Move the decals around for a fresh look.
– Add a few color accents like leaves or shells to match the theme.
@media(max-width:480px){
Conclusion
These 25 paper wall art DIY designs not only enhance your child’s room but also foster creativity and bonding time. Each project offers a chance to explore different techniques and styles, allowing kids to express themselves in vibrant ways.
So gather your materials and start crafting together! You might just discover a new family favorite project that can grow and change with your child’s interests.
Note: We aim to provide accurate product links, but some may occasionally expire or become unavailable. If this happens, please search directly on Amazon for the product or a suitable alternative.
This post contains Amazon affiliate links, meaning I may earn a small commission if you purchase through my links, at no extra cost to you.
Related Topics
paper wall art
DIY home decor
kids room decor
paper crafts
easy DIY
whimsical art
interactive wall art
colorful designs
budget friendly
creative projects
kid-friendly crafts
wall decor ideas