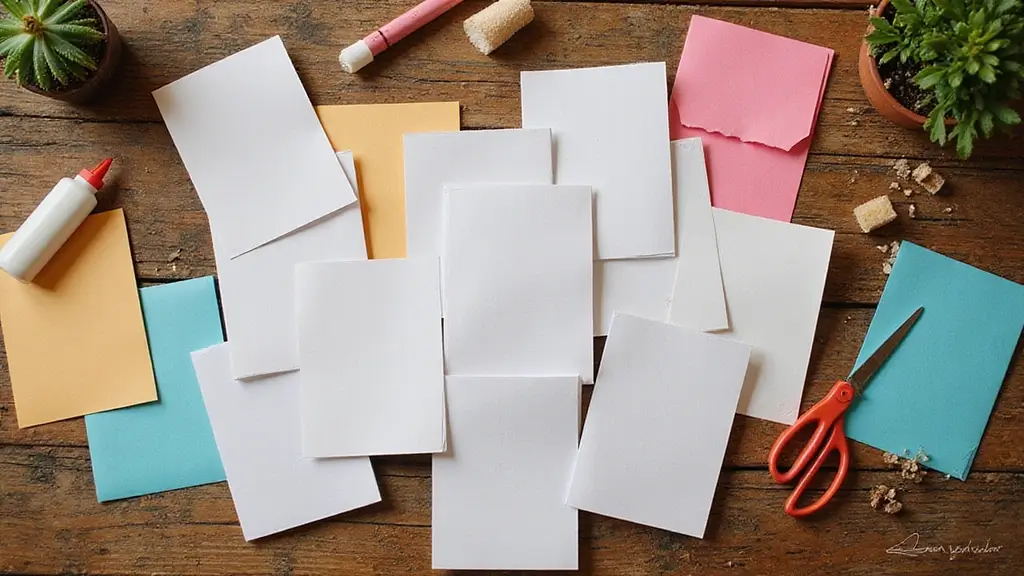
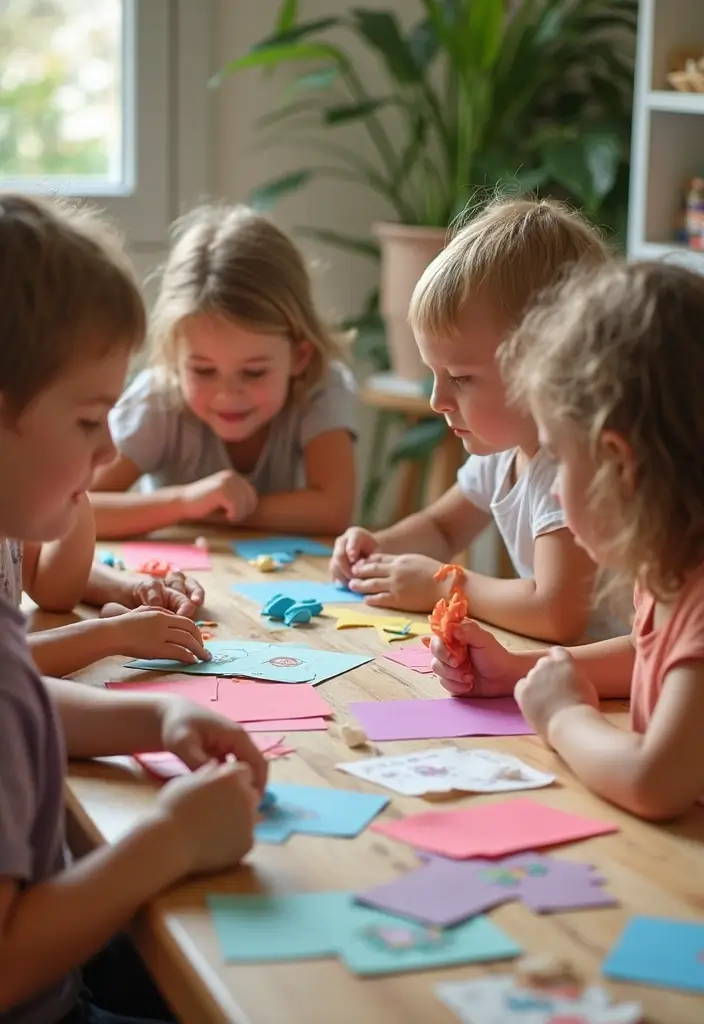
I put this together because I know how hard it is to find simple, screen-free activities that kids actually want to do. Lately I crave quick crafts that spark imagination without the mess of big kits. Paper toys fit that need. They start with a flat sheet and end with a little friend, a tiny dragon, or a friendly robot you can hold in your hand. You can color them, fold them, and bring them to life with a splash of glue and a dash of imagination. These are easy DIY crafts you can finish in one sitting.
Here is why I made this The idea came from watching kids and grownups reach for screens when a small piece of paper could spark a story. This collection of 30 paper toys is built to be print and go. The ideas are quick to finish, sturdy enough for play, and flexible enough to spark different stories every time. You can tailor colors to your mood, to a classroom theme, or to a party. These mini projects are perfect little DIY crafts that travel well in a tote bag.
Who it’s for If you’re a busy parent, a teacher planning centers, a caregiver, or a curious kid who loves to create, this post is for you. The projects suit small hands and growing skills. They work at home, in a classroom, or on a road trip when you want something creative and calm.
What you’ll get Here are printable templates and clear, step-by-step guides. You’ll find 30 ideas ranging from cute animals to brave heroes. Each toy includes simple folding tips, coloring ideas, and notes about paper weight and glue options so you can start with what you have. The set also shows quick variations to make each toy feel new.
Let’s break it down with a quick example. Start with a friendly fox. Print, cut, fold, glue the ears, color, and you have a toy that becomes a storyteller. The whole process can take 15 to 30 minutes. You can add a background scene or a small shelf display. This works as a calm afternoon project or a classroom center.
Next steps Grab a sheet, pick a toy, and start small. Print a few patterns and save others for later. Try swapping colors or adding tiny accessories with stickers. If you try these, tell me which ones you loved most and how you used them.
1. Origami Animals
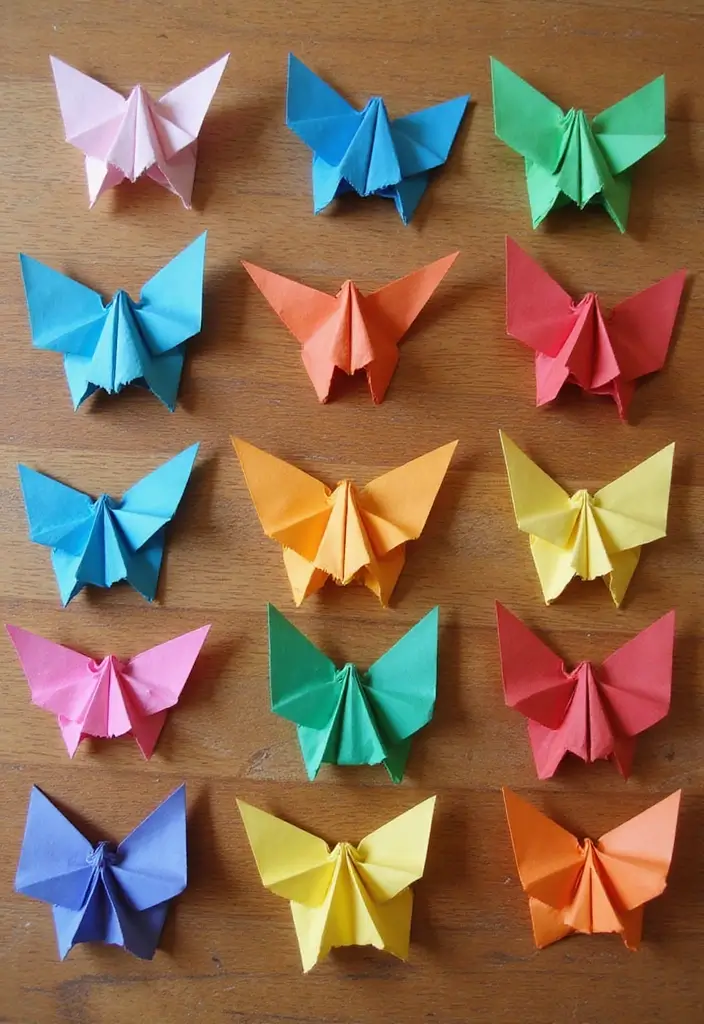
You’re looking for a calm, playful craft that sparks imagination and strengthens hands. Origami animals fit that need. A flat sheet becomes a crane, frog, or puppy with just a few folds. You learn shapes, balance, and a little math without feeling stuck.
Materials are simple. Use light origami paper, or repurpose old magazines for a greener twist. A few colors in a tidy stack will keep you excited to fold. Keep a clean space and a quiet rhythm.
Getting started is easy. Start with a small, friendly figure like a paper dog or cat. When you’re ready, tackle a hopping frog or a crane that seems to fly off the page. Each fold reveals a new shape and a new trick.
Learning tips. Watch short online tutorials that show every crease. Pause when a step is tricky, then try it again. Fold alone for focus, or host a folding party with friends for a shared smile.
– Begin with light-weight paper for easy folding.
– Follow step-by-step video guides.
– Make time for a quick solo session or a folding party.
Origami boosts fine motor skills, patience, and focus. It also offers color, pattern, and imagination you can display as tiny art.
Next steps: pick a figure, grab paper, and fold your first animal today. Take pride in each crease. Try a new animal tomorrow.
2. Paper Puppets

Feeling stuck for a fun, easy craft? Paper puppets bring stories to life with simple tools.
Here is why they work for you.
Let’s break it down with quick, practical steps.
What you need
– Cardstock in bright colors
– Paper bags or popsicle sticks
– Scissors, glue, markers
– Buttons for eyes, yarn for hair
– A few stickers or bits of glitter
How to build your puppets
– Cut out simple shapes to form a head, body, and arms.
– Glue the shapes onto a stick or a bag.
– Add eyes with buttons and hair with yarn.
– Color features with markers and add tiny details with stickers.
Play ideas
– Put on a small show for family or friends.
– Have each child introduce their puppet and its story.
– Create short scenes and switch puppets to act different roles.
Why this helps
– Puppets spark storytelling and speaking practice.
– Kids plan steps, share ideas, and listen to others.
– The activity uses safe, familiar materials you already have.
Next steps
Grab supplies tonight, pick a quick story, and start crafting. You’ll get a pocket theater right at home.
You can reuse the puppets for new stories. It helps kids learn patience. Try a quick five minute scene today.
3. DIY Paper Airplanes

DIY Paper Airplanes: Quick Start Guide
You want a quick, fun project that also teaches. DIY paper airplanes fit that need. You start with a sheet of paper and a few folds. You can see how the shape and weight change how far the plane flies.
Choose standard printer paper. It folds easily and flies reliably. Heavier stock can travel farther but is harder to fold. Start with regular paper and save stiffer sheets for later tests.
Try a classic dart. Fold the sheet in half lengthwise. Unfold it and fold the top corners to the center line. Fold the tip down to meet the bottom edge. Fold the wings down to form a flat base.
Next, test a simple glider. Fold the sheet in half lengthwise again. Keep the center crease light. Open and fold the wings down on each side to create a long, flat plane. Slightly bend the back ends of the wings for a steadier glide.
Decorate to taste. Use markers or stickers to give each plane a name or theme.
Here are fun ideas for your paper airplane project:
– Challenge friends to see whose plan flies the farthest
– Create holiday planes for Christmas or birthdays
– Host an outdoor flight day to test wind and distance
This craft blends play with science. It shows you how aerodynamics and careful folding matter. It also gives you a quick, hands-on way to learn.
@media(max-width:480px){
@media (max-width: 600px) {
.normal-quiz-iframe { min-height: 570px !important; height: 570px !important; }
}
4. Paper Dolls and Their Wardrobes

You want fast, kid-friendly crafts that spark imagination. Paper dolls fit that need. Cut a simple figure from sturdy paper. Add arms, legs, and a neck line. Draw a friendly face. Then make outfits from more paper. Clothes click on and off for quick play, so kids can mix, match, and get creative. Keep a stash of plain colors for the clothes.
Work with your child. Pick a theme like fairies, space explorers, or sports stars. Use scraps, old magazines, or junk mail for clothes. This keeps costs low and cuts waste. It also shows how recycling can be fun and artistic at the same time. Kids love to swap outfits with friends.
Here is why this project works for you. It blends play with simple steps.
Tips
– Plan a themed wardrobe around one idea, like heroes or animals.
– Hold a mini fashion show to show off outfits.
– Give each doll a simple backstory so scenes can unfold.
– Store finished dolls in a folder or box for reuse.
What you gain
– Fine motor skills grow as small pieces are cut and glued.
– Creativity and storytelling bloom when outfits change and stories unfold.
– Patience and sharing rise during show time.
Next steps
– Gather paper, scissors, markers, and tape.
– Cut a doll and a few outfits.
– Make a quick story for the first dress up.
@media(max-width:480px){
5. Pop-Up Cards
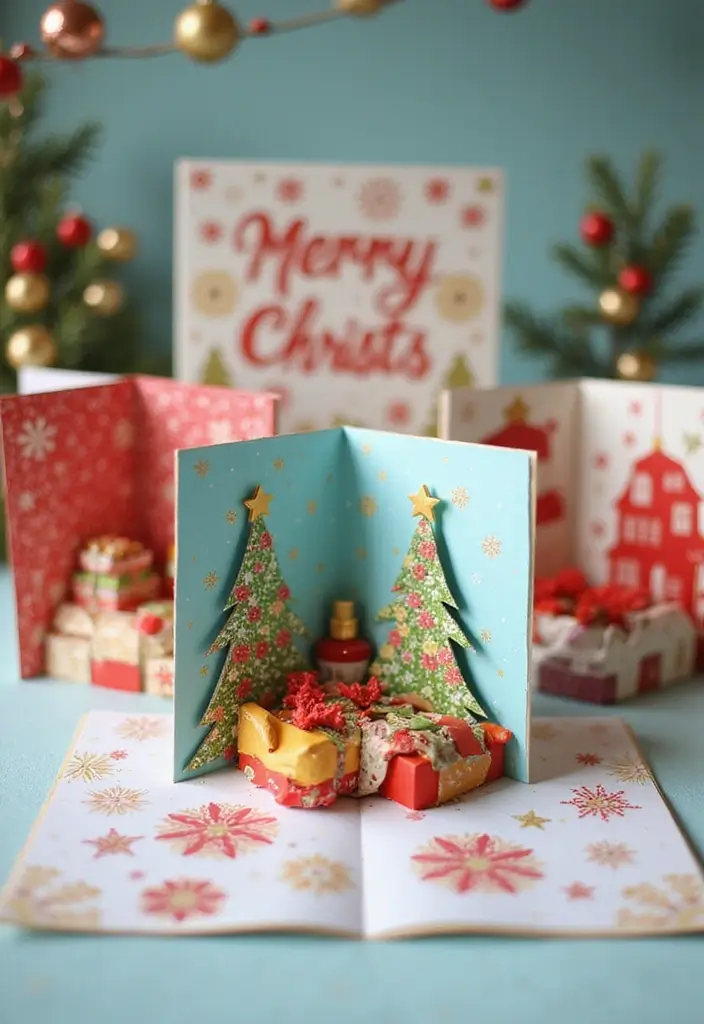
What pop-up cards are
Pop-up cards turn a simple greeting into a tiny stage show. When you lift the flap, a 3D scene jumps out. They feel special without being hard to make. You can use them for birthdays, holidays, or just to say you care.
What you’ll gain
You’ll boost your hand strength and eye feel from folding. You’ll plan ahead as you map out how the pieces fit. You’ll add a personal touch with drawings and messages. And you’ll have a keepsake that friends and family will remember.
What you’ll need
– A sturdy folded card base
– A separate paper strip for the pop-up piece
– Scissors, glue or tape
– Colors, stickers, and markers for decoration
Step-by-step guide
– Start with the card base opened flat. This makes it easier to place the pop-up later.
– Sketch a simple pop-up on a small strip of paper. Plan where it will rise when the card opens.
– Cut a few small slits in the card where the pop-up will sit. These act as anchors.
– Fold the pop-up strip along its scored lines. Create a small tab so you can attach it securely inside the card.
– Glue the tab to the inside panel of the card. Let the pop-up stand up as the card opens.
– Decorate the outside and add a short message on the inside. Keep the design bright and clean.
Tips for a clean pop-up
– Use thicker paper for a sturdier pop-up.
– Start with a simple shape like a flower or balloon before trying animals.
– Test the card by opening and closing a few times to check the action.
– Let colors and textures mix for a lively look.
Next steps
Try a two-layer pop-up next time. Add a small scene on the inside and a bold greeting on the cover. With practice, your pop-up cards will become a fun, reliable way to share joy.
@media(max-width:480px){
6. 3D Paper Models
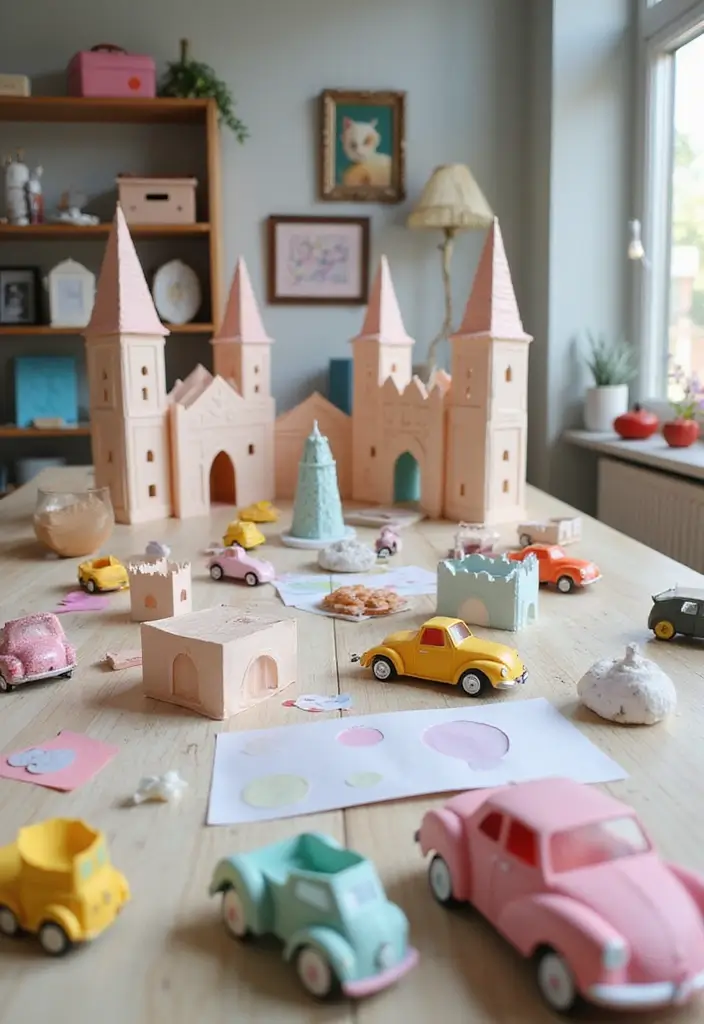
If you want a fun, doable project that doubles as decor or a toy, try 3D paper models. You’ll build real, tactile pieces from simple paper and scraps. They’re affordable, quick to finish, and surprisingly sturdy after you glue them together.
What you need
– Recycled cardboard or thick paper
– Scissors, glue, and tape
– Printable or hand-drawn templates
– A ruler and pencil for neat folds
– Markers or paint for color and detail
Getting started
1) Choose a simple template to begin.
2) Print it or draw it on paper.
3) Cut along the lines, then score the fold lines with a ruler.
4) Fold and crease cleanly to form edges.
5) Glue tabs to join pieces and build your 3D shape.
6) Add color and small details with markers or paint.
Tips for stronger models
– Use light glue and let it dry fully before moving.
– Score all fold lines for crisp edges.
– Work in a flat, clean space to stay tidy.
– Reinforce bases with extra strips of paper.
Project ideas
– Build a tiny Eiffel Tower or Great Wall replica.
– Create a simple car, boat, or airplane.
– Design a castle, ship, or a friendly dragon.
– Craft a fantasy creature from layered shapes.
Display and care
Show off your 3D models on a shelf or desk. Keep them dry and away from heavy handling. They make great gifts or classroom room decor.
@media(max-width:480px){
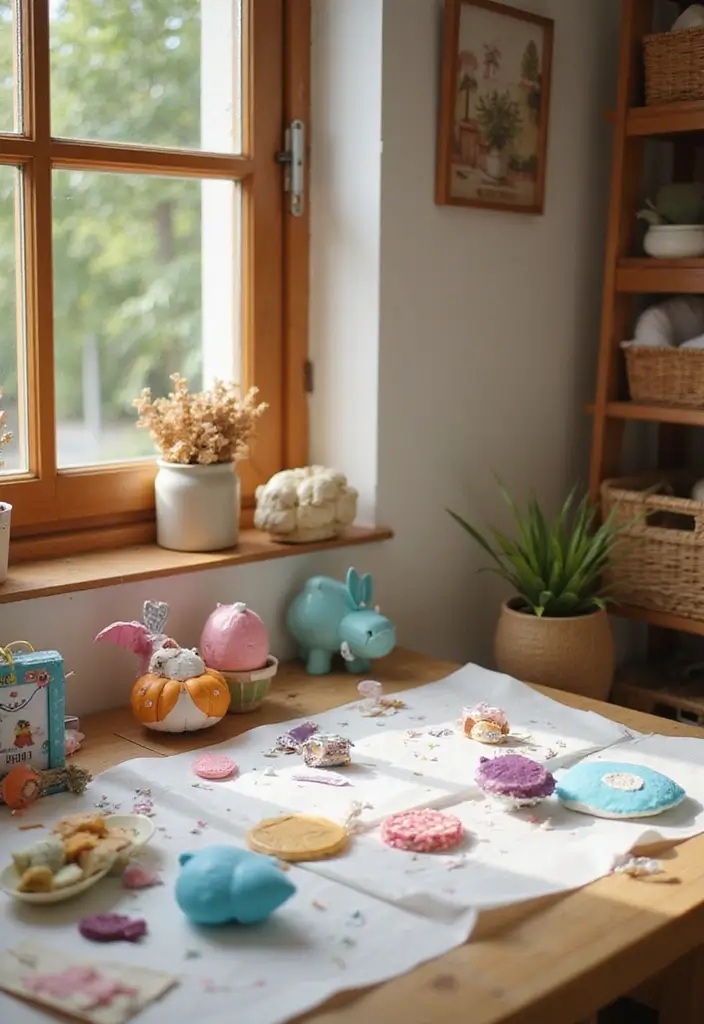
7. Paper Mache Creations

Paper mache can be a bit messy, but it pays off with light sculptures and masks that take color. Here is why this craft is a solid pick for you and your kids: it uses simple materials, dries into a solid form, and invites big imagination.
What you need to start:
– Balloons or foam bases
– Newspaper strips and thin paper
– Glue or flour paste mixed with water
– A clean bowl, brush, and a little tape
– Paints, markers, and any decorative bits
Steps that work well:
– Build a base. Inflate a balloon or shape a sturdy frame.
– Mix a glue paste. Water and flour make a smooth, sticky mix.
– Layer paper. Dip strips, smooth over the form, and let each layer dry. Add several coats for strength.
– Dry completely. Patience helps this harden evenly.
– Finish. Paint, add color, and seal with a varnish or clear nail polish.
Ideas to try:
– Animal masks for dress-up play.
– Small bowls or storage containers.
– Sculptures of favorite characters or toys.
Tips for success:
– Keep layers thin and even.
– Lay down old newspaper to catch drips.
– Let dry overnight to avoid cracking.
Next steps:
pick a base, gather strips, and start your first project.
@media(max-width:480px){
8. Paper Bead Jewelry

You’re looking for a craft that is fun, cheap, and kind to the planet. Paper bead jewelry fits. It turns old magazines or gift wrap into bright beads you can wear or gift. You see patterns form as you work. You get a tangible result fast.
Here’s how to make it. First, cut a strip of paper about 1/4 inch wide and 6 inches long. Then roll the strip tightly around a toothpick or thin skewer until a bead forms. Seal the edge with glue. Keep rolling until the bead feels smooth. Let the bead dry. Repeat to make many beads. Once dry, slide off the skewer and coat lightly with glue or clear nail polish for shine.
What you’ll need
– Paper strips from magazines or wrapping paper
– White craft glue
– Toothpicks or skewers
– Clear sealant or nail polish
– Scissors and stringing material
Cool ideas
– Make a set of earrings, a bracelet, and a necklace that match
– Host a mini bead party with friends to swap patterns
– Try different papers and color blends for each bead
Why it helps
– It boosts creativity and fine motor skills
– It teaches color, pattern, and repetition
– It cuts waste by turning scraps into art
Next steps: practice a color plan, then lay out a simple bracelet. You can grow from there.
@media(max-width:480px){
@media (max-width: 600px) {
.visual-quiz-iframe { min-height: 995px !important; height: 1100px !important; }
}
9. Paper Rockets

Want a quick, hands-on way to show how rockets fly? Paper rockets fit that need. They use simple supplies and turn ideas into action.
– Materials – Lightweight paper, a paper tube or cardboard tube, tape, scissors, and markers or paint.
– Roll the hull – Roll a sheet into a sturdy hand-held tube.
– Form the nose cone – Fold a sheet into a cone and tape it on.
– Attach fins – Cut small triangles and tape them to the base.
– Decorate – Decorate with markers, stickers, or paint.
– Launch tips – Test different designs and see which flies highest.
Set up a safe testing space. A flat surface works. Keep people and pets away. Push the rocket with a gentle gust of air from a straw, or use a soft launcher to start.
Why this works? You see how light paper and a smooth nose help lift. A small tail fin steadies the rocket and improves propulsion.
Next steps are simple. Compare two designs and note which goes farthest. Then tweak one feature at a time and try again.
Building and launching paper rockets builds curiosity and basic science skills.
Keep notes and share results with friends. Over time you will see bigger jumps in your rocket ideas.
10. Paper Flowers
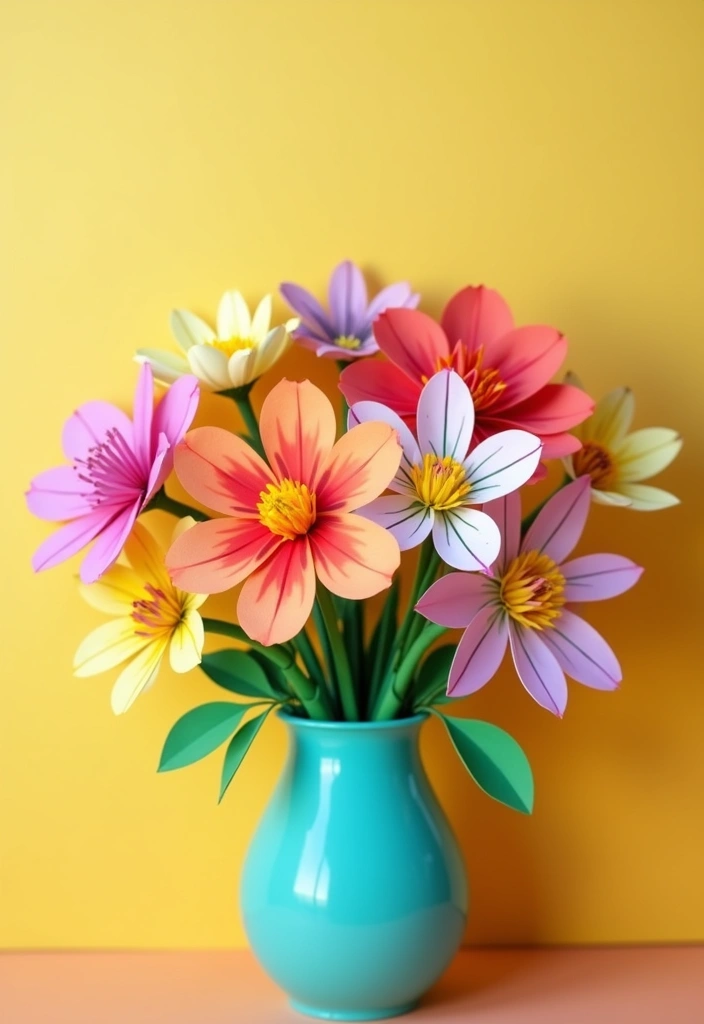
Do you want decorations that are easy for kids and last a long time? Paper flowers fit. They brighten a room and never fade with a little glue and imagination.
Materials
– Colored or scrapbook paper
– Scissors and glue
– Green stems such as pipe cleaners or thin cardstock
– Optional: a foam base for a centerpiece
How to make them
Cut several petal shapes. Layer the petals to form a bloom. Glue the layers so they stay. Attach a green stem and a few leaves. Gently fluff the petals to add depth.
Tips for kids
Choose bold colors. Use double‑sided paper so both sides show. Pre-cut shapes save time. Add a small desk center with a marker dot in the center for detail.
Creative ideas
Make a birthday bouquet, or a table centerpiece. Clip a few flowers to cards or gift wrap. Cluster different sizes for a fuller look on a mantel.
Smart variations
Try flat two‑color blooms for cards, or three‑dimensional petals for a fuller bouquet. Use simple greens for stems to fit any decor.
Here is why you should try this: paper petals teach color play, a calm craft, and you get reusable decor.
Next steps: grab supplies, pick a color set, and start with a small bouquet. Share your bouquet ideas in the comments.
11. Paper Chains

If you want a quick, kid-friendly craft that also makes great party decorations, paper chains are a perfect pick. They boost hand control and spark creativity, with repetition that kids find satisfying.
What you need
– colored paper strips, about 1 inch wide and 6 inches long
– kid-safe scissors
– tape or glue
– optional markers or stickers to decorate before linking
How to make them
1) Cut several strips in different colors.
2) Make a loop with the first strip and seal it with tape or glue.
3) Thread a second strip through the loop, then close its ends to form the next link.
4) Repeat to build a long chain.
5) Hang the chain as a banner on a wall, doorway, or ceiling.
Creative twists
– Use patterned or shiny paper for a party look.
– Alternate colors to create a simple pattern.
– Pick a theme, like red and green for holidays or pastels for spring.
– Challenge a friend to see who can make the longest chain.
Here is why this works
Looping and linking trains finger control and focus. It also gives kids a chance to work together on a shared banner.
Tips for easy crafting
– Have pre-cut strips ready for younger crafters.
– Add a small piece of tape on each link end to keep links secure.
– Let kids decorate strips first, then link them for extra flair.
Why this helps
– Builds fine motor skills and concentration.
– Encourages teamwork when making chains together.
Next steps
– Try a short chain as a bookmark or use several as a bright party garland.
12. Paper Kites

Your goal is a quick, fun outdoor craft. Paper kites fit. They mix art with wind and space to run. Here is why they work: they are light, easy to build, and they fly with little help from you.
What you need
– Colorful paper
– Thin wooden dowels or plastic straws
– Tape or glue
– String or light cord
– Scissors
– Markers or stickers (optional)
Build it
Let’s break it down. Start with a diamond or a rectangle. Place two sticks across to make a cross. Tape them at the center so the frame holds together. Attach the paper sail to the frame with tape. Check that the surface is tight but not stretched too hard. Cut a tail to the bottom. A longer tail helps it stay straight in the wind.
Tips for a smooth flight
– Use bright colors to see the kite from far away.
– Add a tail that is several feet long for stability.
– Decorate with simple designs so it moves with the wind.
– Pick an open area away from trees and power lines.
Ready to fly
Take your kite outside on a windy day. Hold the string and let the wind lift it. Watch it rise, dip, and glide. Plan a small kite-flying day with friends to share the fun.
Next steps: Have fun, keep experimenting with sizes and shapes.
@media(max-width:480px){
13. Miniature Paper Furniture
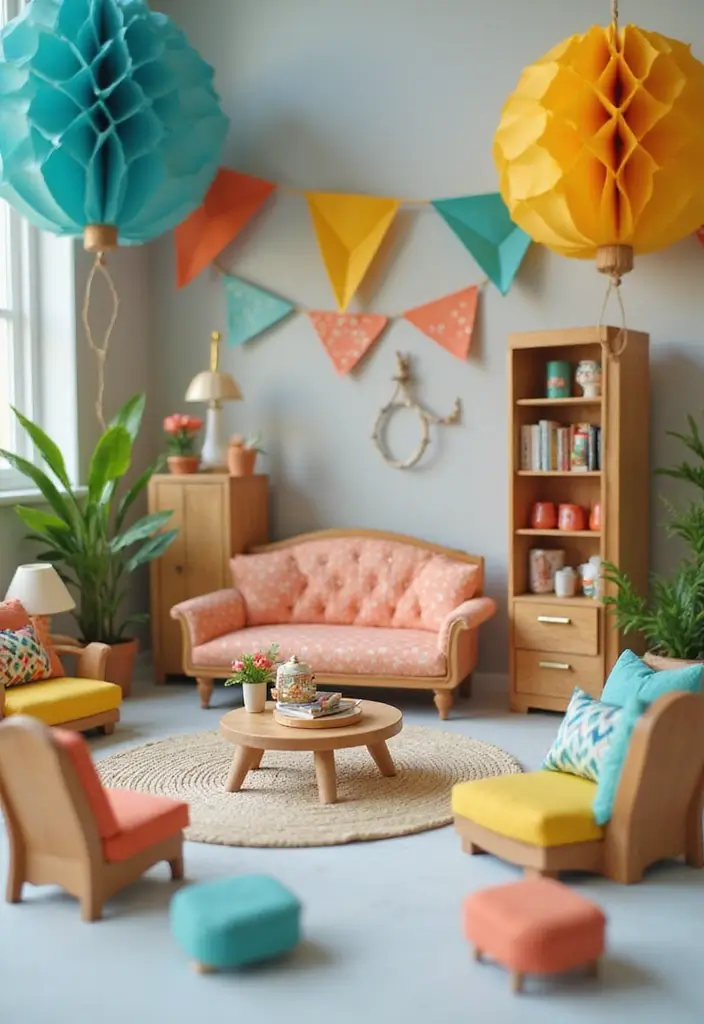
If you want dollhouse decor that won’t cost a lot, try miniature paper furniture. A few cuts and folds bring plain paper to life.
Here is why it fits your day: it uses simple materials, builds steady hands, and invites play.
– Plan first Sketch each piece, like a chair or table. A quick rough drawing stops extra cuts later. Use a ruler to keep lines straight. Label parts so they fit. These steps help you save scraps.
– Choose materials Use sturdy cardstock or recycled paper. Thicker paper holds shape better for tiny furniture. Gather glue, a safe pair of scissors, and markers. Label pieces with colors for quick assembly.
– Cut and fold Cut clean lines and score folds first. Fold along the marks and glue corners to make strong joints. Add tabs where you can to help glue stay put. Use clean scissors for neat joints.
– Decorate with care Color with markers, add small patterns, or use washi tape. Test a swatch of color on scrap paper to see how it looks in light. Keep colors simple to avoid fuzzy edges.
– Play and display Fit pieces before gluing, then let glue dry a bit. Create a tiny room scene and mix bright colors with neutral tones. Display pieces on a small shelf to keep them organized.
This craft sharpens fine motor skills and sparks imagination. You can reuse scraps to add more pieces later, keeping your dollhouse fresh. With practice, you can add more furniture pieces in a weekend.
14. Paper Plate Animals
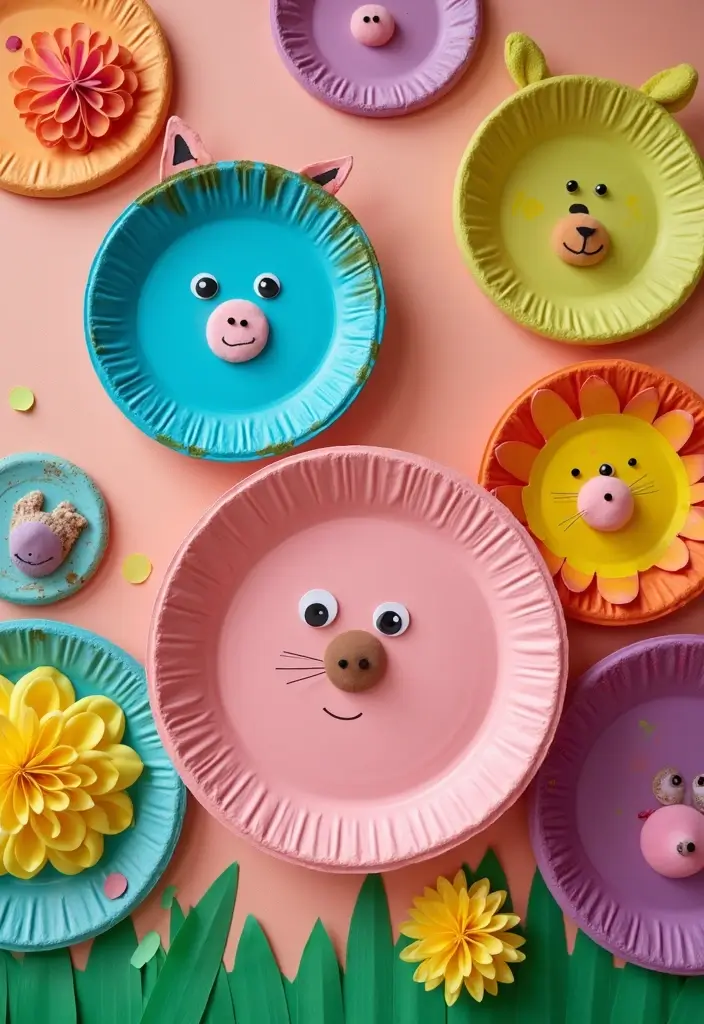
You want a fast, easy craft that kids actually want to do. Paper plate animals fit the bill. They turn a simple plate into a smiling creature with color and texture. You’ll get a small sculpture and a big smile, all from one cheap supply.
What you’ll need
– Paper plates
– Glue or tape
– Scissors
– Markers, crayons, or paints
– Colored paper, foil, fabric scraps, or yarn
– Googly eyes or a marker to draw eyes
How to make them
Start with a clean plate as your base. Pick an animal idea or mix two to invent a new one. Cut out simple shapes for ears, wings, or a mane. Color the plate first, then add the shapes for texture. Glue pieces in place and press firmly so they stay.
Here is why this works. Paper plates are sturdy, easy for small hands, and cheap for many tries. You can layer materials to show texture, shine, and movement.
Fun ideas to try
– Lion on a yellow plate with a crinkled paper mane
– Fish with bright colors and foil scales
– Bird with tissue paper feathers
– Insect with pipe cleaner legs
– Dragon or unicorn with extra scales and bright colors
Next steps: display your creatures, trade ideas, or snap a quick photo to share. Keep experimenting with shapes and textures to grow your skills.
15. Paper Jewelry Boxes

Need a simple craft that also helps you stay organized? Paper jewelry boxes do that and more. They’re tiny works of art you can make from cardstock or recycled paper. They’re great for storing tiny treasures or giving as a thoughtful gift. You get a pretty box and a keepsake at once.
Here is why this project fits you well. It teaches you tidy folding, clean gluing, and a neat finish without hard tools. You finish with a box you can feel proud of.
Materials you need
– Cardstock or thick recycled paper
– Scissors
– Ruler
– Glue or double-sided tape
– Pencil and eraser
– Decorations: stickers, markers, washi tape, small ribbons
How to make a simple paper jewelry box
– Cut a square base from your paper.
– Score lines about 1 cm from each edge.
– Fold up the sides to form the walls.
– Fold the corners in and glue them to seal.
– Repeat with a second, slightly larger square for the lid so it fits over the base.
Decoration ideas
– Color the box with markers or paint.
– Add stickers, doodles, or washi tape for texture.
– Create a quick theme like a treasure box or tiny jewelry holder.
Tips and practical notes
– Use crisp folds with a straight edge or ruler.
– Let glue dry fully before handling.
– Aim for even gaps so the lid sits neatly.
Next steps: pick a paper you love, pick a friend to gift it to, and start crafting. This little box can spark big smiles.
16. Paper Pencil Holders

Want a neat desk and a simple project? You can make paper pencil holders that do both. They use cheap, easy materials and reuse old boxes or rolls. You get a tool for pencils, markers, and scissors.
Here is why this helps you stay tidy and creative.
Materials
– Gather colored paper in two to three colors.
– Use old boxes or paper rolls as the base.
– Have non-toxic glue, tape, and scissors ready.
– Keep markers, stickers, and washi tape handy.
Steps
– Roll a sheet of paper into a cylinder to make a holder.
– If using a box, cover it with bright paper and glue it shut.
– Tape or glue the edges to keep it strong.
– Decorate with stickers and tape.
Design ideas
– Make a jungle look with green leaves and animal stickers.
– Build a space holder with dark paper and star stickers.
– Make a sea scene using blue tones and fish stickers.
For friends
– Make three or four holders to share and keep things organized.
Tips
– Use different heights for a small desk stand.
– Label each holder with a name or color.
– Let glue dry.
These holders keep pencils handy and show you how to reuse old things.
@media(max-width:480px){
17. Paper Collage Art

Struggling to find a kid-friendly craft that uses scraps? Paper collage lets you turn torn paper into bright pictures. It blends art with recycling. Your child becomes a tiny designer as color and shape come together.
What you’ll need
– Gather different colored papers, magazines, old drawings, and a glue stick.
– Decide on a theme or image to build.
– Cut shapes and tear edges to add texture.
– Glue pieces in layers, starting with the background and building toward the foreground.
Steps to start
– Arrange pieces on the page before sticking to plan.
– Use a limited color palette for a clean look.
– Layer pieces to create depth and texture.
– Add small details with markers after glue dries.
Here is why this works for kids. It is hands-on and lets little ones learn by doing.
Here is why this helps them grow. It builds focus and patience as they stack elements and press them in place.
Why this helps
This project boosts fine motor skills as kids press tiny bits into place. It sparks focus and helps kids tell stories with pictures. Plus, it makes use of scraps and keeps art from piling up.
Ways to use collage
– Create greeting cards, wall art, or a small storyboard.
– Make seasonal decor like a spring garden or a winter scene.
– Turn a collage into a story by adding a few captions.
Next steps: Try a mini collage challenge. Set a theme, a time limit, and a space to display. Ask your child to share the story behind each piece.
18. Paper Bookmark Crafts
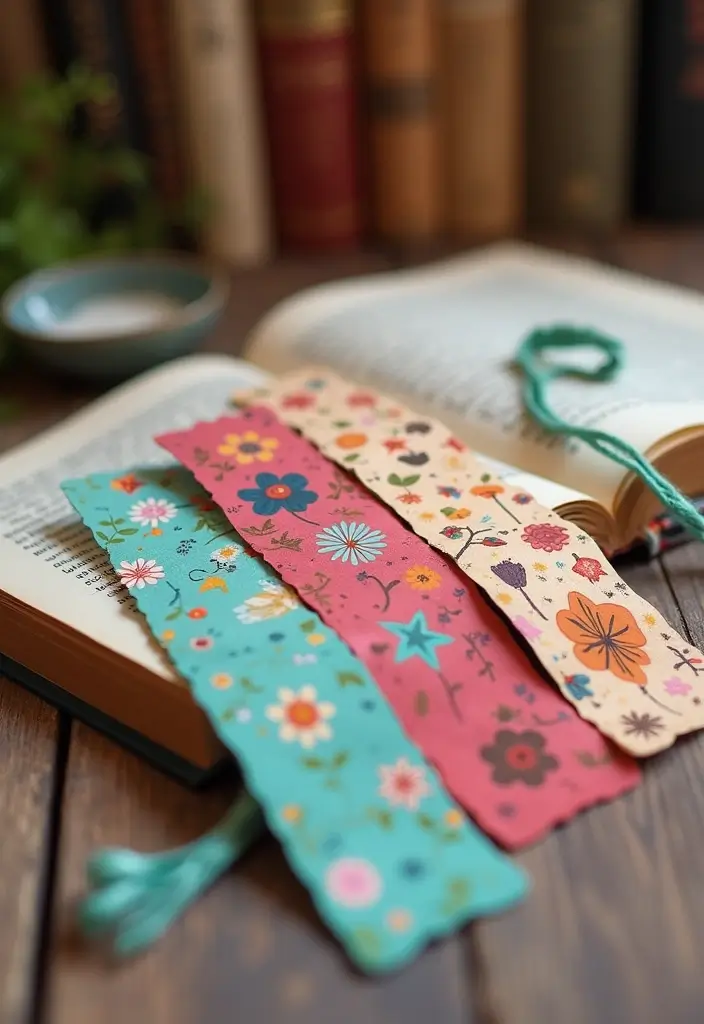
You want a quick, kid friendly craft that makes reading feel special. Paper bookmarks fit that need. They are easy, cheap, and ready in minutes.
What you need
– Sturdy paper or card stock
– Scissors that fit small hands
– Markers, crayons, or colored pencils
– Glue or clear tape
– Optional: old greeting cards, stickers, ribbon
Here’s why to start now. The right supplies help kids stay focused and proud.
How to make them
1. Cut a strip about 2 inches by 6 inches. You can adjust for book sizes.
2. Let your child decorate with color and drawings.
3. Add an inspiring quote or name with a marker.
4. Lightly seal with tape or glue to help it last.
5. If you want, punch a small hole and tie a ribbon or string.
Fun ideas
– Create themed bookmarks for books or genres.
– Use recycled cards or paper for a fresh look.
– Make photo or animal bookmarks readers will love.
– Swap bookmarks with friends.
Tips to make them last
– Use card stock for sturdiness.
– Add a thin tape layer on top for protection.
– Store them in a small box or drawer so they don’t get bent.
Frequently asked questions
Q: Can kids cut shapes easily?
A: Yes, with kid-safe scissors.
Q: How to keep bookmarks flat?
A: Tape lightly.
Q: How do you store many bookmarks?
A: Keep them in a small box or stitched pouch.
Next steps: grab supplies and start a bookmark craft corner with family or classmates.
@media(max-width:480px){
19. Paper Coasters
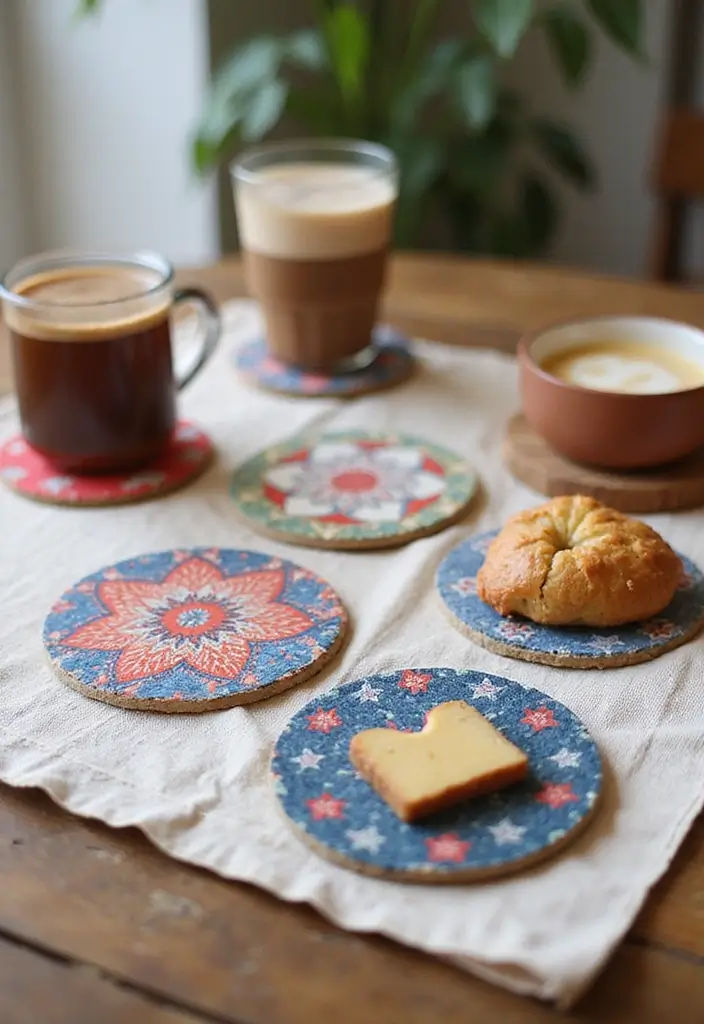
You want a quick, affordable way to protect surfaces and add a personal touch to your home. Paper coasters do that and more. They turn simple scraps into art and give your table a fresh look for daily use or parties.
Materials you’ll need
– Recycled paper scraps or colorful scrapbook papers
– Thick cardstock or thin cardboard for the base
– Craft glue or white school glue
– Scissors and a ruler
– Paint, markers, stamps, or pens for decoration
– Clear sealant or Mod Podge to seal the surface
– Backing options: cork sheets, felt, or extra cardstock
Steps to make them sturdy and stylish
– Cut circles or squares from your paper scraps.
– Layer 2–3 sheets to build a sturdy coaster base.
– Glue the layers together and press flat until dry.
– Decorate with colors, patterns, or quotes.
– Apply a clear top coat to seal and protect from moisture.
– Add a backing so the coaster won’t slip or scratch tables.
Next, create sets that fit different rooms or events. A teal-and-gold pair forgives casual tabs, while a bright rainbow set shines at a birthday party. You can gift a matching trio to friends or family.
Tips to try
– Mix textures: paint and paper collages look cool together.
– Use themes: garden designs, ocean hues, or seasonal colors.
– Keep it simple for kids: small, bold shapes are easiest.
Care tips
– Wipe with a damp cloth. Do not soak.
– Let each coaster dry completely before use.
This craft boosts creativity and makes spaces feel more like you.
@media(max-width:480px){
20. Paper Storybooks

You want a craft that helps kids read, write, and imagine. Paper storybooks fit this goal. They let you make a tiny book, tell a new tale, and celebrate the result.
Steps to make your DIY storybook:
– Gather supplies: pull plain paper, markers, scissors, glue or a stapler, and a ruler.
– Make the pages: fold sheets in half to form pages.
– For more pages, stack sheets and trim so the edges line up.
– Plan the story: brainstorm a title, a hero, a setting, and a simple plot.
– Write and draw: on each page, write a line or two.
– Add drawings or cutouts to bring scenes to life.
– Bind the book: staple along the spine, or sew with thread.
– Tape binding also works.
Tips for engaging books:
– Use short sentences and clear ideas.
– Create speech bubbles for dialogue.
– Pick bright colors to attract the eye.
– Read the pages aloud and invite feedback from family.
Why this helps:
It builds basic literacy, helps kids plan a story, and gives a real object they can share.
Next steps:
Keep a stack of mini storybooks.
Try new tales with the same sheets.
Host a tiny storytime to show off their work.
@media(max-width:480px){
21. Paper Mosaic Art
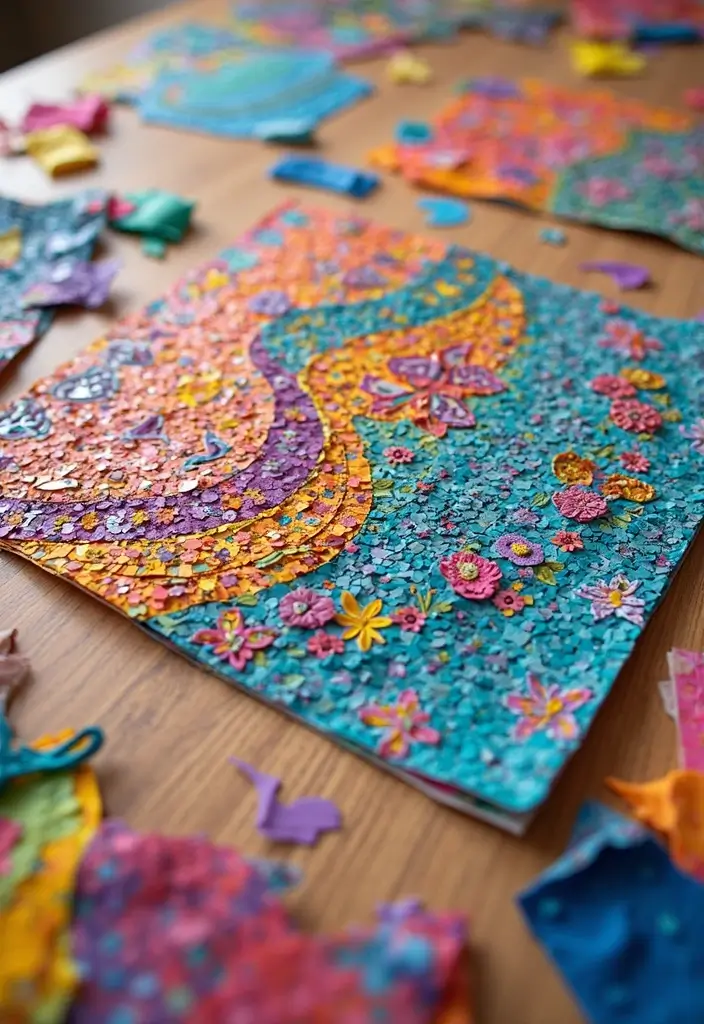
Want a simple way to turn scrap paper into bright art? Paper mosaic art does just that. It uses small pieces of color to build a picture, piece by piece. Kids cut scraps into tiny shapes and stick them on a sturdy base to reveal a scene. You’ll feel the rough texture of the paper and hear the glue dry as colors come alive.
Here is why it works. It builds color sense, patience, and planning.
What you need
– Colored paper scraps in several shades
– A sturdy base like cardboard, poster board, or a small canvas
– Glue or a glue stick
– Scissors and, if needed, adult help
Ways to create paper mosaics
– Choose a theme, such as animals, landscapes, or a favorite object, to guide colors
– Start with a simple layout on the base, then fill in with pieces
– Cut pieces into different shapes and sizes for texture and interest
– Place pieces first, then glue. Layer some pieces for depth and shadow
– Mix papers with different finishes—matte, glossy, or metallic—for shine
Next steps
This craft is eco-friendly and stretches imagination. To begin, plan a small scene, test a few color ideas, and glue down pieces slowly. As you get comfy, try bigger pictures that use more tiny pieces.
22. Paper Quilts

Looking for a kid-friendly craft that builds pattern skills and lets imagination run free? Paper quilts fit the bill. They turn simple paper into a quilt-like artwork you can make with just a few cuts and glues. You’ll see how color, shape, and order come together.
What you’ll need
– Colored or patterned paper
– Scissors
– Glue or a glue stick
– A large sheet of paper or cardboard as a base
– A ruler and pencil for neat lines (optional)
Here is why this setup works: simple tools, quick setup, and lots of room for personal style.
How to make it
– Cut lots of small squares from different papers.
– Plan a simple pattern on your base. You can use a grid or just go freestyle.
– Place the squares to build a quilt look. Take a photo to save your layout.
– Glue the pieces down and let them dry. Add a border if you want a finished frame.
Next steps let you push your design further with texture and color.
Creative twists
– Try fabric scraps or textured papers for a real quilt feel.
– Make seasonal quilts—reds and greens for winter, pastels for spring.
– Build themed quilts around hobbies, animals, or sports.
– Do a class quilt: each kid adds a block, then you assemble the whole piece.
Display ideas
– Frame the finished piece and hang it on a wall.
– String several small quilts into a decorative garland.
– Mount on a cork board to switch designs easily.
What kids gain
– Better pattern recognition and color balance
– Fine motor practice and careful cutting
– Teamwork when making a group quilt
Tips and tricks
– Start with bigger squares for younger kids; smaller ones for older kids.
– Lightly draw a grid with a pencil to guide placement.
– Use a plain background to make colors pop.
– Let children pick a theme to guide their color choices.
Common questions
– What ages work best? Younger kids enjoy it with help; older kids handle solo projects.
– How long does it take? Expect about 20 to 40 minutes for a simple piece.
– What if glue shows? Let it dry, then trim any excess edges or press flat.
Next steps: craft a quick mini quilt today, then expand to a larger wall-hanging project later. This simple approach keeps creativity flowing and builds confidence with every square you place.
@media(max-width:480px){
23. Paper Snowflakes

Looking for a quick, playful winter craft you can do with kids? Paper snowflakes fit. They turn plain sheets into tiny works of art. You can hang them in a window or use them to decorate a shelf.
Materials
– Square paper (white or colored)
– Scissors
– A flat, clean surface
– Optional: colored tape or string to hang
Steps
– Fold the square in half to make a triangle, then fold again to a smaller triangle.
– Fold once more to a neat point. You should see a small layered triangle.
– Cut shapes along the edges of the folded paper. Keep cuts small and simple at first.
– Open the paper to reveal a snowflake pattern. Flatten with fingers.
Tips to boost the fun
– Use bright paper for a cheerful look.
– Create a group of snowflakes to line a window.
– Try different folding ideas to get unique designs.
– Let kids color parts of the cut lines with pencils or markers.
Snowflake crafts teach symmetry and planning. They build hand skills while sparking imagination. Ready for a few more patterns? Next steps are to try more folds and larger grids to make bigger snowflakes. You can try larger sheets for bigger flakes at home.
24. Paper Campfire
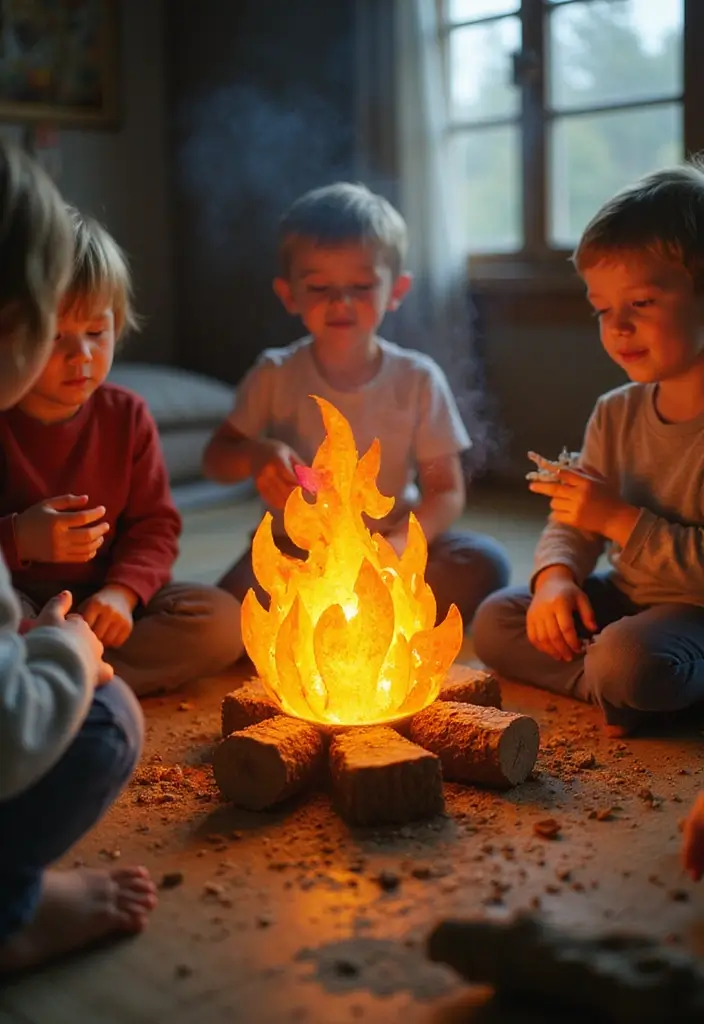
Want a cozy craft that fuels outdoor pretend play? A paper campfire helps kids tell stories and build tiny night scenes without real flames. It turns a simple project into a little campsite you can hold in your hands.
Here is why you’ll love it: it builds patience and fine motor skills while sparking imagination.
What you need
– colored paper in red, orange, and yellow for flames; brown for logs
– scissors and glue
– markers for extra details
– a small LED tea light or battery-powered light
How to build it
– Cut bright flame shapes from the warm paper.
– Cut a few log shapes from brown paper.
– Arrange the logs in a ring and glue them together.
– Place the flame pieces in the center so they look stacked and roaring.
– Add the LED light for a soft glow during play.
Ways to play
– Create a camping scene with tiny tents and paper animals.
– Gather around the paper campfire and tell a short story each time you add a line.
– Switch on the light to make the glow feel real during nighttime play.
Tips and safety
– Let glue dry before moving pieces.
– Use tape to reinforce stubborn joints.
– Always use LED lights; avoid real flames for kids crafts.
This simple project boosts teamwork and creativity, giving you a ready-made backdrop for many mini adventures.
@media(max-width:480px){
25. Paper Maze

If you want a fun, hands-on project that sharpens thinking, try a paper maze. It uses simple materials and fits in a small space.
Materials
– Thick paper or thin cardboard
– Scissors and tape
– Ruler and pencil
– Markers or stickers for color
Design and build
Start with a plan. Sketch a simple path from start to finish. Cut out wall pieces and stand or tape them on a base sheet to create walls. Leave gaps for doors or shortcuts. Use a ruler to keep paths even. Add markings with markers to show checkpoints.
Play and test
Choose a small toy car, a marble, or a toy figurine. Try to reach the finish without knocking walls over. Time the run or count how many moves you used. Move walls to try a new route and keep the game fresh.
Tips to level up
Make several maze levels on one board. Color-code paths and checkpoints. Use removable walls so you can remix the maze. Add a finish flag or sticker as a prize.
Why this helps
Kids practice planning, problem solving, and patience. It also sparks creativity as they redesign routes.
Next steps
Build a bigger maze on poster board. Create a portable maze in a lunch box for travel fun.
@media(max-width:480px){
26. Paper Crowns
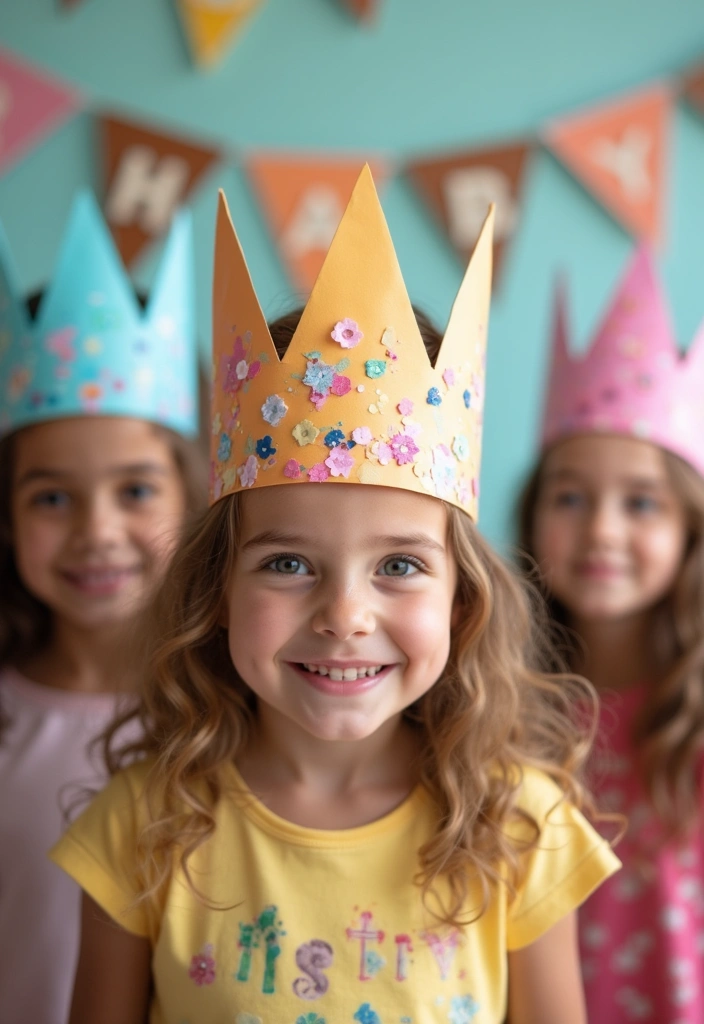
Want a fast craft that makes kids feel like royalty? Paper crowns are the perfect pick. They spark imagination, build pride, and use simple supplies.
Here is why they work: you control colors, shapes, and size. It is a straightforward project that turns plain paper into a crown.
– Gather supplies: colorful construction paper, scissors, tape or glue, markers, stickers, and a touch of safe glitter if you like. Keep safety in mind for younger kids.
– Make the base: cut a long strip that fits around the head. A crown is usually about 3 to 4 inches tall and long enough to wrap. Test the fit with a quick bend.
– Decorate: invite kids to draw stars, shields, or their favorite hero. Add stickers, color blocks, and a border. A little glitter makes it shine.
– Shape and wear: bend the strip into a circle, join with tape or a staple, and try it on. If it feels loose, add another strip to make it snug.
– Eco-friendly option: use a cereal box or old magazines as the crown base. Reuse scraps to cut out shapes and patterns.
– Themes and party ideas: superhero crowns, princess tiaras, space bands, or forest crowns. You can host a crown-making party to celebrate creativity.
Next steps: wear your crown, snap photos, and let your design evolve with new decorations.
@media(max-width:480px){
27. Paper Suncatchers
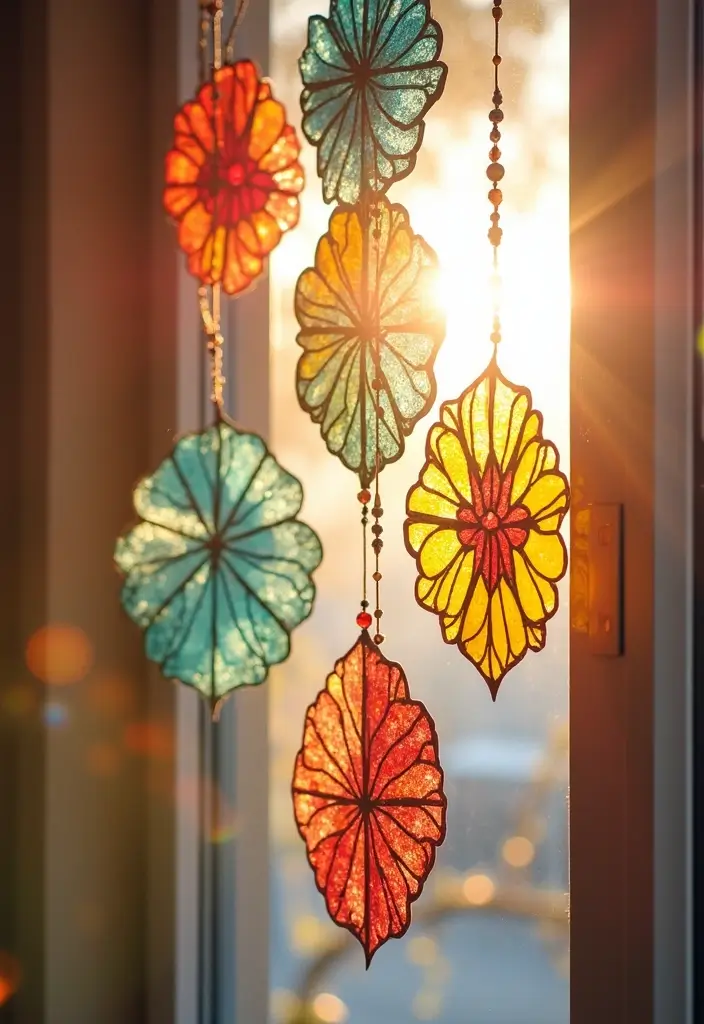
Paper Suncatchers: Bright Color, Easy Craft
If you want a fast project that adds light and joy, try paper suncatchers. They glow in sunlit windows and cast playful colors on the walls. Working with color and light teaches how shade shifts with the sun. It’s simple enough for kids and calming to do with a friend.
What you’ll need
– Colored tissue paper or clear plastic sheets
– Clear contact paper or two sheets of transparent plastic
– Scissors
– String or ribbon
– Tape
How to make them
1) Cut simple shapes—stars, hearts, or circles—from your colors.
2) Peel the backing from one contact paper sheet and lay it flat.
3) Layer tissue pieces on the sticky side to build a color panel.
4) Cover with the second clear sheet and press to seal.
5) Trim edges and loop a string at the top.
Tips to shine
– Mix bold colors with light tones for depth.
– Use two or three shapes for a tiny scene.
– Try different spots in the window to see how light moves.
– Store your suncatchers flat so they stay crisp.
Next steps
– Try wax paper for a softer look.
– Make a small set for the seasons, like spring blooms or autumn leaves.
@media(max-width:480px){
28. Paper Wind Spinners

Want a simple craft that moves with the wind and adds color outside? Paper wind spinners deliver motion you can see and a splash of color as the sun hits them. They spin in a gentle breeze and brighten porches, decks, or a garden.
What you need
– colored paper or lightweight cardstock
– scissors
– a brad, paper fastener, or sturdy paper clip
– string or a wooden dowel for hanging
– a hole punch or a sharpened pencil to make holes
How to make it
– Pick a shape for your spinner. Circles, stars, or petals work well.
– Cut out 4 to 6 pieces in matching sizes.
– Punch a hole at the center of each shape.
– Stack the shapes and slide them onto the brad. Tighten so they stay together but still spin freely.
– Insert the brad through a central hanging hole and attach a string or stick so the wheel can turn.
– Hang in a light breeze or mount on a stake for your yard display.
Creative ideas
– Use bold colors and patterns to catch the eye in sunlight.
– Vary sizes and shapes for a lively look.
– Line up several wind spinners to make a small spinner garden.
Care and tips
– Keep paper dry. Rain will warp and tear the shapes.
– For longer outdoor life, seal edges with clear tape or use laminated paper.
– Check and tighten the brad every so often so the pieces spin smoothly.
Next steps
– Try a mini set on a balcony or in a window box.
– Share your designs with friends and swap color ideas.
– Experiment with different wind speeds to see how the spins change.
@media(max-width:480px){
29. Paper Games
Paper games that kids will love
If you want kids to learn while they have fun, try paper games. They fit any table and any time, and they spark ideas with simple tools.
Here is why they work. Small crafts push you to think. You decide how the game looks and runs. You also practice sharing and taking turns.
– Step 1: Pick a clear theme. Animals, space, or a favorite character work well.
– Step 2: Sketch the pieces. Draw a simple board, cards, and tokens on plain paper.
– Step 3: Cut and color. Use scissors carefully and color with markers or pencils.
– Step 4: Write short rules. Say how to win and what a turn looks like.
– Step 5: Test and tweak. Play, note what confuses, and fix it.
Here are a few ideas to start:
– Bingo with your own pictures or themes. It turns any night into a mini game session.
– A card game based on your favorite characters with simple actions on each card.
– A memory or matching game using tiny drawings or color icons.
Tip: keep goals small and the pace easy. The point is creativity and practice, not perfection. When you finish, host a quick game night with family.
Next steps: gather plain paper, scissors, markers, and tokens or coins for pieces.
@media(max-width:480px){
30. Paper Christmas Ornaments

You want easy, budget-friendly decorations for your Christmas tree. Paper Christmas ornaments fit the bill. They use recycled paper, and kids love turning scraps into tiny works of art. This craft is calm, colorful, and fun to do together.
What you’ll need
– Recycled paper, craft paper, or old greeting cards
– Scissors and glue
– Markers, paints, or colored pencils
– Glitter, stickers, and ribbon or thread
– A hole punch or a pin to make the hanger
Steps
– Cut simple shapes like stars, trees, circles, or bells
– For depth, fold pieces or glue two shapes together
– Decorate with color, glitter, doodles, or tiny beads
– Punch a hole and thread a length of ribbon, string, or floss to hang
Here are easy ideas
– Make a themed set, such as all red and green stars
– Gift them to family as personal tree ornaments with their name on a tag
– Host a quick ornament party and let everyone decorate a few pieces
Next steps
– Start with four ornaments. Add more as you go
Here is why this works
– It uses scraps, cuts waste, and brings your family together
Tips for best results
– Use sturdy paper, let glue dry, and store finished pieces flat
@media(max-width:480px){
Conclusion
Crafting paper toys is not only a fun way for kids to express their creativity but also an opportunity to learn valuable skills along the way.
From origami to DIY games, each project encourages imagination and fosters a love for crafting. Engage your kids in these eco-friendly paper crafts, and watch as they develop their artistic abilities and storytelling.
Why not try out some of these delightful ideas and see where your creativity takes you next?
Note: We aim to provide accurate product links, but some may occasionally expire or become unavailable. If this happens, please search directly on Amazon for the product or a suitable alternative.
This post contains Amazon affiliate links, meaning I may earn a small commission if you purchase through my links, at no extra cost to you.
Related Topics
paper toys DIY
eco-friendly crafts
creative paper projects
handmade toys
easy crafts for kids
origami techniques
quick DIY
screen-free activities
paper puppets
recycled materials
crafting for children
3D paper models