Why I made this post Color has a way to lift a room and a mood. I wanted a simple, doable list of paper rainbow crafts that bring joy without a big mess. This collection features 25 ideas you can finish in a single afternoon. No fancy tools are needed, just paper, scissors, glue, and a splash of color.
Who it’s for If you are a parent, caregiver, teacher, or someone planning a kid-friendly party, this is for you. You care about crafts that are easy, affordable, and look nice. These ideas work for a range of ages, from preschoolers to early teens.
What you’ll get 25 paper rainbow crafts that cover wall art, decor, gifts, and small desk projects. Each idea includes straightforward steps and tips to tweak for different ages. Most use common supplies and leave little mess, so cleanup goes fast. The projects scale from quick wins to longer builds for weekend sessions.
Here are a few examples you can actually start today. Make a hanging rainbow garland from color strips. Create sun catchers with translucent paper that catch the light. Cut circles into a mosaic or layer folded papers to make a 3D star. Finish with a spinning color wheel that teaches color order.
These ideas lean toward low mess and quick setup. You can pair bold primaries with soft pastels to fit your space. Use scraps and recycled paper to cut down waste and save money. They fit classrooms, kitchen tables, and party corners. While they are simple, they also let you play with color, shape, and pattern.
If you try a few this week, you will see how fast color can brighten a room. Save this post for easy weekend activities or rainy days. Share photos of your finished crafts and tag me so I can cheer you on. Here is what to do next: gather paper, scissors, glue, and a few markers, pick one or two ideas, and go.
1. Rainbow Paper Chain
Want a quick, colorful craft you can do with kids? A rainbow paper chain fits perfectly. It uses scraps, it’s simple, and it brightens any room or party space.
Materials
– Colored paper scraps in rainbow shades
– Scissors
– Glue or a stapler
– String, yarn, or tape for hanging
– Optional: a hole punch for extra ties
Steps
– Cut strips about 1 inch wide and 6 inches long.
– Loop the first strip into a circle and seal the ends with glue or a staple.
– Thread the next strip through the last circle and seal it.
– Keep adding strips to build a long chain.
– Hang the chain in a zigzag pattern for a dynamic look.
Display ideas
– Drape multiple chains across a wall or doorway.
– Create a rainbow garland for a kid’s room or a birthday backdrop.
– Layer several shorter chains to form a rainbow arch over a table or window.
Tips and variations
– Use scraps from old drawings to save paper and money.
– Let kids choose color order to practice color skills.
– You can make every chain different by varying strip width or length.
– Secure each end with tape when hanging for a tidy finish.
2. Rainbow Bunting
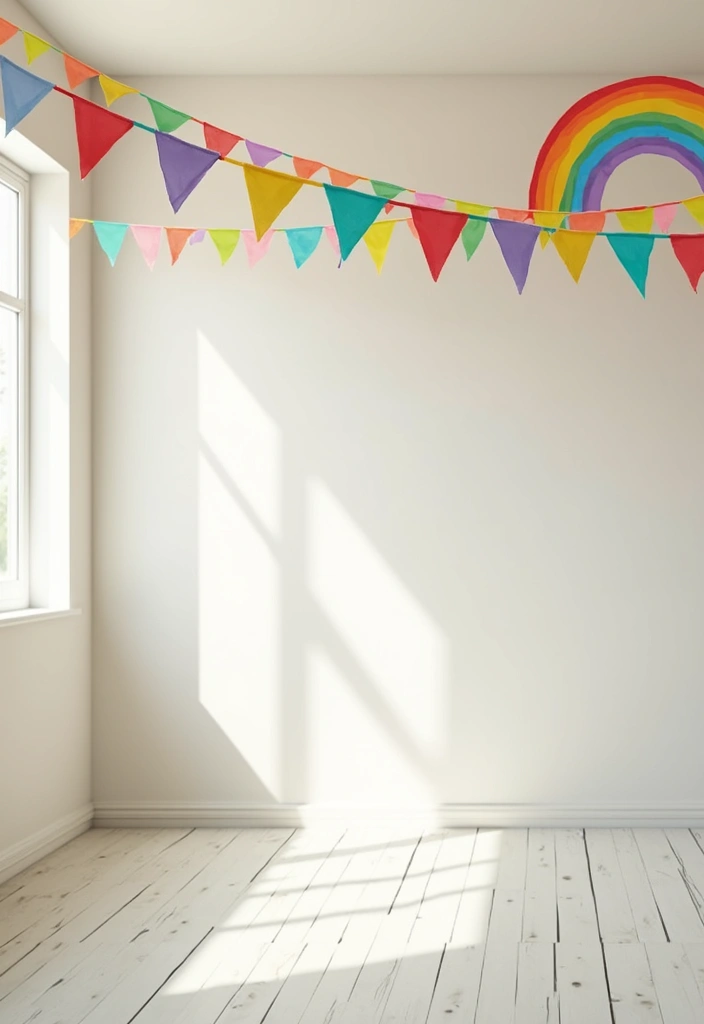
Rainbow bunting adds a festive touch fast. It uses plain or patterned paper and a string you already have. You can reuse old wrapping paper or magazines for a fresh look. It’s sturdy and easy for kids to help.
– What you’ll need
– You’ll need colored paper or scrapbook sheets.
– You’ll also want recycled paper to be eco-friendly.
– A long piece of string, twine, or yarn is handy.
– Glue, tape, and scissors help you attach things.
– Optional glitter, stickers, or markers add extra shine.
– How to make it
– Cut triangles from different colors. Aim for variety so the bunting looks like a rainbow.
– Line up the triangles and join them to the string. Glue the top edge or tape the back so the points stay free.
– Space the triangles evenly. Leave a little gap between each piece for air to move.
– Ways to use it
– Hang across a wall, above a table, or along a ceiling line.
– Drape over a doorway for a burst of color at a party.
– Try this for birthdays, holidays, or a bright touch in a daily room.
– Tips to boost fun
– Add glitter accents or shiny stickers to a few triangles.
– Let kids design their own triangles. Their art makes the banner unique.
Give it a try and adjust colors as you go. You’ll see how a simple banner can lift the mood in any space. It is quick to remove when the party is over.
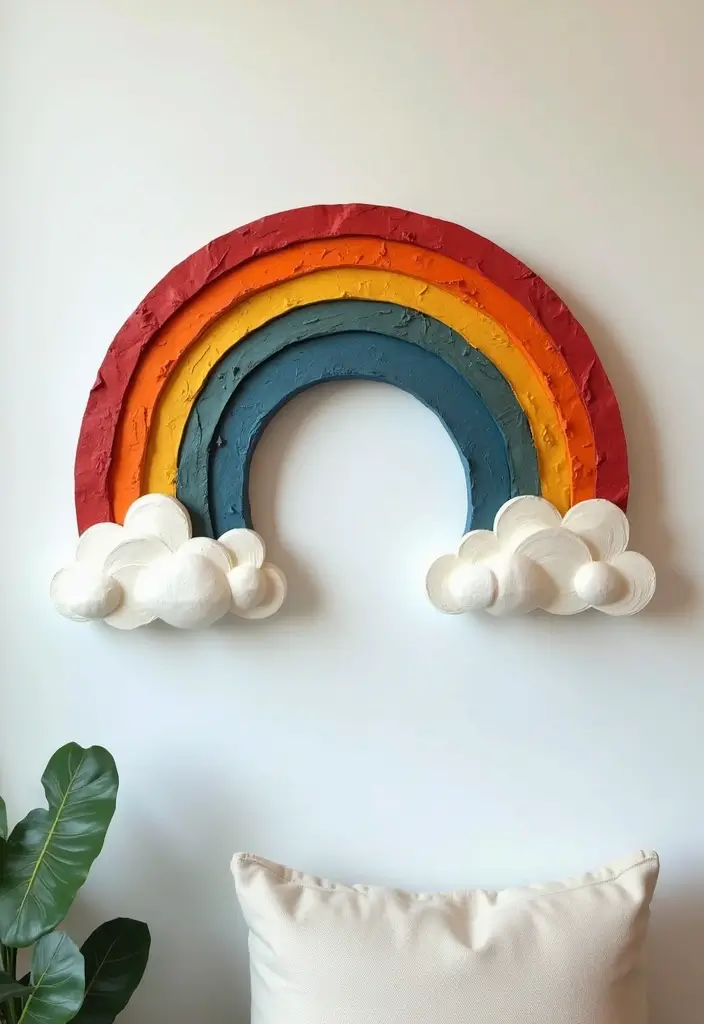
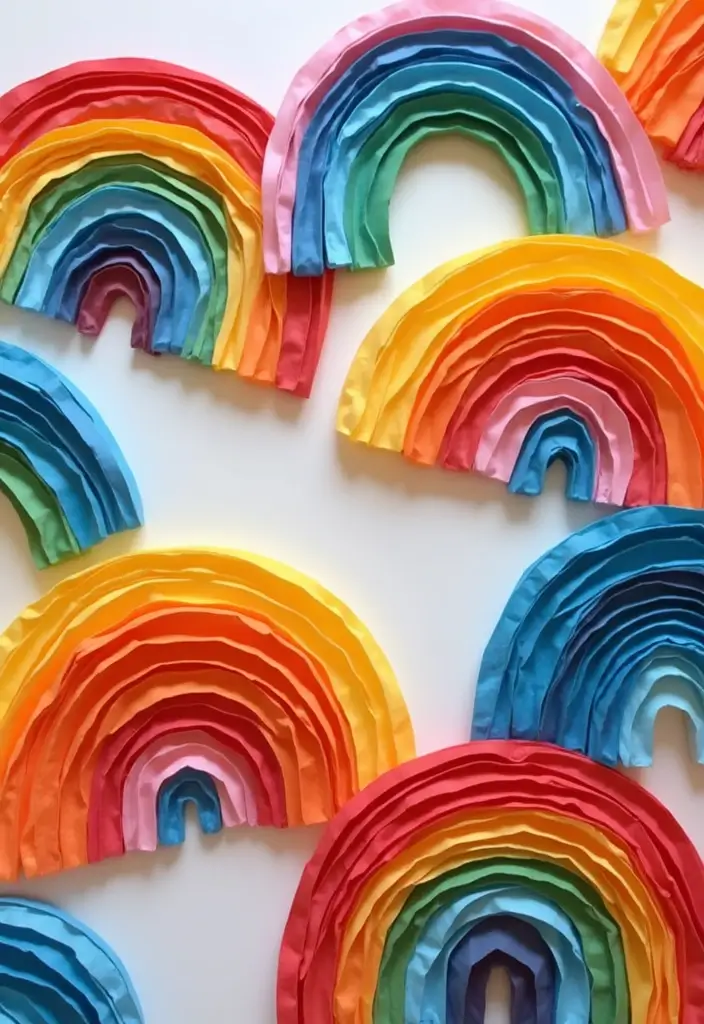
3. Paper Rainbows with Clouds
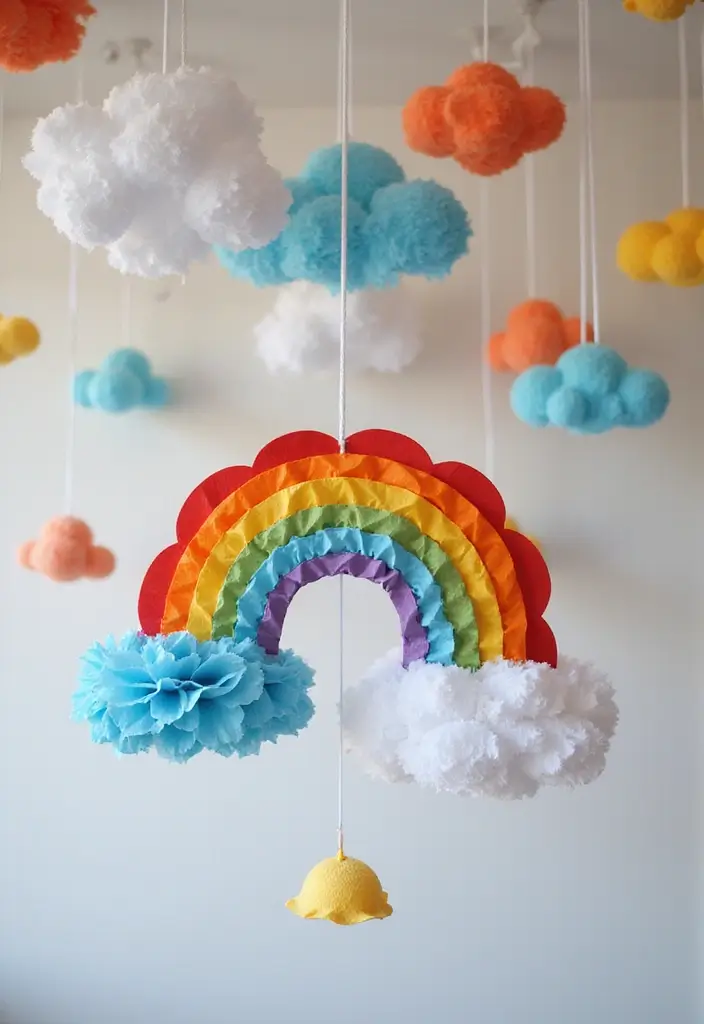
Paper Rainbows with Clouds
Looking for a bright, easy craft you can finish in one sitting? This paper rainbow with clouds fits. It works at home, in class, or as a party activity.
What you’ll need
– White paper or card stock for the cloud
– Colored paper for rainbow arcs
– Glue and scissors
– Optional markers, glitter, stickers
How to make it
– Cut a big cloud from white paper. Keep the edges soft and fluffy.
– Cut four to six rainbow arcs in red, orange, yellow, green, blue, and purple.
– Glue the largest arc to the bottom of the cloud. Layer the smaller arcs on top to build a 3D rainbow.
– Add a face, if you like. A smiling cloud invites stories and play.
– Decorate with glitter or stickers for extra sparkle.
– Hang it on a wall or in a window. It will brighten any spot.
Tips
– Let glue dry fully before moving.
– Use tape or blu-tack to hang on glass so light shines through.
Variations
– Try different cloud shapes.
– Make a group display with different sizes.
Next steps
– Create a small set and mix in other colors for a wall collage.
Why it helps
– This craft boosts fine motor skills and sparks playful storytelling about rain and color.
Enjoy the colorful result. Share it with a friend.
4. Rainbow Bookmark
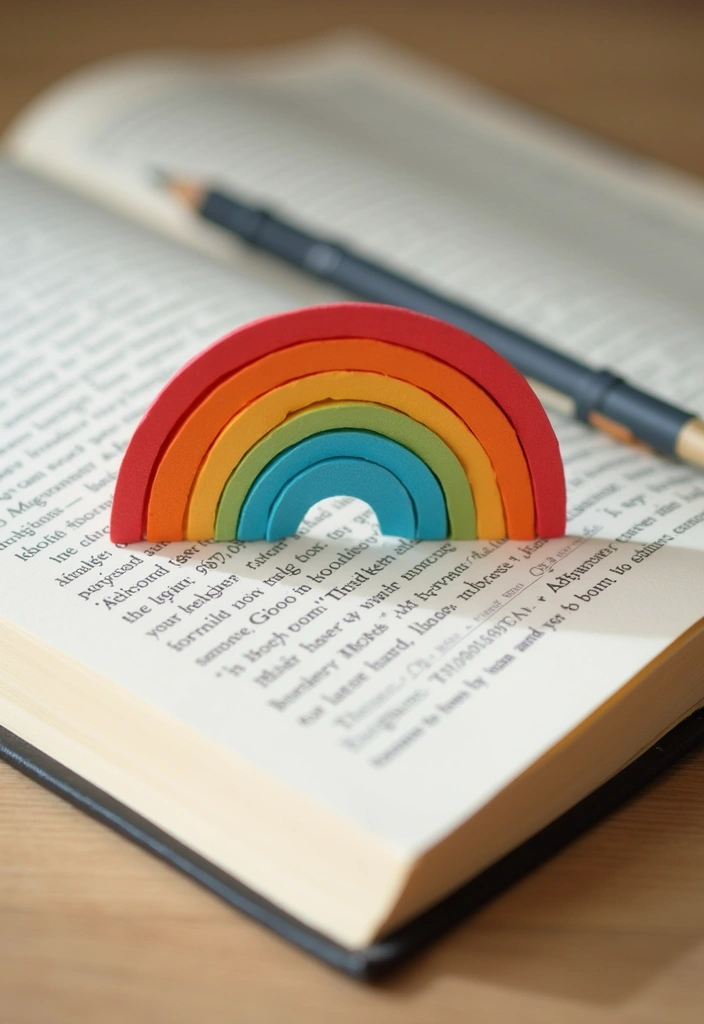
You love color in your books. A rainbow bookmark adds color and helps you mark your page.
Here is why this small project works: it is quick, cheap, and easy to personalize.
What you need
– A strip of cardstock or sturdy paper, about 2 inches wide and 6 inches long
– Colorful washi tape or markers
– A hole punch, yarn, or a small ribbon (optional)
– Scissors
How to make it
1. Cut the strip to size.
2. Make a rainbow arc on the front using red, orange, yellow, green, blue, and purple tape or markers.
3. If you like, color the back for a double surprise.
4. Punch a hole at the top and slide in a length of yarn or ribbon.
Why this works
It is cheap and fast. You can match colors to any reader. You get a ready-made gift that shows you care.
Ideas to customize
– Use school colors for a class gift
– Add a small charm or sticker near the top
– Laminate lightly for more durability
Next steps
Grab supplies and make one in minutes. Share ideas with friends or family and swap color themes.
This tiny accessory fits in a book bag and makes reading feel personal. It also makes a great gift that friends will treasure. Try it today too.
5. Rainbow Wall Art
Rainbow Wall Art You Can Make
Is your wall blank and dull? Let’s break it down. This DIY rainbow wall art is simple, quick, and fun for you and the kids.
– What you’ll need
Large canvas or sturdy cardboard base
Colorful paper, old magazines, or fabric scraps
Glue (glue stick plus white glue works best)
Scissors, pencil, ruler
Optional textures: glitter, textured paper, fabric strips
– Steps to create
Plan the arc sizes on your base.
Cut large color arcs from red to violet.
Glue the arcs in rainbow order, layering them slightly.
Fill the gaps with texture pieces. Try torn paper, fabric scraps, or glitter.
If you want a cleaner look, add a simple frame or mount it on a board.
– Tips for texture and depth
Mix flat papers with rough textures to catch the light.
Use small scraps to form tiny curved details.
Let family members pick colors and place arcs to tell a tiny story.
– Display ideas
Hang the art where you sit most, in the living room, hallway, or a kid corner.
Frame it for a finished look, or mount it directly on the wall with a backing.
Next steps: gather colors, plan your arcs, and start gluing.
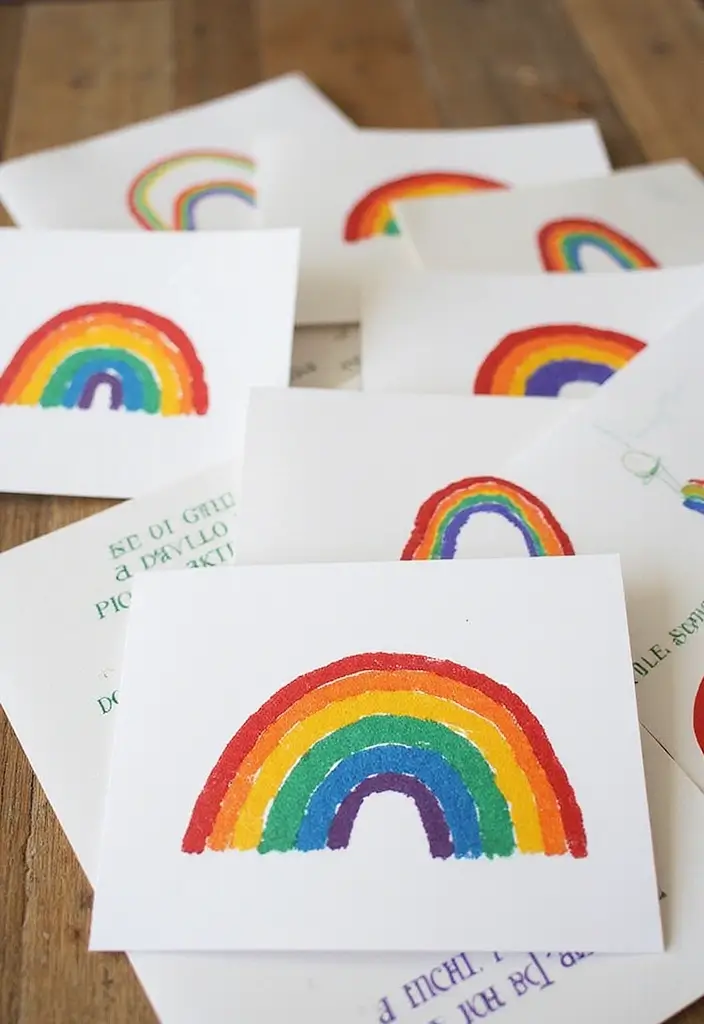
6. Rainbow Greeting Cards
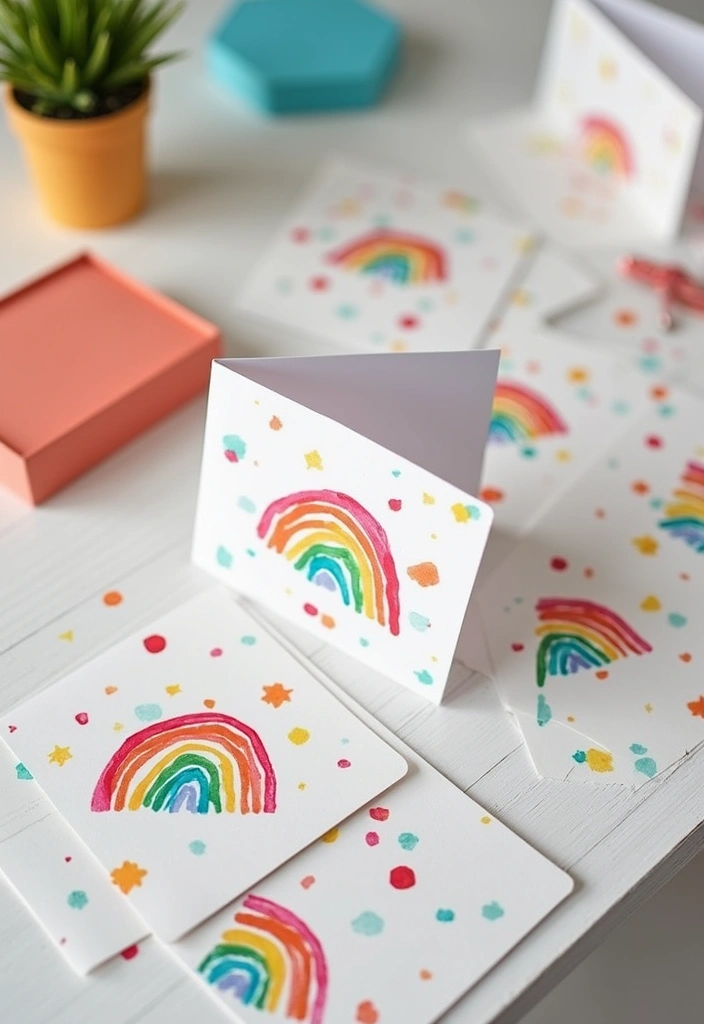
Rainbow Greeting Cards
Want a quick way to spread color and cheer? DIY rainbow greeting cards fit the bill. They’re simple, personal, and fun to make.
Materials
– Blank cards or colored paper to fold into a card
– White paper scraps for clouds
– Rainbow hues (red, orange, yellow, green, blue, purple)
– Glue, scissors
– Stickers or small scraps for extra pop
– Glitter or glossy accents for shine
– Optional: foam tape for a 3D touch
Steps
1. Fold a card or use a blank one as your base.
2. Cut curved arcs from the colored papers.
3. Glue the arcs in rainbow order from top to bottom.
4. Cut white clouds and place them at the rainbow ends.
5. Write a short message inside and add a tiny note on the front if you like.
6. Add a dash of sparkle with glitter or glossy accents.
Tips
– Keep edges neat with clean cuts and steady glue.
– Lift the clouds with foam tape for depth.
– Personalize each card with a small drawing or inside message.
– Try soft pastel colors for a gentle look or bright tones for a bold vibe.
– Store finished cards flat to avoid smudges.
Rainbow cards brighten birthdays, holidays, or a simple hello. They’re easy to make, affordable, and a joy to give.
7. DIY Rainbow Wreath
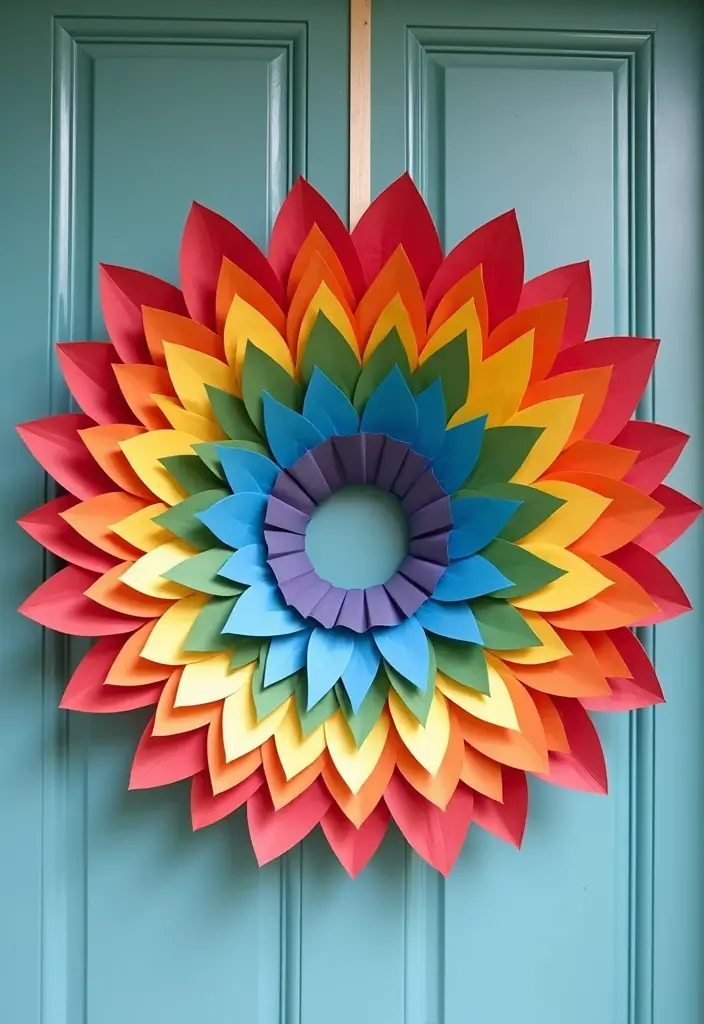
Want a front door that welcomes visitors with color? A paper rainbow wreath can do it with almost no mess. It starts with a foam wreath base or a simple cardboard circle. You cut strips of colored paper and wrap them around the ring. Glue as you go and stack color bands to form a clear rainbow arc.
Here is why it helps your decor: it is easy to make, light, and cheap. You can switch colors whenever you want.
– Materials you need: a foam wreath base or cardboard circle, colored paper in red through violet, scissors, glue, and a marker if you like to mark lengths. Optional decorations include small flowers, butterflies, or glitter.
– How to build: cover the base with a few tight wraps. Add extra strips in a curved pattern. Press each piece firmly so edges hide under the last layer. Keep adding until the ring is fully covered.
– Finishing touches: tuck in a few accents. A bow or sparkles add texture. A tiny sign can fit with seasons.
– Seasonal tweaks: switch to warm tones for autumn, pastels for spring, or metallics for holidays.
– Display tips: hang with string or a door hook. Make sure it sits straight.
Next steps: refresh the colors for new seasons or swap in a light decoration to keep it fresh.
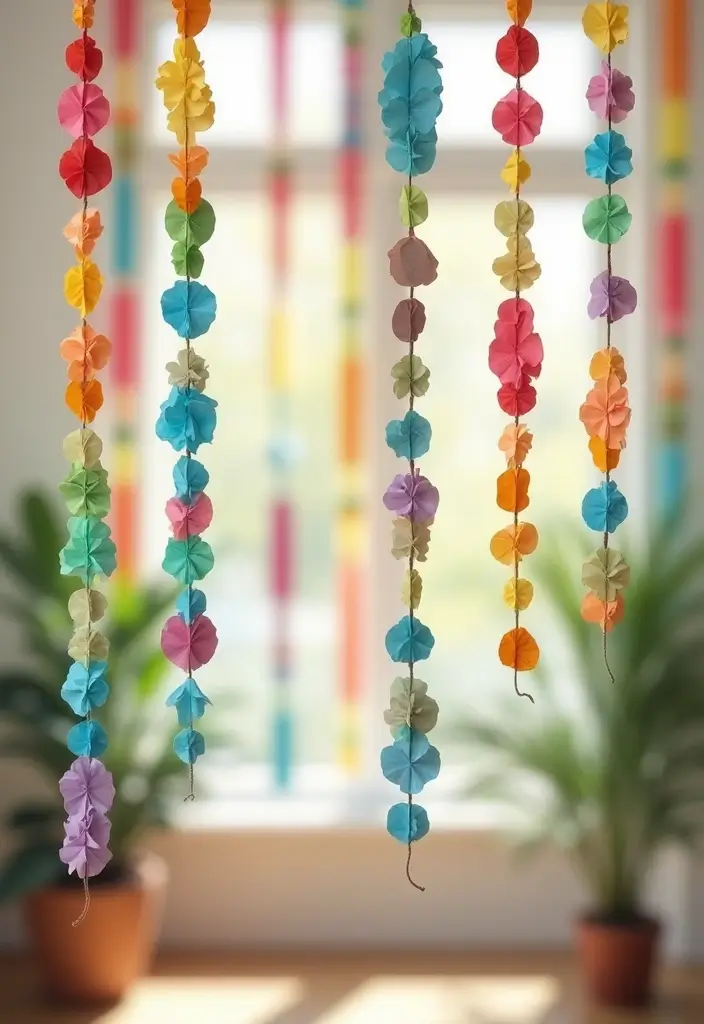
8. Paper Rainbow Garland

Want a bright decor piece that’s easy on the budget? A paper rainbow garland fits. It’s simple, colorful, and perfect for parties or everyday spaces. You can hang it across a mantel, along a wall, or above a table for a cheerful vibe. Here is why it works: light paper stays flexible, so the circles drape nicely and don’t weigh down the string.
– Materials: colored paper or cardstock, scissors, white or clear string, a needle or a toothpick, and tape or adhesive hooks for hanging.
– Make the circles: choose a color mix you love. Cut many circles. You can use uniform sizes for a clean line or vary the sizes for a playful look. If you want a gradient, lay out colors from light to dark before cutting.
– String it together: lay out the circles in the order you want. Thread each circle with the string by pushing the thread through the center. Space them about an inch apart so they sit nicely on the line.
– Display tips: string the garland to match your space. Attach ends with removable hooks or tape to a wall. For a quick finish, knot the ends of the string and tie to a rod.
– Eco-friendly options: use recycled or biodegradable paper. Skip glitter to keep waste low. Reuse the garland after a party by storing it flat.
– Quick ideas: swap colors for holiday themes or birthdays. Try two-tone circles for a modern look.
Next steps: gather materials, pick a color plan, and start cutting. Your rainbow will bring color and charm in minutes.
9. Rainbow Origami
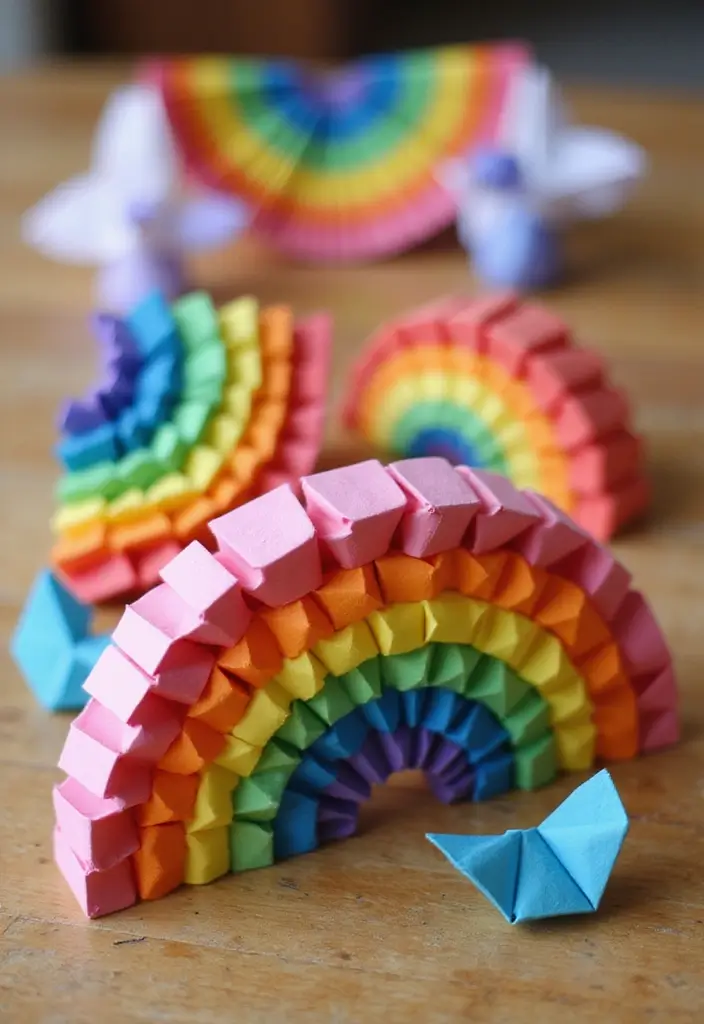
Rainbow origami blends color with calm focus. You fold into bright shapes that feel satisfying to complete. Use origami paper or any colored sheets. Start with simple rainbow-inspired designs like boats, cranes, or flowers, then try more intricate models.
Materials
– Colorful paper (single color or two-sided)
– A clean, flat workspace
– Optional tools: scissors, a ruler for neat edges
How to start
– Learn the basic folds: valley and mountain folds.
– Watch tutorials and practice slowly.
– Keep creases sharp; clean lines help.
Rainbow project ideas
– String several shapes into a rainbow garland for a wall.
– Make a hanging mobile for a nursery or playroom.
– Arrange folded flowers into a tiny rainbow bouquet.
Tips to improve fast
– Try double-sided paper for bold rainbow colors.
– Line up edges with careful folds.
– Practice a few minutes each day to build rhythm.
Why you should try
– It boosts fine motor skills and concentration.
– It gives you a quiet, creative break you can share with family.
Common questions
– Do you need special origami paper? Not always.
– Regular colored paper works.
Next steps
– Choose a beginner design, gather supplies, and start folding today.
10. Rainbow Mason Jar Lanterns
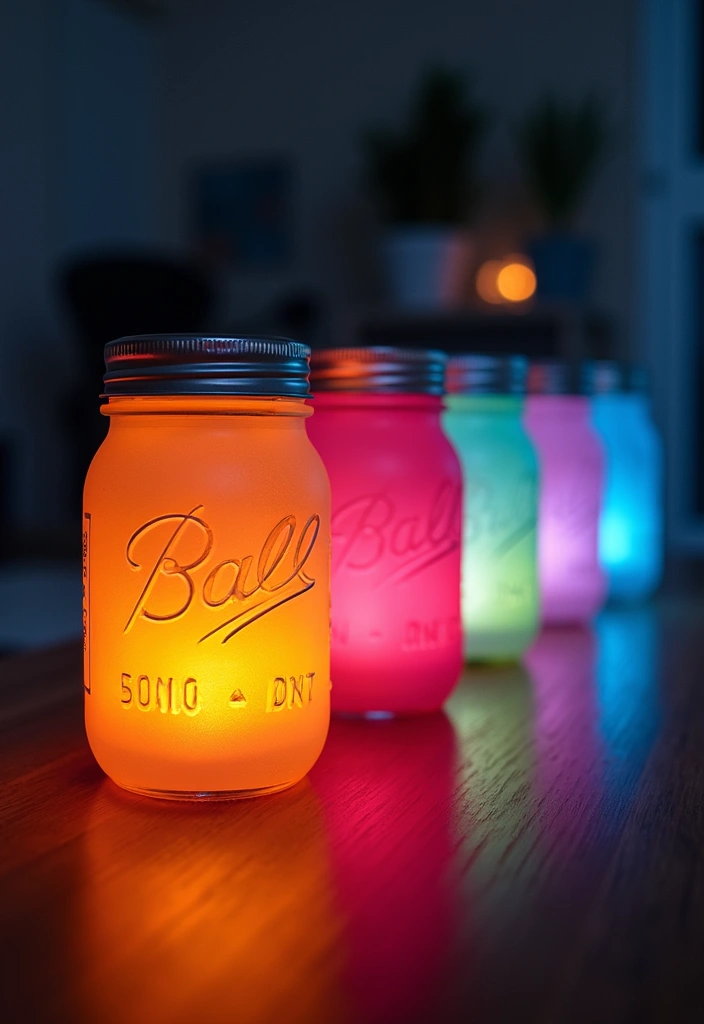
Rainbow mason jar lanterns add a soft glow and a pop of color to any space. They’re easy to make and give old jars a new life.
What you need
– Clear mason jars, clean and dry
– Rainbow color option: inside paint or colored tissue paper with glue
– Lights: tea lights or LED candles (battery powered for safety)
– Optional: ribbon, twine, or a tiny lid hanger
– Scissors, glue, and a few paper towels
How to build them
1) Wipe jars clean. Let them dry.
2) Create the rainbow inside. Paint horizontal stripes from top to bottom, or press tissue pieces in rainbow order inside the jar.
3) Let the inside finish dry completely.
4) Add a light. Place a tea light or LED in the bottom.
5) Set them on a table, shelf, or porch step. They glow softly at night and brighten a corner.
Safety and care
– Use battery lights for safety around kids.
– Keep jars away from wind and moisture.
– Do not leave real flames unattended near fabric or tissue.
Display ideas
– Line a table for a dinner backdrop.
– Place on a nightstand for gentle light.
– Group on a tray for a patio gathering.
Next steps: tailor colors to your space, swap in glass pebbles for a different shimmer, and store the supplies together for a quick craft session.
11. Rainbow Flower Bouquet
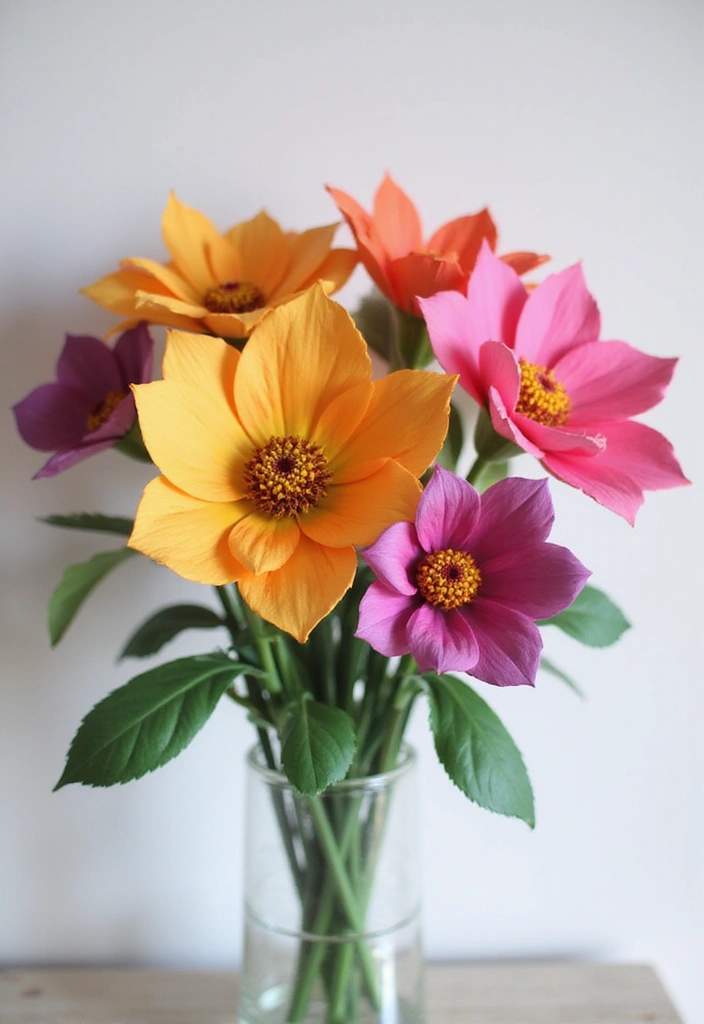
Want a bright centerpiece that lasts and cheers everyone? A rainbow paper bouquet fits. It’s simple to make and easy to customize. Here is why this craft works for you: it uses safe supplies, it blooms in color, and it stays neat.
– Materials. Grab colored paper in a rainbow mix, scissors, glue or tape, pipe cleaners or wooden sticks for stems, and green paper for leaves. For extra strength, choose heavier paper or card stock.
– Cut and layer. Cut flower shapes in several sizes. Layer petals to create full, dimensional blooms. Try teardrop or round petals for different looks. Press layers slightly to reveal color edges.
– Stems and assembly. Attach flowers to stems using tape or glue. Bend pipe cleaners for a natural stem shape. Add a dab of glue at the base to keep the flower steady.
– Leaves and contrast. Add green leaves to frame the blooms and make the colors pop. Vary leaf sizes for a natural feel.
– Display and care. Arrange in a jar or vase. This bouquet lasts forever and stays crisp with light dusting.
Next steps: choose your color set and start cutting. You’ll have a cheerful rainbow bouquet in no time.
Share this project with friends and start a new color story. Pick a theme, and you are done.
12. Rainbow Puzzle
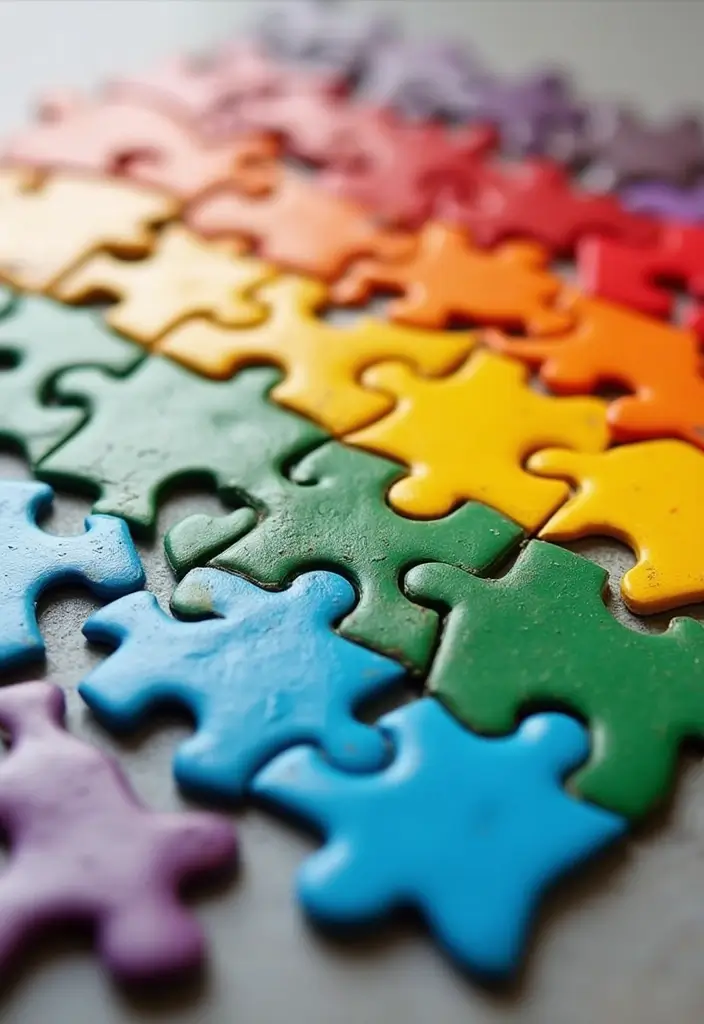
– What you need Gather supplies: thick paper or cardboard, kid-safe scissors, markers or paints, and a small amount of tape or glue.
– Make a rainbow puzzle Make a rainbow puzzle by drawing a rainbow across the cardboard, then cut it into six to eight puzzle pieces.
– Customize the difficulty To match your kid’s age, use fewer large pieces for younger children and more smaller pieces for older ones.
– Color and assemble Let kids color the pieces if you want extra practice with color mixing or leave them plain.
– Why it helps The activity teaches color names and order, sharpens spatial skills, and boosts focus.
– Eco twist Use recycled cardboard and water-based paints to keep the craft eco-friendly.
– Play tips Start with a guided build and gradually let your child finish the puzzle on their own.
– Label the back Label the back of each piece with its color name to boost reading and memory.
– For older kids For older kids, cut the rainbow into curved slices or zigzags for more challenge.
– Keep it simple and safe Keep it simple and safe by using blunt scissors and drying time between steps.
– Store the pieces Store the pieces in a tote for easy cleanup.
– Color order challenge Try a color order challenge by asking your child to arrange the pieces from red to violet before assembly.
– Recycle lesson You can turn this into a small lesson on recycling by showing how to use scraps and save materials.
13. Rainbow Decorated Flower Pots
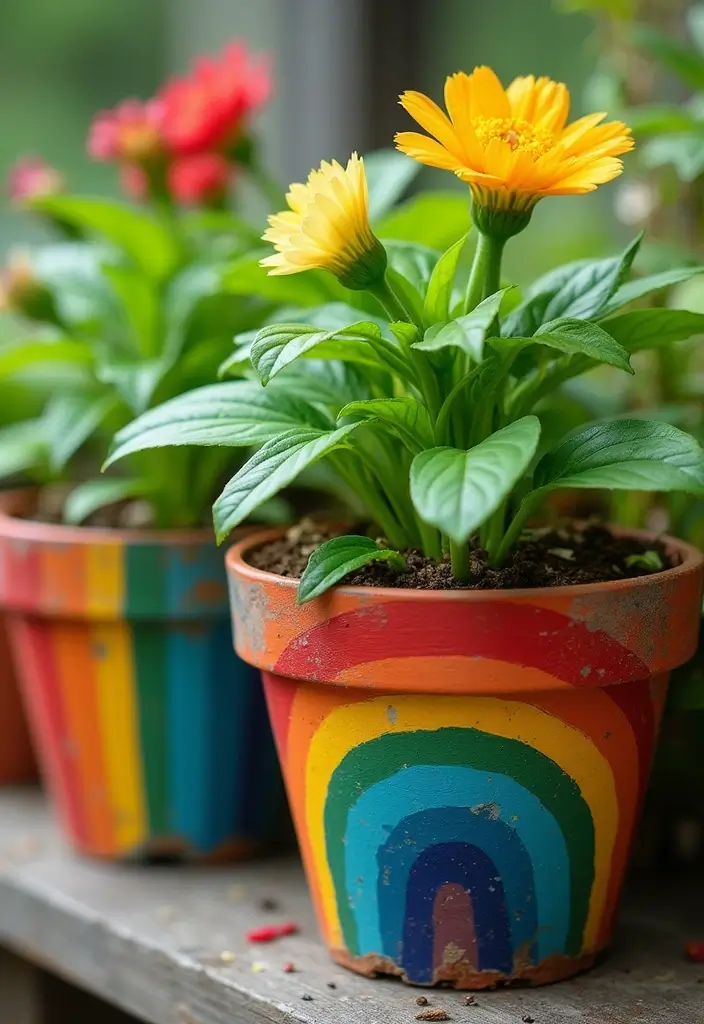
Want to brighten up your space? Rainbow decorated flower pots are an easy, fun way to show off your plants.
What you need
– Terracotta or plastic pots
– Acrylic craft paints in rainbow colors
– Small brushes for details
– Clear varnish or outdoor sealer
– Optional: decoupage glue and bright paper patterns
Two simple methods
– Paint it. Create rainbow stripes or spots with bold color blocks.
– Decoupage. Glue colorful cut paper patterns onto the pot and seal.
Let’s break it down with these steps
1) Clean the pots and let them dry. A clean surface helps paint stick.
2) If you want, apply a light base coat and let it dry.
3) Paint your rainbow design. Try stripes, polka dots, or a swoosh. Let colors dry before adding the next.
4) Seal the pot with a clear coat. This protects color and makes it easier to wipe clean.
Care and placement
Place your pots where you can see them daily. If they sit outside, use weather-safe sealant and bring in during heavy rain.
Tips
– Choose bold colors for a strong look.
– Use stencils for neat lines.
– A matte finish hides smudges better than gloss.
14. Rainbow Bookmark Set
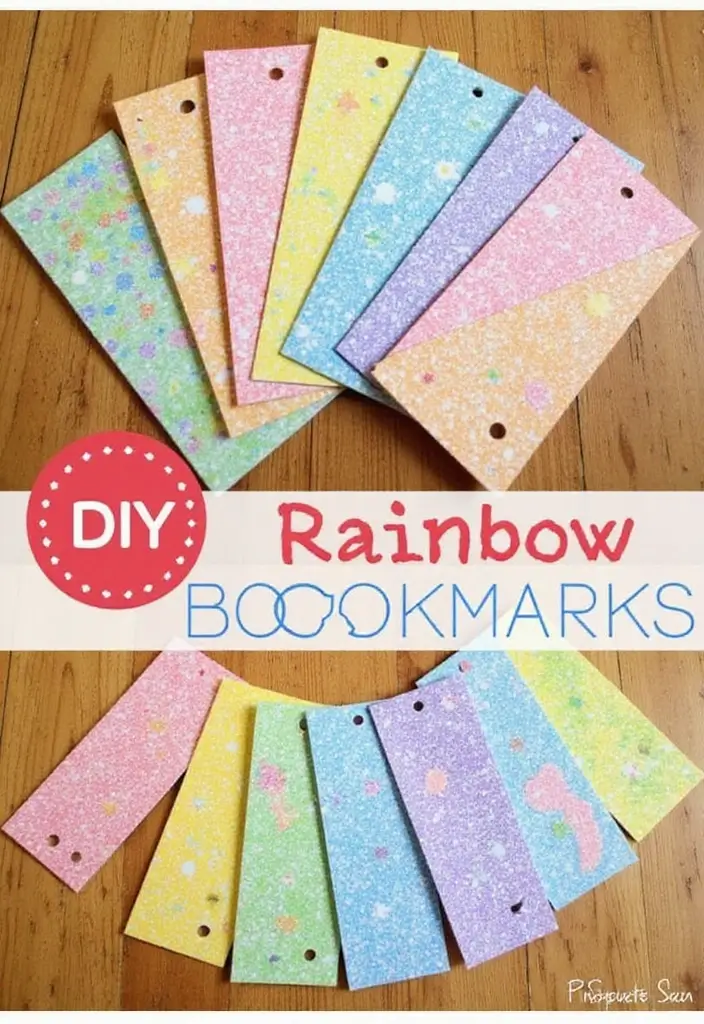
You want a small, colorful project that helps people read more. A Rainbow Bookmark Set fits that need. It’s easy, budget-friendly, and fun to customize.
What you’ll need
– Sturdy paper or cardstock in six rainbow colors
– Scissors and a ruler
– Markers, paints, or colored pens
– Stickers, washi tape, light decorations
– A hole punch and a ribbon for tassels (optional)
– Clear tape or a light sealant to last longer
Steps to make
– Cut 6 to 8 strips in different lengths to echo a real rainbow. Short at the top, longer at the bottom looks nice.
– Decorate each strip with simple designs that match its color.
– Write a name or a short quote in the same color. Keep letters neat and small.
– Add a sticker or a strip of washi tape along the edge for a tidy look.
– Punch a hole and tie a thin ribbon if you want a tassel.
Personal touches
– Add the recipient’s name or a favorite line to make each bookmark feel special.
Tips for a lasting set
– Laminate or seal with clear tape so they survive many reads.
– Pack the set in a small gift box or wrap with a note about your color choices.
Why this works
– Here is why this makes sense. It blends color fun with reading.
– It’s a thoughtful gift you can finish in a weekend.
15. Rainbow Paper Mache
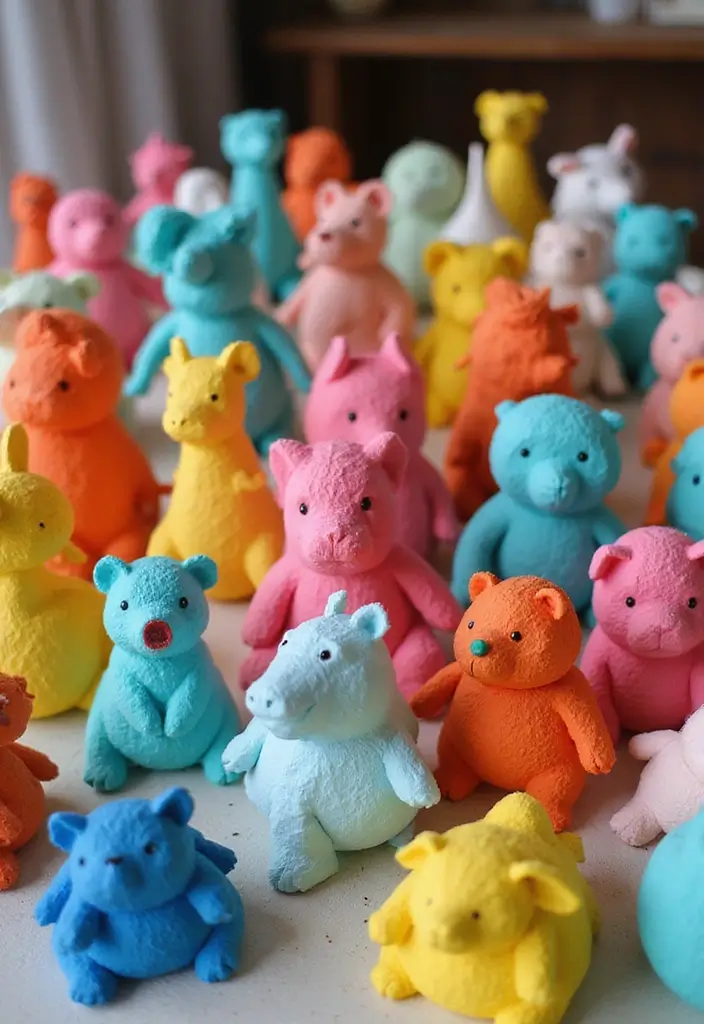
If you want a lively, hands-on craft, rainbow paper mache fits. You make 3D shapes from paper strips. The result is colorful and fun to make.
What you need
– Strips of colored paper
– Glue and water mix that pours smoothly
– A mold such as balloon or bowl
– Paints or markers for finishing
– A brush, scissors, and old newspapers to cover the work area
– A clear sealant to protect the piece
Here is how to do it
1) Tear thin strips.
2) Dip strips in the glue mix and wipe off excess.
3) Lay strips on the mold, smoothing as you go.
4) Add 2 more layers in different colors.
5) Let dry, then remove from the mold if hollow.
6) Finish with paint or leave as is.
Tips and tweaks
– Start with a balloon for a bowl.
– Kids can take turns adding strips.
– Try tissue paper for a soft look, or a shiny coat.
– If cracks appear, add a thin layer.
What you gain
– Hand skills and focus.
– A keepsake of color choices.
– A bright centerpiece or wall art.
Display ideas
– Painted bowl on a shelf.
– Wall mask for a playful touch.
– Small sculptures on a sunny sill.
It is a bit messy, yet the color payoff makes it worth it.
16. Rainbow Pinwheels
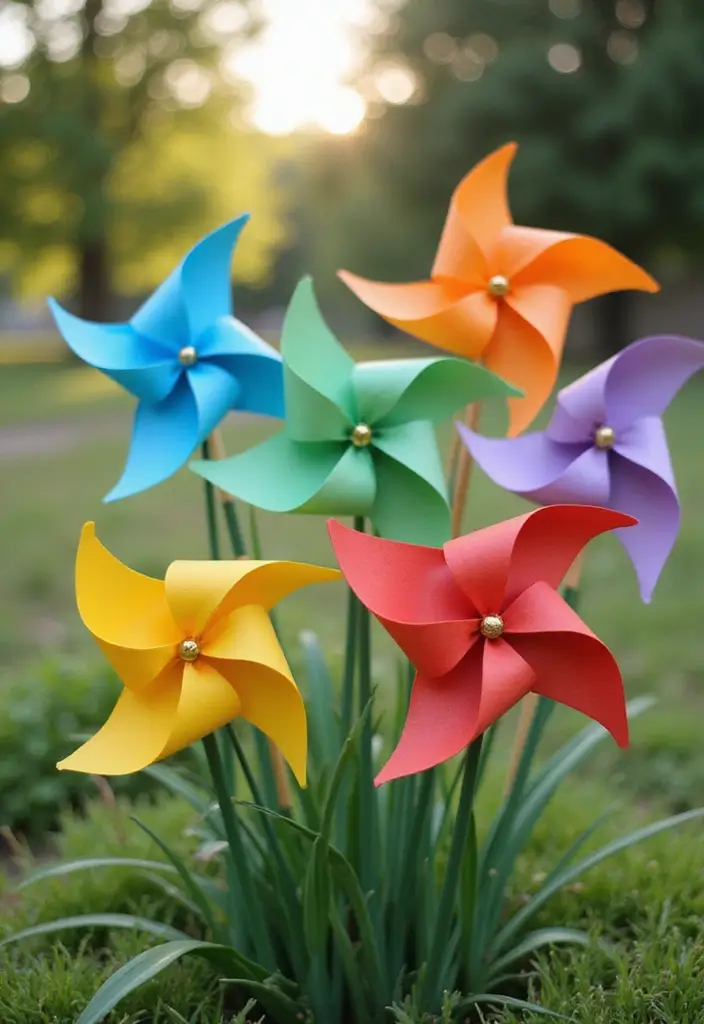
You want color that moves. Rainbow pinwheels give you both in minutes. They shine in a yard, on a balcony, or as a party favor.
Here is what you need to start:
– Lightweight paper in rainbow colors
– Scissors and a hole punch or pin
– A small brad or paper fastener
– A wooden dowel or sturdy stick
– Tape (optional)
Let’s break it down:
– Cut a square, about 6 inches on each side.
– Fold each corner toward the center to form a four-point pinwheel.
– Make a small hole at the exact center.
– Push the brad through the hole and leave it loose enough to spin.
– Place a stick at the center and secure it with the brad so the wheel spins. If the brad won’t fit, tape the back and attach the stick there.
Color and pattern tips:
– Use all rainbow tones for a bold look, or mix patterns for whimsy.
– Lighter paper helps the pinwheel spin with a breeze. Heavier stock can slow it down.
– Try 4 to 8 inch sizes for a cluster that catches the eye.
Where to use them:
– Garden borders, porch planters, or a kid’s outdoor station.
– They also make fun, simple party favors.
Next steps:
– Make several and line them up for a color parade. This gives you moving color with little work.
17. Rainbow Dot Art
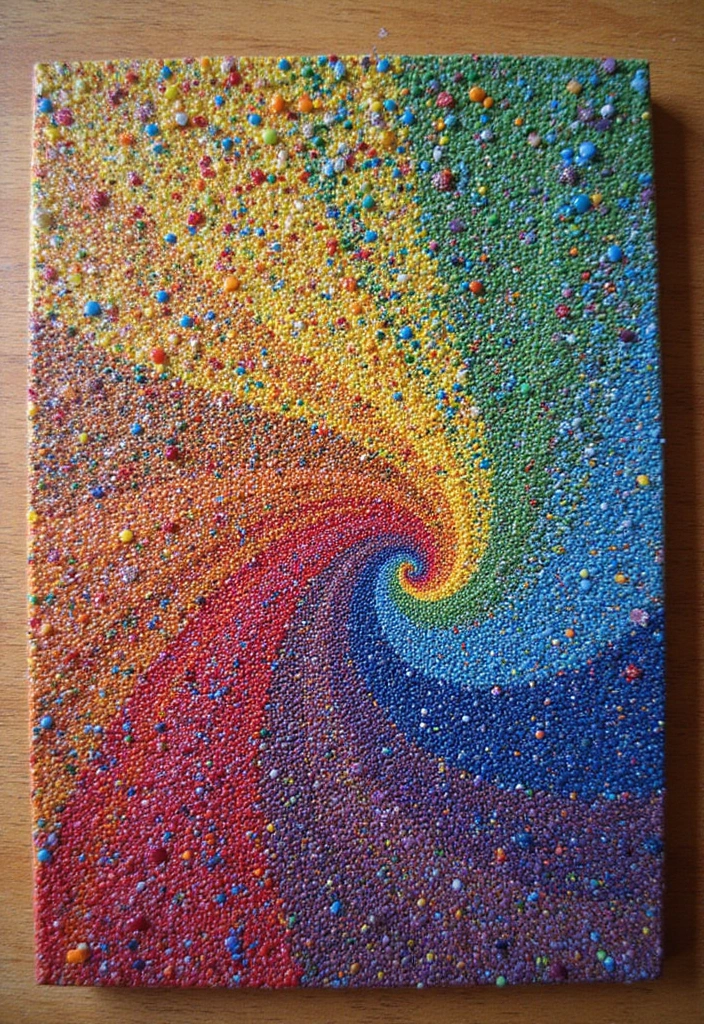
Rainbow Dot Art: Easy Dots for a Bright Rainbow
Are you looking for a simple craft that both kids and adults can enjoy? Rainbow dot art gives you color, patience, and a cheerful keepsake. With just dots, you build a rainbow on paper. You can use markers or paints. When the dots dry, frame the piece to add a sunny touch to any room. This activity also helps you slow down and focus, a small but strong way to calm the mind.
– Materials you’ll need
White paper, color markers or acrylic paints, a dot tool (cotton swab, the end of a paintbrush, or a bottle cap), a flat table, and a bit of space to work. Optional tape helps keep edges clean.
– Step by step
Here is why the steps work well: let’s break it down. Plan your color order first. Start placing dots in rows or curves. Make some dots small and some big for depth. Keep dots close enough to blend into a rainbow, but with room to breathe. Let the dots dry completely, then add a thin border if you like.
– Tips for best results
Try color gradients from light to dark. Use different dot sizes to add texture. Mix warm colors on one side and cool colors on the other. If you want a neat frame, tape the edges before you start.
Next steps: hang your rainbow dot art, gift it, or use it as a daily reminder to slow down.
18. Rainbow Egg Carton Crafts
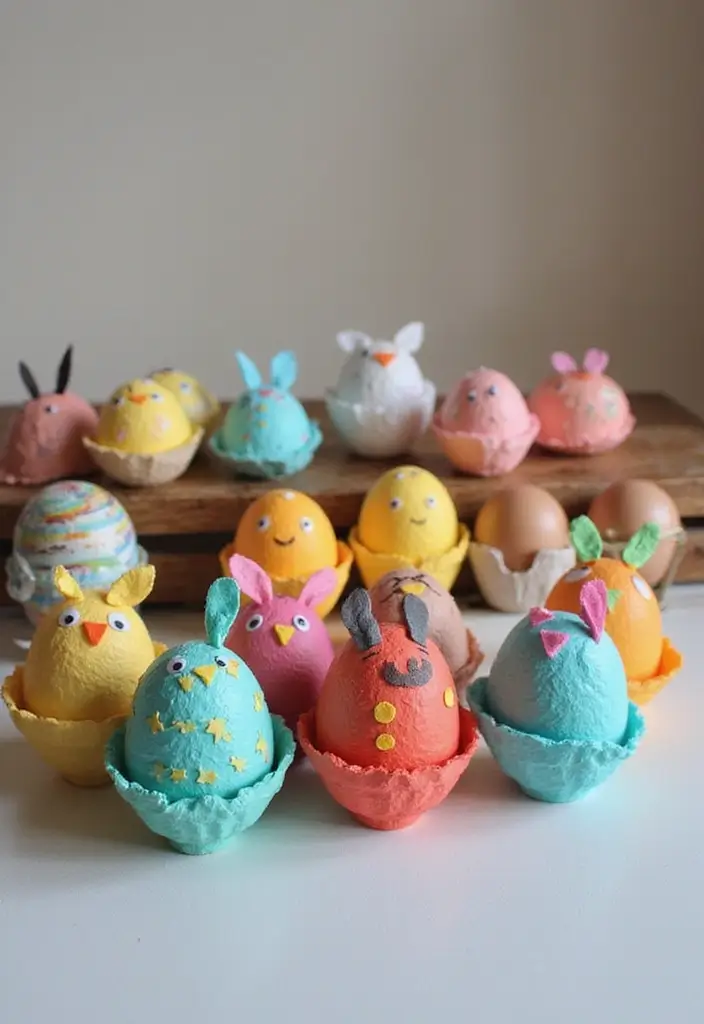
Need a bright, simple craft using stuff you already have? Rainbow egg carton crafts fit the bill. You turn waste into color and fun.
What you need
– empty egg cartons
– rainbow paints or markers
– brushes and scissors
– glue
– string for hanging
– optional googly eyes or yarn
Steps you can follow
1) Prep and cut. Rinse the cartons and dry them. Cut cups into petals, caterpillar links, or small shapes.
2) Paint. Color each section in a rainbow sequence.
3) Assemble. Glue pieces into a flower, or string them to make a garland. Add a center bead or cotton ball for a pop.
4) Display. Hang on a wall, in a window, or use as a seasonal decoration.
Why this works
It saves waste, keeps costs low, and sparks big ideas. It’s safe with a little adult help and easy for kids to pick colors they love.
Tips and ideas
– Use top cups for petals; bottom cups can hold tiny accents.
– Glue onto cardboard for a sturdy wall hanging.
– Add texture with tissue paper or yarn.
– Create a rainbow caterpillar by linking cups.
Next steps
Try a larger piece, like a rainbow wreath or a bright banner for birthdays.
19. Rainbow Photo Frame

Want a rainbow frame that makes your photos pop? This DIY project uses simple supplies and bold color to turn a plain frame into a memory keeper. You can do it with things you find at home, and kids will love picking colors.
– Start with a plain wooden frame as your base.
– Choose bright paper strips, buttons, or paint to color it.
– Layer these pieces to create a 3D effect that catches the eye.
– Arrange the colors in a rainbow order from red to violet.
– Glue pieces in place, and use foam tape for extra depth.
– Let kids help pick photos and decide where each one goes.
– Trim photos to fit the frame, leaving a small art border.
– Add a touch of glitter or tiny sequins for sparkle.
– Seal with clear glue or spray so pieces stay put.
– This rainbow photo frame makes a bright room accent or a thoughtful gift.
– Swap photos seasonally or switch colors for a fresh look.
– Try frame finishes like natural wood or painted white for styles.
– Use washi tape to outline the photo window and add color bands.
Have fun making it, and let your rainbow frame grow with your memories.
20. Rainbow Scrapbook Page
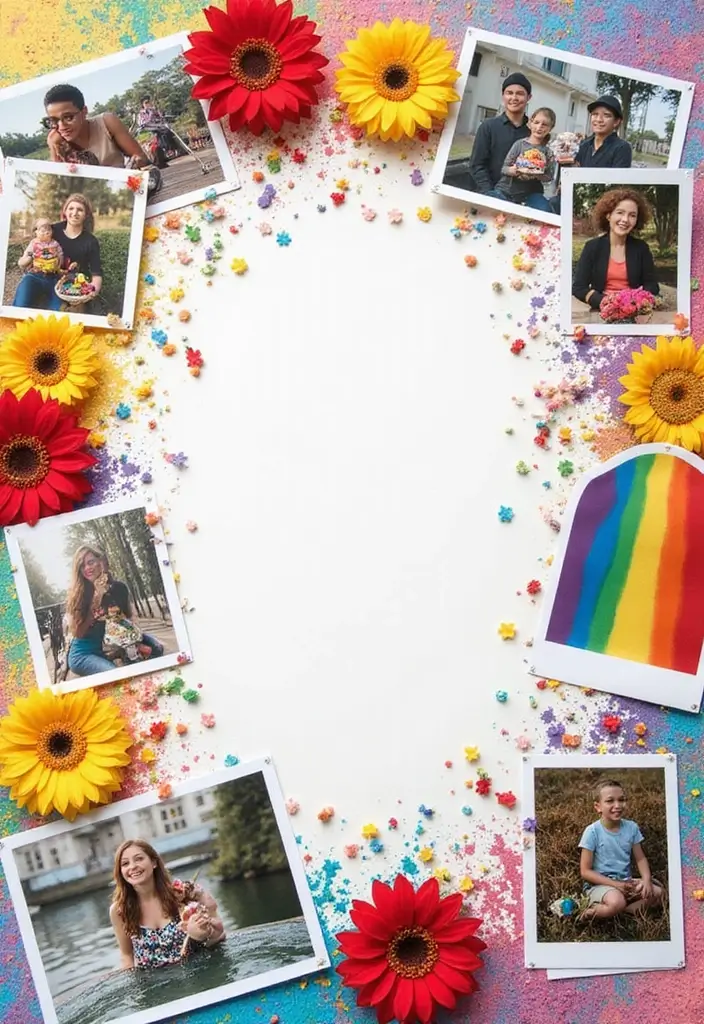
Here is why you should try a rainbow scrapbook page. It keeps memories bright and easy to look back on.
What you need
– Colored papers in rainbow shades
– Photos from your event or trip
– Stickers, embellishments, and washi tape
– Glue or double-sided tape, scissors, and a photo mat
– Optional textures like fabric scraps or ribbon
Plan the layout
– Create a simple rainbow arc or a few horizontal stripes
– Leave white space for balance
– Place 3 to 5 photos along the color path with mats that match
Build the layers
– Layer papers and photos for depth
– Tuck small trims under edges to catch light
– Add stickers and tiny accents that echo each color
Add words and memory
– Write short captions in rainbow colors by each photo
– Include a favorite memory or a short quote in the same hue
– Sign and date the page at the bottom
A quick tip: quotes in rainbow colors help pull the page together. A short memory near the photos makes the page feel like a story you can relive.
Include the kids
– Let children pick colors and designs
– Invite them to share a memory aloud while you assemble
Next steps
– Slip the page into a scrapbook sleeve
– Look at it later with your family and smile
Give this a try on a smaller page first to practice. When you feel ready, scale up to a full scrapbook.
21. Rainbow Mobile
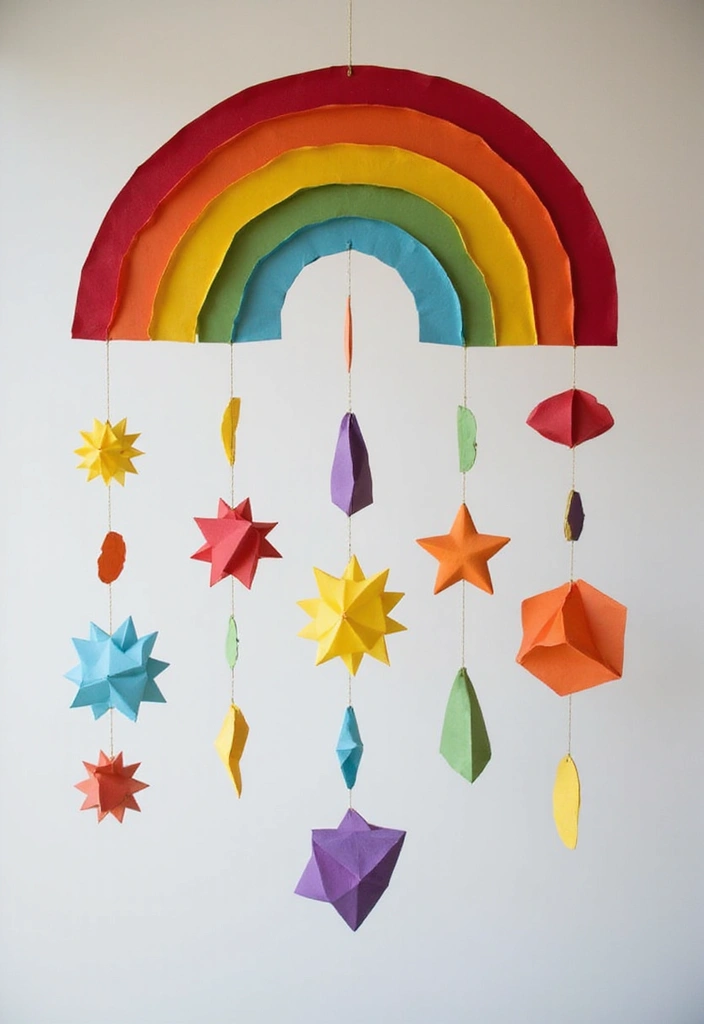
Here is how you make a rainbow mobile that dances in the air. It adds color, movement, and a calm feel to any room. It helps kids learn color order and balance. Here is why it works at home or in a classroom: it is light, simple, and easy to redo with more colors later.
Materials:
– Lightweight paper in red, orange, yellow, green, blue, and purple
– Thin string or yarn
– A wooden hoop or sturdy hanger
– Scissors and tape or a glue stick
– Optional: paper clouds or stars for extra whimsy
Steps:
1) Cut shapes from each color. Circles, triangles, and squares look playful; clouds or stars add fun.
2) Punch a small hole or attach a top loop on each piece, then thread a string through.
3) Vary the string length so some shapes hang lower.
4) Tie the other end of each string to the hoop. Space pieces evenly around the ring.
5) Add extra shapes to fill gaps and balance the look.
6) Hang your mobile in a light spot where a breeze can gently move it.
Tips:
– Use light paper so it moves easily.
– Keep colors bright but not crowded.
– Check balance by nudging the hoop; trim strings if needed.
Next steps: enjoy the colors as they drift in the room.
22. Rainbow Greeting Cards for All Occasions
What you need
Here is why rainbow greeting cards work for all occasions. They are bright, friendly, and easy to customize. You can make them with simple supplies and bright color.
– Gather basics: blank cards, colored paper or paints, scissors, glue, markers, and envelopes.
– Pick a plan: stripes, arcs, dots, or a small rainbow scene. You can add hand-drawn images or paper cutouts.
For a kid-friendly project, keep designs swap-ready. Personalize each card for a birthday, a thank-you, or a cheerful note. Parents can guide cutting while kids place pieces and write a message inside.
– Try a simple layout with bold colors on the front.
– A standard folded card fits classic, while a mini card adds a surprise.
Here is how to make one card quickly:
1) decide on colors and a simple layout
2) cut rainbow strips or shapes
3) glue pieces on the front
4) add a short message inside
5) sign and pop it in an envelope
Tips
– Use a wash of watercolors for a soft rainbow, or blend markers for bold stripes.
– Add glitter glue or tiny cutouts for texture.
– If you create a few at once, you can mail or gift them as a set.
Next steps
– Save scraps and try a new theme.
23. Rainbow Nail Art with Paper
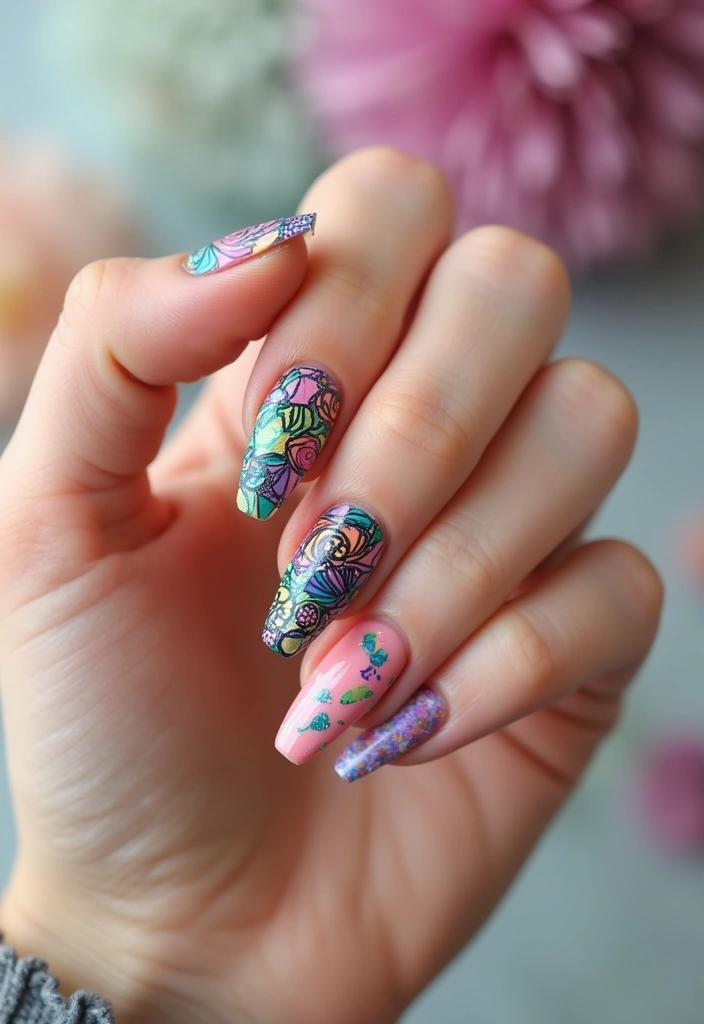
Want a fast, colorful nail look you can do at home? Rainbow nail art with paper lets you mix many colors in minutes.
Here is why it works: thin paper sticks to nails when you seal it with clear coats. A few tiny shapes create a bright, playful rainbow you can customize.
Materials
– colored paper scraps in rainbow shades
– small scissors
– clear top coat
– a base nail color you like (optional)
– nail file and a cotton swab for neat edges
How to do it
– Start with clean nails.
– Paint a base color if you want a background.
– Cut tiny shapes from thin paper—triangles, stripes, circles.
– Place shapes on nails with a dab of clear top coat.
– Press flat and seal with another coat of clear top coat.
– Let it dry completely before you use your hands.
Paper decals option
– Print simple rainbow designs on paper, then cut them out.
– Apply the same way as shapes and seal with clear polish for longer wear.
Tips for longevity
– Let the final coat dry fully.
– Add a thin layer of top coat every other day.
– Avoid soaking hands in water right after.
Kid-safe note
– Kids can join in, but do this with adult supervision.
Next steps
– Try different shapes, mix sizes, or layer tiny pieces for new looks.
24. Rainbow Stationery Set

Want a rainbow set for your notes and letters? A rainbow stationery set adds joy to writing. You can craft matching notepads, envelopes, and letterheads with simple colored paper. Add stamps or doodles to give it character.
What you’ll make
– Notepads you can write on.
– Envelopes you can mail.
– Letterheads to top your notes.
Materials
– Colored paper in rainbow shades.
– Scissors, a ruler, and glue or tape.
– A small stapler for binding.
– Envelopes and stamps for a finished look.
– Optional recycled paper for pages.
Steps
1. Choose a rainbow palette and cut pages to size.
2. Stack a few sheets and bind them with staples at the top.
3. Cut envelopes from colored card stock and seal with glue.
4. Draw a simple rainbow border on a letterhead and add your name.
5. Decorate with stamps or light doodles along the edges.
Here is why this works: color sparks imagination and makes writing feel like art.
Next steps: store your set in a neat folder for quick use.
This can be a thoughtful gift for friends.
25. Rainbow Candle Holders
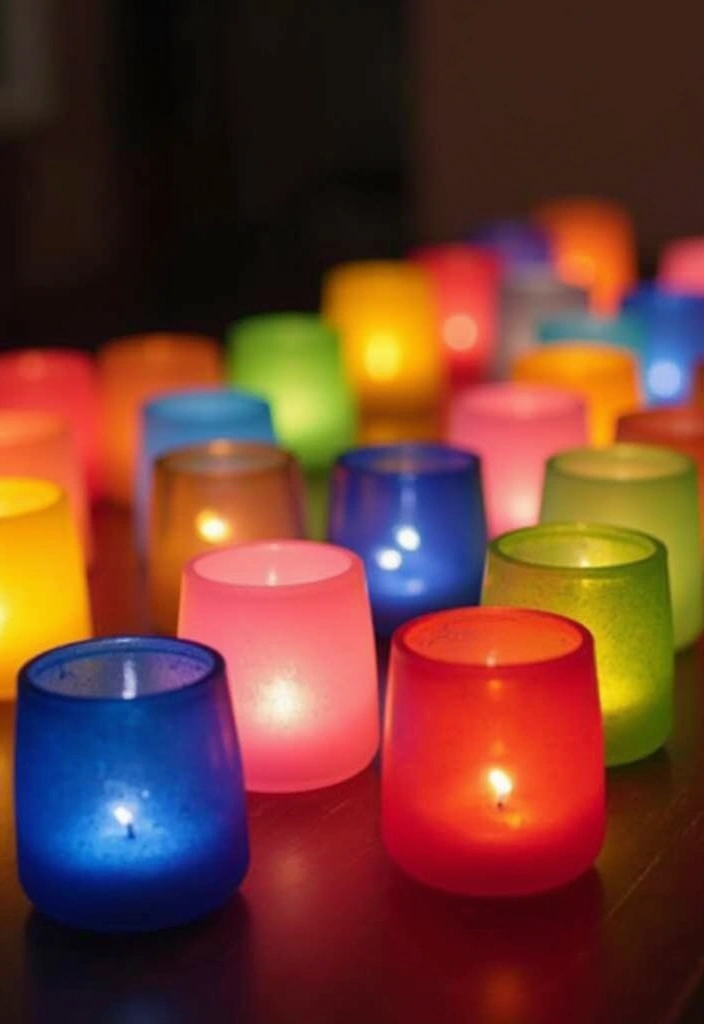
Want a bright glow in your room? Rainbow candle holders add color and warmth in one simple project.
Here is what you need and how to do it.
– Materials: plain glass jars, glass paints or tissue paper, scissors, a brush or glue, tape, tea lights or small LED candles.
– Steps: Clean the jars. Let them dry. Paint or glue color bands on the outside. Create stripes, dots, or a mosaic in rainbow colors. Let the decoration dry completely. Place a tea light inside or use a battery LED for safety. Dim the room lights and enjoy the glow.
– Kids and ideas: Let kids choose colors. They can make patterns or just lines. This makes the craft personal and fun.
– Safety and tips: Never leave real candles burning unattended. Use LED lights for bedrooms or play areas. Keep jars away from curtains or paper.
– Variations: Try metallic paints, or wrap a thin ribbon around the rim. Group several holders on a table for a rainbow centerpiece.
Next steps: snap a photo of your finished jars and share your rainbow glow with family. Store leftovers in a box for future crafts. See how your colors pop at dusk. Ask friends to pick a favorite.
Conclusion
Creating paper rainbow crafts is all about fun, color, and creativity!
These 25 eco-friendly ideas provide a fantastic way to bond with family and friends while reducing waste. Whether you’re decorating your home or crafting gifts, there’s a colorful project for everyone.
So gather your supplies, unleash your inner artist, and let the rainbow magic unfold in every corner of your life!
Note: We aim to provide accurate product links, but some may occasionally expire or become unavailable. If this happens, please search directly on Amazon for the product or a suitable alternative.
This post contains Amazon affiliate links, meaning I may earn a small commission if you purchase through my links, at no extra cost to you.
Related Topics