I put this together because I wanted easy, affordable ways to add grace to my home. Seasonal decor can feel crowded. I crave something quiet and refined.
If you love DIY decor, thoughtful gifts, or projects you can finish in a weekend, this is for you. You don’t need fancy tools. A few basics will do.
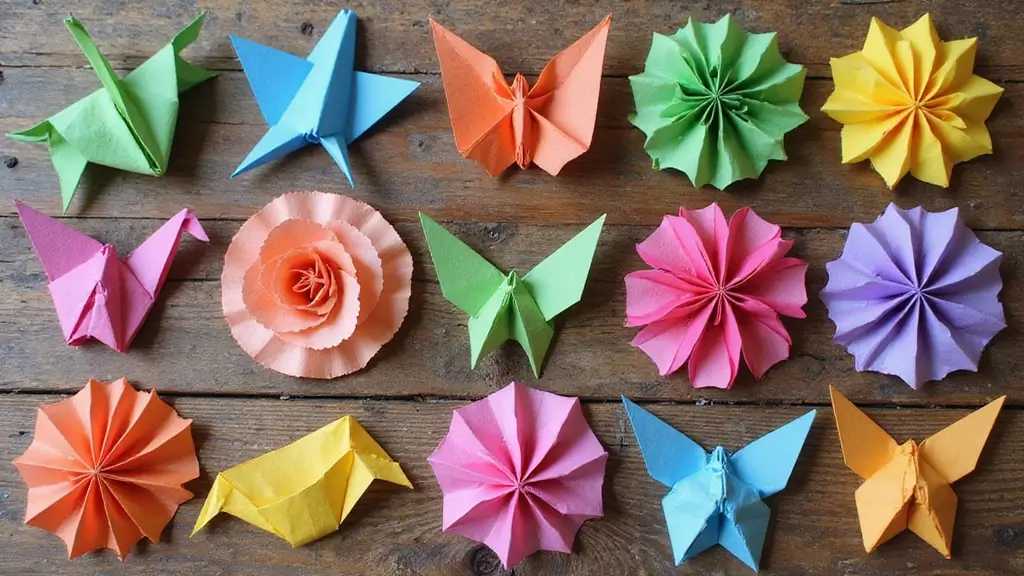
Here are 25 paper quilling ideas that are easy to master. They look elegant. They are friendly to beginners. They cover wall art, cards, and small gifts.
You will learn simple techniques to shape coils, teardrops, and spirals. You will see tips for neat lines and even spacing. The glue dries clear and helps your coils stay tight.
Start with the basics: thin paper strips, a slotted tool, white glue, and a clean workspace. Choose one project and a color scheme. You will finish something elegant with a small setup.
Quilling can be delicate. It can be a little slow. The results feel special.
Grab a few supplies. Pick a simple piece like a curling leaf. Share your progress in the comments.
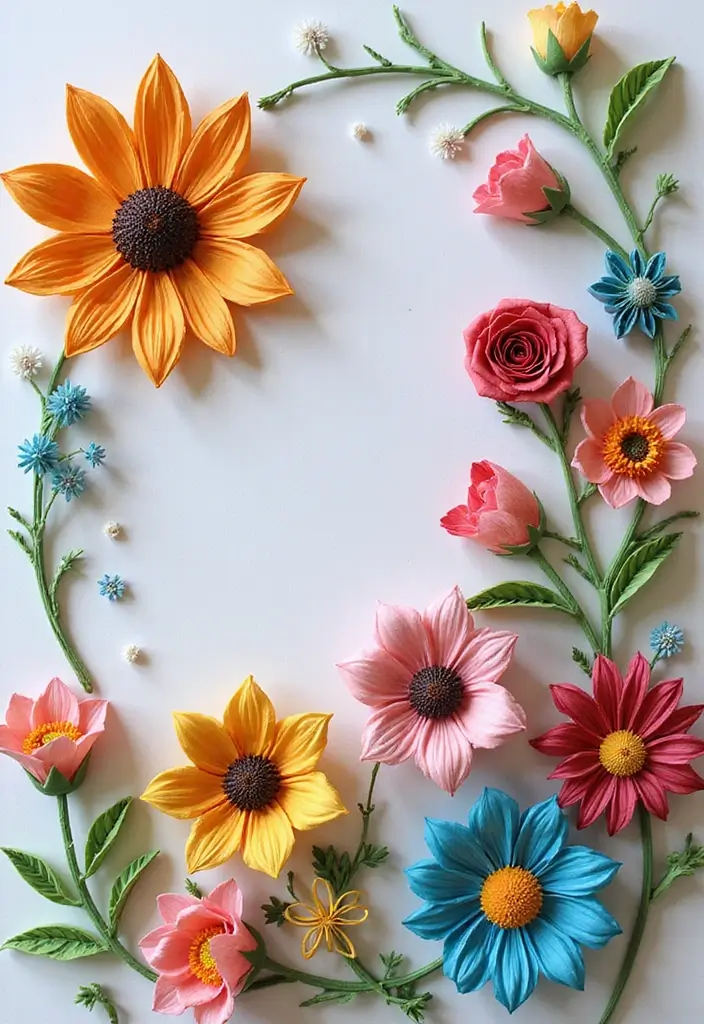
1. Floral Wall Art
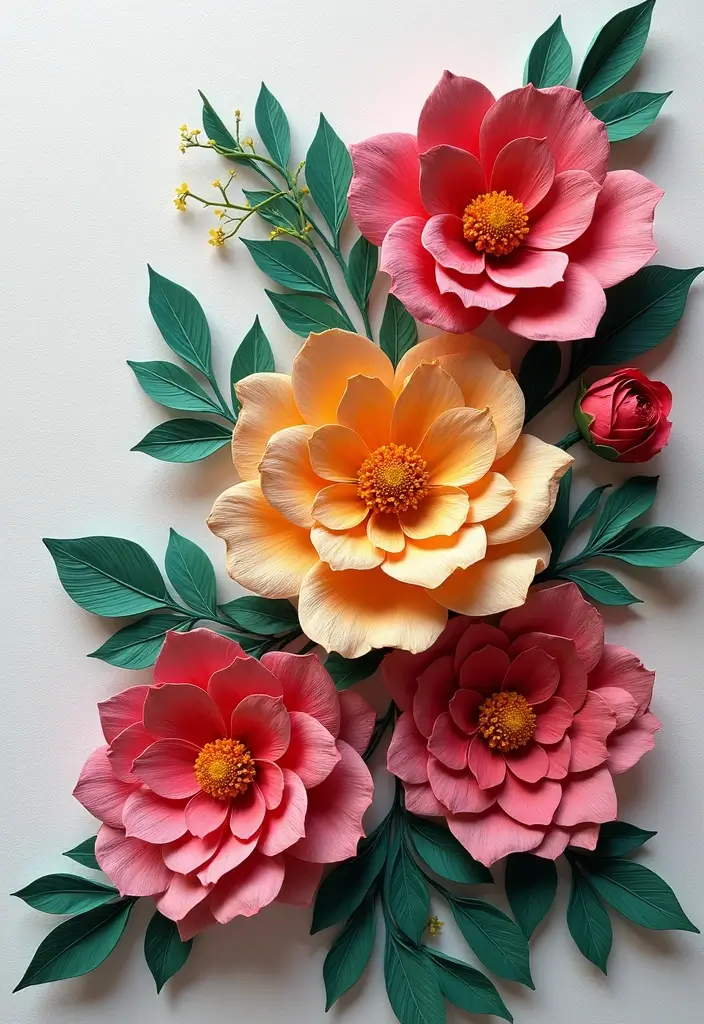
You want a floral wall art piece that catches the eye. Start with a sturdy base, like canvas or thick cardstock. Pick colors that match your room and feel right to you. Plan a main bloom and a few supporting clusters. Here is why this approach helps: it looks full without crowding the wall.
Make the petals. Roll paper strips into tight centers, then pinch to form petal shapes. Use different sizes for depth. Layer petals for a soft 3D look. Create leaves by bending green strips into teardrop shapes near the blooms.
Tips:
– Use petals in several sizes to add depth.
– Layer petals to build a 3D look.
– Shape green strips into teardrop leaves to finish the bouquet.
Finish your layout. Place the largest petals first, then work toward the center. Glue lightly so you can adjust. Let the glue dry. Consider a soft background wash or keep the piece clean with a plain backdrop.
When you are happy, frame your art or hang it as is for a fresh botanical touch. For longer life, frame under glass and dust with a soft brush. This project brings calm color and a handmade feel to your wall. Give it a try.
2. Quilled Card Set
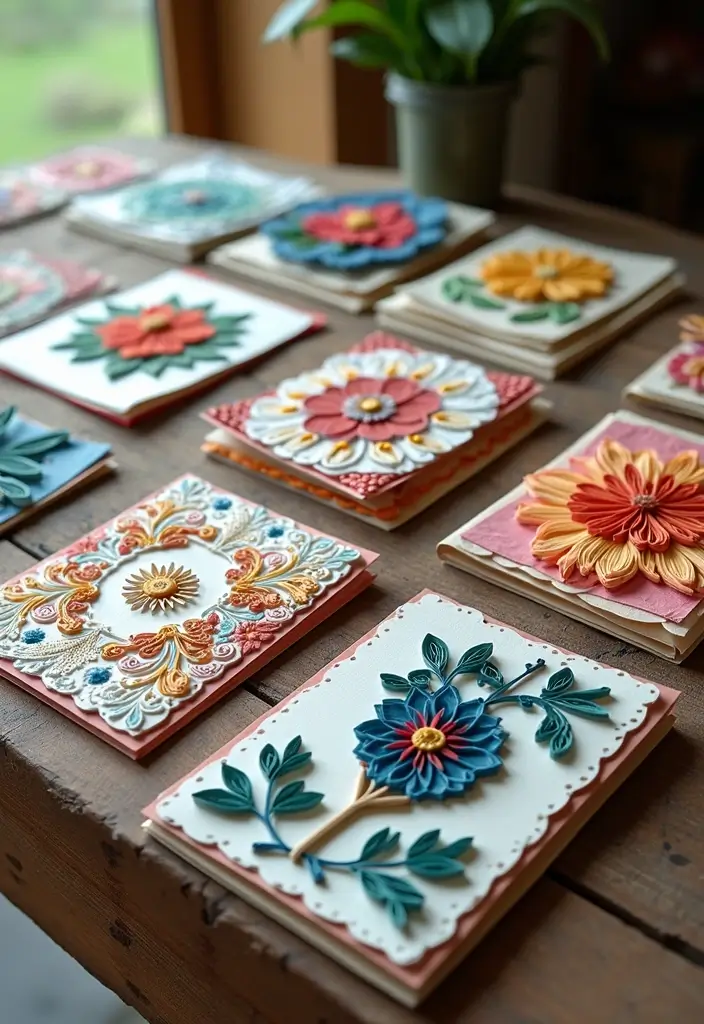
Want a thoughtful gift that’s easy to make? A quilled card set fits. Start with blank cards and envelopes. You can pull together a small, ready-to-send bundle.
Materials
– Blank cards and envelopes
– Paper quilling strips in several colors
– Quilling tool or a thin needle
– Craft glue and a glue bottle
– Tweezers, scissors, a ruler
– Tiny beads or buttons for flair (optional)
Here is why this works: it puts you in control. You pick the colors, the shapes, and the message. Simple shapes carry big charm when they’re well placed.
Design ideas
– Hearts, stars, and flowers as the main motif
– A single bold shape with a gentle border
– A small cluster of coils to create texture
Quick examples
– Birthday card with a big flower
– Thank-you card with tiny hearts
– Holiday card with a snowflake or bell
Next steps: plan a short batch. Sketch a layout, make the shapes, then glue them to the card. Let each piece dry before you write inside.
Tips
– Work on a clean, flat surface
– Use tiny glue dots rather than large globs
– Store finished shapes for later use
– Personalize with a name or short note on the inside
With a little practice, your quilled cards look polished and thoughtful every time.
3. Quilling Picture Frames

Want a quick way to make a plain photo frame feel special? Quilling adds texture and tiny color pops that draw the eye. Pick a frame that fits your room, from vintage wood to modern metal. Then turn it into a tiny piece of art.
What you need
– Frame that matches your style
– Quilling paper strips in 2–4 colors
– Craft glue, tweezers, and a toothpick or bone folder
– Scissors and a clean backing board
– Optional clear sealant or tape to protect the finished work
Plan your look
Here is why a plan helps. It keeps shapes even and colors balanced. Try a simple border around the photo, or a floral edge along the frame. Match the color mood to the room—soft pastels for calm spaces, bright contrasts for playful rooms.
Make the design
– Roll strips into coils, teardrops, spirals, and leaves
– Arrange shapes along the frame edge or cluster a small bouquet at a corner
– Leave small gaps so the frame doesn’t look crowded
– Glue shapes one by one, using tweezers for control
Finish and care
Let glue dry completely. Insert your photo and fit the frame with glass or clear acrylic. Keep it away from direct sun and humidity to preserve color and shape.
4. Decorative Bowls

Tired of plain bowls that fade into the shelf? You can make decorative bowls from paper quilling that catch the eye and stay sturdy. You shape coils from color strips, then glue them to form a small bowl you can use every day. The finish matters, but the feel in your hands is what keeps you coming back for more. This is a simple project you can finish in a weekend.
Materials
– Heavier paper or cardstock for a solid base
– Quilling paper strips in colors you like
– White craft glue
– A shallow bowl or mold to help shape the piece
– Tweezers and a toothpick for precise placement
– Clear shellac or a spray sealer for protection
Steps
– Roll tight coils and glue the ends so they stay put.
– Place coils on the mold and stack outward to build a bowl wall.
– Add a few extra rows near the rim to strengthen the edge.
– Let the piece dry fully, then lift it from the mold and smooth any rough spots.
– Coat lightly with shellac for a clean, protective shine.
Tips
– Use sturdy paper to keep the bowl from wobbling.
– Mix sizes of coils to create a varied, interesting texture.
– Pick a cohesive color palette to make the set feel calm, not busy.
– Apply a thin seal coat to keep colors bright and edges sealed.
Uses
These bowls hold keys, rings, coins, or small trinkets. Place one on a coffee table as a centerpiece, or group a few in different sizes for a simple display. They’re lightweight, easy to dust, and surprisingly elegant without a lot of fuss.
5. Quilled Coasters

Want a small project that protects furniture and adds a personal touch? Quilled coasters fit the bill. They are quick to make. A thick cork base or sturdy cardstock gives them staying power. When you finish, you’ll have a set that looks neat and sturdy, not a rough DIY job.
Here is why this works: coasters stop water rings and guard wood. They’re practical and easy to show off. Let’s break it down.
Design Ideas:
– Shapes: circles, squares, or hexagons to fit your vibe.
– Color schemes: soft neutrals or bold contrasts.
– Patterns: clean geometric lines or soft teardrop swirls.
– Set strategy: keep one base color, or use two tones for contrast.
– Tiny details: a leaf accent for a nature-inspired touch.
Next steps:
– Choose a base size about 4 by 4 inches.
– Pick cork or heavy cardstock for the base.
– Cut quilling strips about 1/8 to 3/16 inch wide.
– Coil and shape strips into spirals and teardrops.
– Glue pieces to the base in a pattern.
– Seal with a clear finish and let dry.
These coasters are practical for daily life and a fun way to show your craft. They blend with many decors and are easy to replace if you want a new look.
6. Quilling Wall Clock
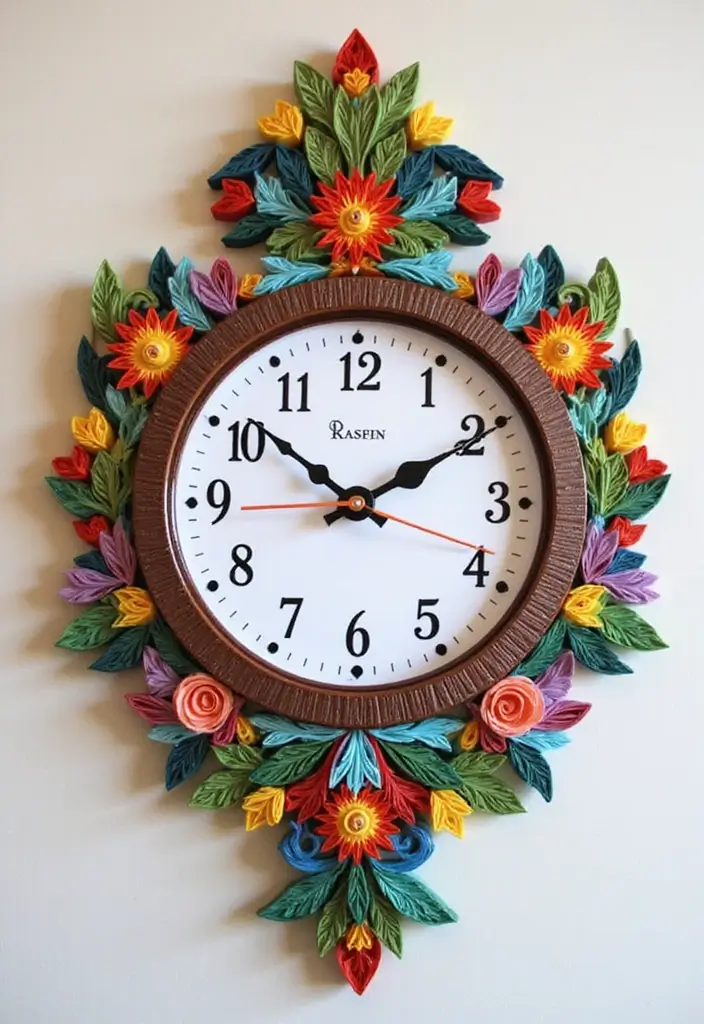
A quilled wall clock adds a touch of whimsy to your space while staying useful. You get a piece that shows your style and keeps time at the same moment.
What you’ll need
– A simple clock base with a working mechanism
– Quilling paper strips in the colors you choose
– Glue, scissors, a quilling tool or a thin pick, ruler
– Clear sealant or varnish for protection
Step-by-step
– Decide your color plan. Pick two to three colors that match your room.
– Mark the hours with numbers or simple marks so you know where to place designs.
– Create hour accents with quilled shapes. Use tight coils for bold numbers, teardrops for markers, and small scrolls for tiny details.
– Arrange the pieces around the clock face. Leave space in the center for the hands.
– Glue each piece down and let it dry completely.
– Thread the clock hands through the center and test the movement.
Tips for durability
– Apply steady glue and let it fully dry before handling.
– Keep the quilled pieces away from the moving hands to avoid contact.
– A light coat of sealant helps dust slide off and keeps colors bright.
This clock becomes a dialogue between time and art. It tells the hour and adds texture, light, and personality to any wall.
7. Quilling Mobile
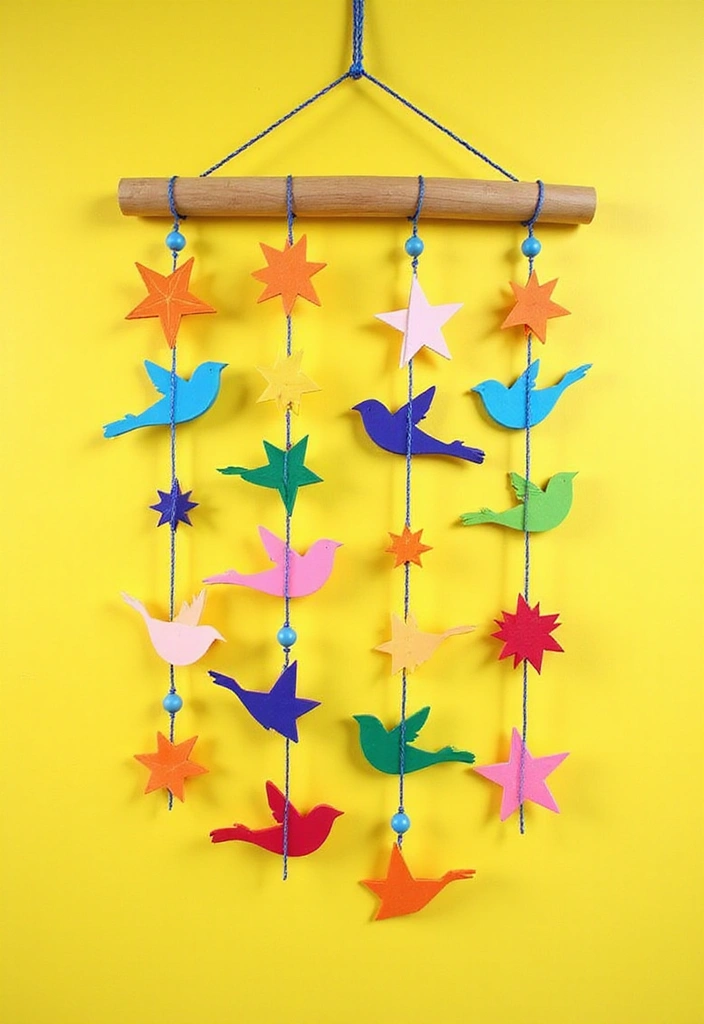
Want a soft, eye catching decor piece that moves with the air? A quilling mobile does just that. It adds gentle motion, catches light, and stays calm to look at. It works in a child’s room or in a cozy nook. You control the colors and shapes.
Let’s break it down. Here is why it helps: you build a tiny gallery of pieces that swing at different speeds. Your eyes travel from one form to the next, and your mind rests.
What you’ll need
– Lightweight paper strips, about 3-5 mm wide
– Glue and a small quilling tool or toothpick
– Fine string or fishing line
– A sturdy base, like a wooden dowel or a metal hoop
– Optional beads to anchor threads
How to make it
– Create several quilled shapes. Try birds, stars, clouds, and simple leaves.
– Glue each shape to a short piece of string so it hangs freely.
– Tie the ends of the strings to the base at different lengths.
– Balance the whole thing by adjusting short and long cords until it holds steady when you gently move it.
Tips for best results
– Use light colors for a soft look.
– Test the balance before finishing knots.
– Hang away from direct sun and vents to keep colors bright.
Next steps
– Start with four shapes, then add more as you gain little skills.
– Swap colors for a new mood.
– Keep it simple for a clean, elegant effect.
8. Quilled Candle Holders

Want a candle holder that shines with handmade style? Quilled strips add color and depth. You can use a plain glass or plastic holder. The result is a warm glow that fits any room. Here is how you do it.
Materials:
– Use a clear glass or plastic holder.
– Choose quilling paper strips in your chosen colors.
– Have clear glue that dries hard.
– Keep scissors and a quilling tool or toothpick on hand.
– Have a ruler and a pencil.
– Use battery-operated tea lights for safety.
Steps:
1. Clean the holder. A clean surface helps the glue grab.
2. Plan a pattern. Hold your colors up to the glass and try a floral design or a simple stripe.
3. Make your quilled pieces. Roll strips into coils and shape them into petals, scrolls, or tight loops.
4. Attach the art. Glue your pieces around the exterior, letting a small gap stay free so the glass can still shine through.
5. Let it dry. A full cure avoids smudges or chips.
6. Add the light. Place a battery tea light inside.
Tips:
– Keep the quill work on the exterior. The heat stays away from the paper.
– Choose floral or geometric patterns that wrap smoothly around the holder.
– Use battery tea lights for a safe, steady glow.
Uses:
– Great for dinner parties, cozy nights at home, or as a gift.
9. Quilling Jewelry

Want to wear your art? Quilling jewelry makes that easy. You can turn paper into earrings, a necklace, or a bracelet. The result looks chic and one of a kind.
What you need
– Quilling paper strips, light but strong, about 3 mm wide.
– A glue that dries clear.
– A simple quilling tool or a thin pin.
– Jewelry findings like earring hooks, jump rings, and a small chain.
– A clear varnish or sealant.
– Tweezers and scissors for precise work.
How to make it
– Plan a simple design first. Simple stems, teardrops, and circles are easy to wear.
– Roll shapes with steady hands. Keep each piece snug so it holds its shape.
– Glue shapes in a flat layout on a clean surface. Let the glue dry fully.
– Attach pieces to a backing or directly to a jewelry finding. Use jump rings to link parts if needed.
– Seal the final piece with varnish. This helps it last longer and resist wear.
Tips you can use
– Pick colors that match your clothes and mood.
– Start with one piece, like a small earring, to test durability.
– Keep designs simple for daily wear and easy care.
– Store finished pieces flat and dry to avoid warping.
Care and style
Treat quilling jewelry gently. Wipe with a soft cloth. Avoid getting it soaked in water. With care, these tiny art pieces make great gifts or personal accents.
10. Quilling Planters
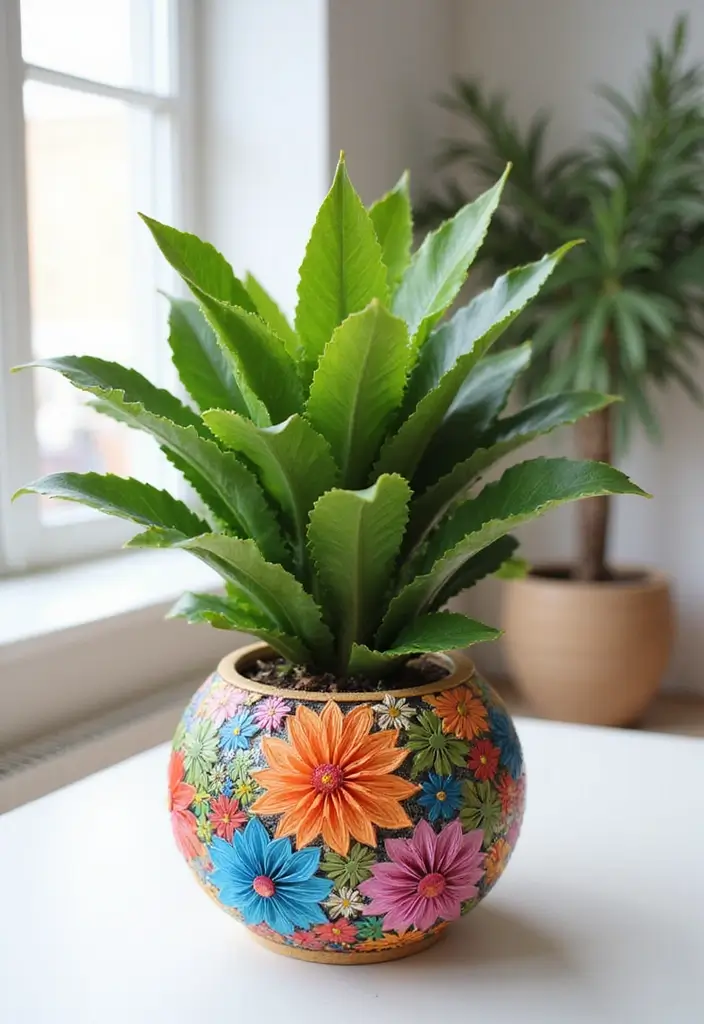
You want planters that pop with color and still show your plants. You can turn plain plastic or terracotta pots into decorative planters that fit your greenery.
What you’ll need
– Plastic or terracotta pots
– Paper quilling strips in your favorite colors
– White glue or glue for paper
– Scissors or a small craft knife
– Clear outdoor sealant to protect the design
Next, plan your design. Sketch a pattern so colors flow around pot. Try vines, flowers, or a bold band from top to bottom.
Then apply the quill strips. Start at one edge and work your way around. Press gently so the strips lie flat. Let the glue dry before adding more layers.
Finish with a seal. If the pot sits inside, you can skip outdoor sealant. For pots outside, use a clear outdoor sealant to keep colors bright after rain.
Creative tips:
– Create floral patterns that intertwine around the pot.
– Use outdoor sealant if your plants will be outside.
– Mix and match color schemes to match your plants.
These planters are useful and pretty. They fit on shelves, balconies, or garden beds. Swap colors with the seasons for a fresh look.
Start small with one pot, then add more later.
11. Quilling Art Pieces

You want a quilling art piece that fits your space. A wall showpiece or a shelf treasure can come from a simple plan and careful glue. Start with a base like a canvas or a shadow box. Let your tiny spirals and strips form a scene you love.
What you need
– Paper quilling strips in a few colors
– White or neutral card backing
– Glue, tweezers, and scissors
– A base to mount on (canvas or shadow box)
– Foam dots for gentle height
– Clear finish spray or varnish
Steps to build your quilling scene
1. Pick a base. A flat canvas works, or a shallow shadow box adds depth.
2. Sketch a simple idea. Landscapes, animals, or abstract shapes all work.
3. Create shapes. Roll tight coils, loose scrolls, teardrops, and petals.
4. Arrange first. Place pieces on the base to test the look.
5. Glue and layer. Press pieces in place, then lift some with foam dots to add depth.
6. Color and finish. Use 2-3 main colors plus neutrals. Seal lightly to protect.
Next steps: display and care
– Frame or hang the piece where light hits softly.
– Keep away from direct sun and high humidity.
– Dust gently and re-seal if the finish looks worn.
This approach lets you craft a calm, elegant piece you can be proud of.
12. Quilling Bookmarks
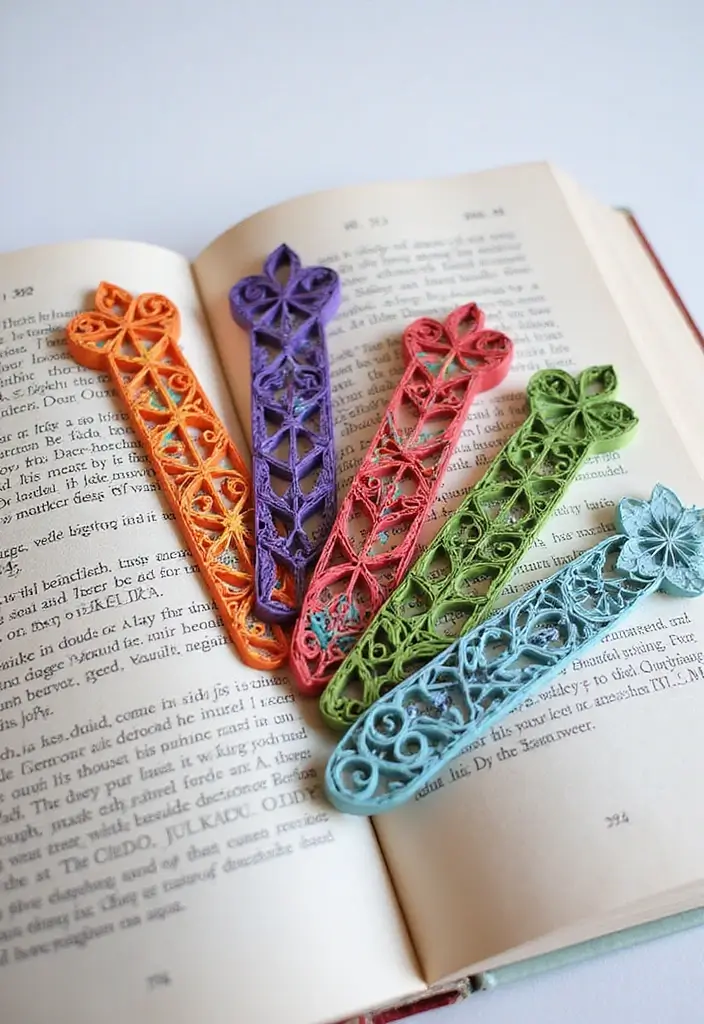
Book lovers know small accents can brighten a page. A quilling bookmark adds color, keeps your place, and wears well after many reads. This tiny project fits any book shelf and any mood.
Here is why it shines: you customize every strip. You can pick colors that echo your favorite tale. You can turn simple shapes into tiny scenes.
Materials you’ll need
– sturdy cardstock for the base
– thin quilling paper strips in your chosen colors
– glue and a small quilling tool or a toothpick
– scissors
– a ribbon, tassel, or cord for the finishing touch
Steps to Create:
– Cut a 2 x 6 inch strip of cardstock for the bookmark base.
– Plan a simple design: circles, leaves, stars, or a tiny character.
– Coil and pinch quilling strips to form the shapes. Glue them to the base and let them dry.
– Attach the ribbon at the top edge for a neat finish.
These bookmarks give reading a little extra sparkle and make thoughtful gifts for fellow readers. Tip: seal the back with a light coat of glue to keep the shapes from fraying. If you want extra durability, bind a thin clear sleeve around the front. Next steps? Try a set in a matching color family or designs from a single story.
13. Quilling Table Centerpieces
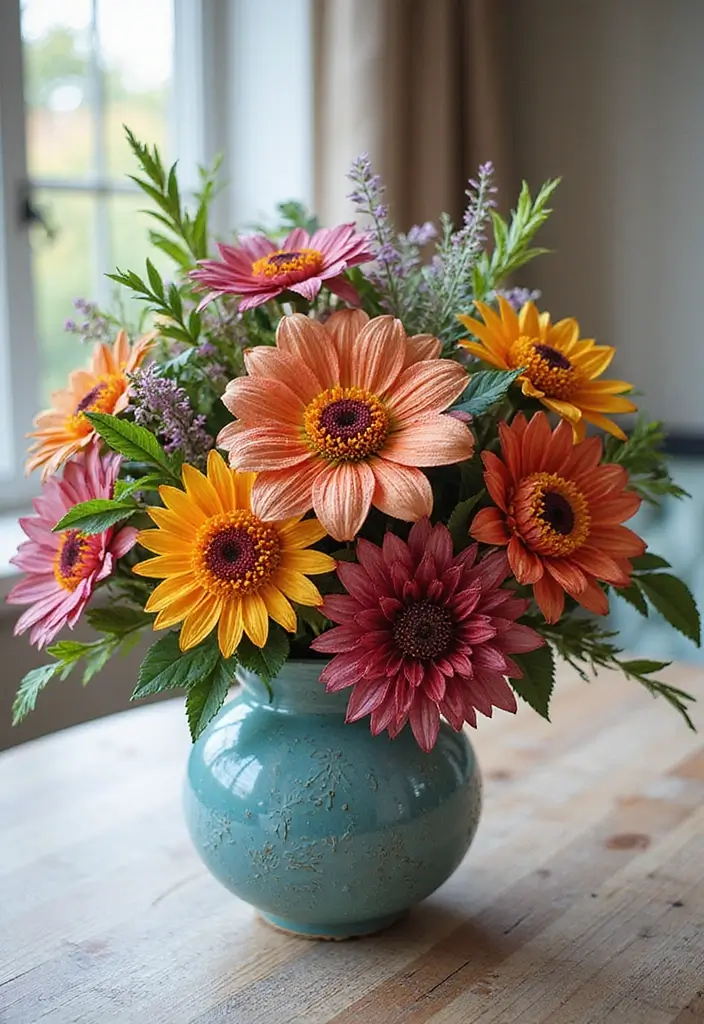
Are you looking for table decor that wow guests but stays easy to make? Quilling centerpieces fit the bill for paper quilling decor. You can layer flowers, leaves, and decorative shapes to match any theme. Here is how to build centerpieces that shine.
Materials
– Base ideas: vase, bowl, or tray.
– Quilling supplies: colored strips, glue, and a small roller tool.
– Finishing touches: beads or stones for weight and sparkle.
Step-by-step
– Pick a base and plan the layout. Decide where the tallest pieces sit and where the low elements go.
– Create quilled pieces in different sizes. Try a few large flowers with small spirals for variety.
– Attach pieces to the base with glue. Let it dry fully.
– Add beads, stones, or tiny pearls to fill gaps and catch the light.
– Spray a light seal if humidity or handling could harm it.
Style ideas
– For spring, use pastel flowers and leafy greens.
– For weddings, mix ivory, white, and a soft metallic.
– For holidays, choose bold reds and greens or a single color family for unity.
Next steps
– Place the centerpiece where it is seen from all sides.
– Pair with matching napkins or candles to finish the look.
– Enjoy the conversations it sparks tonight.
– It brings color to tables.
14. Quilling Gift Wrap

You want your gift to feel special with little work. Quilling gift wrap gives you a handmade look using tiny coils and shapes. A few paper strips and a dab of glue do the job.
What you need
– Quilling paper strips, scissors, clear glue, a small quilling tool or tweezers, and clear tape
– Your gift wrap and a clean workspace
Plan your look first. Pick paper that fits the moment. Soft pastels feel calm for birthdays; bold hues suit a party; neat patterns work for a friend who loves order. A quick color map helps you mix pieces without clashing.
Quick ideas
– Roll coils into flowers or a tidy bow
– Add a quilled tag with a note
– Let colors echo the gift’s theme or the recipient’s taste
How to apply
– Make a few small coils and pinch the ends to form petals or loops
– Place shapes on a corner or along the edge of the wrap
– Glue them carefully and press until they set
– Let glue dry a minute or two before you wrap fully
Tips for success
– Use thin glue and a light touch
– Dry pieces before wrapping to avoid smears
– For bulky gifts, put the quill work on the top only
With these steps, your gift wrap becomes part of the present, personal and affordable to make.
15. Quilling Wall Hanging

You want wall art that feels both delicate and bold. A quilling wall hanging can be that standout piece in your space. It’s doable, even if you’re new to paper coils. Here is how to make one that lasts and looks clean.
What you need
– A sturdy base: a wooden board or stretched canvas that can take a little glue
– Quilled shapes: a mix of tight coils, teardrops, and scrolls
– Glue: clear-drying craft glue that grips fast
– Tools: a quilling tool, tweezers, and a sharp pair of scissors
– Hanger: picture hooks or a length of strong twine
– Extras: a clean cloth for wipe-downs, a light sealer if you want a subtle shine
Here is why planning helps. A simple layout stops you from guessing as you go. Start by drawing a light outline on the base.
Steps to Create:
– Lay out your design on the base. Position the main shapes first, then fill with smaller pieces
– Glue each piece in place. Press gently with a cloth and let it dry before adding more
– Build depth by layering colors. Overlap some coils to add shadows
– Let the piece dry fully, then attach your hanging hardware
Next steps: hang in a bright spot where you can admire the details up close. A soft shelf or a wide wall corner works well.
16. Quilled Calendar

Here is why a quilled calendar can brighten your space and your schedule. It blends art with daily use, and you get a wall piece that also keeps dates handy.
Here is how to make it.
What you’ll need
– sturdy cardstock or a small base board
– thin paper strips for quilling
– a quilling tool or slim needle
– craft glue that dries clear
– a dry-erase marker for updates
– a calendar template or a month-by-month plan
– scissors, ruler, and a pencil
Creative steps
– Pick a color set for each month to match the season
– Roll small coils for moons, petals, or numbers
– Glue designs onto the base in a clean, balanced layout
– Leave space for the dates with a dry-erase area
– Hang the calendar where all can see it, like the kitchen or hallway
Next steps: jot birthdays, appointments, and holidays now, then refresh as the year moves on. This project blends craft with daily planning, giving you a useful, eye-catching piece you’ll enjoy every day.
17. Quilling Refrigerator Magnets
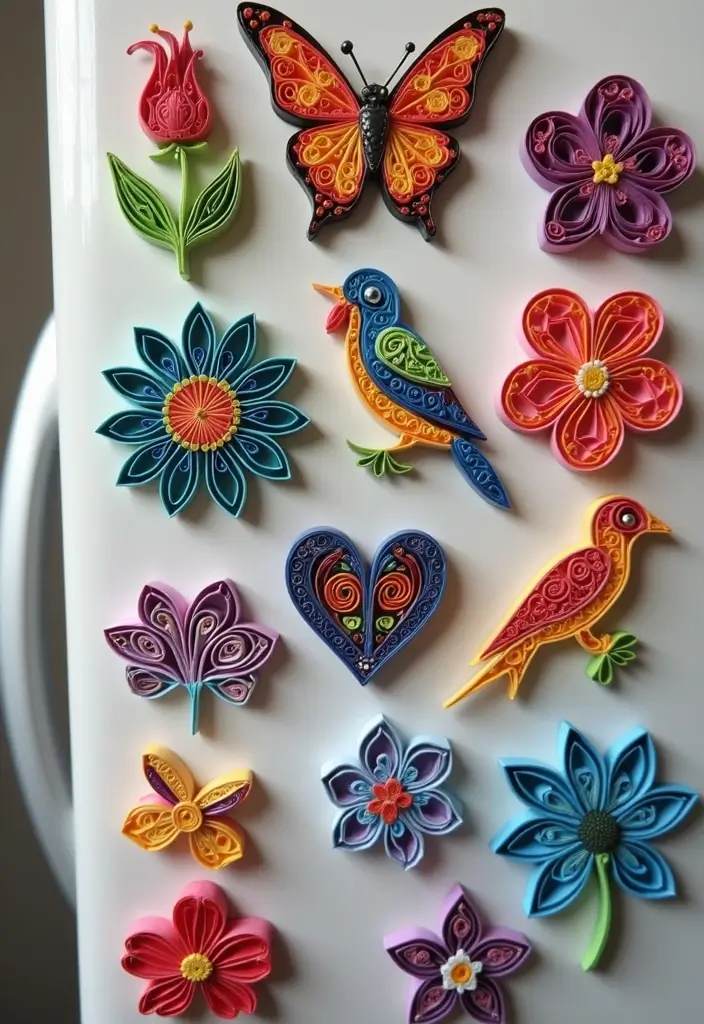
Your fridge is a blank canvas. You can turn it into a tiny gallery with quilling magnets. They are light, bright, and easy to swap as your mood changes.
Making Your Magnets:
– Pick small shapes you like, such as tiny fruits, flowers, stars, or letters. Lightweight designs stay put.
– Use strong adhesive magnets. A dab on the back gives durable hold.
– Roll and pinch paper strips to create clean coils. Glue edges so the shapes keep their form.
– Mount a thin backing if you want a smooth edge. A tiny felt circle works well.
– Finish with a clear seal or a thin coat of glue for wear. This helps the colors stay bright.
– Try many colors and mix shapes in one set. Group them by theme to tell a simple story on your fridge.
These magnets do more than hold notes. They add personality to your kitchen, office, or dorm. They’re easy to swap, so you can refresh the look after a season or a special event.
Next steps: gather a few tools, set aside an afternoon, and start with two shapes. You’ll see how quick and fun it is to make a tiny art piece that holds a note.
18. Quilling Lampshade
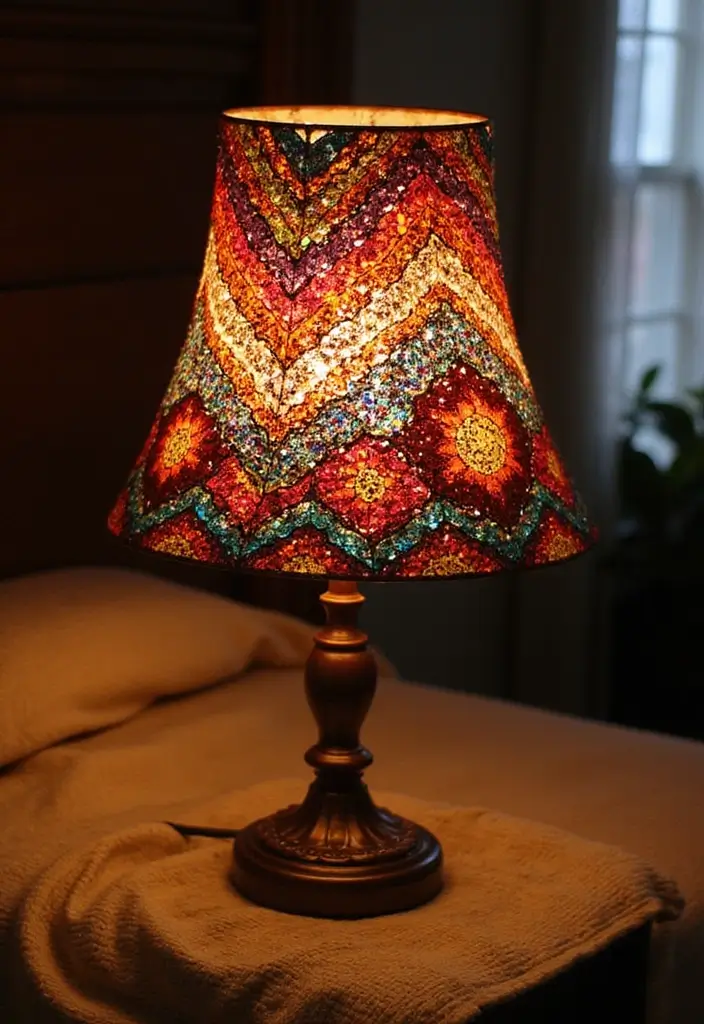
Want a lamp that gives a soft glow and a one of a kind look? A quilling lampshade can do both.
Materials
– Plain lampshade
– Quilling paper strips in colors you love
– Clear-drying glue
– Scissors and a toothpick for placement
– LED bulb to keep heat low
How to make it
– Cover the shade with quilled shapes. Start with large leaves, flowers, or curved lines.
– Plan your design first. Lay it out on the shade with light pencil marks.
– Roll and shape your paper strips. Make coils, teardrops, and scrolls.
– Glue each piece in place. Press gently until the glue dries.
– Let the shade dry fully before you hang it. Use only LED bulbs.
Design ideas
– Floral clusters for a romantic look
– Abstract swirls for a modern vibe
– Soft gradients by using colors that blend
– Leave some negative space so light can diffuse
Care and safety
– Choose heat safe papers or treat regular paper for lamps, and avoid thick stacks near the bulb.
– Check the glue is dry before use.
– Dust gently with a soft cloth to keep the design bright
Why this works
– The lamp gives warm light without getting hot if you use LED bulbs.
– The shade is light, so you can swap colors with seasons.
– It adds a personal piece of art to any room.
Next steps
– Start with a simple floral edge and grow your skill.
– Photograph your design to share ideas with friends.
19. Quilling Fairy Lights
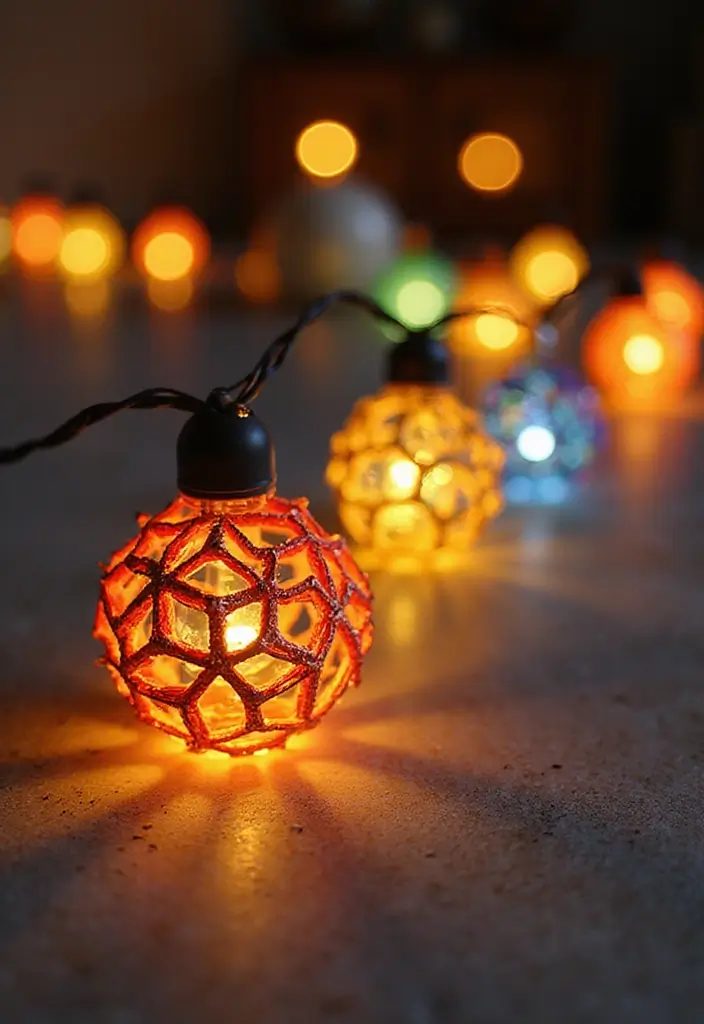
You want cozy lights that feel handmade but aren’t fussy. Quilling fairy lights give you that charm with a soft, warm glow. You can wrap tiny quilled shapes around each bulb or hang them along a string as a decorative garland. LED lights stay cool, so your paper art stays safe.
– Materials: LED fairy lights, thin paper, clear glue, scissors, and a soft brush for dust.
– Make the shapes: Roll paper into spirals or loops. Create tiny flowers, hearts, or simple leaves. Keep each piece small so it sits neatly on the bulb.
– Attach or hang: For bulbs, wrap a slim strip around the glass and secure the end with a dab of glue. If you prefer a hanging look, thread several quilled pieces onto a thread or thin ribbon and space them out along the string.
– Seasonal ideas: Winter nights get stars and snowflakes. Spring rooms glow with petals. Autumn corners brighten with leaf shapes. Mix colors for extra pop.
– Placement tips: Try a bedside strand, a headboard border, or a patio arch. Choose warm white LEDs for a soft feel. Weave in a few clear beads for extra shimmer if you like.
– Care and safety: Use lights that stay cool. Avoid pulling too tight on the shapes. Dust gently with a soft brush. Replace any damaged bulbs right away.
Start small with one string. Then expand as you see how the light changes your space.
20. Quilling Seasonal Decor

Want fresh seasonal decor you can make by hand? Quilling lets you shape thin paper into elegant pieces. You control color, size, and mood. Here is why it works: it’s affordable, calm to do, and you keep the art for years.
Three easy projects
– Seasonal wreaths. Start with a small hoop. Roll paper strips into petals and leaves. Glue them around the ring using season colors: spring pastels, summer brights, autumn earth tones, winter cool blues. Add a tiny bow or a few quilled berries. Hang on your door or wall for a welcome touch.
– Holiday ornaments. Make tiny shapes like stars, bells, or snowflakes. Shape coils and teardrops from the strips. Attach a small loop of thread to hang them. Use white, gold, or metallic tones for a classic holiday feel.
– Seasonal framed art. Create a small panel with a bouquet, a leaf burst, or a simple scene. Place it in a ready-made frame or a shadow box. Swap the colors each season to keep the display fresh.
Next steps: pick a project, gather basic supplies, and set aside a quiet evening. You’ll finish with classy pieces that add texture and charm to any room.
21. Quilling Pet Portraits

Want a keepsake of your pet that feels warm and personal? A quilling pet portrait can do that. Turn a clear photo into a softly layered paper scene that shows fur, eyes, and personality.
What you need
– Paper strips in browns, grays, creams, and a few accents for eyes and nose
– A quilling tool or a thin needle
– Plain glue and a small brush for neat edges
– A flat backing board and a frame or matte for display
Steps
– Pick a good photo and mark the main shapes on your backing as a simple guide.
– Decide which colors map to fur, eyes, nose, and mouth. Cut short pieces for tight lines and longer strips for hair.
– Roll pieces for ears, snout, eye whites, and pupils. Bend them gently to shape and place.
– Layer darker tones first, then add lighter shades to bring out features.
– Glue pieces in place. Let the glue dry before you move to the next area.
– Mount the work on a plain background and frame it for a clean, finished look.
Tips
– Work small and steady; patience matters in quilling.
– Start with the face—eye contact often makes the portrait feel alive.
– Use fine glue and a light touch to avoid bumps on the paper.
– Keep a spare color kit to tweak shading if needed.
This unique piece will warm any room and bring a smile to every viewer.
22. Quilling Themed Art

You want quilling that shows who you are. Themed quilling makes that easy. It turns a favorite movie, book, or hobby into wall art you can be proud of.
Here is why it works: you pick the mood, the story, and the colors. A small set of shapes can tell a big tale. And you can build a striking piece from simple tools.
Let’s break it down.
– Pick a theme Choose a character, a scene, a symbol, or a short quote.
– Plan the layout Draw a simple outline first. Decide where each piece will go.
– Choose colors Use papers that match the mood. Bright tones for energy, soft tones for calm.
– Shape with care Make tight spirals for eyes, curved lines for mouths. Layer pieces to add depth.
– Add text or symbols Include a brief quote or a tiny emblem from your theme. Keep it readable.
– Finish and mount Glue to a sturdy backing. Frame it or mount on a board with color.
Next steps: put it where friends can see it. Tell a bit about your theme to start a conversation. If you’re new, begin with a small character portrait before a larger scene.
23. Quilling Recipe Cards
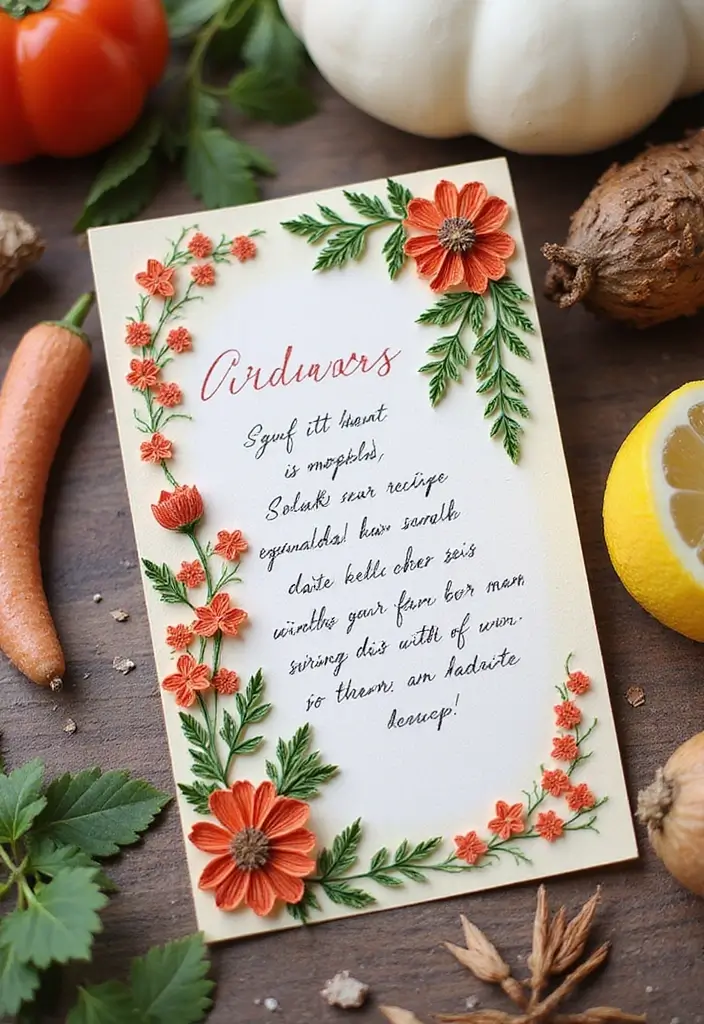
Want a cute, lasting way to save recipes and show your craft? Quilling recipe cards mix cooking love with paper art. They look classy on a shelf and shine in a family cookbook.
Materials
– sturdy cardstock or blank cards
– thin quilling paper in dish colors
– white glue and a fine applicator
– scissors and a small tool for shaping
– a pen for neat handwriting
– a light spray sealant for protection
What you plan
– Choose a dish you want to feature. Think color and shape.
– Sketch a simple layout with the title, the quilled art, and the recipe.
Steps to Make
1. Cut a card to size and set it aside.
2. Create small quilled shapes that hint at the dish (swirls for sauce, leaves for garnish).
3. Glue the shapes on the card in a balanced design.
4. Write the recipe clearly, with ingredients, steps, and time.
5. Let ink dry, then seal the card lightly.
Tips
– Pick a limited color group for a calm look.
– Practice shapes on scrap paper first.
– Keep text large enough to read easily.
– Add a tiny photo or a ribbon for extra charm if you like.
Why they work
– They organize recipes and make sharing easy.
– They feel personal and special.
– They store well in a recipe box or binder.
24. Quilling Home Sign
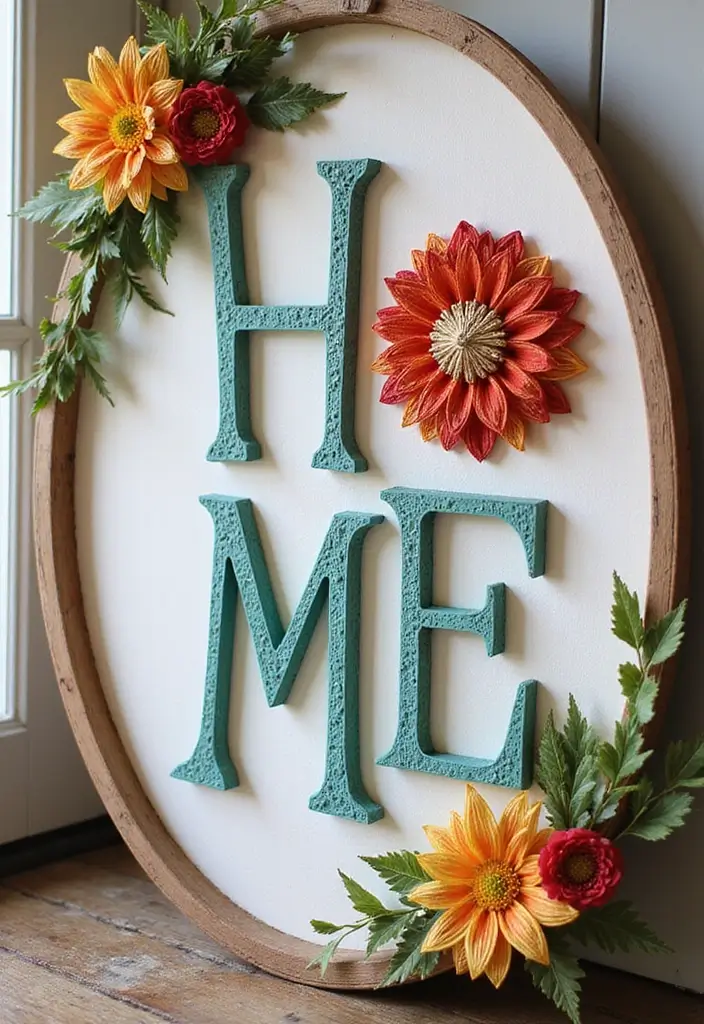
Want a warm welcome at your door? A quilling home sign fits. It is simple to make and personal. You can tailor it to your entry and your style. Here is how you do it.
Color and style ideas
Pick a palette that matches your home. Neutrals work in most entry spaces. Bright hues give a friendly pop. Rustic halls like earthy tones. Modern spaces prefer white with a bold accent. These choices guide your design and keep the sign from clashing with your decor.
What you’ll need
– Base: wood plaque or heavy cardstock sized for your space.
– Quilling strips: colors you love, about 3–6 mm wide.
– Tools: glue, scissors, and a toothpick to place small curls.
– Plan: a rough layout for the letters and tiny decorations.
Making Your Sign
– Prep the base and decide the overall size that fits your doorway.
– Create the letters with rolled quill strips and glue them in place after they hold shape.
– Add borders or flowers that echo your chosen palette.
– Step back to check spacing and alignment, then adjust as needed.
Finishing Touches
– Seal lightly with a clear finish to protect color and paper.
– Attach a hanging method, like jute twine or a small sawtooth hanger.
– Wipe gently with a soft cloth to remove dust.
Care and display
– Keep the sign out of direct sun to prevent fading.
– Dust every few weeks with a soft brush.
Ready to start? Your quilling home sign becomes a warm greeting that lasts and grows with your skills.
25. Quilling Memory Box
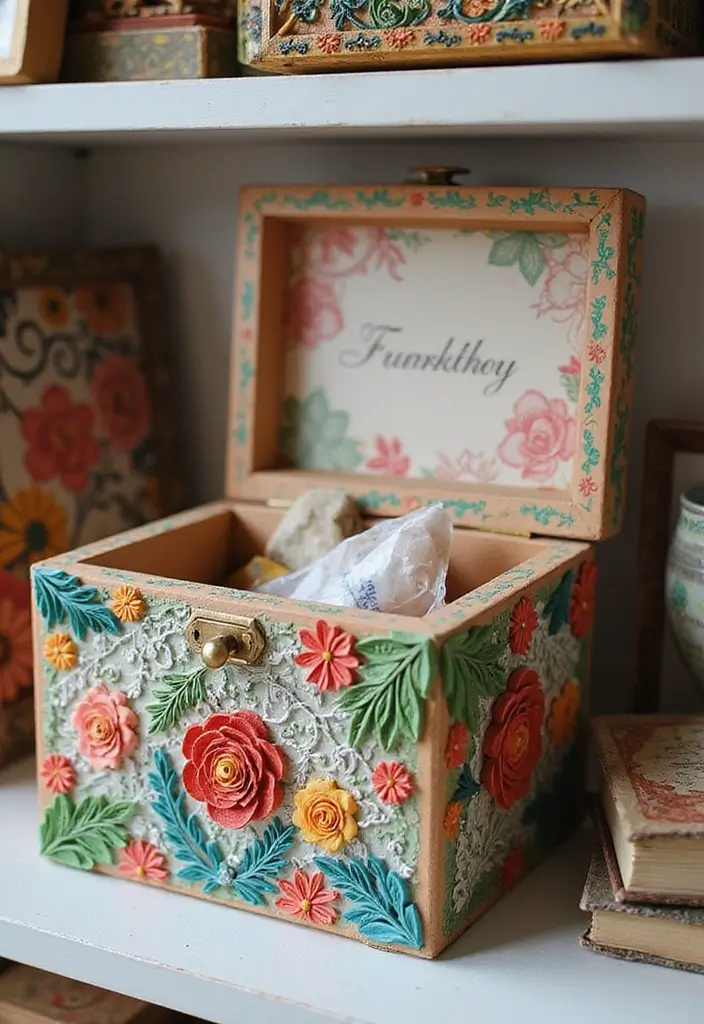
Want a safe, pretty home for your memories? A quilling memory box helps you store keepsakes and show them off. Start with a plain box. Add your own quilled designs that echo the items inside. It is simple and feels thoughtful.
Here is how to do it. First plan your theme. Think of what you will store: photos, tickets, small mementos. Then pick colors that match those memories. Next, make small quilled shapes that stand for each item. A tiny heart can mark a first dance. A little camera can recall a trip. A leaf might celebrate a nature day. Place these shapes on the box with a strong glue. Let the glue set before you move on. You can line the inside with soft paper to guard delicate keepsakes. Beginners can follow these steps and finish in a weekend.
Tips:
– Use a color scheme that reflects the memories stored inside.
– Add hearts or symbols that mean something to you.
– Use a durable adhesive to keep the designs in place.
Next steps: keep the box somewhere safe away from heat and direct sun. It will protect memories and become a nice decor piece in your room. Display it on a shelf to enjoy the glow of your work.
Conclusion
Paper quilling is not just an art form; it’s a delightful way to express creativity and elevate your home decor. From elegant wall art to personalized gifts, these 25 DIY projects provide endless possibilities for crafting.
Challenge yourself to try new quilling techniques and immerse yourself in the creativity of paper art. Which project are you excited to try first? Let’s keep the crafting spirit alive together!
Note: We aim to provide accurate product links, but some may occasionally expire or become unavailable. If this happens, please search directly on Amazon for the product or a suitable alternative.
This post contains Amazon affiliate links, meaning I may earn a small commission if you purchase through my links, at no extra cost to you.
Related Topics