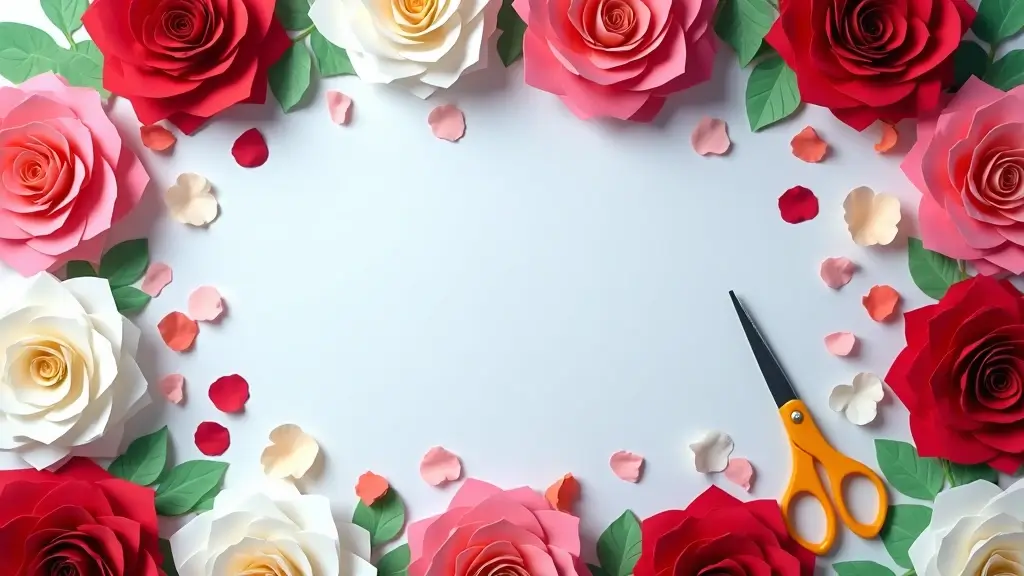
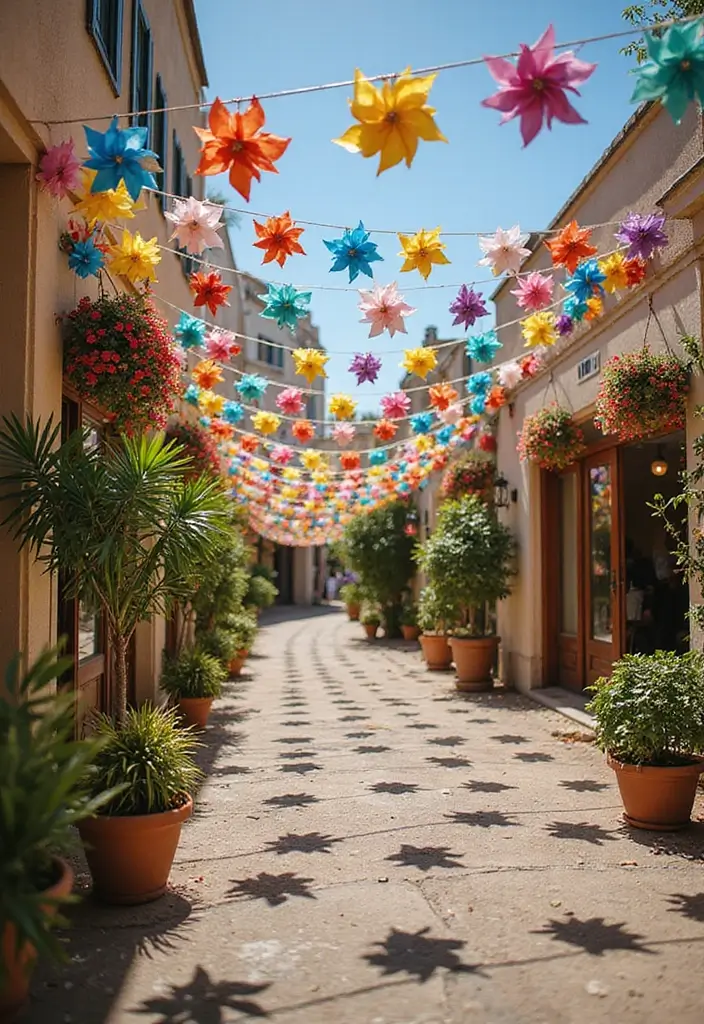
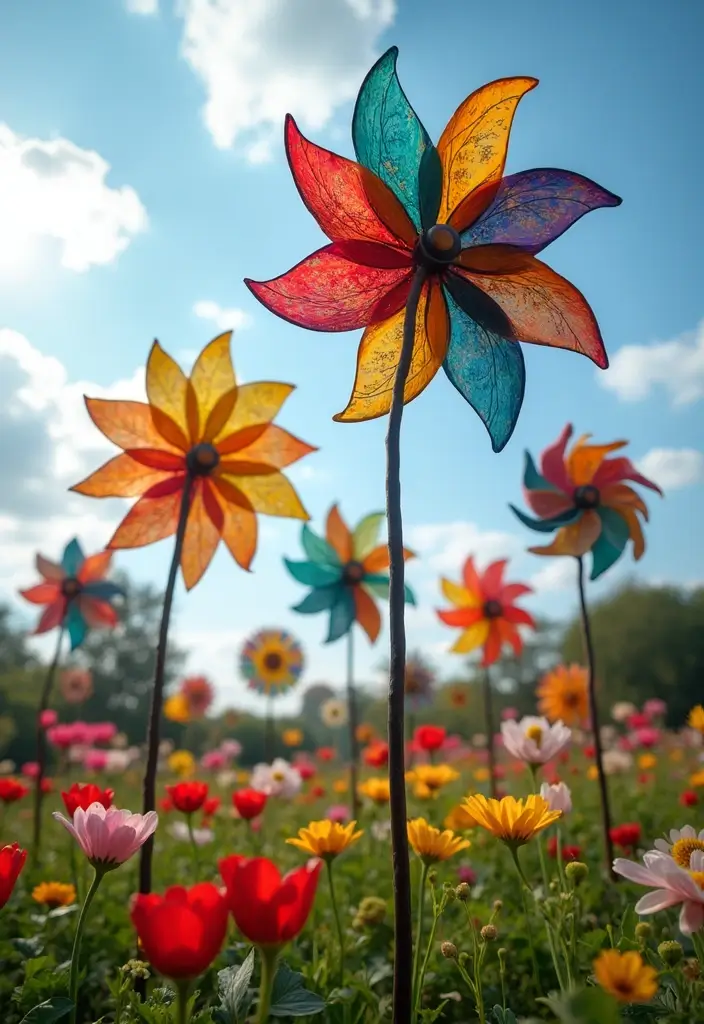
You want simple, cheerful decorations you can finish this weekend. Paper pinwheels spin and catch light in a way that makes any room feel brighter. I made this post because I wanted a practical roundup of easy paper pinwheel DIYs that anyone can try.
This post is for busy people who love a friendly craft vibe but not a pile of steps. If you’re planning a birthday party, decorating a classroom, or just brightening your home on a budget, this is for you. You care about crafts that look good, are easy to make, and use everyday materials.
You’ll find 28 ideas that run from tiny desk pinwheels to large outdoor spinners. Each idea keeps things simple: a few supplies, quick steps, and room for your own color mix. I’ve added notes on color schemes, paper types, and finishing touches that help your wheels move smoothly.
Here is how you can use these ideas. Start with a plan, pick a size, and gather your paper, sticks, and a fastener or glue. Cut a square, fold to form a pinwheel, then secure the center. Attach it to a stick for a garden wand or hang it with string for a dreamy wall display.
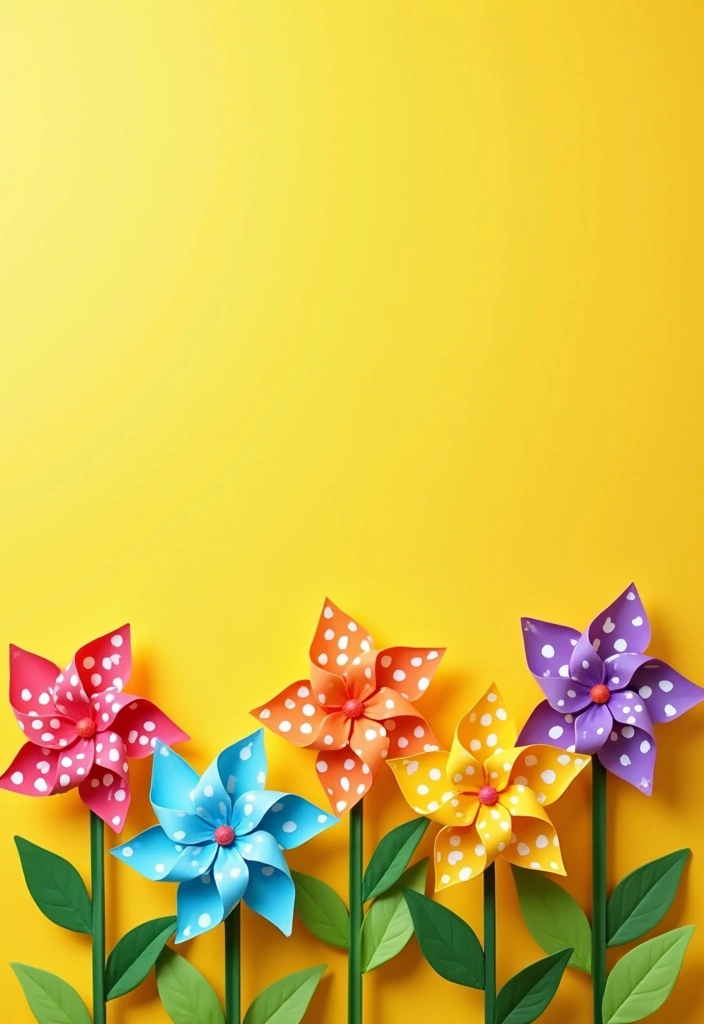
Choose materials that fit your space. Recycled paper, bright card stock, or bold patterned prints all work. Try two tones for a kid’s party, pastel shades for a baby shower, or metallics for a party night. Most pinwheels can be finished in under 30 minutes, and some are ready in 10.
Here is why this matters. These pinwheels add motion, color, and whimsy without costing a lot. They’re easy enough for kids to help with, but pretty enough for grownups to enjoy too. Next steps are simple: pick two or three ideas, grab your supplies, and start spinning. Share your finished wheels and inspire others to try their own spin with joy.
1. Classic Triangle Pinwheel
Looking for a simple, cheerful craft you can finish fast? The Classic Triangle Pinwheel fits the bill. It’s small, magnetic with color, and spins with a gentle breeze.
Why this works
A plain square of colorful paper becomes a lively pinwheel with just a few moves. You can swap colors to fit any party or room. It’s a favorite for kids and adults because it’s easy and satisfying to see spin in the air.
How to make it
1) Cut the square from each corner toward the center. You want four triangles meeting at the middle.
2) Fold the tip of each triangle toward the center. Press to keep them flat.
3) Secure the tips with a small pin or brad in the exact center. If you’re making a portable version, slide a straw through the center before the pin goes in.
4) Add a splash of sparkle. Try metallic paper or a dab of glitter glue along the edges for shine.
Unique insights
You can use recycled paper from old magazines or gift wraps. It adds a one‑of‑a‑kind look and cuts waste.
Practical uses
Hang it as party decor, prop a few on a wall, or attach one to a straw for a handheld toy. It spins nicely in a light breeze and brings a playful touch to any space.
Next steps: gather a few sheets of scrap or colorful paper, pick a color combo you love, and start pinwheeling.
2. Ombre Pinwheels

Ombre gives a soft, chic look. It slides from light to dark with ease. You can make it with gradient paper or by painting white cardstock.
– What you need:
gradient paper or white cardstock
paints or colored markers (your color choice)
brushes or sponges
scissors
a pin or brass fastener
a ruler
glue or tape
– How to do it:
Choose two or more colors for your gradient.
If you use gradient paper, cut it into a pinwheel.
If you paint, lay the paper flat and blend colors.
Let it dry.
Cut the square and fold the triangles to form a pinwheel.
Attach the pin with the fastener.
– Tips:
Let the colors blend at the edges for a soft look.
Use several shades for depth and texture.
Choose sturdy cardstock so it holds up in sun or breeze.
Pair with flowers and table linens to tie the room together.
– Ideas for uses:
This style shines in wedding decor as table accents or aisle markers.
They also work as party favors or photo backdrops.
– Next steps:
Test a small version first, then scale up for larger decorations.
3. Glittery Pinwheels

Want a dash of magic for your party? Glittery pinwheels catch eyes and spin with joy, turning any table into a bright display.
Here is what you need to start:
– Pinwheel template on sturdy paper or cardstock
– Glue or a glue stick
– Glitter in colors you love; consider biodegradable glitter
– Glitter sealer like spray adhesive or a clear spray
– A thin wooden dowel or sturdy straw for the handle
– A small brad or fastener to hold the blades (optional)
Next, steps to make:
1) Print or draw a pinwheel on the sturdy paper and cut it out.
2) Slice from the center to the corners to form four blades.
3) Fold each blade and glue the edges so the piece keeps its shape.
4) Brush a thin coat of glue on the outer edge and sprinkle glitter all over. Tap off the extra.
5) Let it dry completely, then seal with a light spray to lock the glitter.
6) Attach the dowel or straw at the center and test the spin.
Unique Insights: Using several glitter colors makes a lively look as light hits each blade. Biodegradable glitter keeps the craft pretty and kinder to the planet.
Tips: A quick spray seal keeps glitter in place and reduces shedding. These pinwheels work well as party favors or cake toppers for a festive finish.
If you want extra shine, make a batch in matching colors for a coordinated party vibe.
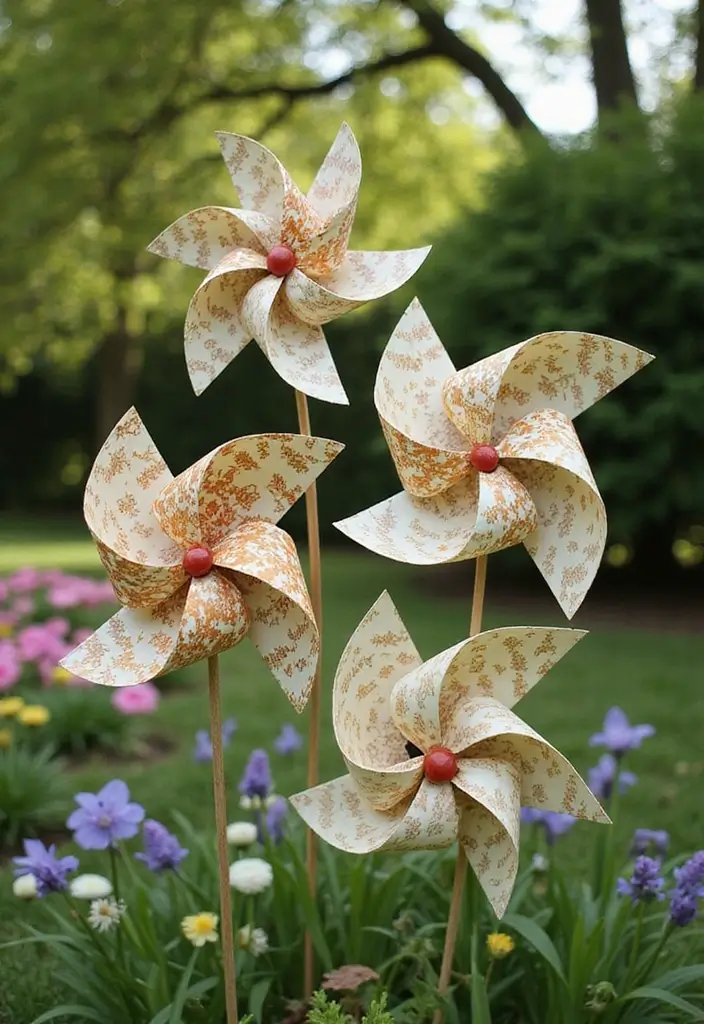
4. Floral Print Pinwheels

Floral print pinwheels made from paper brighten a party space fast. They spin with the breeze and add color to tables, fences, or gates. You get a cute, lively look with a simple craft.
What you need:
– Floral-pattern paper (gift wrap or scrapbook scraps)
– Scissors
– A straw, stick, or dowel
– A pin or tape
Steps:
– Cut a six-inch square from the paper.
– Fold the corners to the center and press to form a pinwheel.
– Punch a small hole in the center and slide the straw through.
– Secure the blades with a pin or tape so they stay balanced.
To use them well:
– Pair floral prints with solid colors for bold contrast.
– Reuse scraps from gift wrap to stay eco-friendly.
– Use the same design in two sizes for depth.
– Store flat when not in use to avoid creases.
Tips:
– Match pinwheels to real flowers in your centerpiece.
– Hang several on a string to make a garland.
– Let kids help with folding under supervision.
Next steps:
– Try different sizes and hang at varying heights.
– Place a few by a floral table setting so colors repeat.
5. Mini Pinwheel Favors
Looking for charming favors that don’t stress your budget? Mini pinwheels fit parties, weddings, and casual gatherings. They spin with joy and add whimsy to tables.
What you need:
– Small square paper (about 2×2 inches) in colors you love
– Toothpicks or straws
– A pin to hold the wheel
– Scissors and tape or glue
– A safe pen for names or dates
How to make:
– Cut and stack four to six layers of the square paper.
– Fold every other corner toward the center to form a pinwheel.
– Poke a hole through the center and fasten it with the pin.
– Push the pinwheel onto a toothpick or straw. Lightly bend the pinhead to keep it steady.
Unique Insights: Personalize each mini spin by writing names, dates, or a message on the back with a safe pen. This small touch makes guests feel noticed.
Tips: Display them in small jars or tie ribbons around the sticks for a sweet scene. They also work as place cards. Write a guest name on the back and place the pinwheel at each setting.
Next steps: choose a color mix that fits your theme, prep in advance, and enjoy the glow these mini pinwheels bring to your event.
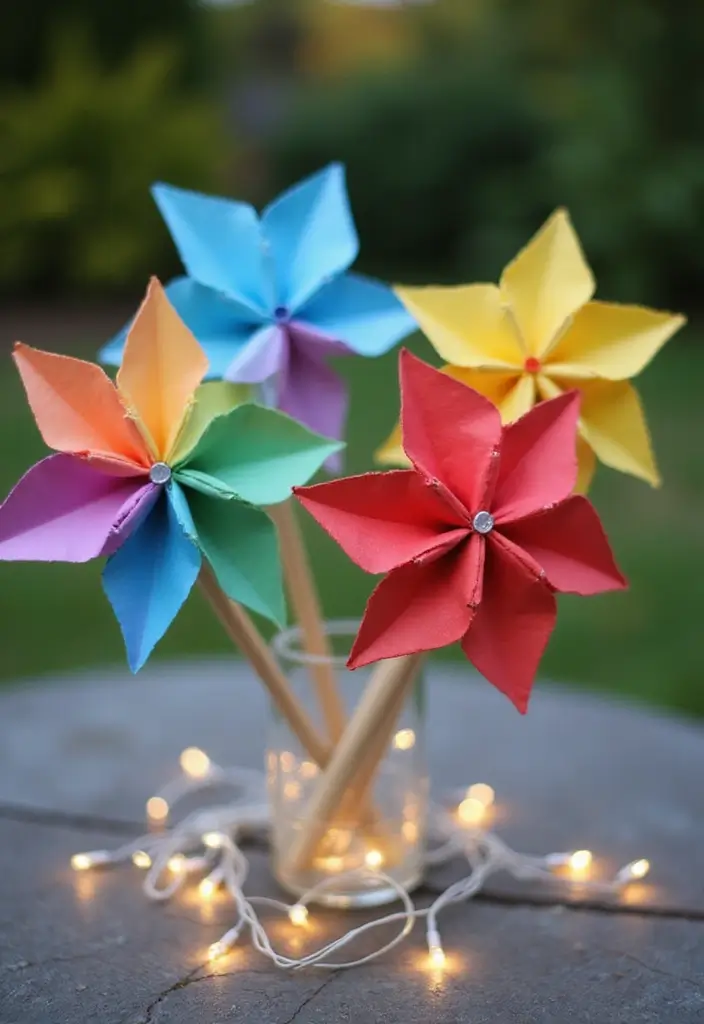
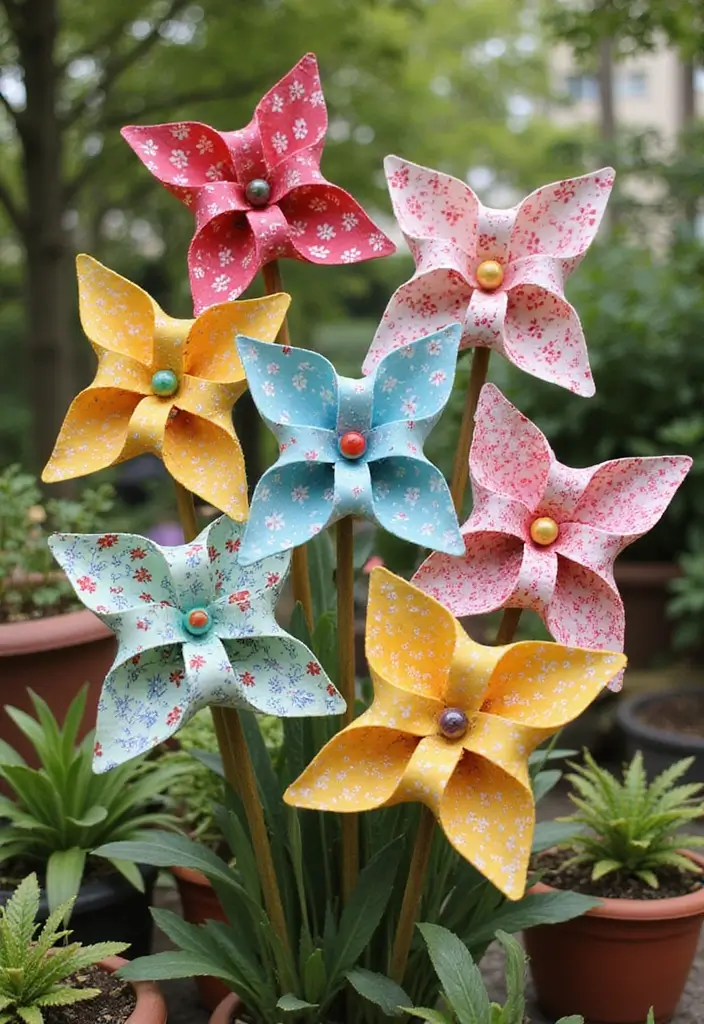
6. Rainbow Pinwheels

You want a bright, easy craft that adds joy to parties and craft time. Rainbow pinwheels do just that. They’re colorful, simple to make, and spin with a light breeze or a gentle bump.
Materials
– Colored paper in 4–6 colors
– Scissors
– A small brass brad or pin
– Wooden sticks or thick craft straws
– Tape or glue
– Optional: string for a mobile
Steps
– Cut a 6×6 inch square from one color of paper. Make the same cut with several other colors.
– From each square, cut four straight lines from the edges toward the center. Stop about half an inch before the middle.
– Fold every other corner toward the center and press flat.
– Place a brad through the center to hold the folds. Leave the brad loose enough to spin.
– Slide a stick or straw under the brad to anchor the pinwheel. Spin it to test the breeze.
Unique insights
Rainbow pinwheels are perfect for Pride events or birthday parties. They add instant color and cheer to walls, tables, and windows. Use them as small, portable decorations that kids can carry in a parade or photo booth.
Tips
– Create a pinwheel mobile by stringing several pinwheels at different lengths. Hang it where a breeze comes through.
– Make extra pinwheels with bright hues for photoshoots or outdoor games. They look lively in group shots and near candy tables.
7. Seasonal Pinwheels
Seasonal pinwheels give you quick, festive décor you can reuse. You control the color and paper for each season. For Halloween, try orange and black. For Christmas, red and green. In spring, go with pastels. In summer, use bright blues and yellows. The little wheels flutter in the breeze and draw the eye.
Where you place them matters. You can hang pinwheels inside on walls or in windows. Put some in the yard on a stake. You can also tuck a few into gift wrap to add a playful surprise.
Unique insights: Try a full pinwheel wreath. Use different sizes and seasonal papers to frame a door or wall. It becomes a simple, handmade art piece you can reuse.
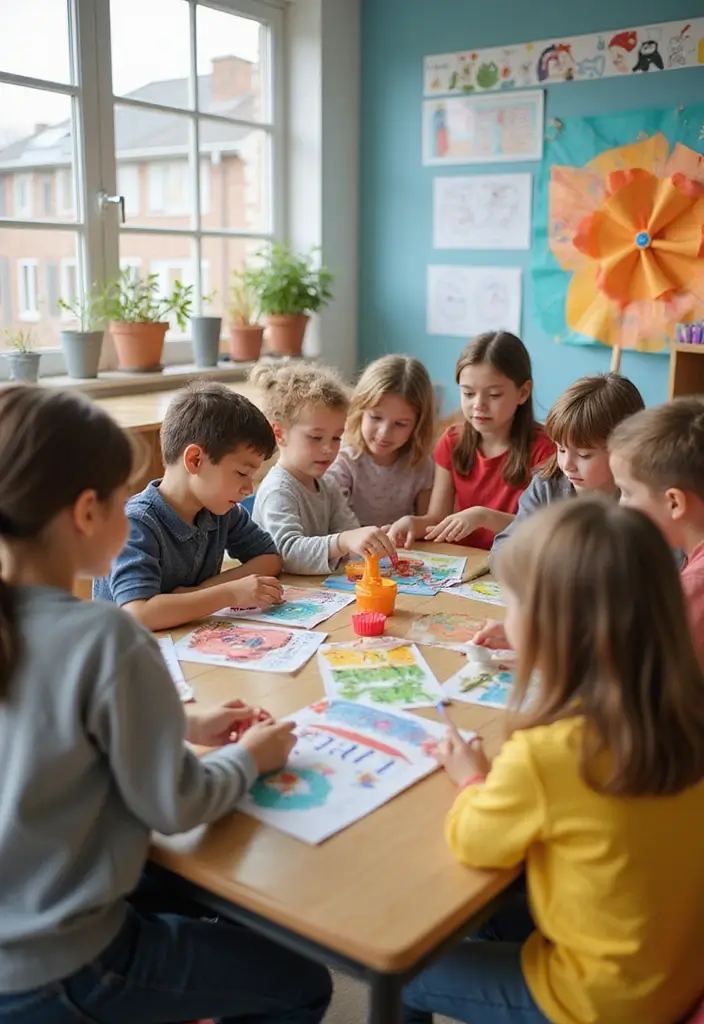
Tips: Pair seasonal pinwheels with garlands, lanterns, or string lights to boost the festive feel. Kids love this activity on a holiday craft day. Provide kid-safe scissors and shapes, and let them pick the colors.
Here is why it works. The colors shift with the wind and add motion to any room or yard. Next steps: gather your papers, scissors, and a thin stick or ribbon. Cut sheets into square pieces, fold into pinwheels, and attach a pin or fastener. Hang, display, or gift as a small celebration of the season.
8. Nature-Inspired Pinwheels
Want pinwheels that fit a nature vibe? Nature-inspired pinwheels use leaves, trees, and woodland scenes to blend with your garden. They also spark talks about the outdoors.
– Paper prints: Choose craft paper printed with leaves, trees, or nature scenes. This helps the pinwheels blend with your garden.
– Base: Use a real twig or small branch as the base. This adds texture and a natural feel.
– Size: You can aim for a 4×4 inch rotor for balance. A compact size spins well in light wind.
– Center: Punch a small center hole and secure with a brass fastener. The blades turn smoothly with a tiny looseness.
– Mount: Attach the rotor to the twig so it spins freely. Check that nothing rubs and it moves easily.
– Colors: Keep colors earthy greens, browns, and sky blues. These tones help the design blend with the outdoors.
– Uses: They work well for outdoor parties, picnics, and nature walks. Use them as decorations or quick teaching tools.
– Kids activity: Let kids sketch what they see outside. Then copy their designs onto printable pages.
– Unique Insights: Real twigs add texture and a natural feel.
– Tips: Use these pinwheels at outdoor parties or nature walks to spark talks about the environment. Let kids copy designs from what they see outside.
9. Upcycled Book Page Pinwheels
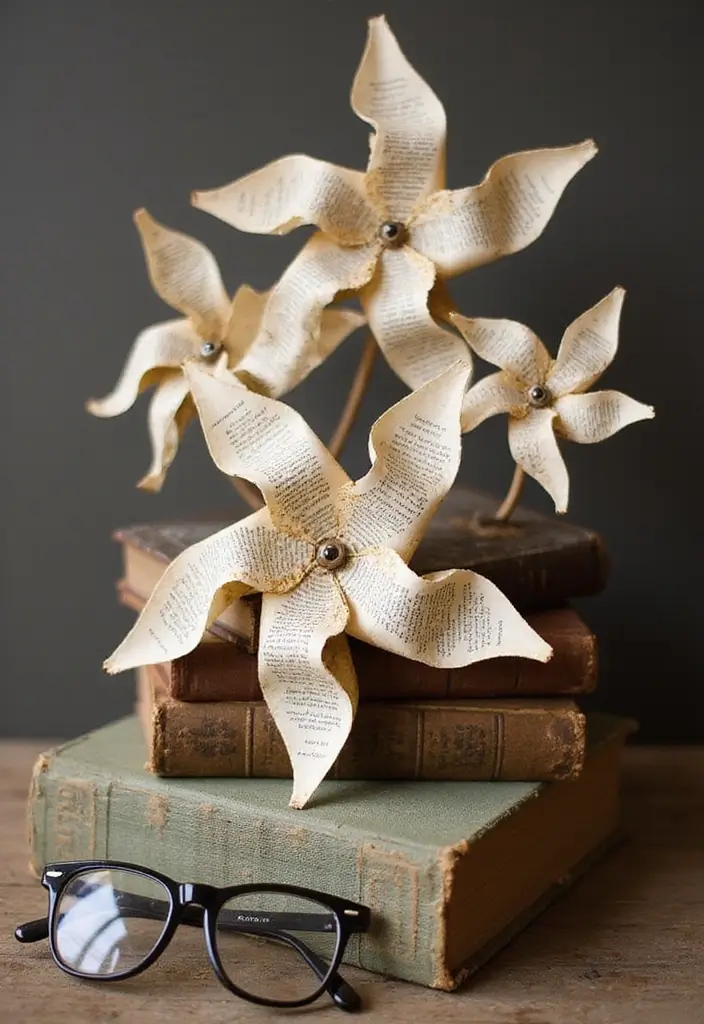
Are you looking for a green, simple decor idea that fits a book vibe? Turn old book pages into pinwheels. They give new life to pages you would toss and add a literary feel to your space.
What you’ll need
– Old book pages from a low-cost or thrifted book.
– Scissors to cut neat squares.
– A wooden skewer or thin dowel for the pinwheel stem.
– Glue or tape to keep the blades in place.
– A small pin or brad to hold the center.
How to make
– Cut a square about 4 by 4 inches from a page.
– Fold each corner toward the center to form blades.
– Make a small cut on each corner and slip the blade tips into the cuts.
– Press in the center and attach a pin or brad through the center hole.
– Slide the pinwheel onto the stick and test its spin.
Unique insights
These pinwheels spark quick chats at book-themed parties and events.
Tips
– Use pages from different genres for a varied look.
– Mix black-and-white text with colorful illustrations to catch the eye.
– Create a string of pinwheels for a literary garland.
– Set a few on mini stands as table centerpieces at a reading night.
These tiny pinwheels add motion and a soft whisper of stories to any space.
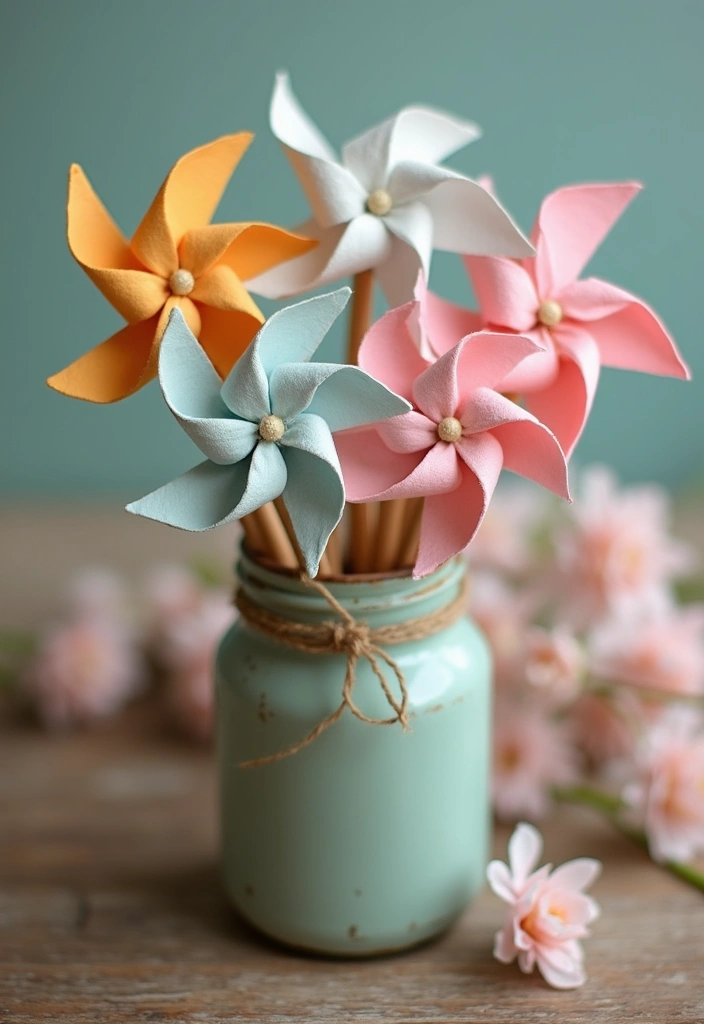
10. Fabric Pinwheels
Fabric pinwheels add texture and staying power to your outdoor decor. They look lively in the wind and won’t tear as easily as paper.
Here is how you make them.
1) Gather supplies: fabric squares (cotton works), fusible interfacing, a wooden dowel, scissors, needle and thread or fabric glue, pins.
2) Cut two fabric squares about 7 inches on each side.
3) Iron interfacing to one side of each square.
4) Layer the squares, align the edges, and cut four slits toward the center.
5) Twist the corners to form the pinwheel and secure with pins.
6) Attach the wheel to the dowel with glue or a few stitches. Let it dry.
Unique Insights: Fabric pinwheels hold up longer outdoors and resist tears in light wind. They work well as garden decor, at weddings, or along a fence line.
Tips: Use mixed fabrics for a boho vibe or match colors to your event. Double up fabrics for more stiffness. Seal the edges with a light clear spray if you plan to leave them outside for a time. Store clean and dry when seasons change.
Next steps: place your fabric pinwheels where they catch the breeze.
11. Button-Decorated Pinwheels
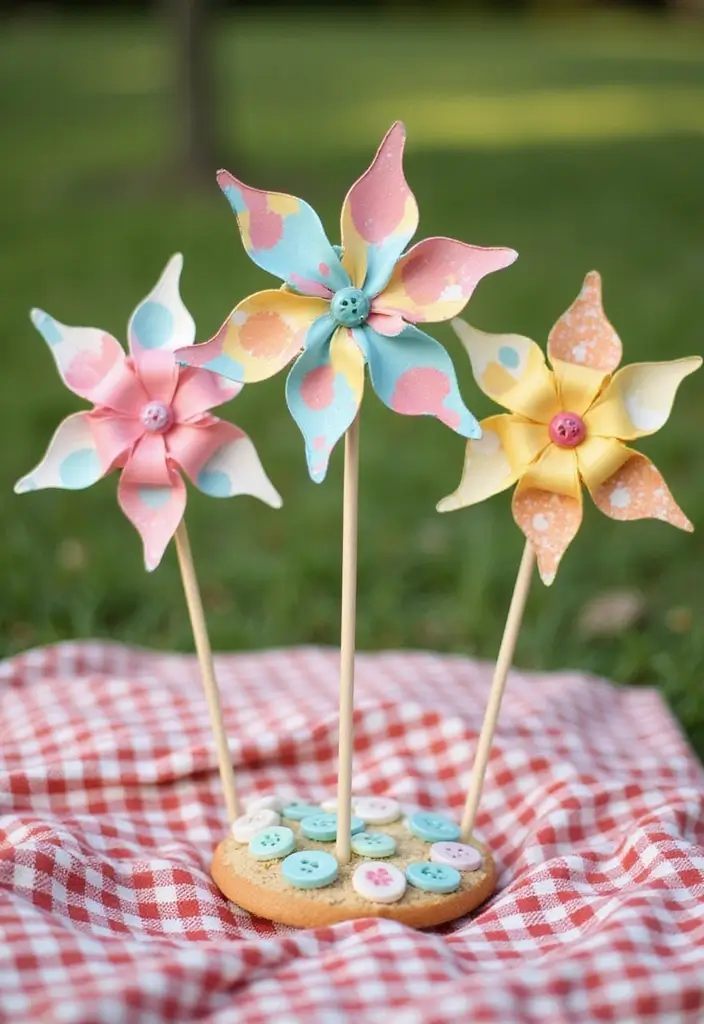
You want a simple way to make pinwheels feel special. Button centers add color, texture, and a smile in one touch.
– Materials: bright paper, a pinwheel, a small button for the center, clear craft glue, a wooden stick.
– Step by step: Put a dot of glue on the back of the button. Press it to the center of the pinwheel and hold it for a few seconds. Let it dry fully. Glue the pinwheel to the stick so it spins freely.
– Why it matters: The button acts as a bold focal point and a calm texture contrast with shiny paper. Kids enjoy picking buttons that fit a theme or mood.
Unique Insights: These make great gifts or party favors. Each one has its own flair when you let different buttons shine.
Tips: Try vintage buttons for a retro touch or mix many styles for a playful look. Larger buttons create a bold center; smaller ones read subtle. For outdoors, a thin clear seal around the center keeps the button in place longer.
Here are practical ideas: a set of four with a color family, a gift for a class, or a party favor bag. Share with friends or use as decor.
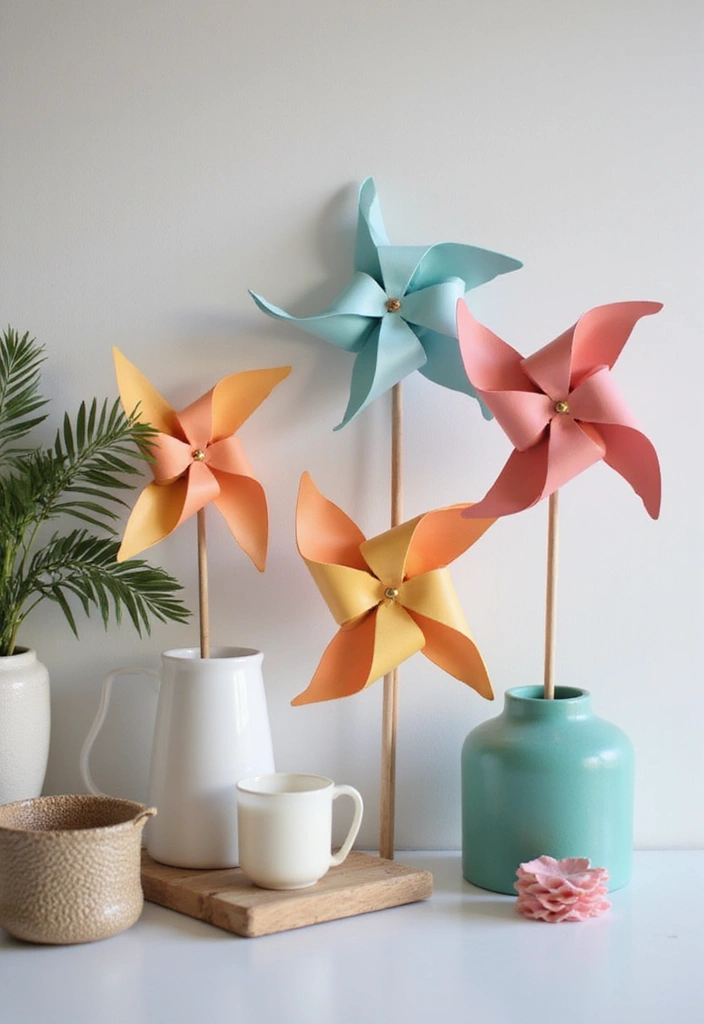
12. Painted Pinwheels

Painted pinwheels give you a splash of color and a chance to show your style. You can paint plain paper pinwheels or wooden pinwheels to make them truly yours. Acrylic paints stay bright in sun and wind if you seal them after they dry.
Here is why this works: colors and patterns match your party theme or home decor.
– Materials you’ll need: acrylic paints, brushes, pinwheels, and a clear sealant.
– Acrylic paints come in many colors and finish.
– Fine brushes, a small plate, and a spray bottle help.
– A clear sealant protects your design from chips.
– Allow time for drying between coats.
How to paint: Base color first, then add patterns.
– Let each layer dry before adding more.
– Finish with a sealant layer once everything is dry.
Design ideas: Stripes, polka dots, florals, or seasonal motifs.
– Create themes for birthdays, holidays, or classroom art.
– For outdoors, pick weatherproof sealant and sturdy wooden pins.
Tips: Keep colors bold by applying thin coats.
– Use a light base to make colors pop.
– Do not rush the drying time; this helps prevent smears.
– Final note: Painted pinwheels brighten any shelf, garden bed, or party backdrop.
– Outdoors or indoors, painted pinwheels bring joy and color to any space.
– Pick easy patterns you can finish in one afternoon.
13. Pinwheel Garland
You want party decor that pops without a lot of fuss. A pinwheel garland brings color and motion to any space.
– Choose pinwheels in different sizes and colors.
– Thread them onto a long string or twine, leaving space between each wheel.
– Hang the garland where guests will see it, across a wall, above a doorway, or from a tree.
It’s quick to put together, and you can reuse the garland many times.
Store it flat in a bin between parties.
Unique Insights: Pinwheels catch the light as they flutter in the breeze, creating a sense of movement. Outdoors, they brighten trees, fences, or a canopy. Indoors, they become a playful focal point that guides guests through the room.
Tips: Mix shapes and sizes to keep the eye moving. Try a coordinated color palette or a bold rainbow to match your theme. If you are short on time, buy ready-made pinwheels and string them up. You can reuse the garland for future parties by storing it flat. For a casual look, leave some twine tails dangling and clip a few with clothespins.
14. Bubble Wrap Pinwheels
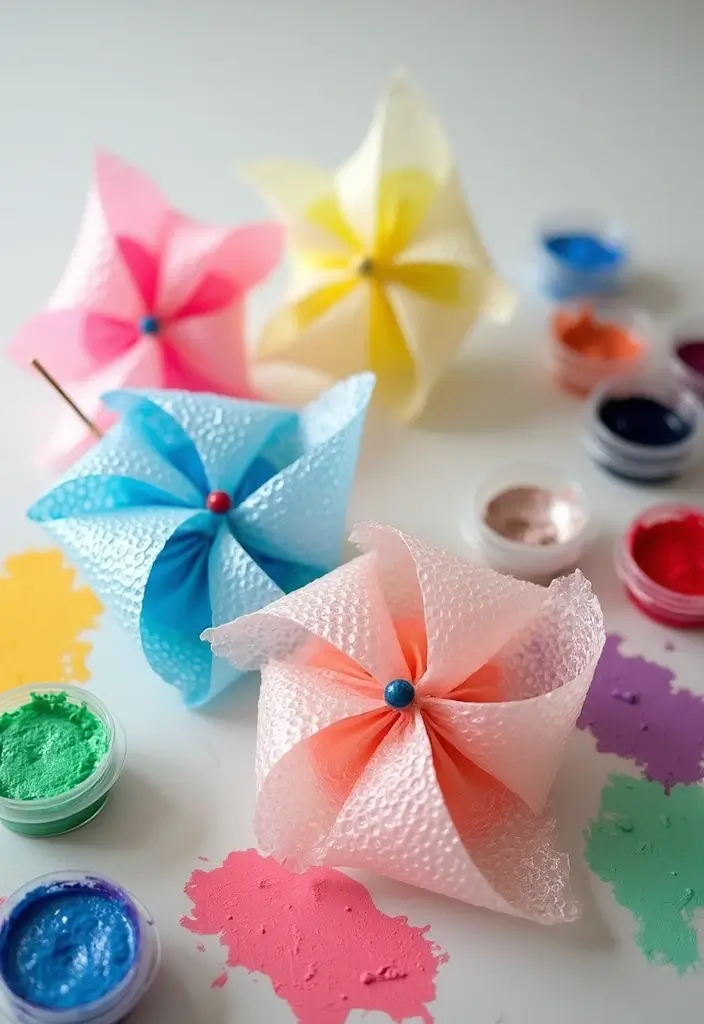
Want a craft that feels fresh and playful? Bubble wrap isn’t the first material you think of for pinwheels, but it adds texture you can feel. Here is why it works: the bubble bumps catch the wind and give the wheel a soft, 3D look.
Next steps: do it in four simple steps.
– Cut bubble wrap into small squares.
– Decorate each square with paints or markers, and let the colors sit on the bumps.
– Punch a hole near the center and attach the squares to a pinwheel stem in a cross pattern so the wheel spins evenly.
– Seal the pieces with tape or glue so they stay put in the breeze.
What you get is a wheel that seems to have tiny hills. The bubbles add a gentle, tactile effect as kids press them while planning colors.
Unique Insights: Bubble wrap pinwheels boost sensory play and help kids feel wind as they spin and think about motion.
Tips: Use bright colors so the pinwheel pops in sunlight. Let paint dry fully before assembly. For younger kids, pre-cut squares and supervise glue use. Attach a sturdy stick for outdoor spins.
Next steps: try this on a breezy day, then compare spins with different square sizes.
15. Pinwheel Centerpieces
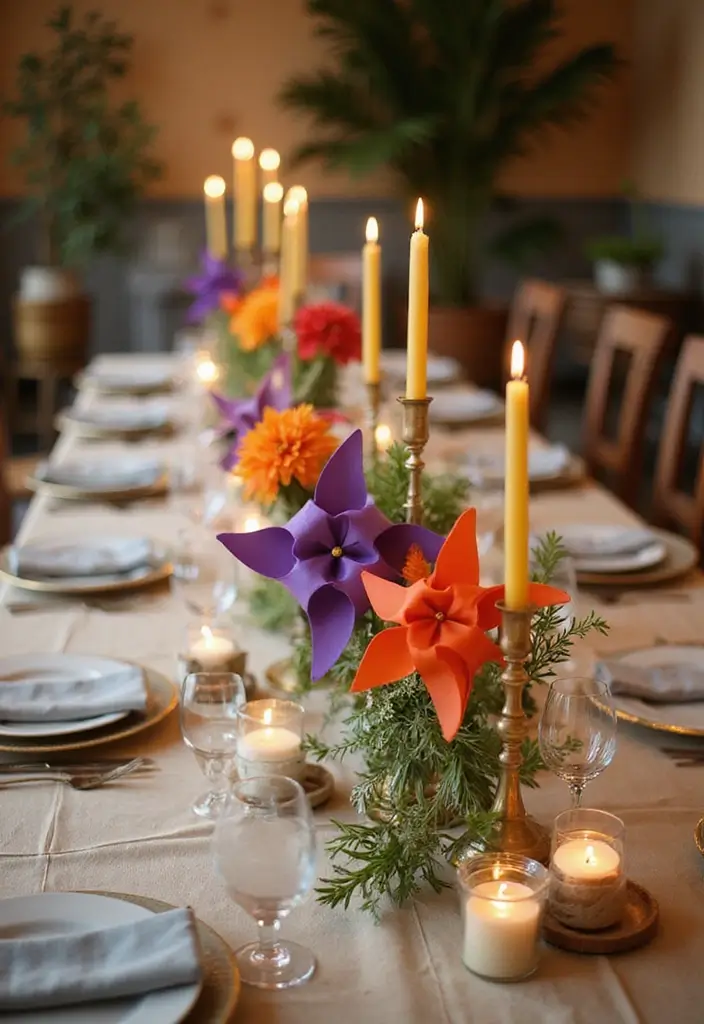
Looking for a bright, easy centerpiece for meals or parties? Pinwheel centerpieces give a sunny vibe. Use large pinwheels with bold patterns and colors. Stand them tall in a clear vase, a sturdy glass jar, or a pot filled with stones. They rise above the table and catch light as people talk.
Unique Insights: Pinwheels fit many themes. A garden party likes greens and yellows. A birthday meal can lean toward pinks, blues, or oranges. Mix colors from place to place for a playful rhythm.
Tips: Pick colors with strong contrast so the pinwheels pop. Add a few real flowers or greenery around the base to soften the scene. Tie a thin ribbon to the stem for extra charm. Check the base so the pinwheel stays upright in a breeze.
Next steps: Here is how to set them up.
1) Choose pinwheels 12–24 inches in diameter with bold, clean patterns.
2) Pick a tall, clear vase or wooden pot; fill the bottom with sand or glass beads for stability.
3) Mount the pinwheel on a sturdy stem and insert it into the base so it stands straight.
4) Add a small bouquet or a few simple blooms to finish the look.
This approach keeps centerpieces easy to move and gives your table a joyful feel.
16. Star-Shaped Pinwheels
Need a fresh craft for a party or yard display? Star-shaped pinwheels give you a bright twist on the classic spin. They catch the wind and add color.
Here is why they fit a space-themed party or night look. They echo stars and comets. They look great in photos, catching light as they turn. They pair well with moons and twinkling lights to make a celestial setup.
Materials
– Colored paper or patterned cardstock
– Star templates you can print or draw
– Scissors, glue or tape
– A small hole punch and a fastener or pin
– A wooden dowel or sturdy stick
– Optional: ribbon for extra flair
Steps
1) Place a star template on your paper. Trace the shape.
2) Cut out four to six identical stars.
3) Cut a small hole in the center of each star.
4) Fold every other point toward the center to form blades.
5) Stack the stars and align the holes. Insert the fastener.
6) Slide the wheel onto the dowel. Tighten just enough to spin.
7) Decorate with color, patterns, and a clear seal to hold the folds.
Tips
– Try bright blues, silver, and black for a space look.
– Use garden stakes for outdoor displays or plant pots.
– Hang from the porch ceiling to add motion indoors.
Next steps: print a few star templates, grab your supplies, and spin up a starry scene.
17. Themed Pinwheels
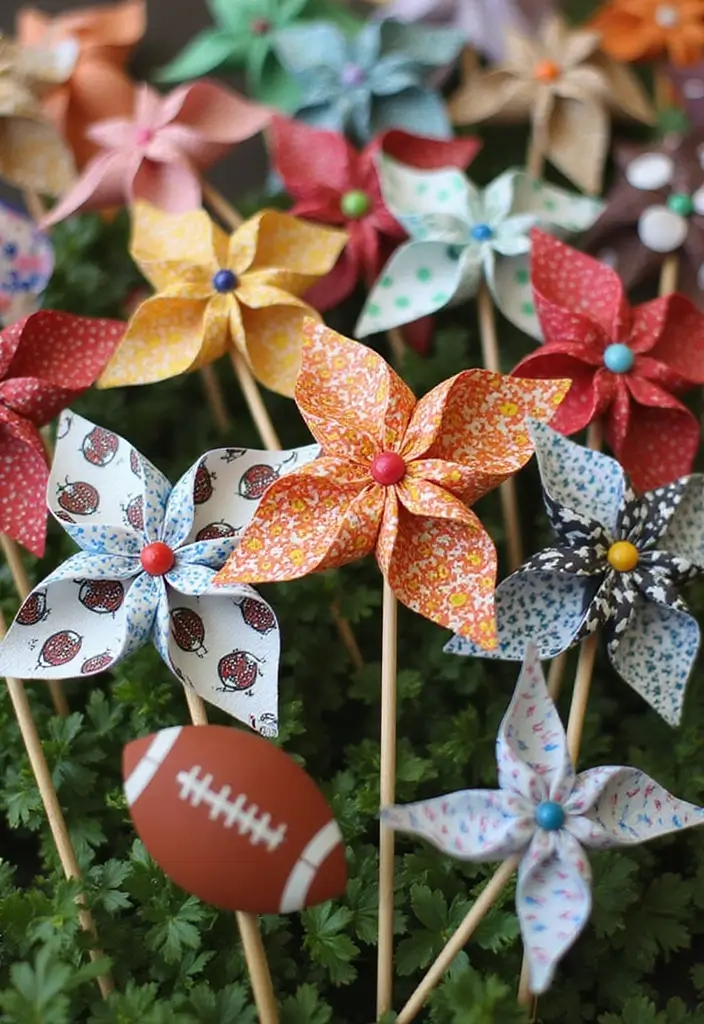
You need pinwheels that fit your event. Start with a clear theme. Pick sports teams, school colors, or holiday vibes. Print or color paper with logos, bold stripes, or blocks of color.
These pinwheels look right at home on a table or stuck in a potted plant. For sports fans, add a baseball or a mini basketball at the center. It gives a playful touch that fans will notice.
Here is how to make them work.
– Cut a square of paper.
– Fold the edges to form the pinwheel.
– Glue the center and push a stick or straw through to hold it up.
– Secure the folds with a dab of glue or tape.
Tips:
– Pair the pinwheels with other themed decor.
– Use tablecloths, balloons, and napkins in the same colors.
– Keep small lists or banners in the same style.
– Choose sturdy paper so winds do not bend the blades.
– Vary sizes for added depth.
These themed pinwheels will draw eyes and spark conversation. They fit tailgates, game days, or birthday parties. You can use them indoors or outdoors, in sun or shade, and they always spin with a smile.
Share photos of your set when you finish.
18. Personalized Photo Pinwheels
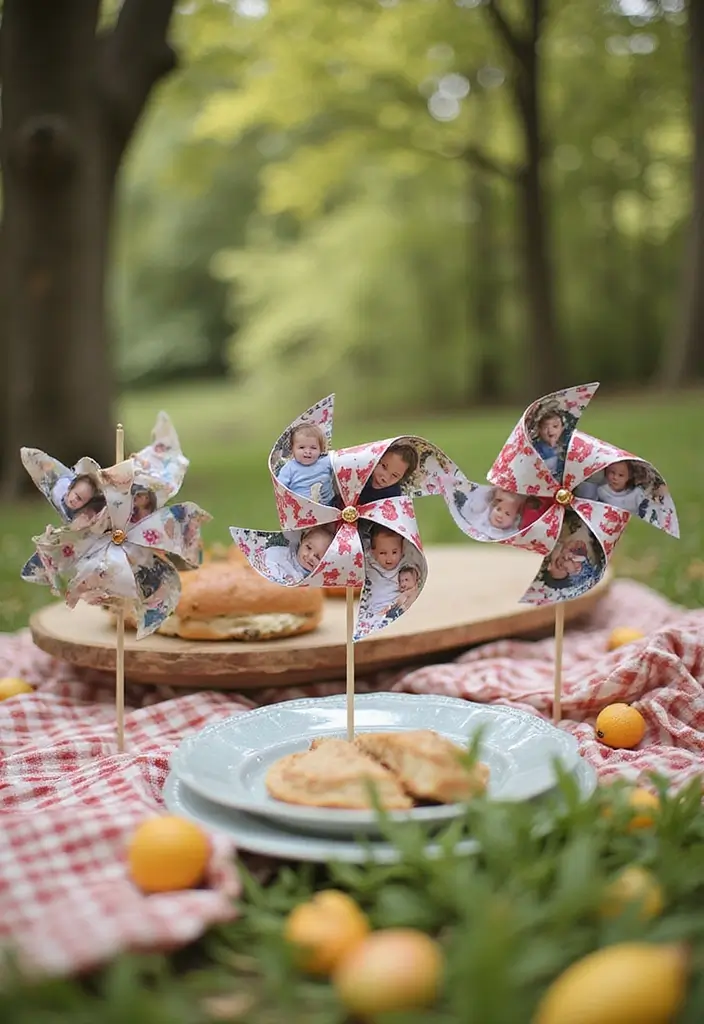
Want a pinwheel that feels truly yours? You can add photos to spin a memory reel with every breeze. Small pictures on each blade turn a simple toy into a keepsake you can show off.
Here is why it works:
– It turns a party favor into a story you can walk through.
– It gives guests a chat starter as the blades flutter past.
– It makes a unique gift for family milestones or weddings.
How to do it in steps:
1) Pick 4 to 8 photos that fit your blade size. Crop them so the important bits stay in frame.
2) Print them in black and white or soft, washed colors for a cohesive look.
3) Laminate or seal each image. This makes rain and sun less harsh on the photos.
4) Trim the photos and attach them to the blades with strong glue or double sided tape.
5) Fix the blades to a sturdy pinwheel base. Use waterproof glue if it will sit outside.
6) Mount the pinwheel on a solid stake or thick dowel so it stands up in grass or soil.
Unique Insights: Photo pinwheels create a living memory. They invite guests to share a story tied to each image.
Tips: Keep a consistent style by using black and white or muted tones. Use a heavy base to help the pinwheel stay upright outdoors. Consider laminated backups in case some blades get nicked.
19. Color Block Pinwheels
If you want a clean, modern accent, color block pinwheels fit the bill. They bring bold shape and solid color to any space or event. You can mix tones to match a room, a season, or a theme. Here is why they work: the sharp lines stay tidy, and the color blocks catch the eye without feeling loud.
Materials you’ll need
– Color block paper or four solid papers in your chosen palette
– Scissors, a ruler, and a pencil
– A small cardboard disc or thick paper for a hub
– Craft glue or double‑sided tape
– A brad or push pin and a wooden dowel or stick
How to make color block pinwheels
– Start with four colors that fit your theme. Pick easy, high‑contrast pairs for the most impact.
– Cut four triangles from each color square or use four color blocks that already form wedges. The goal is four even blades that meet at a center point.
– Arrange the four blades around a center hub. Make sure each blade points outward and sits at a right angle to the next for a classic pinwheel shape.
– Secure the blades at the hub with a brad or push pin. Attach the hub to a dowel or stick so you can display it in a vase, garden, or on a wall.
– Gently bend each blade to create a slight tilt. This helps the wind catch the color blocks if you hang them outside.
Nice touches and tips
– For outdoor use, choose sturdier cardstock and seal the edges with a clear spray.
– Pair color block pinwheels with minimalist decor for a balanced look.
– Create larger versions for a bold garden display or party backdrop.
Next steps
– Experiment with different palettes. Try pastels for spring or high‑contrast primaries for a modern party.
– Store flat blades between sheets of paper to keep colors crisp for your next project.
20. Travel-Inspired Pinwheels

Have you ever wished a craft could tuck a memory inside your hand? Travel-inspired pinwheels do just that. You can press maps, postcards, or photos from places you love onto the blades. When you spin them, you relive a moment from your trip.
Materials you’ll need:
– Cardstock or thick craft paper
– A travel image, map piece, or postcard
– Scissors
– Glue or a glue stick
– A decorative brad or pin
– A wooden dowel or sturdy stick
– Tape or hot glue for the stick
Steps to make it:
1) Cut a square from the cardstock base.
2) Trim your travel image into eight triangle slices.
3) Glue the slices around the square, leaving a hole in the middle.
4) Poke a hole in the center and insert the brad or pin.
5) Attach the pinwheel to a stick with tape or glue.
Here is why these parts work. The image you choose gives every wind a story. The brad lets the blades spin freely. A simple stick makes the piece easy to display and move.
Unique Insights: Travel pinwheels become quick conversation starters. Guests will swap travel tips, favorite destinations, and dream routes.
Tips:
– Group several pinwheels by region for a mini world tour at your table.
– Use them as centerpieces or on memory boards for a keepsake display.
– Label each blade with a date or country to mark your journeys.
21. Tie-Dye Pinwheels

Want color and motion in one easy craft? Tie-dye pinwheels bring both. They turn plain paper into bright art you can wave at a party or in the yard. You can make these with kids or by yourself. They’re a simple way to add fun to any day.
Materials
– White paper or light card stock
– Fabric dyes or a tie-dye kit
– Protective gloves
– Scissors
– A center pin or brad and a straw or wooden skewer
– Glue or tape to hold the center
How to make
1) Dye the paper. Squeeze dots or swirls on the sheet. Let colors blend.
2) Let the paper dry completely.
3) Cut the dyed sheet into a square. Cut from each corner toward the center, stopping short.
4) Poke a hole in the middle. Insert the pin, brad, or skewer. Secure with a dab of glue if you want extra hold.
5) Attach a straw or handle. Spin to see the colors whirl.
Design ideas
– Try a rainbow ring, a spiral, or bold color blocks. Different blends give each pinwheel its own look.
Tips
– Wear gloves to prevent stains on hands.
– Use bright colors for fast motion and clear spins.
– If you want faster drying, lay the paper flat in a warm spot.
– Hang them from strings for a mobile wall or outdoor decor.
– These pinwheels catch light and move nicely in a gentle breeze.
Next steps: practice with scraps, then scale up to larger sheets for bigger spins.
22. Transparent Pinwheels
Looking for a modern spin on pinwheels? Transparent pinwheels use clear plastic to catch sun and move with a quiet grace. They shine in any space, from a garden path to a wedding setup.
Here is how you make them at home.
– Materials: Clear plastic squares, scissors, permanent markers or acrylic paints, a center pin or brad, and a small bead or washer for weight.
– Decoration: Decorate one side of each square before you assemble, keeping lines simple so the wind shows the color.
– Assembly: Punch holes in opposite corners, align the squares, and slide the pin through the center with the bead to hold. Attach the pinwheel to a dowel or stake if you want.
Unique insights: Clear pinwheels add an elegant touch to weddings or upscale events. They offer a fresh look beside paper designs and glow when the sun hits them.
Tips: Use tempered plastic for durability. Add a small LED light near the base for night glow. Place them in a garden bed, along a walkway, or inside a clear vase to create a bright focal point.
Next steps: Try a couple of sizes and see how they spin in your space.
23. Pinwheel Wall Art

You want a bold wall piece that feels playful and easy to change. Turn several pinwheels into a large wall art on a canvas or sturdy board. It adds color and motion to any room. Use it in a kid’s bedroom, a family room, or a bright play corner.
Here is how to do it well.
– Base choice: choose a strong surface such as a 24×36 inch canvas or a wooden board.
– Pinwheels: gather pinwheels in different colors and sizes for depth.
– Layout: plan a pattern before you attach. Try a grid, a spiral, or a sunburst.
Test layouts first. Tape or lay them to the board to see how they look. When you love a design, switch to secure mounting.
Unique Insights: This wall art can be the room’s focal point and spark imagination.
Tips: Do a quick floor test to see colors together. Mix big and small pinwheels for depth. Start with a few pieces and add more later. Use removable strips if you want to reset the look. Make it a family project and have fun.
Keep it clean by dusting with a soft brush. Avoid direct sun that fades colors.
When you want a vibe, swap in pinwheels.
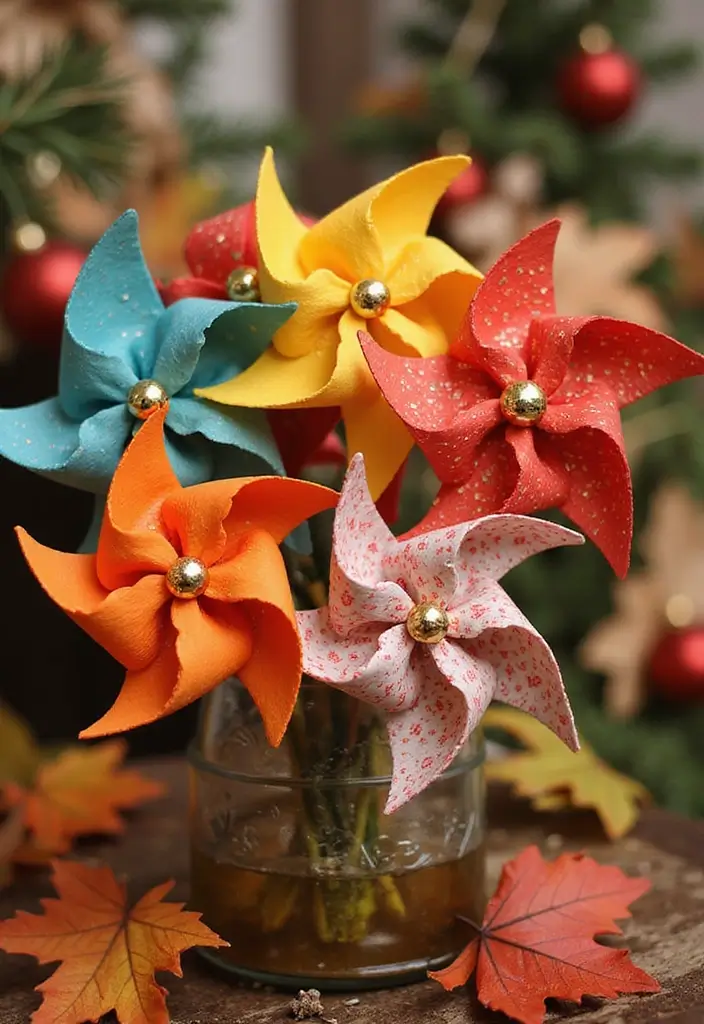
24. Festive Holiday Pinwheels
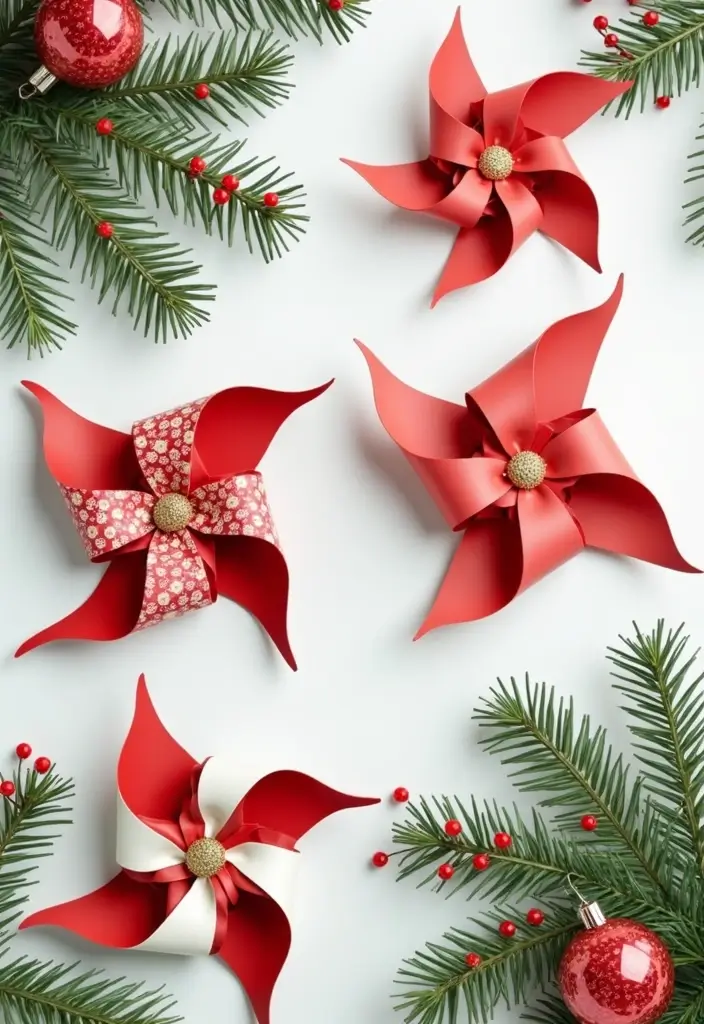
Here is why you should try festive pinwheels this season. They spin, they sparkle, and fit any holiday look. You can switch designs with the calendar and refresh your decor.
Materials you’ll need
– 6×6 inch colored paper or lightweight cardstock
– a second back sheet in a contrasting color
– a straight pin or small brad
– a wooden dowel or sturdy stick
– scissors and tape or glue
– markers or paint for details
Step by step
1) Pick a season theme, like pumpkins for Halloween or snowflakes for winter.
2) Cut two equal squares from your papers.
3) Cut a slit from each corner toward the center, stopping before the middle.
4) Punch a small hole in the center of both squares.
5) Layer the fronts and backs, line up the holes, and insert the pin. Secure with a cap or bead if you have one.
6) Slide the pin onto a stick and gently bend the blades so they catch the air.
Creative ideas
– Halloween pumpkins, autumn leaves, winter snowflakes, spring flowers, or Christmas trees.
– Use the same color family for a cohesive look.
– Pair pinwheels with wreaths or garlands for a fuller display.
Next steps
Gather supplies, plan three designs, and invite kids to help. Your home will feel festive in minutes. Share photos of your creations.
25. Kinetic Pinwheel Sculptures
Here is why you should try moving pinwheel sculptures. They spin with the wind and bring motion to any outdoor space. You get a playful, eye-catching art piece that guests pause to watch up close.
Here is why this helps your yard or event:
– It turns a plain garden into a focal point.
– It invites people to slow down and look around.
– It gives you an easy, shareable project you can grow later.
– Materials Lightweight pinwheel blades (balsa, thin plastic, or foam), a small hub, a pin or bolt, and a steady base.
– Base and mounting Choose a strong base. Use a metal stake or thick wooden post. Secure it so wind can move the blades without tipping.
– Assembly Balance the blades so they spin freely. If you have tiny bearings or washers, add them. Cover sharp edges for safety.
– Height and layout Vary blade heights to add depth. A staggered group looks richer from more angles.
– Placement ideas Put them along a path, near seating, in a garden, or at events. They invite people to stop and admire.
– Care and safety Check screws, inspect blades for cracks, and replace worn parts. Clean blades with a soft cloth.
Next steps: plan colors, gather simple tools, and test in a gentle breeze. Start small, then add more blades to grow your wind garden.
26. Whimsical Rainbow Wheel

Want a bright, easy decoration that fits any space? The Whimsical Rainbow Wheel turns a simple pinwheel into a bold rainbow centerpiece. You get a large, spinning wheel that adds motion and color to a room or party.
– Materials:
– Use 12 colored wedges in rainbow hues.
– Choose a sturdy circle base.
– Include a central fastener.
– Use a wooden dowel.
– Keep glue and tape handy.
– Include optional ribbons or streamers to add flair.
– How to build:
– Cut equal wedges from colored paper.
– Attach wedges around the circle in rainbow order.
– Poke a hole in the center and fix with the fastener.
– Put the wheel on the dowel and test the spin.
– Display ideas:
– Hang from ceilings at events.
– Stand in a corner as a photo backdrop.
– Use outdoors as a wind-catching art piece.
Unique Insights: This wheel shines at carnival or festival setups. It makes guests pause for photos and smiles.
Tips: Use bright colors with high contrast. Add ribbons for extra flair. Make the wheel large for a bold statement. If outdoors, seal the colors so they last.
Next steps. Gather supplies. Pick a spot. Then enjoy spinning your rainbow.
27. Interactive Pinwheels for Kids
Want a kid-friendly way to turn lessons into play? Interactive pinwheels do it.
Here is why they work. A spin reveals a new question, word, or clue. You can place math problems, spelling prompts, or science facts on the wheel faces. Kids spin, answer, and move on to the next prompt. The bright colors, crisp print, and smooth spin make learning feel like a game.
Unique Insights: Teachers and parents gain a simple tool that blends play with practice. Students stay focused longer because they move and think at the same time.
Tips:
– Keep prompts age-appropriate and visuals clear.
– Use large, high-contrast text.
– Laminate wheels or use sturdy card stock so you can reuse them.
– Let kids design their own wheels to boost pride and ownership.
Next steps: in a classroom, you can set up a small station with blank templates and a stack of prompts. Have students rotate through roles—writer, spinner, and checker. At home, you print a few themes and switch them weekly to maintain interest.
Here’s a quick plan you can follow: 1) pick a theme, 2) assemble a wheel, 3) write prompts, 4) run a short round with a friend or family member. Short rounds keep energy up and learning steady.
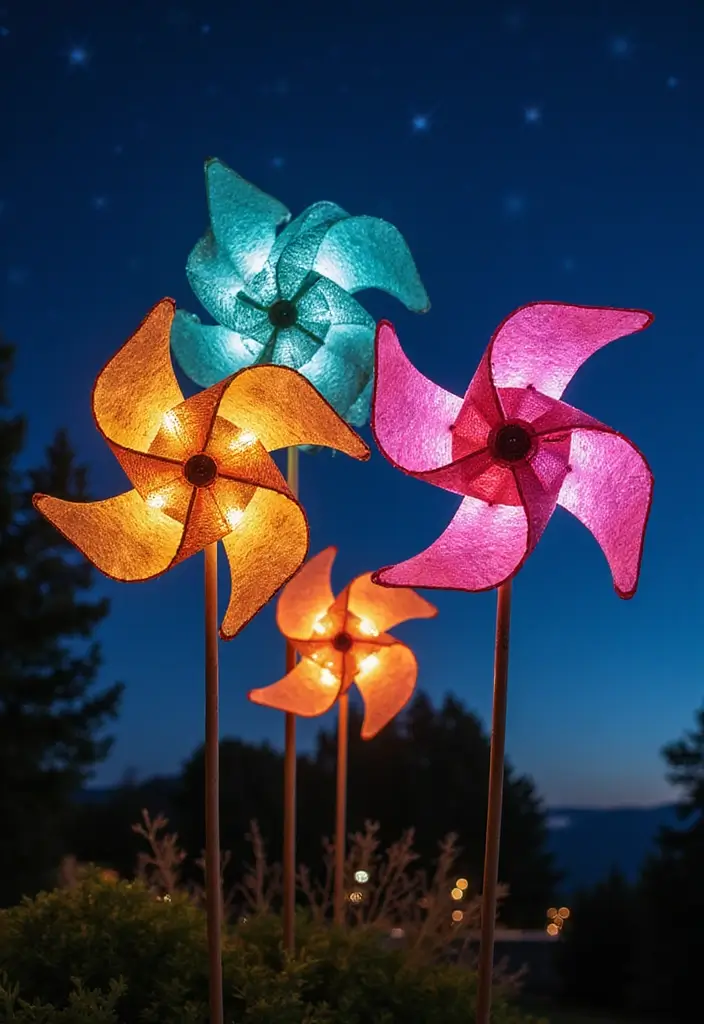
28. Glow-in-the-Dark Pinwheels

You want a simple way to brighten night events. Glow-in-the-dark pinwheels can add a touch of magic after dusk. With a small batch of supplies, you can make several that glow softly. Here is how to do it in a few easy steps.
– You will need glow-in-the-dark paint or glow stickers.
– Choose sturdy pinwheel blanks made from thick paper.
– Have wooden sticks or dowels ready.
– Use small brads or tape to attach the wheel to the stick.
– Keep glue handy to seal all joints.
– A bright light will charge the glow elements before use.
– Draw the pinwheel shape on the paper.
– Apply glow paint or stickers to each blade.
– Attach the wheel to a stick with a brad.
– Let it dry completely.
– Charge the wheel under a bright light for a few minutes.
– Take it outside and spin to see the glow.
– You can add a few around a path or yard for a soft map of light.
– If rain comes, dry the blades before storage to keep glow bright.
Tips: Charge before dark, and keep the pinwheels dry. Use them along a path or around seating for gentle light. They work well at bonfires or outdoor movie nights. Next steps: place the pinwheels along walkways or near seating so guests can follow the glow.
If you make several, you can swap colors for more fun.
Conclusion
With these 28 delightful paper pinwheel DIY ideas, you can bring colorful joy and creativity into any space or celebration.
Whether you’re crafting with kids, decorating for a party, or simply looking to express your artistic side, these simple projects are full of fun and possibilities.
Get started on your pinwheel journey and watch as they spin joyfully in the breeze!
Note: We aim to provide accurate product links, but some may occasionally expire or become unavailable. If this happens, please search directly on Amazon for the product or a suitable alternative.
This post contains Amazon affiliate links, meaning I may earn a small commission if you purchase through my links, at no extra cost to you.
Related Topics