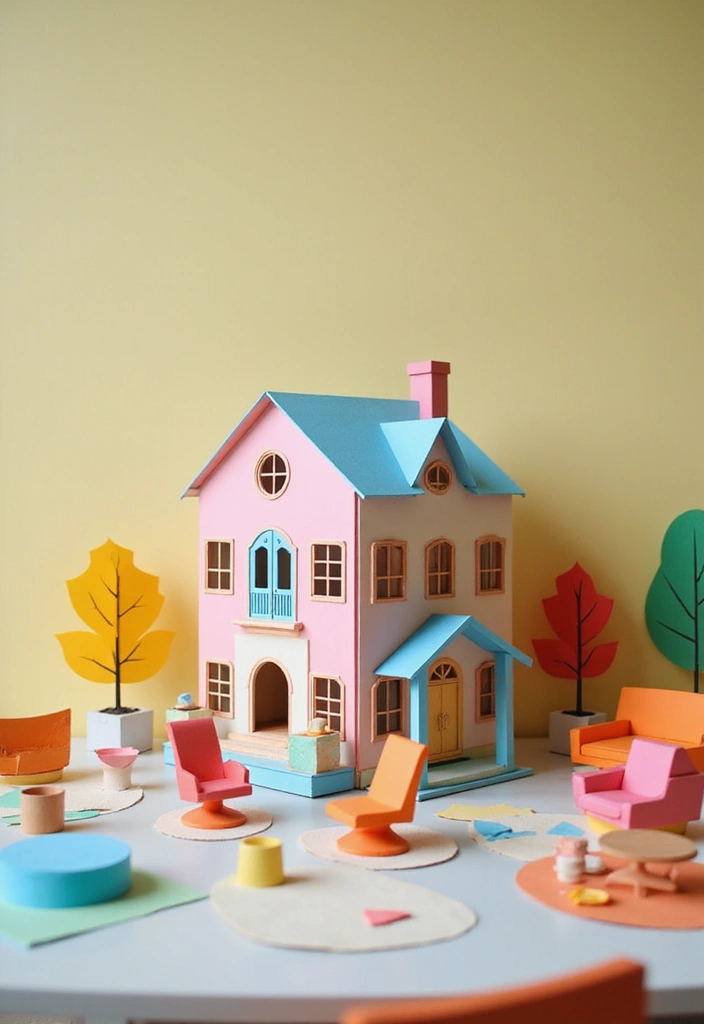
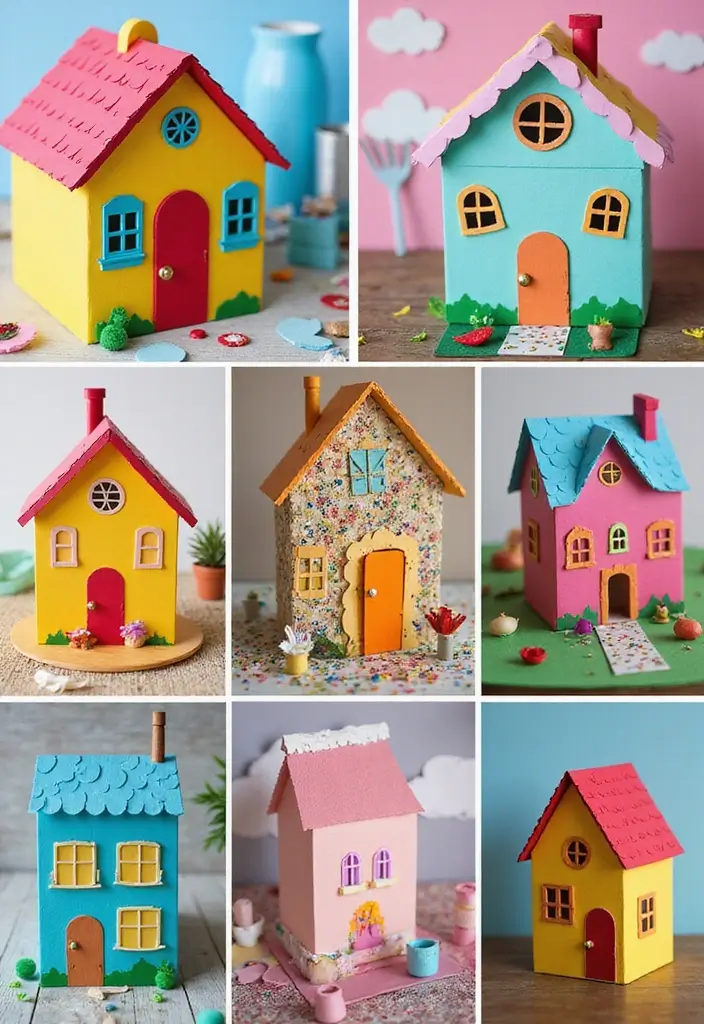
This season has me craving tiny, joyful crafts that fit on a shelf or a desk. Paper houses let you build a whole street of tiny worlds with just a sheet of paper and a dab of glue. I made this post to share a simple, smile making idea you can start today.
Who is this for? If you like easy projects you can do with kids, roommates, or on a quiet afternoon, this is for you. The ideas keep mess low and the pace steady, so you can finish one before the next episode of your favorite show.
What you’ll get is a collection of 30 paper house crafts that are playful, doable, and great for small spaces. Each idea comes with simple steps and easy materials. You will also find tips for choosing colors, adding tiny textures, and making minis that hold up to daily play.
Here is why I did this. I want to show that a stack of paper can spark stories and tiny drama in your home. These projects travel well, too, moving from the kitchen table to the classroom or the craft drawer.
Let’s break it down. Start with a simple house shape on card stock. Fold a roof, cut windows, glue a tiny door. Add a second layer for a 3D effect, or layer colors for a playful view.
You will gain a go to set of ideas for wall decor, table toppers, or party favors. These crafts work with basic supplies like card stock, craft paper, scissors, glue, and a ruler. You can pick a style from origami to pop up to collage, then mix and match. Next steps are simple: pick an idea, gather your supplies, and start with a small house.
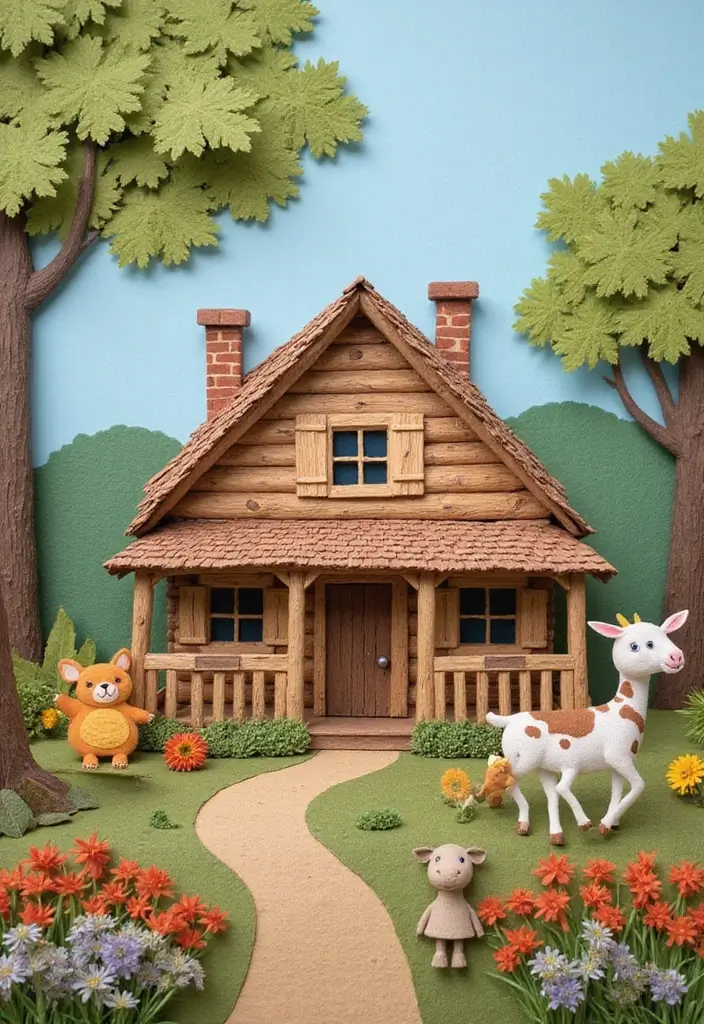
1. Enchanted Fairy Cottage
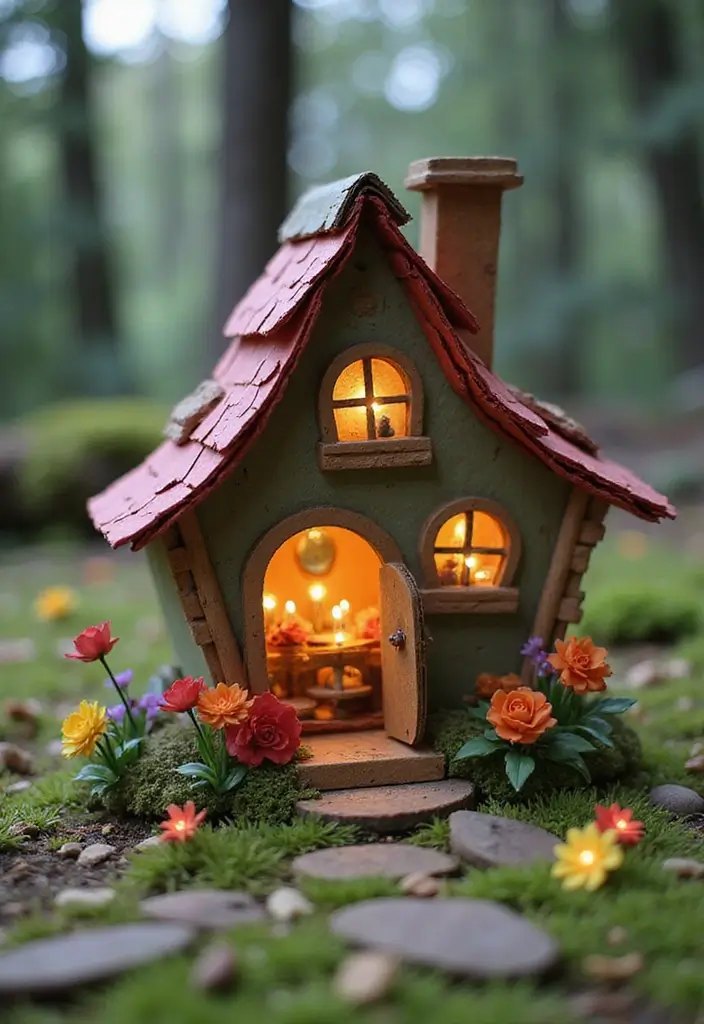
You want a fun, low-cost craft that sparks imagination. The Enchanted Fairy Cottage fits the bill. It uses recycled cardboard and bright paper to create a tiny magical home.
– Materials
Recycled cardboard, colorful craft paper, scissors, glue, markers, stickers, glitter, small garden pieces (paper flowers, green paper for grass), and optional LED fairy lights with a small battery pack.
– Steps
1) Cut a simple house shape from sturdy cardboard.
2) Cover the shape with bright craft paper. Smooth the edges as you go.
3) Add a door and windows with markers. Try round windows or a crooked door for charm.
4) Decorate the outside with stickers and a bit of glitter. You can add shutters or a chimney.
5) Build a tiny garden around the base. Use cut-out flowers and green strips for grass.
6) If you want a glow, tuck LED fairy lights inside. Hide the battery pack behind the cottage.
7) Place the cottage on a shelf or in a play space. It can hold small dolls or toy fairies.
– Why it works
This project is simple, eco-friendly, and highly customizable. You control colors, patterns, and textures. It builds fine motor skills through cutting and folding and fuels storytelling as you decorate.
– Pro tips
Keep scissors kid-safe and supervise gluing. Use lightweight paper for easier wrapping. Mix in natural textures like twine for a rustic look.
– Next steps
Try different roof shapes, add a doorbell using a button, or craft a sign that names your cottage. Have fun and share your tiny world.
2. Modern Paper Mansion
Looking for a simple paper craft that kids can do with pride? Build a Modern Paper Mansion that uses clean lines like today’s houses. Use a sturdy base and add walls, a roof, and even balconies with colored cardstock. Cut out geometric shapes: squares, triangles, hexagons and fit them into doors, windows, and stairs. Let kids mix light and dark colors. The result is a bright house they can hold.
Make it a tiny world by adding interior details. Create furniture cutouts like a bed, a chair, a desk. Place them in rooms to feel like a real home. You can even add small rugs or lamps with scraps of paper.
Tip: Use tabs and glue to help pieces stay on a flat base. Pre-cut shapes on one sheet speed up play and keep the mess down.
Here is why this project works: it teaches geometry and planning. It also builds fine motor skills as small pieces are cut and glued. Turn it into a game by asking your child to design their dream house and furnish each room. Next steps: pick a color scheme, decide on room layouts, and start building. You’ll have a neat playset that sparks imagination.
3. Classic Paper Dollhouse
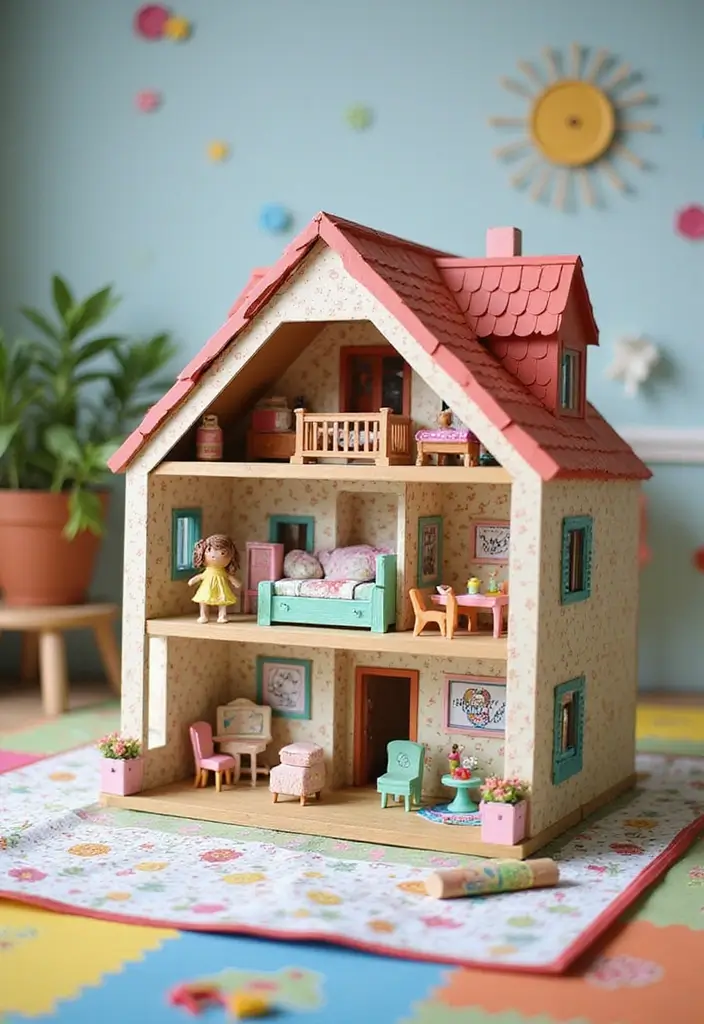
You want a project that sparks imagination and builds tiny skills? A classic paper dollhouse fits. It stays simple, yet you can add little touches as you go.
Materials
– You need sturdy cardstock or thick craft paper.
– You need scissors.
– You need glue or tape.
– You need colored pencils or markers.
– You need a ruler.
– You need patterned paper for walls and wallpaper.
– Optional: small scraps of paper for furniture and extra tape.
Step-by-step
1. Draw a simple house outline on the cardstock. Keep lines light.
2. Cut out walls and glue to form the rooms. Make the shell sturdy.
3. Color each room. Try different moods.
4. Create tiny furniture and dolls from paper. Use simple shapes first.
5. Add wallpaper by gluing patterned paper to walls. Here is why: it adds texture and personality to every room.
6. Let kids arrange rooms and play.
Tips for success
– Let kids choose colors to boost ownership.
– Use paper tabs to hold furniture in place.
– Keep pieces flat when not playing to avoid warping.
– Use a light touch with scissors for neat edges.
Variations
– Print a dollhouse template and scale shapes to suit your space.
– Try a modern, vintage, or fairy-tale style with mixed patterns.
Care and storage
– Store flat in a large envelope or folder.
Next steps: start small, expand later, and invite a friend to play. Your finished dollhouse opens doors to play, color, and sharing.
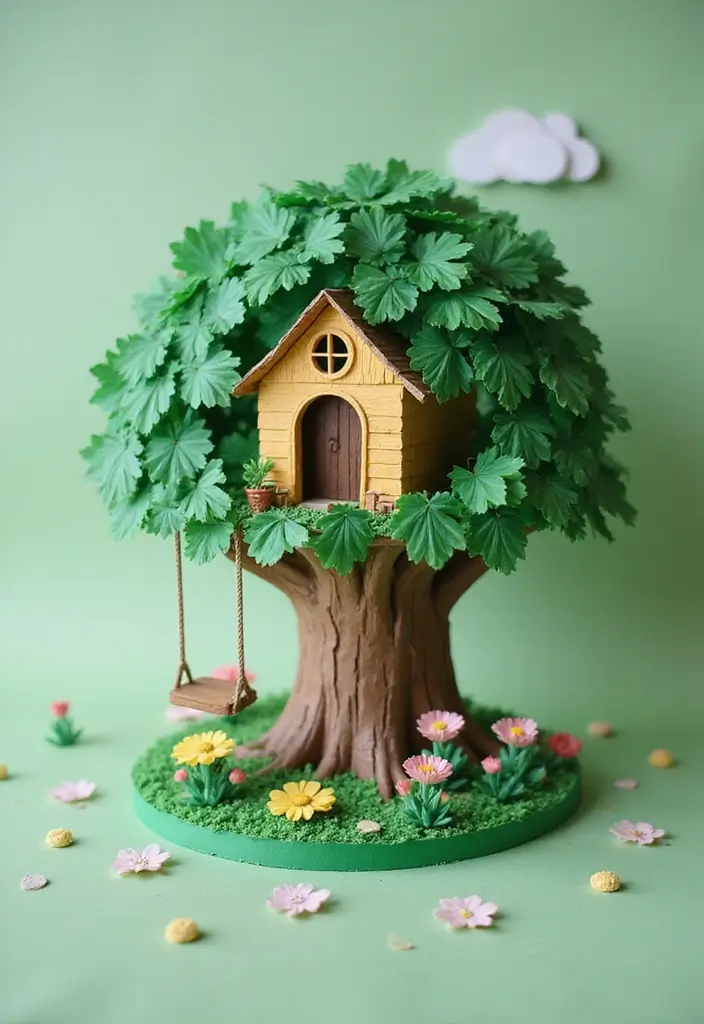
4. Nature-Inspired Treehouse
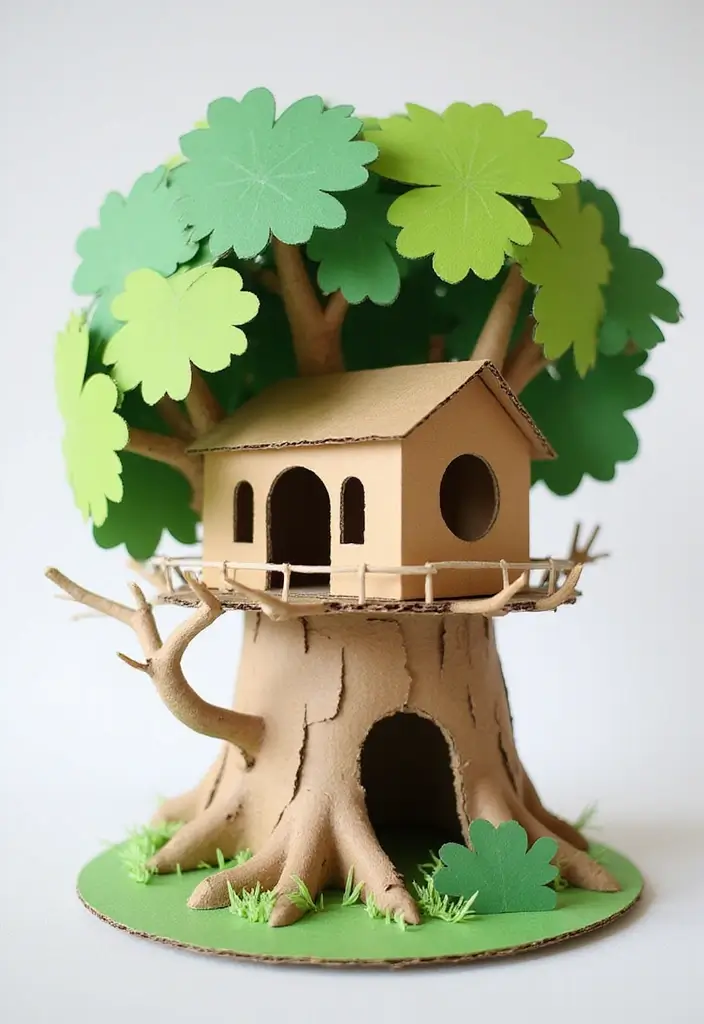
Want a nature feel in a tiny craft? A nature-inspired treehouse made from paper is simple, safe, and endlessly playful. It lets you bring the outdoors inside and imagine a woodland hideout on your desk.
– What you need:
Brown paper or cardboard cut into a tree shape.
Green paper for leaves.
Small twigs for texture and strength.
Glue, tape, scissors.
Markers or colored pencils for extra color.
– How to build:
1) You draw a simple tree on brown paper and cut it out.
2) Attach twigs to create branches with glue.
3) Make a tiny house from a folded piece of brown paper and nestle it on the trunk.
4) Add leaves with green paper and color the house to match a favorite forest spot.
– Fun idea:
Create a mini slide or swing with paper hinges. A couple of folds act as a hinge; glue secures the swing to the tree.
Here is why this setup helps you. It sparks storytelling and fine motor work. It’s also a gentle intro to nature crafts and recycled materials.
Next steps: let your child customize the colors, add tiny paper critters, and display the scene on a shelf. If you want more realism, vary leaf shapes and add a bark texture with crayons.
Tips:
– Let glue dry before moving pieces.
– Add a small ground strip of paper to anchor the scene.
– Use seasonal colors to change the look.
Seasonal twists:
Spring greens, summer sun hues, autumn browns and oranges, or winter white for a snowy touch.
Common questions:
– Is this sturdy for rough play? It’s best as a display piece and storytelling prop.
– How can I make it sturdier? Use thicker paper and stronger glue, and let it dry fully.
5. Cozy Beach Hut
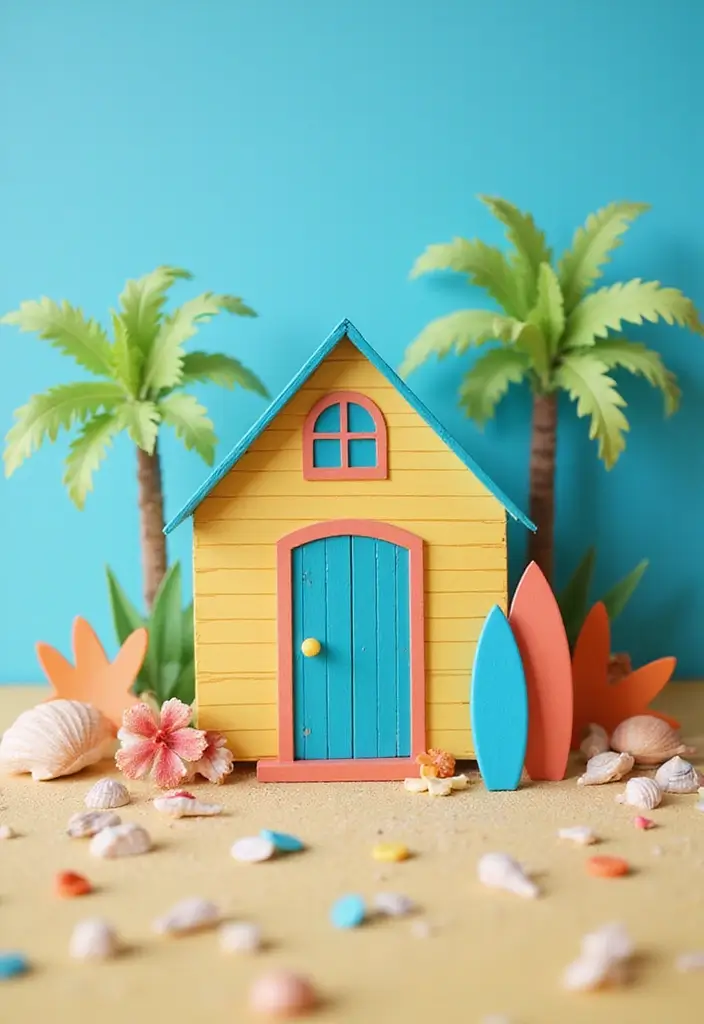
Here is a quick way to bring a sunny day home. You want a craft kids enjoy that sparks a summer chat. The Cozy Beach Hut does both. It is easy, colorful, and ready to play once the glue dries.
– Cut a hut shape from sturdy paper.
– Keep the roof simple so little hands can manage it.
– Color the walls with bright blues, yellows, and oranges.
– Let the sun light up the hut on warm sand.
– Add texture with tan or brown textured paper to imitate boards.
– Glue small pieces in a grid to suggest boards.
– Create a tiny porch. A strip of paper or a toothpick railing helps hold seashells.
– Decorate with sea finds. Glue shells, a beaded rope, and a painted door.
Next, add beach accessories. Make tiny surfboards from small cardboard scraps. A mini picnic and a striped towel make the scene real.
This project shines when you build a village of huts. It sparks stories about summer adventures and helps kids share ideas.
Use your hut as a center piece for story time or a small photo set.
Tip: Make several huts in different colors and sizes. Line them up to tell a beach tale.
6. Whimsical Gingerbread House

Here is a sweet, simple way to bring a holiday vibe. A paper gingerbread house fits in any cozy afternoon.
Materials
– Brown craft paper
– Scissors, glue or tape
– Colored paper and markers
– White gel pen or white paper strips for icing
– Small shapes for candy
How to build
1) Cut a basic house shape from brown paper. Keep the lines tidy.
2) Add a roof with a second piece or a folded strip to create a peak.
3) Decorate with icing lines. Draw swirls and dots or paste white strips.
4) Make candy bits from colored shapes. Glue them on like gumdrops and peppermint candies.
5) Attach windows with colored or translucent paper. Let light peek through.
6) Create a tiny paper path with small stones or beads leading to the door.
7) Set the pieces on a sturdy base and let the glue dry.
Display ideas
– Put it on a table with lighting for a warm glow.
– Add more houses to form a village later.
– Keep a small pile of extra shapes for quick updates.
Creative twist
Creative Twist: Host a gingerbread decorating contest. Each child decorates their own house, then you vote on color, neatness, and imagination.
Next steps
– Snap photos to remember the craft.
– Save scraps for projects. Plus, the scraps spark new ideas for a tiny village or future season crafts.
7. Tiny Urban Apartment

Want a fun way to learn about city life with your kids? Build a tiny urban apartment out of paper. This project turns a simple rectangle into a tall little building with several floors.
Start with a sturdy base. Stack two or three levels to create living, dining, and sleeping spaces. On each floor, let kids place cut-out people and tiny furniture. They can tell stories as they move figures from room to room. This is more than a craft. It teaches space, plan, and how a city works.
Here is why it helps. Kids see how rooms fit together. They think about stairs, doors, and light. They learn to share ideas and work as a team. The finished piece becomes a prompt for stories and games.
Let’s break it down:
– Draw a rectangle on thick paper to make the base.
– Cut out a few extra floors and stack them on the base.
– On each floor, mark rooms with simple lines for living, dining, and sleeping.
– Add tiny paper people and furniture to act out scenes.
– Draw windows and doors. Color the outside.
– Give the building a roof view with a balcony or small garden.
Materials
– Colored paper or card stock
– Scissors (kid-friendly)
– Glue or tape
– Markers, crayons, or colored pencils
– Ruler and pencil
– Optional: washi tape, fabric scraps for tiny rugs
Tips and tweaks:
– Keep scale consistent so pieces look like a real home.
– Use bright colors to make each floor feel new.
– Let kids design the exterior for extra ideas like a rooftop garden.
Next steps. Put the model on a shelf and use it for daily city stories.
8. Magical Treehouse Castle
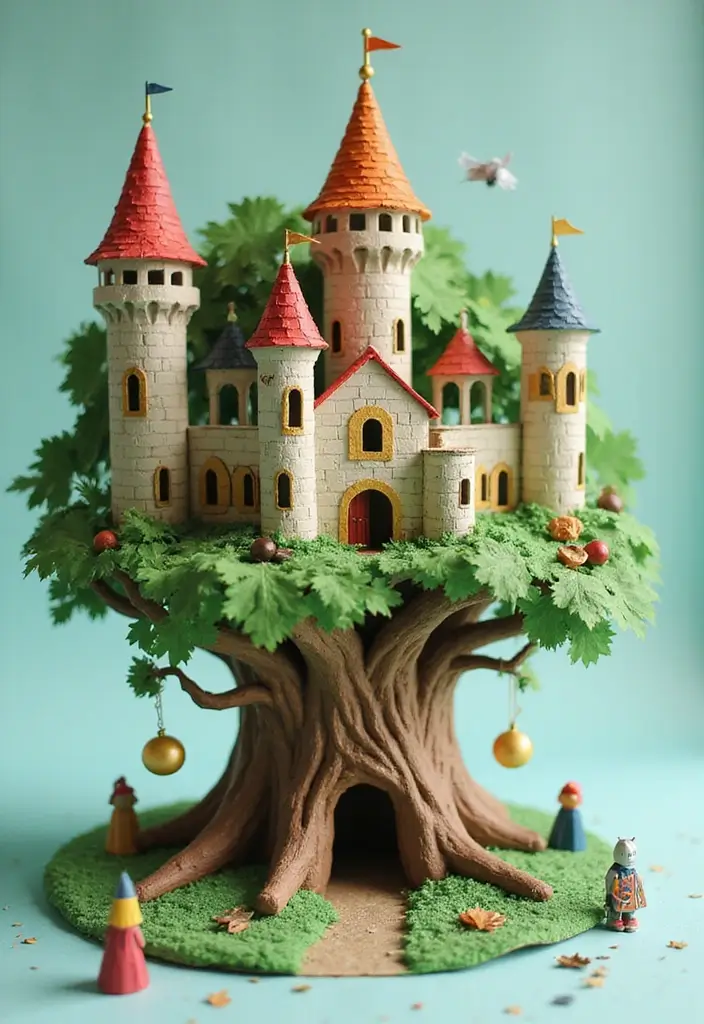
You want a project that sparks imagination and teaches some real skills. The Magical Treehouse Castle blends a treehouse with a castle, all in one paper craft. Here is why this idea works for a quick, kid-friendly session.
Materials
– Green and brown craft paper for trees, trunks, and leaves.
– Scissors, glue, and tape to cut and attach pieces.
– A ruler and pencil to keep lines neat.
– Colored markers or crayons for details and faces.
– Craft sticks or thin cardboard to help the towers stay strong.
– Optional stickers or foil for extra shine.
Steps
1) Build the tree base. Draw a sturdy trunk and branches, then cut two levels for a tall, layered treehouse.
2) Stack and glue. Glue the levels in place so the tree stands firm.
3) Create the castle. Cut bright rectangles to look like bricks and form two tall towers with a short center wall.
4) Attach the castle. Glue or tape the castle on top of the tree and let it dry a bit.
5) Add characters and stories. Draw knights, princesses, and dragons and place them around the castle.
6) Add a flag. Put a small flag on the highest tower to finish the regal look.
Tips
– Keep the base wider than the top for balance.
– Let the glue dry before moving your creation.
– Store it flat so you can recycle or reuse parts later.
9. Underwater Paper Village
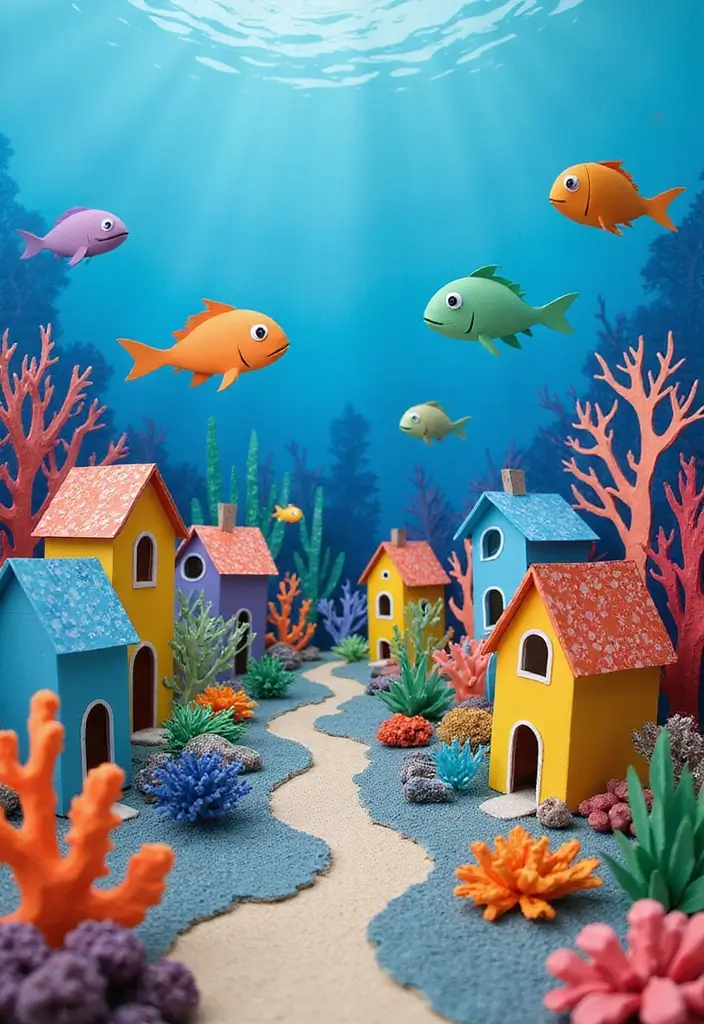
– Looking for a calm, creative craft that sparks stories? An underwater paper village fits. It blends art with storytelling and gives kids a tiny sea world to build.
– Materials you need: blue construction paper for the ocean, colors for animals and houses, scissors, glue, markers, and a backdrop board. Crumpled paper makes coral.
– Here is how to start: cut out small houses and sea creatures. Lay blue background first to show sea floor. Place houses in a village line and tuck creatures nearby.
– Let’s break it down step by step: add lighter blues to deepen the scene. Glue fish, turtles, and a mermaid in friendly poses. Leave gaps to show water.
– Create coral and plants by crumpling bright paper and shaping it with fingers. Layer pieces to build a reef that pops.
– Next steps: bring the scene to life. Make fish that flip or sway. Attach them to thin sticks for gentle movement.
– Why you’ll love it: kids tell stories, name characters, and act out quick scenes under the sea.
– Tip: keep the display flat for easy sharing. A shallow frame helps the scene stay sturdy.
– Share your sea scene with family and watch stories grow.
10. Cute Camping Tent

Want indoor fun that sparks imagination without a big mess? A cute paper camping tent fits the bill. It gives your child a cozy spot for pretend camping on the table. It’s quick to make and easy to store.
What you’ll need
– Cardstock in colors you like
– Scissors
– Tape or clear glue
– Markers or crayons
– Stickers or simple nature drawings
How to build
– Cut a large triangle from the cardstock
– Fold the sides to form a tent shape
– Tape or glue the edges to hold the tent steady
– Stand it on a flat surface and add a rug or mat if you want
Decoration ideas
Decorate with greens for trees, blue for sky, and little stars. Use stickers, doodles, and color blocks to make each tent unique. Add a doorway flap so you can peek inside.
Play ideas
Set tiny chairs outside the tent and pretend you are at a campsite. Draw a fire on paper and put it near the entrance. Use the scene to tell camping stories.
Learning and safety
This project teaches nature and outdoor fun in a safe, indoor way. It encourages storytelling and planning without the real world risks.
Tips for success
– Let glue dry before moving the tent
– Use double-sided tape for a clean look
– Keep pieces on a flat surface to avoid tipping
– Try different colors to match seasons
11. Skyscraper Cityscape
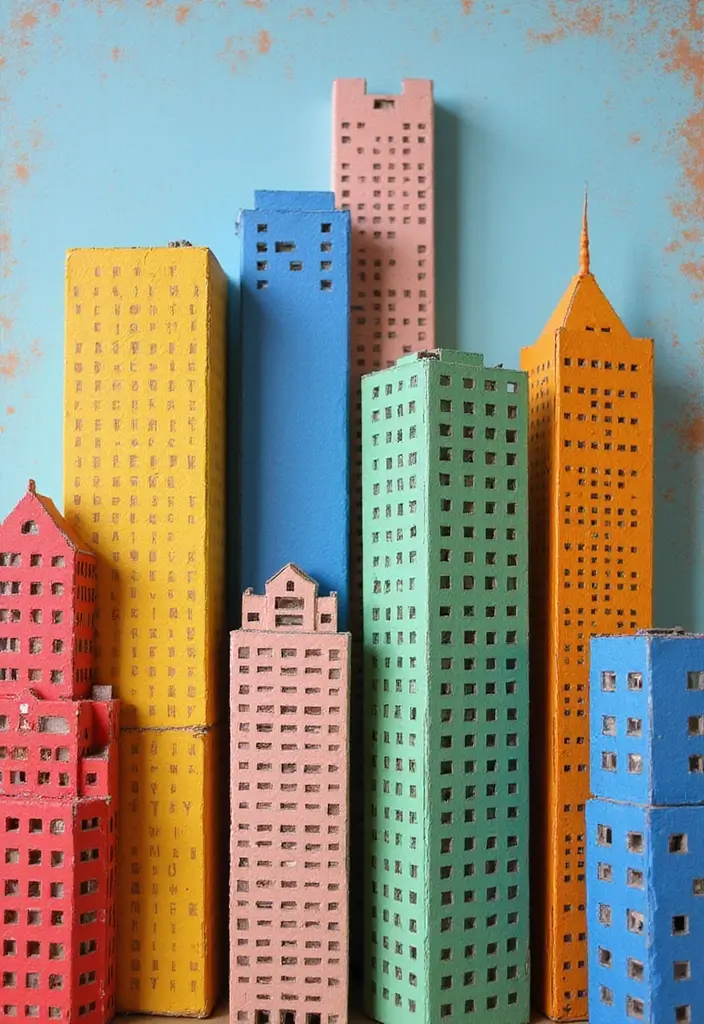
Want a craft that sparks ideas about cities? Build a skyscraper cityscape from recycled cardboard that stays light and easy to move.
Materials you need: recycled cardboard, scissors, glue, tape, paint or markers, and a sturdy base. Optional extras include bottle caps for windows and a ruler to keep towers straight.
Here is how to build it.
1) Plan your skyline by sketching a rough layout.
2) Cut towers of different heights.
3) Paint each building in a different style.
4) Glue towers to the base and let dry.
5) Draw a background with sunset or clouds.
6) Add doors, windows, and small details.
Next, design ideas.
Each tower shows a style from modern glass boxes to brick rows.
Try a stepped Art Deco look.
Use light colors for day scenes and darker hues for night.
Here is why this helps you learn.
Kids see how buildings stand tall in a row and how city spaces fit together.
Talking about architecture and city planning adds context.
Lightweight cardboard keeps the project easy to assemble.
Tip: Share a fun fact about skyscrapers as you work.
Next steps.
Display your skyline, take photos from different angles, and compare styles. Ask questions like which tower is tallest and why.
12. Cozy Log Cabin

1. Gather supplies You need brown craft paper for a log cabin craft, scissors, glue, markers, and small scraps of color paper for details. Have a clean work space.
2. Cut and shape the cabin Cut a rectangle for the base. Add a triangular roof. Use thin brown strips to form a log look. Layer them in a staggered way for a real feel.
3. Add wood texture Add wood texture and depth. Draw horizontal lines on the logs with a darker marker. It shows grain and gives depth.
4. Add porch and yard Leave a small space for a porch. You can cut a tiny board and glue it in place. Put green paper as grass around the cabin.
5. Decorate Create flower beds with green strips and tiny petals. Add paper animals like birds or rabbits to spark stories.
6. Conversation and care Let’s break it down. Talk about nature as you build. Ask what animals live nearby and how the seasons change the yard. This crafts a mini nature lesson.
7. Finishing touches Let glue dry. Show off your cozy cabin on a shelf or display.
8. Fun Idea Make a small porch area for paper critters to gather.
9. Why it helps Next steps: This simple project builds patience and sparks stories you tell at bedtime.
13. Fairytale Castle
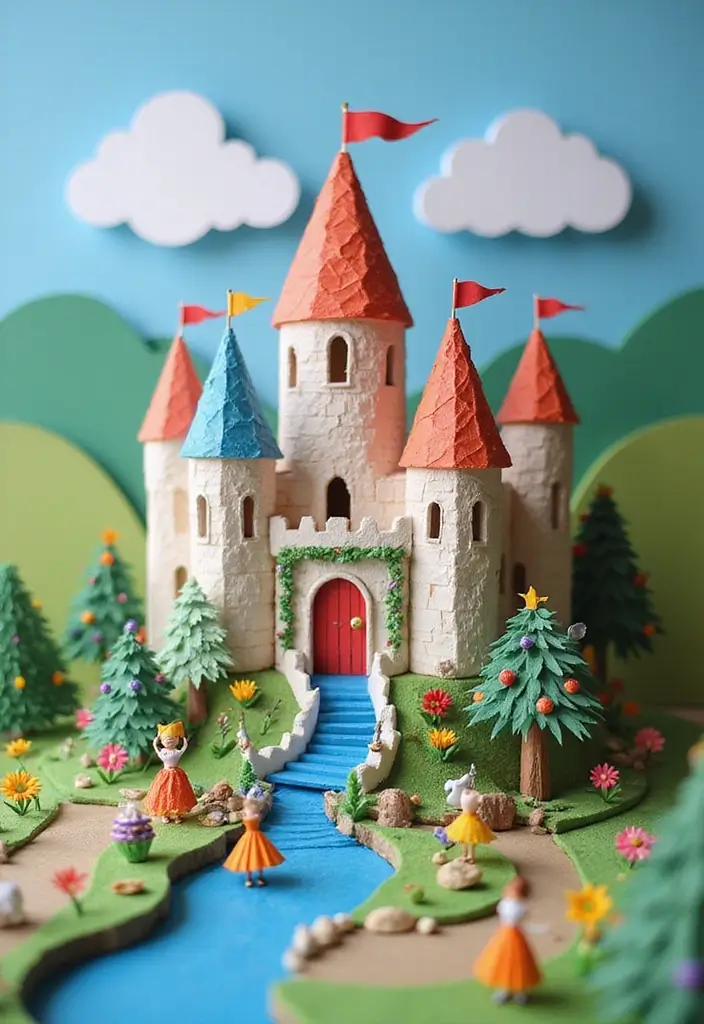
Want a castle that sparks dreams and starts stories? This project helps you build it from simple parts. Start with a rectangular base and two tall towers. Add walls with cardboard or thick paper. Keep the shapes light so you can move them around as you play.
Here is why it works: you see action and ideas take shape in front of you. Let’s break it down into easy steps you can tackle today.
– Materials: sturdy cardboard, extra cardboard for towers, tape, scissors (adult help), paints or markers, colored paper, glue, string for flags.
– Build base: cut a rectangle about 12 by 8 inches. Place towers at the ends. Use extra cardboard for crenellations on the walls.
– Color and decorate: paint bright walls, add gray stone patterns with a marker, glue on banners, and fix a simple drawbridge with a folded cardboard strip.
– Make it live: draw fairy tale characters or print small figures. Place them around the castle and on the towers.
– Literacy link: ask your child to write a short fairy tale about the castle. Prompts help a lot, like “A brave knight visits at dawn” or “A friendly dragon guards the gold.”
– Culture twist: try castles from other places. A European fortress, a Moroccan kasbah, or a quiet Japanese keep each teach something new.
Next steps: set up a mini storytime, snap photos, and share the tale with family or friends.
14. Space Station Home
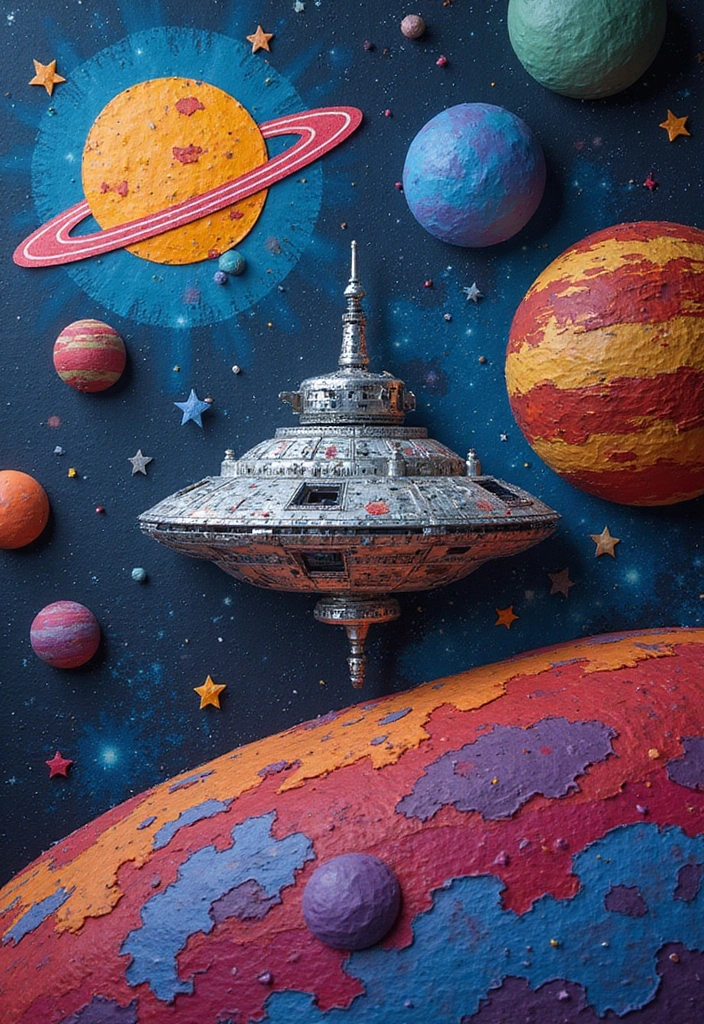
Here is why your kid will love this space station craft. A paper space station gives pretend play and space facts in one.
What you’ll build
Make a small space station model from bright and metallic papers. Add rockets, planetoids, stars, and friendly aliens. The station should look like metal with windows that shine. The project stays simple and helps imagination grow.
Materials
– Metallic and colored papers (silver, blue, black)
– Plain color paper for panels and planets
– Scissors and glue
– Ruler and pencil
– Markers or stickers for details
– String for hanging stars (optional)
Build steps
1) Cut a sturdy base shape, like circle or square.
2) Make tower sections from rectangles. Glue them to the base with small gaps.
3) Add windows and doors with dark paper. Stick on rocket shapes and antenna bits.
4) Create planets, stars and a space backdrop. Attach them around the station.
5) Finish with metallic panels using foil or shiny tape if you have it.
6) Let glue dry, then add astronauts or alien friends you draw with markers.
Learning and play
Encourage your child to name crew members. Chat about real space facts as you decorate. What a station does in orbit and how astronauts work can come up naturally. This simple activity can spark curiosity without a long lesson. You can snap a quick photo when you finish.
Tips
– Use the shiny paper to give a metal look.
– Keep pieces small for easy handling.
– Add a string to hang the scene.
15. Rustic Barn House
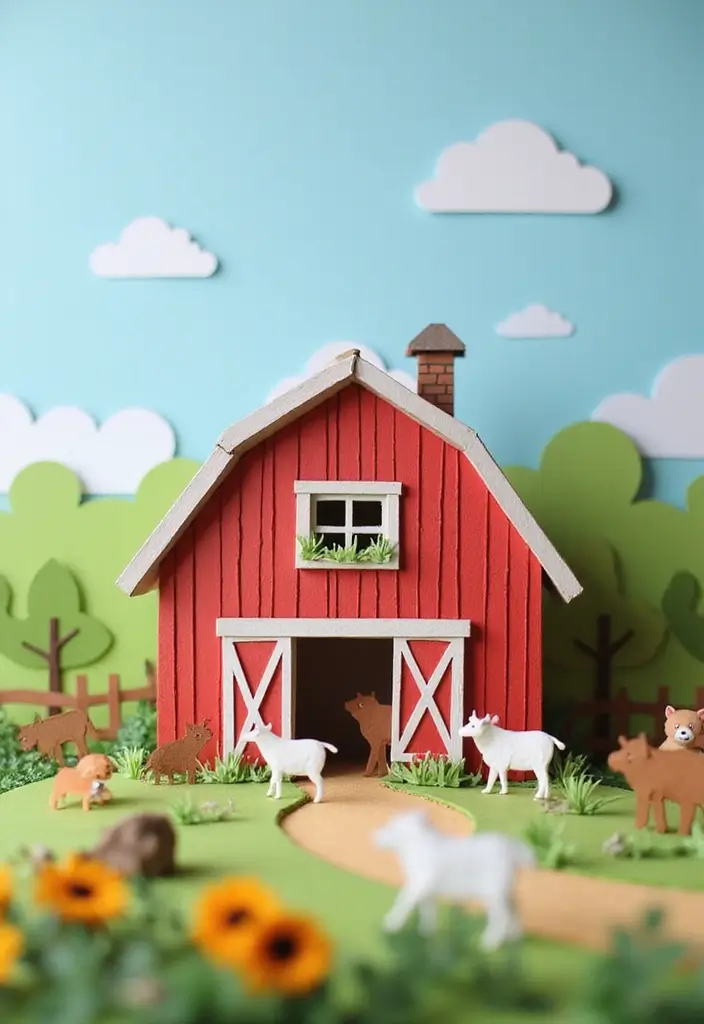
You need a calm, engaging craft that teaches farming and sparks stories. A Rustic Barn House made from red and white paper fits perfectly. It is simple to build and full of ideas.
Here is why it works: small hands can shape the barn, and the scene invites kids to spin farm tales. The colors feel bright, and the paper holds still for neat cuts.
Materials
– red craft paper (heavier stock works best)
– white craft paper
– green paper for fields
– kid-safe scissors
– glue or tape
– markers or crayons
– small paper animals and a tractor (optional)
Steps
1. Cut a red rectangle for the barn body.
2. Add white trim for doors and windows.
3. Attach a roof piece in a lighter shade.
4. Glue the barn onto a green field background.
5. Place animals and a tractor to finish the scene.
Details to boost realism
– Fold yellow paper into hay bales.
– Use thin brown strips for a simple fence.
Creative Twist
Pair the craft with a farm day or a trip to a local museum. Seeing real barns and tools makes the idea come alive. Let them swap roles and tell a new story.
Next steps
– Display the scene on a shelf or board.
– Use it to start a short farm story you tell or write together.
– Add your own touches by coloring the trim and sky.
Tip: Pre-cut pieces can speed up the session.
16. Magical Mushroom House

You’re after a kid-friendly craft that sparks imagination without a long setup. The Magical Mushroom House delivers. It uses simple paper, bright colors, and a dash of fantasy that kids can own from start to finish.
Materials:
– Colorful craft paper in two or more shades
– Scissors and glue
– Markers or crayons
– Small stickers, buttons, or fabric scraps for details
Steps:
1) Cut a large circle for the base.
2) Cut a dome or rounded cap for the roof.
3) Glue the cap on top of the base so it looks like a mushroom from a storybook.
4) Add polka dots, a doorway, windows, and little flowers around the edges.
5) Create tiny resident shapes like pixies or animals and place them near the door.
This project invites hands-on fun and room for personal flair. Let kids choose colors that feel magical to them. They can layer dots, paint a delicate stem, or add a scarf to a twig peg as a tiny character.
Why it works
It blends art with storytelling. After building, you can start a tale about who lives inside and what adventures they have. Kids grow confidence when they see their finished house stand on the shelf.
Next steps
Use this craft to explore nature and fantasy ideas. Ask open questions and let the scene evolve as your child adds new details.
17. Victorian House
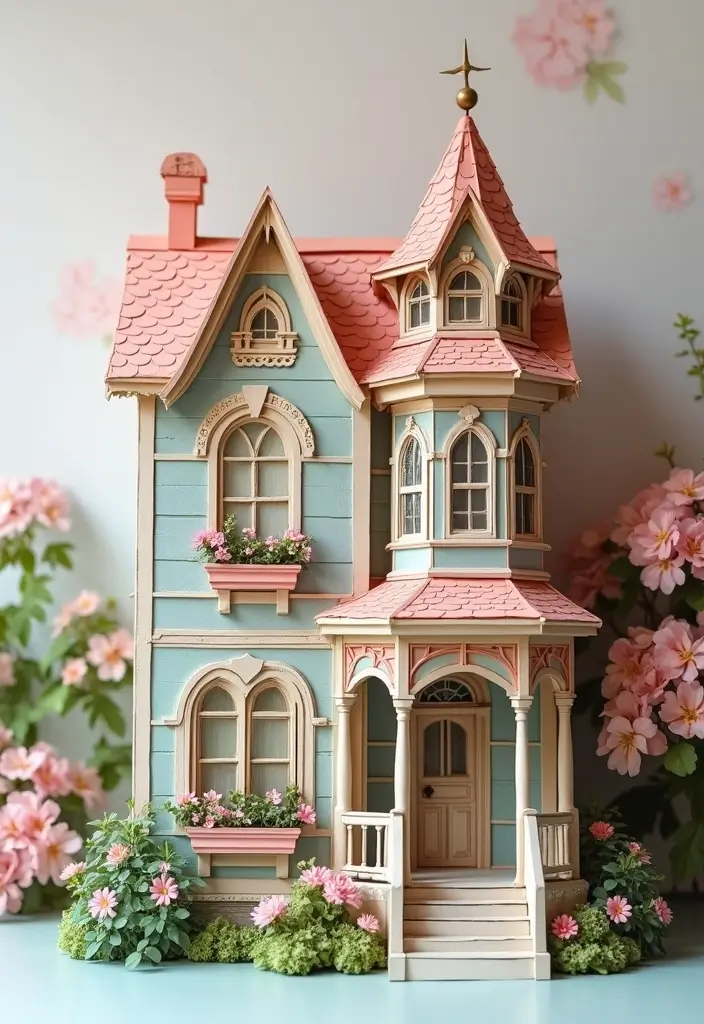
Want a Victorian look in a simple paper craft? You can build a tiny house that looks old-time. You’ll practice basic shapes, windows, and a porch.
What you’ll need
– pastel paper in soft tones
– white cardstock
– scissors and glue
– a ruler and pencil
– optional: small brads or string for a moving swing
Step-by-step
1) Start with a sturdy base. Draw a basic house on the card.
2) Cut two arched windows and a front door frame.
3) Add side windows for balance.
4) Fill shapes with pastel papers. Layer to create depth like siding and shutters.
5) Draw a thin trim along the roof.
6) Cut a small porch and a flower box from paper strips. Glue them on.
7) For a porch swing, cut a tiny seat and two supports. Attach with a brad or glue so it can move a bit.
Here is why this works: simple shapes are easy for kids, and layering gives a rich look. The project stays light and tidy while teaching cutting and gluing.
Fun Idea Organize a show. Display houses on the wall. Let each maker share a detail, like a window shape or color choice. Invite family and friends to see your street.
Next steps: take photos, add captions, and keep building more houses in varied colors.
18. Eco-Friendly House
Here is how to build an eco friendly paper house that teaches green habits.
– You gather clean cardboard, scrap paper, glue, tape and safe markers.
– Build a simple frame by cutting walls from cardboard and taping them together.
– Add solar panels on the roof using foil or drawings with markers.
– Create a small garden with paper beds and leaves.
– Add wind power with folded paper blades on a straw.
– Set up a rainwater feature with a bottle and a paper spout.
– Paint and decorate with bright colors and simple textures.
– Tie in a green lesson by talking about reusing and saving water and energy.
– Tip: While you craft, ask your child how they would help the planet at home.
– Next steps: photograph the model, label its eco parts, and plan one real action for the week.
– Quick upgrades: use bigger boxes to make a taller house.
– Quick upgrades: cut a foil panel to catch sun.
– Quick upgrades: add a tiny water barrel with a cup and string.
– Keep safety in mind as you cut and glue.
– Do a quick clean up to save scraps for next project.
– Have your child label each eco part with a simple name.
– Display the finished model and name one real action you will try this week.
19. Fantasy Treehouse with Swing
Here is how to make a magic forest home you can build with paper.
Want a craft that feeds imagination and gets kids outside? Try a fantasy treehouse with a swing made from paper.
Here is why it helps. It blends art with play. It is easy to store. It invites storytelling.
What you’ll build
– A multi-level paper tree with a swinging seat.
– Paper ladders that link the levels.
– Painted flowers around the base to add color.
Materials
– Green construction paper.
– Brown cardstock for the trunk.
– Scissors and glue.
– String or thin yarn.
– Markers or paint.
– Small stickers or markers for flowers.
Steps
1) Cut a large tree shape from green paper and a brown trunk backing.
2) Glue the trunk behind the tree so it looks sturdy.
3) Make ladders from thin paper strips and attach between levels.
4) Create a swing: thread string through a paper or small cardboard seat and tie to a branch point on the tree.
5) Decorate with painted flowers around the base and a few leaves on the branches.
6) Set up a mini playdate where kids show their treehouses and tell a tiny adventure.
Next steps: use this craft to spark outdoor play and storytime. You can extend it with new rooms, more ladders, or a second tree.
20. Art Deco House

You want a craft that looks stylish and easy to do. The Art Deco House gives you bold shapes and clean lines in one simple project. It teaches design as you go.
Here is why this works. You use strong lines and sharp angles. You get a shiny look with metallic accents. You finish with a tiny landscape that adds charm.
What you need
– You will need two bold colors of craft paper plus a black marker.
– You will need gold or silver foil or metallic paper for trim.
– You will need scissors, glue, and a sturdy cardboard base.
– You will need rulers or straight edges for clean lines.
Design ideas
– Pick two colors that pop and keep the rest simple.
– Use stepped shapes, triangles, and chevrons for a true Art Deco feel.
– Add a thin gold border to windows or roof edges.
– Create a flat or slightly raised facade to give depth.
Step-by-step
1) Draw a simple house outline with a stepped front on paper.
2) Cut out geometric pieces for windows, doors, and decorative patterns.
3) Glue pieces to the base and draw crisp lines with a ruler.
4) Add a fountain and a small garden using foil, paper, and tiny plant shapes.
Finish and share
– Let it dry and place it on a shelf.
– Share it on a bulletin board or with your family.
21. Storybook Cottage
Looking for a simple paper house craft that sparks imagination? This storybook cottage blends art with storytelling and fits as a DIY cottage craft for kids. It looks sweet with a slanted roof, bright blooms, and tiny doors that invite a tale. You shape the scene, and a story grows right alongside it.
Here is why it helps learning: making the cottage ties craft to reading. Kids pick details from books, chat about characters, and practice telling a tale while they glue.
– Materials you need
– Cardstock or thin cardboard
– A small box or base
– Glue, scissors, markers
– Fabric scraps, buttons, felt for flowers
– Optional paint or stickers
– Steps
– Cut a house shape and add a roof
– Put in a door and windows
– Decorate with color and flowers
– Place a tiny figure to act out the tale
– Ask the child to describe who lives there
– Story prompts
– Who calls this cottage home: a shy mouse, a brave fox, or a kind sprite?
– What quest starts at sunrise or after dark?
– What pet keeps the home lively?
– What secret room hides behind a shelf?
– Reading tie-in
– Read cottage books first, then craft scenes
– Keep a small book nearby as you work
– Display the cottage next to a favorite title
22. Tiny Camping Village

You want a craft that keeps kids busy and brings the outdoors inside. A tiny camping village made from paper fits as a fun DIY camping village you can build at home. It helps kids work together and make something cool. They build tents, a campfire, and trees, and then tell stories of adventure.
Here is why this works. It uses simple supplies, clear steps, and room for imagination. It fits a rainy day, a classroom project, or a weekend activity. Now, let’s break it down.
– Supplies you need: color paper in greens, browns, and bright shades.
– Kid-safe scissors.
– Glue or tape.
– Markers.
– A sturdy base like cardboard or thick cardstock.
– Make tents: fold paper into triangles or cones.
– Tape or glue to a small base.
– Decorate with stripes or dots.
– Create a campfire: cut circular “logs” and stack them in a ring.
– Add orange and yellow paper flames.
– Add trees and ground: cut tree shapes from green paper, add a brown trunk.
– Place them around the village to create a forest edge.
– Build the village layout: line up tents as campsites.
– Position the campfire in the center.
– Add a paper path for a trail.
– Story ideas and play: each tent becomes a site for a mini tale.
– Kids take turns leading an adventure and sharing lines.
Fun Idea: Organize a camping-themed play date with storytelling around the campfire.
Next steps: start small, then grow your village with more tents, trees, and tiny details like a paper lake or a picnic blanket.
23. Cozy Garden House

You want a cozy, kid-friendly craft that sparks imagination. A paper garden house fits that need. It blends art with nature and stays easy to finish.
Here is why this works. It builds fine motor skills, sparks stories, and uses common craft supplies.
What you’ll need
– Colored craft paper in a few shades
– Glue and tape
– Scissors
– Markers for details
– A sturdy base such as thick cardboard
How to build the garden house
– Cut a small house shape from colored paper.
– Fold and tape the roof so it stands up.
– Glue the house to the sturdy base.
Make the garden come alive
– Cut slim green strips to make grass around the house.
– Add small paper flowers for color in the beds.
– Create paper birds and butterflies from bright paper and place them in the sky and trees.
Story time
– Invite your child to invent a tiny tale about who lives in the garden house.
– Let that story guide where more plants or animals go.
Creative Twist
– Host a garden party play date with friends to share their creations and tales.
Tips for success
– Keep colors simple and bright so the scene reads at a glance.
– Use different paper textures for depth.
– Display the final piece on a shelf or table for easy viewing.
Next steps
– Take a quick photo to remember the craft.
– Save extra paper for future paper house projects.
24. Ice Cream Shop
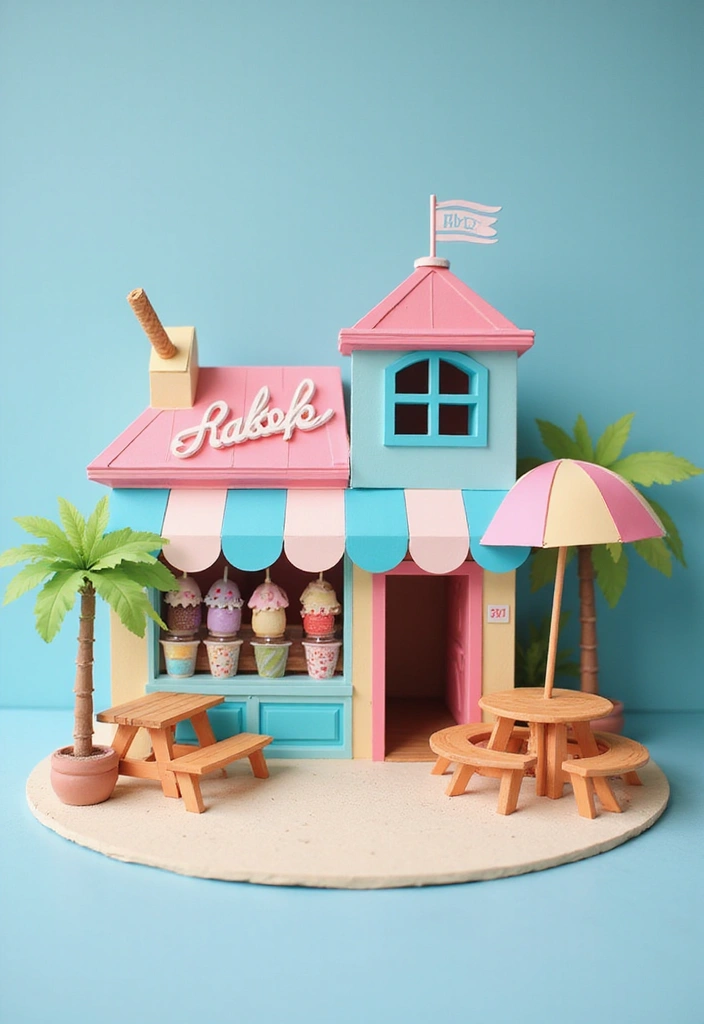
Want a fun paper craft that doubles as play? Build your own ice cream shop from color paper. You get a fun project and a shop all in one.
Here is what you need:
– colored craft paper, glue, scissors
– cardboard or a sturdy base
– markers or stickers for signs
– string or popsicle sticks for scoops and menus
– Build the shop
Fold and glue a simple storefront. Add a roof. Keep the shape wide so you can show windows and a counter.
– Make scoops
Cut circles in bright colors. Let scoops sit on a cone or sit in cups. Tape helps them stay in place.
– Create flavors and menus
Name flavors like strawberry pink or vanilla yellow. Draw cups on a menu card. Laminate it with clear tape so it lasts.
– Add drive-thru and seating
Cut a window for a drive-thru. Add paper chairs and a table outside. Let customers line up on a paper path.
– Play and learning
You practice sharing, counting money, and talking with customers. Set prices and give change to sharpen math and social skills.
Tip: Use this craft to explore food and small business ideas in a simple, playful way.
Next steps: decorate, display the menu, and set up a pretend cash box to role-play.
25. Rustic Farmhouse
You want a simple, cozy farm scene you can build with paper. This rustic farmhouse craft fits that need. It shows farming ideas and sparks imagination without a mess.
What you’ll need
– textured papers that look like wood and stone
– scissors, glue, and markers
– colored paper for animals, garden, and a fence
– a sturdy base sheet
Here is how to build it
– Start with a base. Lay down your sheet and decide where sky meets ground. A light blue wash works.
– Make wood planks. Cut thin brown strips and place them as wooden panels.
– Add a stone wall. Tear gray paper into irregular shapes and glue them in a rough line.
– Put up a fence. Use brown paper strips as vertical slats with space between.
– Bring it to life. Cut out animals, a small barn, and a garden. Glue them where they belong.
– Add texture. Use green scraps for crops and tiny bits for a gravel path.
– Finish with small details. Draw a sun and clouds. Write a sentence about your farm animals to tell a tiny story.
Tip: Have kids describe their farm while they work. Quick line links the craft to farming and land care.
26. Castle of Dreams

You want a paper craft that kids will finish with pride. The Castle of Dreams makes that possible. It uses bright paper, simple shapes, and a touch of shine.
Here is how it helps creativity: towers rise, bridges swing, and stories grow as you build.
– Materials
– Bold colored paper (at least 3 colors)
– Safety scissors or kid scissors
– White glue or glue sticks
– Tape
– Markers for faces and flags
– Jewels or stickers for royal details (optional)
– Glitter or foil (optional, with adult help)
– Build steps
1. Cut tall towers from rectangles and top them with square caps.
2. Glue towers to a sturdy base and space them like real guards.
3. Make a simple drawbridge with a folded strip of paper you can lift.
4. Trace a moat around the castle with a blue band of paper.
5. Add doors, flags, and tiny windows with markers. Decorate with gems and a touch of glitter. Let dry.
– Pro tips
– Plan the layout on a page first.
– Use tape for heavy pieces.
– Keep small bits away from younger siblings.
– Fun idea
Dress-up playdate: invite friends to wear crowns and robes, then tell quick royal tales as you parade around the castle.
27. Cozy Cabin on the Lake

– Materials
– Brown craft paper for the cabin walls.
– Blue paper for the lake surface.
– Green paper for trees and wildlife.
– Scissors, glue, and a marker.
– Small pieces of white or yellow paper for windows and sun.
– Build the scene
– Lay a base of blue paper for the lake so you can see the water.
– Cut a simple cabin shape from brown paper and color the roof if you like.
– Glue the cabin near the lake edge.
– Add a row of trees around the cabin using green scraps.
– Create a boat and a duck with tiny paper shapes and float them on the water.
– Draw window panes, a door, and a chimney with a marker.
– Make it feel real
– Layer trees by placing smaller greens in front of larger shapes.
– Add tiny birds and animals to spark imagination.
– Curl the edges of paper to give texture to the land and water.
– Press gently so pieces stay flat and neat.
– Creative prompt
– Use this lake cabin to tell a summer adventure or camping story.
– Here is why
– This project blends craft with play.
– You practice cutting, gluing, and shaping while you plan a scene your story can live in.
– Next steps
– Take photos of your finished scene to share with friends.
– Hang it on the wall to inspire more tales about nature and quiet days by the water.
28. Festival House

Need a craft that’s simple, fun, and full of ideas? The Festival House helps kids build a tiny home and dress it with bunting and color. It lets them remix real festivals or dream up new ones.
– What you’ll need
– Cardboard or sturdy paper works as the base.
– Bright paints or markers add color.
– Glue or tape and kid-safe scissors hold pieces together.
– String or yarn for bunting creates flags.
– Paper scraps, fabric bits, stickers add tiny details.
– Steps to make
– Draw a small house on cardboard and cut it out.
– Paint the walls in bold colors and simple patterns.
– Make bunting by cutting triangles and threading them on string.
– Add signs, stickers, and fabric scraps for extra sparkle.
– Have your child draw or write one sentence about a favorite festival inside the house.
– Why this works
– This project grows color sense, storytelling, and fine motor skills.
– It gives a clear, shareable result you can display.
– Mini festival idea
– Set up a tiny festival at home.
– Line up all the houses and invite family for a quick, friendly tour.
– Tips for success
– Reuse old papers and fabrics to cut costs.
– Keep pieces large and easy to handle.
– Display every house so kids feel proud.
– Quick questions
– How long does this take? About 30 to 60 minutes, with breaks.
– What if you don’t have scissors? Use pre-cut shapes or skip the cutouts.
29. Lighthouse Adventure
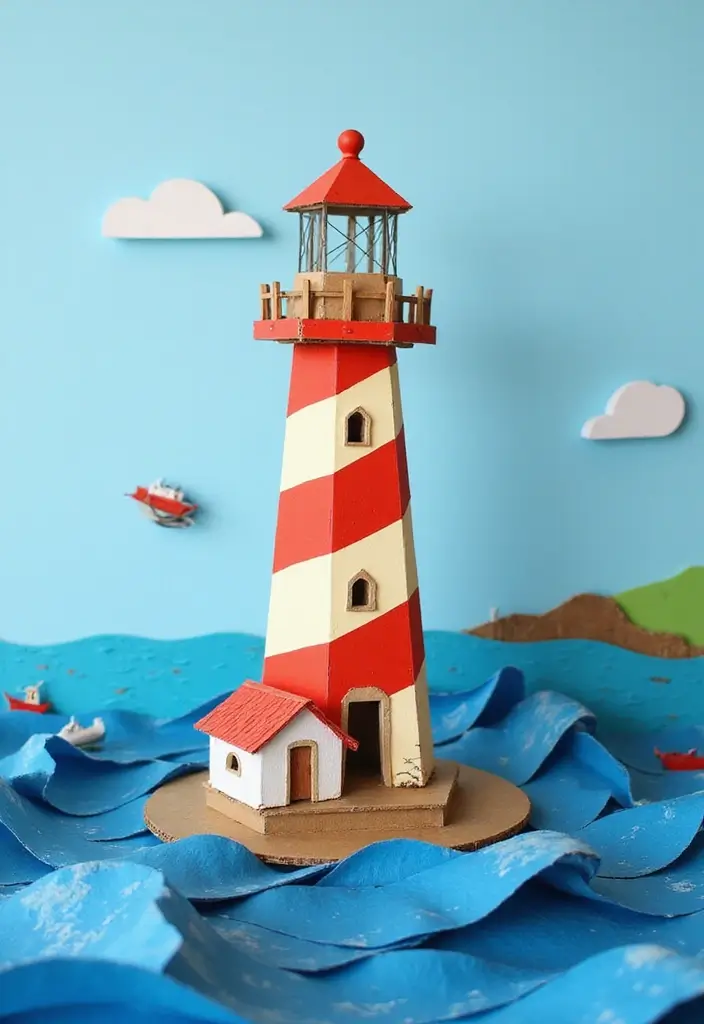
Want a coast craft that is simple and sparks imagination? A lighthouse adventure fits. You get a tall tower made from cardboard and stripes of bright paper. It turns a plain table into a coastal scene full of stories.
– Materials you need: sturdy cardboard, colored paper, glue, scissors, markers. Add rock pieces or gray paper for a rocky base. Use blue paper or tissue for waves. Small boat cutouts and a tiny LED light are optional.
– What to build: a tall lighthouse with a sturdy base. Add a colorful stripe pattern. Create a rocky shore and a blue sea around it. Place boats near the waves for action.
– How to assemble: roll or cut cardboard into a tower. Glue the stripe paper around the tower. Build a ground base with rocks. Glue waves in front. Add boats and a light at the top if you have one.
Here is why this matters: kids learn balance, stacking, and color choice. You also spark storytelling as you describe a ship passing by at night.
– Step by step tips: let glue dry between steps. Use markers to add windows and doors. You can make the beacon glow with a small LED.
Next steps: display the scene on a shelf or in a photo corner. Tell a tiny sea tale to finish the day.
30. Paper House Parade
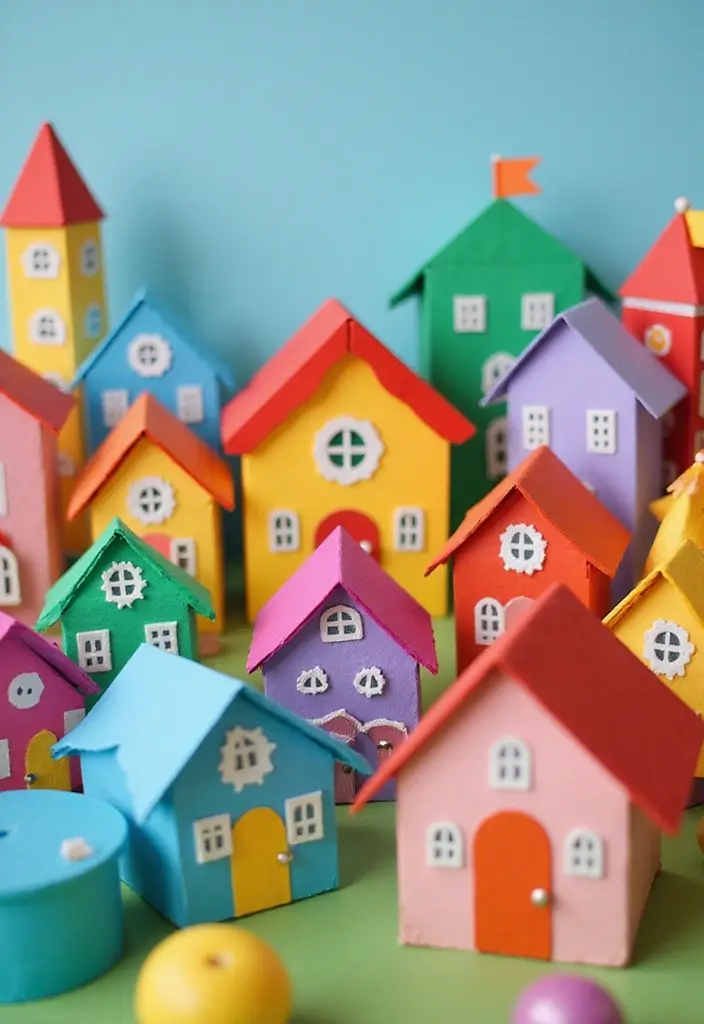
You want a memorable finish to your paper crafts. A parade of tiny paper houses sparks imagination. You can make styles from around the world. It feels like a small street in your living room. You can adapt the idea to fit any space. It also works for rainy days.
Here is why this works: kids learn about different cultures and building ideas. They spot roof shapes, name colors, and hear quick facts. It also builds a sense of sharing. When you display the houses, family and friends smile and talk about what they see.
Here is how to set it up:
– Materials you need: colored paper, scissors, glue, markers, toothpicks for stands, string, clothespins, tape.
– Texture ideas: Add texture with scraps.
– Texture ideas (continued): Foil for windows or tissue for shingles.
– How to build: Pick 4–6 styles and keep shapes simple.
– Details to add: Draw doors, windows, chimneys.
– Color and walls: Use blocks of color to show walls.
– Labels: Add a tiny label for country or style.
– Parade setup: Line a table or hang a string.
– Display tips: Clip each house in place.
– Display tips (continued): Then play soft music and let kids tell the story.
– Creative idea: Host a mini parade where every house shines while each child shares their design.
– Next steps (1): Take photos, make a small album, share with family.
– Next steps (2): Store the houses in a box for next year.
Conclusion
These 30 paper house crafts provide endless inspiration for creativity and imagination.
From cozy cottages to grand castles, every project opens doors to storytelling and play, allowing children to explore their artistic sides while learning valuable skills.
Grab your crafting supplies and start creating, because these delightful DIY projects are sure to spark joy and creativity in every child!
Note: We aim to provide accurate product links, but some may occasionally expire or become unavailable. If this happens, please search directly on Amazon for the product or a suitable alternative.
This post contains Amazon affiliate links, meaning I may earn a small commission if you purchase through my links, at no extra cost to you.
Related Topics