Valentine season has me craving simple, heartfelt crafts that anyone can make. I wanted to collect DIY projects that spread love through tiny paper hearts without taking a ton of time. These ideas fit a weekend craft session or a quick classroom activity. Making something by hand sends warmth in a way that a text just can’t match. Plus, a stack of paper hearts can brighten a desk, a fridge, or a gift bag.
If you’re into gifting, party decor, or tiny acts of kindness, this one’s for you. Parents, teachers, roommates, students, and friends who want to spread warmth will find options that fit. The projects are budget-friendly, beginner-friendly, and easy to pack in a tote for on-the-go crafting. You can finish most ideas in under an hour and still have room for a few more.
I pulled together 25 paper heart crafts that cover garlands, cards, wall art, and keepsakes. Most ideas use common supplies: colored paper, scissors, glue, string, and a simple punch. Some ideas are bold and playful, others are delicate and sweet. Every project includes simple tips on folding, layering, and finishing so your piece feels thoughtful. Whether you want to decorate a party or give a friend a small gift, you will have options you can actually do.
Here is how to get the most from this guide. Start by picking 2 ideas that match your time and supplies. Pull together a small tray of materials so everything is ready. Follow the steps and snap a quick photo as you go, so you can recreate it later. That approach keeps things simple and fun.
These ideas lean on easy, timeless styles. Many feel warm and handmade rather than glossy. They work with recycled paper or craft paper, so you can be kind to the planet. Small touches like washi tape, stickers, or a handwritten note make a big impact. Plus, the steps are clear enough to teach a younger friend or class helper.
Ready to spread a little love with paper hearts? Grab your favorite colors and start with one project you can finish today. I hope these ideas spark joy and give you fast wins you can share right away. Tell me which project you try first and how it goes.
1. Heart-Shaped Paper Garland
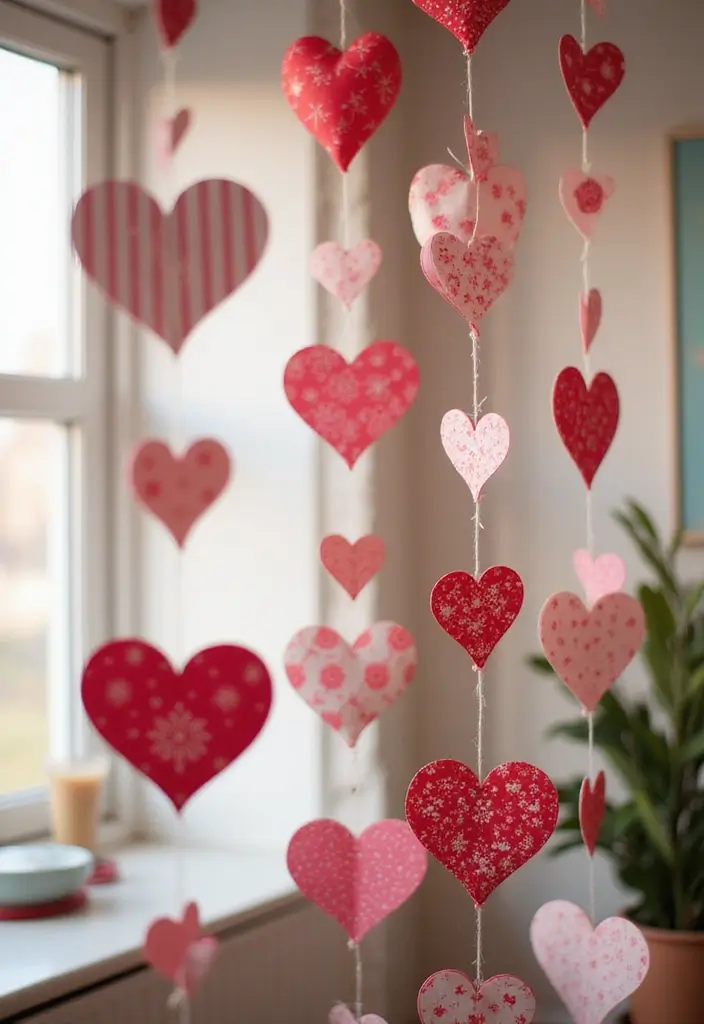
Want a quick, cozy touch for your home? This heart garland fits the bill. It uses simple supplies and is easy for kids to help.
What you’ll need
– Colored paper in a few shades
– Scissors
– String or twine
– Glue or tape
Optional: glitter paper or patterned sheets for extra shine
How to make it
1) Cut several hearts in different sizes and colors. Mix big, medium, and small shapes for depth.
2) Lay the string flat. Put small glue dots on the back of each heart, then press them onto the string at even gaps.
3) Let the glue dry a moment, then hang. Drape it across a doorway or above a window to catch light.
4) For a longer garland, cut more hearts and add extra string sections. Keep the spacing similar so it feels balanced.
Tips to brighten the look
– Use glitter or metallic paper for a touch of sparkle.
– Vary colors so the garland feels playful and warm.
– Create two or three strands and weave them together for a fuller effect.
– Try a seasonal theme, like pinks for Valentine’s Day or earth tones for fall.
Why you’ll love it
Kids enjoy picking favorites and swapping colors. This becomes a simple family project and a nice way to celebrate Valentine’s Day or any moment you want to spread love. After the party, it stores flat and can be reused next year. You can even hang it in a zigzag or loop it around a light fixture for different looks.
@media(max-width:480px){
@media (max-width: 600px) {
.normal-quiz-iframe { min-height: 570px !important; height: 570px !important; }
}
2. DIY Paper Heart Cards
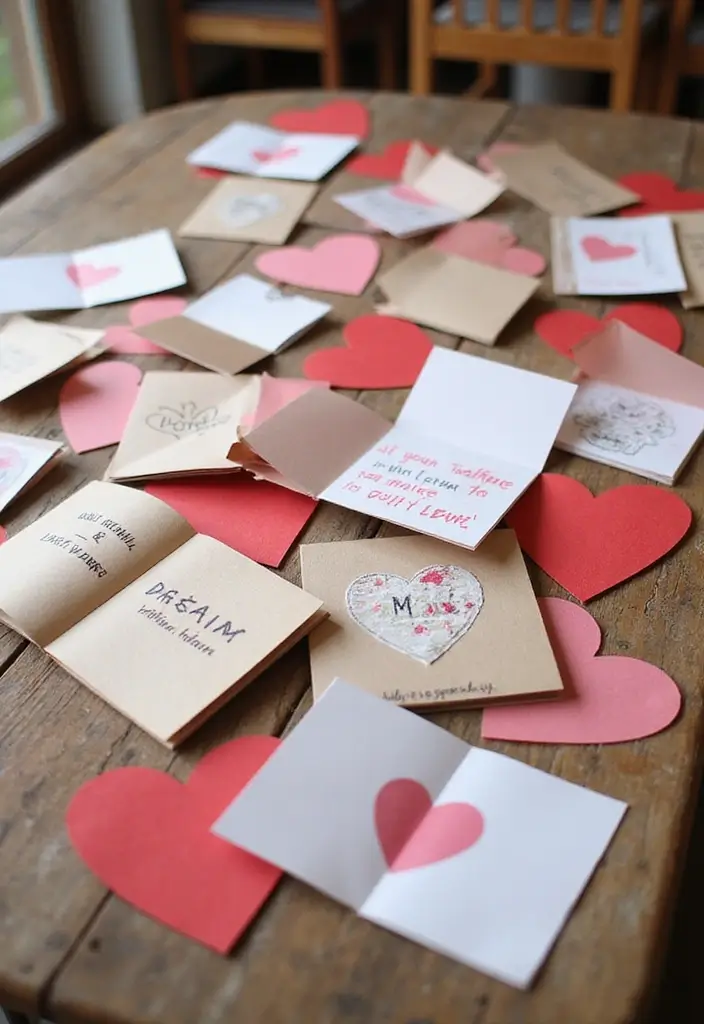
Want a quick, heartfelt way to say you care? DIY paper heart cards fit the bill. They’re easy for kids and fun to make.
What you’ll need
– Cardstock in a color you love
– Scissors
– Pencil or marker
– Glue or tape
– Optional: stickers, stamps, or glitter
How to make the heart card
1) Fold a sheet of cardstock in half to form a card.
2) On the folded edge, draw a half-heart that sits on the fold. Cut along the curved line, leaving the fold intact.
3) When you open the card, you’ll see a full heart cutout. Decorate the front with color or patterns.
4) Write a warm message or a short poem inside.
Ways to decorate
– Colorful markers, watercolor washes, or light paints
– Layer paper hearts for dimension
– Add borders with simple doodles
– Attach stickers or tiny confetti bits (glitter optional)
Message ideas
– You brighten my day.
– Happy moments are better with you.
– Thank you for your kindness.
– I’m glad we share this friendship.
Why this helps
Here is why this works: kids practice handwriting, plan a gift, and feel proud to give. It spreads love with a personal touch.
Next steps: grab supplies and make a batch of DIY heart cards for family and friends.
3. Origami Heart Boxes
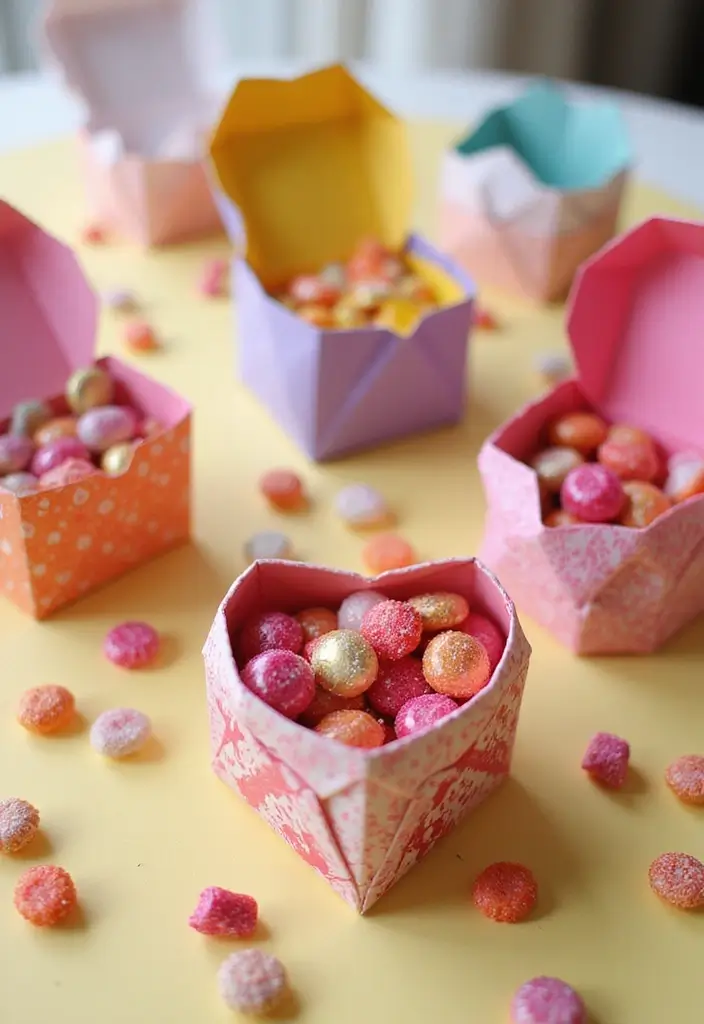
Here is why you might love origami heart boxes. They feel special and they are useful.
Materials
– Square origami paper or a sturdy square sheet
– Optional stickers, markers, or washi tape for decoration
– A small treat, note, or trinket to tuck inside
How to make it
1) Start with a clean square sheet.
2) Fold it in half to crease, then unfold.
3) Fold the top and bottom edges toward the center to form a heart top.
4) Shape the sides to create a small box that can hold a few goodies.
5) Press the folds firmly so the box stays together.
Decoration and usage
– Decorate the lid with a doodle, sticker, or a ribbon.
– Fill with candies, a tiny note, or a small gift.
– Gift it by placing the lid on top or tying a string around.
Tips for success
– Use thicker paper for a sturdier box.
– Let kids help with folding and decorating.
– Keep the size small or go bigger for different treats.
Benefits
– Builds fine motor skills through careful folds.
– Adds a personal touch that stands out.
– A repeatable, low-cost craft for home or class.
4. Heart Mosaic Art
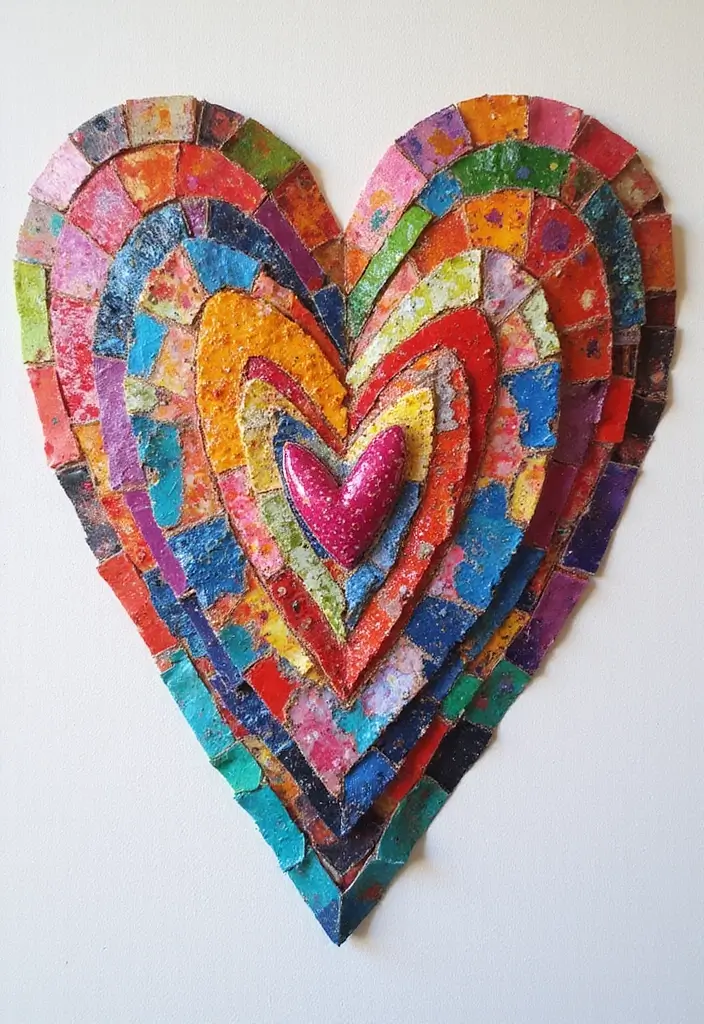
Want a keepsake from your paper scraps? A heart mosaic turns old colors into art you’ll love to display.
What you’ll need
– Colored paper scraps and magazine cutouts
– Scissors and glue
– A sturdy base like thick paper, poster board, or a small canvas
– A pencil for tracing and a sealant if you want a durable finish
Here is why this project works well for kids. It uses scraps, so there is less waste. It boosts fine motor skills as small pieces are cut and placed. It builds color sense when you choose shades that fit together. And it gives a visible, finished piece to treasure or gift.
Steps to create your heart mosaic
– Collect scraps and pick a color theme that feels right to you.
– Draw a large heart on your sturdy base with a pencil.
– Cut tiny pieces from the scraps. Aim for variety in shape and shade.
– Start gluing from the center or from the edge and work inward.
– Fill the whole heart with pieces. Let any edges overlap slightly for texture.
– Allow glue to dry, then add a light seal if you want extra hold and a smooth finish.
Tips and ideas
– Try a monochrome palette for a calm look or bright colors for a bold display.
– Create a border by outlining the heart with a row of small, uniform pieces.
– Frame the finished art or mount it on a pretty card for gifting.
Next steps: hang it where family can see the love you poured into every tiny piece.
@media(max-width:480px){
5. Heart Bookmark Craft
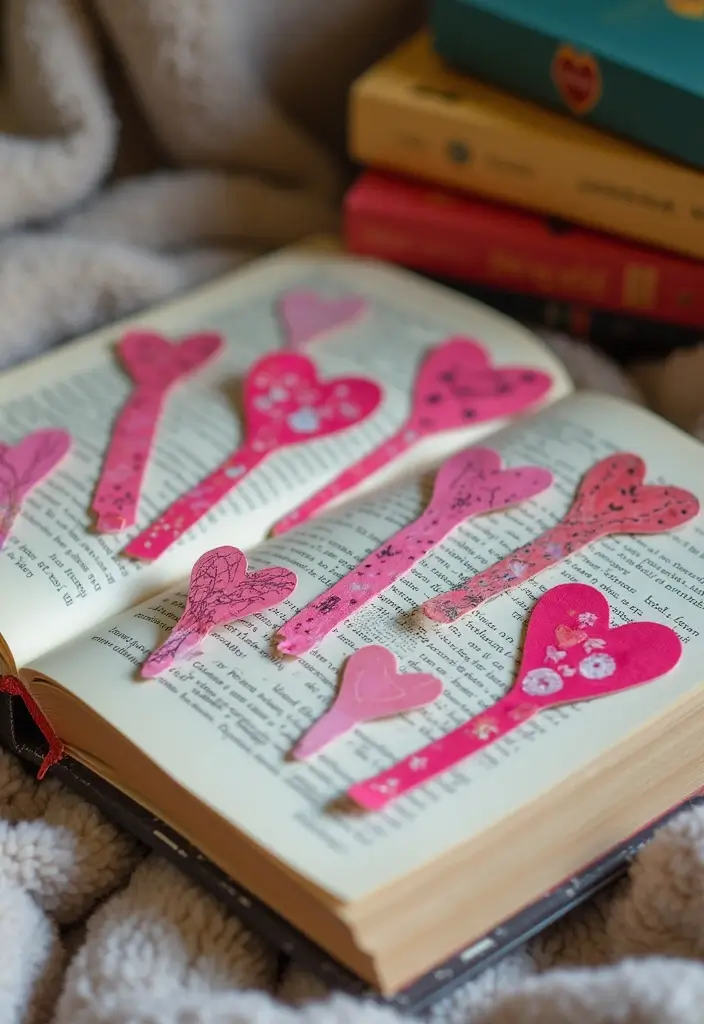
Heart Bookmark Craft
Looking to spark a love of reading without a big mess or high cost? Try this heart bookmark. It’s a simple, satisfying paper craft you can customize for any kid. These little bookmarks add color to a page and make reading feel special. Here is why it helps kids love books. It’s also easy to do in a classroom or at a party. You’ll finish with a nice keepsake and a new book buddy.
– Materials: sturdy cardstock, scissors, glue, markers, stickers. Optional: a ribbon.
– Step 1: cut a strip. Aim for 1 inch by 6 or 7 inches.
– Step 2: add the hearts. Cut one or two small hearts from colored paper. Glue them to one end and press flat to dry.
– Step 3: decorate. Color inside the hearts, add stickers, or doodle a simple border. Have kids sign the back.
– Step 4: finish. Punch a small hole and thread a ribbon or tassel.
– Step 5: use and share. Slip the bookmark into a favorite book or wrap it as a thoughtful gift for a friend who loves to read.
Bonus idea: add a short love or friendship quote on the back to spark a moment of reflection.
Tips: supervise younger kids with scissors. Let them choose two colors and a simple theme to keep it easy.
Next steps: grab supplies, pick a theme, and start crafting.
6. Heart Wreath Decoration

Want a quick, kid-friendly heart wreath that spreads love at home? This paper heart wreath is a simple, cheerful DIY project you can finish in one sitting.
– What you need
– sturdy cardboard for the base
– colored paper in different shades
– glue or a glue stick
– scissors
– foam shapes or pom-poms for 3D spots
– a string or ribbon to hang it
– Step-by-step guide
– Cut a large heart from the cardboard base. This is your frame.
– Cut many small hearts from the colored paper.
– Glue the small hearts all over the big heart, filling in every edge.
– Add foam shapes or pom-poms in a few places to create a raised look.
– Tie a ribbon to the top and hang the wreath on a door or wall.
– Tips for style and texture
– Vary the colors to suit the room you decorate.
– Layer two small hearts on top of a bigger one for depth.
– Try paper from old magazines or scrapbooks to recycle and save.
– Use a hint of glitter glue on a few hearts for a subtle shine.
– Why this works
– It’s fast, fun, and perfect for Valentine’s or any time you want to show love.
– It turns scraps into cute decor you’ll be proud to display.
– It’s easy for kids to help, building confidence with a simple craft that looks great.
@media(max-width:480px){
7. Heart-Shaped Photo Frame
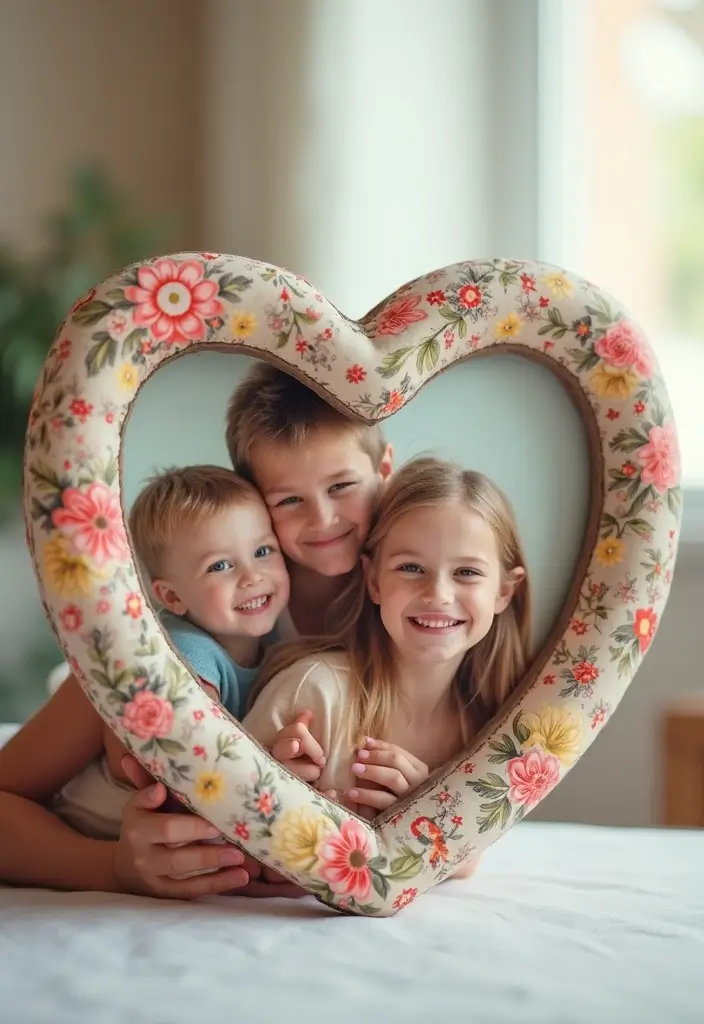
Here is a fun project you can do with kids that yields a keepsake. A heart-shaped photo frame made from cardboard puts a memory front and center. It is simple, bright, and ready to gift. Here is why this frame shines.
Materials
– Thick cardboard or poster board
– Colorful craft paper and stickers
– Clear plastic sheet to protect the photo
– Glue, tape, and scissors
– Markers, paint, or glitter for a splash of color
– Optional: a small stand or a ribbon for hanging
How to make it
1) Draw a large heart on the cardboard and cut it out.
2) Cut a smaller heart in the middle to form the window.
3) Decorate the outer edge with color and shapes.
4) Cut plastic to fit and glue it behind the frame to shield the photo.
5) Attach a stand on the back or a hanging string.
Personalize and decorate
Add a name, date, or short message. Try different paper patterns or a photo mat. A tiny note on the back adds meaning.
Safety and tips
Use kid-safe scissors. Let the glue dry fully before handling. If a photo is small, mount it on colored paper first.
Gift ideas and twists
Give this frame on Valentine’s Day or a birthday. Use a pet photo or a family moment to spread love through the year.
@media(max-width:480px){
8. DIY Love Coupons

You want a small gift that speaks from the heart. DIY love coupons fit that need. They are easy to make and travel well as a kind surprise.
Here is why they work. They are personal, simple, and fun for kids to create.
Materials
– Colorful paper or card stock
– Scissors and a pencil
– Markers or colored pencils
– Stickers or simple decorations
– A ribbon or string for binding (optional)
Make the coupons
– Cut thin rectangles. They look like tiny cards.
– Add hearts or simple doodles on each one.
– Leave a space for a promise on every coupon.
– If you have a printer, you can print ready coupons instead of drawing them.
Fill with thoughtful offers
– Let kids write easy acts such as “one homemade dinner,” “a day of no chores,” or “movie night pick.”
– Keep every promise doable. Short favors beat big tasks.
– Use kind words when writing. This grows care and generosity.
Put them together
– Decorate the back with a border. A string of tiny hearts works well.
– Punch a small hole in one end and tie them with thread or a small ribbon. If you don’t have a hole punch, a paperclip or staple works too.
Presentation and tips
– Bundle the coupons in a cute envelope or jar.
– Show the giver how to use them. This makes the gift feel alive.
– For younger kids, help write the offers. For older kids, let them sign each coupon.
Next steps: share the bundle on a special day like Valentine’s or family game night.
@media(max-width:480px){
9. Heart-Shaped Stencils
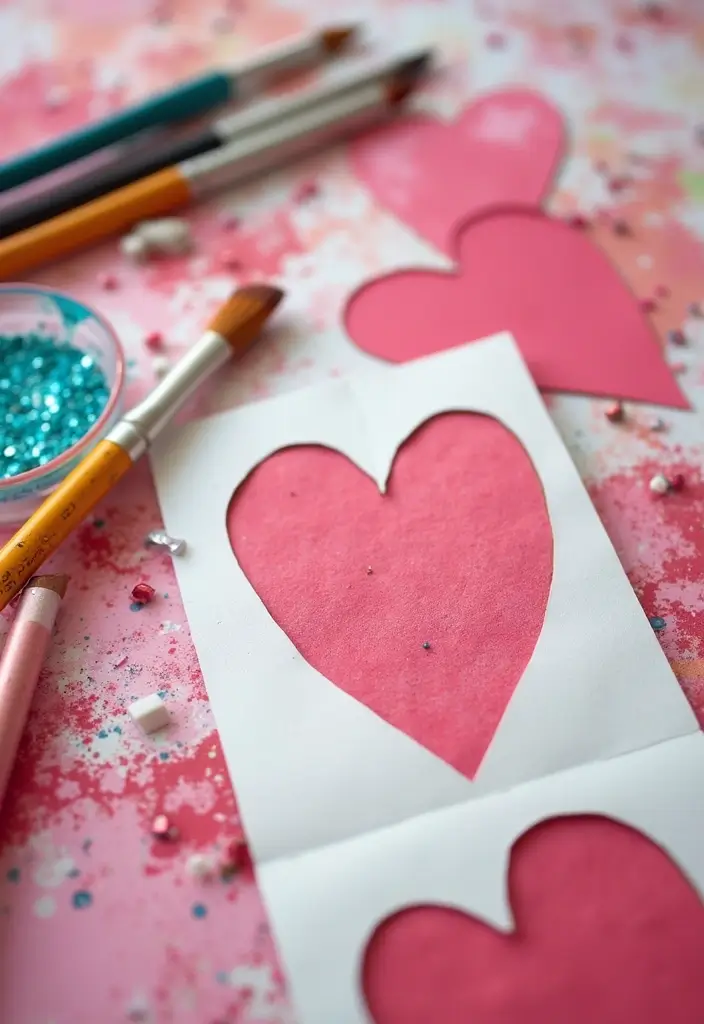
Want a simple craft that kids can do with little help? Heart-shaped stencils fit the bill. They save time and keep paint from smudging. They also give you clean, repeatable shapes for many projects.
What you need
– Thick cardboard works best.
– A pencil to draw.
– Safety scissors to cut.
– Tape holds layers together (optional).
How to make them
1) Draw a plain heart on the cardboard.
2) Cut it out carefully.
3) For a sturdier stencil, glue two hearts together or tape the edges.
4) Trim edges to keep the shape clean.
Ways to use
– Place the stencil on paper, then dab on paint, a stamp pad, or chalk.
– Lift straight up to reveal a crisp heart.
– Reuse the stencil for cards, posters, or wall art.
– Layer with other sizes for a layered look.
Tips and ideas
– Use different sizes to make tiny hearts or a big focal heart.
– Tape the stencil to the surface so it stays still.
– Clean the stencil with a damp cloth between colors.
– Store it flat in a folder or under a book.
Next steps: Invite a friend over and have a stencil swap. You both get new shapes to try.
@media(max-width:480px){
10. Heart Window Clings

You want a cheerful window decoration kids can handle. Heart window clings fit that need. They brighten rooms and let light pass through.
Here is why they work: simple materials, quick steps, and a glow you can feel.
What you need
– Wax paper
– Colored tissue paper
– Clear glue or glue stick
– Scissors
– A flat workspace
– A clean window for testing
How to make
1) Cut heart shapes from the wax paper. Keep edges tidy.
2) Tear or cut tissue into small pieces in bold colors.
3) Glue tissue to one side of each heart. Cover the shape, but don’t press so hard you flatten the piece.
4) Let the glue dry completely.
5) Peel the wax paper away from the tissue.
6) Place the wax heart on a window. Press gently to smooth out air bubbles.
Tips for best results
– Pick bright colors to make the glow pop.
– Use a mix of sizes to form a pretty collage.
– Create seasonal looks with reds and pinks for Valentine or pastel hues for spring.
Care and reuse
– Handle with care. Store flat if you want to reuse parts later.
@media(max-width:480px){
11. Heart Keychains
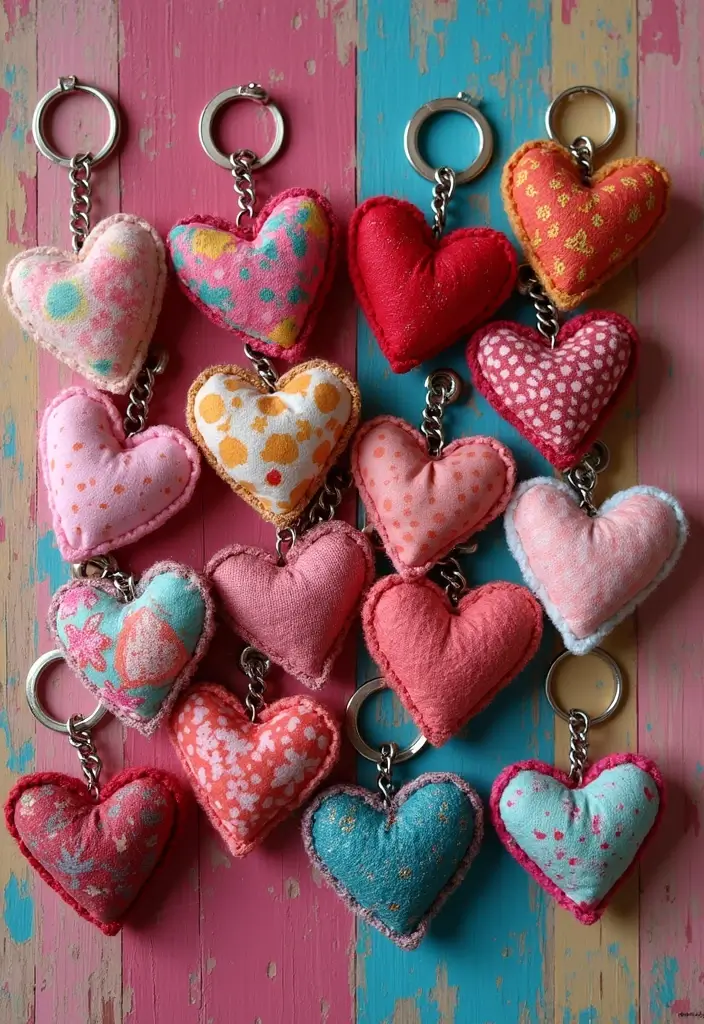
Heart Keychains
Looking for a tiny DIY gift that spreads love? Heart keychains fit the bill. They’re simple to make and bright to carry. It works for kids, teens, and adults who want a quick, cheerful craft.
What you need
– Felt or thick paper
– Scissors
– Markers, sequins, beads
– Small key rings and a jump ring
– Hole punch or a needle
– Glue or double-sided tape
How to make it
1) Cut two equal heart shapes.
2) Decorate the front heart with color and sparkles.
3) Punch a small hole near the top.
4) Thread the ring through the hole and add the back heart.
5) Glue the edges if you want a sturdy hold.
6) Tie a short ribbon or add a bead for flair.
Why you’ll love this project
– Quick to finish and great for beginners.
– Builds fine motor skills with cutting, poking, and gluing.
– Ends as a cute gift or personal key tag.
Tips and variations
– Try felt for durability or thick paper for lightness.
– Add a simple stitch around the edge for texture.
– Create a mini set or a small heart garland.
– Use decorative tape to add stripes.
Safety and care
– Watch for small parts. Keep away from little kids who mouth objects.
– Store in a dry place to keep colors bright.
12. Heart-Shaped Pinata
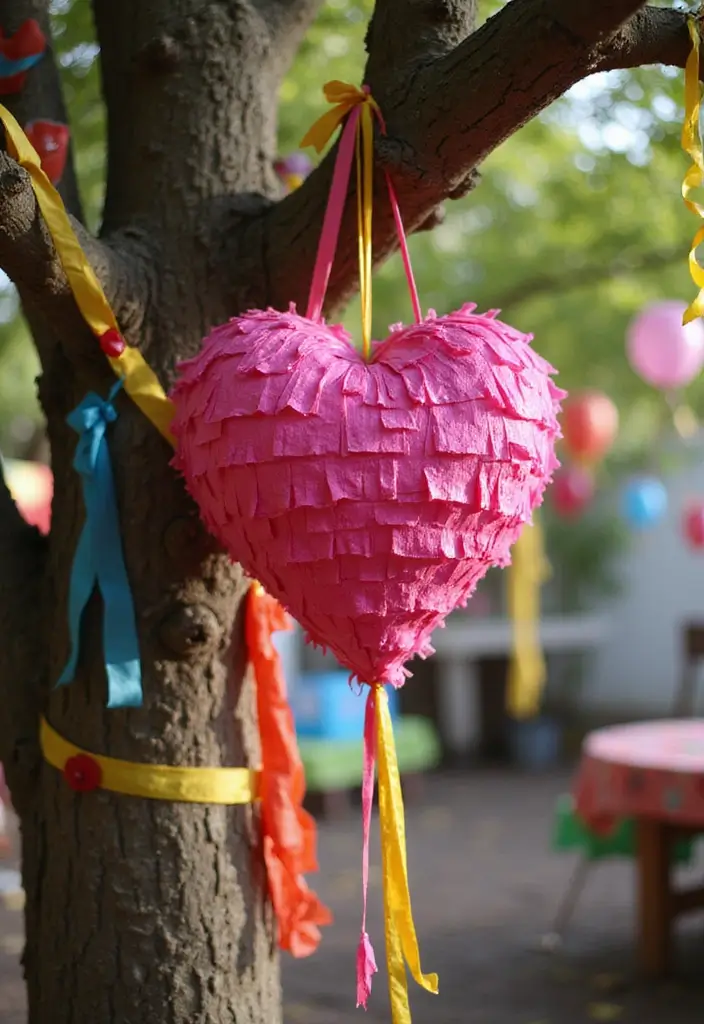
You want a heart pinata for your Valentine party. It gives kids a fun project and a sweet payoff. Build a sturdy 3D heart from cardboard, then dress it in bright tissue paper. When you pop it open, you’ll hear cheers and see bags of treats spill out.
What you need
– Cardboard sheets
– Scissors and glue
– Colored tissue paper
– String or ribbon
– Candy or small toys
– Tape for seams
How to make it
1) Cut two equal heart shapes from cardboard. Glue them back to back to form a thick, hollow heart.
2) Cover the outside with tissue paper strips. Glue each strip to stick on cleanly.
3) Punch a small hole at the top and thread a loop of string. This is how you hang it.
4) Leave a small opening to add treats, then seal it with more tissue paper.
Fill and play
Fill the pinata with candy and tiny toys. Hang it at kid height and have players take turns with a soft bat or stick.
Tips
Use extra glue for durability. Mix light candies to avoid mess. Enlist a helper to guide turns and keep the room safe. Try a pink or red palette to match your party decor. If you have space, hang it where the kids can take turns safely indoors.
13. Heart Stick Puppets
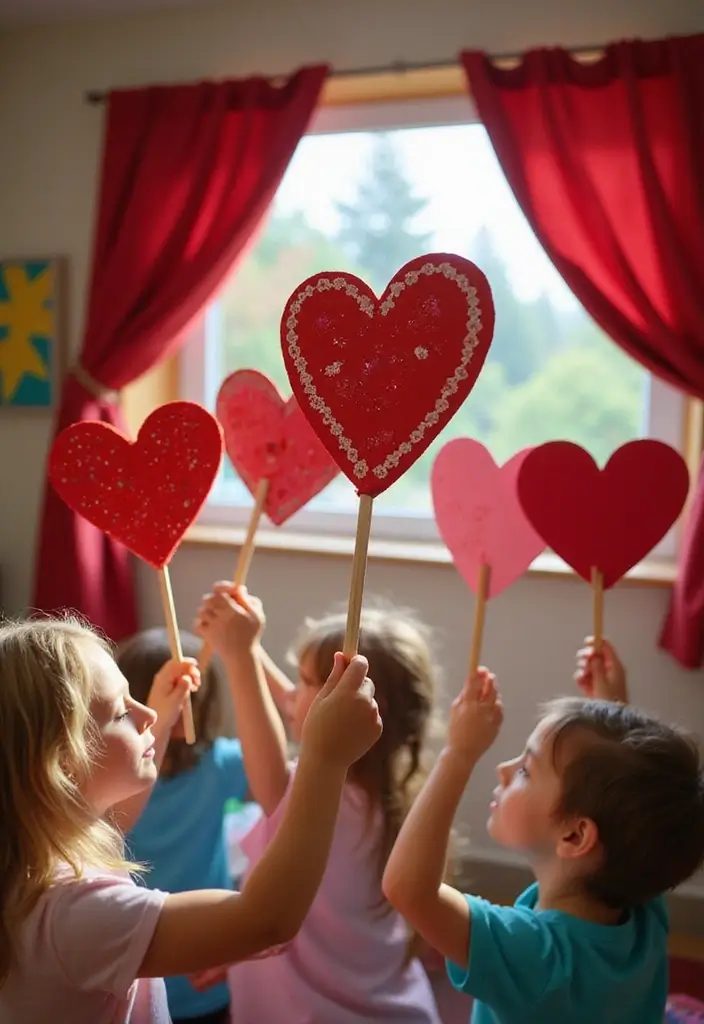
Here is why heart stick puppets work for kids and families. They are quick to make and fun to use. You see results fast, so no long prep.
Materials you need
– craft sticks
– paper in red, pink, or any bright color
– scissors (kid-safe) or a grown-up pair
– glue or tape
– markers or crayons
– optional: googly eyes, yarn, fabric scraps, stickers
What to do
– Draw or cut a heart from paper.
– Glue or tape the heart to the end of a craft stick.
– Add a face with markers and then draw hair or tiny accessories.
– Create clothes with paper or fabric scraps.
– Let the glue dry before playing.
– Add a small cape or bow.
– Then you can start your first show.
– Invite a friend to join.
Ways to play
– Act out a story with your new cast.
– Put on a show for your family.
– Use puppets to tell a bedtime tale or to retell a favorite scene.
– Swap characters and improvise.
Tips and tricks
– Use two-sided paper so both sides look good.
– A glue stick keeps hands clean.
– Store puppets in a small box or bag.
Safety
– Supervise scissors and glue.
– Clean up after play.
Next steps are simple: gather more hearts and start your own show.
Customization ideas
– Try different shapes on the heart end, like stars or circles.
– Mix colors to show a mood, such as red for brave or pink for kind.
These little puppets travel well for car trips and sleep time stories.
@media(max-width:480px){
14. Heart Collage
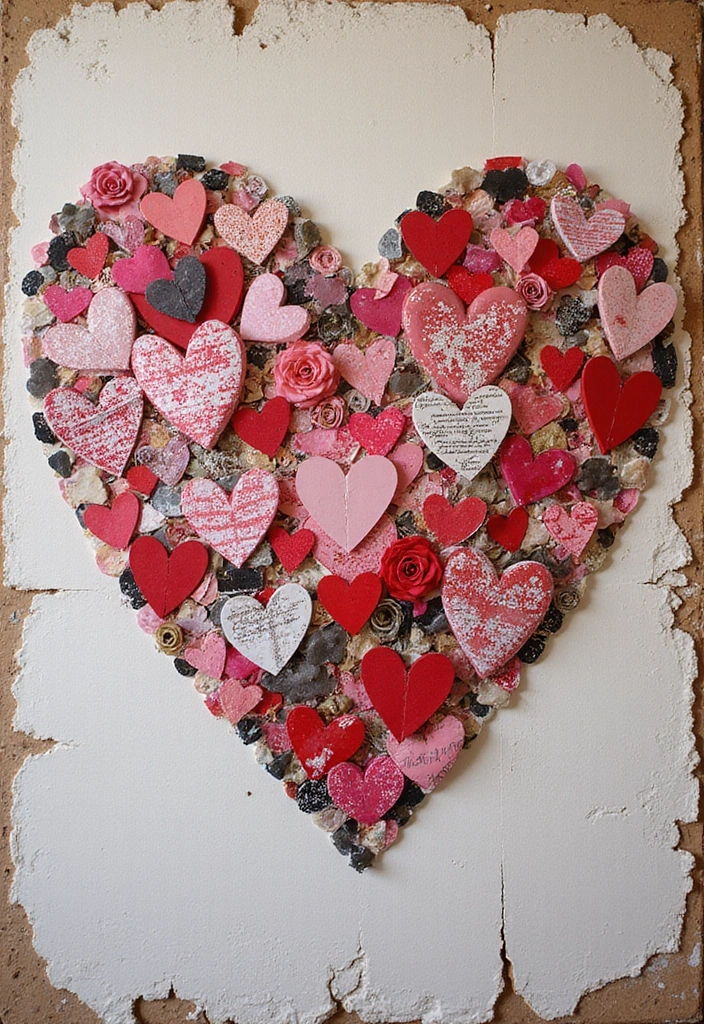
Heart Collage
You want a warm craft that shows your family love. This project helps you create a bright mosaic that tells your story.
– Materials: magazines, colored paper, fabric scraps, glue, scissors, a big poster board or sturdy cardboard, and a pencil.
– Prepare: draw a large heart on the board. Cut out many small hearts from the paper. You can also tear fabric bits for texture.
– Build: place the big heart as your base. Arrange the small hearts around it. Try a soft gradient or a bold mix of colors.
– Glue: glue each piece in place. Press gently so the edges stay flat. Let it dry.
Here is why this works: it invites every family member to pick pieces and share ideas. You get a single piece that shows love from all corners of your home.
Eco tip: use scraps and old magazines. It teaches kids to recycle while they have fun.
Ways to mix it up: add photos, buttons, or fabric patches. Create seasonal looks like red hearts for Valentine or pastel hearts for spring. Hang it on a wall or frame it to keep as a memory.
Next steps: set a small craft time, gather materials, and start placing hearts. Keep the vibe calm and joyful.
15. Paper Heart Jewelry
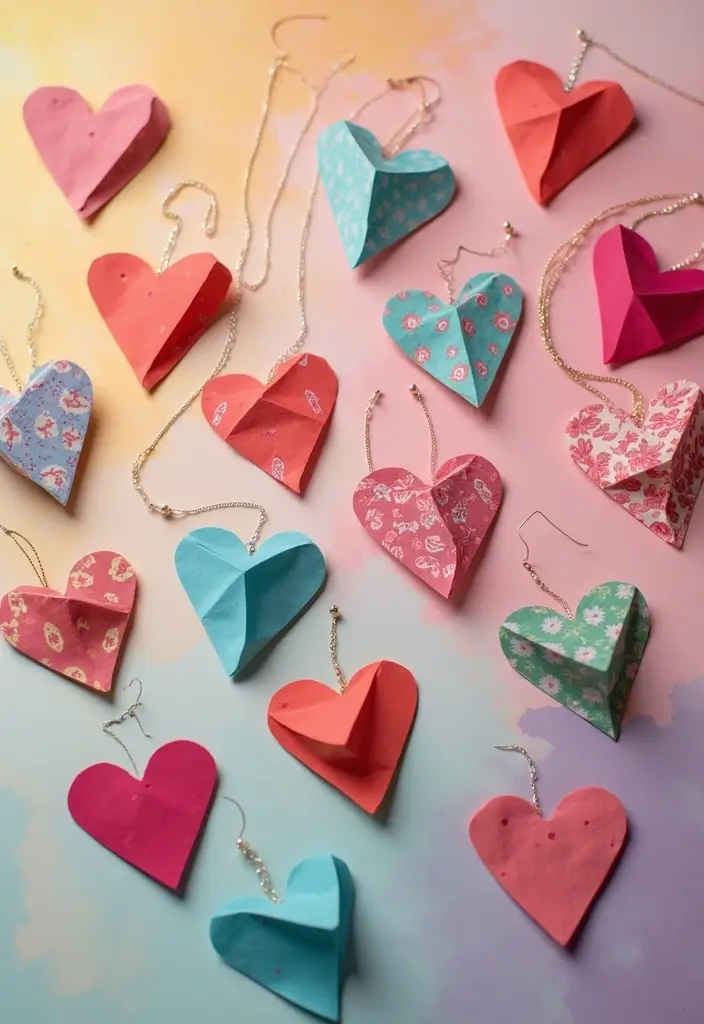
Looking for an easy, sweet gift idea? Paper heart jewelry fits. You can turn simple hearts into necklaces, bracelets, or earrings. Decorate them with color, stickers, or glitter to show your style. Then attach each heart to string or earring hooks and wear or share.
What you need
– Cardstock or thin paper
– Scissors
– Hole punch or needle
– String, cord, or thin chain
– Earring hooks (for a pair)
– Glue or tape
– Markers, paints, or glitter
– Clear sealant or nail polish (optional)
How to make
1) Draw small hearts and cut them out neatly. Two or three shapes work well.
2) Decorate with markers, paint, or glitter. Let colors dry.
3) Seal lightly to help color stay, then punch a hole at the top of each heart.
4) Attach. Thread string for a necklace or bracelet. Add hooks for earrings and finish with a tiny bead.
Tips for stronger jewelry
– Glue two paper layers back to back or seal with a clear coating.
– Use sturdy string and strong knots.
– Hide the knot behind the heart so it looks neat.
Fun ideas and uses
– Make a set of three hearts that tells a small message.
– Give a matching set to a friend on Valentine’s Day.
Care
– Store flat, away from water. Wipe gently if needed.
Next steps: grab supplies and start crafting with your favorite colors.
@media(max-width:480px){
16. Paper Heart Banners
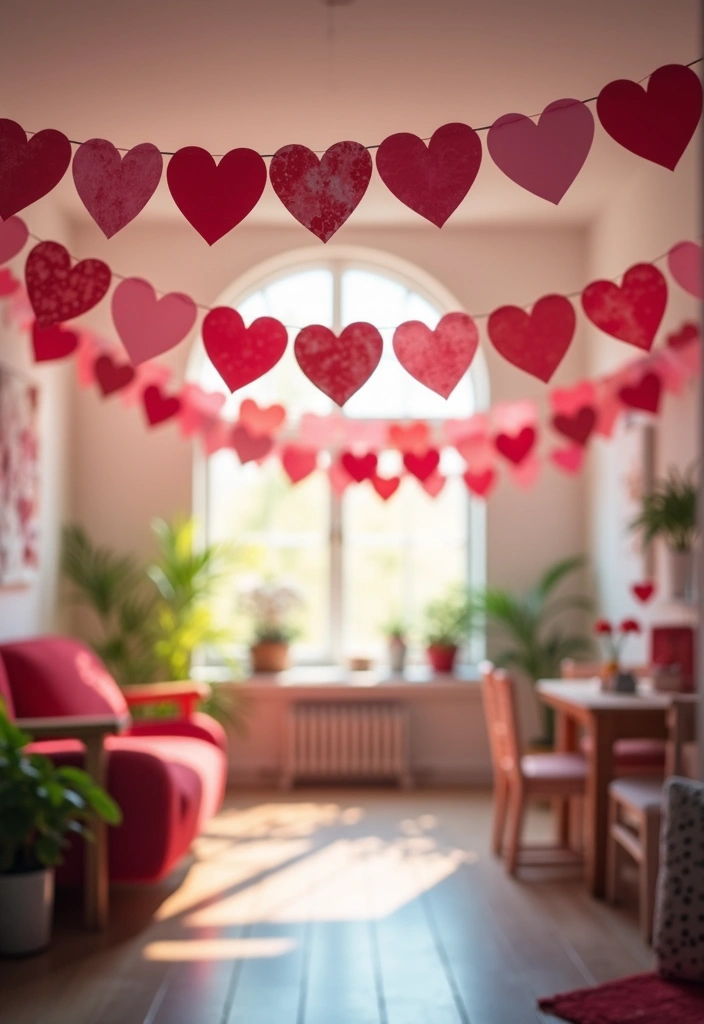
You want a quick, warm way to decorate. A paper heart banner does that with little work. It looks cheerful and is easy to store for next time.
– Materials: colored or patterned paper, scissors, string, tape or glue, a hole punch (optional), markers or stickers. Reuse scrap paper when you can.
– How to make it:
1) Cut hearts in different sizes.
2) Decorate each one with simple designs.
3) Punch a hole at the top or just tie the string through.
4) Thread the hearts on the string and space them out.
5) Hang across a wall, over a door, or in a sunny window.
– Design ideas: pastel colors give a soft look; bright colors make it party ready. Mix striped or polka dot papers. Use two-sided paper so both sides look nice.
– Practical tips: vary sizes for rhythm. For a longer banner, cut more hearts. Store flat or roll the string to keep it tidy.
– Great for any day: hang it for a birthday, a holiday, or just to add love to a room.
– Storage tips: store hearts flat in a folder or roll the banner to keep its shape.
Share a photo of your banner with friends today.
17. Heart-Shaped Plant Holders

Heart-Shaped Plant Holders You Can Make at Home
You want a simple way to add plants and let kids lend a hand. Heart-shaped plant holders fit perfectly. They’re cheap and easy. Here is a practical guide you can use today.
What you need
– Use thick cardboard or poster board.
– Have scissors and glue or tape.
– Keep a pencil for tracing.
– Gather acrylic paint or markers.
– Get soil and a small plant or seeds.
– Optional: a clear sealant to protect the surface.
How to make them
– Trace two matching hearts on the board.
– Cut them out and trim the edges.
– Glue the hearts together with a small open top.
– Fold the sides to shape a tiny planter.
– Let it dry completely before decorating.
– Paint or decorate the outside as you like.
– Fill with soil and plant or sow seeds.
– Water gently and place in bright light.
Decoration ideas
– Paint a solid color and add tiny dots.
– Wrap the outside with decorative paper and seal it.
– Tie a string hanger or add tiny stickers for charm.
Care and placement
– Water when the soil feels dry.
– Keep indoors and away from heavy rain.
– Set on a shelf, desk, or sunny windowsill.
Next steps
– Try different sizes for many plants.
– Use recycled scraps to save on materials.
– Let kids choose colors and plants.
18. Heart-Printed T-Shirts

Heart-Printed T-Shirts: DIY Wearable Love
You want a craft that kids can wear and show off. Heart-printed T-shirts fit the bill. They’re simple, colorful, and perfect for a weekend project or a party.
Here is why this works:
– Gather supplies: a plain cotton T-shirt, fabric paint or markers, a heart sponge or cut-out, a shallow plate, newspaper, and a damp cloth.
– Prep the shirt. Lay it on a protected surface. Smooth wrinkles. Iron if needed.
– Make the hearts. Dip the sponge in paint and stamp onto fabric. Press gently, lift straight up. Use different heart sizes for variety. Mix colors for a bright look.
– Dry and set. Let it dry completely. If heat setting is required, iron on the back per the paint label.
– Try variations. Outline hearts with a thin brush or marker. Add initials or a short word. Make a row of matching shirts for family or friends.
– For bigger art, stamp hearts from seam to seam to cover more area across the chest.
Next steps:
– Let kids pick a theme. Set one rule: no paint on skin.
– Wash inside out and air dry until color stops transferring.
This is a fun, low-stress way to make keepsakes.
Share photos when you finish.
@media(max-width:480px){
19. Paper Heart Magnets
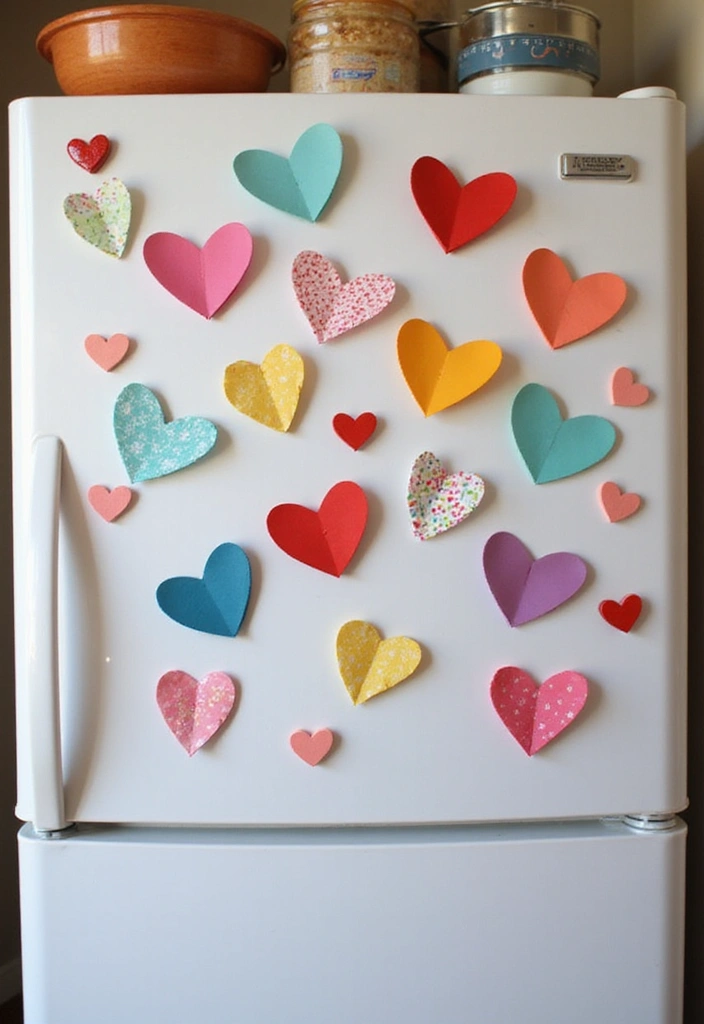
Want a cute fridge upgrade that kids can make? Paper heart magnets are a fast, satisfying craft. They turn simple supplies into tiny keepsakes you can use every day. Here is why this project helps you and your kids. It makes art feel special in your home. It also teaches patience as glue dries and ideas come to life. Next steps are simple, so you can start right away.
What you need
– Craft magnets.
– Colored or patterned paper.
– Scissors.
– White craft glue.
– Pencils or markers.
– Optional glitter, stickers, or fine-tip pens.
How to make them
1. Cut small heart shapes from the paper.
2. Glue a heart to the back of a magnet.
3. Let the glue dry a bit.
4. Decorate the heart with glitter, stickers, or markers.
5. Place the magnets on the fridge and press to hold notes or art.
Decoration ideas
– Use different sizes for a playful display.
– Pick colors to match a kitchen theme.
– Add a tiny smile with a marker for personality.
– Try a lightweight seal with clear tape for a glossy finish.
Ways to use
– They hold kids’ artwork, reminders, or grocery lists.
– Give a set as a simple gift for family.
– Create a rotating display by swapping pieces every week.
These magnets spread charm without much effort and make everyday tasks a bit sweeter.
@media(max-width:480px){
@media (max-width: 600px) {
.visual-quiz-iframe { min-height: 995px !important; height: 1100px !important; }
}
20. Heart Paper Chains
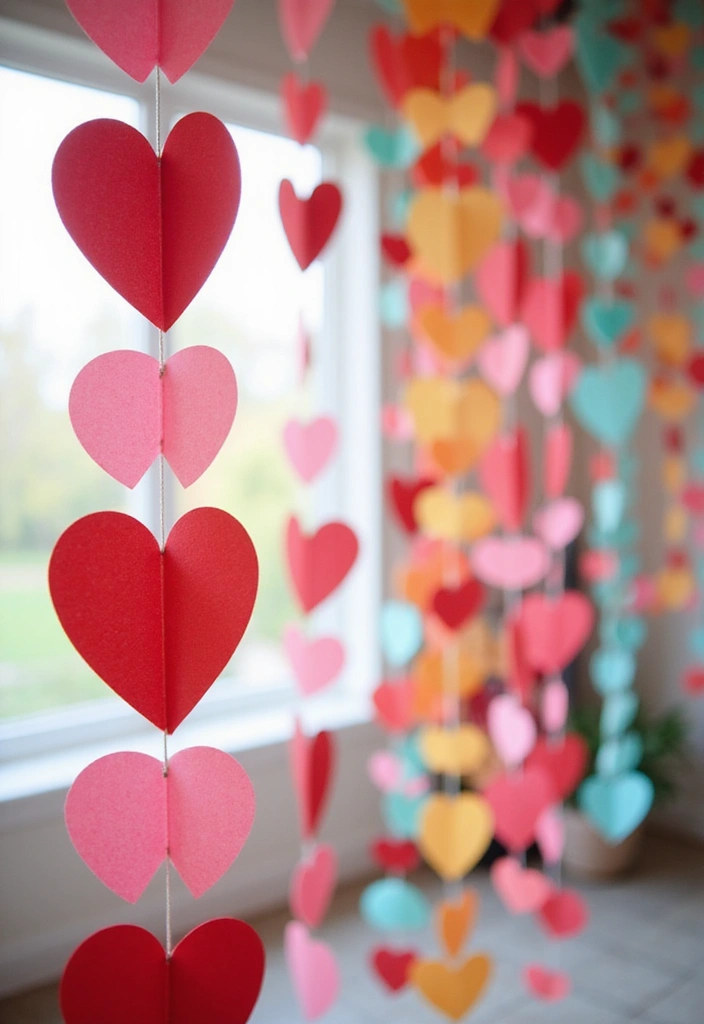
You want a warm look without breaking the budget. DIY heart paper chains are easy and fast. They fit home, class, or a party.
– Materials: colored paper, scissors, tape or glue, a hole punch or a stapler, and string or ribbon.
– Make a heart from each strip: cut strips about 1 inch wide and 6 inches long. Fold the strip in half, then pinch the bottom to form a heart shape. Tape the edges for a neat finish.
– Link the hearts: punch a small hole at the top of each heart. Thread a thin string through the holes, or slide one heart through the loop of the next. Keep going to make a long chain.
– Decorate: let kids add markers, stickers, or glitter before you link them. You can also color hearts with rainbow patterns or swap in metallic paper for shine.
– Display ideas: hang the chain across a doorway, wrap it around a mirror, or drape it along a wall shelf. Use several chains in different colors for a bold effect.
– Tips: set a timer to pace the project. Work in small groups to build teamwork. Store flat when you’re done to keep the hearts from bending.
Try different sizes, or add tiny hearts inside bigger ones for depth.
@media(max-width:480px){
21. Heart Shaped Coasters

You want coasters that protect your tables and look warm on every table setting. Heart shapes do both. You can make them from cork or thick cardstock and turn them into a family project.
What you’ll need
– cork sheets or thick cardboard
– sharp scissors
– pencils and a heart template (or freehand)
– paint, markers, or washi tape
– fabric scraps or napkins for texture
– glue or decoupage medium
– a clear sealant to guard against moisture
– small felt pads for the bottom
How to make them
1. Pick your base: cork stays soft under hot cups, card stock feels light and clean.
2. Trace two hearts the same size on your material.
3. Cut out the shapes.
4. Smooth any rough edges with a quick trim.
5. Decorate with color, tape, or tiny fabric patches.
6. Glue on felt pads to keep surfaces safe.
7. Seal the surface with a clear coat and let it dry fully.
Tips for variety
– Personalize each coaster with initials or a special date.
– Make a set of four in one color family for a coordinated look.
– Try decoupage with tissue paper for a soft, layered feel.
Care and usage
– Wipe gently after use.
– Do not soak; air dry.
– Store in a small tray or box when not in use.
Next steps: gather a few simple supplies and invite a little creativity to the table. These coasters blend style with a useful touch that families will love.
@media(max-width:480px){
22. Heart-Shaped Pom Poms
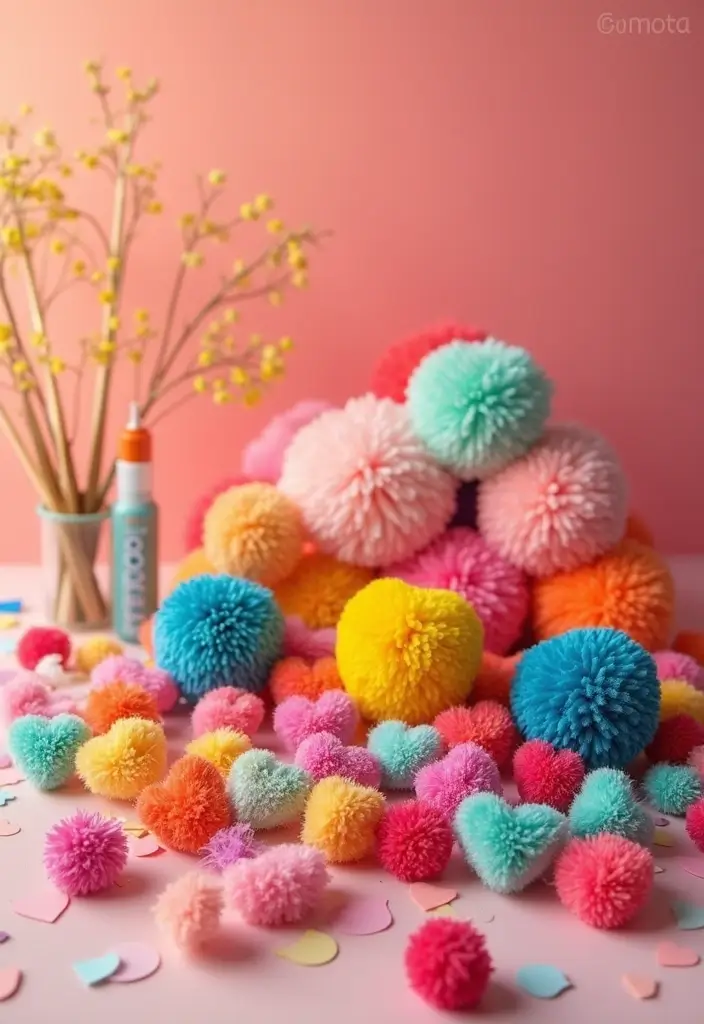
Want a soft, kid-friendly craft that adds a cute touch to gifts or outfits? Heart-shaped pom poms are the perfect fit. They’re simple, colorful, and a lot of fun to make with yarn.
What you’ll need
– Yarn in two or more colors
– Scissors
– A small piece of yarn to tie the center
– A flat surface to work on
How to make heart-shaped pom poms
1) Wrap the yarn around your fingers many times. The more wraps you use, the fluffier the pom pom will be.
2) Slide the yarn off your fingers gently. Tie a tight knot around the center with the small piece of yarn.
3) Slide the tied yarn onto your work surface and trim the ends so the top and sides form a heart shape.
4) Fluff and shape the pom pom with your fingers. A quick snip here and there helps it keep a neat heart silhouette.
Heart-shaped pom poms are great for many projects. Use them to decorate gifts, clip them into hair accessories, or hang them as playful home decor. They make any bag or bulletin board feel warm and cheerful.
Tips for best results
– Use two colors for a playful look, or stick to one color for a cute, monochrome heart.
– Trim even amounts on both sides so the heart stays balanced.
– Make a few at once and string them into a garland for a little party vibe.
Next steps: try different yarn textures, like soft acrylic or fuzzy blends, and experiment with sizes. You’ll have fresh, sweet decorations in no time.
@media(max-width:480px){
23. Heart-Shaped Seed Bombs
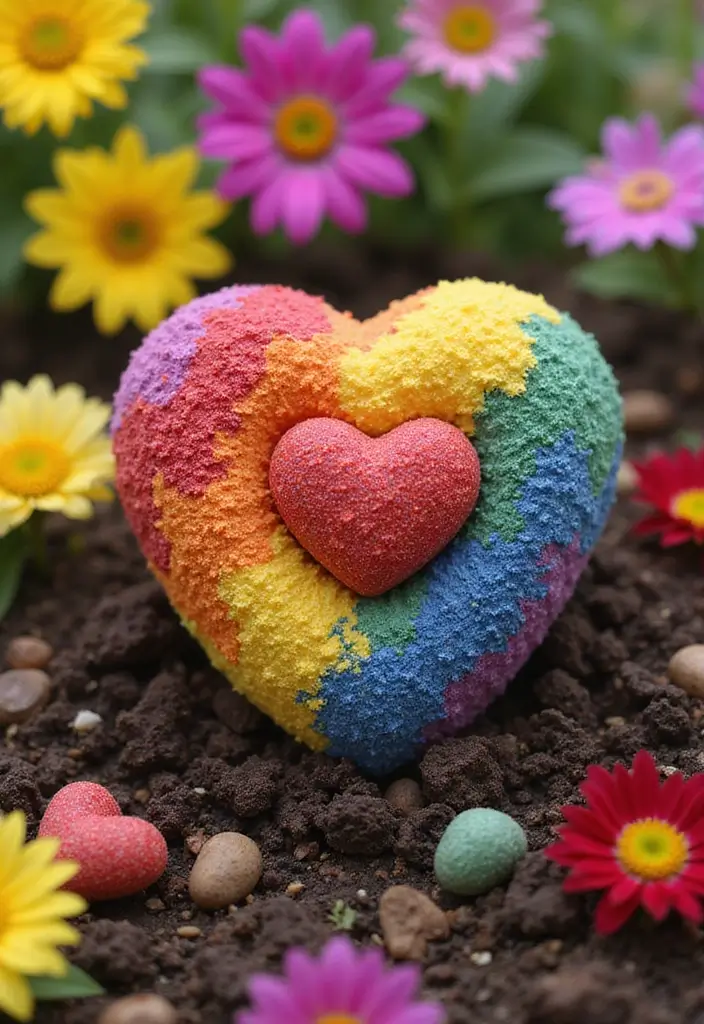
Want a simple craft that helps gardens and spreads love? Heart-shaped seed bombs are perfect. You mix clay, compost, and seeds, then mold the mix into little hearts. When they dry, plant them in pots or the garden.
– What you’ll need
Air-dry clay or a clay mix, compost or potting soil, seeds that grow in your area (wildflowers work well), a heart-shaped mold or a small cookie cutter, a splash of water, a flat tray.
– How to make
1) Mix clay, compost, and seeds with just enough water to hold together.
2) Press the mix into heart shapes using the mold or by hand.
3) Smooth the edges and set the shapes on the tray.
4) Let them dry completely, about 24 to 48 hours.
– Planting and care
Place each seed bomb about an inch deep in loose soil in a sunny spot. Water gently after planting. In a few weeks you will see sprouts. Teach kids to check moisture and help the plants grow.
– Why it helps
It shows love for nature and supports pollinators. Kids learn patience, responsibility, and the joy of giving.
– Tips and variations
Use seeds that fit your climate. Add a pinch of natural pigment for color. If you don’t have a mold, shape by hand into hearts. Make several at once for a small gift set.
24. DIY Heart Puzzle
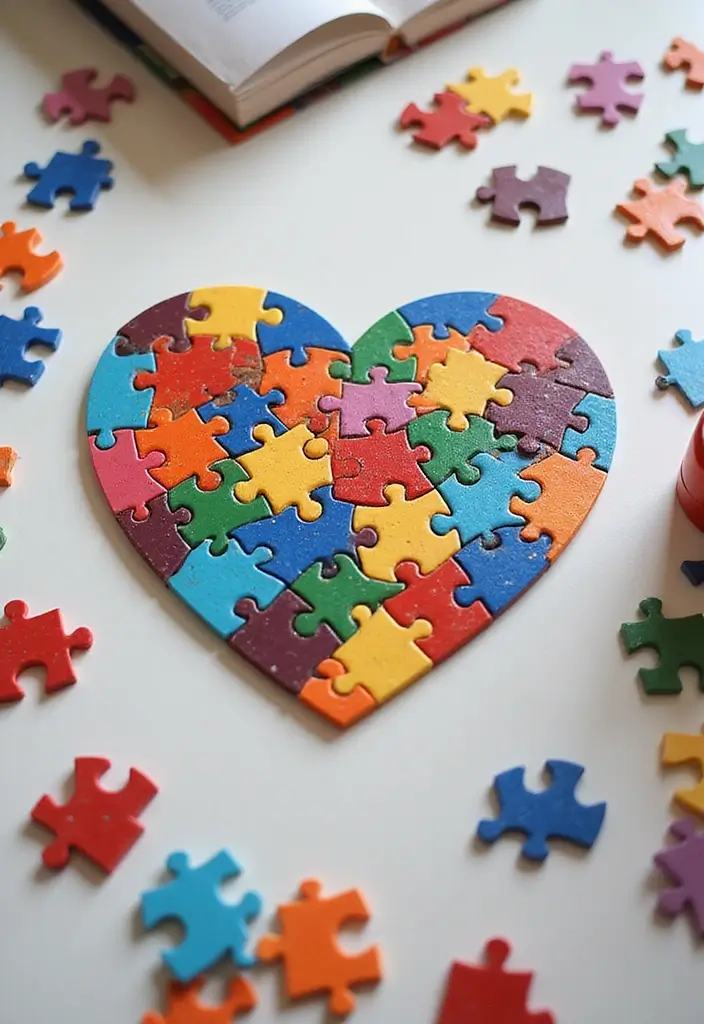
Need a kid friendly craft that feels personal and gives a little brain workout? A DIY heart puzzle fits. You cut a big heart on sturdy cardboard, then split it into puzzle pieces. It becomes a tiny treasure when a kid fits the pieces back together.
What you need
– Thick cardboard
– Scissors and a pencil
– Paper paints or markers
– Glue, stickers, or tape
– Optional string or a small frame
How to make it
1) Draw a large heart on the cardboard.
2) Lightly split the heart into 6 to 12 puzzle shapes.
3) Cut out each piece. If a piece is tricky, ask an adult to help with a craft knife.
4) Let kids decorate every piece. They can draw, color, or write a short message for someone they love.
5) Mix pieces up and challenge them to rebuild the heart. Talk about how each piece fits with its neighbors.
6) For a keepsake, slide the pieces into a decorated envelope or mount them in a simple frame.
Why this helps
It builds fine motor skill, planning, and focus. It gives a fun goal and a real prize when the heart is whole. So, a homemade heart puzzle is a sweet gift that lasts for years.
25. Heart Felt Board
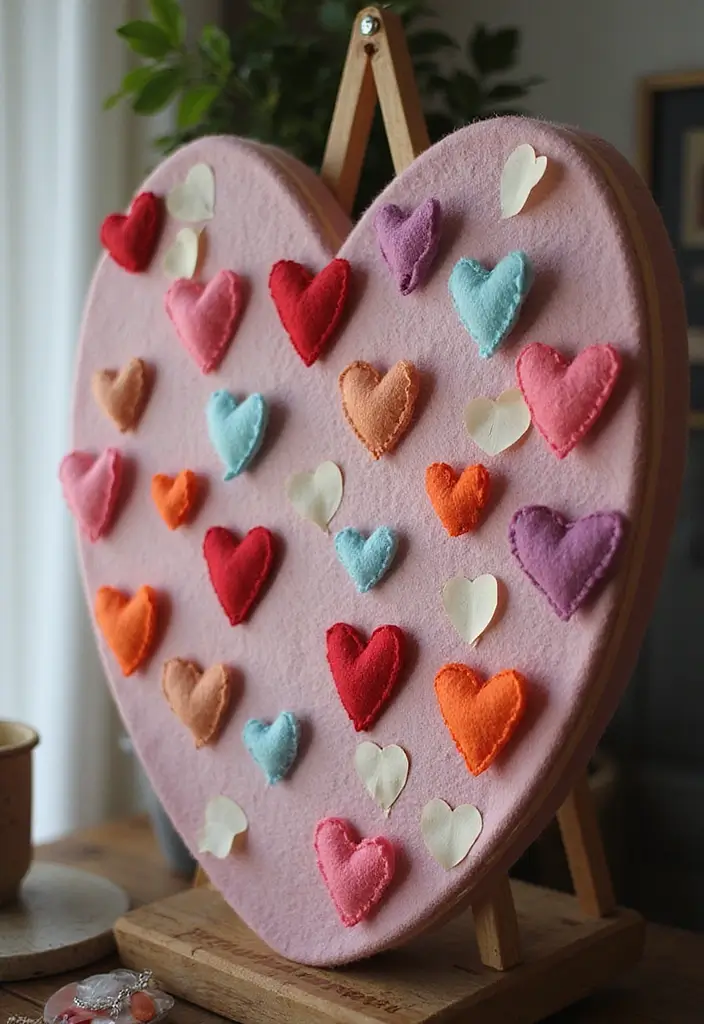
You want a simple way to give kids a place to share thoughts and art every day? A heart felt board does that. It turns a plain corkboard or sturdy cardboard into a cozy wall companion. Pick a base that fits your space. Then cover the front with felt in colors your child loves.
Here’s how to build it:
– You’ll need a corkboard or sturdy cardboard, felt in several colors, scissors, glue or tape, and pins or small safe magnets.
– Prep the base: lay it flat, trim the felt to cover the front, and press smooth so there are no wrinkles.
– Cut the hearts: make eight to twelve hearts in different sizes and colors. Keep the edges rounded for a friendly look.
– Arrange and attach: place the hearts to form a big heart or a playful splash. Glue them for a fixed board or pin them for swaps.
– Add flair: sew a small felt pocket for notes or clip a border with tape.
Ways to use the board:
Your kids can pin what they love, draw and leave reminders. Ask them to write one kind note for a family member each day.
– Safety and care: pick rounded pins. Keep the board away from hands.
This simple heart felt board invites daily sharing and brightens any wall.
@media(max-width:480px){
Conclusion
Crafting paper hearts is a wonderful way to spread love and creativity this Valentine’s Day!
Each project offers a chance for kids to express themselves while having fun.
As you dive into these crafts, remember the joy they bring to those who receive them. Get crafting, and let love flow!
Note: We aim to provide accurate product links, but some may occasionally expire or become unavailable. If this happens, please search directly on Amazon for the product or a suitable alternative.
This post contains Amazon affiliate links, meaning I may earn a small commission if you purchase through my links, at no extra cost to you.
Related Topics
paper heart crafts
Valentine's Day crafts
DIY projects for kids
easy decorations
creative paper projects
romantic DIY
family-friendly crafts
quick crafts
kid-friendly activities
seasonal crafts
heart-themed crafts
paper crafting techniques