I put this together because party decorating can feel like a big job, and I want to keep it doable. A room can look bright and festive with just a few simple touches. Paper fans are cheap, easy to make, and they catch the eye in a big way. This post shares 27 ideas you can try this weekend.
Who is this for? If you plan birthdays, baby showers, school events, or weddings, this is for you. It is for anyone who loves a DIY vibe but wants results that look neat, not messy. You can be new to crafts and still pull off colorful, clean decor.
What you’ll get: 27 paper fan ideas that cover walls, ceilings, tables, and photo backdrops. Each idea comes with straight steps and simple materials like tissue paper, scissors, string, and tape. You will learn how to mix colors, pick sizes, and layer fans for depth.
Here is why these ideas work. They are fast to make, light on cost, and easy to adjust for any space. They pack color and texture without taking over a room. You can use them for a birthday party in a living room, a school fair, or a wedding reception hall.
Let’s break it down with a quick plan. Start by choosing a color palette that fits your theme. Next, pick a few fan sizes and cut them to fit the space. Hang them from a wall or ceiling to create a simple backdrop. Pair a fan wall with a string of paper fans along a table or doorway to frame the moment.
Next steps: pick one idea to try first, gather a small stack of tissue sheets, and give it a go. You can tweak the colors, angles, and placement as you go. As you test ideas, think about how to store them for another party or how they could double as gift wrap accents. I hope these ideas spark your best party yet.
1. Classic Accordion Paper Fans
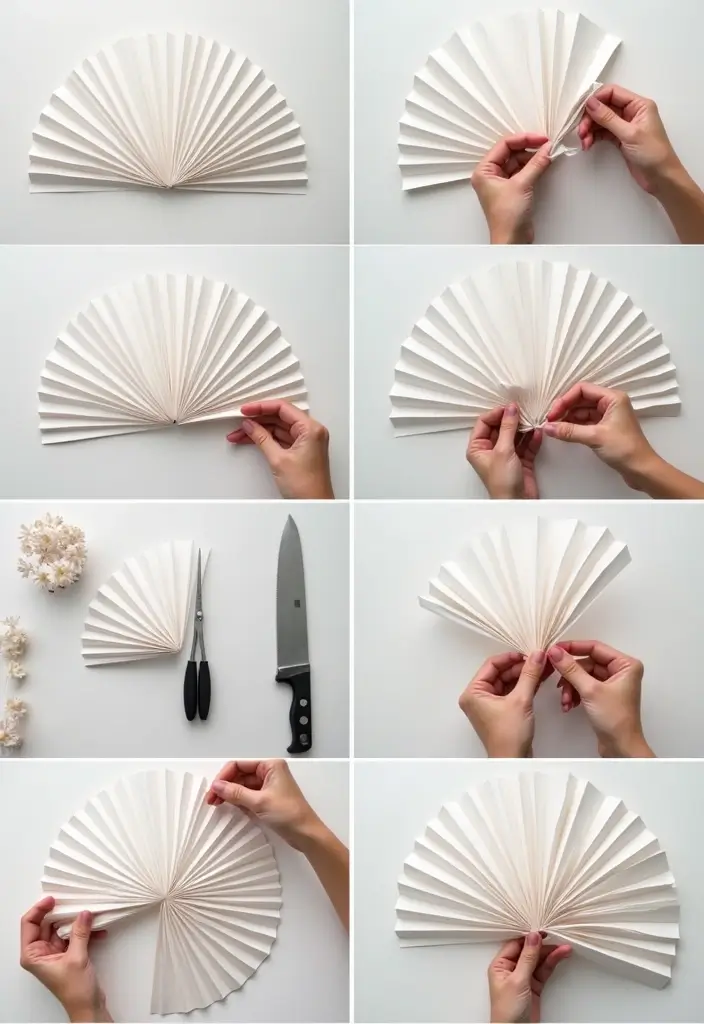
Need stylish decor for your party? Classic accordion paper fans fit the bill. They’re cheap, easy, and you can tailor them to your colors.
Why you’ll love them
They fold flat, set up fast, and you can reuse them later. Pick recycled or handmade paper to cut waste.
What you’ll need
– decorative paper
– string or a clip
– a little tape
A hint of imagination goes a long way.
How to make
– Take a sheet of paper.
– Fold it back and forth in even pleats, like a fan.
– Secure the ends with string, a clip, or tape.
– You can tuck the bottom edge to hide loose folds.
Display ideas
– Hang fans from the ceiling in clusters.
– Place a few in different sizes as a centerpiece.
– Make a garland by stringing several fans along a wall or table edge.
Ways to customize
– Try edge shapes by trimming the sides before folding.
– Use bold colors or patterns for contrast.
– Add soft lighting by placing string lights behind the fan for a warm glow.
Sustainability tip
Choose paper that is recycled or handmade. You can reuse fans at another party or store flat between events.
Tips
– Use double-sided tape to secure folds.
– Create edge shapes for variety.
– Pair with string lights for charm.
– Store flat to keep them crisp.
2. Floral Design Paper Fans
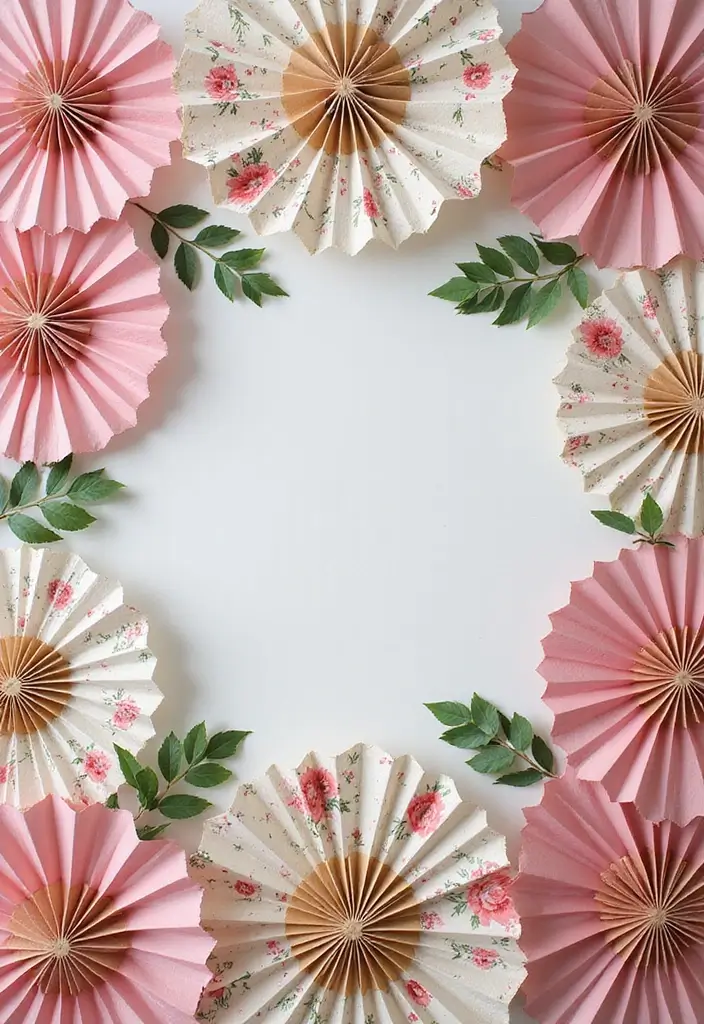
You want décor that is pretty, affordable, and easy to use. Floral design paper fans deliver a soft, romantic feel for any party. They work great for weddings, garden parties, and outdoor events. Pick paper with gentle flower prints and fold it with the classic accordion method to make a ready-to-hang decoration.
These fans shine when paired with real or faux flowers. Hang a line of them as a pretty backdrop, or place a few on sticks to form light bouquets for tables or aisles. You can tuck a fan into a bouquet for texture, or prop them around a photo wall to add color and depth.
Eco Tip: Choose paper from eco-friendly sources or inks that are safe for the environment. After the event, you can recycle or reuse the fans in other décor.
Ideas:
– Use pastel floral designs for a gentle spring vibe.
– Mix different flower patterns for a boho look.
– Attach a few fans to sticks and use them as mini bouquets.
Next steps: pick a theme, test a sample fan, and gather a few helpers to speed up assembly. With a little planning, floral paper fans bring warmth and charm without a lot of effort.
3. Ombre Paper Fans
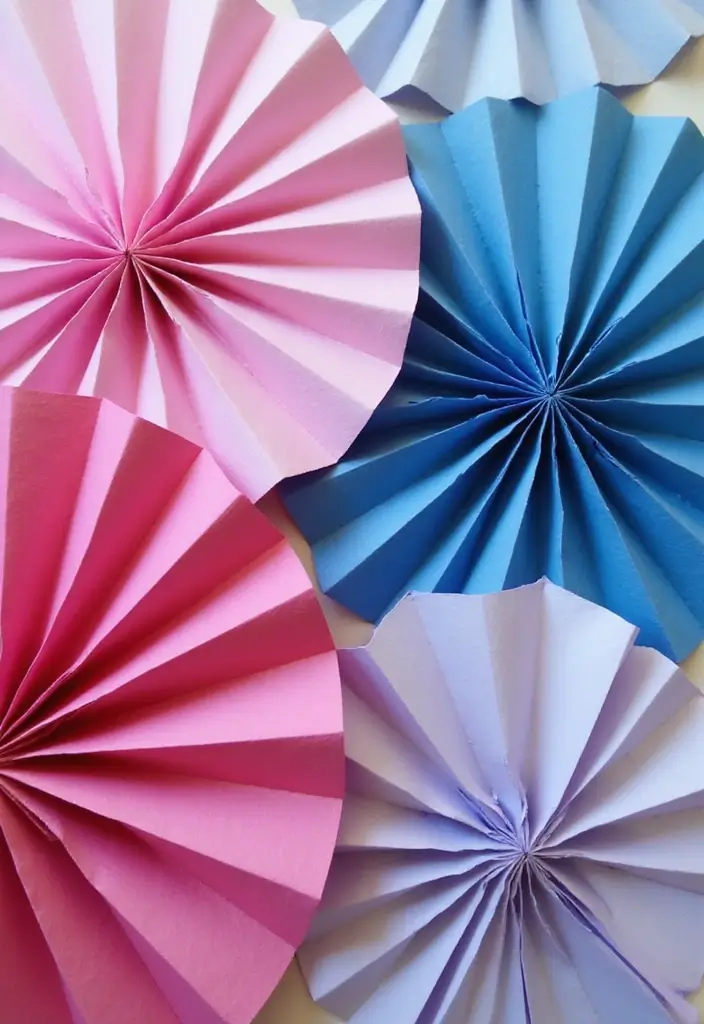
You want a wall that draws the eye without a lot of work. Ombre paper fans give you a soft glide of color from light to dark. Start with a large sheet in the light shade. Add one or two smaller fans in deeper tones, layered so the color meets the next shade. The result is a smooth gradient that feels fresh.
These fans work as wall decor or as a backdrop for photos. They catch the light and move with the air, giving texture to the room.
DIY tip: Watercolors make gentle fades. Markers stay bold and crisp. Layer colors so the edge blends into the next shade. Mix tones to fit your theme.
Considerations:
– Contrast for a bold statement
– Two or three colors for a subtle look
– Vary fan sizes for depth
Getting started is easy. Cut several fans from sturdy paper. Fold them like a palm leaf, then hang with double-sided tape or string. Space them until the gradient feels right. This quick touch adds style to parties, showers, and events. Try them over a doorway for a grand entrance, or in a corner as a soft backdrop. If you have space, hang a row from the ceiling to make a light canopy. You can reuse the fans at future gatherings or store them flat for a quick remix.
4. Geometric Pattern Fans
Geometric pattern fans give a clean, modern look. They fit chic parties and are easy to make. You pick patterns that match your vibe. Cut the paper into triangles, hexagons, diamonds, or other shapes. Layer shapes to build depth and a fresh feel.
Here is why this works: you can place them on walls as a bold backdrop or tuck them into table settings for color pops. Try clusters above a dessert table or along a stair rail for a simple wow.
Materials
– Thick craft paper or colored cardstock
– Scissors or a craft knife
– Glue sticks or liquid glue
– Tape or string for hanging
– Optional: recycled paper for an eco-friendly choice
Design tips
– Vary the sizes to create a dynamic display
– Use bright colors for party energy or soft tones for elegance
– Mix matte and metallic papers for texture
Setup steps
– Cut shapes with clean edges
– Fold each shape into a fan, then crease well
– Glue or tape the base so it holds your fan
– Attach to walls or place on sticks for table decor
Care and reuse
– Store flat in a box
– Keep a few extra shapes for quick tweaks at the next event
5. Themed Movie Night Fans

Planning a movie night and want decor that pops without a big cost? Try themed paper fans. They bring color and a playful vibe to any room. You can mirror styles from a classic Disney poster or go sleek with black and white for film noir. Fans also double as wall art or a bright part of the snack table.
Here is how to do it in a few simple steps:
– Pick a theme and color mood that fits your movie picks.
– Gather papers with film posters, quotes, or colors. You can print posters on regular paper or use craft paper with printed quotes. Have scissors and glue or tape ready.
– Make the fans by folding a rectangle into an accordion. Fan it open and tape or glue the base to a wooden skewer or craft stick.
– Decorate the fan fronts with clips, strings, or small sticker accents. You can add a mini poster cutout or a film quote on each fan.
– Hang the fans on a wall or set them along the snack table using string or tape.
Craft Tip: Use printable templates that let you design your fans digitally before you print.
Fun Ideas:
– For a superhero night, use comic book prints.
– For a vintage cinema vibe, choose muted colors and old posters.
Mix sizes to create a curved wall or layered look. Next steps: place a row of fans at eye level to guide guests into the room and echo your movie theme.
6. Seasonal Holiday Fans
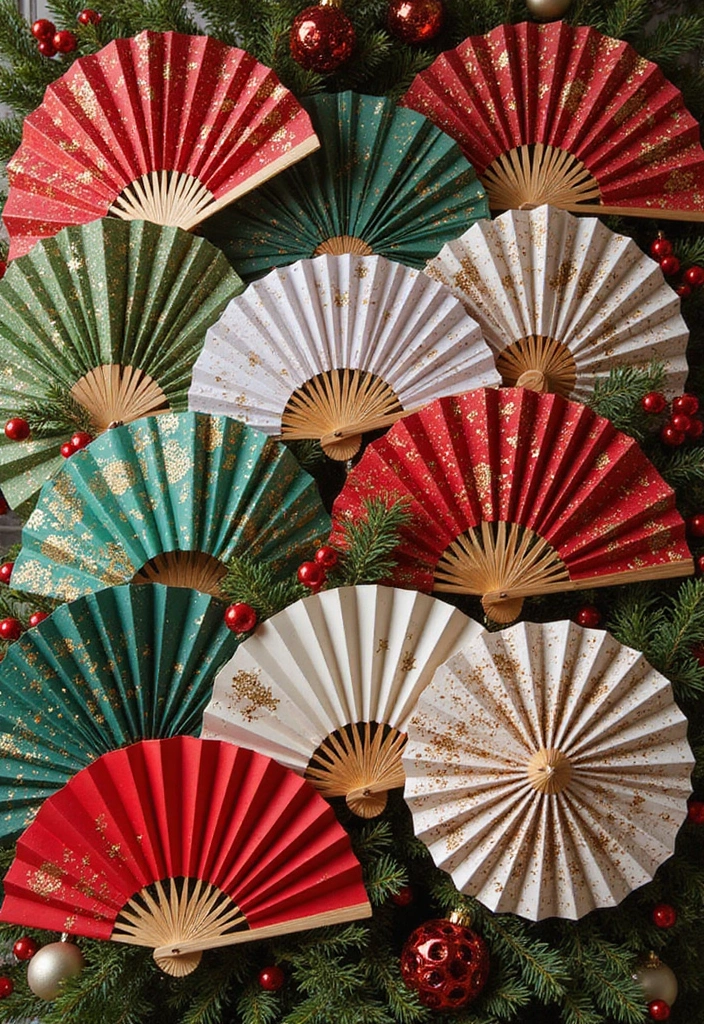
Seasonal Holiday Fans
Seasonal paper fans bring charm with little effort. You get a quick lift, and you can reuse them year after year. Here is why they work for parties and home decor. They are light, easy to store, and simple to place.
Color palettes guide your look. For Christmas, pair red and green with a splash of white. For Easter, choose soft pinks, blues, and yellows. For fall, warm peaches, burgundy, and gold feel cozy. Each fan can stay different. Add stickers, glitter, or pressed leaves to catch the light and reflect the season.
How to use them. Drape fans around tables to frame sweets and drinks. Hang a fan backdrop against a wall in matching colors for a themed event. They also brighten mantels, windows, or doorways in your home during the season.
Craft Tip: Use biodegradable glitter for a sparkle that saves the earth.
Ideas:
– Personalize each fan with names or dates for a special occasion.
– Mix large and small fans for depth and movement.
Next steps. Pick a season, decide the color plan, decorate, and place the fans where guests will notice the color first. Have fun and adjust as you go.
Shopping list and storage.
– Colored paper, scissors, tape.
– Glue sticks.
– Thin string or ribbon for hanging.
Store flat in a folder between uses so they stay crisp. Keep a small extra set for last minute party bursts.
7. Mini Fan Place Cards
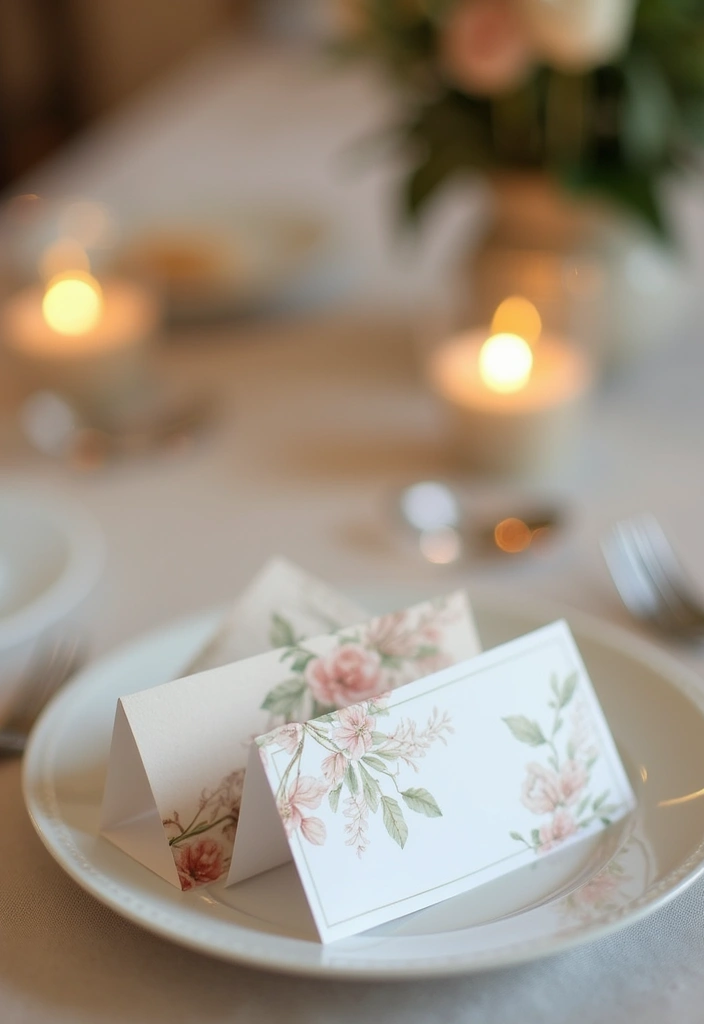
If you need a seating cue that looks cute and stays useful, try mini paper fan place cards. They help guests find their seats and become a small keepsake from your event. Here is why this idea fits many parties: it adds color, charm, and a practical touch all in one.
What you need
– small paper fans
– craft or recycled paper
– water-soluble markers
– scissors
– glue or double-sided tape
– a tiny stand or a slim vase
– optional ribbon and a tiny flower for the base
How to make it
– Pick a color story that matches your theme. Write each guest’s name on a fan blade, or add a tiny tag with the name.
– Let the ink dry before you move the fans to display. This keeps letters neat and avoids smears.
– Add a small floral detail at the base or tie a light ribbon for a touch of flair.
– Stand the finished fans on a tray or tuck them in a slim vase so they’re easy to spot as guests walk in.
Display and tips
– Line up the fans so names face outward. This helps guests find their seat quickly.
– Use recycled paper or leftover scraps to stay eco-friendly. Reuse fans from past events when you can.
Next steps: set up a quick mock table before guests arrive. Adjust colors and spacing until the display feels balanced and easy to read.
8. Colorful Hanging Fans
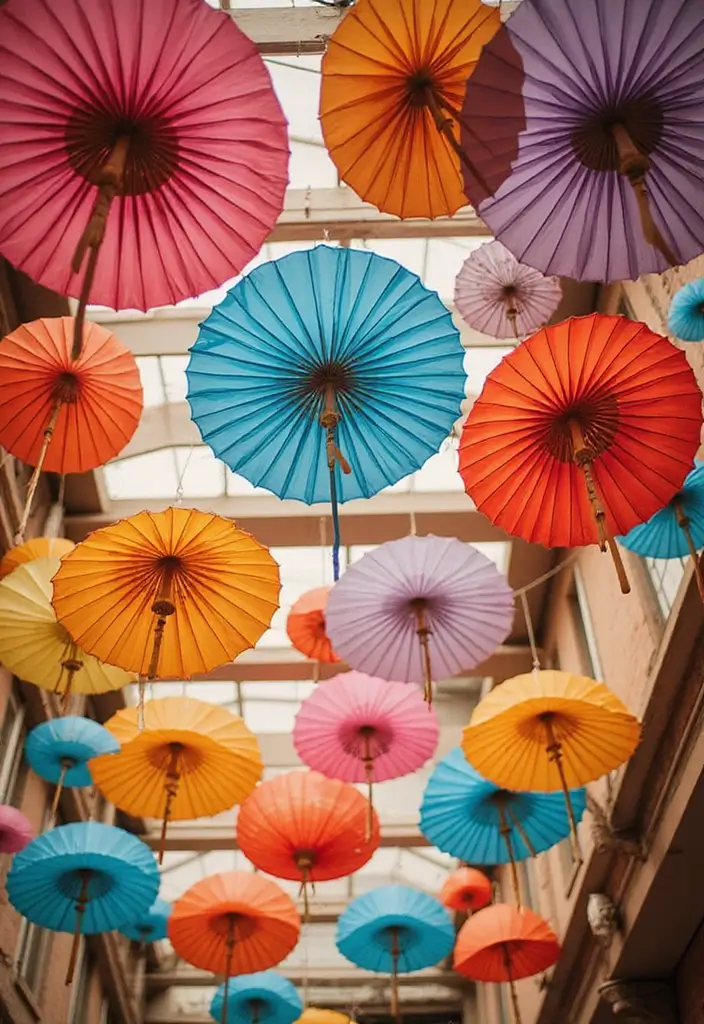
You’re planning a party and want a look that feels bright but not loud. Colorful hanging fans pull the eye up and set a festive mood. They work for weddings, birthdays, and outdoor gatherings.
How to set them up
– Gather paper fans in a mix of sizes and colors that match your theme.
– Pick a simple color palette to keep the look cohesive.
– Use clear fishing line or strong thread to suspend the fans.
– Install ceiling hooks or use existing fixtures to anchor the lines.
– Space the fans so they form a gentle arc across the ceiling.
– Use varied lengths for a layered canopy.
Creative tricks
– Layer fans to add depth and movement.
– Alternate colors to form a soft pattern.
– Tuck fairy lights among the fans for a warm glow.
Step-by-step guide
– Choose 3–5 colors and 3–5 fan sizes.
– Attach a short piece of string to the top of each fan.
– Find sturdy anchor points and run the lines to the ceiling.
– Vary the line lengths to create a canopy over seating areas.
Tips for best results
– Combine light shades with bolder colors for balance.
– In small rooms keep fans light and airy; in large spaces go bold.
Storage tips
– Store folded and flat in labeled boxes to keep creases out.
This setup is easy to adjust. Swap colors mid party to refresh the look without buying new decorations at any moment.
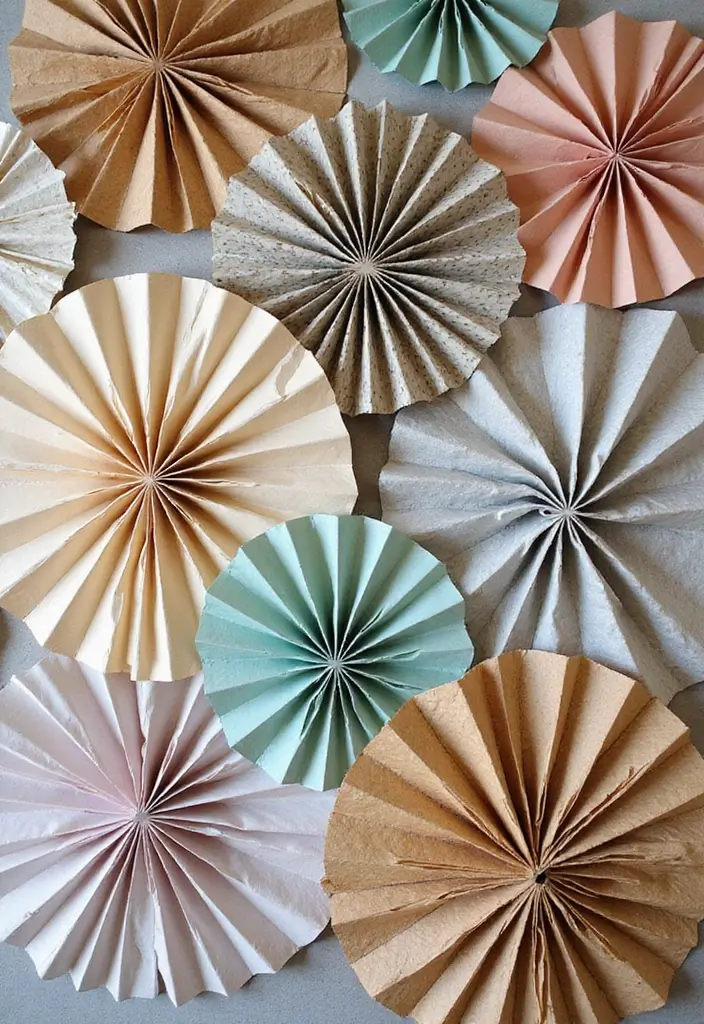
9. Rustic Brown Paper Fans
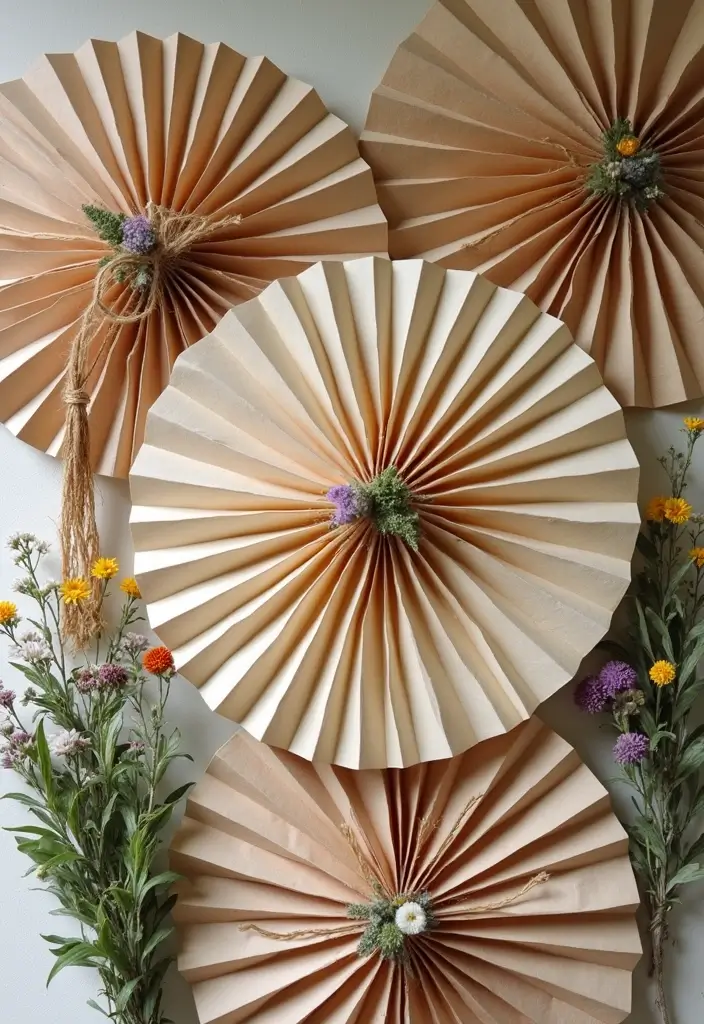
You want a simple, warm vibe for your party. Rustic brown paper fans fit the bill. They are light, affordable, and easy to make.
What you need:
– Kraft paper
– Twine or jute string
– Wildflowers or dried leaves
– Scissors and a flat surface
How to make it:
– Cut a sheet of kraft paper to the size you prefer.
– Fold the sheet accordion style, then open the ends to form a fan.
– Secure the center with twine. Let it hang or lean against a surface.
– Decorate with a small bouquet of wildflowers or a sprig of greenery.
Craft Tip: Stamp simple patterns or dab natural dye on the paper for a subtle print.
Considerations:
– Pair with burlap table runners for a cohesive rustic look.
– Add wood accents like mini toppers, lanterns, or candle holders.
– Place a few fans at entrances to greet guests with a warm setting.
Next steps: test a few sizes. You can mix large and small fans for variety. This approach keeps decor light, breathable, and naturally stylish.
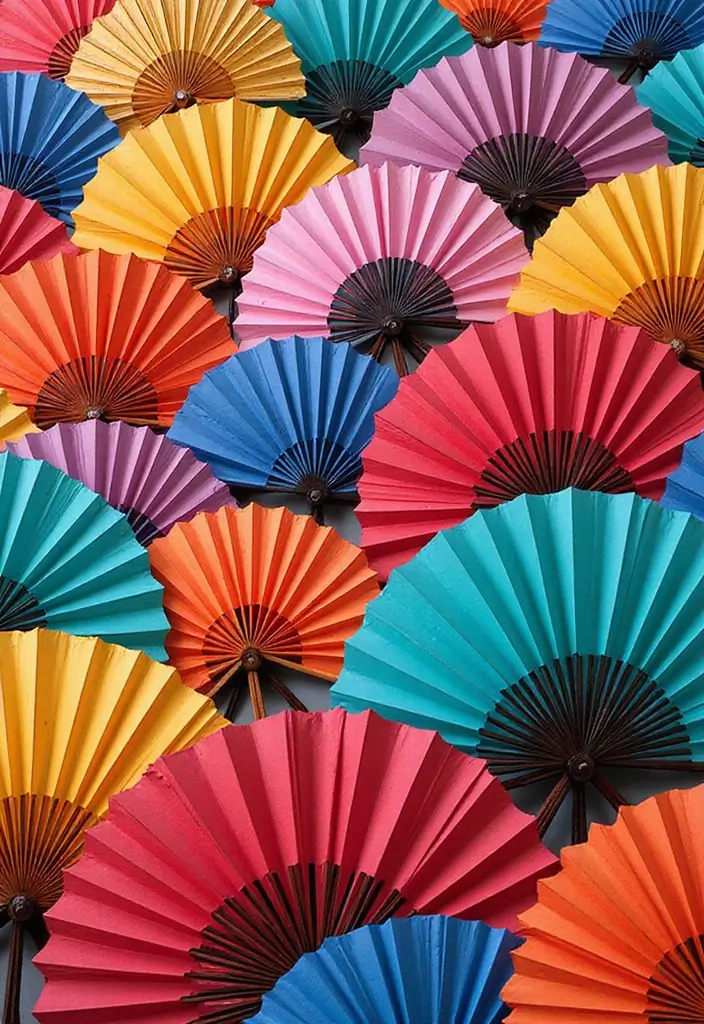
10. Neon Party Fans
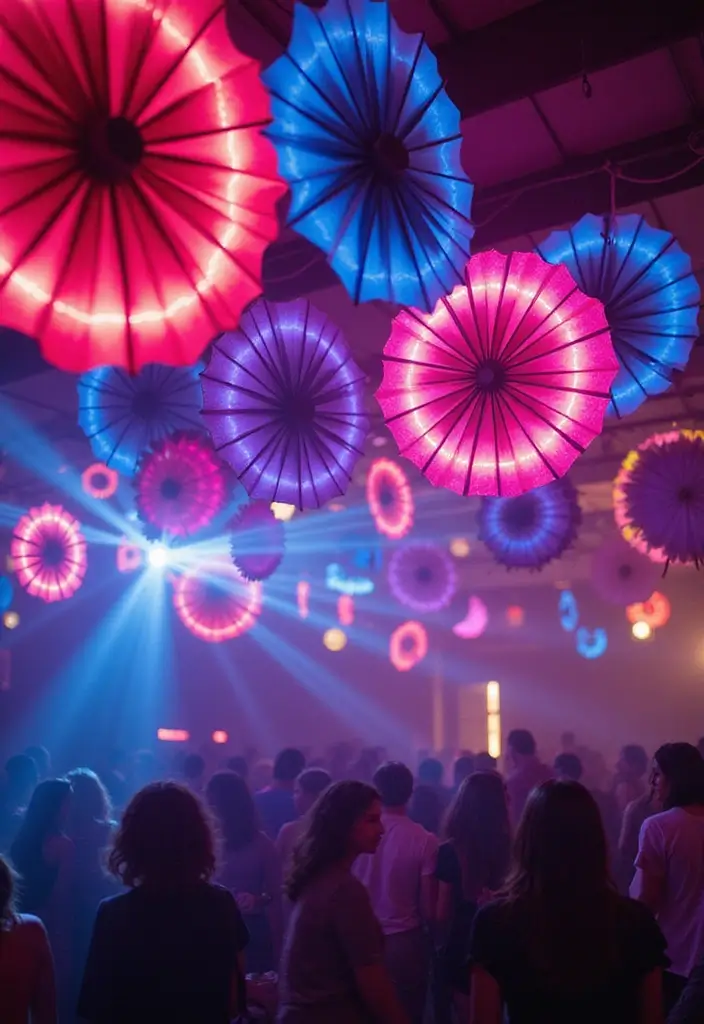
You want a bold look for your party without a big budget. Neon paper fans do that. They catch eyes in photos and on the dance floor. You can hang them from the ceiling or hand them to guests as accessories.
Here is how to make them simple and sturdy:
– Materials: neon craft paper or neon tissue paper, lightweight bamboo sticks, scissors, glue or tape, string.
– Steps: fold a sheet into a tight accordion, unfold to full width, then glue the base to the end of a stick. Let it dry. Repeat for as many fans as you need.
Use ideas: hang fans across a room to add color. Give guests a neon fan to wave on the dance floor. Build a photo booth wall by layering fans behind a plain backdrop.
Here is why this works: neon colors stay bright under party lights and pop under black lights. For extra effect, pair them with white or black backdrops, bold balloons, and shiny table runners. Color pairings like hot pink with electric blue or lime green with purple read well in photos.
Next steps: store unused fans flat in a box so they keep their shape. If you plan outdoor use, choose thicker paper and avoid rain. Ready to brighten your event with neon party fans?
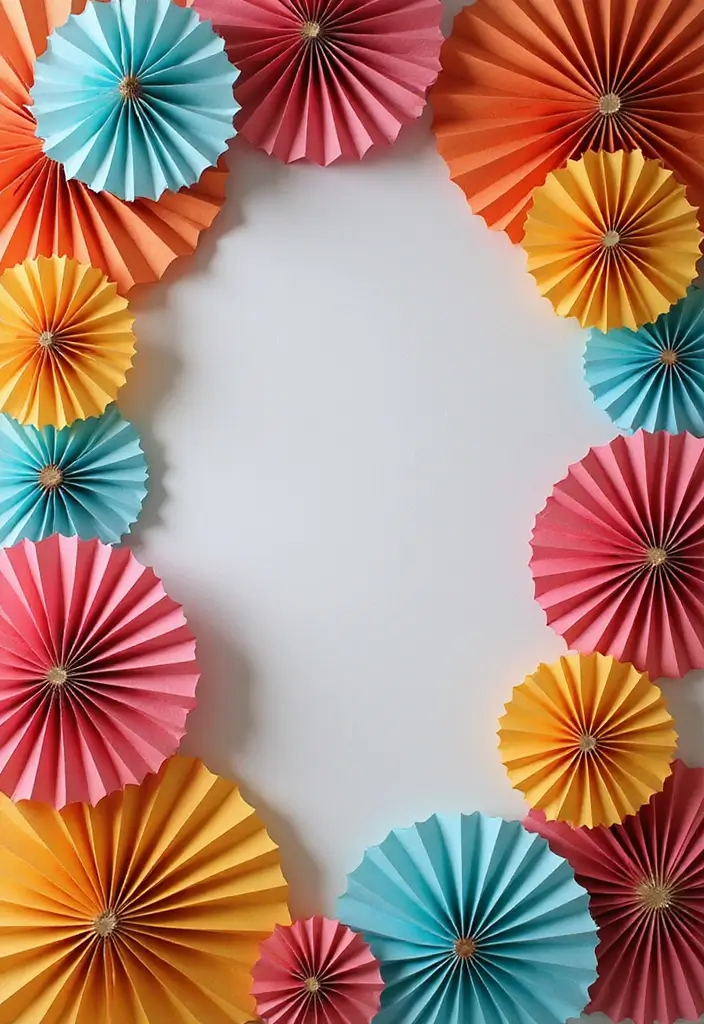
11. Rainbow Paper Fan Wall
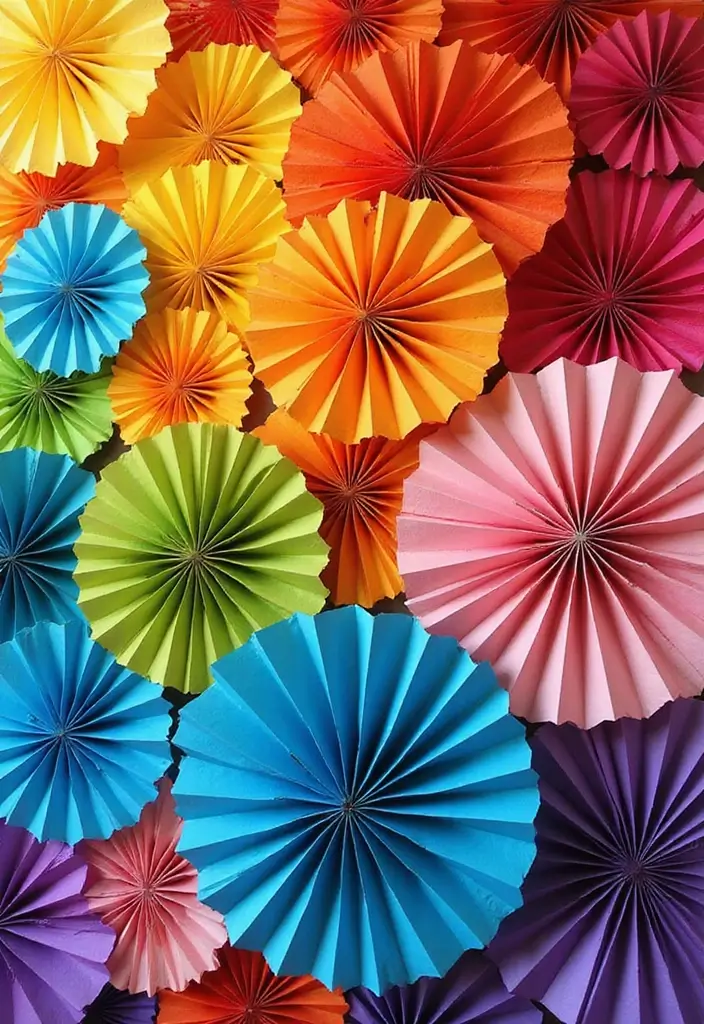
Want a bright photo backdrop that makes your party shine? A rainbow paper fan wall does the job. It creates a bold eye‑catcher for photos and for social posts.
What you’ll need
– Rainbow paper fans in a mix of colors and sizes
– Removable adhesive strips or wall-safe putty
– A rough plan of your wall layout to test patterns
How to set it up
– Pick a wall and measure the space.
– Lay out the fans on the floor first. This helps you pick a pattern you like.
– Start either from the center or from the top.
– Press each fan onto the wall with a gentle push. Use the removable adhesive so you can pull them off later without damage.
– Keep fans flat and aligned for a clean look.
Design ideas
– For a bold feel, stack different sizes to add depth.
– Place colors in rainbow order for a neat stripe, or arrange them in a curved arc for drama.
– Mix in soft pastel fans for a gentler vibe.
– Put larger fans toward the center to draw the eye to your best shot spot.
Craft Tip: Use varying sizes to create visual depth. Secure with removable adhesive to protect walls.
Considerations: Layer colors so some hues pop more. A pastel rainbow adds a softer mood.
Extra tips
– Add soft lighting from above to make colors pop.
– Use the wall as a backdrop for photos, desserts, or a gift table.
– When you’re ready for a change, simply peel off and store the fans for later events.
12. Elegant Monochrome Fans
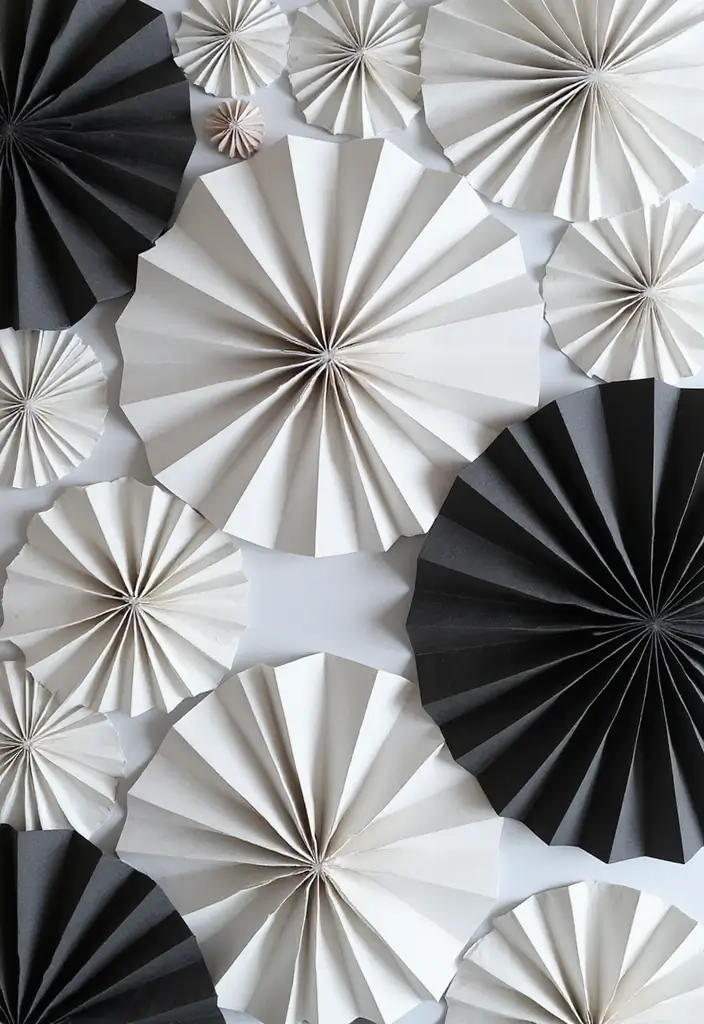
Want a refined look without loud patterns? Elegant monochrome fans give your event a calm, classy feel. Start with a single color—classic white, deep black, or soft ivory—and build a small set you can place around the room. This keeps your space cohesive and easy to style.
Here is why this works. Monochrome decor reads as polished and timeless. It fits formal occasions like galas or weddings and still blends with theme colors. To add depth, mix textures within the same color family. Try matte paper next to a shiny finish, or add a subtle embossing. Small shape variations—folded differently or cut with soft curves—also add interest without adding color.
Tip: Add metallic accents with a gold or silver ribbon. A touch of shine catches light and elevates the look without overpowering the color scheme.
Suggestions:
– Use varying shades of the same color to create depth and dimension.
– Pair with neutral table settings so your fans stand out.
– Hang the fans in clusters at entrances or above key seating areas for a focal point.
Next steps. Gather your color, textures, and a string or ribbon. Make 4 to 8 fans, then place them where guests will notice—entryways, ceiling lines, or behind a head table.
13. Whimsical Fan Garlands

Need party decor that feels warm and handmade? Whimsical fan garlands are a quick fix. You thread paper fans in different sizes and patterns to form a bright line of color. Hang them across tables, along walls, or from a tree for outdoor charm.
Here is why this works: garlands frame a space, add texture, and don’t break the budget. They are simple to make and easy to adjust.
Materials you’ll need:
– Paper fans in 3 sizes
– A sturdy string or twine
– Tape or glue dots
– Optional pom poms or small lanterns
– Scissors
Craft Tip: Use a strong string and attach fans with two small dots of tape or glue. This keeps them flat even when a breeze hits.
Steps to assemble:
– Pick a color theme
– Choose 3 sizes for variety
– Lay out the order on the floor to plan spacing
– Thread the string and leave ends free
– Secure each fan with tape or glue dots
– Space evenly and let the rims flare for fullness
Ideas:
– Add pom poms or lanterns for texture
– Mix patterns to fit birthdays, baby showers, or get-togethers
– Vary garland lengths for depth
– Clip to a mantel or tree branches for indoors or outdoors
Next steps: measure your space, mock-hang a line, and tweak.
14. Eco-Friendly Newspaper Fans
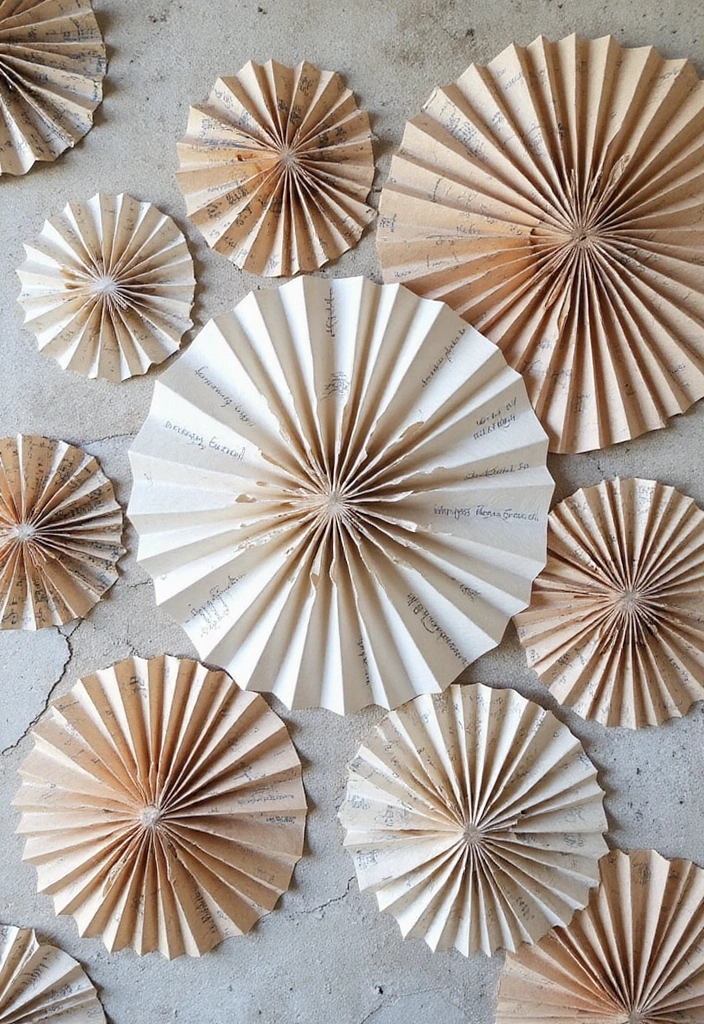
You want party decor that stands out without wasting money or supplies. Eco-friendly newspaper fans fit the bill. They reuse old newspapers to add texture and charm. Here is why they work.
Materials
– Grab old newspapers.
– Pick wooden sticks or dowels for handles.
– Have scissors and craft glue or tape ready.
– Choose eco-friendly paint or watercolors.
– Add optional embellishments like stamps, string, or small clips.
Steps
– Cut the newspaper into a wide accordion strip.
– Fold the strip back and forth to form a classic fan.
– Secure the base with glue or a tape strip.
– Attach the fan to a stick to make a handheld prop.
– Let it dry before you display them.
Design ideas
– Paint the fans in your event colors for a bold look.
– Attach quotes or fun headlines to give each fan personality.
– Create a wall garland by hanging several fans on a string.
– Use fans as a soft centerpiece by laying them flat under a vase.
– Tie a few fans to gift wrap for a fun, reusable accent.
– Use fans as a ceiling garland by stringing them above a table.
Tips
– Use non-toxic paint to stay green and safe.
– Let paint dry fully to avoid smudges.
– Apply a light seal if you want extra durability, then dry completely.
– Store the finished fans flat in a dry place for future events.
Next steps: Plan a few sizes and place them in layers for a fuller display.
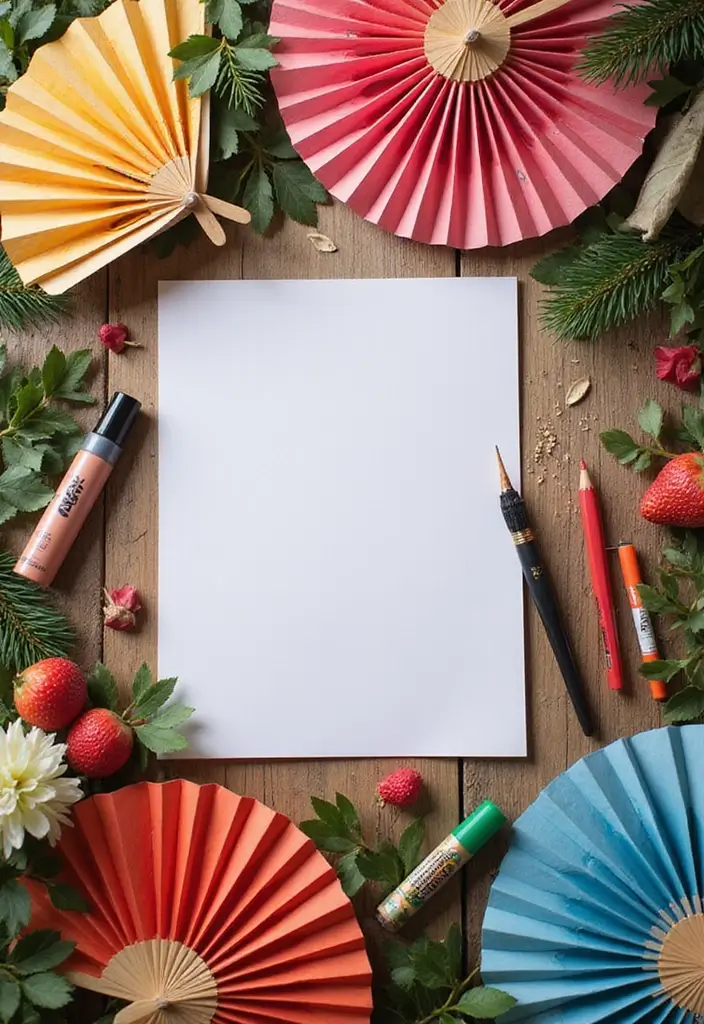
15. Interactive Fan Stations

You want a hands-on activity that fits a party and gives guests a keepsake. A DIY paper fan station is the answer. It keeps people busy in a fun way and leaves you with fans that look great in photos.
Here is why this idea works. It starts conversations. It adds color to the room. It gives guests a quick win they can take home.
What you need
– Grab colored paper or printable fan templates.
– Offer scissors and glue sticks for shaping and sticking.
– Provide markers, stickers, and simple embellishments for decoration.
– Include a ruler or a craft knife for clean lines with adult supervision.
– Add easy templates to jumpstart designs.
How to run it
– Set up a sturdy table with chairs nearby.
– Place a few sample fans to spark ideas.
– Let guests pick a design and a template.
– Have them cut, fold, and decorate the fans.
– Keep safety in mind and offer kid-friendly options.
Tips and design ideas
– Try classic stripes, bold color blocks, or scalloped edges.
– Make fans in different sizes for variety.
– Use the fans as a photo prop by adding a small handle or tag.
– Add name labels so guests can remember the moment.
Space and help
– Leave enough room for people to work and chat.
– Have a helper at the station to guide beginners.
– Keep a bin for scraps and used glue sticks to avoid a mess.
Next steps: ready your supplies, line up guests, and watch the fan station become a hit at your event.
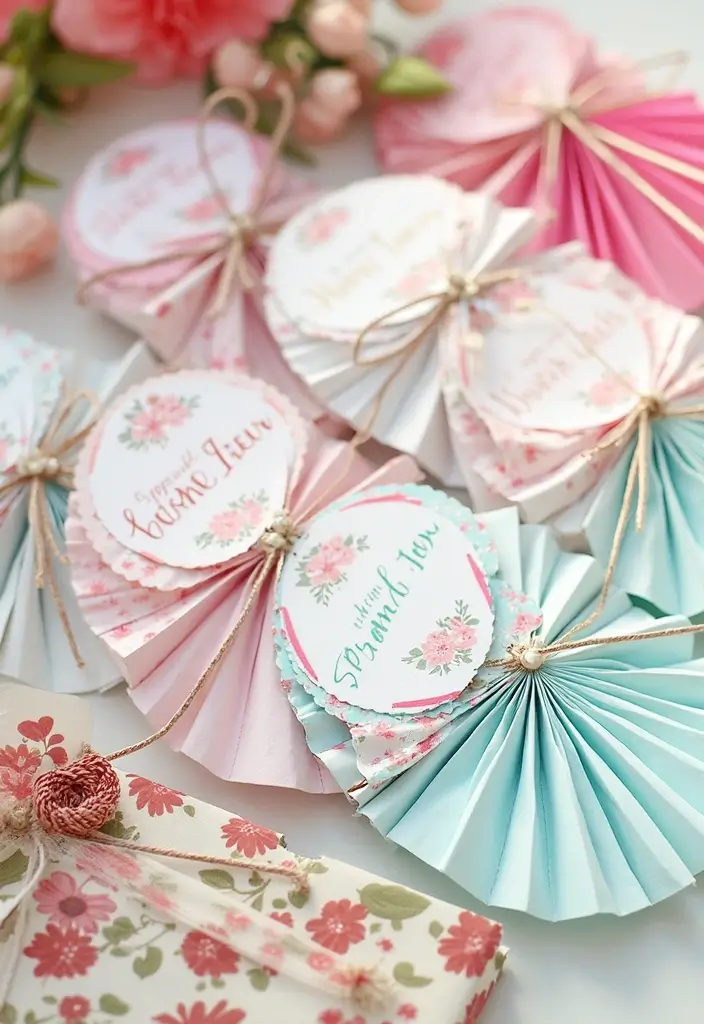
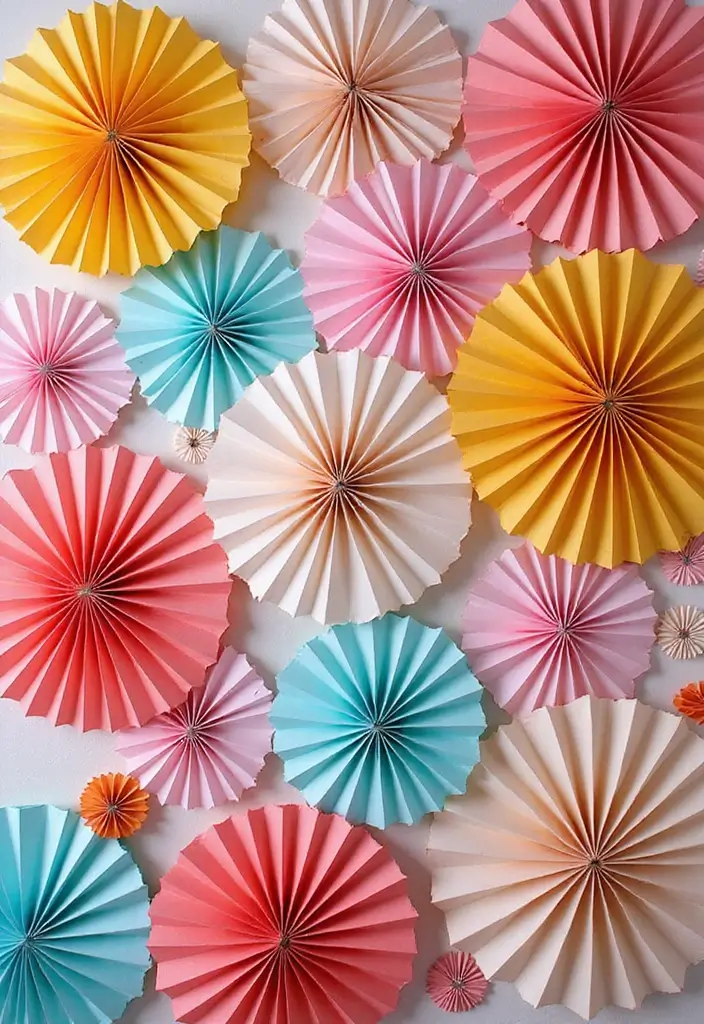
16. Elegant Pastel Fans

You want a calm, stylish vibe for your next party. Elegant pastel fans can help. They bring soft light and gentle shadows to the room. Use blush pink, baby blue, and mint green to fit garden or nature themes. Add a touch of gold or silver to make them feel dressed up.
Where to use them is simple. Set them as centerpieces in low bowls with blooms, or hang them along doorways or ceilings. They flutter with a breeze and glow in sunlight. Layer fans of different sizes for depth and interest.
Craft tip: choose lighter-weight paper. It folds cleanly and catches the air for an airy look. Practice on a sample first so you get the flow just right.
Suggestions:
– Pair with floral arrangements for a cohesive look.
– Mix solid colors with subtle patterns to add interest.
– Use different sizes to create depth.
Here is why a simple build pays off. It is quick, affordable, and looks polished. Let’s break it down.
– Step 1: Materials. Gather pastel craft paper, thin sticks or dowels, glue, tape, and ribbon.
– Step 2: Make fans. Fold the paper in an accordion, then press flat to form a fan.
– Step 3: Attach. Glue or tape the stick to the back, and wrap the handle with ribbon for a neat finish.
Next steps. Place the fans now. Try a low centerpiece, or hang them in rows along a wall or arch.
17. Unique Fan Bouquets
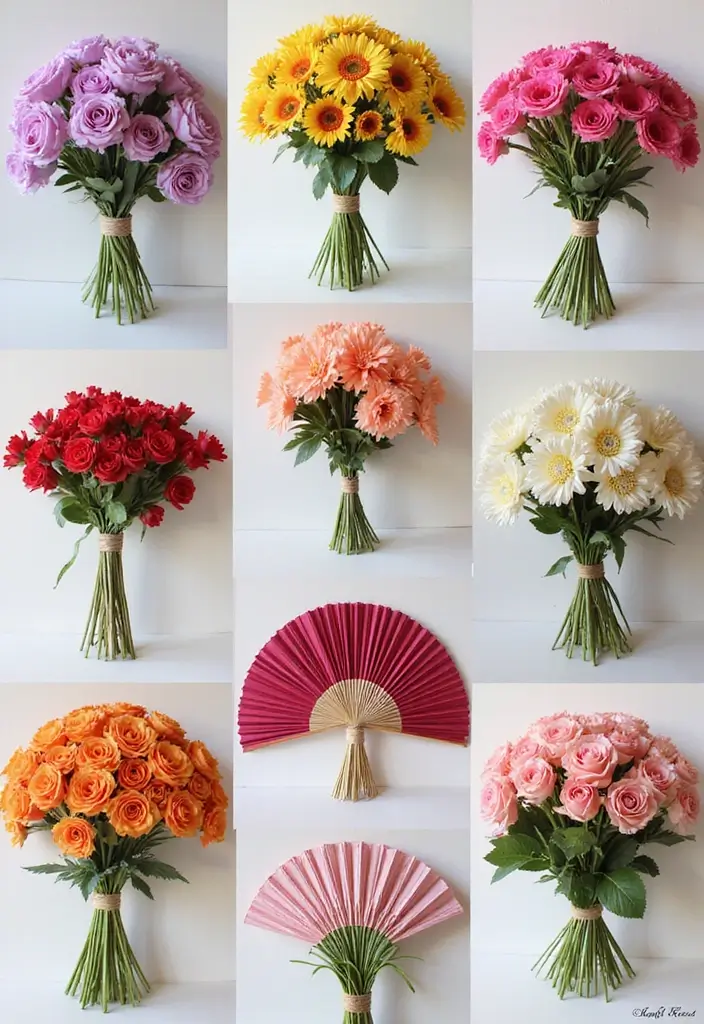
Want a centerpiece that grabs attention without breaking the bank? Unique Fan Bouquets mix real flowers with bright paper fans. The result is a bold, colorful display that breathes life into your table. Pair soft blooms with crisp fans. Place fans at different heights and angles to add depth. Mix flower textures to echo the fans’ colors.
Here is how to build one:
– Pick a sturdy base.
– Choose real flowers with a few textures.
– Roses and greenery keep it light.
– Add one bright accent for a pop.
– Select paper fans in your theme colors.
– Open them partly for dimension.
– Arrange in layers.
– Start with stems, then tuck a fan behind at a tilt.
– Add a second fan on the opposite side for balance.
– Finish with a few filler greens.
Craft Tip: Use fan colors that align with the event theme for a cohesive look.
Considerations:
– Assemble the bouquets a day ahead and keep them hydrated in water until display time.
– Choose lightweight, easy-to-handle fans so they support the flowers instead of competing with them.
Next steps: place these centerpieces on dining tables or entry tables to greet guests with color and charm.
18. Vintage Map Fans

You’re planning a travel themed party and want decor that starts conversations. Vintage map fans fit. They’re cheap, easy to make, and full of character.
Here is why they work: they double as art and props. You can hold them in photos or prop them on a table. They tell a story of journeys and dreams.
– Supplies you’ll need:
Old maps or atlas pages
Cardstock or light wrapping paper
Scissors
Glue or decoupage glue
Wooden sticks or skewers for handles
Tape or a stapler
Optional: a fine pen for notes
– How to make:
Cut a map page into a 9 by 18 inch rectangle. Score folds every 1 or 2 inches to create pleats. Fold the pleats and press them flat. Glue the narrow end to a stick or staple it in place. Seal with a bit of tape at the top for hanging.
Craft Tip: Use decoupage glue to seal the surface. It protects the map and adds a gentle shine.
<Ideas:
– Display the fans with old suitcases or travel posters.
– Choose maps that have meaning to you or your guests.
– Add a travel quote along the edge or mark favorite destinations.
Next steps: set the fans up at the entrance, in front of a backdrop for photos, or as a charming table feature.
Tip: store flat in a box if you plan to reuse them.
19. Ruffled Tissue Paper Fans
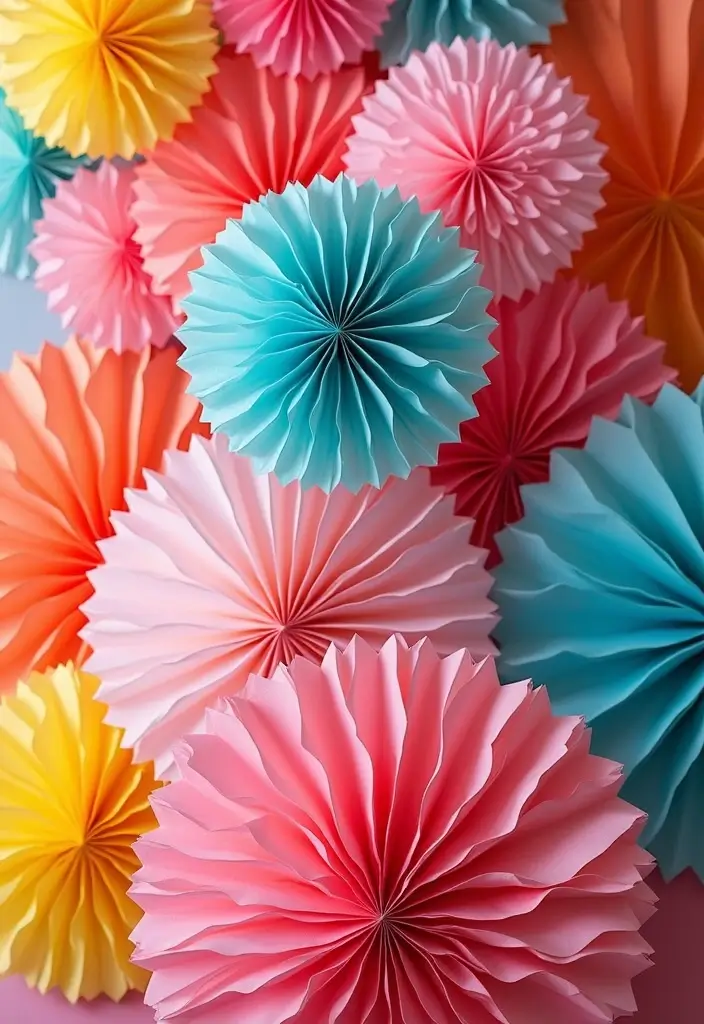
Want quick party decor that stands out? Ruffled tissue paper fans fit the bill. They add texture and color without much cost. They work well for birthdays, baby showers, and casual events. Here is why this DIY shines at any party: it’s fast, simple, and easy to customize.
Materials you need
– Tissue paper sheets in your chosen colors
– Scissors
– Clear tape or glue
– A thin string or fishing line
– A small cardboard circle or a paper clip
How to make one
– Stack 6–8 tissue sheets in the colors you want.
– Cut a fringe along the top edge, about 1 inch deep.
– Accordion fold the stack.
– Pin or tape the center to hold the folds.
– Gently fan out the layers to form the ruffled circle.
– Attach a string or line to hang the fan.
– Fluff and adjust the folds for fullness.
Craft Tip: Use a mix of bold and soft colors to create depth and interest. Not everything has to match.
Ideas:
– Hang several fans in different sizes for a bold display.
– Pair with streamers or balloons for instant festivity.
– Group colors by hue to build color blocks.
– Drape above a table to catch light and create soft shadows.
Practical notes
For indoors, place fans on light walls to get good contrast. Store them flat when not in use. They’re lightweight and easy to reuse at future gatherings. Next steps: pick a color scheme and start folding.
20. Holiday Themed Fan Decorations

Planning for a holiday party? You can add real sparkle with paper fan decorations. Pick the look that fits the season. Spooky fans in orange and black set Halloween mood. Bright, metallic fans in gold and silver shine for New Year. Use themed paper and add seasonal motifs like pumpkins, stars, or bells.
Where to place them? They can line walls for a festive backdrop or go on tables as mini centerpieces. When light hits them, the folds catch color and cast gentle shadows.
Craft tip: Stick on themed stickers or wrap bits of washi tape around the edges to lift the vibe without extra fuss.
Suggestions:
– Match fans to your holiday color scheme for a cohesive look.
– Create a mini display where the fans serve as the centerpiece of the table or wall grid.
Tip for timing: cut and fold the fans a day before your event. Store them flat to keep folds crisp.
Next steps: gather plain paper fans or make your own, pick a color palette, add simple motifs, and hang them in a loose cluster or along a string garland. They’re easy to pop up and remove after the party.
21. Beach Party Fans
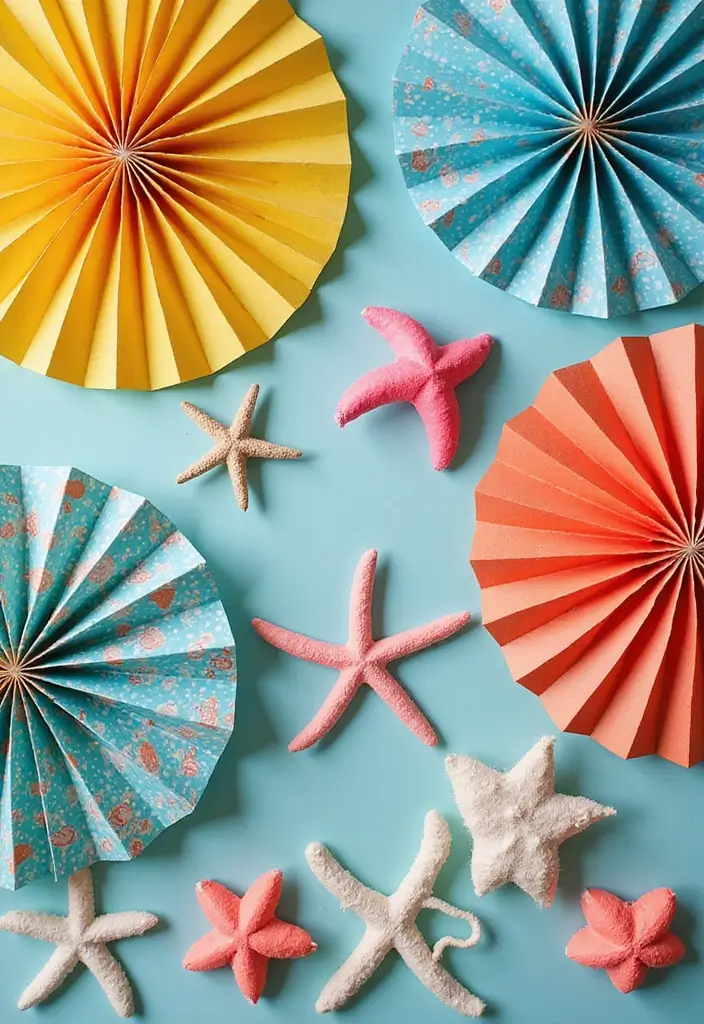
Dreaming of a beach vibe on a budget? Beach party fans bring sun and sea into your space fast. Use bright turquoise, coral, and sandy yellows. Add coastal prints with shells, starfish, or tiny boats. They work for summer parties, picnics by the water, or a beach wedding. They travel easy in a tote or bin.
Here is why this works: the fans are handy. Guests can cool off, and you gain multiple uses from one craft. They can also double as party favors if you add small tags.
What you need: tissue paper or light cardstock, wooden sticks or bamboo dowels, glue, scissors, markers or stickers, and shell decals.
How to make:
1) Cut a square of paper.
2) Fold it into a tight accordion.
3) Glue a stick to the back edge.
4) Press flat to reveal a fan.
5) Decorate with shells or doodles.
Craft Tip: Use waterproof materials if outdoors to keep them lasting all day.
Ideas:
– Pair with beach-themed table settings for a cohesive look.
– Hand out small handheld fans for hot days.
– Hang fans along walls or entryways as a breezy decor line.
– Give personalized fans as beach wedding favors with a tag.
22. Interactive Fan Art Corner
Looking for a simple, fun activity that fits any party theme. Create an interactive fan art corner guests can enjoy. Here is how you set it up.
What you need:
– You need blank paper fans.
– You need art supplies like paints, markers, colored pencils, and stickers.
– You need scissors, glue sticks, and washi tape.
– You need wipes and a small bin for mess.
How it runs:
– Guests pick a fan and start drawing.
– Designs should be quick so lines move fast.
– You can offer a few ready prompts to spark ideas.
Craft Tip: Place a few quick examples near the table. Show a bold stripe, a small flower, or a mini monogram to guide beginners.
Considerations: Make supplies easy to reach and clearly labeled. Create a simple gallery by hanging finished fans on a wall or string. Let guests take their fans home as party favors.
Extra ideas:
– Add themed prompts like “summer vibes” or “your initials with a border.”
– Keep the setup mobile so you can move it as the room changes.
– Rotate the display as new art lands.
Why this helps your event:
– It gives guests a hands on moment with minimal prep.
– It adds color to the room and starts conversations.
Next steps:
– Prep the table, set a cleanup station, and invite guests to join anytime.
23. Upcycled Fan Decorations
You want decor that looks great and keeps waste low. Upcycled fan decorations let you turn scraps into art that shines at any party. They feel personal and one of a kind.
What you need
– Paper scraps in different colors
– Fabric remnants or old gift wrap
– A sturdy base like thick card or cardstock
– Glue or a needle and thread
– Scissors and a ruler
– String, ribbon, or a clip for hanging
Steps
– Decide a simple color plan so the fans look connected.
– Cut fan shapes from paper or light cardboard.
– Layer pieces in a fan form, mixing patterns and tones.
– Secure the layers with glue or a simple running stitch through the center.
– Press the stack flat and let it dry so the fan stays neat.
– Add hanging hardware like a ribbon or string.
Craft Tip: Glue along the edges for a clean, crisp finish, or sew the layers to add texture and grip.
Suggestions:
– Use old wrapping paper for bold prints that pop.
– Pair the fans with fabric scraps and natural twine for a cohesive eco-friendly setup.
Next steps: hang these at eye level, vary sizes for depth, and enjoy a festive look that’s kind to the planet.
24. Party Favors Fan Packs
Need a simple way to thank guests and keep your theme going after the party? Party favors with mini paper fans do just that. They’re usable, shareable, and easy to tailor to any event.
Here is how to pull them off:
– Choose mini paper fans in colors that mirror your decor. Think bright blues, sunny yellows, or rose pinks. Pick sizes that feel balanced with your gift bag, not bulky.
– Personalize. Add names or a short message on a label or the fan blade. It feels special and gives guests a little reminder of your event.
– Pack with style. Slip the fans into small decorative bags or tuck them in tiny boxes. A neat presentation goes a long way.
Craft Tip: Keep wrapping materials green. Use recycled paper, cloth bags, or fabric ribbons.
Ideas:
– Include another small treat that fits your theme, like a sticker sheet or a tiny candle.
– Tie the packs with colorful twine or ribbon to add a pop of color.
– Add a printed thank-you note or a QR code message that links to a playlist or photo gallery.
Next steps: lay out your favors on the table, snap a quick photo, and watch guests smile as they head home.
25. Kawaii Character Fans
Kawaii character fans add a cheerful touch to any party. You can turn plain fans into cute characters or animals that kids will love. This works for birthdays and themed parties.
Here is why it helps: bright colors and friendly faces grab attention, spark smiles, and give you instant photo props.
Materials
– sturdy paper or card stock
– colored paper, markers, brushes
– wooden sticks or craft dowels for handles
– optional glitter or sequins for extra charm
How to make them
– Pick a simple character idea. A smiling cat, a small panda, or a tiny bear is easy.
– Draw a basic face on the fan and color it. Keep lines bold and clear.
– Add small details with markers. Pink cheeks and big eyes boost the cute factor.
– Glue on a handle. Let the glue dry before you wave.
Craft tip
Let kids help with the drawing. It becomes a fun family activity and they feel proud of the decorations.
Durability tips
– choose thick paper so the fan bends without tearing
– seal glitter with a clear spray to keep it from shedding
Final touches
Match colors to your theme. Pair pastels or candy tones for a sweet, playful look.
26. Cultural Heritage Fans

You want a party idea that honors many cultures. Cultural heritage fans do that by adding color and story to your space. You can display them as art or use them as decor around the room.
Here is why they fit many celebrations. They show patterns and textures in a bold, easy way. They are simple to make with common crafts and stay affordable.
– Materials to gather: plain paper fans, scissors, glue, markers, paint, fabric scraps, and string for hanging.
– Design ideas: pick 2 to 3 motifs from cultures you know or admire. Keep the lines simple so they read from far away. Use colors that fit your theme but stay respectful to the sources.
– Step by step: cut the patterns on the fabric or paper. Glue fabric pieces to the fan surface or paint blocks of color. Let everything dry completely.
– Display options: line up fans on a wall, create a fan banner, or set a few on dessert tables.
– Craft Tip: Talk with family about their heritage. Their stories spark ideas for patterns and colors.
– Suggestions: Use fans as conversation starters about traditions. Pair with related foods or music for a complete experience.
– Final note: aim for a warm, respectful vibe. These fans celebrate culture and add personal meaning to your event.
27. Fan Photography Backdrops
Want photo moments your guests will remember? A paper fan backdrop does it. You turn simple fans into a bright wall that makes every shot stand out. This DIY idea works indoors and out and is easy to adapt. You can reuse these fans for future parties.
Plan your colors, sizes, and shapes first. Choose a theme and pull fans to match it. Mix bold hues with soft tones. Use large and small fans to add depth. Test your pattern on the floor first, then pin or tape them to a wall. Leave some space so people can stand in front and still see the fans. Cotton finishes look soft; glossy finishes catch light for bright moments.
Cotton and glossy finishes give different looks. Glossy fans catch sun or lamp light for a bright moment.
Craft Tip: Secure fans to a wall or frame so they stay flat and stable.
Ideas:
– Provide fun props for guests to hold while posing.
– Set this backdrop near a photo booth to spark candid shots.
– Add warm lighting behind the fans, like string lights, to give photos a gentle glow.
– Mix in a few oversized fans to create a clear focal point.
– Layer fans in a cross pattern for a bold focal point.
– Add a small sign with your event name or hashtag to guide guests.
Conclusion
There you have it, 27 creative and eco-friendly paper fan decoration ideas to bring your events to life!
Each suggestion invites you to craft unique pieces that reflect your style while being kind to our planet. Don’t hesitate to merge ideas or put your spin on them!
We’d love to hear about your favorite projects or any fan decoration ideas you have.
Note: We aim to provide accurate product links, but some may occasionally expire or become unavailable. If this happens, please search directly on Amazon for the product or a suitable alternative.
This post contains Amazon affiliate links, meaning I may earn a small commission if you purchase through my links, at no extra cost to you.
Related Topics