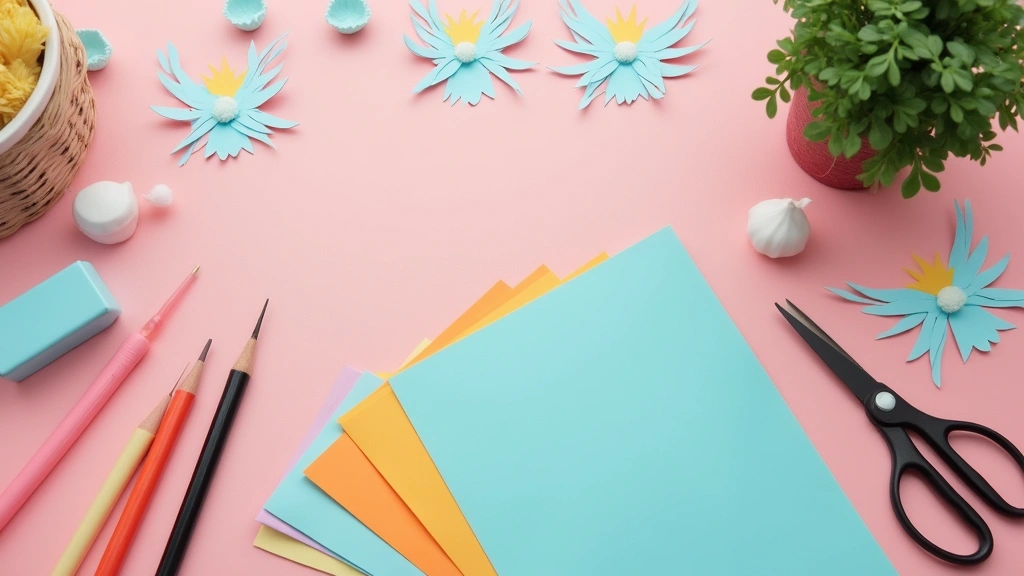
This season has me craving small, playful crafts that feel magical. Paper crown crafts fit that wish perfectly. They turn a normal day into a tiny party with just paper, scissors, and a little glue. I gathered twenty six ideas that are simple, affordable, and fun to make at home or in a classroom.
If you’re a parent, caregiver, teacher, or party host, this post is for you. You want activities kids can help with, that spark pretend play, and that don’t require fancy supplies. These crowns are beginner friendly and easy to adapt.
Here you will find twenty six crowns using common materials like colored paper, markers, ribbon, and glue. Each crown includes simple steps and practical tips for small hands. I kept the ideas flexible so you can mix colors, themes, and sizes.
These crowns work for pretend play, party moments, story time, or photo props. They help kids practice fine motor skills and color matching. Plus, they offer instant rewards when a crown is finished and worn.
You can set up a little crown making station at home or in a classroom. Try themes like fantasy, animals, seasons, or your child’s favorite book. Decorate with stickers, glitter, or foil accents if you like, but you can skip messy extras for a quick finish.
Ready to start? Dive into these twenty six ideas and find what fits your day. Keep a few ready to wear crowns on hand for spontaneous pretend time.
1. Classic Paper Crown with Gems

Want a quick crown for pretend play or a party? The classic paper crown is easy to make and it sparkles with simple gems.
Materials
– Use construction paper or metallic paper as the base.
– Have scissors handy to cut clean edges.
– Keep tape or a stapler ready to fasten the ends.
– Gather markers, stickers, and adhesive gems for decoration.
– Optional: extra colored strips for a layered, multicolor look.
Steps
1) Measure a strip 3 to 4 inches wide and long enough to wrap around your child’s head.
2) Let kids decorate with markers, stickers, and gems. Encourage patterns and bright colors.
3) Fasten the ends with tape or a stapler so the crown stays in place.
4) For a layered effect, cut a second strip in a different color and attach it behind the first.
5) Try a diagonal line of gems along the band to guide the eye.
Tips
– Use metallic paper for a regal feel.
– Add a paper flower or a small feather for extra flair.
– Set up a small craft station with organized supplies so kids can grab what they need.
Next steps
Hang the crown on the wall or wear it during play. Invite a friend to join the fun. Grab supplies and start today for quick fun.
2. Nature-Inspired Crown

Looking for a crown that fits outdoor play and nature crafts? This nature-inspired crown is simple to make, and it feels real in your hands. You get a rustic look with leaves, flowers, and twigs. It works for a nature party or a sunny park run.
What you’ll need
– sturdy crown base cut from cardstock or a ready-made crown template
– fresh leaves, tiny flowers, and a few twigs
– non-toxic craft glue or hot glue
– optional old book page or brown craft paper for the base
– scissors and a marker to trace the template
How to make it
1) Cut the base using a simple crown pattern. Make sure it fits around the head.
2) Gather natural pieces from your yard or park. Look for colors and textures you like.
3) Glue the leaves first, then add flowers and twigs. Press gently so everything sticks.
4) Let the glue dry. Trim any ragged edges and balance the weight so it sits nicely.
Tips and ideas
– Turn this into a scavenger hunt to collect your materials.
– Try an old book page as the crown base for a vintage feel.
– Talk about textures and colors as you go. Notice leaf veins, bark, and petal shapes.
Why this helps
Kids explore nature while crafting. It sparks curiosity and fine motor skills. It’s a calm, creative break outdoors.
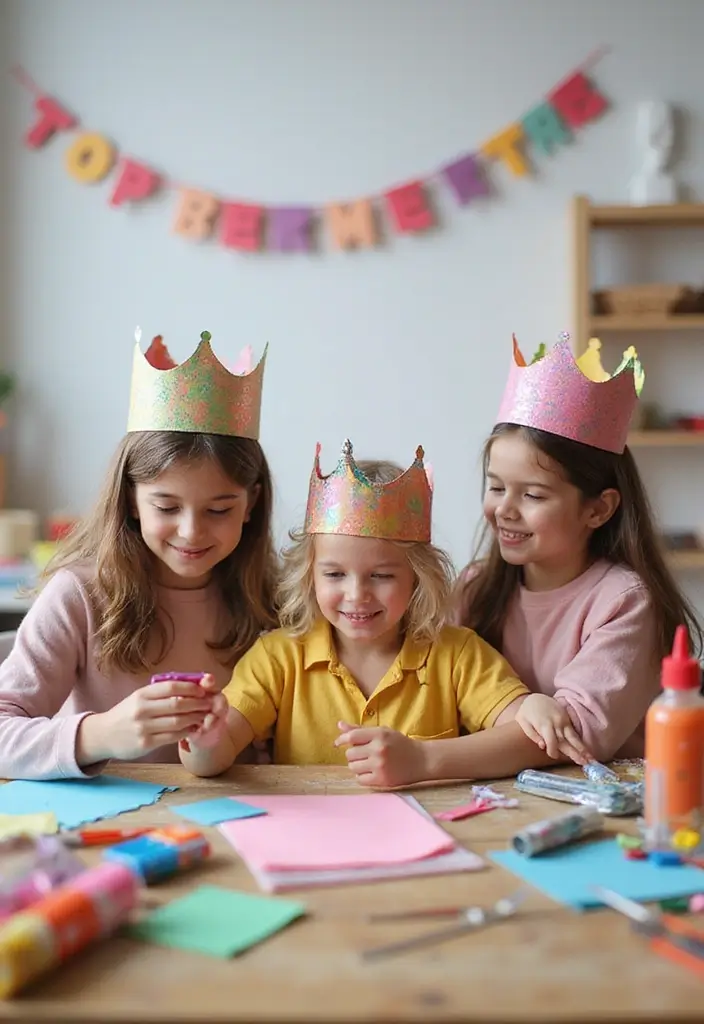
3. Glitter Explosion Crown

Want a crown that catches every eye? The Glitter Explosion Crown brings bold sparkle to playtime. Here is why it works: it’s fast, kid-friendly, and you can tailor the shine to any mood.
– Materials
Plain paper crown base, white craft glue, fine glitter, a few colors of glitter for an ombre look, small stars or sequins, a shallow tray, and a clean cloth. Keep a damp rag handy to wipe hands and the table. A tray helps catch loose glitter so cleanup is easier.
– Steps
1) Brush a thin coat of glue over the crown. A light layer sticks better and cuts mess.
2) While the glue is still wet, sprinkle glitter all over. Cover every inch for a full glow. If you want an ombre effect, start with light colors at the base and move to darker tones toward the top.
3) Gently tap the crown to settle the glitter, then shake off the excess onto the tray. Let it dry completely.
4) Add stars or sequins with a dab of glue for extra pops of shine. Press them in so they don’t slide off with every wiggle.
5) Once fully dry, you can wear the crown or store it for pretend play.
– Variations
Try a single bold color for a strong look, or mix several shades for a rainbow crown. Use only fine glitter for a softer glow, or mix in a few chunky pieces for texture.
– Tips & cleanup
Do the craft outside or near a table you don’t mind getting glitter on. Keep the glitter tray under the work area to catch spills. Clean up is faster when you rinse hands and wipe surfaces right after you finish.
Next steps: try different color combos with friends or siblings. You’ll get a shiny crown that’s perfect for pretend play, photos, or costume days.
4. Animal-Themed Crown
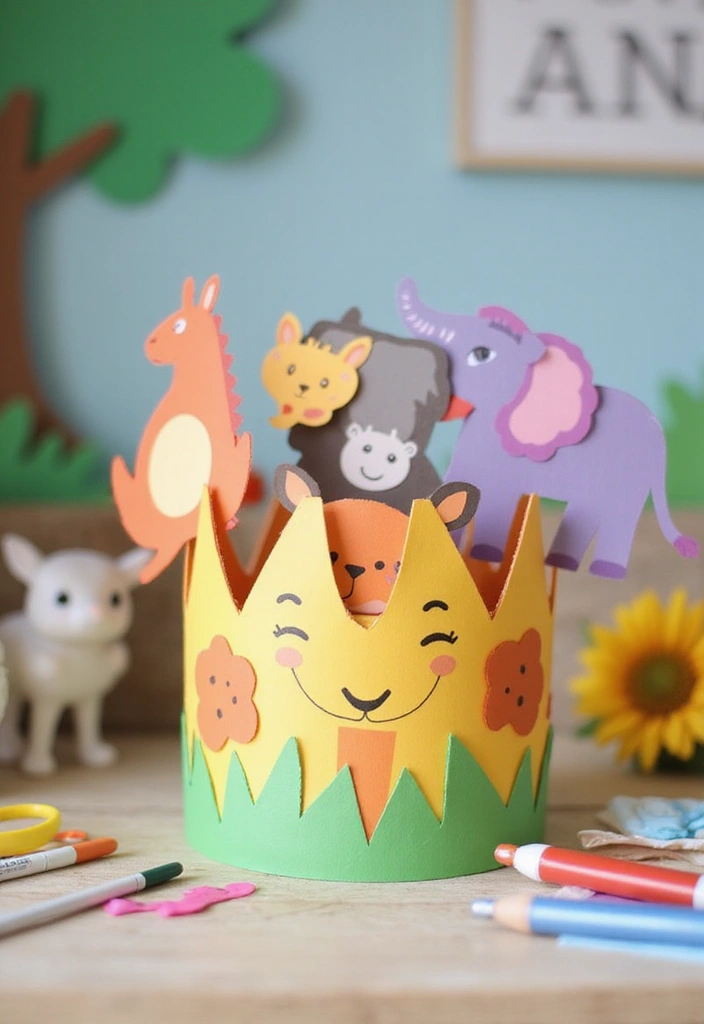
Want a crown that sparks imagination and fits a party or playtime? An animal-themed crown does the trick.
Here is why you should try it: kids love animals, and a crown makes pretend play come alive. You can pick a simple design and watch your child light up as they wear it.
Here is how to build it:
– Materials: sturdy construction paper, safety scissors, glue, markers, and optional felt or craft foam.
– Steps: draw the animal shapes on paper, cut them out, and glue them to a base crown, a strip of paper or a paper headband. Attach ears and a mane for extra character. Decorate with lines, dots, and bold colors. Let glue dry before wearing.
– Variations: add tails on the back for a wag, and use face paint to finish the look.
– Why it helps: this craft boosts creativity, improves hand skills, and invites role play. It’s great for birthday parties or a quick after-school project.
– Tips: keep the task simple for little hands, pre-cut pieces, strong glue, and clear steps. Use safety scissors with young kids.
– Next steps: gather your supplies and start designing your animal crown. Your child will love the finish and the stories that come with it.
5. Recycled Paper Crown

Want a crown that is fun to make and easy on the planet? A recycled paper crown fits the bill. This simple, kid-friendly craft turns scraps into shine. Here is what you need and how to do it.
Materials
– Old magazines, newspapers, or wrapping paper
– Cardstock for the crown base
– Scissors
– Craft glue or glue stick
– Optional markers, stickers, or tape for extra flair
Steps
– Cut wide strips from your paper scraps. The more colors, the better the patchwork.
– Shape a band from the cardstock to fit your head. This is the crown base.
– Glue strips onto the base in a patchwork style. Let colors overlap and mix.
– Let the crown dry. Add a few pops of color with markers or stickers if you want.
Tips:
– Start a quick chat about recycling and why it matters.
– Make a color challenge: try to use the most different hues.
Why it works
– The patchwork look gives each crown a one-of-a-kind style.
– Kids practice color matching and pattern making.
– It shows how waste can become art with a little glue and imagination.
Next steps
– Try a larger crown for pretend play or a mini crown for dolls.
– Save scraps for a future patchwork crown day.
6. Floral Crown for Kids
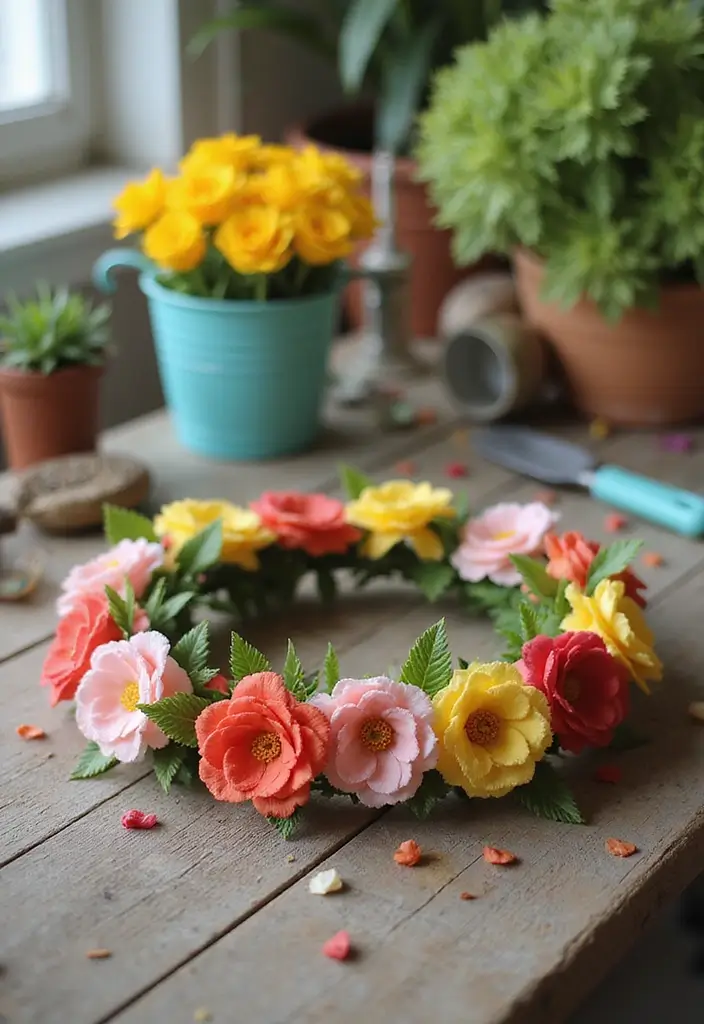
You want a simple, fun craft for a garden party. A floral crown made with faux flowers fits the bill. It brings color to the day and lets kids feel like little royalty in dress-up time.
What you need
– Floral wire
– Faux flowers in bright colors
– Tape or hot glue
– Scissors
– Optional ribbon for a soft, adjustable fit
How to make it
– Measure the wire so it fits your child’s head.
– Bend the wire into a circle and secure the ends.
– Start attaching flowers along the wire with tape or glue.
– Add smaller buds in between for fullness and texture.
– If you want a gentler fit, tuck the ends under and tie a ribbon at the back.
Tips and ideas
– Choose seasonal blooms for different looks and moods.
– Invite friends to make matching crowns for a mini party or photo session.
– Mix big blooms with tiny blossoms for a playful, layered look.
– Safety note: let glue cool before wearing and check for any sharp wire ends.
Why this works
Kids stay engaged as they choose colors, place blooms, and see their crown form. It becomes a small, hands-on lesson about nature and design. This project also doubles as a group activity that builds teamwork and brag-worthy photos.
Next steps
Keep a few extra flowers and wire on hand for quick crown refreshes. Save finished crowns for future dress-up days or outdoor adventures.
7. Superhero Crown
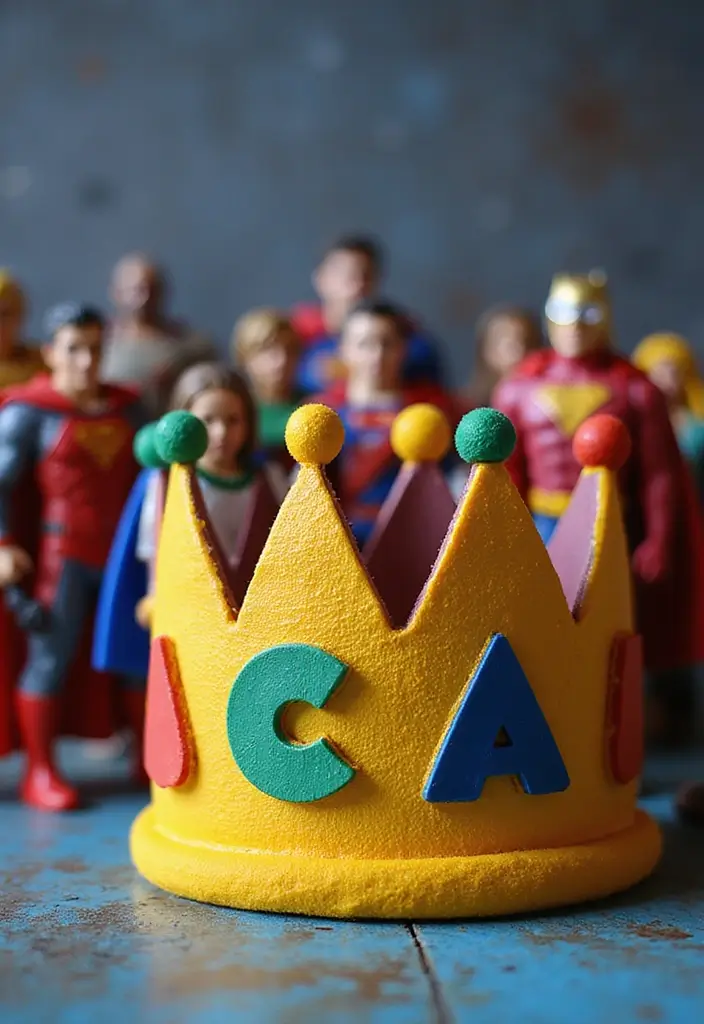
You want a quick, fun way for your child to feel like a brave hero. A DIY superhero crown fits the need. Start with bright cardstock in bold colors. Cut out a classic crown shape, then smooth the edges so little hands can help. Let your child add their favorite logos, painted or glued on. Use markers, foam stickers, or printed symbols for clean lines.
Next steps bring in a cape for extra flair. Cut a small cape from fabric or felt and attach it to the back with glue or a safety pin. A flutter of fabric behind the crown turns pretend play into a real mission.
This crown works for a superhero party craft or for everyday play at home. It’s a fast, low-cost project that kids love to wear and show off.
Creative Tip:
– Make a matching cape from a simple piece of fabric.
– Host a superhero photo shoot after crafting.
Here’s why it helps kids grow: it sparks imagination, storytelling, and confidence while you share a fun, collaborative moment.
Next steps: store the crown with care so it’s ready for the next costume adventure.
Keep glue handy and let kids swap logos to switch heroes today.
8. Rainbow Crown

Need a fast, joyful craft for kids that packs color and teamwork? A rainbow crown does it all.
Here is a sturdy rainbow crown you can finish in one sitting.
Materials
– sturdy paper or cardstock for the crown base
– strips of colored paper in rainbow hues
– glue or clear tape
– scissors
– ruler or craft knife (adult supervision)
– stickers or glitter for extra sparkle (optional)
Tip: choose sturdy paper for a longer crown.
How to make
1) Measure and cut a band that fits your head. Tape or glue the ends to form a circle.
2) Cut long strips; vary their lengths for layering.
3) Glue strips on the band, layering from bottom to top.
4) Add stickers or glitter. Let it dry flat.
Creative ideas
– Try rainbow order: red to violet, or mix warm and cool tones.
– Create a gradient by shading colors gradually.
– Use wide strips for bold blocks or thin strips for a busy mosaic.
– Seal with clear tape to hold pieces.
It’s easy to customize for parties or class time.
Have fun.
Fun tips
– Talk about rainbow colors and color mixing.
– This activity works well for group crafts or birthday stations.
Next steps: hang the crown on a wall or let kids wear it.
Nice and easy to make.
9. Holiday-Themed Crown

Want a quick, festive crown craft that kids love? A holiday-themed crown brings the season to life in minutes.
Materials you’ll need are simple: colored paper or card stock, a strip of cardboard for the headband, scissors, glue or tape, markers, stickers, and a ribbon to fit. Optional textures like fabric strips add depth. Tip: let glue dry for 10 minutes before wearing.
– Christmas Crown:
Cut a wide headband and shape it to fit. Glue on faux holly, small pom-poms, and snowflakes. Add a few simple drawings for stars or snowfall. Tie a ribbon at the back to secure it. Let it dry before wearing.
– Halloween Crown:
Use black and orange as your color theme. Trim on paper pumpkins, bats, and ghosts, then glue them in a playful pattern. Include a couple of glow-in-the-dark stickers if you have them. Finish with a back ribbon or taped ends to fit. Allow time to dry.
Next steps: wear the crown, snap a quick photo, and swap decorations for new looks. It’s an affordable, easy craft for home or classroom. Ready to start? Gather supplies and dive in. They store well for next season and can be reused.
10. DIY Crown Templates

If you need a fast, fun crown craft for many kids, DIY crown templates fit the job. You can print ready designs or draw simple shapes.
– Choose templates: print crown templates or sketch your own curved tops and points.
– Color and decorate: let kids color, add stickers, gems, and shiny tape.
– Cut and fit: cut along the edge, punch holes, then add tape or string to fit.
– Assemble and wear: glue inner tabs if needed, then try the crown on.
Why this works for groups: it saves time with many participants. It also lets kids add their own flair, so every crown looks unique.
Where to get templates? Look online for crown templates or draw your crowns with lines. Use paper sizes to fit kids. Tools matter: blunt scissors and non-toxic glue sticks.
Tips:
– Offer templates in different shapes and sizes for all ages.
– Let kids mix templates to create a one‑of‑a‑kind crown.
– Use sturdy paper or light cardstock and safe glue.
– Set up a coloring station and a quick decorating area.
– Write names on crowns to keep things organized during a party or class.
Next steps: print a batch, set up stations, and watch the party glow with color.
11. Starry Night Crown

Starry Night Crown
Need a crown that invites bedtime adventures and space stories? This Starry Night Crown uses a dark, night-sky look to spark imagination. It’s simple to make and easy for kids to wear during play or storytelling.
What you need
– Black cardstock or a ready-made crown base
– Yellow, silver, and blue paper or foam stars
– Glue
– Silver tinsel or fine glitter
– Optional glow-in-the-dark paint
Step-by-step
1. Cut the crown shape from the black cardstock and fit it to your child’s head.
2. Arrange stars in a scattered pattern across the band. Glue them in place.
3. Add a few strands of silver tinsel or a light sprinkle of glitter for extra sparkle.
4. Brush glow-in-the-dark paint on select stars or along the crown edge for a soft glow after lights out.
Creative ideas
– Mix different star shapes and sizes for visual interest.
– Include a small moon piece or a comet cutout for variety.
– Use washable glue so you can reuse the crown for many nights of play.
– Attach the crown to a headband or elastic to fit kids of different ages.
Why it works
Kids love the shimmer and glow. The crown is quick to make, affordable, and portable, so you can use it for pretend plays, party favors, or bedtime storytelling. Let your child guide the placement of stars to build a tiny space tale as they wear it.
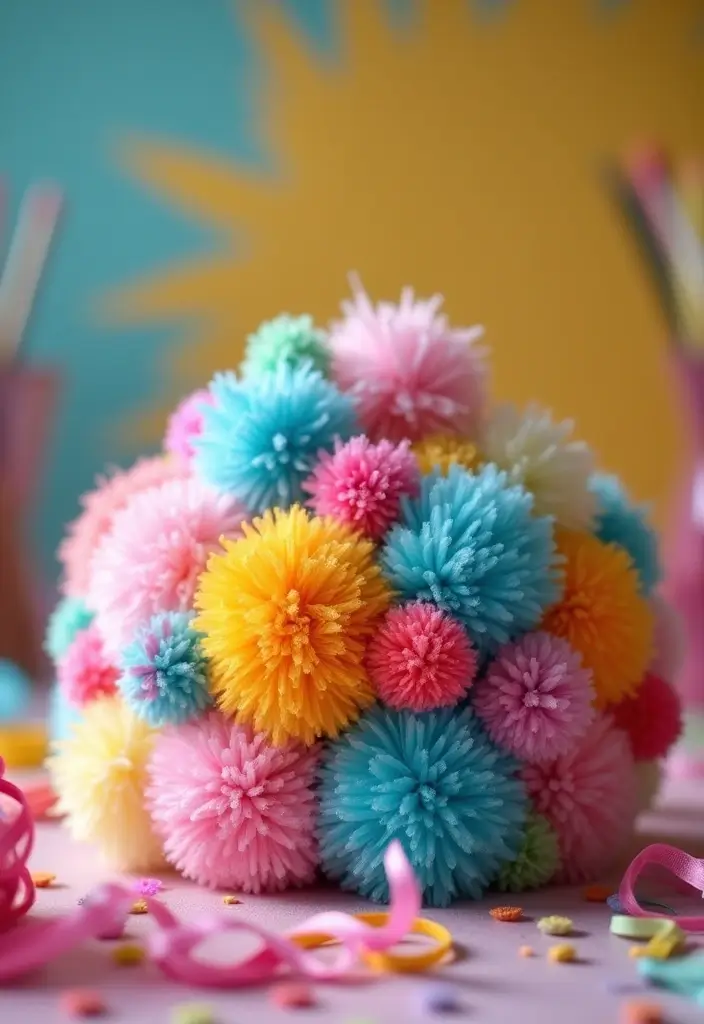
12. Simple Pom-Pom Crown

Simple Pom-Pom Crown
You want a crown that is fluffy and playful. This pom-pom crown fits the bill. It uses a paper base and yarn pom-poms kids love. It’s an easy, hands-on project you can finish fast.
Here is how to do it.
– Gather supplies: colored paper or card stock, yarn for pom-poms, scissors, tape or glue, and a ribbon to tie.
– Build the crown base: Cut a strip of paper long enough to fit around your child’s head. Fold a bit to make a gentle arc. Tape the ends to form a snug headband. Use bright patterns for extra pop.
– Make pom-poms: You can buy ready-made pom-poms or make your own. To DIY pom-poms, wrap yarn around a fork or card 40–60 times. Slip off and tie a piece of yarn around the middle. Snip the loops and puff with your fingers until the ball forms. Trim to the size you want.
– Attach pom-poms: Glue or tape the pom-poms onto the paper base. Start with large pom-poms first, then fill in with smaller ones. Place a few at the front.
– Finish and wear: Add ribbons or stickers if you like. Let the glue dry fully before wearing.
Why this works: it builds fine motor skills, sparks color ideas, and adds a playful accessory.
13. Cultural Heritage Crown
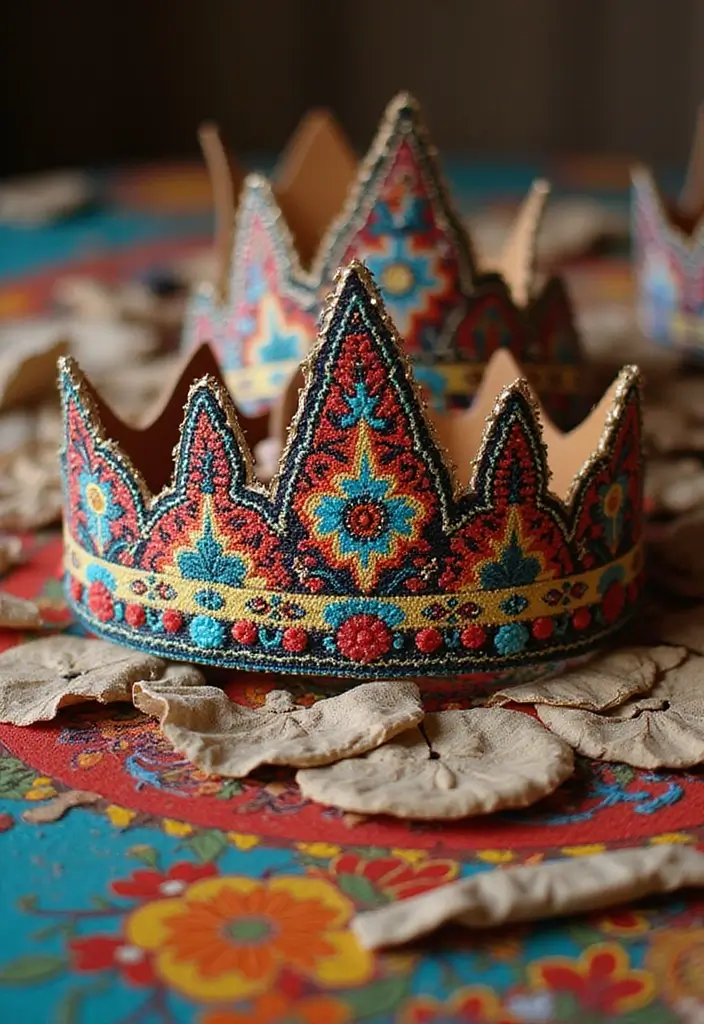
Here is why a cultural heritage crown works well for learning and play. It blends art with a lesson about world cultures. Kids spot patterns, colors, and symbols. They also learn to explain what they design.
What you’ll need
– Colored paper or cardboard for the crown base.
– Beads, fabric scraps, and markers.
– Glue, scissors, and tape.
– String or elastic to fit a head.
– Optional: stickers or foil for shine.
How to make it
1. Pick patterns from cultures you study. Let kids choose a design and color that speaks to them. Add a short note about what it means.
2. Fold or cut a crown strip and tape it together. Make the base wide enough to sit on a child’s head.
3. Decorate with texture. Add beads, fabric, markers, and foil. Mix smooth and rough surfaces for interest.
4. Tell the story. Have kids explain why they chose each pattern. Share the crown and story with family.
Tips for learning
– Include local cultural elements for a personal touch.
– Plan a presentation day where kids wear their crowns and share their stories.
– Do a quick fact check first. Respect patterns and avoid stereotypes.
Here’s what to do next: keep the session simple, with time for discussion and show-and-tell. This project builds pride in both personal and cultural identity while keeping craft time enjoyable.
14. Confetti Crown
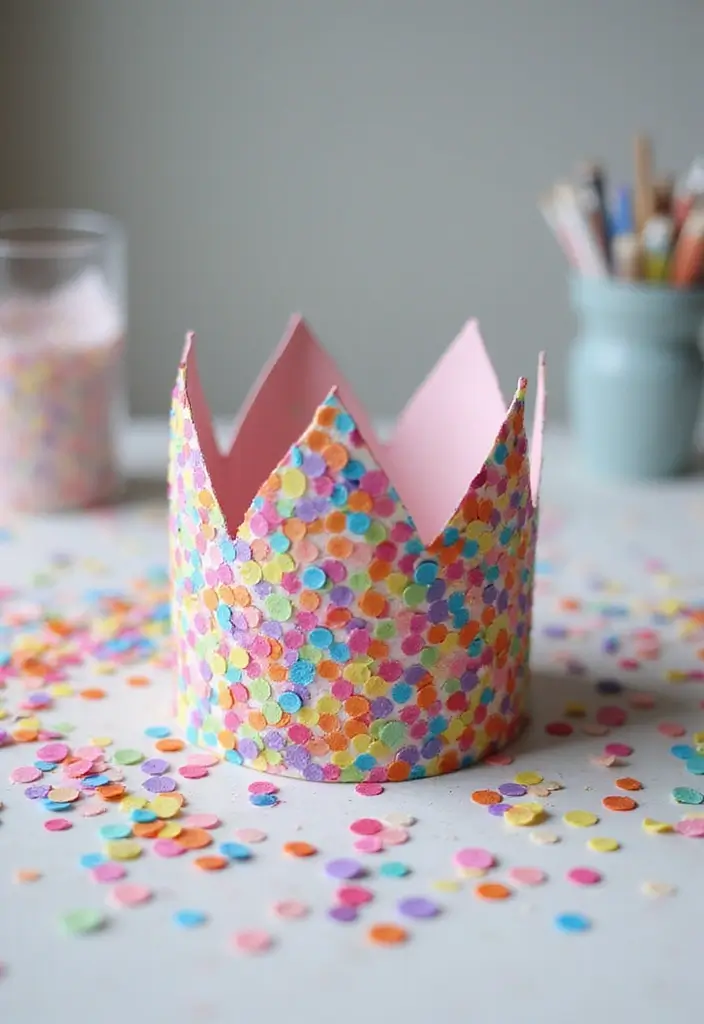
You want a crown that shines and is easy to make. This confetti crown hits that goal and gives kids pride when they wear it.
What you’ll need
– Sturdy paper crown base
– Clear glue or a glue stick
– Confetti in mixed colors and sizes
– Optional biodegradable confetti
– Scissors and tape or stickers to finish edges
How to make it
– Step 0: Pick colors that fit your party.
– Step 1: Set the crown on a flat surface. Lay glue in light lines.
– Step 2: Sprinkle confetti over the glue. Press pieces so they stick. Work in sections.
– Step 3: Rotate the crown as you add pieces. This keeps colors even.
– Step 4: Let glue dry completely. If you want, seal the edge with tape or add stickers.
Finish and wear
– When dry, wear the crown for a birthday, pretend play, or fun at home.
– It also shows you can finish with a strip of tape or a few stickers.
Why this works
– The activity blends color and texture, keeping hands busy.
– It builds fine motor skills as little fingers place pieces.
Safety and clean up
– Use glue sparingly to avoid mess.
– Keep small confetti away from younger children and clean up with a quick wipe.
Creative ideas
– Use biodegradable confetti for an eco-friendly twist.
– Cut confetti from scraps of paper or old cards.
This tiny crown makes a big moment, and you can reuse the base for more colors later.
15. DIY Cardboard Crown
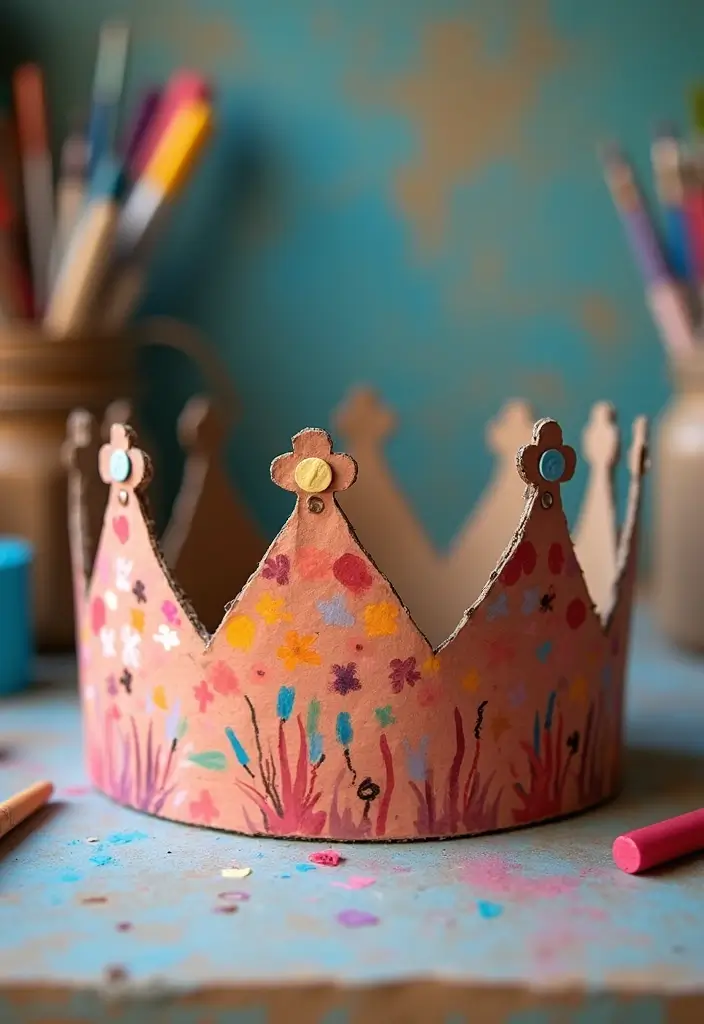
Want a crown that can handle outdoor play and busy hands? A cardboard crown fits the bill. It’s light but steady, and you can tailor it to any kid’s imagination.
What you’ll need
– Thick cardboard
– Scissors and a ruler
– Pencil for tracing
– Paints, markers, stickers
– Optional add-ons: feathers, beads, photos
– Tape or glue, and a small elastic or ribbon for the fit
How to build it
1) Trace a crown shape on the cardboard. Make it wide enough to sit comfortably on the head.
2) Cut out the crown and cut a second, matching strip to wrap around the head as the base.
3) Attach the base to the crown with tape or glue. Add a little extra padding if needed for comfort.
4) Let kids paint, color, and decorate. They can use markers, stickers, or color patterns that fit their mood.
5) Add extras like feathers, beads, or photos for a personal touch. Seal edges to keep pieces in place.
Texture and style options
– Try a paper mache layer for a textured look that stays tough in wind and sun.
– Work in pairs to decorate large crowns. Team effort can spark new ideas.
Wear and care tips
– Sand any rough edges first to avoid snags.
– Use a thin elastic at the back or tie a ribbon to keep the crown on during play.
– For outdoor use, a light coat of clear glue helps it last longer and dry quickly.
Next steps: save the crown for future games, or remake it with new colors for each new story you want to tell.
16. Layered Crown with Ribbons
You want a crown that looks layered and fancy without the fuss. A layered crown with ribbons gives that look and stays comfy for kids. Here is why this design works for parties and everyday play.
1) Cut a band to fit your head and glue the ends to make a circle. Let it dry so it plants a solid base.
2) Pick a base color for the crown and cut 2–4 extra strips in brighter shades. The extra layers add depth and shine.
3) Layer the strips from largest to smallest.
4) Glue them to the base in a slightly offset pattern. Press everything firmly so it sticks.
5) Attach several ribbons to the back of the crown. Let them hang down as part of the design. You can knot the ends or tape them to hold fast. If you want extra security, add a tiny strip of tape where the ribbons meet.
6) Add texture with shiny paper, fabric scraps, or tiny stickers. You get a mix of gloss and feel that kids love.
7) Try it on, check the fit, and trim any long tails. A snug crown stays in place during play.
Tips:
– Mix textures with foil paper, felt, or satin scraps.
– Plan color choices ahead to keep the look balanced.
Next steps: use this crown for a party, a photo day, or a dress-up moment with friends.
17. Magic Unicorn Crown

Want a unicorn crown that kids will reach for again and again? You can make one fast with just a few simple supplies. This crown works great for dress-up days, themed parties, and cozy pretend play.
What you need
– Sturdy paper or cardstock for the crown base
– Metallic paper or foil for the horn
– Glue, scissors, tape
– Markers or colored paper for the mane
– Sequins, small faux flowers, or pom-poms
– Optional glitter for a little extra sparkle
Here is how to build it
– 1) Make the crown base. Measure your child’s head and cut a long strip. Curve it into a circle and tape the ends so it fits snugly but comfortably.
– 2) Create the unicorn horn. Roll a strip of metallic paper into a cone, then tape it shut. Glue the cone to the front of the crown.
– 3) Add the mane. Cut thin strips of colored paper or felt. Glue them around the crown to form a rainbow fringe. Tuck in a few small sequins or flowers for extra charm.
– 4) Sparkle finish. Lightly dab glue on the mane and sprinkle with glitter. Tap off the excess.
Tips and ideas
– Try a rainbow mane or pastel shades to fit your party theme.
– Use different horn shapes—a tall cone or a spiraled tip both look cute.
– Make a softer version with thick paper and a fabric lining for comfort.
Next steps: test fit, add decorations, and you’re ready for photos, games, and lots of imaginative fun.
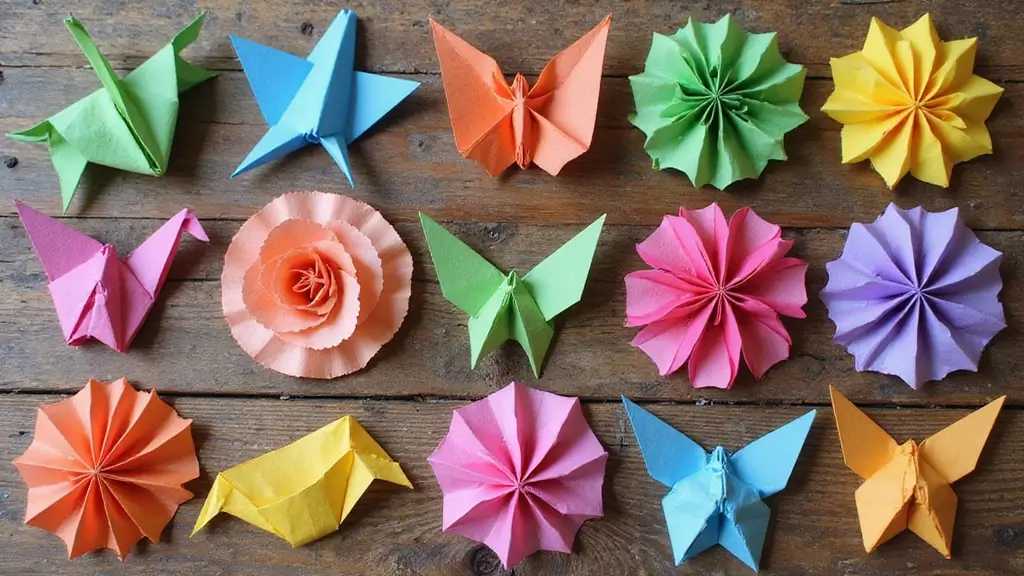
18. Super Simple Origami Crown

Want a crown craft that kids can finish with little help? This super simple origami crown fits the bill. It’s quick, tidy, and great for focus as little hands learn new folds.
Materials
– A square sheet of paper (6×6 inches or 15×15 cm works well). If you only have printer paper, cut it into a square first.
– Crayons, markers, stickers, or glitter for decorating
– Tape or glue (optional for a snug fit)
How to make it
1) Place the square on the table with the colored side up. A bright color makes the crown feel special.
2) Fold the paper in half from left to right. Crease, then unfold. This gives you a center line.
3) Fold the left and right edges toward the center line. You should end up with a narrow rectangle.
4) Fold the bottom edge up to the center to form a band. This band is what sits on the head.
5) Along the top edge, make three small folds to create crown points. Try a center peak and two side peaks.
6) Turn the crown over and adjust the points as needed. Use a little tape or glue to secure it if you want a sturdier crown.
Tips and variations
– Start with colorful origami paper for extra appeal.
– Try different sizes to get a family set of crowns. A larger square makes a bigger crown; a tiny square makes a cute mini crown.
– Let kids decorate after the folds. Stickers, doodles, or glitter spark imagination.
This simple origami crown blends art with craft. It gives kids a sense of achievement and invites them to explore shape and symmetry.
19. Collage Crown

You’re looking for a crown craft that sparks real creativity, without a long setup. This collage crown fits the bill. It uses a simple cardstock base and lets kids mix images, color, and texture for a bold, personal look. They can shape patterns, or tell a tiny story with what they choose.
Materials
– Cardstock crown base provides a sturdy starting point.
– Magazines, colored paper, and fabric scraps offer a wide mix of images and textures.
– Glue sticks are easy for little hands.
– Child-safe scissors cut clean shapes.
– Markers, stickers, and pencils add color and detail.
– Optional ribbon helps you fit the crown to any head.
How to make it
– Trace a simple crown shape on the cardstock and cut it out.
– Gather cutouts from magazines or fabric scraps in a large, inviting pile.
– Plan your design first, either with a quick sketch or a rough map of where pieces go.
– Glue large pieces first, then fill gaps with smaller shapes.
– Add details with markers, paint, or stickers to finish the look.
– If you want a tight fit, punch two tiny holes and tie a ribbon.
Creative ideas
– Host a themed collage day with nature, dreams, or adventures.
– Turn each crown into a tiny story by adding a scene with shapes.
– Use recycled scraps to show how art can reuse materials.
What kids learn
– This craft builds fine motor skills and color sense.
– Kids learn basic composition by balancing shapes and colors.
Next steps
– Display crowns on a wall or door for a mini exhibit.
– Take photos to remember the moment.
– Store scraps for the next crown project.
20. Stenciled Crown

If you want a crown project that is quick and easy, try a stenciled crown. It looks bright and fun with little mess. This style works well for kids of many ages.
Materials you’ll need:
– Crown base made from sturdy paper or cardboard
– A crown template or pattern
– Sponges or small brushes
– Paint or fabric paint, depending on the crown material
– Colored markers or pencils
– Decorative bits like stickers, gems, or glitter
– Clear spray sealer or gloss (optional)
Here is how to do it:
– Place the template on the base and tape it so it won’t move.
– Pick a color theme and dab your sponge or brush lightly.
– Gently dab paint through the stencil; lift carefully to reveal clean shapes.
– Let the base dry, then add a second color or add hand drawn details.
– Finish with personal touches from markers or glued decorations.
– If you used fabric paint, let it cure fully before wearing. A light spray seal adds durability.
Helpful Tips:
– Try different stencils like stars, hearts, or flowers for variety.
– For a lasting finish, use fabric paint on fabric crowns and seal when dry.
This crown craft fuels creativity and stays simple for younger kids. It gives you a bright, ready-to-wear crown in one session.
21. Playful Animal Ears Crown
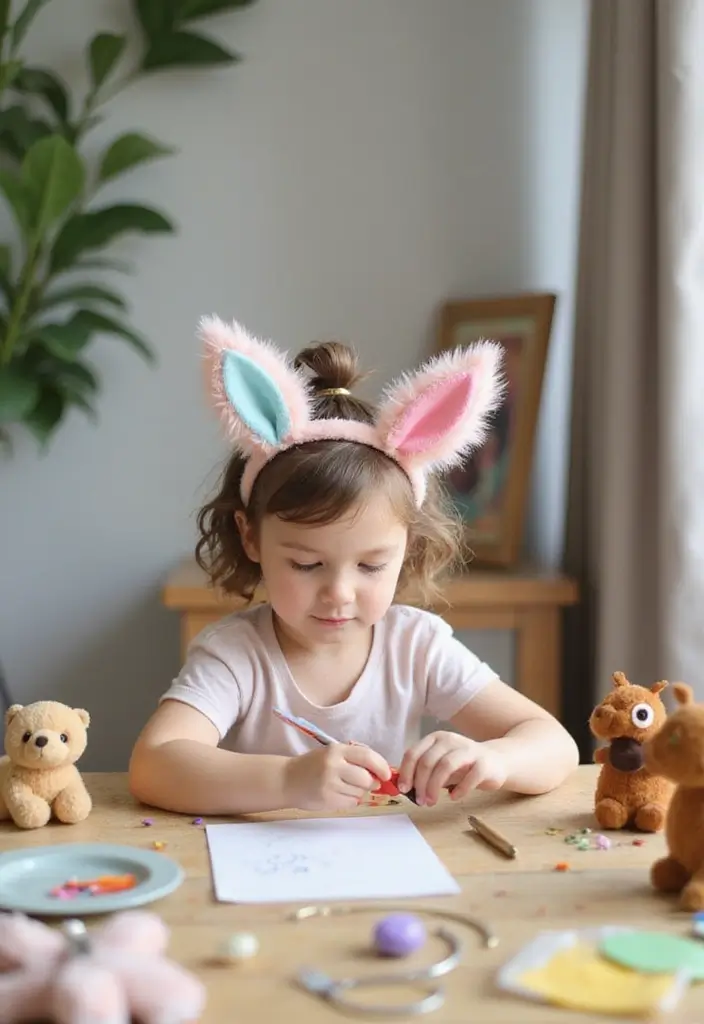
You want a crown craft that is easy to finish and fun to wear. The playful animal ears crown delivers that. It blends a simple crown base with soft ears for instant dress-up magic.
– Materials:
– Cardboard or sturdy paper for the crown
– Felt or thick paper for ears
– Scissors, glue or tape
– Markers, crayons, or paint
– Optional decorations: yarn, sequins, stickers
– Steps:
1. Make a crown base that fits. Measure your head and cut a strip. Add tabs so it sits snugly.
2. Cut two ear shapes per animal. Kitty ears are small triangles; bear ears are rounded.
3. Glue the ears to the crown. Hold until dry.
4. Color and decorate. Bright colors pop. Add fur texture with felt or yarn.
5. Attach a simple strap if you want it to stay on during play.
6. Try many animals. Cat, dog, fox, or bear are big hits.
– Play ideas:
– Have a mini animal parade or dress-up party where everyone wears a crown.
– Use face paint to complete the look.
– Tell a quick animal story and let the crowns star in it.
– Care:
– Store flat in a box. Gently reshape ears before reuse.
– Reuse pieces to make a new crown tomorrow.
22. Pompom and Ribbon Crown
If you want a crown that feels joyful and easy to make, this pom-pom and ribbon crown fits the bill. It moves with kids as they play and grabs attention with bright, fluffy color.
– Materials: sturdy base (cardboard strip or soft headband)
– Colorful pom-poms
– Long ribbons
– Craft glue or glue dots
– Scissors
Here is how to build it:
1) Cut a sturdy base that fits around the head, such as a folded cardboard strip or a soft headband.
2) Glue pom-poms evenly around the base so they sit high and fluffy.
3) Cut ribbons into long pieces and tie or glue them at intervals, letting them hang for a playful swing.
4) Pick colors that mix well and vary ribbon lengths for a lively look.
5) Let everything dry fully before wearing.
Next steps: personalize with extra bits like bells or star shapes.
Fun Tip:
– Use different ribbon lengths for a lively appearance.
– Encourage kids to make matching bracelets or hair accessories!
This craft invites teamwork when you create crowns together and adds a joyful flair to any celebration.
23. 3D Paper Flower Crown
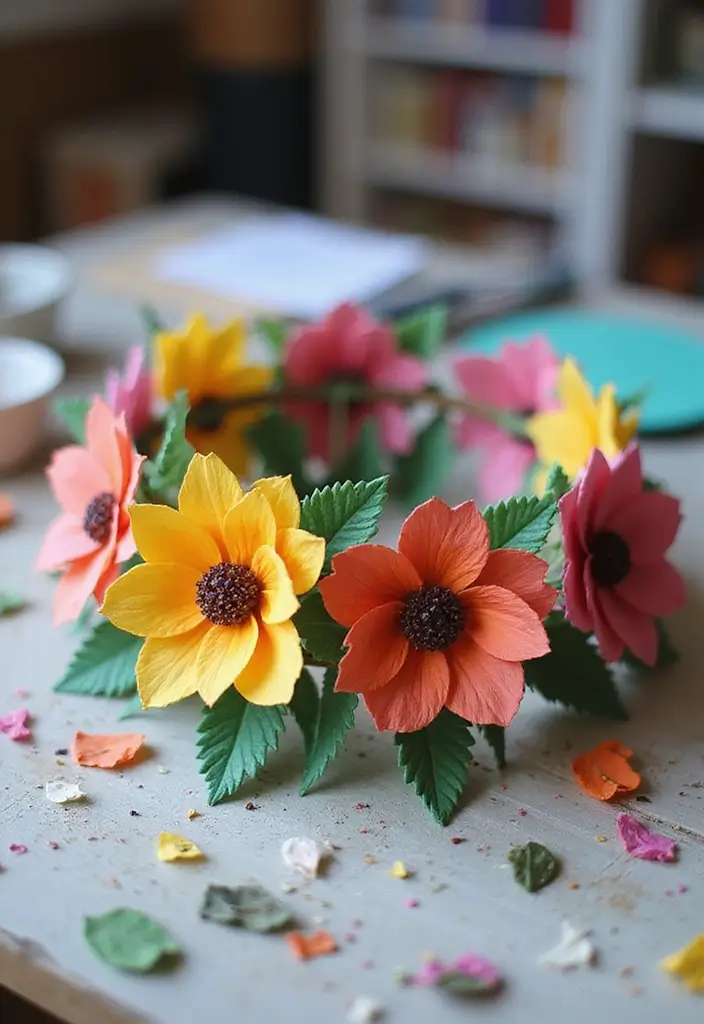
You want a crown your kid will love to wear and talk about. A 3D paper flower crown makes that easy. It looks fresh and feels fun to make.
Materials
– Colored craft paper in several shades
– Scissors
– Washable glue or a glue stick
– A strip of sturdy paper or light cardboard for the crown base
– Optional: markers, curling scissors, tape, and a little ribbon
Steps
1) Build the crown base. Cut a long strip of paper. Tape the ends to fit around your child’s head. Make it comfy and light.
2) Cut and shape the flowers. Use different colors. Cut petals in circles or teardrops. To create a 3D look, fold the petals a touch and glue in layers. Pinch the centers so petals lift.
3) Attach the blooms. Glue the flowers onto the crown base. Vary the size and place so the crown feels full but not crowded.
4) Finish and wear. Let glue dry fully. Try a leaf or two to add green touches. You can add a small ribbon to tie it on.
Tips
– Use bright colors for a lively crown.
– While you craft, name the flowers you imitate to add a mini lesson.
– Keep glue to a kid-friendly amount to prevent soggy parts.
What you gain: better finger strength, color awareness, and a crown ready for play time photos.
Next steps: experiment with different flower shapes, add beads, or switch to a softer crown base for younger kids.
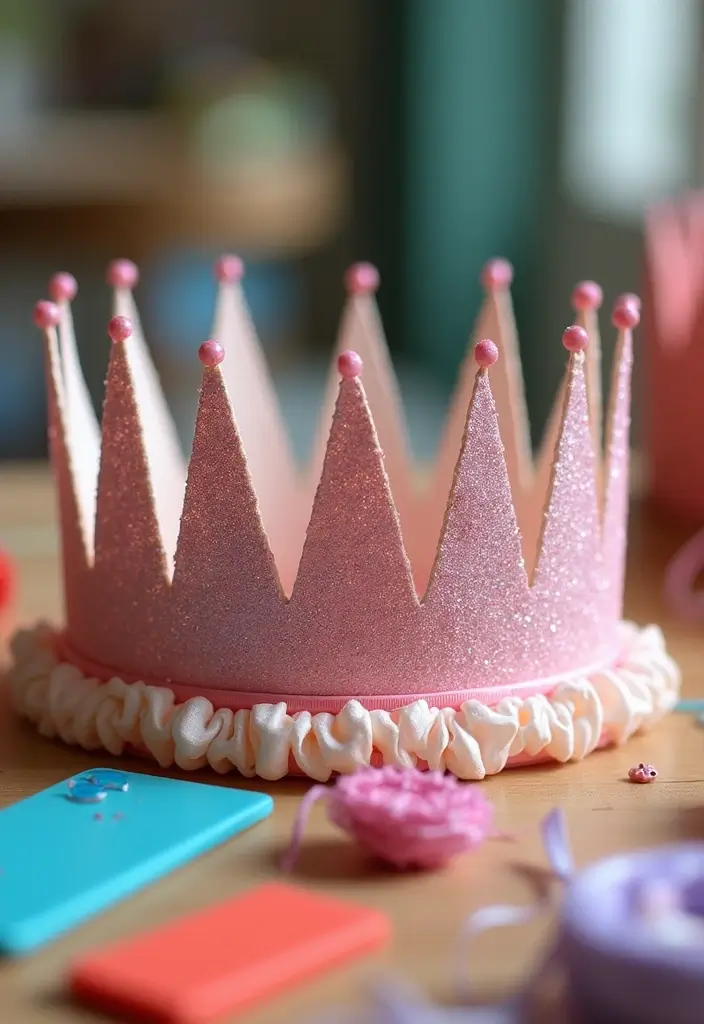
24. Whimsical Fairy Crown

Want a fairy crown that feels magical but is easy to make at home? You can craft a light, kid-friendly crown that shines during dress-up, photos, and party time.
What you’ll need
– Foam crown base or sturdy cardboard to shape the band
– Craft foam sheets or glitter paper for color
– Faux gems, small beads, and tiny artificial flowers
– Mini butterflies or sparkly accents
– Glue or low-temp glue gun (adult help for hot glue)
– Scissors, ruler, and pencil
– Optional: tiny LED fairy lights with battery pack
– Ribbon or elastic to fit
How to build it
1) Cover the crown band with a bright piece of foam or glitter paper so the shape looks finished.
2) Arrange tiny flowers, butterflies, and gems along the band. Glue them in small clusters for texture.
3) If you have lights, weave the string along the crown and tuck the battery pack at the back. Keep wires neat and hidden.
4) Tie on a ribbon or slip in elastic so the crown fits securely around small heads.
Creative tips
– Add LED lights for a soft glow that makes the crown feel real at dusk.
– Make a matching wand to complete the fairy look.
Next steps: keep the colors pastel for a dreamy vibe, and let kids pick their favorite charms to personalize their crown. This simple crown sparks imagination and gives kids a ready-to-wear prop for fairytale play.
25. Music-Themed Crown
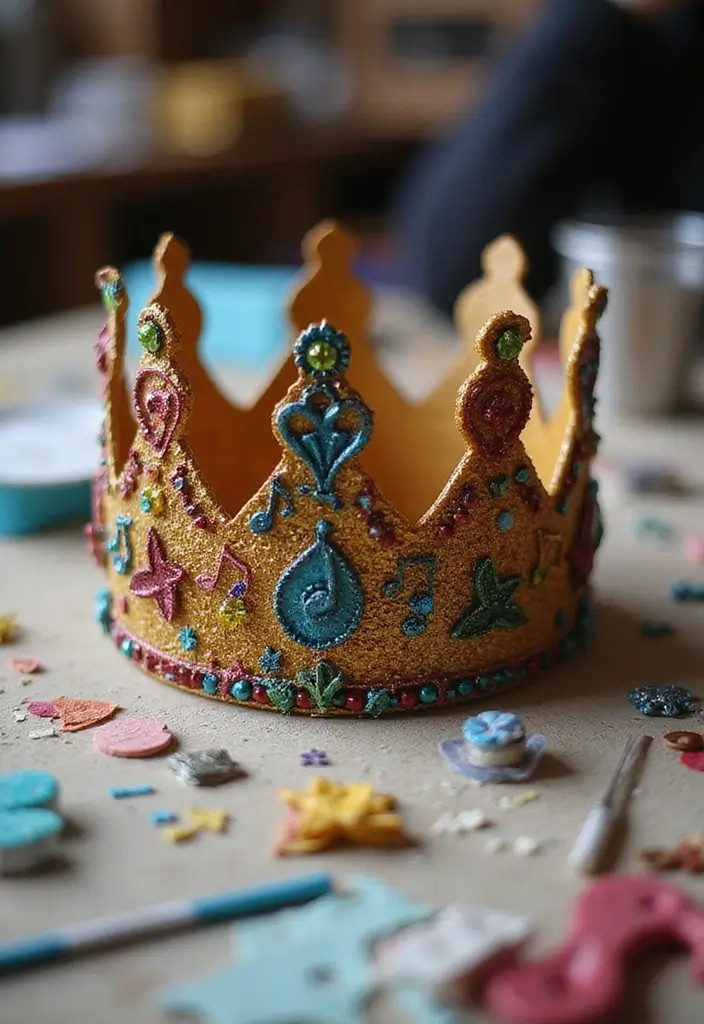
Are you looking for a crown that fits a music party or pretend concert? This music-themed crown helps kids celebrate sound and rhythm in a simple craft. It blends color, cutouts, and tiny sounds and makes the party more playful. You can tailor it to any favorite tune.
Suggestions:
– Use old sheet music for a unique look that nods to real composers.
– Add bells or ribbons to bring gentle sounds as kids move.
– Cut out musical notes and simple instrument shapes. Stick them in bright spots.
– Let kids pick colors that reflect their mood or favorite song.
– Use non toxic glue and safe scissors for a smooth build.
Next, step by step. First, make a sturdy base from cardboard. Trace and cut a crown shape. Punch two small holes for a ribbon strap. Then arrange notes and instrument cutouts, glue them on, and color with markers or paint. Let it dry so pieces stay put. Tie the ribbon at the back, adjust for a comfy fit, and try it on.
Practical tips:
– Mix flat pieces with a few 3D elements for depth.
– Tape loose pieces while glue dries.
Next steps: share a crown photo, swap designs, and host a mini parade.
Have fun crafting.
26. Weather-Themed Crown
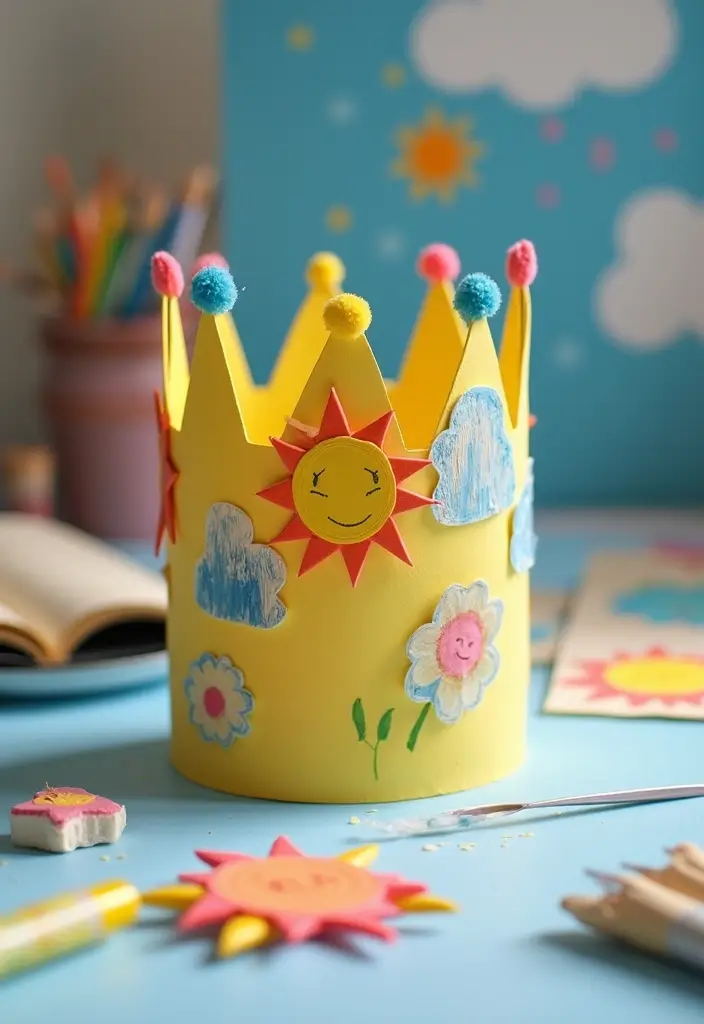
You want a weather crown that is fun and easy to make. This craft turns simple paper into a tiny stage for sun, cloud, raindrop, and snowflake shapes. It blends color, texture, and play so kids learn as they create.
Materials
– Collect colored paper in sun yellow, cloud white, raindrop blue, and snowflake light blue or silver.
– Grab cotton balls for fluffy clouds.
– Pick shiny paper for the sun to catch light.
– Use a sturdy crown base made from cardstock or thick cardboard.
– Have glue, a glue stick, scissors, and markers.
Steps
– Cut a crown base that fits your child.
– Cut simple shapes for sun, cloud, raindrop, and snowflake.
– Attach each piece to the crown in different spots.
– Add cotton to the clouds and some sparkle with markers.
– Let glue dry before wearing.
Learning ideas
– Talk about how the weather affects daily plans and what we wear.
– Create a mini weather forecast while wearing the crown.
– Show four patterns: sunny, cloudy, rainy, snowy.
Tips
– Make the crown adjustable for different heads.
– Use kid-safe glue and blunt scissors.
– Keep the crown flat while it dries to keep shapes tidy.
Next steps: vary the icons, add a day-by-day forecast, or turn this into a small classroom demo.
Conclusion
Crafting paper crowns is a fantastic way to spark creativity and imagination in children.
From nature-themed crowns to magical unicorn designs, each idea encourages kids to express themselves while developing their crafting skills.
As you embark on these creative adventures, remember that the most important part is the joy and laughter shared along the way. Enjoy crafting together and watch the smiles grow!
Note: We aim to provide accurate product links, but some may occasionally expire or become unavailable. If this happens, please search directly on Amazon for the product or a suitable alternative.
This post contains Amazon affiliate links, meaning I may earn a small commission if you purchase through my links, at no extra cost to you.
Related Topics