This time of year brings back memories of warm lights and handmade ornaments. Here is why I chose this idea. I want simple crafts that brighten a room without a big mess. Paper Christmas tree projects fit that need perfectly. They glow in the window and can be finished in minutes.
Who it’s for If you love cozy budget-friendly projects, this one is for you. This is for families, teachers, roommates, and anyone who enjoys tidy, easy crafts. You care about looks that feel thoughtful and fun. This collection fits busy days and small spaces.
What you’ll get You’ll get 26 paper Christmas tree ideas, from tiny desk ornaments to larger wall displays. Each project uses simple paper and common supplies. The ideas cover styles from modern to rustic and everything in between. Steps are clear so you can finish in a weekend or a quiet afternoon.
Here is how to turn the ideas into real decor. Start with a color plan. Pick 2 or 3 colors that suit your room. Gather paper, scissors, glue, tape, and a little string. Fold, cut, and glue as you go. Mount on cardboard to stand up or tape to a wall. Display on a mantel, shelf, or entryway.
Look for looks that feel fresh and cozy. Geometric shapes, layered paper, and soft pastels are popular. Try magazine pages for a vintage feel. Go kraft paper for a rustic vibe. The set stays budget-friendly and bright.
Are you ready to start? Dive into the guide and pick a project that fits your space. Set up a quick workspace, grab a few scraps, and start cutting. You will finish with a small forest of paper trees that bring holiday cheer to your home.
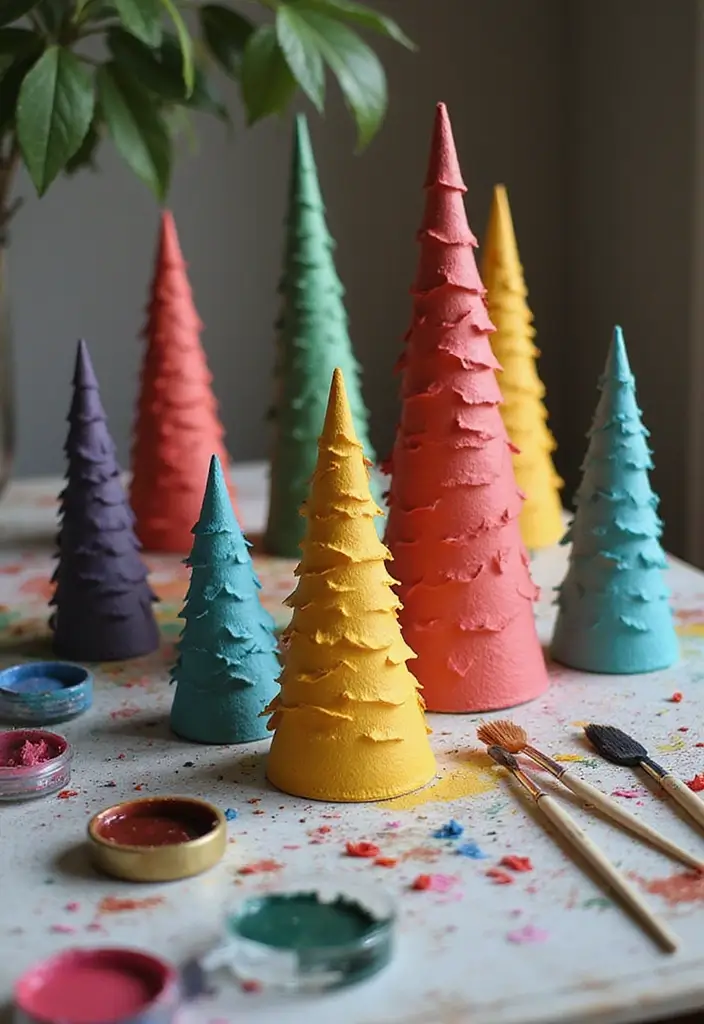
1. Classic Cone Trees

Classic cone trees are a simple, friendly way to add paper art to your holiday. You can pull them from magazines, gift wrap, or colored cardstock. They fit any color theme and they cost almost nothing.
Here is why they work. They are fast to make and you can reuse scraps. They look great on a table, shelf, or windowsill.
Materials
– Paper circle: cut from any scrap you have.
– Glue or tape to hold the cone edge.
– Optional: yarn for texture, stickers for color, or a light spray of glitter for sparkle.
– Scissors for cutting and shaping.
How to make it
– Cut a neat circle. This circle becomes your cone base.
– Gently roll the circle into a cone shape.
– Seal the edge with a dab of glue or a strip of tape.
Decorating ideas
– Wrap a band of yarn around the cone for texture.
– Add stickers or a few glitter specks for shine.
– Try two colors for depth. Bold colors stand out.
– Make different heights for interest.
– For a fun crown, top the cone with a small bead or button.
Display tips
– Group several cones on a tray to make a bright centerpiece.
– Place a solo cone on a shelf for a simple look.
– Use different sizes to fill odd corners.
Storage and care
– Double sided paper gives a bright look on both faces.
– Store finished trees in a box for next year.
2. Layered Paper Trees
You want a holiday decoration that feels rich and homemade. Layered paper trees give you depth with just a few cuts.
Here is why layered paper trees work. These DIY paper Christmas trees are light and easy to store.
– They stay light but look full.
– You can mix papers to fit any room.
– They store flat when not in use.
– Start with a sturdy base: cut a large circle or a triangle from thick cardstock or scrap cardboard.
– Cut the layers: make 4 to 6 shapes, each one smaller. You can use paper circles or triangles so they stack neatly.
– Pick your paper: patterned scrapbook paper for a rainbow look, or solid colors for a clean style.
– Glue in place: stack the largest at the bottom, center on each layer, and press firmly.
– Add a trunk touch: tie a small piece of natural twine around the middle or let the bottom layer touch a short strip of twine as a base.
– Optional sparkle: dab a little glue with glitter or add a tiny star at the top.
If you want a softer look, try pale papers and fewer layers. They make a great gift too.
Next steps: Try two sizes for a small display. Glue the layers to a cone cut from cardboard to give height. Or attach a tiny loop of twine so you can hang it as a wall ornament.
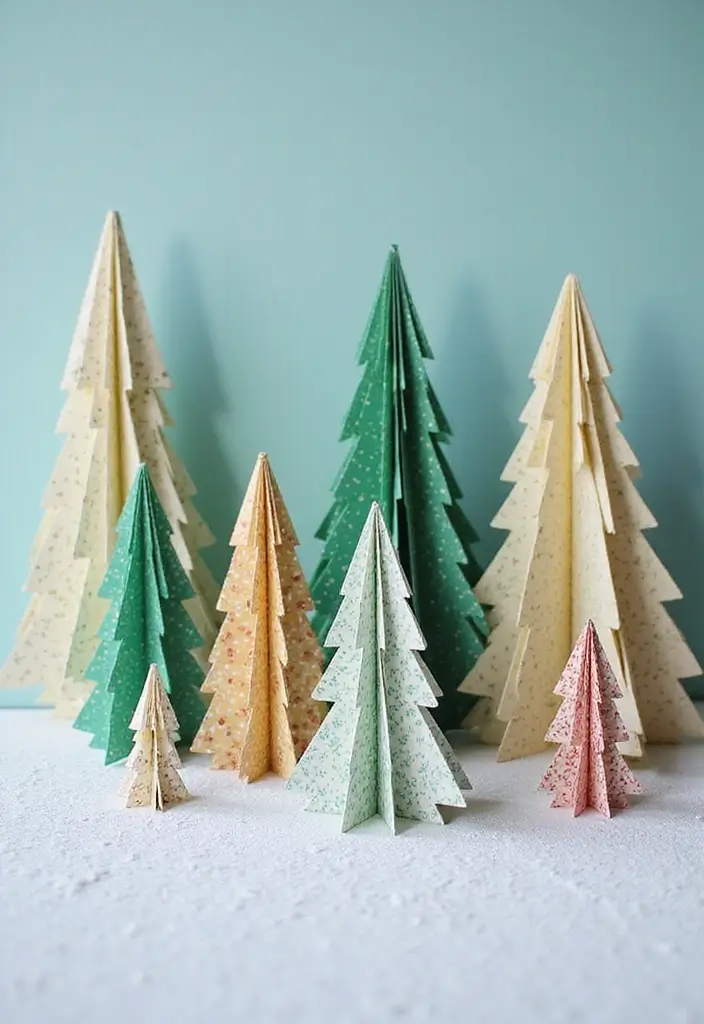
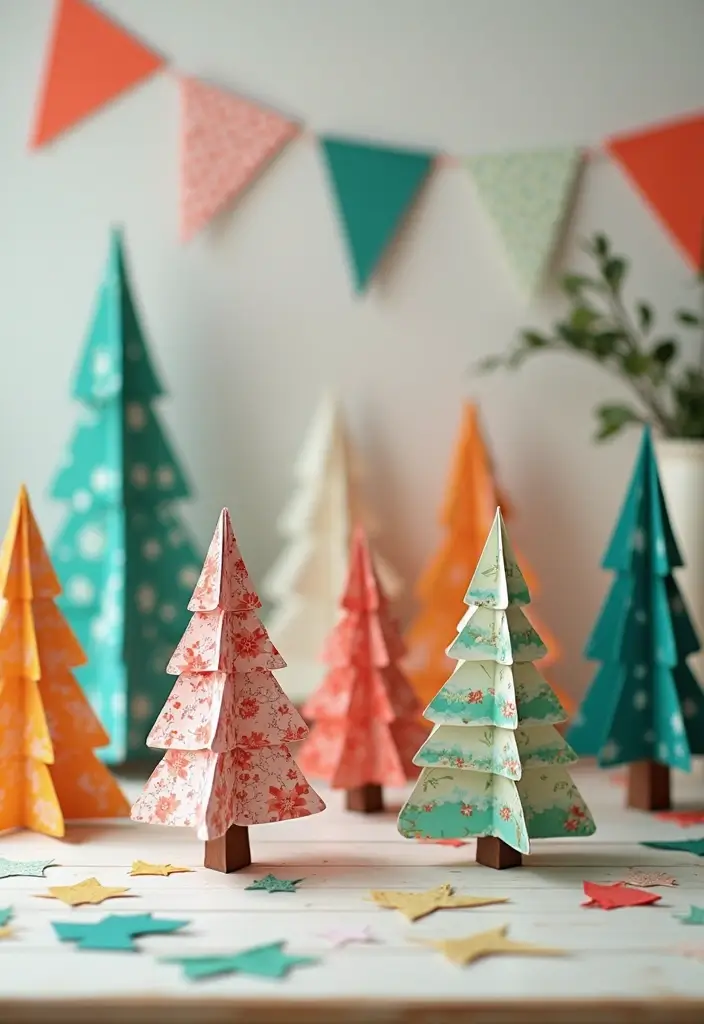
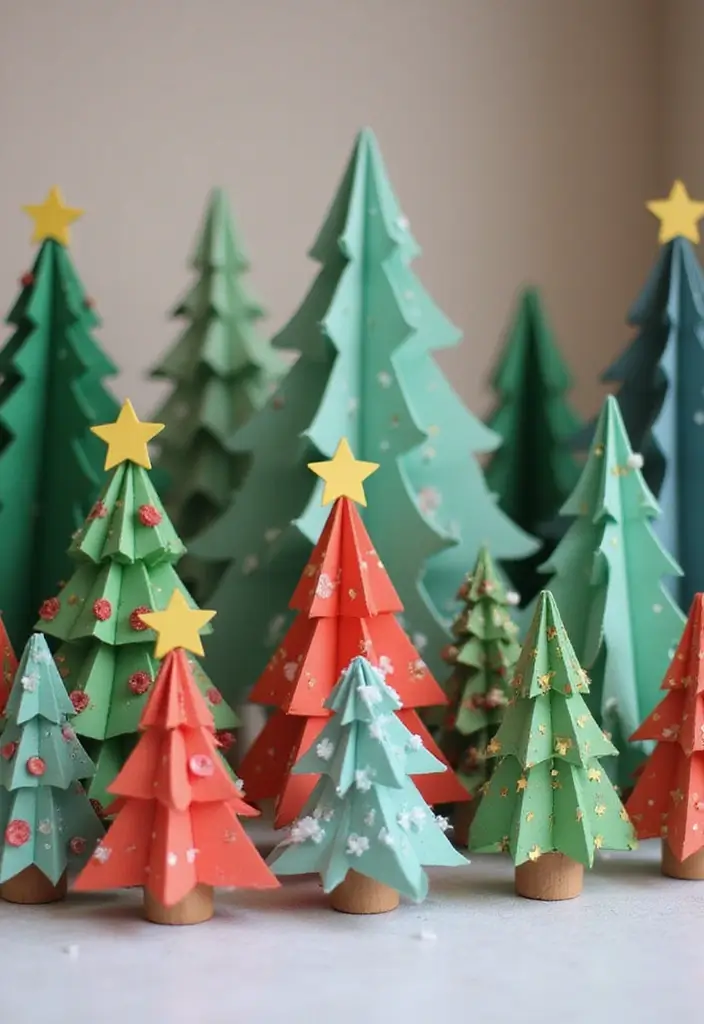
3. Origami Christmas Trees

If you want classy holiday decor you can make at home, origami Christmas trees fit the bill. With a few neat folds, a square sheet becomes a tiny pine. All you need is square paper, origami sheets or any colored square you like. Choose colors that match your tableware or go for a frosty white for a winter mood. Patterned or textured paper adds depth without extra mess.
These trees can stand on their own. They work as place markers, a festive centerpiece, or a bright table accent. Try a mix of sizes to form a tiny forest in a tray. Patterned paper makes every tree look unique. A simple white tree with red edges can feel crisp and fresh.
Here is why they work for your decor plan: they are easy to make, cost little, and you can reuse scraps to create new looks next year.
What you need
– Square sheets in colors you love
– Patterned or textured paper for depth
– A flat, clean workspace
Quick tips
– Watch short tutorials for clear folding steps
– Use larger paper for bigger trees and smaller sheets for tiny ones
– Practice on a scrap to get sharp edges
Next steps
– Gather supplies and pick a color scheme
– Fold a test tree to learn the steps
– Display your finished trees on a table, mantle, or centerpiece
4. Folded Book Page Trees

Folded Book Page Trees give your home a warm, green touch this season. They turn old books into tiny, leafy sculptures you can see from across the room. It’s a simple, low-effort project for a cozy Christmas display.
Start by picking the right book. Look for sturdy pages and a thick spine. A book with good weight holds folds well and won’t sag. If you fear cutting, you can use copies. That keeps the original safe.
Here is why this works. You fold pages in a pattern to build a tree shape. The pages become leaves. The stack grows taller as you add folds. You can choose a tall tree or a small one to sit on a shelf.
Next steps to make it yours.
– Choose one book or several.
– Open to the middle and start with a simple valley fold along the page edge.
– Create a few small creases up the page to form a branch line.
– Repeat, page by page, until the tree reaches your desired height.
Decorate to taste. Paint the page edges a soft green or dab on gold. Tie a ribbon around the base, or hang a tiny ornament at the top. If you copy the pages, you can build a forest by using more than one book.
This decor adds a rustic, cozy feel to any room. It offers a quiet, thoughtful way to celebrate the holidays.
5. Newspaper Trees
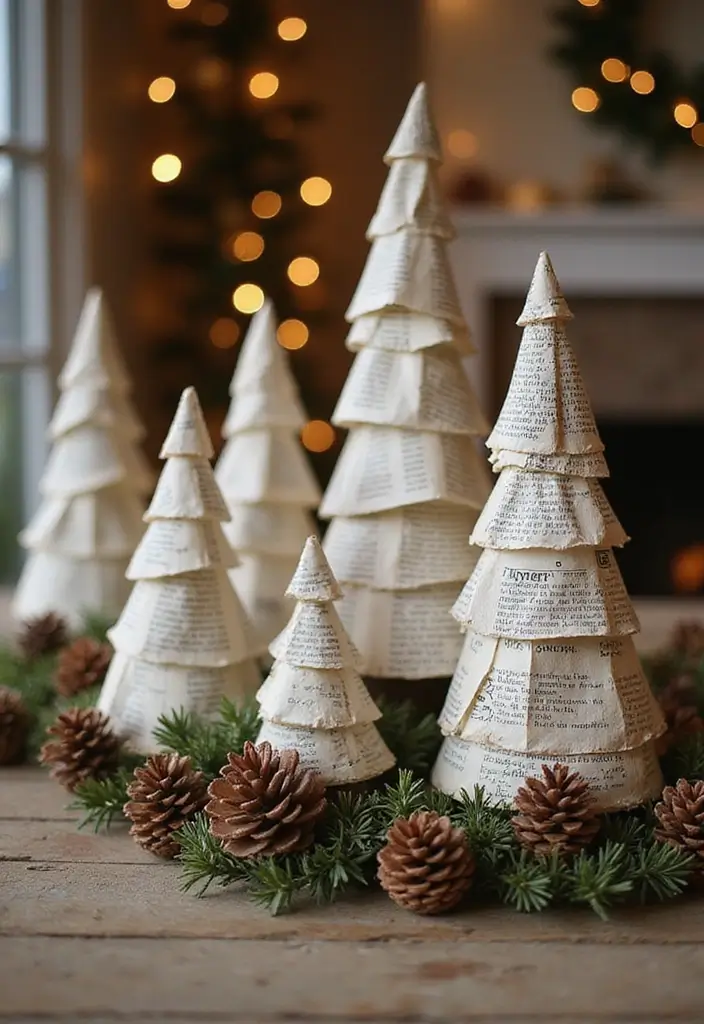
Newspaper Trees
You want a budget-friendly, stylish tree for the holidays. Newspaper trees reuse old newsprint and bring a warm, rustic feel to your home. They are simple to make and fun to customize.
Here is how you can make one.
– Gather old newspapers. Save comic pages for bright color.
– Roll pages into cones and tape the edge. Make several sizes to stack into a tall tree.
– Create the trunk. Use a cardboard cone or a sturdy tube as the spine.
– Attach the cones. Glue or tape them around the spine in a vertical stack.
– Add texture. Cut thin strips and wrap them around the cones to form a layered, pine-like look.
– Decorate with a simple finish. Paint the cones white or brown, then add a light glitter dust for a festive shine.
– Ground the piece. Place the tree on a sturdy base with pinecones or small branches to anchor the look.
– For glitter. Spray a light coat of adhesive first, then sprinkle the glitter and shake off the excess.
– Eco note. This project saves paper and helps your budget stay in check.
Next steps. Store the tree flat after the season and reassemble quickly next year for fast setup.
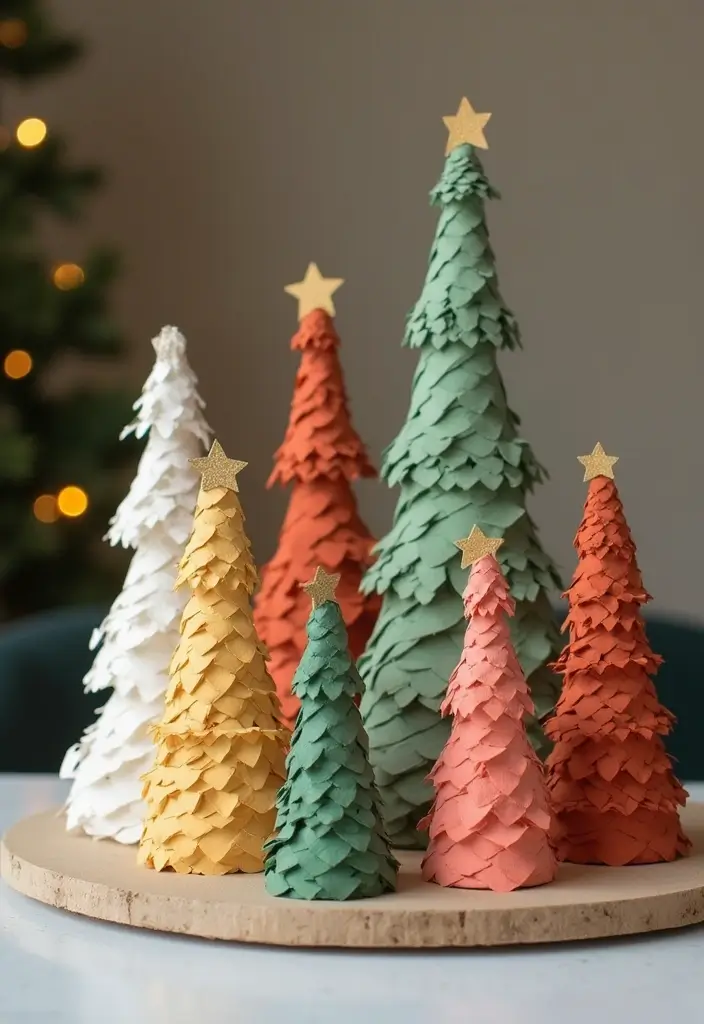
6. 3D Paper Trees
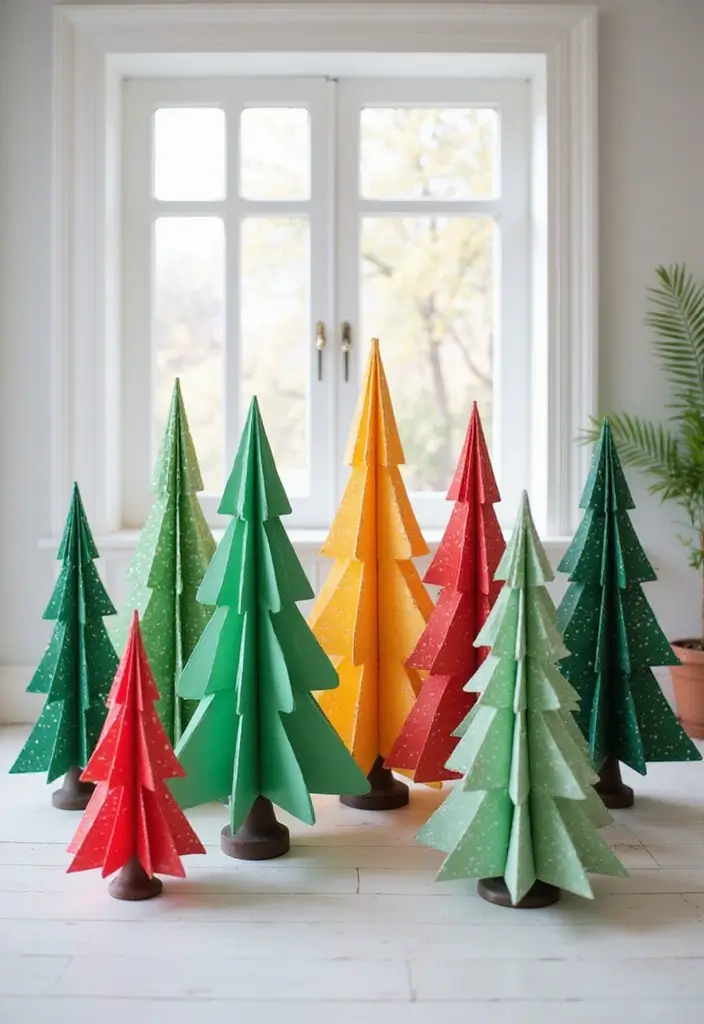
Here is why 3D paper trees fit into your holiday plan. They look striking, they are simple to make, and they cost little.
1) What you need
– Sturdy paper in your chosen colors.
– Scissors, a ruler, white glue or glue stick, and a hot glue gun for speed.
– Optional: metallic or glitter paper and a small base to keep the tree upright.
2) How to build
– Cut basic shapes such as triangles, circles, or diamonds.
– Score or fold the shapes to add depth.
– Glue the pieces in a staggered stack, offset each layer to create a three dimensional look.
– Let the glue dry fully before moving the tree.
3) Finishing touches
– Add a metallic tip or a hint of glitter for sparkle.
– Pick a simple color scheme that matches your decor.
– Mount the tree on a small base for extra stability.
4) Display ideas
– Place the trees on a mantel, a windowsill, or a centerpiece.
– Use 2 or 3 trees at different heights for a bold display.
5) Quick tips and limits
– Hot glue speeds up the process, but handle it with care.
– These trees are lightweight and best for indoor use.
– They store flat when you are done, so packing is easy.
6) Next steps
– Try different sizes, from mini to tall.
– Pair with other paper crafts to create a seasonal paper scene.
7. Paper Plate Trees
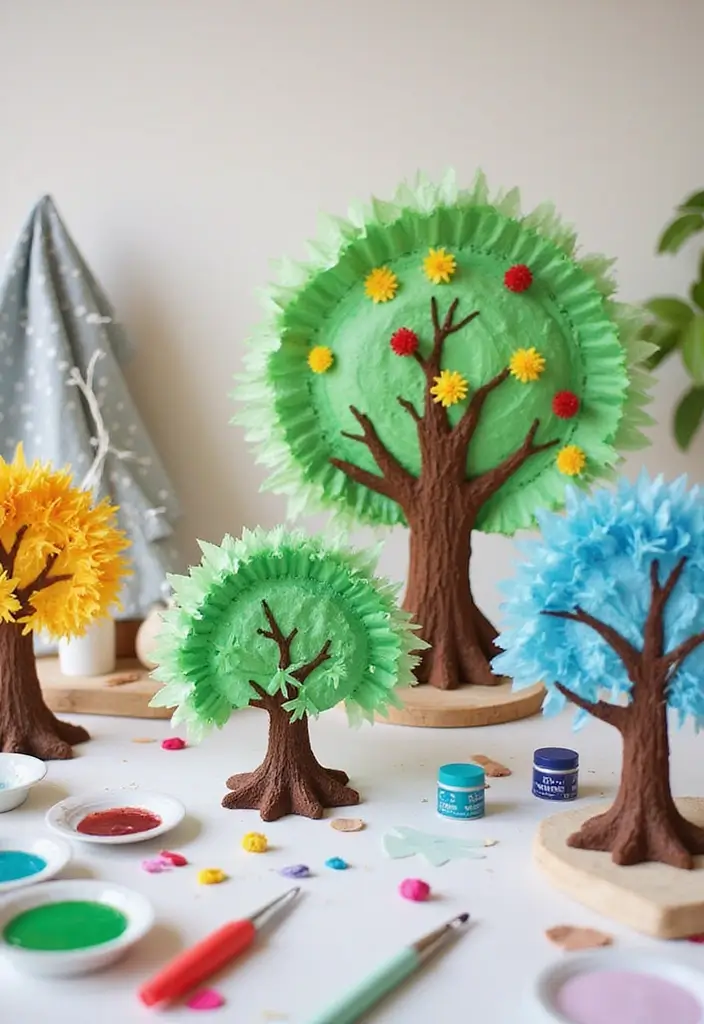
Looking for a quick, kid friendly Christmas craft that adds life to your space? Paper plate trees are a simple, fun option. They use common supplies and let you mix textures for a cozy look. You can make several in one afternoon and place them on a shelf, a table, or as a cheerful centerpiece.
Here is why this project works for you
– It involves little prep but big impact.
– It grows with your kids. They can choose colors and textures.
– It stays beginner friendly while still looking fun and festive.
What you need
– Paper plates (use several for a full tree)
– Green paint or markers
– Scissors
– Glue or glue sticks
– Wrapping paper, fabric scraps, tissue, or felt for texture
– Sequins, beads, buttons for sparkle
– Optional: a small stand or pipe cleaner to help hold the tree
Steps
1) Cut each plate into a tree shape. Start with a simple cone or triangle and leave a short trunk at the bottom.
2) Color or draw. Paint green in light and dark shades or use markers to add chevron or stripe patterns.
3) Build depth. Stack two or three plates and glue them so the tree looks layered. A light glue line helps keep it strong.
4) Add texture. Glue on fabric scraps, wrapping paper, or felt to give the tree a rich look. Mix rough and smooth pieces for contrast.
5) embellish. Add sequins, beads, or tiny buttons to mimic ornaments. A dab of sparkle catches the eye.
6) Display. Lean the trees on a mantel, set them on a table, or string a few together to make a garland.
Tips and care
– Let each layer dry before stacking to avoid slipping.
– Use kid friendly scissors for safety.
– Store flat, then reassemble once you pull them out next year.
These paper plate trees are a simple way to add color and texture to your holiday plan. They stay affordable, feel homemade, and give your space a warm, festive touch.
8. String Art Trees
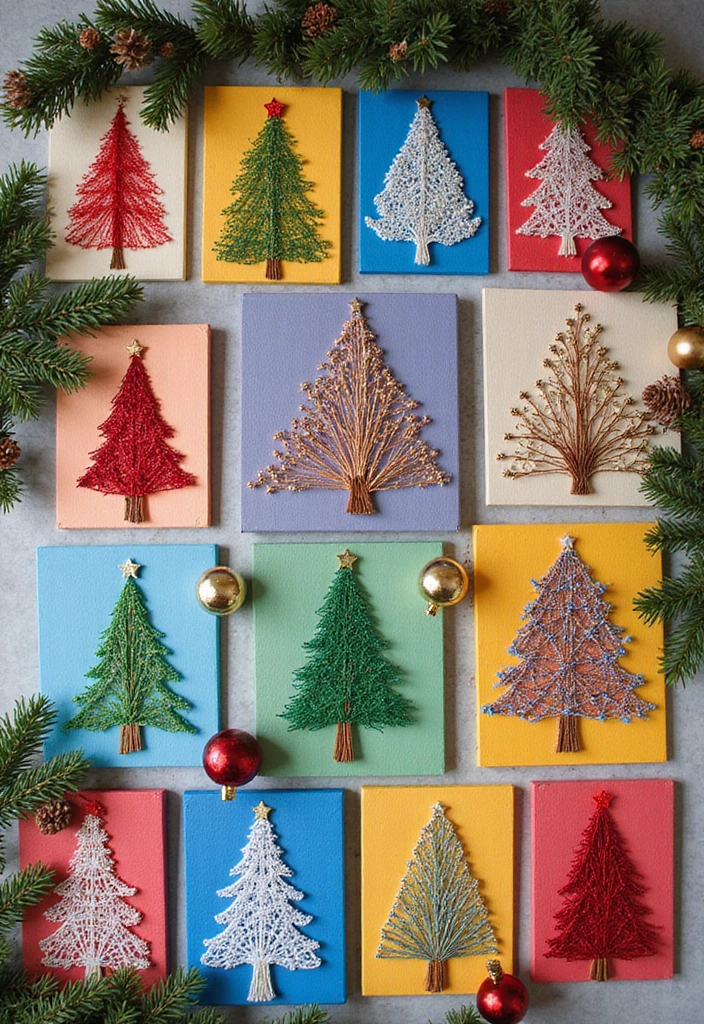
Looking for a quick, cozy Christmas craft you can do with kids? String art trees on paper add texture and warmth to your holiday display. This project blends a simple tree outline with colorful string for a bold, handmade look.
Here is why this works. You use a sturdy sheet, a clear outline, and easy winding of string. You can pick bright colors to match your space or go classic green and brown. Next steps help you finish fast.
What you need
– Supplies: sturdy paper or cardboard, pencil, a tree outline, colorful string, glue dots, scissors.
Steps
– Step 1: Draw or print a simple tree outline on your board.
– Step 2: Secure the outline so the string has a guide and won’t shift.
– Step 3: Wind the string from the trunk outward, filling the shape in neat lines.
– Step 4: Finish ends with glue dots for a clean edge.
– Step 5: Add tiny ornaments after it dries, if you like.
Tips
– Use colors that fit your decor, not just green and brown.
– Try different string weights to add texture.
– If a line gaps, add a new strand with a glue dot at the end.
These string art trees lay flat yet feel alive on a wall, shelf, or mantle. They’re easy to customize and great for quick holiday cheer.
9. Paper Mache Trees
Paper mache trees bring holiday charm with little cost and big texture. You can shape them into tall towers or small tabletop trees. The wet glue and paper smell blends with pine in the air. They are forgiving enough for beginners and flexible for tweaks later. Next steps will guide you.
Materials you’ll need
– Balloon or cone base.
– Newspaper strips.
– Glue mix or flour paste.
– Water.
– Paints and brushes.
– Clear sealant.
How to build
– Inflate a balloon and tie it off.
– Dip a strip in glue and press onto the base.
– Smooth and overlap strips to cover the shape.
– Add layers until the tree has the height you want.
– Let each layer dry fully before the next.
– Paint the dried tree in your colors.
– Add texture with glitter, beads, or paper scraps.
– Seal with a clear finish for a long-lasting look.
– Allow the finished tree to dry overnight for extra firmness.
Tips for best results
– Use a sturdy base so the tree stays steady.
– Drying time varies with humidity and thickness.
– Build a few trees in different heights for a dynamic display.
These paper mache trees act as bold accents in your holiday decor.
Place them on a mantel, shelf, or table for a bright finish.
They catch light and add texture to the room.
Pair green with gold accents for a classic look.
10. Shadow Box Trees
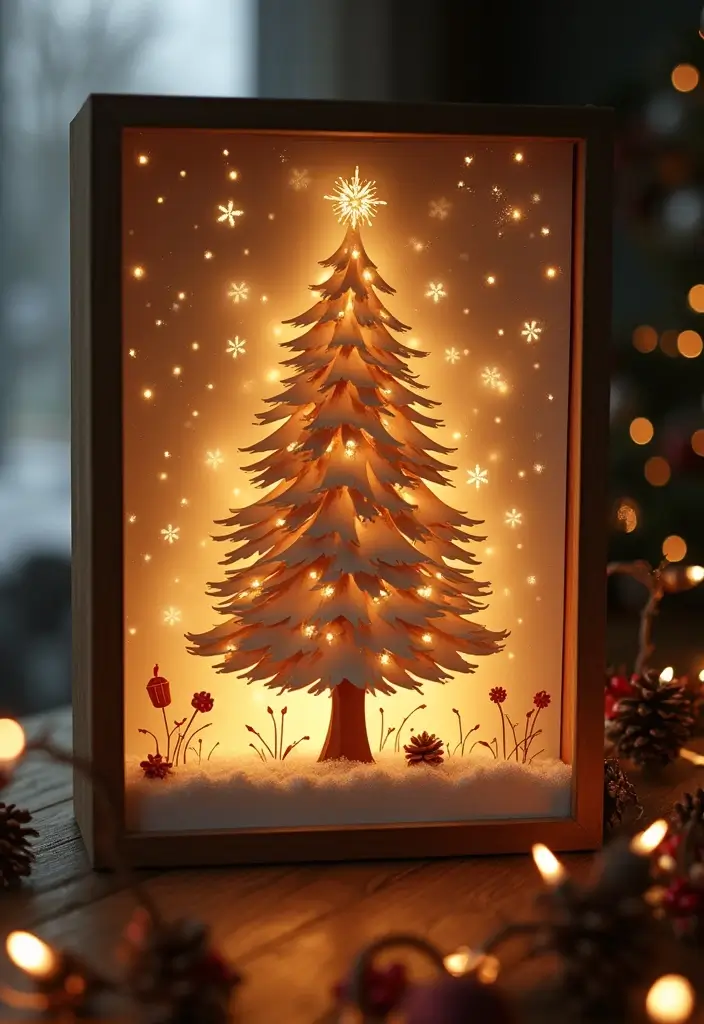
You want holiday decor that feels warm and easy. Shadow box trees can deliver. They house a small, layered paper tree inside a shallow frame, with a little scene around it. You build the tree, place it in the box, and then add the rest.
Here is why it works. Layers create depth. Different paper textures add interest. A few tiny lights make the scene glow.
What you’ll need
– Shadow box frame that fits your space
– Paper in white, kraft, textured, or metallic
– Foam dots or spacers
– Background paper or a simple scene card
– Faux snow and tiny ornaments
– Tiny LED lights or a small battery light
– Glue and scissors
How to make
– Draw a simple tree on each paper, and cut three to five layers.
– Space the layers with foam dots to add depth.
– Place the background first, then stack the tree layers inside.
– Add snow and ornaments for a wintry touch.
– Tuck in lights so the glow shows through.
– Close the box and set it on a shelf.
Tips
– Mix textures for depth.
– Change color palettes each year.
– Use low heat LEDs for safety.
Next steps
– Pick a size and finish the project in an afternoon.
– You’ll have a personal, year round decoration.
11. Felt and Paper Combo Trees
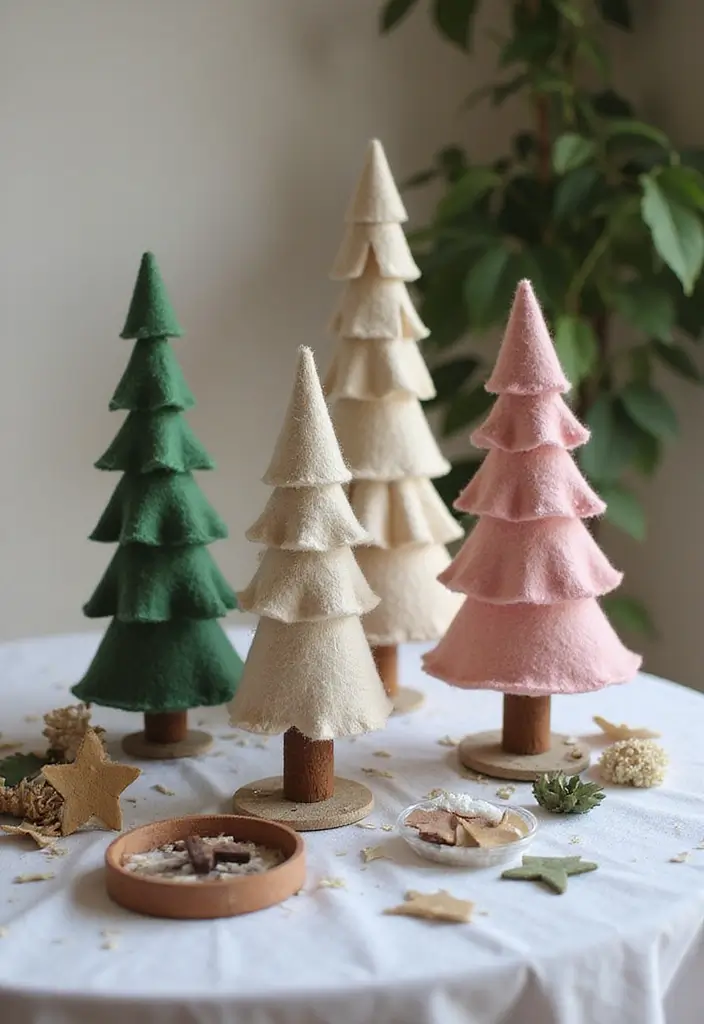
Want a warm, textured tree for your holiday display? Try felt and paper combo trees. They’re easy to make and fun for all ages. Layering adds depth and the soft felt feels nice against crisp paper. They use everyday supplies and teach color, pattern, and layout. They also make a great upcycle project.
– Start with a sturdy paper base. Use cardstock for a shape that lasts. Choose a color that matches your felt for a cohesive look.
– Cut a simple tree shape on paper. A wide triangle or pine outline works for beginners.
– Layer felt shapes on top. Layering creates depth.
– Start with a large piece, then add smaller ones for branches.
– Leave space for ornaments.
– Mix colors and textures. Greens, reds, creams; add a few neutral scraps for contrast.
– Variety makes the tree look lively and bold.
– Embellish with buttons, beads, or ribbons.
– Place a few for balance in small amounts.
– Glue pieces securely with a hot glue gun.
– Press gently, then hold to help set.
– Try different patterns.
– Sketch a plan first, then fill in layers before you start.
– Upcycle leftovers.
– Use scrap felt and old ribbons for ornaments, for extra shine.
– Finish with a trunk.
– Cut a short strip of paper or felt to finish.
These trees are simple to assemble and let you recycle scraps while you decorate.
12. Pom-Pom Tree
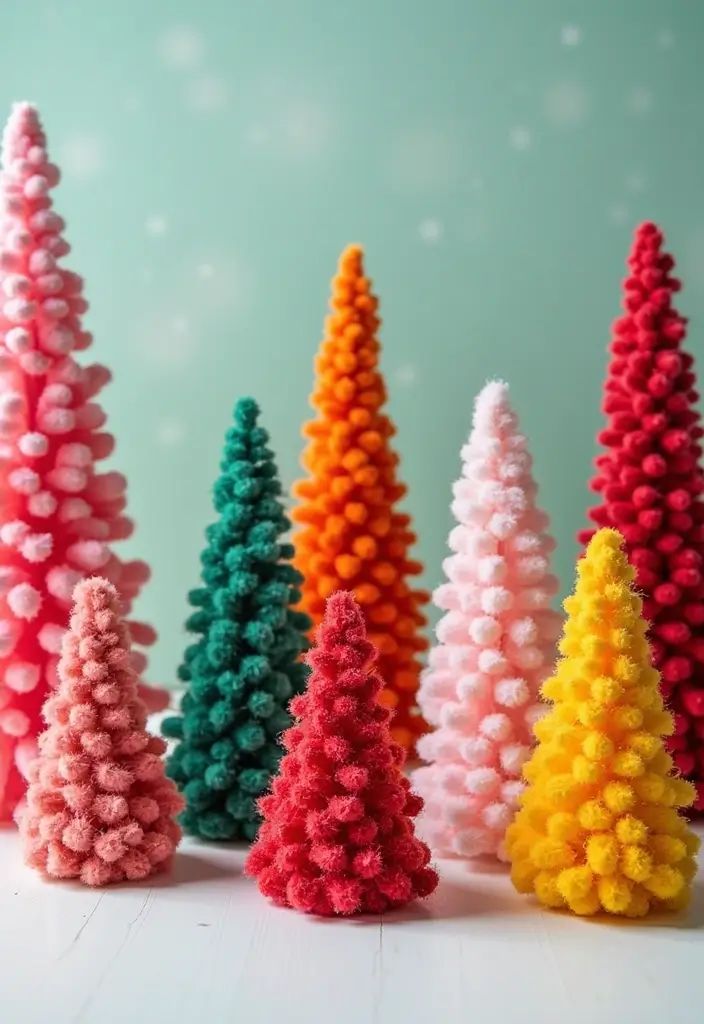
Here is a quick, cozy craft you can do with kids or on your own. A pom-pom tree adds color and softness to your holiday space. It’s fun to make and easy to adjust.
Materials:
– Yarn in several colors and textures
– A cone-shaped base (foam or cardboard)
– Scissors
– Glue (hot glue or craft glue works)
– Optional: pins or a light string for hanging
Here is how to build it:
– Make many pom-poms. Wrap yarn around a card or your fingers, tie in the middle, and trim until round. Use big and small pom-poms for a full look.
– Prepare the cone. A simple foam cone or a folded cardboard cone works well.
– Glue pom-poms to the cone. Start at the bottom and work up. Press each pom-pom in place for a few seconds so it sticks.
Tips:
– Mix yarn textures for depth.
– Put the largest pom-poms at the base and smaller ones toward the top.
– Add a few metallic or glittery strands for a holiday sparkle.
Ways to use it:
– Place it in the center of a table as a cheerful centerpiece.
– Make mini trees for place cards or small gifts.
– Turn a few into a garland by threading a string through the tops.
Care and storage:
– Keep away from pets and heat. Store flat in a box so the shapes stay.
Next steps: Gather colors, pick a cone, and start crafting.
13. Watercolor Trees
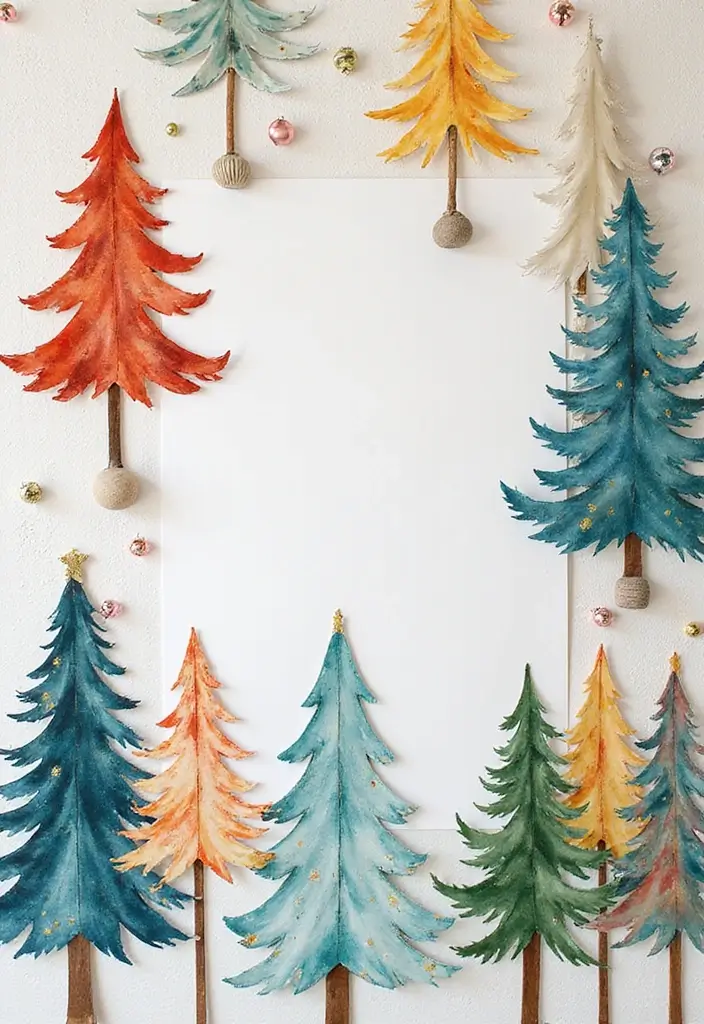
Want a simple way to add a handmade touch to your holiday decor? Watercolor trees let you mix soft colors on plain paper. You get gentle gradients and unique shapes that feel fresh every time. After they dry, you can cut them into tree silhouettes and place them anywhere you like—on a shelf, in a wreath, or as a garland. It’s art you can grow with year after year.
Materials
– watercolor paper (cold press, about 140 lb works well)
– watercolors or liquid inks
– small round brush and a larger wash brush
– pencil and eraser
– scissors or a craft knife
– masking or washi tape
– glue or double-sided tape
– optional: salt for texture, white gel pen or masking fluid for highlights
Steps
Next steps help you finish fast. 1) Sketch light tree shapes on the paper. 2) Paint a soft base wash. 3) Add color layers while the paper stays slightly damp. 4) Let everything dry completely. 5) Cut out the trees with clean lines. 6) Mount them with tape or glue where you want them.
Display ideas
– Lean a few on a shelf for a quiet display.
– Clip or tape several into a small wreath for a handmade touch.
– Thread strings of trees into a simple garland for a wall or mantel.
Tips
– Layer colors to add depth.
– Let each layer dry before adding more.
– Save white areas for highlights.
– Use washi tape to keep edges neat for a crisp look.
14. Scrap Paper Trees
Here is why you should try scrap paper trees. You want a simple, cheap, eco friendly craft for the holidays with paper Christmas trees. You can turn old scraps into something new and pretty. Here is why this idea fits your needs: it uses what you already have and looks nice on a table. Let’s break it down and get started.
Materials
– Cardstock scraps, wrapping paper, old cards
– Glue or a glue stick
– Scissors
– A piece of cardboard or thick paper for the base
– Optional: markers, stickers, ribbon for decoration
Steps
1) Gather scraps in different colors and textures.
2) Cut pieces into small and medium shapes. The variety makes the tree look full.
3) Layer pieces in a triangular tree shape. Start wide at the bottom and narrow as you go up.
4) Glue each piece in place. Let the glue dry a bit before adding more.
5) Mount the finished tree on the base. Stand it up on a shelf or table.
6) Repeat to build a small forest of trees for a bold display.
Design ideas
– Mix textures like glossy wrapping paper with matte cardstock.
– Add old card fronts for a patterned edge.
– Vary sizes for depth and create a mini woodland scene.
Tips
– Keep scraps handy in a bin so you can grab pieces fast.
– Use non-wrinkled scraps for easier gluing.
– Seal lightly with a spray or clear coat if you want more durability.
Next steps: Set out a few scraps, try a quick tree in 15 minutes, and see how a tiny forest changes your holiday display.
15. Miniature Bottle Brush Trees
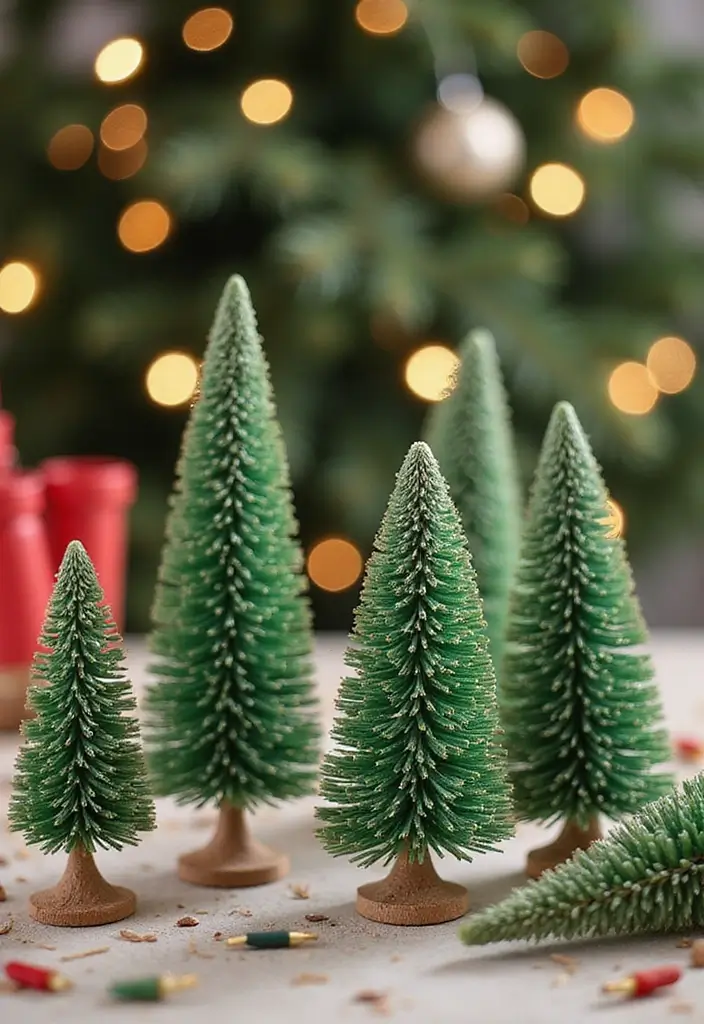
Here is a cute, quick way to add tiny charm to your holiday decor. You want something small and affordable that still feels special. Miniature bottle brush trees made from paper fit that need. They look delicate but are sturdy enough to move from room to room.
Materials
– Paper strips in your favorite colors
– A thin wire or floral wire
– Scissors and glue
– Paint or glitter for a festive finish
– Optional small ornaments or beads
How to make them
Let’s break it down. Cut short paper strips. Wrap a strip around the wire, turning it a little at a time to form a tree shape. Secure the base with glue. Repeat with more strips to thickens the tree. Paint the tip or sprinkle glitter for snow. You can add a tiny ornament on each branch.
Here is why this works: the wire keeps a sturdy trunk, and paper can be colored to match your theme. Use different colors to create a tiny forest on your table.
Tips
– Let each layer dry before adding the next one.
– Try matte and metallic finishes for variety.
– Use a dab of glue at the base so the trees stand upright.
– Spray with clear sealant if you want them to last.
Next steps: set a few on a tray, or use them as gift toppers to spread holiday cheer.
16. Vintage Style Trees
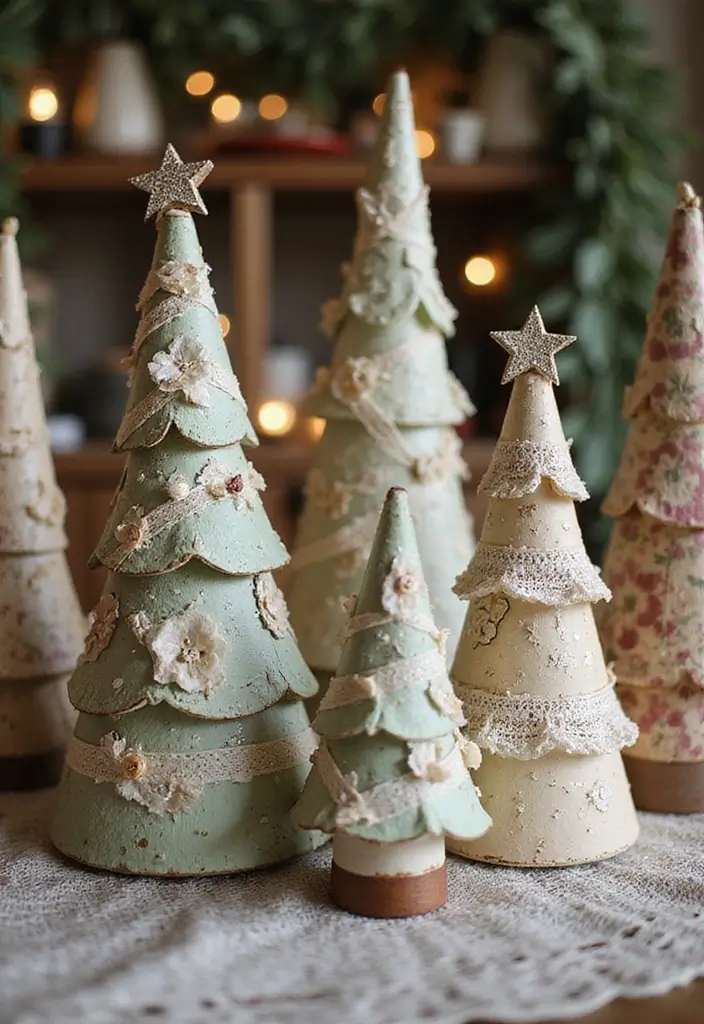
Want a cozy, old-time feel for your decor? Vintage style paper trees give that warm, retro vibe without a big project. Use patterned scrapbook paper with classic holiday designs. Cut out small tree shapes and stack them slightly offset to add depth. Add lace or buttons to boost the vintage look. You can tuck in old family photos to personalize each piece. Keep the color palette muted for an authentic finish.
– What you’ll need
– Patterned scrapbook paper in soft tones
– Cardstock for sturdier shapes
– Scissors and craft glue
– Lace, buttons, small ribbons
– Thin twine to hang (optional)
– Old photos or keepsakes (optional)
Next, how to make your vintage trees
– Cut three tree sizes from paper and cardstock
– Layer shapes with a slight offset for depth
– Glue edges to keep the layers secure
– Add lace or buttons near the trunk
– Slide in a tiny photo or card for character
– Edge the sides with ink to vintage the look
Here’s why this works: old patterns, soft hues, and tiny details spark nostalgia. Try cream, sage, and dusty rose, and set the trees on a mantel or shelf for instant charm.
These trees store easily, so you can swap papers every year for a fresh retro vibe. Give it a try.
17. Glitter Trees

You want a sparkle that fits your home. Glitter trees are a quick, affordable way to get it. They’re simple to make and give a festive look fast. Here is why this plan clicks for beginners.
– Materials: Plain cones in several sizes, clear glue, glitter in one shade or a mix, and a string of tiny fairy lights (optional).
– How to build: Spread glue on a cone. Roll it in glitter or press glitter onto the surface. Tap off the extra glitter. Let the cone dry completely before handling.
– Color ideas: Use one color for a clean, chic look. Mix two or three colors for a playful vibe. Try gold with white, or silver and blue for a wintry glow.
– Display tips: Stand different sizes together on a tray or on a mantel. Wrap a light strand around them for extra sparkle. Put them where they catch the eye.
– Clean up and care: Use a tray to catch stray glitter. Return unused glitter to its jar. Store dry trees in a box until next season.
Next steps: Set up a mini forest on a side table. Let the lights glow softly at night for cozy cheer.
18. Chocolate Wrapper Trees
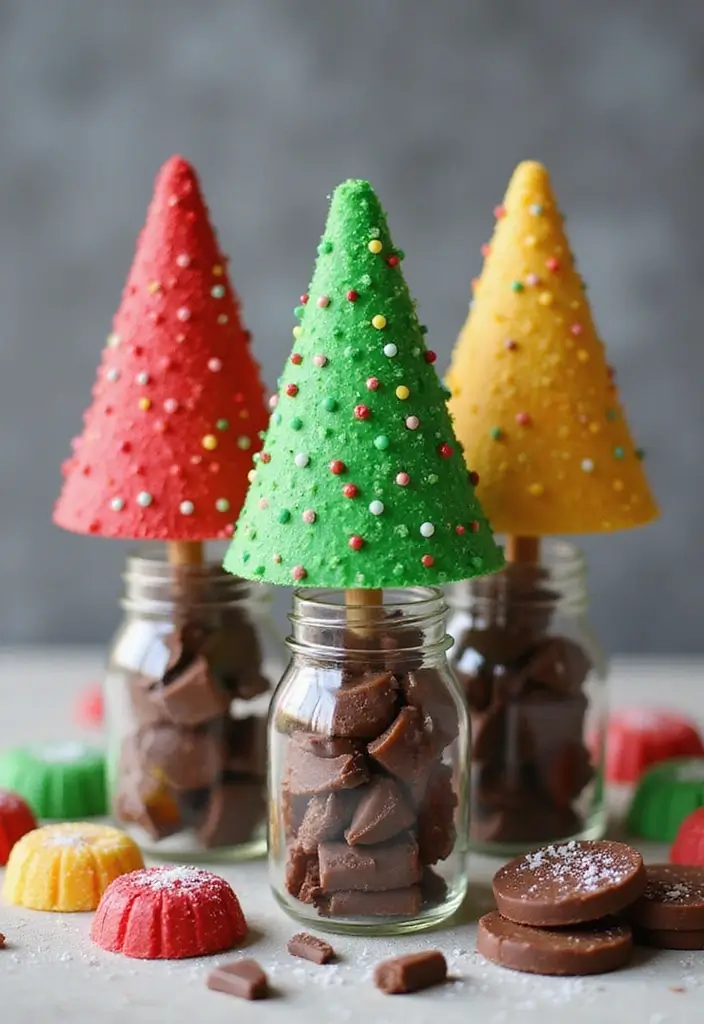
You want a festive look without adding more waste. This project turns everyday chocolate wrappers into playful holiday trees. We call them chocolate wrapper trees, and they sparkle with color.
Here is how you do it.
– Collect wrappers from candies you love. Let the wrappers show their colors. Dry wrappers keep their shine.
– Flatten each wrapper. Fold edges so you get neat, cone-like shapes.
– Roll the paper into cones. Glue the seam so it stays tight. Think of tiny pine cones in bright coats.
– Build the tree. Start with the biggest cone at the bottom and stack smaller ones toward the top. Use a sturdy base like cardboard or a thin wood disk. Glue holds each cone in place.
– Add the top touch. Glue a small star or a pom on the peak. Add a string or ribbon around the trunk if you like.
– Show it off. Place your tree in a clear jar for a sparkly centerpiece, or set several trees together for a colorful display.
Tips: Mix many colors for a lively look. If wrappers curl, press them flat with a book for a minute before shaping. For durability, seal with a light spray once the glue dries.
19. Washi Tape Trees
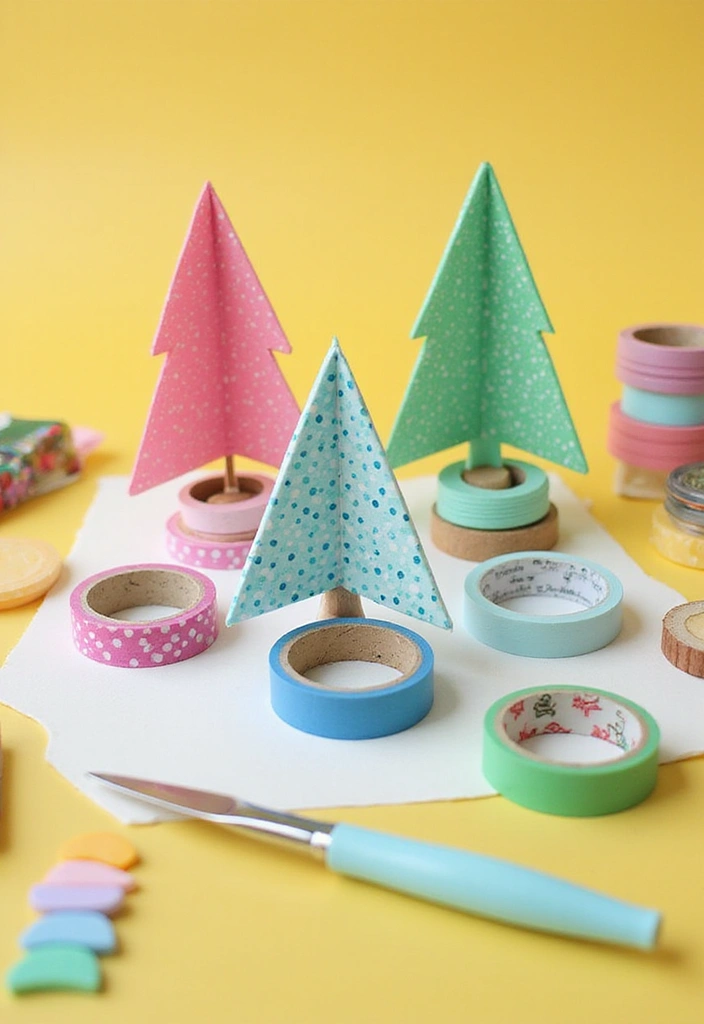
Washi Tape Trees are a quick and cheerful craft you can finish in minutes. They turn scrap tape into a colorful holiday tree you can hang on a wall or set on a desk.
What you need:
– Sturdy paper base
– Washi tape in colors and patterns
– Scissors
– String or ribbon for hanging
– Beads or sequins for sparkle
– Glue for extra hold
Here is how to make them:
1) Cut a simple tree shape from the paper base.
2) Start at the bottom and lay long strips of tape across the shape.
3) Layer tape in different colors and patterns until the tree is filled.
4) Trim the edges with scissors for a clean outline.
5) Add beads or sequins in gaps for extra shine.
6) To turn it into an ornament, punch a hole at the top or tie a loop of string.
7) Hang it on a wall, on a garland, or set a row on a mantel.
Tips and ideas
– Choose a color theme like red and green or go with metallics for a modern look.
– Mix matte and glossy washi to add depth.
– Create mini versions for a forest display.
Or make a mini forest by cutting several trees in different sizes and lining them up on a shelf.
This craft shows your style and gives you a personal, kid-friendly decoration.
20. Felt Pockets Tree
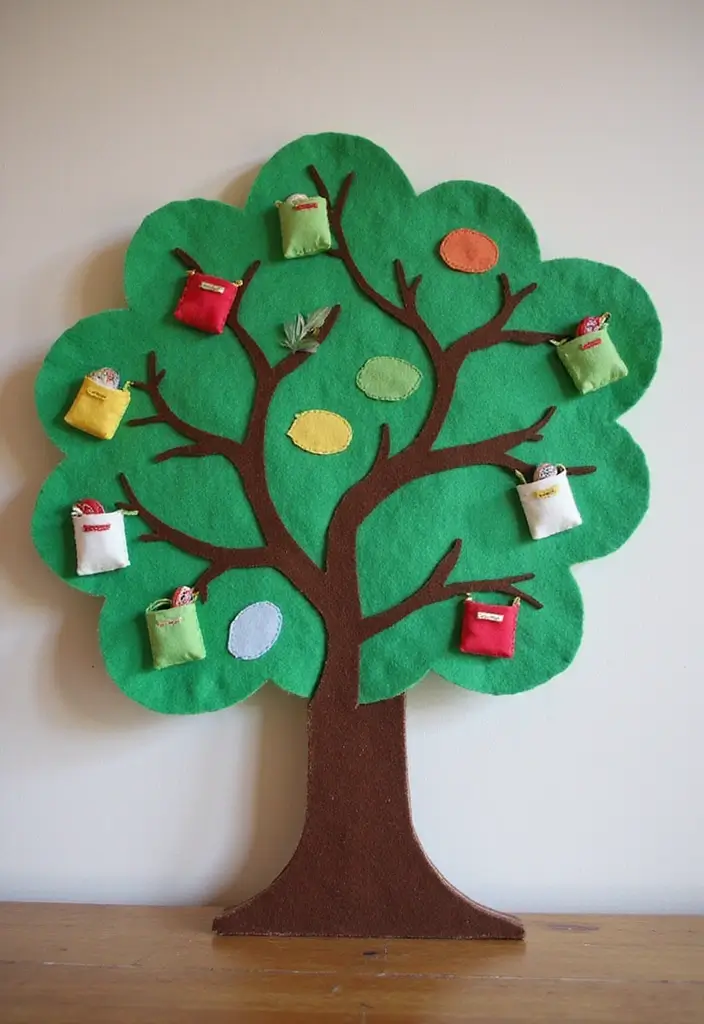
Looking for a playful twist on a Christmas tree? The felt pockets tree adds charm and a hint of surprise to your holiday decor. Build a tree outline from paper or cardboard, then sew or glue felt pockets along the shape. Fill each pocket with a tiny treat, a mini ornament, or a note for a small gift. This DIY stays simple and keeps the focus on fun.
Materials
– Cardboard or sturdy base for the tree
– Felt in several colors for pockets
– Needle and thread or strong craft glue
– Small treats, mini ornaments, or notes
– String or a wall hanger for display
Steps
– Draw a simple tree outline on the base
– Cut out the shape
– Cut felt into pocket shapes and hem the top
– Attach pockets along the outline with stitches or glue
– Leave openings to fill, then tuck in treats
– Add a loop at the top to hang it or place it on a table
Design tips
– Use bright colors and different pocket sizes
– Space pockets in a lively, uneven pattern
– Add tiny labels or numbers for a simple gift hunt
Display ideas
– Hang on a wall at a reachable height
– Set on a table with a small stand
21. Nature-Inspired Paper Trees

Nature-Inspired Paper Trees
You want a warm, earthy holiday look you can make at home. Nature-inspired paper trees give that feel with simple materials. They are quick to make, and easy to pull apart later.
– Start with the trunk. Use brown craft paper rolled into a sturdy tube. Set it on a flat base.
– Build the leaves. Cut green paper into simple shapes. Curl edges for life. Glue around the trunk.
– Add natural details. Tuck in dried flowers or pressed leaves for texture. These small touches feel rustic and real.
– Color with natural dyes. Tea, coffee, beet juice, or turmeric give soft tones. Brush a light wash and let dry.
– Create a mini forest. Use trees of different heights and shapes. Line them up on a shelf to mimic a woodland look.
– Finish with twine. Tie the base with natural string. It adds a warm finish.
– Try different bases. Use a bottle cap, a cork, or a small clay disc for stability.
– Display ideas. Group the trees on a shelf, a mantel, or a sunny windowsill. Add a few pinecones for contrast.
What you gain. The project uses scraps and common supplies. It stays friendly to your budget and to the planet. The result is calm, cozy decor that brightens any room.
Next steps. Decide your forest size and color plan. Then start shaping your display.
22. Teacup Trees

Looking for a cute, budget-friendly table ornament? Teacup trees fit the bill. They recycle old cups and add a cozy, handmade touch to your holiday decor. Here is how to make them. You can customize colors to match your tree or table cloth.
Steps to build your teacup tree
– Place a small foam cone inside a teacup and secure it with a dab of glue.
– Dress the cone with colorful paper. Cut paper into tiny leaves or triangles and layer from the base to the tip.
– Add small decorations like beads, sequins, or tiny paper cutouts to imitate ornaments.
– Wrap a battery-operated string of fairy lights around the cone for a soft glow.
– Fill the teacup with treats such as candy canes or chocolate, or leave it empty for a clean look.
Tips
– Try mismatched teacups for a vintage vibe.
– Use a ribbon or tiny topper to finish the look.
These teacup trees bring whimsy to any shelf, mantel, or dining table. They are simple, practical, and add a warm holiday feel. Next, gather supplies and try a few color combos to see what works best.
23. Geometric Paper Trees

If you want a modern holiday look that stays calm and clean, try geometric paper trees. They use simple shapes to make a bold, contemporary decoration. Cut shapes from paper in triangles, diamonds, and hexagons. Then stack them into a tree form.
Here is why this style works: the shapes catch light at different angles and add depth, even on a flat wall.
– Materials: sturdy craft paper or cardstock, scissors, glue or double‑sided tape, a small base or stand. Optional string to hang.
– Shapes: plan for a range of sizes, from large at the bottom to small on top.
– Finish: pick metallic paper for shine or matte paper for a soft, modern vibe.
– Next steps: cut several pieces per size, then start at the bottom. Glue the largest shapes first, then layer smaller ones on top. Leave a few gaps so the tree looks airy. Secure the stack to a base or a wooden dowel so it can stand, or skip the base and hang the piece as wall art.
This idea fits tight spaces and gives your room a crisp focal point. Try color combos like silver with white, copper with charcoal, or all white for a minimal look. Ready to build your own geometric tree this season?
24. Tulle and Paper Trees
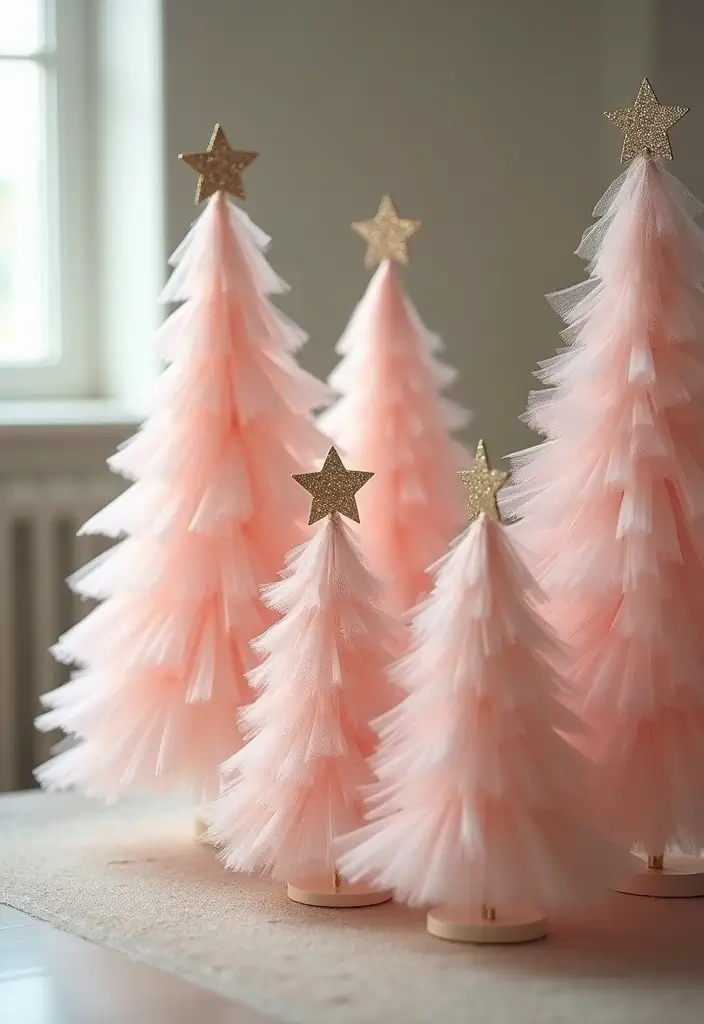
You want a holiday tree that feels soft and stylish. This tulle and paper combo gives you both. It stays light on a shelf yet sturdy enough to stand on a table. You can pick colors that match your decor and add glitter for a touch of sparkle. Here is how you can make one that shines in your home.
– Step 1 – Paper base Cut a sturdy sheet into a cone, then glue extra layers to build a firm, lightweight tree ready to decorate.
– Step 2 – Wire core Slip a slim wire inside as a core, so the branch tips stay straight and stable.
– Step 3 – Wrap with tulle Drape tulle around the cone, pin or glue where needed, then tease it into soft, fluffy folds.
– Step 4 – Glitter accents Add glitter paper accents by tucking tiny shapes into the tulle, catching light from every angle.
– Step 5 – Color and texture Experiment with colors and textures, like white tulle with silver tips or blush with gold.
– Step 6 – Base and stability Secure the base in a small pot filled with stones or sand to anchor it.
– Step 7 – Finishing touches Finish with a tiny star, beads, or a string of pearls for a polished look.
Care tips: Store in a cool, dry place. Gently puff the tulle to refresh the shape.
These tulle and paper trees are easy to customize and make a cheerful focal point.
25. Braided Paper Trees
Want a simple, eye catching Christmas craft? Braided paper trees give you texture, color, and a handmade feel.
To start, cut several paper strips. Braid them together into a long strand. Bend the braid into a cone and glue it to hold the shape.
Next, trim the bottom so the tree sits flat. Glue the base so it can stand on a shelf or window sill. Let the glue dry fully before you move it.
Here is why braided paper trees work well for holidays. They are light, easy to store, and you can mix colors to fit any room.
Next steps.
What you will need
– Paper strips in colors you like
– Scissors and glue
– Optional decorations like beads, buttons, or ribbons
Tips for a standout braid
– Use double-sided paper for more color choices on each side
– Vary the strip width to add depth
– Add small beads or buttons at the tip or along the braid for extra flair
These braided paper trees bring a cozy, craft feel to your holiday space. Place a few on a mantle, a windowsill, or a holiday tablescape for a charming display.
26. Upcycled Cardboard Trees

You want a fun, easy, eco friendly tree that kids can help with. Upcycled cardboard trees fit the bill. They’re simple, safe for children, and they cut waste.
What you’ll do
– Gather cardboard boxes, a ruler, scissors, glue, paint, paper scraps, fabric, and a string of LED lights.
– Trace a simple tree shape on cardboard and cut it out. Make one flat tree or stack pieces for a 3D look.
– Decorate with a base color first. Add texture with fabric, wrapping paper, or magazine cutouts. Layer colors to add depth.
– Build a stand or hang it. A folded cardboard base helps it stand on a shelf. You can also mount it on a wall with tape.
Make it shine
– Thread LED lights through tiny holes for a gentle glow. This lights branches without getting hot.
– Add tiny ornaments or paper stars. Keep things light so the box stays sturdy.
Tips for teamwork
– Make it a family night. Let each person decorate a branch or a small tree piece.
– Use recyclable scraps. Save leftover wrapping paper for later details.
Why this works
– It teaches recycling and hands on skills.
– It cuts costs and reduces waste. It stores flat if you keep the design simple.
Next, start
– Pick a box, sketch a plan, and begin cutting. Your cozy, green Christmas tree is ready.
Conclusion
Creating paper Christmas trees is a wonderful way to get into the holiday spirit while being eco-friendly. Each DIY project not only provides a chance for creative expression but also reinforces the importance of sustainability this season.
Whether you choose a classic cone tree or a whimsical pom-pom version, you’ll be spreading cheer and joy in your home. So gather your supplies and start crafting your festive decorations for a warm and inviting holiday season!
Note: We aim to provide accurate product links, but some may occasionally expire or become unavailable. If this happens, please search directly on Amazon for the product or a suitable alternative.
This post contains Amazon affiliate links, meaning I may earn a small commission if you purchase through my links, at no extra cost to you.
Related Topics