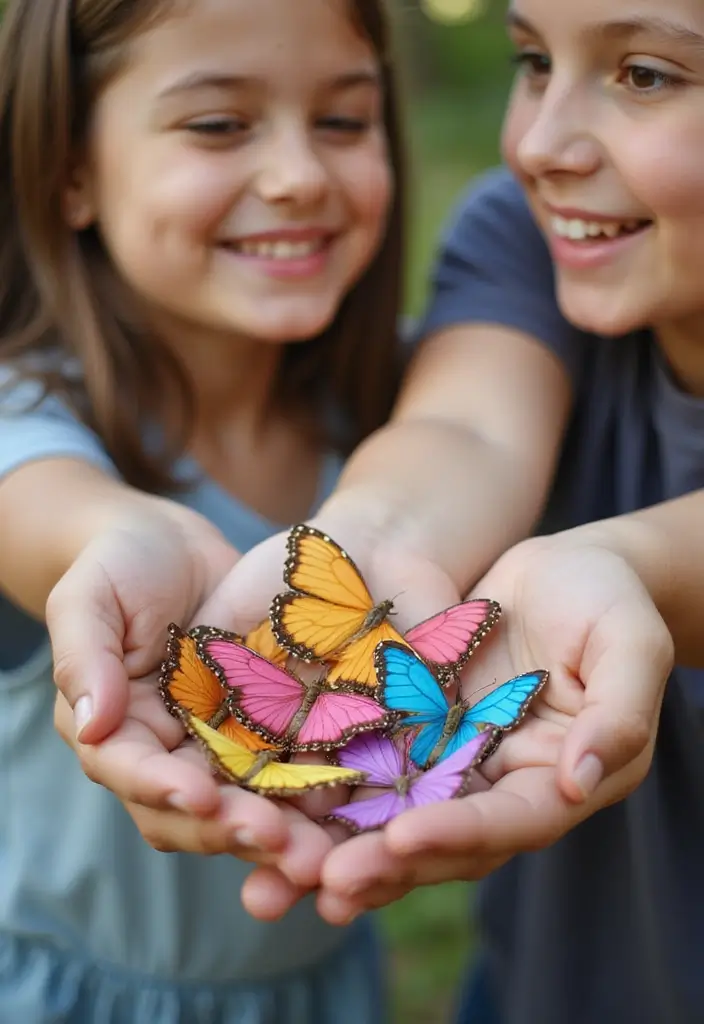
Here is why I made this post. Blank walls can feel heavy when you want color but not a big project. Paper butterflies give a light, playful touch you can pull off in an afternoon. This guide shows 28 DIY designs that bring whimsy to walls and a smile to your space.
Who it’s for. If you love easy crafts, clean looks, and a touch of magic on the wall, this one’s for you. Renters, parents decorating a kid’s room, teachers making a classroom feel cozy, or anyone who wants a pop of color without heavy work will find ideas here.
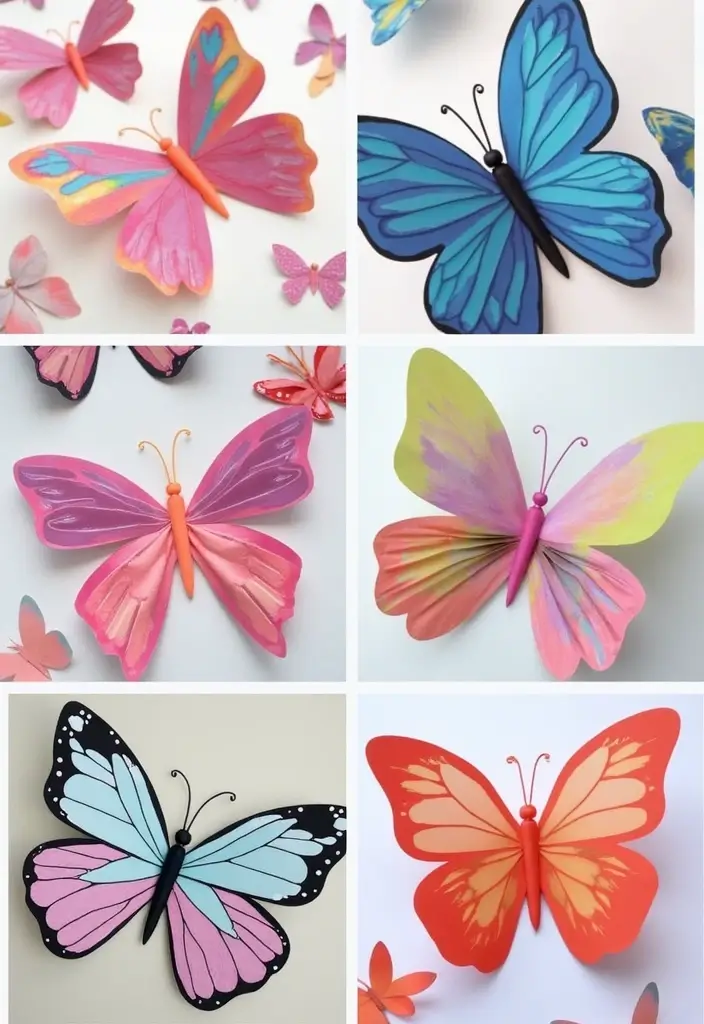
What you’ll get. You will find 28 butterfly ideas, from flat decals to layered 3D pieces. Clear steps and simple tips help you pick paper, cut and fold, and place the designs. You’ll learn color mixes, how to set scale, and how to tell a tiny story on a wall.
How to do it. Here are practical steps you can follow. Gather colorful paper, scissors, glue, and some lightweight tape. If you want a softer look, use tissue or vellum. Cut simple shapes, fold for depth, and layer the butterflies for a 3D feel. Hang with tape and adjust the balance as you step back.
Where this works. A wall cluster near a door, above a bed, or along a hallway can glow with tiny wings. The idea fits calm pastels or bold contrasts and pairs well with natural light. Mix sizes and angles to mimic a fluttering breeze.
Next steps. Start with one easy design. Pick colors you love and a spot that catches light. Try a small cluster first to learn spacing. When you finish, snap a photo and share your setup to inspire others.
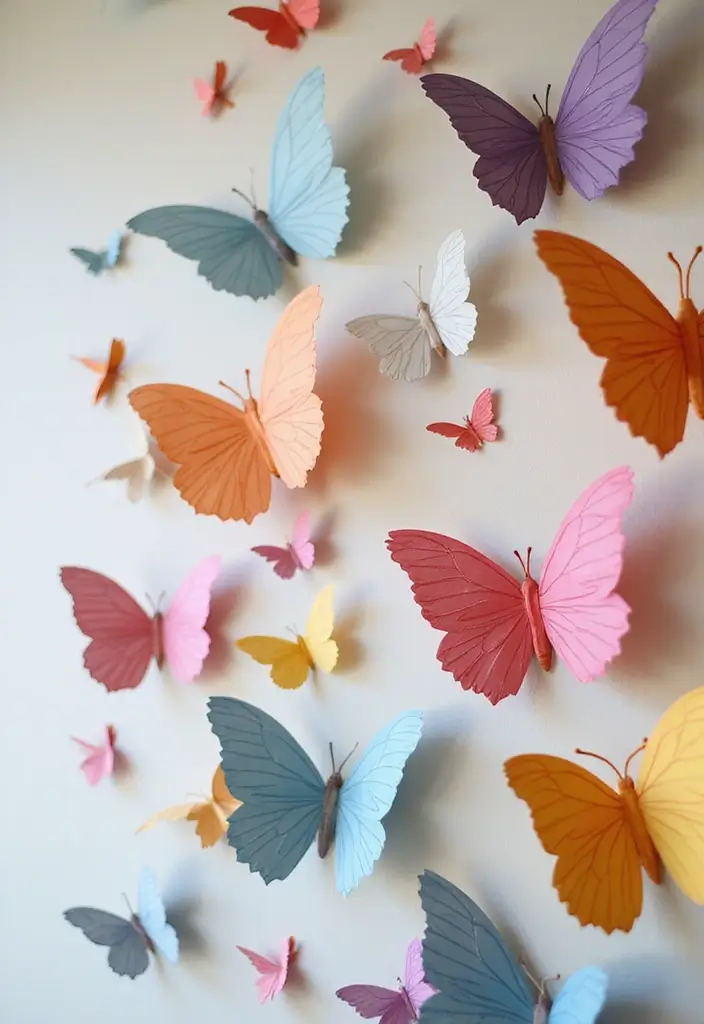
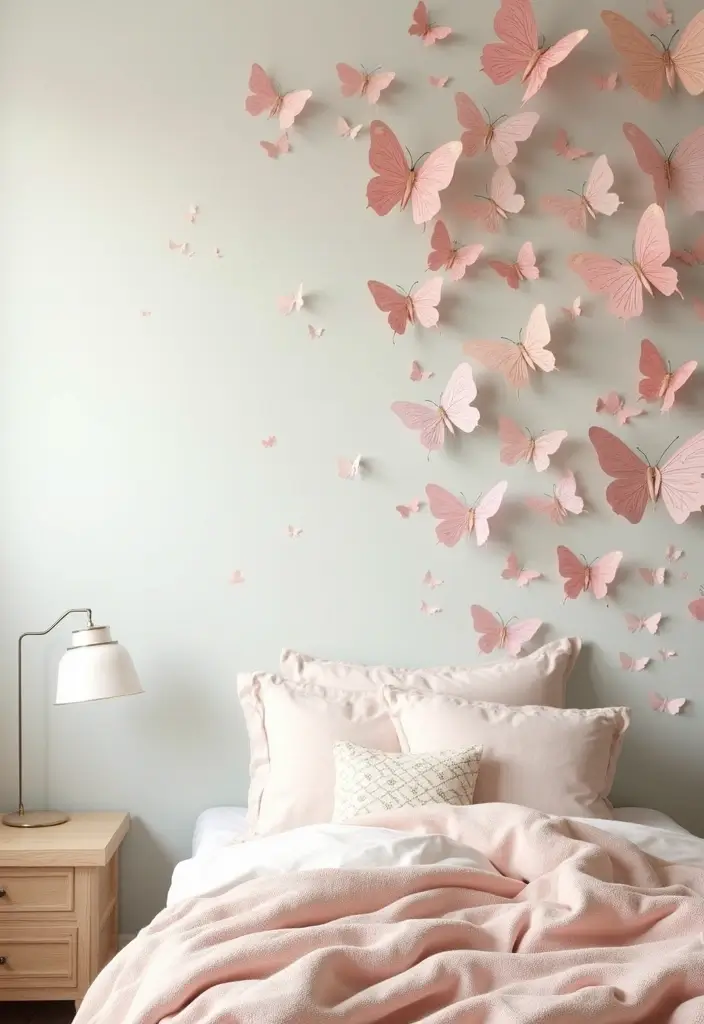
1. Whimsical Pastels

If you want a dreamy wall that helps kids relax and focus, pastel paper butterflies are a smart pick. They brighten a room without loud decor.
– Materials Needed: pastel-colored cardstock, scissors, glue, double-sided tape, and butterfly templates. Keep a ruler handy for even wings and straight edges.
– Tip: Use two or three colors per butterfly. Layer pieces to create a gentle 3D look. Tap a small amount of glue so edges stay lifted.
– How to assemble: Cut the wings with the templates. Glue a larger pair to a backing, add a smaller inner wing, then press lightly. Let the glue dry a couple of minutes before moving.
– How to place them: Try a curved line along a wall, or cluster them above a bed. Mix small, medium, and large butterflies for rhythm. Leave even gaps for a neat display.
– Unique Insight: Soft pastel shades calm the mind and help kids feel safe. The colors can spark quiet daydreams during rest time.
– Final note: In bright light, these butterflies seem to flutter softly. They bring motion and warmth with almost no effort.
– Care: If a piece wrinkles, press flat and re-glue.
@media(max-width:480px){
2. Bold and Bright
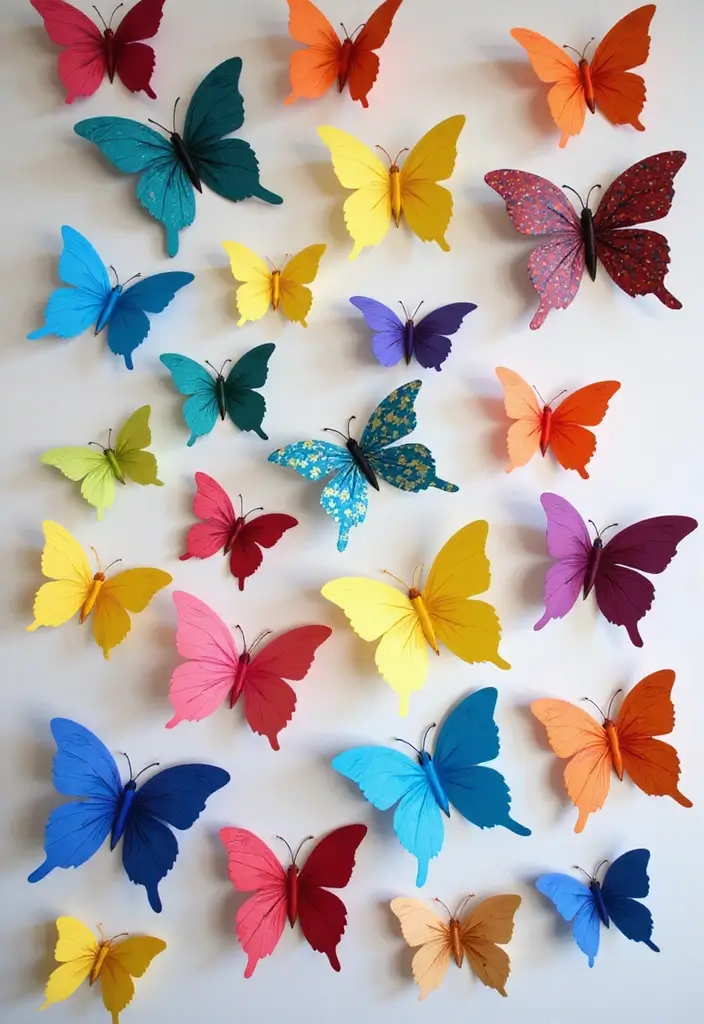
Want to brighten a plain wall with a playful touch? Bold color on paper butterflies can make a big impact fast. You pick bright reds, sunny yellows, and bold blues to wake up the room. Here is why color helps and how to use it.
Here is why color matters. Bright hues catch the eye and lift the mood. They give your space a sense of life that is easy to achieve with simple shapes.
Here is how to do it. Let’s break it down.
– Materials you need: Bright-colored paper in red, yellow, blue, green, or any colors you like, sturdy scissors, a glue stick, and butterfly outlines or templates. You can draw your own shapes or print easy templates. If you have decorative edge scissors, they add a fun touch.
– Layering tip: Build depth by placing a larger butterfly behind a smaller one. Let edges peek through for a sense of movement. Use a mix of colors to keep the flock lively.
– Placement ideas: Create a fluttering line along a wall. Cluster butterflies near a reading nook to guide the eye to a cozy spot. You can also form a soft arc to soften a plain hallway.
– Mood boost: Color can lift mood and spark energy. Reds and yellows wake things up; blues calm the space. This little mural works well in a kids’ room to make daily routines brighter.
– Next steps: Cut out shapes, test the layout on the floor, then glue them to the wall in stages. Press gently to seal. Step back and adjust as needed. These butterflies will seem to dance as you move.
@media(max-width:480px){
3. Glitter and Glam
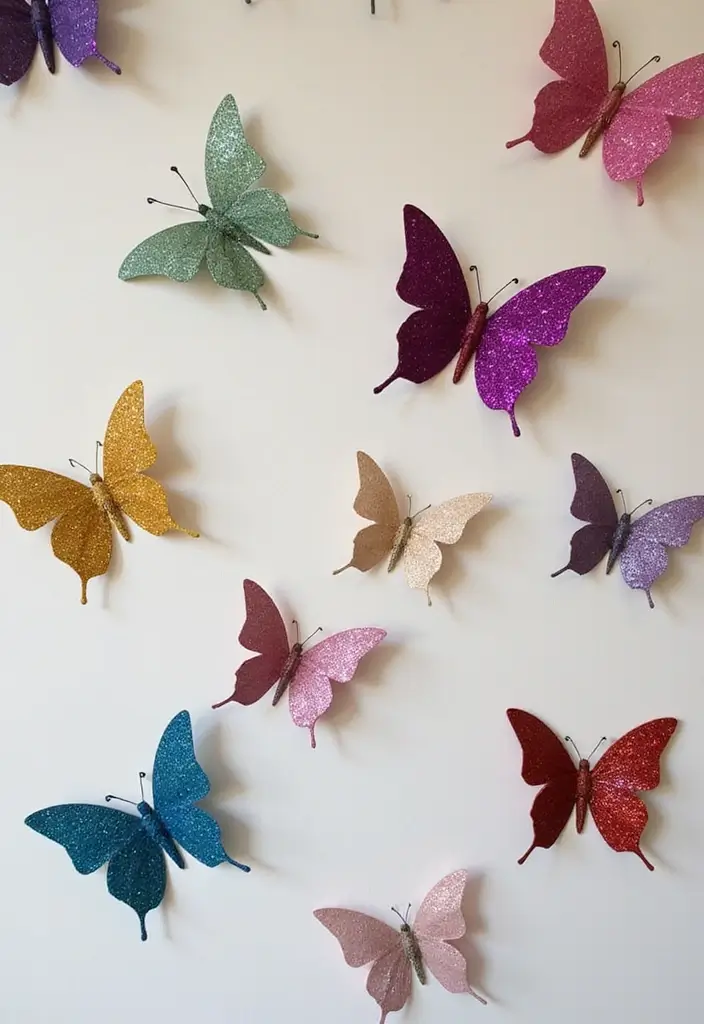
Want to add sparkle to your butterfly wall art? Glitter brings a gentle, magical glow that kids and adults love. Here is a simple, mess-free way to add shimmer you can actually finish in one afternoon.
– Materials You’ll Need Glitter paper or shimmer sheets in your favorite colors, clear craft glue, scissors, and butterfly templates. Foam dots or small sticky pads give each piece a tiny lift for dimension. Keep a scrap bin handy for extra tiny shapes.
– How to Create Start by cutting out shapes from the glitter paper using the templates. Mix small and large wings for variety. Glue the pieces together to form the butterfly bodies and wings, but don’t press too hard at first. This helps edges stay clean.
– Add Depth Place pieces on foam dots to create a 3D effect. Layer wings in different directions. Tilt some butterflies slightly to suggest flight. A little asymmetry makes the display feel alive.
– Light It Up Put the finished butterflies near a lamp, under a shelf light, or by a sunny window. The glitter catches the light and sends tiny sparkles across the wall.
– Care and Shine If you notice shedding, seal the edges with a thin coat of clear glue or a light spray sealant. Let it dry fully before hanging.
– Why It Works Shiny elements spark imagination and brighten a room without strong colors. It feels playful and dreamy.
– Next Steps Try a small cluster in pastel tones, then a larger mix of metallics. Change the arrangement with the seasons for a fresh look each time.
@media(max-width:480px){
4. Butterfly Garland
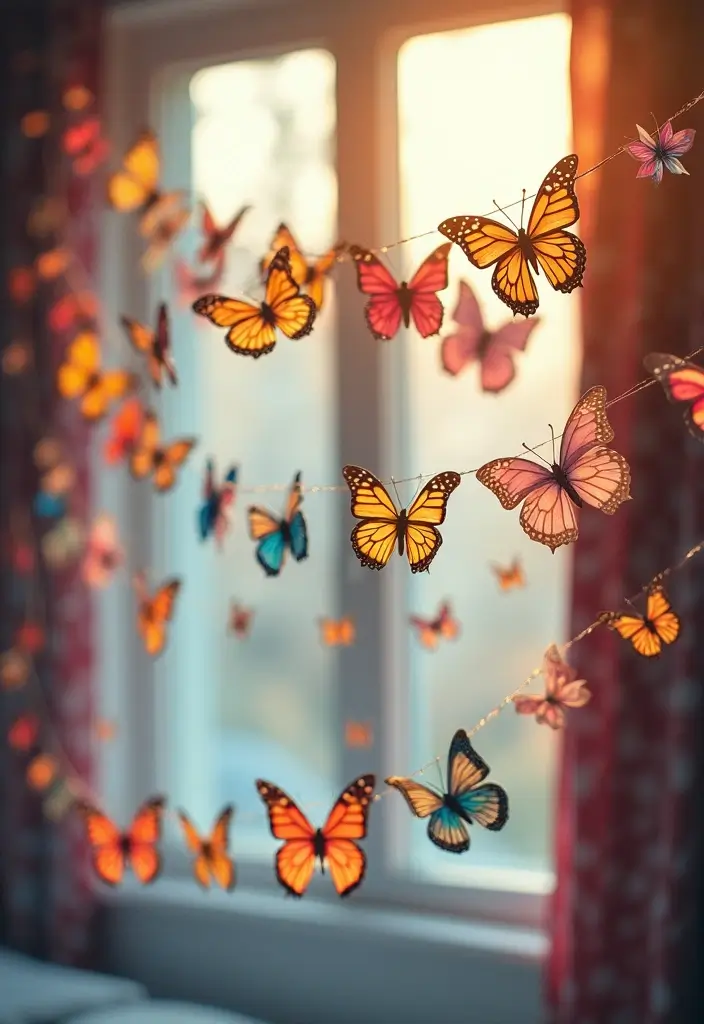
Here is why you want a butterfly garland. It catches light. It brings gentle motion to a wall.
– Materials: Mini paper butterflies, string, a needle, scissors. Use sturdy paper so the wings don’t tear. Pick bright colors for the best impact.
– How to build: Cut a long piece of string. Thread each butterfly with the needle. Space them evenly. Alternate colors and sizes to keep it playful. If a butterfly slips, tie a small knot and slide it back in place.
– Display ideas: Hang it across a room or above a window. Clip it near a doorway for a soft welcome. Try different heights to add depth. A gentle curve or a zigzag helps the line feel alive.
– Kid-friendly twist: Let kids pick the colors. They can arrange butterflies in patterns or in random clusters. It becomes a tiny art project they own.
– Practical tip: Measure the wall, cut the string a bit longer than needed, then secure the ends with tape or small hooks. This makes setup quick.
– Why it helps: It creates warmth and a friendly vibe. It works for parties or everyday decor and looks good in photos. Swap in seasonal colors to match a holiday. It keeps your room fresh.
@media(max-width:480px){
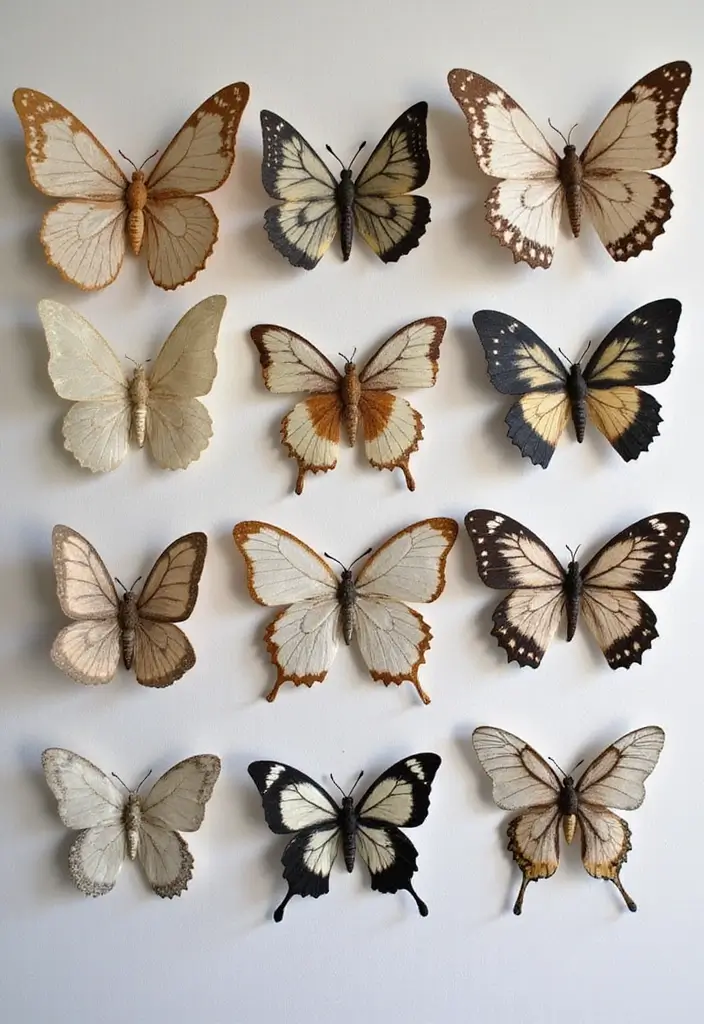
5. Nature-Inspired Designs

Want to bring a calm, outdoorsy feel to a room with simple wall art? Nature-inspired butterfly designs use earthy tones and floral prints to feel warm and inviting.
1. Materials you need: Floral-patterned paper in a few prints, scissors, and glue.
2. Color plan: Pick 3 earth tones: sage greens, warm browns, soft yellows to make the butterflies look natural.
3. Cut and layer: Draw a simple butterfly on paper, cut out a few shapes, then stack different prints to build the wings.
4. Details and display: Add a small leaf cutout or a thin strip for a body, then place the butterflies on a wall in a nature corner or above a reading nook.
5. Display tips: Vary height and angle to create the impression that they are fluttering.
6. Quick version: If you want a quick version, skip layering and glue a single patterned wing to a plain back.
7. Flexible display: Mount with removable magnets or foam dots so you can move them later.
8. Bonus tip: Hang them near a window so sunlight makes the prints glow and the wings seem to flutter.
Why it helps: These nature-inspired designs teach kids to notice patterns and care for the outdoors.
Next steps are simple: choose a wall, gather prints, and start.
Together, they bring the outdoors inside and set a calm, playful mood.
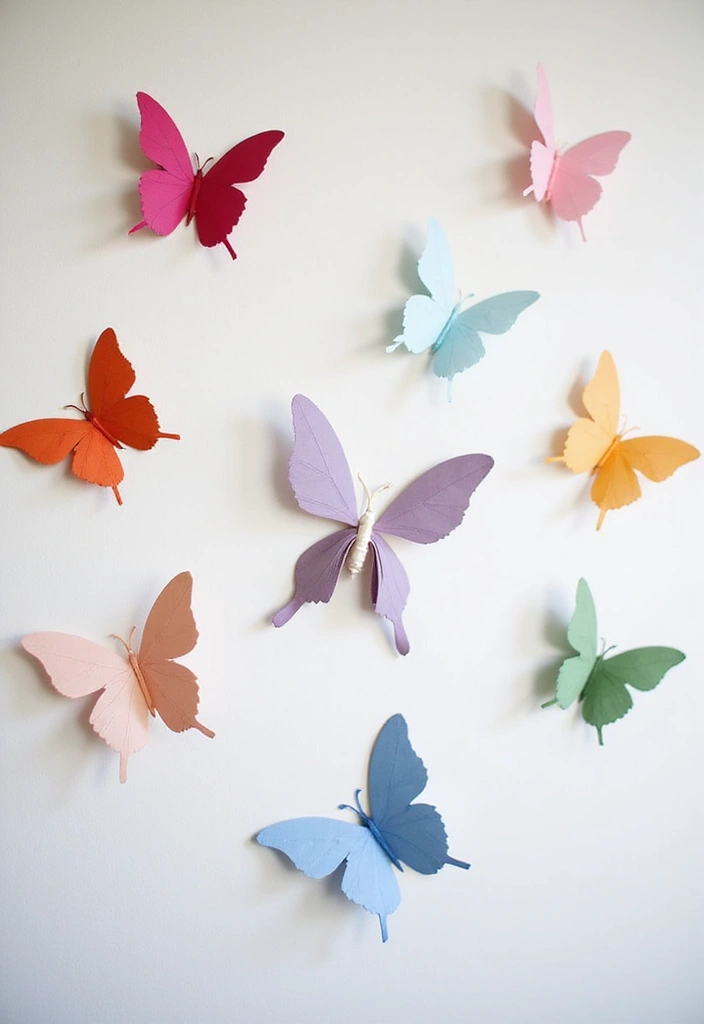
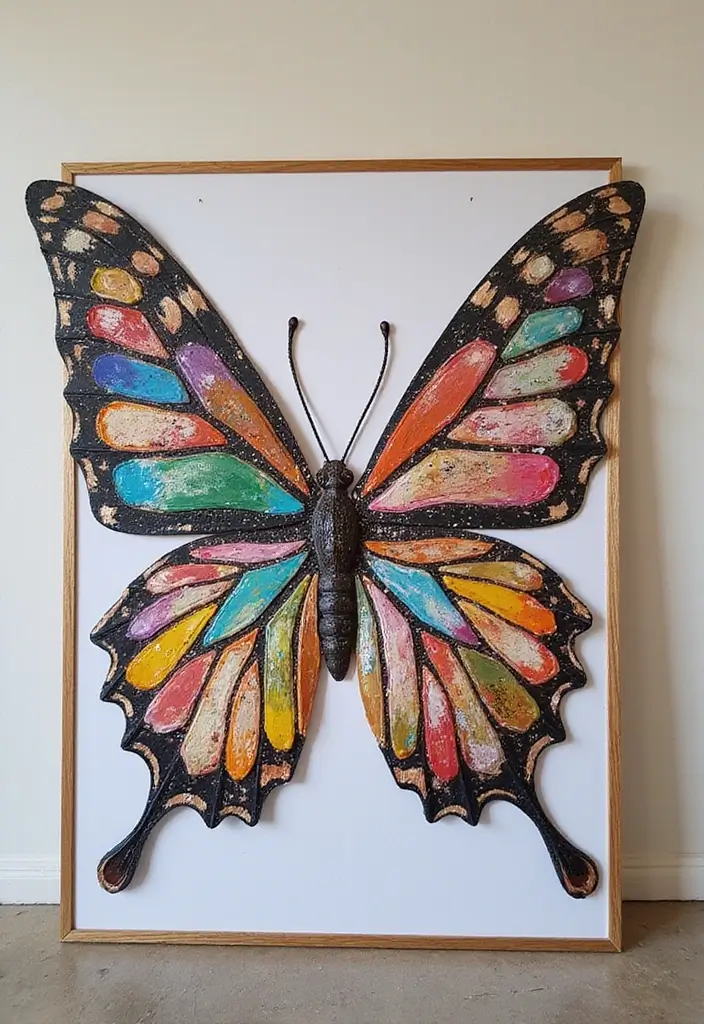
6. 3D Butterfly Wall Art
You want wall art that feels alive without a lot of fuss. 3D paper butterflies can do that. They add depth, color, and a playful vibe to any room.
What you need
– Cardstock or craft paper in your chosen colors
– Scissors and a pencil
– A hot glue gun with sticks
– Thin craft wire or clear fishing line
– A few small wall dots or nails for hanging
How to make it
1) Cut several butterfly shapes in different sizes from your paper. A mix of large and small looks natural.
2) Create the 3D lift. Fold the wing center slightly and bend the wings upward a bit. A gentle curve works best.
3) Attach a tiny wire to the back of each butterfly. Glue the wire to the center so the butterfly can hover a little from the wall.
4) Hang and shape. Put a small glue dot on the wall or use a nail, and position the wire so the butterfly sits away from the surface. Space them at different heights for a floating field of wings.
Why this works
The raised wings catch light and create shadows. Viewers notice patterns and movement, especially kids who love exploring the tiny details.
Tips to perfect your display
– Use a cohesive color family or a soft mix of pastels for a dreamy scene.
– Vary the distances by changing wire length.
– Keep humidity in check to prevent the paper from curling.
Placement ideas
Create a curved flock above a bed, a doorway, or a reading nook. A subtle swarm of butterflies can brighten a plain wall and invite imagination.
@media (max-width: 600px) {
.normal-quiz-iframe { min-height: 570px !important; height: 570px !important; }
}
7. Mixed Media Butterflies
Want wall art that feels alive? Mixed media butterflies bring texture and charm to any space. You can mix felt, fabric, and paper to craft unique wings.
– Materials needed: Felt, patterned fabric, cardstock, scissors, and a hot glue gun.
– Here is why this helps: fabric makes a soft body, paper keeps wings bright. The contrast draws the eye.
Let’s break it down:
– Step 1: Cut wing shapes from patterned fabric or cardstock.
– Step 2: Cut a simple body from felt or a sturdy fabric.
– Step 3: Glue the wings to the body with a hot glue gun.
– Step 4: Add tiny details with markers, sequins, or buttons if you want.
– Step 5: Mount on the wall with tape, or hang with a string for a little swing.
– Next steps: vary sizes and shapes. Use bold colors with neutral tones to balance it. Let kids feel the textures as they assemble.
– Notes: Mixing textures sparks creativity and shows crafts work together.
These butterflies add rich texture and make each piece feel special.
Final thought: Try it with kids.
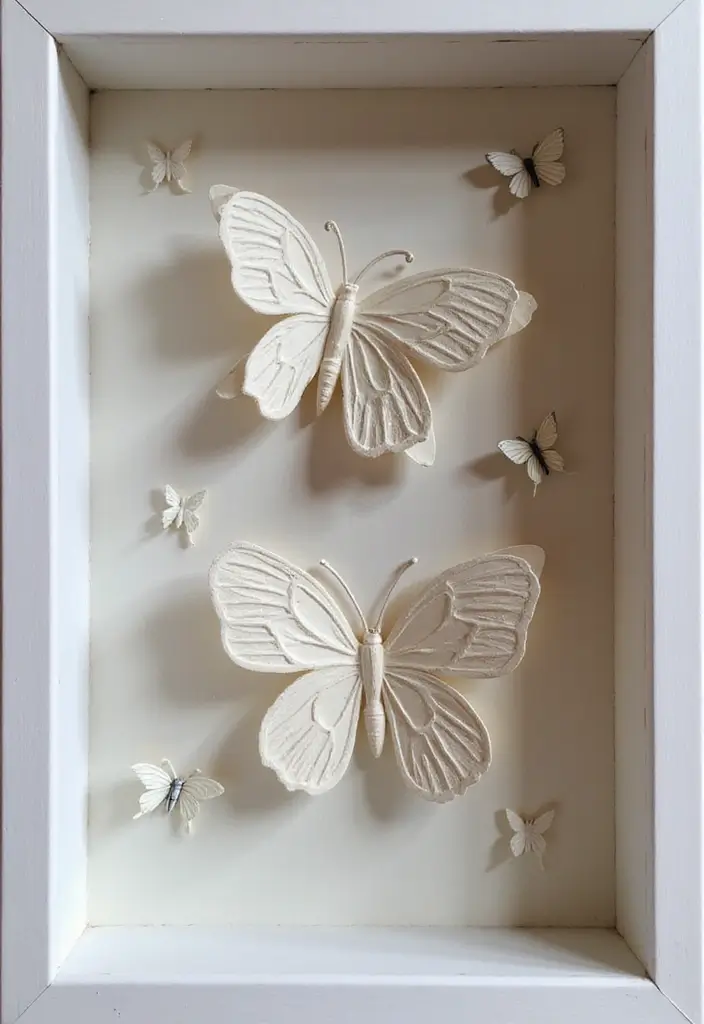
8. Butterfly Silhouettes
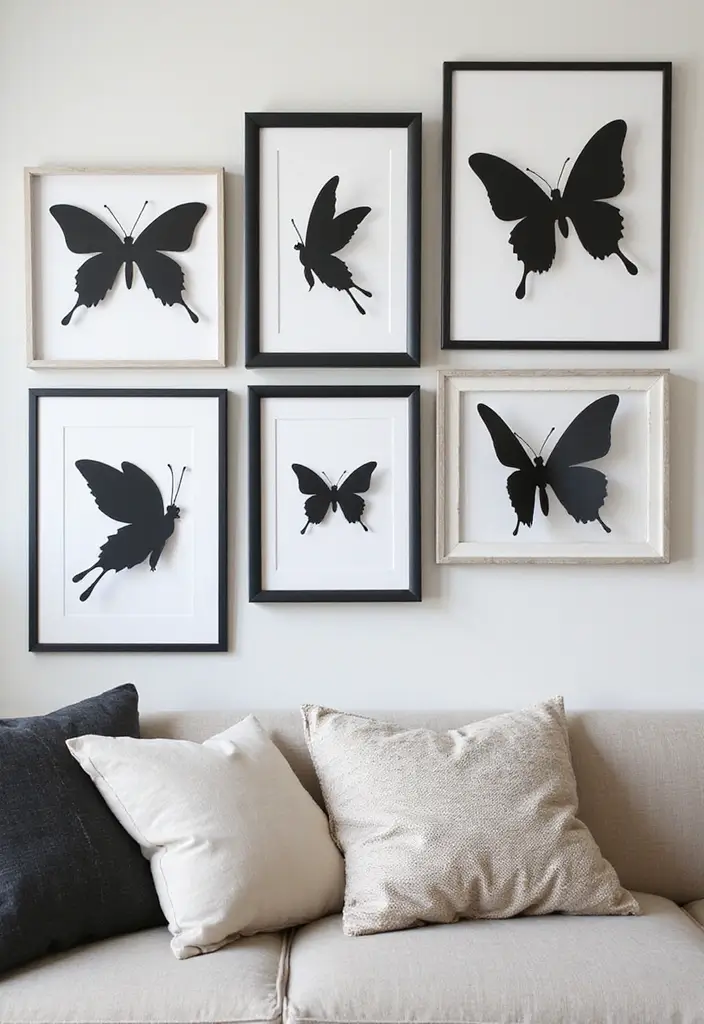
Looking for an easy wall art idea that feels chic but simple? Butterfly silhouettes cut from paper bring a light, playful touch to a kid’s room.
Materials
– Black cardstock
– Scissors
– A white frame or a shadow box
– Removable mounting dots or putty
How to make them
1) Cut butterfly shapes in several sizes. Mix big, medium, and small for depth.
2) Lay them out on a flat surface to test your arrangement.
3) Place the silhouettes in a frame or inside a shadow box.
4) Hang the piece on the wall at your child’s eye level for best impact.
Here is why this setup works: silhouettes stay clean from far away, yet the tiny differences in size keep the eye moving. A shadow box adds real depth, almost like a tiny stage for winged art.
Placement ideas
– Create a gentle arc that runs across a wall or above a bed.
– Line a small grid for a tidy, modern look.
– Use a shadow box to give a dramatic, three‑dimensional display.
Variations
– Swap black for white or metallic paper for a subtle shine.
– Try framed silhouettes in a single color on a pastel wall.
– Mix shapes, sizes, and even add a few real butterfly prints for a mixed-media feel.
Next steps
Grab your papers, cut a few shapes, test layouts, and swap in new silhouettes whenever you want a fresh vibe.
9. Butterfly Wall Stickers
Butterfly wall stickers give you a quick, playful way to refresh a room without lasting changes. They add color and whimsy you can easily swap.
– Materials: sticky-back paper, scissors, and a craft knife for clean cuts. If you’re guiding kids, use safety scissors and rounded blades.
– Design idea: cut several butterflies in different sizes and two tones. Mix bold colors with soft pastels. Try placing a few wings in two layers for a fluttered look.
– How to apply: peel the backing, press the sticker to a smooth wall, and smooth out air with your finger. Move them around until the layout feels right. A cluster in a corner or a scattering across a smooth wall works well.
– Why it helps kids: trying new layouts trains spatial sense and design thinking. They see how size and color change the mood.
– Practical notes: this is non-permanent. They stick to clean, smooth walls but may lift on rough surfaces or in very hot rooms. If needed, a touch of removable tape helps.
– Next steps: plan a quick floor mock-up before sticking. Reposition every few weeks to keep the room fresh.
This simple project gives big payoff and teaches kids to love their space.
10. Interactive Butterfly Wall
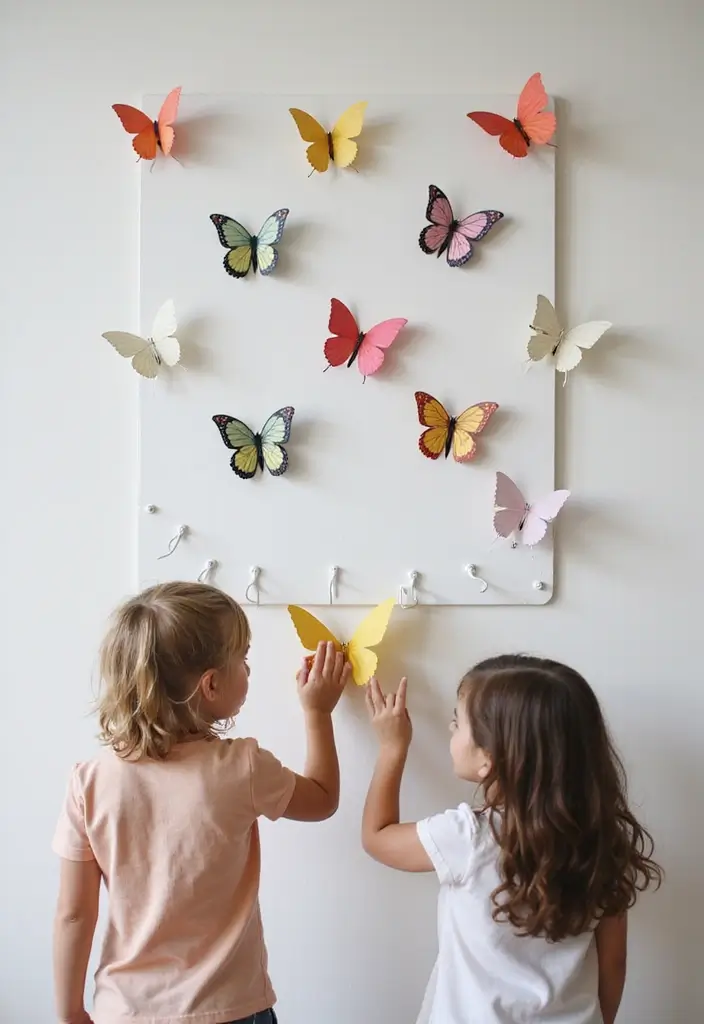
Turn a plain wall into a playful butterfly wall that invites touch and ideas. You get a quick, kid-friendly activity that stays put but moves in tiny hands.
– Materials needed: Paper butterflies, small hooks, string or clear fishing line, and a wall-mounted board or sturdy corkboard.
– How to mount: Attach hooks to the board and hang butterflies on strings. This keeps each butterfly removable.
– Play idea: Let kids rearrange the butterflies and create mini scenes. You can set up a butterfly scavenger hunt with simple clues.
– What kids gain: Fine motor skills grow as they pick, hook, and swap butterflies. They also learn color patterns and storytelling.
– Tips for a smooth setup: Use lightweight butterflies and avoid heavy pieces. Add a soft chalk outline on the board to guide placement.
This interactive wall invites stories and games. It stays flexible as you add new butterflies for holidays or themes. Start small, test the setup, and then expand with more colors or shapes. Here is why it works: it provides hands-on play right where kids learn best. Next steps: hang the board at kid height and invite them to co-create weekly. If you have a small wall, use a shorter length of string and fewer butterflies to keep it tidy. Try two colors.
@media(max-width:480px){
@media (max-width: 600px) {
.visual-quiz-iframe { min-height: 995px !important; height: 1100px !important; }
}
11. Seasonal Butterflies

Here is why seasonal butterflies make sense on your walls. You want a look that fits the year without a big mess. These tiny paper wings let you update decor with the seasons and holidays. They are simple to make, easy to store, and fun to swap. Let’s break it down and get you started. Here is why this setup works for you.
– Materials Needed: Gather colored papers in seasonal tones, a pair of scissors, glue, and optional craft tape to help attach your butterflies.
– Seasonal color ideas: For autumn, pick warm oranges and browns; for winter, cool blues and whites; for spring, pinks and greens; for summer, bright yellows and teals.
– How to create: Start by cutting simple butterfly shapes, then bend the wings slightly to add depth, glue on a small body, and place them on the wall in a loose cluster or a gentle line.
– Rotation and storage: Store off-season butterflies in a sturdy craft box and rotate them on the wall as the calendar changes, so they stay in good shape.
– What you gain: You get a wall that moves with the year, a fun learning moment for kids, and a low-cost DIY project that keeps paying off month after month.
Next steps: grab colors, pick a wall, and start your seasonal butterfly display today.
12. Butterfly Shadow Boxes
You want a wall piece that shows your kid’s art and adds a playful touch. A butterfly shadow box can do that. It turns simple crafts into a keepsake you can hang and enjoy.
– Materials – A shadow box frame, paper butterflies, background paper, and glue. You can add foam dots to lift some butterflies for a subtle 3D look. Choose backgrounds that match the room or your child’s colors.
– Depth and layout – Start with a loose plan. Place a few butterflies flat on the paper. Then lift others with foam dots so they seem to float in space. Keep some near the top, others toward the bottom for balance.
– Background ideas – Try a floral print, a starry night, or a bold solid color. A soft pastel brings calm; a bright hue makes the scene pop. You can add a simple border to frame the butterflies.
– Why it matters – These boxes honor kid art and make warm gifts. They keep memories fresh and show you notice the details. They’re quick, affordable, and fun to make with your child.
Next steps to build it:
1) Open the shadow box and prepare the backer.
2) Lay out the butterflies on the background to test the look.
3) Glue each butterfly; use foam dots for depth.
4) Reassemble the frame and hang it where you’ll see it daily.
Here is why you’ll love this: it’s a charming, hands-on project that turns art into a display that anyone can enjoy.
13. Glow-in-the-Dark Butterflies

If you want a gentle glow that comforts at night, glow-in-the-dark butterflies can help. They wake the wall with soft light and stay calm with no loud lamps. Here is why this idea works: it adds whimsy without waking the whole house.
– Materials you’ll need: Glow-in-the-dark paint, cardstock, scissors, glue. A small brush and a clear protective sealant can help the project last.
– How to make it: 1) Cut several butterfly shapes from cardstock. 2) Paint the edges and tips for a subtle halo. 3) Add a light coat across the wings for even glow. 4) Let dry completely, then glue each butterfly in place.
– Where to put them: Create a trail over the bed or a soft cluster in a corner. Place the main group at eye level so your child can notice it easily.
– Glow tips: Expose the butterflies to bright light for 15–30 minutes before bedtime to charge the glow. The glow will fade after a while, so you may want to refresh every few nights. A string of warm fairy lights nearby can boost the effect.
– Practical notes: It’s a simple, kid-friendly craft that doubles as decor. If your child needs a night light, keep a small light on in the room as well.
– Care and upkeep: Dust gently with a soft cloth. If a piece loosens, re-glue and hang again.
14. Butterfly Mobile

You want a playful wall decor that moves but stays safe. A butterfly mobile does just that. It hangs from the ceiling and flits in the breeze.
– Materials you’ll need: several paper butterflies, lightweight string, a hoop, and scissors. Keep the butterflies simple for clean cuts.
– Why this works: hang butterflies at different heights to create a cascading look. The movement catches light and draws the eye.
– Quick tip: use fishing line to make the threads nearly invisible. Your eye sees more flutter and less string.
– How it helps kids: the fluttering shapes invite little ones to follow the moving pieces with their eyes. That builds early visual tracking.
– Step by step:
1. Punch a small hole in each butterfly and tie a short length of string to the hole.
2. Tie the other end of each string to the hoop at different heights.
3. Space the butterflies around the hoop so they have room to sway.
4. Hang the hoop from a ceiling hook in a roomy corner.
– Finishing touches: pick a simple color scheme and keep the butterflies lightweight. A quiet palette helps the room feel calm.
This butterfly mobile will drift softly, bringing charm and life to your space.
@media(max-width:480px){
15. Butterfly Wall Mural
Butterfly Wall Mural with Paper and Paint
You want a wall that feels playful. A butterfly mural adds color and texture. It creates motion and a focal point you can refresh later.
What you need
– Wall-safe paint in a few colors you love
– Paper butterflies in different sizes
– Glue or double-sided tape
– A brush or sponge for soft edges
– A pencil, painter’s tape, and a ruler
How to build it
1) Plan the layout. Lightly mark large butterflies first. Let the rest drift in a loose, natural pattern.
2) Add painted shapes. Use a soft brush to draw simple wing shapes. Keep edges clean with painter’s tape.
3) Place paper butterflies. Start with biggest pieces, then add medium and small ones. Attach with tape so they lie flat.
4) Finish the mix. Let painted and paper butterflies overlap for texture. Adjust colors as you go for balance.
5) Seal if you want durability. A clear coat keeps the mural looking good.
Tips to help it fit your space
– Pick a few bright colors plus neutrals to calm the look
– Vary sizes and angles to create movement
– Start high and work down so gravity helps placement
This mural can be the room’s bright spot, inviting imagination and play. If you don’t love a piece, move it. You can add more later to refresh the scene. Next steps.
@media(max-width:480px){
16. Butterfly Craft Kits
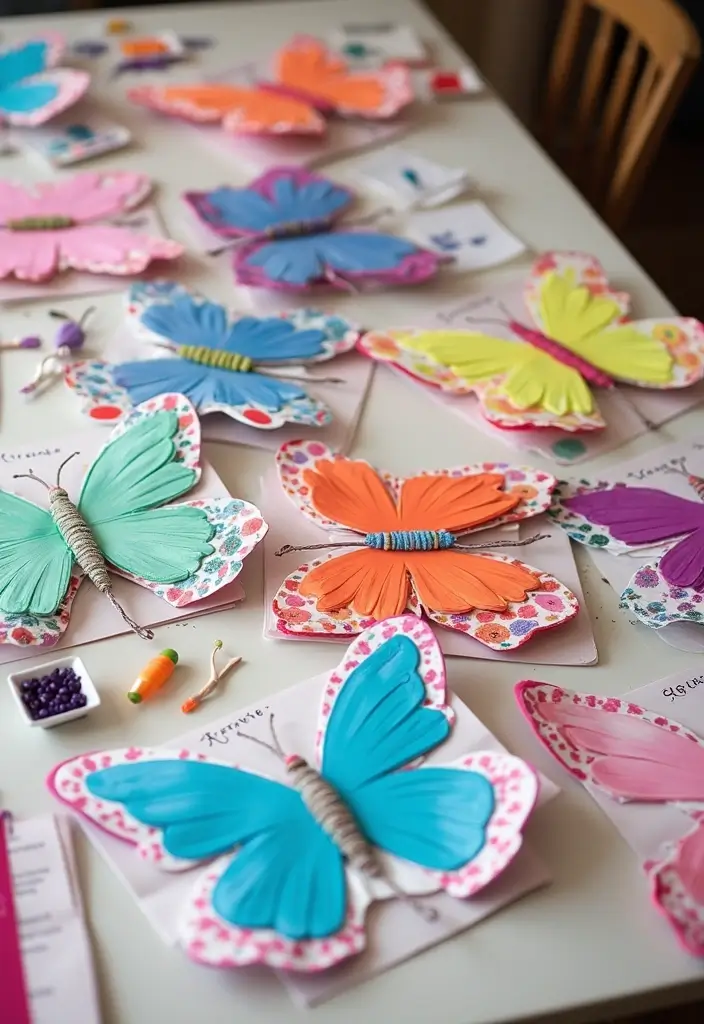
If you want craft time that guides kids and keeps you in control, try butterfly craft kits. They bundle pieces and simple steps in one ready-to-go box.
Here is why these kits work. They give structure, spark creativity, and stay easy for beginners. It saves time, reduces mess, and builds confidence.
– Materials: Pre-cut paper butterflies, colored paper, stickers, sequins, glue dots, and a small illustrated instruction sheet. Add ribbons or pipe cleaners for extra flair.
– Setup: Set up a low table or mat. Put pieces in small bowls by color. Place a finished butterfly sample where kids can copy it.
– Creativity spark: Encourage mixing textures and colors. Let kids pick two colors and add a few sparkles or tiny gems.
– Themed options: Try birthday kits or seasonal kits like spring blooms or garden friends. The theme gives a clear prompt.
– Group play: In small groups, assign roles: cutter, decorator, storyteller. Kids help each other and share supplies.
– Time saver: Prep ahead. Pack each kit with all items and label by age or skill level.
– Practical tips: Use a timer to finish in about 20 minutes. Keep instructions short and picture-based.
– Limitations: Glitter can be messy. Have wipes handy and supervise younger kids.
– Next steps: Display finished butterflies on a string line or wall. Celebrate effort and proud results.
17. Butterfly-Themed Parties
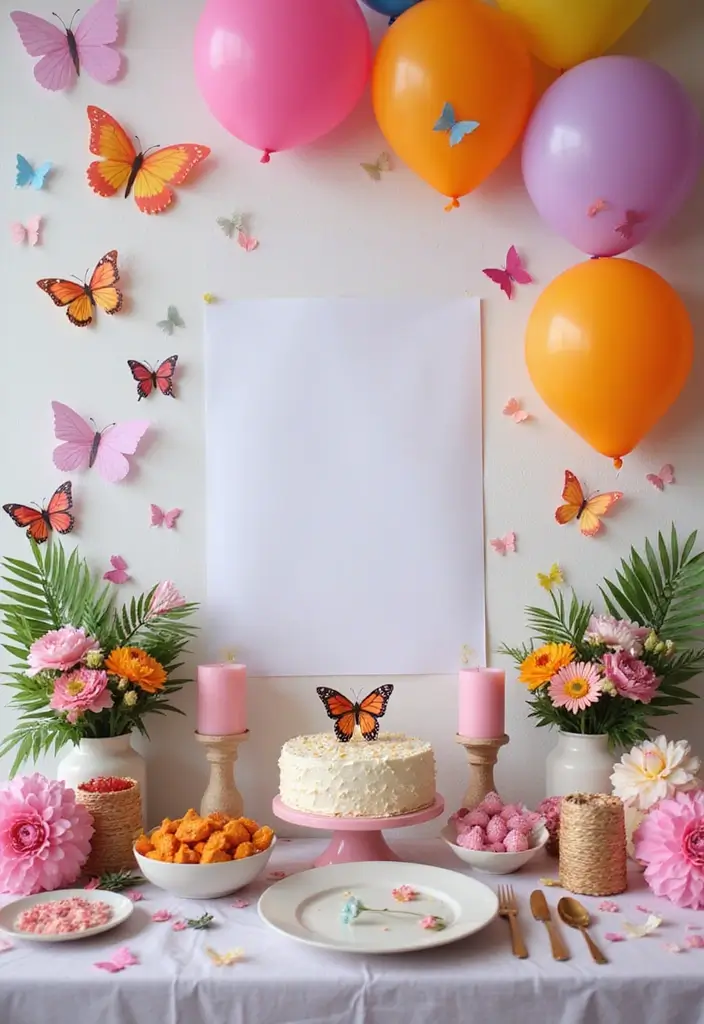
Planning a butterfly themed party? Paper butterflies add a soft, magical touch. They flutter with the breeze and catch the light on the tables. You can use them as the main decor without a big cost.
1. Materials to gather
Paper butterflies, balloons in your colors, and long streamers. Add simple table decor like napkins or confetti. Have tape and glue sticks ready for quick placement.
2. Ways to use them at the party
Hang them from the ceiling in clusters. Let a few float above the food area. Stick some to place cards for a small pop of color.
3. Party favors
Place a couple of butterflies in favor bags or on each guest’s chair. Small keepsakes like a butterfly sticker or a mini kite work well too.
4. Cake and snacks
Try butterfly stencils on the cake or on cupcakes. A light dusting of edible sugar in pastel colors creates a gentle sparkle.
5. Why this works
Here is why this approach fits a kid party. A butterfly theme ties the room together. It gives kids a simple story to follow and a playful mood for games.
Butterflies bring a calm, joyful touch that makes the party feel complete.
18. Educational Butterfly Displays
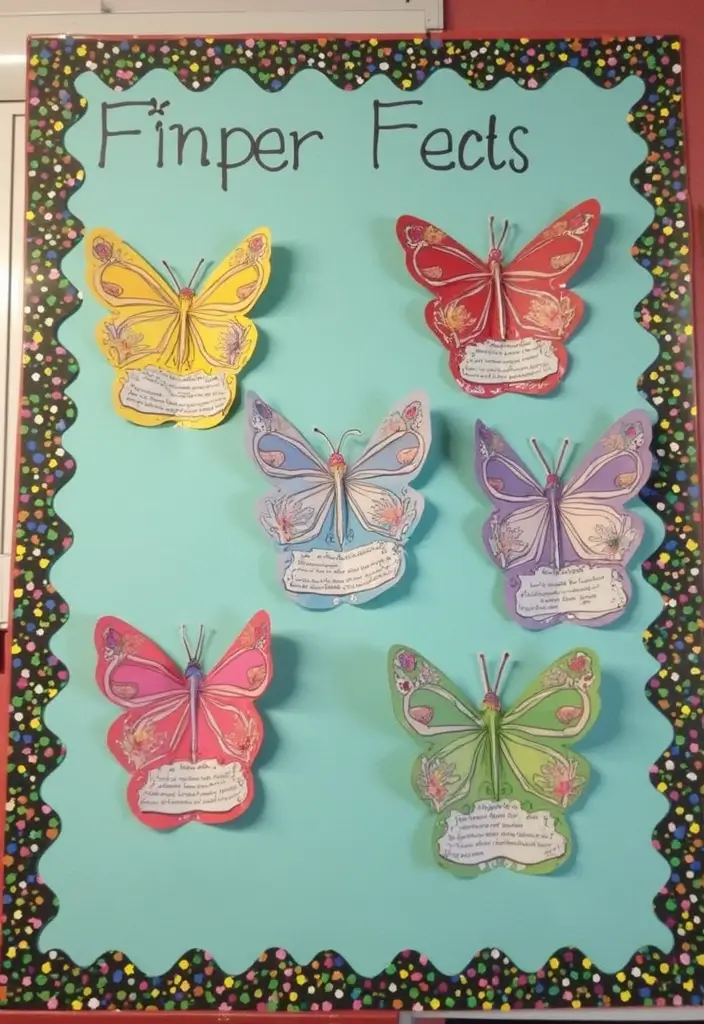
If you want a wall that teaches and delights, try Educational Butterfly Displays. You turn art time into a quick science lesson.
– Materials: Paper butterflies, butterfly facts, and a sturdy poster board. Add glue, tape, and markers if you want to label wings.
– Setup: Print or cut 8 to 12 butterflies. Write a short fact on a card beside each one.
– Display: Arrange the pieces in a grid or a loose arc. Place facts next to the matching butterfly to show the life cycle. Include a simple title on the board, like “Butterfly Facts,” so kids know where to look.
– Tips: Use bright colors and clear, easy words. Laminate the cards if you plan to reuse the display. Let kids help with placing the pieces. Let a student read a card aloud to the class.
– Why it helps: Seeing a picture plus a fact helps learning stick. Kids remember wings, colors, and patterns.
This wall display can turn a simple corner into a tiny nature lab. It sparks curiosity and makes learning hands on.
Here is why: you get a quick, low effort project with big payoff for memory and focus. Next steps: pick a wall, gather supplies, and start crafting.
19. Upcycled Butterfly Art
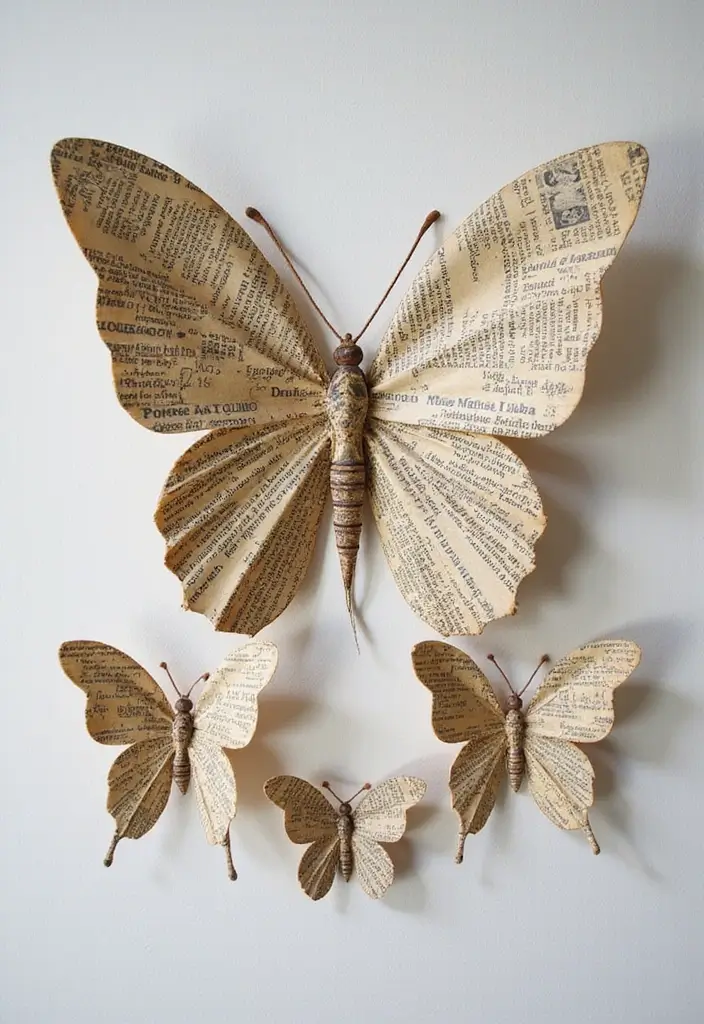
You want a wall piece that is easy on the budget and kind to the planet. Upcycled butterfly art turns old magazines into bright butterflies that flutter on your wall. It’s quick, fun, and a gentle lesson in reuse.
Materials you’ll need
1) Old magazines you don’t mind cutting up
2) Scissors that are safe for kids
3) White glue or a glue stick
4) Simple butterfly templates or your own cut-out shapes
5) Optional: thin cardboard backing for sturdiness
Here is how you can make it. Next steps are short and clear.
Step-by-step guide
1) Pick pages with strong colors and clear images.
2) Trace butterfly wings on a page or use the templates.
3) Cut two matching wings for each butterfly.
4) Add a bit of lift by curling the edges of the wings.
5) Glue the wings to a small body made from paper.
6) Let each butterfly dry before you hang it.
Smart display ideas
– Group several butterflies into a mini gallery on a wall.
– Make a hanging mobile with string and a light frame.
– Create a long border or a dotted path of butterflies along a shelf or door frame.
Why this works
Reusing paper is friendly to the planet. The craft teaches you to see value in scraps. You get a fresh look without buying new decorations.
Common questions
– Will they stay on the wall? Use a sturdy backing and solid glue.
– What if pages glare? Use non-gloss pages or place butterflies where light isn’t harsh.
– Can kids help? Yes. Let them pick colors and place the wings.
Try this upcycled butterfly art to add whimsy with a conscience. It blends easy steps with a bold, colorful result that fits any room.
@media(max-width:480px){
20. Butterfly Collages
Butterfly collages use paper butterflies to turn plain walls into a story. You and your kids can make airy, colorful art that feels alive. This project works for any age with some tweaking. Here is how to do it.
– Materials Needed: Gather varied papers, glue, scissors, and a canvas or sturdy board. Add a pair of tweezers or a craft brush for fine details. Let kids pick colors they love and cut them into wings, bodies, and spots.
– Tips: Layer pieces to create depth. Let some pieces extend beyond the edge of the canvas for a bold look. Use even small scraps to craft tiny butterfly parts.
– Theme Ideas: Give a prompt to spark ideas, like “My favorite spot,” “Garden wings,” or “Spring colors.” A good prompt keeps the page focused and fun.
– Why it helps: Collages help kids express feelings they might not name out loud. Color, shape, and texture become a language kids use to tell a story.
Wrap-up: These butterflies on canvas become bold statements of personality. Each piece feels one of a kind and can brighten any room.
Hang them in clusters to spark conversation and pride. You can switch them with the season too today.
21. Butterfly Frames
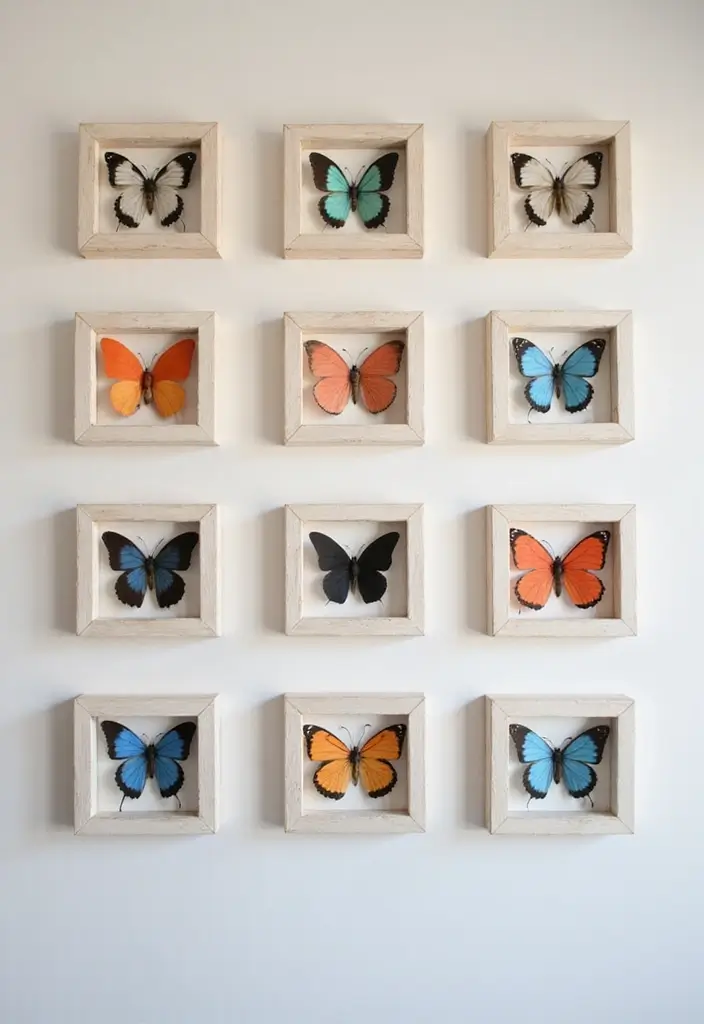
Want a playful wall that doubles as a keepsake of your kid’s creativity? Framed paper butterflies do the job. They add charm without a mess. Here is why they work: frames give art a finished look and make small crafts feel like real decor.
– Materials you need
– Paper butterflies from your projects
– Frames in matching or varied sizes
– Craft glue or adhesive strips
– Optional: backing paper, scissors, and a ruler
– How to assemble
– Pick a simple color theme so the butterflies pop.
– Lay out a plan on a table to see your arrangement.
– Glue each butterfly to the backing, one by one.
– Slide the backing into the frame and seal it up.
– Hang the frames in a tidy grid or a playful stagger.
– Display ideas
– Create a neat grid for a clean, kid-friendly look.
– Mix large and small frames for visual interest.
– Line a hallway, above a desk, or in a cheerful playroom.
– Tips and care
– Choose frames with dark or light contrasts to highlight the butterflies.
– Keep frames out of direct sun to prevent colors from fading.
– Update the wall as new butterfly crafts come home.
– What you gain
– A chic wall that celebrates your child’s creativity.
– A zero-muss project with immediate, shareable results.
– A simple, repeatable decor idea you can reuse anytime.
Next steps: plan your layout, gather your frames, and turn fresh butterfly crafts into wall art.
@media(max-width:480px){
22. Butterfly Art Exchange

Butterfly Art Exchange: A Quick, Friendly Swap
You want a simple way to turn art into a social moment. A butterfly art exchange does just that. It invites friends to trade tiny pieces and ideas.
– What you need: your finished paper butterflies, envelopes, and a small surprise for each swap.
– Small touch: include a short note with each butterfly to share a spark or idea.
– How to run it: set up a kid-friendly art day. Each child brings 3–5 butterflies to trade.
– What you gain: exchanges build trust, help kids talk about art, and grow friendships.
Here is why this works. Simple trades feel easy. Kids smile when they spot colors they love. They learn kind talk as they wrap up each wing gift.
Next steps. Plan a monthly swap. Start with a small group and a supervising adult. After the first trade, ask each child to name one thing they liked about a piece they received.
This activity fits any style. It uses common materials and adds a tiny surprise for extra delight. It keeps creativity bright and helps kids build social skills. Feel the flutter of paper wings as you trade.
@media(max-width:480px){
23. Butterfly-Themed Room Makeover

You want a room that feels calm and playful. A butterfly-themed room can give you that with a simple plan. Here is a setup you can follow.
– Materials to gather: butterfly-themed bedding, a duvet cover with matching sheets, butterfly curtains, wall art like canvas prints, wall decals, and kids’ crafts. Add a soft rug and a small night light. Choose items that wash easily and wipe clean.
– Color and style: pick two or three butterfly colors. Use them across bedding, curtains, art, and small accents. A neutral wall lets the colors pop. Go pastel for a gentle mood or choose brighter tones for a cheerful vibe.
– Involve the kids: ask them to pick favorite butterfly species and a wall color. Let them help place decals and arrange a few shelves. Their choices make the space feel like theirs.
– Practical setup: use removable decals, washable paint, and labeled storage bins. Keep shelves clear and add a cozy reading pillow. Choose a lamp that gives warm, steady light.
– Cozy retreat idea: create a small reading nook with a comfy chair or floor cushions, fluttery curtains, and a butterfly print above the bed. Soft music or nature sounds help.
Next steps: tidy regularly, rotate one art piece each season, and refresh pillows with new fabrics.
This makeover turns a plain room into a warm space for sleep and play.
24. Butterfly Kites
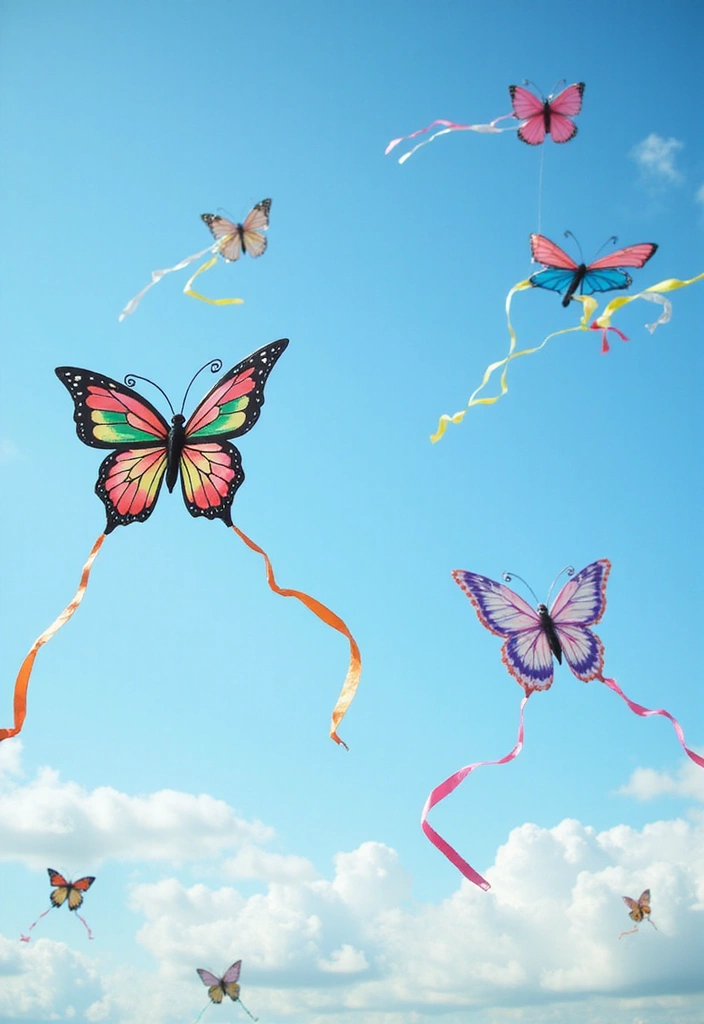
Would you like a craft that adds play to outdoor time? Butterfly kites are a simple fit. They blend art with wind and cheerful movement.
Materials
– Kite frames
– Colorful paper
– String
– Glue
How to build
– Draw or paint designs on the paper before you attach it to the frame.
– Let the designs dry, then glue the paper to the frame ends securely.
– Tie a sturdy string to the frame so it flies well.
Tips for best results
– Use bright colors that catch the sun as your kite moves.
– Keep the paper light so the kite glides easier on a gentle breeze.
– Test one design at a park or in your yard before you plan a big fly day.
Fun idea
– Plan a kite-flying day with friends at a local park. You can turn it into a mini festival with snacks or a quick photo scavenger hunt.
Why this works
Here is why it fits so well for kids and families. This project blends art with motion and keeps you active while you create. It invites you to be patient, adjust the paper, and learn how wind helps or hinders flight.
Next steps
– Try different butterfly shapes and sizes.
– Bring extra paper and supplies to refine designs on the fly.
– Celebrate the sunny day with a small wind-burst finale.
These colorful butterfly kites brighten outdoor play and turn a simple sunny day into a small, joyful adventure.
@media(max-width:480px){
25. Butterfly Journals
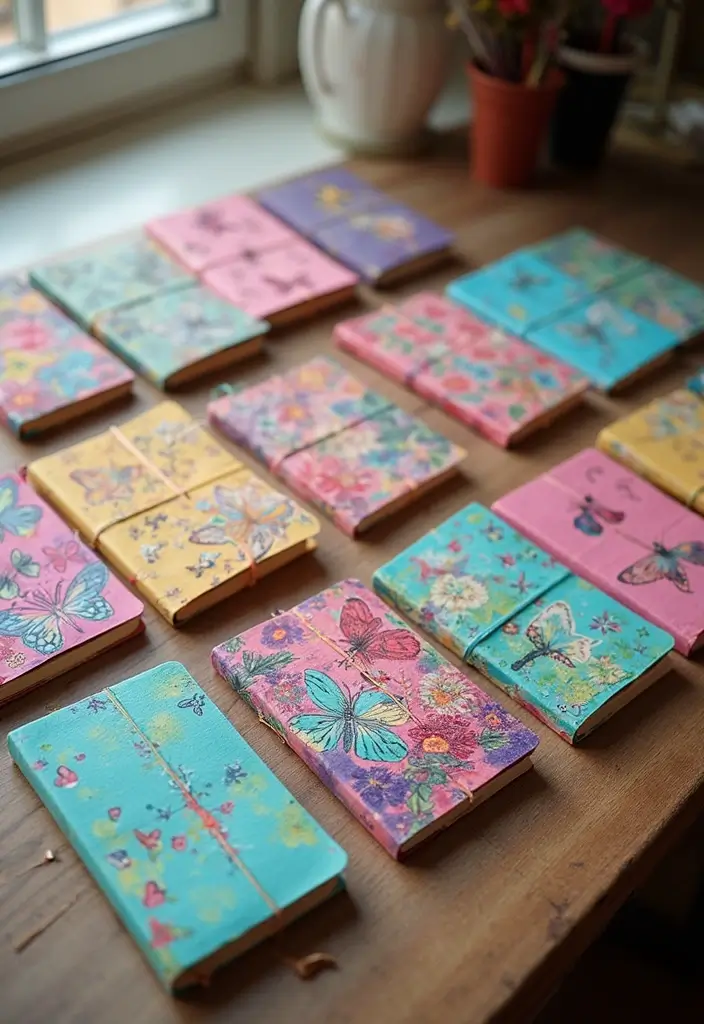
Want a simple way to spark writing and art at home or in class? Butterfly journals blend creativity with care.
Turn a plain notebook into a mini garden of color.
What you need
– Blank journals give you a clean canvas.
– Paper butterflies add color and texture.
– Stickers, glue, scissors, and colored pencils help you finish the look.
– Optional fabrics or tissue add extra texture if you want it.
How to build it
1) Choose a journal with a cover you like.
2) Decorate the cover using different sizes of paper butterflies to create layers.
3) Glue a bold butterfly on the center for a focal point.
4) Seal the cover with a quick coating of clear tape or a sticker border to keep pieces in place.
Ways to use
1) Write a short butterfly adventure on each page.
2) Describe a day in the life of a tiny winged traveler.
3) Include a sketch on one page and a caption on the next.
4) Share stories with friends or family to grow confidence.
Why it helps
These journals invite self-expression.
Writing builds reflection and helps kids name what they feel.
Tips
– Keep a small stack of prompts ready.
– Let kids pick their own colors.
– Store the journal in a box with extra paper to spark ideas.
– Take it outside for garden or park writing sessions.
This simple project fits many spaces and ages.
26. Butterfly Bookmarks
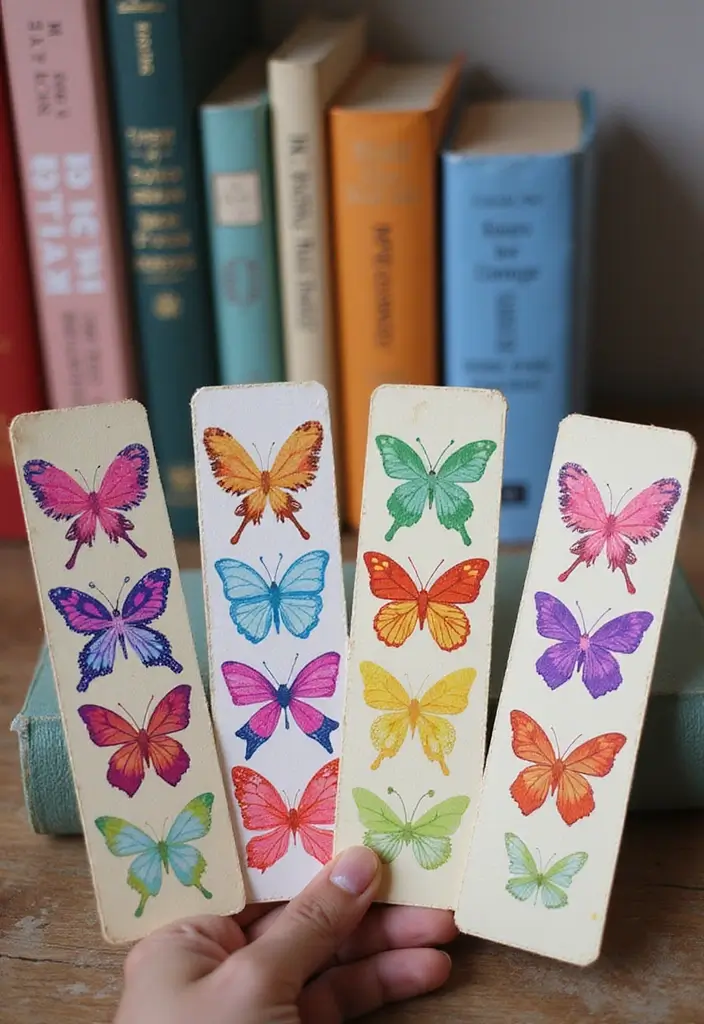
You want a simple craft that makes reading feel special. Butterfly bookmarks do that. They are small, colorful, and easy for kids to make. Here is a quick guide you can use today.
– Materials you need: Cardstock in bright colors, safety scissors, glue or tape, and small decorations like ribbons, stickers, or markers.
– How to make:
1) Cut one or more butterfly shapes from the cardstock.
2) Punch a small slot near the top edge.
3) Thread a ribbon, yarn, or paper clip through the slot and tie or secure it.
4) Decorate with color, patterns, and tiny details.
5) Optional: laminate the bookmark for durability.
– Tips for longer life:
Laminate the finished bookmark or seal with a clear sleeve.
Add a corner sticker for wear and a tiny reinforcement around the hole.
– Ways to use and share:
Gift bookmarks to friends, family, or classmates.
Use them to mark favorite stories or reading goals.
– Why they work:
Bright butterflies turn reading time into a fun, personal ritual.
Kids feel proud when they finish a bookmark and keep it in their book.
Next steps: pick easy color combos, lay out a quick craft space, and start creating.
27. Butterfly Thank You Cards

You want a personal touch when you say thanks. Butterfly thank you cards add charm to gifts and notes. They are easy to make and show you cared. Keep a few ready to mail so you can send thanks fast.
Materials
– Cardstock, scissors, colored pencils, glue.
– Optional: butterfly stickers, stencils, or fine glitter.
Here is why
– Handmade cards feel thoughtful. They brighten a dull day and make the recipient smile.
– It helps you remember the moment and what you are grateful for.
Let’s break it down
1) Fold a sturdy sheet of cardstock to make a card.
2) Draw a simple butterfly on the front with a pencil.
3) Color the wings with bright pencils. Try two colors that pop.
4) Cut out the butterfly or draw patterns on the wings.
5) Glue the butterfly to the front. Let the glue dry.
6) Write a short thank-you message inside.
7) Add a tiny doodle or sticker if you like.
Next steps
– Make a small set for different occasions, like birthdays or holidays.
– Keep a stack ready in a box so you can grab one when you need it.
– Pair the card with a real note inside to boost kindness.
– Try different color themes: soft pastels, bold jewel tones, or warm autumn colors.
With a little effort, these butterfly cards turn a simple thank you into a memory your friend will treasure.
28. Friendship Butterflies
This DIY friendship butterflies project turns simple paper into bright wall decor that celebrates friendship.
Each butterfly acts as a small reminder that friends care.
Here is how to do it.
1. Materials: Multi-colored paper, scissors, and glue.
2. Design idea: Let each friend craft a butterfly that shows their own style.
3. How to cut: Cut out a basic butterfly shape and make the wings look unique with simple cuts.
4. Decorate: Add veins with a marker, color spots, or tiny stickers to give each butterfly a personality.
5. Personal touch: If you like, draw a friendly face on the butterfly to make it feel alive.
6. Swap and share: When they dry, swap the butterflies as a sign of friendship and trust.
7. Display: Clip them on a string with small clothespins or stick them to a wall to form a bright hallway banner.
8. Why it helps: Making and swapping butterflies starts chats, teaches listening, and helps kids care for each other.
9. Tips: Use different sizes for depth, lay down a sheet to catch glue, and place the finished pieces on a board before hanging.
This small craft grows into a wall story you can read again.
@media(max-width:480px){
Conclusion
Creating paper butterflies is a fantastic way to spark joy, creativity, and a sense of whimsy in children’s spaces. With these diverse ideas, you can easily customize your child’s room and make it a haven for imagination and play.
Whether you choose to go with bold colors, glitter, or nature-inspired designs, each project offers a chance to bond and create beautiful memories together. Embrace the fun of crafting and watch as these lovely butterflies take flight in your home!
Note: We aim to provide accurate product links, but some may occasionally expire or become unavailable. If this happens, please search directly on Amazon for the product or a suitable alternative.
This post contains Amazon affiliate links, meaning I may earn a small commission if you purchase through my links, at no extra cost to you.
Related Topics
paper butterflies DIY
3D wall art
kids room decor
butterfly crafts
easy DIY projects
colorful wall decor
handmade decorations
nature-inspired art
whimsical decor
interactive wall art
seasonal crafts
upcycled art