Seasonal gifting is in the air, and I find myself craving small, meaningful presents that don’t take forever to make. This post grew from that craving: 28 paper box DIY crafts that make perfect little gifts. Why I made this post is simple — I want you to have fast, fun ways to give a personal touch without a big cost. You can whip up a neat gift box, tuck in a tiny treasure, and brighten someone’s day with a handmade surprise.
Who it’s for reading this? If you love easy crafts or want gifts that feel warm and thoughtful, this one is for you. It’s great for teachers, friends, coworkers, and family who appreciate a small, handmade gesture. The ideas fit different styles, from playful and cute to clean and calm, so you can match the look to the person.
What you’ll get here is a practical guide with 28 paper box DIY crafts that are easy to follow. Each idea lists simple supplies and clear steps. You’ll learn how to form a snug lid, decorate with washi tape, stamps, or ribbons, and hide a tiny treat inside.
These tiny boxes work for many gifts, from jewelry and tea bags to candy and notes. I included a mix of sizes and styles so you can pick a look that matches your gift and the person. If a plan falters, small fixes are in reach. Adjust the lid, resize the base, or swap papers until the box feels just right.
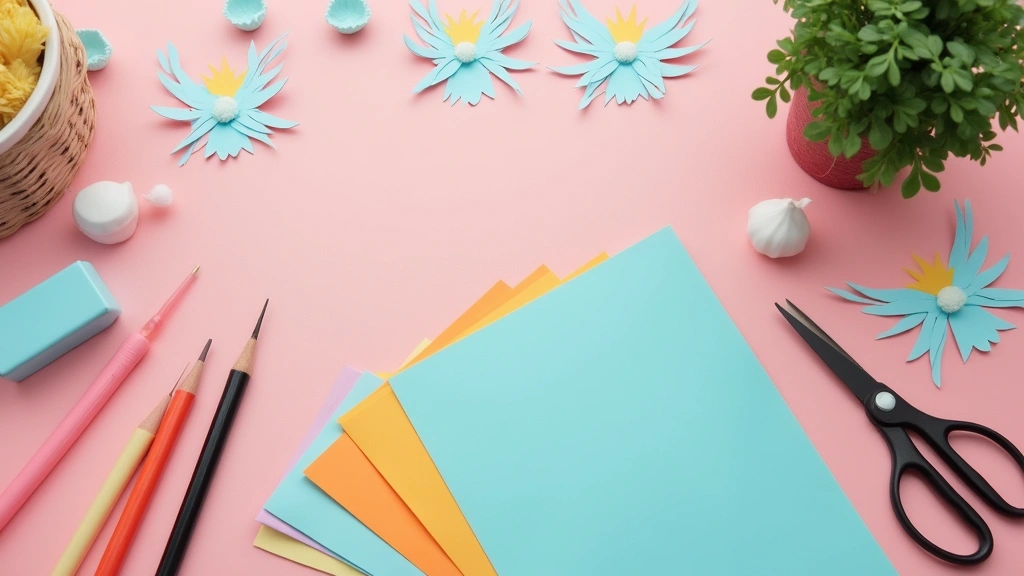
How to use this post starts with a box that fits your gift and mood. Gather plain cardstock, origami paper, washi tape, ribbon, and a little filler. Then follow the step by step ideas and tweak the size or decoration to fit your item. You can mix and match techniques to build a small gift set that still feels crafted by you.
Next steps are simple. Pick the first idea that catches your eye, try it, and adapt it to your gift. You’ll get results you can be proud of and a little box that is ready to give. The joy is in the tiny details, the color, the texture, and the way a simple box becomes a memory.
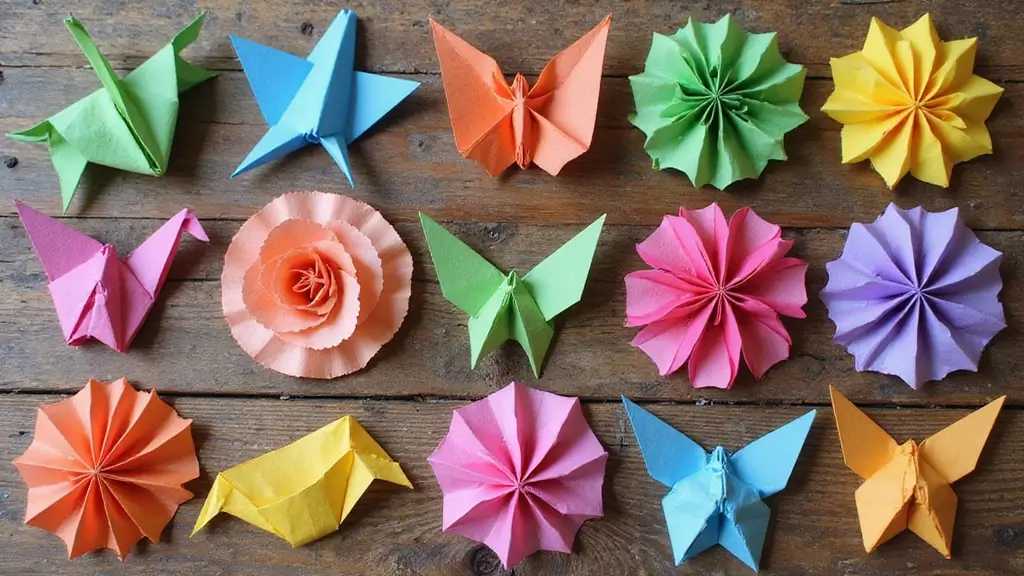
1. The Classic Origami Box

The Classic Origami Box
You want a small gift box that looks polished and uses little material. The classic origami box fits that need. It starts with a single square sheet of paper and ends as a neat little gift holder. You can make it larger or smaller to fit jewelry, candy, or a tiny note.
Here is why this works:
– The folds create a clean, eye catching shape.
– You can pick colors and patterns for any occasion.
– No glue is needed, so the box stays eco friendly.
Next steps: ready your paper, choose a size, and fold along the lines.
Step by step:
1) Start with a square sheet of paper.
2) Fold in half diagonally, crease, then unfold.
3) Fold along the other diagonal and crease.
4) Bring the corners to the center.
5) Fold the edges to form the box sides and push the top flaps to meet.
Tips to level up:
– Try double-sided paper for a contrasting lid and base.
– Use a heavier weight paper so the box holds its shape.
– Add a small note inside for a warm touch.
That’s it. A simple, stylish gift box you can make in minutes.
Use this box for any small gift. It travels flat and folds away when you store it.
2. Decorative Matchbox Gift Holder

Want a tiny gift that feels special without a big mess? A decorative matchbox gift holder hits the mark. It’s simple, low cost, and easy to customize. Here is why this little box can brighten any occasion.
What you’ll need
– Empty matchbox
– Decorative paper or fabric
– Paint or colored markers
– Ribbons, stickers, or pressed flowers
– Double-sided tape
– Scissors and a pencil
– A tiny gift to hide inside
Here is where you begin. Let’s break it down step by step.
Step 1: Pick a color theme
Choose a scheme that fits the event. Bright for birthdays, soft for a thank-you, bold for a celebration. Keep it tidy so the box looks put together.
Step 2: Clean and prep
Wipe the box clean. Let it dry before you start decorating.
Step 3: Wrap and decorate
Cover the outside with decorative paper or a quick coat of paint. Add a ribbon, some stickers, or a few dried petals. Use double-sided tape to keep everything steady so it won’t peel.
Step 4: Add a personal touch
If you know the recipient’s name or initials, put them on with a sticker or tiny hand-written tag. That small detail makes it feel thoughtful.
Step 5: Fill and finish
Place a small gift inside—a ring, a charm, a note, or a sweet treat. Close the lid and tie a final ribbon knot if you like.
Next steps and ideas to try. Create a mini set by making several boxes in different colors for a charming gift bundle. Go eco by using scrap paper and natural embellishments. This tiny project repurposes a box and gives you a pocket-friendly, memorable gift.
3. Gift Boxes from Recycled Paper

You want a gift box that feels special but uses scraps you already have. This DIY keeps waste low and style high. Turn old magazines or wrapping paper into bright, sturdy boxes with a simple fold.
– Gather scraps and cut squares: Old magazines, wrapping paper, or used gift wrap work well. Cut several squares in common sizes so you can fit any gift.
– Layer for impact: Stack two or three squares to add depth. Mix bold prints for a lively look, or flip one sheet to use the reverse side for a softer tone.
– Shape choices: Try standard squares, long rectangles, or even cut a heart for a playful lid. The same fold can create many styles.
– Fold and secure: Use the classic folding method to form the box. Bring up the sides, press the edges to make straight walls, and pin corners for extra strength. A little glue or tape keeps it neat.
– Add a lid: For a two-piece box, cut a second square a bit larger to serve as the lid. It slides on easily and makes gifting tidy.
– Finish with style: Wrap a thin ribbon or string around the box, or place a matching strip of paper over the lid for a clean finish. Add a little tag from your scraps.
Your friends will notice the care you took and the waste you avoided.
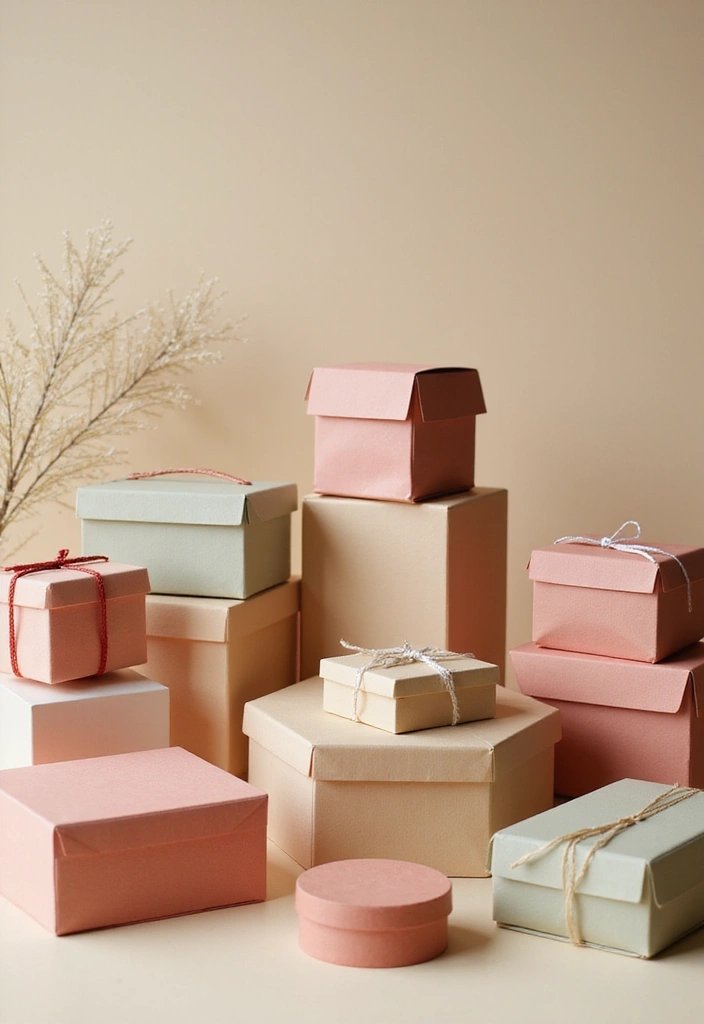
4. Hexagon Gift Boxes
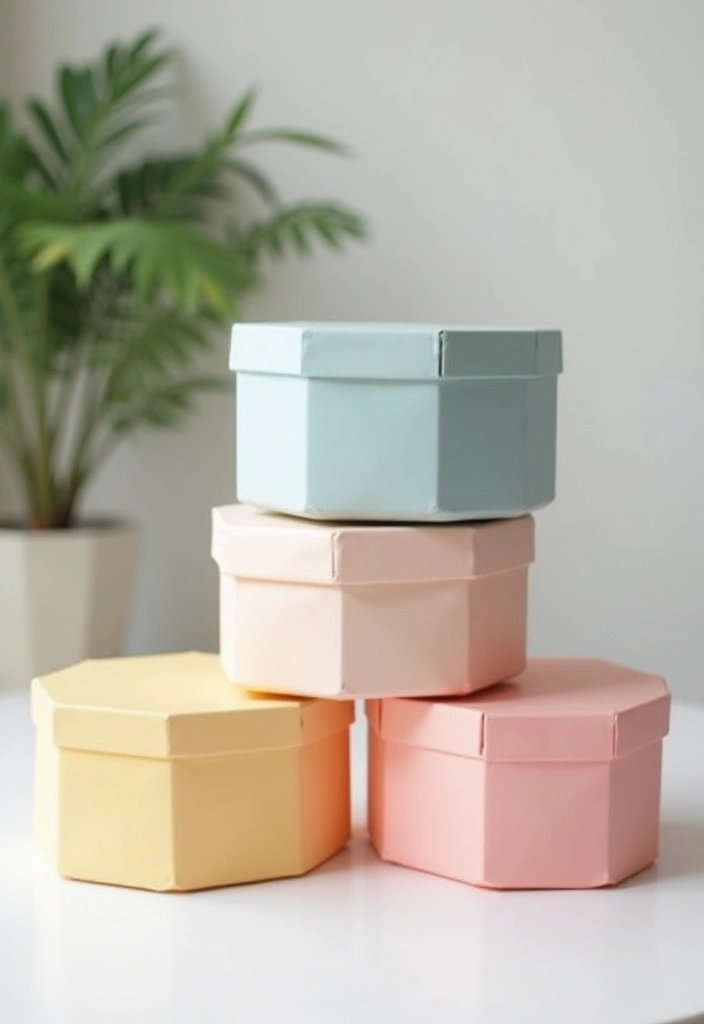
You’re after a gift box that stands out yet stays simple to make. Hexagon gift boxes give a clean, modern look that regular square boxes miss.
Materials
– Use sturdy cardstock or thick paper so the box holds its shape.
– You’ll need a ruler, scissors or a craft knife, a scoring tool, glue or tape, and some decorative twine or a tag.
– If you want color, keep markers, paint, or washi tape handy.
Steps
– Draw two hexagons on your paper, one for the lid and one for the base.
– Make the lid a bit larger than the base so it fits over it.
– Cut, score, and fold the shapes to form the lid and the base.
– Glue the sides and let them dry.
– Slide the lid over the base to test the fit and tweak as needed.
Here is why this design shines: hexagon boxes grab attention, come in many sizes, and hold candies or small keepsakes neatly.
Finishing touches
– Wrap with twine or add a tag for a personal note.
– Decorate the lid with a stamp, sticker, or splash of color.
Ways to use
– Give them at engagements, anniversaries, or birthdays.
– Fill with treats or a tiny keepsake.
Next steps
– Choose your size, decorate in your style, and start crafting your own hexagon gift boxes today.
5. Star-Shaped Gift Boxes
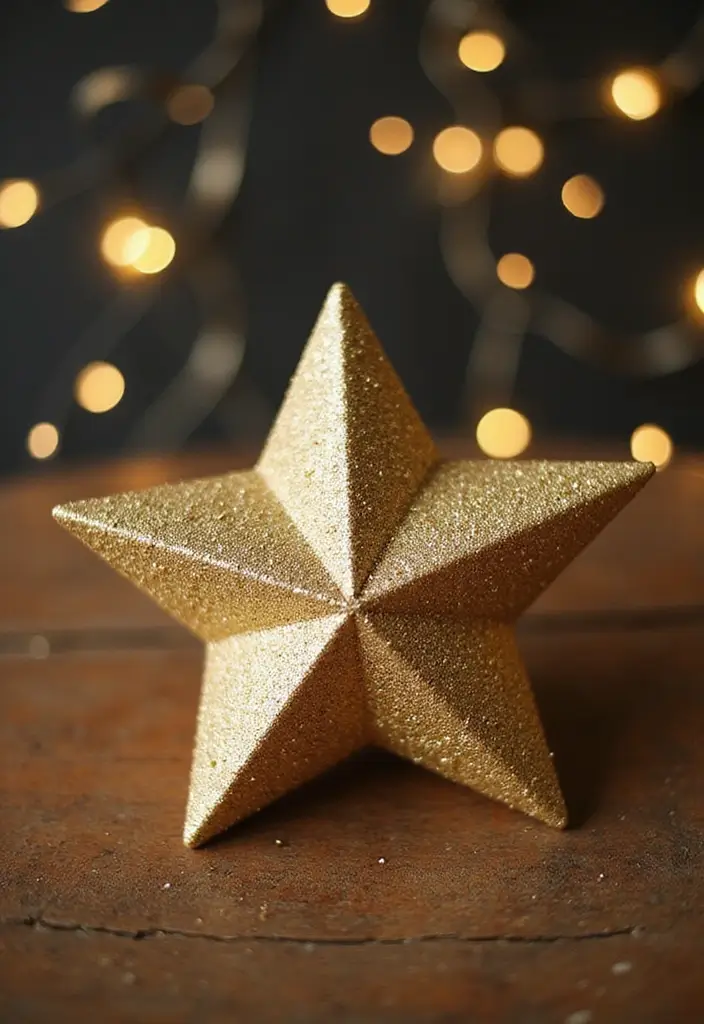
Want a small gift that really shines? Star-shaped gift boxes make gifts feel like a tiny celebration. They catch the eye and lift the mood the moment you hand them over.
What you’ll need
– Star template: pull one online or draw your own.
– Sturdy paper or light cardboard that can hold its shape.
– Scissors or a craft knife for clean cuts.
– Ruler and scoring tool to make neat folds.
– White glue or craft glue for strong joints.
– Optional: glittery paper, metallic ink, ribbon, and a tiny charm.
How to build
– Cut out a star shape from the sturdy paper. Keep the lines smooth.
– Score the fold lines along each arm so you can bend easily.
– Fold the edges and glue them in place to form a hollow, three‑dimensional star box.
– Let it dry fully, then test the opening. It should hold a small treat or note.
Ways to add sparkle
– Use glittery or metallic paper to give the star extra shine.
– Slip a small charm or trinket inside for a pleasant surprise.
– Wrap a thin ribbon around the star or tie a tiny tag with a message.
Final touches
These star boxes are gifts and keepsakes. They turn simple moments into memorable little presents.
6. Boxed Plant Gifts
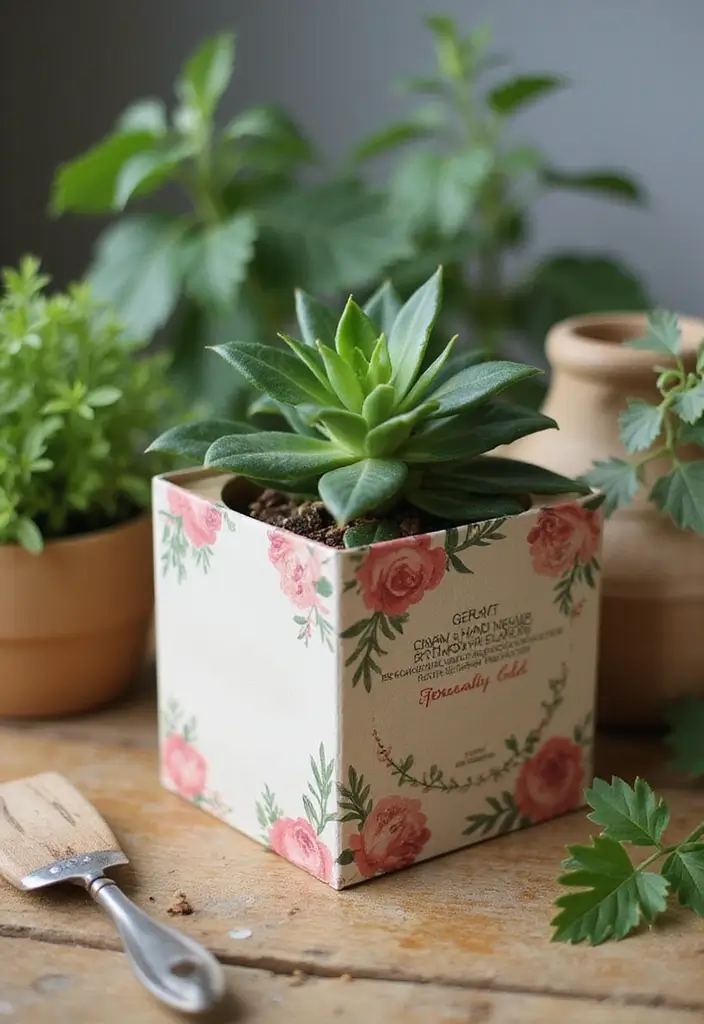
You want a gift that feels personal, practical, and kind to the planet. A boxed plant gift fits that need. It blends nature with simple craft and gives a keepsake that grows with time.
What you need
– biodegradable or recycled paper
– a small plant such as a succulent or air plant
– a tiny care card and a short, handwritten note
– twine or a soft ribbon for finishing touches
Here is why it works
It stays lightweight and easy to ship. It looks thoughtful without piling on waste. The plant adds color and scent, a hint of green to brighten a desk or shelf. Among the plants, a succulent or air plant needs little water and fits tiny spaces.
How to make it special
– Cut a square from your paper and fold it into a box shape
– Gently place the plant inside, using a little tissue to hold it steady if needed
– Add a simple decoration like a pressed leaf or a light botanical stamp
Next steps
– Use eco-friendly materials for the box and any filler
– Include brief plant care instructions on a small card
– Add a handwritten note that shares a memory or wish
It’s a gift that grows in space and in thought, long after the birthday.
7. Puzzle Box Gift
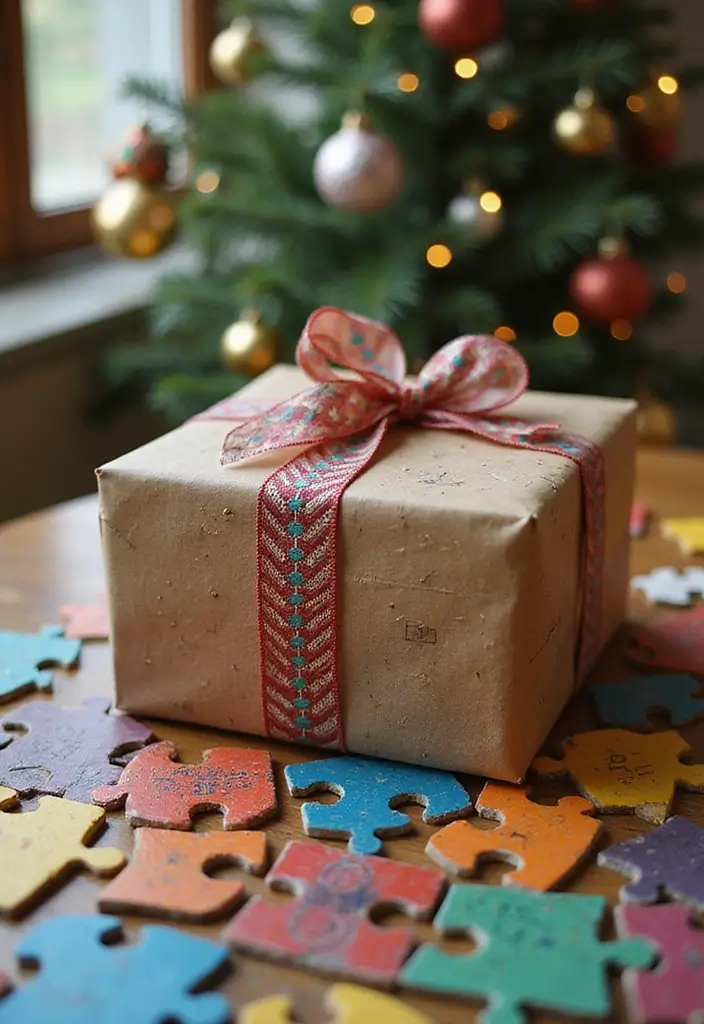
Crave a gift with a little mystery? A puzzle box gift turns any present into a small game. You start with a sturdy cardboard base and a few extra pieces that fit together like a simple puzzle. You must solve the puzzle to reveal the gift inside.
Materials
– Cardboard box with lid
– 3–5 slim puzzle pieces cut from scrap cardboard
– Glue or tape
– Bright markers, paint, or colorful paper
– Small treats or a note to tuck inside
Steps
– Cut 3–5 matching interlocking pieces from scrap cardboard.
– Decorate every piece with bold colors and simple patterns.
– Create a sliding or interlocking lid design on the box top.
– Place the gift inside and tuck a few treats around it for an extra surprise.
– Test the puzzle. Make sure the lid opens only after the pieces fit together.
– Seal the box and wrap or decorate the outside for a complete package.
Why it shines
– It makes opening feel like a small adventure.
– You pick colors and patterns and set the pace.
– It can be reused for future gifts.
Tips
– Keep the pieces easy to handle. They should fit in your hand.
– Use strong glue and let it dry fully before gifting.
– This works well for kids’ parties, sleepovers, or any fun gathering.
8. Simple Pillow Boxes
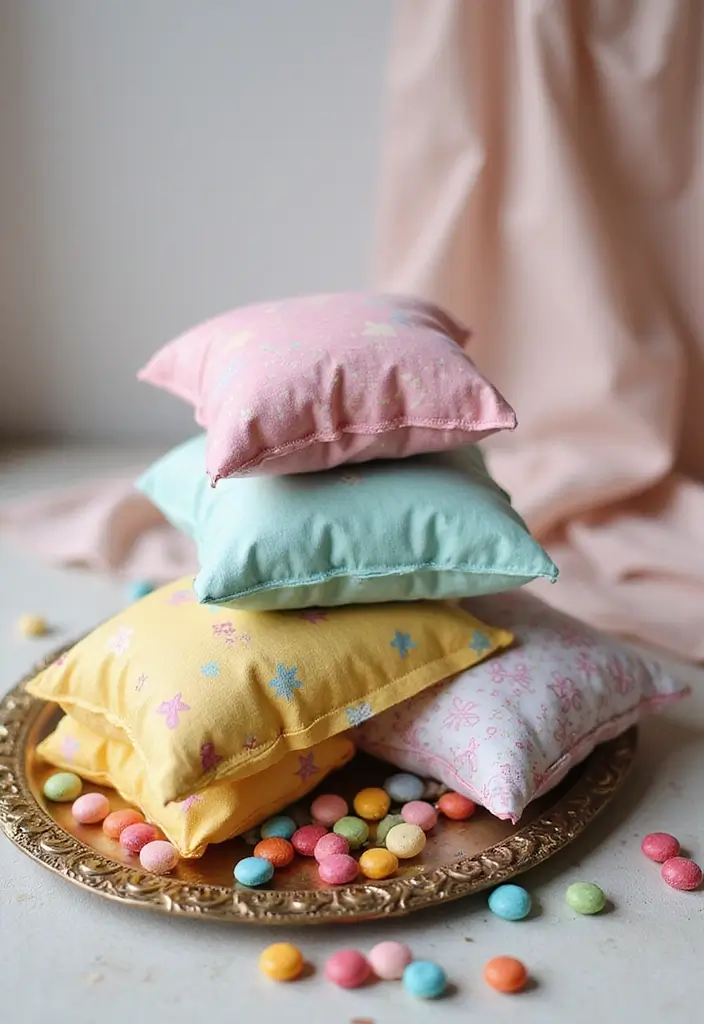
You want a cute gift box that’s quick and neat. Pillow boxes fit the bill. They hold small treats or a tiny gift with a soft, friendly look.
What you need:
– Cardstock in your chosen color
– A pillow box template or stencil
– Scissors and a little glue or tape
– Decorating supplies (stamps, stickers, markers, ribbon)
Here is why they work:
– The curved ends feel warm in hand
– You can pick any color or print to match your theme
– They’re perfect for party favors, weddings, or small gifts
Make it easy:
– Trace or print the pillow box shape on cardstock
– Cut it out, then fold along the score lines
– Glue or tape the flaps to seal the box
– Close the ends and add a simple tie or label if you want
Decoration ideas:
– Stamp a pattern, add a hand-drawn doodle, or wrap with a slim ribbon
– Use washi tape to add color without extra bulk
– Personalize with a tiny tag or name
Tips for faster setup:
– Cut several in one go and stack them flat
– Use a heavier cardstock for a sturdy box
– Try different sizes for different gifts
Next steps:
– Choose your colors, print a template, and make a few test boxes
– Then pack your treats and share
9. Candy Box with a Twist
Want to lift a candy gift from nice to memorable? Try a candy box with a twist. Pick a box that matches your theme. Use a bright color, a simple pattern, and a sturdy lid. Then split the inside into a few compartments so each candy has its own space. A tidy layout makes tasting feel deliberate, not rushed. If you can, choose a box in a fun shape—square is fine, but a small heart or hexagon adds charm. Plan for about 6 to 12 pieces so the box isn’t heavy.
Here is how you can do it:
– Show it off inside Use clear cellophane to wrap the box. Seeing the colorful sweets through the wrap makes the gift look polished. Tie a neat knot at the top.
– Include a flavor card Add a small card that lists each candy and a quick flavor note. You can add a friendly tip like “best with coffee” or “pair with mint.”
– Finish with a ribbon Choose a ribbon that matches your colors. A bow on top adds a friendly touch and makes the box feel extra cared for.
Optional touches: try a themed sticker, a tiny tag with the occasion, or a scent of vanilla near the lid. Keep the box light and easy to open so the recipient can start tasting right away. With a few simple steps, your candy box becomes a warm, shareable moment.
10. Upcycled Shoe Box Gift

Want a gift that feels personal but uses what you already have? An upcycled shoe box can become a stylish, eco-friendly DIY gift box. You can tailor it to a theme and add a personal note.
Materials you need
– Shoe box
– Decorative paper or fabric
– Glue or double-sided tape
– Scissors
– Ribbon or twine
– Markers or a small card
How to make it
– Clean the box and wipe away dust.
– Cover the lid and sides with paper or fabric.
– Add texture by layering fabric over paper.
– Write a message on the lid or on a tag.
– Fill with small gifts that fit the theme.
– Tie a ribbon and add a tiny charm.
Themed ideas
– Travel box: add maps, a small notebook, and travel-sized treats.
– Cozy night box: include tea bags, a candle, and a soft fabric wrap.
– Garden box: pack seed packets and a mini hand rake.
Quick prep tip
If the box has rough edges, sand them lightly or wrap the edge with a narrow strip of paper. That small step makes the box feel finished.
Why this works
This approach cuts waste and makes a simple box feel special. It shows you care without buying new packaging.
Next steps
Grab an old shoe box and start with a theme you love.
11. Pop-Up Box Cards

Pop-up box cards blend a gift with a greeting. They lie flat for mailing and spring to life when opened. You build a small box inside the card and add pop-up pieces that fit your message.
Here is why this works: it is easy to customize, it feels special, and it travels well in an ordinary envelope.
– Use sturdy cardstock for the base. A thick sheet holds the box shape and pops reliably.
– Choose colors that match the occasion. Soft pastels for a birthday, bold reds for love, bright greens for spring.
– Craft a shallow box inside the card. Score and fold the edges so it stays flat when mailed and lifts up cleanly when opened.
– Create pop-up elements. Think small flowers, hearts, balloons, a miniature cake, or a tiny photo. Attach them to inside tabs so they rise as the box opens.
– Add keepsakes or treats for charm. A tiny charm, a note, or a wrapped candy tucked in makes the surprise sweeter.
– Finish and mail. Leave enough room in a standard envelope. Use lightweight tape to keep pieces in place during mailing.
Next steps: test your pop-up scene before final assembly. Trim pieces if they stick or rub. With a little practice, you’ll get clean pops and a gift that feels personal.
12. Foldable Heart Boxes
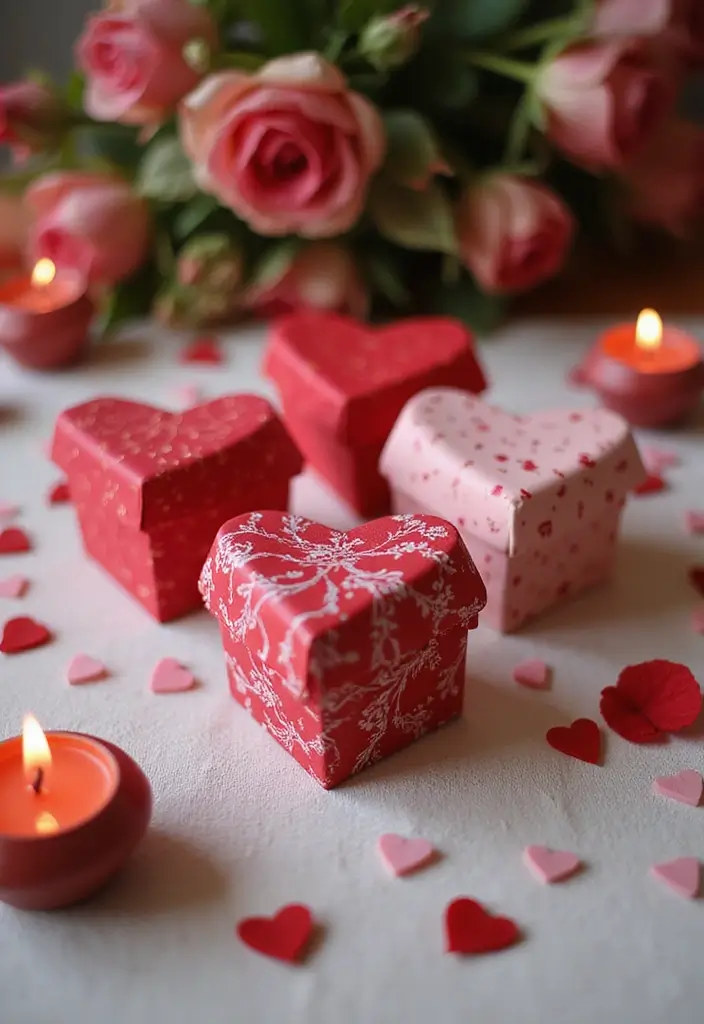
Want a simple gift that says you care? Foldable heart boxes add charm to small treats. They hold a chocolate square or a tiny love note with ease.
– Heart templates: You start with a clean heart shape on colored or patterned paper.
– Cut and score: You cut out the heart and score the fold lines for neat edges.
– Fold into a box: You fold along the lines to form the box and its base.
– Glue and finish: You glue the edges and press to set the box flat.
– Fill it: You place chocolates or a love note inside before closing.
– Write a note: You add a handwritten message inside the lid or a short poem.
– Color pairings: You use two colors for a bold, eye catching look.
– Decorate: You tie a ribbon, add a sticker, or a tiny tassel.
These boxes work for anniversaries, Valentine’s Day, or a simple surprise.
They fold flat for easy storage and take minutes with scissors, glue, and colored paper.
Next steps: choose your paper, print a template if you like, and start folding.
You’ll gain a sweet, personal gift that shows you care.
Tip: keep a few extra hearts for last-minute gifts.
Try different papers to fit your mood or season.
Color, pattern, and texture make each box feel fresh.
13. Rustic Wooden Crate Box
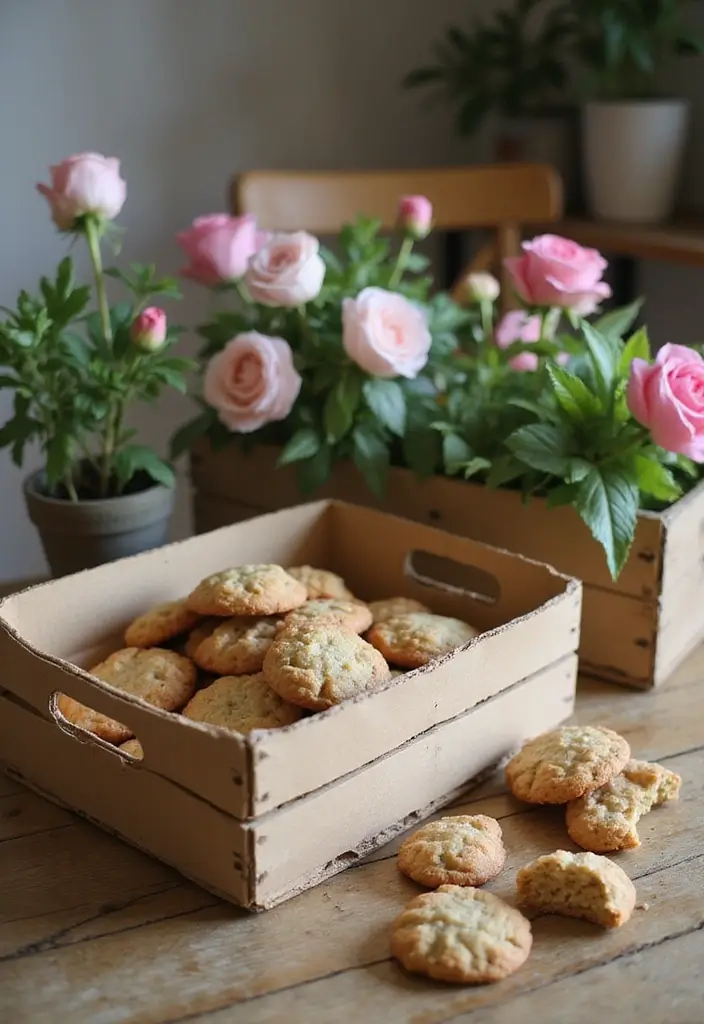
Want a rustic gift box that feels sturdy yet is easy to make from paper? You can create a wooden crate look with simple supplies. Here is how you can craft one that looks great.
What you need
1. Gather brown craft paper.
2. Choose textured paper for a wood grain feel.
3. Have scissors, a ruler, glue, and twine.
4. Add burlap or lace for extra charm.
5. Optional wood-grain stamp adds texture.
How to make it
1. Cut a rectangle of craft paper to form the base. For a small crate, 8 by 6 inches works.
2. Fold the sides up and crease lines to form the walls.
3. Glue the seams so the crate holds its shape.
4. Cut thin paper strips to make crate slats and glue them on.
5. Wrap twine around the box and tie a simple bow.
Decoration ideas
1. Tuck burlap into corners for texture.
2. Add a lace edge along the lid for a soft look.
Filling ideas
1. Fill with treats, tea, or a small plant.
2. Slip a handwritten tag inside the lid.
Occasions
1. Great for country weddings and farm parties.
2. Perfect for birthdays or housewarmings.
Next steps
Now your paper crate box stands out as a warm, affordable gift wrap. Share a photo of your finished crate to inspire others. Try different papers to get a lighter or darker wood look.
14. Shadow Box Gifts

If you want a gift that tells a story, a shadow box fits. You can craft a small shadow box from sturdy paper and fill it with photos, mementos, and keepsakes. The outer frame can be decorated to match the moment.
Here is why this works. It becomes a home for memories you can touch and display. The layers of color and texture give depth. A short handwritten note or quote adds personality.
What you need
– Thick paper or card stock
– A shallow box or frame
– Small photos, trinkets, dried petals, fabric scraps
– Glue, scissors, pencil
– Paint or ribbon for outer decor
Step by step
– Create a flat background by cutting a base piece.
– Arrange photos and keepsakes into a tiny scene.
– Add a personal message on a small card.
– Finish with a border or bow on the outside.
Display tips
– Place it on a shelf or stand where it won’t face direct sun.
– Keep it away from damp rooms.
– Shadow box gifts work well for weddings, graduations, anniversaries, or birthdays.
Next steps: pick a memory, plan the layout, and glue it in place. Your gift will glow long after the day.
Each box acts as a small stage for memories. Swap in new keepsakes later to keep it fresh.
15. Miniature Book Boxes
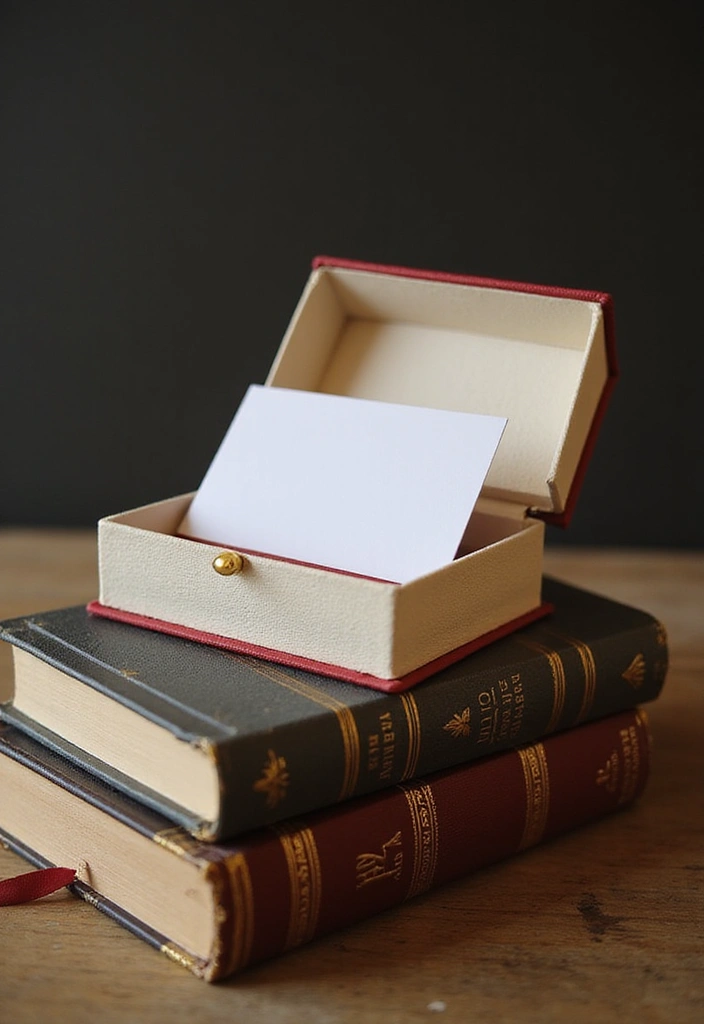
Here is a gift idea that feels big in a tiny package. A miniature book box looks like a real book but hides a small surprise inside. It’s a clever way to give something tiny, such as a gift card, a charm, or a short note.
What you need
– Cardstock in a light color
– Craft glue
– Scissors or a craft knife
– A scoring tool or blunt edge
– Optional decorative paper or a thin ribbon
Step by step
1. Cut a mini book from cardstock. Make the cover a little wider than the inner pages.
2. Create a hollow by gluing a neat stack of pages inside. Leave a pocket for the gift.
3. Glue the cover to the spine. Let it dry so the box holds its shape.
4. Add a lid if you like. Tie a small ribbon for a finishing touch.
This tiny box keeps the surprise hidden until the moment you open it.
Pro tips
– Personalize the cover to fit the recipient’s interests.
– Add tiny quotes on the edges of pages for a warm surprise.
– This works well for book lovers or as a fun wrap for small gifts.
Next steps
Slip in your gift, close the book, and hand it to the reader in your life. It’s simple, memorable, and shareable.
16. 3D Butterfly Boxes

You want a gift box that looks sweet and hides a tiny surprise. A 3D butterfly box fits spring parties and adds a playful touch to favors. Here is how you can make it, step by step.
Materials
– Use colorful craft paper or cardstock to give the box life.
– Have scissors and a pencil ready for clean cuts.
– Use glue or double-sided tape to keep the 3D wings solid.
– Prepare a small tag and string for a personal message.
– Add optional embellishments like stickers to match your theme.
Steps
– Draw a simple butterfly shape on folded paper so wings lift as you open.
– Cut out the butterfly, then score the wing lines to create depth.
– Fold the wings upward and glue the body to a base.
– Create a tiny inner pocket inside the wings to hide your gift.
– Decorate the outer wings with bright colors before you seal it.
Tips
– Pick bold color combos to catch the eye.
– Attach a tag with a short message like For you.
– Keep the box light so the butterfly sits nicely.
– If you hand these out, make a few in different colors.
Ready to try? Start with a scrap of paper and a little tape, then share your butterfly boxes at your next party.
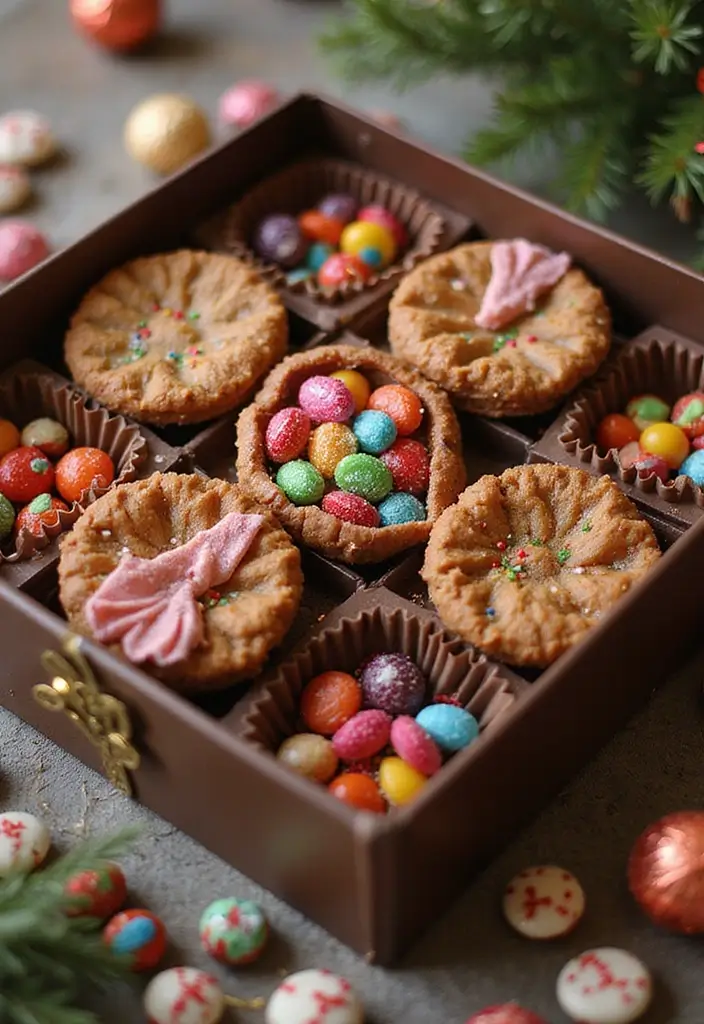
17. Elegant Chocolate Boxes
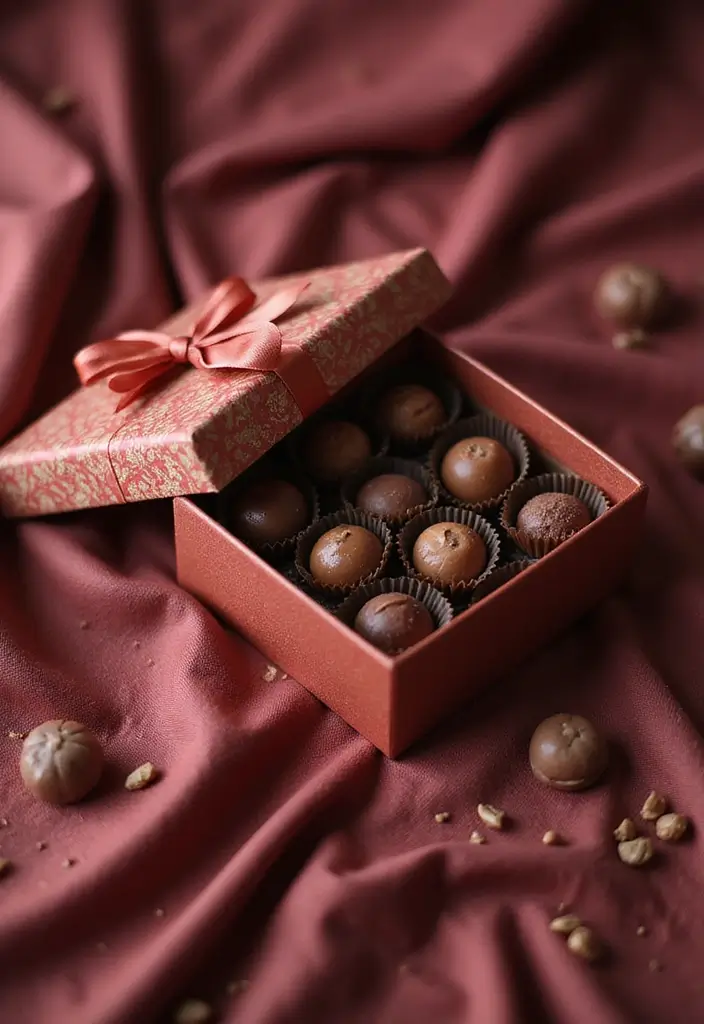
Elegant Chocolate Boxes
Need a classy way to gift chocolates? You can craft an elegant chocolate box that turns small treats into a memorable moment. This project is friendly to beginners, and you control the look from start to finish.
Here is how to design a box that fits and shines:
– Pick a box size that fits your chocolates with a little room to breathe.
– Use luxurious paper or cardstock. Think rich color, smooth texture, and a sturdy feel.
– Create a simple interior insert. Use thin cardboard or foam to form compartments that match your pieces.
– Add a clear lid if you can. It shows the sweets without lifting the box.
– Add a touch of style with themed decorations. Ribbons, lace, or a small tag suit the mood.
– Seal with a neat finish. A satin ribbon or a tiny wax seal can elevate the gift.
This works well as wedding favor boxes or anniversary gifts. Here is why these steps matter: a tidy insert holds shapes, a lid shows off the treat, and dressed edges make the box feel premium. Next steps, you can tailor colors to the event and reuse the box later.
18. Foldable Puzzle Boxes
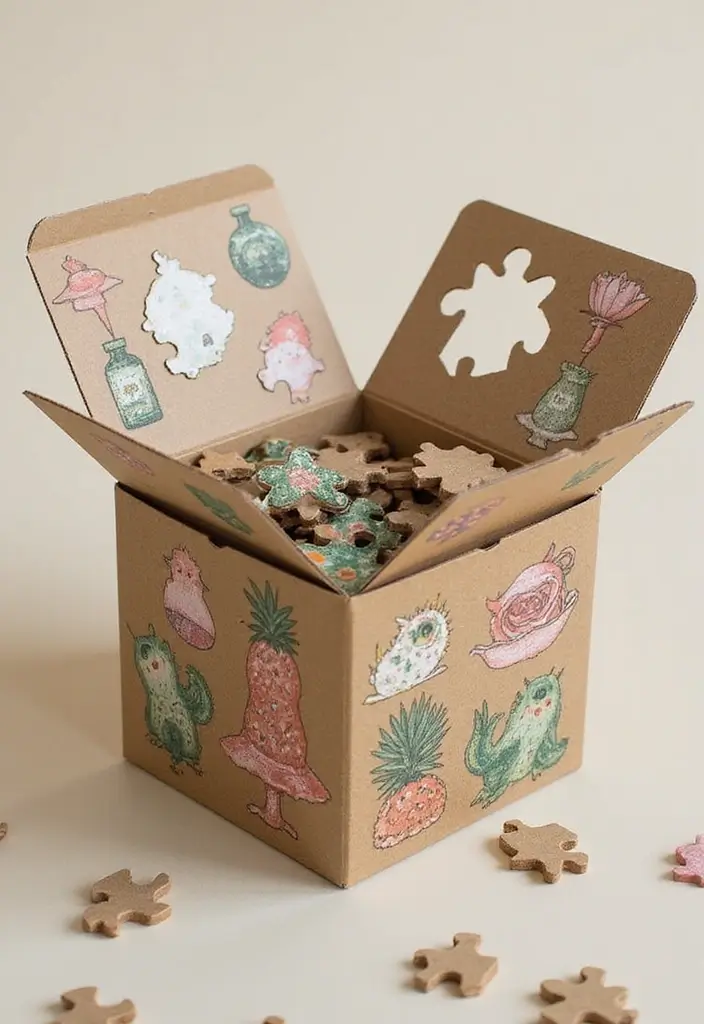
If you want a gift that adds a playful moment, foldable puzzle boxes do it. They look simple but hide a small puzzle. The box opens only after you crack the puzzle. The gift feels personal when the lid finally slides open.
Here is why this works: it turns a plain box into a tiny game you can finish in minutes. Here’s how to craft one. Next steps are easy to follow.
What you need
– Choose sturdy paper or light cardboard for a durable box.
– Keep the box small so the gift fits.
– Use a ruler and scoring tool for clean folds.
– Have glue or tape to hold tabs.
– Decorate with markers or stickers.
Steps to build
– Decide the box size.
– Sketch a lid puzzle that hides the gift.
– Plan folds for a secret flap.
– Cut panels and score fold lines.
– Fold and glue to finish.
Design ideas
– Match the party theme.
– Use color clues to hint at the answer.
– Add a small string pull to reveal a clue.
Tips for success
– Test the puzzle before gifting.
– Keep clues clear for younger players.
– Seal with a light wax seal for charm.
This little craft adds a memorable touch to any gift and is easy to adapt for different ages and themes.
19. Collapsible Gift Boxes

Why collapsible boxes fit your needs
If you want a gift box that travels light, yet looks great, collapsible boxes are the answer. They fold flat when you store them and snap into shape when you need them. That means less clutter and more wow on delivery day.
Materials you need
Choose colorful paper or patterned cardstock. Pick prints that fit the occasion — bright confetti for birthdays, calm florals for anniversaries, or seasonal patterns for holidays. The boxes stay neat with a small tab or a touch of tape to keep them shut.
Quick steps
– Pick a size and sheet.
– Score the edges so folds stay clean.
– Fold up the walls and crease the corners.
– Add a tab or tape to close, then decorate with stamps, stickers, or a ribbon.
Benefits at a glance
They save space in your craft room and your gift stash. They are easy to reuse, so they fit eco-friendly gifting. Use them for jewelry, cookies, or a sweet note. They are light, yet with the right paper they feel special.
Common questions
– Can they hold heavy gifts? Best for small items.
– How sturdy are they? With good scoring and a bit of glue or tape, they hold their shape.
Getting started
Grab a sheet, try a size, and test a few patterns. You’ll see folding and gifting can go hand in hand.
20. Advent Calendar Boxes
You want a gift that grows with anticipation. Here is why a simple Advent calendar works. A DIY Advent calendar box uses paper boxes, treats, and short notes to build daily moments. It turns a plain present into daily joy.
What you’ll need
– 24 small boxes or envelopes.
– Decorative paper or washi tape.
– Glue or double sided tape.
– Scissors and a ruler.
– Numbers or day stickers.
– Tiny treats or message cards.
– Ribbon, string, or a board to show the calendar.
Plan your theme
– Pick a look that matches the recipient, like warm winter, candy shop, or cozy forest.
– Decide how many days you want to count.
Here is why a theme helps. It keeps the whole calendar tied together.
Make the calendar
– Cut, fold, and seal each box with a touch of glue.
– Decorate boxes with paper, ribbons, and simple drawings.
– Label each box with a day from 1 to 24 or your chosen count.
– Keep lids or tops in a matching style for a clean look.
Fill and arrange
– Place a small treat or a heartfelt note inside every box.
– Arrange the boxes on a tray, a board, or hang them as a garland.
– Keep days in order for a smooth daily reveal.
– Leave a special note on day 24 for a final smile.
Tips to boost appeal
– Use a calm color plan to give the set a neat look.
– Reuse boxes or lids to save money.
– Add a big finale on day 24 to end with joy.
21. Layered Boxes for Special Gifts
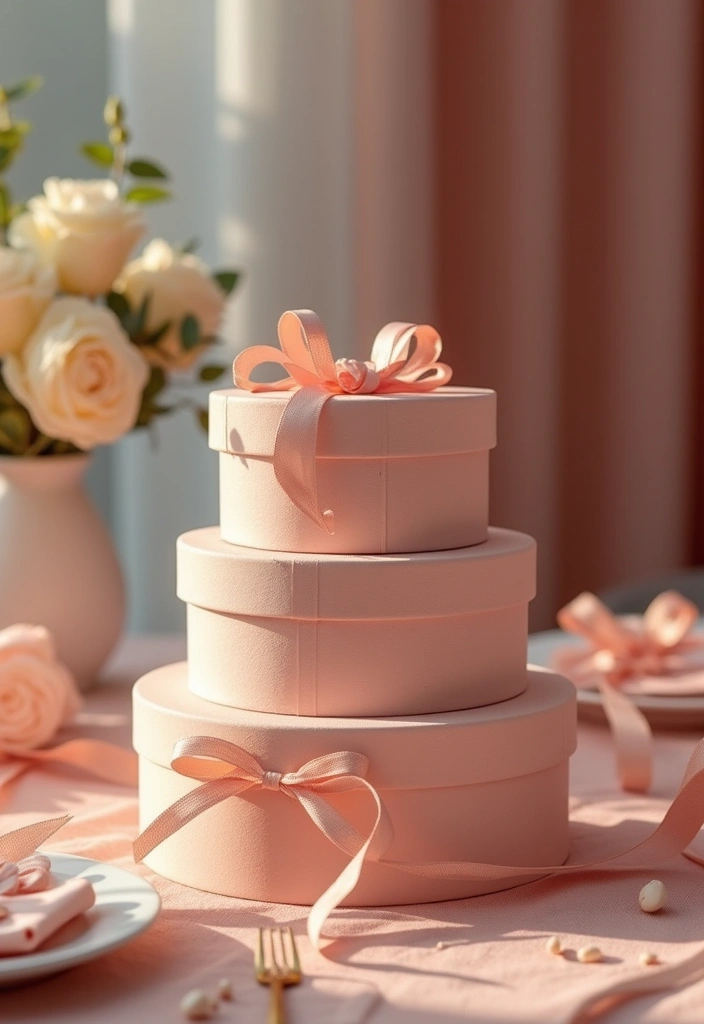
Want a gift that feels like a treasure to unwrap? Layered boxes turn several small gifts into one memorable moment. With a stack of boxes, you guide the eye from top to bottom.
Here is why layered gift boxes work:
– Plan your stack: decide how many boxes you need, pick sizes that nest inside one another, and plan what goes in each layer.
– Choose a simple theme: match colors or patterns across all layers so the stack reads as one cohesive gift.
– Fill each layer: add small items or keepsakes you know the recipient will enjoy.
– Dress the stack: wrap each box in the same paper or color, then run a long ribbon around the whole set.
– Add clue cards: tiny labels for each layer build curiosity.
– Finish with a bow: a final touch makes the presentation polished.
This idea works for birthdays, graduations, or other special days. For real impact, mix items that fit the theme and stay light enough to stack without tipping. Top layer could hold a small charm, middle a gift card, bottom a sweet treat. Keep layers simple so the gift feels thoughtful, not bulky.
Next steps: gather boxes, paper, and ribbon, then start stacking. Your layered gift will feel personal and fun to unwrap.
22. Paper Mache Gift Ball
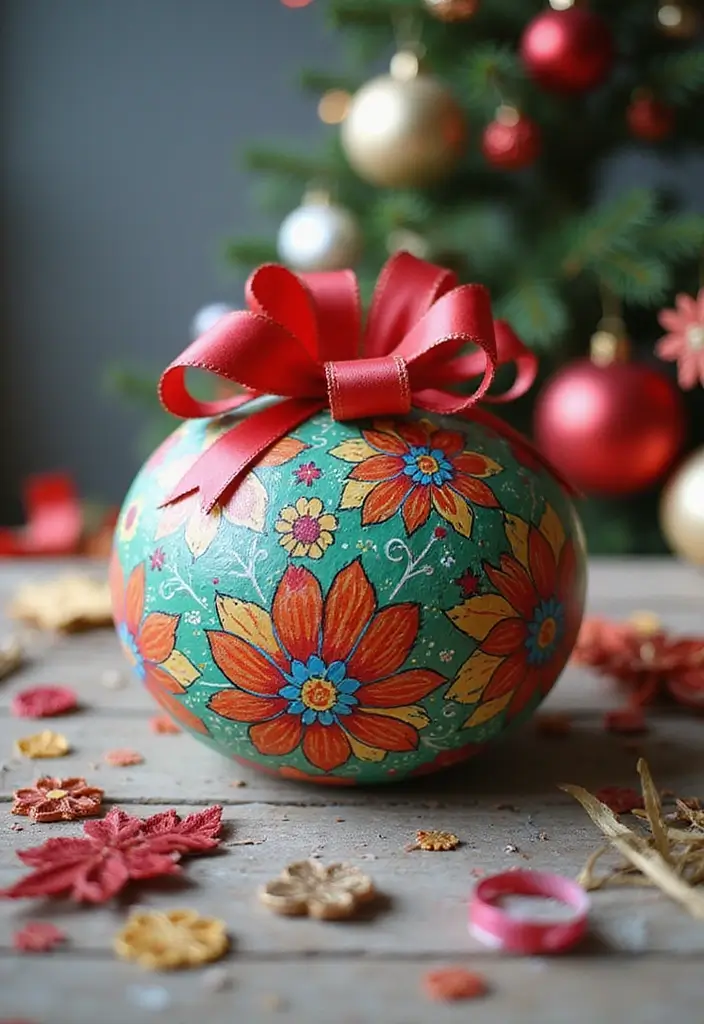
You want a gift that feels special the moment it is opened. A paper mache gift ball creates that big reveal. Here is why this works. Let’s break it down.
What you need
– balloon sized to your ball
– torn newspaper or thin paper
– flour and water paste or white craft glue
– a bowl and spoon
– paint or decoupage paper
– clear sealant
– small gifts and filler for the hollow center
How to make
1) Inflate the balloon to the size you want. Tie it off.
2) Mix a paste from flour and water or use glue thin with water.
3) Dip strips of paper, wipe off excess, and lay them over the balloon. Build 2–3 layers.
4) Let each layer dry completely. A sturdy shell takes time.
5) Pop the balloon and remove it. You now have a hollow ball.
6) Fill the core with small gifts and a note. Seal the opening with more paper strips.
7) Paint the outside, add decoupage or color blocks, and finish with a clear coat.
Decoration ideas
– use a party color theme with bold shapes
– try napkin decoupage for texture
– add a ribbon wrap for a ready-to-gift look
– keep a metallic or pastel finish to suit the event
Next steps
– test fit your gifts, then close the ball tight.
– store in a dry spot until the big day.
23. Handmade Gift Wrap Boxes
You want gifts that look thoughtful and stay neat. Handmade gift wrap boxes can do both. Build a sturdy box, then cover it with wrap or fabric to create a ready to give package.
Here is how to do it.
– Start with a box that sits flat and closes cleanly. A snug lid finds the edges fast.
– Cover with paper or fabric. Wrapping paper works, but a fabric cover adds a soft, tactile look.
– Add simple decorations. Try stamps, stickers, or a thin ribbon. Tape the edges so it stays tidy.
– Include a note. A short message tucked under the ribbon makes the gift personal.
– Match the theme to the occasion. Choose florals for birthdays, metallics for holidays, or solid colors for weddings.
Here is why this matters. The wrap box is easy to carry, pops on a shelf, and stays sturdy if the gift needs time to travel. The finish feels premium without extra fuss.
Next steps. Gather your box, pick paper or fabric, and write the note.
Great for weddings, birthdays, or big holidays. With a little care, your gift becomes a keepsake in a box you made.
Share a photo of your wrap box to inspire friends.
24. Folded Gift Envelopes
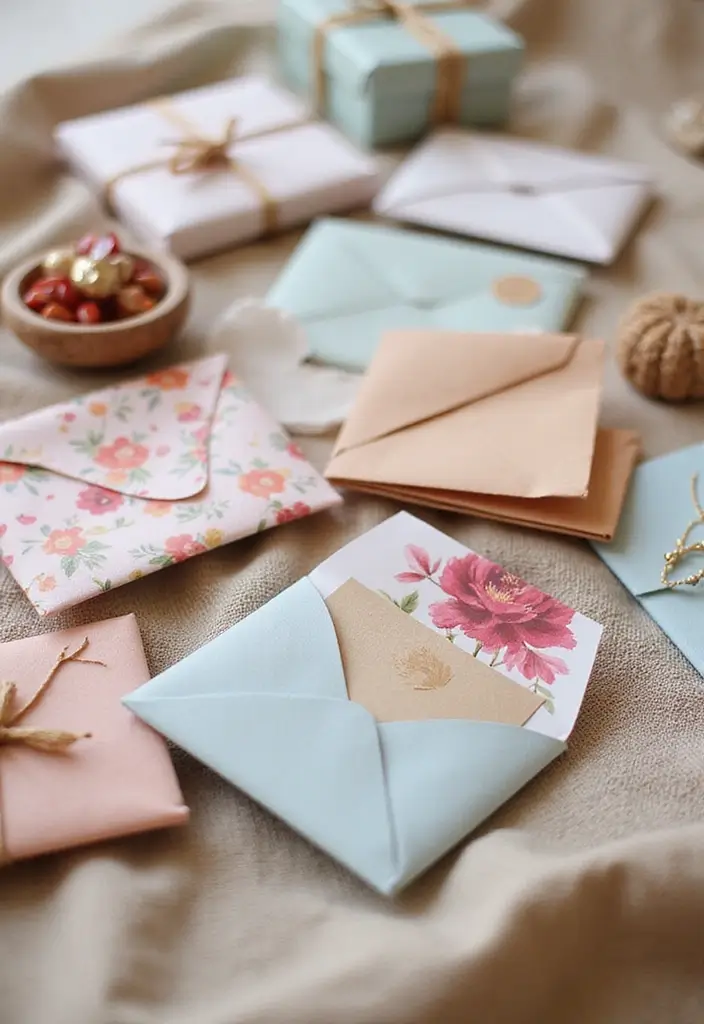
You want a quick, stylish wrap for a card or small gift. Folded gift envelopes fit that need. They are simple, neat, and ready in minutes. Here’s a straightforward plan you can follow.
What you’ll need
– Colored or patterned paper (thin enough to fold cleanly)
– A decorative sticker or a small seal
– Scissors, a ruler, and a pencil (optional for tidy edges)
Steps
1) Start with a square sheet. 2) Fold the paper to form an envelope shape. 3) Tuck in the sides and crease the flap. 4) Seal with a sticker or seal. 5) Slip your card or tiny gift inside and press shut.
Tips
– Choose patterned paper for extra flair.
– Match the envelope color to the gift theme.
– Make a few envelopes in different sizes so you’re ready.
– Keep the look clean with a single sticker and no ribbon.
– For a tiny tag, punch a small hole and thread a slim string.
Size ideas
– Small cards fit in about 4×4 inch envelopes.
– Gift cards can work in 4×6 inch envelopes.
– For small trinkets, use 5×5 or 6×6 inch sheets.
Next steps: store a few ready-made envelopes in a drawer. When you need a gift, you can wrap fast and still feel thoughtful.
25. Tiny Treasure Boxes

Looking for a gift that fits in the palm but shines with thought? Tiny treasure boxes do that. They are cute, cheap, and easy to make with everyday scraps.
What you need
– Small cardboard pieces
– Glue or tape
– Scissors
– Washi tape, markers, or paint
– Optional stickers or stamps
How to make it
– Cut a tiny box shape from cardboard.
– Fold the sides and glue or tape the edges tight.
– Add a lid by making a slightly larger top piece, or just fold the top flap to close.
– Let glue dry before you decorate.
Decoration ideas
– Wrap a band of washi tape around the box for quick color.
– Draw simple shapes like stars, hearts, or arrows.
– Add a tiny patch of confetti or a stamp for texture.
– Use bold colors or pastel tones to fit a party theme.
Fill ideas
– A small piece of jewelry, a gift card, or a sweet note.
– A tiny folded poem or a paper charm.
– A few candies tucked inside.
Why it works
– You give a personal touch with a handmade box.
– It feels special without a big cost.
– It doubles as a cute party favor.
Next steps
– Pick a theme for your event.
– Make several boxes in one sitting.
– Keep a stash ready for surprise gifts.
26. Message in a Box

Need a gift that feels warm and personal but won’t break the bank? A message in a box gives you a simple way to show you care. A small box filled with handwritten notes, kind words, and shared memories can brighten any day. Decorate the outside so it looks inviting and ready to give.
Here is how to add a personal touch:
– Use colorful paper for each note to lift spirits.
– Include quick drawings or doodles for extra charm.
– Slip in a tiny keepsake or photo to make it real.
– Write notes in a friendly voice and sign them with your name.
– Finish with a ribbon or stickers to seal the look.
Step-by-step guide
1) Pick a sturdy box and wrap or decorate the lid.
2) Cut small pieces of colored paper for your notes.
3) Write 1–4 lines per note. Mix compliments, memories, and wishes.
4) Fold and place the notes in a neat stack inside the box.
5) Add a final touch like a ribbon, a seed paper, or a tiny photo.
Tips you can use today
– Keep notes short and easy to read.
– Add a date or a prompt to inspire reflection.
– Arrange notes by theme, mood, or memory.
– Use different pen colors and a few doodles for variety.
Why it works and who benefits
This gift feels personal and thoughtful. It gives the recipient something to read and revisit. It’s perfect for birthdays, long-distance friends, or anyone going through a tough time.
Next steps
Gather a small box, colorful paper, and a pen. Write your messages, decorate the box, and you’re ready to give a meaningful keepsake.
27. Memory Box

You want a simple place to store photos and small keepsakes. A memory box gives you that space and a story you can touch.
Here is how to build a sturdy keepsake box you will use for years.
– Pick a solid box. Wood works well, or thick cardboard that you reinforce at the edges.
– Line the inside. A soft lining or felt protects photos and mementos from scratches.
– Decorate with care. Choose colors that fit your room. Keep the look clean so it lasts.
– Add labels and pockets. Small dividers help you sort memories. Write dates on the back of items.
– Make it personal. Add names and dates, like anniversaries, milestones, or trips.
– Keep it simple. A plain lid or minimal pattern lasts longer.
This DIY memory box doubles as a thoughtful gift for loved ones.
What to keep inside
– Photos, ticket stubs, letters, programs, and tiny mementos
– Short notes about each item so you remember the story
– A date on the lid helps you find it fast
Care tips
– Store away from direct sun and damp air
– Use acid-free sleeves for fragile items
– Keep the box in a cool, dry spot
With a little care, your memory box becomes a tiny museum you can visit any time. Keep the box somewhere safe and you will cherish it.
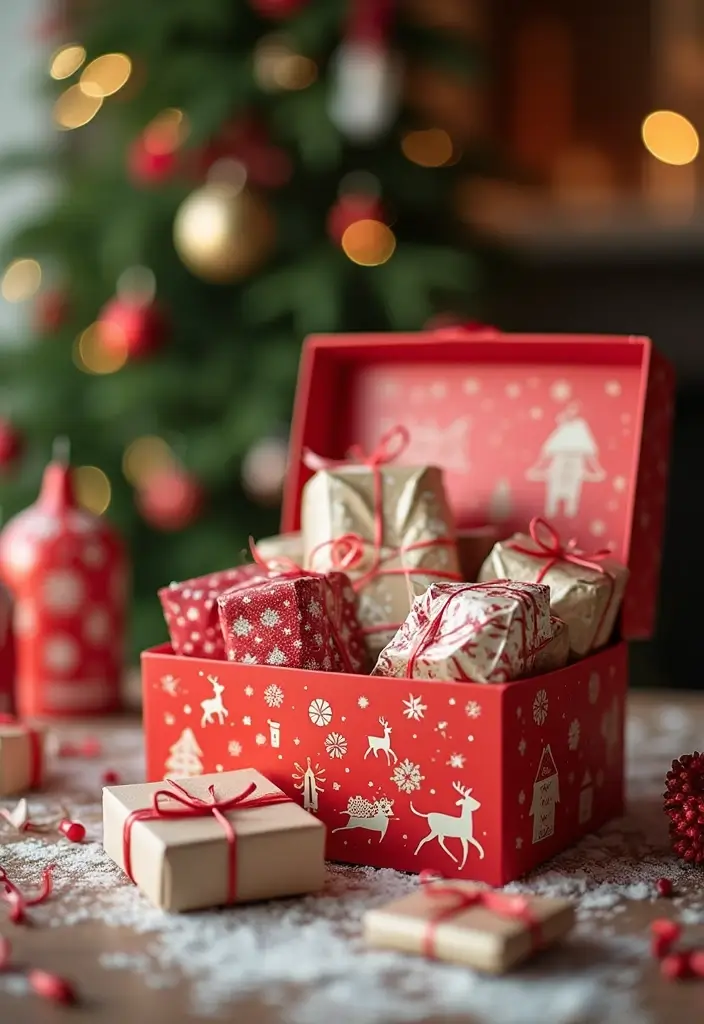
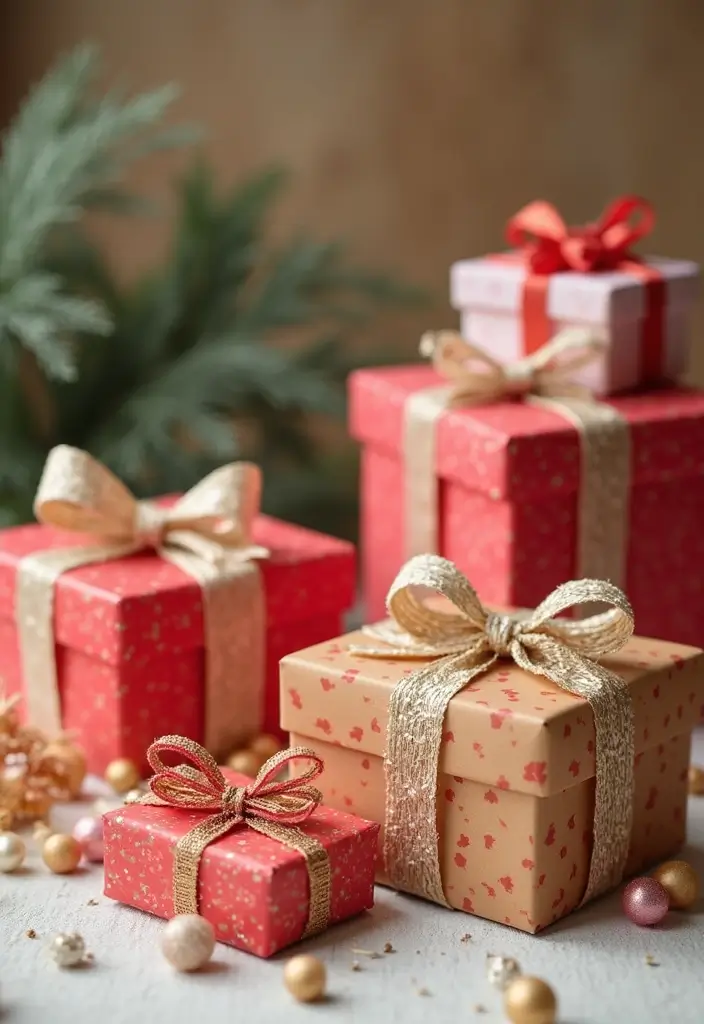
28. Festive Holiday Gift Boxes

Looking for a gift that feels warm and personal? Festive holiday gift boxes are a simple, affordable way to do DIY gifts. You can make them from paper and fill them with treats that match the season. Here’s a plan to help you make eye-catching boxes fast.
What you’ll need
– Choose a sturdy box or fold a cube from cardstock.
– Pick seasonal colors and patterns such as red, green, gold, or silver.
– Get glittery or metallic papers to add a festive shine.
– Gather ribbons, small ornaments, and a few stamps or stickers for decor.
– Have tissue paper and light glue or double-sided tape on hand.
– Gather a few small treats or tiny gifts to tuck inside.
Decoration ideas
– Use glittery or metallic papers to catch the eye and reflect light.
– Tie a ribbon around the box and add a tiny ornament or charm.
– Stamp a simple holiday message or a cute pattern on the lid.
Filling and finishing
– Line the bottom with tissue paper so items sit softly.
– Place your treats or small gifts with care to balance the box.
– Close the lid and secure with tape or a ribbon.
Practical tips
– Write the recipient’s name on a label to avoid mix-ups.
– Keep the box flat when not in use so it stores easily.
This idea fits many holiday styles and works for small gifts.
Conclusion
From origami masterpieces to delightful recycled treasures, these paper box DIY crafts bring a personal touch to gift-giving.
Each box offers an opportunity for creativity and sustainability, ensuring your gifts are as memorable as they are eco-friendly.
Embrace these ideas and start crafting your unique gifts today!
Note: We aim to provide accurate product links, but some may occasionally expire or become unavailable. If this happens, please search directly on Amazon for the product or a suitable alternative.
This post contains Amazon affiliate links, meaning I may earn a small commission if you purchase through my links, at no extra cost to you.
Related Topics