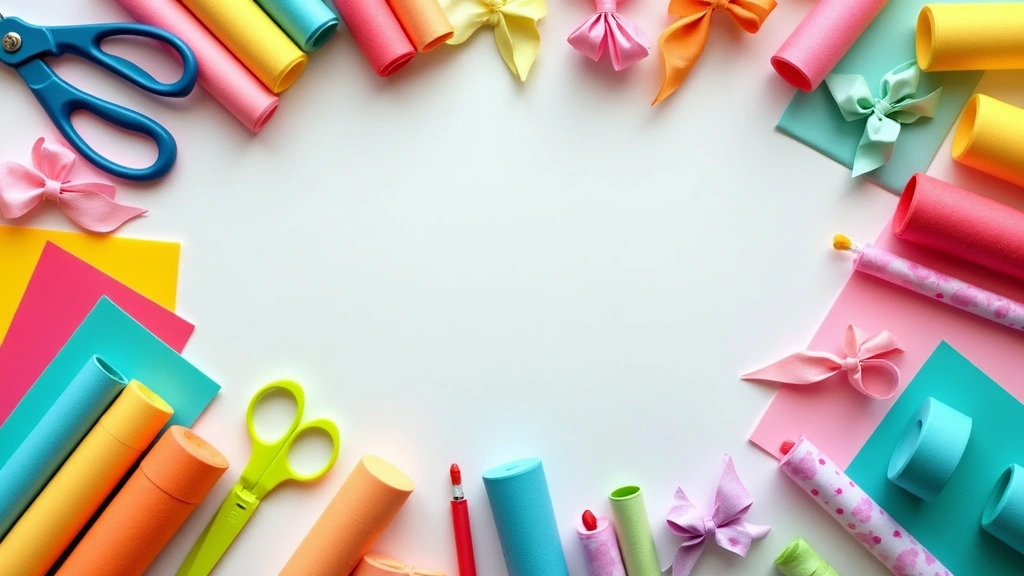
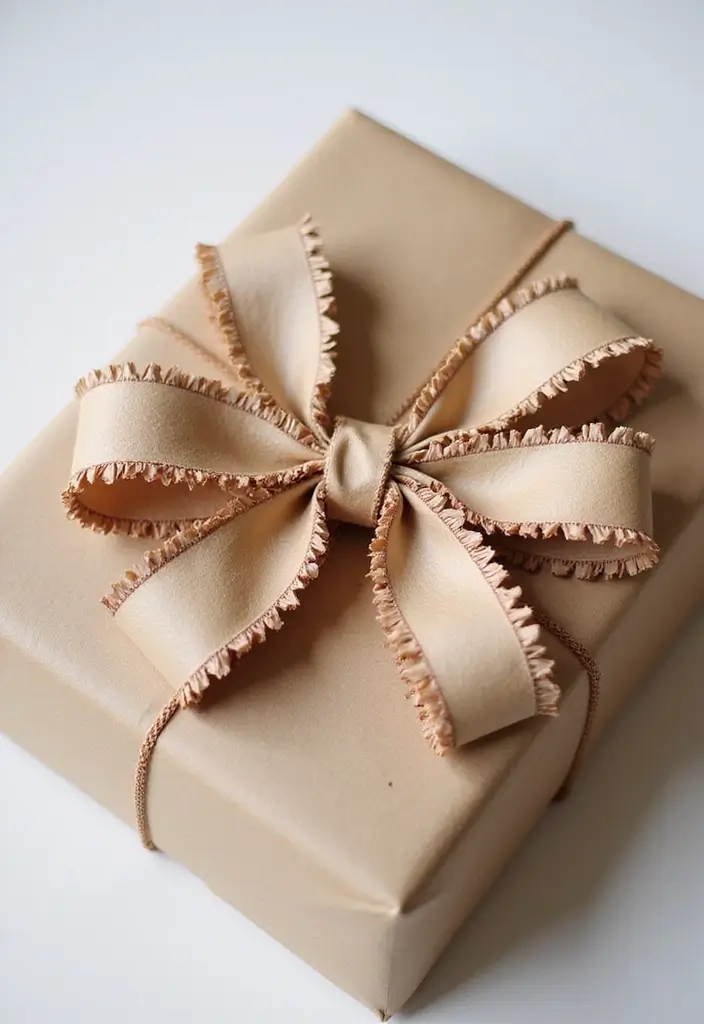
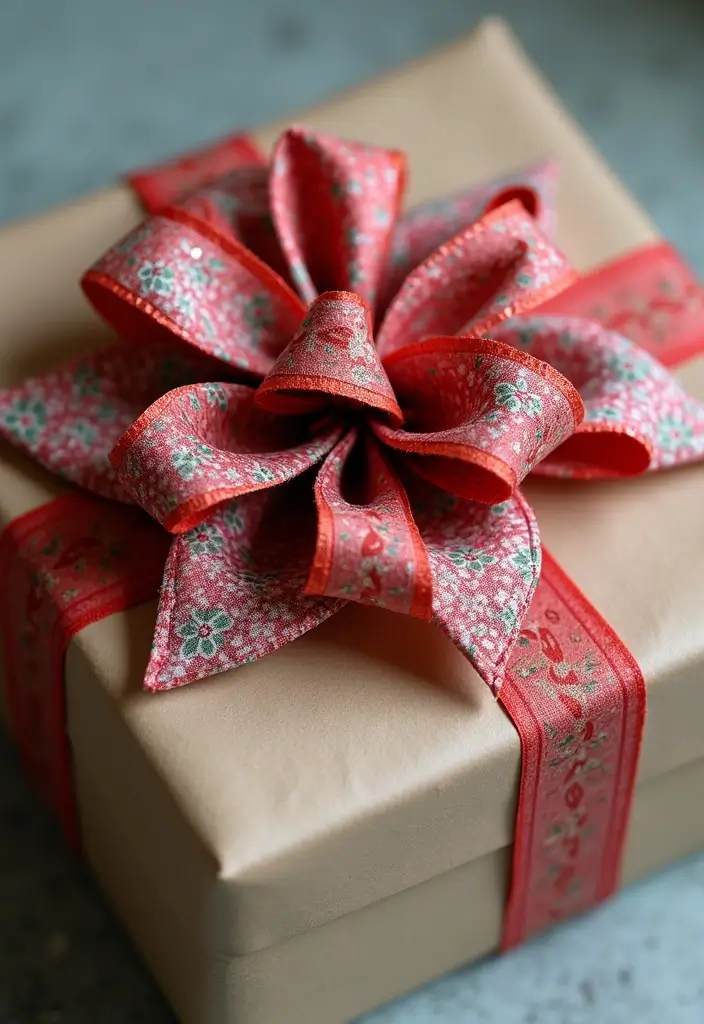
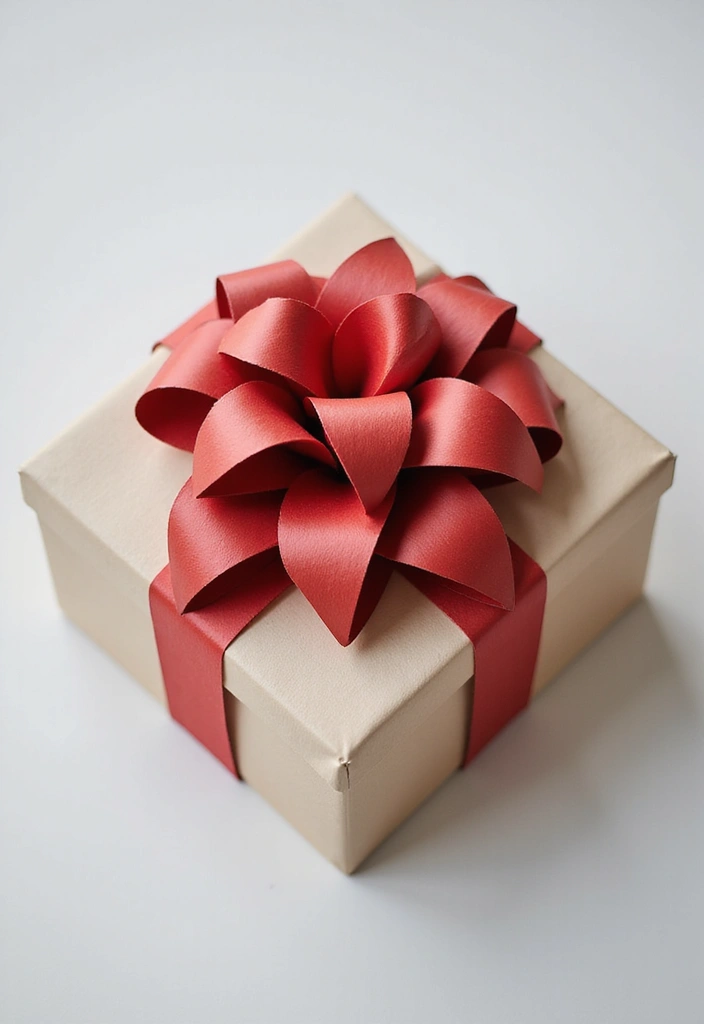
Wrapping a gift should feel like a small celebration. The bow should add charm, not stress you out. If you struggle with neat, quick bows, you are not alone. This post brings you 30 paper bow crafts you can make at home.
This season of gifting has me craving simple, pretty finishes that don’t waste time or money. I wanted ideas that are easy to master and fun to try. I also looked for bows you can make with everyday paper or scraps you already have.
If you love DIY projects, budget friendly wrapping, or just enjoy little touches that say you cared, this is for you. Beginners and busy crafters will find something they can fit into a weekend.
I pulled together 30 paper bow crafts. The collection covers many styles from clean folded bows to delicate origami shapes. They use basic tools like scissors, glue, tape, and paper you already have. Each idea is described with simple steps and practical tips for quick shaping.
Here is how you can use this guide. Pick a project that matches your gift size. Gather a few sheets of paper in the color family you want. Practice on a scrap before you decorate the real present. Pair the bow with your wrap and a ribbon if you like.
Paper bows shine on small boxes and flat gifts. Some bows may be fragile for rough handling, so use lighter gifts or secure them with tape. You can add a personal touch by adding a sticker or tag. Ready to start? Scan the ideas, grab your paper, and give gift wrap a craft boost.
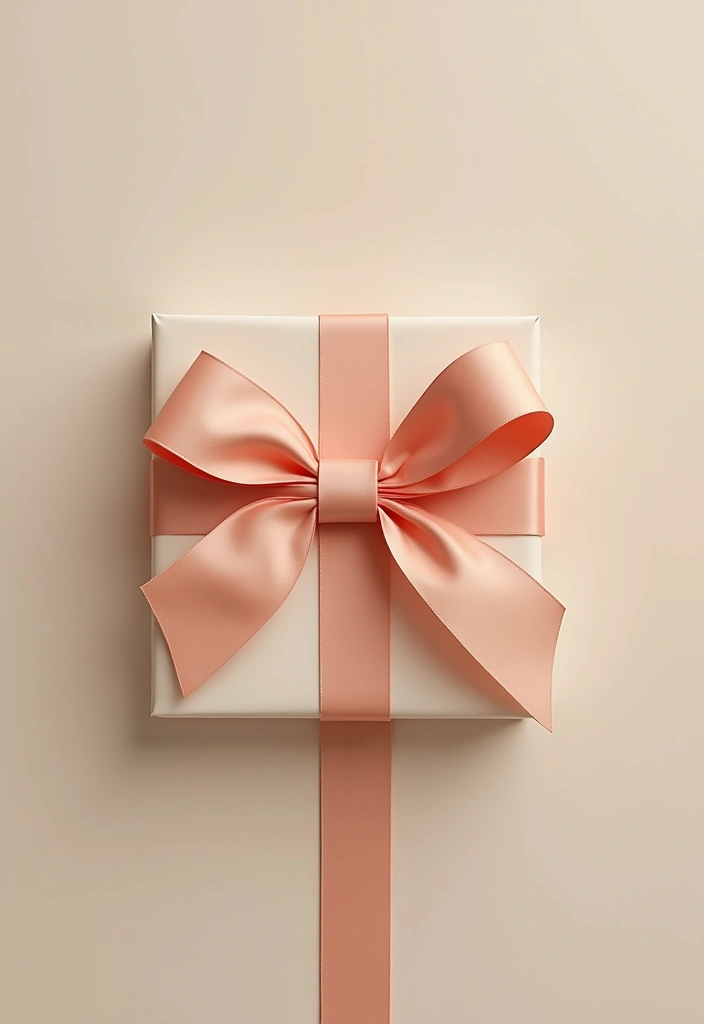
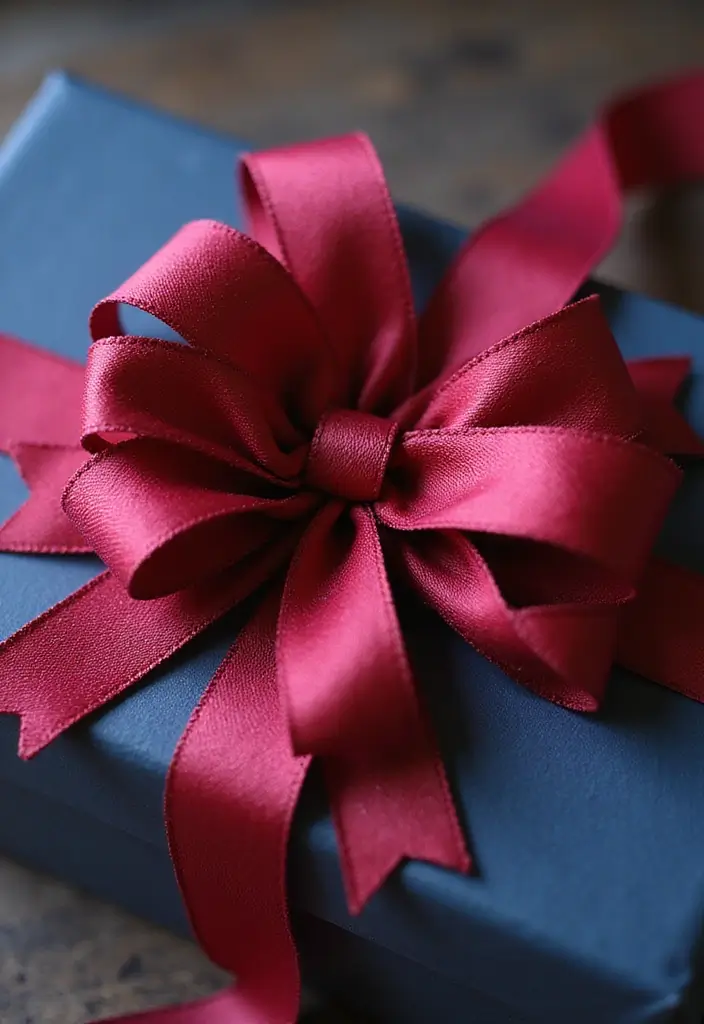
1. Classic Ribbon Bow
– You want a classic paper bow that looks neat on any gift. This simple method uses ordinary wrapping paper.
– What you need: wrapping paper scraps, scissors, glue or clear tape, and a small piece of wire or a twist tie.
– Step 1: Cut several strips in different lengths. Long, medium, and short pieces give a layered look.
– Step 2: Fold each strip into a loop. Pinch the center and secure with glue or tape.
– Step 3: Layer the loops. Place the largest loop down first, then the medium, and finish with the smallest on top.
– Step 4: Tie the center. Use a short piece of wire or twist tie, or wrap a tiny strip of paper around the middle and tape it.
– Step 5: Add a center accent. A small button or gem can sit in the middle for a polished finish.
– Step 6: Fluff and shape. Gently bend the outer edges to make rounded loops that catch the light.
– Step 7: Attach to the package. Tape it to the gift from the back so no tape shows on the front.
– Tips: Tips: Use double-sided paper for a clean finish. Kraft paper adds texture and depth. Try bold colors or patterns to suit the gift.
– Why this helps: Paper bows stay light and flat enough to mail, yet they look rich on a wrapped present.
– When to use: Birthday gifts, holiday packages, or any time you want a simple, charming wrap.
– Next steps: Play with loop counts and strip widths to craft your signature bow.
– Final note: Practice helps you get a perfect bow every time.
2. Spiral Paper Bow
You want a gift that stands out. A spiral paper bow does the job. It adds motion and color to plain wrapping. Tiny curls catch the light and draw the eye.
What you’ll need
– Several long strips of paper in different colors or patterns
– A pencil or thin dowel
– Craft glue or a glue stick
– Scissors
– A small circle of cardstock for the base
– Optional: a dab of glitter
Here is why this works
Spiral bows look lively. The curls stay soft and playful. They’re simple to make, yet they read as fancy on the gift.
Let’s break it down
1) Cut 4 to 8 long strips. Mix colors and patterns for a bright mix.
2) Curl each strip. Wrap a strip around the pencil, then slide it off. Press the curl flat to set it.
3) Create a base. Glue a small cardstock circle in the center.
4) Build the bow. Arrange the curled strips around the base. Layer them so some curl up, some lie flat.
5) Secure and finish. Glue everything in place and let it dry. A dash of glitter adds sparkle if you like.
Next steps
Top gifts with a spiral paper bow for birthdays, holidays, or thank-you wraps. It shines on plain paper and makes your present feel extra personal.
3. Simple Bow with a Twist

If you want a gift wrap bow that is easy and stylish, this twist bow fits the bill. It looks clean but has a playful edge, perfect for any occasion.
How to make it:
– Cut 5 to 7 strips of paper, about 1 inch wide and 6 inches long.
– Fold each strip into a small loop. Leave the ends loose for overlap.
– Overlap the loops at the center and twist them. You get a compact center without a knot.
– Glue the center well so the loops stay put.
Why this paper bow works:
– The look is flexible for any gift under any theme.
– It uses scraps, which saves paper and reduces waste.
– It goes with solid wraps or busy patterns.
Tips to boost your DIY paper bow:
– Try contrasting colors for a bold pop, or use similar tones for a refined feel.
– Pick craft paper, shiny paper, or recycled pages for texture.
– Make a batch of bows in different colors so you can grab one fast.
– Store the finished bows flat in a box so they keep their shape.
Next steps: attach the bow to your gift and trim uneven ends. A simple, stylish paper bow can lift any wrap.
Your gift will stand out with this small twist.
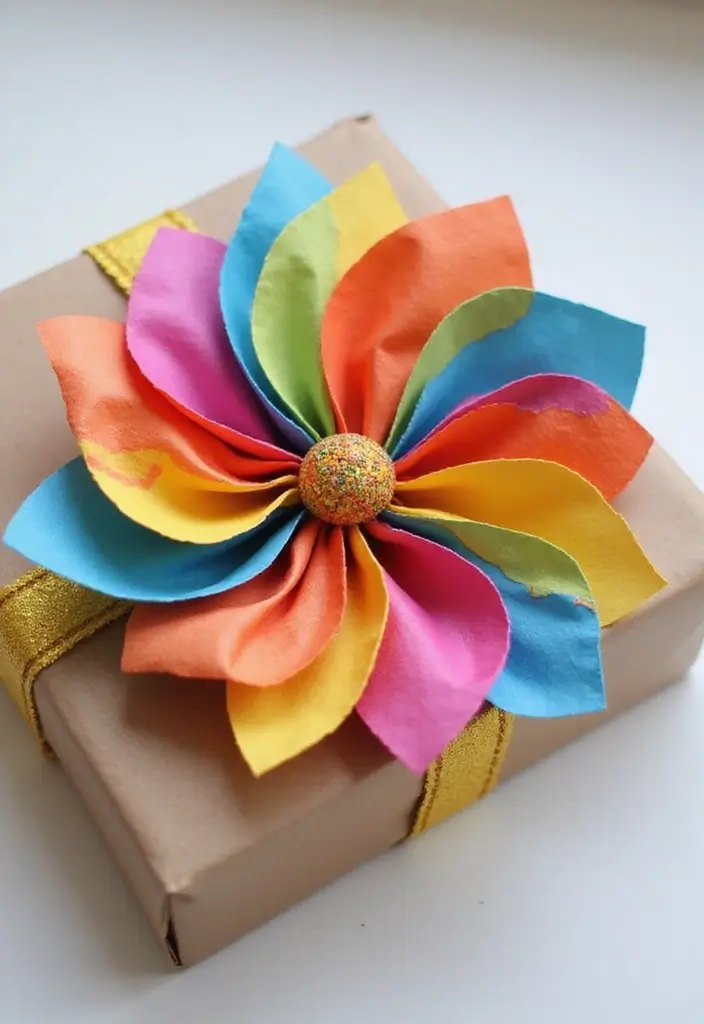
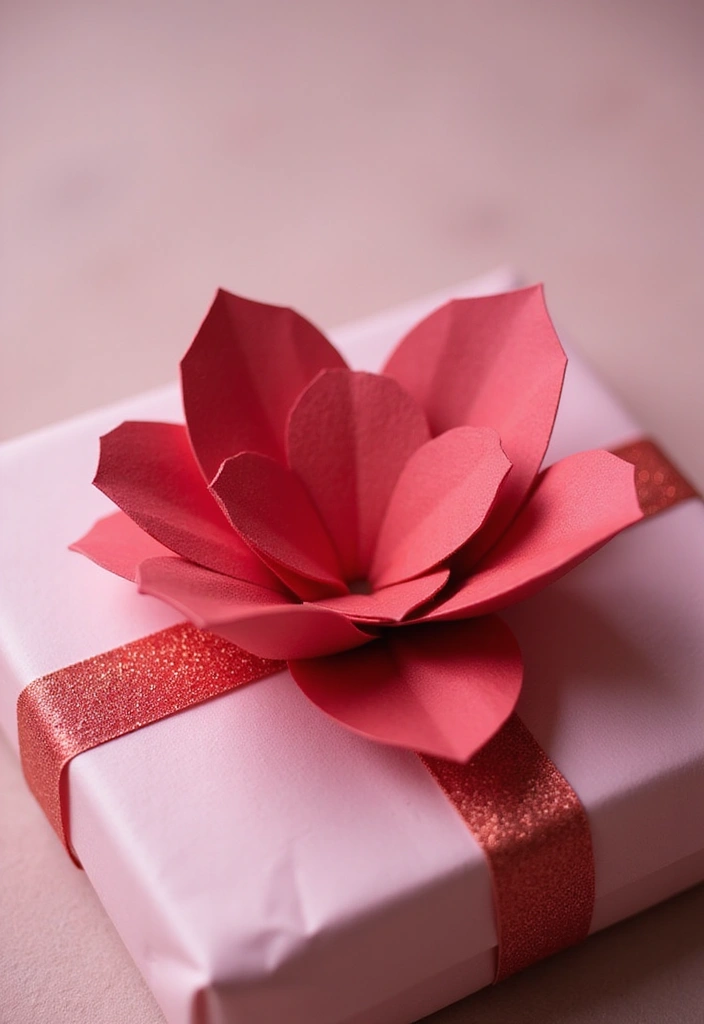
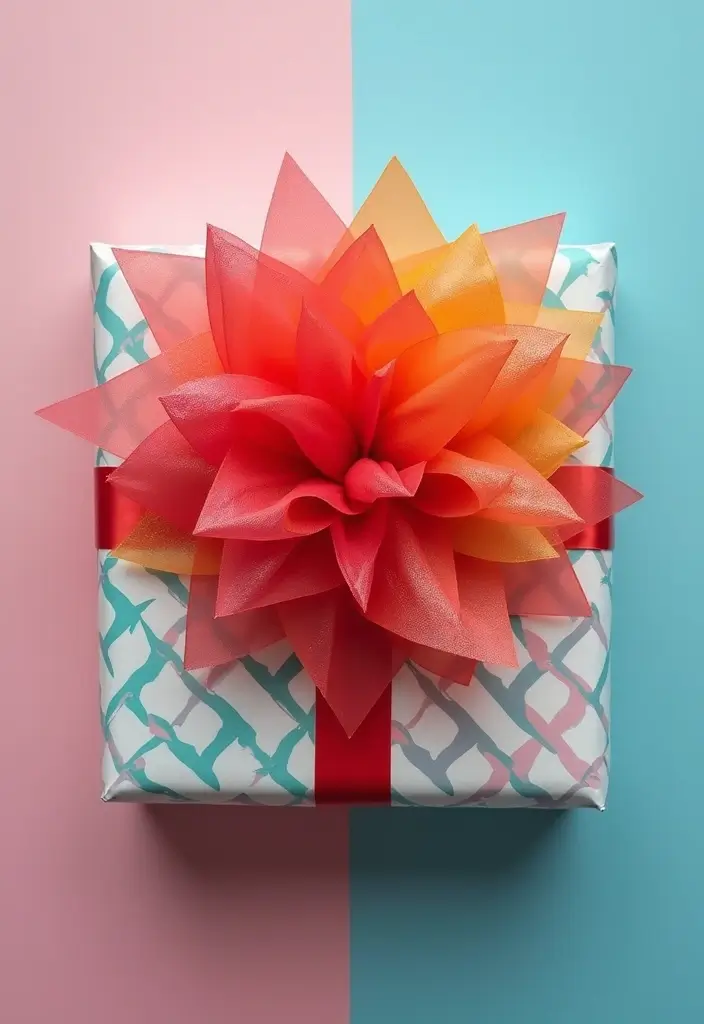
4. Layered Petal Bow
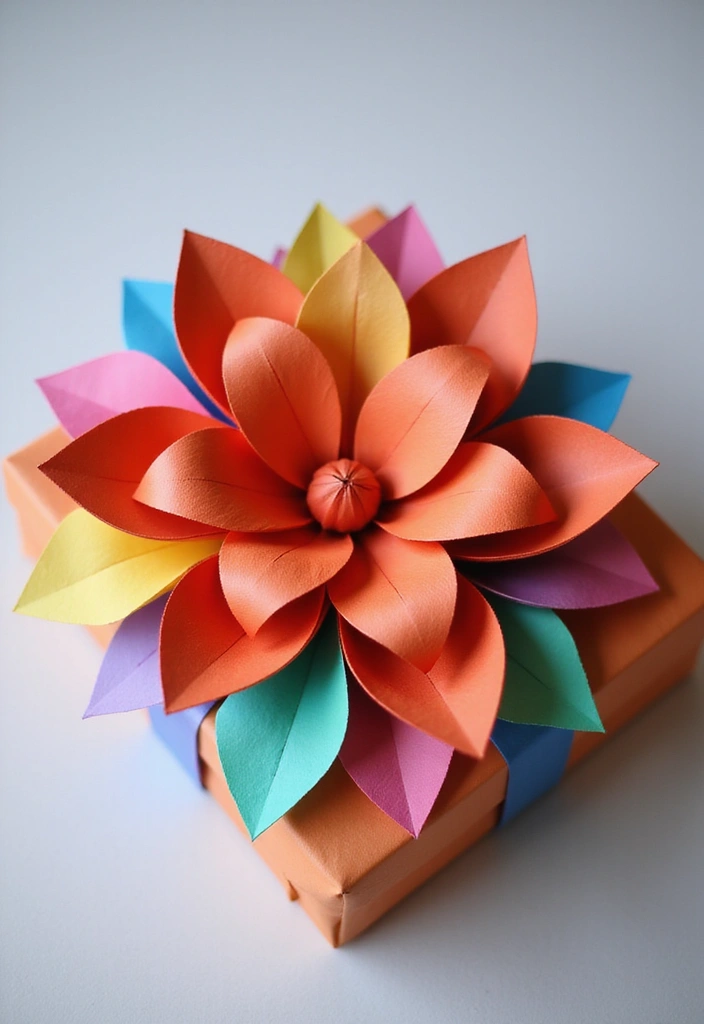
If you want a gift wrap that pops without a lot of work, the layered petal bow is your go to. It adds real depth by stacking paper shapes that look like petals. Cut the shapes from paper—teardrops or circles work best. Make several sizes, from large to small, so you can stack them from bottom to top.
Stack the pieces and secure them in the center with a brad or a dab of glue. Press the center so the layers stay neat on the gift. Let the glue dry a moment if you use liquid glue.
Creative Ideas:
– Use two or more colors for each layer to create contrast.
– Mix patterned base layers with a solid color on top to balance the look.
– Trim the edges with decorative scissors to add a gentle fringe.
This bow works well for weddings or gifts with a floral theme, giving a touch of elegance that catches the eye.
Next steps: attach the bow to your wrapped present with a little tape or a glue dot. If you worry about movement, add a tiny dab of glue at the center. You can store pre-cut petals for a quick, pretty finish on future gifts.
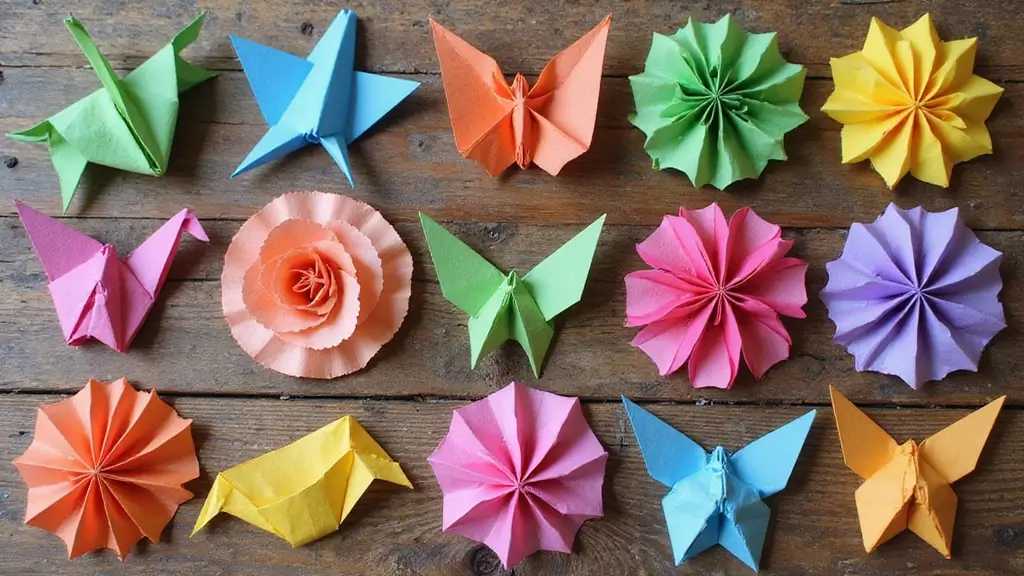
5. Origami Bow
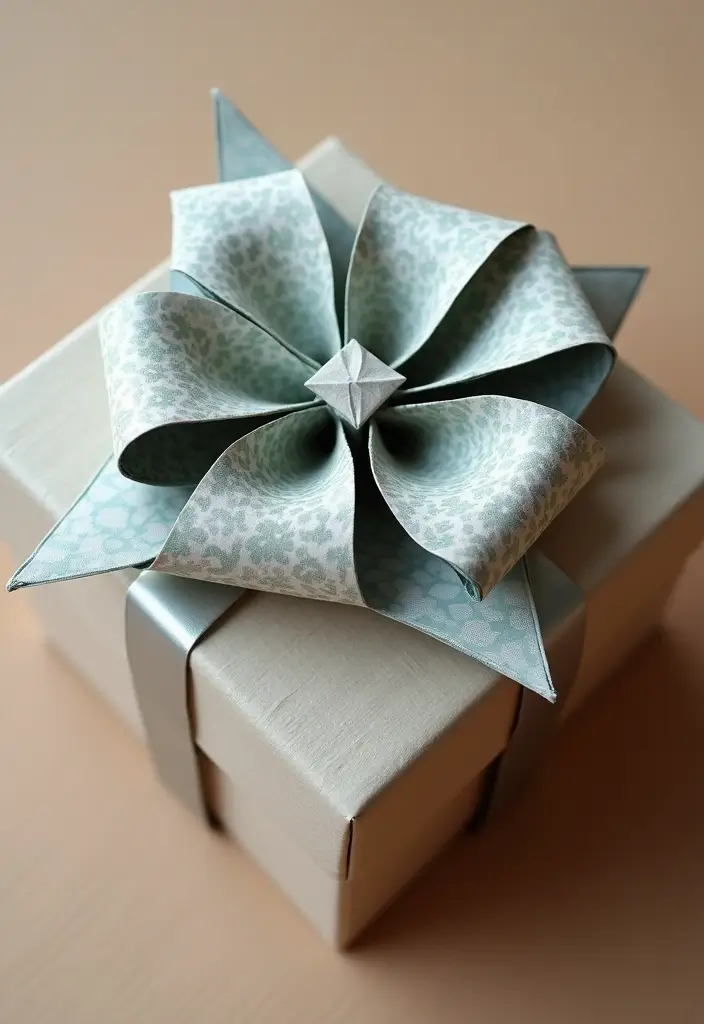
Here is why origami bows work for gift wrap. They add polish without a lot of bulk. They feel handmade and thoughtful.
What you need
– A square sheet of paper (a 6×6 cm size works well for a neat bow; bigger if you want more presence)
– A flat workspace
– Optional glue or tape to secure the center
How to fold
1) Place the square on the table so it looks like a diamond.
2) Fold the paper in half to make a crease, then unfold.
3) Fold the left edge toward the center, then do the same with the right edge.
4) Fold the top edge toward the center and the bottom edge toward the center. You should see a small diamond with two flaps.
5) Pinch the middle to form a tight center. Gently pull the top and bottom flaps outward to create two bow loops.
6) Add a dab of glue or a tiny piece of tape to fix the center if you want a sturdier bow. Let it set a moment.
Tips and variations
– Use metallic or patterned paper to add shine.
– Double-sided paper hides the inner folds for a clean look.
– Add a small gem, a knot of string, or a slim ribbon at the center for personality.
Next steps
Practice on a few sheets to get the balance right. A smooth, flat surface helps the folds stay crisp. Then wrap your gift and enjoy the neat, paper bow finish.
6. Folded Star Bow
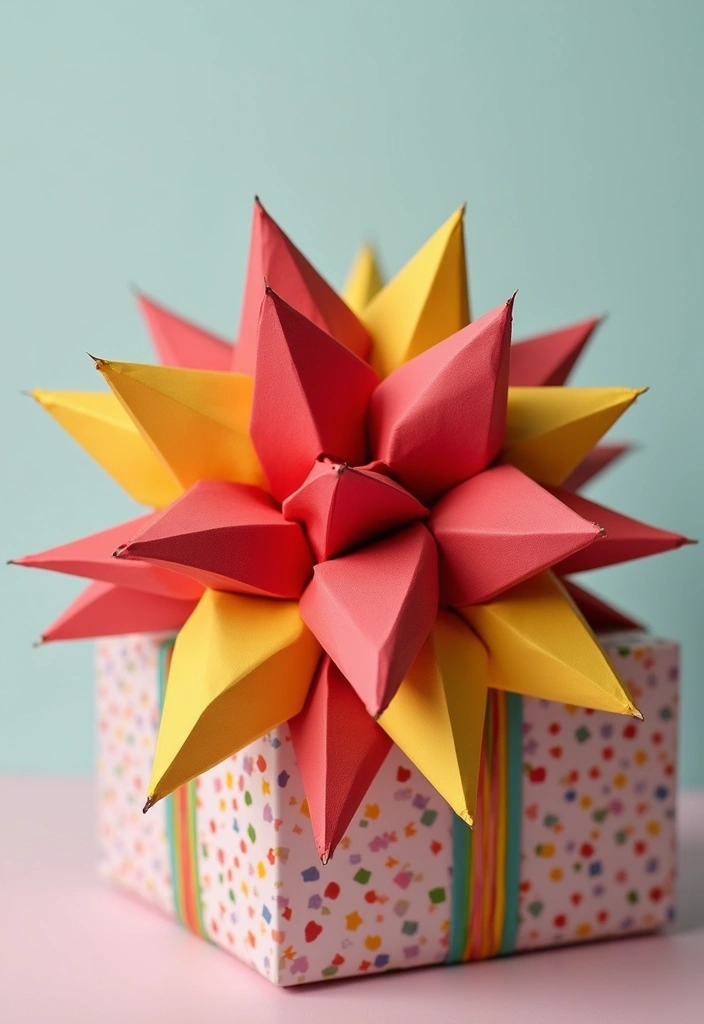
You want a gift bow that catches the eye with little effort. The folded star bow does that. It looks festive on a wrapped present. You can use bright colors or shiny paper to make it pop.
What you’ll need
– Colored craft paper in two sizes
– Scissors
– A star template or hand-drawn star
– Glue or double-sided tape
– Metallic or glitter paper for sparkle
Make the stars
– Cut strips of color and fold them into star shapes.
– Use the template for even stars or go freehand for a playful look.
– Cut a few more stars in a smaller size to stack.
How to assemble
– Start with the biggest stars as the base.
– Layer smaller stars on top to create depth.
– Add metallic or glitter paper on some layers to catch light.
– Secure every layer with glue or tape for a clean finish.
Finish and use
– Add a small center dot or a ribbon loop if you like.
– Attach the bow to your gift with tape or glue.
– This bow fits Christmas or birthday gifts.
For kids, it’s a fun project that teaches layering.
7. Fringe Bow
You want a gift wrap that stands out without taking all day. A fringe bow adds texture and life to any package. It feels fancy but is easy to make. You can do this at your desk in minutes.
Here is how to make it:
– Cut a paper strip about 1 inch wide and 6 inches long.
– Fringe one long edge with small cuts, leaving the other edge smooth.
– Roll the uncut edge to form a loop.
– Press the fringed part in the middle to hold the loop.
– Glue a dab at the center and set the bow onto your wrapped gift.
What makes this bow special:
– The fringe edges move as you lift the package, catching light and drawing the eye.
– Try two colors. A lighter color for the loop and a darker fringe adds depth.
– It makes use of scraps. Bring left over pieces back to life instead of tossing them.
This fringe bow fits bohemian and rustic gift wraps. It adds a handmade charm that many gifts love. It also works well on simple boxes, jars, or even gift bags. With a little practice you will be fast and neat.
Next steps: experiment with fringe length and strip width. Use metallic or textured papers for extra shine. Keep a tiny bottle of glue handy for fast fixes.
8. Heart-Shaped Bow
You want a gift that feels personal without a lot of fuss. A heart shaped paper bow does that in one simple step. It adds a warm touch and looks great on any present.
Materials
– Red, pink, or white craft paper
– Scissors
– Glue or glue dots
– Pencil and small ruler
– A thin paper strip for the knot
– Optional: a tiny inside heart for a message
How to make it
1. Cut two to three hearts in different sizes.
2. Layer the largest heart first, then place a smaller one on top. Offset them a bit to create a bow shape.
3. Tie the center with the thin strip or glue a short strip to hold everything tight.
4. Stick the bow to your gift with glue or double stick tape.
5. If you like, write a short message on the inner heart before you seal the wrap.
Tips
– Pick a patterned paper with a romantic print for extra charm.
– Add a sweet note on the inner heart for a personal surprise.
– Use a contrasting color for the knot to make the bow pop.
Why it helps your gift feel warmer? The layered hearts catch the eye and invite a closer look. It’s quick, but it shows you thought about the wrap as much as the gift inside.
9. Nature-Inspired Bow
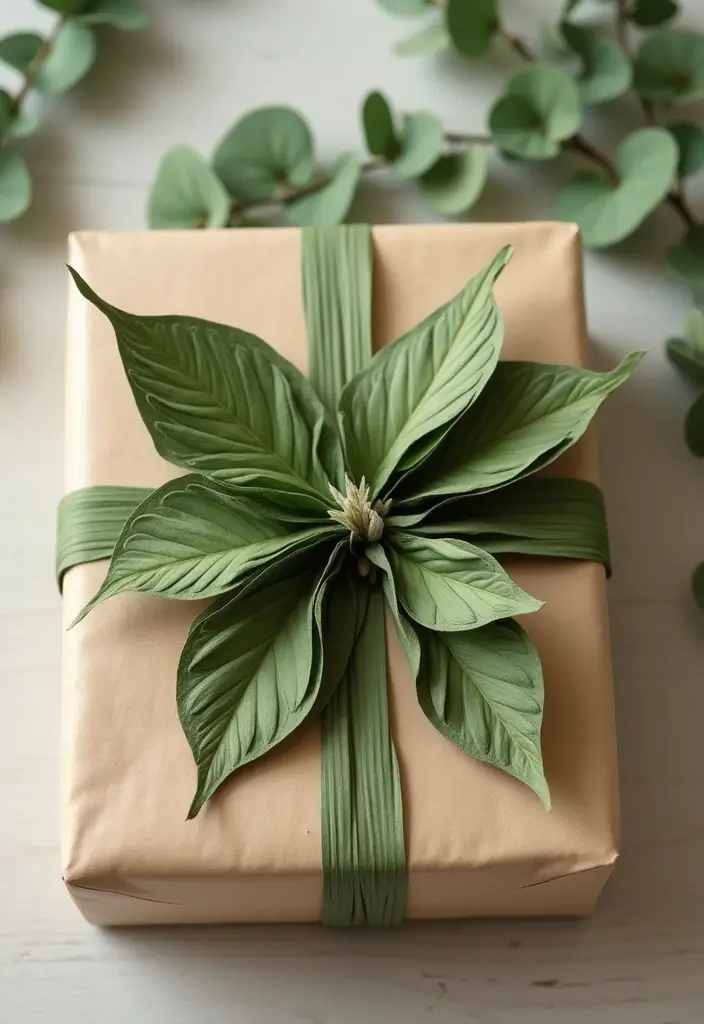
You want gift wrap that feels like a walk in the yard. A nature-inspired bow does that. It uses leaves, twigs, and dried flowers for a soft, earthy look. It also fits eco-friendly gifting because you can use recycled paper.
Here is how you make it.
What you need
– Gather: kraft paper or green wrap, leaves, twigs, dried flowers, glue, scissors, and twine.
How to assemble
– Cut and form: cut leaf shapes from your paper. Layer them into a bow. Let layers overlap for depth.
– Add a center: loop a twig or tie short twine at the center.
– Attach: use glue dots to fix the bow to the package.
– Add life: tuck a dried flower in for a pop of color.
– Finish: press gently and smooth edges so the wrap lies flat.
Next steps: keep your materials dry and flat so they keep their shape.
Here is why it works: it looks thoughtful, uses natural pieces, and you can reuse what you have.
Variations
– Swap in pine needles for texture, use a seed pod for a rustic touch, or switch to a white tag for contrast.
Store this bow for future gifts.
10. Pom-Pom Bow
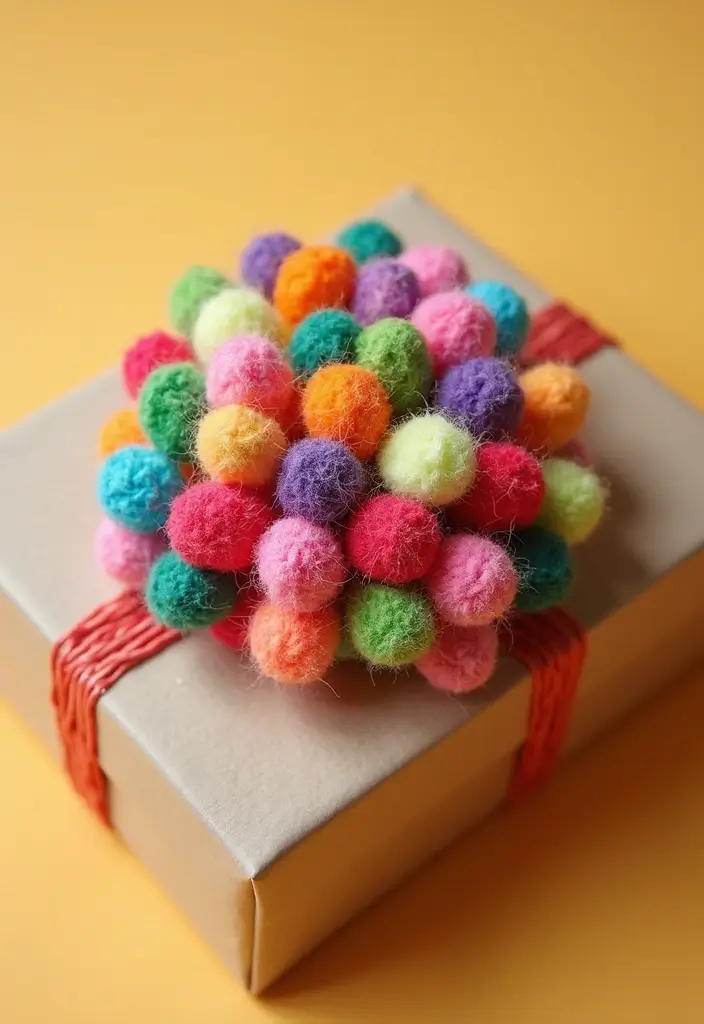
Want a gift bow that feels playful but easy to make? Try a pom-pom bow. Make fluffy pom-poms from yarn or paper, then stack them into a soft bow shape. Attach the bow to a simple paper base, and you have a bright, cheerful wrap that stands out. It looks friendly on boxes for any happy occasion.
Crafting Tips:
– Layer different colors and sizes for a lively mix.
– Use a plain paper bow as the anchor for the pom-poms.
– When the gift is opened, the pom-pom bow becomes a keepsake you can reuse or keep.
Why it works: It adds color, texture, and a soft touch without much cost. You can adjust the look for kids’ parties, birthdays, or casual gifts. And you get a removable decoration that can be worn or kept.
Here’s how to make it.
– Gather supplies: paper or yarn, scissors, glue, and a small base bow.
– Make pom-poms: for yarn, wrap around a finger or card 20–30 times, tie, cut, fluff. For paper, cut fringe circles or fold strips and fluff into a puff.
– Build the bow: glue the pom-poms in a bow shape on the base bow.
– Attach to your gift: secure with glue or tape.
11. Newspaper Bow
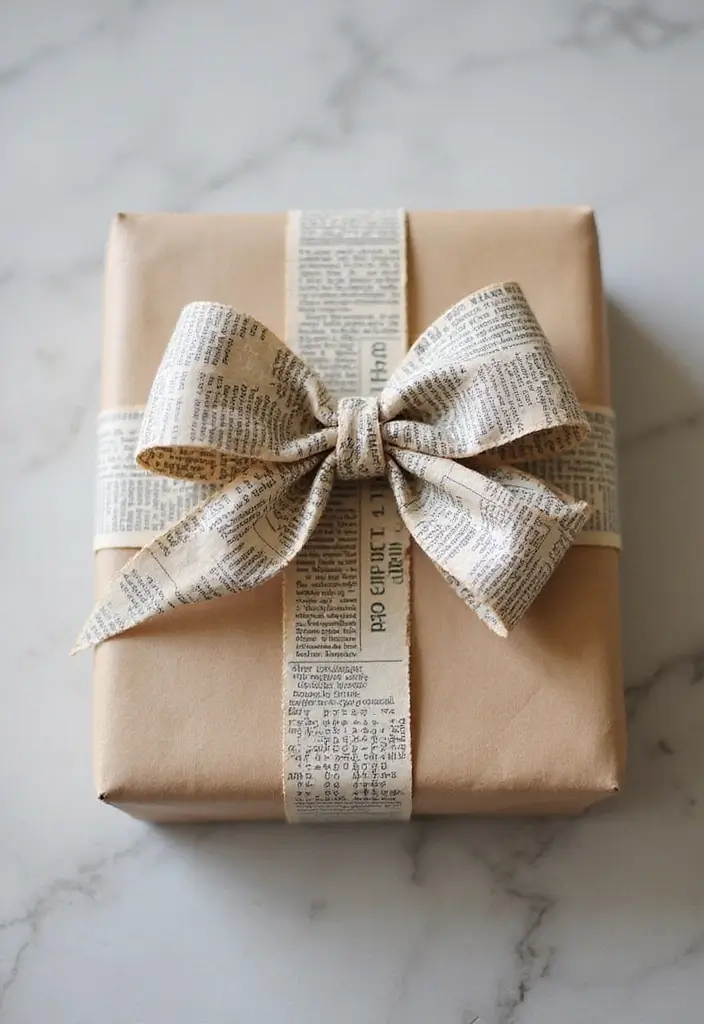
Here is why this newspaper bow can be the star of your gift wrap. It uses old papers you already have. It gives texture and a vintage feel.
What you need
– clean old newspapers
– scissors
– craft glue or a glue gun
– a thin ribbon to finish
How to make it
1) Cut strips about one inch wide and six to eight inches long.
2) Curl the strip ends with a pencil to form small loops.
3) Layer several loops to build a full bow and glue the center shut.
4) Tie the finished bow to your package with a short ribbon or string.
Color and style
– You can paint or dye the strips for extra pop.
– Tea stains or colored markers work well on black and white print.
– The look stays rustic and classy, perfect for vintage gifts.
Next steps: place the bow on the package and press it flat with a fingertip for a neat finish. It feels good to reuse paper and cut down waste. This small craft helps you show care for the planet while giving your gift a unique charm.
Try different sizes to fit big or small gifts. Use glue dots for a cleaner finish and let it dry before wrapping. It looks sharp.
12. Fabric Bow
If you have scraps of fabric, turn them into a charming fabric bow. It adds texture that paper can’t match and makes your gift feel unique. Start by cutting a fabric strip about 1.5 inches wide and 8 to 12 inches long. Fold it into a bow and secure with a tight knot or a small stitch. For a cleaner look, back the knot with a quick cross stitch or a tiny dab of fabric glue (optional). Let the ends fray naturally for a casual vibe or trim them for a neat finish.
Here’s How to Style:
– Mix patterns and colors to create a boho feel.
– Choose soft fabrics like cotton, linen, or velvet for a cozy look.
– Reusable fabric bows are an eco-friendly gift wrap option.
This method adds elegance and a personal touch that the recipient can keep long after the gift is opened. It’s simple, fast, and surprisingly sturdy.
Practical notes:
– Attach the bow with a short thread or a small safety pin for easy removal.
– Avoid very slick fabrics if you want a solid hold.
– Store unused bows flat in a box to stay crease-free.
– Sew a tiny loop at the back to attach to boxes or jars easily.
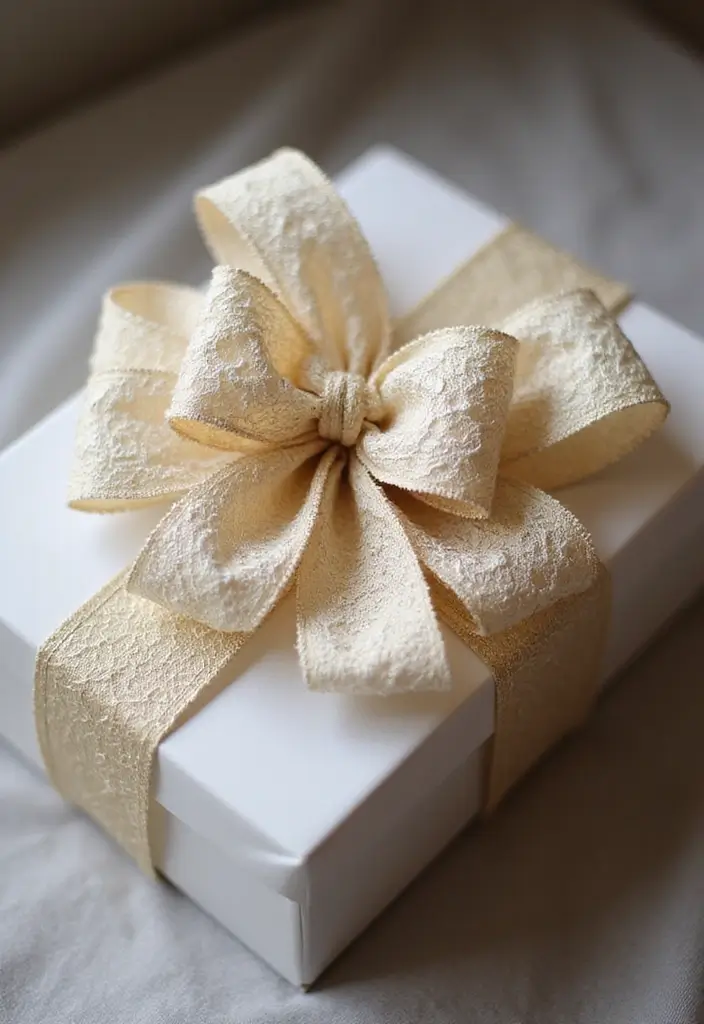
13. Textured Paper Bow

You want a gift bow that catches the eye without a lot of work. A textured paper bow can do that with style. Use embossing, glitter, or specialty paper to add shine and depth. Cut your paper into strips and fold them into loops or any shape you like.
Enhancement Ideas:
– Layer different textures to create depth.
– Use contrasting textures to add visual interest.
– Pair with simple wrapping paper so the bow stays the focus.
Textured bows shine in light. They can make a plain gift feel more luxurious. This style fits formal occasions or special gifts.
How to make a textured paper bow
– Pick a textured paper. Choose embossed, glittery, or foil-backed stock.
– Cut strips about 1 inch wide and long enough for the number of loops you want.
– Fold each strip into loops or a small petal shape.
– Glue or tape the center to hold the loops together.
– Add a small dot of glue on the back to attach to the package.
Next steps: place the bow on the wrapped gift, press it gently, and finish with a tiny ribbon knot if you like.
Keep a few sizes ready. Store flat in a box so the folds stay neat.
14. Watercolor Wash Bow
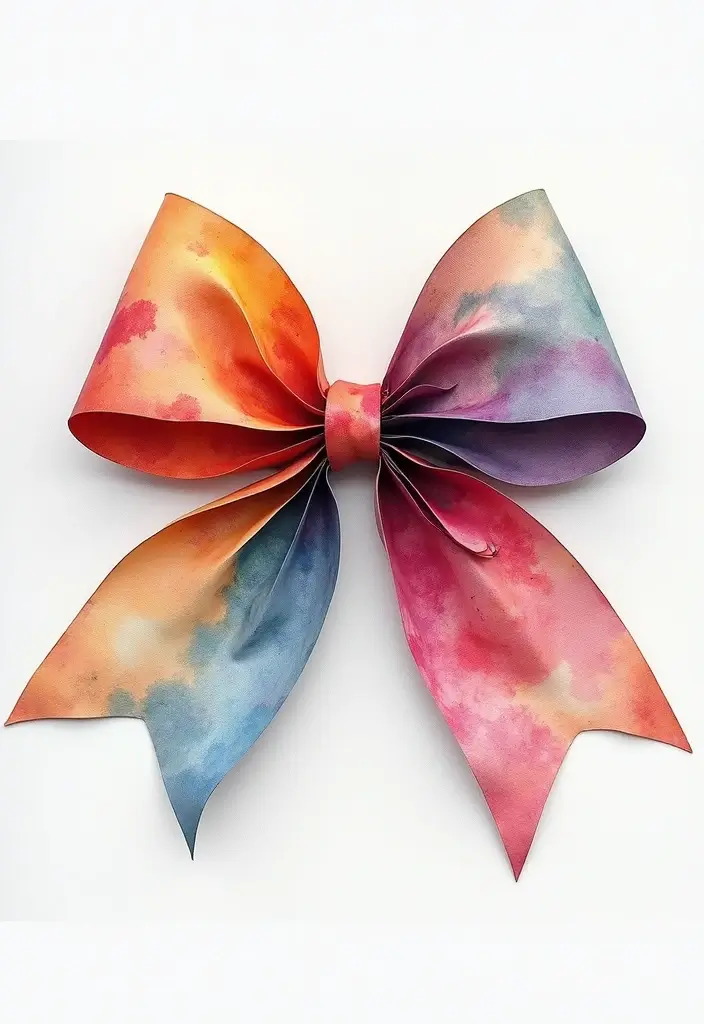
Want a gift bow that feels artsy and one of a kind? A watercolor wash bow gives you a soft, dreamy look that makes your gift stand out. You paint the bow on paper first, then cut and shape it into a pretty bow ready to wrap.
What you’ll need
– Watercolor paper or sturdy craft paper
– Watercolor paints or ink
– A small brush and a cup of clean water
– Scissors and a pencil
– Glue or double-sided tape
– Ribbon to finish the wrap
Here is how to make it.
1) Create the wash. Wet a small area of paper and dab in two or three colors. Let the colors blend slowly for a smooth transition.
2) Let it dry completely. A dry sheet holds the bow shape better and prevents smudges.
3) Cut the bow shapes. Draw two loops and a center strip, then cut them out.
4) Assemble the bow. Glue the loops in place, then press the center strip over them to form the knot.
5) Attach and finish. Tape or glue the bow to your gift, then add the ribbon if you like.
Creative Tips:
– Use two or three color variations for a lively look.
– Let the wash dry fully to avoid smudges.
– Layer a piece of textured paper behind the bow for a mixed-media feel.
Next steps: try a cool blue and pale gray for winter gifts or a warm pink for birthdays to match your wrap.
15. Geometric Bow
Want a wrap that feels fresh and sharp? A geometric bow gives your gift a clean, modern look. It uses angular shapes to form a bow that sits flat and bold on the package. Cut paper into triangles, squares, or other polygons, then layer them into a star-like shape or any design you love. The result is eye catching and easy to recreate.
Materials
– Paper in two or three colors (craft, scrapbook, or thin cardstock)
– Scissors
– Glue dots or craft glue
– A bit of tape or a tiny ribbon to finish the center
Cutting ideas
– Try triangles in different sizes for a spiky, dynamic feel
– Add squares or diamonds for solid color blocks
– Mix in small trapezoids to soften the edges
How to assemble
– Lay out shapes on a flat surface so you can see the design
– Glue three shapes in the center to make a tight knot
– Place larger pieces behind, angles pointing outward like petals
– Press gently until the glue sets
– Finish by applying the bow to the gift with tape or glue dots
– Add a small centered square for a neat, polished look
Style tips
– Bold pairs work best: black and white with a bright accent
– A single shade on matte paper creates a sleek vibe
– Metallic papers add shine without clutter
Here is why you should try it: geometric bows anchor modern gift wraps and become a standout focal point. They work well on boxes, tins, and even slim gift bags. Next steps—practice on scrap paper, then test a tiny bow on a plain package to see the effect.
16. 3D Bow
Want a gift wrap that catches the eye? A 3D bow brings drama to big gifts with almost no extra work.
Here is how it works. Cut out several layers of the same bow shape in different sizes. Use sturdy paper, or go with glitter paper for extra shine. Stack the layers from largest on the bottom to smallest on top. A tiny shift in each layer lets the edges peek out and creates real depth.
Stacking Tips:
– Use varying shades of the same color for a clean, monochrome look.
– Glitter or metallic edges catch light and make the bow sparkle.
– Secure every layer well so the bow stays neat and strong.
Here is why this method helps your gift look special. The layered shape adds height and texture, so the bow reads big from across the room. It works great for tall presents, awkward widths, or oddly wrapped boxes.
Next steps:
– Finish with a small center knot. Cut a short strip, wrap it around the middle, and glue the ends to the back.
– Attach the bow to the gift using tape or glue for a secure hold.
What you need:
– Heavy-weight craft paper or glitter paper
– Scissors
– Glue or glue dots
– Double-sided tape
– A short center strip or string to tie the middle
With these steps, you can craft a striking 3D bow in minutes.
17. Twisted Paper Bow

Twisted Paper Bow: Fresh Take on Gift Wrapping
You want a bow that makes a gift pop without a lot of work. The twisted paper bow does that. It has a playful look and goes on fast. Pick bright colors or bold patterns, and you’ll see the wrap come to life in seconds.
Materials you’ll need
– 6 to 8 paper strips, about 6 to 8 inches long and half an inch wide
– Scissors
– Glue or clear tape
– A small center piece, like a folded strip or dot of glue
How to make a twisted bow
1) Cut the strips to size. You can adjust to fit the gift.
2) Twist each strip tightly from end to end. Keep the twists neat.
3) Lay the twisted pieces in two small loops to form a bow shape. Lift and stack them lightly so they look balanced.
4) Secure the center with a dab of glue or a tiny piece of tape. Hold until it sticks.
5) Attach the bow to your gift with more tape or a small dab of glue. Adjust the loops if needed.
Tips for a bold look
– Mix colors for a brighter effect.
– Try patterned paper to add texture.
– Make sure the center is solid so the bow keeps its shape.
Where to use it
Perfect for kids’ gifts, birthday wraps, or holiday packages. It’s easy to replace a plain bow with this twist for a quick upgrade.
Next steps: grab scraps you have, and give this twist bow a try on your next wrap.
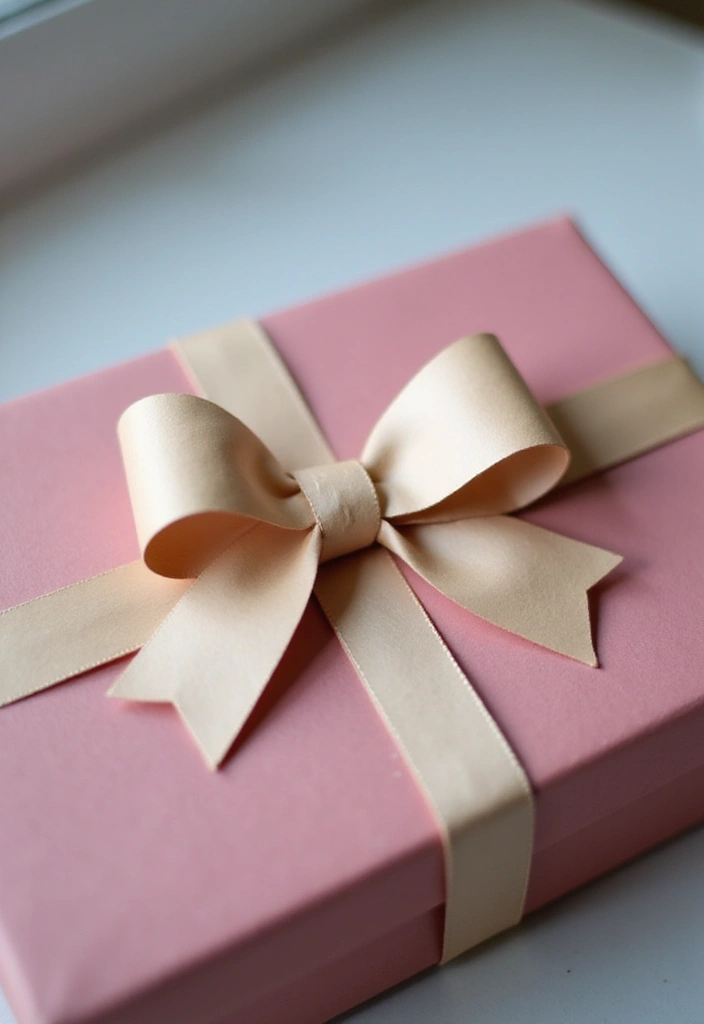
18. Minimalist Bow
Want a gift wrap that looks clean and classy without a lot of work? A minimalist bow does it. It uses a single strip of paper, one simple loop, and a tight center hold. The result is tidy, stylish, and easy to make.
Minimalist Tips:
– Use solid colors to keep the look chic.
– Pair the bow with bold wrapping paper so it shines.
– Try textured or kraft paper for extra depth.
Here is how to make it.
– Cut one long strip of paper. For most gifts, about 2 inches wide and long enough to wrap around once plus extra for the loop works well.
– Form a clean loop in the center. Pinch the middle to hold the loop steady.
– Bring the strip ends behind the bow and secure with tape or a dab of glue at the back.
– If needed, trim the ends and press the center flat so nothing peeks out.
Why this style works: it draws the eye without shouting. The loop sits flat on the lid, giving a calm, modern look.
Common questions: Will it stay on if the paper is thin? Use a stiffer strip or double layer. It should hold with a small dab of glue.
Next steps: pick colors you love and wrap two gifts to practice.
19. Festive Tissue Paper Bow
Stuck on a last-minute gift? A festive tissue paper bow can fix it. It adds color fast without extra weight. Here is how you build it:
– Layer several sheets of tissue paper. Stack 3 to 5 sheets until you like the thickness.
– Align the edges. Place a twist tie, elastic, or a small strip of tape at the center.
– Gather the center and pinch tight. Fan out the layers to form a round, airy bow.
– Fluff the ends. Let the layers spread into soft petals.
– Attach to your gift. The bow stays light on any wrapping paper or gift bag.
Tissue Paper Tips:
– Use bright colors for a bold look.
– Try two or three hues for a playful vibe.
– Keep the tissue thin enough to puff but sturdy enough to hold its shape.
This bow brings a bright pop to gift wrapping. It draws the eye and adds a touch of care without heavy ribbon. Use it for holidays, birthdays, or any cheerful moment. Try metallic or matte finishes to match your wrap. Next steps: experiment with glitter tissue or a small tag in the center for a personal touch.
20. Bow with Beads

Want a simple way to add sparkle to gift wrap? A beaded bow does it in an instant. It starts as a plain paper bow, then beads are placed at the center or along the edges of the loops. The beads catch light as you tilt the package. The result is a chic finish for celebrations or special occasions.
Here is why it works. Beads add texture and shine with almost no extra work. They stay in place once glued or sewn on.
Let’s break it down. Next steps:
– Create a basic bow from your wrapping paper.
– Plan where beads go: center knot, or along the top edges of the loops.
– Attach beads with clear craft glue for a clean look, or stitch them with fine thread for extra security.
– Let the glue dry before you handle the bow or wrap the gift.
Beading Tips:
– Choose beads that match or pop against your paper.
– Mix bead sizes for a layered texture.
– Secure each bead firmly so nothing loosens in transit.
– For extra shine, try metallic or glass beads on light papers.
This beaded paper bow adds a glow to any gift. Use it on birthday packages, holiday presents, or wedding favors. It works best with a simple bow shape and a calm background color.
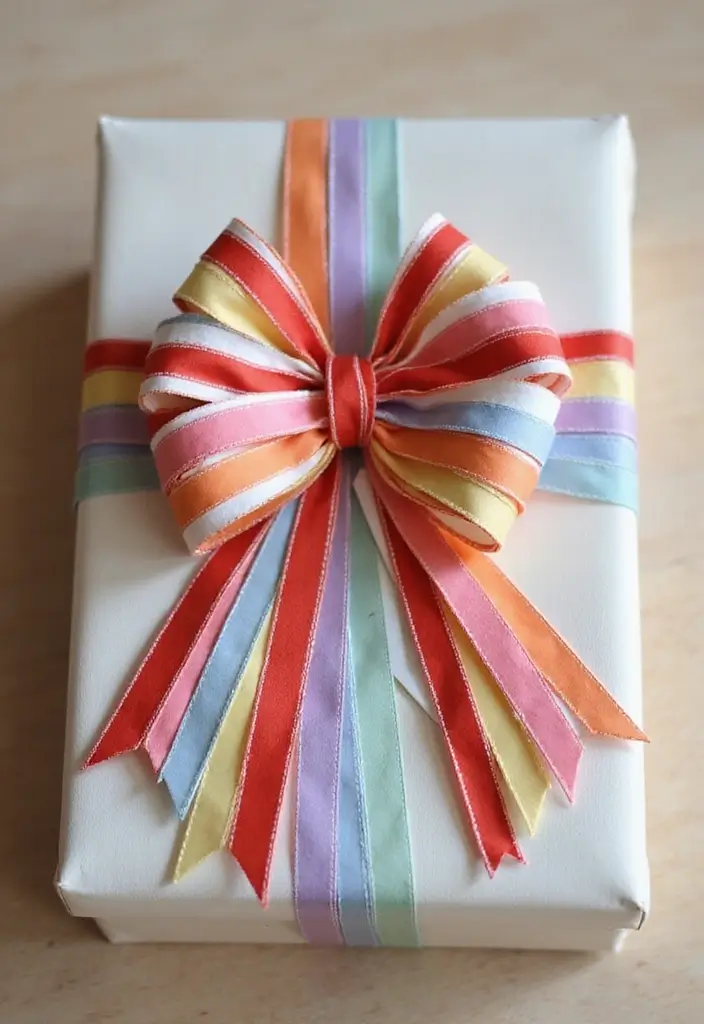
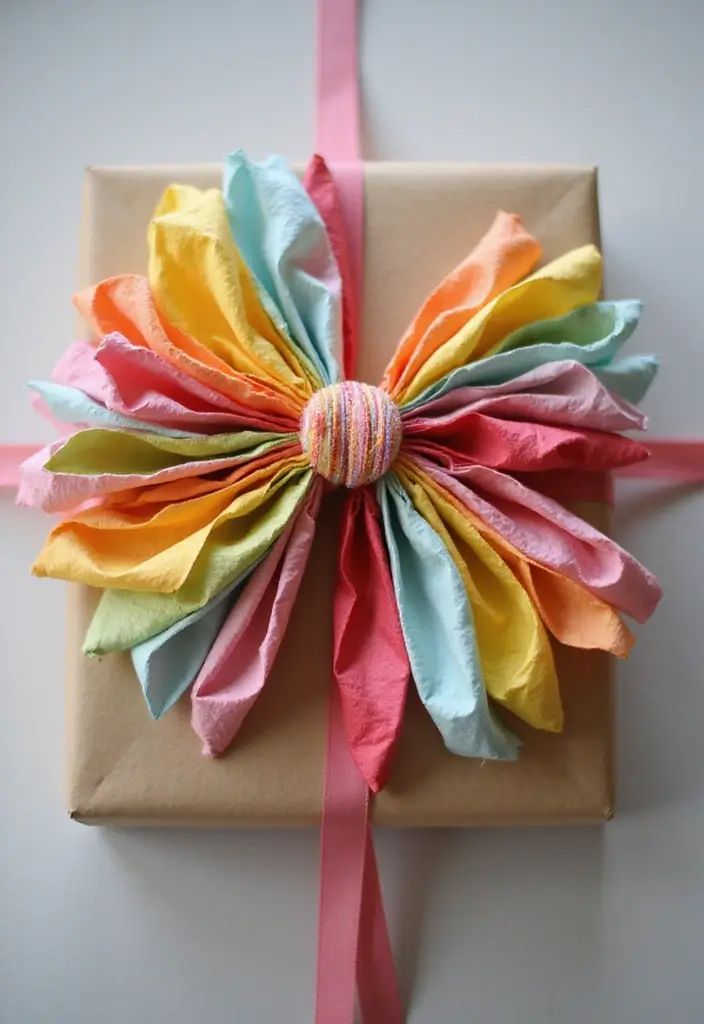
21. Rainbow Bow
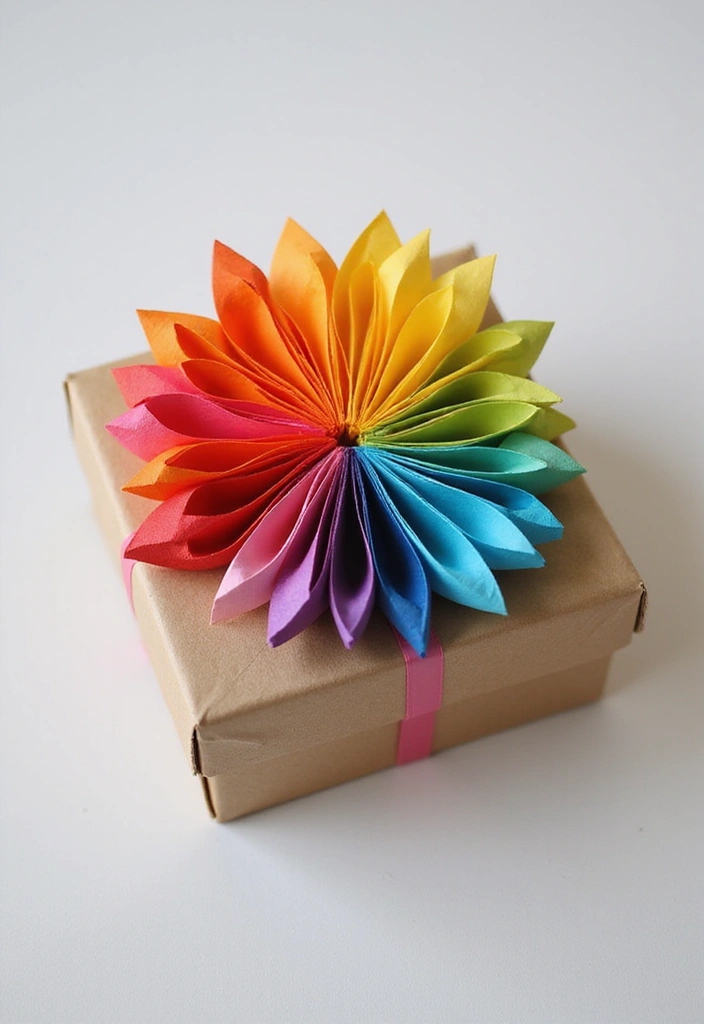
Here is why a rainbow bow works for gift wrap: the bright stripes draw the eye and lift any present. You’ll make it from a few simple paper strips, but it looks like a small rainbow crown on your package.
Materials:
– colored paper strips in rainbow colors
– scissors
– glue
– a small fastener or tape
– optional glitter
How to make it:
1) Cut strips about 1 inch wide and 6 inches long.
2) Line them up in rainbow order: red, orange, yellow, green, blue, indigo, violet.
3) Glue all strips at the center. Press until they hold.
4) Fan the layers outward so the colors show in a circle.
5) Tie the bow with a tiny strip of tape or a small fastener at the center.
Next steps:
– For a softer look, use lighter to darker shades of the same color.
– Add glitter or metallic paper for extra shine.
– This bow works well on kids’ gifts and party presents.
This rainbow bow adds color and joy to any package, and you can make it in minutes with just a few simple tools.
Want a bigger bow? use longer strips and fewer layers. Try foil or patterned papers for a bold look.
22. DIY Twine Bow
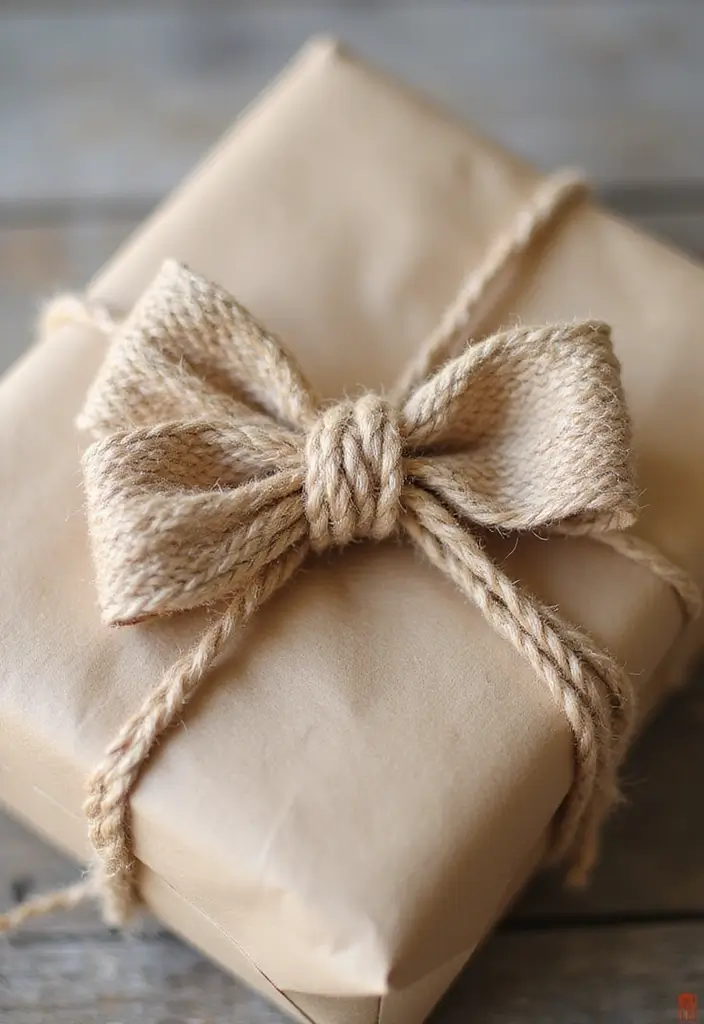
If you want a simple, rustic touch for gift wrap, a DIY twine bow is your best friend. Pick jute or burlap twine. Wrap the twine around the gift a few times to make a natural band. Then tie a bow on top. The result is warm, handmade, and ready to wow.
Here is how you do it in minutes:
1) Cut a piece of twine about 24 to 30 inches long, depending on your gift size.
2) Place the twine under the gift and bring the ends up over the top so two strands meet in the middle.
3) Tie a snug knot in the center and pull tight.
4) Form two loops with the ends. Cross one loop over the other and pull it through the center to make a bow.
5) Adjust the loops and trim the tails at a slight angle for a clean finish.
Twine Tips:
– Perfect for adding a natural touch to any gift.
– Pair with recycled wrapping paper for an eco-friendly look.
– Add small embellishments like dried flowers or a tiny pinecone for extra charm.
This style works especially well for housewarming gifts or rustic-themed events. You get a cozy, down-to-earth presentation without extra tape or fuss.
23. Sweet Candy Bow
Want a gift bow that looks playful and sweet? The Sweet Candy Bow gives a candy-wrapped look fast. It comes from a simple twist of paper ends. You can make it with any paper you have, even leftover gift wrap scraps.
Here is how to make it:
– Cut a rectangle of paper in the size you want for your bow.
– Fill the center with a bit of filler. Tissue, a small candy, or a soft pom-pom work well.
– Twist both ends toward the center until they meet.
– If you like, press the sides a little so the bow looks full. Add a dab of glue or a tiny piece of tape to keep it in place.
Filling Ideas:
– Colorful tissue in bright shades for a candy look.
– Tiny non edible treats or wrapped candies (if you’re sure they stay clean).
– Confetti, beads, or small foam pieces to add texture.
Why this bow shines: it’s quick, lightweight, and easy to customize with your favorite colors. It adds a playful pop to plain gift wrap without needing special tools. Use bold combos like pink and yellow or blue and lime for a fresh, festively sweet vibe.
Next steps: try two colors on one bow to mimic a striped candy wrap. Attach with a touch of tape at the corner of the box for a neat finish.
24. Vintage Lace Bow
You want a gift wrap that feels special. A vintage lace bow does that with quiet elegance. Use lace fabric or lace-patterned paper to create a soft, refined look. Layer it on a solid or textured base to make the lace stand out.
Materials
– Lace fabric or lace-patterned paper
– Backing paper in a neutral color
– Scissors, glue or double-sided tape
– Small pearls, beads, or a tiny ribbon (optional)
– Thin craft wire or string for extra anchor (optional)
How to make it
– Cut a lace strip about 12 to 14 inches long, depending on how big you want the bow.
– Fold and loop the lace to form a classic bow shape. Pinch the center and secure with a dab of glue.
– Attach a neutral backing piece behind the lace. This keeps the bow steady on the gift.
– Place the bow on a neutral base first, then add layers if you like. A cream or taupe background makes the lace pop.
– Add a small pearl or bead at the knot for a classic touch. If you prefer a simpler look, skip extras.
– Fix the bow to the package with a little tape or by tying a thin string around the gift.
Pro tips
– Neutral tones stay timeless and versatile.
– Use lace paper for a crisp look on small gifts.
– This bow works well for bridal showers or anniversaries.
Quick note
– Lace can fray on fabric. Trim cleanly and handle gently.
25. Butterfly Bow

Need a playful touch for gift wrap? A butterfly bow makes a plain package feel special. You can make this with simple paper.
Materials – Simple paper, glue or tape, a short length of wire or a pipe cleaner, and string.
– Cut two paper shapes that look like butterfly wings. Pick two colors that pop. Glue them in the center to form a bow.
– Make the butterfly body with a short length of wire or a pipe cleaner. Wrap it around the center to hold the bow. Flatten the wings.
– Add antennae. Use thin twine or string. Attach loops at the ends.
– Finish with flair. Draw dots or add sequins.
– Choose colors that fit the gift. Neon tones work for kids, pastel shades suit spring, and metallics suit weddings.
This bow feels light and easy to make. It looks unique and adds texture to the wrap. It is sturdy enough to stay on the package with tape or glue.
Next steps: try different wing shapes or add a crystal bead in the center for extra pop. With practice, you can craft styles in minutes.
Your gifts will glow with this tiny butterfly. Print a few for a party. Try it on different wrap papers.
26. Tulle Bow
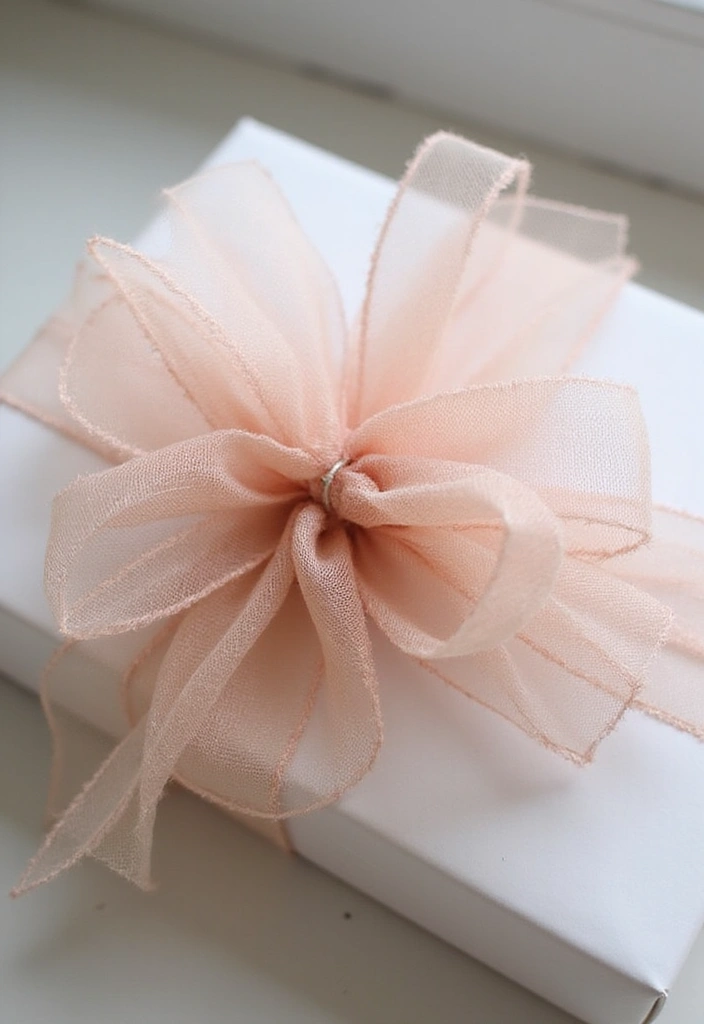
A soft bow can lift any gift. A tulle bow adds air and light. It looks delicate yet festive. You can use it for wedding gifts, baby showers, or a special treat for a friend.
Here is how to make one.
– What you need
– Tulle fabric, cut into a length about 18 to 24 inches long.
– A ribbon or string to secure the center.
– Scissors to cut the fabric.
– How to make it
– Cut a strip of tulle to your chosen length.
– Fold it in the middle so you have two layers.
– Pinch the center and pull the edges to form a loop.
– Tie a ribbon or string around the middle to hold the shape.
– Trim any uneven edges for a clean look.
– Styling tips
– Choose soft pastels for a gentle, romantic vibe.
– Layer two or three colors of tulle for more depth.
– Pair with a satin ribbon for a classic finish.
– These bows shine at weddings and baby showers, and they feel light on the present.
This bow adds an ethereal, elegant touch to your gift wrap. It gives you a big effect with simple steps.
Try it on gift boxes, jars, or even as a hair accent.
Store extra tulle bows flat in a box so they stay fluffy.
27. Felt Bow
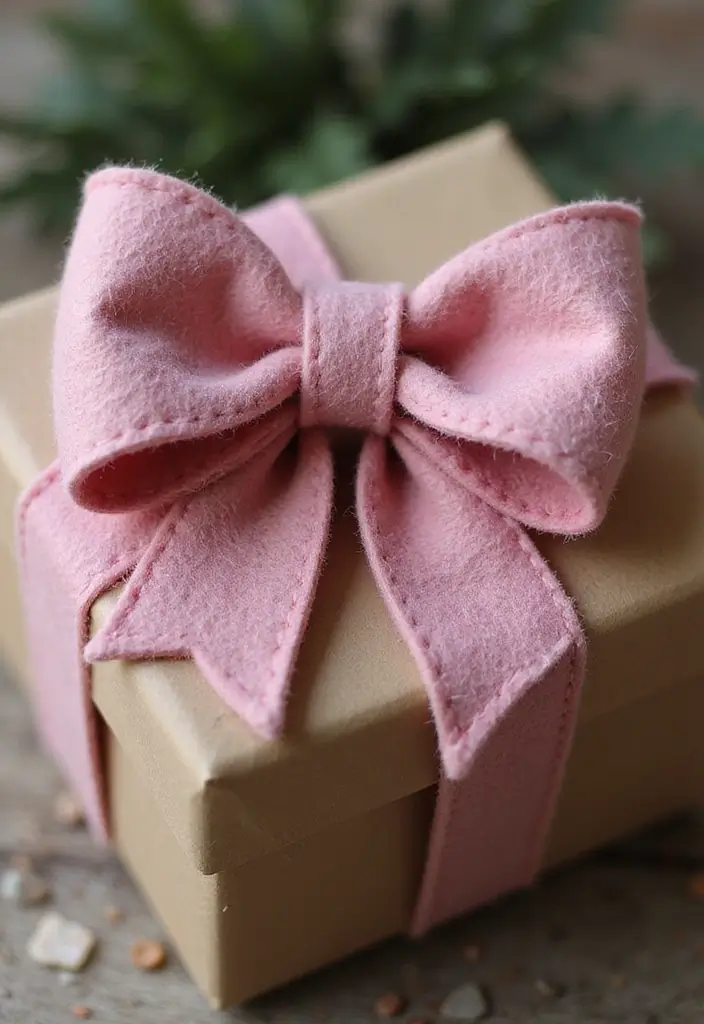
You want a bow that adds warmth to a gift. Felt can give you that cozy look. It stays thick and holds its shape well.
Here is why felt works for a bow on gifts. Cut simple shapes from felt, then glue them into a classic bow. A pair of loops with a small center knot makes a tidy, friendly look.
Next steps to make yours:
– Pick two colors that pop. A light pair of loops with a dark center knot catches the eye.
– Cut two identical oval shapes for the loops and a narrow strip for the center.
– Glue the loops together, stack the center strip, then press and hold until it sticks. Let it dry a minute.
– Attach the bow to your gift with a dab of glue or a tiny pin if you want to reuse it.
Felt Tips:
– Use contrasting colors to make your bow stand out.
– Add a button or a bead to give it a tiny personal touch.
– Felt bows are great for kids’ gifts or homemade treats.
This bow brings warmth and charm to your package. It’s quick to make, easy to adapt, and adds a soft, handmade feel to any gift.
Try a mini bow on a card too.
28. Balloon Bow

You want a gift that stands out without extra fuss. A balloon bow can give that big, playful touch. It uses paper to make a bow shaped like a puffed balloon. Pick bright colors or shiny paper for a party feel.
Here is why it works. It creates a 3D look with simple folds.
Next steps help you build it quickly.
Materials
– sturdy cardstock or craft paper
– scissors
– clear glue or tape
– a thin ribbon to attach the bow
– optional: metallic or patterned paper for extra shine
Steps
1) Cut a 1-inch by 6-inch strip of paper.
2) Curl one end to form a small round knot.
3) Fold the strip to create two rounded lobes on opposite sides.
4) Glue the lobes together so they bubble into a balloon shape.
5) Add a small piece of paper to resemble a knot, then glue on the ribbon.
6) Attach the bow to your gift wrap with the ribbon.
Design ideas
– Use shiny or satin paper to boost the glow.
– Pair with balloon-themed wrapping paper for a finished look.
– Layer a second, smaller balloon bow for extra depth.
This balloon bow adds a burst of joy to any gift and makes wrapping feel like a mini celebration.
29. Jewel-Toned Bow
Want a bow that looks like a tiny gem on your gift? A jewel-toned bow adds depth and a hint of luxury to any wrap. Pick deep hues like ruby red, emerald green, sapphire blue, or amethyst purple. Cut several narrow strips from jewel-toned paper. Layer and twist them into a classic bow shape. Secure the center with a dab of glue or a small brad. Gently fan the loops so they stand out.
Here is why this bow works:
– It looks rich without a lot of work.
– The layered strips catch light and shine.
– It pairs well with many wraps and ribbons.
Next steps to nail the look:
1) Build two or three long loops from your strips, then knot in the middle.
2) Save the center with a tiny glue dot so the bow keeps its shape.
3) Puff the outer loops a bit for glow.
Luxurious Touches:
– Pair with metallic or black wrapping paper for a striking contrast.
– Add gold or silver accents to the center or edges.
– This bow style fits formal gifts or upscale events.
The jewel-toned bow makes any gift feel special. Try it on a present this week and notice the extra care it adds to your wrap. It’s a small touch that makes a big impression.
30. Chocolate Bow
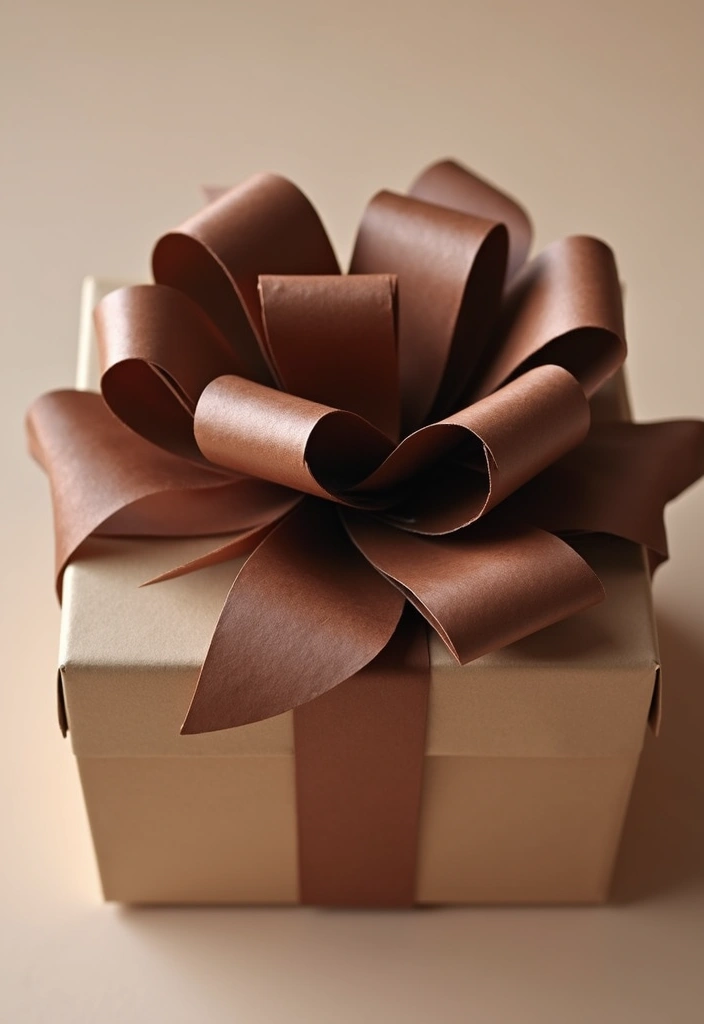
Want a gift bow that looks like a treat? A chocolate bow made from brown paper adds a tasty vibe to any present.
What you need
– Brown wrapping paper or kraft paper
– Scissors
– Tape or glue
– Optional: clear gloss spray for shine
If you want a richer look, pick a darker chocolate shade or add a thin light center band.
How to make it
– You cut 6 slim strips about 12 inches long.
– You roll each strip into a tight, chocolate-like tube.
– You place two tubes side by side to form the bow top, then twist in two more for depth.
– You secure the center with a small dab of glue or a bit of tape.
– If you want a glossy finish, you spray lightly and let it dry.
– You can gently shape the loops with your fingers to balance the bow.
Here is why it works
– It mimics real chocolate without melting on your gift.
– The brown shade reads as chocolate to the eye and delight to the touch.
– It suits dessert-themed gifts, birthdays, or romantic surprises.
This quick bow also stacks well with other wrapping ideas too.
Next steps
– Try this bow on a gift bag or a sturdy box.
– Add a dessert tag or edible ribbon for extra charm.
Conclusion

Crafting paper bows is not just about function; it’s an art that adds personality to your gifts. Whether you opt for classic, eco-friendly, or whimsical designs, each bow speaks volumes about the care and effort you put into your presents. So next time you’re wrapping a gift, remember these creative paper bow crafts that will make your presents stand out!
With these 30 ideas, you have the perfect arsenal of DIY gift decorations at your fingertips. The best part? You can enjoy the process while being eco-conscious. Happy crafting!
Note: We aim to provide accurate product links, but some may occasionally expire or become unavailable. If this happens, please search directly on Amazon for the product or a suitable alternative.
This post contains Amazon affiliate links, meaning I may earn a small commission if you purchase through my links, at no extra cost to you.
Related Topics