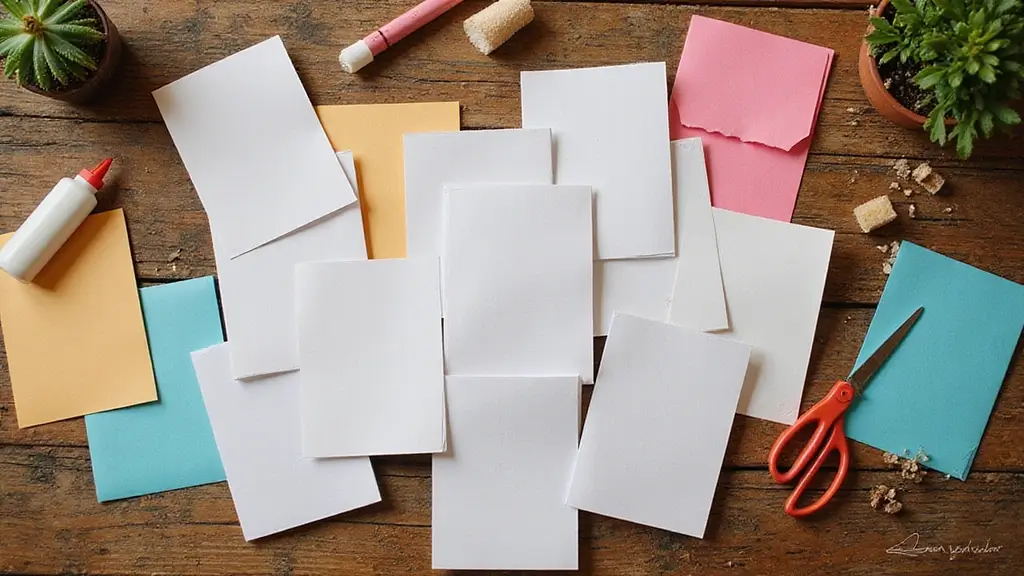
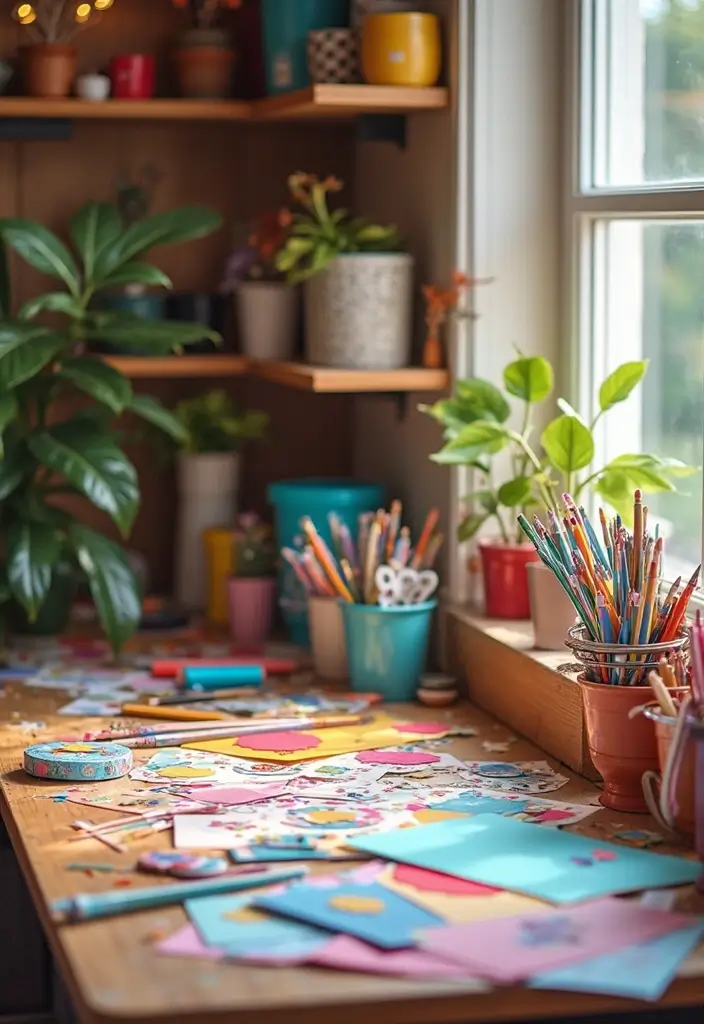
I put this together because I wanted quick, satisfying crafts you can finish this weekend. Lately I crave simple projects that use just paper and a few common supplies. Paper is cheap, forgiving, and endlessly versatile. You can turn a single sheet into art, gift tags, or a tiny piece of decor in no time.
If you love easy projects that fit a busy life, this one’s for you. If you are a parent, student, or someone who enjoys a calm, creative break, you will find something you can make at home. This guide focuses on clear ideas that use scraps, glue, scissors, and a marker.
Here are 27 Easy Paper Crafts DIY Ideas That Anyone Can Make at Home. You will find options for greeting cards, party banners, gift wrap accents, mini organizers, and playful origami figures. Each idea stays beginner friendly and uses affordable supplies like colored paper, tape, scissors, and a pencil.
Every idea includes simple steps, a quick materials list, and tips to customize. You can swap in magazines, old wrapping paper, or scrap paper to suit what you have. These projects are easy to pick up and perfect for a fast, satisfying finish.
These ideas fit current trends without the excess. Think upcycled look, bold color pops, and clean shapes that match many homes. Use them to brighten a birthday party, decorate a study desk, or create thoughtful, handmade gifts.
Take it one idea at a time. Start with a project that matches your supplies, set up a small station, and you are on your way. You will gain practical skills you can reuse for other crafts and you will see how fun paper can be.
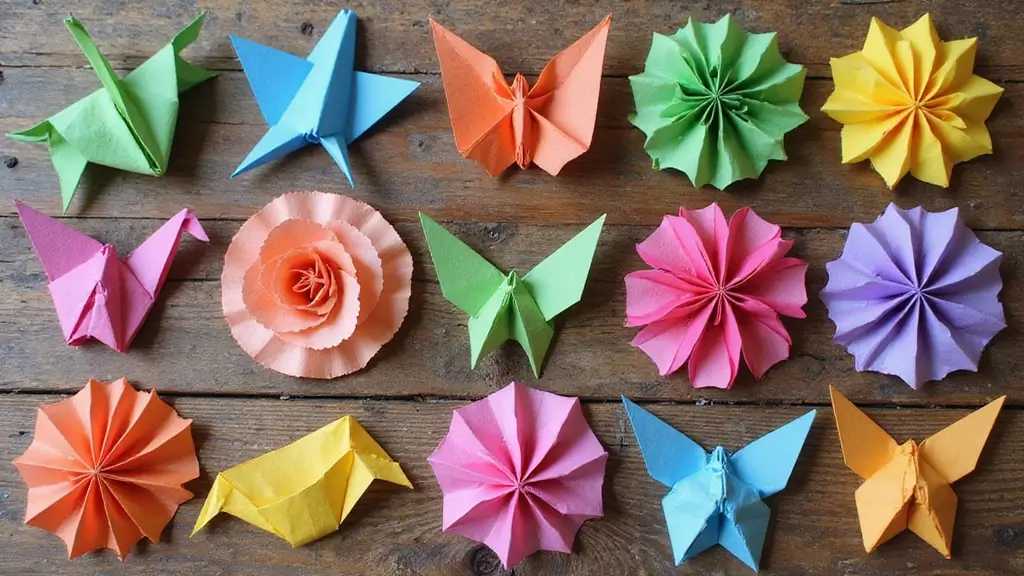
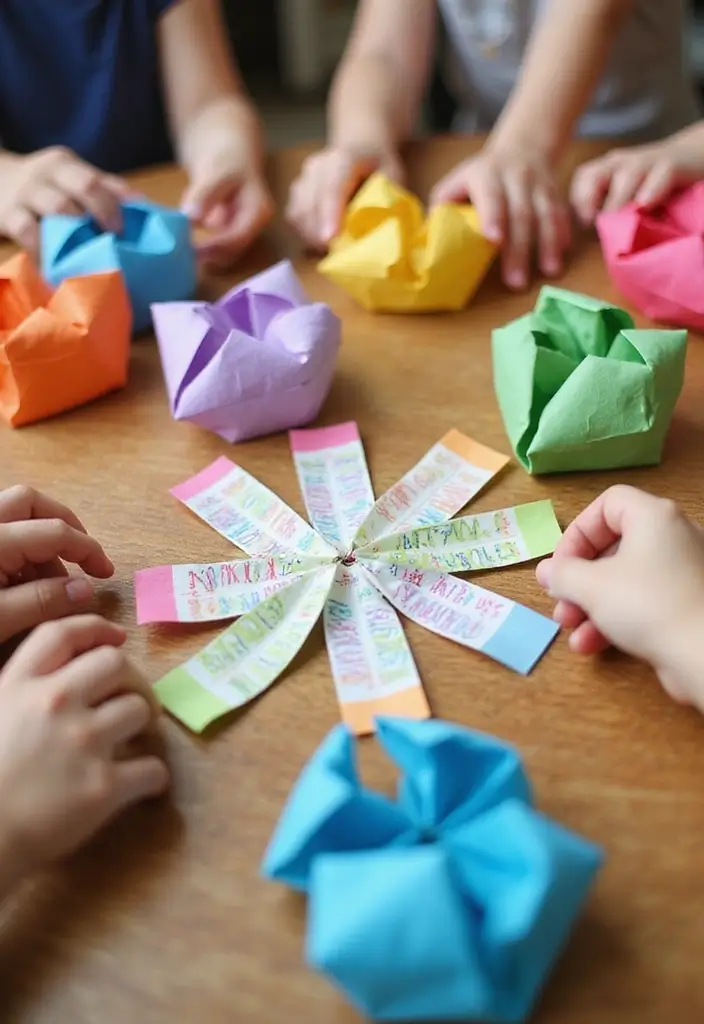
1. Origami Animals: Fold Your Way to Fun

Origami Animals: Fold Your Way to Fun
You want a simple, quiet project that sparks imagination. Origami fits that need. A flat square becomes a crane, a frog, or a tiny cat with just a few careful folds. The joy comes as a sheet changes shape right before your eyes.
Here is why it works: you control each crease, you watch patterns appear, and you can do it with scraps or new paper. Start with a square and a beginner-friendly model. For beginners, a six-by-six inch sheet is a good size. Use bright origami paper for crisp colors, or repurpose old magazines for a quirky, vintage look. You don’t have to cut at all.
Next steps: find a simple guide that shows two easy designs. Pick one and master the folds before moving on. After you feel steady, try different sizes or colors to grow your mini zoo.
– Tip: take your time with every fold to keep lines neat.
– Tip: invite a friend for an origami night and trade ideas.
– Tip: vary the paper size to create a family of animals.
With practice, your models become quicker and the edges stay neat. It’s a calm, hands-on hobby that fits at home, in the classroom, or on a kitchen table.
2. DIY Paper Flowers: Blooming Beauties

You want decor that lasts and feels fresh. DIY paper flowers give you that without watering or upkeep. You can use tissue paper, lightweight cardstock, or recycled gift wrap for a quick start.
Here is why they work well in any room. They travel well, sit on a table, or cling to a wall. They are cheap to make and easy to mix into your color plan.
– Materials you’ll need: tissue paper or thin cardstock, scissors, white glue or glue stick, a thin stem like floral wire or a pipe cleaner, tape, a pencil for curling edges, optional flower templates.
– Flower choices: roses, daisies, or peonies. Templates online help you cut clean shapes.
– Quick tips: pick a color plan first. Blend two or three shades for depth.
Let’s break it down. Step by step:
1) Cut petals in layers. Use a simple template or freehand shapes. Aim for 5 to 8 layers per flower.
2) Assemble. Glue the layers in a circular pattern, slightly offset for fullness.
3) Make a stem. Tape a piece of wire or a pipe cleaner to the back. Cover with floral tape.
4) Finish. Curl the edges with a pencil to add life.
Next steps: ideas for display.
– Put a cluster in a vase for a centerpiece.
– Create a paper flower wall by mounting blooms on a board or wall.
– Gift a small bouquet by tying stems with string.
Care and storage: keep them dry and flat if you plan to reuse. They can stay bright as long as you want.
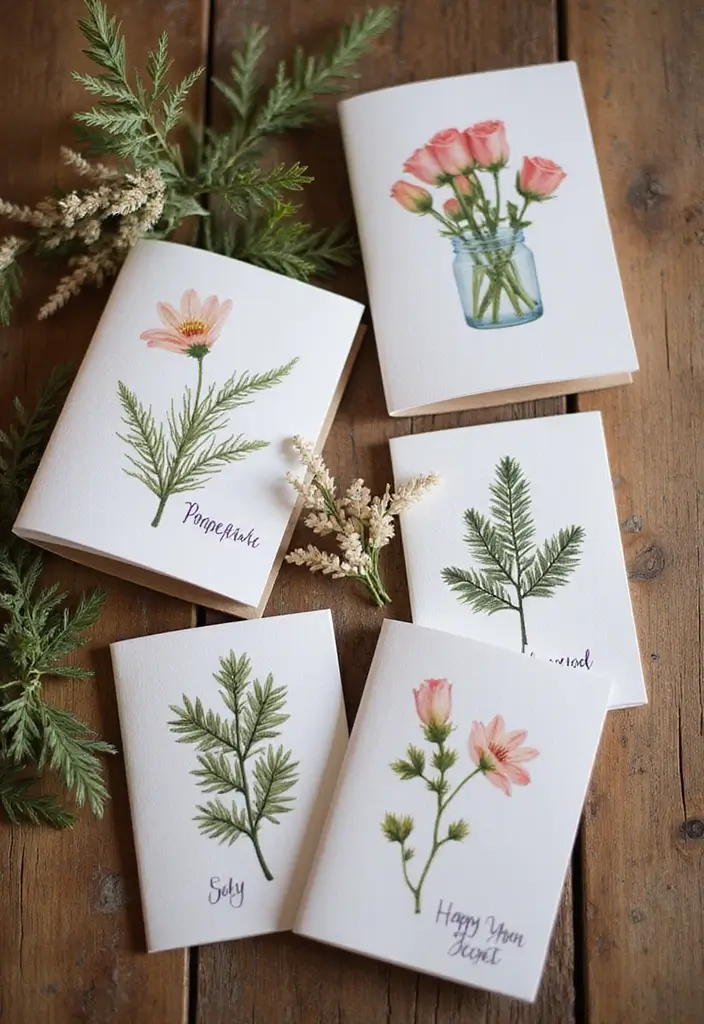
3. Homemade Greeting Cards: From Heart to Hand
– Materials Gather blank cards or cut cardstock, scissors, glue, markers, decorative paper, ribbon, and a few natural elements.
– Simple designs Start with a quick front design like a single doodle, a heart cut from colored paper, or a pressed flower.
– Plan your message Decide the occasion and note a short message to place inside.
– Layout tips Lay out on the table before glue to see how it looks.
– Eco option Use recycled paper and scraps to cut shapes and decorations.
– Personal style Let your style show, whether playful, elegant, bold, or minimalist.
– Practical ideas Keep a small stash of ready-to-go cards for last minute gifts.
– Finishing touch Sign your name, date it, and add a little doodle.
– Why it matters A handmade card makes any greeting feel warmer.
Here is a simple plan to finish one card this afternoon.
Choose a blank card and one color scheme.
Cut two or three shapes from scrap paper.
Glue them in a pleasing layout on the front.
Write a short note inside that fits the moment.
Let the glue dry and sign your name.
Store spare cards in a labeled box.
Keep a small stash ready for spontaneous, heartful gifts.
Your friends notice.
4. Paper Mache Art: Sculpt Your Imagination
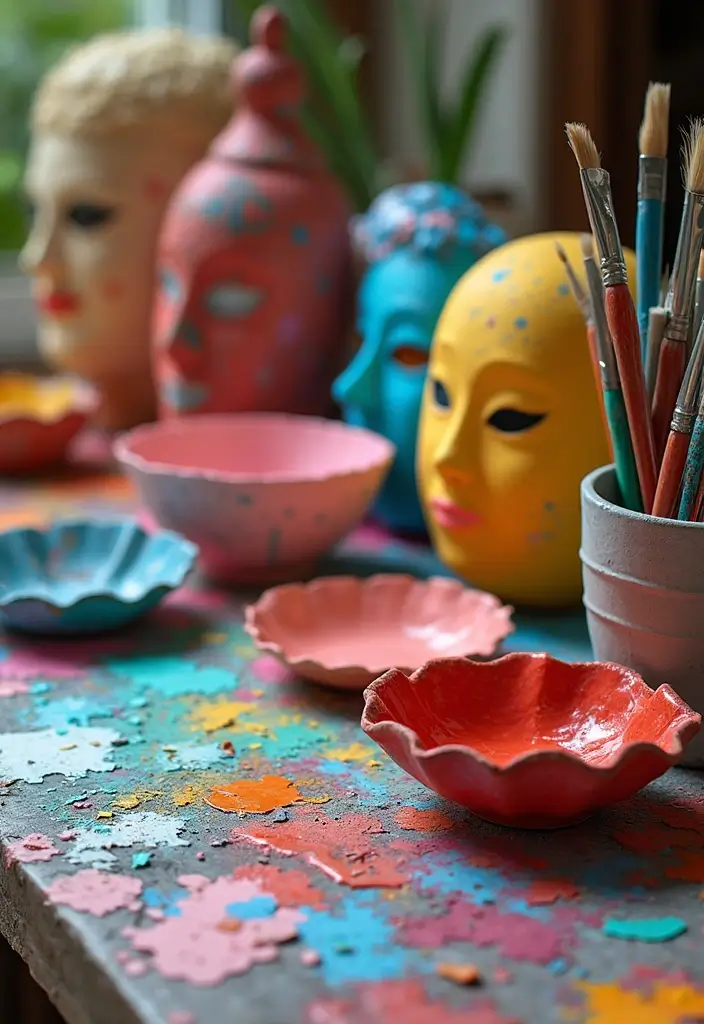
Paper Mache Art: Sculpt Your Imagination
Here is why this project fits your home craft plan. It turns simple scraps into bold 3D art. You can do it with stuff you already have.
What you need
– Newspaper strips
– Glue mix or flour-and-water paste
– A balloon, bowl, or foam mold
– Paints and brushes
How to build your piece
– Inflate a balloon or set a mold for the core.
– Tear strips, dip in glue, and press on.
– Add many coats for strength.
– Let each coat dry before adding more.
Finishing touches
– Paint with bright colors to bring the form to life.
– Add a sealant to keep it lasting.
– Glue on beads, glitter, or shells for texture.
Projects you can try
– A decorative bowl
– A wearable mask
– A small animal figure
Tips for durability
– Dry thoroughly between layers to avoid cracks.
– Smooth edges as you go for a clean look.
– Use clean glue and neat strips for a neat seam.
Next steps
Start small with a bowl or mask. Then grow to bigger sculptures as you gain confidence.
5. Paper Beads: Jewelry with a Twist

Here’s why you should try paper beads. They turn scrap paper into pretty, wearable jewelry you can make at home. Let’s break it down.
What you’ll need
– Paper strips from magazines or flyers
– Toothpicks
– Clear glue
– Scissors
– Clear varnish or finish
First, gather scraps. Cut strips from magazines, flyers, or old books. Aim for 1/4 inch wide and 6 to 8 inches long. That size is easy to roll and shows color.
Next, roll. Hold a strip at one corner and wind it tight around a toothpick. Keep the wrap snug. When you reach the end, dab a thin line of glue on the tip and press. Let it dry a minute.
Tip: trim any uneven edges so the bead sits flat. A flat base helps it keep its shape as it dries.
Make a batch in several colors. When you have enough beads, string them to create a necklace, bracelet, or earrings. For gloss, brush on clear varnish and dry completely. If you prefer a matte look, skip the varnish.
Mix styles by pairing paper beads with natural materials like wood or stone. It adds warmth and texture.
Here is how to get the best results:
– Use different papers for varied tones
– Coat with two thin finishes for durability
– Store beads in a dry place to avoid warping
– Smooth edges with a soft brush before the finish dries
Next steps: set up a small kit, pick a day, and make a few pieces to wear or gift.
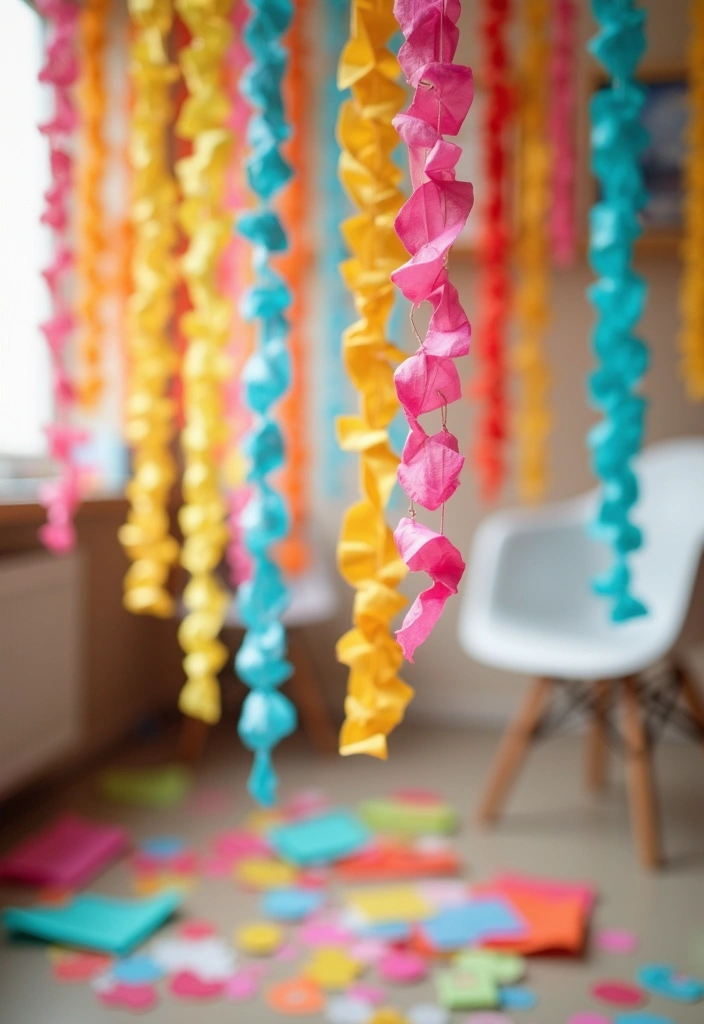
6. Decorative Paper Garland: Festive Flair

You want a quick glow of cheer without a big cost. A simple paper garland can do that. It looks cozy and invites smiles.
Here is why it works. Color, texture, and movement catch the eye. It is easy to tailor for any space, season, or party.
What you need:
– colorful paper in your favorite hues
– scissors or a craft punch
– twine, string, or thin ribbon
– tape or glue for securing
How to make it:
– Cut shapes you like. Hearts, stars, circles, or seasonal motifs. Use sturdy paper for clean edges.
– Stack shapes to make layered designs. Vary sizes for depth.
– Punch a small hole near the top and thread each piece on the string. Space shapes about 2 to 3 inches apart.
Tips to boost the look:
– Use double sided tape to reinforce if pieces slip.
– Add glitter paper for a sparkly touch.
– Mix shapes and colors for a playful feel.
– Tie the garland into a loop for a window or doorway and hang it across walls or ceilings.
Next steps:
– Decide on a color theme now.
– Plan where to hang it. A hallway, entry, or party corner.
End result: a festive, reusable decoration you can pack away and use again.
7. Paper Collage Art: A Creative Mash-Up
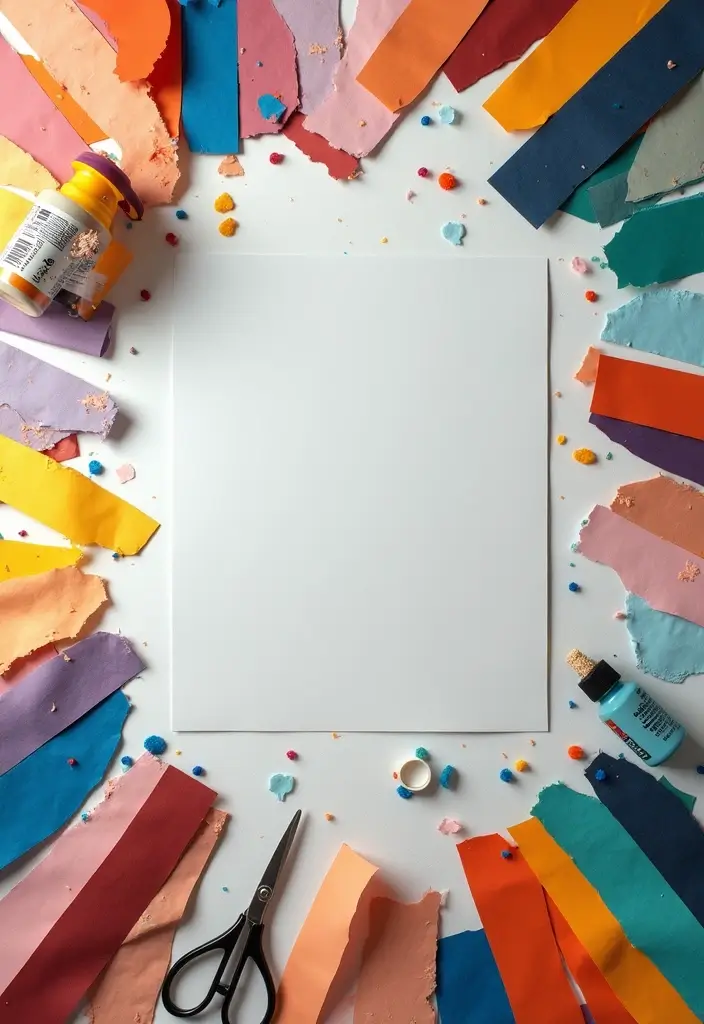
Paper collage art helps you turn scraps into a single, eye catching piece. You mix different papers, textures, and colors to tell a small story. It’s a playful way to make art that looks unique every time.
What you need
– Scraps from magazines, greeting cards, colored paper, or fabric bits
– A sturdy base such as canvas, poster board, or thick cardboard
– Glue that dries clear, scissors, and a pencil
– Optional touches: stickers, photos, fabric swatches, or dried leaves
Let’s break it down
1) Pick a theme or mood. Think bright, calm, or bold. 2) Cut shapes in different sizes. Try circles, squares, and freeform turns. 3) Lay out shapes on the base without glue first. Move pieces until the arrangement feels right. 4) Glue from large to small. Press each piece flat so it won’t bubble. 5) Layer and adjust to add texture. Add a few pieces on top for depth. 6) Finish with a personal touch. Small mementos or favorite colors make it yours.
Tips for depth and durability
– Layer papers at varying angles to create interest.
– Use thicker pieces for the foreground and lighter ones in the back.
– Press with a clean weight while the glue dries.
– If you want a smooth, lasting look, seal lightly with a gentle spray or frame the piece.
Common questions
– How do I keep edges from curling? Use a firm base and press every piece well.
– How should I store a finished collage? Keep it flat and away from humidity.
Next steps
Give this mash up a try with your own mix of papers. You’ll see how easy it is to craft something personal and visually satisfying.
8. Paper Cup Crafts: Fun and Functional

You want quick, affordable crafts that kids can enjoy. Paper cups fit that need. They’re cheap, easy to find, and easy to customize. With a splash of paint, a roll of washi tape, and a dab of glue, a plain cup becomes something playful. You can make puppet characters, tiny planters, or simple storage cups for your desk. These ideas stay friendly for rainy days or busy playdates.
– Eco twist: Use biodegradable cups for a greener option that’s kind to the planet.
– Puppet cast: Build a whole crew of cup characters for a mini show.
– Hanging fun: Tie lightweight string to cups to make a bright mobile or floating banner.
Here is how to start and finish fast. First, choose a cup and rinse it clean. Let it dry completely. Pick a look you like and gather your decorations. Paint the cup in a base color, then add details with markers, washi tape, or small bits of felt. Glue on googly eyes, yarn hair, or tiny noses to give each cup its personality. For planters, punch a small drainage hole and use a liner to keep soil from leaking. For puppets, glue a stick to the back to hold them like a character in a show. For storage cups, keep the rim smooth and use the inside for pens, brushes, or little tools.
Next steps are simple. Let the kids choose colors and shapes. Press items firmly so they stick. If you hang cups, space them evenly and test the balance. This keeps playtime fun and projects organized.
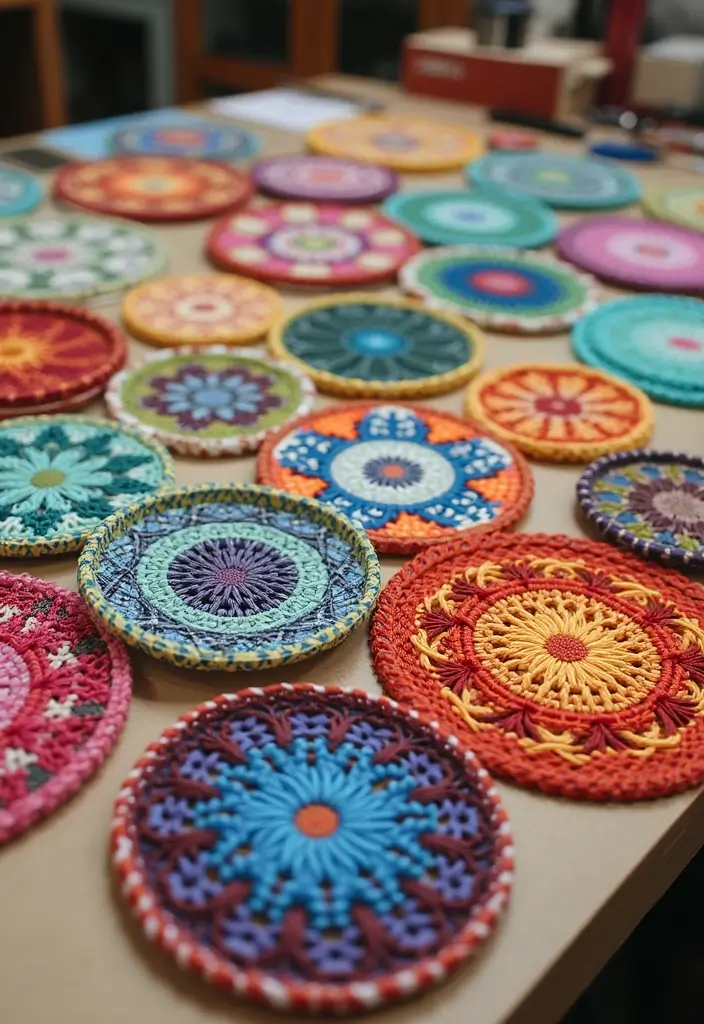
9. Paper Quilled Art: Swirls and Twirls
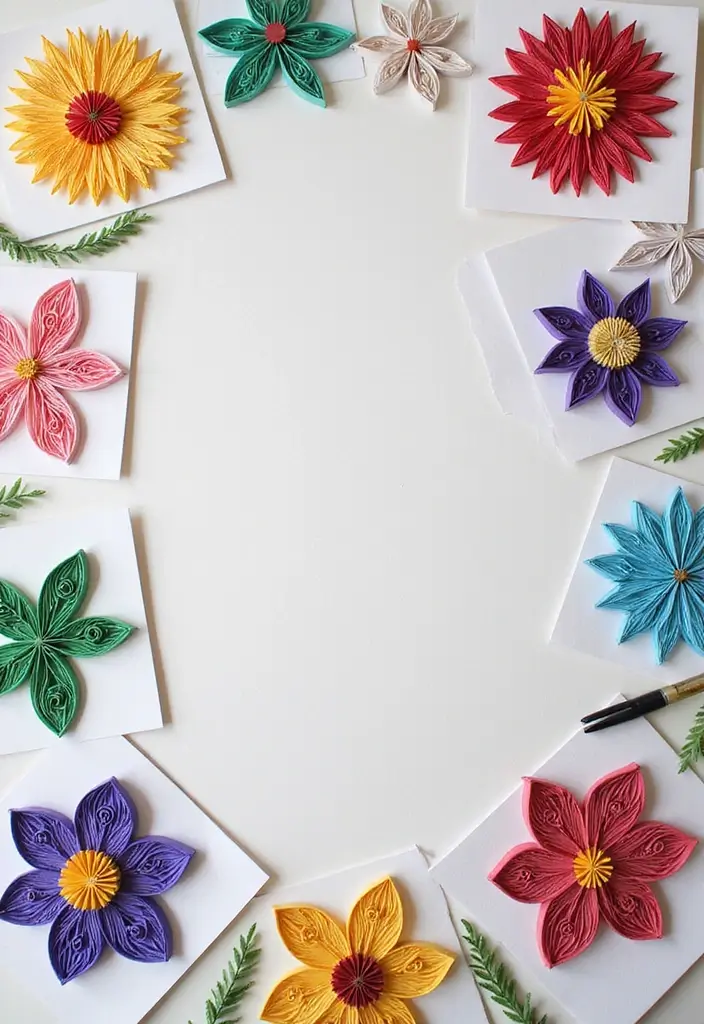
You want a craft that looks intricate but stays doable at home. Paper quilling turns simple strips into swirls, curls, and tiny flowers. It feels satisfying and lets your creativity shine in a small space.
What you’ll need
– Quilling strips in your favorite colors
– A quilling tool or just your fingers
– Glue and scissors
– A flat board, foam mat, or cork pinboard
– A small pin or needle for adjusting shapes
Quick start guide
– Begin with a basic loop. Pinch the end to create a teardrop and press it lightly so it holds.
– Curl a strip to make a tight coil. Gently pull the center to loosen it.
– Shape coils into petals, spirals, or waves. Build your design piece by piece on the board.
– When you like a shape, dab a tiny amount of glue on the back and secure it on the layout.
Putting it together
– Plan a simple image, like a flower or a swirl, on your board.
– Arrange each quilled piece until you love the look.
– Glue the pieces in place, then let it dry flat. Framed art or a greeting card both work well.
Tips for color and layout
– Choose 2–3 colors that contrast so shapes pop.
– Mix different strip widths for texture and depth.
– Keep a light touch; too much glue can smudge the paper.
Common questions
– How long does a small card take? About 30 to 60 minutes.
– Do I need fancy tools? Not really; fingers work, but a basic quilling tool speeds things up.
10. Paper Straws: More than Just Drinking
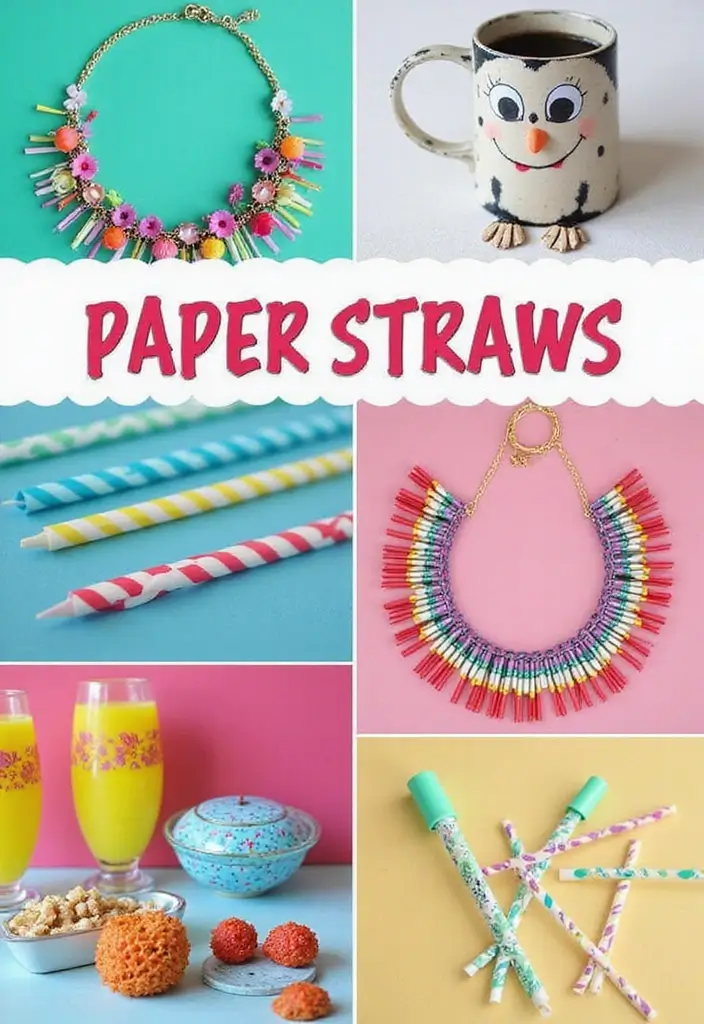
You want crafts that are cheap, quick, and kind to the planet. Paper straws fit. They stay sturdy enough for small projects and brighten your work with color. You can cut, bend, and glue them into new shapes. They pair well with other recycled pieces. Here is how to use them.
– Paper straw jewelry Cut straws into short rounds or tubes. Thread them on string to make bracelets, necklaces, or anklets. Layer different colors for a bold look. Seal with a bit of clear glue to keep beads in place.
– Decorative shapes Shape straws into stars, hearts, or geometric forms. Glue them to cards or picture frames for simple decorations. Create a mini wind chime by hanging shapes from a twig.
– Weaving texture Weave straw pieces with yarn or string for a textile feel. Use a small loom or a cardboard frame. Try a checkerboard or stripe pattern for a bright, tactile piece.
– Seasonal decor Craft small ornaments for holidays. Turn straws into Christmas trees or snowflakes. Add ribbon for hanging and a touch of sparkle with glue or glitter.
– Mix with other recyclables Combine straws with bottle caps, corks, or fabric scraps. This adds contrast and depth to your project.
– Tips and safety Use sharp scissors with care. Glue in small amounts and let it dry fully before handling.
Next steps: pick a quick idea, gather colors, and start cutting. You’ll see how fun eco-friendly crafts can be.
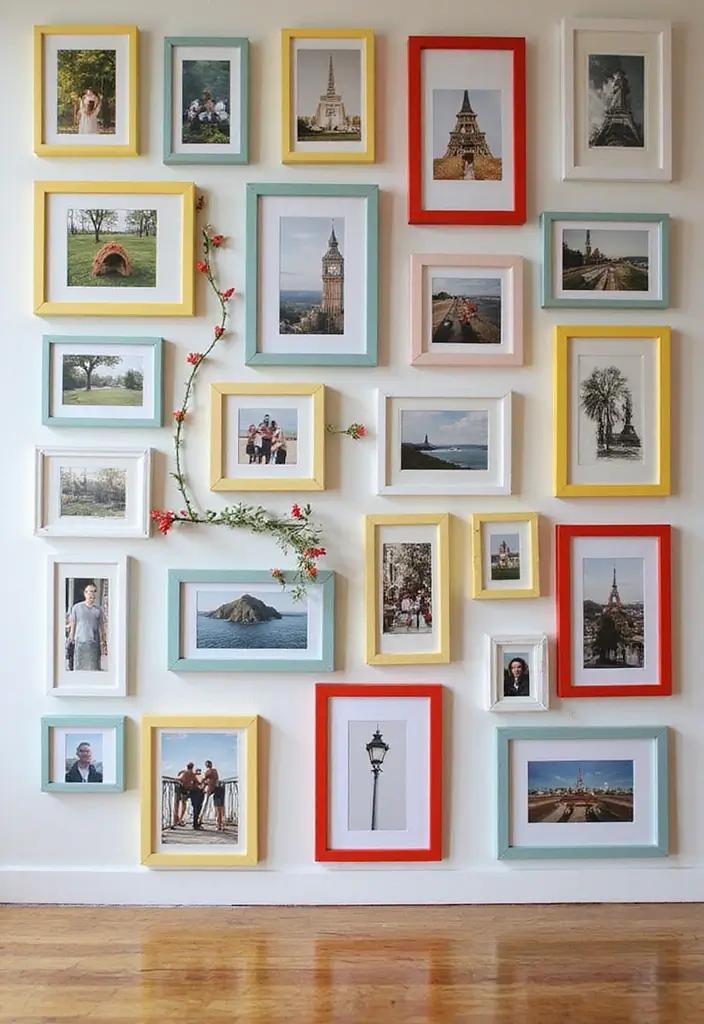
11. Photo Frames: Capture Memories Creatively

Want frames that fit your space and budget? Build your own photo frames from cardboard and simple craft supplies. These frames add a personal touch and protect your photos.
Materials you’ll need
– Cardboard or thick paper
– Scissors and a ruler
– Glue gun or craft glue
– Paints, markers, or colored paper
– Paper flowers, fabric scraps, or washi tape
– A backing board or extra cardboard to hold the photo
How to make a frame
– Use cardboard to cut out a frame shape. Keep a wide border for a bold look.
– Cut out a photo opening in the middle. This gives you a clear window for the picture.
– Glue the frame layers together. A glue gun works fast or use craft glue for a careful fit.
– Decorate the front. Paint, add paper flowers, or wrap fabric scraps for texture.
– Attach a backing and slip in your photo. A simple hinge or tape helps hold it in place.
– Add a wall hanger or stand. This lets you hang it or set it on a shelf.
Style ideas for a gallery wall
– Plan a set with different sizes to form a lively gallery.
– Lay the frames on the floor first to check spacing.
– Hang them with tape to test layout before putting nails in the wall.
Practical tips
– Let kids help with easy frames for their rooms.
– Use a hot glue gun for quick work and a clean finish.
– Keep frames light so they’re easy to move.
– Try bold colors for a playful space or neutral tones for a calm look.
12. Scrapbook Pages: Preserve Your Memories

You want to keep memories alive in a simple, easy way. Scrapbook pages let you tell your story with photos, words, and color. They save memories for years.
What you need
– Materials: acid-free cardstock, photos, patterned paper for backgrounds, stickers, ribbons, washi tape, glue, scissors, a pen for journaling, page protectors, an album.
– Optional accents: small tags and labels.
Plan your page
– Pick one memory: a season, a trip, or a special event.
– Decide the mood: bright and sunny or calm and cozy.
– Choose a layout that fits your photos. A grid works well.
Layout and decoration
– Place a main photo on the page first. Add a second photo if you want.
– Leave space for journaling to explain the moment.
– Use washi tape to make clean borders and little accents.
– Add a few embellishments, but avoid clutter.
Journaling and memory cues
– Write a short note about who is in the photo and what you felt.
– Add the date and place to help future you recall it.
– A tiny caption sticker can highlight a detail.
Themed pages and care
– Create pages by theme: seasons, trips, celebrations.
– Protect pages with sleeves and store them in a cool, dry place.
– Use acid-free glue and keep a tidy workspace.
Next steps
– Start with a small two-page spread.
– Try a travel diary page or a seasonal mood page.
– Scrapbooking should stay fun, not perfect.
13. Paper Coasters: Functional Art
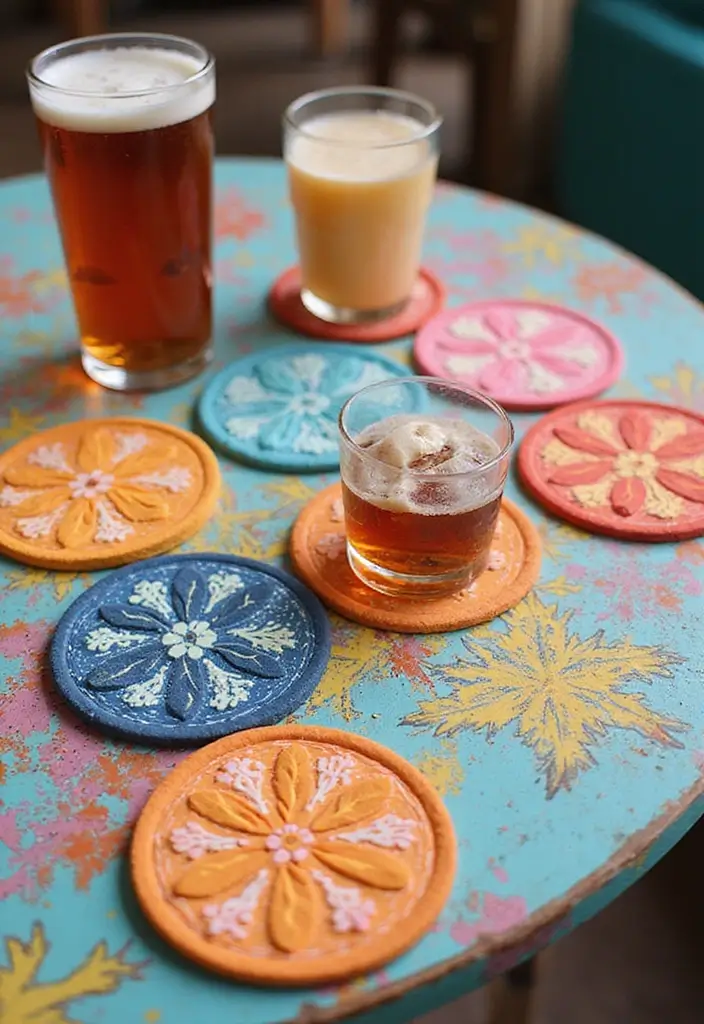
Paper Coasters: Functional Art
Need a simple way to guard your tables and add a touch of style. DIY paper coasters are fast, cheap, and useful. Here is why they shine. They soak up tiny drips, they wipe clean easily, and you can make them in any shade you want.
Here is how you make them:
– Start with thick paper or cardboard so they hold up.
– Cut circles or any shape you love.
– Decorate with paint, decoupage, or fabric scraps for texture.
– Seal with a coat of clear varnish or Mod Podge to keep moisture out.
– Attach a cork or felt backing to stop slides and protect surfaces.
– Try themed sets for seasons or moods, like greens for spring or golds for winter.
– Use recycled scraps to keep it eco friendly.
These little coasters bring more than color. They make a nice gift that says you cared. Next steps are simple: gather supplies, pick a shape, and start crafting.
Tips
– Standard size is about 3.5 inches across.
– Let each coat dry completely before adding the next.
– Keep extra backing circles on hand for quick updates.
– Store flat so they stay in shape.
Care: wipe with a damp cloth and avoid soaking. They cost little and spark big smiles.
14. Paper Towel Roll Crafts: Upcycle with Style
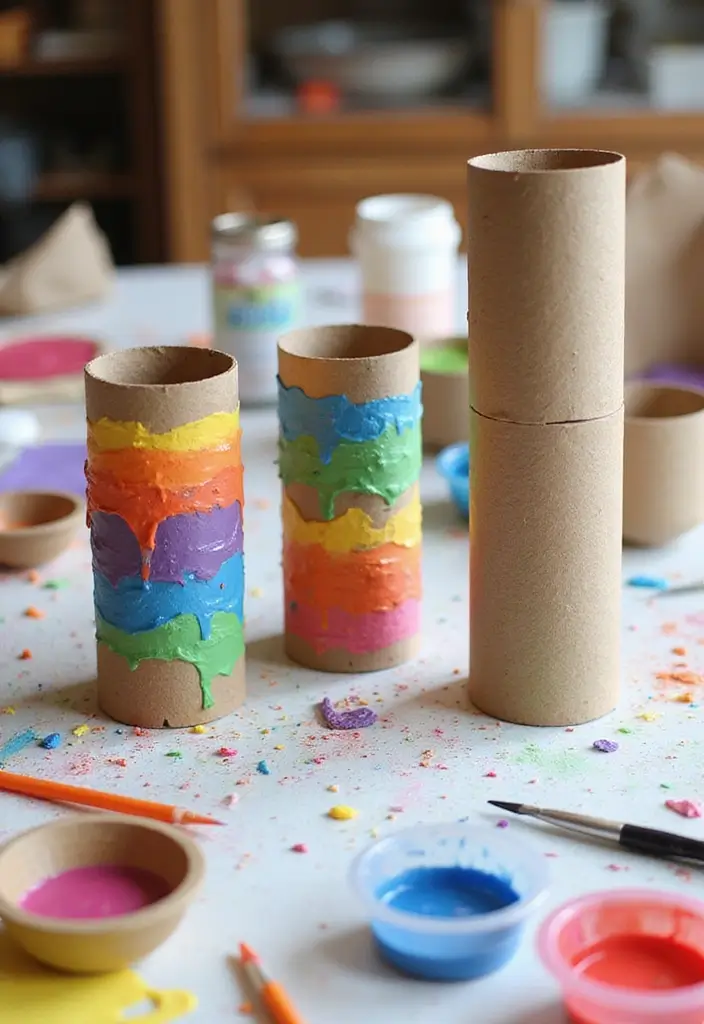
Your craft bin is full of paper towel rolls waiting for a new life. You want projects that are cheap, easy, and safe for kids. These upcycle ideas turn waste into bright, simple crafts you can be proud of.
Here are easy ideas to try this weekend:
– Tube binoculars: Decorate two rolls with bright paint, glue them side by side, and add a string to wear.
– Mini desk organizer: Stack three rolls, glue them into a block, and use a label to mark small items like paper clips, beads, or erasers.
– Snail friend: Curl a roll into a snail shell, glue on a paper face, and add two pipe cleaner antenna.
– Owl on a twig: Wrap a roll in brown paper, add paper eyes, a beak, and tiny wings, then perch it on a twig.
– Desk cable tidy: Wrap a roll with fabric or tape, then tuck cords inside to keep your space neat.
Decorating tips help you make each roll feel new. Use bright paint, markers, or wrapping paper. Add texture with fabric scraps, buttons, or foil.
Let glue dry fully before playing. Wash brushes and keep scissors away from small hands.
Grab some rolls today and start your first project.
15. Paper Puppets: Bring Stories to Life
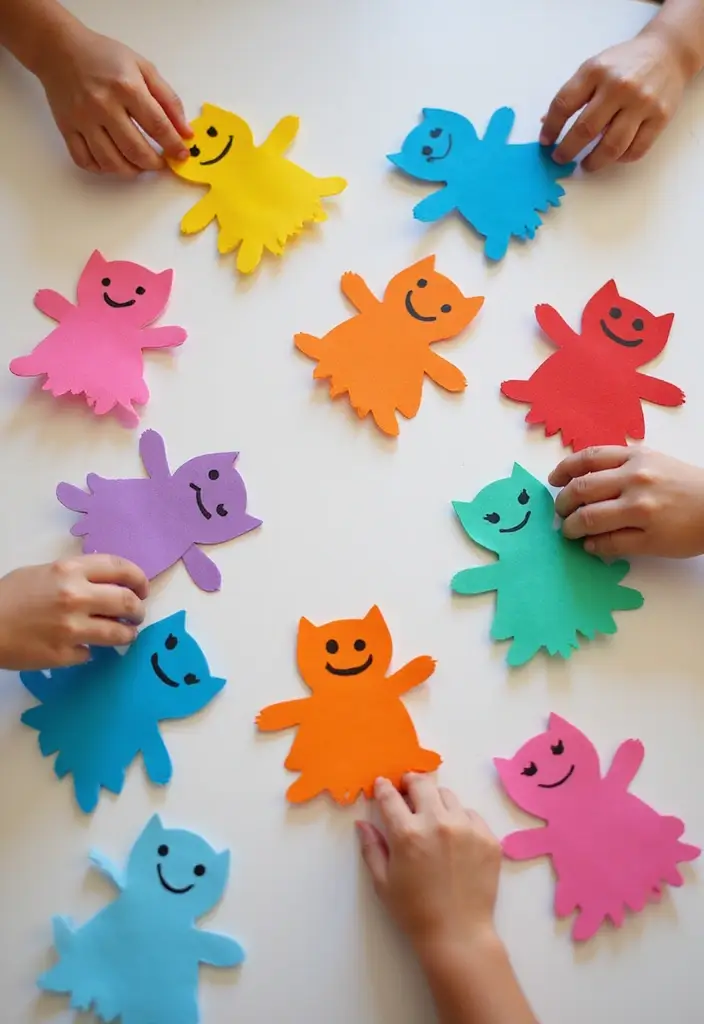
Want storytime to feel alive? DIY paper puppets let your characters jump off the page.
– Choose easy materials. Use paper bags, cardstock, or popsicle sticks. Add glue, safety scissors, and markers. This mix stays affordable and kid-friendly.
– Pick your characters. You can pull from favorite tales or dream up new ones. Keep designs simple so little hands can cut and glue.
– Build the puppets. Draw a head and body on cardstock, cut it out, and glue it to a stick. Add arms with extra paper. Let the pieces be light and bounce with a gentle tilt.
– Decorate with texture. Use paints, markers, fabric scraps, and sticker bits. A splash of color makes each character pop.
– Set up a tiny stage. A cardboard box open at the front makes a neat theatre. Add a strip of paper for a curtain if you like.
– Practice a short scene. Give each puppet a voice. Keep lines short and easy to remember.
– Host a mini show. Sit on the floor, invite one or two family members, and let the puppets tell the story. Pause for questions or cheers.
– Store and reuse. Keep puppets in a tote. The next story time can start in minutes.
16. Paper Mosaics: Crafting with Color

Paper Mosaics: Crafting with Color
You want a colorful project that feels big, yet stays simple. Paper mosaics let you build a picture one tiny piece at a time. You mix colorful scraps to form a pattern, a landscape, or a bold design. It’s easy for kids and satisfying for grownups too.
– Gather supplies: colored paper or magazine scraps, scissors, white glue, and a sturdy backing like heavy cardstock. Keep a pencil handy to map your design.
– Pick a palette: limit yourself to 3-5 colors. Use magazine scraps for extra tones without buying new paper.
– Cut and sort: make many small shapes like squares, triangles, or diamonds. Vary sizes to add texture.
– Plan your layout: sketch a light outline or place large shapes first. Fill in with smaller pieces as you go.
– Glue with care: place pieces gently and press flat. Work from the edges toward the center to reduce gaps.
– Finish and display: trim rough edges and let the glue dry. Frame the piece or mount it on a wall panel. A light spray seal adds protection.
– Seasonal twists: try a winter scene, a spring garden, or a beach sunset to match the season.
This keeps the project approachable while teaching color balance and patience. You’ll enjoy watching color come alive as you work. Keep a small tray of extra cut pieces for quick ideas later.
17. Paper Dolls: Timeless Play
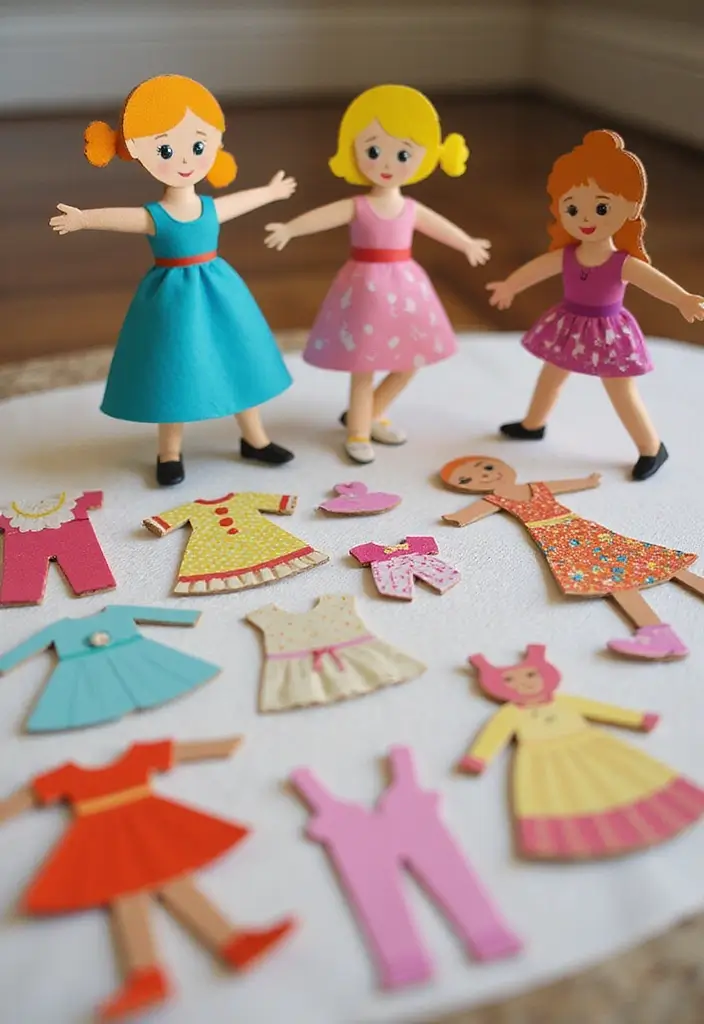
Looking for a quick, timeless craft you can start right away? Paper dolls offer simple fun that sparks stories. The activity fits many ages and uses mostly everyday supplies.
What you’ll need
– Paper or cardstock
– Scissors
– Crayons, markers, or colored pencils
– Glue or tape
– Printable templates or a pencil and paper to draw your own figure
– Brads or paper fasteners
– Optional extras: glitter, fabric scraps, stickers
How to make them
1) Pick a figure or print a template.
2) Cut out the body first, then separate arms and legs.
3) Color the figure.
4) Draw and cut quick outfits on separate paper.
5) Add tabs to each outfit so you can swap them on the doll.
6) Use a brad at the joints to make movable arms.
7) Slip in the brad ends and flatten them.
8) Create a small wardrobe with several outfits.
Fun ideas
– Make themed sets like princesses, animals, or superheroes.
– Try different styles: retro paper dolls, modern silhouettes, or cartoon pals.
Why this helps
Paper dolls boost focus, fine motor skills, and imagination. They invite tiny stories and games. For younger kids, cut only larger pieces and supervise with scissors. Store sheets in a folder or binder so they’re easy to reuse.
Enjoy.
18. Paper Seed Packets: Garden Ready
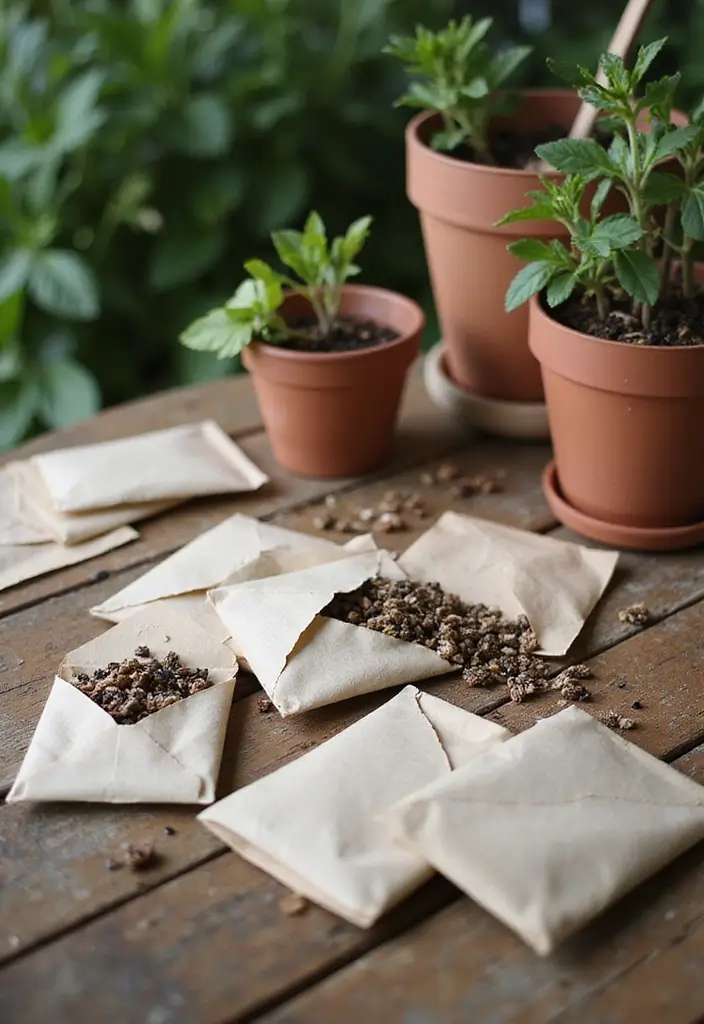
You want a simple, clean way to share seeds and keep your garden organized. Paper seed packets fit that need. They’re quick to make and look tidy on a shelf or in a gift basket.
Here is why this works for you. You can use color to label seeds at a glance. The packets protect tiny seeds from moisture and spills. Best of all, you can swap in recycled paper to cut waste.
What you will need
– Colored or patterned paper, or recycled sheets for an eco-friendly choice.
– Scissors and glue or tape.
– A ruler and pencil for neat edges.
– String or twine for an extra decorative touch.
– Markers or stickers to label seeds.
– A small label or card for inside the packet.
Step-by-step
1) Cut a square about 6 by 6 inches.
2) Fold the square to form a pocket by bringing the sides toward the center and creasing.
3) Seal the left and right edges with glue or tape so seeds stay inside.
4) Write the seed type on a label and attach it to the front.
5) Place a tiny care note inside, then tie on a string and add a decorative label if you want.
Tips to shine
– Use plain paper on the inside for a clean look.
– Decorate with simple drawings or stickers to show seed type.
– Store packets in a dry, cool spot until you’re ready to plant.
Next steps: Enjoy gifting these garden ready packets or use them to organize your own seeds this season.
19. Paper Photo Wall: Memories on Display
You want a memory wall that shines without a lot of nails or fuss. A paper photo wall gives you a playful, easy way to show your favorites. Pick colors that match your room and cut shapes that frame each photo.
Materials
– Colorful craft paper in 3–4 tones
– Thick cardstock or poster backing
– Your photos
– Scissors or a craft knife
– Double-sided tape or removable mounting squares
– Optional: string lights for warmth
Steps
– Plan the layout on the floor. Spread out the photos and shapes so you can see the whole wall.
– Cut shapes in different sizes. Circles, squares, and triangles work well.
– Glue the shapes to the backing to make tiny frames. Let each piece breathe with space around the photo.
– Attach photos to the backdrops with small bits of tape at the corners.
– Hang the pieces on the wall. Start in the center and work outward for balance.
– Add string lights along the top or around the edges for a cozy glow.
Tips
– Keep even spacing for a tidy look.
– Use washi tape so you can move pieces easily as you change photos.
– Mix seasons and events to tell a story.
Now you have a memory wall that’s stylish, easy to update, and true to your home.
20. Paper Weaving: Interlacing Creativity
If you want a calm, hands-on craft that yields colorful art, try paper weaving. It turns simple strips into neat patterns you can be proud of. You’ll gain focus, patience, and a small sense of accomplishment when you finish.
Materials
– Colored paper, magazine pages, or tissue sheets
– Scissors
– Glue stick or clear tape
– A sturdy base like cardstock or cardboard
– Optional: a ruler for neat strip sizes
How to do it
1) Cut several vertical strips (the warp) and lay them side by side on your base. Tape the ends to keep them in place.
2) Cut horizontal strips (the weft) in any width you like. Weave by pulling each strip over and under the verticals.
3) When you finish a row, press gently and glue the ends to the back so the weave stays put.
4) Add more strips to build a busy pattern. Mix colors, textures, and strip widths for a richer look.
Tips and variations
– Start with a small 4×4 grid to practice the rhythm.
– Use different textures: glossy magazines with matte construction paper.
– Turn your weave into a mini wall hanging or a greeting card.
Here is why this works: you reuse scraps, patterns are easy to adjust, and you can see progress fast.
Next steps
Try this on a rainy day or as a quick gift project. Share your finished pieces with friends or post a photo to inspire others.
21. Paper Planes: Take Flight
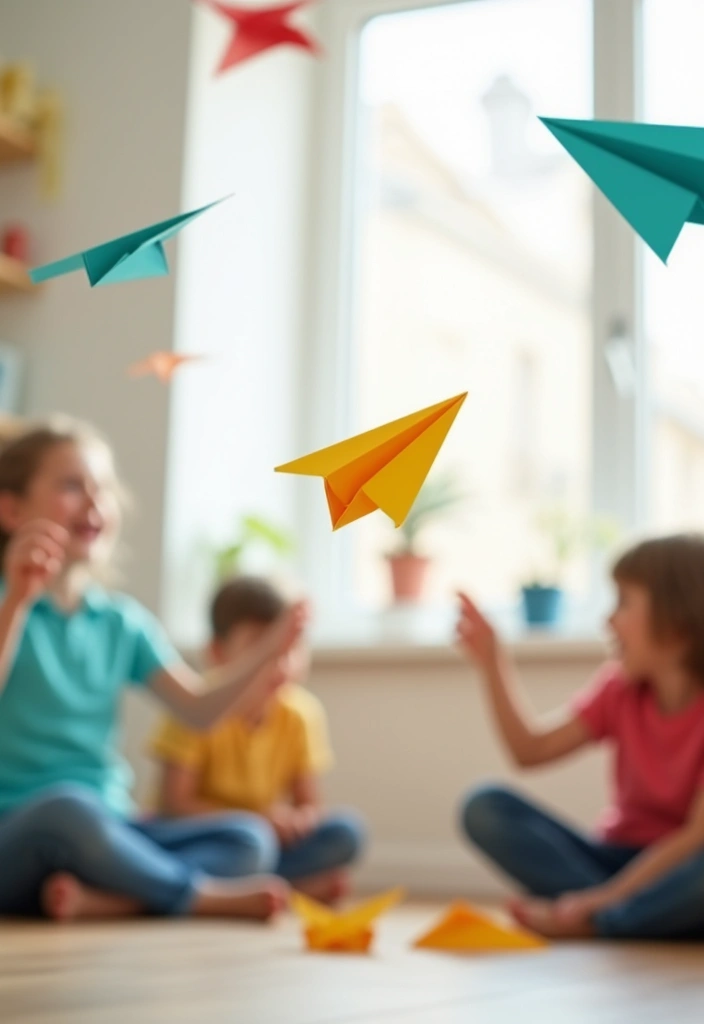
Paper planes at home
Want a quick, fun craft that teaches how a tiny flyer works? Paper planes fit the bill. They cost almost nothing and you can test ideas right away.
Start with a light sheet of paper. A standard printer page or notebook paper works. Fold a simple dart shape, then try another design. Fly and watch how it glides, climbs, or dives.
Here is why this works: small changes at the nose, wings, or body shift lift and stability. You can play with tall planes and flat ones to feel the difference.
– Try different folding techniques to vary flight patterns.
– Decorate your planes for a personal touch.
– Use recycled paper for an eco-friendly spin on the craft.
Next steps: mark a line, toss with a smooth flick, and see how far it goes. If it loops, trim the wings a touch. If it dives, bend the back edge of a wing up a little.
Turn this into a mini contest with friends or family. See whose plane flies the farthest or stays afloat the longest. It is a clear way to learn basic physics concepts in a real, hands-on way.
Remember, not every plane will be perfect. Keep trying, note what works, and have fun.
22. Paper Box Crafts: Storage Solutions
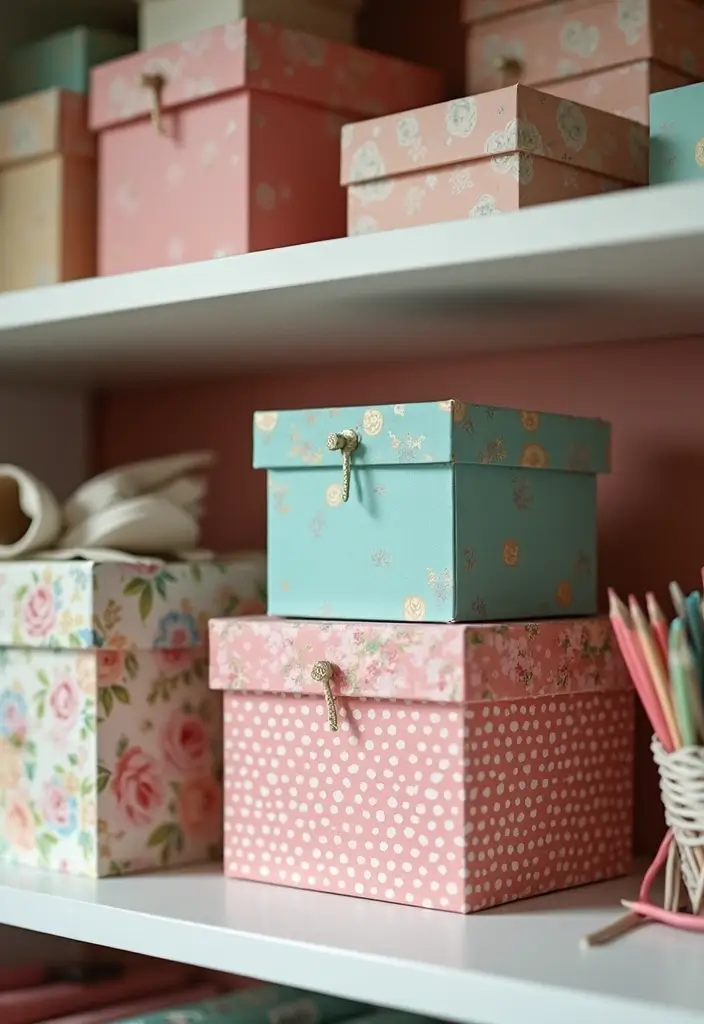
Want a storage solution that is simple and stylish? Paper box crafts let you build sturdy boxes from cardboard and basic paper. They fit craft supplies, office odds and ends, or small gifts. Build a few boxes in different sizes and stack them for a neat, organized look.
Materials
– Sturdy cardboard or thick paper
– Paint or patterned paper
– Scissors, ruler, pencil
– Glue or craft glue, and double-sided tape
– Optional scoring tool to help fold cleanly
Steps
1) Cut a base to your chosen size. Cut four side panels to match the base height.
2) Score along the folds, then fold and glue the edges firmly.
3) Make a lid by cutting a base that is a touch larger and four side walls.
4) Decorate. Paint a base color, wrap the outside in patterned paper, or add a simple design. Add a label if you want quick reference.
Organization tips
– Add inside dividers to separate items.
– Use double-sided tape for clean, quick assembly.
– Create a matching set in different sizes for a cohesive look.
Practical uses
Store craft tools, office supplies, or gift items. Use themed boxes for holidays or special events.
Keep boxes dry and flat when not in use. A small stack can transform a cluttered corner into calm space.
Next steps: start with one box, then grow your set as you need more storage.
23. Paper Chains: Simple Yet Charming
If you want a fast, friendly way to decorate, paper chains fit. They’re cheap, easy, and full of charm. This quick project works with kids and grownups alike. You get bright color, texture, and a playful look that lasts for days.
Materials you’ll need
– Colored paper or scrapbook sheets
– Scissors
– Tape or glue
– A bit of string to hang them
Step-by-step guide
1) Cut many strips about 1 inch wide and 9 inches long.
2) Thread one strip through a second to form a loop, then seal with tape.
3) Repeat to create a chain of links.
4) Finish the last link and hang your garland where you want.
Creative twists
– Use two colors per link for a simple striped look.
– Mix patterned or metallic papers for a party vibe.
– Make longer strips for bolder, thicker chains.
– Add small shapes like hearts or stars between links for a themed decor.
Where to use them
– Drape along walls above shelves.
– Wrap around a Christmas tree, staircase, or doorway.
– Create a bright photo backdrop by linking several chains.
Tips for best results
– Trim edges cleanly with sharp scissors.
– Store flat in a tub or bag after use.
– Keep chains away from young children who might chew on them.
Next steps: gather supplies, pick a color plan, and start linking. Your room will feel cheerier in no time.
24. Paper Ribbons: Gift Wrapping with Style
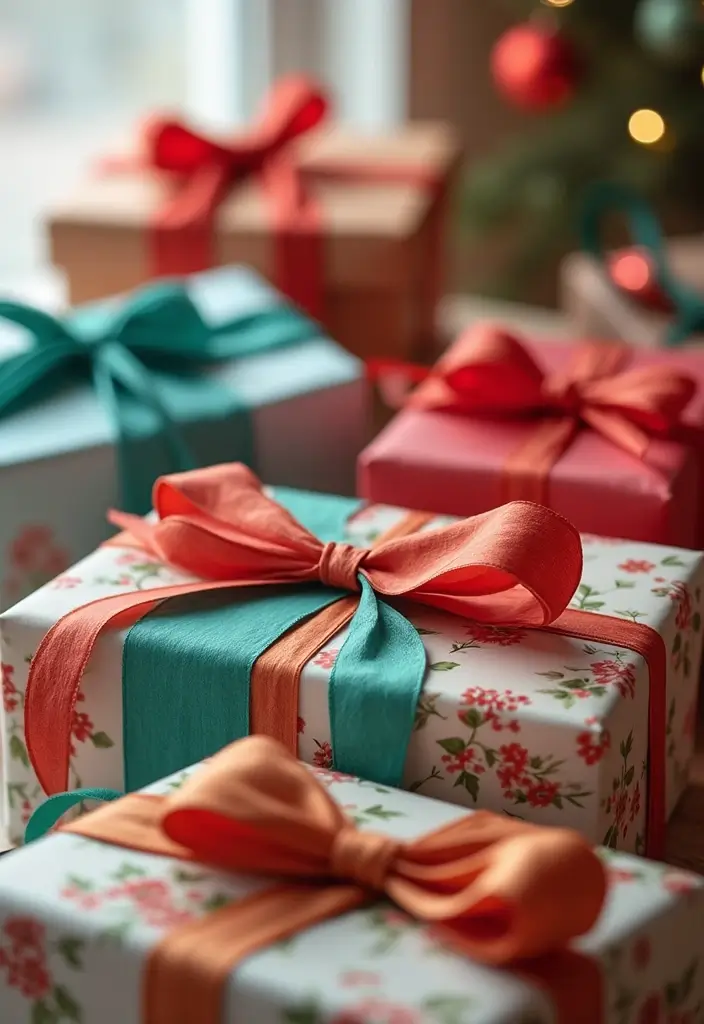
Paper Ribbons: Gift Wrapping With Style
You want wrap that looks personal. You can make paper ribbons at home. They take minutes and cost little. They use scraps and add a warm touch.
– Gather small strips of patterned or plain paper. Look for leftovers from cards, magazines, or old wrapping paper.
– Cut strips in a few widths. A bold wide strip stands out. A skinny one adds a delicate line.
– Curl the ribbons with scissors. Hold the end and run the blade along the edge away from you. A soft curl forms.
– Attach with tape or a little glue at the back of the package. A tiny dab keeps the ends in place.
– Layer ribbons. Use two or three pieces to build a fuller look. Try placing them at slight angles for a dynamic finish.
– Add small extras. A dried flower, a sticker, or a small tag makes it personal.
Here is why this works: homemade ribbons bring texture to plain wrap. They lift simple gifts and save scraps. Next steps: choose two or three colors, practice curling on a scrap, then wrap your gift using one or two ribbons. Experiment with color combos you see around you.
25. Paper Snowflakes: Winter Decor
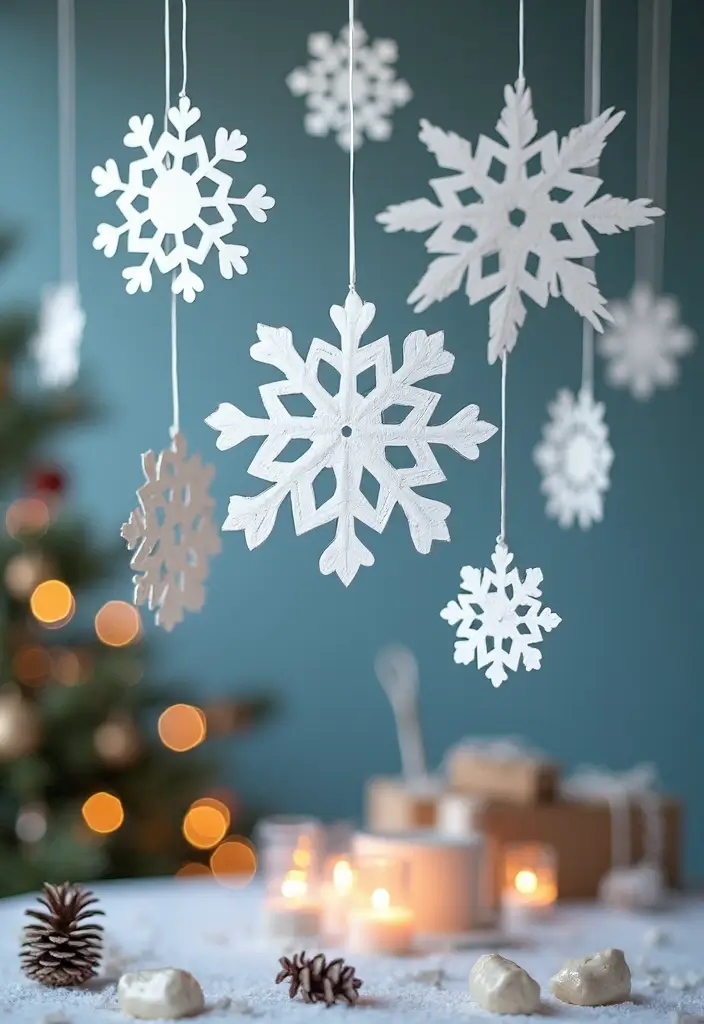
Want winter décor that feels cozy and handmade? Paper snowflakes hit the mark. They look delicate but are simple to make. You only need white paper, scissors, and a little imagination.
What you need
– A square sheet of paper
– Scissors with safe tips
– String or tape
– Optional: colored or textured paper for depth
Step-by-step
– Start with a square sheet. Fold it into quarters and crease well.
– Cut shapes along the edges. Do not cut through the center so it stays intact.
– Unfold slowly to reveal the snowflake. Smooth the edges with your fingers.
– If you like, press it flat with a warm iron or place a light weight on top.
Display ideas
– Hang the flakes from the ceiling or across a doorway.
– Tape them to windows to catch the light.
Creative twists
– Use blue, silver, or kraft paper for different vibes.
– Add a touch of glitter or ribbon for extra shine.
Party and practice
– Host a quick snowflake night. Share scissors, swap patterns, and have fun.
Care and storage
– They are fragile. Keep them away from humidity and drafts.
– Store flat in a folder between seasons.
Quick FAQs
– Do they last? They fade in damp air and wind.
– How many to hang? Start with 5–10 and build from there.
– Best spots? Windows and under lights amplify the glow.
26. Paper Fortune Tellers: A Fun Game
Why you might love this craft
You want something quick, cheap, and fun. Paper fortune tellers fit the bill. They spark smiles and a touch of nostalgia.
How to make it
Use a square sheet of paper. Fold it into the fortune teller shape by bringing four corners to the center. Push the folded sides to flatten. Flip it over. Inside pockets hold fortunes or challenges. On the outside, write numbers or colors.
What to put inside
Write light, friendly fortunes. You can add dares, silly questions, or kind notes. Keep it simple so everyone can read it.
How to play
Ask a question, choose a color, or pick a number. Open and close the flaps to reveal a message. The result should be a small moment of fun, not pressure.
Ways to customize
– Decorate the outside with markers, stickers, or patterns for a personal touch.
– Let kids write their own fortunes to share with friends.
– Use recycled paper for a low-waste version.
Why it works now
It’s a quick, cozy activity that you can do indoors. It fits at a party, a rainy day, or a family night. The color, the move, and the surprise keep everyone engaged.
Bonus ideas
– If you want more fun, run a tiny show after the reveal.
– Your guests will cheer.
– Keep a few sparklers for a quick finale.
– Try it tonight.
27. Paper Clutch: Stylish Storage
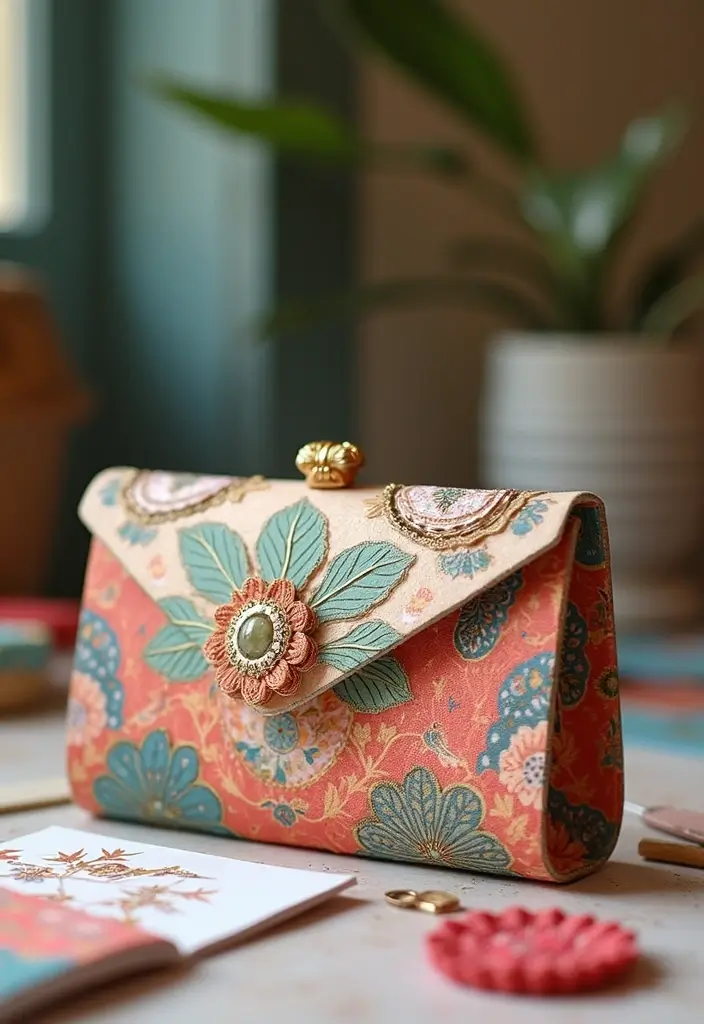
Want a chic bag you can make at home? A paper clutch is a stylish storage option you can craft in one sitting.
What you need
– Thick paper or cardstock, a 9 by 6 inch sheet works well
– Glue or double-sided tape
– Scissors and a ruler
– Optional decor: washi tape, paint, markers, stamps, and small embellishments
How to make it
– Cut a 9 by 6 inch rectangle. This is your clutch body.
– Score a line 1 inch from the top and bottom edges along the width. This helps the folds be neat.
– Fold the top and bottom flaps in toward the center.
– Fold the sides up to form a shallow box shape. Press the edges smooth.
– Glue the side seams so the clutch holds its shape. Let it dry before using.
– Add a simple closure. You can tuck in a small button, use a tiny magnet, or attach a button with a loop.
Decorating ideas
– Wrap the outside with washi tape for a clean look.
– Paint a simple pattern or color block.
– Add stickers, stamps, or a tiny paper flower for flair.
Practical tips
– Start with a test sheet to dial in your size.
– Use recycled paper scraps to cut scraps of waste down.
– A light coat of clear glue keeps the finish durable.
Variations and uses
– Try different sizes for cards, receipts, or tiny jewelry.
– Add an inside pocket for small keepsakes.
– Make a curved flap or rounded corners for a softer style.
This quick project gives you a personal, eco-friendly clutch that doubles as storage and self-expression.
Conclusion: Unleash Your Creativity!
The world of paper crafts offers endless possibilities for creativity and fun.
Whether you’re making something for yourself or gifts for loved ones, these easy paper crafts are perfect for all ages.
Dive into these projects with your family, and enjoy the time spent crafting together.
Remember, every piece you create tells a story and reflects your unique style!
Note: We aim to provide accurate product links, but some may occasionally expire or become unavailable. If this happens, please search directly on Amazon for the product or a suitable alternative.
This post contains Amazon affiliate links, meaning I may earn a small commission if you purchase through my links, at no extra cost to you.
Related Topics