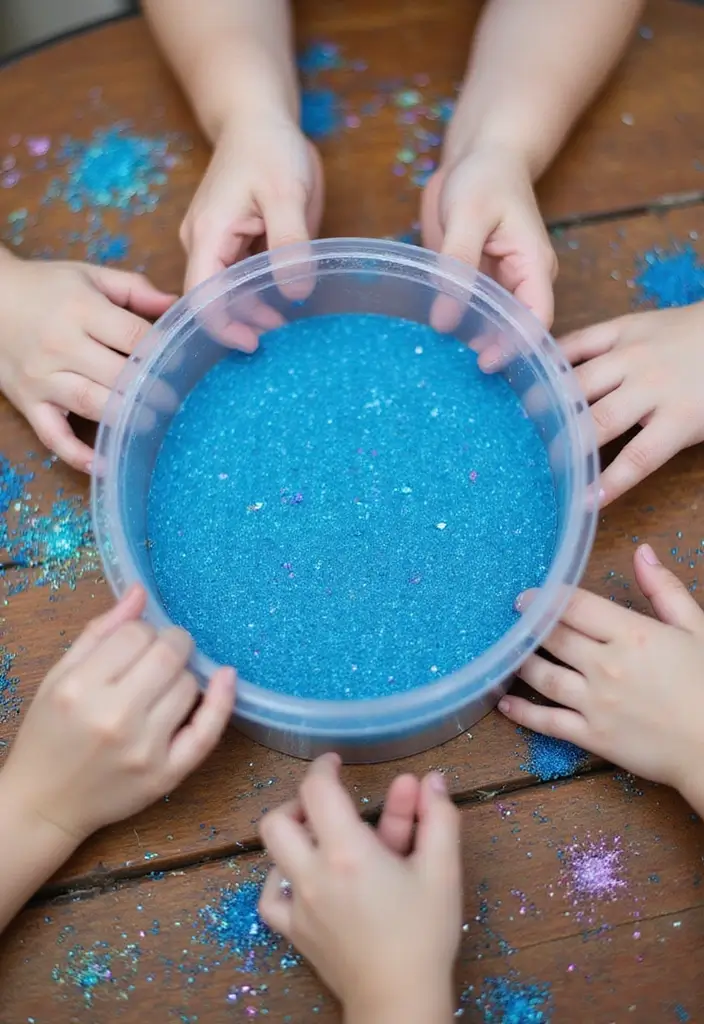
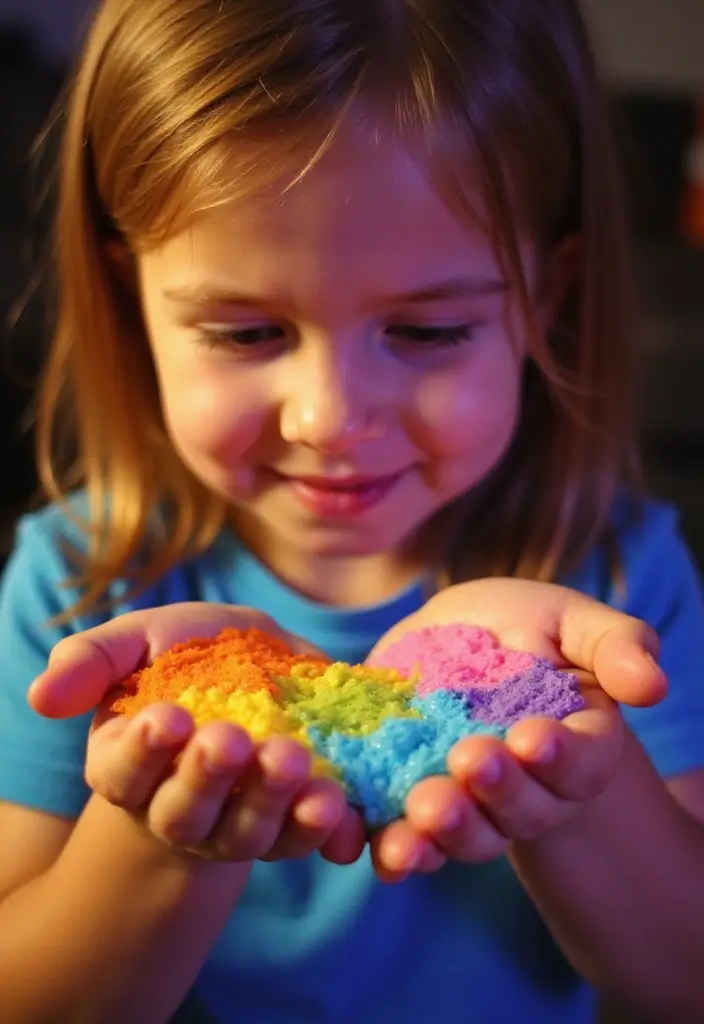
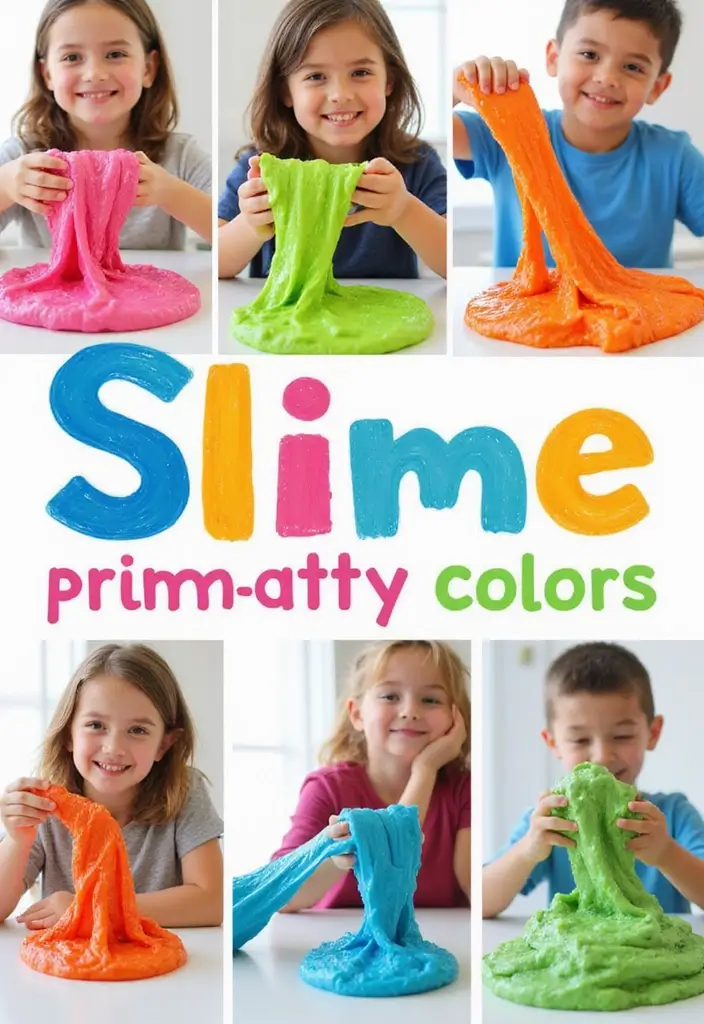
Here is why I made this post. This slime trend has me craving gooey, colorful fun you can make at home. I wanted to pull together ideas that are easy, safe, and actually enjoyable for kids. So I gathered 28 DIY slime recipes that fit the bill. They are playful, a little messy in a good way, and simple to start with.
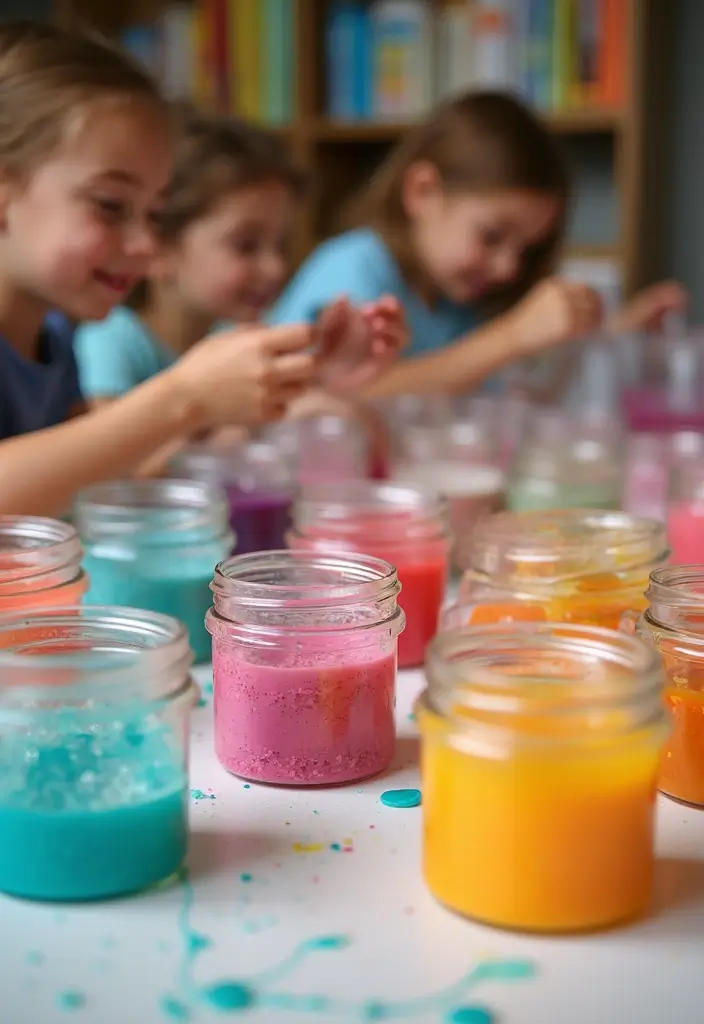
If you’re a parent, caregiver, teacher, or someone who loves hands on crafts, this one is for you. You want activities that spark curiosity without a big setup or a long cleanup. These recipes fit that need and give you room to swap colors and textures. You can adapt them to the materials you already have at home.
What you’ll get is a clear, friendly collection of slime ideas that are gooey, colorful, and easy to follow. Each recipe lists basic ingredients you can grab at a store, plus step by step instructions. You’ll find tips to keep things smooth, ideas for mixing colors, and simple swaps for scent or texture.
Here is how it’s organized. You’ll see the core material list, a short, practical method, and quick troubleshooting tips if a batch feels too sticky or too stiff. I’ve kept safety in mind, so you’ll find reminders about supervision for younger kids and kid friendly options whenever possible.
This collection covers a range of vibes, from fluffy and glossy to sparkly and neon. Think color swirls, glittery accents, and even glow in the dark options for a night time twist. You can switch textures by adding beads, foam bits, or a pinch of cornstarch for a softer feel. It’s plastic-free where possible and easy to customize.
Next steps are simple. Pick a slime type you love, lay out a small set of colors, and start with one recipe. You’ll see how tiny changes change the look and feel of the slime. If a batch isn’t perfect on the first try, you’ll know what to tweak next time. You’re about to turn a simple kitchen moment into a hands on, colorful learning moment.
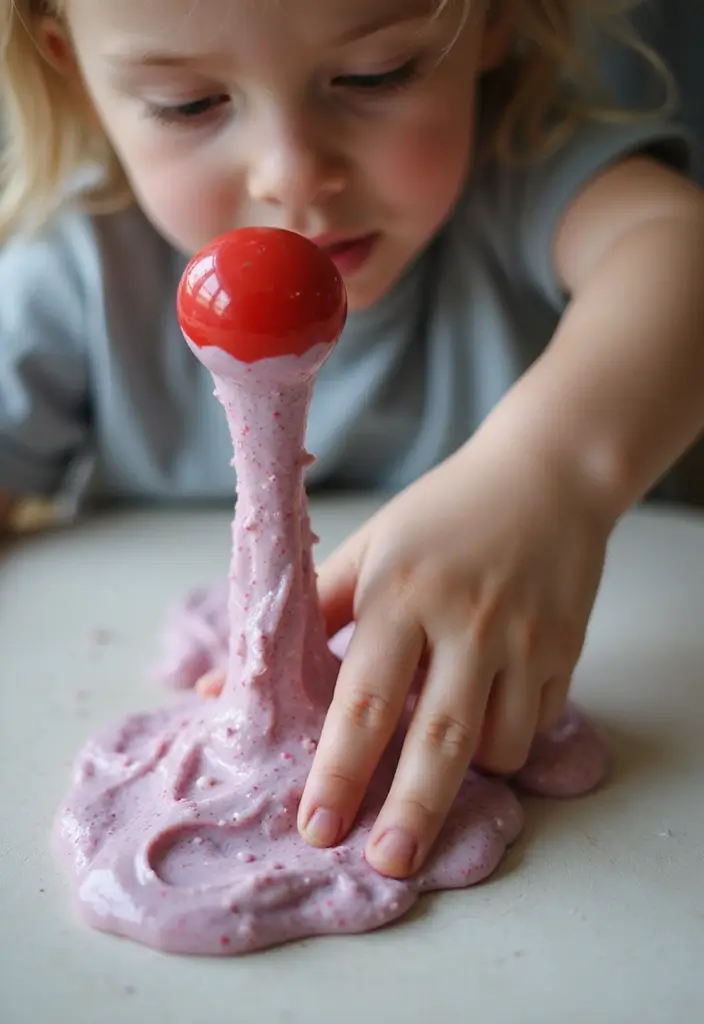
1. Classic Fluffy Slime

– What you need
– 1 cup white school glue
– 2 cups shaving cream
– 1 tablespoon contact lens solution
– Food coloring (optional)
– How to make it
– In a bowl, pour the glue and fold in the shaving cream until the mix is fluffy and light.
– If you want color, add a few drops of food coloring and stir.
– Now add the contact lens solution and mix until the slime holds together.
– Knead with your hands until it becomes smooth and stretchy.
– Tips for best results
– Knead the slime well for 1 to 2 minutes to boost stretch.
– If the slime is sticky, add a tiny amount of solution and knead again.
– Keep the surface clean and use a clean spoon or finger to mix.
– Safety and care
– Supervise kids under 8 during the mixing and when handling the solution.
– If skin or eyes feel uncomfortable, stop and rinse with water.
– What you get
– A soft, airy slime that is easy to shape and squish.
– It works great for sensory play, crafts, and quick, goofy experiments.
– Next steps
– Try color swirls or tiny beads for extra texture.
– Wash hands after play and store slime in a sealed container.
@media(max-width:480px){
2. Sparkly Glitter Slime
Want a slime that shines and stays fun to make? Glitter slime gives you color, sparkle, and a soft squish. You can make it with simple glue and glitter and a little science.
– What you need
– 1 cup white school glue
– 2 tablespoons glitter
– 1/2 teaspoon baking soda
– Saline solution (as needed)
– How to make
– Mix glue and glitter in a bowl until smooth.
– Stir in baking soda.
– Add saline solution slowly while you stir. When the mix pulls away from the bowl, you have slime.
– Knead with clean hands a minute or two, until it feels nice and stretchy.
– If it stays too sticky, add a few more drops of saline solution.
– Color ideas
– Use rainbow glitter for a party look.
– Try gold or silver for a fancy shimmer.
– Mix colors to fit a mood.
– Tips
– For an extra pop, add glow-in-the-dark glitter.
– You can add a little extra glue if the slime is too stiff.
– Fun activities
– Hold a slime decorating contest to see who can make the sparkliest slime.
– Display finished slime in clear jars so everyone can admire the shine.
– This glitter slime is a hit at gatherings and quiet play alike.
Share your glitter slime art with friends and snap a quick photo.
@media(max-width:480px){
3. Edible Slime

Looking for a slime that kids can play with and also eat a little? Try this edible slime. It uses simple kitchen items and no glue.
Here is why it works. Cornstarch and water form a texture that acts like both a solid and a liquid. It feels slick and springy in your hands. This edible slime recipe is quick and kid friendly.
– What you need
2 cups cornstarch
1 cup water
A few drops of food coloring (optional)
– How to make it
1) Pour cornstarch into a bowl.
2) Stir in water slowly until the mix holds its shape but still flows when you tilt the bowl.
3) Add color if you want a brighter slime.
Next steps: try different colors or a tiny scent with flavor extract. This adds variety and a small science lesson to the play.
Safety note: This is edible, but use it for play only. It is not a meal. Keep it away from small parts that could choke. Supervise younger kids during the first tries.
Store in an airtight container if you have extras. It can dry out a bit; add a splash of water and mix to refresh.
Science takeaway: the slime shows how matter can act like a solid and a liquid at the same time. Kids can squash it, roll it, and then watch it flow again.
@media(max-width:480px){
4. Cloud Slime
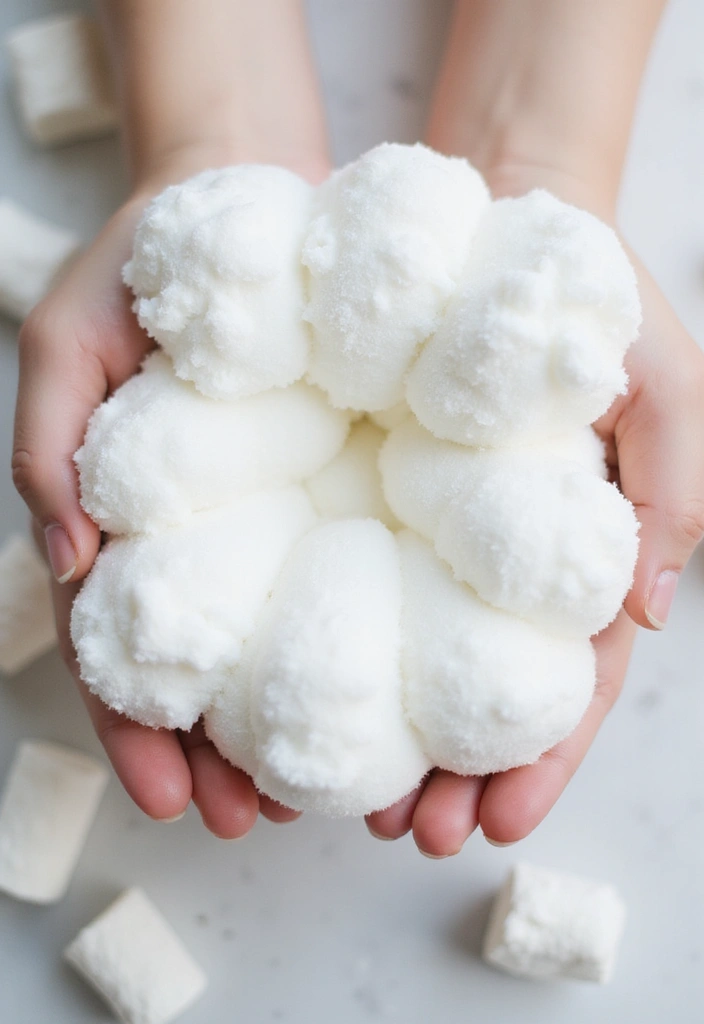
Want a slime that feels soft and fluffy? Cloud slime adds a puff of texture you can stretch and poke all day. It leaves your hands with a gentle, marshmallow-like touch. Here is why this works and how to make it easy.
What you need
– White glue
– Foam shaving cream
– Cornstarch
– Lotion
– Saline solution
Step-by-step
1) In a bowl, whisk 1 cup glue with 2 cups shaving cream and 1 cup cornstarch.
2) Add 1 tablespoon lotion and mix until smooth.
3) Keep stirring until the mixture looks even and soft.
4) Pour in saline solution slowly, a little at a time, until you reach your chosen stretchiness.
What you get
A stretchy, puffy slime that stays soft as you play.
Tips for best results
– Put in a few drops of essential oil or your favorite scent for a pleasant smell.
– Add a touch of food color to make the slime look like a real cloud.
– Keep it in an airtight container so it stays fluffy.
– If it gets stiff, knead in a tiny bit more saline.
Next steps
– Try less lotion to make a firmer puff, or more lotion for extra softness.
– Experiment with clear glue to get a see-through cloud slime.
This recipe gives you a calm, tactile slime that kids can enjoy for long, quiet play sessions.
@media(max-width:480px){
5. Color Changing Slime
Color changing slime adds a fast twist to play time. Heat is the trigger that shifts its color. This slime uses a thermochromic pigment that changes as it warms. You can start with a simple slime base and then add the color change.
What you need
– 1 cup clear glue
– 1 tablespoon baking soda
– 2 tablespoons contact lens solution
– Thermochromic pigment that changes with heat (follow the package for amounts)
How to make it
– In a bowl, pour 1 cup clear glue.
– Stir in 1 tablespoon baking soda.
– Add 2 tablespoons contact lens solution and mix until a soft slime forms.
– Fold in the thermochromic pigment, using the amount the package says.
How it works
– The pigment responds to warmth. When your hands warm the slime, it shifts to a new color.
Play ideas
– Tip: Look for pigments that shift from warm colors to cool colors for a stronger effect.
– Activity idea: Challenge kids to guess the next color the slime will show as it heats up.
Care and safety
– Store in a sealed container to keep it from drying out.
– Keep slime away from eyes and mouth.
– Do not heat in a microwave or on a stove.
What to expect
– The color shift looks best in bright light. Some pigments fade after heavy use. That’s normal, and you can refresh by adding a touch more pigment.
Try next ideas
– If you like heat color shifts, try UV-reactive slime or different bases for more color paths.
@media(max-width:480px){
6. Scented Slime
Looking for slime that smells as fun as it looks? Scented slime adds a simple fragrance boost to the classic recipe.
– 1 cup white glue
– 1 tablespoon baking soda
– A scent option: essential oil, fruit extract, or flavored gelatin powder
– Saline solution, added slowly to reach the right slime texture
Here is why you should try it. You mix glue with baking soda first, then pick a scent you love. Stir until the mix is smooth. Add saline solution a few drops at a time. Keep stirring until it forms stretchy slime.
This kind of slime engages more than just the sense of touch. The scent makes playtime feel richer and more exciting. Kids enjoy guessing which scent is in their slime and comparing different blends.
– Tips: Lavender is a calming choice for quiet play.
– Safety: If younger kids might lick the slime, choose food-safe scents.
Next steps: create two or three small batches with different smells. Let kids name their blends and swap scents with friends. Store in an air-tight container to keep the fragrance strong, and remind everyone not to taste it.
This approach adds color and scent, while staying easy to make at home.
@media(max-width:480px){
7. Magnetic Slime
Magnetic Slime: See magnetism in action
Want slime that also teaches science? Magnetic slime lets a magnet move goo that holds iron filings. You’ll see it stretch, bend, and clump as you drag the magnet across the table. With a little supervision, it’s safe and easy to run.
What you’ll need
– 1 cup white glue
– 2 tablespoons liquid starch
– about 2 tablespoons iron filings
How to make it
– Mix glue and starch until smooth.
– Stir in iron filings until even.
– Knead until stretchy. If it sticks, add a pinch more starch. If too stiff, add a tiny bit more glue.
What happens
– Iron filings respond to magnets. Move a magnet near the slime and parts of it slide toward it, then spread and pull.
– This helps kids notice how magnets grab metal.
Play ideas
– Try different magnets to see how moves change.
– Build a magnetic obstacle course and guide the slime along the path.
– Test ideas: does a closer magnet speed the move? Does a stronger magnet pull harder?
– Use a stopwatch to time how fast the slime moves.
Safety and tips
– Keep slime away from eyes and mouth. Wash hands after play.
– Iron filings can stain fabric; use a tray or mat.
– If it dries, add a drop of glue and knead.
Bottom line
– Magnetic slime makes science playful and clear to see. Share what you learned with a friend.
@media(max-width:480px){
8. Glow-in-the-Dark Slime
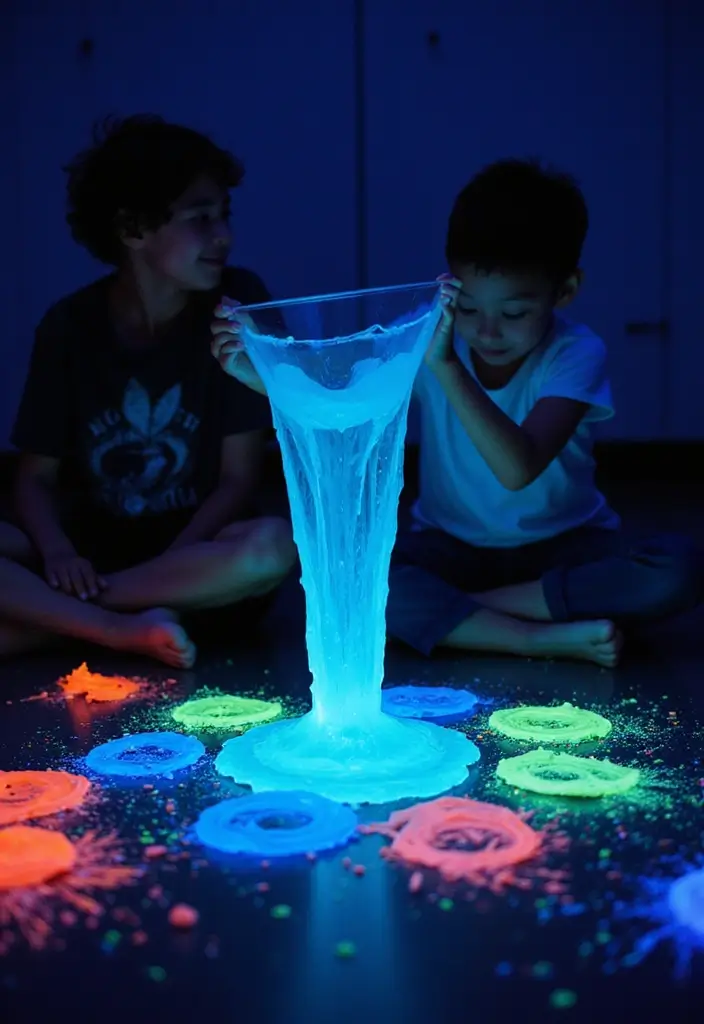
Ever wanted slime that glows when the lights go off? Glow-in-the-dark slime gives that wow moment with simple steps you can do today.
– Materials
– 1 cup white school glue
– 1 teaspoon baking soda
– Glow-in-the-dark powder or glow paint
– Contact lens solution or saline solution to activate
– How to make it
1) Pour glue into a bowl. 2) Add baking soda and mix well. 3) Stir in the glow powder or paint until the color is even. 4) Add the contact solution a little at a time while stirring. 5) Knead with clean hands until the slime is stretchy and not sticky.
– Charge and glow
Place the slime under a bright light for three to five minutes. Then switch off the lights to see it glow. The glow is strongest right after charging and fades with time.
– What makes it glow
Glow pigments store energy from light and release it as visible glow in the dark. A quick charge under a lamp or sunlight helps.
– Tips
Try different glow colors or mix two powders to make a new shade. Using a clear jar helps you see the glow. Keep the slime in a sealed container when not playing.
– Fun ideas
Try a night scavenger hunt. Hide small glow clues or objects and let the slime reveal them in the dark.
– Care and safety
Do not put slime in the mouth. Supervise younger kids. Wash hands after play and store in a cool, sealed spot.
@media(max-width:480px){
9. Water Bead Slime
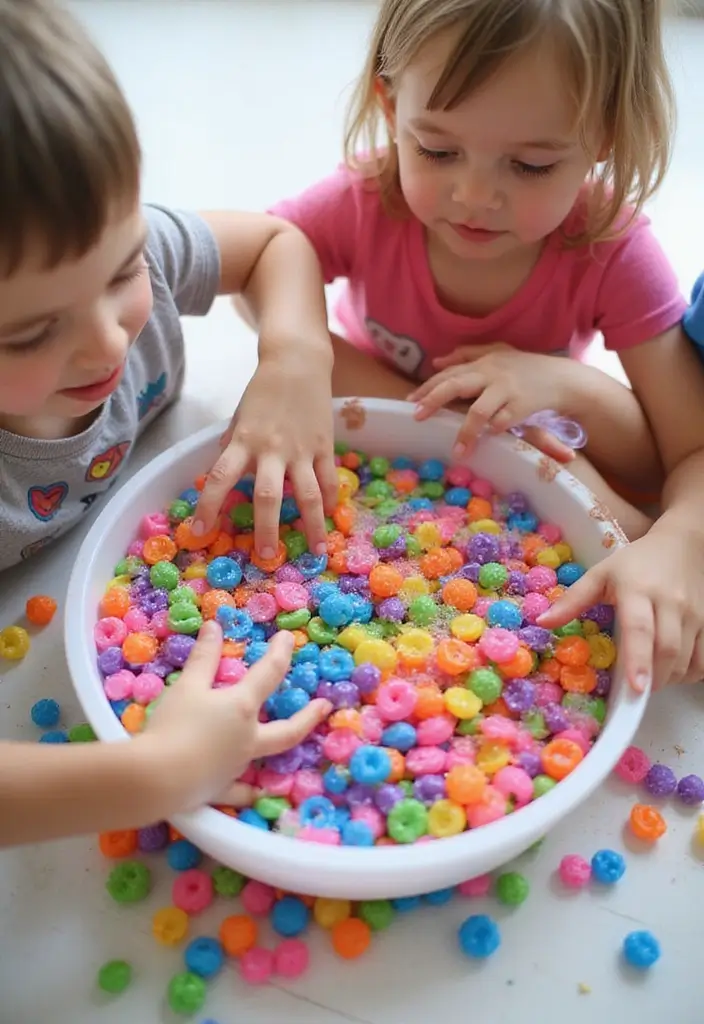
You want a slime that feels fresh and keeps kids curious. Water bead slime blends squish with tiny beads, giving texture you can see and hear as you poke it. It also looks bright and inviting on the table.
Here is what you gather:
– 1 cup school glue
– 1/2 cup water
– 1 tablespoon baking soda
– Pre soaked water beads
Next, the steps:
– Mix the glue and water until smooth.
– Stir in baking soda until dissolved.
– Add the soaked water beads and mix so they spread evenly.
– Knead the slime for a minute or two until it stays stretchy and soft.
The result is a squishy, textured slime that pops with color. The beads add crunch and a lively look that shines in bright dye.
Safety and tips
– Tip: Try different colors and bead sizes to change the feel and look.
– Safety note: Water beads can be a choking hazard for younger kids. Supervise and remove any beads that come loose.
– This slime boosts sensory play and helps with hand control and finger strength.
Use and care
– Play on a washable mat or tray so cleanup is easy.
– Store in a sealed container to keep it from drying out.
Next steps
– Add a sprinkle of glitter or tiny foam balls for an extra texture boost.
10. Unicorn Slime
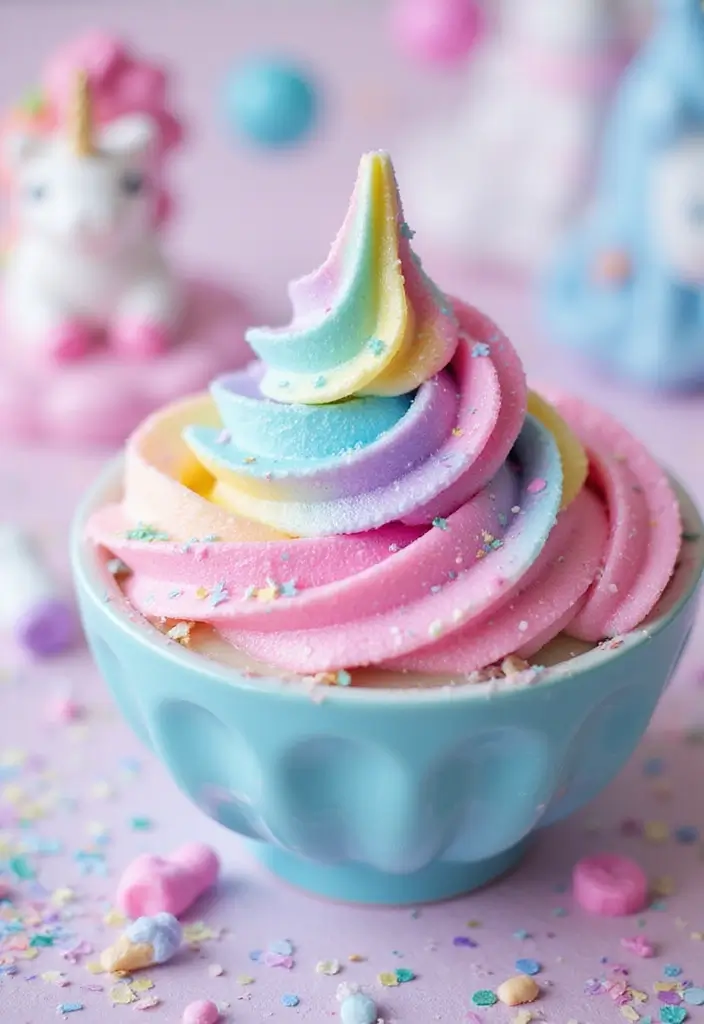
You want a unicorn slime that looks magical and is easy to make. This recipe gives you a soft, stretchy slime with three pastel colors that swirl like a dream.
Here is how you do it
– Make a simple base. In a bowl, mix 1 cup white glue with 1/2 cup water. Stir until smooth.
– Prepare the activator. Mix 1/2 tsp baking soda with 1 cup warm water. Add drops of contact lens solution or borax solution gradually until the slime comes together.
– Split the base. Divide the slime into three small bowls.
– Color each part. Add pink, blue, and purple dye a few drops at a time. Stir until you see soft pastel tones.
– Create the unicorn swirl. Return all colors to one bowl and gently swirl with a spoon. Stop before the colors mix too much.
– Add fluff and sparkle. Fold in a little shaving cream for a fluffy feel. If you like, sprinkle biodegradable glitter for tiny specks.
Why this works
– Three colors give a dreamy unicorn look.
– A fluffy texture is comfy to squeeze and stretch.
Next steps
– Store in a sealed container to keep it from drying out.
– For a party, make slime together and tell unicorn stories.
– Quick tip: Work in a well-lit area so the pastel shades stay visible.
– Quick tip: Wash hands after playing to keep colors clean.
@media (max-width: 600px) {
.normal-quiz-iframe { min-height: 570px !important; height: 570px !important; }
}
11. Marshmallow Slime

Craving a soft, marshmallow-like slime you can really squeeze? This marshmallow slime delivers fluffy texture with a gentle stretch. It feels smooth, light, and totally kid-friendly.
– What you need
– 1 cup white glue
– 2 cups shaving cream
– 1 tablespoon cornstarch
– 1 tablespoon contact lens solution
– Optional: a few drops vanilla extract for scent
– How to make it
1. In a bowl, whisk glue and shaving cream until the mixture looks pale and fluffy.
2. Stir in cornstarch until it blends through.
3. Add the contact lens solution and knead until the slime is smooth and stretchy.
4. If you want a scent, stir in a tiny bit of vanilla extract. You can also add food coloring for a pastel look.
– What you’ll notice
The slime should feel soft and pillowy. It squishes like a marshmallow yet stretches with ease. If it sticks, add a few drops of solution and knead again.
– Safety and care
This slime is safe to touch, but it is not for eating. Wash hands after playing. Keep small kids from putting it in their mouths. Store in an airtight container to keep it fluffy.
– Next steps
Try different colors, add tiny beads or glitter, or mix this with other slime recipes for a swirl effect. It’s a gentle, satisfying sensory project that kids love.
12. Ocean Slime
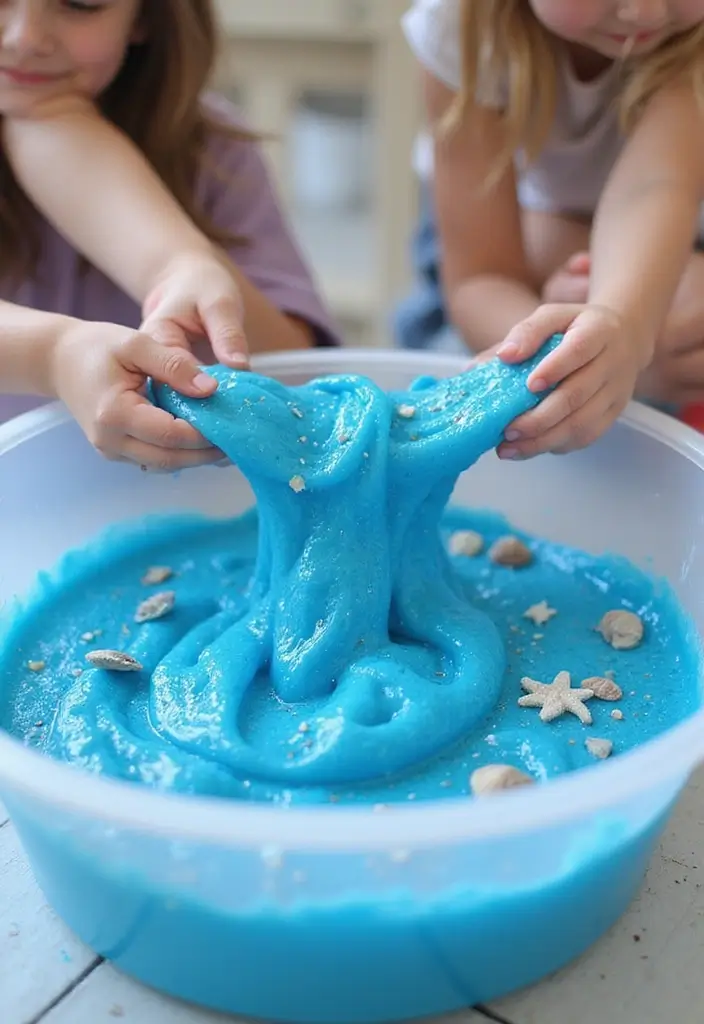
Want a slime that feels like a sea breeze? Here is why ocean slime works well for kids. It looks bright, stretches easy, and invites touch. A splash of blue, a hint of glitter, and tiny seashells create a real ocean vibe.
What you need
– 1 cup clear glue
– 1 tablespoon baking soda
– 2 tablespoons saline solution
– blue food coloring
– glitter
– mini seashells or small fish charms
How to make
– Pour glue into a bowl. Stir in baking soda until smooth.
– Add saline solution slowly. Stop when the mix pulls away from the edges and feels stretchy.
– Squeeze in blue color and glitter. Mix until you see a deep sea shade.
– Fold in seashells gently so they show through.
Tips
– Use two or three blues to make waves.
– Start light; you can add more color later.
– Store in a sealed container so it lasts longer.
Play ideas
– Set up an ocean corner for pretend trips. Add a toy boat, a net, and your slime as water. Kids knead, pull, and imagine currents.
– Compare slow and fast pulls to feel different wave motions.
What to expect
– A simple sensory treat. It looks bright, feels springy, and fuels play.
Try it today.
@media(max-width:480px){
13. Tie-Dye Slime

Colorful slime is a simple way to spark creativity. Tie-dye slime turns a plain batch into a color party. You can see swirls that look like a rainbow as you play.
Here is why this works: kids mix colors, learn color blending, and get a big payoff from a small effort.
– Start with a basic glue slime recipe.
– Split the mix into several bowls.
– Add different colors to each bowl.
– Stir until the colors coat the slime.
To create the tie-dye effect, scoop small portions from each color and swirl them in one blob. Do not fully mix at once. Let the colors meet and twist to form rings and waves. No two batches look the same. That adds to the fun.
Tips for bright tie-dye slime
– Use bold, bright colors for eye-catching swirls.
– Add color slowly to keep the hues vivid.
– Keep colors in separate bowls until you are ready to swirl.
– Use a clean stick or toothpick to sketch patterns.
Next steps: Try a tie-dye slime contest to see who makes the coolest pattern. Set a timer and judge by color balance and pattern. Kids love this playful challenge.
Keep it tidy and safe
– Cover the workspace with a mat or tray.
– Have paper towels handy for spills.
– If a color mix goes wrong, start a fresh slime batch.
@media(max-width:480px){
14. Pumpkin Spice Slime

Want a fall slime that smells like pumpkin spice and glows bright orange? This Pumpkin Spice Slime is a perfect pick. It stays soft and stretchy, and the warm scent makes play feel cozy. You get a simple craft and a little autumn aroma in one.
What you need
– 1 cup white school glue
– 1 tablespoon pumpkin spice extract
– a few drops orange food coloring
– 1 teaspoon baking soda
– saline solution (use slowly to reach the right thickness)
How to make
– In a bowl, pour the glue and stir in the pumpkin spice extract.
– Add orange color until the mix looks vibrant.
– Stir in baking soda until it blends evenly.
– Knead while you add saline solution a little at a time. Stop when the slime is stretchy but not sticky.
Tips for scent and texture
– For a stronger smell, dust in a pinch of ground cinnamon.
– If the slime sticks, add a few more drops of saline and knead again.
Play ideas
– Pair this slime with a fall-themed storytime for a cozy, quiet afternoon. Kids love the scent as they listen.
Care and safety
– Store in a sealed container.
– Wash hands after play and keep slime away from eyes or mouths.
– If it dries out, add a few drops of saline and knead until smooth.
@media(max-width:480px){
15. Fruit Slice Slime

Fruit Slice Slime
Want a slime that looks cute and feels squishy? This Fruit Slice Slime makes both. Tiny fruit shapes sit in a bright, clingy base. It’s a hit with kids who love color and texture.
You’ll need simple ingredients
– 1 cup white craft glue
– 1/2 cup water
– 1 tablespoon baking soda
– Saline solution (enough to grab the slime)
– Food coloring (optional)
– Fruit slices made from polymer clay or foam beads
Here is how to make it
1. In a bowl, mix glue and water until smooth.
2. Stir in baking soda.
3. Add saline solution a little at a time while stirring. Stop when the mix gets stretchy and not sticky.
4. Add a few drops of color if you want a different hue.
5. Fold in the fruit slices. If you don’t have slices, make your own from clay or find foam beads made to look like fruit.
Why this works
– It yields a soft slime you can knead for minutes.
– The fruit slices give a fun, eye-catching look.
– Making your own slices adds a personal touch.
Fun ideas
– Craft day: set aside time to create slices and slime together.
– Storage tip: keep in an airtight container to slow drying.
@media(max-width:480px){
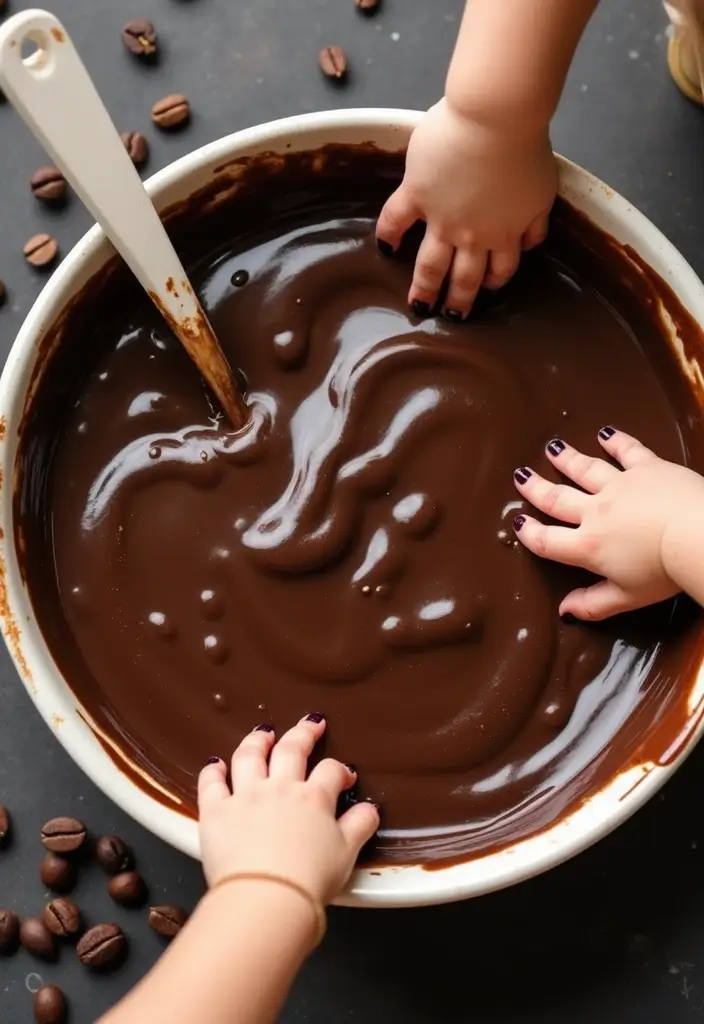
16. Chocolate Scented Slime

Got a craving for a chocolate scented slime? You get a goo that smells like cocoa and is fun to poke and stretch. Here is how you make it.
What you’ll need
– 1 cup white school glue
– 1 tablespoon cocoa powder
– A pinch of baking soda
– 1–2 teaspoons saline solution (the kind for contact lenses)
– Optional: a few non-toxic chocolate chips
– Optional: a tiny drop of vanilla extract for extra scent
How to make
– In a bowl, mix glue and cocoa powder until smooth and brown.
– Stir in the baking soda.
– Add saline solution a little at a time while you knead until the slime pulls away from the bowl and stops sticking.
– Knead with your hands for a minute or two until stretchy and squishy.
– If you want, press in a few chocolate chips so you see specks as you stretch.
Tips and safety
– This slime is not edible. It’s safe to touch, but wash your hands after playing.
– The scent comes from cocoa. Avoid strong flavors that may irritate skin.
– If it stays sticky, add a few more drops of saline solution and knead.
Storage and quick fixes
– Keep in an airtight container to stay soft.
– If it dries, work in 1–2 drops of saline solution.
This version gives a chocolate vibe with a playful scent while staying simple and safe.
@media(max-width:480px){
17. Nature-Inspired Slime

Want slime that feels special and helps you notice the outdoors? Nature-inspired slime lets you touch leaves, petals, and grass while you play. You start with a simple base, then fold in real plant pieces. The goo becomes soft, bumpy, and colorful. It invites your senses—feel the texture, see the shades, and even smell a hint of earth.
Here is why it works. Natural bits add texture and color. They turn plain slime into a tiny sculpture you can squeeze.
– What you need is a basic slime base you know.
– Nature bits are dried leaves, flower petals, and grass.
– Finish is a pinch of eco glitter if you want a subtle sparkle.
Let’s break it down:
– Step 1: Make the slime base with your favorite recipe.
– Step 2: Fold in dried leaves or petals until the color shows.
– Step 3: Press in small grass blades to add texture.
– Step 4: Sprinkle eco glitter for a light shimmer, if you wish.
Next steps: take a quick nature walk to gather items and test different looks. Let the slime rest a few minutes so textures settle. Play, compare colors, and notice what each item adds to the feel of the slime.
@media(max-width:480px){
18. Snow Slime
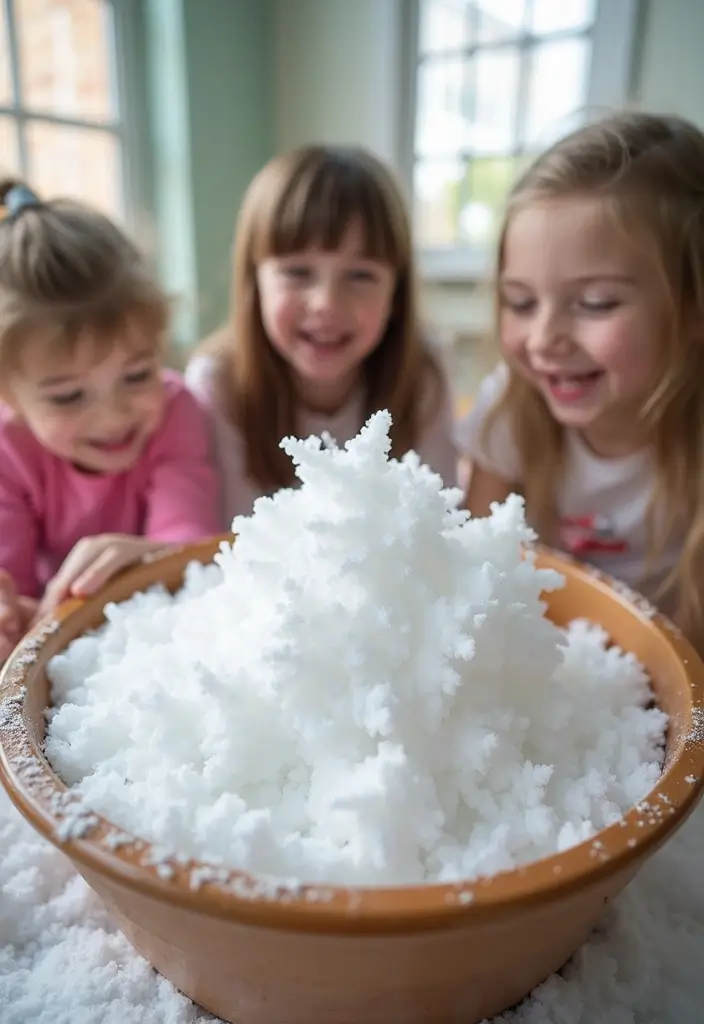
Want a wintry mood indoors? Snow slime brings a cold, fluffy feel to your desk or kitchen table. This easy recipe uses white school glue and instant snow powder to make a squishy, snow-like slime. It looks chilly and feels soft when you squeeze it.
What you need
– 1 cup white glue
– 1 cup instant snow powder
– water, just enough to make it workable
– optional: a few drops mint extract for a refreshing scent
How to make it
1) In a bowl, pour in the glue and stir in the snow powder until fully blended.
2) Add water slowly. Keep mixing until the mixture is soft, stretchy, and easy to work with.
3) Knead the slime with your hands. If it sticks, add a little more water or glue until you reach the right texture.
Play ideas
– Use it to build tiny snowmen, trees, or a winter scene.
– Roll it into balls or press it into mini molds to create frosty shapes.
Tips for scent and care
– A few mint drops give a crisp winter smell. Don’t overdo it.
– Store in an airtight container. Keep it away from heat and direct sunlight.
Safety and tips
– This slime uses non-toxic supplies, but never eat it. Wash hands after playing, and supervise younger kids.
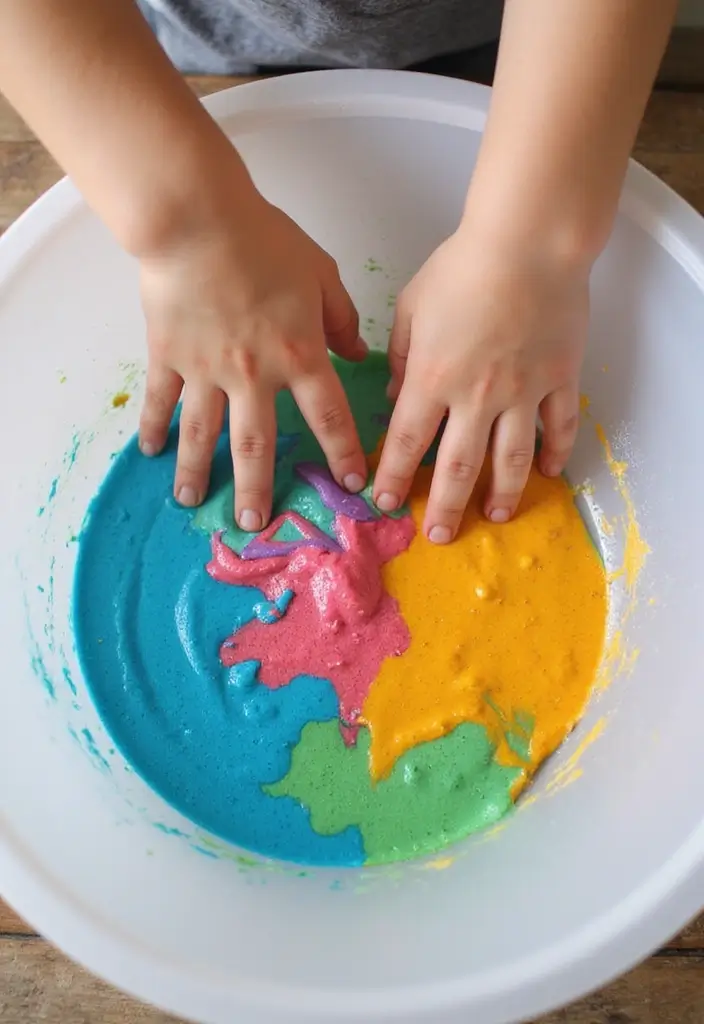
19. Galaxy Slime
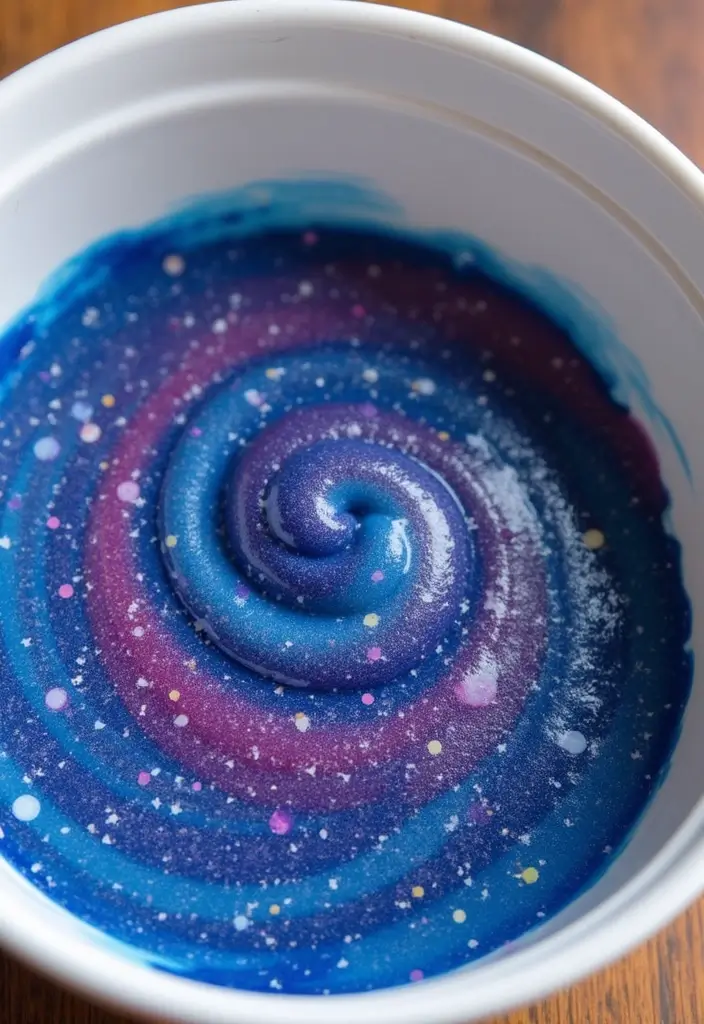
You want a slime that kids love and that still teaches them a bit. Galaxy slime gives you both. It feels soft, looks like a starry sky, and is easy to customize.
Here is why it works. The swirl of black, purple, blue, and silver mimics the night sky. Glitter adds tiny stars that catch the light as you poke and squish. It stays playful without becoming a mess. This is a great way to spark curiosity about space.
– Materials
– A basic slime base (glue, water, and a kid-safe activator)
– Food coloring or dye in black, purple, blue, and a touch of silver
– A little glitter for extra sparkle
– One large mixing bowl and several small bowls
– How you do it
– Make your standard slime base and split it into four bowls.
– Color each bowl with one shade: black, purple, blue, and a hint of silver.
– Put all the colors in a big bowl and swirl gently. Don’t overmix.
– Add glitter and fold a few times to create a galaxy dust look.
– Play ideas
– Talk about planets and stars while you swirl.
– Use the slime to trace constellations on a dark mat.
Next steps: try different color mixes, add glow-in-the-dark paint, or layer two slimes for extra depth.
@media(max-width:480px){
@media (max-width: 600px) {
.visual-quiz-iframe { min-height: 995px !important; height: 1100px !important; }
}
20. Fidget Slime
Why you need fidget slime
If your kid fidgets, you can turn that energy into a calm, fun activity. Fidget slime gives a safe way to move hands and stay focused. It feels cool in the palm and squishes softly when you press it. Use it during stories or quiet time to keep little hands busy without making a mess.
What you’ll need
– 1 cup white glue
– 1 tablespoon baking soda
– Foam beads or small poppable pieces
– Optional: a few drops of food color or a pinch of glitter
How to make it
– In a bowl, pour in the white glue.
– Stir in the baking soda until the mix is smooth.
– Add foam beads and mix gently until they spread evenly.
– Knead with your hands until the slime holds together. If it sticks, add a tiny pinch more baking soda, then knead again.
Ways to mix it up
– Swap in larger or smaller beads for different textures.
– Color the batch with a few drops of food color.
– Try a tiny splash of lotion for a softer feel.
– Make two batches with different bead sizes for a fun sensory contrast.
Smart uses and safety
– Use fidget slime during storytime, at a desk, or in a car to stay focused.
– Keep it in a sealed container and wash hands after play.
– Store away from small, chewable pieces; supervise younger kids to keep play safe.
21. Whipped Cream Slime

If you want a slime that feels light as a cloud, whipped cream slime is a great pick. It’s soft, squishy, and fun to poke. Here is a simple, kid-friendly method you can try at home.
What you need
– 1 cup white glue
– 1 cup shaving cream
– Saline solution (just a few drops at a time)
– Optional: a few drops of vanilla extract for scent
Steps to slime
1) In a bowl, pour glue and shaving cream. Stir until smooth.
2) Add saline solution slowly. Stir and watch it turn stretchy.
3) Knead with clean hands until the texture stays soft and fluffy.
4) If it sticks too much, add a tiny bit more saline solution and mix again.
Tips and play ideas
– Add vanilla for a gentle scent that kids notice with their noses.
– Shape the slime into tiny desserts or swirls for pretend baking.
– Store in an airtight container to keep it fluffy. If it dries, drop in a small amount of saline and knead.
This slime feels creamy in your hands and washes out easy with soap and water. It’s a safe, simple DIY slime that fits busy days.
Next steps: try it with a friend, compare textures, and swap scents to make your own mini scent shop.
22. Coffee Slime
Coffee Slime: A Quick Wake-Up for Playtime
If you want a slime that feels bold and smells like morning coffee, this is a great pick. Coffee slime looks dark and rich and adds a cozy aroma. It is simple to make with common supplies and a safe activator.
– Materials you need
– 1 cup white glue
– 1 tablespoon instant coffee
– 1 teaspoon baking soda
– Saline solution to reach the right stretch
– How to make coffee slime
– 1) Pour the glue into a bowl.
– 2) Stir in the instant coffee until the color is even and dark.
– 3) Add the baking soda and mix well.
– 4) Add saline solution a little at a time, then knead until the slime is smooth.
– Why this works
Here is why this slime shines: the coffee gives color and a warm scent. Baking soda helps the glue hold together. The saline solution activates the slime so it stretches nicely.
– Tips for best results
Try decaf if you want the smell without caffeine. Start with less saline and add more slowly to avoid a stiff texture.
– Fun ideas
Pair this slime with a coffee-themed craft day. Set up mini cups as slime containers and label them like a cafe.
– Safety and clean-up
Do not taste or eat the slime. Wash hands after playing and store the slime in an airtight container.
@media(max-width:480px){
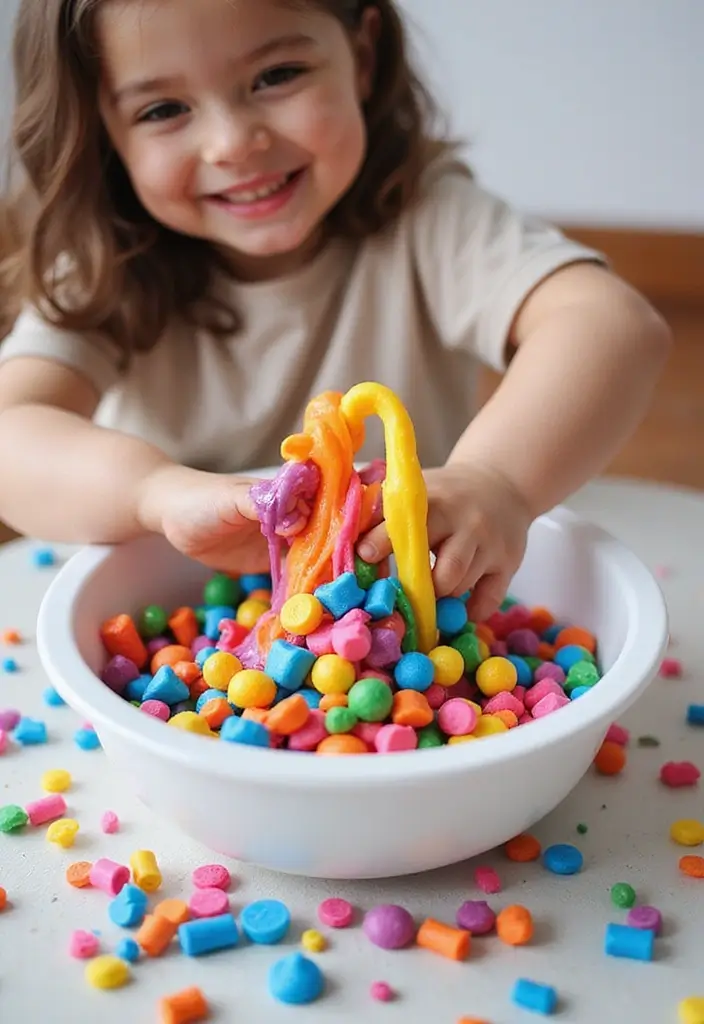
23. Dinosaur Egg Slime

Want a slime activity that feels like a mini dig site? Dinosaur Egg Slime hides tiny plastic dinosaurs inside a crunchy, colorful mix. You get surprise finds and big dinosaur fun all in one throw of slime.
What you need
– A basic slime base
– Colored foam beads to look like eggs
– Small plastic dinosaurs
– Optional: glitter, food coloring, or a tray for messy play
How to make it
Here is why it works. Start with your basic slime base. Mix in foam beads until the slime looks like a nest of tiny eggs. Fold in the dinosaurs so they sit just under the surface. Put the slime in a shallow tray, then press a few dinosaurs deeper so they hide. Let kids poke and dig to uncover each find. This keeps fingers moving and minds curious.
Play ideas
– Dig and discover race: who finds all dinosaurs first?
– Create a story map: where did each dino live in your pretend world?
– Use color clues: assign egg colors to different species.
Tips
– Use dinosaurs of different sizes for more suspense.
– Mix two colors for variegated eggs.
– Keep slime in a sealable container when not playing to stay fresh.
– Lay a paper towel under the tray for easy cleanup.
Safety and care
Always supervise younger kids. Check small pieces so they don’t pose a choking risk. Store leftovers properly and wash hands after play.
@media(max-width:480px){
24. Cereal Slime

If you want slime that pops with crunch, cereal slime is the answer. It adds a fun, textured twist to your regular slime. You get a squishy mix that crackles when you squeeze it.
What you need
– Your go-to basic slime base
– 1 cup of crunchy cereal (puffed varieties work best)
– Optional: extra cereal for more texture
How to make
1) Make a simple slime base first. Use your favorite glue and activator until it feels bendy.
2) Stir in the cereal pieces. You can crush some pieces to add more crunch or leave others whole for bigger texture.
3) Knead gently until the cereal is evenly mixed. Stop before the slime gets too soggy.
Tips for great results
– For a louder crunch, crush the cereal a little, then fold it in.
– Pick colors that match your mood or theme. White slime with colorful cereal looks fun.
– Keep cereal slime fresh by using it soon after you make it. The cereal can soften if it sits too long.
Why kids love it
Kids like the way the slime sounds and feels. They can describe the crunch, squish, and texture. It also makes a good science moment about texture and moisture. This slime idea is simple, safe, and easy to adjust with different cereals.
Playdate idea
Host a cereal-themed slime party. Everyone can mix in their own cereal and compare textures. It doubles as a sensory activity and a tiny art project.
Next steps
Try different cereals to find your best crunch. Share your favorite combo and challenge friends to make the most satisfying slime texture.
@media(max-width:480px){
25. Peanut Butter Slime

Peanut Butter Slime: Creamy, Stretchy, and Fun
Want a gooey, kid-friendly slime that’s easy to make? Peanut butter slime fits the bill. It blends creaminess with a stretchy snap kids love.
What you need
– 1 cup white glue
– 1 cup foamy shaving cream
– 1 tablespoon peanut butter
– Saline solution
– Food color
How to make it
– In a large bowl, mix glue and shaving cream until smooth.
– Stir in the peanut butter for texture.
– Add a few drops of color if you want a tint.
– Pour in saline solution slowly while you stir. Stop when the mix tightens.
What it feels like
– Creamy and stretchy, with a soft, slightly sticky feel.
Safety and tips
– Check for peanut allergies before starting.
– Do not share with anyone who has an allergy.
– If it’s too sticky, add a bit more glue or shaving cream and mix well.
– If it’s too stiff, add a few more drops of saline solution.
Fun pairing idea
– Pair this slime with a sandwich craft. Draw bread shapes and act out lunch while you play.
Care and storage
– Store in an airtight container. Wash hands after playing.
Next steps
– Take turns stirring and explain why each ingredient helps the slime.
– Try different colors to make themed batches.
@media(max-width:480px){
26. Rainbow Slime
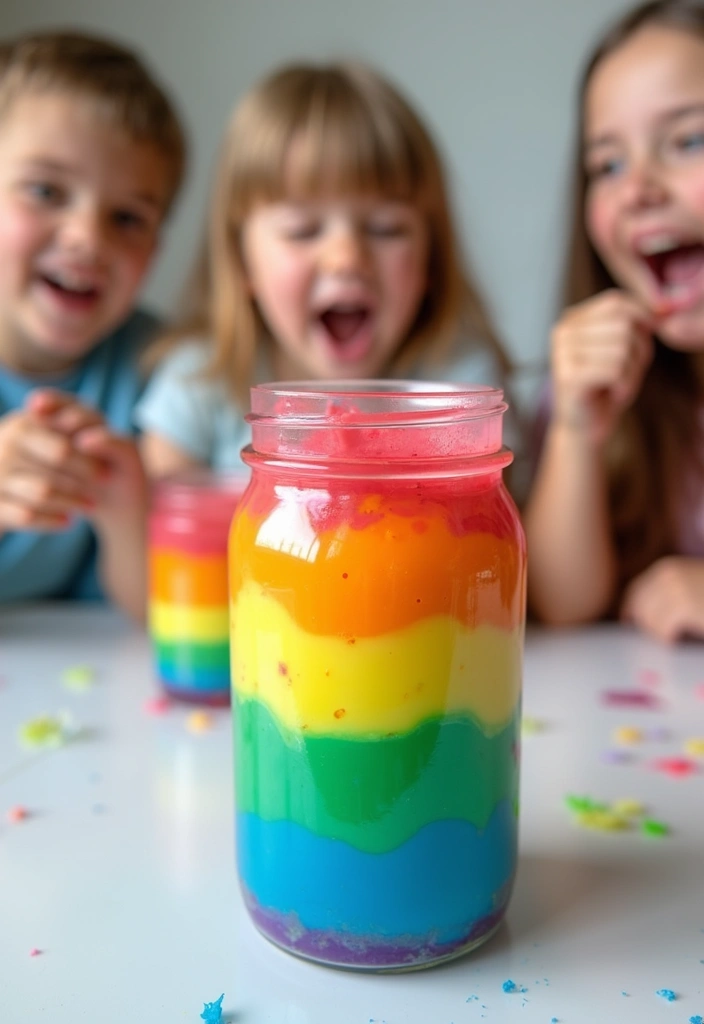
Rainbow slime that wows kids? Yes. This version stacks bright colors for a bold look in a jar or tray.
What you’ll need
– Basic slime base (glue, water, and an activator) or a ready-made slime
– Food coloring in red, orange, yellow, green, blue, and purple
– A clear container or shallow tray to show the layers
Here is why this works. You split the base into several bowls, color each one, then drop the colors into the container in order. The result is a clean rainbow that kids can see from the top and the sides.
Step by step
1) Make one plain slime batch. Mix glue with water and a safe activator until you get the right stretch.
2) Split the slime into six bowls. Color each with one shade of the rainbow.
3) Layer the colors in a tall, clear jar or wide tray. Pour slowly so the colors stay separate.
4) Let kids tilt and wiggle the container to see colors blend gently. They can mix the edges to make new tones.
Tips and ideas
– Use bright food colors for a bolder rainbow.
– Keep layers neat for the best look.
– Try a rainbow party or a small play date idea.
Next, inviting kids to remix is part of the fun. They can blend colors and discover new shades, all while touching something soft, squishy, and spectacular to watch.
@media(max-width:480px){
27. Ice Cream Slime

Ice cream slime gives you a soft, fluffy texture that looks like soft-serve. It’s a simple recipe you can make with common craft supplies. You get a creamy color and a cloud-like feel in your hands. Here is how to make it and how to use it in play.
– What you need
– 1 cup white glue
– 2 cups shaving cream
– Food coloring
– Optional sprinkles or tiny beads for toppings
– How to make
1) In a large bowl, pour in the glue.
2) Stir in the shaving cream until the mix is fluffy.
3) Add a few drops of food coloring to get your ice cream shade.
4) Fold in sprinkles or beads if you like.
5) Knead with your hands until the slime is smooth and stretchy. If it sticks, add a tiny amount of glue.
– Tips and play ideas
– Add a few drops of scent like vanilla or strawberry for a fun smell.
– Set up an ice cream themed play station with pretend scoops, cups, and spoons.
– Great for kids who love sweets and cozy crafts.
– It cleans up easily and teaches you to knead and shape.
– You can change colors to match your mood.
– Store the slime in a sealed bag when not playing.
@media(max-width:480px){
28. Baking Soda Slime
Want a simple slime that kids can make with ease? This Baking Soda Slime keeps the fun high and the mess easy to handle. It uses just glue, baking soda, and saline solution. It feels stretchy and soft in the palm, and cleanup is quick. Ready to try a goo that washes away with soap and kids can brag about?
What you will need
– 1 cup white school glue
– 1 tablespoon baking soda
– Saline solution (start with 2–3 tablespoons and add more as needed)
– Optional: a few drops of food coloring
Step-by-step
1) Pour the glue into a mixing bowl.
2) Stir in the baking soda until it blends in.
3) Add saline solution a little at a time. Keep stirring until the mix pulls away from the bowl and forms a soft, stretchy slime.
4) If you want color, drop in a few drops of food coloring and mix well.
5) Knead the slime with clean hands for 1–2 minutes. If it sticks, add a tiny amount of saline solution and knead again.
Here is why this works: the glue makes a sticky network. Baking soda helps it thicken. The saline solution acts as a activator, linking the glue strands so the slime stretches.
Tips to boost the fun
– Color and texture: try different food colors or add glitter for sparkle.
– Texture test: make two batches and compare how they feel. One can be a bit stretchier, the other more firm.
Play ideas and safety
– Challenge friends to create slimes with unique textures and names.
– Store in a sealed container to keep moisture in. Clean surfaces with soap and water after play.
Next steps: experiment with tiny tweaks, like a pinch more baking soda for a thicker slime or a splash more saline for a looser feel. Have fun and stay curious.
@media(max-width:480px){
Conclusion
These 28 DIY slime recipes offer a rainbow of possibilities for kids to explore their creativity and enjoy sensory play!
From fluffy to crunchy, and sparkly to edible, each slime type brings its own unique fun.
Encouraging kids to experiment with their creations makes for memorable moments and endless entertainment, so gather your supplies and get crafting!
Note: We aim to provide accurate product links, but some may occasionally expire or become unavailable. If this happens, please search directly on Amazon for the product or a suitable alternative.
This post contains Amazon affiliate links, meaning I may earn a small commission if you purchase through my links, at no extra cost to you.
Related Topics
DIY slime for kids
easy slime recipes
colorful slime ideas
eco-friendly crafts
fun slime activities
sensory play
edible slime
scented slime
seasonal crafts
DIY projects
educational slime
creative playtime