This season has me craving simple, pretty ways to store my tiny treasures. Paper jewelry boxes fit that need right away. They’re cheap, fun to make, and they brighten a dresser or desk in minutes. I made this post to share a little stash of ideas you can actually finish on a weekend.
Who it’s for If you love crafty projects, small home touches, and gifts with your own stamp, this is for you. Whether you sew, doodle, or cut and glue your way through a Saturday, these ideas fit. Busy students, new homeowners, and anyone building a cozy space will find something useful.
What you’ll get A collection of 29 ideas that blend looks and function. Each box uses simple paper supplies and easy steps. You’ll see options for lids, drawers, compartments, and pretty finishes—think patterns, textures, and little details like washi tape, decoupage, or a velvet lining.
These projects solve two problems at once: storage and style. You can store rings, earrings, and bracelets, or use them as mini gift boxes. Materials stay light, so you can make several to organize a growing collection. I included a range of styles from soft pastel to bold geometric, so you can pick what fits your space.
How to start Gather basics: cardstock or scrapbook paper, glue, scissors, a ruler, and a pencil. Pick a size you like, then follow a simple plan for a lid and a little tray inside. You can add a liner or a touch of color with washi tape. The steps are meant to be small wins you can finish in one sitting.
Here is why you should try this today. They are doable, forgiving, and you can put your own spin on each box. If you want a quick project to brighten your desk or a thoughtful handmade gift, you will enjoy these ideas. Ready to dive in? Let’s pick a favorite and start creating.
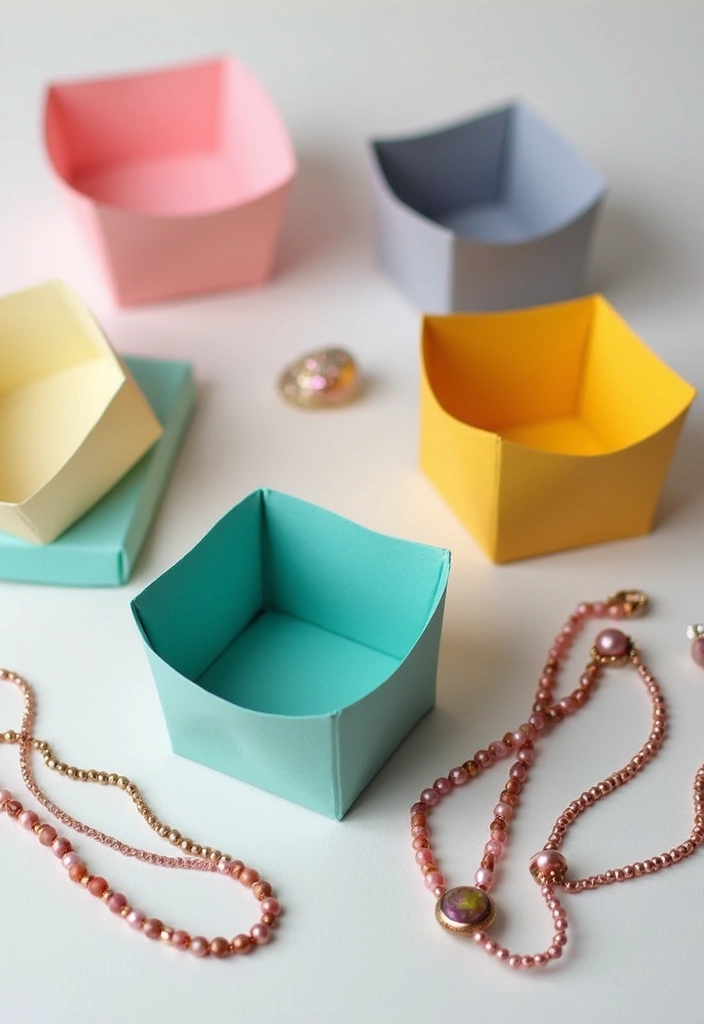
1. Elegant Origami Box
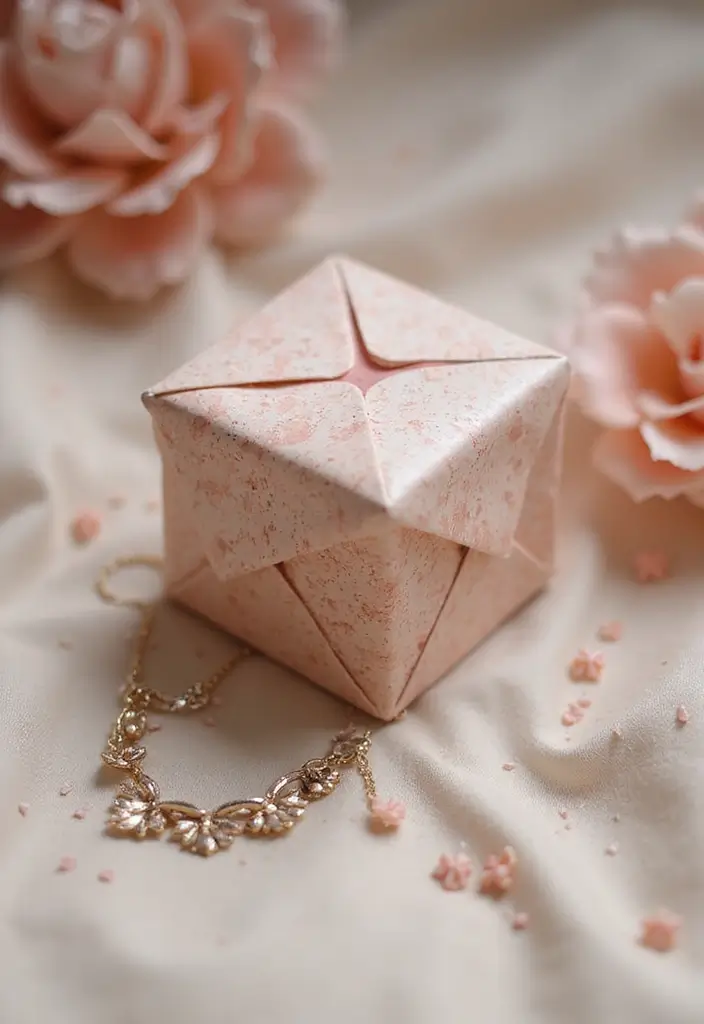
Elegant Origami Box
You want a neat, pretty place for rings and small earrings. A square sheet can become an elegant origami jewelry box. With careful folds you make a sturdy little box that sits flat when it opens and closes snugly when you finish.
Here is why this approach works. It is light, it folds to fit many sizes, and you can learn the moves with a little practice. Start with paper choices that fit your style. Patterned or colored paper adds personality, while recycled paper keeps it kind to the planet.
Next steps: pick a size that matches what you plan to hold. A tiny box works well for rings. A slightly bigger one fits small stud earrings. You can also make a matching set to form a mini collection.
– Use recycled paper to stay eco-friendly.
– Fold matching origami flowers to decorate the lid or the base.
– Apply a light spray sealant for extra durability and a polished finish.
With time and patience, you could build a small family of origami boxes. They make charming gifts and neat, space-saving storage. Keep a few ready to give as quick, thoughtful presents.
@media(max-width:480px){
2. Charming Matchbox Storage
Want a neat place for tiny jewelry bits without buying a new box? This DIY matchbox storage idea gives you a cute, compact solution. Matchboxes are small and easy to customize. They can sit on a dresser, in a drawer, or in a small tray.
– Gather clean matchboxes. Remove the striker strip and any waxy lining.
– Cover each box with decorative paper, fabric scraps, or a coat of simple paint. This adds a vintage touch while protecting the contents.
– Add a soft liner. Cut tiny squares of felt or thin felt pads to line the bottom. They protect delicate pieces and stop them from sliding.
– Sort by piece type. Put rings in one box, studs in another, and hoops in a third. You get fast access when you need a piece.
– Label with tiny stickers or a marker. A quick note on the lid helps you mix and match without digging.
– Stack or tray display. You can stack boxes in a row with a dab of double-sided tape, or place them side by side in a decorative tray for an organized look.
– Use washi tape for quick flair. It’s easy to apply and comes in many patterns.
– Reuse scraps from old gift wrap or stationery. It saves waste and adds charm.
– Keep it secure. If you stack, press lightly so you can lift the top box without shifting the rest.
Your matchbox jewelry storage will look charming and keep small pieces easy to reach.
@media(max-width:480px){
3. DIY Paper Mache Box
You want a sturdy jewelry box you can call your own. Paper mache makes a strong shell and lets you shape it any way you like. It’s simple, and you get a hands-on project you can brag about.
– Materials you need: old newspapers or magazines, glue or a flour-water mix, a mold or form, paint for the finish, and a waterproof varnish.
– Step 1: Tear strips from the paper. Dip them in glue and squeeze out the extra.
– Step 2: Layer the strips over your mold. Build up the sides until the box feels solid.
– Step 3: Let each layer dry. A warm, dry spot helps a lot.
– Step 4: Apply a base coat of paint. A single color or a pattern from your cut papers works well.
– Step 5: Add sparkle or texture. Glue on glitter, beads, or small shells if you want a unique look.
– Step 6: Seal the box. Coat it with waterproof varnish to protect it from spills and wear.
Here is why this method works: glue locks the paper strips together. The result is a light, durable box perfect for rings, necklaces, or small keepsakes.
Next steps: try different shapes like square, heart, or round. Mix bright colors, line a tiny felt lining inside, and your paper mache box becomes a charming, usable piece.
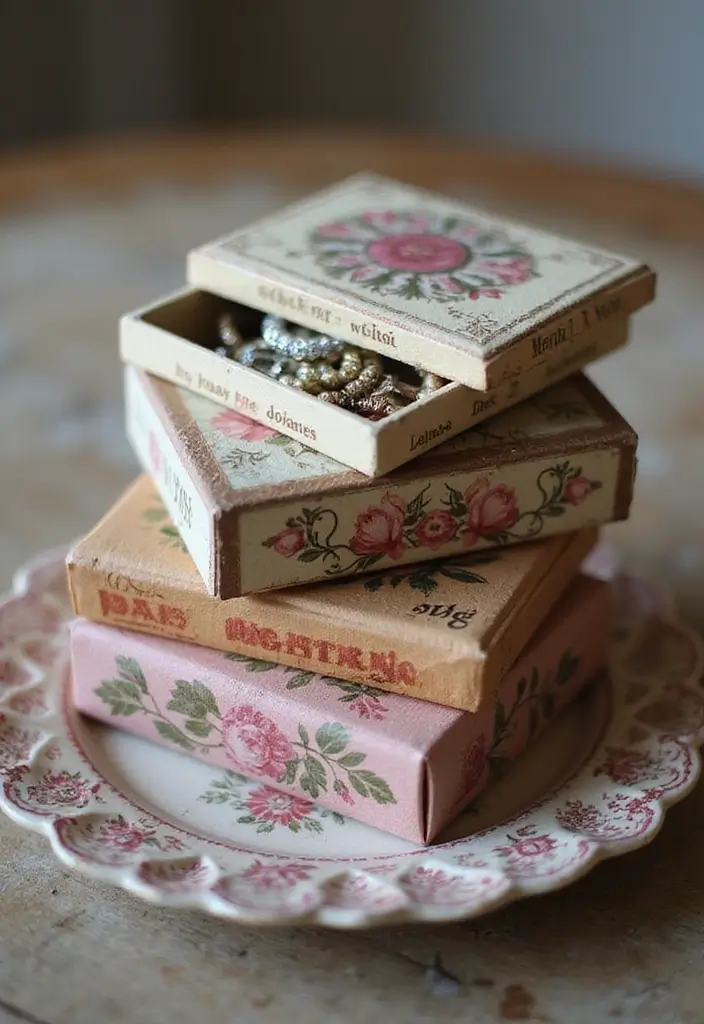
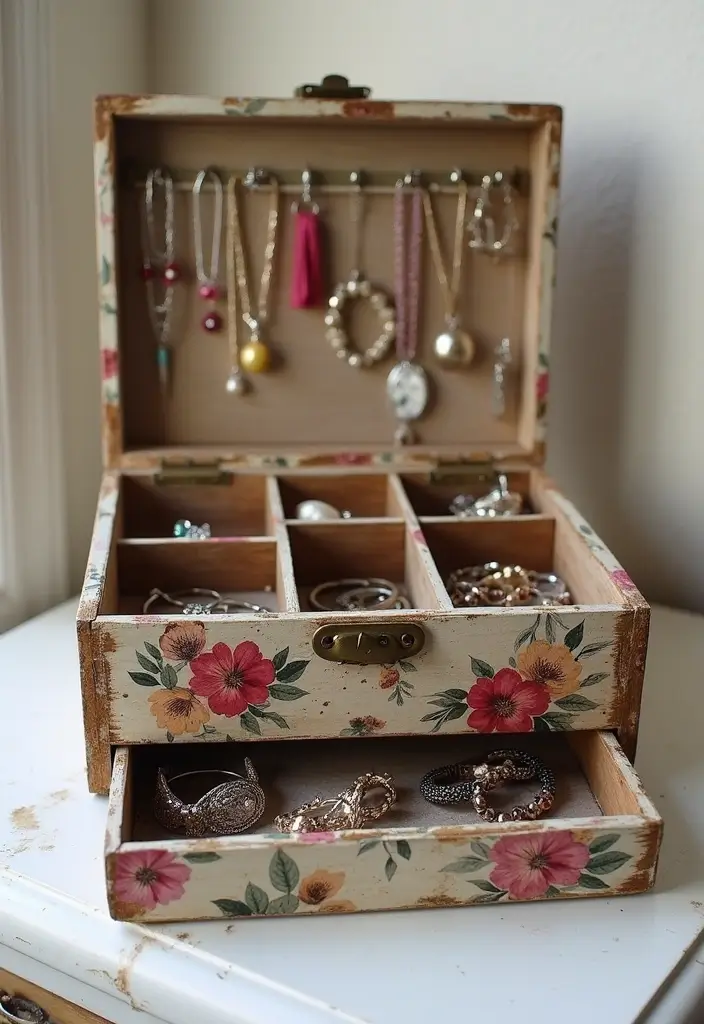
4. Vintage Book Page Box
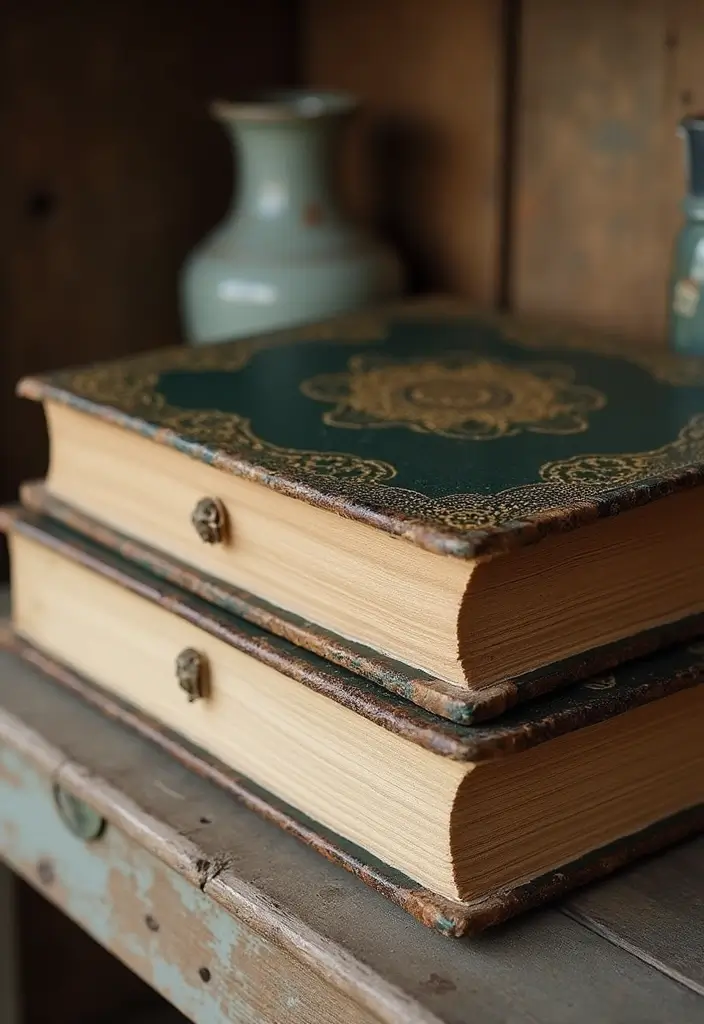
Want a chic storage solution that uses what you already own? A vintage book page box fits. Turn an old book into a stylish jewelry box with careful cuts. Keep the cover sturdy; it acts as a lid and frame.
Here is why it works: the hollow inside gives you real storage without extra bulk. You can add soft lining so rings stay snug and bracelets won’t slip.
Next steps:
– Pick a book with a strong cover and a size that matches your needs. Use thin cardboard to reinforce the inside if the pages feel thin.
– Cut out the inner pages to form a hollow cavity. Leave a solid front and back cover for durability.
– Create smaller compartments by adding folded card dividers or thin strips of plastic.
– Finish the outside with decorative paper, fabric, or paint that matches your decor.
– Line the inside with felt or velvet. A soft touch keeps jewelry from scratching.
– Optional: seal the surface with spray to guard against wear, especially if the box sits on a dresser.
This upcycled project is perfect for book lovers and anyone who wants a one-of-a-kind storage box for earrings, rings, and necklaces.
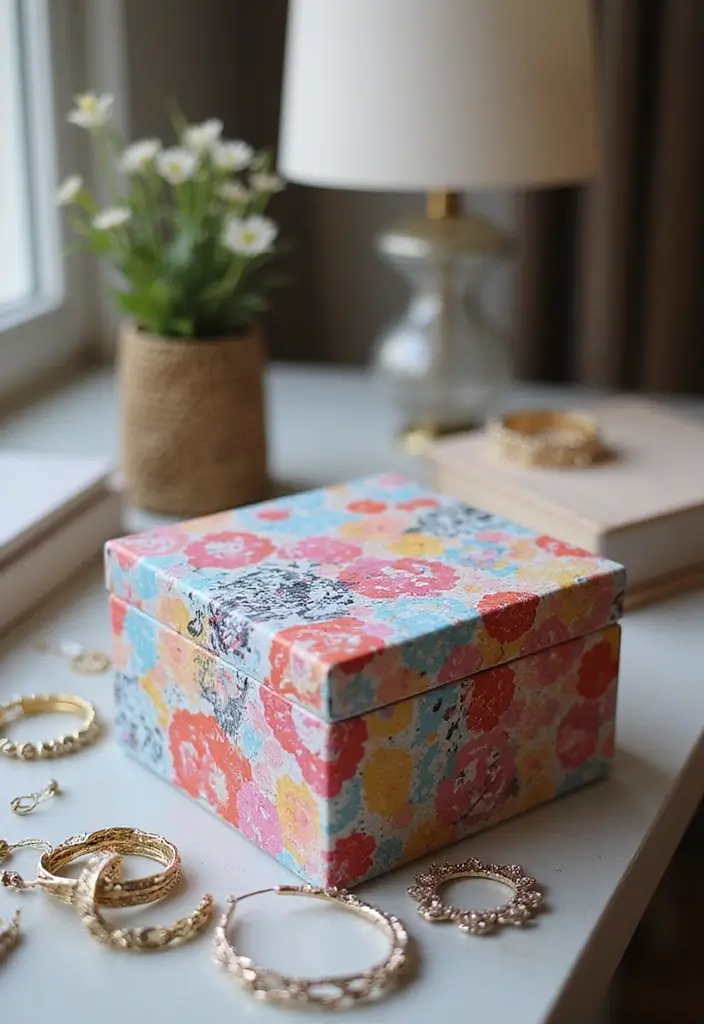
5. Personalized Photo Box
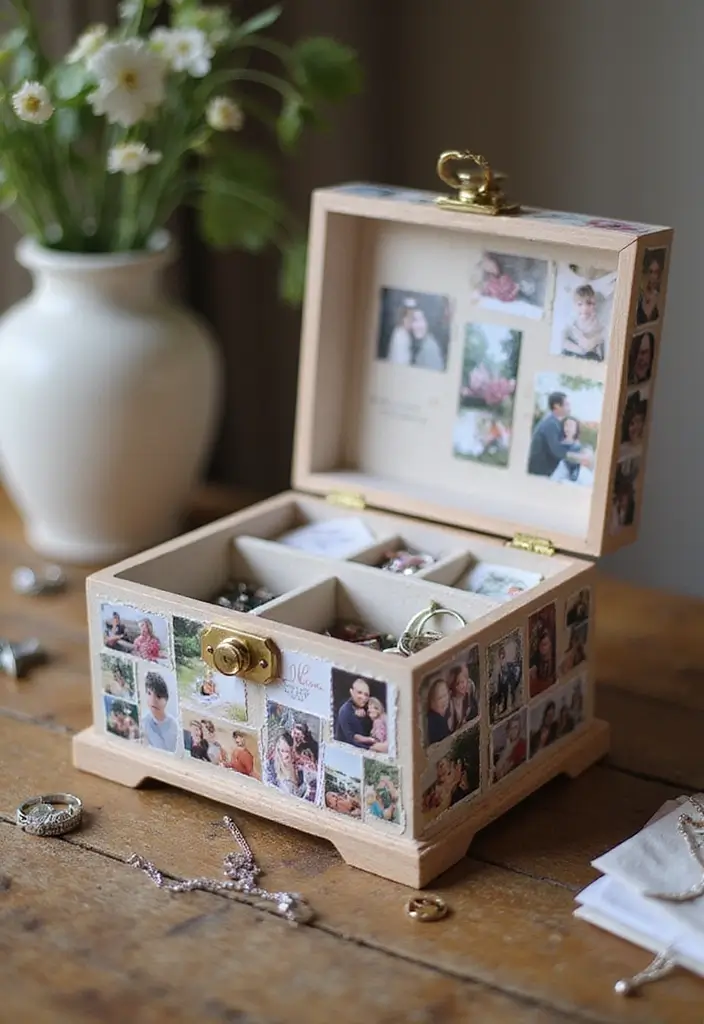
Personalized Photo Box
You want a keepsake that stores jewelry and your memories. A DIY photo box does that in one simple project. You can repurpose an old album or scraps. Cover a small box with photos or printed images. The result feels personal and neat.
Here is how to build it. Pick a box that is sturdy but easy to cover. Clean it and remove any loose pieces. Choose photos with colors that match the box. Print small images or tear out favorites from a printed album.
– Use mod podge to attach the photos and seal them with a glossy coat.
– Let it dry fully before handling.
– Line the inside with a soft cloth or a thin velvet insert to protect your jewelry.
Add little details to tell your story. Stick on tiny stickers, or write short notes next to a few photos. A date, a place, or a memory can make the box feel alive.
This box works as a personal gift or a cute memory box for your own keepsakes. It also serves as a stylish way to store rings, earrings, or bracelets.
The finished piece should be light, bright, and meaningful. Keep it away from humidity to keep photos vibrant.
With a little care, your photo box stays bright for years.
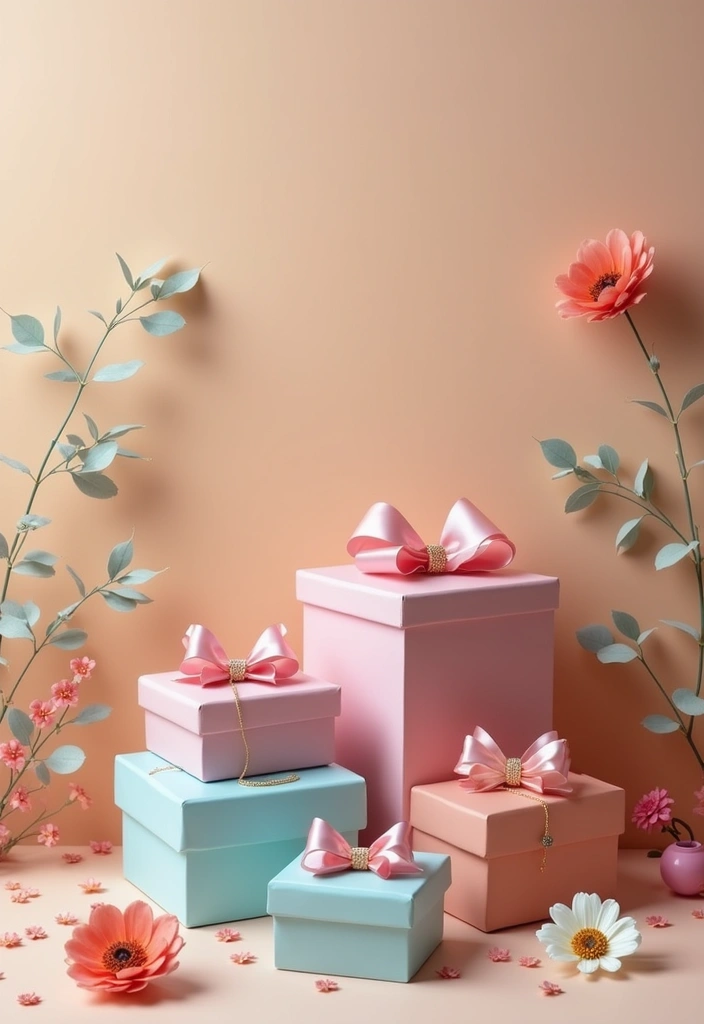
6. Decorative Paper Box with Lids
Here is why a DIY paper jewelry box with a lid helps your storage. It stays light, costs little, and is easy to switch up with the seasons.
– Materials Use sturdy cardstock or layered paper for strength and a smooth surface for easy decoration.
– Design options Pick colors and patterns that fit your room or mood and switch anytime.
– Lid benefit A lid keeps dust off and protects items from scratches.
– Size variety Create a matching set in small, medium, and large sizes to fit rings, earrings, and bracelets.
– Assembly tip Use double-sided tape for clean, tight corners that last.
– Inside finish Add a thin layer of felt for a soft touch against the jewelry and added protection.
– Shape ideas Try hexagons, octagons, or rectangles for a modern display.
Let’s break it down. Cut two pieces that fit together, shape the sides, and press the edges. Place the lid over the base to finish the box. Decorate with a simple pattern, a ribbon, or a label.
Next steps: decide what jewelry goes in each box, then line, store, and enjoy. These paper boxes stay light, look neat, and cost less than store-bought options. They also make easy, thoughtful gifts.
7. Minimalist Geometric Box
Need a small jewelry box that looks clean and modern? A minimalist geometric box fits right in. It stores your rings and earrings without stealing attention. The secret is simple lines and a calm color. This design stays fresh in any room. It’s easy to switch colors when your decor changes.
Materials
– Thick paper or sturdy cardstock that holds its shape.
– A ruler and scoring tool for crisp folds.
– White glue or double-sided tape for clean seams.
– Velvet, felt, or soft fabric to line the inside.
– A light sealant for extra durability (optional).
Design idea
– Pick a simple shape like a cube or hexagonal box.
– Use a single color for a calm, refined look.
– Make the lid fit snugly so the box sits flat.
– If you like, make a larger box that holds several smaller geometric boxes for a neat display.
How to build
– Cut all panels from thick paper.
– Score along the lines and fold with a firm crease.
– Glue the edges to form the box, then add the lid.
– Line the interior with velvet or soft fabric.
– Let it dry completely before loading with jewelry.
Finish and use
– Place the box on a shelf or dresser.
– Stack smaller boxes inside a bigger one for a modular setup.
– Wipe with a soft cloth and keep away from humidity.
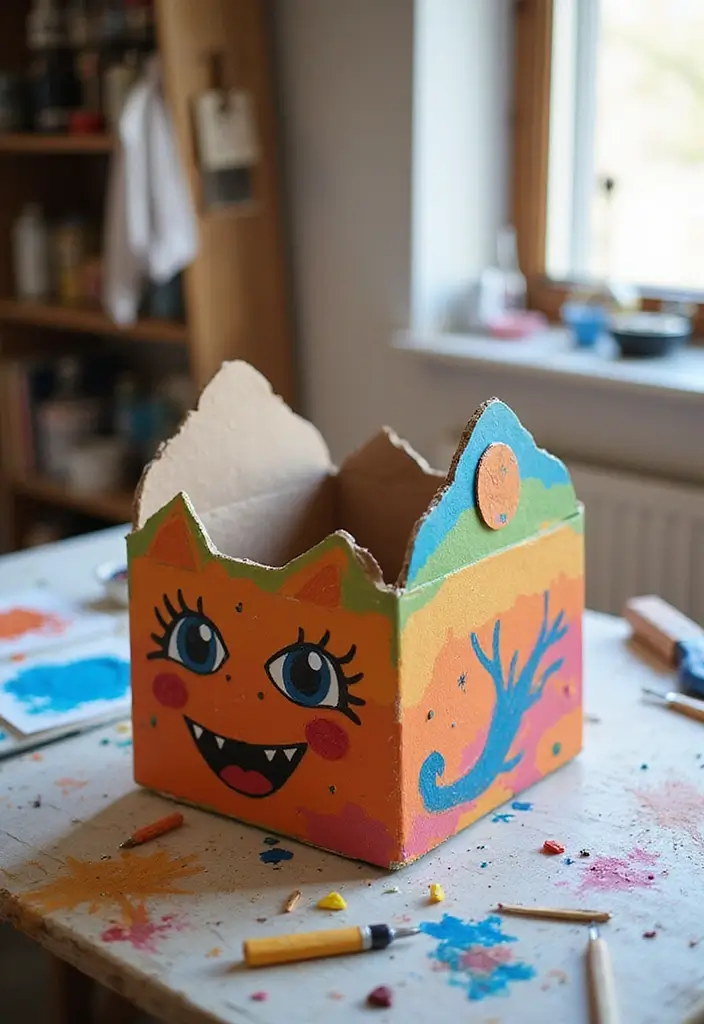
8. Quirky Animal-Shaped Boxes
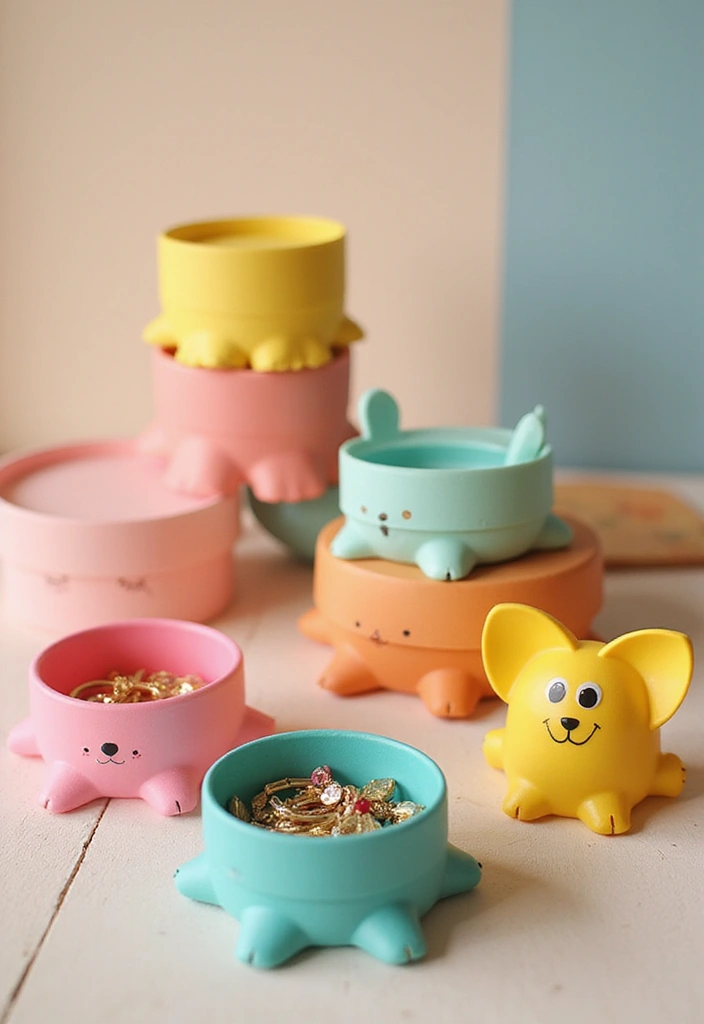
Quirky Animal-Shaped Boxes
Want jewelry storage that also brings a smile? Quirky animal-shaped boxes fit the need. They keep small pieces organized and make your dresser look fun. Use a ready-made base box, or cut an animal from sturdy paper. Elephants, foxes, and owls are great starting ideas.
Here is why they work: they are cheap and easy, yet full of charm. Pick colors you love and match your room. Add tiny features like googly eyes, ears, or whiskers for character. These boxes also work as gift boxes for kids’ jewelry.
What you’ll need: thick cardstock or a small cardboard box, scissors, glue, colored paper, markers, and optional googly eyes.
How to build it: 1) choose a base box and a simple animal template, 2) trace and cut the shape, 3) glue the shape to the lid or side, 4) color and decorate, 5) let it dry.
Tips: pick bright papers for a bold look, or mix patterns for flair. A ribbon or small bow adds a cute touch. Use them as treats or small keepsakes.
Next steps: pick your animal, gather supplies, and turn a plain box into a happy home for rings, earrings, and charms.
9. Foldable Travel Jewelry Box
You need a quick, tidy way to carry your jewelry. A foldable travel jewelry box gives you that.
This design folds flat for packing and opens to reveal clear compartments. It holds earrings, rings, and necklaces without tangles. Build the shell from sturdy paper or thin cardboard. For extra durability, use water resistant paper for the shell or seal the surface with a clear coating. Inside, add small pockets and elastic loops so pieces stay in place.
– Close it with snaps or Velcro. The fasteners keep the box shut on trains and planes.
– Use a simple hinge technique with tape or fabric so the box opens smoothly.
– Include a tiny mirror for quick checks on the go.
Personalize your box by adding initials or a color you love. A touch of your style makes it feel like yours.
Why it helps: it saves space, stops chains from tangling, and makes travel calmer. It fits in your carry-on or day bag and is easy to refresh between trips.
Next steps: gather materials, sketch a quick pattern, and test the folds. With a little practice, you’ll have a handy, portable jewelry box that travels as well as you do. Take it anywhere.
@media(max-width:480px){
@media (max-width: 600px) {
.visual-quiz-iframe { min-height: 995px !important; height: 1100px !important; }
}
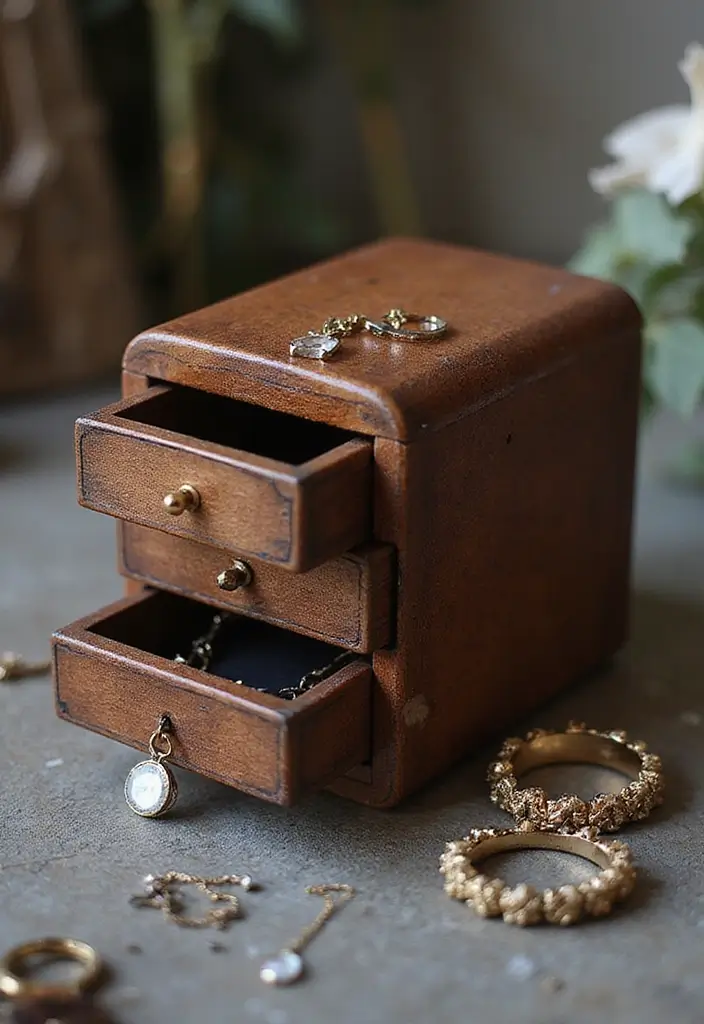
10. Elegant Drawer Box
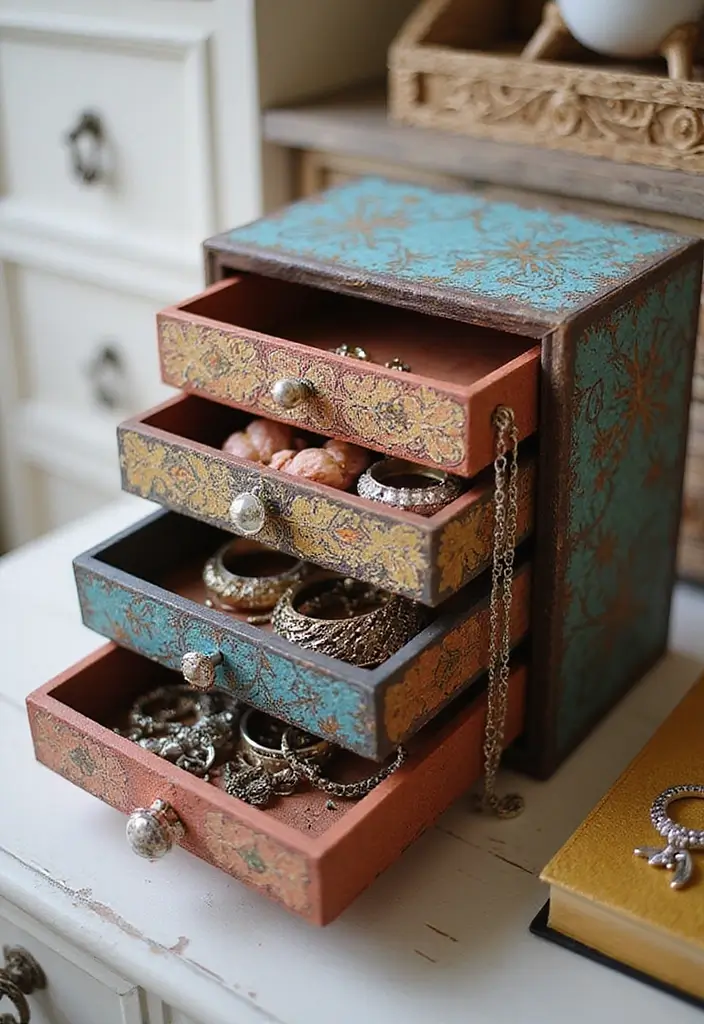
Here is why this design helps you stay tidy. You want a box that looks good and keeps your pieces easy to reach. A drawer style box does both. It holds rings and bracelets in separate spaces and makes morning prep faster.
Next steps: gather simple supplies.
– What you’ll need
– recycled cardboard for the base and the drawers
– colored or patterned paper for the shell
– soft felt or velvet for lining
– glue and scissors
– a ruler for straight edges
– a clear finish to guard the paper
– ribbon or string for small pulls
Here is how to build it. Let’s break it down.
1. Cut the cardboard into a box with several shallow drawers. Make each drawer the same depth so they slide easily.
2. Glue the drawers into the box frame. Let it dry completely.
3. Line each drawer with felt. Press the felt smooth so nothing snags.
4. Cover the outside with your paper. Smooth out air bubbles and seal with a clear finish.
5. Add tiny pulls from ribbon. They make opening a drawer quick and fun.
Tips: leave a tiny gap around each drawer edge so it slides well. Choose a finish that protects from wear. This DIY jewelry box suits any dresser and keeps your things organized with style.
@media(max-width:480px){
@media (max-width: 600px) {
.normal-quiz-iframe { min-height: 570px !important; height: 570px !important; }
}
11. Layered Keepsake Box
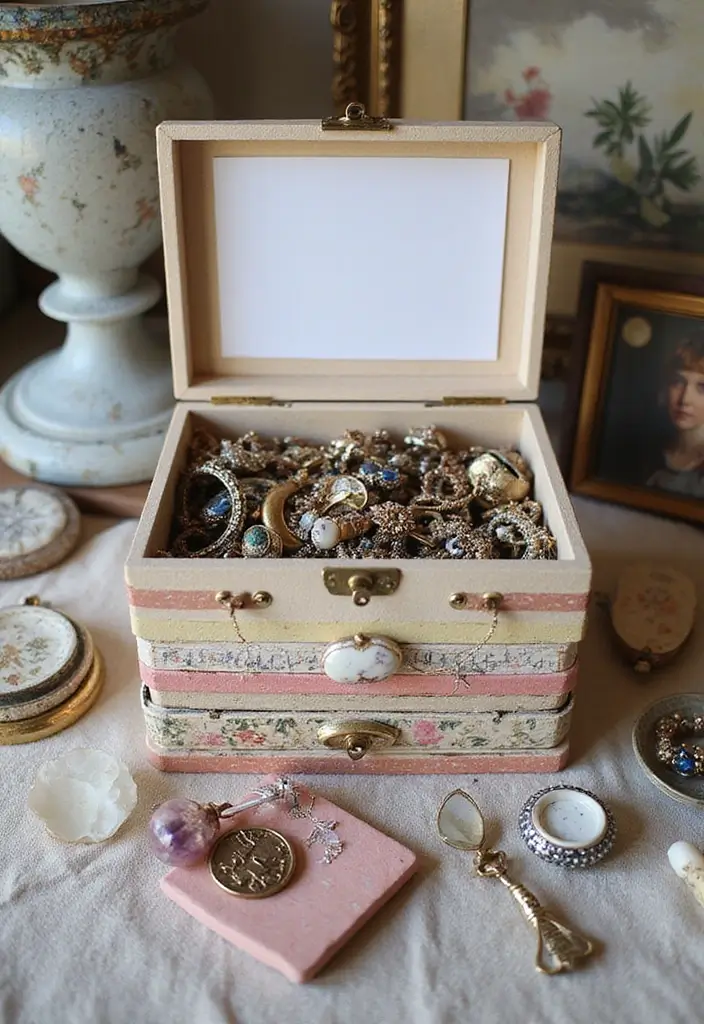
If you want a home for jewelry and keepsakes, a layered keepsake box fits the bill. It keeps items easy to reach and gives you a pleasant display.
Build it with several layers or compartments. You can sort rings, earrings, charms, notes, and small photos.
This project works as a thoughtful gift or a personal keepsake for your own memories.
Choose papers and photos to add memory. Patterned paper or a favorite photo inside makes it feel special.
Layering adds depth and visual interest. It invites the eye to explore each tray.
Here is why you should plan the layout. Start with a sturdy base. Then cut dividers from the same wood or thick cardboard.
Next, decorate edges with patterned tape. Line the inside with soft fabric or felt. A clear top lets you view treasures.
If you want to give a polished look, add a latch or a ribbon closure. It keeps the lid neat.
– Plan snug dividers that carve out zones for rings, earrings, keepsakes, and notes.
– Decorate with decoupage to attach small images, patterned paper, or pressed petals.
– Finish with closure a small latch or a ribbon tie to keep the lid tidy.
With care, this layered keepsake box becomes a small treasure you can reuse and pass on.
@media(max-width:480px){
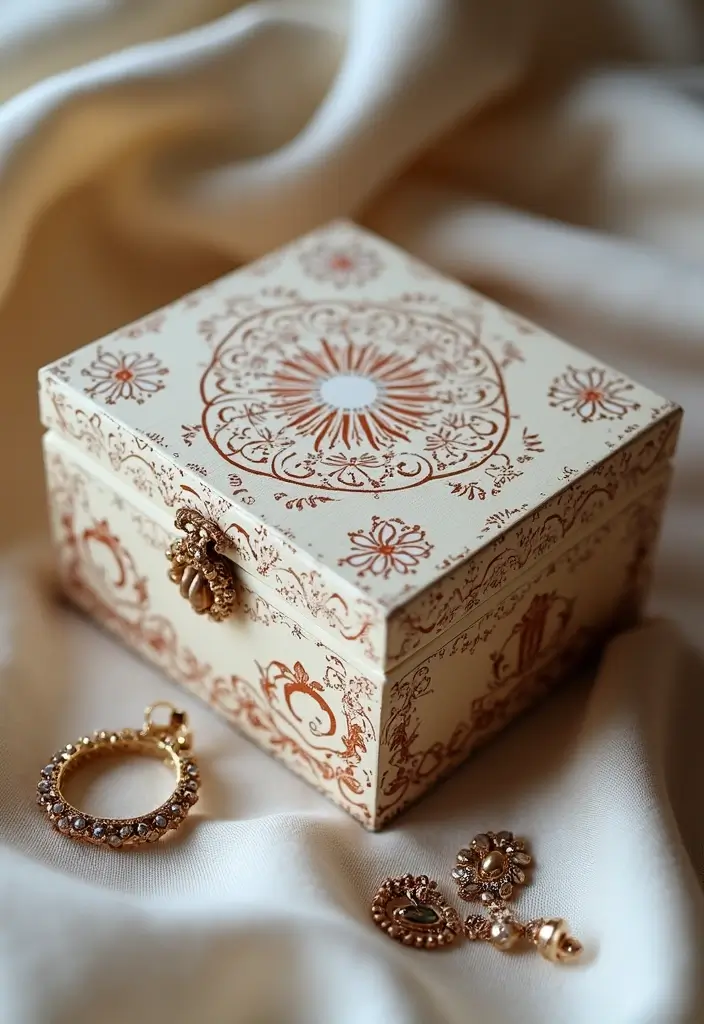
12. Chic Box with Hand-Painted Designs
Here’s a simple way to add charm to a plain paper jewelry box. A hand-painted design makes it feel special. You get something you can use every day and still admire.
Here is why this works. A small painting changes how you see a box and how a room feels.
– Materials you’ll need. Acrylic paints or watercolor paints work well. A small, smooth brush helps you control lines. Keep a cup of water and a paper towel for cleaning.
– Prepare the box. Wipe it clean. Lightly sand edges so the paint sticks. If the box has a glossy finish, wipe it with a bit of alcohol to remove slickness.
– Choose your method. Freehand art shows your personality. Stencils keep shapes neat if you want clean curves. You can sketch faint lines with a pencil first.
– Build the design in layers. Start with a simple base color. Add shapes, then small details. Let each layer dry before the next. Keep your lines crisp by using thin layers.
– Seal the work. Apply a clear top coat so colors won’t smear. A spray sealant is fast and easy. Allow the finish to cure fully before handling.
– Match your decor. Pick colors that echo your room. You’ll create a cohesive look in your space. Look at photos of your space for color picks.
Next steps: place the box where you’ll see it daily. This DIY paper jewelry box becomes a warm touch on a dresser, vanity, or shelf, and it lasts with a little care. If you want, try a pair of boxes with different themes to suit different rooms.
@media(max-width:480px){
13. Eco-Friendly Tube Box
Need a simple, eco-friendly way to tidy up necklaces and bracelets? Try an Eco-Friendly Tube Box. It turns cardboard tubes into light, stylish organizers you can display on a shelf or on a wall. You reuse materials that might otherwise be waste, and you get a neat look with little cost.
What you need
– Clean cardboard tubes from toilet paper or paper towels
– Decorative paper or gift wrap
– Glue or tape
– Scissors
– Twine or ribbon for closures
– Optional: dried flowers, leaves, small tags, or a bit of felt
Next, Steps
– Cut each tube to your desired length.
– Cover the outside with paper. Glue, then press the edges smooth.
– Add a small closure with twine or ribbon. Tie lightly so you can open easily.
– Decorate with dried plants or a tiny tag to show what’s inside.
Next, display ideas
– Stack tubes in a shallow tray for a compact jewelry shelf.
– Mount a row on the wall by looping a string behind each tube.
– Place a few tubes in a drawer organizer for quick access.
Why this works
– It uses common scraps and keeps pieces visible, so you pick the right item fast.
– It’s inexpensive and easy to customize with colors and patterns.
– It protects delicate pieces when you line the inside with felt or fabric.
Next steps
– Pick a color scheme and gather supplies.
– Make a set for different jewelry kinds (necklaces, bracelets, rings).
– Try it this weekend and adjust sizes for your space.
14. Decorative Jewelry Tray
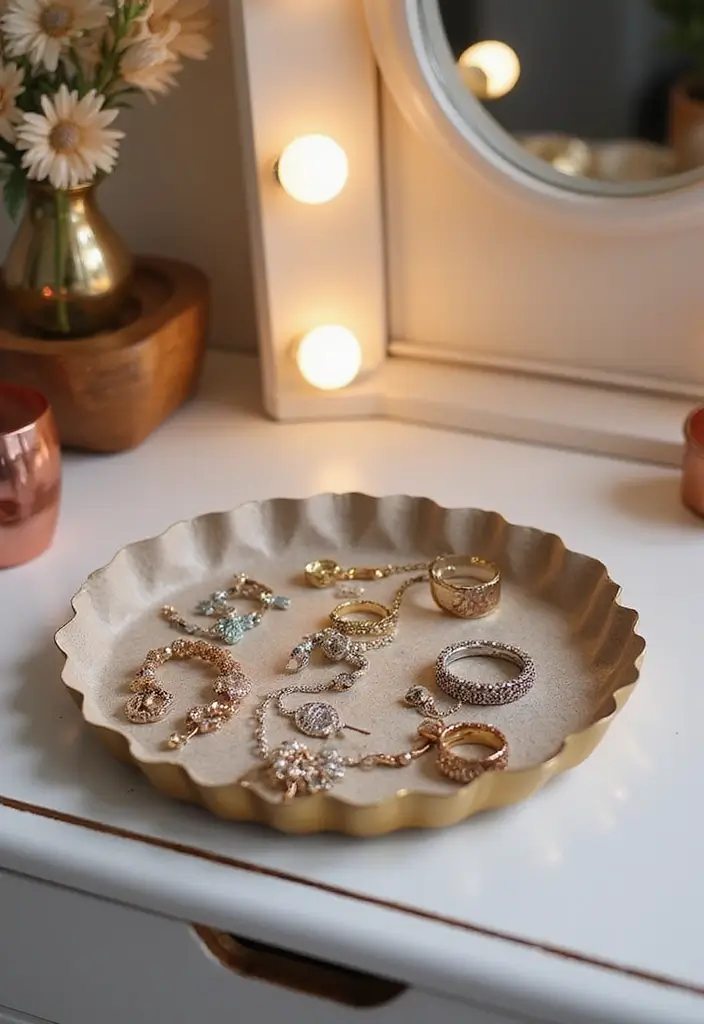
Decorative Jewelry Tray
Do you want a neat spot for rings, earrings, and bracelets? A paper tray can be that place. It’s cheap, fast, and stylish. Use sturdy cardstock and pick a size that fits your space. A shallow tray works for everyday pieces; a deeper one can hold more.
– Cut a base and four sides from the cardstock.
– Glue the sides to the base. Let it dry fully.
– Decorate the edges with color or pattern. A touch of washi tape adds charm.
– Cover the top with a clear adhesive sheet for a smooth finish.
– Line the bottom with soft fabric for a luxe feel.
– Make a few mini trays to separate rings, earrings, and bracelets.
Place it on a dresser, vanity, or inside a jewelry box. It makes daily use quick—grab your pieces and go.
Tips
– Round the edges to avoid snags.
– Pick calm colors that match your decor.
– If you want multiple trays side by side, add a thin divider between them.
Next steps: choose a look, cut the pieces, and glue them together. Your new tray will keep pieces safe and easy to find. It’s simple, fast, and you control the style.
@media(max-width:480px){
15. DIY Jewelry Roll
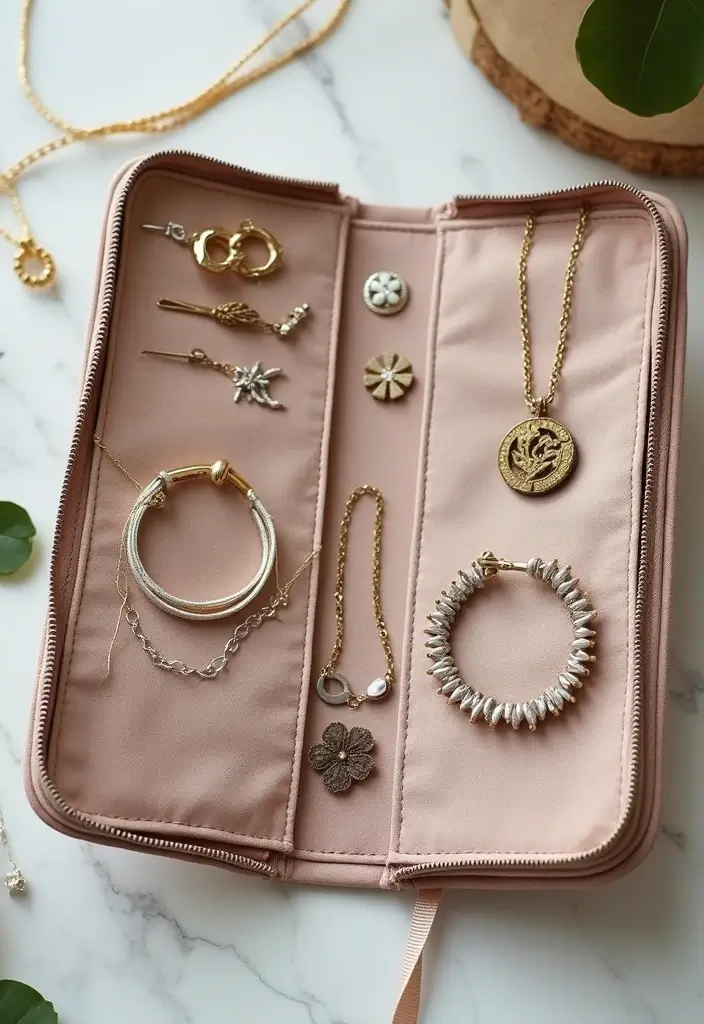
Keep your jewelry neat on the go with a DIY jewelry roll. This simple craft helps you avoid tangles and lost pieces when you travel or store items at home.
– Pick sturdy materials. Use thick fabric, felt, or thin leather. Patterned fabric adds style and helps the roll stand out.
– Plan the pockets. Include small rings pockets, two earring slots, and a larger slot for bracelets or a chain.
– Add a secure closure. Use a snap, button, or ribbon tie to keep items in place.
– Reinforce the pockets. Stitch strong edges so rings won’t slip out.
– Keep it travel friendly. Choose a compact size and a roll that lays flat when closed.
– Personalize it. Try embroidery, small appliques, or tiny beads for a unique gift.
– Use a soft lining. A smooth inner layer protects jewelry and makes packing easy.
How to build it
– Cut fabric to fit the pockets and the rolled width.
– Sew or glue pockets, then sew the closing seam.
– Attach the closure and test with a few pieces. Adjust pocket sizes if needed.
With a DIY jewelry roll, your pieces stay tidy and ready. It also makes a thoughtful gift for travelers who pack light and love style.
16. Collapsible Paper Box
Collapsible Paper Box for space-friendly storage
Need a storage fix that saves space and keeps things easy to find? A collapsible paper box can hold jewelry and small treasures, and it folds flat when you’re done. Here is how to make one that’s sturdy and simple to use.
– Use heavier paper or cardstock to add sturdiness.
– Cut pieces carefully and score the fold lines so it folds cleanly.
– Glue tabs or use strong tape to hold the box shape.
– Add a decorative ribbon to secure the lid.
– Make a few sizes so you can store rings, earrings, and other small items.
– Add a divider or a small fabric pouch inside.
Color and finish ideas
– Choose colors or patterns you love.
– Bright colors catch the eye and brighten a dresser.
– Simple patterns look calm on a nightstand.
– Inside, you can line pockets for extra grip.
Why this works
It slips into drawers or shelves and still looks nice. It’s portable and cheap to make. It isn’t for heavy items or wet spaces. Use it for light jewelry, keepsakes, or desk bits.
Next steps
Decide your sizes, grab supplies, and test fold a prototype. Start with a small test box to check fit, then go bigger. With a few colors, you get a cute, practical storage solution.
17. Box with Compartments
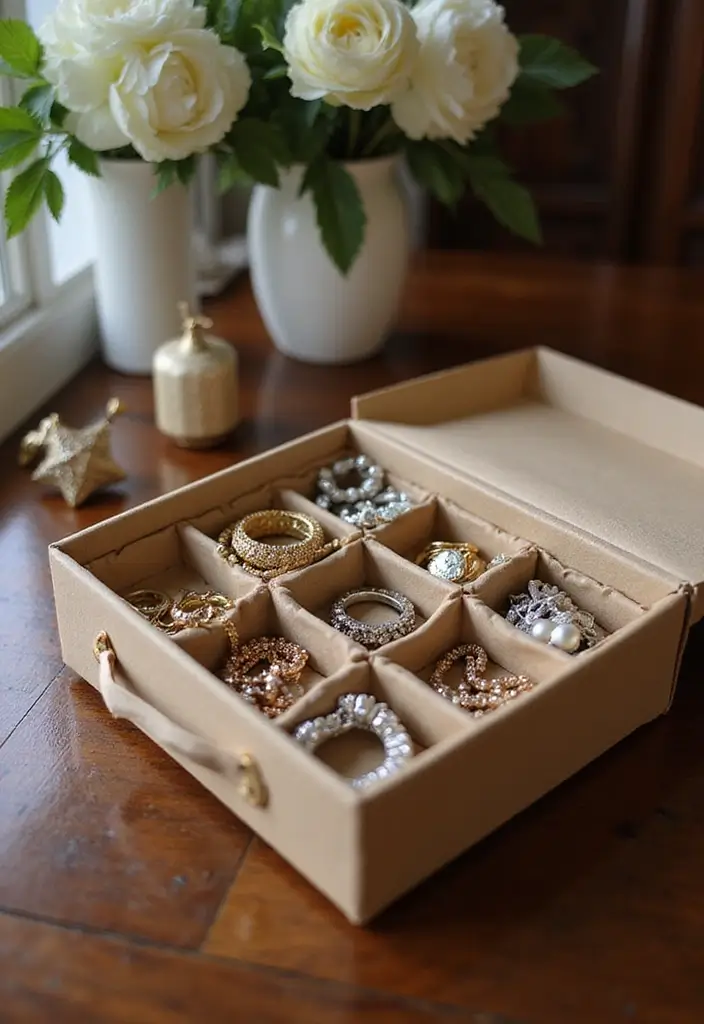
If you want tidy jewelry, a box with compartments makes it easy. It saves time and protects pieces from scratches. This design travels well in a drawer or small bag.
Next steps help you build it.
– Plan the layout Start with a rough sketch to place rings in tiny pockets, bracelets in wider slots, and long spaces for necklaces.
– Cut and score Use sturdy paper or thin cardboard; cut a base, sides, and dividers, then score along marks so folds stay sharp.
– Build the dividers Create dividers of different heights to separate items, glue them in place, and leave a little space so you can slide pieces in without snagging.
– Seal and base Line the bottom with soft fabric or felt, add a slim lid, and test fit before final glue to keep everything snug.
– Decorate and personalize Choose a color theme, add stickers or washi tape, and label each section with tiny tags so you can spot items at a glance.
– Care and use Keep the box away from moisture, store it in a drawer or on a shelf, and adjust dividers as your collection grows.
– Choose the finish Add a clear coat on the outside to protect color and a pinch of shine; it helps the box last.
With this approach, your jewelry stays neat and easy to browse. You will find the piece you want in seconds rather than digging through a jumble.
18. Creative Hexagonal Boxes
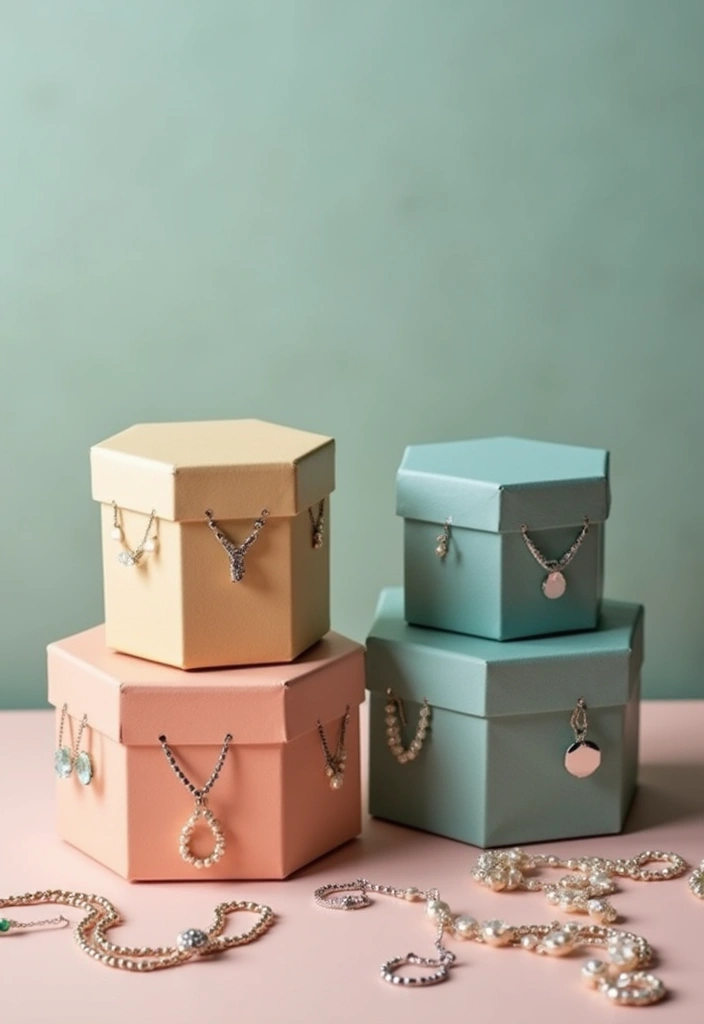
Why hexagonal boxes work
They look clean and modern. They save space and give room for jewelry. You can pull off a geometric vibe with a few simple steps.
– Use sturdy cardstock or craft board.
– Cut a hexagon base and six side panels.
– Glue the walls to the base, then add a matching hexagon lid.
– Line the inside with velvet, felt, or soft fabric.
– Decorate with paint, metallic accents, or washi tape.
– Stack boxes to create a tiny gallery on your desk.
Next, a practical build. Start with a thick hexagon base. Cut six rectangular strips for the walls. Glue the strips to the base to form a shallow box. Let it dry. Add a lid made from another hexagon piece. Press the edges smooth. Line the interior to protect rings and earrings. Finish with a light coat of color or gold trim.
Decoration tips that work. Choose matte colors for a calm look. Add a thin metallic edge for a hint of shimmer. Apply a paper pattern with decoupage for texture. Use a soft lining to keep pieces safe.
Where to place them. On a dresser or shelf. They look best in pairs or stacks.
@media(max-width:480px){
19. Stencil Art Jewelry Box
Want a jewelry box that feels unique, not mass made? A stencil art box delivers. Start with a plain lid or small box and clean the surface. Lightly sand the top so paint grips. Choose a simple pattern or a full scene that fits your style. You hold the look with color choices and how you layer the shapes. Keep tools handy: stencils, tape, spray or ink, a small brush, and a clear top coat for shine and protection.
What you need
– Choose a sturdy, flat-topped box as your base.
– Pick stencil sets with patterns you enjoy.
– Use spray paint or ink to keep lines crisp and prevent smudges.
– Secure stencils with low-tack tape so they stay in place.
– Begin with a light base color, then add bolder overlays.
– Layer several patterns to create depth and interest.
– Experiment with contrast: black and white for pop, soft pastels for subtlety.
– Finish with a clear seal to protect the art and the box.
– Gift idea: wrap for a friend who loves handmade pieces.
– Let the box dry fully before moving or filling it.
Let the paint dry in a warm room. You will smell it for a bit, then you have a nice gift.
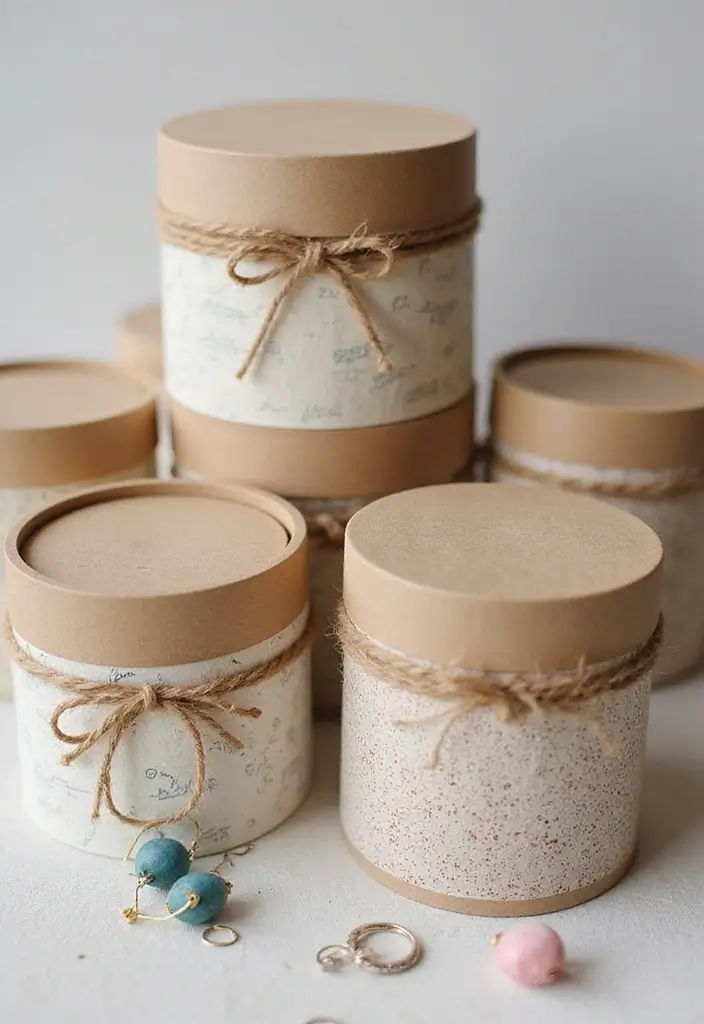
20. Round Paper Box with Lid
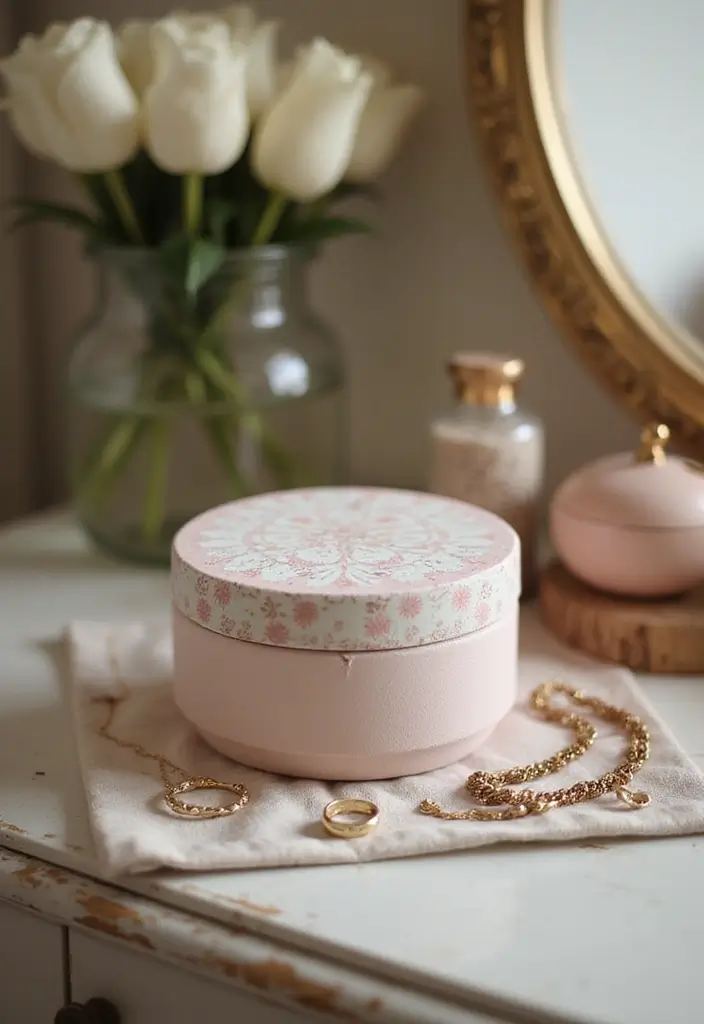
Want a cute, space saving way to store your jewelry? A round paper box with a lid fits the job. It uses cheap materials and is easy to make. You will see how quick a fresh storage idea comes together. Here is why this shape helps: round boxes stack neatly and keep small pieces from sliding around.
What you need
– Cardstock or heavy recycled paper
– Scissors, glue, and a pencil
– A circle template for the base and lid
– Decorative paper, stickers, or paint
– Ribbon or string for a simple closure
Let’s break it down
– Step 1. Trace a circle for the base using your template.
– Step 2. Cut out the base circle and a second circle for the lid.
– Step 3. Cut a strip of paper tall enough for the box sides.
– Step 4. Glue the strip to the base to form a shallow bowl.
– Step 5. Create the lid by tracing and cutting a circle slightly larger than the base.
– Step 6. Attach a short rim around the lid so it fits snugly over the box.
– Step 7. Decorate with decorative paper, stamps, or paint to match your style.
– Step 8. Add a closure with a ribbon tied in a small bow around the lid.
Next steps: place rings, earrings, or bracelets inside the box. You can make several sizes to hold different items. If you want a personal touch, add names or dates with a stamp. This round paper box with lid is sturdy enough for light jewelry and nice to look at on a dresser or shelf. It’s a simple, thoughtful DIY that blends beauty and function.
21. Upcycled Cereal Box Jewelry Storage

Turn a cereal box into a chic jewelry organizer
Need cheap, easy jewelry storage that fits your style? An upcycled cereal box can do it. It keeps rings, earrings, and bracelets neat and it helps the planet.
Here is why this works: you reuse a common item, you control the look, and you keep your pieces easy to find.
What you’ll need
– 1 plain cereal box
– decorative paper or fabric
– craft glue or decoupage glue
– scissors
– thin cardboard dividers or foam scraps
– a small handle or ribbon (optional)
Steps to build
1) Open the box and take out any inner inserts. Cut it to the height you want.
2) Cover the outside with paper or fabric. Smooth the edges for a clean line.
3) Create compartments. Use dividers to separate rings, earrings, and bracelets. Add small slots for studs and a row for hoops if you have many pieces.
4) Add a small handle or ribbon so you can pull it out of a drawer easily.
5) Glue in extra inside dividers if you have many pieces. Let everything dry.
6) Finish with a light coat of decoupage glue or sealant for durability.
Tips to customize
– Pick colors and patterns that match your room.
– Try a soft liner on the inside to protect pieces.
– A simple label on the front helps you spot the box fast.
– Use removable dividers to reconfigure as your collection grows.
Next steps: place it on your dresser or inside a drawer and start organizing today.
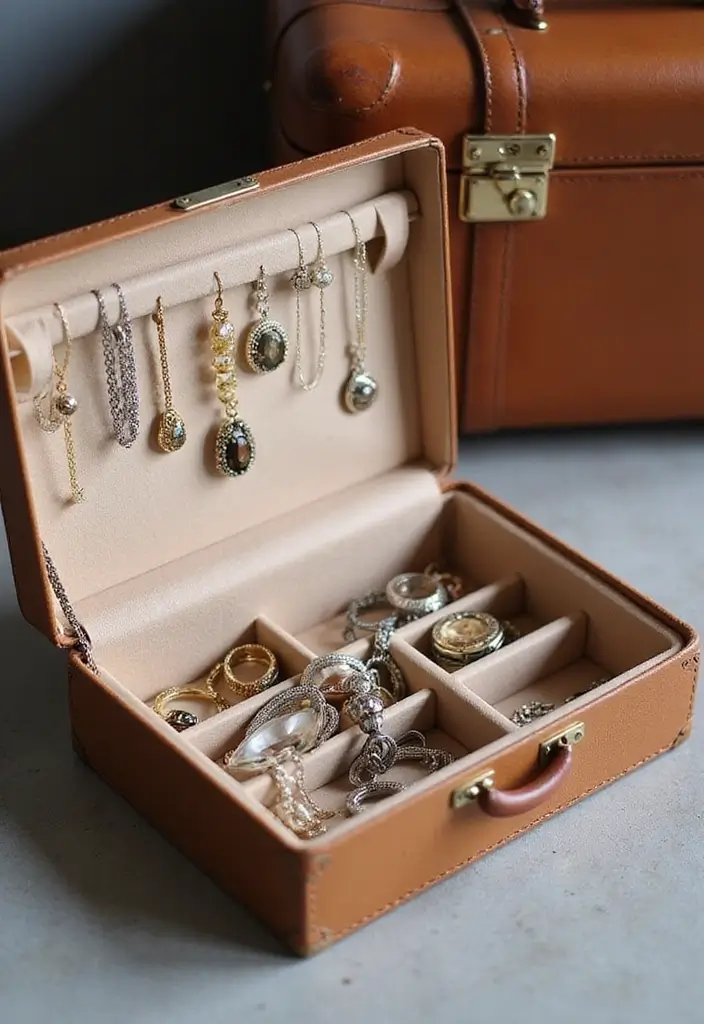
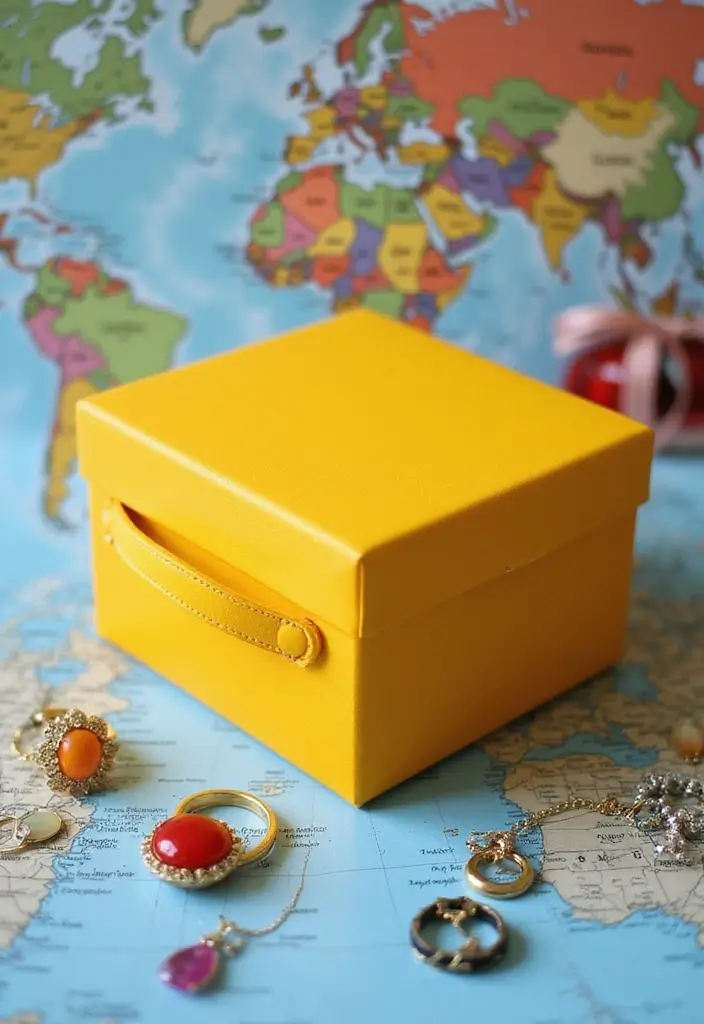
22. Miniature Suitcase Jewelry Box

Want a tiny box that holds your jewelry and looks like a mini suitcase? This mini suitcase jewelry box is quick to make and great for travel or storage.
Here is why it works: the little shell keeps pieces together, and the soft interior protects them from scratches.
– Materials
– Sturdy paper or card stock for the shell.
– Extra layers of thin cardboard for extra strength.
– Craft foam for a soft interior lining.
– A small handle (ribbon, cord, or folded paper).
– Paint, markers, or stickers to decorate.
– A tiny latch or magnet for secure closure.
– Initials or name stickers for personalization.
– Steps
– Cut two box shapes for the base and the lid.
– Glue layers to form a solid shell.
– Attach the lid and add the handle on top.
– Decorate the exterior with stripes or stickers.
– Line the inside with craft foam and add small compartments.
– Place dividers to separate rings, earrings, and a necklace.
– Add the latch or magnet so the box stays closed.
– Personalize the front with your initials.
This little travel box is charming and practical. It’s easy to customize with colors you love. Use it as a gift or keep your pieces neat on trips.
23. Nested Box Set

Need a tidy jewelry stash that doubles as a display. You want boxes that save space and look good. A nested box set does just that. Build several boxes that fit inside one another. Each box can show a different style, yet they stack neatly.
– Plan outer, middle, and inner sizes so they nest without sticking
– Choose sturdy materials like thin wood, plywood, or thick cardboard
– Add a soft lining such as velvet or felt for safe storage
Materials
Keep it simple and affordable. Wood or cardboard, glue, sandpaper, small nails or brads. Paint, brushes, or decorative paper. Fabric lining for the inside.
How to make
1. Sketch the sizes. Leave about a half inch for rims or edges.
2. Cut the panels to size. Sand until smooth.
3. Assemble the frames with glue. Let them dry well.
4. Decorate each box differently. Try two colors that clash in a good way.
5. Glue a thin lining to the inside walls.
6. Add lids if you want them, or leave them open to see the contents. Check the stack so it sits flat.
7. Finish with a clear coat to protect the paint.
Tips
– Use contrasting colors for a modern look
– The largest box can hide the others when closed, giving a clean showpiece
– Gift a nested set to a friend for a thoughtful present
Next steps: place rings, earrings, and chains in their own box. Stack and unstack to enjoy both beauty and function.
24. Teabag Box Jewelry Organizer
Looking for a small, affordable way to keep tiny jewelry tidy? A teabag box can become a neat organizer you actually enjoy using. It’s quick to make, respects the planet, and fits on a nightstand or dresser.
What you need
– One used teabag box, clean and dry
– Decorative paper or paint for the outside
– Fabric or felt for lining
– Glue, scissors, ruler, and a pencil
– Simple labels or a marker to mark areas
Step-by-step
– Start by washing the box and letting it dry completely. A dry box holds up better over time.
– Plan the inside. Lightly draw lines to map out compartments for earrings, rings, and bracelets.
– Decorate the outside first. Wrap it with decorative paper or give it a clean coat of paint so it matches your room.
– Line the tray with fabric or felt. The soft base protects delicate pieces and feels nicer to touch.
– Add small dividers if needed. You can glue in thin cardboard pieces to create sections that fit your items.
– Label each section with a tiny tag or marker. Quick labels keep you from grabbing the wrong spot in a rush.
Tips for best results
– Pick colors that match your decor for a cohesive look.
– Seal the outside with a light spray to keep dust away (do this in a well-ventilated area).
– Use a tiny magnetic or Velcro pin for earrings so they stay put.
– Keep it simple; you don’t need perfect lines to get a good result.
Your teabag box jewelry organizer is ready. It stores every piece cleanly and adds a small touch of charm to your space. Plus, you saved a box and cut clutter at the same time.
@media(max-width:480px){
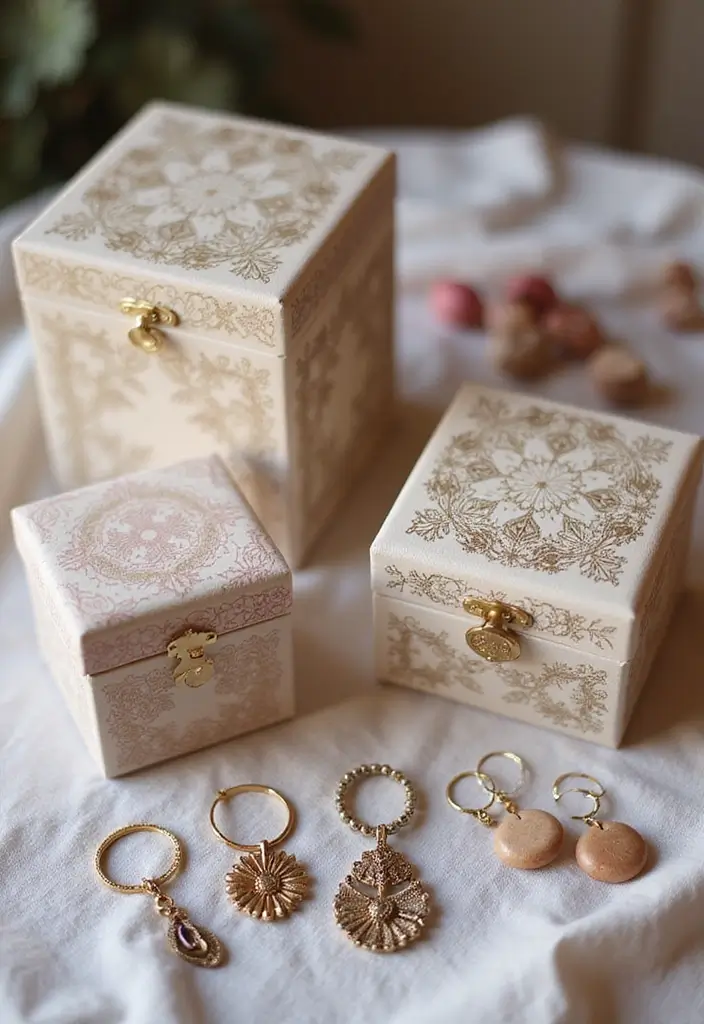
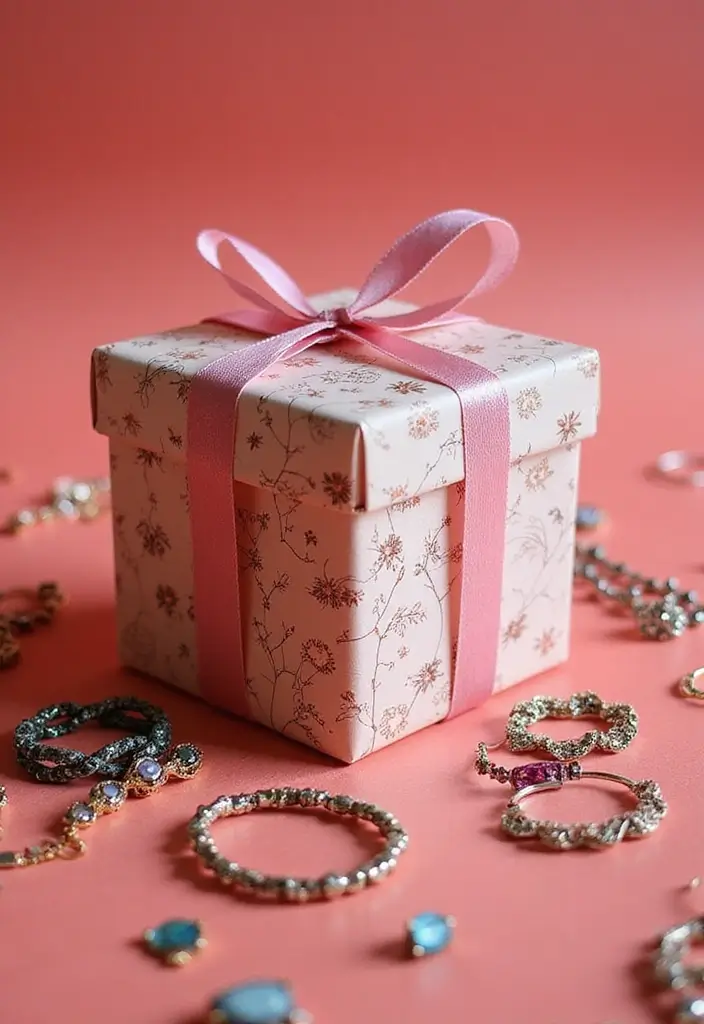
25. Decorative Gift Box for Jewelry
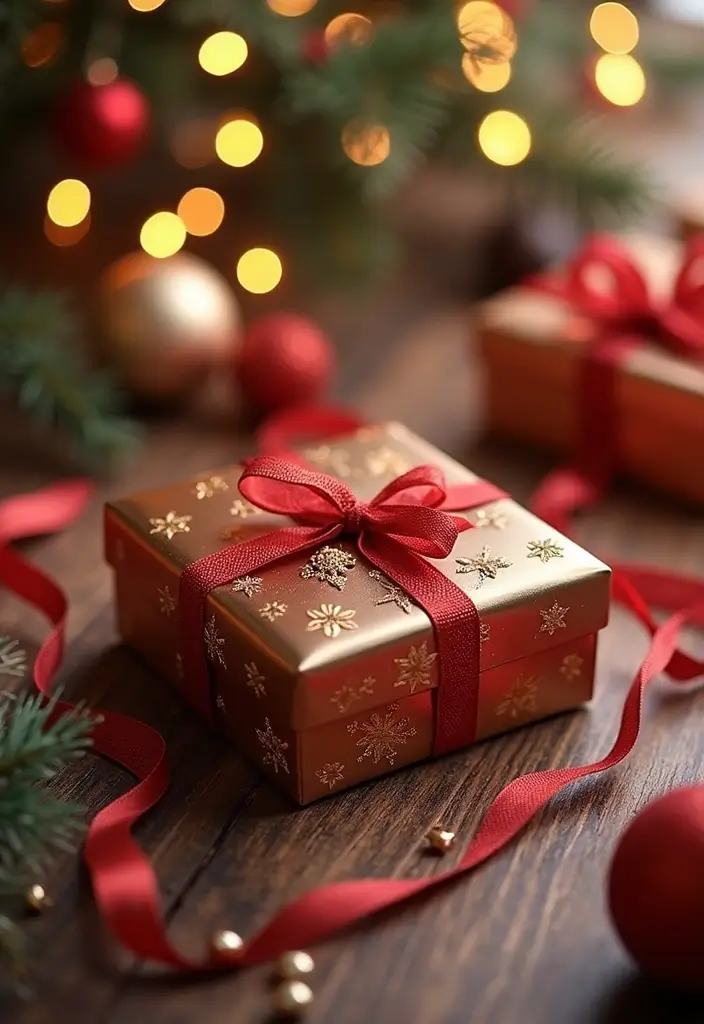
Need a gift box that makes jewelry feel special. Start with sturdy paper or cardstock so the box lasts during gifting.
Here is why shape matters: hearts work for romance, stars for birthdays, rectangles for a classic look. Choose a size that fits the piece with a little room to breathe.
Next steps: cut, fold, and glue. A double layer adds strength and helps it hold its shape.
Decor ideas you can try
– Use metallic or glitter paper for a luxe touch.
– Create custom sizes for rings, bracelets, or small necklaces.
– Add a small card slot inside for a personal note.
Practical finishing touches
– Tie a satin ribbon around the lid.
– Line the inside with soft fabric or velvet to cushion the jewelry.
– Include a tiny tag or label to name the piece.
This handmade gift box will be practical and memorable. The recipient will notice the care you put into the presentation.
Tips to finish fast
– Measure twice, cut once.
– Glue thin lines to avoid lumps.
– Check the fit with a dummy piece.
– A small window on the lid shows the gift and adds curiosity.
Ship it safely with a protective sleeve. This project can be finished in an afternoon.
Try this once, then copy the idea everywhere.
26. Box with a Secret Compartment
Want a simple box that hides a secret but still holds your treasures? A box with a secret compartment brings a touch of mystery to your jewelry storage. It’s a handy project you can finish in a weekend and use every day.
Here is why you should try it. A hidden pocket makes a small keepsake feel special. It also lets you tuck away a love note or a tiny keepsake alongside your rings or earrings. You can pick a bold patterned paper to draw the eye, then build the surprise.
– Decide where the secret lives. A hidden drawer under a false bottom works well in a compact box. A panel in the lid can slide up to reveal a tiny pocket. Or try a side panel that flips open to hide a secret card.
– Use Velcro to keep the secret part secure but easy to open. A light touch is enough to avoid forcing the box apart.
– Patterned paper makes the reveal exciting. Choose colors and textures you love, and don’t fear a little contrast on the hidden part.
– Keep it simple. A clean, snug fit makes the secret feel genuine.
Here’s how to put it together. Cut your box from sturdy paper or thin cardboard. Add a false bottom or hidden panel. Attach Velcro and test the move. Decorate with washi tape or coordinating patterns. Now you have a treasure chest that stores jewelry and secrets.
Next steps: pick a style, gather materials, and start crafting. Your box becomes both storage and story.
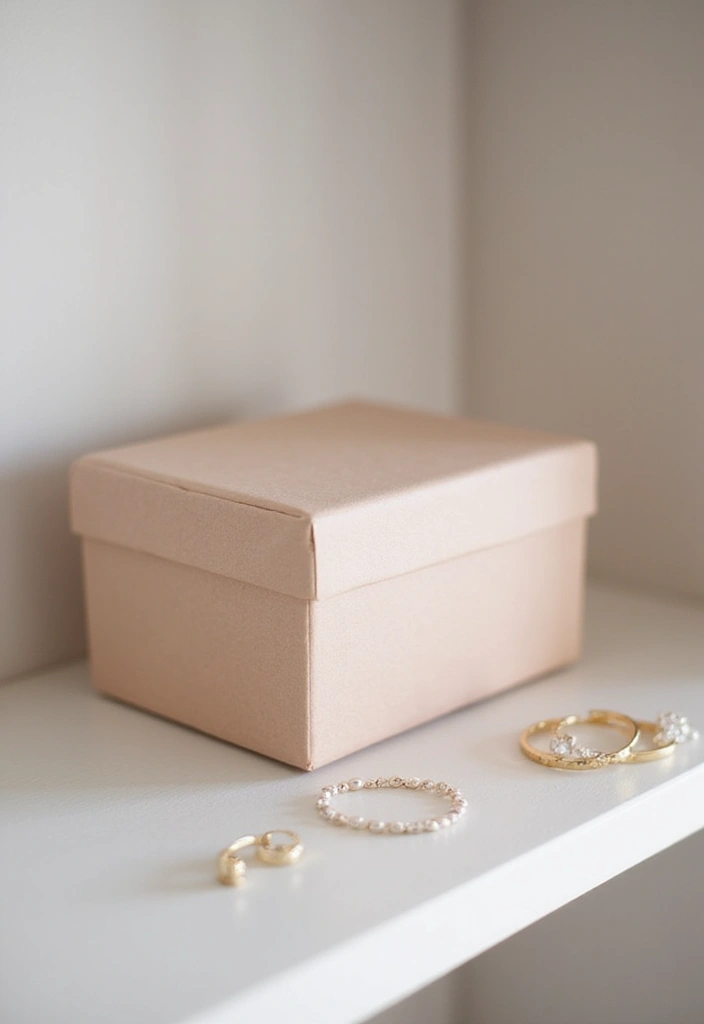
27. Elegant Pillow Box
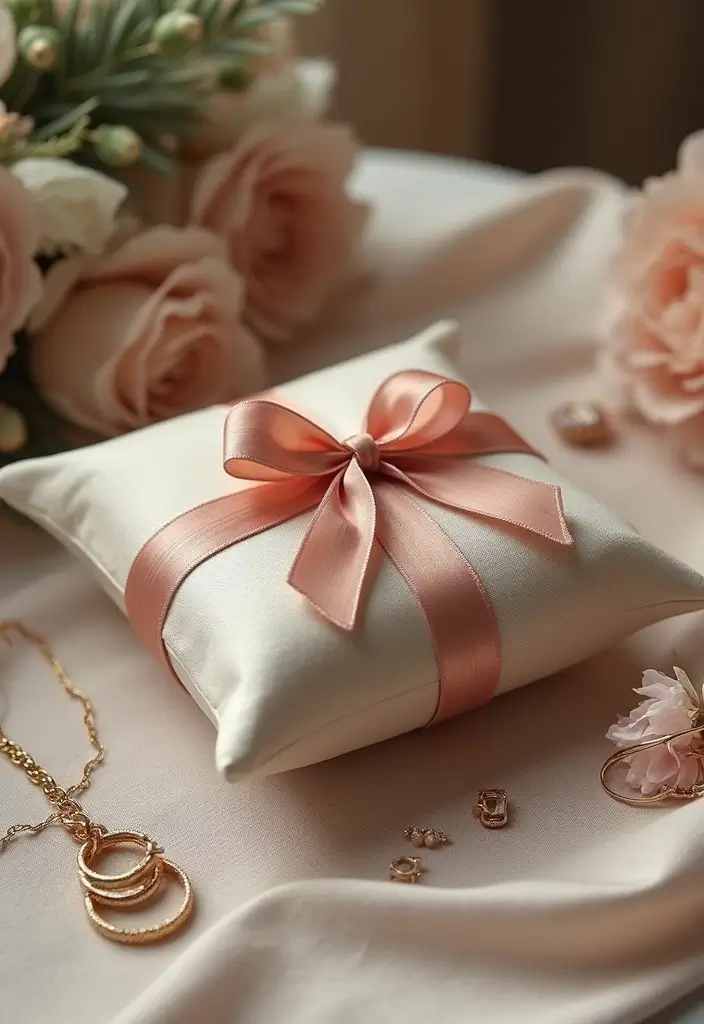
Elegant Pillow Box
You want a small storage option that also feels like a gift. A pillow box gives you that: soft curves, sturdy inside, and a stylish look. It works great for earrings, rings, or a delicate bracelet.
Why it helps: the rounded shape makes a sweet first impression. It stays closed well and is easy to carry. It’s perfect for birthdays, weddings, or any special moment.
What you need
– Durable decorative paper or light cardstock
– Scissors, a scoring tool, glue
– Ribbon, a small flower or charm
– A tiny tag for labeling
How to make it
– Cut a sheet to the size that fits your item.
– Score the long edges to create gentle curves.
– Fold and glue to form the pillow look.
– Add a lid or tie a ribbon to close.
– Slip the jewelry inside and attach the tag.
Decoration ideas
– Wrap a satin ribbon around the middle
– Top with a mini fabric flower
– Attach a personalized tag for a gift vibe
Next steps: test a few sizes with your favorite papers. This pillow box adds charm to your jewelry display and makes gifting effortless. Try different color tones to match the gift mood. You can line the inside with tissue for extra protection and a neat finish.
@media(max-width:480px){
28. Brightly Colored Box with Handles
Brightly Colored Box with Handles
You want a jewelry box you can grab on the go. A brightly colored box with handles makes that easy. It stays sturdy in a bag and shows your style.
Here is how to bring one to life.
– What you need
– Colorful paper or thick cardstock
– Glue, a glue stick, and scissors
– Small trays or folded cardboard for dividers
– Fabric ribbon, cord, or sturdy string for handles
– Stickers, washi tape, or simple embellishments
– How to build
– Cut a box shape from the cardstock with a lid
– Tape the sides to make a snug frame
– Add tiny dividers inside to separate pieces
– Attach handles
– Glue fabric strips to the left and right sides
– Let the glue dry fully before lifting
– Decorate
– Paint or cover the box in a bright color
– Add stickers or labels to show your style
– Tips for travel
– Line the bottom with soft fabric or felt
– Put small pieces in a tiny pouch inside the box
– Why you’ll love it
– It is easy to carry. It keeps jewelry neat. It reflects your personality.
29. Foldable Cube Box
Looking for a compact, stylish way to store jewelry? A foldable cube box does the job. It holds small pieces and folds flat when needed. You get beauty and function in one simple project.
Here’s how to make it and keep it sturdy.
– Materials: Gather decorative paper or cardstock, a scoring tool or ruler, glue or double-sided tape, and optional hardware such as a small tab, magnets, or a ribbon.
– Make the cube: cut a square sheet big enough for your size. Score lines to form six square panels. Fold along the lines and glue the edges to hold the cube. Add a lid or a top flap that tucks in.
– Close it easily: try a tiny tab and slot, a light magnet, or a ribbon loop. These keep the lid shut but open smoothly.
– Personalize: cover each side in different paper or paint. Seal with a clear coat to protect the design.
– Use it well: store rings, earrings, bracelets, and small keepsakes. When not in use, fold flat for storage or stack with others.
– Styling ideas:
– Use a bold lid color to stand out.
– Keep the rest neutral for a modern look.
– Top it with a small ribbon handle for easy lifting.
– Gift-ready: wrap in tissue and add a note.
Next steps: pick your size, choose papers, and begin. Your foldable cube box adds neat order and charm to any space.
@media(max-width:480px){
Conclusion
Creating a DIY paper jewelry box is not just an eco-friendly project; it’s an opportunity to blend functionality with creativity.
With these 29 unique ideas, you can craft a wide range of beautiful boxes to suit any style or occasion.
Whether you’re looking for a thoughtful gift or simply want to reorganize your own jewelry collection, these projects can inspire you to get started. Let your creativity flow and enjoy the process of crafting something special!
Note: We aim to provide accurate product links, but some may occasionally expire or become unavailable. If this happens, please search directly on Amazon for the product or a suitable alternative.
This post contains Amazon affiliate links, meaning I may earn a small commission if you purchase through my links, at no extra cost to you.
Related Topics
DIY paper jewelry box
eco-friendly crafts
upcycled paper projects
handmade storage
origami techniques
vintage style
quick DIY
beginner friendly
jewelry organization
creative gift ideas
minimalist design
paper crafts