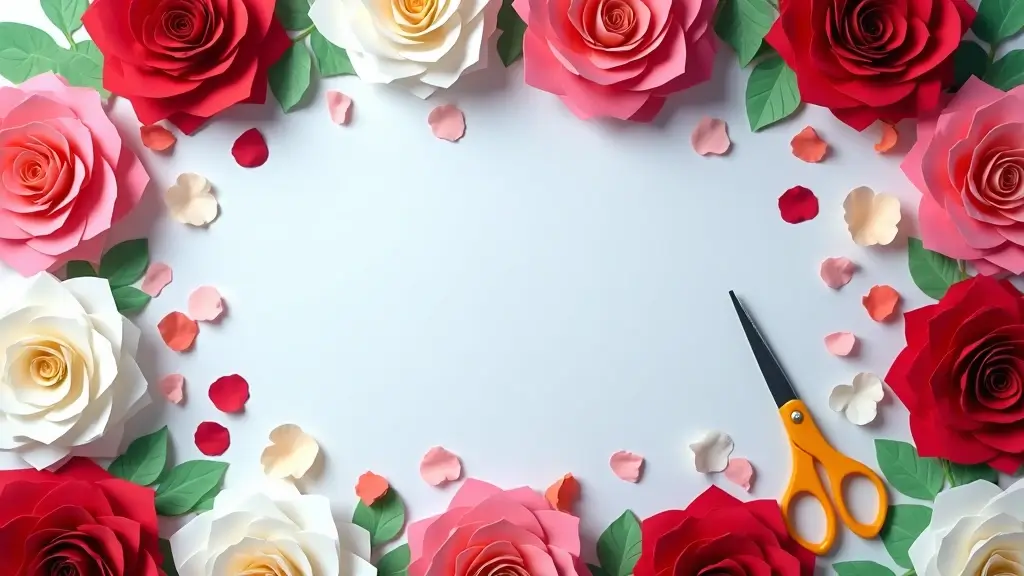
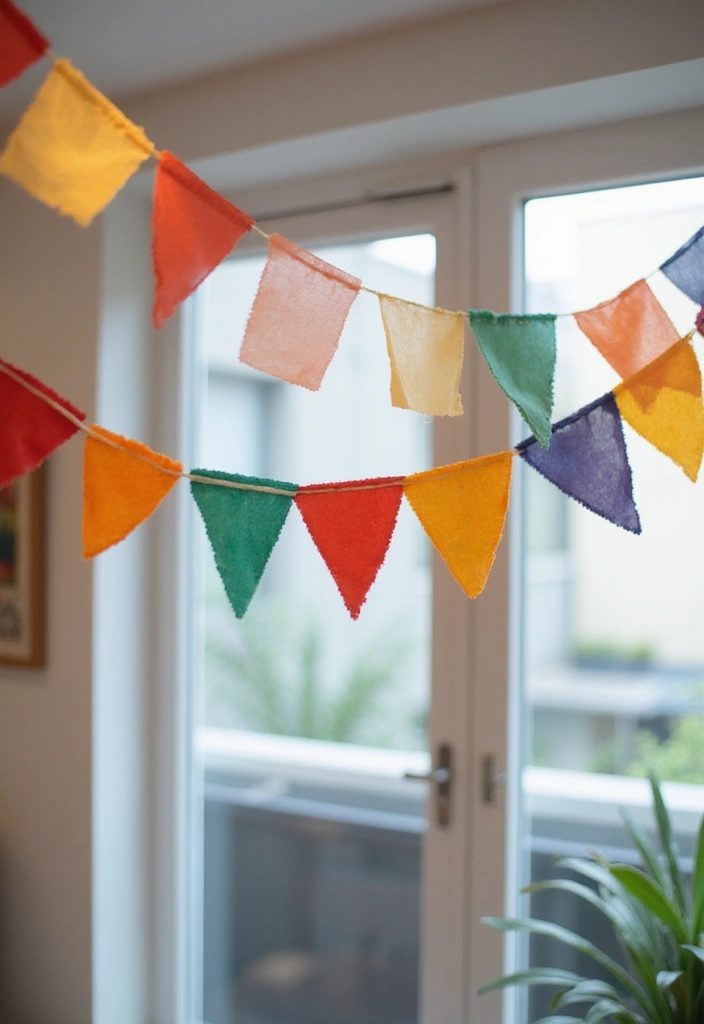
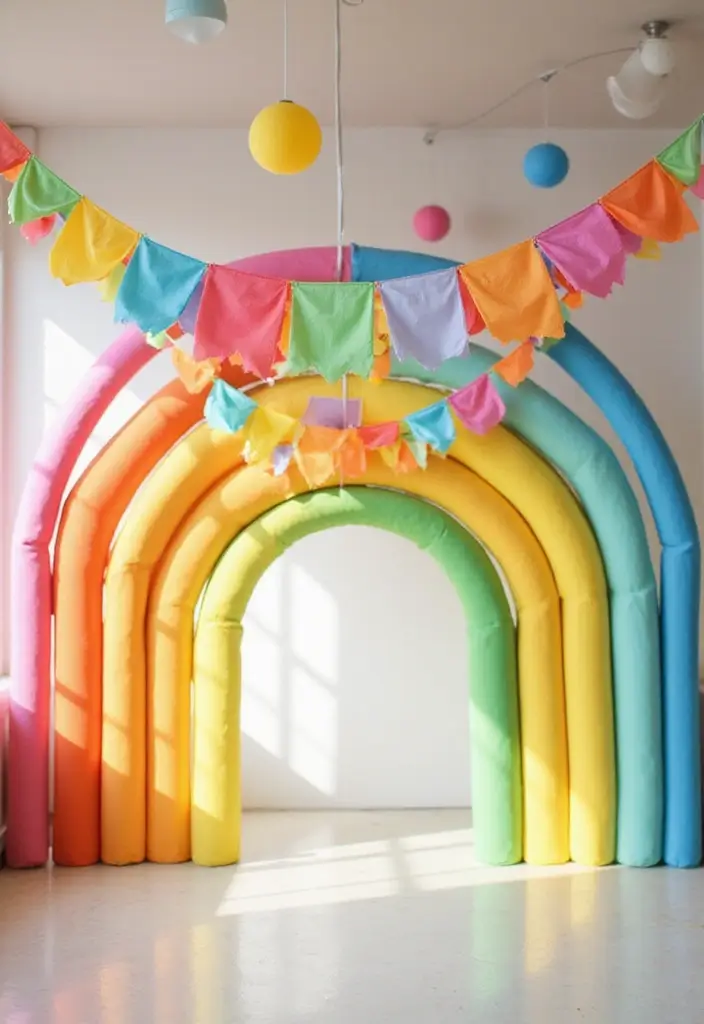
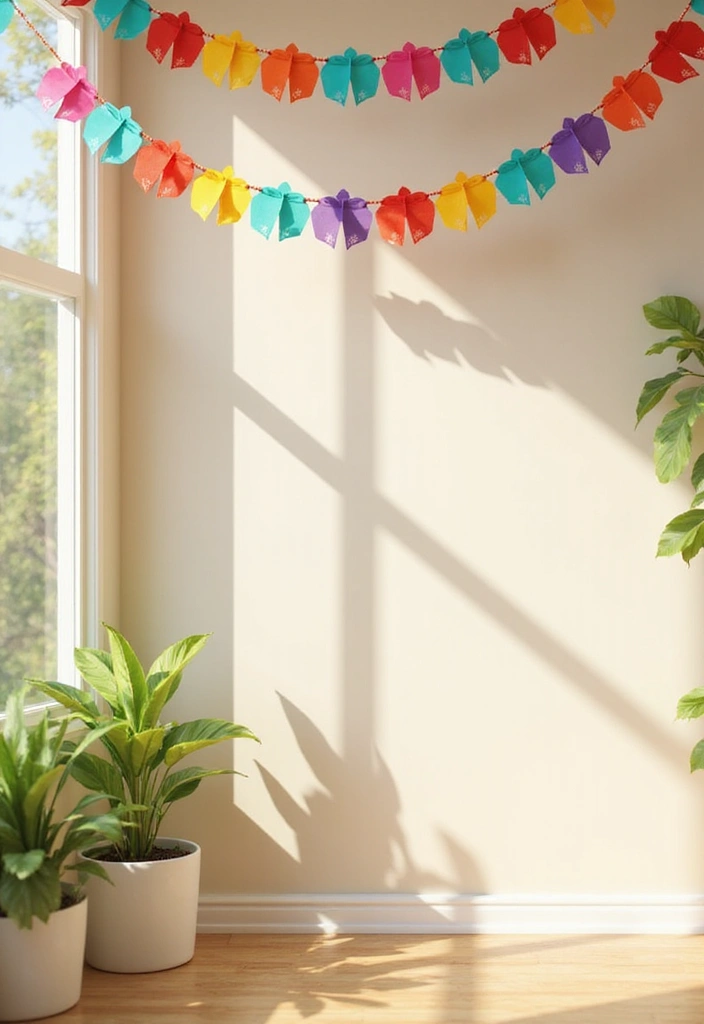
Decorating for a party should feel easy and fun. I keep noticing paper garlands brightening rooms and shelves alike. They bring color and texture fast, and they don’t cost a lot. So I pulled together 29 DIY Paper Garland Ideas That Add Festive Flair.
Here is why I made this. Why I made this is simple: I want decor that is quick to make and easy on the budget. I want ideas you can finish in a weekend with paper, string, and glue. You can mix colors to fit birthdays, holidays, or a cozy night at home.
Who it’s for If you love hosting friends, family dinners, or kids’ parties, this is for you. If you care about simple, pretty decor you can change with the season, you’ll find something here.
What you’ll get You’ll get 29 ideas you can make with paper, string, scissors, and a bit of patience. They range from bright party garlands to soft wall accents that brighten a room. You can pick a couple to start and then grow a set as you go.
Each idea comes with quick steps and tips to customize color, size, and how you hang them. You will learn tricks like mixing matte and shiny paper, using tape for clean edges, and turning scraps into new shapes. The notes are practical so you can start this weekend.
This guide is a friendly nudge to get you crafting. Start with your favorite colors and a simple shape, then build from there. Gather paper, scissors, string, and a glue gun if you have one, and watch a small project turn into a festive setup. Have fun and enjoy spaces that feel personal and bright.
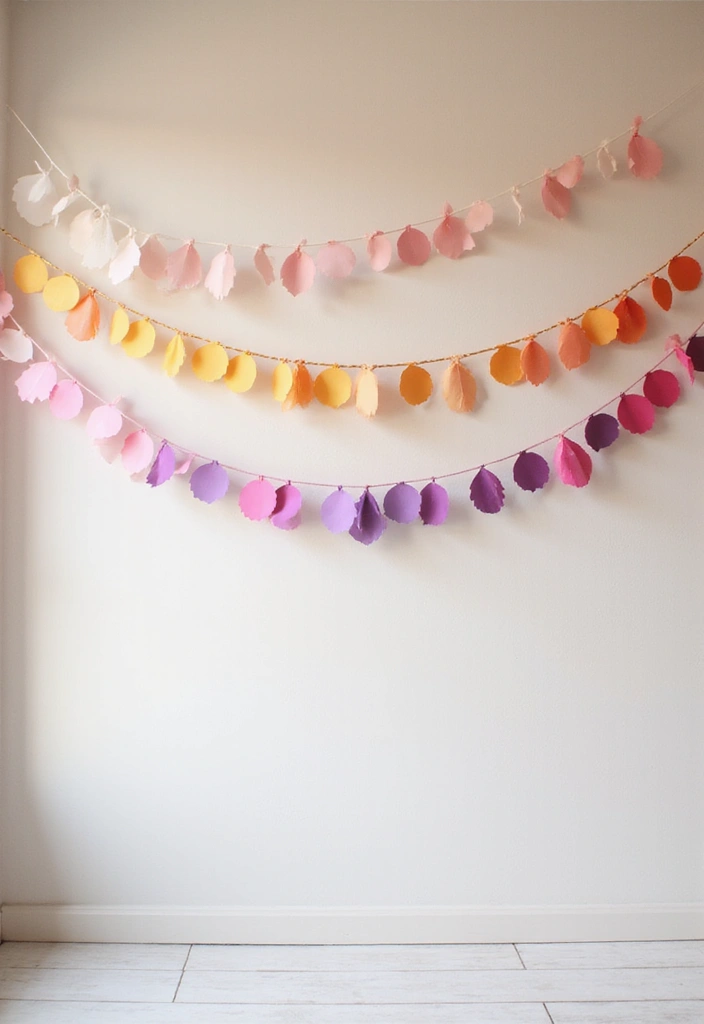
1. Colorful Circle Garland
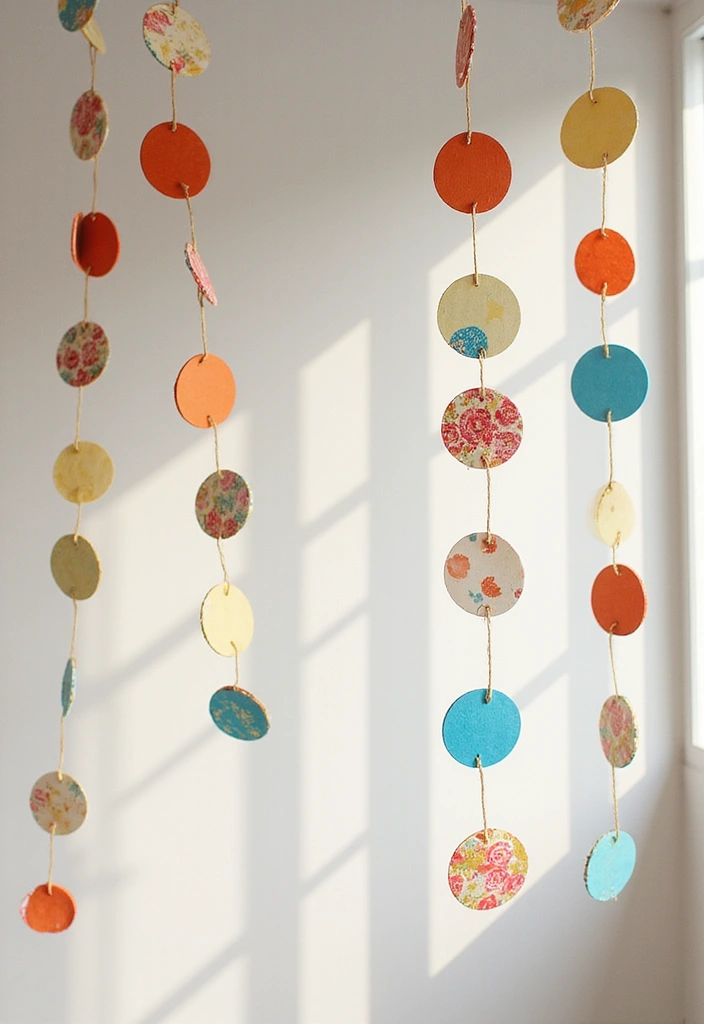
You want a party look that fits any budget. A colorful circle garland does the job. It uses scraps and adds a bright line of color.
– What you’ll need
– Scraps of patterned paper
– A hole punch or scissors
– Twine or thin string
– A needle or tape to guide
Here is why this setup works: it lets you mix prints and colors while keeping the project quick and easy.
– How to make it
– Cut or punch circles from your scraps. Vary the size for interest.
– Sort the circles by color or pattern. Create a rhythm you like.
– Thread circles on the twine. Tie a simple knot after each piece so they stay in place.
– Space the circles evenly. Let some gaps breathe to avoid a crowded look.
– Where to use it
– Drape it over a table for a festive backdrop.
– Hang it across a wall or above a doorway.
– Layer a few strands for a fuller effect.
– Tips and variations
– Add a few solid colors to make prints pop.
– Mix large and small circles for movement.
– Save scraps after the party for more crafts later.
Next steps: pull your paper stash, pick a color plan, and start punching. You’ll have a cheerful focal point in minutes.
2. Dainty Floral Garland
You want a soft, natural vibe for your space. A dainty floral garland can give you that look without a lot of fuss. Start by cutting flower shapes from bright paper, then string them together.
What you’ll need
– colored craft paper in a few gentle hues
– scissors
– string, twine, or yarn
– glue or tape
– leaf shapes (paper or cut from green paper)
– optional dried flowers for a mixed-media touch
Here is how to make it. First, draw simple flower shapes. Next, cut out many pieces in small, medium, and large sizes for a layered feel. Then punch a tiny hole at the top of each flower or glue them to a strip of paper. Add leaves between flowers to add depth. Finally, thread the shapes onto your string with even spacing, or tie them on for a floating look. If you want a mixed-media touch, tuck in a dried bloom here and there.
Play with styles. White and soft pastels work well for weddings and spring parties. Bright colors suit garden parties and casual gatherings. Hang the garland over a mantel, along a stair rail, or as a backdrop for photos. Make it long or join several strands to cover more wall space.
Tips to nail it. Use double-sided paper so color shows on both sides. Space pieces about 1 to 2 inches apart. Keep glue neat and wipe stray glue quickly. Store flat when you aren’t using it.
@media(max-width:480px){
3. Paper Star Garland

You want a quick way to add sparkle to a room. A paper star garland does that with little work and big charm. It fits holidays, parties, or a cozy night at home.
– Materials: cut stars from metallic or glitter paper. Use sturdy thread or string and a thin needle or a dab of glue.
– Star sizes: cut three sizes. Small stars line the string, medium stars stand out, large stars draw the eye.
– Colors: silver and gold look classic. Add deep blue or black for a night-sky vibe. Mix solid colors with glitter for contrast.
– Cutting tips: sketch simple stars, then cut. Punch holes at the tips or near the center for easy stringing.
– Stringing method: thread the string through the holes, or lay stars flat and tie between them.
– Where to hang: drape it across a wall, above a mantel, or from the ceiling for a dreamy ceiling canopy.
– Spacing and setup: space stars about 2 to 3 inches apart. Vary the gaps for a natural look.
– Practical use: great for rooms, dining areas, or porches. It stores flat in a bin for reuse.
With a little light, these stars shimmer and lift the mood. Next steps: cut, string, and hang.
@media(max-width:480px){
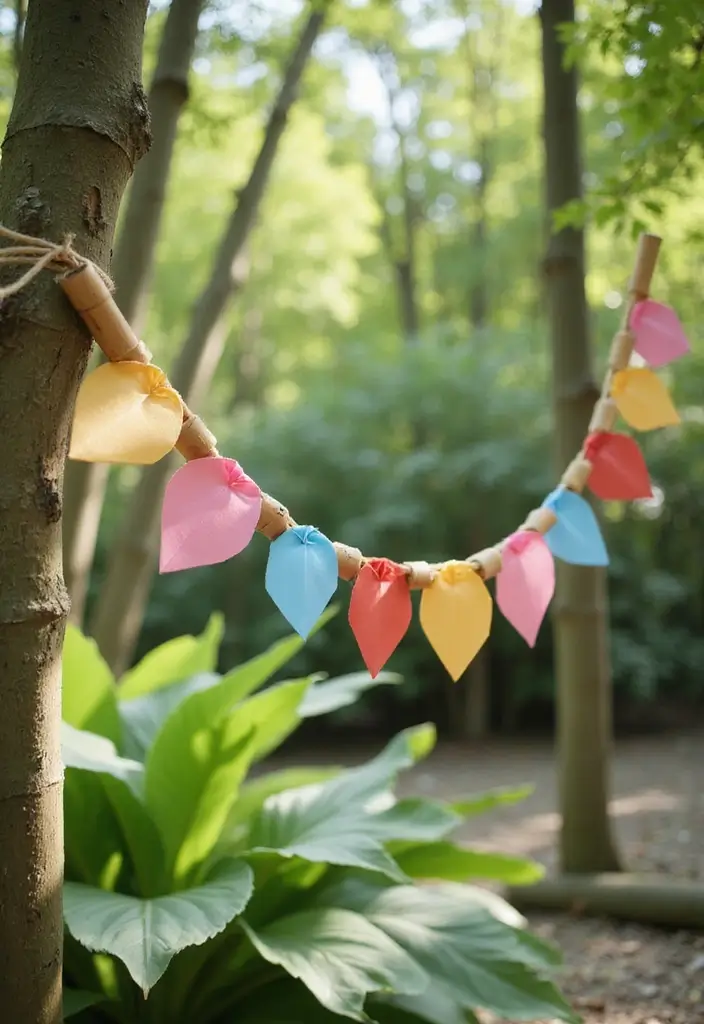
4. Eco-Friendly Leaf Garland
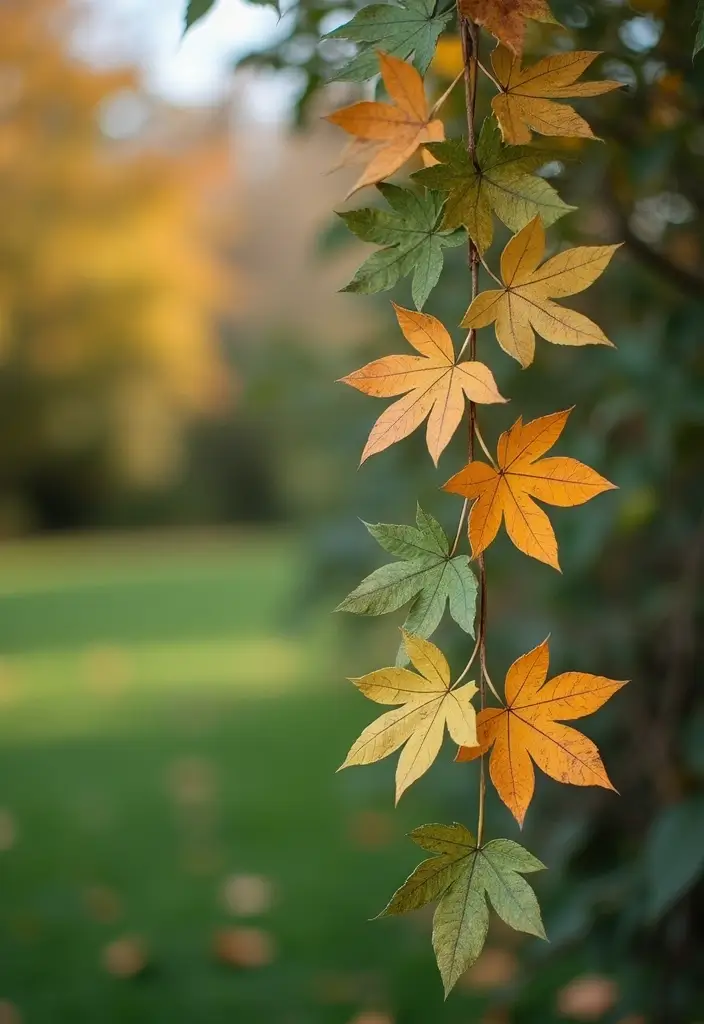
Here is why you need this: a leaf garland made from recycled paper offers a warm, natural look with little waste. Let’s break it down.
– Materials: recycled paper or old book pages. This keeps a classic green vibe. It also costs little if you already have scraps on hand.
– Shapes: cut leaf shapes with scissors. Use a simple stencil or freehand. To save time, print a simple leaf shape and cut.
– Assembly: punch two small holes near the top of each leaf. Thread with jute twine, hemp string, or thin ribbon. Space leaves about 2 to 3 inches apart for air and light.
– Color ideas: greens for a fresh feel. For fall, mix oranges, browns, and olive hues. Add a touch of lime with deep forest green for variety.
– Texture: add tiny twigs or dried flowers as you string for depth. Tie a tiny twig at the leaf base for extra texture.
– Use and setup: ideal for outdoor parties, garden arches, or eco-themed events. Hang along fencing, arches, or behind a dessert table. Indoors, place it above a doorway or as a photo-wall backdrop.
– Care and longevity: keep it dry. If damp, lay flat to dry. Store in a dry box and press leaves flat when saved.
Next steps: gather pages, cut leaf shapes, and string them. You’ll see how this easy craft brings a natural touch to your space.
5. Geometric Shapes Garland
– Geometric shapes garland gives a clean, modern look for parties or home decor.
– You cut triangles, squares, and hexagons from bright paper and thread them on a string.
– Try color gradients for a calm fade or use bold blocks for a punchy vibe.
– Vary the shape sizes to add depth and movement.
– Materials: colored paper in 3–5 colors, scissors, a hole punch or needle, string or twine, tape for hanging.
– Step by step: pick a palette, cut shapes in 3–4 sizes, punch holes, and slide them onto the string.
– Leave space between pieces so the garland breathes.
– Hang it where light can hit the shapes. A slight tilt makes edges catch the eye.
– Tips: write the palette on a sheet so you stay consistent. Tie the ends with a simple knot to keep it long.
– Uses: drape over a mantel, doorway, or along a wall. It’s easy to move and store.
– Here is a practical note: this garland works best with lightweight paper and a sturdy thread, so it stays flat and tidy even after a few days of display.
– Perfect for seasonal swaps too.
6. Ombre Paper Garland
– You want a chic backdrop that won’t break the bank.
– An ombre paper garland fits the bill and adds a soft glow to your room.
– Pick a color palette that blends well, like pale blue to deep blue or blush to rose.
– Cut your shapes in circles or scallops for a timeless look.
– Use gradient sheets or color several pieces to create a real fade.
– For a refined finish, choose double-sided paper so both sides shine.
– String the shapes by punching holes or clipping to a long thread.
– Space the pieces to create air and flow across the wall.
– Hang where light can hit it, so colors glow softly.
– This garland makes a great photo backdrop thanks to its gentle gradient.
– Here is why it works for events: it adds depth without crowding the space.
– Next steps: test a small sample first, tweak the colors, then cut more.
– When you are done, store flat so the edges stay crisp.
– Try a two-tone gradient on each shape for more depth.
– Wrap a few pieces with sheer ribbon for a subtle sparkle.
– If your wall is bright, use larger shapes to fill space.
– Store the garland flat or roll it for easy reuse.
7. Vintage Book Page Garland
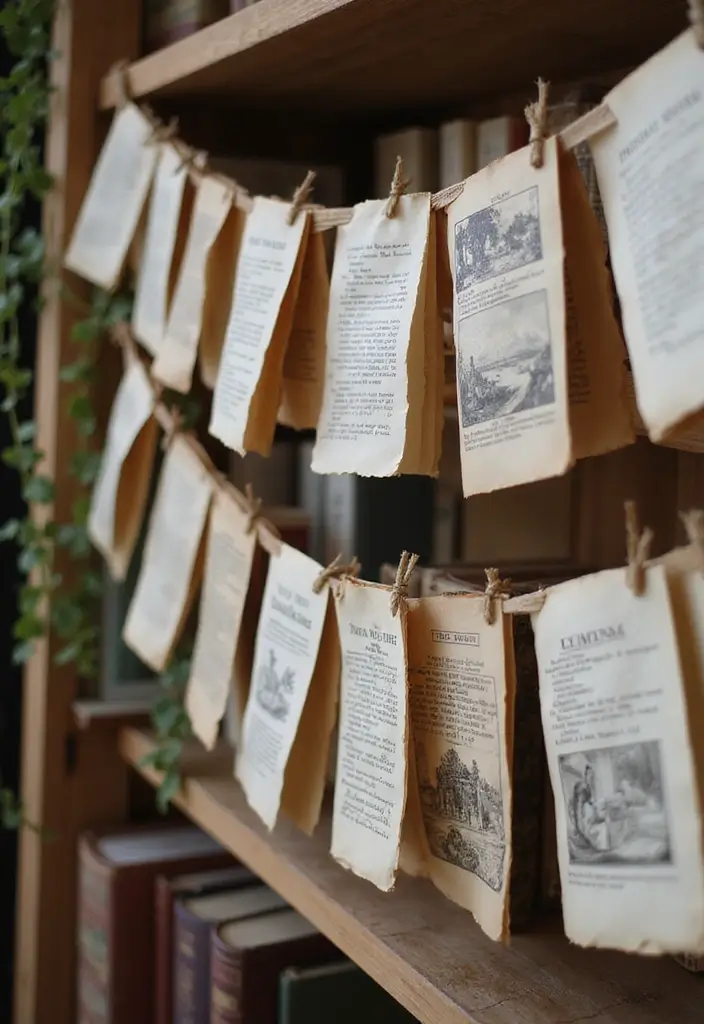
Looking for a warm, bookish decor piece you can make at home? A vintage book page garland fits.
What you’ll need
– Old books you can spare
– Scissors or a craft knife
– String, twine, or thin rope
– A hole punch or a stapler
– Optional: lace, burlap, or illustrated pages for extra charm
How to make it
– Cut pages into triangles, strips, or circles. Keep shapes simple.
– Layer different pages. This adds depth and color variation.
– Punch a hole at the top of each piece. Thread them onto your string.
– Add small accents. A lace edge or burlap between layers adds a rustic feel.
Where to hang it
– Above a reading nook or window
– Behind a table for a literary party backdrop
– As a soft banner for a book club gathering
Tips to style it
– Use illustrated pages for a whimsical touch
– Tea stain the edges for a warm, aged look
– Keep the garland away from damp spots to protect fragile pages
Why it helps your space
– It brings a cozy, inviting vibe
– It shows old books in a fresh way
– It’s easy to swap pages for different themes
Extra ideas you can try
– For a color themed party, group pieces by shade and weave a rainbow along the string
– Add a few calendar or poster pages to create new shapes and textures
– Let the scent of aged ink guide your placement near a reading chair
A vintage book page garland invites guests to slow down and read. It’s simple, stylish, and practical.
8. Rainbow Paper Garland
Need a bright, easy decor idea? A rainbow paper garland works. It adds color to any space and is quick to make.
– What you need
– Construction paper in 6–8 colors
– Scissors and tape or glue
– String, twine, or fishing line
– Optional: a hole punch
– How to make
– Cut wide arcs from each color.
– Keep the arcs big for a bold look.
– Tape the ends of the arcs to the string in a color order.
– For more depth, layer a second set behind the first.
– How to place
– Drape it across a wall, over a doorway, or above a table.
– Space arches evenly or stagger colors for a playful rhythm.
– A light string behind boosts the colors at night.
– Where to use
– Birthday parties, Pride events, classrooms, nurseries, and photo booths.
– Tips
– Mix glossy and matte papers for contrast.
– Try tissue paper or metallic sheets for a different vibe.
– Save scraps to create mini fringe or mini arches later.
Here is why this works: it’s cheap, reusable, and kid friendly. You can do this start to finish. Next steps: cut, string, hang.
9. Mini Polaroid Garland
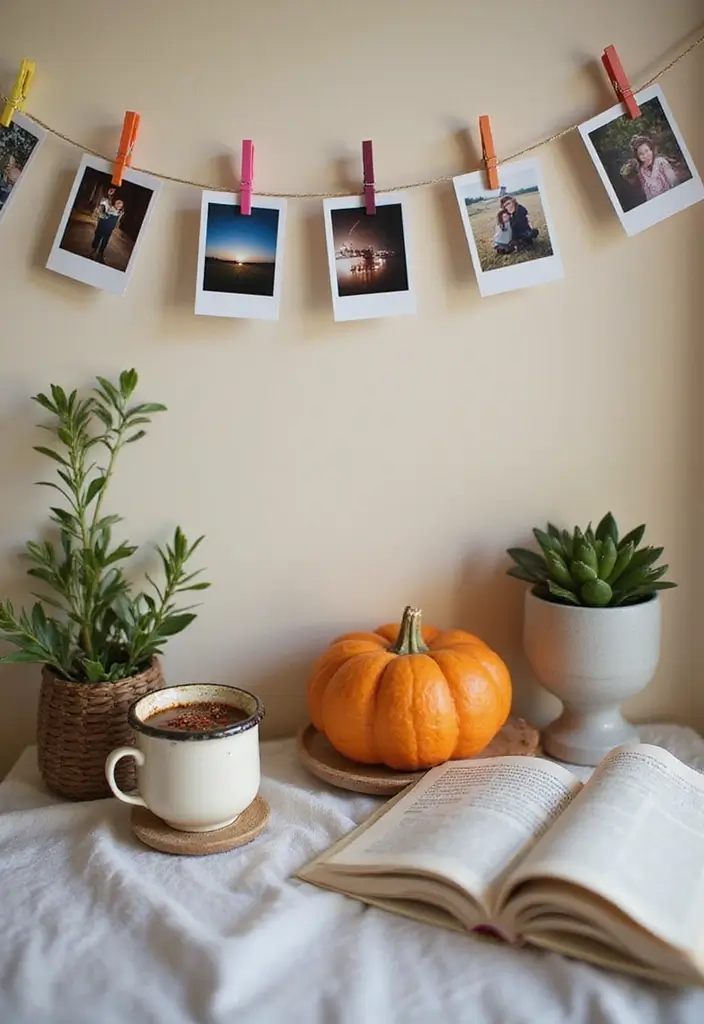
Mini Polaroid Garland
Are you looking for a way to show memories without a lot of fuss? A mini Polaroid garland does the job. It turns photos into a string of stories you can hang and rearrange.
What you’ll need
– Small prints or Polaroid-style photos
– A length of string or thin wire
– Tiny clothespins or clips
– Optional accents: ribbons, dried flowers, or short notes
How to make it
Gather your favorite images from the past year. Print them small and clear. Try a consistent size, but mix in a few different sizes for depth. String your line where guests will pass, like a doorway, mantel, or table edge. Clip photos with clothespins, keeping them about a few inches apart. Add flair by tying ribbons between some photos or slipping in a dried flower. Slide in a short quote or note on a folded strip of paper. Vary the hanging height so the garland looks lively.
Tips to boost impact
Use warm lights nearby to create a cozy glow. Swap in new memories after a few days or weeks. Keep it light so you can move it later.
Why this works
It shows your moments in a simple, tactile way. Guests can walk along the garland, read the notes, and smile. Then you can reuse it at home for other gatherings.
10. Confetti Paper Garland

Want a quick party upgrade? A confetti paper garland fits the bill. You punch tiny circles from colorful papers, thread them on twine, and you have a bright streamer that moves with the breeze. It’s light, playful, and easy to match to your theme. Great for birthdays, baby showers, and casual gatherings.
What you’ll need
– Confetti punch or circle shapes
– Colorful paper in 3–4 tones
– Twine, string, or thin ribbon
– Scissors
– Tape or glue dots
– A sewing needle (optional)
How to make it
– Cut circles in two or three sizes.
– Choose papers in your theme colors.
– Thread a circle onto the string, leave a small gap, and add another.
– If you have a needle, slide circles on quickly; otherwise tie a simple knot to hold each piece.
– Finish by tying the ends to anchor points.
Tips for a stronger look
– Mix sizes for depth.
– Pair warm and cool colors.
– Space pieces about 0.5 to 1 inch apart.
– Use double-sided paper so both sides look good.
Ways to use it
– Hang from the ceiling or above a doorway.
– Drape behind a table as a soft backdrop.
– Run it along a wall for a festive stripe.
@media(max-width:480px){
11. Cut-Out Silhouette Garland

If you want a bold art touch for a party or a kid’s room, try a cut-out silhouette garland. Pick a theme such as animals, objects, or simple shapes. Cut clean outlines from colored paper or black paper for a strong look. When you string them together, you create wall art that moves with the room.
Here is how to make it work.
– Materials: Colored paper, black paper for contrast, sharp scissors, a bit of glue or tape, string or twine, and a hole punch or a needle.
– Shapes: Decide on a few silhouettes that fit your theme. Simple lines work best for easy cutting.
– How to cut: Lightly sketch each shape on the paper and cut along the lines with steady hands. Take your time; clean edges read as crisp silhouettes.
– Threading: Punch or poke holes near the top of each shape. Tie or thread shapes onto the string, leaving even gaps between them.
– Hanging: Drape the garland across a wall, above a doorway, or from the ceiling to create a dramatic focal point.
Here are some quick ideas to try. Go black against bright paper for high drama. Mix sizes for depth. Use pastel silhouettes for a soft, playful vibe. Add a touch of glitter or metallic paper for festive sparkle.
Next steps: gather your supplies, draw a few shapes, cut them out, thread them, and hang. You’ll have a striking, handmade decoration that shows your creativity without a big mess or cost.
12. Balloon Paper Garland
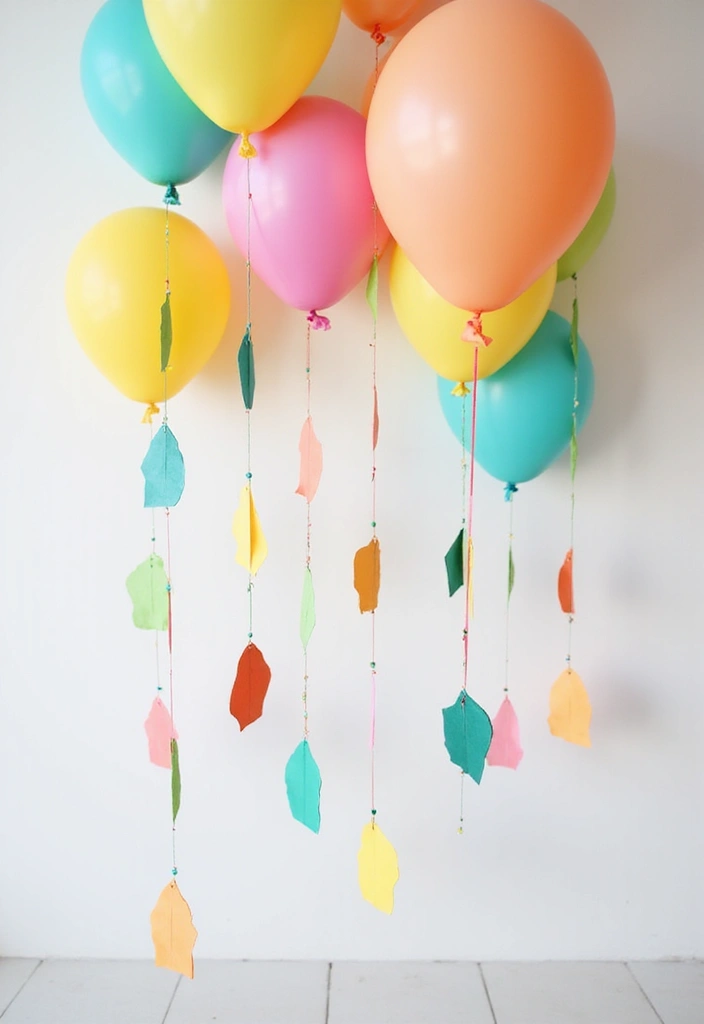
You want a festive look that’s easy to pull off. A balloon paper garland gives you that, with little mess to clean up. It’s quick to make and easy to tailor to your party.
Materials
– Bright paper in several colors
– Scissors and clear tape
– Thin string, twine, or fishing line
– Optional: faux balloon string and small bows
How to make it
– Cut balloon shapes from your colored paper.
– Punch tiny holes or leave holes at the top for hanging.
– String the shapes along the line, leaving some spaces and some clusters.
– Tie the ends of the string and secure the garland to a wall, doorway, or mantel.
Styling ideas
– Drape it over a dessert table or entryway to frame the space.
– Use different sizes for depth and movement.
– Mix warm and cool colors to fit your theme, from pastel to tropical.
Tips and care
– Hang it at eye level for the best view.
– If you need a bigger garland, add more shapes or extend the line.
– Reuse the garland by taking it down gently and storing flat.
Common questions
– Is it easy for beginners? Yes. You only need scissors and tape. No special tools are required.
Give it a try and see how easy it is to bring a lively feel to your space.
13. DIY Photo Booth Backdrop Garland
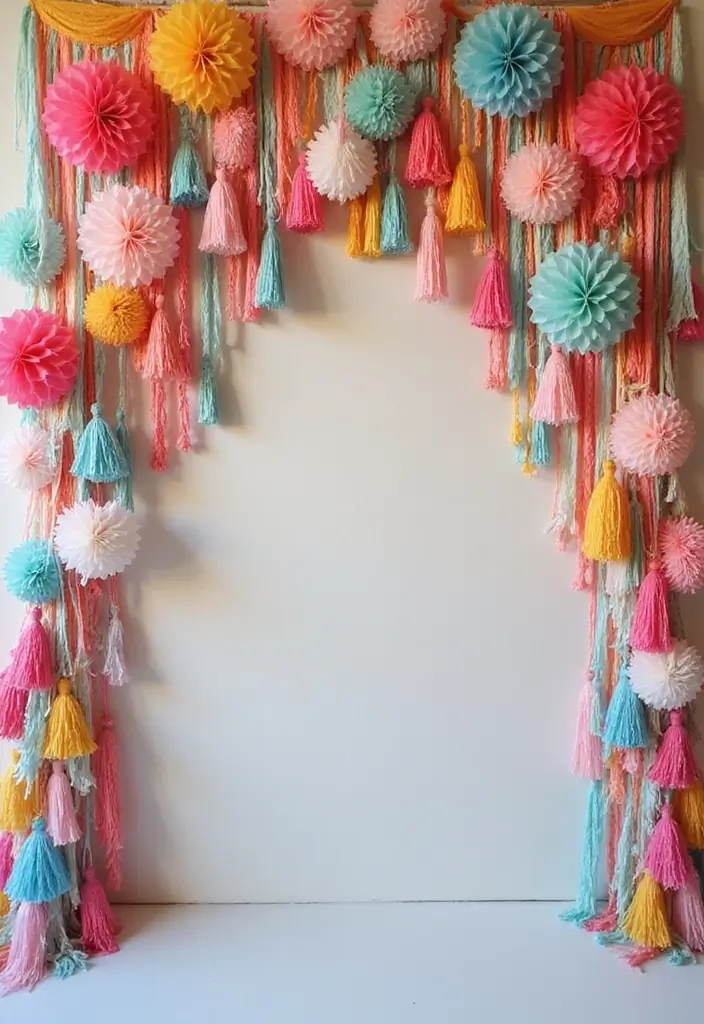
You want a photo booth backdrop that grabs attention without a big budget. This DIY garland setup gives you texture, color, and a lively scene all in one.
– Choose a mix of styles, such as tassels, circles, and leaf shapes.
– Add texture with tissue fringe, fabric swatches, and sturdy cardstock circles for your backdrop.
– Mount the backdrop on a solid wall to make colors pop.
– Pick bold colors that pop in photos, like hot pink, sunny yellow, and deep blue.
How to plan and assemble. Cut shapes in several sizes for your display. String garlands on lightweight twine or ribbon for easy hanging. Layer garlands at different heights for depth in your backdrop. Tape or clip them to the wall so they stay put.
Fine-tuning tips. Start with a central focal piece, like a large circle or tassel strand. Balance the sides with smaller garlands. Leave space around the edges for close-up shots. If you shoot in daylight, the colors stay crisp.
Best uses. Weddings gain romance with the soft textures. Birthday parties feel festive with bright color combos. Seasonal events shine when you swap in seasonal shapes and hues.
Quick proof and reuse. This backdrop is easy to disassemble and store. You can mix, match, and reuse garlands for future parties.
Plan a quick test run days before the event to see how the colors look in photos.
@media(max-width:480px){
14. Tassel Paper Garland
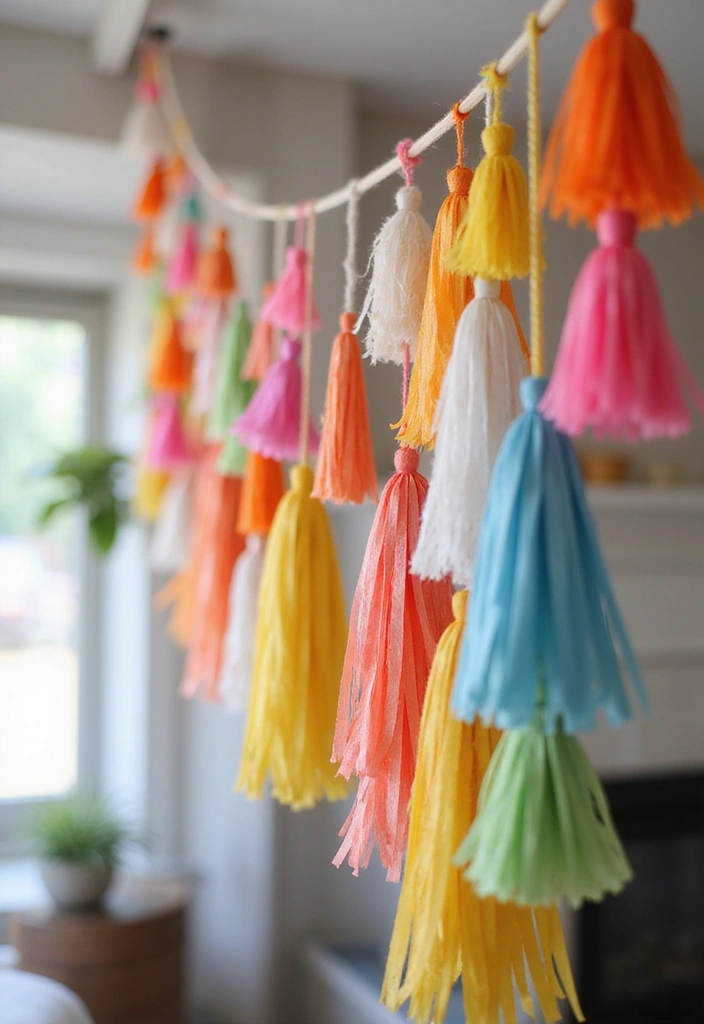
You want decor that feels festive without being hard to pull off. Tassel paper garlands fit the bill. They add motion and color to any room.
What you need
– Paper in colors you love
– Scissors
– String or twine
– Tape or glue
How to make
Cut fringes into strips on a sheet of paper. Leave a small strip at the top. Fold that strip and tie the tassel to the string. Repeat until you have enough tassels. For big tassels, use wider strips. For lighter tassels, use thinner strips.
Ways to style
Mix colors and sizes for a boho look. Try shiny or metallic paper for a party glow. Space tassels about 2 to 4 inches apart. Hang them at different heights to add depth.
Where to use
Perfect for parties, weddings, baby showers, and seasonal decor. They cast gentle shadows on walls and ceiling.
Tips for best results
Test one tassel with a simple knot first. Use two layers of paper for sturdier tassels. Trim ends so they look neat.
Notes
Tassel garlands are light and easy to store. If wind is an issue outdoors, take them down after the event.
@media(max-width:480px){
15. Vintage Seed Packet Garland

You want a simple garland that adds warm, old-time charm. A vintage seed packet garland does that and more. It brings gardening memory and craft into one string. You can make it with a printer or by hand.
Materials
– Printed seed packet designs on sturdy paper or kraft paper
– Cardstock for added strength
– Twine, thread, or thin ribbon
– Scissors and a hole punch or needle
– Optional real seeds or faux seeds for texture
Steps
– Print or draw small seed packet shapes that match your color theme
– Cut out the packet shapes
– Punch two holes in each packet
– Thread them on your string, leaving even spaces between packets
– Add a few seed accents in tiny clear pockets if you like
Display ideas
– Drape the garland across a dining table or mantel
– Hang it above a window or along a garden shed wall
– Line a fence or porch railing for a mini garden party look
– Use mixed sizes for a casual, eclectic vibe
Care and quick tweaks
– Keep it away from direct sun to slow fading
– Store flat in a dry box when not in use
– Swap in new designs for seasonal updates
Next steps
Experiment with different seed themes, like herbs or wildflowers. Try real seeds in small sealed pockets for extra texture. This garland tells a slow story of growth and nature, right in your own space.
16. Nautical Themed Garland
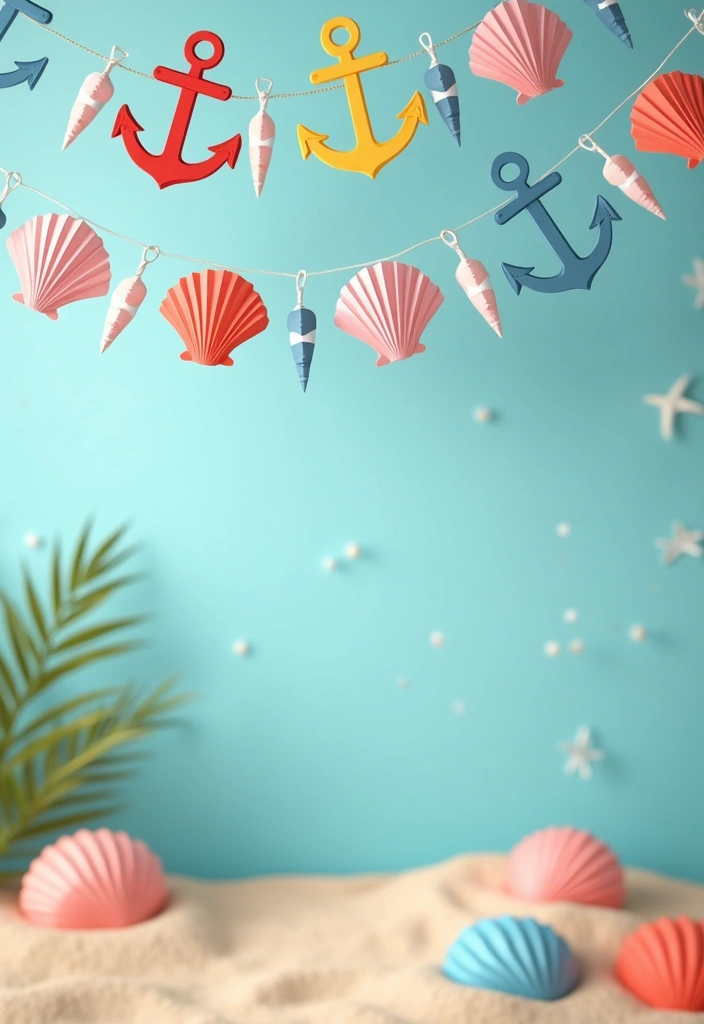
Want a crisp sea look for your next party? A nautical themed garland brings a breezy, beachy vibe. You can make it with simple paper shapes and a rope.
What you need
– Blue, white, or navy paper
– Scissors and a hole punch or a sharp needle
– String, twine, or rope
– Glue or tape
– Small shells or starfish for a coastal touch
– Optional patterned paper like stripes or dots
Here is why this setup works. It uses easy items you likely have at home. The colors echo sea light and sky. The rope adds a real sailor feel.
How to build it
Cut shapes that echo the coast. Try anchors, fish, seashells, and waves. Keep lines clean for a neat garland. Fold a small tab at the top or punch holes so you can thread them.
String it up
Thread each shape, spacing them evenly. Try alternating solid colors with patterned pieces. Tie the ends to your rope for a sturdy finish. Add a few shells or starfish with a dab of glue.
Why this works
It matches blue and white decor and fits any beach party or summer gathering. It’s easy to store and reuse. You get a fresh, breezy vibe without a big spend.
Next steps
Choose your colors, cut the shapes, and start threading. Hang it in a beach house, porch, or outdoor setup for best effect. You now have a simple, stylish statement piece.
@media(max-width:480px){
17. DIY Christmas Tree Garland
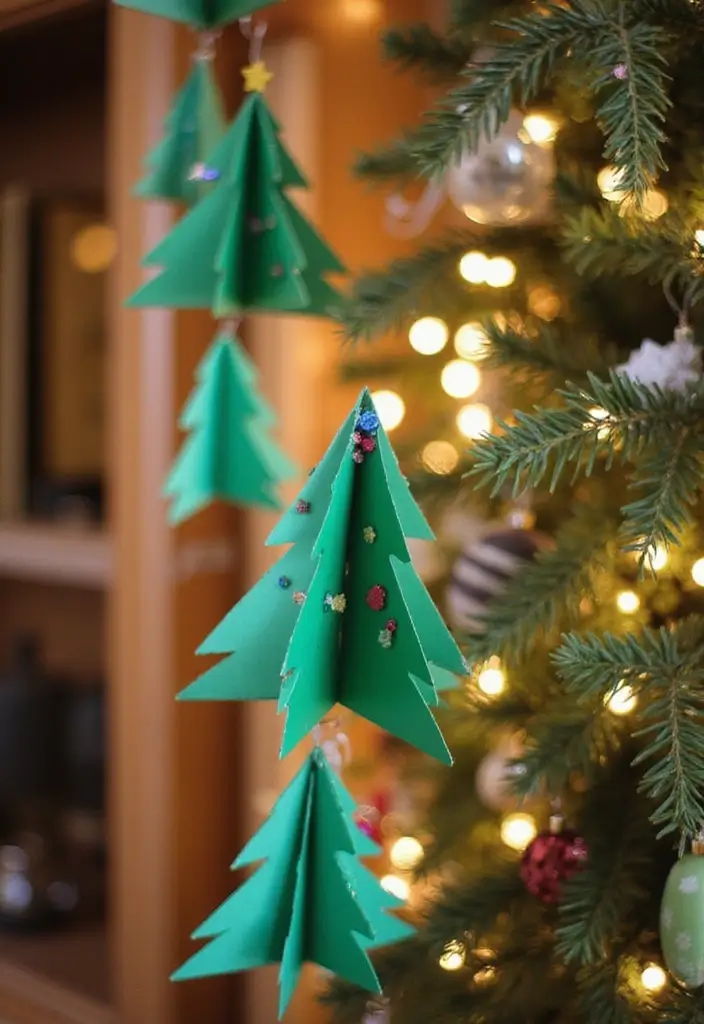
DIY Christmas Tree Garland
Want a quick, cozy decor project you can finish today? A DIY Christmas tree garland adds warmth to your space. It uses green paper cut into tree shapes to brighten your tree, mantle, or shelf. You can lift the look with color dots, stripes, or glitter.
– Gather: green craft paper or cardstock, scissors, glue or tape, string, markers, optional glitter.
– Cut shapes: create easy pine tree silhouettes in a few sizes.
– Decorate: add color dots, stripes, or a light dusting of glitter.
– String: punch small holes or tape the trees to a length of string.
– Add accents: tuck in tiny bows or mini ornaments for extra shine.
– Mix shapes: include stars, snowflakes, or bells for variety.
– Display: drape the garland on a mantel, along a stair rail, or around the tree.
This activity is kid-friendly and simple to pull off. Here is why it fits many homes: it’s inexpensive, fast, and easy to store after the season. Next steps: grab supplies, cut shapes, and start your garland today.
18. Mixed Media Garland
Want a garland that feels handmade and warm? A mixed media garland blends paper, fabric, and natural finds into one eye-catching piece. It’s affordable, easy, and perfect for cozy corners.
– What you’ll need
– Paper scraps in different shapes
– Fabric bits or ribbon
– Small sticks or twigs
– String, twine, or a long ribbon
– Glue or tape
– Scissors
– Beads or buttons for extra texture
– How to assemble
1) Decide on a base. Stretch twine on a rod or use a long ribbon you can hang.
2) Cut simple shapes from paper and fabric. Keep a mix of sizes.
3) Attach pieces to the base with glue or a few tiny stitches.
4) Tuck in sticks, beads, or buttons for rough and smooth touches.
5) Space items so colors and weights feel balanced.
6) Hang where light hits softly. A lamp glow makes colors pop.
– Color and texture ideas
– Pair matte paper with a few shiny bits
– Combine rough twigs with soft fabric for contrast
– Pick a small seasonal palette to suit your room
– Layer a couple of small pieces to add depth
– Display ideas
– Drape it over a mantel or doorway
– Hang along a staircase rail where sun or lamp light lands
– Let it frame a window for a friendly, inviting look
Try this soon. It proves you can craft a unique piece with simple ingredients and a bold hand.
@media (max-width: 600px) {
.normal-quiz-iframe { min-height: 570px !important; height: 570px !important; }
}
19. Felt and Paper Combo Garland
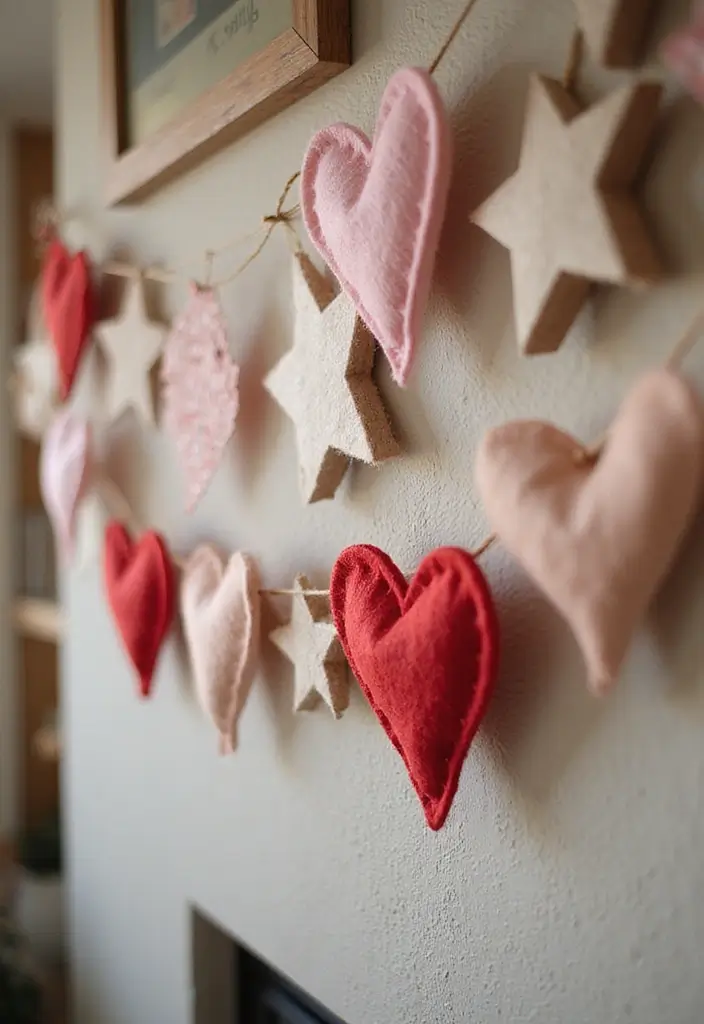
You need a garland that feels soft and lasts. A felt and paper combo does that. It adds warmth to small rooms and cozy corners.
– What it is: A garland made from felt shapes joined with paper shapes.
– Why it suits you: The texture adds warmth. The paper keeps edges crisp. The mix is sturdy enough to reuse.
– What you need: Felt sheets, craft paper, scissors, glue or needle and thread, string or twine, a pencil. You can reuse old scraps if you have them.
– Design ideas: Try hearts with pink felt and white paper. Or stars with gray felt and gold paper. Use two or three color pairs. Mix sizes for rhythm.
– How to put it together: Cut shapes from both materials. Punch a hole or tie a loop. String pieces with even spacing. Glue the edges if you want extra hold.
– Where to hang: A sofa table rail, a doorway, or a shelf lip. It’s great for holidays or a date night vibe.
– Care and reuse: Store flat. Wipe with a damp cloth. It stays durable for many uses.
– Extra tips: Add a thin felt border around paper shapes for clean edges. Hang it low to catch soft light. Change the color mix with the season.
You can rotate pieces to refresh its look. It’s simple to make and quick to hang. Finish it this weekend.
@media(max-width:480px){
@media (max-width: 600px) {
.visual-quiz-iframe { min-height: 995px !important; height: 1100px !important; }
}
20. Pom-Pom Paper Garland
Need a soft, festive touch for your party? A pom-pom paper garland adds fluffy charms with simple materials. Here is why it works: tissue layers catch light and rustle softly as you move, bringing a warm glow to any room.
What you’ll need
– Tissue paper in 2 to 3 colors
– Scissors
– Clear thread or string
– A needle or a simple knot method
– Optional beads or small charms
Steps to make pom-poms
1. Layer 8 to 12 sheets of tissue paper. Bigger colors give bolder pom-poms.
2. Fold the stack in a loose accordion until compact.
3. Tie a piece of string in the middle. This holds the shape.
4. Clip the ends of the tissue into a rounded or pointed shape.
5. Gently pull apart the layers from the middle to fluff the pom-pom.
6. Slide the finished pom-pom onto the garland line. Repeat with more colors and sizes.
Styling ideas
– Vary sizes for depth and motion.
– Alternate colors or create a soft gradient.
– Add tiny charms or beads between pom-poms for sparkle.
– Hang across a doorway, mantel, or outdoor arch.
Care and storage
– Keep the garland flat when not in use.
– Store in a box away from moisture to prevent wrinkling.
A pom-pom garland brings a warm vibe to any celebration and invites smiles at first glance.
21. Hand-painted Paper Garland
Here is why you should try a hand-painted paper garland. It costs little and you get a lot of color and charm. You can match any party theme or room style.
What you need
– Sturdy paper or cardstock
– Acrylic or watercolor paints
– Brushes, scissors, string or twine
– Optional: stencils, texture tricks like salt, paint pens
How to make it
– Decide a color scheme. Soft blues for calm, bright pinks for a party, greens for a nature vibe.
– Paint simple shapes or loose swirls. Use layered colors for depth.
– Let each sheet dry flat. If it curls, press it under a heavy book.
– Cut shapes you love: circles, pennants, stars, leaves.
– Punch holes and thread pieces on a line. Vary sizes for visual interest.
Display ideas
– Drape the garland above a doorway or along a table edge.
– Create a long strand for a photo wall or frame a seating area.
– Mix a few shorter garlands to form a cozy backdrop.
Tips and notes
– Use heavy-weight paper to cut clean edges.
– Work in daylight so colors look true.
– This idea fits kids’ rooms, living spaces, and events.
Next steps
Make a quick sample strip, then scale up for your space.
22. Animal Shape Garland
Animal Shape Garland
Looking for a kid-friendly garland that’s easy to make and fun to see? An animal shape garland fits. You cut colorful shapes, link them on a string, and get a display that brightens a room. It’s perfect for parties or a playful nursery touch.
Here is why this works: bold shapes grab little eyes, and you can swap in new animals without changing the whole setup.
– Pick 4 to 6 animal shapes. Mix elephants, giraffes, birds, foxes, and cats.
– Cut shapes from colorful paper or light cardstock. Use templates or draw freehand.
– Trace, cut, and smooth the edges so each piece looks neat.
– Punch two holes near the top. Thread a sturdy string through them.
– Add personality. Glue on googly eyes, draw a smile, and add tiny ears.
– Space the shapes about 2 inches apart so the garland hangs evenly.
– Use this garland for kids’ rooms, showers, nursery decor, or zoo-themed parties.
Tips keep a small color palette for a cohesive look, or mix patterns for a playful vibe. Store flat when not in use so shapes stay crisp.
Next steps hang it along a wall, above a crib, or across a doorway to add instant charm.
23. Cupcake Liner Garland
Looking for a quick, cheerful banner for a dessert table? A cupcake liner garland fits the bill. It brings color and playfulness with hardly any mess. You can match it to any theme and finish a room in minutes.
What you need
– Cupcake liners in your chosen colors or patterns
– A long string or ribbon
– Scissors
– Clear glue or double‑sided tape
– Optional glitter or tiny confetti for extra sparkle
Ways to arrange
– Layer liners for a fuller, puffier look
– Use single liners for a clean, delicate line
– Mix sizes or liner styles to add texture
– Alternate colors to follow your party theme
How to assemble
– Decide your color order and the length of the garland
– Attach liners to the string with glue or tape
– Space pieces evenly, then press gently so each liner sits flat
– Hang the garland where guests will see it, like above a dessert table or photo area
Tips for color and shine
– Add a touch of glitter to the liner rims for sparkle
– Choose pastel shades for spring or bold tones for a birthday bash
– Keep a few extra liners on hand for quick tweaks or fixes
Next steps
Now you can drape the garland and enjoy the festive mood it creates.
@media(max-width:480px){
24. Bead and Paper Garland
Want a garland that brightens a room without a lot of fuss? A bead and paper garland does the job. It adds texture, color, and motion to any party or artsy corner. You’ll see sunshine tones and playful shapes dance along the string.
What you’ll need
– Bright construction paper in your favorite colors
– Beads, wooden or plastic
– String, twine, or fishing line
– Scissors and a simple hole punch or a needle
– A flat workspace and patience
How to make it
1) Cut easy shapes from the paper, like circles, hearts, stars, or squares.
2) Punch a hole near the top of each shape.
3) String a shape, then slide a bead, then another shape.
4) Mix bead sizes and colors for a lively look.
5) Vary the strand length to add depth on walls or a table.
This simple method creates a cheerful piece that fits casual gatherings or kid-friendly crafts. You can hang it across a doorway, above a dessert table, or along a porch rail for summer vibes.
Style ideas and setup
– Use bright beads with clear or metallic accents to catch light.
– Create two or three strands of different lengths for dimension.
– Pair with other paper crafts for a cohesive party look.
Tips and variations
– Try alternating large and small beads for rhythm.
– Use translucent colors for a sunny glow.
– Store coiled on a hanger to keep shapes from bending.
Quick questions
– How long should it be? Measure your space and add a few feet.
– Is this kid-friendly? Yes, with supervision near scissors.
– How long does it last? It holds up for the party and can be saved for future events.
Next steps: gather colors, cut shapes, and start threading. Your bead and paper garland is ready to spark joy.
25. DIY Wedding Garland

You’re planning a wedding and want decor that feels personal but doesn’t cost a lot. A DIY wedding garland can give you that. It works as a ceremony or reception backdrop.
Materials and styles
– Lace, silk paper, dried flowers, and greens create a soft, romantic look.
– Twine, ribbon, or wire keeps every piece secure.
– Scissors, glue, and clips help you assemble and hang the garland.
Make it personal
– Add names, dates, or a favorite line to tag along the garland.
Placement ideas
– Use the garland to frame the ceremony arch, edge the sweetheart table, or decorate a photo wall.
Step-by-step
1) Measure the space and cut the twine a bit longer.
2) Attach elements with glue or by threading through holes or clips.
3) Space pieces evenly for balance.
4) Add extra texture with small fabric scraps or leaves.
5) Hang using removable hooks and adjust as needed.
Design ideas
– For a romantic vibe, pair ivory lace with pale blush paper.
– For a garden look, mix fresh greens with dried florals.
– For a bold modern feel, use black ink on white cards and sleek twine.
Care and reuse
– Store flat in a box, and keep away from moisture.
FAQ
– It holds up in light wind if you use sturdy twine and clip each piece well.
– You can reuse it for another event with a few tweaks.
26. Seasonal Garland
Seasonal Garland that grows with the year
You want decor that matches the changing seasons. A seasonal garland makes that easy and fun. It stays fresh with updates you can do in minutes. Try it today.
– Pick a color kit. Winter uses white and blue. Spring leans toward pinks and greens. Summer shines with bright yellows and teal. Fall goes warm with rust and gold. Keep colors simple so it reads neatly.
– Create easy season icons: snowflakes for winter, flowers for spring, leaves for fall, suns for summer. Cut shapes from cardstock or felt to layer textures.
– Add texture to breathe life to the garland. Use paper, fabric scraps, burlap, ribbon, and lace. The mix of textures makes it feel richer.
– Set up a swap system. Thread shapes on a string or clip them with tiny clothespins. Hang where you can reach it to switch shapes.
– Store and rotate. Keep shapes in labeled bins by season. Change out every two weeks to keep things lively.
– Quick tips. Punch holes, tie strings, or clip shapes with clothespins. Drape the garland along a mantel, a window, or stair rail.
A seasonal garland helps your home stay fresh and friendly, all year long.
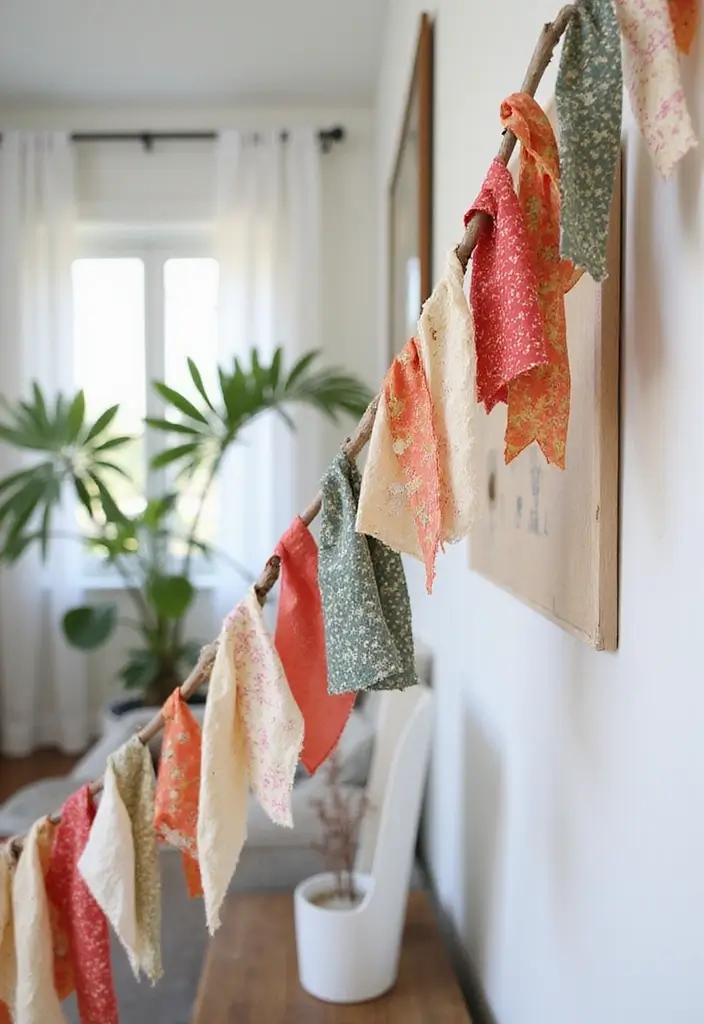
27. Twine and Paper Garland

Here is why a twine and paper garland fits many spaces. It brings a warm, earthy feel to any event or room. You can adapt it to weddings, birthdays, or just a cozy living area.
What you need:
– kraft paper shapes (circles, flags, leaves)
– twine or jute
– scissors and tape or glue
– optional dried flowers or fresh greens for a natural touch
How to make it:
1. Cut shapes from kraft paper. Mix sizes to add depth.
2. Punch small holes at the top of each piece and thread them on the twine.
3. Space shapes every few inches. Vary the lengths so the garland drapes nicely.
4. Clip or tape the shapes in place. Clothespins work well for easy changes.
5. Add dried flowers or greens tucked between pieces for a subtle pop.
Ways to use it:
– Hang above a table or mantel for a focal point.
– Drape across a doorway or window to frame a space.
– Pair with wood, linen, and candles for a cozy, rustic vibe.
Next steps: choose your color palette, cut and string your shapes, and adjust the length to fit your space. This garland is easy to reuse. Store flat and bring it out for future celebrations.
@media(max-width:480px){
28. Bamboo Stick Garland
You want a fresh, nature-inspired look for an outdoor event. A bamboo stick garland can give you that in minutes. It feels earthy and light, without weighing down your space.
Materials
– Bamboo sticks in your preferred length
– Paper shapes in natural colors like green, cream, and brown
– Twine or jute for hanging
– Scissors and a hole punch
– Glue or tape
– A clear spray sealant (optional)
Here is why this works. Bamboo adds texture. Paper shapes give you color and personality. The result stays easy to handle and kid-friendly to make.
How to make
– Cut simple shapes from craft paper. Leaves, circles, and stars are quick and cute.
– Punch small holes in each shape so you can thread them or tie them.
– Create a long line by threading shapes onto twine. Space them evenly so the garland looks balanced.
– Attach the twine to bamboo sticks. You can tie the ends of the twine to the sticks or glue shapes directly to the sticks for a staggered look.
– Hang the garland behind a doorway, along a fence, or over a garden arch.
Display ideas
– Drape a line between trees for a woodland vibe.
– Make multiple shorter garlands and weave them along a railing.
– Pair with greenery and lanterns for a cohesive, outdoor theme.
Outdoor tips
– Use natural colors to keep the look cohesive with the setting.
– If rain is likely, seal shapes or choose thicker paper to resist moisture.
– Store unused pieces indoors after the event to extend their life.
Next steps: map your space, cut shapes, and start threading. A bamboo stick garland is a simple, stylish way to bring nature indoors.
29. Fruit Slice Garland
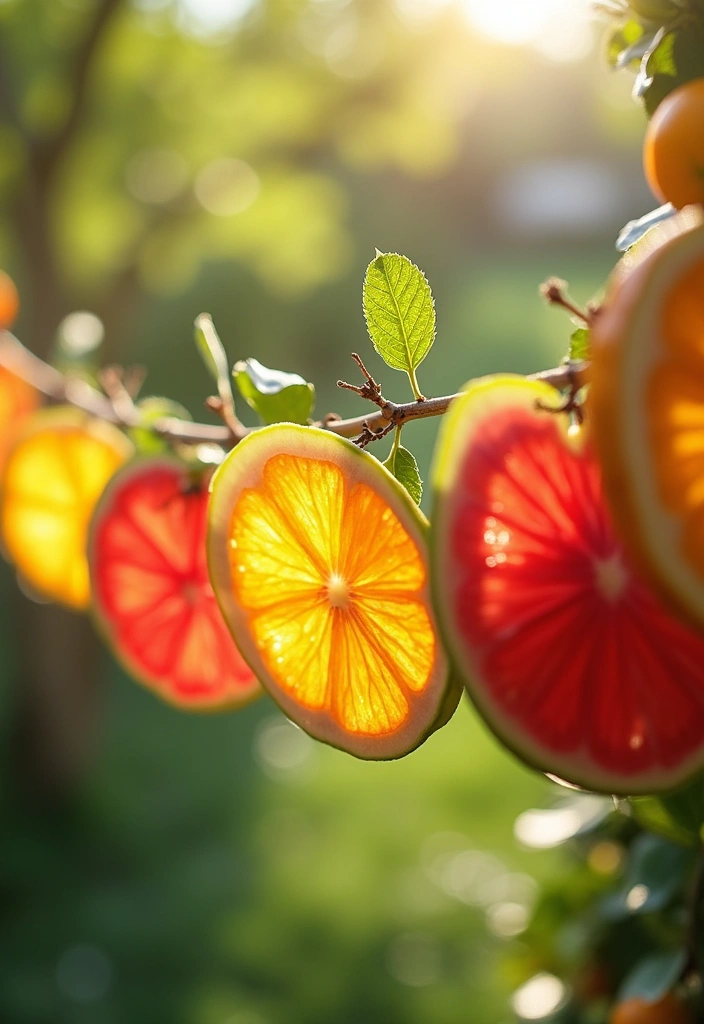
Need a bright, low-cost party idea? A fruit slice garland adds a sunny vibe to any summer setup.
Here is why it works:
– It pops with bold colors for a tropical feel.
– It fits luau parties, picnics, and casual gatherings.
– It’s quick to make and budget friendly.
– It can double as a fun photo backdrop.
What you’ll need:
– Colored paper in lemon yellow, orange, lime, pink, red.
– Scissors, a hole punch or a sharp tool.
– Twine or string and tape or glue.
– Optional faux greenery and tiny lights.
How to make it:
1) Cut round slices and wedges from the paper.
2) Color and add seeds.
3) Punch a hole near the top of each piece.
4) Plan length and spacing.
5) Thread pieces onto twine, with gaps between.
6) Tuck in a leaf between some slices.
7) Hang on a wall, entry, or table backdrop.
Tips:
– Mix bright colors for a lively look.
– Use a few leaves to soften the edges.
– Tie ends with a knot and trim stray threads.
Care and reuse:
– Store flat in a box after your party so it lasts for next time.
Conclusion

Creating your own DIY paper garlands is not just a fun project, but also a wonderful way to express your creativity and bring a personal touch to your decor. From cheerful fruit slices to elegant wedding designs, the possibilities are endless!
These 29 ideas are sure to inspire your next crafting adventure, allowing you to whip up stunning decorations for any event. Don’t hesitate to experiment with colors, materials, and themes as you discover your unique style. Happy crafting!
Note: We aim to provide accurate product links, but some may occasionally expire or become unavailable. If this happens, please search directly on Amazon for the product or a suitable alternative.
This post contains Amazon affiliate links, meaning I may earn a small commission if you purchase through my links, at no extra cost to you.
Related Topics
DIY paper garland
eco-friendly crafts
festive decorations
handmade garlands
paper crafts
easy DIY projects
party decor
seasonal decor
colorful garlands
creative paper projects
beginner friendly
quick crafts