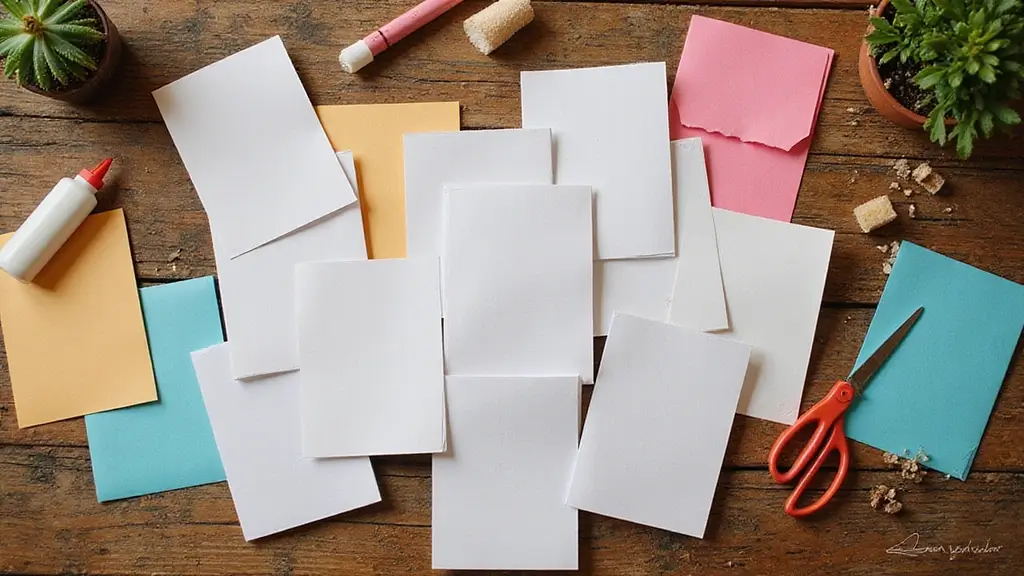
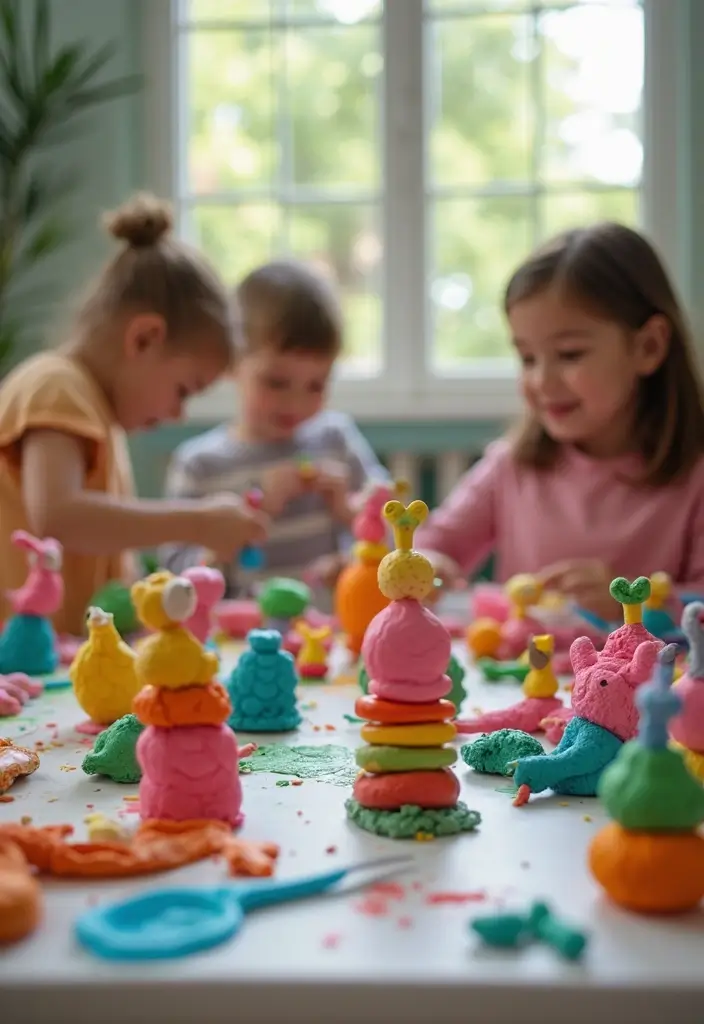
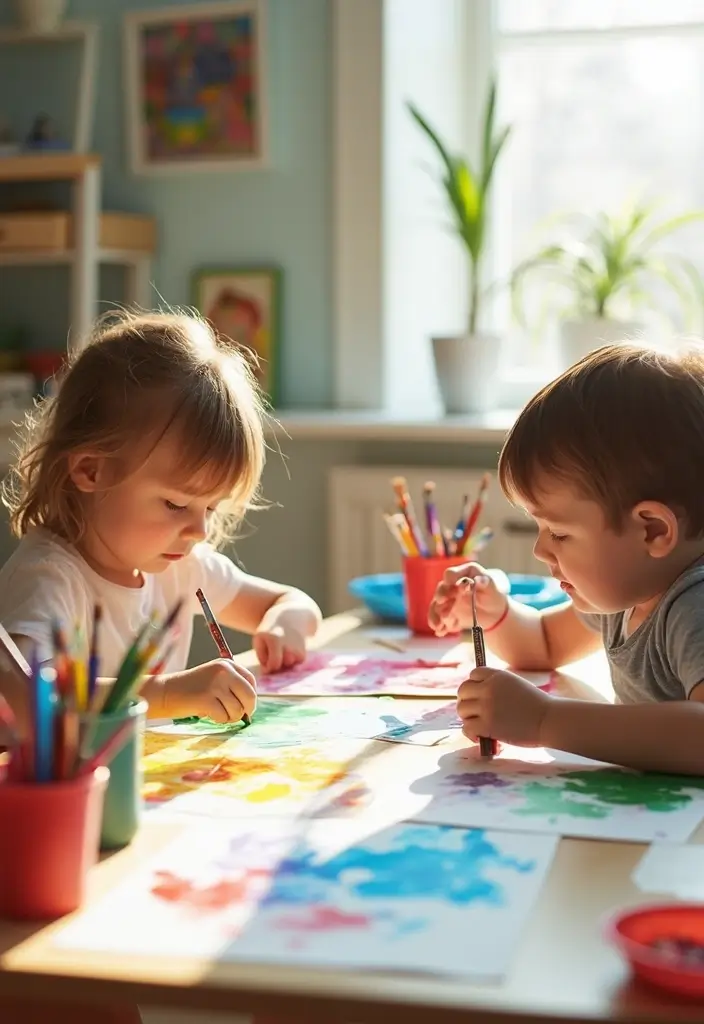
Spring break has me craving simple, adorable crafts that kids will love. I keep watching children reach for art that feels doable and fun. So I pulled together 29 animal crafts that are easy to pull off, quick to finish, and full of charm.
Here is why I made this post. This topic sits right at a sweet spot for busy families. I want you to have quick, cute activities that fit in between school and chores. You should be able to grab a few supplies and start right away.
Who it’s for If you’re a parent, guardian, teacher, or anyone who helps kids with crafts, this one is for you. You care about simple steps, kid safe materials, and projects that little hands can finish. The ideas use common items and can be scaled for younger kids or added a bit of challenge for older ones.
What you’ll get You’ll get 29 ideas with clear steps and quick tips to keep mess small. Each craft names the supplies and shows a path that works for rainy days or after school. Think paper plates that become owls, socks turned into foxes, or pom poms that become fluffy puppies.
Here’s how to put these ideas into action. Start by choosing 2 or 3 crafts to begin with. Gather a simple kit: paper, scissors (safety for little ones), glue, colors, and a few scraps you already have. Set up a little craft station with a wipeable mat and kid friendly tools, then let kids pick what they want to make. The rest comes together in short, fun bursts that leave spoiled hands and full hearts.
If you try one of these animals this week, you’ll see how a small project can spark big smiles. The colors, textures, and tiny details bring a sense of pride to kids as they finish each piece. And you’ll gain a stash of ready ideas you can pull out again when you need a bright moment in a busy day.
1. Paper Plate Pandas
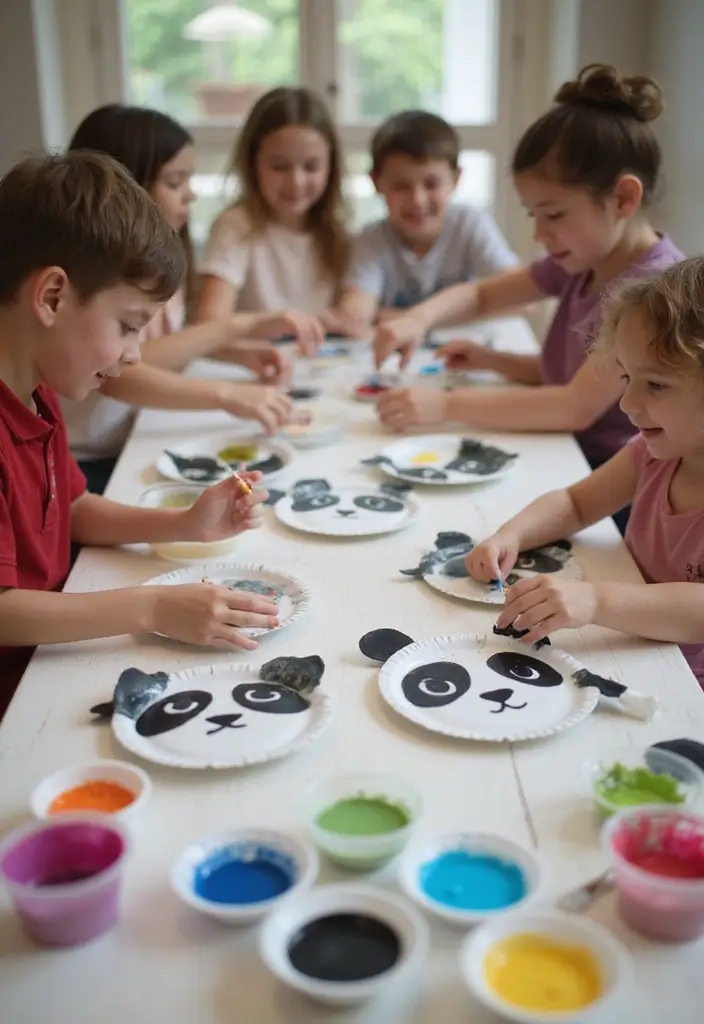
Love pandas? This simple plate craft makes a panda you can hold and show off. It blends color work with a tiny lesson about wildlife.
Here is how you do it. Paint the plate in black and white. Let the paint dry so the panda looks sharp.
Next, cut two small ears from black construction paper. Glue them to the top edge of the plate. Add a round nose and a mouth using more black paper or paint. Place two googly eyes to finish the face.
Tips: Use non-toxic paints for safety. Let kids mix shades to give the panda soft gray fur. Talk about panda habitats and why forests matter for their meals and home.
Materials Needed:
– Paper plates
– Black and white paint
– Black construction paper
– Googly eyes
– Glue
This project is quick, hands on, and great for a home or classroom. It offers art time plus a short talk about wildlife that kids will remember.
2. Recycled Bottle Fish
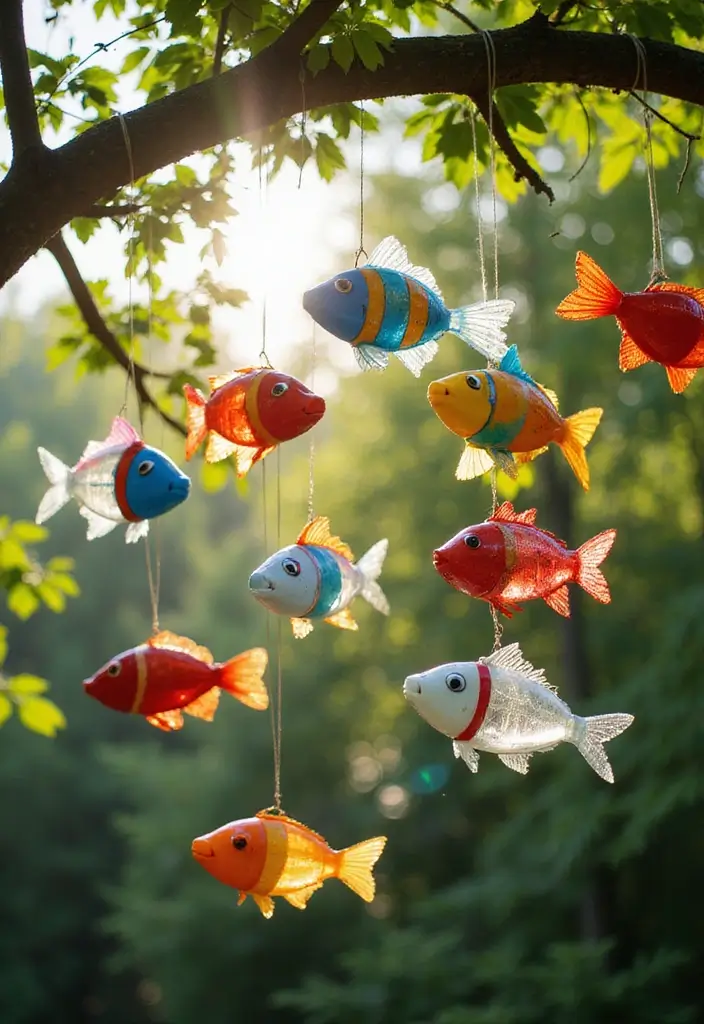
Need a quick craft that fits a busy day and teaches kids to reuse? Here is why this works: Recycled Bottle Fish turns old plastic bottles into bright fish that seem to swim when you hang them in a window or from the ceiling. It’s simple, and it shows how trash can become art.
Materials Needed:
– Empty plastic bottles (wash and dry)
– Paints and brushes
– Glitter (optional)
– Seashells (optional)
– String or yarn for hanging
– Scissors (adult help) and tape
Steps:
– With adult help, cut each bottle in half or into a fish shape.
– Paint a base color. Let it dry, then add stripes, dots, and fins with more colors.
– Glue or tape on eyes. Add glitter or seashells if you like.
– Attach a length of string to the top and tie a loop for hanging.
– Hang the fish where they can catch light and look like they’re swimming.
Tips:
– Use bottles of different sizes to make a school of fish.
– Create fins from colored paper or extra bottle pieces.
– Keep edges smooth and supervise scissors.
Why you’ll love it: it turns recycling into color and motion. You get unique hanging decorations, and your kids learn that small scraps can become art. Next steps? Try a room garland with several bottle fish to brighten up any space.
@media(max-width:480px){
3. Cardboard Tube Owls
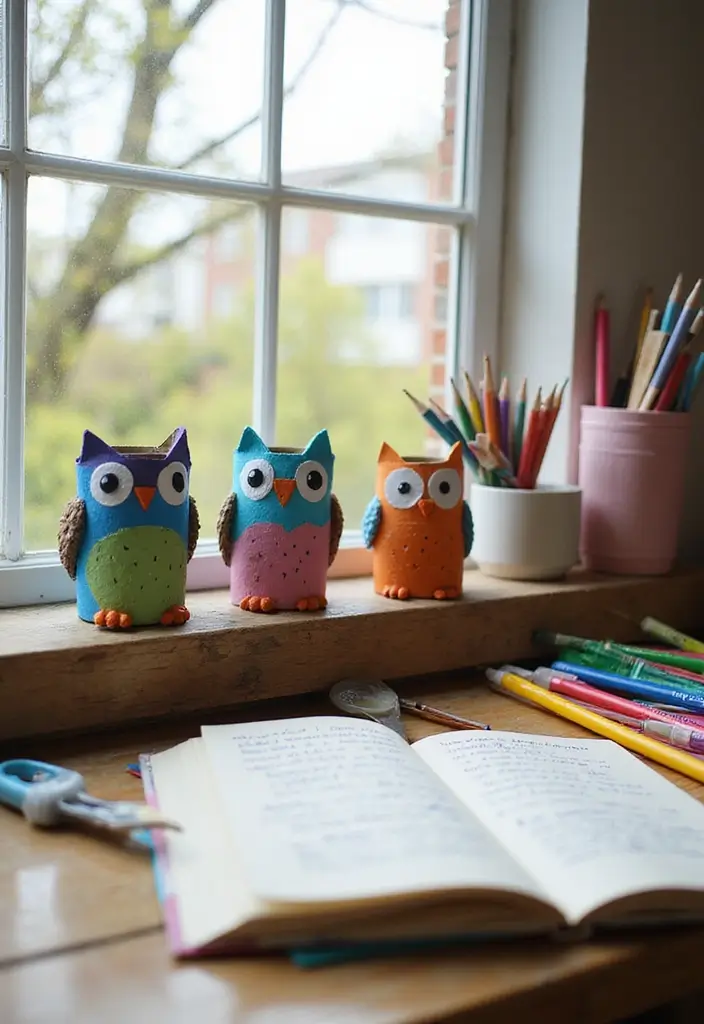
Want a fast, kid-friendly craft that uses things you already have? Cardboard tube owls are perfect. They are simple, fun, and a good way to recycle.
Materials:
– Empty toilet paper rolls
– Paint and brushes
– Colored construction paper
– Glue
– Scissors
How to make it:
– Paint the tube in bright colors and let it dry.
– Cut circle or oval shapes in paper for eyes. Add a small black dot for the pupil. Glue them on.
– Cut a tiny triangle or diamond for a beak and place it under the eyes.
– Add paper feathers or wing shapes around the sides. Layer a few for texture.
– Draw small details with a marker or add more paper pieces to finish.
Crafting Tip: Name your owl and tell a quick story about it. This sparks imagination.
Why this is great:
– It uses recycled materials
– It lets you pick bold colors and create texture
– It can be a decoration or a soft toy
Next steps: set out a few owls on a shelf, or hide them as little surprises around the room. This simple project builds fine motor skills and makes learning about owls feel real.
Keep practicing with this idea, and your kids will want to make more owl friends.
@media(max-width:480px){
@media (max-width: 600px) {
.normal-quiz-iframe { min-height: 570px !important; height: 570px !important; }
}
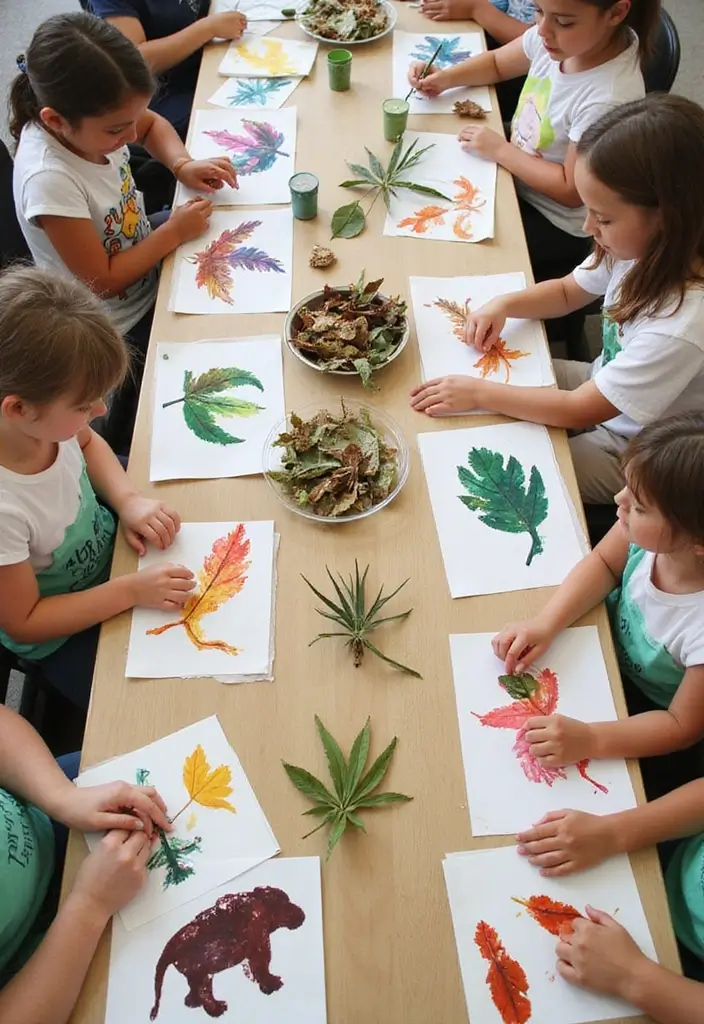
4. Nature-Inspired Leaf Animals
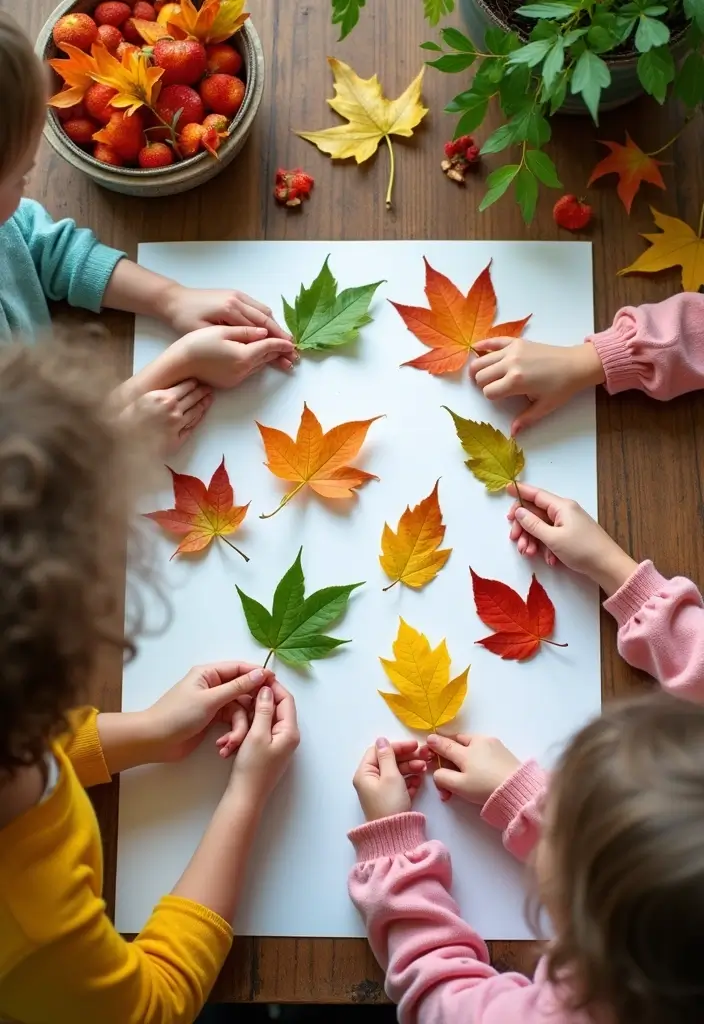
Want a craft that’s easy, mess-free, and fun? Try nature-inspired leaf animals. Collect leaves from your yard or a park and turn them into cute animal art. This activity sparks imagination and helps kids connect with the outdoors.
Here is why it works. Leaves offer colors, textures, and shapes. You can mix several leaves to form bodies, wings, and shells. Simple, clear steps keep kids on task and proud of their work.
Fun Idea: Take a short nature walk to gather leaves. Talk about where the leaves came from and what trees you see.
Materials Needed:
– Various leaves
– Glue
– Construction paper
– Markers
How to make leaf animals:
– Lay out a few leaves to plan the animal shape, such as a butterfly made from two big leaves and two small ones.
– Glue leaves to the paper to form the body and wings.
– Draw eyes, legs, and patterns with markers.
– Add tiny details like veins or spots with a marker or pencil.
– Let the artwork dry before handling.
Next steps: try a turtle, a fish, or a bird using different leaf sizes. You can frame the pieces or create a small display wall.
With practice, you can make bigger leaf creatures and even small scenes. Try seasonal colors and patterns next to keep the fun going.
5. Sock Puppets: Animal Edition
Here is a fresh take on sock puppets. If you want a quick, low-cost craft that sparks stories, you are in the right place. Sock puppets let kids share animal ideas with simple supplies on a small stage.
Materials Needed:
– Old socks
– Googly eyes
– Felt or fabric scraps
– Glue
– Yarn
Here is why this works. The sock becomes the body, and eyes and ears bring the animal to life. You can mix felt for ears, add yarn for hair, and draw a mouth with a marker. No sewing required, so it goes fast.
Start simple. Pick one animal idea for each puppet. Place the sock on your hand and glue on eyes first. Cut felt for ears and features, then glue them in place. Add yarn for a tuft of hair or a tail. The last touch is a small backstory. A clear goal makes play more fun and helps kids improvise.
Tips: Encourage kids to tell a short story for each puppet. Put puppets in a box and stage a mini show. Keep rules light so shy kids feel brave.
Next steps: practice a scene, invite a friend, and video the show. Then invite family to watch and cheer together.
@media(max-width:480px){
6. Egg Carton Caterpillars
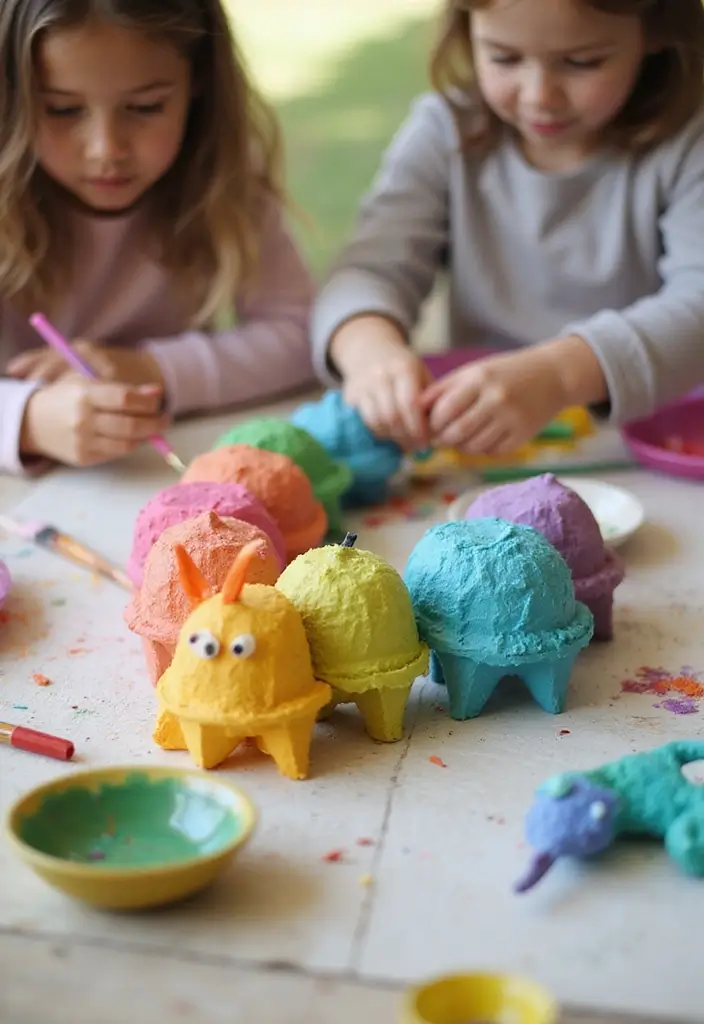
You want a kid-friendly craft that uses things you already have. Egg cartons become small caterpillars in minutes.
Here is how you do it.
– Materials Needed:
– Egg cartons
– Paint
– Glue
– Googly eyes
– Pipe cleaners (optional)
– Scissors
– Steps:
1) Cut the carton into 4 to 6 rounded sections. Each piece is a body segment.
2) Paint the pieces in bright colors. Let them dry.
3) Glue on two googly eyes at the front. A tiny mouth drawn with a marker works too.
4) Add pipe cleaner antennae by twisting a short piece and attaching it to the top.
5) For texture, glue on small scraps of felt or yarn as tiny feet.
6) Line up the segments to form a crawling caterpillar. You can connect them with a short string so a kid can move it.
– Creative Twist: When the caterpillar grows up, turn it into a butterfly. Draw or cut wing shapes and attach them to the last segment. This shows metamorphosis in a simple story.
– Here’s the payoff:
It uses recycled materials and teaches colors, counting, and life cycles. It’s easy to set up on a kitchen table and cleans up quickly.
@media(max-width:480px){
7. Rock Painting: Animal Friends
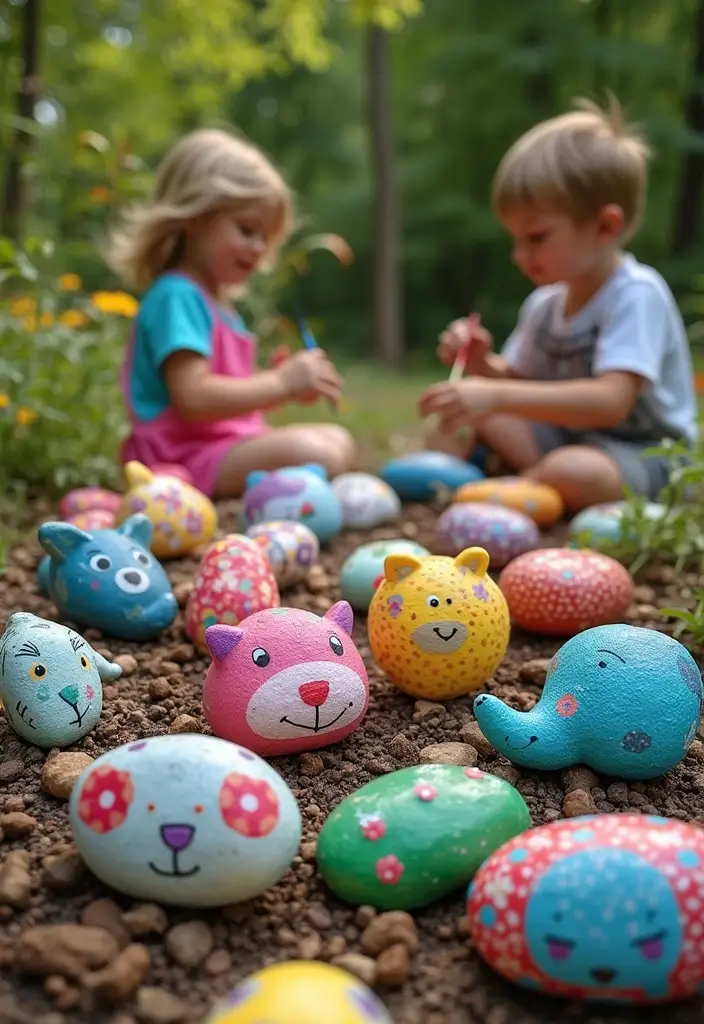
Here is why this project fits a busy kid’s day. It stays calm. It sparks imagination. It helps small hands grow stronger.
Set up on a table. Pick smooth rocks. Clean them well. Let them dry.
Choose animal designs. You can paint ladybugs, turtles, elephants, or quirky creatures. The colors pop as the rocks dry.
Materials Needed:
– Smooth rocks
– Non-toxic paints
– Brushes
– Sealer spray (optional)
Here is how to do it:
– Lay out a small tray of paints.
– Lightly sketch a shape if you want.
– Paint in thin layers. Wait for each layer to dry.
– Add tiny details with a fine brush.
– Let the rocks dry completely. If you seal, do it outside.
What you gain:
– Better control of small motions.
– A cute item for the garden or a shelf.
– A simple, personal gift idea.
Tip: Hide painted rocks around your neighborhood for others to find. Include a small note so the finder feels connected.
Next steps: make a mini rock-hunt kit for a family walk or a friendly neighborhood activity.
@media(max-width:480px){
8. Paper Bag Puppets
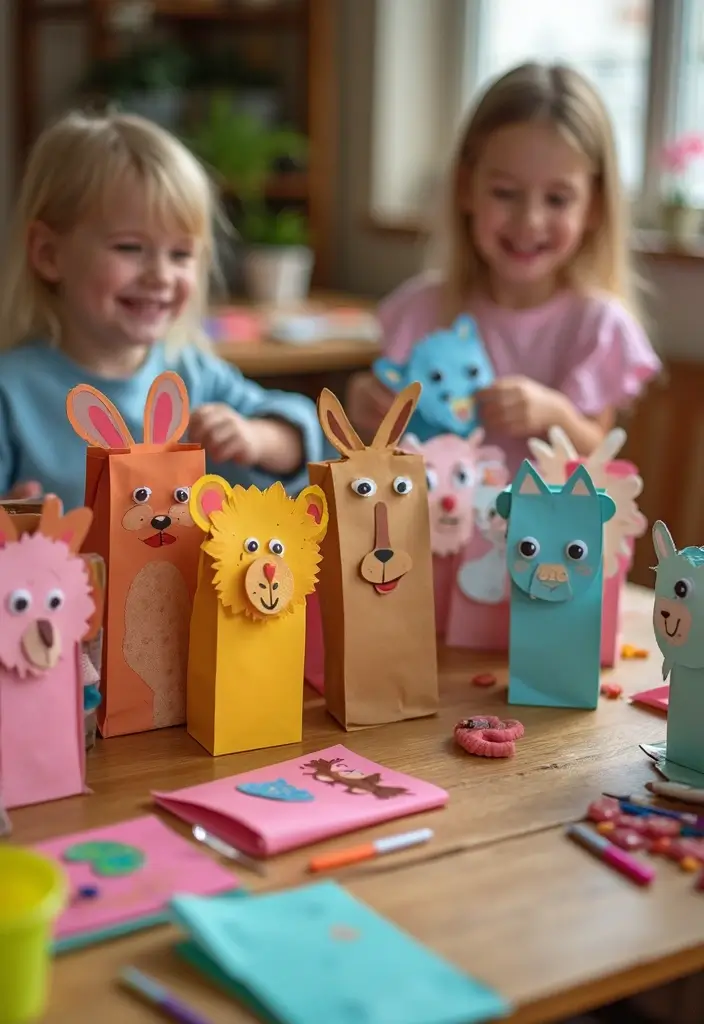
You want a craft that keeps kids interested and helps them tell stories. Paper bag puppets do that with a simple, hands-on approach.
Turn a plain bag into a small animal. Watch imagination grow as kids plan scenes, move the mouths, and give each character a voice. The bag rustles softly as it works.
Materials Needed:
– Paper bags
– Markers
– Stickers
– Glue
– Scissors
Here’s how to make them.
– Pick an animal and picture its face.
– Open the bag and draw the face on the front.
– Add eyes with markers or stickers.
– Glue on ears or a nose if you like.
– Cut a mouth from colored paper and glue it in place.
– Let it dry before you play. Then you’re ready to perform.
Fun Suggestion: Set up a tiny puppet stage at home. A cardboard box with a string curtain works well. Invite stuffed toys to be the audience.
Why it helps This craft sharpens focus and storytelling. Kids plan a tale, swap voices, and act it out. You can reuse it with new animals for more shows.
@media(max-width:480px){
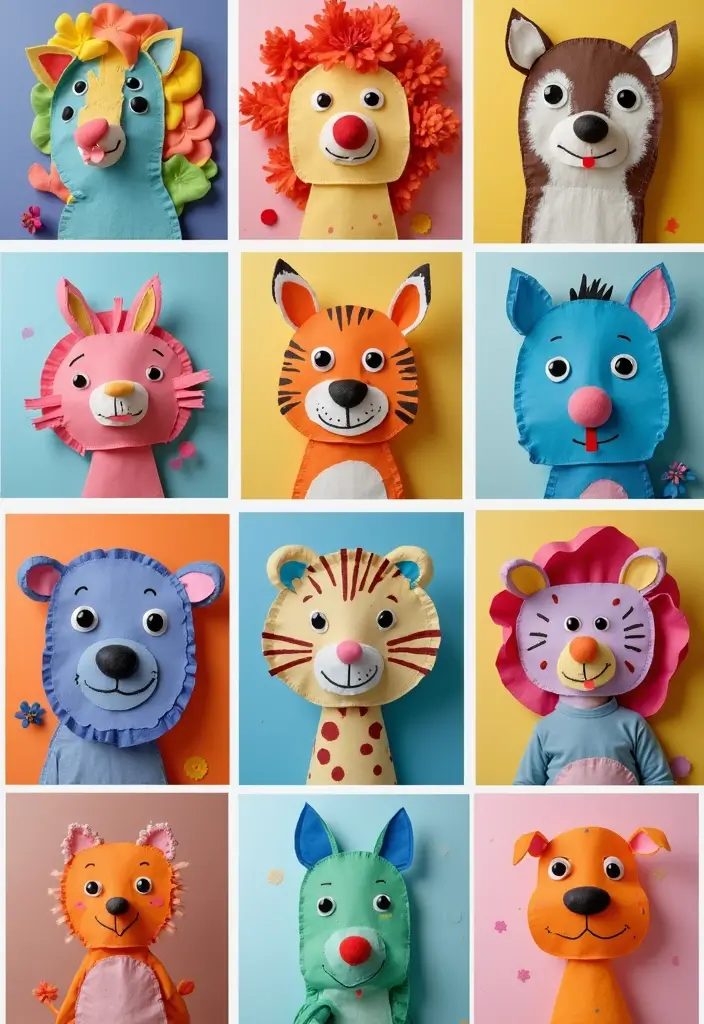
9. Felt Animal Masks
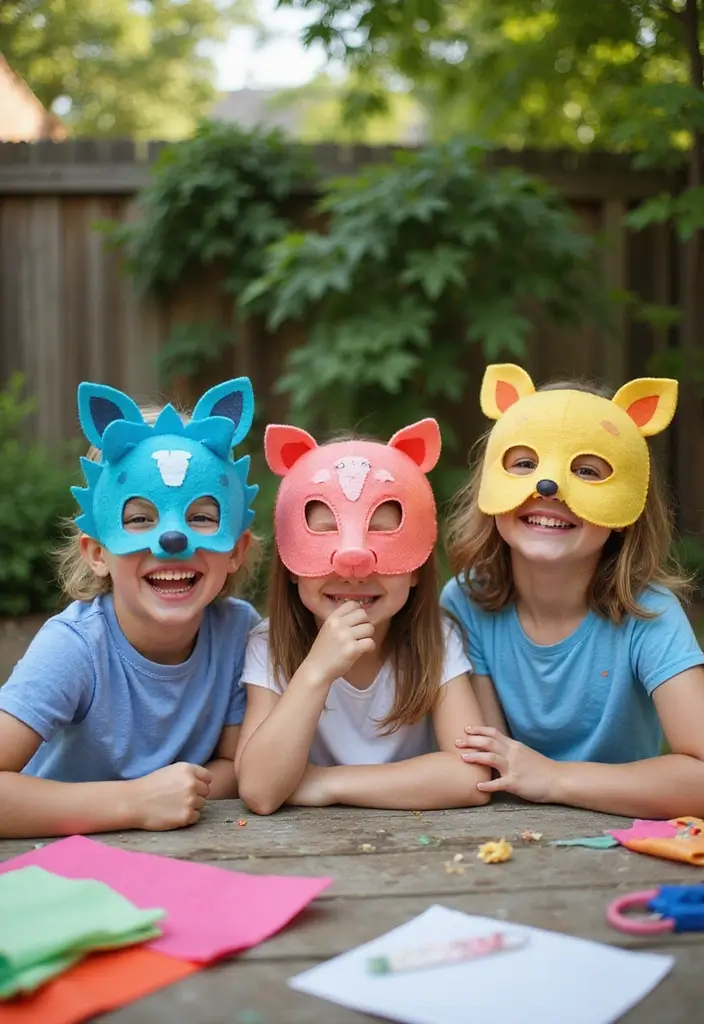
Want a craft that sparks imagination and is quick to finish? Felt animal masks let you transform into your favorite creatures in minutes. They’re great for dress-up, pretend play, or cute photos.
Materials Needed:
– Felt sheets in colors for the mask and details
– Scissors
– Glue or fabric glue
– Elastic string or a headband for wearing
How to Make:
1) Pick a simple mask shape on felt and cut it out.
2) Cut extra pieces for ears, noses, and eyes.
3) Glue the pieces in place and let the glue dry a bit.
4) Punch small holes at the sides and weave in elastic or a headband.
5) Try different faces and add tiny details with felt scraps.
Tips:
– Use bright colors for a bold look, or soft tones for a gentle style.
– Add texture with tiny felt tufts or stitched accents.
– For safety, glue only and supervise younger kids, or let an adult help with scissors.
These masks build confidence as kids practice pretending and storytelling. They also invite friends to join in and create a mini photo booth or show.
Here is why it helps: kids grow confident when they speak in new voices and act out tiny tales.
Next steps: Plan a little nature-themed party moment where kids wear masks for a photoshoot and a quick parade.
@media(max-width:480px){
10. Pinecone Animals
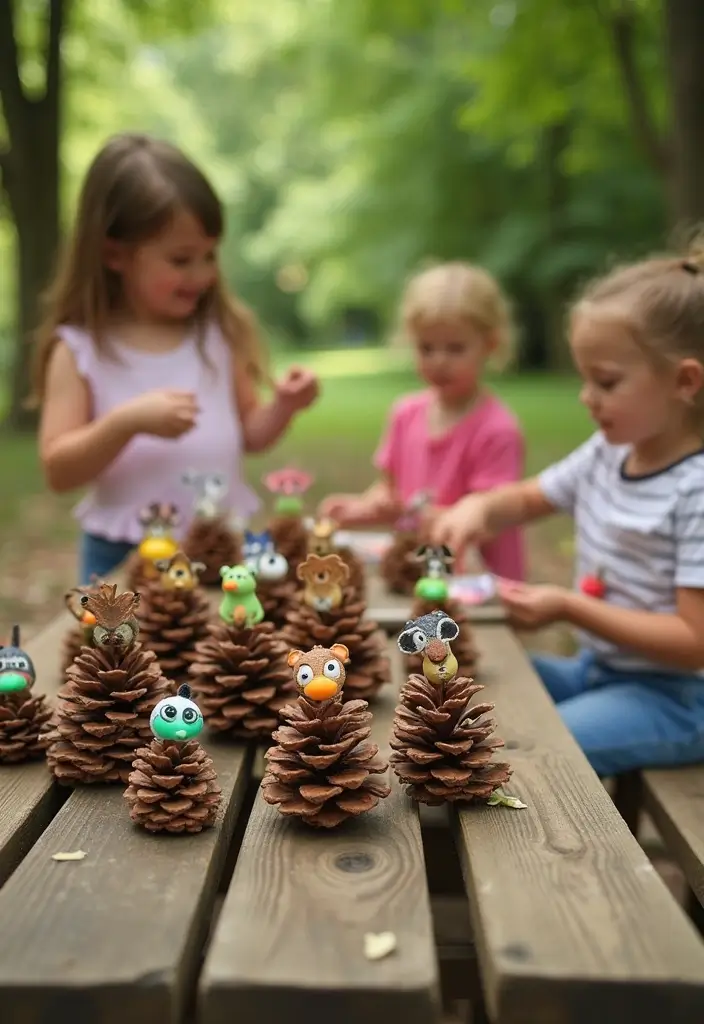
You want a craft that is easy, fun, and connects kids with nature. Pinecone animals fit the bill. They use simple supplies and spark imagination.
Take a nature walk to collect pinecones. Look for ones with tight scales and a sturdy shape. At home, set up a small art station with non-toxic paints, glue, googly eyes, and felt scraps.
Here is how you do it:
– Paint the pinecones in friendly colors. Browns and beiges work well, with a dash of color for fun.
– Add eyes, noses, and tiny ears using googly eyes and felt.
– Glue on shapes to turn the cone into an owl, hedgehog, or even an elephant.
– Let each piece dry before you handle it.
Creative Tip: Host a pinecone animal parade after the craft session. Let kids introduce their animals and give them funny names.
Materials Needed:
– Pinecones
– Non-toxic paints
– Googly eyes
– Felt scraps
– Glue
This project invites outdoor exploration and helps kids notice textures, colors, and wildlife. If a pinecone is too rough for tiny hands, try using smaller cones or pre-cut felt pieces to finish the faces. It is a simple, mess-friendly way to enjoy nature and create keepsakes.
@media(max-width:480px){
11. DIY Bird Feeders
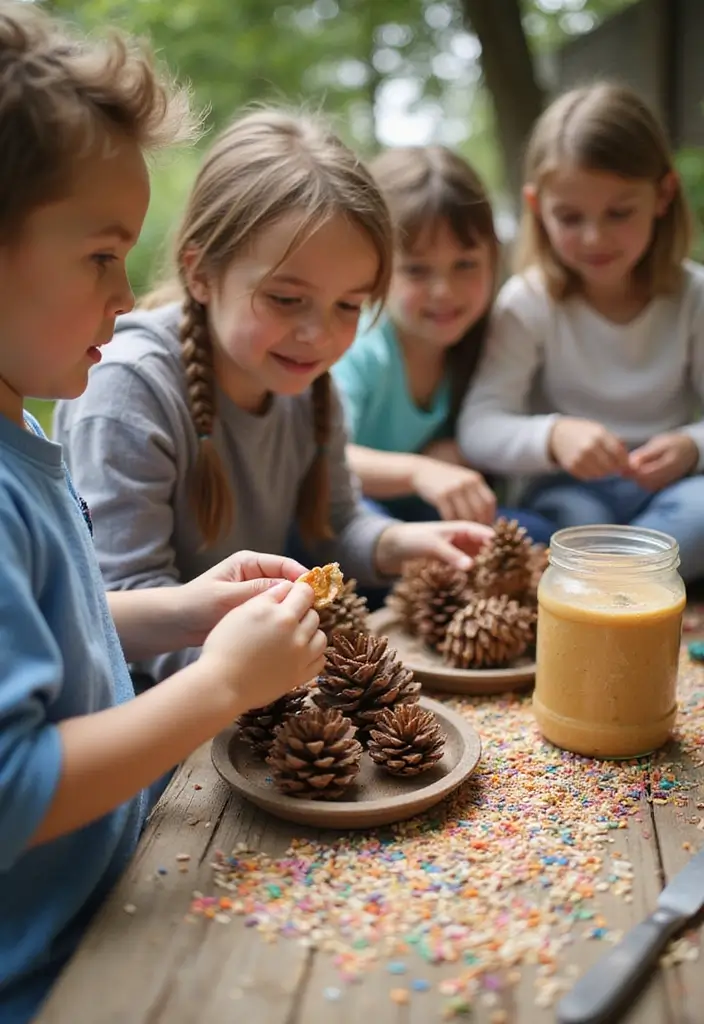
Is your backyard feeling quiet? You can change that with a simple DIY bird feeder. It helps local birds and it gives kids a chance to watch small birds up close. Here is why it works. Pinecones grip the peanut butter. The seeds lure the birds. A string lets you hang the feeder where you can see it from a window.
Materials Needed:
– Pinecones
– Natural peanut butter (unsalted)
– Birdseed
– String or twine
Here is how to make it. First, spread a thick layer of peanut butter all over a pinecone. Next, roll the pinecone in birdseed so seeds stick to the butter. Then tie a strong string to the top and hang it from a branch in your yard or garden. Keep it away from where pets roam and away from direct sun to stop the seeds from spoiling.
Fun Fact: Kids can spot different bird species that come to feed. Some birds arrive in winter; others stay year round. Watch and learn as they perch and peek around the feeder.
Next steps: check the feeder regularly. Replace seeds if they get wet or moldy. If you want, make extra feeders with different seeds. You can add a simple birdbath later for extra charm.
@media(max-width:480px){
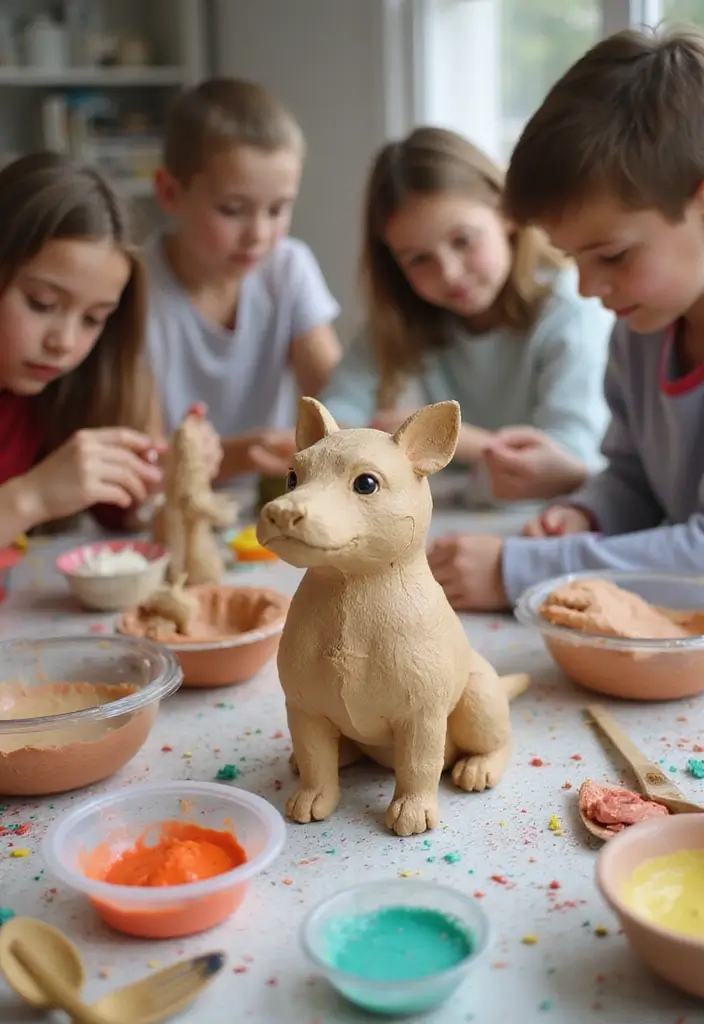
12. Clay Animal Sculptures
Need a kid-friendly craft that sparks creativity and builds steady hands? Clay animal sculptures fit the bill. Your child can shape animals with air-dry clay, then brighten them with paint. This activity strengthens fine motor skills and invites big, imaginative play.
Here is how to get started. Pick a theme—ocean life or safari creatures work great.
Materials Needed:
– Air-dry clay
– Paint and brushes
– Sculpting tools (optional)
– A tray or mat to keep the workspace clean
– A small amount of water for smoothing
1. Choose a simple animal to begin with. Start small with a fish, cat, or panda.
2. Roll a small ball for the body. Add a smaller ball for the head.
3. Attach legs, ears, or a tail by gently pressing them on.
4. Use a damp finger or a tool to blend seams and add texture.
5. Let the sculpture dry completely. This is air-dry clay, so it will not go in the oven. Drying time varies; a day or two is common.
6. Paint your piece after it dries. Layer colors for depth. Add eyes, patterns, or stripes to bring it to life.
7. Optional finish: a clear sealant once the paint is dry.
Tip: Keep the clay soft by covering unused pieces with plastic wrap and keeping a damp cloth nearby.
These sculptures become part of pretend play after they dry. Set up a small zoo, tell stories, or mix them into a display shelf.
@media(max-width:480px){
@media (max-width: 600px) {
.visual-quiz-iframe { min-height: 995px !important; height: 1100px !important; }
}
13. Felt Animal Story Stones
Looking for a simple, creative activity that fuels imagination and builds storytelling skills? Felt Animal Story Stones give kids a ready-made cast of characters they can hold, move, and narrate with.
Materials you’ll need
– Smooth stones
– Felt scraps in bright colors
– Non-toxic craft glue
– Paint or markers (optional)
– Scissors (kid-safe, for older children)
– A small box or bag for storage
How to make them
Start with clean, flat stones. Let kids plan two or three animal ideas on paper first. Cut small felt pieces for ears, noses, tails, and mouths. Glue the felt shapes onto the stone and press firmly. If you use paint or markers, add simple facial features after the glue dries. For younger kids, pre-cut shapes speed things up. Set the stones aside to dry. If you want extra sparkle, add tiny googly eyes or yarn for a fluffy tail.
Play ideas that spark stories
Place a few stones in a line and invite your child to start a tale. Each stone becomes a character or place in the story. Ask questions like, “What does the fox stone see on its walk?” or “How do the turtle and bird work together?” You can start with a prompt such as, “Once a time, five animal friends headed to the park.” Let the story grow with each new stone.
Tips for best results
– Keep the set small at first; 6 to 12 stones is a good starter group.
– Use pre-cut felt for quick builds or let kids cut their own shapes for more challenge.
– Let stones double as color practice by naming each animal’s hue as you place them.
Practical notes and safety
This project works well on a kitchen table or craft mat. Supervise younger children to avoid choking hazards from tiny pieces. When done, store stones in a box to keep shapes intact. Optional sealant can protect the surface for outdoor play, but choose a water-based, kid-safe option.
Why it helps
Kids boost fine motor skills with gluing and cutting. They gain confidence as their stories flow from stone to story. It’s a calm, hands-on way to learn colors, shapes, and sequence.
Next steps: gather materials, try a 15-minute starter session, and watch the stories unfold.
@media(max-width:480px){
14. Cotton Ball Sheep
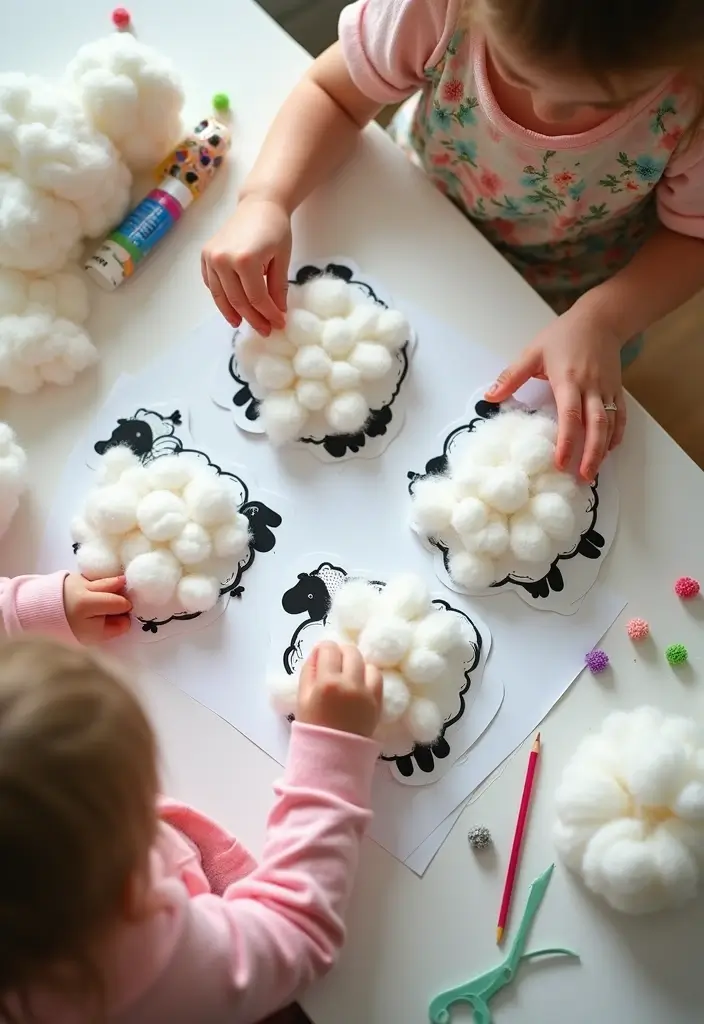
Your kids want a quick, cozy craft that feels soft in their hands. The Cotton Ball Sheep gives that fluffy payoff with almost no mess. This simple project boosts focus and lets kids explore texture.
Materials Needed:
– Cotton balls
– Construction paper
– Googly eyes
– Glue
Here is how you do it.
1) Cut a sheep shape from construction paper. Keep the body round and the head small so the sheep looks fluffy.
2) Dab glue on the outline and press cotton balls all over the body. Leave the face area clear so you can add eyes.
3) Glue on googly eyes. If you like, draw a tiny smile with a marker for extra character.
4) Let the glue dry. You can add a tail by tucking another cotton ball on the back for a tail.
What you gain from this craft
This activity builds fine motor skills as kids press each cotton ball in place. It also teaches patience while waiting for glue to dry. A fluffy sheep makes a friendly reminder of farm life and where wool comes from.
Creative Tip: Use this to talk about farm animals and how wool helps keep sheep warm. Ask simple questions like, where does wool come from, and what else do farmers do on a farm?
Next steps
Display the sheep on a fridge or create a small flock line for a cute classroom display. You can do this with white, gray, or even tinted construction paper for variety.
@media(max-width:480px){
15. Bottle Cap Bugs
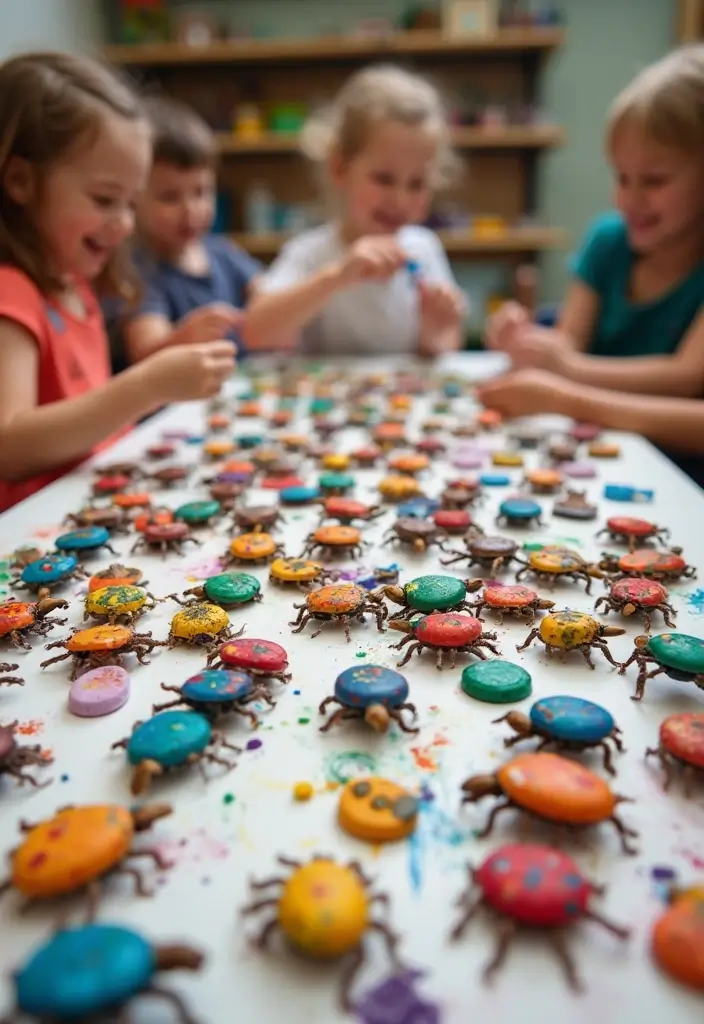
You want a quick, budget-friendly craft that kids can do with everyday items. Bottle cap bugs fit the bill. They turn plain bottle caps into tiny insects. Kids paint the caps, glue on eyes, and twist pipe cleaners into antennae and legs. The result is colorful bugs that can decorate a shelf or become small toys.
Materials Needed:
– Bottle caps
– Paint and brushes
– Googly eyes
– Pipe cleaners
– Glue
Steps to make your bottle cap bugs:
1. Wash and dry the bottle caps so paint sticks well.
2. Paint the caps with bright colors and let them dry.
3. Add spots, stripes, or wings with a contrasting color.
4. Glue in googly eyes for character.
5. Cut tiny pipe cleaners for antennae and legs; twist and attach.
6. Let everything dry again before playing.
Play idea: Set up a bug design contest. See whose bug looks the most unique.
These little bugs teach recycling and creativity in one fun activity. You reuse materials, practice hand skills, and end with a set of charming creatures. Kids love choosing colors and naming their bugs. These tiny creatures spark stories for playtime. If you have extra caps, make a whole bug colony and display it on a bulletin board.
@media(max-width:480px){
16. Yarn Animal Art
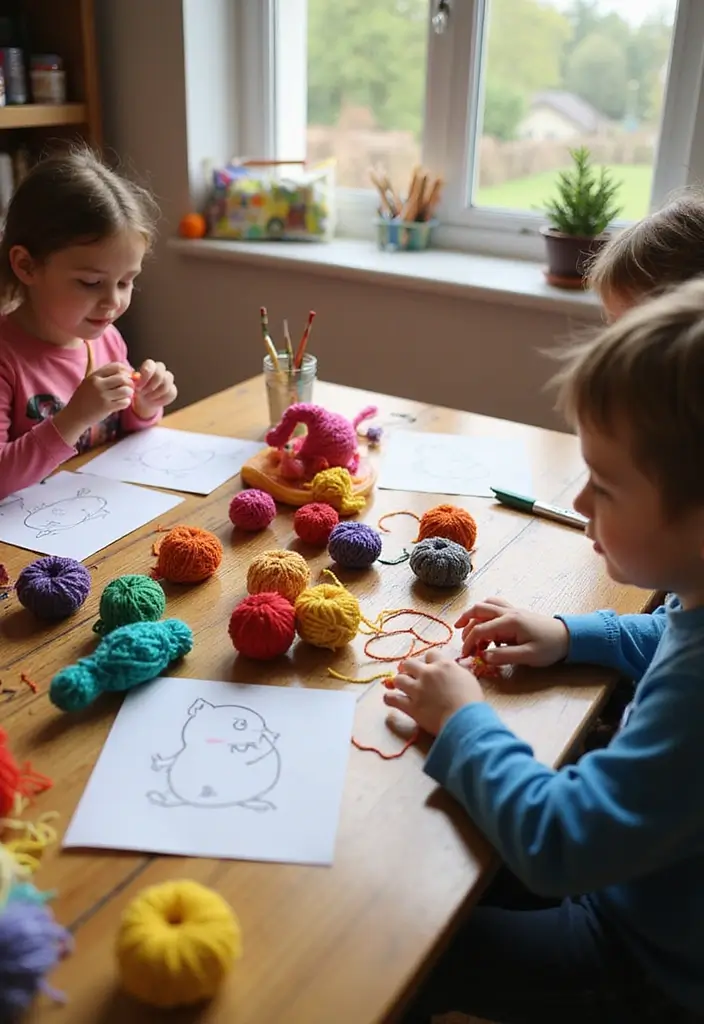
Yarn Animal Art blends touch and color for kids. You see texture, patterns, and tiny wins as shapes form. This calm, hands-on craft keeps little fingers busy and minds curious.
Pick an animal that sparks joy. A fluffy bunny, a striped llama, or a sleepy fox works well. You’ll learn how color choice changes mood and look.
Materials Needed:
– Yarn in several colors
– Cardboard templates or a sturdy base
– Scissors
– Glue
Here is why you’ll love this project. It builds fine motor skills as you wrap and trim yarn. It sparks color thinking when you pick shades and patterns. It also gives a small sense of pride when the figure comes together.
Let’s break it down step by step:
– Lay the base down and plan where each part goes
– Wrap yarn around the template to fill the shape
– Add ears, tails, or a fluffy mane with extra yarn
– Make a face with pom-poms or small yarn dots
– Glue all parts in place and press gently to set
– Let dry before you display
Next steps: try new animals, test fuzzy yarn, or use two textures for contrast. Hang your yarn animals on a wall or board. Clean up fast. Save scraps.
@media(max-width:480px){
17. Eggshell Animal Faces
Want a quick craft that teaches reuse and makes adorable art? Eggshell faces turn a kitchen staple into tiny animal friends. It’s simple, hands-on, and a great way to show kids how to reuse what they already have.
Materials Needed:
– Clean eggshells
– Non-toxic paints
– Brushes
– Construction paper (for bases)
Here is how you do it. Let the shells dry completely after washing. Then paint them to look like bunnies, chicks, or even goofy dinosaurs. Use small brushes for tiny details and a steady hand for eyes and noses.
Next, attach the shells to construction paper bases. You can lay out a mini zoo on a table, or create a big wall display. Add simple facial features with a little paint or a dark marker if you like. Let everything dry before you touch it.
Tip: Keep a small tray of water for rinsing brushes so colors don’t mix too much. Set up a kid-friendly display area so everyone can admire the finished faces.
This activity teaches reuse and sparks creativity without extra mess. It’s affordable, breezy to run, and adjustable for any age. Next steps: try a new theme, like sea animals or farm friends, and watch your child’s art grow.
@media(max-width:480px){
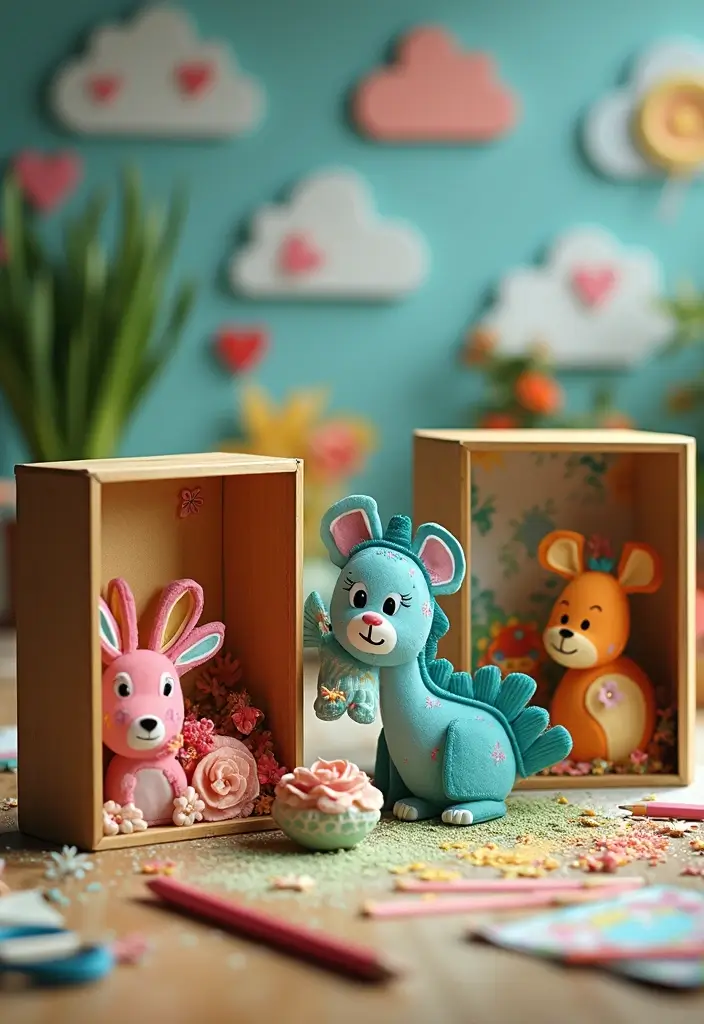
18. DIY Animal Habitat Dioramas
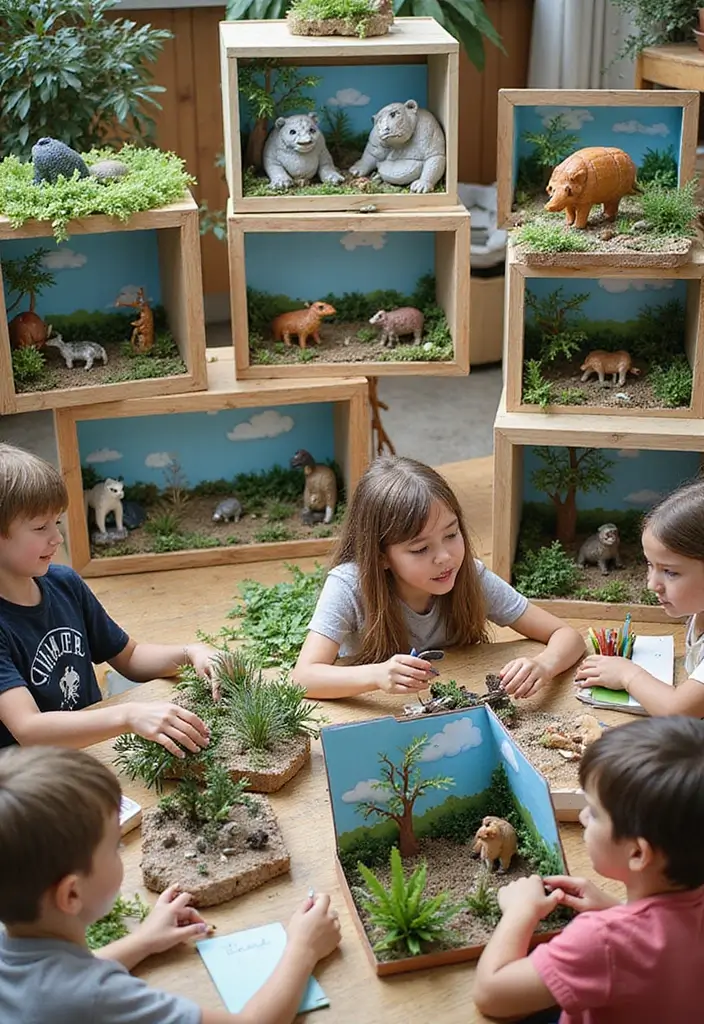
Worried your kids need a fresh, hands-on way to learn about nature? DIY Animal Habitat Dioramas give them a tiny, real world to build and explore. You’ll turn a shoebox into a vivid scene—jungle, ocean, savanna, or forest—where creatures live and breathe in their homes.
Materials Needed:
– Shoeboxes
– Recycled materials (like old toys or bottle caps)
– Construction paper
– Paint and markers
– Glue and scissors
– Natural textures (leaves, twigs, sand)
Here is why planning first matters. Start by picking a habitat and the animals you want to show. Next, sketch a simple layout on paper. That keeps colors, props, and animals in balance.
Here are steps you can follow now:
– Paint the inside of the shoebox to create the sky and ground.
– Cut paper or fabric to make plants, water, rocks, and sand.
– Glue on textures from home scraps and nature finds.
– Place the animals toward the center so they look alive.
– Add tiny details like a tree trunk, coral reef, or tall grass to finish the scene.
Next, try a few kid-friendly ideas. A jungle with monkeys, a coral reef with fish, or a snowy arctic scene with seals. Use stickers or drawings if you don’t have figurines.
What you gain goes beyond fun. Kids learn about ecosystems, biodiversity, and how animals adapt to their homes. Ask simple questions: What does the animal eat? How does weather change its habitat?
Safety first: use non toxic paints, supervise scissors, and let glue dry fully before moving the diorama. When you’re done, display it proudly and talk about the habitat’s needs and threats.
19. Nature Collage Animals
Want a kid-friendly craft that uses what nature gives you? Try Nature Collage Animals. It blends art with the outdoors and shows kids how textures become pictures. You’ll collect simple pieces, arrange them, and glue them into animal scenes. The result is unique and personal.
Materials Needed:
– Natural materials (leaves, twigs, petals)
– Glue
– Construction paper or sturdy cardstock
– Markers or crayons
How to make it:
1) Start outside. Gather leaves, sticks, and flowers with varied shapes and colors. Look for textures like smooth petals or bumpy bark.
2) Plan your animal. Could a squirrel be built with a brown leaf body and twig legs? Think about size and balance on the page.
3) Glue the pieces in place. Press each item softly so it sticks well without tearing the paper.
4) Add details with markers or crayons. Draw eyes, noses, or fur lines to bring the collage to life.
Here is why it helps: kids learn texture, color, and composition while practicing fine motor skills. It also encourages outdoor exploration and careful observation.
Next steps: take a short nature walk to collect new pieces for another animal. Try using different colors or a whole family of creatures to keep the project fresh and fun.
@media(max-width:480px){
20. Watercolor Animal Art
You want a kid friendly art project that helps kids explore color and love animals. Watercolor animal art makes that easy. It blends color ideas with simple drawings and keeps little hands busy. Here is why this works and how to do it.
Materials Needed:
– Watercolor paints
– Heavy watercolor paper
– Brushes
– Water containers
– Paper towels
Steps to create your piece
1) Pick a favorite animal and sketch a simple shape on the paper. A rounded body, two ears, and a tail are plenty to start.
2) Moisten the paper a little. Add a light wash of color using big moves with a broad brush.
3) Add more color, letting some shades meet and blend. Watch the colors mingle and create new hues.
4) Once the wash dries, bring in details with a smaller brush. Add eyes, nose, fur marks, or stripes.
5) Finish with a few darker lines to give form. Keep lines soft so the painting stays friendly.
Tips for success
– Practice wet on wet for soft blends and dry brush for texture.
– Rinse brushes often so colors stay bright.
– Let kids choose playful colors or invent their own creatures.
This activity boosts color sense and brush control while fostering care for animals and nature through art.
21. Animal-Themed Friendship Bracelets
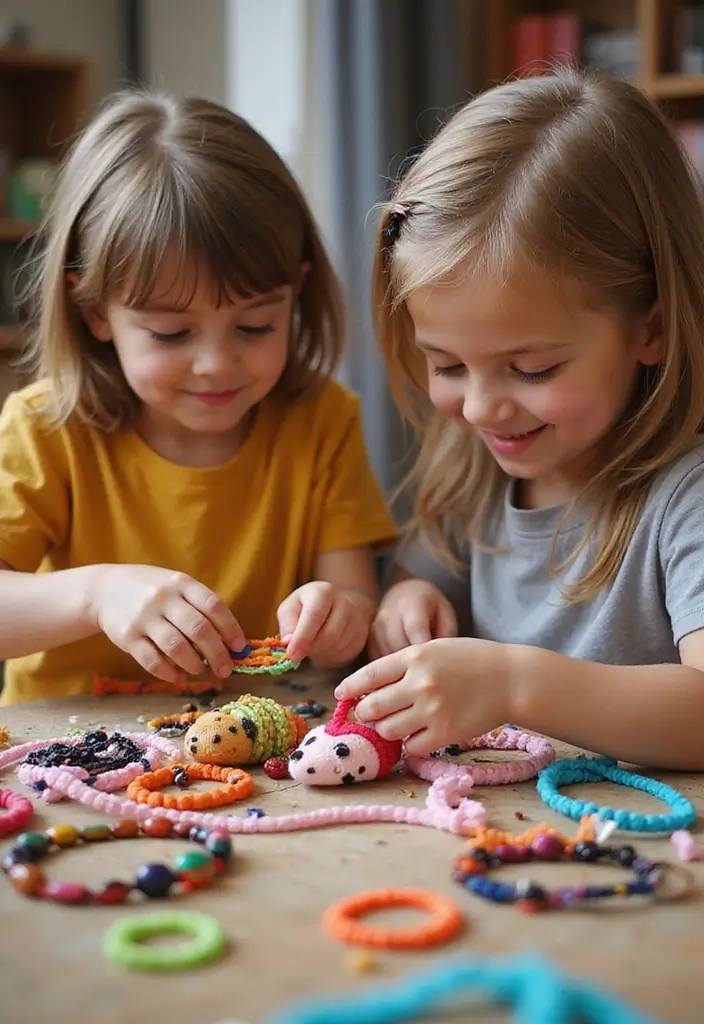
You’re looking for a quick, kid friendly craft that ends with a gift. Animal-themed friendship bracelets fit the bill. They sparkle with beads and feel smooth as you slide them onto thread. Best of all, they teach sharing and help friends feel special.
Materials Needed:
– Colorful beads
– String or elastic thread
– Scissors
Here is how you make them. Start with a color plan. Pick two or three colors that match your animal theme. Next, cut a piece of thread or elastic a bit longer than the wrist you target. Tie a simple knot loop at one end for a fast fit. Now string beads in your chosen pattern. Use animal shaped beads or charms for character. Keep the pattern simple so you finish in one sitting. When the beads are on, slide the knot to close the bracelet. Tie a secure knot and trim the ends.
This project helps small hands move with control. It also gives you a ready-made gift that shows you care. Try different animals like rabbits, bears, or birds. You can mix sizes or add tiny charms.
Next steps: share your bracelet with a friend and ask for feedback. You can keep a few on hand to trade at school.
@media(max-width:480px){
22. Animal Shadow Boxes
You want a kid-friendly craft that teaches about animals and their homes. Animal shadow boxes give you that. They turn a shoebox into a tiny scene using simple, recycled materials. The result is colorful, hands-on learning and a keepsake you can display.
Materials Needed:
– Shoebox or small box
– Construction paper in greens, blues, browns
– Recycled bits: bottle caps, fabric scraps, twigs
– Scissors, glue, tape
– Markers or crayons
– Optional: a small lamp or flashlight for shadows
Here is how to make it:
1) Choose a habitat. Forest, farm, or coast work well. Pick one animal to feature.
2) Create the backdrop. Glue paper to the back wall for sky and ground.
3) Build the scene. Cut trees from cardboard, grass from strips, and rocks from caps.
4) Add the animal. Use a cutout or tiny toy. Glue it so it sits in front of the backdrop.
5) Add details. String vines, cotton clouds, and fabric for a roof.
6) Label it. Write the habitat name and a quick fact.
Why it helps you learn: you see how animals fit into their places. Discuss food, shelter, and weather. The project teaches planning and sharing. A side light adds soft shadows. Keep the box compact for a neat display.
Perfect for a quick classroom display.
23. DIY Animal-Themed Bookmarks
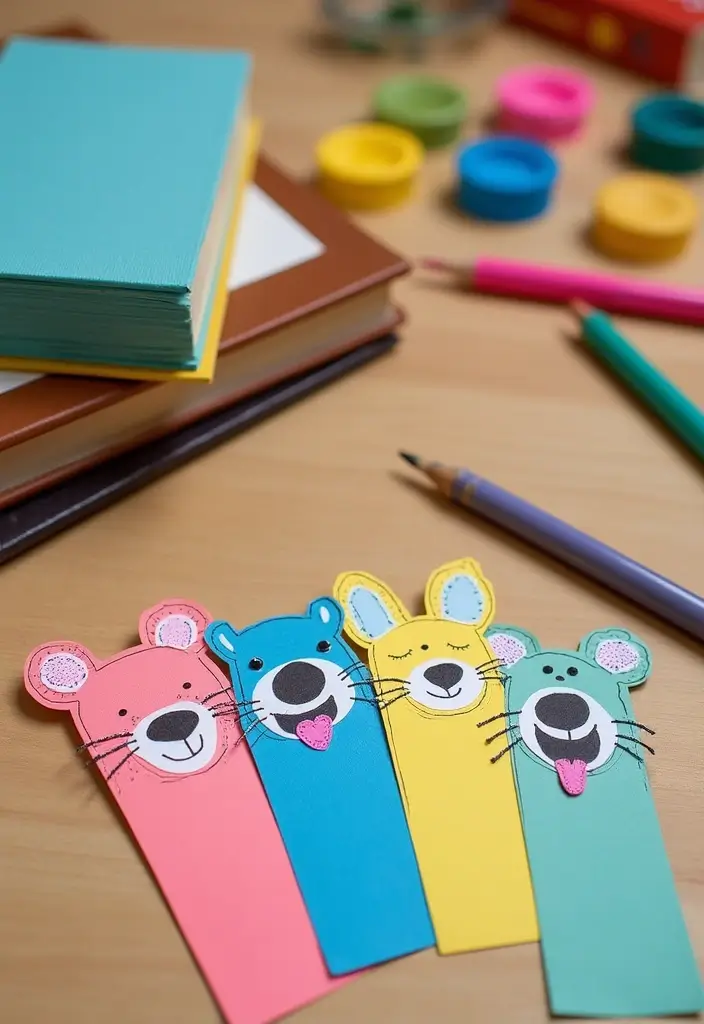
Want to make reading time feel like a tiny adventure? DIY animal-themed bookmarks turn that goal into a simple at-home project. Your kid will get a keepsake that makes every page feel special.
Materials Needed:
– Sturdy paper
– Markers or colored pencils
– Stickers or stamps
– Scissors
Here is why these basics work: they are easy to find, and they let your child express color and shape.
What to do:
– Cut the sturdy paper into a bookmark size, about 2 by 6 inches.
– Let your kid draw an animal. Try a fox, a panda, a sea turtle, or a silly monster.
– Add stickers or stamps for texture. A fluffy tail or spotted skin can pop off the page.
– Personalize with a name or a favorite color scheme. Small dabs of white or black pen add eyes and smiles.
Try seasonal animals or book themes. If you want quick results, pick a simple silhouette like a cat or fish.
Next steps:
– Laminate the finished bookmark for durability, or punch a hole and thread a ribbon.
– Use them daily to mark chapters and spark conversation about the book.
Tips:
– Work in short bursts; a little dry time helps.
– Store bookmarks flat in a folder so they stay neat and ready for the next reading session.
@media(max-width:480px){
24. Nature-Inspired Animal Prints
You’re looking for a simple craft that kids will love and learn from. This activity brings art and nature together. You’ll see animal patterns come alive as you press leaves into paint. You can use this as a quick art lesson at home or in class.
Here is how you make nature prints with leaves as stamps.
– Gather leaves for stamps.
– Use non-toxic paint.
– Choose sturdy paper.
– Pick leaves with bold shapes and clear veins.
Dip a leaf in paint and press it onto paper.
– Press it gently straight down, then lift to reveal the print.
– Try many leaves to see different textures.
– Let each print dry before you touch it.
– Add small details later with a pencil or crayon to hint at fur, scales, or shells.
Why this works: you notice how texture and shape create animal patterns. The act of stamping connects you to a walk in the woods. The prints dry fast on plain white or construction paper.
Next steps: try this after a quick nature walk. Collect leaves, swap prints with friends, or start a tiny printable animal book to compare patterns. Keep a small notebook to track the patterns you see.
25. Paper Mache Animals
You want a craft that is fun, a little messy, and ends with a cute animal you can keep. Paper mache animals fit the bill. They use scraps you already have and teach how to build a sculpture through simple layers. It’s a hands-on project that sparks imagination.
Materials Needed:
– Old newspapers
– Flour and water for paste
– Paint (acrylic or tempera)
– A bowl, a spoon, and a simple frame like a balloon or cardboard form
– Tape or masking tape
– Optional: string, brushes, and a clear sealant
nnSteps to follow:
– Step 1: Make paste. Mix 1 cup flour with 1 1/2 cups water. Stir until smooth with no lumps.
– Step 2: Build a frame. Use a balloon for a round shape, or cut cardboard to form ears, a trunk, or fins. Tape the pieces tight.
– Step 3: Add layers. Dip newspaper strips in paste, wipe off the excess, and lay them on the frame. Smooth out bubbles. Do 3–4 layers, letting each coat dry a bit.
– Step 4: Dry completely. Let the piece sit in a dry spot for about 24 hours or longer.
– Step 5: Paint and detail. Base with bold colors, then add eyes, patterns, and shading with small brushes.
– Step 6: Seal. Apply a clear finish to protect the art from smudges.
nnTips for great results:
– Texture adds charm. Press crumpled paper between layers to create fur, scales, or wrinkles.
– Start simple. A round body with easy ears makes a quick elephant or whale friend.
– Let kids choose. Allow them to pick colors and patterns to make the animal unique.
nnWhy this works:
– It uses recyclable materials and builds patience and focus. You watch a plain frame turn into a friendly animal you can display.
@media(max-width:480px){
26. Animal-Themed Quilts
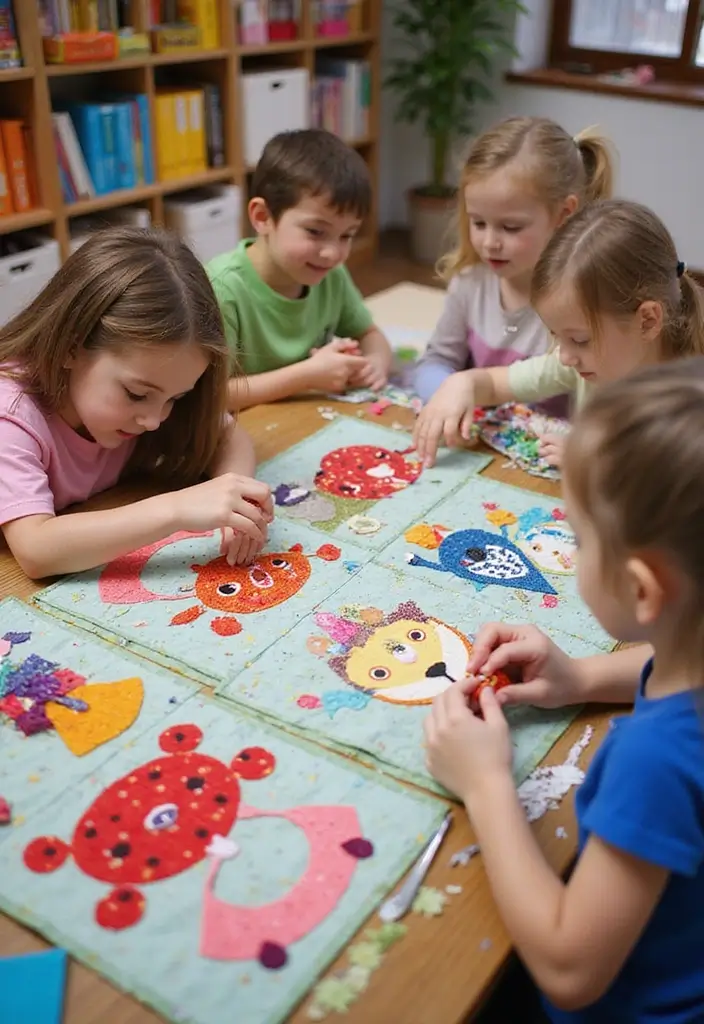
You want a kid-friendly project that lasts. Animal-themed quilts let kids turn fabric scraps into a warm blanket. They pick animals or colors and lay out the pieces first. This craft teaches teamwork and gives a big sense of accomplishment when the top takes shape.
Materials Needed
– Fabric scraps
– Sewing kit (needles, thread)
– Safety scissors
Optional for a bigger quilt:
– Batting and backing
How to make it
1) Choose a simple animal shape or stick with square patches. Let your child arrange colors like a small mural.
2) Pin pieces in place. Start with a running stitch to join them.
3) Add more panels until the top is large enough for a blanket.
4) With a grown-up help, finish the quilt by adding a backing and stitching around the edges.
Tips for success
– Use kid-friendly needles and plastic safety scissors.
– Work in a bright, calm space.
– Keep sessions short and celebrate each stitch.
Why this matters
– It builds fine motor skills and focus.
– Kids see the result of teamwork.
– They end with a cozy quilt they made themselves.
Next steps
– Show off the quilt, gift it to a family member, or use it as a cuddle blanket on movie night.
@media(max-width:480px){
27. Clay Handprint Animals
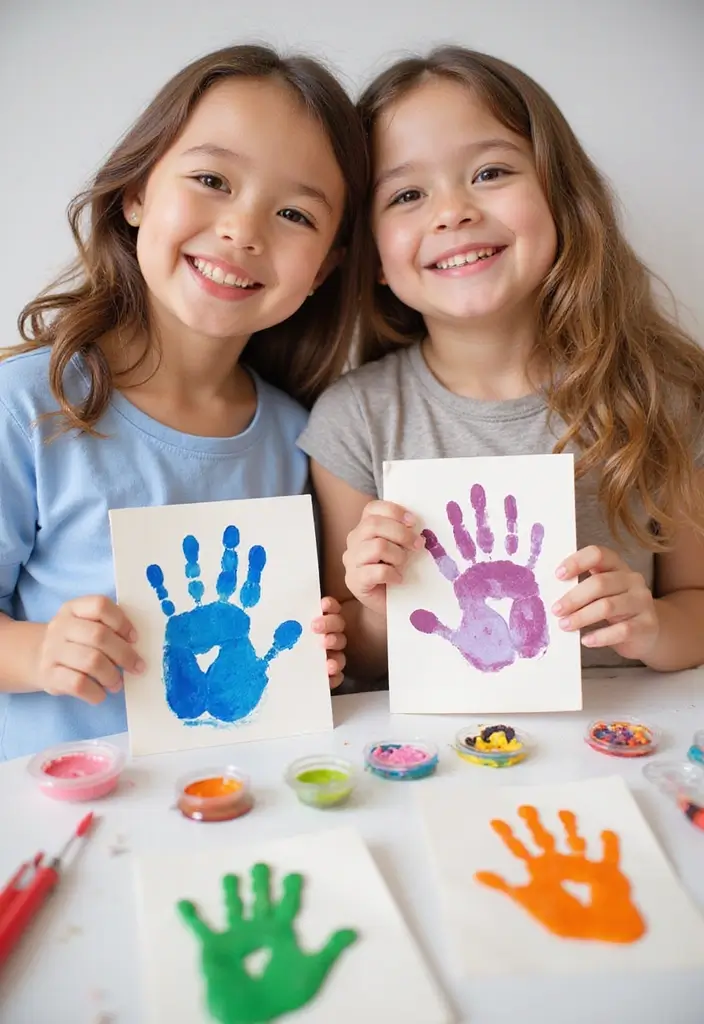
Want a keepsake your child will love to see again? Clay handprint animals turn tiny hand shapes into cute, lasting figures. You press your kid’s hand into soft air-dry clay, let it dry, then paint a small creature you both created. The project is simple, fun, and builds a memory you can keep.
Materials Needed:
– Air-dry clay
– Paint and brushes
– Optional: rolling pin, a little water for smoothing, a tray to dry on
Here is how you do it:
– Knead the clay until smooth. Roll to about 1/4 inch thick.
– Gently press your child’s hand into the clay to leave a print.
– Lift, check the imprint, and trim rough edges. Let dry per the package directions.
– Paint the figure in colors your child loves. Use thin coats so the print stays clear.
– Add simple details like eyes, a nose, or patterns. You can write the name and year with a fine brush.
– Let it dry completely. If you want, seal with a clear finish after it’s dry.
Display ideas:
– Mount on a shelf with a name and date.
– Frame a pair for a tiny gallery.
– Add a string to make an ornament.
This craft sparks creativity and gives you a real keepsake to treasure.
@media(max-width:480px){
28. Animal Origami

You’re looking for a kid-friendly activity that builds focus and calm. Animal origami fits. With simple folds, your child can turn a plain square into a tiny bird, frog, or kitten. The process feels steady and rewarding, and it builds fine motor skills without a screen.
Materials Needed:
– Origami paper
Why it works:
– It teaches precision. Small creases demand steady hands.
– It grows confidence. A visible result boosts pride.
– It opens a view to culture. Paper folding comes from many regions around the world.
Getting started:
1) Pick easy designs first: crane, frog, cat. Use clear step-by-step diagrams.
2) Learn the base folds. The square base and simple bird base are enough to begin.
3) Take your time. If a fold looks off, redo it. Accuracy matters more than speed.
4) Add color and life. Color the animals, draw eyes with a marker, or add tiny accessories.
Ways to use origami art:
– String several animals for a garland.
– Create a small display on a shelf or corkboard.
– Give a folded creature as a thoughtful gift.
Practical tips:
– Work on a clean, flat surface with good light.
– Store sheets flat to keep creases crisp.
If you want a challenge, try layered or pop-up styles. When time is short, fold one animal.
29. Animal-Themed Scrapbooking
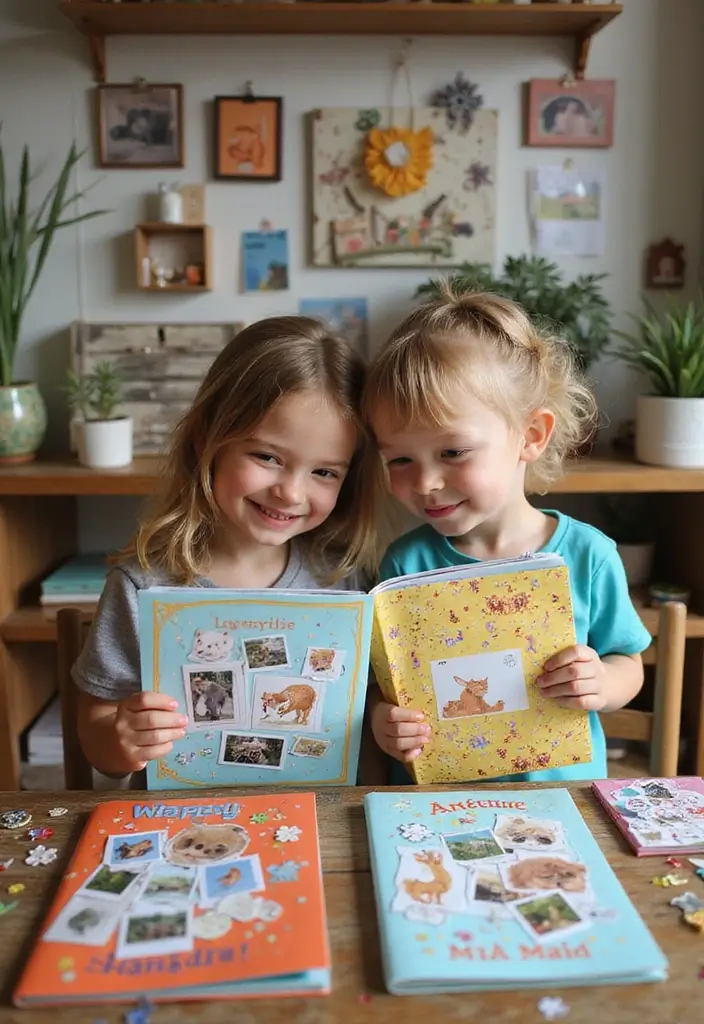
You want a kid-friendly craft that turns photos into stories. Animal-themed scrapbooking fits. It keeps memories safe and grows reading and writing skills.
Here is why it works: kids pick photos, add animal stickers, and write short notes. They practice sequence and layout ideas. The finished book becomes a keepsake you can share.
Materials Needed:
– Scrapbook or sturdy notebook
– Photos or printed pics
– Animal stickers, stamps, and decorative paper
– Glue, scissors, and colored pens
Next, how to do it. Pick a page theme, like a zoo trip or a pet at home. Lay out photos, then write a caption. Add one or two sentences about the animal, like what it eats, where it lives, or a funny moment. Glue everything down and add a few stickers to finish.
Try these page ideas:
– “My Favorite Animal” with a quick fact box
– “Day at the Zoo” in three simple scenes
– “Wild Friends” with animal shapes
Tips for great pages: keep text short, use a bold title, and leave space to breathe. Let kids pick colors and doodles. Read their pages aloud to build confidence.
If you have few photos, add drawings or magazine cut-outs. Scrapbooking grows page by page, not all at once. The result is a sweet memory book and a gentle literacy boost.
Conclusion
From crafty pandas to colorful fish, these 29 animal crafts allow kids to explore creativity while learning about the environment.
Each project offers unique benefits, encouraging artistic expression and a love for the animal kingdom.
Try these fun craft activities for delightful bonding moments and to foster a new appreciation for wildlife together.
Note: We aim to provide accurate product links, but some may occasionally expire or become unavailable. If this happens, please search directly on Amazon for the product or a suitable alternative.
This post contains Amazon affiliate links, meaning I may earn a small commission if you purchase through my links, at no extra cost to you.
Related Topics
animal crafts diy
eco-friendly crafts
kids crafts
creative animal projects
simple DIY projects
nature-inspired crafts
fun craft activities
recycled materials
easy crafts for kids
spring break activities
interactive art projects
budget-friendly crafts