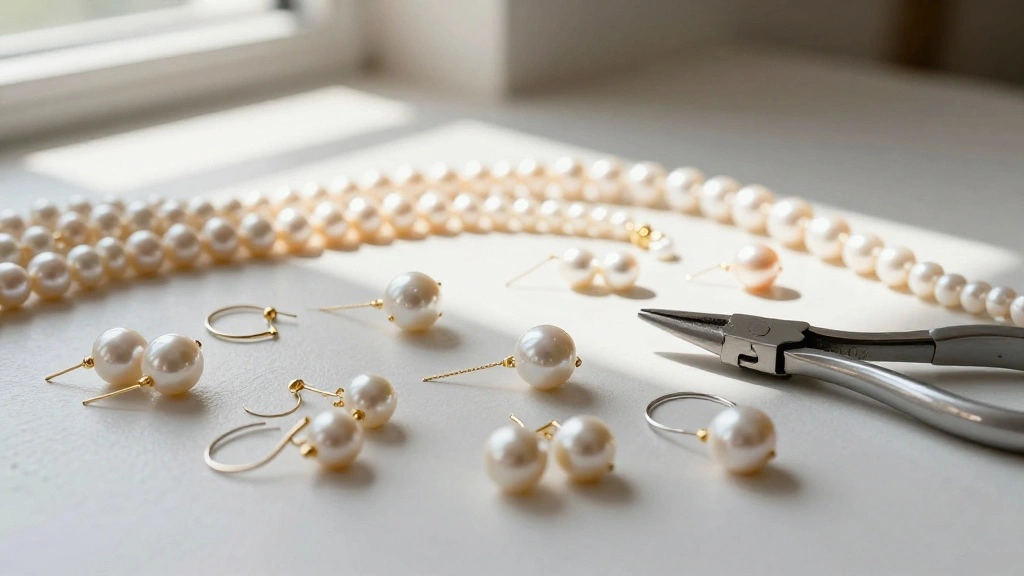
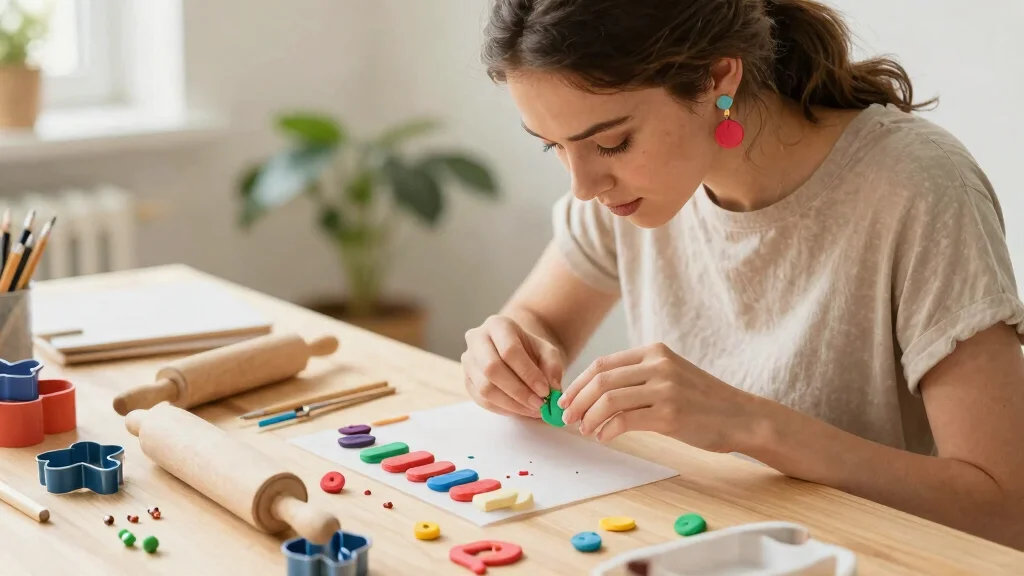
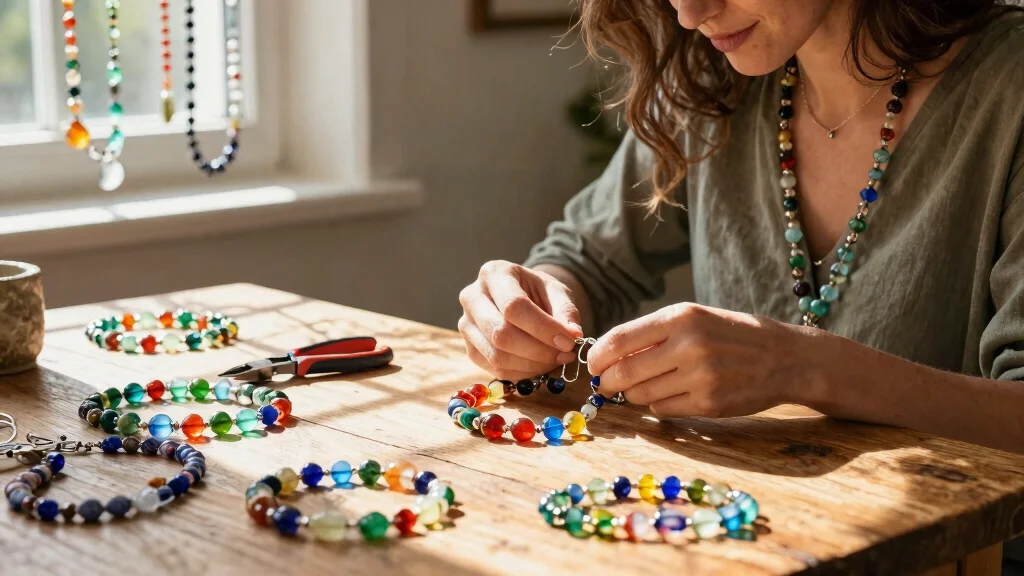
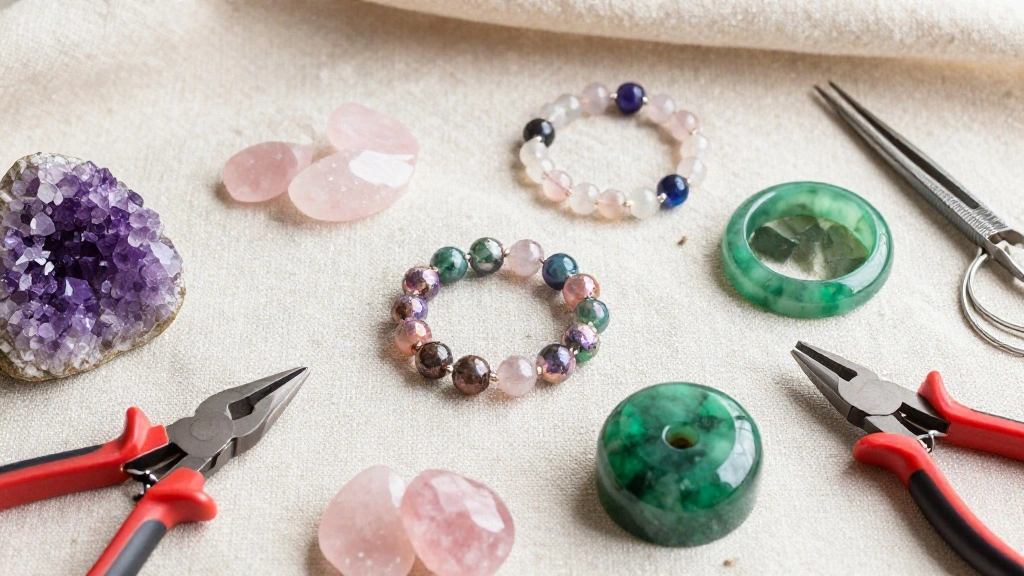
Creating personalized accessories is one of the most rewarding and fun aspects of DIY crafting. If you’re looking to express your style or give a memorable gift, charm bracelets can be a fantastic choice. They let you showcase your personality through unique designs, colors, and themes. This blog post is all about inspiring you with 17 DIY charm bracelet ideas that you can easily make at home. Whether it’s a nature theme or a celebration of your favorite things, these ideas will spark your creativity and help you make beautiful, one-of-a-kind pieces.
If you’re a parent looking to engage your kids in a fun and creative activity, this post is perfect for you. DIY charm bracelet kits for kids are a hit, and these ideas can turn into excellent bonding moments. Not only do kids enjoy crafting, but they also learn about creativity and self-expression. You’ll find tutorials that are easy to follow and materials that are kid-friendly, making it simple for you to get started.
By the end of this post, you’ll have a collection of charm bracelet tutorials that are not only fun and exciting but also packed with tips for making personalized jewelry. Get ready to create some beautiful DIY accessories that you or someone special can cherish for years to come. Let’s dive into the amazing world of charm bracelets and explore ideas that are colorful, meaningful, and totally you.
Key Takeaways
– Discover 17 DIY charm bracelet ideas, each with a unique theme to inspire your creativity and personal touch.
– Explore simple charm bracelet tutorials that make it easy for kids and adults alike to create beautiful accessories together.
– Learn about personalized jewelry making by incorporating favorite colors, symbols, and themes that resonate with you or your loved ones.
– Get practical tips on choosing materials and techniques for your charm bracelets, ensuring a fun crafting experience without frustration.
– Uncover the joy of making handmade charm designs that can serve as thoughtful gifts or treasured keepsakes for any occasion.
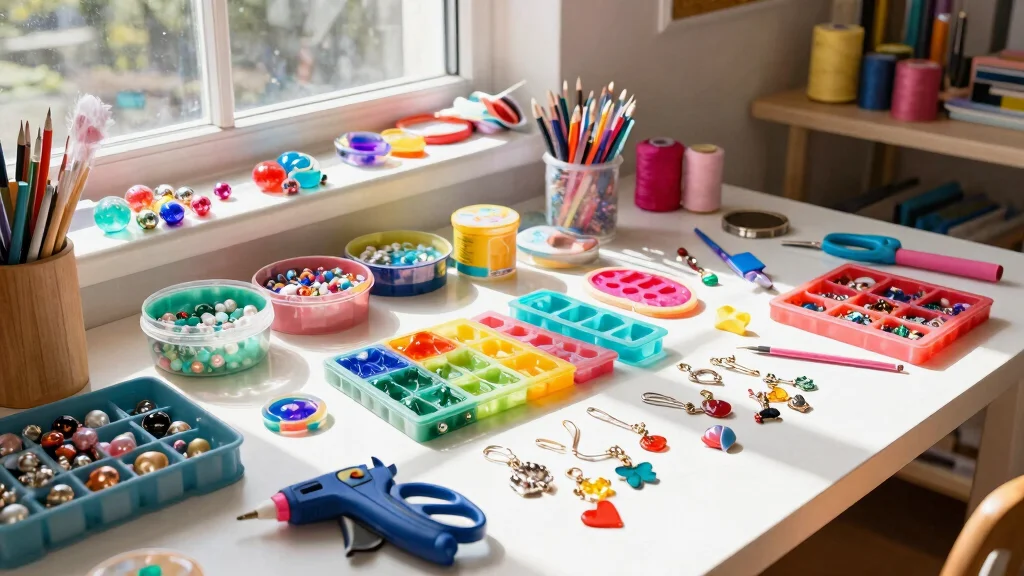
Recommended Products

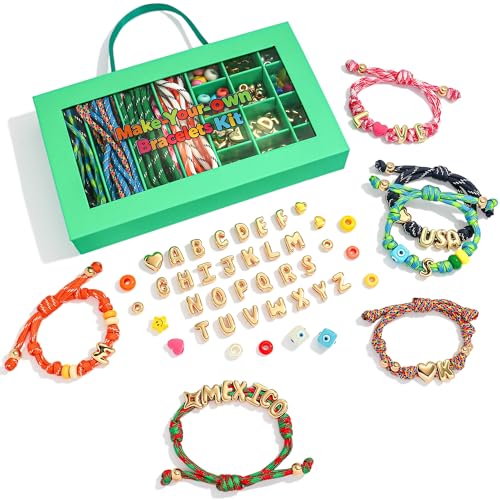
JUICY COUTURE BRACELET KIT: Create your own unique Juicy Couture bracelet with 10 charms, 390 beads, 3 chains, and satin cords. Perfect for tweens who love DIY jewelry making and want a personalized, stylish look.

🌸Everything You Need to Get Started: This bead kit includes everything a beginner needs to start making beautiful bracelets and jewelry, including 4500 pcs flat polymer clay beads and 500 pcs charms kit (2 types random letter beads, smile face beads, golden spacer beads, golden shells, golden starfishes, silver pendant, lobster clasp set, etc.),1 rolls of 10 meters stretchy strings, scissors, tweezers. Let's start your new wonderful journey with the Dowsabel jewelry-making kit as the origin.

[You Will Get]: The DIY charm bracelet kits provides you 5 pieces silver snake bracelet chains with heart lobster clasp extender chain, 20 x charm pendants, 30 x charm beads, 30 x color charm beads, which enough for you to DIY your own jewelry craft
1. Nature-Inspired Charm Bracelet
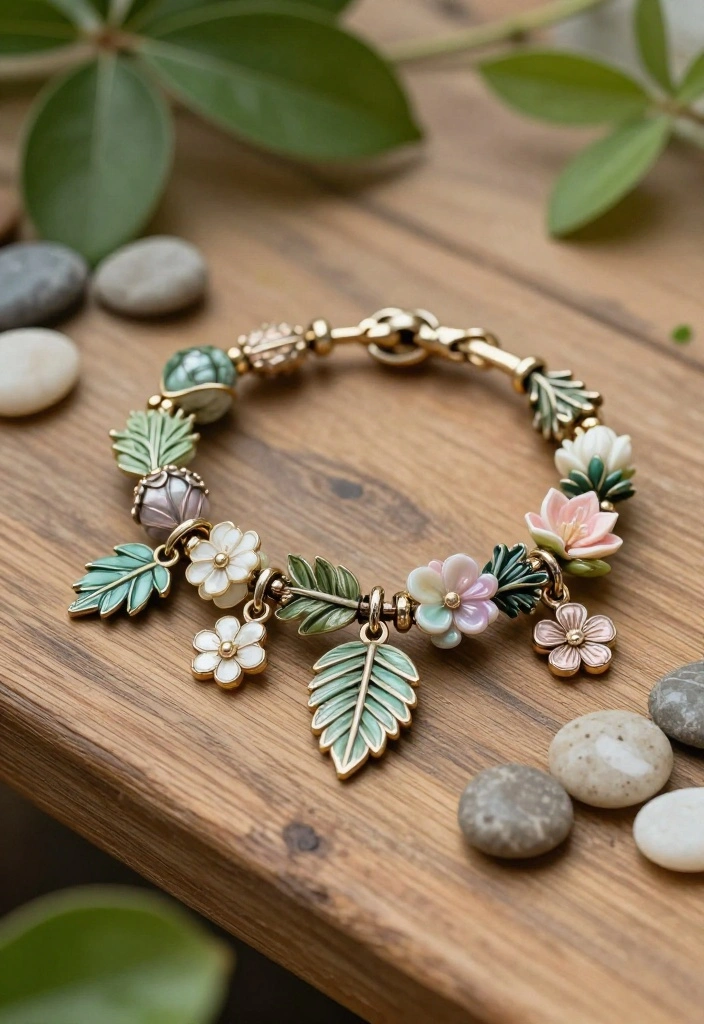
Create a charm bracelet that captures the essence of nature. Think about using charms shaped like leaves, flowers, and small animals to evoke the beauty of the great outdoors. Earthy hues like greens, browns, and blues will enhance this natural vibe.
What makes this design special is its personal touch; you can select charms that remind you of your favorite outdoor adventures, from hiking to beach days. This bracelet is perfect for casual outings, nature walks, or simply celebrating your love for the environment.
Materials Needed:
– Leaf and flower charms
– Natural stone beads
– Clear elastic string
– Lobster clasp
– Jump rings
Step-by-Step Instructions:
1. Measure your wrist and cut the elastic string to size.
2. Lay out your charms and beads to create a design you love.
3. String the beads and charms in your chosen order.
4. Tie a secure knot in the elastic and attach the lobster clasp using jump rings.
5. Trim any extra string to finish.
This nature-inspired bracelet is not just a craft; it’s a way for kids to express their love for the outdoors while telling their own stories through charm selections.
DIY charm bracelet ideas shine when your charms tell your story. Choose leaves, flowers, and small animals to echo nature’s charm, then layer earthy greens, browns, and blues. Pro tip: start simple, add a new charm after each outdoor adventure.
2. Adventure Awaits Charm Bracelet
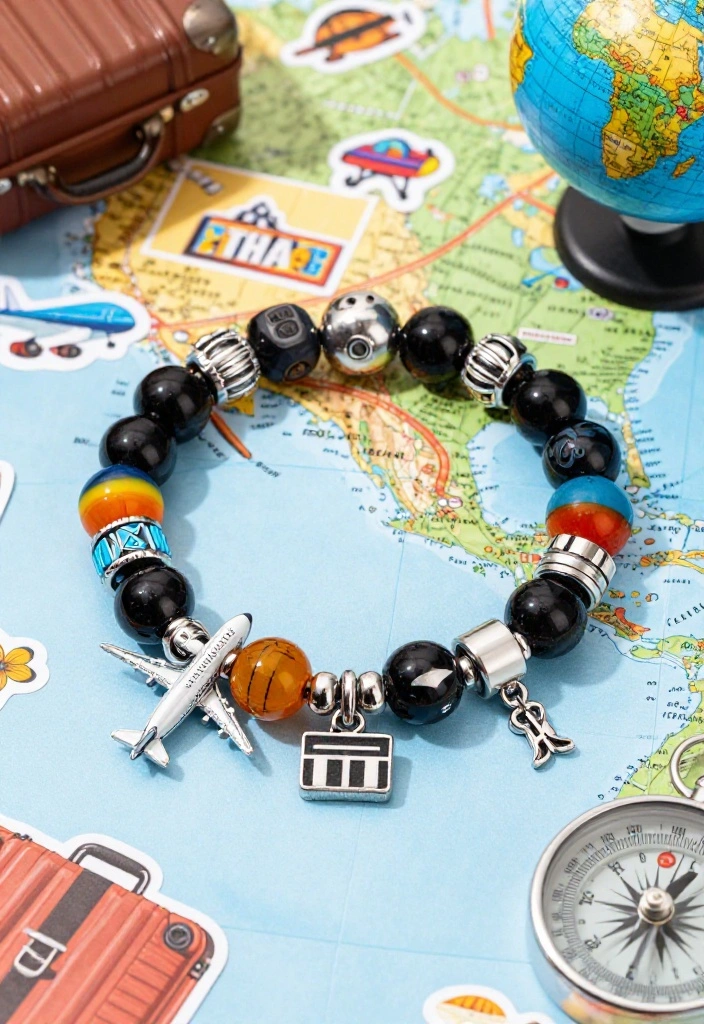
If you have a wanderlust spirit, this charm bracelet is for you! Select charms that represent your travel adventures, such as airplanes, globes, and passports. Bright colors reminiscent of sunny beaches and vibrant cities will keep the spirit of adventure alive.
This design works beautifully for those who cherish travel memories or dream about future destinations. It’s ideal for school events, travel-themed parties, or simply to inspire discussions about adventures.
Materials Needed:
– Travel-themed charms (e.g., airplane, suitcase)
– Colorful acrylic beads
– Stretch cord
– Crimp beads
– Jump rings
Step-by-Step Instructions:
1. Measure your wrist and cut the stretch cord to the right length.
2. Arrange your travel charms and beads to discover a pattern.
3. Begin stringing the charms and beads on the cord.
4. Secure both ends of the stretch cord using crimp beads.
5. Trim any excess cord for a polished look.
This bracelet is a conversation starter, perfect for kids who love to share their travel dreams or experiences.
Did you know that 68% of travelers say travel-inspired DIY charms motivate them to plan the next trip? Choose airplane, globe, and passport charms in sunny hues—the perfect touch to your diy charm bracelet ideas and keep adventure alive.
3. Whimsical Fairy Tale Charm Bracelet
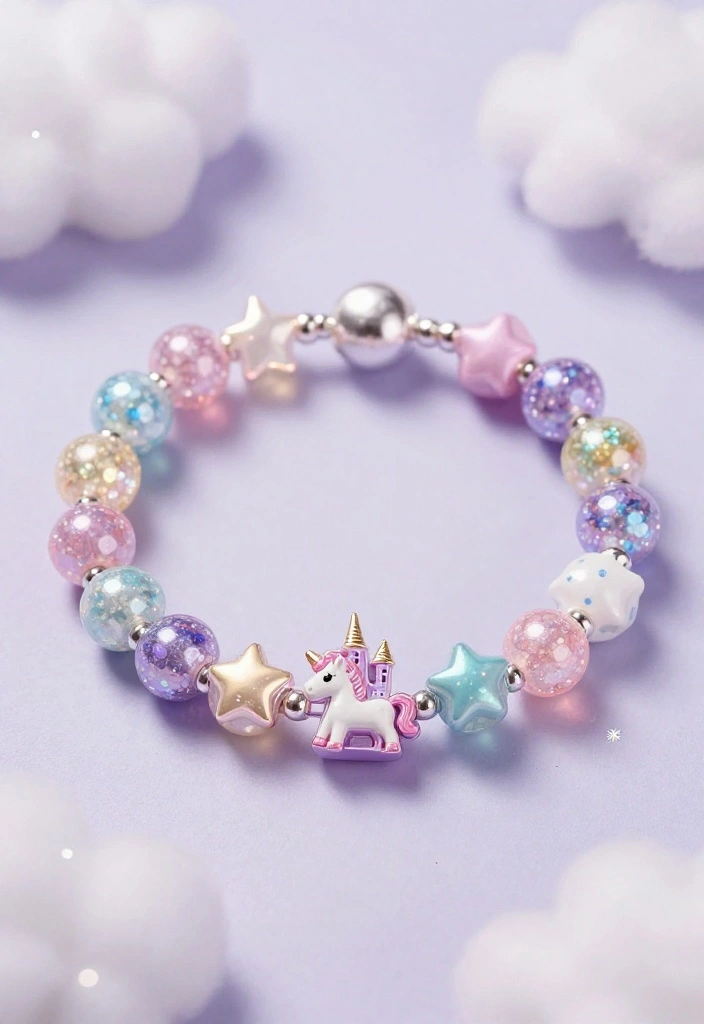
Dive into a world of fantasy with a fairy tale charm bracelet! Incorporate fun charms like unicorns, castles, and stars to bring magical tales to life. Using pastel and sparkling beads will enhance the whimsical feel, making it truly enchanting.
This design not only showcases creativity but also serves as a storytelling tool, as each charm can represent a beloved fairy tale character or moment. It’s perfect for themed parties, storytelling sessions, or imaginative play.
Materials Needed:
– Fairy tale charms (e.g., unicorn, castle, star)
– Sparkly beads in pastel colors
– Stretch cord
– Lobster clasp
– Jump rings
Step-by-Step Instructions:
1. Measure your wrist and cut the stretch cord accordingly.
2. Organize your charms and beads to create a delightful pattern.
3. Thread the charms and beads onto the cord in your chosen design.
4. Attach the lobster clasp and jump rings to secure the ends.
5. Trim any excess cord for a neat finish.
This whimsical charm bracelet is a magical way for kids to express their creativity and love for storytelling.
4. Colorful Friendship Charm Bracelet
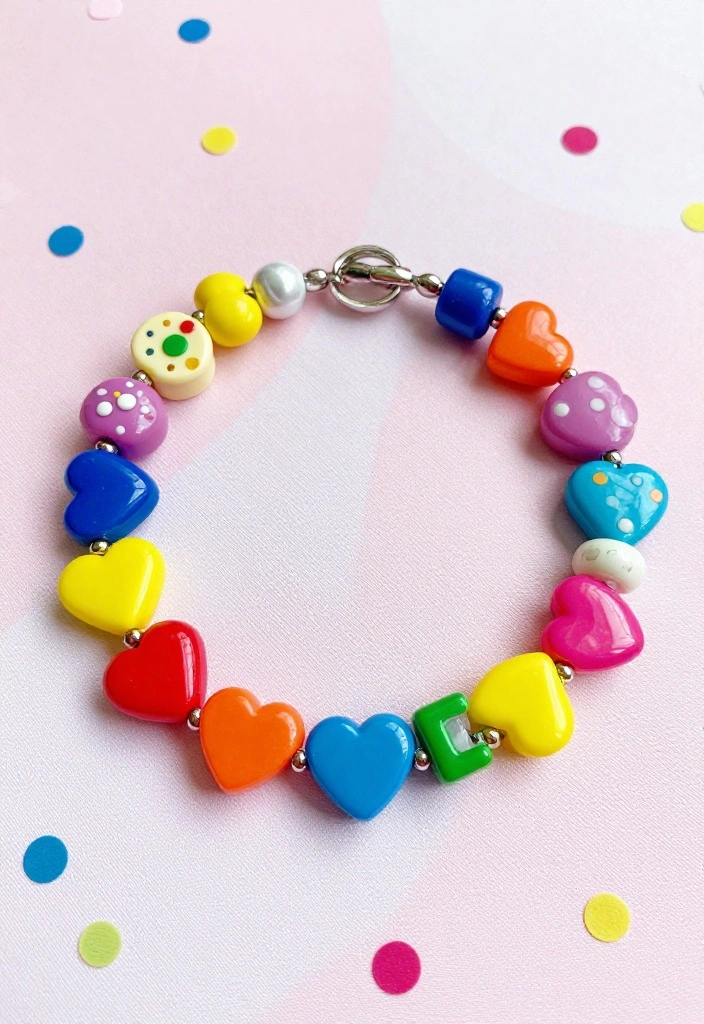
Celebrate the joy of friendship with a vibrant charm bracelet! Use heart-shaped charms, friendship quotes, and bright beads that represent the bond you share. Each charm can symbolize a cherished memory or inside joke, making it a truly personal piece.
This project is ideal for kids wanting to create matching bracelets for their best friends, fostering creativity and strengthening connections. It’s a fun activity for birthday parties or sleepovers.
Materials Needed:
– Heart-shaped charms and friendship-themed charms
– Brightly colored beads (like neon or rainbow colors)
– Elastic string
– Clasp and jump rings
Step-by-Step Instructions:
1. Measure your wrist and cut the elastic string accordingly.
2. Layout your charms and beads for a colorful friendship design.
3. Load the charms and beads onto the elastic and tie securely.
4. Attach a clasp with jump rings for easy wear.
5. Trim any excess string to complete your bracelet.
This colorful friendship bracelet is a wonderful way for kids to express their bond and create lasting memories.
5. Seasonal Charm Bracelet
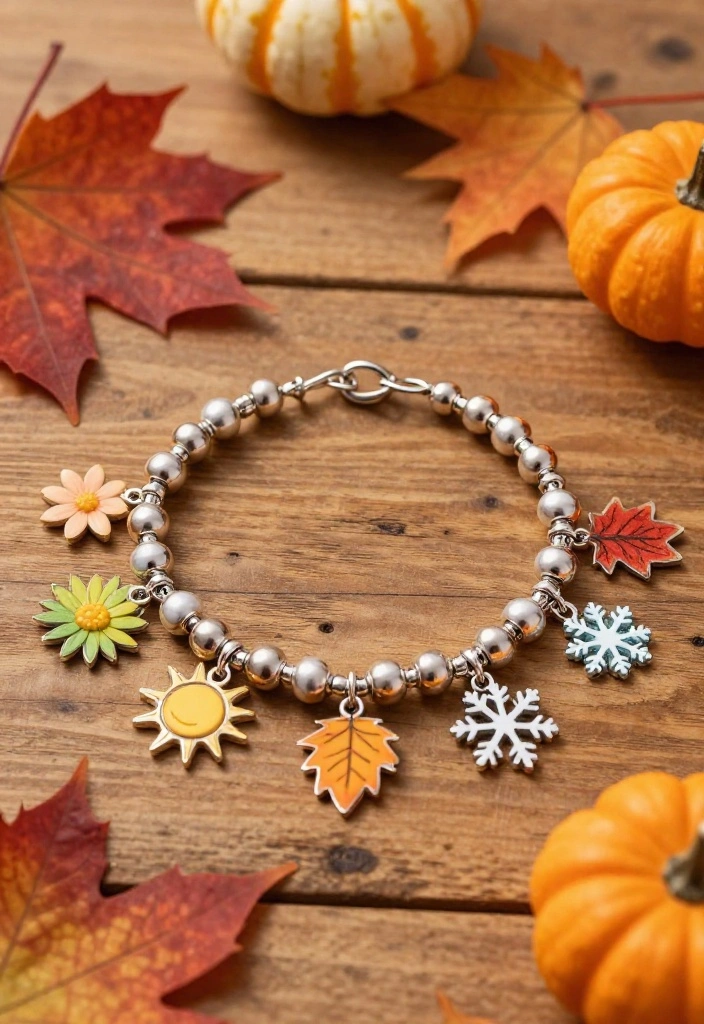
Celebrate the essence of each season with a creative charm bracelet! Choose charms and beads that reflect spring, summer, fall, or winter. Think flowers for spring, suns for summer, leaves for autumn, and snowflakes for winter.
This bracelet allows kids to change charms with the seasons, making it a versatile craft project that promotes creativity and learning about nature’s cycles. It’s perfect for seasonal celebrations or educational activities.
Materials Needed:
– Seasonal-themed charms (e.g., flowers, snowflakes)
– Beads in seasonal colors
– Stretch cord or wire
– Clasp and jump rings
Step-by-Step Instructions:
1. Cut your stretch cord to fit your wrist size.
2. Sort through your charms and beads based on seasonal themes.
3. String your seasonal charms and beads onto the cord.
4. Secure both ends with a clasp using jump rings.
5. Trim any extra cord for a polished look.
This seasonal charm bracelet is not only fun but also educational, allowing kids to explore nature throughout the year.
🎨 Transform Your Space Creatively!
Unlock your inner designer with our DIY guide, perfect for crafting unique charm bracelets and more personalized projects.
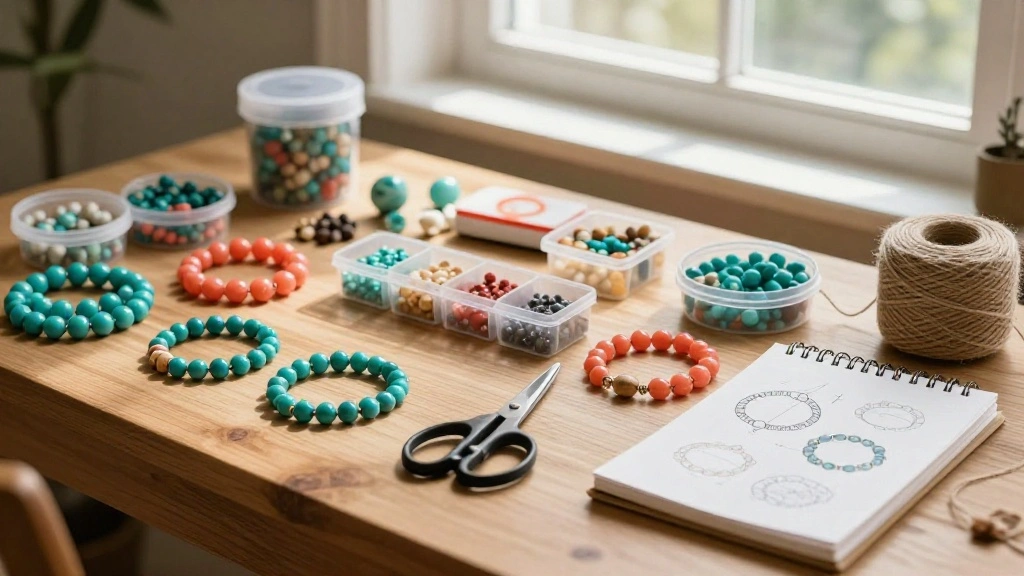
How To Choose The Right DIY Charm Bracelet Kit
When it comes to creating your own charm bracelet, choosing the right DIY charm bracelet kit is key to a fun and successful crafting experience. Here are some important factors to consider:
1. Kit Contents
Check what comes inside the kit. A good DIY charm bracelet kit should include a variety of charms, beads, and a bracelet chain. Some kits also offer tools for assembling. Make sure you have enough materials to make at least one complete bracelet, plus extras for future projects.
2. Age Appropriateness
While many kits are designed for all ages, some might not be suitable for younger children due to small parts. Check the recommended age on the packaging. Kits aimed at kids should have larger beads and charms that are easier to handle.
3. Material Quality
Look for kits that use durable materials. Charms made from metal or high-quality plastic can withstand the wear and tear of everyday use. Avoid kits with cheap materials that might break easily or cause skin reactions. Research the brand to ensure they prioritize quality.
4. Design Options
Consider the themes and styles offered in the kit. Some kits focus on specific themes like nature, friendship, or holidays. Choose one that resonates with your personality or the recipient’s interests. This adds a personal touch to the final product.
5. Price Point
DIY charm bracelet kits come in various price ranges. Determine your budget before shopping. While it’s tempting to go for the cheapest option, remember that higher-priced kits often include more materials and better quality. Compare features among different kits to find the best value.
6. Online Reviews
Look for reviews from other crafters. Websites and social media platforms often have user-generated content that can give you insight into the kit’s usability and quality. Check for customer ratings and comments to gauge overall satisfaction.
Pro Tip: Always keep some extra beads and charms at home. This allows you to customize your charm bracelet further or repair it if needed. Creative projects are often about experimenting, so have fun with it!
Recommended Products

Bracelet Making Kit: receive 10 pcs snake charm bracelet chains with heart extension chains, 100 pcs bracelet charm spacers and 120 pcs hole beads in 12 designs, 1 plastic storage box, this bracelet making kit has sufficient quantity and various styles, can choose and match your favorite charms to make jewelry crafts

Valuable Package: Charm bracelet making kit contains 16 charm bracelet (8 in gold and 8 in silver), 228 mixed pendants, 240 open rings, open rings and jewelry pliers, which is convenient for you to create DIY. Let you create your own fashion collocation at will

6. Birthday Celebration Charm Bracelet
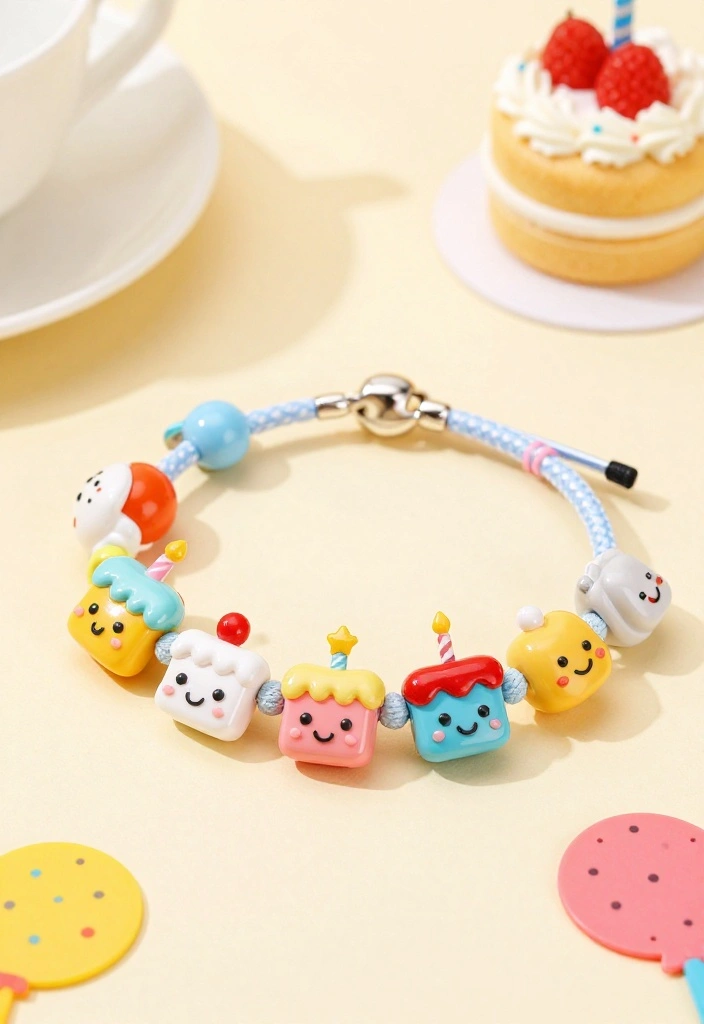
Mark special birthdays with a festive charm bracelet! Use charms like birthday cakes, candles, and balloons to capture the joyous spirit of celebrations. Bright colors will enhance this cheerful theme, making it a playful accessory.
This project is perfect for kids celebrating their own birthdays or as thoughtful gifts for friends. It adds a unique touch to any birthday party.
Materials Needed:
– Birthday-themed charms (e.g., cake, balloons)
– Colorful beads (primary colors work best)
– Stretch cord or elastic string
– Clasp and jump rings
Step-by-Step Instructions:
1. Measure your wrist and cut the stretch cord accordingly.
2. Arrange your charms and beads for a festive birthday design.
3. String them all onto the cord to create your bracelet.
4. Secure the ends with a clasp and jump rings.
5. Trim off any excess cord for a clean finish.
This birthday charm bracelet adds a personal touch to celebrations, making it a memorable keepsake for kids.
7. Music Lover Charm Bracelet
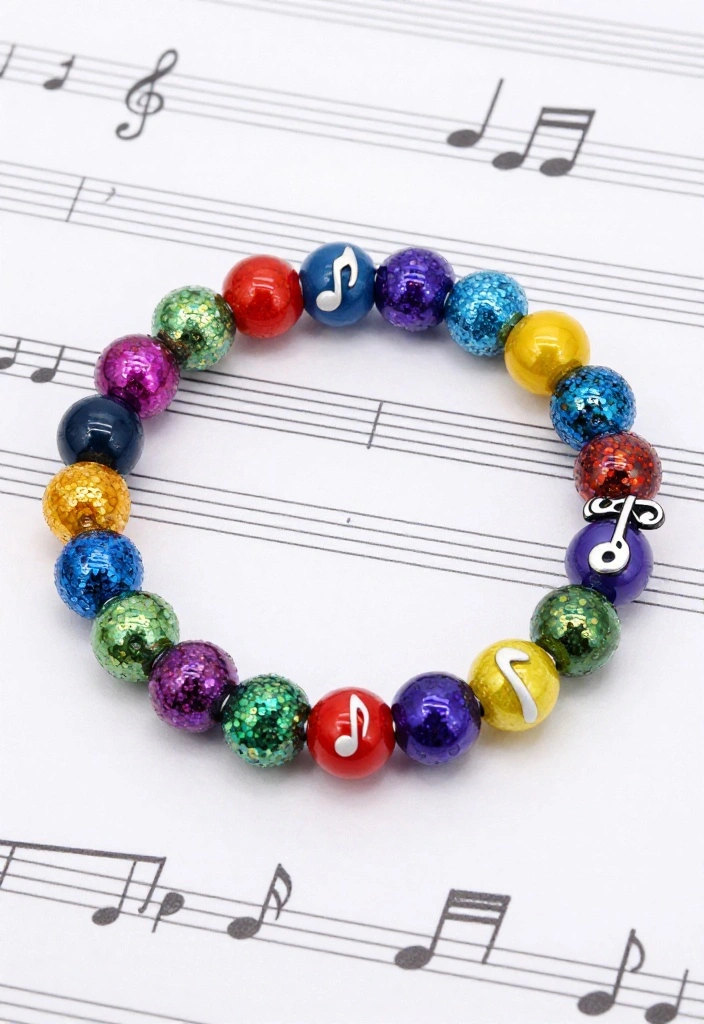
Show off your love for music with a charm bracelet inspired by your favorite tunes! Use charms shaped like musical notes, instruments, and headphones. Metallic beads and vibrant colors can evoke the energy and rhythm of music.
This bracelet is a perfect way for kids to express their musical interests and memories. Each charm can represent a favorite song or concert, making it a meaningful accessory.
Materials Needed:
– Musical-themed charms (e.g., notes, instruments)
– Colorful beads (metallic or glittery options)
– Stretch cord or wire
– Clasp and jump rings
Step-by-Step Instructions:
1. Measure your wrist and cut the stretch cord to fit.
2. Layout your musical charms and beads for a harmonious design.
3. Begin stringing the charms and beads onto the cord.
4. Secure the ends with a clasp and jump rings.
5. Trim any excess cord for a polished finish.
This music lover charm bracelet invites kids to celebrate their favorite music while getting creative!
8. Sports Fan Charm Bracelet

For young sports enthusiasts, a charm bracelet that highlights their favorite sports is a must! Use charms that represent sports balls, trophies, and team logos, and include team colors in the beads for a personalized touch.
This project is fantastic for kids who want to showcase their love for their teams or sports. Each charm can symbolize a memorable game, creating a bracelet rich in meaning.
Materials Needed:
– Sports-themed charms (e.g., soccer ball, basketball)
– Beads in team colors
– Stretch cord or wire
– Clasp and jump rings
Step-by-Step Instructions:
1. Measure your wrist and cut the stretch cord to size.
2. Sort your sports charms and beads by preference.
3. String them onto the cord following your design.
4. Secure the ends with the clasp using jump rings.
5. Trim any excess cord for a clean finish.
This sports fan charm bracelet is a great gift for fellow sports lovers, perfect for celebrating team spirit.
9. Pet Lover Charm Bracelet
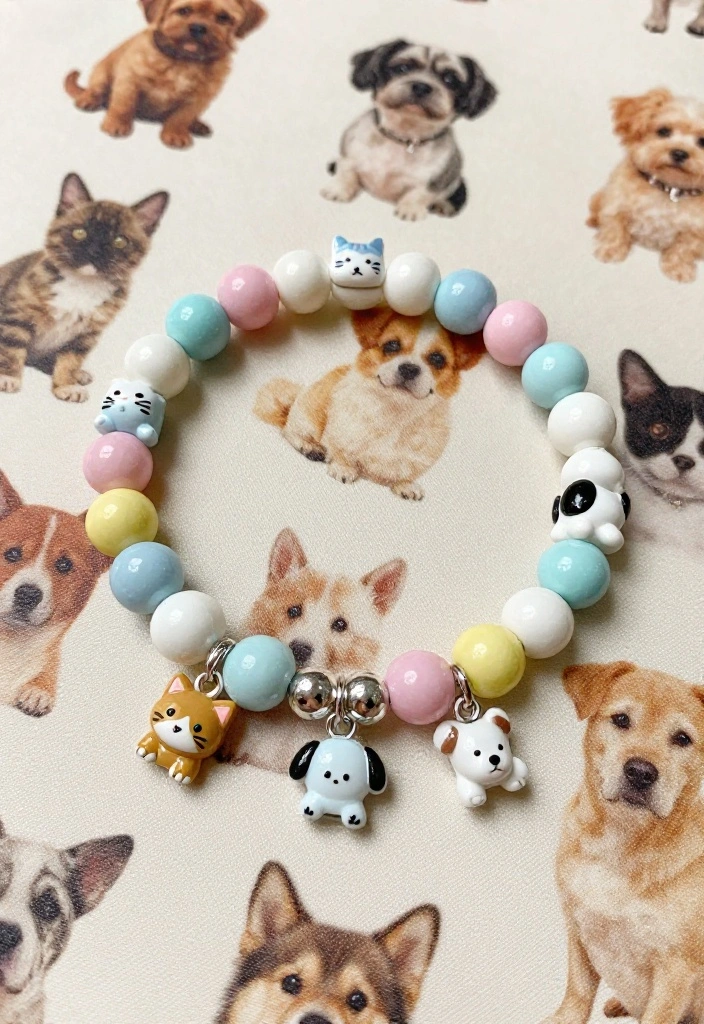
For those who adore animals, a charm bracelet featuring beloved pets is a delightful idea! Use charms shaped like dogs, cats, or other pets, and choose soft, warm colors to create a cozy feel.
This project is great for kids wanting to showcase their love for their furry friends. Each charm can represent a beloved pet or a cherished memory, making it a personal accessory.
Materials Needed:
– Pet-themed charms (e.g., dog, cat)
– Soft-colored beads (like pastels)
– Stretch cord or elastic string
– Clasp and jump rings
Step-by-Step Instructions:
1. Measure your wrist and cut the elastic string accordingly.
2. Lay out your pet charms and beads in a design you love.
3. String them onto the cord one by one.
4. Secure the ends with a clasp using jump rings.
5. Trim any excess string to finish.
This pet lover charm bracelet allows kids to express their affection for their animals while getting creative!
10. Educational Charm Bracelet

Combine learning with creativity by crafting an educational charm bracelet! Use charms that represent subjects like science, math, art, and literature. This project can make learning fun, encouraging kids to express their academic interests.
Incorporating colors that symbolize each subject—like green for science or red for art—will enhance the educational theme. It’s perfect for classroom activities or fun learning at home.
Materials Needed:
– Educational-themed charms (e.g., globe, paint palette)
– Colorful beads representing different subjects
– Stretch cord or wire
– Clasp and jump rings
Step-by-Step Instructions:
1. Measure your wrist and cut the stretch cord to fit.
2. Sort and lay out your educational charms and beads.
3. String them onto the cord according to your chosen design.
4. Secure the ends using a clasp and jump rings.
5. Trim off any extra cord for a neat finish.
This educational charm bracelet promotes creativity while sparking conversations about subjects kids are passionate about!
DIY charm bracelet ideas turn learning into play: kids remember science, math, and art best when their charms tell a story. Crafting an educational charm bracelet makes studying feel like a creative project you do together.
11. Ocean Life Charm Bracelet
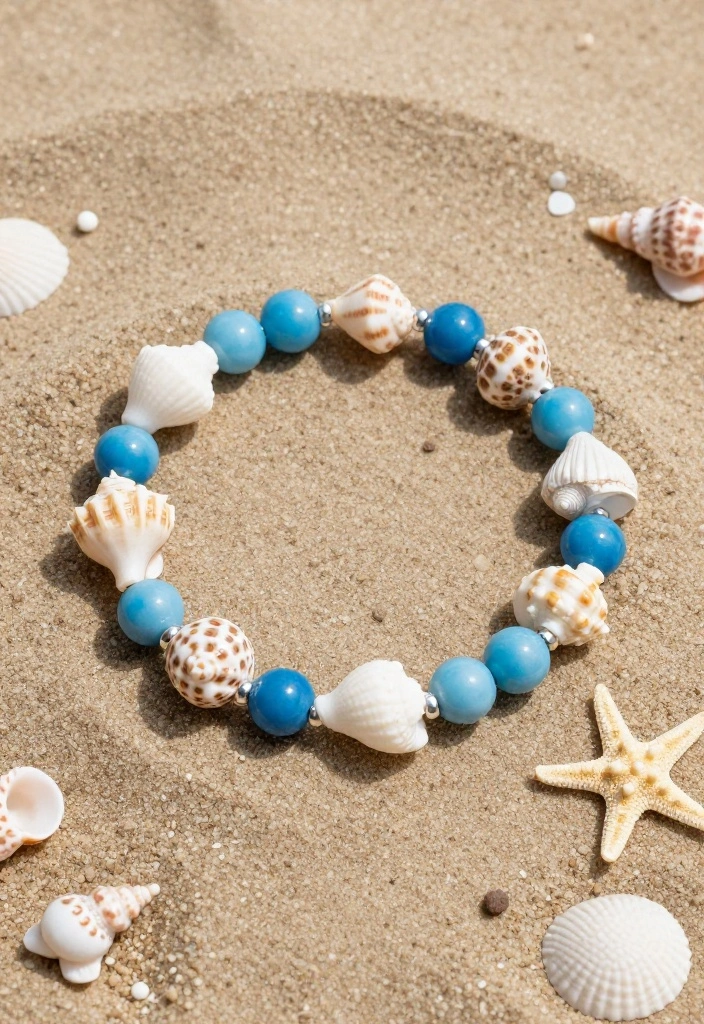
Celebrate the wonders of the ocean with an ocean life-themed charm bracelet! Use charms like seashells, starfish, and dolphins, and choose soft blues and sandy colors in the beads to evoke beach vibes.
This bracelet is perfect for kids who adore the sea, allowing them to express their love for marine life. Each charm can represent a memory from beach trips or favorite sea creatures, creating a sentimental accessory.
Materials Needed:
– Ocean-themed charms (e.g., seashells, fish)
– Blue and sandy colored beads
– Stretch cord or wire
– Clasp and jump rings
Step-by-Step Instructions:
1. Measure your wrist and cut the stretch cord.
2. Layout your ocean charms and beads for a beachy pattern.
3. String them onto the cord one at a time.
4. Secure the ends with a clasp using jump rings.
5. Trim excess cord for a clean finish.
This ocean life charm bracelet allows kids to get creative while showcasing their love for the sea, perfect for beach-themed crafting.
12. Simple Bead Charm Bracelet
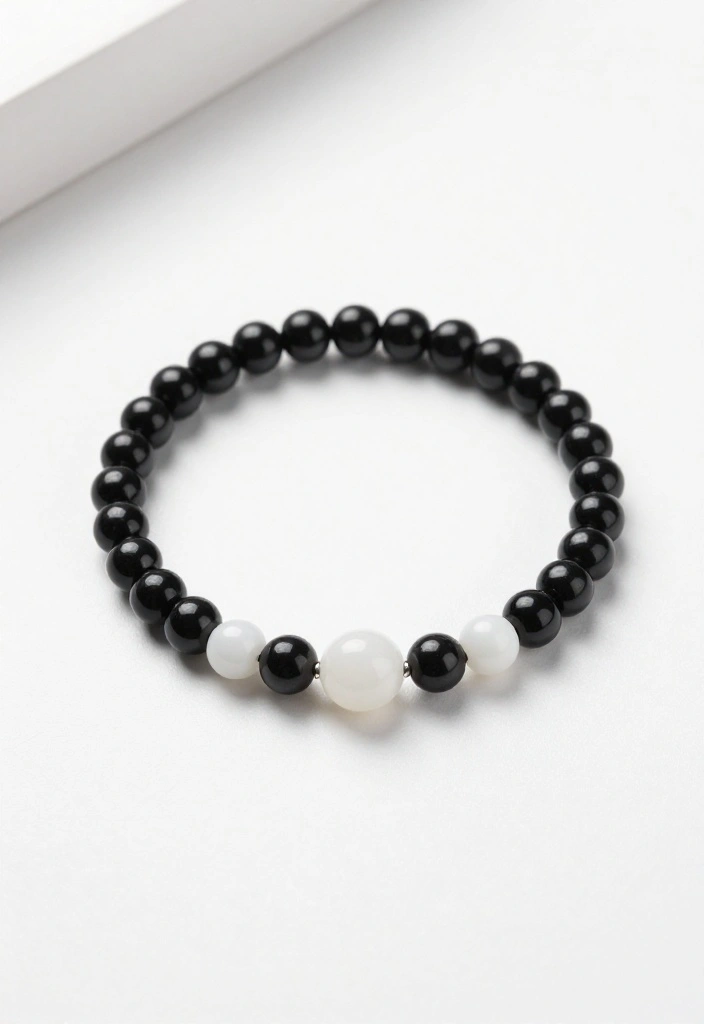
Sometimes, less is more! A simple bead charm bracelet can be stunning with just a few carefully selected beads and a charm. Choose minimalist colors like black, white, or metallic for an elegant look.
This project is easy and perfect for little hands to practice their fine motor skills while getting creative. Each bead can tell a story, and the simplicity of this design makes it adaptable for any occasion.
Materials Needed:
– Minimalist beads (e.g., black, white, metallic)
– A single charm (choose one that has meaning to you)
– Stretch cord or elastic string
– Clasp and jump rings
Step-by-Step Instructions:
1. Measure your wrist and cut the elastic string accordingly.
2. Lay out your beads and charm for a clean pattern.
3. String the beads and charm onto the cord.
4. Secure the ends with a clasp using jump rings.
5. Trim any excess cord to finish.
This simple bead charm bracelet is perfect for kids looking to create something stylish without too much fuss, making it an excellent introductory project.
Recommended Products

Complete DIY Crafts Experience: This extensive bracelet making kit includes 5000pcs high-quality clay beads, flower beads, charms, letter beads, number beads and accessories, providing endless opportunities for creative expression and unique jewelry designs.


1200PCS Bracelet Making Kit: A box contains 20 types(contains animal beads, fruit beads, flower beads, butterfly beads and star beads etc.),50pcs random letter beads in 2 types,300 pcs clay beads and 100 pcs pony beads,1 roll of 6 meters elastic string. You can make bracelets or jewelry according to your favorite color and style.
13. Holiday Charm Bracelet
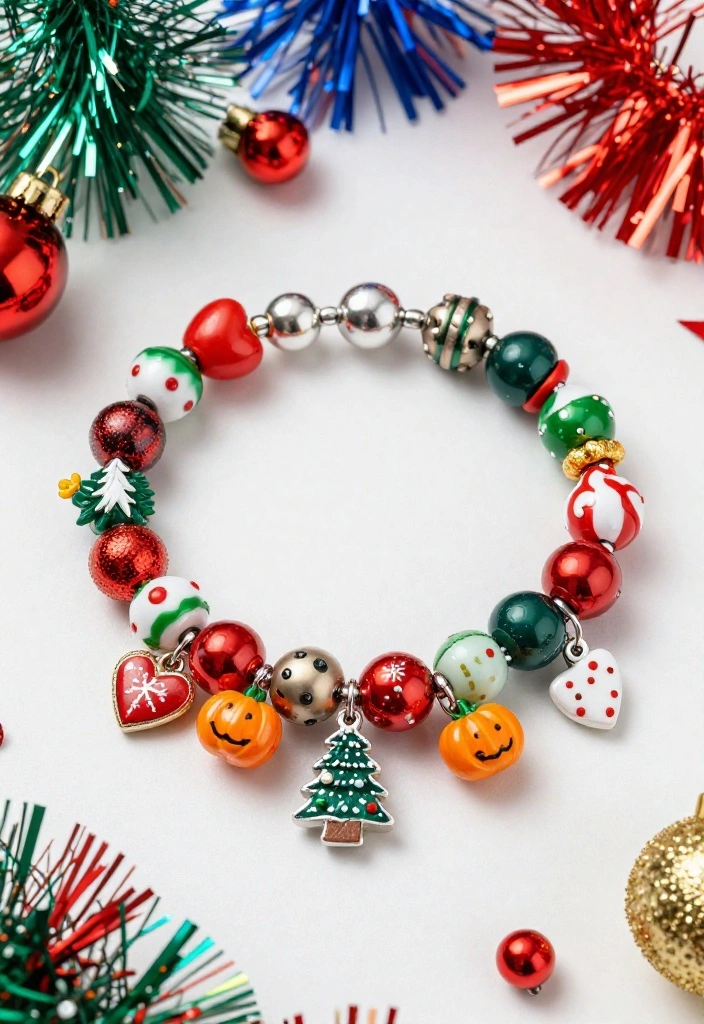
Celebrate the joys of each holiday by creating a holiday charm bracelet! Use charms that relate to specific holidays like hearts for Valentine’s Day, pumpkins for Halloween, or Christmas trees for Christmas. Bright and festive colors will make it a vibrant accessory that captures the spirit of each celebration.
This project is particularly fun for kids to participate in holiday preparations, crafting unique gifts for friends and family. It adds a personal touch to every holiday.
Materials Needed:
– Holiday-themed charms (e.g., hearts, pumpkins)
– Festive beads in corresponding colors
– Stretch cord or wire
– Clasp and jump rings
Step-by-Step Instructions:
1. Measure your wrist and cut the stretch cord.
2. Sort your holiday-themed charms and beads.
3. String them all together on the cord.
4. Secure the ends with a clasp using jump rings.
5. Trim any extra cord for a professional finish.
This holiday charm bracelet is not only fun but also a wonderful way for kids to express their holiday spirit.
14. Art and Craft Charm Bracelet
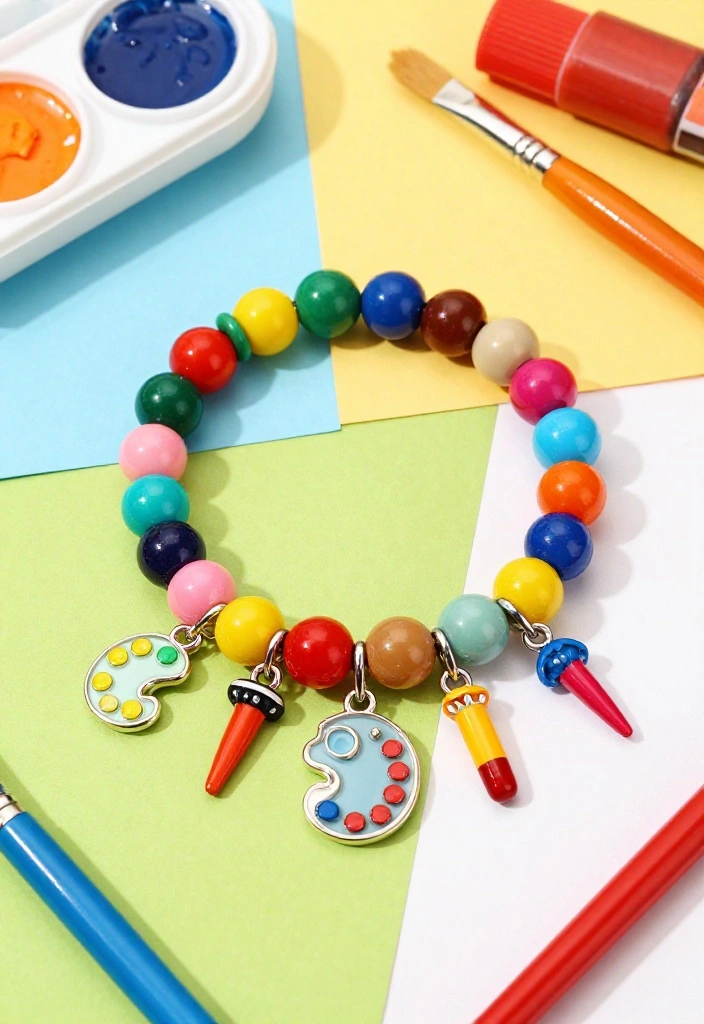
Unleash your inner artist by creating an art and craft-themed charm bracelet! Use charms that represent different artistic tools like paintbrushes, palettes, and canvases. Bright, bold colors in the beads will inspire creativity and fun.
This project is fantastic for kids who love to express themselves through art! Each charm can symbolize a favorite art project or medium, making the bracelet a wonderful keepsake of their creative journey.
Materials Needed:
– Art-themed charms (e.g., paintbrush, palette)
– Bright colored beads (like neon or jewel tones)
– Stretch cord or wire
– Clasp and jump rings
Step-by-Step Instructions:
1. Measure your wrist and cut the stretch cord.
2. Plan your design with art charms and beads.
3. Begin stringing the charms and beads onto the cord.
4. Secure the ends with a clasp using jump rings.
5. Trim any excess cord for a polished look.
This art and craft charm bracelet is an engaging way for kids to celebrate their love for creativity while crafting something beautiful!
Recommended Products

【Including Everything You Need】- Looking for the ideal Christmas or birthday gift for your creative and crafty daughter, niece, or friend? Look no further than our bracelet making kit for girls! Designed for girls ages 5-12, this kit includes everything needed to create beautiful and unique bracelets.

PERFECT BRACELET MAKING KIT: All you need included,about 4600 pcs flat polymer clay beads and 500 pcs charms kit( contains letter beads, number beads, heart beads, gold beads, spacer beads, clay beads charms, lobster clasp, etc.),1 rolls of stretchy strings, a scissors, 1 plastic tweezers ,This complete, expansive jewelry making kit is filled with endless possibilities to be imaginative, to meet all your needs for bracelet making & jewelry making.

Design your own bracelet with itty-bitty glittery charms!
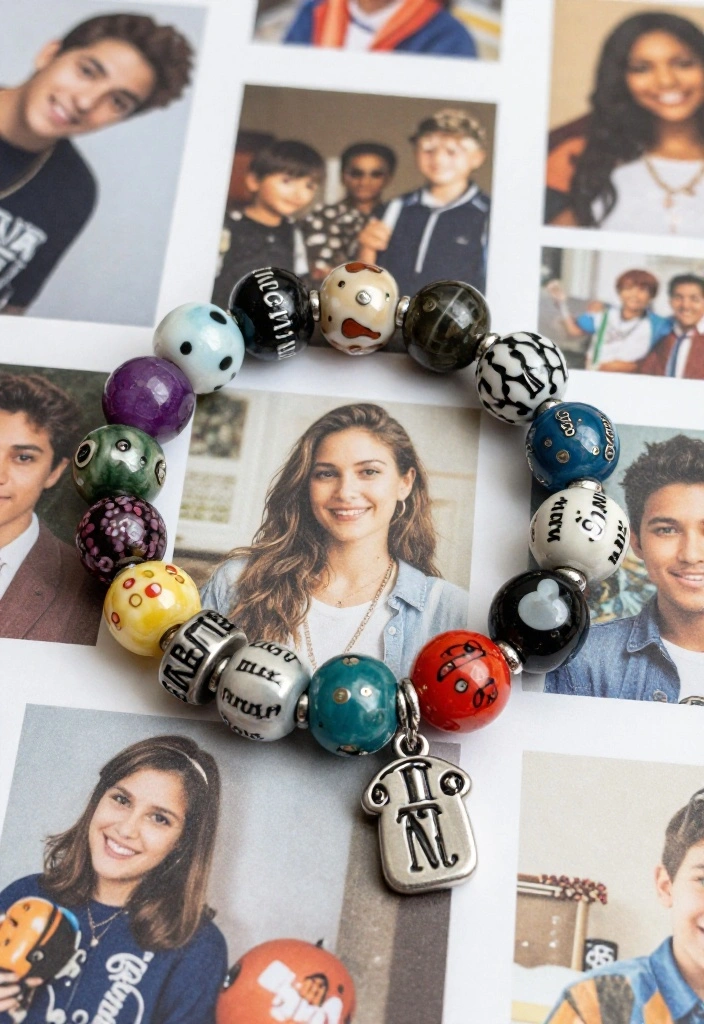
15. Vintage Charm Bracelet
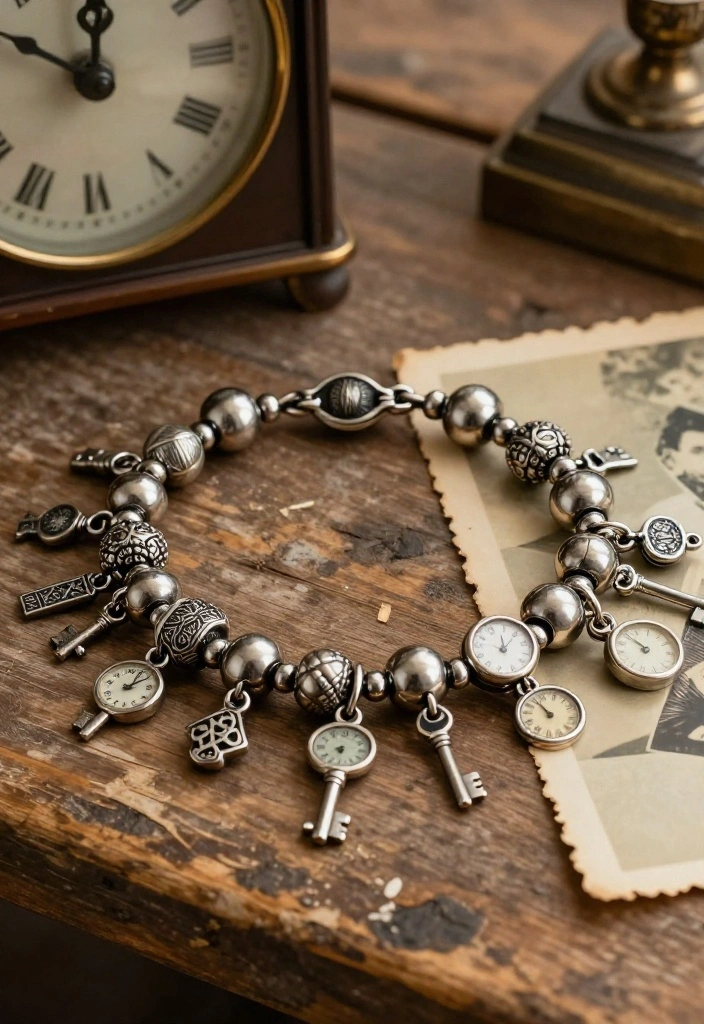
Create a vintage charm bracelet that pays homage to the past! Use charms that have a retro vibe—old keys, clocks, and antique symbols paired with muted colors like gold and silver. This project can be both a stylish accessory and a great conversation starter!
Kids can explore history through this craft, selecting charms that represent different eras or significant events in their lives. It’s a fun way to learn while crafting.
Materials Needed:
– Vintage-themed charms (e.g., keys, clocks)
– Muted or metallic beads
– Stretch cord or wire
– Clasp and jump rings
Step-by-Step Instructions:
1. Measure your wrist and cut the stretch cord accordingly.
2. Sort through your vintage-themed charms and beads.
3. String them together in a design you find appealing.
4. Secure the ends with a clasp using jump rings.
5. Trim any extra cord for a seamless finish.
This vintage charm bracelet allows kids to express their love for history while crafting a unique accessory.
16. Personalized Initial Charm Bracelet
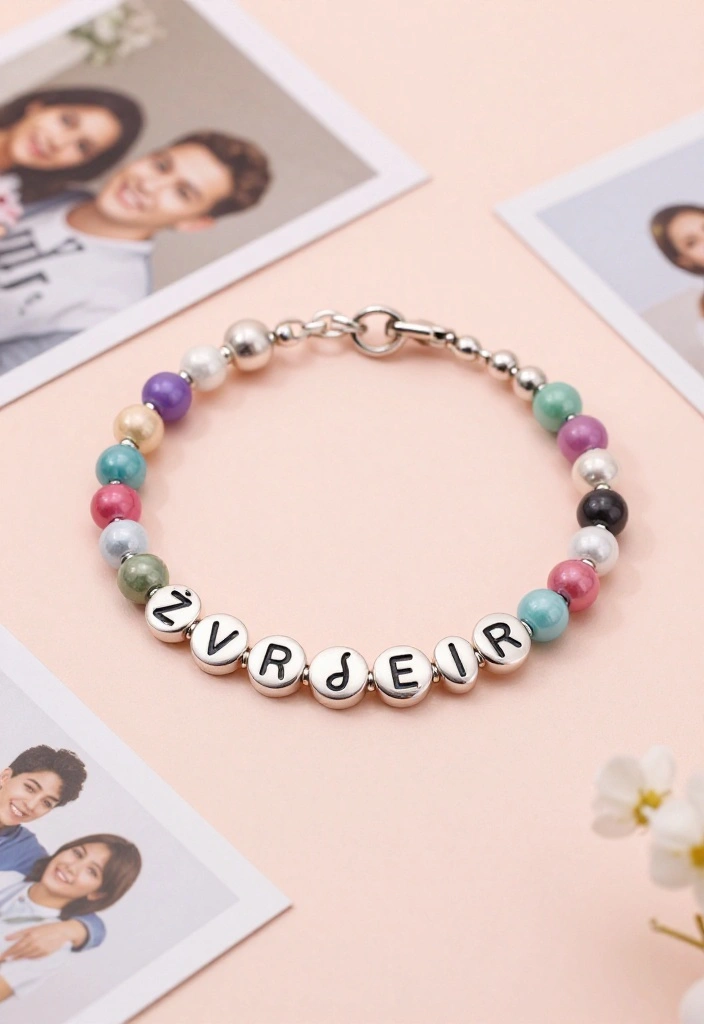
Add a personal touch with an initial charm bracelet! Use charms that feature initials or names, creating a special piece just for the wearer. Choose colors based on personal preferences—soft pastels for a delicate look or bold colors for a statement piece.
This project is especially meaningful for kids, allowing them to celebrate their identities through creative expression. Each charm can represent loved ones, making the bracelet a sentimental keepsake.
Materials Needed:
– Initial charms or letter beads
– Colorful beads in chosen colors
– Stretch cord or wire
– Clasp and jump rings
Step-by-Step Instructions:
1. Measure your wrist and cut the stretch cord to size.
2. Layout your initial charms and beads to form a personal pattern.
3. String them carefully onto the cord.
4. Secure the ends with a clasp using jump rings.
5. Trim off any excess cord to finish.
This personalized initial charm bracelet is a beautiful way for kids to hold onto their identities and celebrate those they love.
Recommended Products

GIRLS CHRISTMAS GIFT IDEA - Every little princess will love this lovely charm bracelet making kit. Whether it's celebrating an upcoming Christmas, birthday, or girls party, it is both a thoughtful and fun gift that can give your girls an imaginative DIY creation experience, and it is well-suited for 5 6 7 8 9 10 11 12 year old girls
Customizable & Trendy Design:Make unique, on-trend rope bracelets with our kit, featuring colorful braided cords, gold-plated letter beads, heart charms, and pony beads. Personalize with initials, names, or fun words to create statement beaded bracelets that match your style, perfect for everyday or festival wear.

【Endless Bracelet Making Possibilities】:With a variety of charms, beads, and bracelets included.This craft kit has everything you need to create beautiful bracelets kits. Unleash your creativity and design unique accessories for yourself or as gifts.
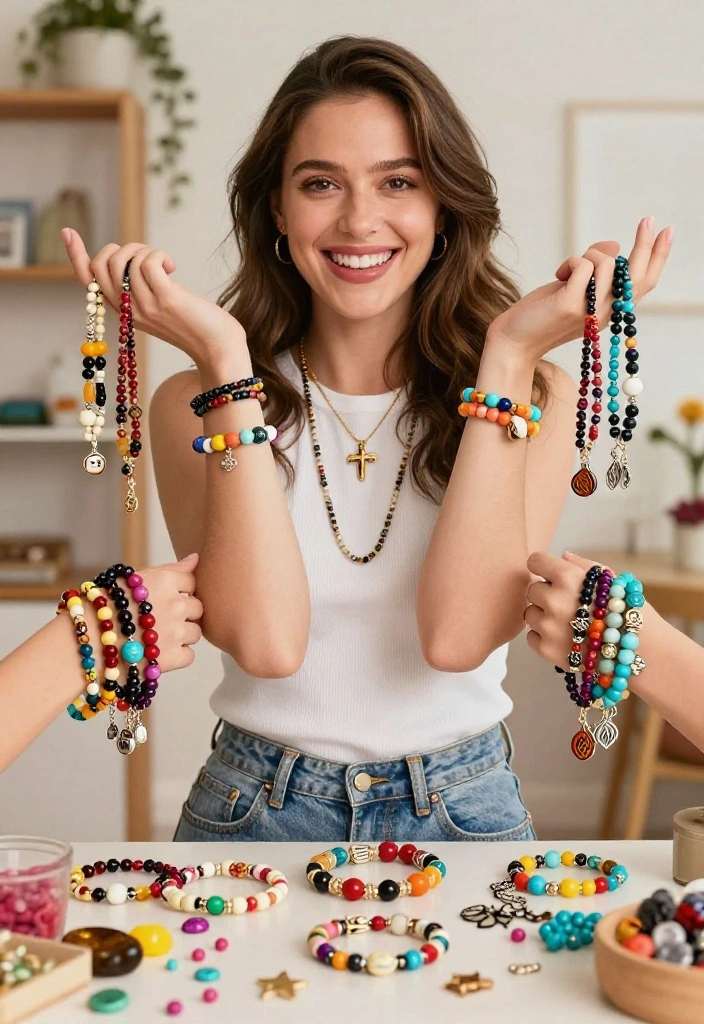
17. Memory Charm Bracelet
Capture precious memories with a memory charm bracelet! Use charms that represent significant moments in life—small tokens from special events or places you’ve visited. The colors can vary based on the memories being represented, creating a beautiful tapestry of life experiences.
This project encourages storytelling and reflection, making it a meaningful way for kids to think about important events in their lives. It’s perfect for creating keepsakes that celebrate personal history.
Materials Needed:
– Memory-themed charms (e.g., travel tokens, event symbols)
– Colorful beads representing different emotions
– Stretch cord or wire
– Clasp and jump rings
Step-by-Step Instructions:
1. Measure your wrist and cut the stretch cord appropriately.
2. Gather charms that evoke special memories along with corresponding beads.
3. Carefully string them together according to your story.
4. Secure the ends using a clasp with jump rings.
5. Trim any excess cord for a clean finish.
This memory charm bracelet is a heartfelt way to keep cherished memories close, allowing kids to express their personal stories through art.
Conclusion
Crafting DIY charm bracelets is not just a fun activity; it’s an excellent way to express creativity and personality! These bracelets can be tailored to reflect interests, memories, and sentiments, making each piece uniquely special. Whether for a birthday, a gift, or just for fun, these projects are perfect for kids and adults alike.
Don’t hesitate to gather your materials and start creating—who knows what stories your charm bracelet might tell! Embrace the joy of making and remember to share your unique designs with friends and family. Happy crafting!
Frequently Asked Questions
What are some easy diy charm bracelet ideas for beginners and kids?
You can start with a ready-made charm bracelet kit designed for kids to keep things simple. Pick a theme (animals, letters, or colors), lay out the charms on a flat surface, then string them onto a stretchy cord or kid-friendly chain. Tie secure knots or add a clasp, and test the fit. For safety, choose larger charms, avoid tiny parts, and supervise young makers. This is a great way to get started with diy charm bracelet ideas and practice basic charm bracelet tutorials in one project.
How can I personalize charm bracelets for kids using personalized jewelry making techniques?
Personalization adds meaning to every piece. Use initials with letter charms, choose birthstone beads, and pick a color palette that matches the child’s favorites. For beginners, aim for 3-5 charms on an adjustable base. Spell a name with letter charms, add a small charm that reflects a hobby, and keep the design cohesive with a single theme. This aligns beautifully with personalized jewelry making and diy charm bracelet ideas.
What tools and materials do I need for charm bracelet tutorials and kids kits?
Essentials include a kid-friendly base chain or stretch cord, charms, clasps or adjustable clasps, jump rings, crimp beads, round-nose pliers, scissors, and a bead tray to stay organized. For kids, choose larger parts and safety-tested kits to minimize small pieces. This setup keeps your projects practical and fun, perfectly suited for charm bracelet tutorials, DIY accessories, and craft ideas for bracelets.
Are there safety-first craft ideas for bracelets that are kid-friendly and avoid small parts?
Absolutely. Look for elastic cord projects with chunky beads, larger charms, and magnetic clasps to minimize loose parts. Use pre-strung beads or simple layouts to keep things manageable for younger crafters. Avoid tiny jump rings and small components. Try easy, color-focused designs that emphasize texture and shape—great for handmade charm designs and craft ideas for bracelets.
Where can I find inspiration and tutorials for diy charm bracelet ideas and handmade charm designs?
Great places to start are YouTube charm bracelet tutorials, Pinterest boards, kid-friendly craft blogs, and the instructions that come with DIY charm bracelet kits. Create a simple design board before you start and test layouts with mock parts. When you’re ready, move to real parts and finish with a secure clasp. For ongoing inspiration, follow handmade charm designs, explore charm bracelet tutorials, and keep a running list of DIY accessories ideas.
Related Topics