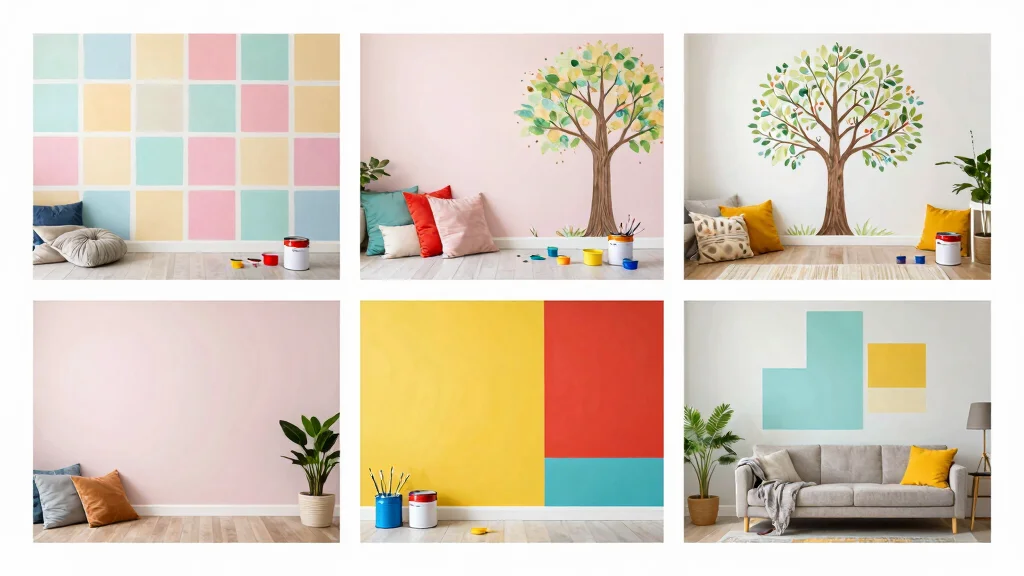
Refreshing your home doesn’t have to be a daunting task or a huge financial burden. If you’ve been feeling the urge to revamp your living space, you’re not alone. Many of us crave a change, whether it’s to brighten up a dull room or to bring a touch of creativity into our homes. That’s why I created this guide packed with 20 home decor ideas DIY crafts that will help you breathe new life into your entire house.
If you’re someone who loves DIY projects, enjoys upcycling, or is simply looking for budget-friendly decor, you’re in the right place. These ideas are perfect for anyone eager to add some character to their home without breaking the bank. You’ll find everything from rustic furniture makeovers to charming seasonal crafts, all designed to help you express your unique style while being resourceful.
Get ready to dive into a world of creativity! This post features practical projects that are fun, accessible, and sure to leave your home looking inviting and refreshed. You don’t need to be a seasoned crafter. Each idea is tailored for you, whether you’re a beginner or someone with a bit more experience. So grab your tools, and let’s transform your living space together!
Key Takeaways
– Discover 20 refreshing DIY crafts that will transform your home decor without overspending. Each project taps into the art of upcycling to repurpose old items creatively.
– Explore practical ideas, like creating a distressed furniture makeover or upcycled pallet coffee table, which can instantly elevate the look of your space.
– Find budget-friendly decor solutions, including upcycled jar lanterns and painted flower pots, that add a personal touch without costing a fortune.
– Get inspired by seasonal crafts, such as seasonal wreaths from nature and seasonal table centerpieces, to keep your decor fresh and inviting throughout the year.
– Learn how to make creative home accents like personalized throw pillows and fabric-covered storage boxes, ensuring that every room reflects your unique style and personality.
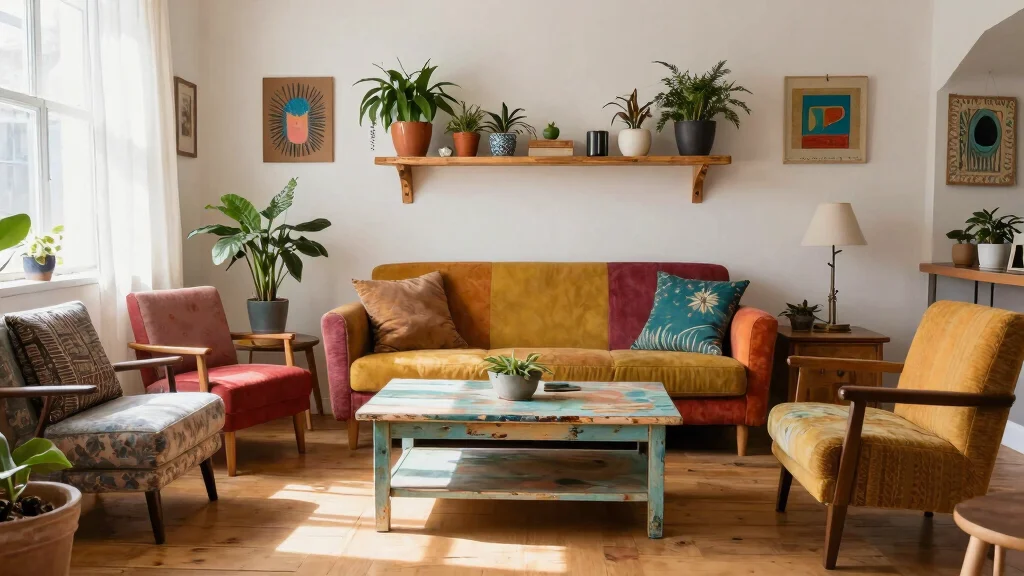
1. Distressed Furniture Makeover

The charm of distressed furniture brings a cozy, rustic vibe to any space. This technique beautifully conceals flaws while adding character to your pieces. For instance, a whitewashed finish on a wooden chair or side table can create a warm, inviting atmosphere in your home. Imagine the soft hues of a faded blue or sage green bringing light to your living area, paired with natural wood accents for a cohesive look.
To achieve this effect, start with a light sanding to prepare the surface. Choose a base coat in a color you love, and once dry, use a dry brush technique with a contrasting shade to add depth and texture. Finish by lightly sanding the edges for that perfect worn-in appearance.
Consider these steps to enhance your furniture’s charm:
– Sand the furniture lightly for a rough surface.
– Apply your favorite base paint color.
– Use a contrasting dry brush for texture.
– Lightly sand edges for a distressed look.
– Optionally, seal for added durability.
This effortless makeover not only adds personality but also highlights the beauty of natural materials, creating an authentic and inviting space.
Upcycled furniture can slash waste by 60% and save you half the cost of new pieces. For home decor ideas diy crafts, a light sanding, a whitewashed finish, and two coats of sealer transform a tired chair.
Recommended Products

RICH INCLUSIONS: This wooden filler set comprises 12 unique colors of resin repair fillers, offering a hassle-free solution for repairing wood furniture stains and scratches. Please note that the wooden furniture repair kit serves as a touch-up set, helping to blend colors to minimize the visibility of scratches or scuffs. It can also be used to repair small dents or cracks. After application, dry the area with a hair dryer and allow it to air dry for 2-3 days (away from water).
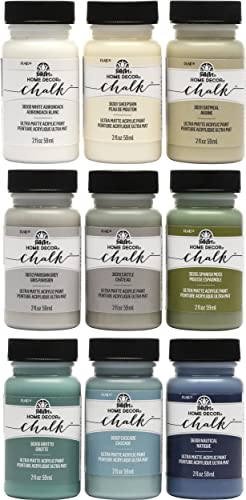
CONVENIENT SIZE - This chalk acrylic paint set includes 9 - 2 oz bottles of chalk paint. The colors in this paint set includes: Nautical, Cascade, White Adirondack, Spanish Moss, Grotto, Oatmeal, Parisian Grey, Castle, and Sheepskin

【Use Freely Furniture Paint】No need for time-consuming polishing or primer, our wood one step paint can be directly applied to your furniture,saving you time and effort in your DIY or refurbishment
🏡 Transform Your Space Like a Pro
Unlock your home’s potential with our DIY guide for stunning makeovers that fit any style and budget.
2. Upcycled Pallet Coffee Table

Transforming old pallets into a stylish coffee table offers both functionality and a rustic aesthetic. Pallets are incredibly versatile, making them a perfect choice for a unique centerpiece in your living room. Picture a stacked pallet table with a natural finish, providing ample space for drinks and snacks during gatherings.
Start by securing two or three pallets together, ensuring stability. You can opt for wheels for mobility or keep it stationary for a classic look. Paint the pallets in a color that complements your decor, or leave them unfinished for a more organic feel.
Here’s how to create your own coffee table:
– Choose sturdy pallets and stack them securely.
– Sand down rough edges for safety.
– Paint or stain to fit your aesthetic.
– Attach wheels for easy movement.
– Let dry completely before using.
This DIY project not only adds a focal point to your room but also showcases a sustainable approach to furniture design, combining style and eco-friendliness.
Recommended Products

SIZE MATTERS – Our FirsTime & Co. Factory Farmhouse Cart Coffee Table has a 18” height, 27.5” width and 47.25” length, making this cocktail table the perfect size for any living space
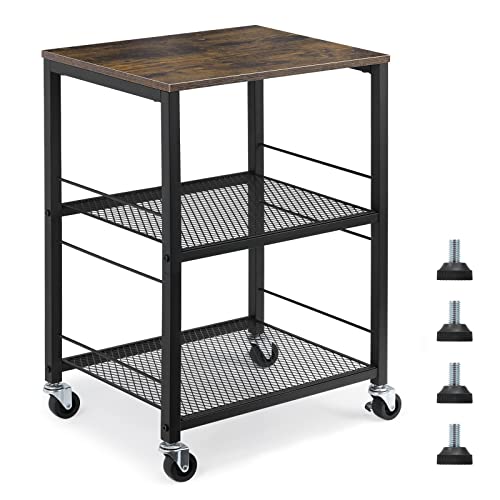
3 Tier Storage Cart: This rolling cart provides you with sufficient storage space, wooden desktop can place your coffee cup, book, photo frame, magazine, laptop, small printer, can also be used as a kitchen cart, microwave stand, printer stand, coffee cart.
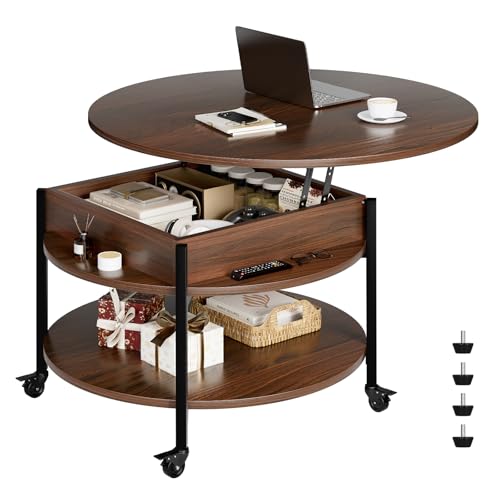
Wheel Design: Say goodbye to worries about moving or stability issues with this coffee table. This movable round coffee table offers the choice between smooth-rolling lockable wheels for easy mobility stability. Adapt to any environment effortlessly, whether you need to move your table around or ensure it stays firmly in place
3. Reclaimed Wood Shelves

Creating shelves from reclaimed wood adds a naturally warm touch to your home decor. These shelves serve as both functional storage and eye-catching displays, perfect for showcasing books, plants, or decorative items. Imagine the rich textures and imperfections of reclaimed wood enhancing your space’s character, making it feel inviting and lived-in.
Select planks of various lengths and widths to add visual interest. After a light sanding and staining, mount the shelves using sturdy brackets to ensure they are securely attached to the wall. This simple yet impactful project brings warmth and personality to any room.
Follow these steps to create stunning shelves:
– Measure and cut reclaimed wood to desired lengths.
– Sand the surfaces until smooth and splinter-free.
– Stain or paint to enhance the natural wood.
– Secure brackets to the wall for support.
– Style the shelves with your favorite items.
By incorporating these shelves, you not only maximize space but also embrace the beauty of sustainable materials, adding charm to your home.
Recommended Products

UNIQUE RECLAIMED ELM WOOD: Handcrafted from reclaimed elm, each floating shelf showcases distinctive wood knots, grain patterns, and natural texture. The rustic finish adds authentic character, making it a unique and eco-friendly addition to your home decor.

AUTHENTIC RUSTIC WOOD FLOATING SHELVES: Crafted from reclaimed solid wood, these rustic wooden shelves bring a unique vintage charm with natural variations, perfect as rustic wood floating shelves for wall in living rooms, bedrooms, and kitchens

AUTHENTIC RUSTIC WOOD FLOATING SHELVES: Crafted from reclaimed solid wood, these rustic wooden shelves bring a unique vintage charm with natural variations, perfect as rustic wood floating shelves for wall in living rooms, bedrooms, and kitchens
4. Upcycled Jar Lanterns

Give your old glass jars a new life by transforming them into charming lanterns. These versatile decorations are perfect for both indoor ambiance and outdoor gatherings, casting a warm glow that enhances any setting. Imagine a row of twinkling jar lanterns on your patio, inviting friends and family to enjoy the evening together.
Begin by cleaning the jars thoroughly and deciding on a design. You might paint them in soft pastels, wrap them in twine, or keep them clear for a minimalist look. Inside, place candles or fairy lights to illuminate your space with a soft, inviting light.
Create your own jar lanterns with these steps:
– Clean and dry the glass jars thoroughly.
– Paint the exterior if desired and let dry.
– Wrap jars with twine or ribbon for added texture.
– Insert a candle or fairy lights inside.
– Display around your home for enchanting illumination.
These personalized lanterns not only beautify your space but also evoke a sense of warmth and coziness, perfect for any occasion.
5. Painted Flower Pots

Revitalize your plant collection by giving plain flower pots a vibrant makeover. Using exterior paint, you can create unique designs that reflect your personal style, whether it’s bold geometric shapes or soft floral patterns. Imagine how colorful pots can brighten up your indoor garden or outdoor patio, adding a playful touch to your decor.
Start by cleaning your pots and deciding on a design that resonates with you. Once painted, these pots will serve as lively accents that bring joy and color to your space. Pair them with lush plants for an added layer of visual interest.
Bring your painted pots to life with these steps:
– Clean pots to remove dirt and residue.
– Plan a design and paint pots accordingly.
– Let the paint dry completely.
– Seal with a protective coating if desired.
– Fill with your favorite plants and enjoy!
This project not only enhances your decor but also encourages a connection with nature, making your home feel more vibrant and inviting.
How To Choose Budget-Friendly Decor for Your Home
Choosing budget-friendly decor can be a fun and creative process. It allows you to express your style without breaking the bank. Here are some tips to help you navigate your selections:
1. Set a Budget
Before you start, it’s crucial to set a budget. Determine how much you can spend on decor items. Keep in mind that the goal is to refresh your home without overspending. A clear budget helps you make better decisions and stay focused on affordable options.
2. Consider Your Style
Think about the aesthetic you want to achieve. Do you prefer modern, rustic, or eclectic styles? Identifying your style will guide your selections. Look for inspiration on platforms like Pinterest or Instagram to gather ideas that resonate with you.
3. Measure Your Space
Knowing the dimensions of your rooms is essential. Measure the areas where you plan to place new decor. This ensures that the items you choose fit well and complement your space. A well-measured piece can make a small room feel larger or a large room cozier.
4. Look for Upcycled Options
Consider upcycling projects to give old items a new life. For example, turning an old chair into a stylish bench or creating home accents from recycled materials can save money and add a unique touch to your decor. Plus, you’ll enjoy the satisfaction of creating something yourself!
5. Seasonal Crafts
Incorporate seasonal crafts into your decor. This allows for easy updates throughout the year without significant investment. Simple projects like making wreaths from natural materials or decorating jars with seasonal colors can bring freshness to your space.
6. Shop Smart
When looking for affordable decor, choose places wisely. Thrift stores, flea markets, and online marketplaces like Facebook Marketplace can be gold mines for budget-friendly finds. Don’t underestimate clearance sections or DIY stores for materials to create your own decor.
Pro Tip: Keep an eye on local workshops that focus on DIY crafts. They often provide hands-on experience and materials at a lower cost. You’ll not only gain skills but also meet fellow DIY enthusiasts who can inspire your projects!
Recommended Products

【HIGH-QUALITY NON-COATED CLASSIC KRAFT PAPER】Our kraft paper roll is made of natural, pure, virgin pulps, ensuring the highest quality. It is pliable, soft, and made from 100% recyclable material, which originates in Canada or Japan. The unwaxed and uncoated design allows for breathability, preventing moisture condensation. Moreover, it is made from natural and child-safe materials.


Give Home a New Look - Peel and stick floor tiles can be adhered to any flat, clean and dry surface and can be removed without leaving a trace, making them perfect for renters.
6. Upcycled Chair into a Bench

Transform an old chair into a delightful bench that adds charm and utility to your entryway or garden. This upcycling project is easy to execute and allows for plenty of creative expression. Picture a rustic bench made from an antique chair, providing a cozy spot to sit and relax.
Start by removing the backrest to leave just the seat and legs. Attach a solid piece of wood on top for a comfortable seating surface. Sand and paint the bench to match your home’s decor, ensuring it complements your existing style.
Create your unique bench by following these steps:
– Remove the chair’s backrest carefully.
– Cut a wooden board to fit the chair seat.
– Sand all surfaces to ensure smoothness.
– Attach the board securely with glue or screws.
– Paint or stain the bench and let it dry before use.
This charming upcycled bench will not only serve as functional seating but also become a treasured conversation piece in your home.
7. Fabric-Covered Storage Boxes

Elevate plain cardboard boxes into stylish storage solutions by covering them with fabric. This project not only helps you organize but also adds a touch of elegance to your living space. Imagine colorful fabric boxes tucked neatly on shelves, each holding your treasures while enhancing the room’s decor.
Start by measuring your boxes and cutting the fabric accordingly, leaving extra for neat edges. Use a hot glue gun to attach the fabric securely, ensuring it covers all sides. Choose fabrics that resonate with your decor style for a cohesive look.
Transform your storage with these steps:
– Measure and cut the fabric to fit each box.
– Use a glue gun to attach fabric, folding edges for a clean finish.
– Allow the glue to dry completely before using.
– Organize your items in these chic boxes.
This simple upgrade not only declutters your space but also adds a stylish element, making organization feel delightful.
Storing becomes stylish: fabric-covered boxes hide clutter and boost room mood with color and texture. With a hot glue gun and your favorite fabric, you can turn simple storage into chic decor—perfect for any home decor ideas diy crafts moment.
8. DIY Wall Art from Old Books

Transform pages from old books into captivating wall art that tells a story. This project is perfect for book lovers and anyone looking to add a literary touch to their decor. Imagine beautifully framed pages featuring enchanting illustrations or meaningful text, creating a unique focal point in your home.
Carefully select pages and arrange them in an aesthetically pleasing layout. Frame them in eclectic frames for a charming gallery wall or create a cohesive collage on a canvas. This art not only decorates your walls but also infuses your space with warmth and character.
Craft your wall art with these steps:
– Gently remove pages from old books.
– Choose favorite pages and arrange them creatively.
– Frame each page or assemble them on a canvas.
– Hang your new art prominently to display your creativity.
This artistic project will not only beautify your walls but also showcase your love for literature, making your home feel more personal and inviting.
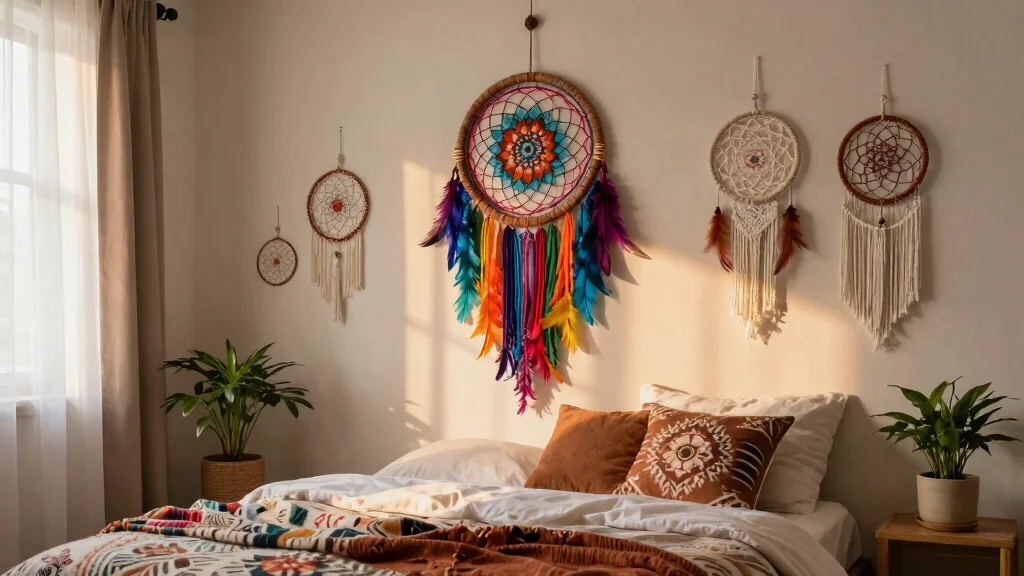
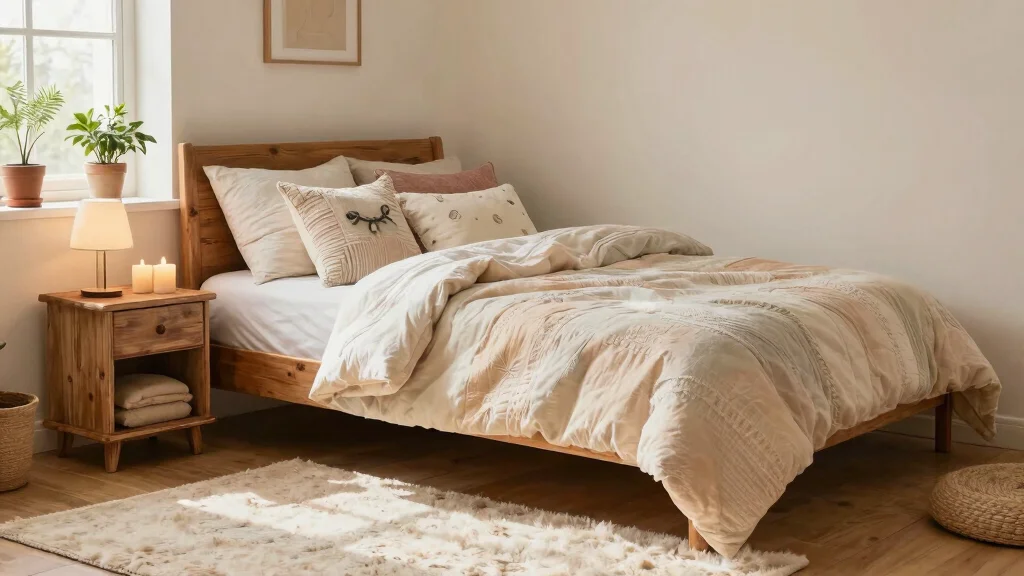
9. Fabric Headboard for Your Bed

Add a luxurious touch to your bedroom with a DIY fabric headboard that is both stylish and affordable. You can customize the fabric to match your decor, whether you prefer bold patterns or soft neutrals. Imagine a plush headboard framing your bed, elevating the overall look of your sanctuary.
Start with a piece of plywood cut to your desired size, then wrap it in foam for comfort. Cover the entire piece with fabric, securing it tightly with a staple gun to create a polished finish. This headboard will not only enhance your bed but also add a touch of elegance to your bedroom.
Follow these steps to create your fabric headboard:
– Cut the plywood to your preferred dimensions.
– Cut foam to fit and adhere it to the plywood.
– Lay fabric over the foam and staple it securely.
– Attach the headboard to your bed frame.
– Style with pillows and bedding for a complete look.
This creative project adds both comfort and style to your space, making your bedroom a true retreat.
10. Seasonal Wreaths from Nature

Celebrate the beauty of the changing seasons by crafting handmade wreaths from natural materials. Using twigs, leaves, flowers, or pinecones, you can create stunning wreaths that bring the outdoors inside. Picture a vibrant spring wreath adorned with fresh blooms or a cozy autumn arrangement showcasing colorful leaves, enhancing your home’s seasonal decor.
Begin with a base, such as a foam or grapevine wreath, and securely attach your chosen natural elements using wire or glue. Hang these wreaths on your front door or inside your home to showcase the beauty of nature throughout the year.
Create your seasonal wreath with these steps:
– Gather natural materials from your garden or local park.
– Attach larger elements to your wreath base.
– Fill in gaps with smaller items for balance.
– Secure everything firmly and allow to dry if using glue.
– Hang your wreath to welcome each season.
This project not only enhances your decor but also connects you with nature, making every season feel special.
11. Upcycled Ladder Bookshelf

An old wooden ladder can become a unique bookshelf that adds character to any room. By leaning the ladder against a wall and styling it with your favorite books and decor, you create a functional and artistic display. Imagine showcasing your beloved novels and treasured trinkets on a rustic ladder, enhancing the room’s personality.
Clean the ladder and sand it if necessary to ensure it’s safe for use. You can leave it in its original finish for a rustic charm or paint it to match your decor style. This project is perfect for any book lover wanting to display their collection in a creative way.
Transform your ladder into a bookshelf with these steps:
– Clean the ladder and sand it if needed.
– Paint or stain to fit your desired aesthetic.
– Lean the ladder against a wall in your living space.
– Style it with books, plants, and decorative pieces.
This DIY project not only creates a practical storage solution but also serves as a beautiful display, making your space feel more inviting.
12. Mason Jar Herb Garden

Bring the flavors of fresh herbs into your kitchen by creating a mason jar herb garden. This project is a delightful way to grow your own herbs, such as basil, parsley, or mint, right on your windowsill. Picture the vibrant green jars adding a pop of color to your kitchen while providing handy access to fresh ingredients.
Fill each jar with potting soil and plant your chosen herbs, labeling each jar for easy identification. This not only enhances your cooking but also adds a decorative touch, making your kitchen feel more inviting and alive.
Start your herb garden with these steps:
– Fill mason jars with potting soil, leaving some space at the top.
– Plant your herb seeds or small plants in the soil.
– Water gently and place in a sunny spot.
– Use labels if desired for easy identification.
This project not only promotes a connection to nature but also enriches your cooking experience, making your kitchen a flavorful sanctuary.
13. Creative Curtain Rods from Branches

Add a touch of nature to your windows by crafting curtain rods from branches. Choose sturdy branches that complement your decor, adding a unique flair to your window treatments. Imagine the organic beauty of natural wood framing your curtains, creating a warm and inviting atmosphere.
Clean and sand the branches to ensure they are smooth and safe for use. Use brackets to mount the branches on either side of your window, allowing your curtains to hang beautifully. This rustic touch brings the outdoors inside while serving a practical purpose.
Create your curtain rods with these steps:
– Find and select sturdy branches for your curtain rods.
– Sand the branches for a smooth finish.
– Attach brackets to the wall for support.
– Place the branches in brackets and hang your curtains.
This DIY project not only enhances your window decor but also connects your home to the beauty of nature, creating a serene environment.
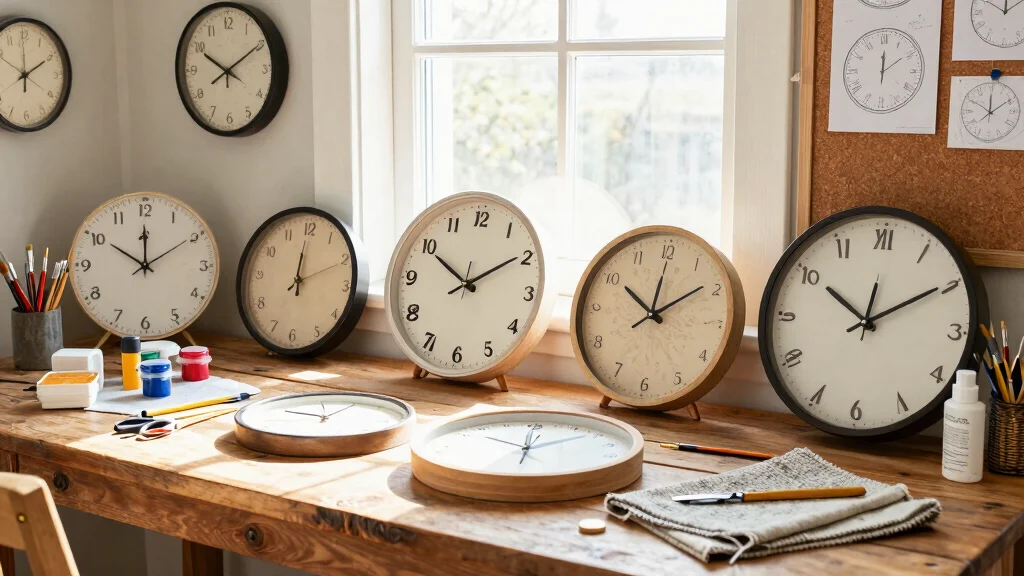
14. Upcycled Frame Magnetic Board

Transform an old picture frame into a magnetic board that is both functional and decorative. This project allows you to repurpose items while adding a stylish element to your home. Imagine displaying reminders, notes, or photos on a chic magnetic board that complements your decor.
Remove the backing of the frame and add a piece of metal sheet to create a surface for magnets. You can paint the frame to match your home’s aesthetic or leave it as-is for a vintage touch. This board makes a stylish addition to any office or kitchen space.
Create your magnetic board with these steps:
– Take apart the old frame and remove the glass.
– Cut the metal sheet to fit the frame and attach it.
– Paint the frame if desired and allow it to dry.
– Place the board in your chosen location and decorate with magnets.
This project not only enhances organization but also adds a creative touch, making your space feel more personalized.
15. Vintage Suitcase Storage
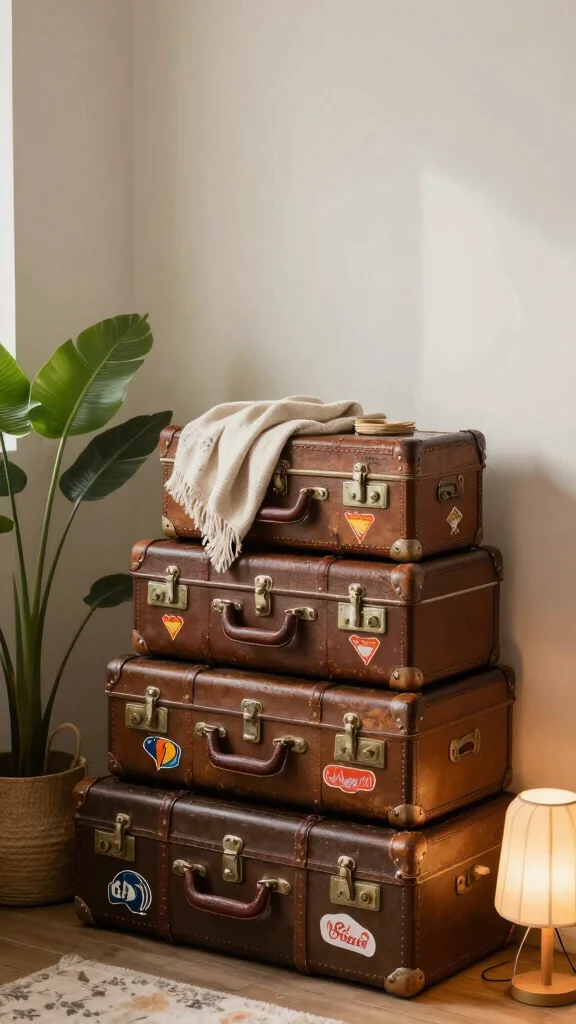
Give new life to a vintage suitcase by turning it into stylish storage. These charming pieces not only offer practical solutions but also add a nostalgic feel to your decor. Imagine stacking suitcases to create a unique side table or using them for hidden storage under your bed.
You can decorate the outside with stickers or paint for a personal touch. This project is perfect for anyone looking to blend function with vintage charm, creating a warm and inviting atmosphere in their home.
Transform your vintage suitcase with these steps:
– Choose a vintage suitcase and clean it if necessary.
– Decorate the exterior with stickers or paint as desired.
– Use the suitcase for storage or display it stacked creatively.
This DIY project not only provides storage but also serves as a conversation starter, adding character to your home.
16. Upcycled Wood Crate Storage

Transform wooden crates into stylish storage solutions or decorative elements for your home. These versatile pieces can be stacked, painted, or used individually to create a unique look. Imagine colorful crates holding toys, books, or even serving as a mini bar for gatherings.
Painting the crates in fun colors adds a playful touch, while their natural wood finish brings warmth to your decor. This DIY project is budget-friendly and adaptable, making it suitable for any room in your house.
Create your crate storage with these steps:
– Choose wooden crates and sand them to remove splinters.
– Paint or stain the crates in colors that suit your space.
– Allow them to dry completely.
– Arrange the crates to fit your needs, stacking or using them individually.
This project not only enhances organization but also adds a whimsical element to your home, making it feel more personalized.
Recommended Products

Rustic organizer boxes for your place. With this ideal home storage basket to keep clutter, salt, pepper, spice jar, napkins well. And make it easier to move items to clean the table off.

[Stackable &Large Storage Space]: The cube modular shelving is stackable and providing large space to store books, shoes, clothing and handbags, etc. Internal size is 9.3"*13.3"*9.8"inch

WOODEN STORAGE BINS (2-PACK) — Provides modern storage for household essentials with a natural look — Pairs nicely with similar styles in the Sorbus Wood Bin Collection (sold separately)
17. Personalized Throw Pillows

Add a personal touch to your living room with personalized throw pillows that reflect your style. This creative project allows you to use plain fabric pillows as a canvas for your artistic expression. Imagine pillows adorned with fun patterns, quotes, or images that resonate with you and your family.
Use fabric paint, stencils, or embroidery to customize your pillows, making them unique accents in your home. This simple upgrade transforms your space, making it feel more inviting and personal without breaking the bank.
Create your personalized pillows with these steps:
– Decide on your design and gather your materials.
– Apply paint or markers to create your design.
– For embroidery, sketch your design and stitch it as desired.
– Allow paint to dry thoroughly before displaying your new pillows.
This DIY project not only enhances your decor but also adds a sense of warmth and comfort, making your home feel truly yours.
18. Customizable Cork Boards
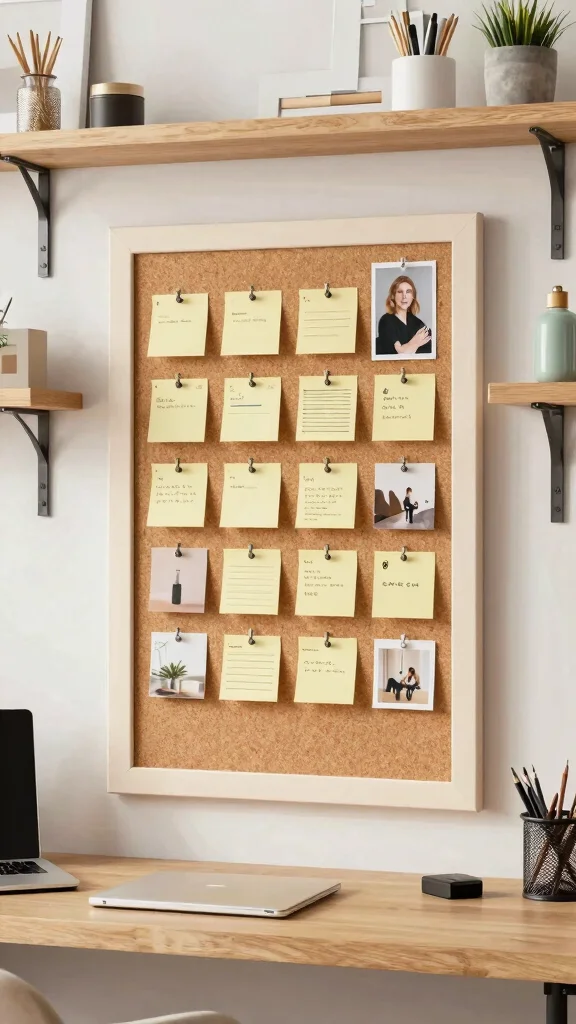
Create a customizable cork board using a simple frame and cork sheets. This project allows you to style the board to suit your decor while providing a place for notes, reminders, and inspiration. Imagine a chic cork board in your home office, enhancing organization while adding a personal touch.
Start by covering a large piece of cardboard or wooden board with cork sheets, securing them in place with glue. Decorate the frame to complement your decor style, making it a functional yet beautiful addition to your space.
Craft your cork board with these steps:
– Cut cork sheets to fit into the frame.
– Glue the sheets onto the cardboard or board securely.
– Allow the glue to dry completely.
– Frame your cork board and hang it where you need it most.
This DIY project not only enhances your organization but also adds a stylish element, making your space feel more personalized and inviting.
19. Decorative Throw Blankets from Old Fabrics
Repurpose old fabrics into cozy throw blankets that are both stylish and eco-friendly. This project is perfect for those who love to sew or experiment with fabric combinations. Imagine a patchwork blanket made from colorful fabric scraps, adding warmth and character to your living room or bedroom.
Gather old t-shirts, fabric remnants, or quilt pieces, and stitch them together to create a unique statement piece. This not only showcases your creativity but also makes for a comforting and inviting addition to your home.
Create your throw blanket with these steps:
– Cut fabrics into equal-sized squares or rectangles.
– Arrange pieces in a design that appeals to you.
– Sew the pieces together, ensuring secure seams.
– Optionally, add a backing fabric for extra coziness.
– Enjoy your new throw blanket as a unique home accent.
This project not only provides comfort but also celebrates creativity, making your home feel warm and lived-in.
Turn old fabrics into a cozy statement with a patchwork throw. Gather fabric scraps or quilt pieces, cut into squares, and sew them together for a one-of-a-kind blanket—easy to do, incredibly stylish, and perfect for upcycled diy crafts and home decor ideas.
20. Seasonal Table Centerpieces

Create stunning seasonal table centerpieces using natural materials that reflect the changing seasons. Gather elements such as pinecones, flowers, or colorful leaves to curate the perfect centerpiece for your dining room table. Imagine a vibrant autumn arrangement or a fresh spring display, enhancing your dining experience.
Use glass vases, wooden boxes, or decorative plates to showcase your seasonal finds. Changing your centerpiece with each season keeps your decor fresh and exciting, making every meal feel special.
Craft your seasonal centerpiece with these steps:
– Gather natural materials from your garden or local market.
– Arrange materials in your chosen container or on a decorative plate.
– Place the centerpiece at the dining table’s center.
– Change it out with the seasons for a continuously refreshed look.
This project not only enhances your dining experience but also connects you with nature, making your home feel vibrant and alive throughout the year.
Conclusion
Revamping your home with DIY crafts doesn’t have to be overwhelming.
With these 20 home decor ideas, you can upcycle old items into beautiful pieces that infuse character into your spaces.
Whether you’re tackling a large project or a small accent, the key is to have fun and let your creativity flow. Embrace the process and enjoy the transformation of your home into a unique haven that reflects your personal style.
Frequently Asked Questions
What are some budget-friendly home decor ideas DIY crafts that can refresh a room quickly?
Kick off with a few high-impact DIY projects that are quick and reversible. Try repainting a dated piece, swapping hardware on a dresser, or adding a new decoupage to a lamp shade. These budget-friendly decor moves pair perfectly with your home decor ideas diy crafts mindset. To keep things cohesive, pick a color palette and repeat a simple motif across items, or lean on upcycling projects for a subtle thread through the room.
Enjoy a refreshed space without a full remodel and save money in the process.
How can I incorporate upcycling projects into a full-room makeover without a big budget?
Incorporating upcycling projects into a full-room makeover starts with an audit of what you already own. Select 1–2 pieces to upcycle using paint, new hardware, or fabric, and plan a cohesive color story so the results feel intentional. Use simple techniques like chalk painting, fabric wraps, or decoupage to transform furniture, then pair refurbished pieces with creative home accents and budget-friendly decor to tie the room together.
With a clear plan and steady progress, you can achieve a stylish room makeover ideas without breaking the bank.
Which seasonal crafts are ideal for updating home decor across the year?
Seasonal crafts are perfect for quick updates that keep your home feeling fresh. Swap textiles and cushions for each season, switch out wall art or small upcycled accents like painted jars or wood slice decor, and adjust color accents to match the season. Use seasonal crafts to layer color and texture without a full remodel, and repeat a few motifs for a cohesive look that still celebrates the moment.
These projects stay budget-friendly and easy to rotate, giving you a steady supply of creative home accents all year long.
What beginner-friendly tools and supplies should I stock to start with home decor ideas diy crafts?
Focus on a small, versatile kit: painter’s tape, sandpaper, brushes, rollers, a drill, hot glue gun, glue, chalk-based paints, primer, sealer, and a few budget-friendly spray paints. Add decoupage glue, scissors, and replacement knobs or hardware for quick furniture updates. With these essentials, you can tackle many upcycling projects and home decor ideas diy crafts without overspending.
As you gain confidence, expand to specialty finishes and larger upcycled pieces.
How do I plan a cohesive look across the entire house using DIY crafts and upcycled furniture?
Define a simple color palette and a few repeat motifs (textures, shapes, or hardware finishes) to create flow across rooms. Choose one or two upcycled pieces as anchors and echo their color or finish in other spaces to achieve cohesive room makeover ideas. Add creative home accents like gallery walls, trays, and seasonal decor that pull the whole house together.
With a thoughtful plan and a steady pace, you can refresh your entire house with home decor ideas diy crafts that look intentional and well styled.
Related Topics