Creating a DIY wall clock is a fantastic way to combine functionality with creativity. In today’s world, where timekeeping is more about style than just utility, I wanted to share some exciting ideas that allow you to express your personality while making something practical. Whether you’re looking for a fun weekend project or a unique gift, these 15 DIY wall clock crafts will inspire you to transform ordinary materials into beautiful and eye-catching wall art.
If you love crafting, home decor, or just enjoy making things with your own hands, this post is perfect for you. You might be a seasoned DIYer or just starting, but if you appreciate creative home decor and upcycled materials, you’ll find something here that speaks to you. These projects not only beautify your wall but also give a personal touch to your space that store-bought items simply can’t match.
By the end of this post, you’ll have a list of 15 inspiring DIY wall clock crafts that are unique, stylish, and easy to make. From a vintage book clock to an upcycled bicycle wheel clock, you’ll discover various materials and techniques to create your masterpiece. So, gather your supplies, unleash your creativity, and let’s get started on making wall art that tells time!
Key Takeaways
– You will find 15 unique DIY wall clock crafts that blend functionality with artistic flair, perfect for any home.
– The crafts use upcycled materials, making them eco-friendly and economical, while adding a personal touch to your decor.
– Each project varies in difficulty and style, catering to both beginners and experienced crafters.
– The blog includes detailed ideas like a vintage book clock and a colorful vinyl record clock, ensuring a range of options.
– You’ll gain inspiration not just for wall clocks but also for creative home decor and unique wall decorations that stand out.
1. Vintage Book Clock

Transforming old books into a vintage book clock adds a unique touch to your home. This craft not only breathes new life into your forgotten tomes but also creates a centerpiece that combines nostalgia with functionality. Picture an old classic’s cover as your clock face, surrounded by beautifully fanned pages that evoke a sense of literary charm.
To create this enchanting piece, choose a thick book with an appealing cover. Carefully detach the cover and a few pages, then gather clock hands and a mechanism from local craft stores or online retailers.
– Use a strong adhesive to firmly attach the cover to a sturdy base.
– Consider adding a glossy finish with mod podge for an elegant shine.
– Hang it in your reading nook or a space that celebrates your literary collection!
This project serves as both art and a functional clock, sparking conversations while showcasing your love for books.
Recommended Products
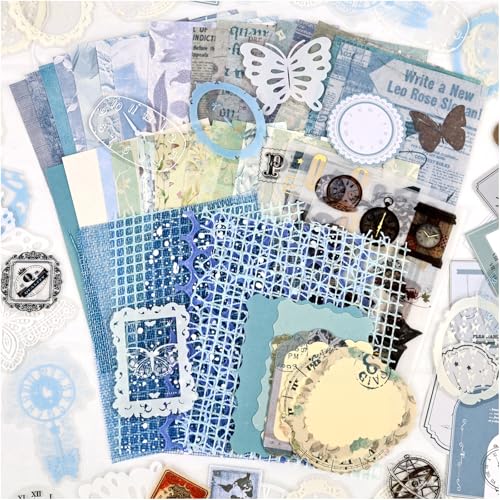
COMPLETE KIT: 95-piece vintage botanical scrapbooking collection featuring decorative papers, patterns, and journaling elements in elegant blue and soft pastel tones
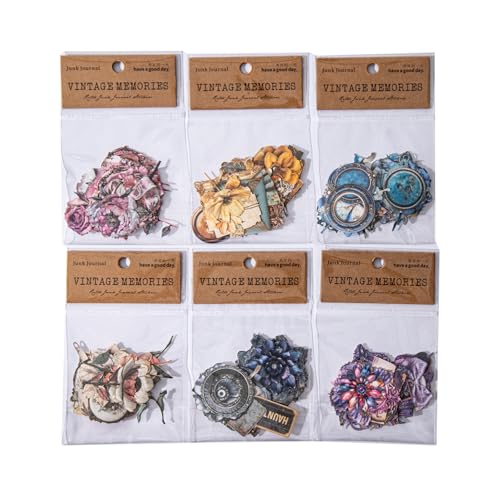
【VARIOUS NATURAL COLLECTION SERIES】 Package Size: 5.3inch*3.4inch Material: White kraft paper The vintage Paper set total Total 180pcs=30pcs ×6bags , 1 bag =30pes×1cs, Single size:50*40mm

Enchanting Postal-Themed Miniature Scene Step into a whimsical world with this "Mail & Gift Cottage" diorama! Featuring a retro-style desk stacked with vintage letters, a rustic "POST" mailbox, and shelves filled with books and gift boxes, this intricately designed micro-scale model recreates a cozy postal workshop. Warm LED lighting enhances the nostalgic atmosphere, making every detail—from scattered postcards to a classic telephone—come alive.
2. Reclaimed Wood Clock

A reclaimed wood clock brings a rustic warmth to your home decor. By upcycling old wood pieces, you not only contribute to sustainability but also infuse your clock with a unique character. Imagine the charm of weathered wood combined into a functional timepiece that suits any style.
Start by sourcing wood from old pallets or scrap lumber, then sand down rough edges for a polished finish. Paint or stain the wood to reflect your personal aesthetic.
– Attach an affordable clock mechanism at the center of your wood base for a seamless look.
– Use stencils or paint to add numbers for increased functionality and appeal.
– Experiment with light and dark stains for a captivating two-tone effect.
This reclaimed wood clock fits effortlessly into any decor, from cozy farmhouse to contemporary chic.
Recommended Products
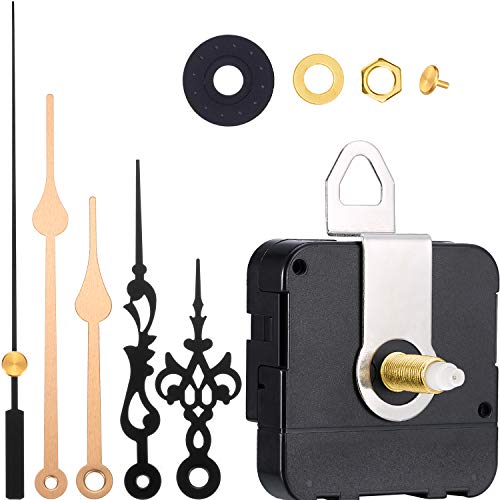
Package and install: come with specially designed with blister cardboard box and instructions, convenient to carry; When you install this clock movement kit, please keep the hour hand and minute hand parallel

IMPORTANT: Before purchase, please measure your old clock mechanism's thread length (must be ≥0.5 inch) and dial thickness (must be ≤2mm). If your old thread is shorter than 0.5 inch, this movement will NOT fit. See product images for measuring guide.

【Quartz Long Shaft Clock Movement】:Good Handwork DIY Clock Replacement Movement Parts With Hook, Which Meet Your Installation Needs.
3. Upcycled Tin Can Clock

Create a vibrant upcycled tin can clock that adds a splash of color to your space. This project turns a simple tin can into an eye-catching wall piece that enhances your decor with playful energy. Imagine a clock bursting with bright colors and patterns that transforms the mundane into the extraordinary.
Begin by cleaning your tin can and removing any labels. Decorate it with paint or patterned paper to match your style. Attach the clock mechanism at the center once your design is complete.
– Choose lively colors or thematic designs, like floral motifs, for added flair.
– Create a series of clocks in various sizes to form a dynamic gallery wall.
This fun craft not only brightens your home but also promotes sustainability by repurposing materials.
Fun fact: a simple tin can becomes a bold wall clock in as little as 2 hours. Clean, decorate with paint or patterned paper, attach a center clock mechanism, and transform everyday scrap into vibrant diy wall clock crafts you’ll love.
Recommended Products

OLD VINTAGE TELEPHONE WALL CLOCK WITH HIDDEN SAFE : Its case measures (H) 16" x (W) 12" x (D) 3.9". The clock's dial is 7" in diameter. It serves not only as a beautiful decorative wall clock, but also as a unique safe. You can keep jewelry, extra cash, bank cards or other small valuables in this battery operated clock with safe. Behind this telephone designed clock is a secret compartment with 2 hooks where you can hide some items and hang keys.

[Unique Exposed Moving Gears] Industrial decor inspired, when you put 3 AA batteries in, various exposed aged gold cog start rotating, definitely an eye-catching wall décor gears clock for your home, surely capture anyone's attention
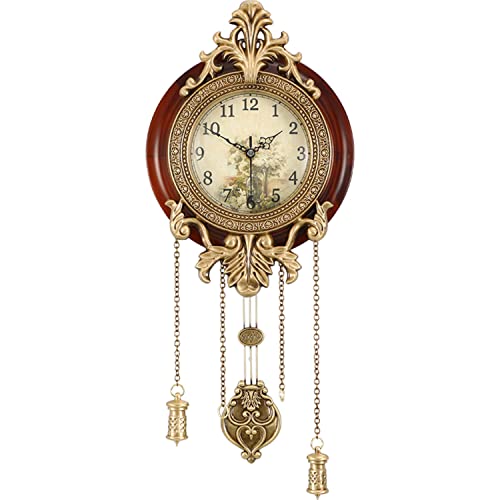
✅ FEATURES: Crafted from Real Solid Wood and Wrought Iron, Exudes Timeless Elegance and Vintage Allure. Analog Time Display, Swinging Pendulum, Imported Mechanism for Long-Lasting Reliability. Scanning Second Hands, Silent to Maintain a Peaceful Environment.
4. Decorative Plate Clock

Revive unused decorative plates by crafting them into a stunning decorative plate clock. This project combines your personal style with beautiful china or ceramic designs, allowing you to showcase your taste while enhancing your decor. Imagine plates adorned with vintage florals or modern geometric prints telling time in your home.
Choose plates that resonate with your aesthetic, then drill a small hole in the center for the clock mechanism. Secure the clock hands in place for a polished finish.
– Create a gallery-style arrangement by grouping several plates together for added visual interest.
– Select colored clock hands that coordinate with your plate designs for a cohesive look.
This clock not only serves a purpose but also acts as a beautiful statement piece that elevates your home’s elegance.
Recommended Products

Good materials: iron material with smooth surface, repeated to use, used with confidence,clock part,wall clock assembly

Creative diy experience: enjoy decorating your home with these blank wood clock face sets, perfect for painting wall and unique clock dial for diy projects

[3D Effect Numbers] - Clock with large size and acrylic mirror surface, this 3D DIY wall clock will let your room get a modern wall decoration. The large DIY wall clock finishing size is depends on your preference to decorate your wall.
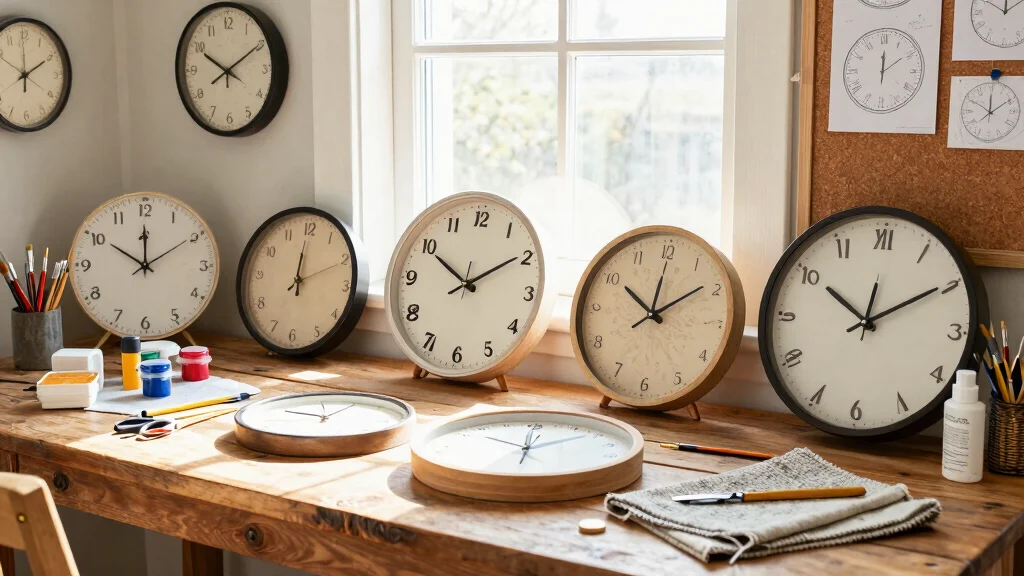
Difficulty Rating & Requirements
Overall Difficulty Rating: Medium
Creating DIY wall clock crafts can be a moderately challenging project. While some crafts are beginner-friendly, others may require more advanced skills and tools. This makes it suitable for individuals with some crafting experience, particularly those who enjoy working with upcycled materials. If you love getting hands-on and have a basic understanding of crafting techniques, you can definitely tackle these projects.
Time Estimate:
⏱ Estimated time: 2-6 hours per clock
Here’s a breakdown of time for major phases:
– Planning & Design: 30 minutes to 1 hour
– Gathering Materials: 1 to 2 hours (may vary based on availability)
– Crafting & Assembly: 1 to 4 hours, depending on complexity
– Finishing Touches: 30 minutes to 1 hour
Skill Requirements:
– Required skills: Basic crafting skills, ability to use tools (like drills or glue guns), some painting or decorating skills
– Beginner-friendly: Yes, with some projects being easier than others. For instance, the decorative plate clock could be a great starter project, while the mosaic tile clock might pose more of a challenge.
– Skills that can be learned: Painting techniques, clock mechanism installation, basic woodworking
– Skills requiring experience: Detailed woodworking or advanced painting techniques
Tools & Materials Needed:
🧰 Essential items checklist:
– Clock mechanism kit (required)
– Base material (wood, canvas, upcycled items) (required)
– Paints or decorative materials (required)
– Drill or screwdriver (optional, depending on project)
– Glue gun and glue sticks (required)
– Ruler and pencil (required)
– Optional embellishments (like beads or fabric) (optional)
Step-by-Step Overview:
1. Planning & Design: Spend some time sketching your ideas and deciding on materials. Allow about 30 minutes to 1 hour for this phase.
2. Gathering Materials: Collect all your supplies. This could take 1 to 2 hours, especially if you’re upcycling.
3. Crafting & Assembly: Follow your design to create the clock. Basic assembly could take 1 to 4 hours, depending on your chosen project.
4. Finishing Touches: Add any paints, decorations, or final adjustments. Allocate 30 minutes to 1 hour for this.
Professional vs DIY:
Creating your own wall clock can save you a significant amount of money compared to purchasing one. A professionally made clock can range from $50 to $200, depending on the design and materials. In contrast, a DIY clock can cost as little as $15 to $50, especially if you upcycle materials you already own. If you’re comfortable with tools and have the patience for crafting, a DIY project can be rewarding and budget-friendly. If you’re unsure about your skills or time availability, hiring a professional might be the better option.
5. Fabric-Covered Clock

A fabric-covered clock introduces warmth and texture to your walls. This delightful project allows you to incorporate your favorite fabrics into a functional art piece, whether you prefer bold prints or soft hues. Imagine a clock that reflects your unique style and adds a cozy touch to your space.
Begin with a basic clock mechanism and a round or square base. Cut the fabric to size, allowing extra for wrapping. Secure the fabric to the base with glue and attach the clock mechanism.
– Incorporate buttons or beads as hour markers for an imaginative twist.
– Layer multiple fabrics for a rich, dynamic appearance.
This project not only highlights your sewing skills but also brings personality and charm to your home.
Recommended Products

Clock Mechanism Replacement Kit: Designed for repairing or DIY wall clock projects. This kit includes 3 quartz clock movements and 7 sets of hands, providing the necessary components to restore or build your timepieces.

Long spindle quartz clock replacement movement parts with metal hook,Good for repairing, replacing or making a clock.

WARNING: CHOKING HAZARD—Small parts. Not for children under 3 Years.
🕰️ DIY Decor Mastery Awaits!
Transform your space with our expert guide to stunning DIY makeovers that impress and inspire creativity.
6. Colorful Vinyl Record Clock

Celebrate your love of music by turning old vinyl records into a vibrant clock. This project transforms each record into a stylish statement piece, blending nostalgia with modern decor. Envision a colorful clock that resonates with your passion for music while enhancing your space.
Start with a vinyl record and a clock mechanism, drilling a hole in the center for the mechanism. Once secured, attach the clock hands to complete the look.
– Decorate the record with paint or leave it as is for a vintage feel.
– Create a collection of clocks using records from different genres for a captivating display.
This project not only recycles old records but also adds a touch of personality to your home.
Fun fact: upcycled vinyl clocks can cut décor costs by up to 60% while turning nostalgia into art. It’s a perfect move for diy wall clock crafts—reusing records, adding a mechanism, and creating a vibrant centerpiece.
7. Nature-Inspired Driftwood Clock
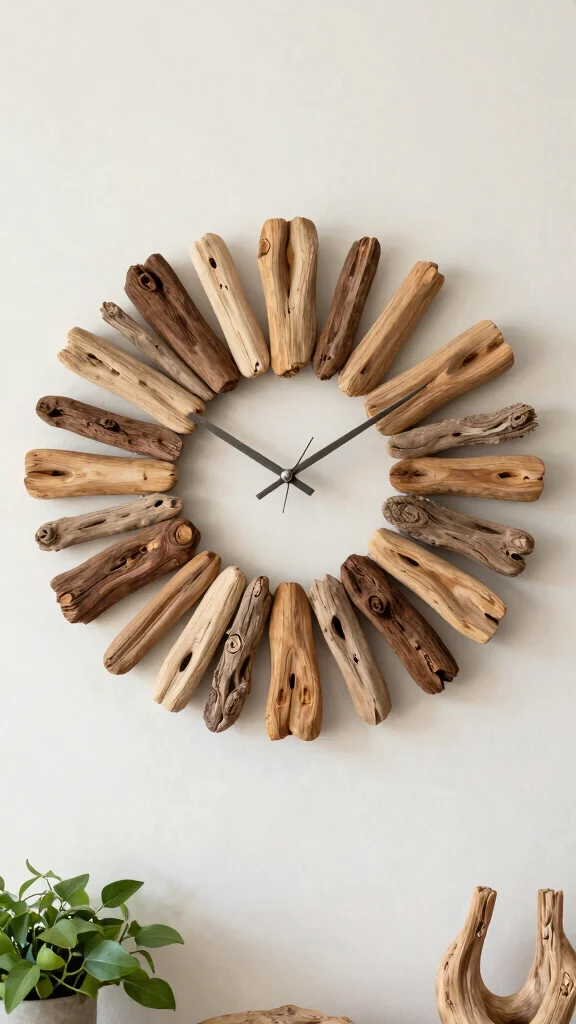
A nature-inspired driftwood clock brings the beauty of the outdoors into your home. This craft is perfect for those who appreciate the organic look of driftwood, creating a serene and rustic clock that enhances your decor. Picture a clock made of natural wood pieces, evoking a calming atmosphere.
Begin by arranging driftwood pieces in a circular pattern on a sturdy base. Secure the pieces with strong adhesive before attaching the clock mechanism at the center.
– Combine various wood textures for a dynamic and interesting design.
– Leave some natural edges for an authentic, organic feel.
This clock not only serves as a functional piece but also celebrates the beauty of nature in your home.
8. Painted Canvas Clock
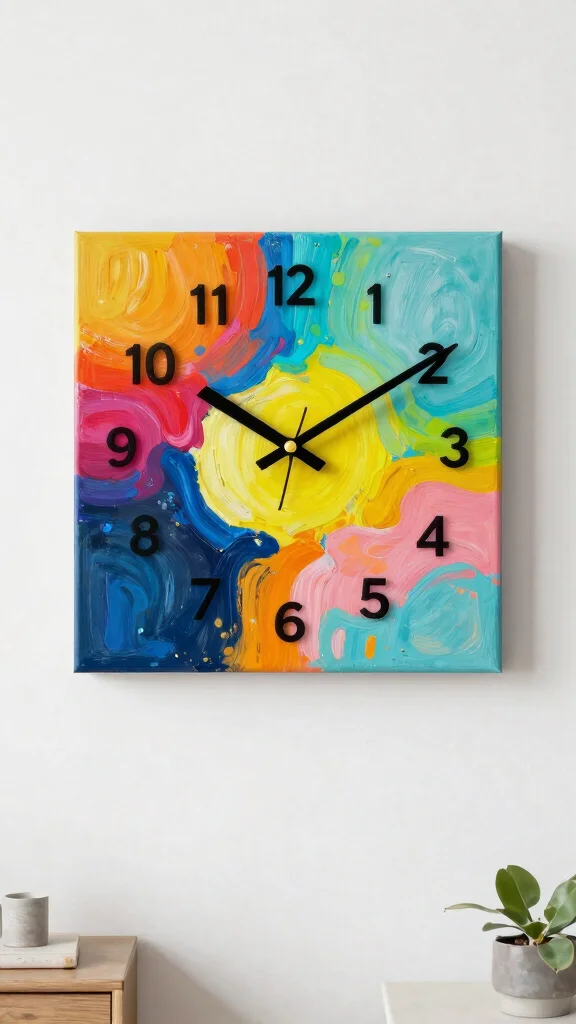
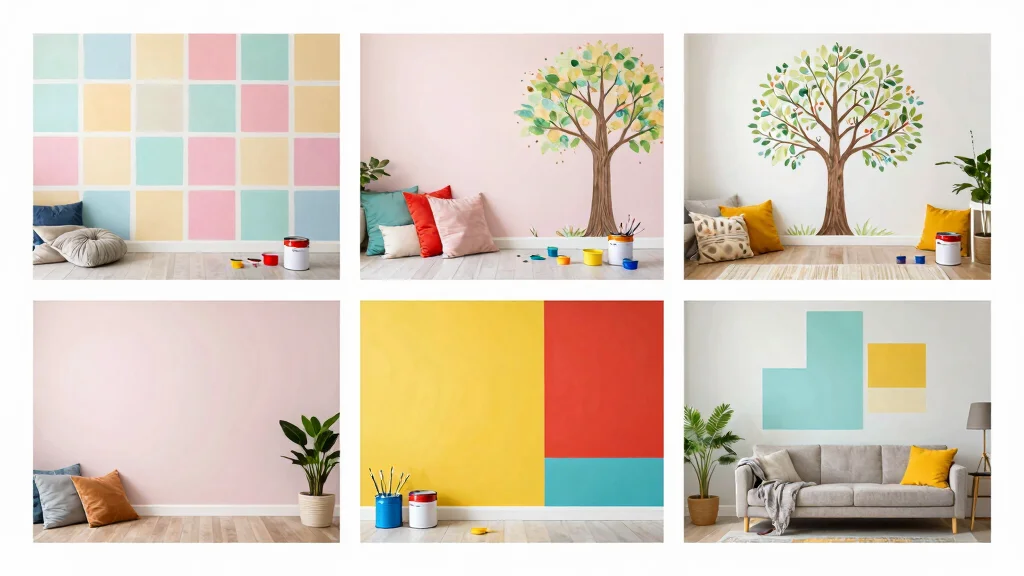
Express your creativity with a painted canvas clock that transforms any wall into a vibrant masterpiece. This project merges art and functionality, allowing you to showcase your unique style through colors and designs. Imagine a clock that captures your personality and enhances the artistic vibe of your space.
Choose a canvas size that suits your area, then unleash your creativity with paint. Once your design dries, attach the clock mechanism at the center for a cohesive finish.
– Experiment with different painting techniques like stenciling or splattering for added effects.
– Host a painting party with friends to create collaborative designs!
This painted canvas clock not only tells time but also enriches your home with artistic flair.
Did you know that 70% of DIY wall clock crafts become more eye-catching when painted on canvas? A painted canvas clock turns a wall into a personal gallery, blending art and time—perfect for showcasing your color palette and style.
9. Upcycled Bicycle Wheel Clock

For cycling enthusiasts, an upcycled bicycle wheel clock is a fantastic way to showcase your passion. This unique project repurposes an old bike wheel into an eye-catching wall decor piece that tells time in style. Envision a clock that celebrates your love for cycling while also serving as a functional art piece.
Clean the bike wheel and remove unnecessary parts before attaching the clock mechanism at the center. You can keep the wheel as is for a vintage look or embellish it with paint or flowers for a modern twist.
– Use colorful clock hands to stand out against the metal.
– Add charming decorations on the spokes for extra character.
This project not only highlights your cycling passion but also creates a stunning focal point in your home.
10. String Art Clock
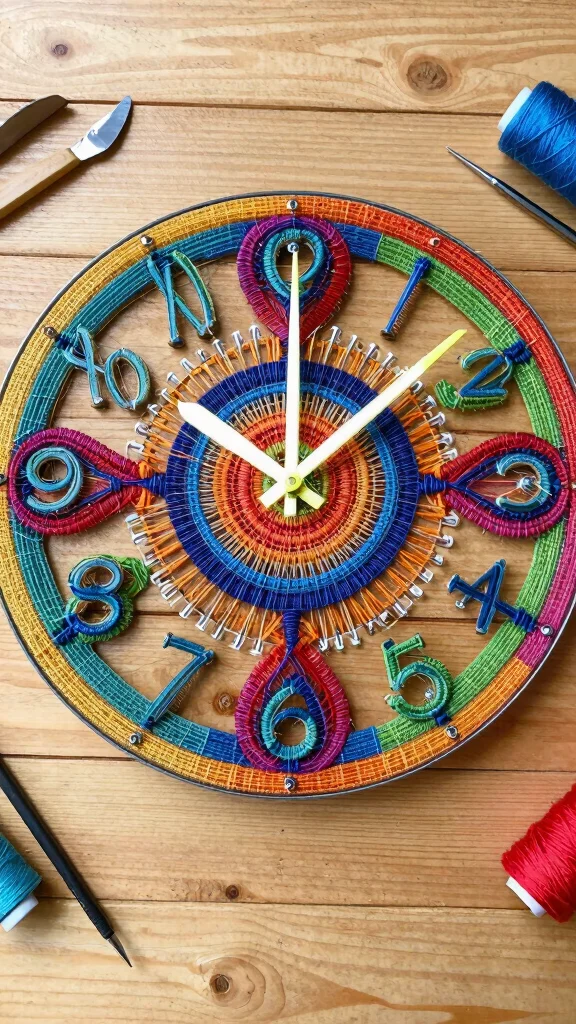
Get creative with a string art clock that combines woodworking and vibrant string patterns. This project allows you to craft intricate designs that enhance your wall decor, making it a visually appealing addition to your home. Picture a clock adorned with colorful string, perfect for showcasing your artistic flair.
Start with a wooden board and hammer in small nails to outline your desired design. Wrap colorful string around the nails in imaginative ways before attaching the clock mechanism at the center.
– Select colors that complement your space for a cohesive finish.
– Vary string tension for diverse visual effects.
This project not only sharpens your crafting skills but results in a stunning piece of functional art.
11. Mosaic Tile Clock

Embrace your creativity with a mosaic tile clock that transforms leftover tiles into a stunning timepiece. This craft is visually striking and a great way to repurpose materials, adding personality to your space. Imagine a colorful, textured wall clock that serves as a conversation starter in your home.
Prepare a base for your clock, using wood, MDF, or an old clock face. Arrange your mosaic tiles in a pattern that excites you, securing them with strong adhesive. Once dry, attach the clock mechanism in the center.
– Incorporate a variety of tile shapes and colors for a lively design.
– Grout the tiles for a polished finish that stands out.
This mosaic tile clock can become a beautiful centerpiece, merging art and functionality seamlessly.
12. Upcycled Shutters Clock

Add a touch of farmhouse charm with an upcycled shutters clock. Transforming old shutters into a rustic timepiece not only enhances your decor but also makes use of materials that might otherwise be discarded. Picture a clock that tells time while infusing your space with unique character.
Start by cleaning the shutters and giving them a fresh coat of paint or stain. Arrange them into a square or rectangle, then attach the clock mechanism at the center.
– Add numbers or decorative elements directly onto the shutters for a cohesive design.
– Pair with other rustic decor to create a charming ensemble.
This clock is more than functional; it’s a beautiful addition to any farmhouse-style home.
13. Fabric Quilt Clock

Combine your passion for quilting with home decor through this delightful fabric quilt clock project. This craft allows you to showcase fabric scraps, creating a one-of-a-kind wall clock that reflects your unique style. Imagine a clock that beautifully tells time while displaying your quilting skills.
Start with a sturdy base and cut fabric into squares or shapes of your choice. Arrange them in a quilt-like design and glue them down securely. Attach the clock mechanism at the center for a functional finish.
– Use contrasting colors to make your fabric pieces pop.
– Frame the clock in a complementary material for added elegance.
This project merges creativity and practicality, resulting in an eye-catching clock that adds character to your home.
14. Artistic Painted Wood Slice Clock

Transform a simple wood slice into an artistic painted clock that showcases your creativity and love for nature. This project allows you to bring a touch of the outdoors inside, with each clock uniquely painted as a personal piece of art. Imagine a clock that serves both function and beauty, adding a natural element to your decor.
Find a smooth wood slice and paint it with your desired design, whether abstract or inspired by nature. Once dried, attach the clock movement to the back.
– Experiment with different paints for varied effects and textures.
– Consider engraving or burning designs into the wood for a rustic touch.
This artistic clock not only tells time but also becomes a stunning centerpiece in your home decor.
15. Upcycled Glass Bottle Clock
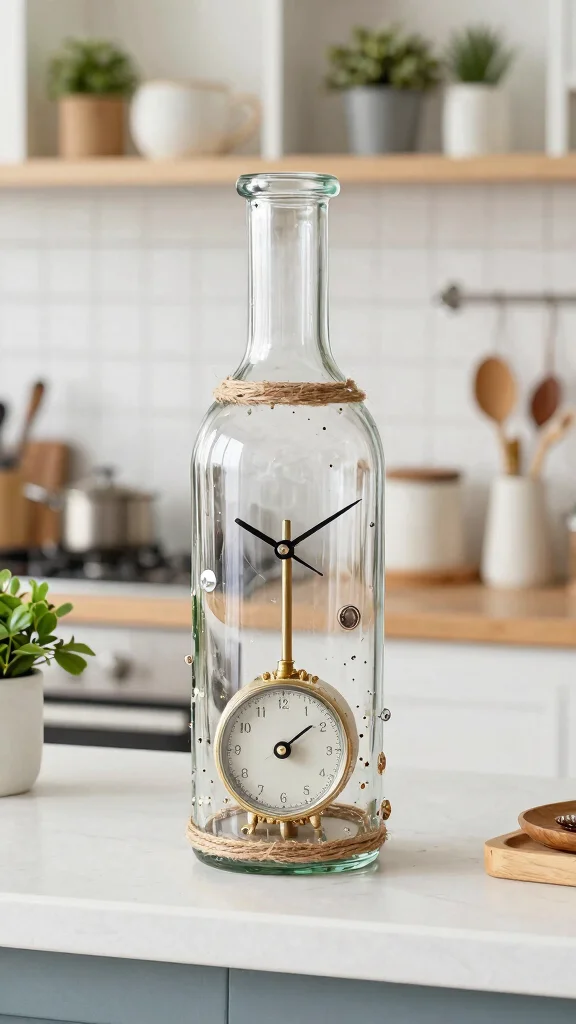
Finish your collection with an upcycled glass bottle clock that embodies creativity and sustainability. This unique craft turns empty glass bottles into a captivating wall clock, perfect for kitchens or casual dining areas. Envision a clock that serves as both functionality and a whimsical decor piece.
Start by selecting a glass bottle with an interesting shape or color. Clean it thoroughly, removing any labels, and attach a clock mechanism by cutting a small hole in the base.
– Decorate the bottle with paint, twine, or fabric to match your decor style.
– Combine it with other upcycled glass projects for a coordinated look.
This project not only breathes new life into glass but also creates a beautiful functional piece that adds a playful touch to your walls.
Conclusion
Crafting your own wall clock not only serves to tell time but also allows you to express your creativity and personality in your home decor. With these 15 DIY wall clock crafts, you’re set to elevate your space with unique pieces that tell a story. Each project gives you a chance to reuse materials, reduce waste, and create beautiful art that is functional and stylish.
So, whether you’re drawn to rustic, vintage, or modern styles, these ideas are perfect for anyone looking to make their walls pop with personality.
Frequently Asked Questions
What are simple upcycled materials I can use to create a DIY wall clock craft?
There are lots of upcycled options that double as wall art. Try an old vinyl record, a vintage plate, a wooden pallet slice, a sturdy picture frame, bottle caps arranged in a pattern, or repurposed tin lids. For each project, attach a ready-made clock movement kit and place the mechanism at the center. Measure carefully, drill a clean hole, and finish with paint or stain to match your wall art ideas and creative home decor goals. Keep it practical: pick a base around 8–12 inches for easy readability and a clock kit with a standard 1/4-inch shaft.
How can I turn thrift store finds into unique wall decorations that also tell time?
Thrift stores are gold for upcycled material clock ideas. Look for a chunky frame, a round or square base, or even a decorative tray. Step-by-step: clean and prime the surface, remove unneeded elements, plan where the clock movement will go, install a quartz movement kit, and add hands that suit the style. Customize with paint, decoupage, or fabric to match your unique wall decorations and homemade clocks vibe. Hang with proper hardware and consider a battery-operated kit for easy maintenance.
What finishing touches make a DIY wall clock look like real wall art?
Great question. You can elevate a DIY clock into wall art by considering color palettes, textures, and typography. Use high-contrast numbers or a decorative dial, add a decorative frame, or create a mixed-media surface with decoupage, embossing, or stencil patterns. Seal with a matte protective coating to keep color vibrant, choose hardware that complements your piece, and mount at eye level for wall art ideas. Your result should feel intentional and cohesive with your creative home decor.
Are there beginner-friendly DIY wall clock crafts that still look stylish?
Absolutely. Projects like a vinyl record clock, a wooden spoon clock, a picture-frame clock, a cork-board clock, or a book-page clock are beginner-friendly and surprisingly chic. Each starts with a ready clock kit, a simple base, and easy-to-follow assembly. Focus on clean lines and a simple color scheme to keep it looking polished as wall art ideas while you learn the craft. As you gain confidence, you can experiment with layering and texture for more crafting projects.
Which tools and clock kits do I need to complete a DIY wall clock craft project?
For most diy wall clock crafts, you’ll want a quartz clock movement kit, a battery, a clock-hand set, and a base (record, frame, wood slice, etc.). Also have a drill with appropriate bits, a ruler or tape measure, a level, sandpaper, glue, acrylic paint or stain, brushes, painter’s tape, and a protective finish. Don’t forget mounting hardware and safety gear. Pick a movement with a standard shaft size and recommend hands that fit your base diameter. This setup keeps making your homemade clocks feel professional and easy to assemble.
Related Topics