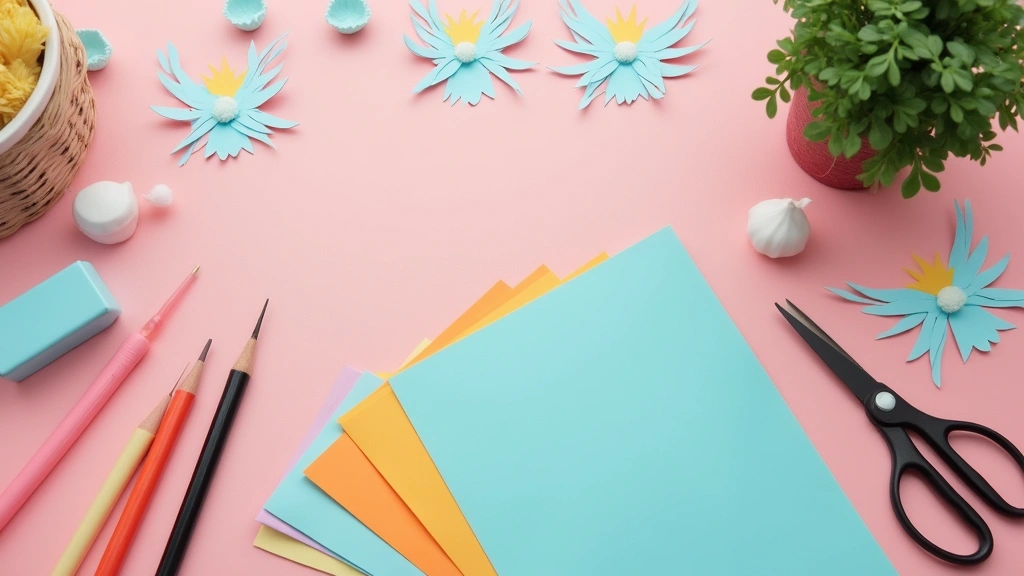
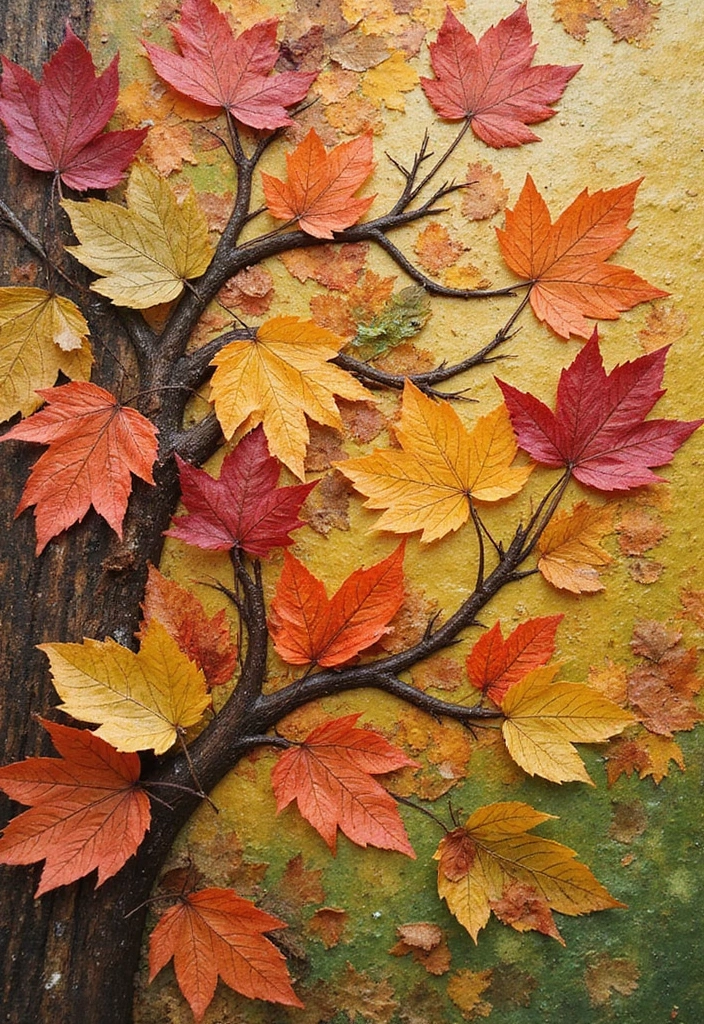
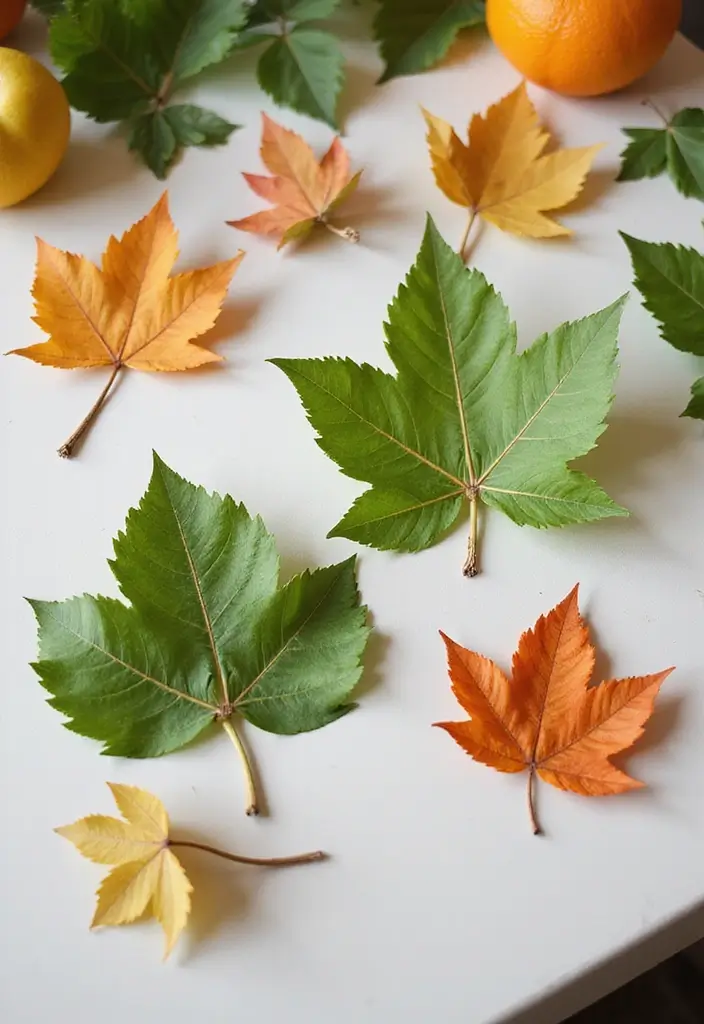
This season brings back cozy corners and a gentle light that makes me crave a touch of nature inside. I want a calm look that still feels alive, not fussy. That love for simple, nature inspired style sparked this post about 29 paper leaf crafts you can use for warm decor. You can brighten a shelf, a wall, or a tablescape with just paper, glue, and a little time.
Why I made this post is simple. Real leaves fade and real plants need care. Paper stays bright and you can choose the color and shape you love. These ideas keep things light, affordable, and easy to fit into a weekend project.
If you love easy crafts, budget friendly decor, or kid friendly projects, this is for you. If you want a touch of outdoors on walls or shelves, you’ll feel right at home here. This collection fits apartments, dorms, and family rooms alike.
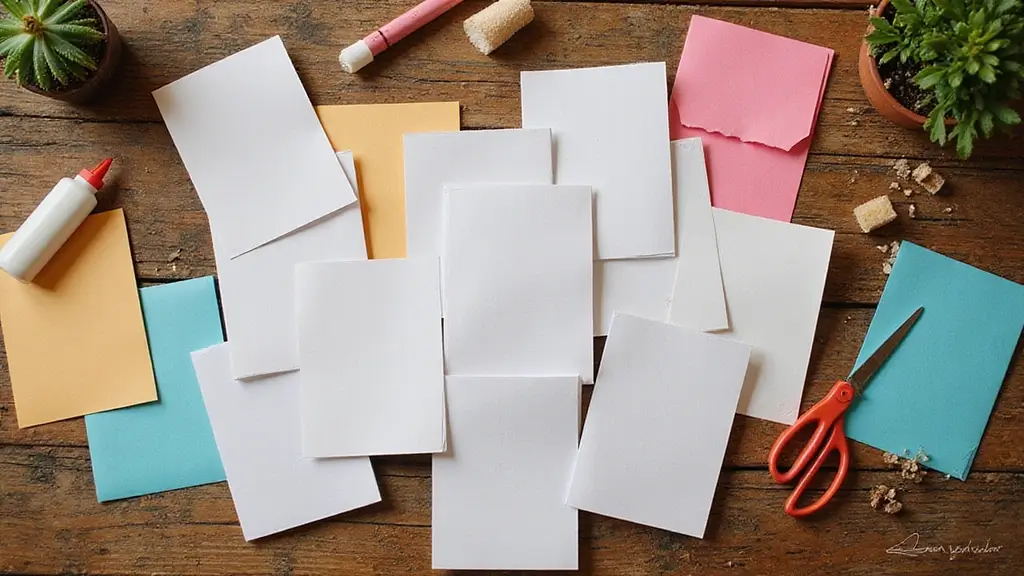
Here is what you’ll get: a set of 29 ideas that cover wreaths, garlands, wall art, and tabletop accents. Each idea uses simple supplies like cardstock, craft paper, glue, scissors, and string. The steps are short and doable, even on busy days. They suit fall, spring, or any season when you want a nature feel.
Plan with a light color palette. Pick two greens, a warm tan, and a touch of white. Print or draw leaf shapes. Cut, fold, and layer for depth. Use double sided tape to attach. Hang a garland across a window or display a few leaves in a tray by a lamp.
Grab a stack of paper and a quiet corner. Start with one simple piece and grow from there. Try a few ideas and notice how your space softens with texture and a bit of nature. If you share your results, I’d love to see how your home gains that gentle, nature inspired glow.
1. Colorful Paper Leaf Garland

Let’s break it down. This quick project adds a natural feel to any room. You can hang it from the ceiling or pin it to a wall for a splash of color and texture.
– Gather supplies: colorful craft paper, twine or sturdy string, scissors, and glue or tape.
– Cut leaves in different sizes.
– Use colors that fit your space.
– Space the leaves along the string at regular intervals.
– Lay the string flat and place a leaf at each interval.
– Glue or tape each leaf to the string.
– Let the glue dry before you hang the garland.
– Hang above a window.
– Hang around a doorway.
– Let it drape at different heights for a playful look.
– Adapt the garland to your space by trimming the length.
Tips:
– Use leaves from different seasons for variety.
– Add small paper flowers or tiny butterflies for extra charm.
– This project works well for kids; they can make their own designs.
@media(max-width:480px){
Recommended Products

🤍Package Contains - 4 packs of white leaf paper garland,each string is 13 feet/ 4 meters.Total length is 52 feet/ 16 meters.
Package Contains-4 packs of green leaf paper garland,each string is 13 feet/ 4 meters.Total length is 52 feet/ 16 meters.

10pcs four leaf clover garlands:10pcs pink kit four leaf clover garlands, each one is 3m/ 10ft length,total 30m/100ft,folding size: 16.2X11.2cm/6.38X4.4 in
2. DIY Leaf Bowl
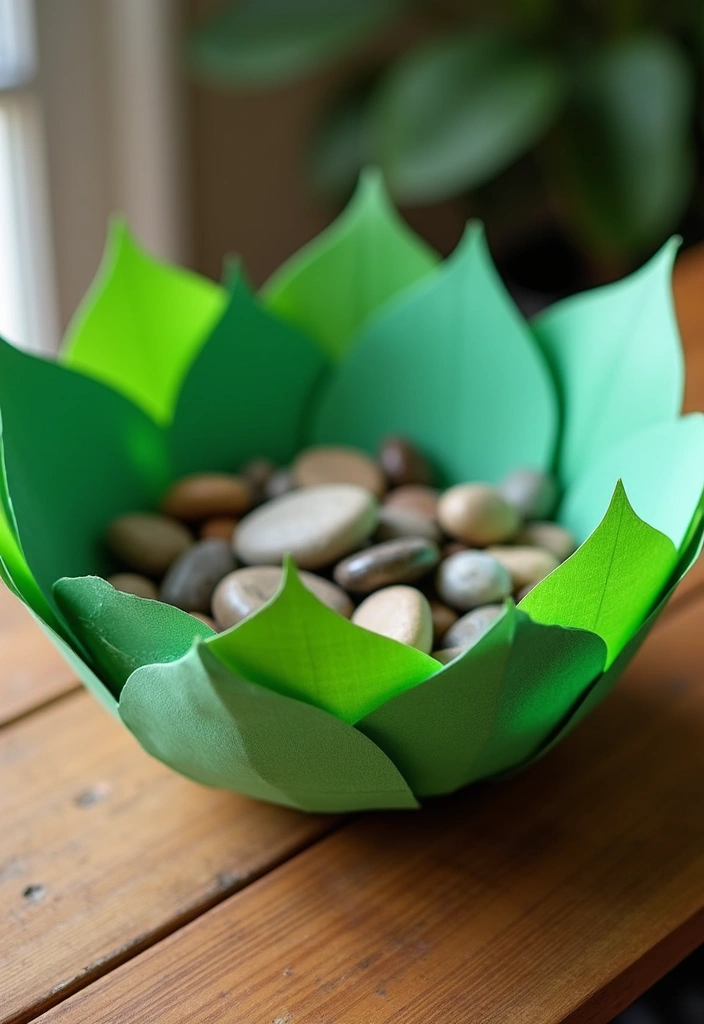
Want a natural bowl for small treasures or snacks that also fits eco-friendly decor? A leaf bowl is simple, creative, and ready to use.
What you need
– Large, sturdy leaves (Monstera or banana leaves work well)
– Vegetable or light cooking oil
– Newspaper strips you can recycle
– Glue or flour-and-water mix for paper mache
– A smooth surface to dry on
– Optional paint or resin for a glossy finish
How to make it
1) Pick a big leaf. Wash it gently and pat dry. Here is why: clean leaves mold better and help you shape the bowl cleanly.
2) Lightly coat both sides with oil. This keeps the leaf from sticking and helps you remove it later.
3) Mix glue with a little water, or use a flour-and-water paste. Dip newspaper strips and lay them over the leaf to form a shell.
4) Build up several layers. Let each layer dry a bit before adding the next to make a sturdy bowl.
5) When the shell is strong, let it dry completely. Then slowly peel the leaf away to reveal your bowl shape.
6) Trim any rough edges. If you like, paint the inside for color or seal it with a clear finish for durability.
Next steps
Display this nature-inspired piece on a shelf or use it at Earth Day events and nature-themed gatherings.
Tips
– Try different leaf shapes for unique looks.
– Add color inside with paint for a pop of brightness.
– Pair this with other leaf crafts to create a cohesive decor set.
@media(max-width:480px){
Recommended Products

Paper mache catch-all bowl.

Artisan Made, each item is handmade with high quality ingredients and design. Colors may vary slightly because this is a hand made peice.

Large Paper Mache Decorative Bowl
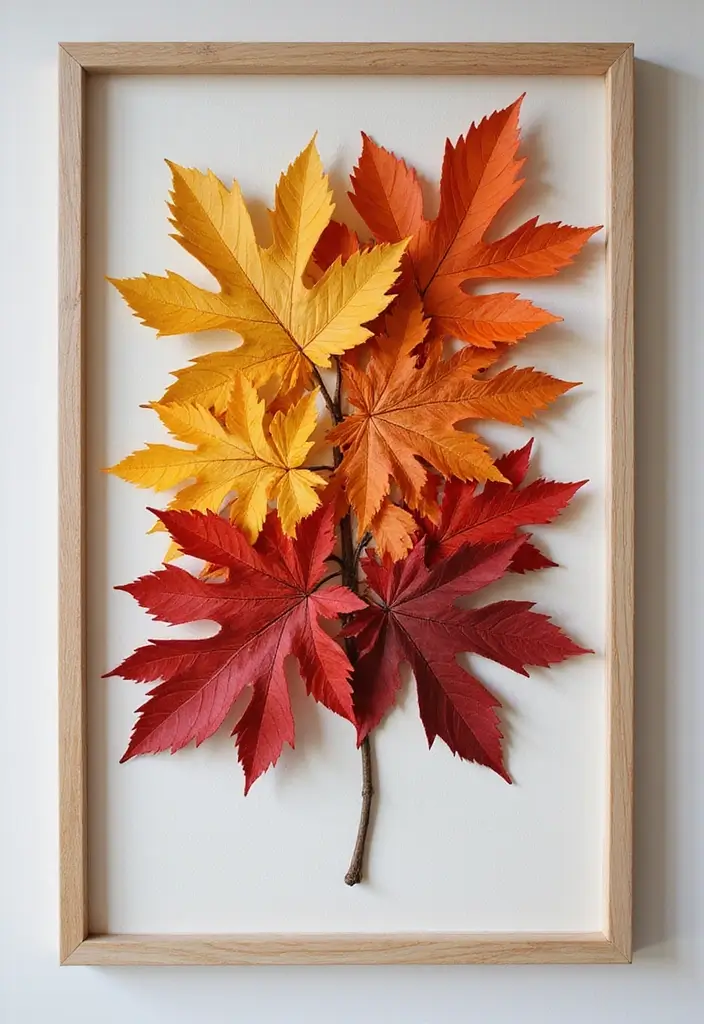
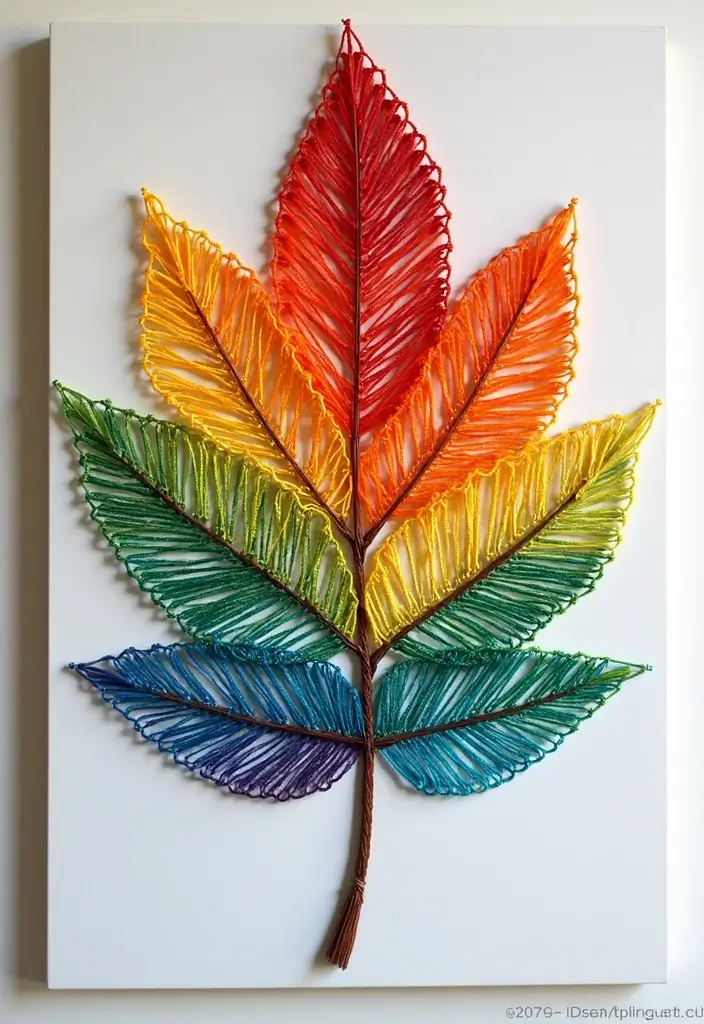
3. Leaf Art Canvas

You want wall art that feels natural and fresh. A leaf art canvas brings the outdoors inside.
Here is why this project works: leaves add texture and color without buying new decor.
What you need
– Blank canvas
– Leaves of different shapes and sizes
– Heavy books for pressing
– A small paint brush and clear glue
– Soft acrylic paints for the background
Let’s break it down
– Gather leaves and press them between heavy books for 5-7 days until flat
– Dry the leaves fully; they should be crisp, not bendable
– Plan a simple layout on the blank canvas before gluing
– Use a brush to apply glue on the back of each leaf; press firmly
– Paint a light background that complements the leaf tones, such as pale blue, sage green, or creamy white
– Let the glue dry completely
– If a leaf curls, press it longer or replace it with a flatter one
– For a neat look, use a thin layer of glue to avoid lumps
Next steps
– If you want extra hold, seal with a light clear spray after drying
– Frame the canvas or hang it as is for a natural gallery wall
Unique Insight:
– Try leaves in contrasting colors for a bold look
– This makes a lovely gift for nature lovers or a nice addition to your home office
Care tips
Keep away from direct sun to prevent color fade and store flat when not on display
@media(max-width:480px){
4. Leaf-Printed Table Runner

Want a natural touch for your dining table? A leaf-printed table runner adds outdoorsy charm. It’s easy, quick, and totally unique.
Tips:
– Use a mix of leaf shapes and colors for depth.
– Cotton or linen fabric helps with washing and ironing.
– Step 1: Choose leaves: Pick large, flat leaves from maple or oak. Flat leaves print clean shapes that stand out.
– Step 2: Prep the fabric: Choose cotton or linen fabric. Wash, dry, and iron it so the surface lies smooth.
– Step 3: Print the leaf: Pour fabric paint on a tray. Coat the leaf on its print side with paint. Press firmly, then lift straight.
– Step 4: Build the pattern: Move along the fabric, overlapping leaves a little. Aim for a full, even pattern across the length.
– Step 5: Dry and set: Let the runner dry completely. If the paint needs heat, follow the product directions to set with an iron.
– Step 6: Care tips: Wash cold on gentle. Line dry away from direct sun to keep colors bright.
– Step 7: Finish touches: For a clean edge, trim or hem the ends.
– Step 8: Variations: Mix leaf shapes and colors for a nature-inspired decor. Try two or three tones and different leaf sizes. Finish with a thin border in a solid color to frame the pattern.
– Step 9: Storage: Store when not in use. Keep it flat and away from direct sun to help the colors last.
– Step 10: Final setup: When you set it out, guests will notice the tiny leaf prints and the handmade touch.
– Step 11: Share: Share photos of your finished runner to inspire others.
Recommended Products

Premium Fabric : Made of Faux Linen 100% Polyester, sturdy sewing, soft and durable, protecting your table from scratches, spills and stains.


Botanic Table Decor: Elevate your dining table with these farmhouse linen blend table runner, measuring 13"W x 72"L. It will make your table full of life and with a refined cottage style
5. Leaf Bookmark Designs

You love books. You want a bookmark that fits your style. Leaf bookmark designs are quick to make and easy on the wallet. They bring a touch of nature to your reading routine.
Here is what you need. Use sturdy cardstock or water-resistant paper. Thicker stock helps the bookmark survive daily page turns. Have scissors, markers, paint, or glitter. Grab a hole punch and some twine or ribbon.
– Cut leaf shapes from your paper.
– Decorate with markers, watercolor, or glitter for a unique look.
– Decorate both sides for a bold effect.
– Punch a hole at the top and thread a length of twine or ribbon.
Let the ink dry completely. If you want extra strength, laminate the bookmark. You can also seal with a clear spray for water resistance.
Unique Insight:
– Laminate for long wear.
– These make good gifts for friends or party favors.
Give it a try with one simple leaf to start. Then make a small set to keep in a gift bag or share with friends.
6. Nature-Inspired Wall Art
Want a wall piece that feels close to nature without a big price tag? You can make one at home with simple steps.
What you need
– Coloured paper in greens, yellows, and browns.
– Scissors and glue or tape.
– A large frame or a sturdy backing board.
– A string of fairy lights behind the frame (optional).
Here’s how to build it
1. Cut leaves in several sizes and shades to show different seasons.
2. Lay them out on a table to plan the collage.
3. Start with the largest leaves, add medium ones, and finish with small pieces. Let some edges overlap to add depth.
4. Glue the leaves to a backing or mount them inside a big frame.
5. If you want a soft glow, place the frame around a strand of lights or set a backlit panel behind it.
Tips and variations
– For a vintage vibe, use leaf shapes cut from magazine pages.
– For a nursery, use soft greens, creams, and gentle patterns.
Care and placement
Keep it dry and away from moisture. If possible, use a glass front to protect the leaves.
Next steps
Swap colors as the seasons change.
Display ideas
– Hang the piece in a bright hallway to catch light.
– Pair with wood frames or a solid color wall to keep focus on the leaves.
This project stays simple yet eye catching.
7. Paper Leaf Magnets
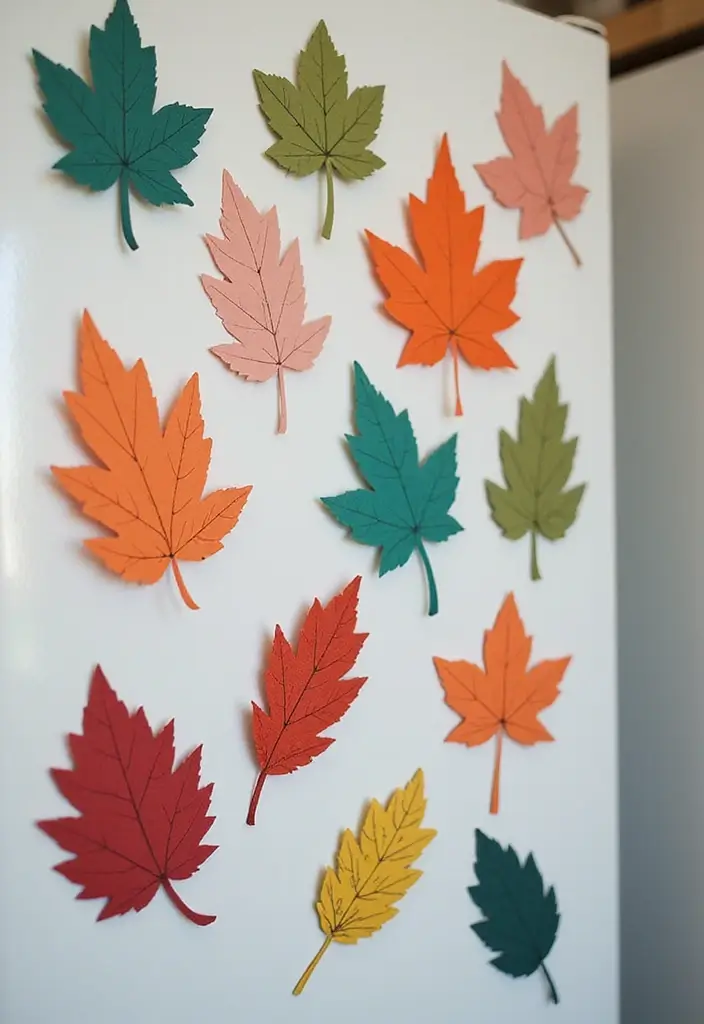
Here is a fridge craft that brings in nature. Paper leaf magnets are small and sweet.
Choose cardstock in greens, browns, and reds. Cut leaf shapes. Use different sizes so the set looks alive.
Flip each leaf and glue a magnet to the back. Let the glue dry before you handle them. For flair, wrap a strip of washi tape around the stem or dab a dot of paint on the tip. Mix patterns with plain colors.
Next steps: make a mini seasonal set. A few bright leaves for spring, deep tones for autumn, pale greens for summer, and frosty whites for winter. Stick them on the fridge to mark dates or notes.
Here is why this works: magnets are light, so small leaves hold notes without sagging. The look is warm, like a tiny forest on your door.
Tips:
– Use many leaf shapes and sizes for a lively mix.
– This project is great for kids. They learn about leaves and practice cutting and painting.
If you want, seal the leaves with a clear coat to add durability. Now you have a mini nature gallery that can change with the seasons.
Best of all, the magnets stay strong on the fridge.
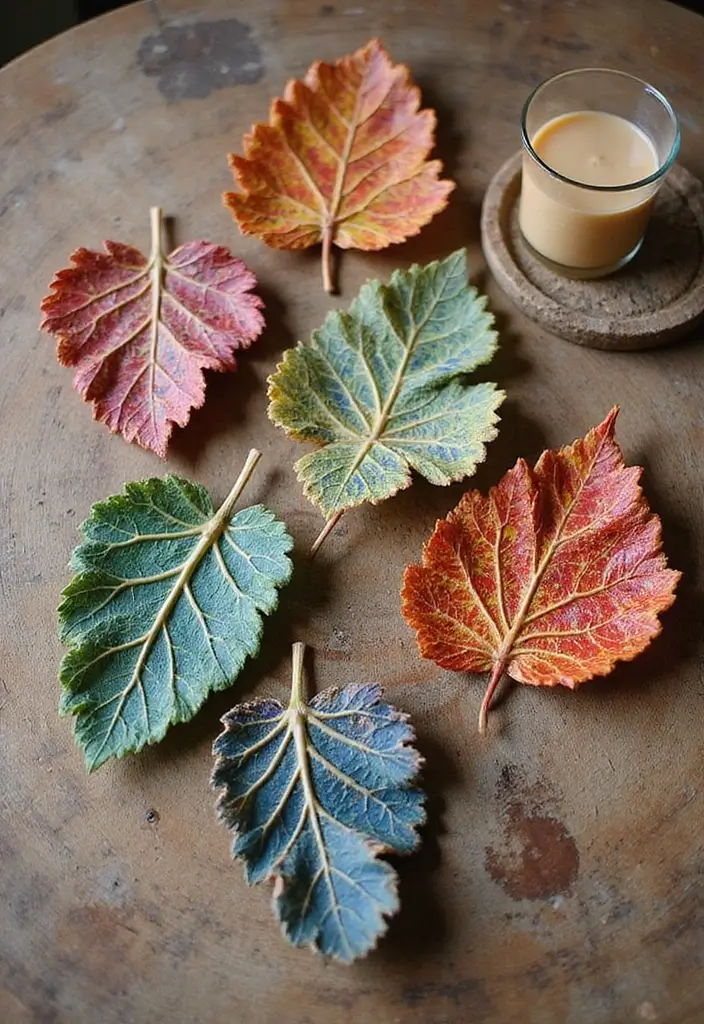
8. Leaf Shadow Boxes

Want a one-of-a-kind piece for your wall or shelf? A leaf shadow box brings a touch of the outdoors inside in a simple, calm way.
– What you’ll need: a shallow shadow box, a background surface, pressed leaves and a few small flowers, twigs, clear craft glue, scissors.
– Pressing basics: gather leaves in good shape. Place them between weights or in a stack of books. Let them dry for 1–2 weeks. Colors stay bright and shapes stay flat.
– Layout plan: pick a background color that makes greens pop. Lay out big leaves first, then add twigs and small blooms. You can sketch the design on paper first to help.
– Attach and seal: glue pieces down one by one. Press gently to avoid tears. If you have clear sealant, apply a light coat to protect the pieces.
– Finishing touches: add a short nature quote on a small card inside the frame. This personal touch can make your piece feel extra special.
– Tips for success: choose leaves with clean edges and strong color contrast for a bold finish.
– Display tips: hang on a wall or stand on a shelf. It works as a thoughtful gift or cozy update to your own space.
@media(max-width:480px){
9. Leaf Coasters Craft
Protect your surfaces with beautiful leaf coasters made from paper!
Cut leaf shapes out of thick paper or cardstock and decorate them with markers or paints. After decorating, coat them with a waterproof sealant for durability. You can also layer some leaves to create a more intricate design.
Tips:
– Use a variety of shapes to make a complete set.
– This craft is perfect for parties or gatherings, adding a touch of nature to your table.
@media(max-width:480px){
10. Leaf Lanterns for Ambiance
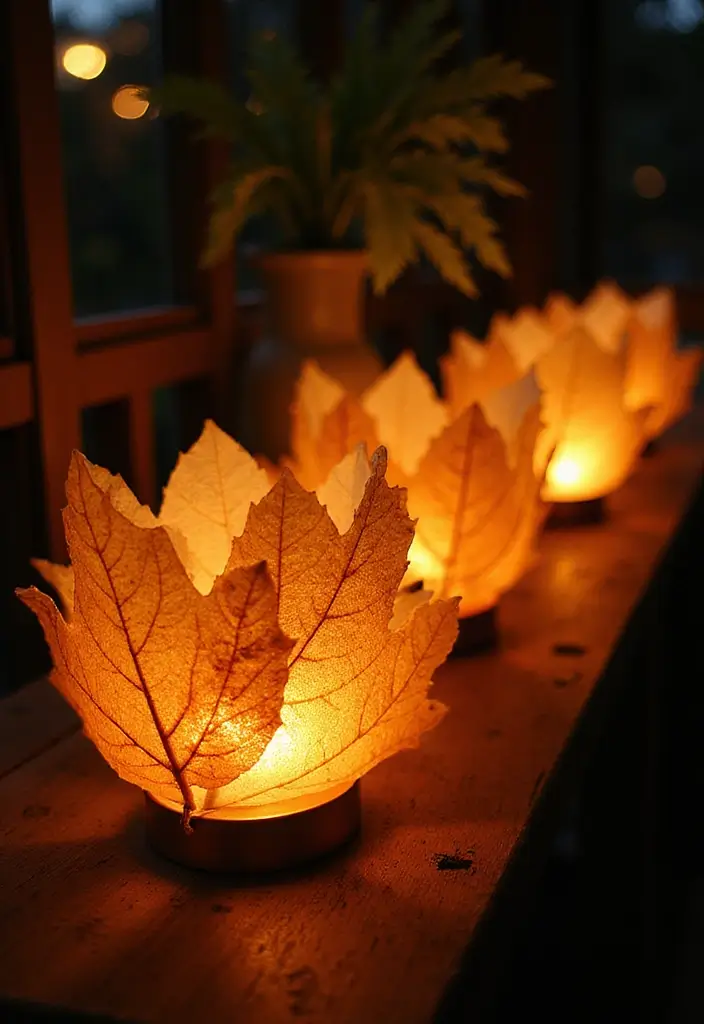
Want a warm, nature-like glow for evenings? Leaf lanterns bring calm light and a little outdoors inside.
What you need
– Clean glass jars
– Real leaves or sturdy faux leaves
– Craft glue or Mod Podge
– Twine or thin rope
– Tissue paper
– A tea light or LED candle
– Scissors and a small brush
How to make them
1) Clean the jar and let it dry.
2) Glue leaves on in a pattern you like. Press gently so they stay flat.
3) Brush a thin layer of glue over the leaves and place a sheet of tissue paper over it. This softens the light.
4) Wrap twine around the neck and knot it. A small bow adds charm.
5) Insert a tea light or LED candle inside. Use LED for safe nights.
6) Add color if you want. A light wash of paint on the tissue can change the mood.
Why this works
– Leaves create a natural pattern that hides the flame but lets glow show through.
– Tissue paper makes the light feel warm and cozy.
Tips
– Use different leaf shapes for unique looks.
– Mix big and small leaves for depth.
– For wind, keep to LED candles.
Where to place
– Outdoor patios at dusk
– Tables inside for cozy corners
@media(max-width:480px){
11. Leaf-Themed Greeting Cards
Want warm, nature-inspired cards for any occasion? Leaf-themed greeting cards bring the outdoors to your mailbox. You can press real leaves onto recycled cardstock or print simple leaf designs to add texture. They feel personal and thoughtful.
Materials
– Recycled cardstock
– Fresh leaves that are flat and intact
– Plant-based ink or watercolors
– Non-toxic glue or double-sided tape
– Optional matte sealant for mailing
How to make
– Gather flat leaves without holes or snag marks.
– Dry them first by pressing between pages for 1–2 days.
– Paint a leaf or press it onto cardstock to transfer color or texture.
– Attach the leaf with glue at the corners to keep it flat.
– Write a message or quote directly on the card.
Design ideas
– Use one leaf as the focal point with a simple border.
– Layer a few leaves and mix green, yellow, or orange tones.
– Add a short seasonal line like “Thinking of you this fall.”
Tips
– Test color on scrap paper before pressing.
– Work with light layers to avoid wrinkling.
– Keep materials eco-friendly for a greener card.
Next steps
– Start with 2–3 cards to practice.
– Share your cards with friends and note what they like.
12. Leaf Mobile for Kids’ Rooms

Need a simple, kid-friendly way to bring a touch of nature into a room? A leaf mobile fits the bill. It adds color and movement, and you can tailor it to your child’s favorites. Here’s how to break it down.
Materials
– Wooden hoop or a sturdy ring
– Leaves cut from colored paper or real dried leaves
– Thread, string, or fishing line
– Scissors
– Non-toxic glue or tape
– Optional beads or small charms for extra sparkle
Here is how to build it.
– Cut leaves in different sizes and shades. Mix big and small for interest.
– Punch small holes or make tiny slits near the leaf tips for threading.
– Tie a short piece of string to each leaf.
– Attach the other end of each string to the hoop. Space leaves so they hang at varying heights.
– Add a few longer strings at the bottom area to create a soft, layered look.
– Find a ceiling hook and hang the mobile where it can sway with the air.
How to customize
– Include shapes like animals, stars, or hearts cut from paper to boost charm.
– Let kids pick colors that match their decor or season.
– Use real leaves for a natural feel, then seal with a light coating to preserve them.
Tips and safety
– Keep small parts away from very young children.
– Let kids help with the simple steps to boost ownership.
– Rotate leaves as seasons change to refresh the look.
Next steps: enjoy the gentle motion and the nature-inspired decor it brings to a kid’s room.
@media (max-width: 600px) {
.normal-quiz-iframe { min-height: 570px !important; height: 570px !important; }
}
13. Leaf-Decorated Picture Frames

Want a simple way to give your photos a touch of nature? Leaf-decorated frames do it. You get frames that feel fresh and special. The texture of real leaves adds a tiny story to each memory.
Here is how you can make them.
– Collect leaves: Choose flat, clean leaves. Avoid torn edges.
– Prep the frame: Pick a plain wooden or cardboard frame. Clean it so glue sticks well.
– Press and dry leaves: Press leaves between papers under a heavy object for 24 hours. This makes them flat and durable.
– Plan your design: Lay leaves on the frame face to test patterns. Try a border, a cluster, or a single leaf in the corner.
– Glue and finish: Use craft glue or Mod Podge. Brush glue on the frame and press the leaf down. Let it dry fully.
– Seal (optional): A thin spray sealant helps protect the leaves from moisture and pale colors.
– Switch photos easily: Use photo mats or leave space behind the leaves so you can swap in new memories.
Seasonal touch: Use leaves that match the season and the photo colors. Fall leaves go well with warm tones; spring greens glow with bright pictures. These frames make gentle gifts for family and friends.
Next steps: Create a few frames, display them in a grid, and rotate photos with the seasons.
@media(max-width:480px){
14. Leaf and Flower Wreath
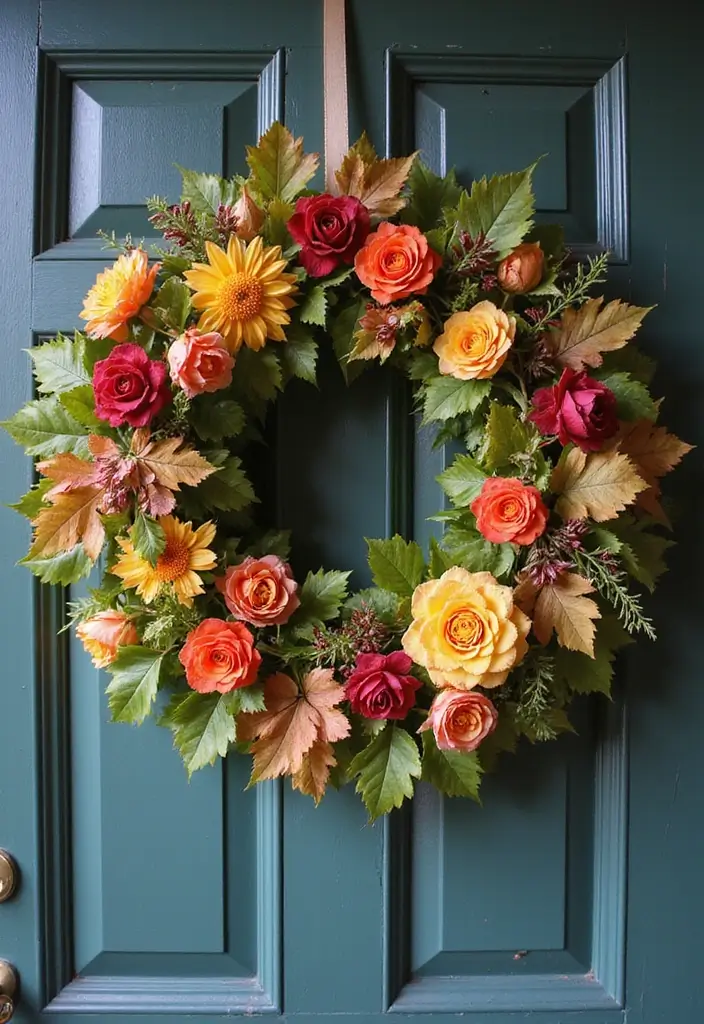
You want a warm welcome for guests. A leaf and flower wreath made from paper and fake blooms fits that need. It looks fresh, feels easy to make, and lasts for weeks. You can customize it to your season and style.
Materials
– Card stock in greens, golds, and browns
– A wreath base such as a foam ring or wire loop
– Scissors for clean cuts
– Craft glue or floral wire to secure pieces
– Artificial flowers for color and texture
– Optional small ornaments or a ribbon for finishing touches
Steps
1) Cut out a variety of leaf shapes in different sizes and colors.
2) Lay out the leaves on the wreath base to plan the design.
3) Attach the pieces with glue or floral wire, keeping them secure.
4) Tuck in artificial flowers for color and texture.
5) Add small ornaments or a ribbon if you want a playful finish.
6) Let the wreath dry completely before you hang it.
Tips
– Use leaves that reflect the season for a festive touch.
– Consider adding a few small ornaments for a playful look.
Hanging ideas
– Hang on your front door to greet visitors with a nature vibe.
– Place on a porch wall or indoor entry to brighten the space.
Here is why this approach works: you get a lightweight, durable decor piece that can be changed with the seasons.
Next steps: grab your colors, cut shapes, and start crafting.
Enjoy your new wreath and your nature-inspired decor.
Recommended Products

Abundant to Use and Share: you will receive 28 pieces of paper flower templates totally, including 24 pieces of petal templates in 4 shapes, 6 pieces each shape in 6 different sizes, 2 piece of bottom templates in round and hexagon shapes respectively, and 2 pieces of leaf templates in 2 sizes, enough for you to DIY different paper flowers or share with others

Flower Wreath Craft Kit: You will receive 48 sets of summer flower wreath art kits in 6 styles (8 pieces each), including 48 floral theme stickers (6 styles, 8 pieces each), 1 pack of 300 colorful flower stickers, 4 butterfly stickers, and 4 rolls of blue hanging ropes. These kits are perfect for group DIY wreath activities, ideal for summer celebrations and craft parties

FLOWER POWER: Transform your crafting experience with our delightful flower kit! Inside, you'll find 280 punch-out flower, stem, and leaf cutouts crafted from assorted bright colored card stock, offering a vibrant palette for your creations. But that's not all - we've included an IDEA GUIDE to spark your creativity, showcasing numerous fun and imaginative flower combinations. Let your imagination bloom!
15. Leaf Tissue Paper Collage
You want nature on your wall, but real leaves dry out fast. A leaf tissue paper collage adds color and texture in minutes. Here is how to do it.
Leaf shapes come in many forms. Simple ovals feel calm; jagged edges hint at maple or oak. Start light and layer darker greens to build depth. Add small touches of yellow or brown for warmth. This mix helps your art feel alive.
What you need
– Tissue paper in greens, yellows, and browns
– A sturdy canvas or heavy paper
– Mod Podge or a glue sealer
– A soft brush for smoothing
Steps
1. Cut leaf shapes of different sizes from the tissue paper.
2. Lay the shapes on the canvas to plan your design.
3. Brush a thin coat of Mod Podge over the top to seal.
4. Let it dry. Add a few more leaves if you want more depth.
Tips for best results
– Use a range of greens and a touch of warm tones.
– Keep the background light so colors pop.
– Smooth pieces as you place them to avoid wrinkles.
Here is why this works: layering gives depth and makes the collage feel full. Next steps: hang it where light hits and enjoy the changing colors with the day.
@media(max-width:480px){
16. Leaf Candle Holders
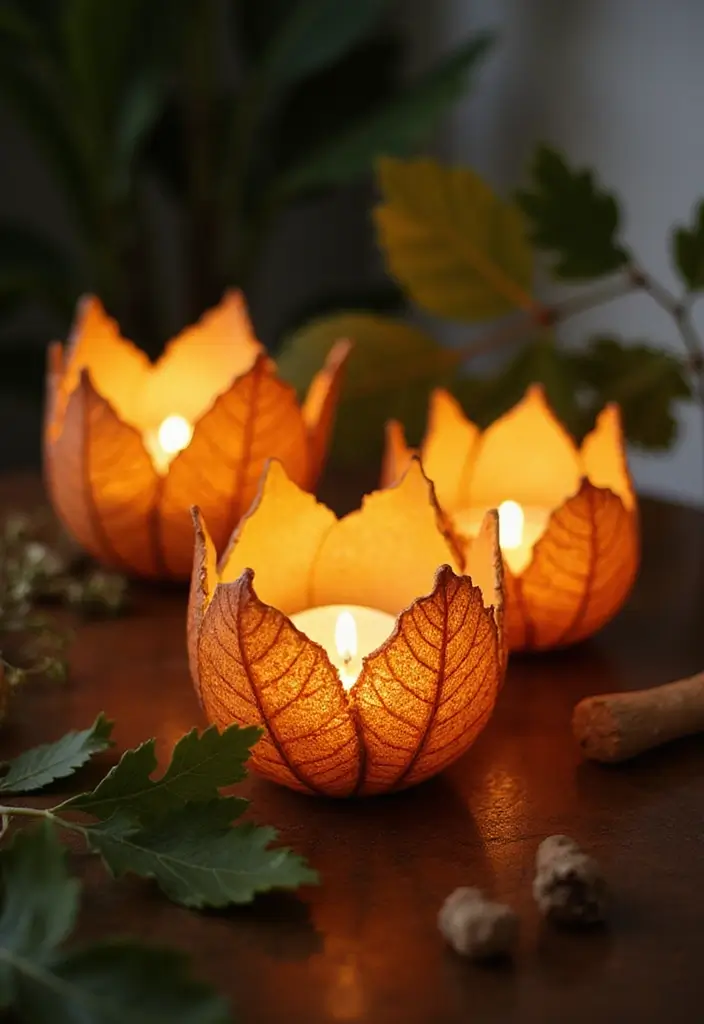
Are you looking for a warm, natural glow without buying new lights? Leaf candle holders bring a soft, outdoorsy glow inside. Here’s a simple way to make them.
Materials
– glass votives or jars
– fresh or dried leaves
– thin string or ribbon
– decoupage glue or craft glue
– scissors
– a tea light or LED candle
Steps
1) Clean the glass holder and dry it well.
2) Pick leaves that feel sturdy. Dry leaves stay flat; pressed fresh leaves work too.
3) Glue leaves to the outside. Start at one edge and wrap around the glass. Let the pieces overlap so the jar looks full.
4) Seal with a thin coat of glue over the leaf layer. This helps the leaves stay put. Let it dry.
5) Place a candle inside. Light the tea light or LED to see the glow through the leaves.
Tips
– Mix leaf types for autumn, spring, or tropical looks.
– Tie a ribbon bow on the rim for a festive touch.
– Make a set of three at different heights for a table centerpiece.
– Never leave candles burning unattended.
Next steps
Try different sizes and seasons. Use these holders for dinners, date nights, or quiet evenings.
17. Leaf String Art
Leaf String Art
You want decor that feels fresh and close to nature. Leaf string art gives that in one simple project. A leaf outline on canvas becomes a bright web when you weave thread around nails. It looks bold yet calm in any room.
Here is how you do it.
– Materials:
Canvas or wooden board, nails or pins, a leaf outline (real, pressed, or printed), thread or yarn (2–4 colors), a hammer, scissors, pencil.
– Steps:
1) Lightly draw or trace the leaf on the surface.
2) Place nails along the edge, about a finger width apart.
3) Hammer in the nails at those spots.
4) Tie thread to a nail and weave along the outline.
5) Change colors to create veins or a filled look.
6) Tie off thread, trim ends, and wipe pencil marks.
– Tips:
Choose colors that match your space. Try two greens or a green plus a bright accent. Practice on scrap first. Keep threads snug but not tight to avoid gaps.
– Variations:
Add a second leaf for a duo. Use metallic thread for a hint of shine. Frame it with a light mat.
Hang it where natural light hits the wall. It glows at dawn and dusk and draws compliments.
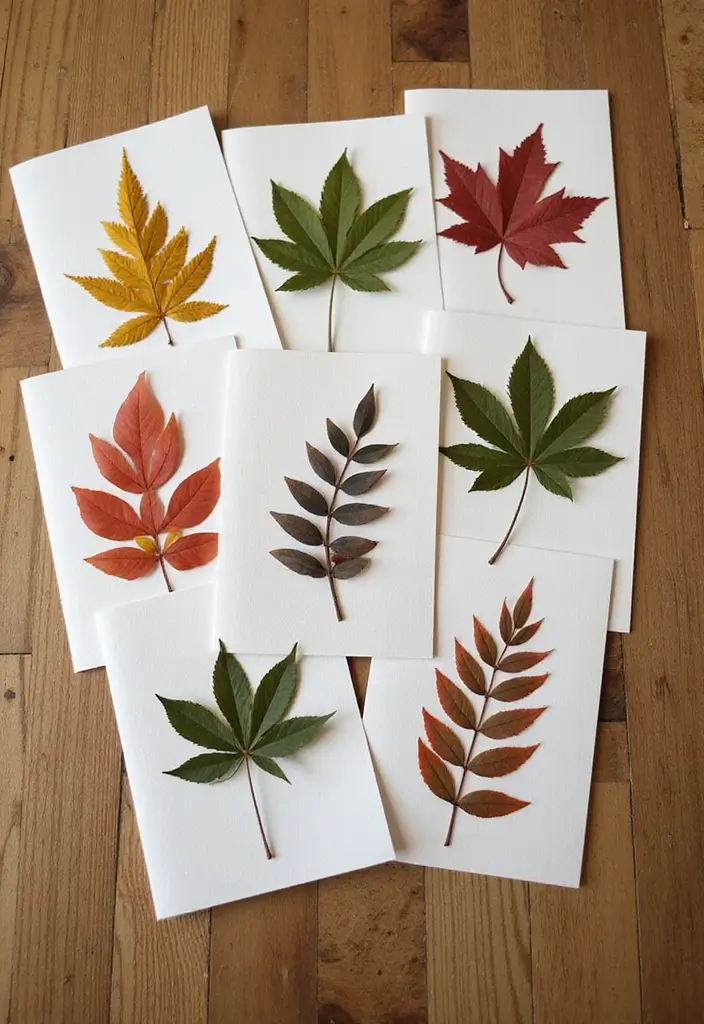
18. Leaf-Pressed Greeting Cards

Leaf-Pressed Greeting Cards
You want a simple, heartfelt way to share nature. Leaf-pressed greeting cards give that warm touch with almost no fuss. Gather leaves from your yard or a nearby park. Look for flat, sturdy leaves with clear veins. Press them flat, then glue them onto blank cards. Add a short message inside, and you have a thoughtful card for any occasion. The effect is fresh, personal, and easy to customize.
Here is why this works for you. It uses common tools and leaves a real, tactile impression. Your card will smell faintly of green and wood, and the texture invites a closer look.
Next steps
– Choose leaves that are dry, clean, and not brittle.
– Press leaves between parchment paper. Weight them with heavy books for 1 to 2 weeks.
– Pick blank cards in seasonal colors to match your leaf set.
– Apply a thin layer of craft glue or double-sided tape to the leaf back. Press gently to remove air bubbles.
– Write inside with a fine pen. For a modern look, add a slim border of washi tape on the front.
Seasonal tips
– Fall cards: warm oranges and browns with maple or oak leaves.
– Spring cards: soft greens and yellows with dainty leaves.
– Summer cards: bold greens and sea-inspired shapes.
With care, these cards stay sweet for years, and they travel well in ordinary envelopes, brightening any day.
19. Leaf Designs on Pillows
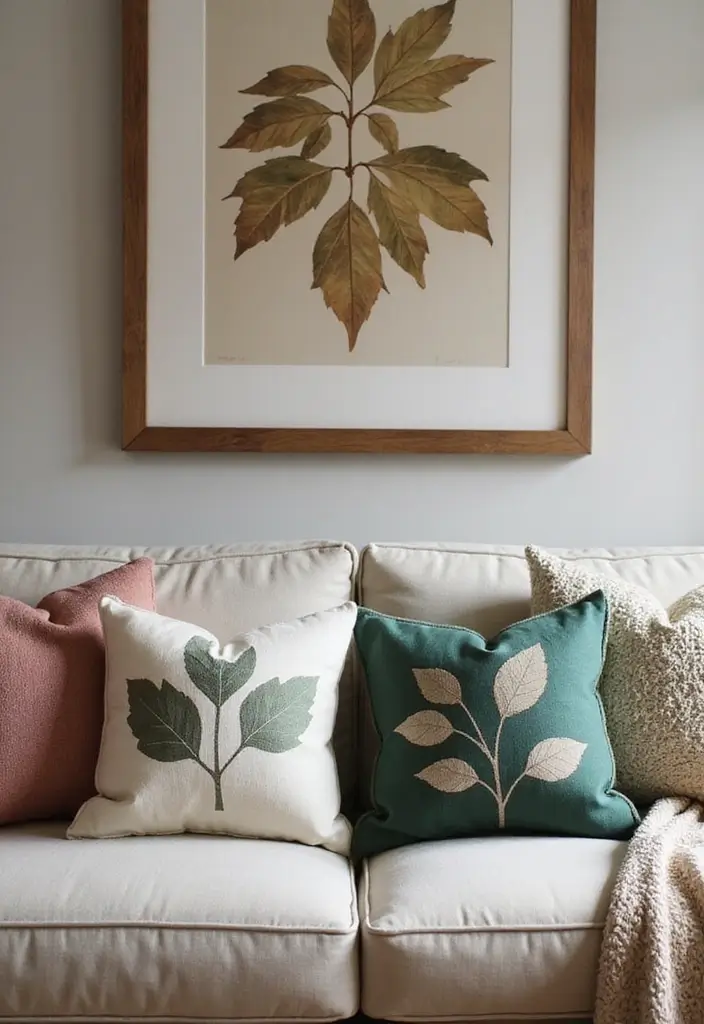
Want a simple way to bring the outdoors into your living room? Leaf designs on throw pillows do that in a cozy, budget-friendly way. They add a touch of nature and let you switch looks with the seasons.
Here is why it works: you can use plain pillow covers, fabric paints, or fabric patches. It’s fast, affordable, and easy to change if you want a new vibe.
Let’s break it down.
– 1) Pick a plain pillow cover and the pillow you want to match. Choose a size that fits your sofa or bed.
– 2) Sketch leaf outlines lightly on the fabric with a pencil. Then trace with fabric paint for clean edges.
– 3) Add color by filling the veins or shading the leaf. Use one bold color or several tones to create depth.
– 4) For texture, cut matching leaf shapes from fabric patches. Sew or glue them on in a layered, overlapping pattern.
– 5) Let the design dry completely. If your paint or patches need heat setting, follow the product instructions.
– 6) Finish by fluffing the pillow, then place it where you want a nature moment.
Tips:
– Pick colors that fit your room’s vibe.
– Test paints on scrap fabric first.
– Wash pillow covers gently to keep them looking fresh.
Next steps: show off a small forest on your couch or bed and swap colors with the season.
20. Paper Leaf Envelopes
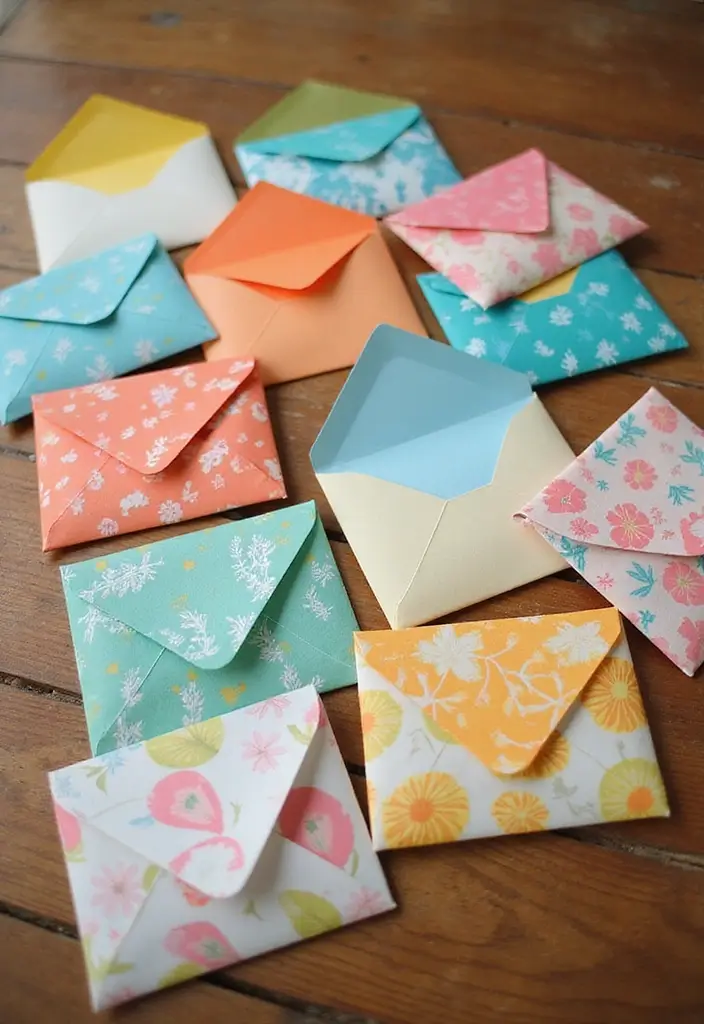
Want a small, personal touch for gifts or notes? Paper leaf envelopes add a nature-inspired feel. You can make them from patterned paper, scrap cards, or recycled sheets. They’re eco-friendly and simple enough for a quick craft after school. Try recycled magazine pages or kraft paper for earthy tones.
Here’s how to make them. Pick leaf shapes you like. Trace or draw simple leaf outlines on your paper. Cut out several shapes for variety. Fold each leaf along a central line to form a shallow pocket. Glue the edges to seal the flap. Press gently and let the glue dry. Slip in a message or a gift card, then seal with a sticker if you want. They feel soft to the touch and light in the hand.
Suggestions:
– Use a mix of leaf shapes for a charming assortment.
– Decorate with stickers, stamps, or washi tape to add texture.
– Seal with a tiny sticker, a dab of glue, or a small wax seal for a finished look.
– Try bold colors for party invites or soft tones for wedding favors.
Next steps: store flat under a heavy book while the glue dries, so they stay crisp. This craft keeps your mail special without adding bulk.
21. Leaf Gift Wrap
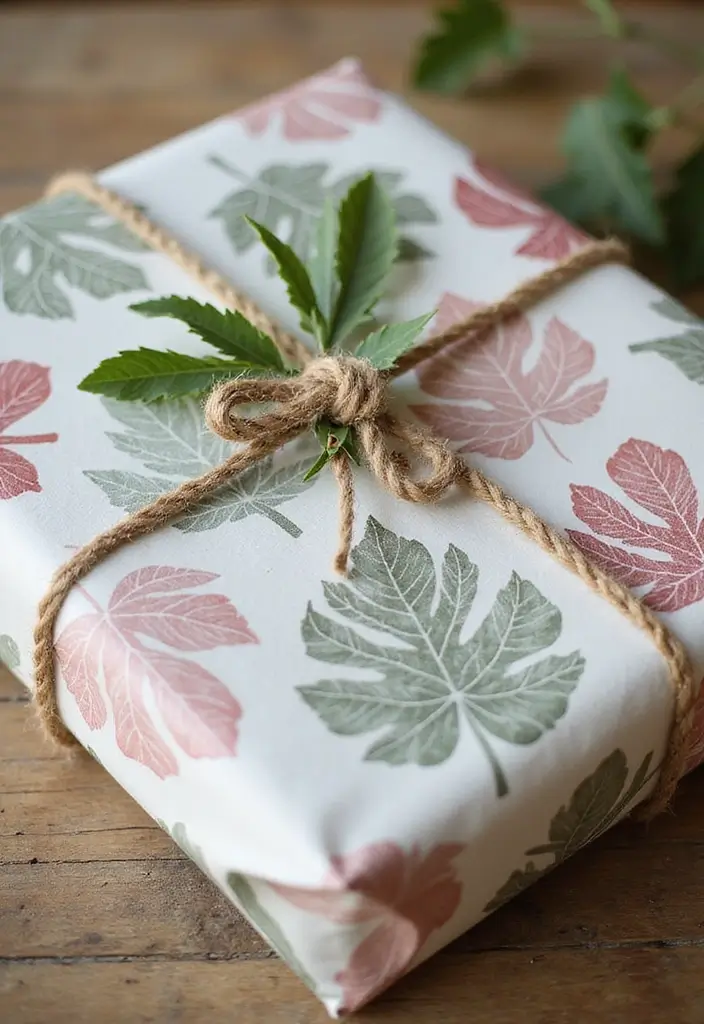
Need a wrap that feels natural and cuts waste? Leaf gift wrap fits. You can use real leaves as the main paper or cut leaf shapes from recycled paper for a similar look. Either way, your gift gets a nature-inspired touch.
Option 1: Real leaves as wrap. Choose large, flat leaves. Wipe them clean and dry. If you want a tidy finish, press them between towels with a book on top for a day. Then wrap the gift in kraft paper, place the leaf on top, and tie with twine. A small branch or dried flower tucked under the knot adds charm.
Option 2: Leaf shapes from recycled paper. Trace a leaf outline on scrap recycled paper and cut out several shapes. Layer the leaves on standard wrap, or use them as a main cover for a cleaner look. Secure with a little tape, then finish with string. A dried bloom tucked under the string colors the package.
Here is why it works: it cuts waste and adds a personal touch. Tips to personalize:
– Color cues Match leaf colors to the occasion or recipient.
– Prep Dry leaves well to prevent moisture.
– Source Use leaves from trees you own or from clean sources.
Next steps: Gather leaves, scrap paper, twine, and a moment of calm. Try leaf gift wrap on your next present.
22. Leaf Mosaic Art
Want a calm, nature-inspired decor idea you can finish at home? Leaf mosaic art turns simple leaves into a small wall treasure.
Materials
– A sturdy base such as a canvas or thick cardboard
– Leaves that are flat and dry, in a mix of sizes and colors
– White glue or craft glue
– A small brush or tweezers to place leaves
– Beads, sequins, or a light glaze for texture
– A clear sealant to protect the piece
Steps
1. Press and trim each leaf so it lays flat on the base. Remove any moisture you see.
2. Sketch or pick a simple pattern you want to form.
3. Lay out the leaves on the base without glue to test the fit. Move pieces until you like the look.
4. Glue leaves one by one. Start at the center, work outward, and press gently so the edges sit flat.
5. Let the glue dry. For more texture, add beads or glitter before it sets.
6. Apply a clear sealant to help it last longer and wipe clean.
Tips
– Choose leaves with bold veins and strong color contrasts.
– Use a mix of light and dark greens, browns, and yellows for depth.
– Work in a well-lit spot so you can see true colors.
It fits any skill level.
It looks great in living rooms or hallways.
23. Leaf-Stamped Bags
Leaf-Stamped Bags
Want a simple, eco-friendly way to carry stuff? Leaf stamping gives you unique bags with a natural look.
What you need
– sturdy bags like canvas or thick cotton
– flat leaves from your yard
– fabric paint or ink in colors you like
– a small brush or sponge
– a clean, flat work surface and a piece of cardboard
– a cloth for cleanup
How to do it
1) Prep the bag. Wash and dry it, then press flat.
2) Choose leaves. Pick leaves with clear veins and simple shapes.
3) Apply paint. Brush a thin coat on the leaf.
4) Stamp. Press the leaf onto the bag, then lift straight up.
5) Dry and set. Let it dry completely. If your paint needs heat setting, follow the label.
6) Care. Hand wash gently and air dry to keep prints sharp.
Design ideas
– Stamp in rows for a tidy pattern.
– Use two colors for contrast.
– Layer different leaves for depth.
Uses
– Great for groceries, beach days, or gifts.
Here is why this works: leaves give real shapes you can love. It’s easy to make a bag that feels personal. Next steps: try new leaf types and color mixes to refresh the look.
@media (max-width: 600px) {
.visual-quiz-iframe { min-height: 995px !important; height: 1100px !important; }
}
24. Leaf-Themed Mobile Phone Cases
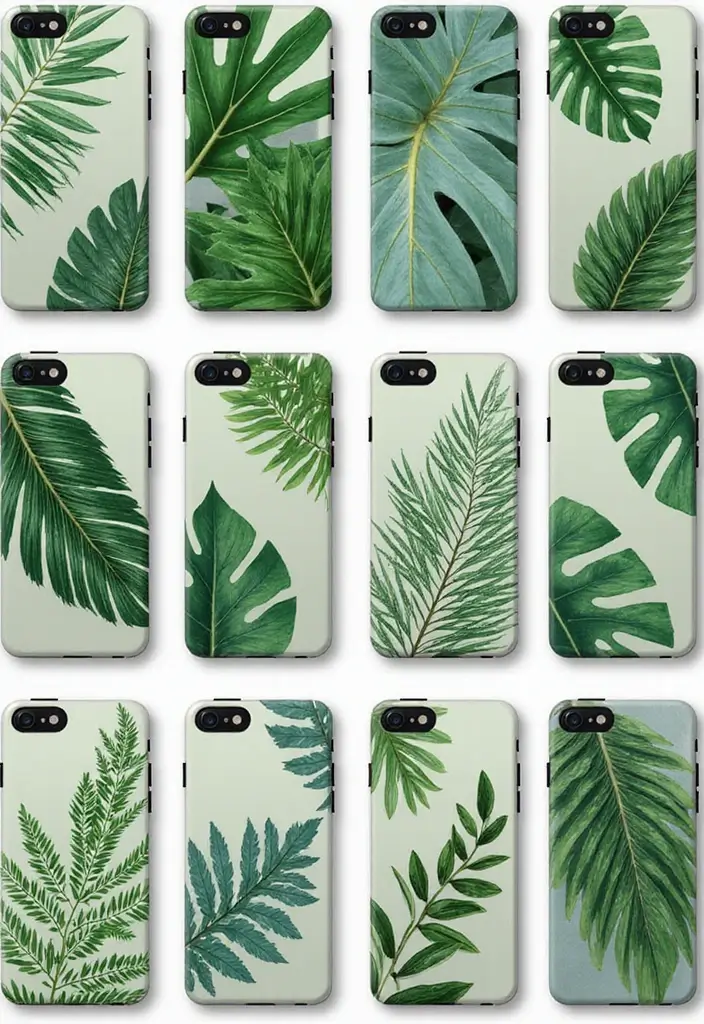
Want a phone case that feels fresh and natural? A leaf themed case lets you carry a little outdoors with you. It’s simple, quick, and personal.
What you need
– Clear phone case
– Flat dried leaves or pressed leaf prints
– Clean cloth and a little rubbing alcohol
– Clear glue, double-sided tape, or a thin layer of resin
– Optional: tiny leaf tweezers for placement
How to do it
1) Press or dry your leaves until they are flat.
2) Clean the inside of the clear case.
3) Place the leaf where you want it. Slide it between the back panel and the clear plastic, then press gently.
4) Secure the leaf. Use a small dot of glue at the corners or a thin tape strip so it lies flat.
5) Seal for grip. If you want extra durability, add a thin coat of resin or clear glue over the leaf. Let it dry completely before you close the case.
Tips
– Do not let water touch the leaves. Moisture can bend or fade them.
– Try different colors and leaf shapes for a forest look.
– These make thoughtful gifts for friends and family.
Next steps
– Experiment with layout, add a pressed flower, or print a leaf pattern inside the case.
– Keep it simple at first, then try tiny color shifts.
– Label the case with the plant name and date.
Recommended Products

MIXED DRIED FLOWERS: Main Green & Yellow Pressed Flower enrich your magic red craft. Green & Yellow pressing kit comes with 26pcs

What You Get: You will receive 11 types,total 30 pieces of dried pressed ferns leaves for resin, enough quantity that can meet your different needs for DIY craft, making your creation look beautiful and special

Assorted Dried Flowers Set- Package includes 2 packs of dried flowers in blue and purple and 1 pack of natural dried leaves, for a total of 90 pieces different kinds of flowers and leaves and 1 piece of curved tweezers.
25. Leaf Gifts and Favors
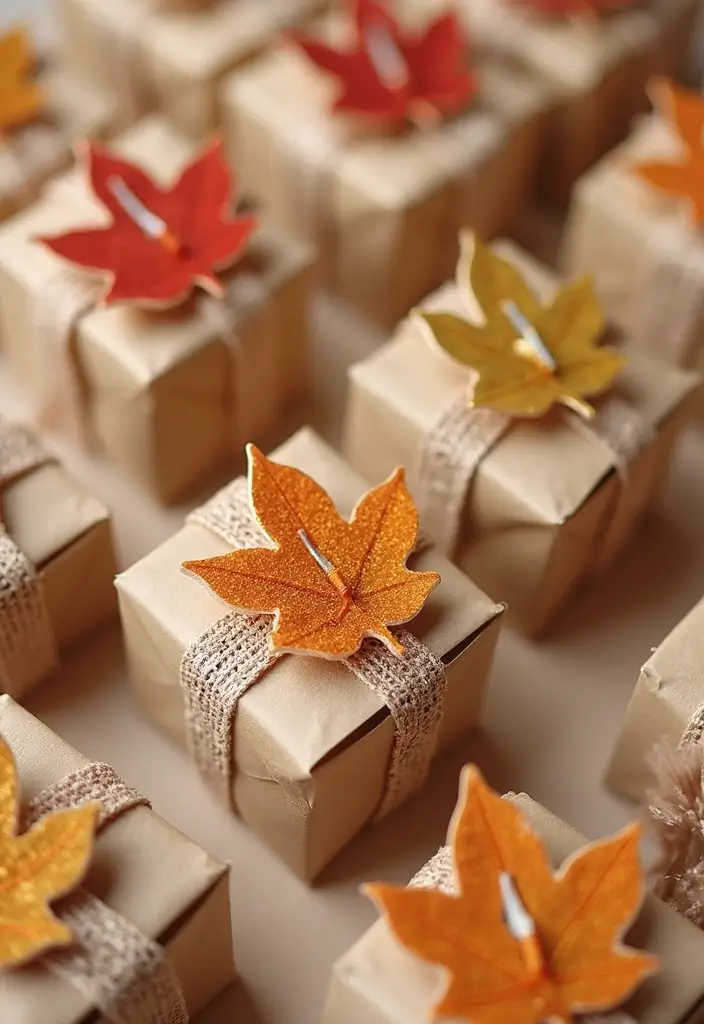
You want a small, personal touch for gifts. Leaf gifts and favors fit many events. They feel natural and warm. You can make them with simple paper leaves and a kind message.
Materials
– Lightweight paper leaves
– A fine pen
– Small treat bags or bookmarks
– Twine or ribbon
Steps
1. Cut out tiny leaves from sturdy paper.
2. Write a short thank-you note or quote on each leaf.
3. Tie the leaf to a treat bag or slip it into a bookmark.
4. Add twine to finish.
Here is why it helps: it is easy, inexpensive, and personal.
Ways to use
– Tie a leaf to favor bags at weddings or birthdays
– Create nature-inspired bookmarks
– Use as simple place cards by writing names on leaves
Seasonal ideas
– Match leaf color to the event
– Fall leaves for autumn parties, spring leaves for showers
– Pair with a rustic ribbon for a cohesive look
Tips
– Practice on scrap paper first
– Use water-based ink to avoid smearing
– Seal or laminate for longer life
– Store in a dry spot to keep leaves flat
– Use a simple, legible font if you print messages
Next steps Choose a style, gather supplies, and try a small batch.
26. Leaf Animal Art
Leaf Animal Art
You want a creative project that is fun and easy. Turn real leaves into animals. It works indoors or outside on a simple sheet of paper or a canvas.
Here is why you should try it: using different leaf shapes helps kids learn about parts of bodies and how nature makes fur in many forms. I’ll explain how to do it.
– Gather leaves with varied shapes and sizes.
– Plan your animal. Place leaves on a backing to see how the pieces fit before you glue.
– Glue the pieces. Use a light dab so the leaves stay flexible and you can adjust.
– Add details with markers or paint. Draw eyes, noses, and tiny paws to bring the creature to life.
– Try a real leaf twist. Use real leaves as the main body instead of cutouts for a fresh feel.
– Frame or tape your art. Hang it on a wall or fridge to spark daily nature talks.
Next steps: collect more leaves after a walk, and try a whole family of leaf animals. Encourage kids to name them and share a short story about their life.
Keep a simple supply kit ready. Glue sticks, markers, brushes, and a sheet of clean paper help you stay organized.
@media(max-width:480px){
27. Leaf Stencils for Wall Art

Want wall art that feels natural and easy to make? Leaf stencils give you nature-inspired decor with minimal fuss. You can brighten a hall, bedroom, or living room with simple shapes and clean color.
What you’ll need
– sturdy cardboard or acetate for stencils
– real leaves or printed leaf shapes
– painter’s tape
– acrylic paint or spray paint
– small brushes or a sponge
– a wall or canvas as your surface
How to make it
– Choose leaf shapes you love.
– Cut out crisp outlines from your stencil material.
– Tape the stencil in place.
– Press gently so it stays flat.
– Apply paint with a sponge for soft edges.
– Or use a brush for crisp lines.
– Lift the stencil slowly to reveal the leaf.
Ways to get depth
– Layer colors. Start light, then add a darker shade for shadows.
– Use a single hue for a minimalist look.
– Mix large and small leaves for visual interest.
Fun twists
– Glow-in-the-dark paint adds a surprise after dark.
– This method works well for renters. It’s easy to switch patterns without a permanent mark.
Finishing touches
– Let paint dry fully. Seal with a clear matte spray to protect the art.
– Hang where light hits the leaves to create shifting shadows.
End note
– Play with spacing to cover a panel or form a border. Nature-inspired decor can feel close by.
28. Leaf Crown for Kids
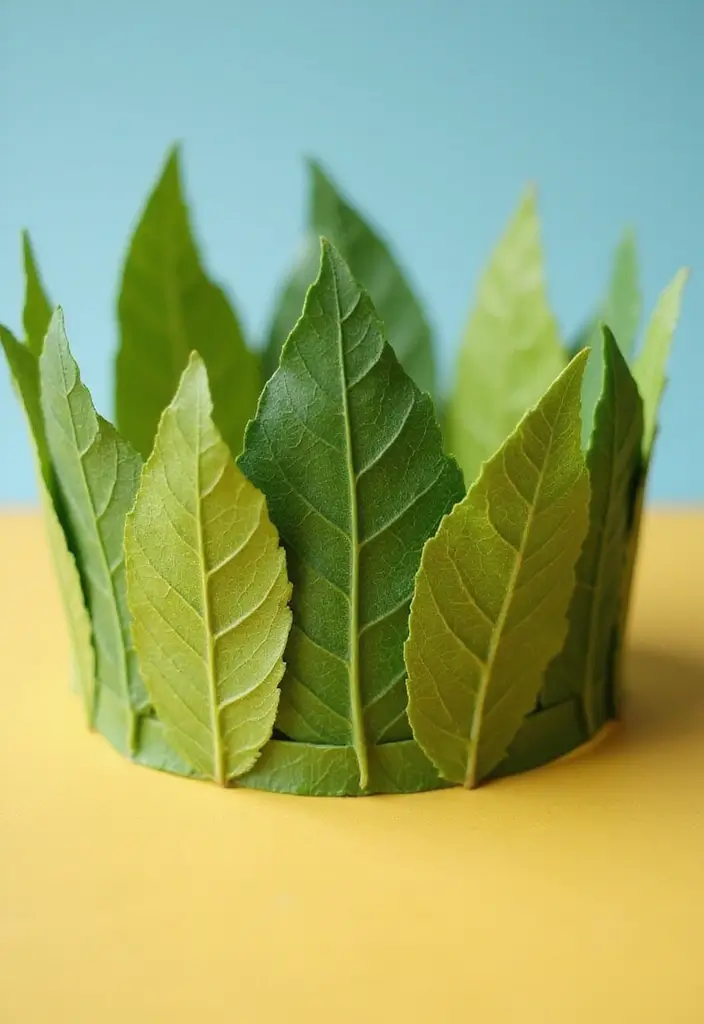
Does your kid want a craft that feels like a walk in the park? A leaf crown gives them a wearable piece of the outdoors. It’s quick, fun, and perfect for pretend play. It’s safe when you supervise.
What you need
– sturdy cardboard circle
– real leaves in different shapes
– non-toxic glue
– kid-safety scissors (adult help)
– ribbon or elastic to wear
– optional flowers, glitter, or pine needles for texture
How to make it
1) Cut a circular disk that fits your kid’s head.
2) Glue leaves around the edge to form a pattern.
3) Fill gaps with small leaves and let it dry.
Ways to mix it up
– Try two colors of leaves for a bold look.
– Glue leaves onto a colored backing for contrast.
– Add tiny flowers or safe glitter to sparkle in the sun.
– A ribbon on the back helps it stay on for a snug fit.
Learn as you go
– Talk about leaf shapes, veins, and where each leaf comes from.
– Name trees like maple, oak, and birch as you place them.
– Ask which leaf comes from which tree.
Safety and care
– Use adult help with scissors.
– Keep small pieces away from younger kids.
– Store flat in a box to keep the leaves crisp.
Next steps: wear it for a parade, photos, or outdoor play. It’s a simple way to bring nature into everyday fun.
@media(max-width:480px){
29. Leaf Alphabet Art

Leaf Alphabet Art
You want a project that teaches letters and brings in nature. Leaf alphabet art does both. Cut leaves into the shape of letters to spell words or names. It’s simple for kids and looks good on a wall or desk.
What you’ll need
– Fresh or pressed leaves in different sizes and colors
– Small scissors or a craft knife
– Cardstock, poster board, or a shallow frame
– Clear glue or double-sided tape
– Optional: a clear spray sealer to help leaves last longer
How to make it
1) Pick a short word or name. Keep it easy to cut.
2) Trace letter outlines on cardstock if you’re new to cutting.
3) Cut each leaf to fit its letter, shaping curves and straight lines.
4) Glue the letters in order on the base. Let it dry before hanging.
Display ideas
– Frame the letters for a neat wall display.
– Create a small banner for a desk or shelf.
– Mix greens and autumn hues for a seasonal look.
Why it works
Here is why this project helps learning.
– The leaf shapes give a hands-on way to learn letters.
– Color variety keeps kids curious about print and font.
Care tips
– Press and dry leaves to stop curling.
– Keep away from direct sun to slow fading.
– If you seal them, do it lightly so colors stay true.
Next steps
Try different words, leaf colors, and frames. You’ll teach letters while enjoying nature in your home. Have fun with it.
@media(max-width:480px){
Conclusion

These paper leaf crafts are not only fun but also a wonderful way to celebrate the beauty of nature while promoting eco-friendly practices.
No matter your skill level, there’s something on this list for everyone to create. Dive into these projects and let your creativity blossom! Share your favorites, and inspire others to connect with nature through art.
Note: We aim to provide accurate product links, but some may occasionally expire or become unavailable. If this happens, please search directly on Amazon for the product or a suitable alternative.
This post contains Amazon affiliate links, meaning I may earn a small commission if you purchase through my links, at no extra cost to you.
Related Topics
paper leaf crafts
nature decor
eco-friendly crafts
DIY home decor
fall crafts
kids crafts
quick projects
handmade gifts
sustainable art
easy DIY
seasonal decor
nature-inspired