I put this post together because I wanted easy, affordable ways to brighten any room. Lately I keep reaching for paper crafts—soft colors, clean lines, and a little texture that feels handmade. Here is why it matters: small, DIY decorations can change the whole vibe of a space without big costs.
If you enjoy quick weekend projects and decorating on a budget, this is for you. If you want spaces that feel cozy and calm, with a touch of whimsy, you’ll find ideas that fit.
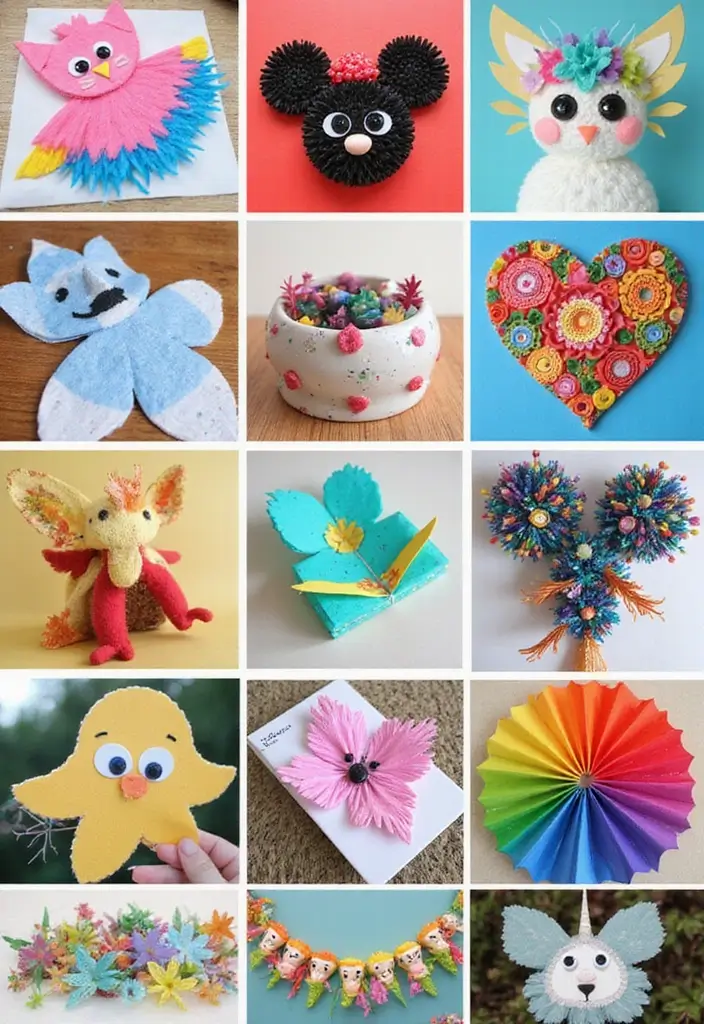
I pulled together 29 paper crafts DIY decoration ideas that are doable with common materials. Think paper garlands, paper lanterns, wall art, and 3D shapes you can bend and shape with ease. Each idea uses simple supplies like printer paper, construction paper, string, glue, and tape. They’re easy to customize with your color palette to match any room. Here is What you’ll get from this round up: practical, pretty, and easy-to-try ideas.
These ideas work in many rooms—a bright living room, a calm bedroom, a sleepy hallway, or a kid’s corner. They stay lightweight and clean, so you can switch them with the seasons or as trends drift.
Here is how to get started. Pick a color plan, gather basic supplies, and choose one or two ideas to begin with. Start with simple projects and save the trickier ones for later. Set a small timer and work in short bursts to keep the space tidy.
By the end you will notice brighter rooms and a sense of pride that comes from making something with your own hands. These paper decorations are affordable, low mess, and highly adjustable. If you’re ready to brighten your space with DIY decoration ideas, you’re in the right place.
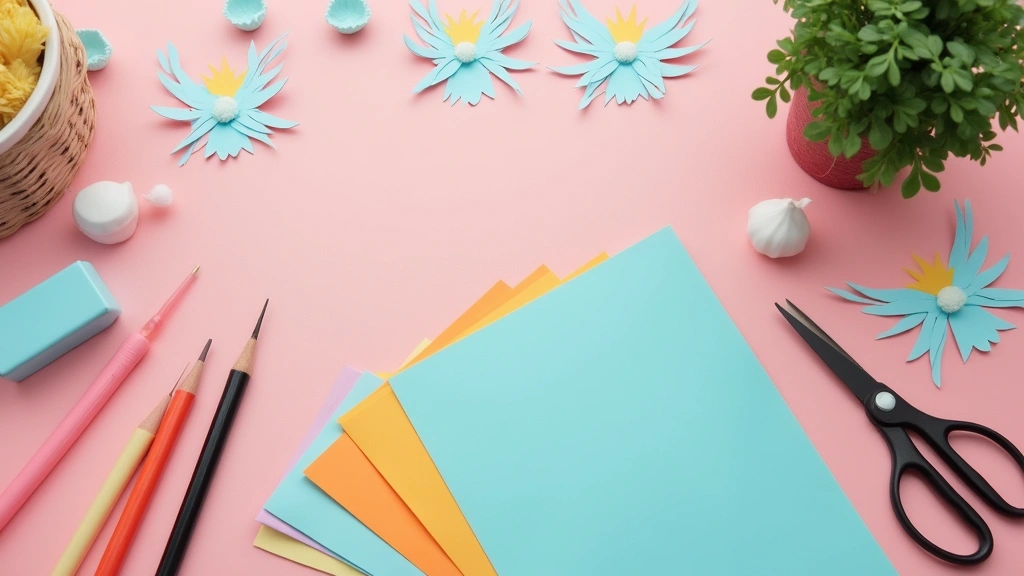
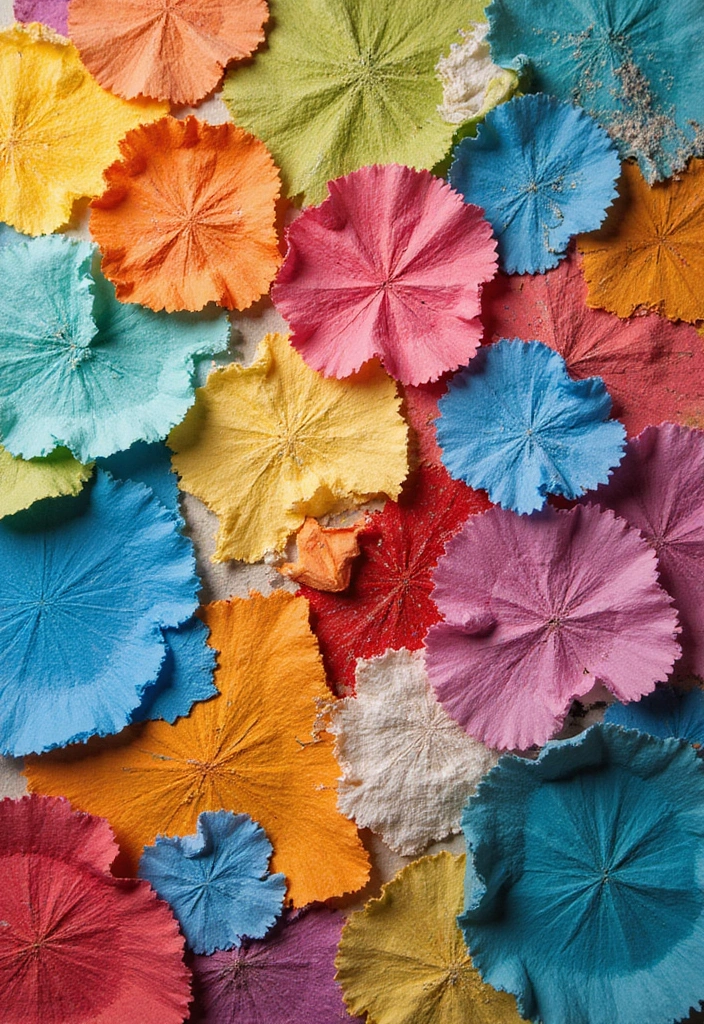
1. Whimsical Paper Flowers
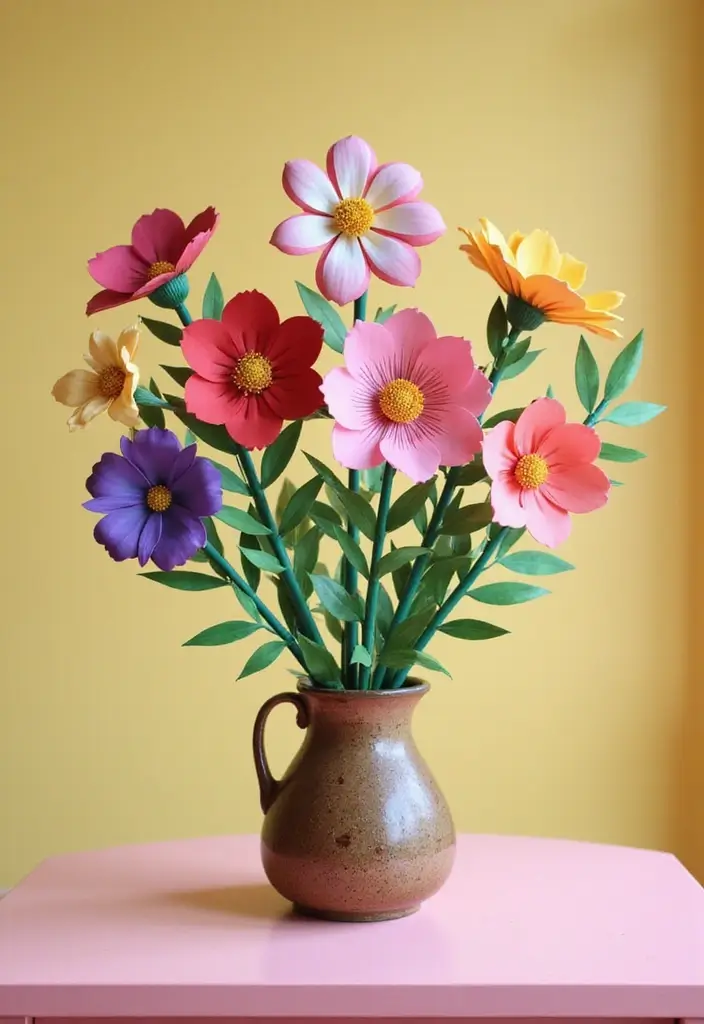
Want decor that brightens a room and lasts? Whimsical paper flowers fit the bill. You can craft them from colored paper, tissue, or even pages from an old book. They stay fresh in a vase and never wilt, and you control the look.
Here is why they work. They are light to hang and easy to move. You can reuse scraps to cut costs and waste.
What you’ll need
– Colored paper, tissue, or repurposed book pages
– Scissors and glue
– Wooden dowels or sticks for stems
– A pencil or straw to shape petals
– A vase or a simple board for a flower wall
Steps to craft simple blooms
– Step 1: Cut petals in a mix of shapes and sizes
– Step 2: Layer petals with glue to build depth
– Step 3: Add a small center with a circle of paper
– Step 4: Attach a stem with tape or glue
– Step 5: Fluff and bend edges to make the bloom look real
Display ideas
– Create a flower wall by mounting stems on a board
– Use a tall vase for a bright centerpiece
– Place a few blooms along a shelf for color accents
Care and quick tips
– Mix sizes and colors to match your space
– Reuse pages for a vintage vibe
– Keep flowers dry and away from direct sun to avoid curling
Eco note: choosing scraps means less waste and more love for your room.
Recommended Products

【Package Includes】:You will receive 100 pcs floral stems wire for paper flower.Dark green floral stem wire is very suitable for art and craft projects,and you can use it to make wreaths,bouquets,crowns,paper ball decorations.

【Package】300g as one package, 60 pcs high quality green flower arrangements wire per package. This quantity can meet your daily needs.

18 Gauge flower stem wire Size:long about 15.35-15.74 inch/39-40 cm, diameter 0.06 inch/ 1.7mm; It is flexible and can be twisted easily without fracturing, which will bring more convenience during the craft making.
2. Origami Wall Art

Here is why origami wall art fits your space. It adds texture and color without heavy frames. It can become a calm, personal feature you love.
What you need
– Lightweight origami paper or copy paper that folds well
– Patterned or metallic paper for bright accents
– A clean wall or a shadow box for depth
– Tape or a frame to hold pieces
Next steps
– Pick a simple design. Start with geometric shapes like triangles or a hexagon. You can add flowers or small animals later.
– Learn a few basic folds. A firm crease keeps pieces neat. Fold in half to make a triangle, then fold edges toward the center.
– Make a few units. For a bold display, aim for 6 to 12 modules. Arrange them in a circle, grid, or a diagonal line.
– Mount your art. Frame three to five pieces or slide them into a shadow box for depth.
– Place and light. Hang at eye level in a bright spot. Metallic papers catch the light and add a soft glow.
What you gain
– A simple craft that invites conversation
– An affordable decor you can swap as you please
– Easy updates as seasons or moods change
@media (max-width: 600px) {
.visual-quiz-iframe { min-height: 995px !important; height: 1100px !important; }
}
3. Paper Mache Bowls
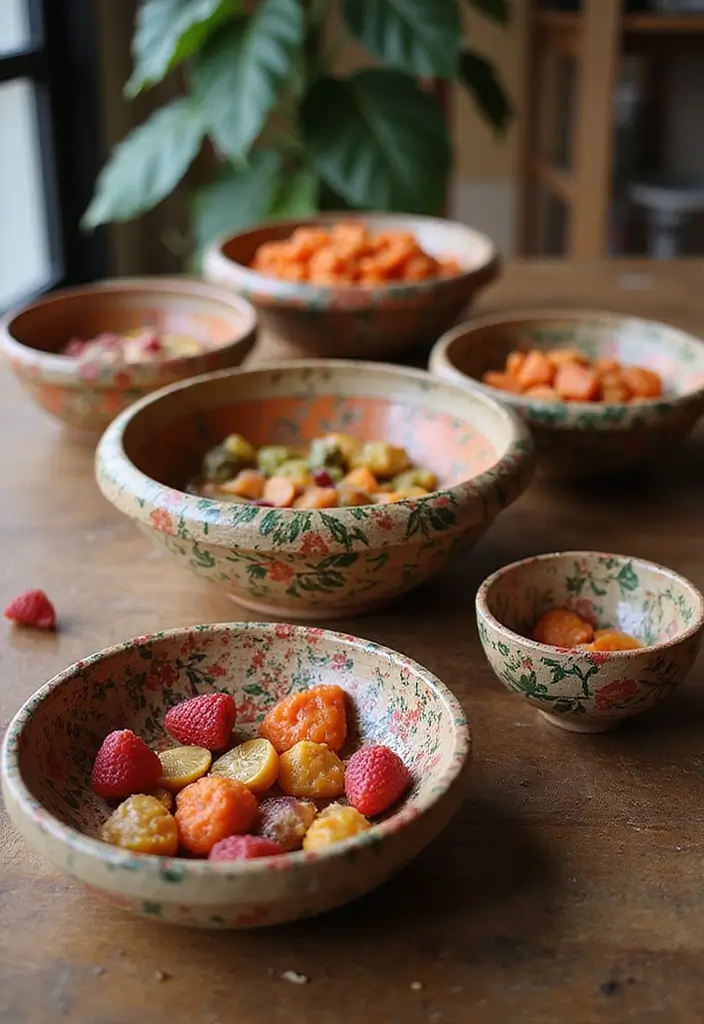
You want decor that stands out and costs little. Paper mache bowls do that. They turn old newspapers and magazines into textured, eye-catching pieces you can place anywhere. Use them on a coffee table, kitchen counter, or your entry shelf. They come in many sizes and shapes. You can fill them with keys, coins, or tiny decor items. For a true eco touch, you upcycle waste into art.
Here is why this works. It’s simple, repeatable, and forgiving. Now let’s break it down so you can start today.
– Gather your supplies: torn newspaper strips, flour and water to make a paste, a balloon or small bowl to mold around, a craft painting kit, and optional fabrics or washi tape for decoration.
– Make the paste: mix flour with water until the mix is smooth and runny enough to soak the paper.
– Build the shape: dip strips in the paste, then lay them over the balloon or bowl. Smooth each strip flat. Add more layers until you get the thickness you want.
– Dry thoroughly: let the bowl sit in a warm, dry spot for a day or two. It should harden before you handle it.
– Decorate: paint with acrylics, wrap the rim with fabric, or press on washi tape for color and texture.
– Use safely: don’t store wet foods inside. If you want to hold fruit or snacks, line the inside with plastic or parchment first.
Next steps: seal the finished piece with a clear coat so it lasts longer. This keeps your handmade bowl looking fresh while staying eco-friendly.
4. Hanging Paper Decorations
Want a quick, cozy update for any room? Hanging paper decorations are affordable, easy to make, and big on charm.
Materials you’ll need
– Tissue paper or origami paper
– String, twine, or lightweight cord
– Scissors and tape
– Glue dots or a small stapler
– Battery LED lights or a string of fairy lights
– Optional: hole punch for clean shapes
Three simple ideas to try
– Garlands: Cut shapes like circles, stars, or pennants. Punch holes at the top. Thread them on string with equal spacing. Hang across a wall, doorway, or under a shelf.
– Lanterns: Make an accordion fold with two sheets of tissue. Tie the center with string and fan out the sides. Place a tiny LED inside for a soft glow. Hang near windows or from the ceiling.
– Paper puffs: Stack 8 to 12 tissue sheets and secure the center with a string. Pull each layer up and apart to create a fluffy ball. Suspend from ceilings or door frames.
Where to place them
Hang decorations from the ceiling, along a wall, or over a doorway. Drape LED lights behind them for a gentle glow and added depth. Keep cords out of walkways and away from heat sources.
Color and season tweaks
Mix bright colors for a party vibe or stick to soft neutrals for a calmer look. Change shades with the season: pastels in spring, bold hues in summer, warm tones in fall, cool whites or blues in winter.
Quick maintenance tips
Store flat shapes in a box. When you reuse them, re-fluff the puffs and reseat the garland. A gentle shake helps colors stay vibrant.
Next steps
Pick 2 shapes, 2 colors, and a small light set. Create a short test display to see how the space feels. Then expand with extra layers for a fuller look.
@media(max-width:480px){
5. Paper Butterfly Wall

You want a wall that feels alive without heavy frames. A paper butterfly wall adds light color and a soft touch with just a few steps. Here is why it works: it’s cheap, easy to change, and kid-friendly.
What you need
– Paper in different colors and patterns (construction paper, origami paper, or scrapbook sheets)
– Scissors
– Double-sided tape or small craft dots
– Ruler and pencil
– A plan for your wall space
How to make them
1. Cut butterfly shapes in a mix of small, medium, and large sizes.
2. Fold the wings slightly to give a quiet 3D lift.
3. Place a dot of tape on the body and press the butterfly onto the wall.
4. Try several colors and patterns to keep the look fresh.
5. Leave space between butterflies so they “dance” across the wall.
Layout ideas
– Create a flutter line along a doorway or shelf edge.
– Make a loose cluster for a focal point.
– Arrange a symmetrical grid for a calm, orderly vibe.
Care and placement
– Use gentle tape to avoid wall damage.
– Dust with a soft cloth every few weeks.
– Move or recolor as your room style changes.
Where to use
Ideal for nurseries, playrooms, or bedrooms that need a soft, friendly touch.
You can start with a small corner and grow the display over time.
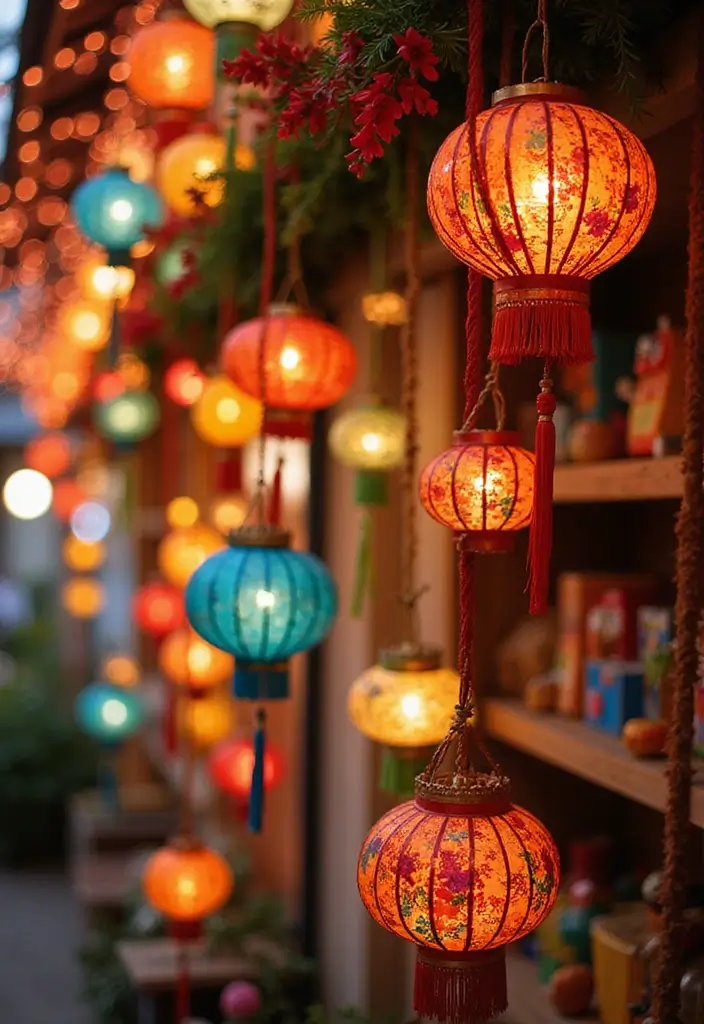
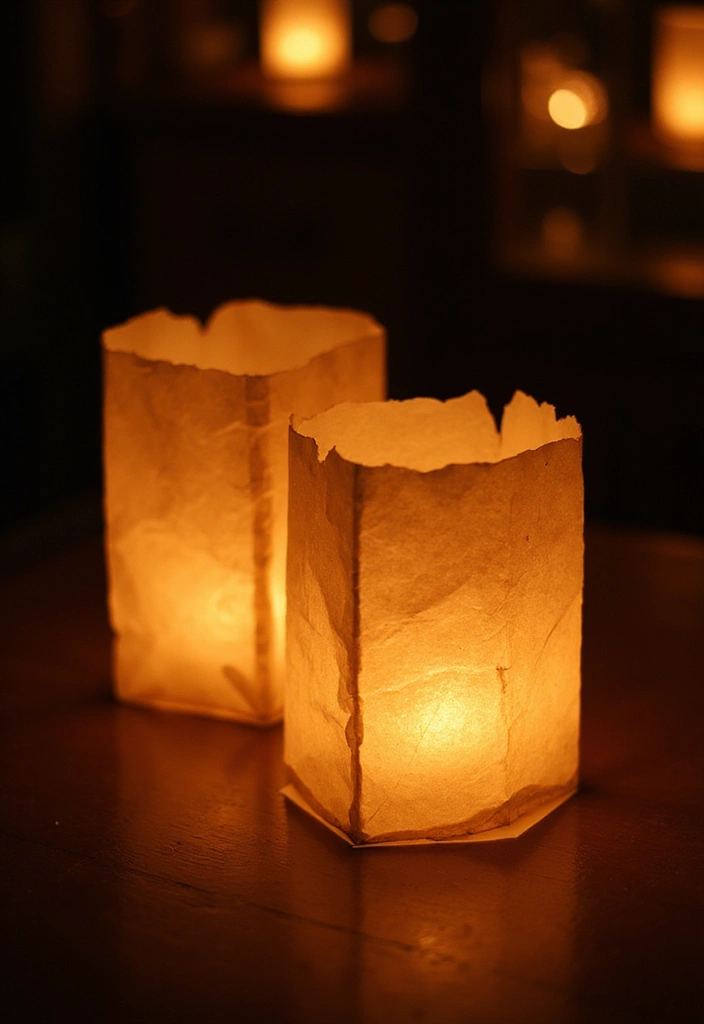
6. Paper Lanterns
Materials you need
– Thin parchment or colored paper that lets light glow through
– A simple frame or a rolled strip of card to hold the lantern shape
– String, twine, or fishing line for hanging
– Tape or glue to seal the edges
– A safe light inside: battery-operated tea lights or small LED string lights
How to build it
1. Cut a circle for the top and bottom of your lantern.
2. Cut a long strip and wrap it to form a tube. Tape the seam.
3. Add a lightweight frame at the top and bottom so the lantern holds its shape.
4. Decorate by punching or cutting small patterns. The light will cast soft shadows.
Lighting and safety
– Use battery lights only. No real flame
– Check the lantern for heat after a few minutes of use
– Hang them where they won’t touch curtains or walls
Placement ideas
– Hang in clusters from the ceiling for parties
– Set a few on shelves or a table with a cozy backdrop
– Mix colors to match your room
– Try different sizes to add depth to a corner
– White paper makes a gentle glow, while bold colors liven a lively space
– Stack them flat when you store them away
@media(max-width:480px){
@media (max-width: 600px) {
.normal-quiz-iframe { min-height: 570px !important; height: 570px !important; }
}
Recommended Products

【Multifunctional Paper Lantern Lights】 : These small lights are designed with hook on the bottom which can be hanged into the paper lantern and also as submersible lights, vase centerpieces light ,hot tub lights and pond lights.

Non-blinking. Color Temperature: 3000K (Warm White).

High Quality Materials:The use of high-quality plastics that are non-toxic and tasteless will not cause harm to the human body.It will not be dangerous to children and can be used with confidence
7. Paper Wreaths
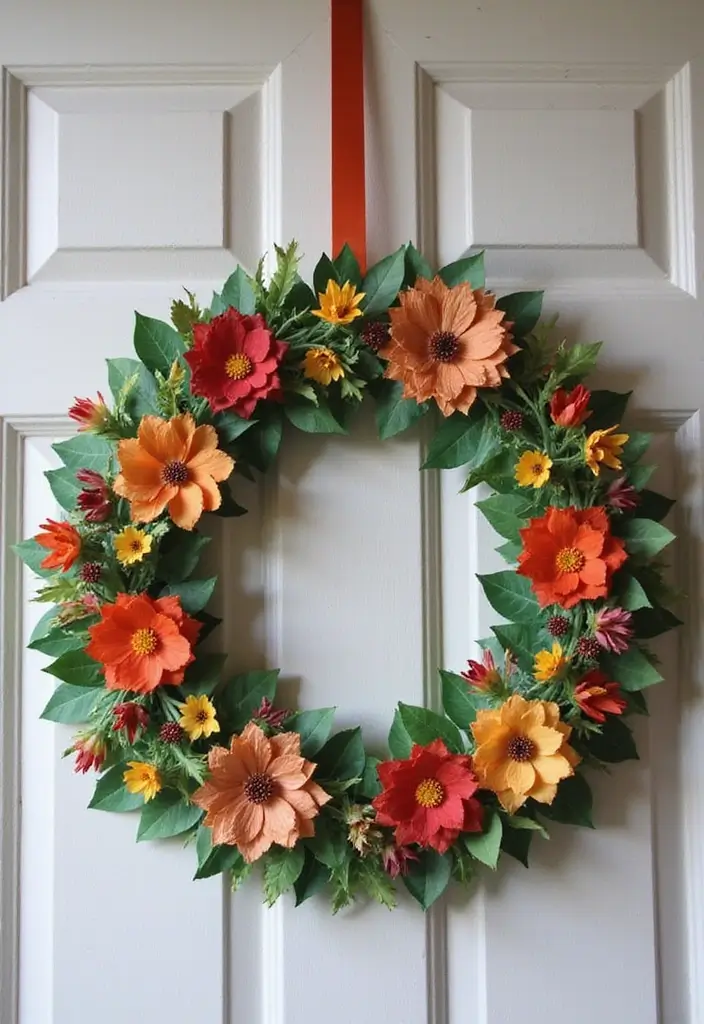
You want a cheerful decor piece you can make at home. A paper wreath fits that need. It stays easy to change with the seasons or your mood.
What you need
– A cardboard circle base to form the wreath.
– Glue and scissors to attach pieces.
– Paper scraps in colors you love.
– Optional textures like fabric or burlap for a tactile feel.
Here is how to make it
– Start by planning your layout. Pick a few shapes you like, such as leaves, flowers, or abstract cutouts.
– Glue the first pieces to the circle. Place larger pieces toward the center and smaller pieces toward the edge.
– Layer more pieces on top. Overlap them slightly to create depth.
– Add texture with fabric strips or burlap before finishing with a few flat paper accents.
– Attach a hanging option, such as a ribbon loop or a small hook, so it rests nicely on a door or wall.
Tips and ideas
– Try seasonal colors: red and green for winter, pastels for spring, warm browns and oranges for fall, bright tones for summer.
– Keep a simple color palette for a modern look.
– Hang it on a door to greet guests or on a wall as a focal point.
– Protect the wreath from sun and humidity; store it in a dry box when not in use.
Next steps
– Refresh the look with new shapes or colors whenever you want a quick update.
– Use different sizes to create a small and large display.
Recommended Products

【Premium Soft-Touch PE & Multi-Textured Design】Lslefu exclusive lavender wreath is made of high-quality soft-touch PE material, with plump, lifelike petals and comfortable tactile feeling. Different from stiff and cheap ordinary plastic wreaths, our handmade wreath integrates delicate paper flowers and soft fabric blooms. The layered and rich textures restore the natural beauty of real lavender, avoiding fake and rigid decorative effects, bringing vivid and fresh visual enjoyment to your home space.
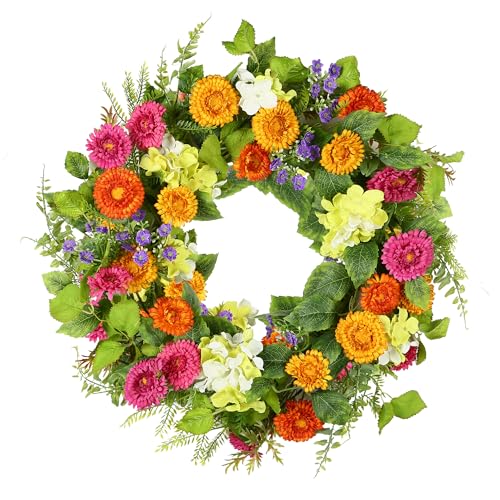
LIFELIKE FLOWER WREATH: YNYLCHMX spring summer flower wreath is surrounded by lush tea leaves and colorful daisy flowers that make this 20-inch wreath look more vivid and colorful, adding a fresh breath to your home around the whole year.

Dual Attachment Design: Our 3D Butterfly Wall Decor features magnets that allow butterflies to stick to any metal surface. Double-sided glue dots design helps stick to anywhere you want, not easy to fall or damage the wall
8. Decorative Paper Chains

Want quick decor that fits a budget? Decorative paper chains work. They brighten a room and use simple supplies. They suit parties, hallways, and everyday spaces. You can make them with kids or on your own. Here is why they help your space. They’re light, cheap, and easy to store for later use.
Materials you’ll need
– patterned scrapbook paper or recycled paper
– scissors and a ruler
– glue or tape
– string or twine
– a stapler or sewing needle (optional)
How to make them
1) Cut strips about 2 cm wide and 10 cm long. Shorter strips make smaller links.
2) Thread a strip into another to form a loop. Glue or tape the ends.
3) Add more strips to create linked chains. Repeat until you reach the length you want.
4) Tie the ends to a string or attach with tape to hang. You can layer several chains for depth.
Easy design ideas
– Use different patterns to match your room. Pick a color theme.
– Mix plain and printed papers for a bold look.
– Add a metallic or pastel twist for a modern vibe.
Placement tips
– Drape chains from the ceiling for movement. Wrap them around a mirror frame for a fun edge. Hang them above a table to frame a party setup.
Next steps: Do a small test run, then scale up.
@media(max-width:480px){
9. Upcycled Book Page Banners
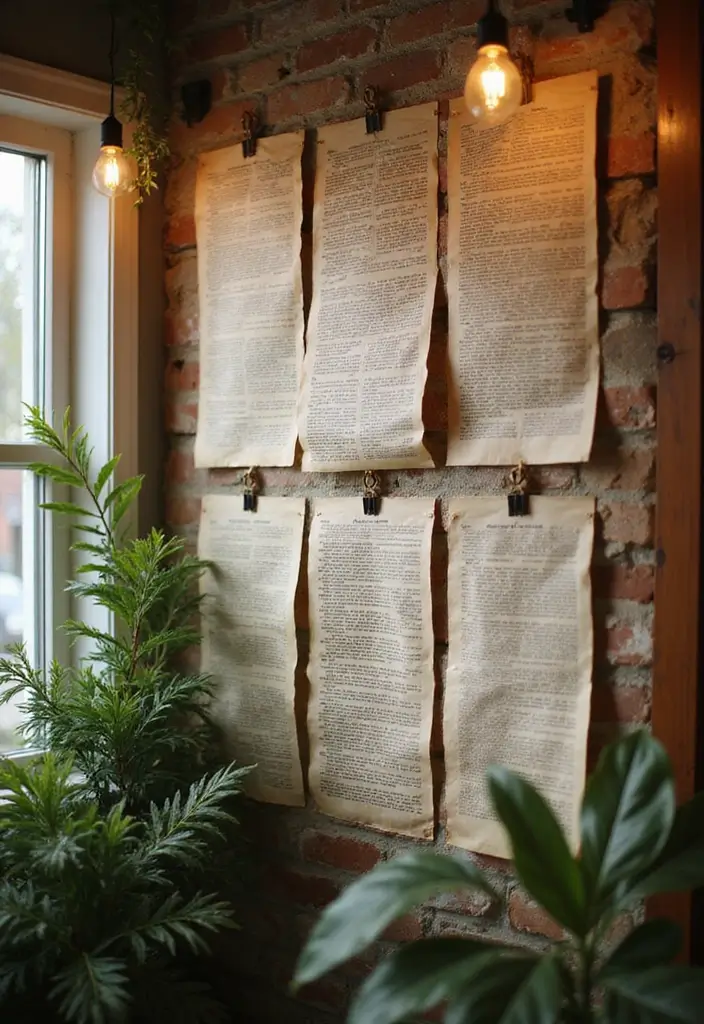
Want a cozy bookish touch without spending much? Turn old books into banners made from their pages. These upcycled book page banners bring a warm, vintage vibe to any room. You’ll see texture, color, and a hint of story in every strip. Best of all, you give new life to pages headed for the trash.
Here is why this idea works. Paper is light and easy to cut. It takes paint and markers well. You can keep the words and images as they are or add soft color for a playful look. The result feels personal and unique, not store bought.
What you need
– Pages from old books (avoid glossy pages)
– Scissors, a ruler, and a pencil
– Twine, ribbon, or sturdy string
– Optional: acrylic paints, stamps, or markers for tiny accents
Steps
– Cut pages into triangles or your favorite shapesnn
– Punch holes or create small slits at the topnn
– Tie shapes onto the string in a loose patternnn
– Add light paint or stamps if you want a pop of color
Display ideas
– Hang a long banner along a sofa wallnn
– Drape it over a mantel or above a fireplace for a literary focal pointnn
– Layer with greenery or soft lighting for a cozy nook
Next steps: start with a short strip, then add longer banners as you gather more pages. Enjoy the calm, bookish vibe you create.
10. Paper Collage Art
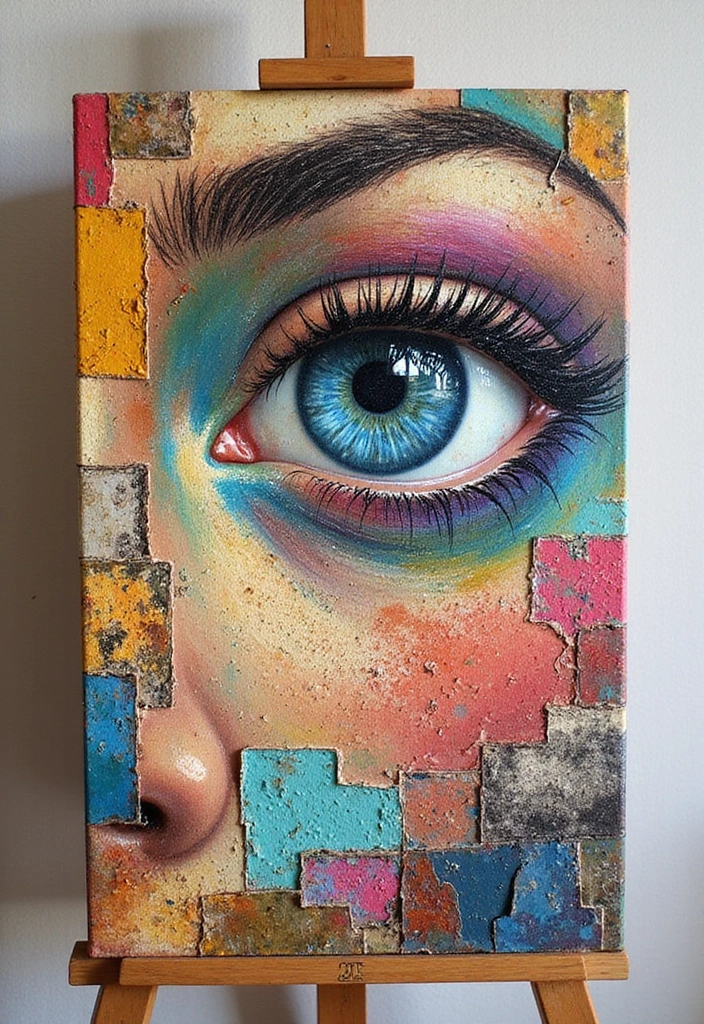
Want a quick, affordable wall piece? Paper collage art lets you mix colors, textures, and shapes. It helps you tell a story with scraps from magazines and paper you save.
Here is why it works. Layering papers adds depth. Small shapes become bold as you place them on a sturdy base.
Materials
– Old magazines, scrapbook paper, newspaper clippings, and decorative scraps
– A sturdy base: canvas, wood panel, or thick cardboard
– Glue or Mod Podge, scissors, a craft knife
– Optional: acrylic paints, markers, or washi tape for accents
– Clear sealer to protect the finished piece
How to make it
– Step 1: Pick a theme and collect pieces that match it
– Step 2: Cut out images and shapes
– Step 3: Lay out the design on the base before glue
– Step 4: Glue pieces down, one by one. Press and smooth
– Step 5: Let it dry. Trim edges if needed
Tips for your collage
– Start with a loose grid or a central focal image
– Vary scale and texture
– Use a unifying color or pattern
– Add small surprise shapes
Care and display
– Seal with a light clear spray to protect
– Let it dry fully
– Hang on a simple frame or mount on a backing board
– Place away from direct sun to keep colors from fading
11. DIY Paper Coasters
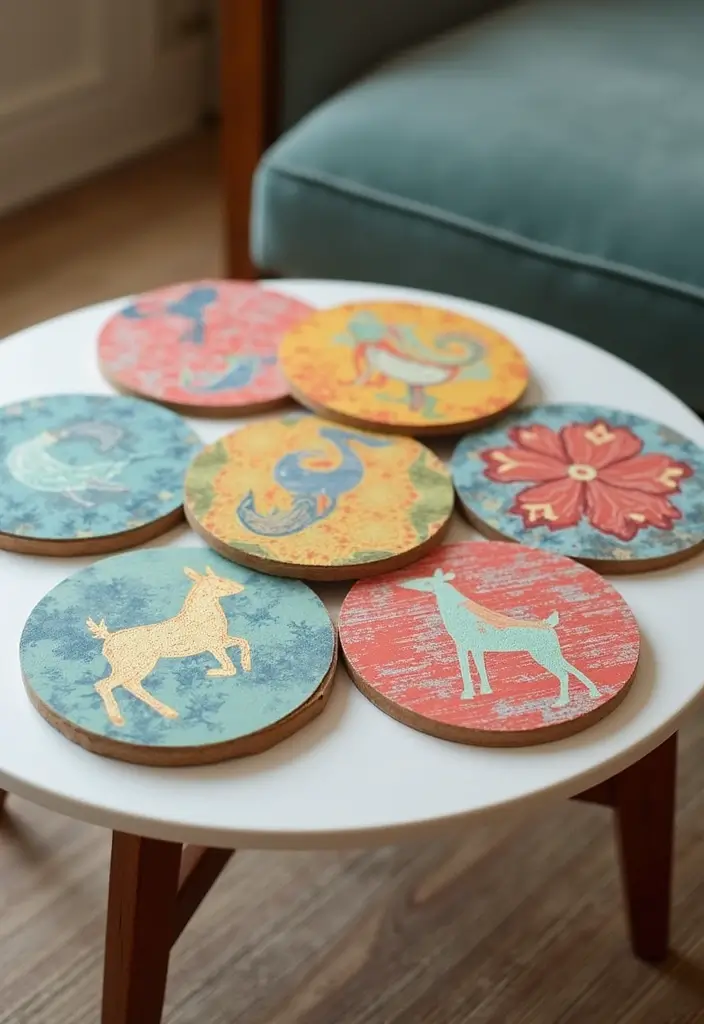
You want to protect your table and add a touch of style at the same time. DIY paper coasters do both. They fit any room and any mood.
Here is why they work. They’re quick to make, cheap, and you can reuse scraps you already have. Let’s break it down with simple steps you can try this weekend.
What you’ll need
– Thick cardboard, chipboard, or strong cardstock
– Scissors or a circle punch
– Paints, stamps, or decorative paper
– Decoupage glue or mod podge
– A waterproof or water resistant sealant
Steps to make them
– Cut bases into circles or squares.
– Design the surface with color, stamps, or decoupage.
– Seal the top coat so drinks don’t soak in.
– Add a personal touch. Pick colors that match your table and space.
Tips
– Glue a thin cork layer to the bottom for grip.
– Use a quick-dry sealant so you can use them fast.
– Store a small stack for guests or last-minute gifts.
Common questions
– Are they absorbent? They absorb a bit, but the seal helps a lot.
– How long do they last? With a good coat, they stay tidy for some time and cost little.
Next steps. Grab scraps and make a couple of sets for your next meal or movie night.
Recommended Products

VINTAGE FRENCH PARIS DESIGN: Elegant Paris-inspired floral and newsprint artwork printed on premium A4 sheets (8.3 x 11.7 inches), perfect for creating antique, shabby chic, and European-style décor accents.

SIMPLE DESIGN - These round coasters are perfect for adding a handmade touch to your space - embellish your epoxy resin with glitter, gems, alcohol inks, and more!

Our DIY Package includes everything you need to make seashells trinket ring dishes or ornaments. Includes different colors and designs. (Note: The set does not include mod podge.) Colorful designs and our package comes with the popular white and blue chinoiserie design. The Shell Decoupage Kits are perfect for making stunning coastal-inspired decor or unique keepsakes!
12. Paper Quilled Art

Looking for a quiet, pretty art project you can finish in a day? Paper quilling turns plain strips into tiny curled shapes. It adds a soft, delicate look to any wall.
What you need
– Quilling tool
– Colorful paper strips
– Clear white glue
– Scissors
– Tweezers
– A stiff backing like cardstock or a small frame
How to start
Here is why this works. You roll, shape, and glue strips, then place pieces on a backing. Let glue set a bit before you move on. Start simple.
– Step 1: Cut 6 to 8 cm of color strips
– Step 2: Make a tight coil for the center, then add teardrops or curls
– Step 3: Arrange shapes on the backing and glue them in place
– Step 4: Frame the piece or mount it on canvas
Shapes to try
– Tight coils
– Loose coils
– Teardrops
– Scrolls
Finish and display
Add a clean border around the design. A light mat makes colors pop. Hang where light hits softly to cast nice shadows.
Care and limits
Keep quilled art in a dry room away from direct sun. Don’t move pieces while glue dries.
Next steps
Try a small floral or leaf motif. Use pastel tones for a calm look, or add a thin metallic strip for a modern touch.
13. Paper String Art

Feeling bored by flat wall decor? Paper string art can brighten a room with texture and color. It blends string work with cut paper for a fresh, handmade look. You’ll enjoy making it, and you’ll love how it changes a space when you hang it up.
Here is why this works: the base holds the string, while the holes guide your lines. The result is a piece that feels stitched and soft, yet bold in shape.
What you need
– Sturdy paper or thin cardboard as a base
– A needle or pin
– Colored thread, yarn, or twine
– Scissors
– An idea for a shape you like
Steps
– Cut a simple shape from the base material, like a heart, star, or circle
– Poke evenly spaced holes along the outline or inside the shape
– Weave the string through the holes to form clean lines and patterns
– Keep the tension steady and tie a small knot when you finish
– Hang the piece on the wall with a nail or frame
Tips and tricks
– Pick colors that fit your room and lighting
– Practice on scrap paper first to map your design
– Try double layers for more depth
– Start with a simple shape before moving to details
Next steps
Grab your supplies and turn string into art you can be proud of. A small, thoughtful piece can refresh a whole wall.
14. Scrap Paper Art
Don’t stash away those scraps. Turn them into art you can hang or gift. Scrap paper art uses any paper you have, from old magazines to cereal boxes. It is a simple, eco-friendly way to brighten a room and cut waste.
Here is why it helps. You use scraps you already own. That keeps waste down and rooms lively. Try several scraps at once to see how colors mix. You may notice a tiny glow where two pieces meet. You can also layer thin tissue over a bold print for a soft look.
Ideas to try
– Use small pieces to make a mosaic on a canvas.
– Layer scraps to form shapes, characters, or landscapes.
– Mix papers of different textures for depth and interest.
What you need
– Scraps of paper in colors and textures.
– A sturdy base like canvas or cardboard.
– Glue or Mod Podge.
– A brush or sponge for smoothing.
Next steps
1. Gather scraps that fit your idea.
2. Plan your layout on the base, and leave room to move pieces.
3. Glue pieces in place, then press gently to flatten.
4. Let it dry, then seal with a light coat of glue or varnish.
This craft stays simple and grows with you. It works well in small spaces and on big walls alike. Try a small scrap piece today.
@media(max-width:480px){
15. Decorative Paper Boxes

You want neat storage that adds charm. Decorative paper boxes give you both. They fit any shelf and make gifts feel personal. You can pick colors and patterns that match your room.
What you’ll need
– Sturdy paper or cardstock
– Glue or tape
– A ruler, scissors, and a light pencil
– A scoring tool or bone folder
– Optional: lid, wrap paper, or washi tape
How to build
– Cut your base to size.
– Score the edges for clean folds.
– Fold the sides and glue the corners.
– Add a lid for a snug cover.
– Let the glue dry before use.
– Score at every inch for a tighter box and reinforce with tape inside.
Ways to decorate
– Paint with acrylics or stamps for color.
– Wrap in patterned paper for a neat look.
– Add stickers, metallic pens, or strips of washi tape.
– Line inside with thin paper to hide edges.
– Glitter accents or a small ribbon add flair.
Smart uses
– Use small boxes for rings, clips, or desk supplies.
– Store photos, notes, or tiny keepsakes on a shelf.
– Create a set of sizes in matching colors for a tidy display.
– When not needed, store boxes flat to save space.
With a little care, these boxes stay sturdy and pretty. They brighten a room and help you stay organized.
Recommended Products

Practical Storage, But Make It Stylish: ZICOTO’s decorative storage boxes with lids keep your essentials neatly organized and add a sophisticated touch to any space. Perfect for storing jewelry, keepsakes, power cords, office supplies & more - all within easy reach

🎁Gift Box - RYDDOY Gift boxes with lids enhances your gift and makes it stand out. Saves you the need to hunt for wrapping paper, ribbon or tape to wrap your gift.

Versatile File Cabinet: Organize all your paperwork, letters, folders and hanging files in style with the portable ZICOTO file storage box Set of 2
16. Paper Teepee Décor
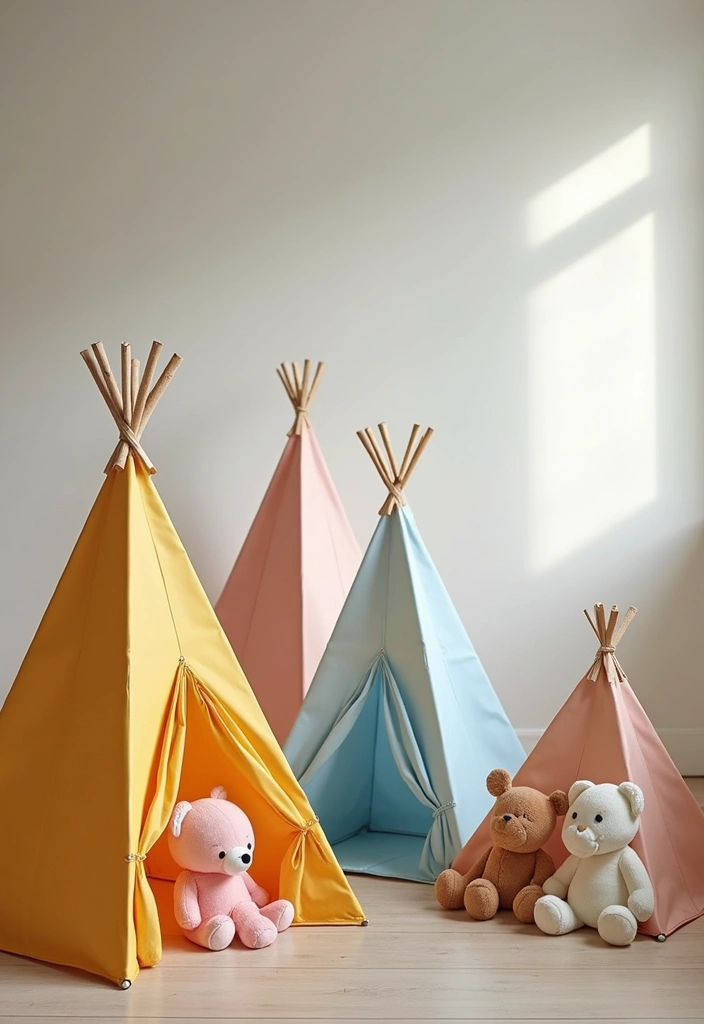
Want a cozy, kid friendly decor idea? Paper teepee décor fits a nursery or playroom. It adds a soft hideaway where imagination can grow. You get a tiny scene that invites reading, games, and calm moments. Here is a simple way to make your own.
What you need
– sturdy craft paper
– scissors and a ruler
– a pencil for marks
– markers, paint, or stickers
– tape or glue
– string lights (optional for a warm glow)
Steps
1. Cut a large circle on the paper. Fold and tape it into a cone so the top closes and the base stays flat.
2. Add four small paper legs or a sturdy base so the teepee stands up.
3. Decorate with color, stripes, dots, or names. Keep edges smooth for safety.
4. If you like, tuck a string of fairy lights inside. Plug in when you want a soft night glow.
Tips to use
– Pick light colors for a calm look.
– Secure pieces well so the teepee holds shape during play.
– Place it near a rug and comfy cushions for a ready space.
Why you’ll love it
It creates a mini space for play and reading. It teaches basic crafts without a big mess. It’s easy to adjust to any room size and style.
@media(max-width:480px){
17. Paper Mosaic Art

You want wall art that feels personal without a big price tag. Paper mosaic art lets you build a bright image from many tiny pieces. It’s simple to try and the finished piece can spark energy in any room. Here is why this approach fits you: small scraps become bold color, and you control every inch.
What you need
– Colored paper scraps
– Scissors
– Glue or mod podge
– A base like cardboard, thin wood, or a canvas
– A pencil for outlines
How to start
– Pick a design and collect papers that echo your space
– Draw a light outline on the base
– Cut papers into small squares or triangles. You can tear some edges for variety
– Leave tiny gaps for the mosaic look
– Glue pieces in place, one section at a time. Press gently and let dry
Tips to win with mosaic
– Work from the edges toward the center
– Mix light and dark colors for depth
– Seal your work if it will hang in a damp room
This craft builds patience and gives you a one-of-a-kind art piece. It costs little and lets you match any style. But it takes time, and you may need to re-glue if it loosens or gets snagged
Creative ideas
– Create a small frame to start, then expand to a grid to cover a larger wall
– Try a name, a simple landscape, or a geometric pattern for different looks
Next steps: hang your mosaic where you will see it daily, then add new pieces later to grow the design.
18. Paper Bead Jewelry
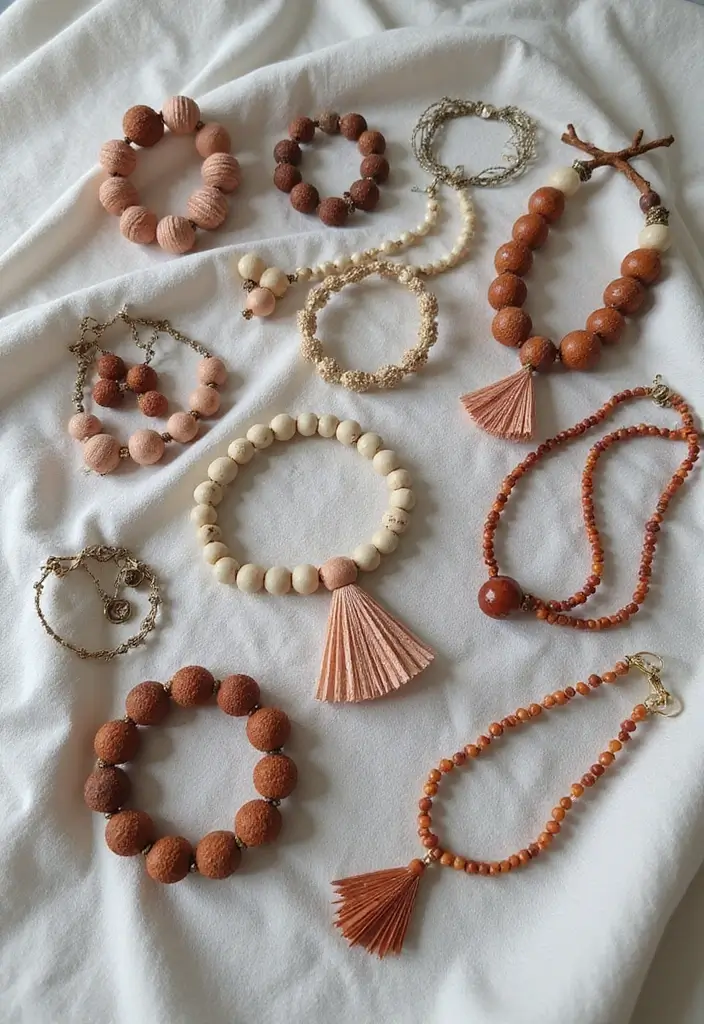
Want eco-friendly jewelry you can wear every day? Paper bead jewelry uses scrap paper to craft bright, light accessories. It’s fun, affordable, and kind to the planet. Here is why you’ll love it: you can make many pieces fast, and you recycle materials you already have. You can mix papers from old cards to add texture.
What you need
– Colored paper scraps (magazines, gift wrap, old cards)
– White glue or craft glue
– Scissors
– A skewer, toothpick, or thin needle for rolling
– Thread, cord, or elastic for stringing
– Clear sealant or varnish (optional)
How to make the beads
– Cut a strip about 1/4 to 1/2 inch wide. Longer strips make bigger beads.
– Roll the strip tightly around the skewer. Keep it steady and press the edge to seal.
– Let the bead dry completely. Slide it off gently when dry.
– Make many beads. Vary width, colors, and paper patterns for variety.
Finish and string
– Optionally seal beads with clear varnish for extra strength.
– Thread beads on a strong cord or thread. Create a necklace, bracelet, or pair of earrings.
– Try different shapes by cutting the paper before rolling or by shaping after rolling.
Tips and care
– Use upcycled paper to cut waste.
– Store beads in a dry place away from direct sun.
– These beads make thoughtful gifts and fun, practical projects.
@media(max-width:480px){
19. Paper Pinwheels
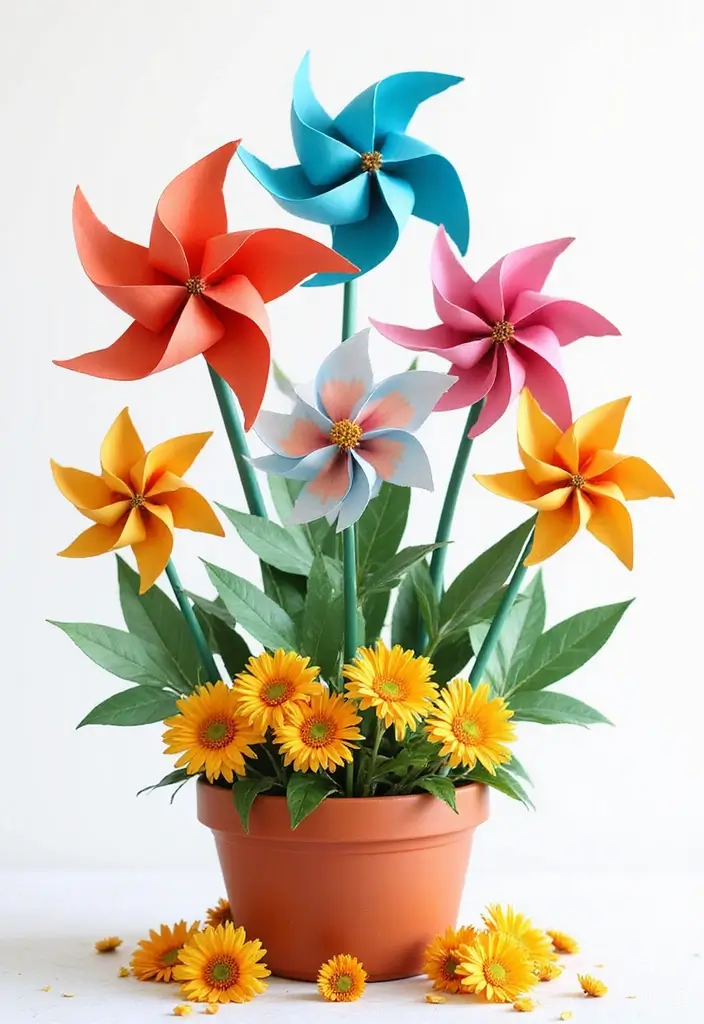
Want a quick way to brighten a room? Paper pinwheels do it with motion and color. They’re easy to make and safe for most beginners.
Here is why they work: the circular shape catches light and spins on a breeze. They bring a soft, playful motion to shelves, windows, or tabletops.
What you need
– Square paper (two colors for a bold look)
– Scissors
– A brad, tack, or glue dot
– A wooden dowel, stick, or skewer for the stake
Make it
– Cut a square piece of paper. If you want a bigger wheel, use a larger square.
– Cut evenly spaced slits toward the center. Don’t cut all the way through.
– Fold each corner inward and press so they meet at the middle.
– Secure the folds with a brad, tack, or a dab of glue at the center.
– Push the pinwheel onto a stick to display. You can hold it in a pot or hang it up.
Try different looks: use two colors on one wheel, use three sizes together, or mount them on a garland for a party vibe. These options give you variety without much extra work.
Display ideas
– Stand a few on a table for a playful centerpiece
– Clip or suspend in a window to catch the light
– Use as cake toppers for a fun, kid-friendly touch
Next steps: pick colors you love, gather the supplies, and start spinning. Your space will feel lighter and more inviting in minutes.
20. Paper Sculpture

You want a decor piece that really stands out. Paper sculpture lets you turn simple sheets into bold, 3D art. It’s eye catching and fun to make.
What you’ll need
– Cardstock or thin cardboard for sturdy shapes
– Scissors and a craft knife
– Ruler and pencil for clean lines
– Glue or clear tape
– Paint, markers, or colored paper for color and texture
– A flat surface and clips to hold parts as they dry
How to build
– Pick a simple shape. A cube, ring, or flower is a good start.
– Plan the cuts. Draw tabs and fold lines with a ruler.
– Cut and score. Fold along the lines to form sharp edges.
– Glue the joins. Press firmly and let dry.
– Add color. Paint, wrap, or layer colored sheets for depth.
Tips to try
– Start small. Build a few pieces first.
– Use light and shadow. Place it where light casts soft shadows.
– Mix sizes. A large piece with smaller ones creates drama.
– Mount on a board. A backing makes hanging easy and neat.
Where to display
– On a wall as a striking sculpture
– On a shelf as a focal point
– As a mobile by suspending pieces at different heights
Next steps
Experiment with shapes and tones. Your next paper sculpture can become your room’s art star.
21. Paper Star Decorations
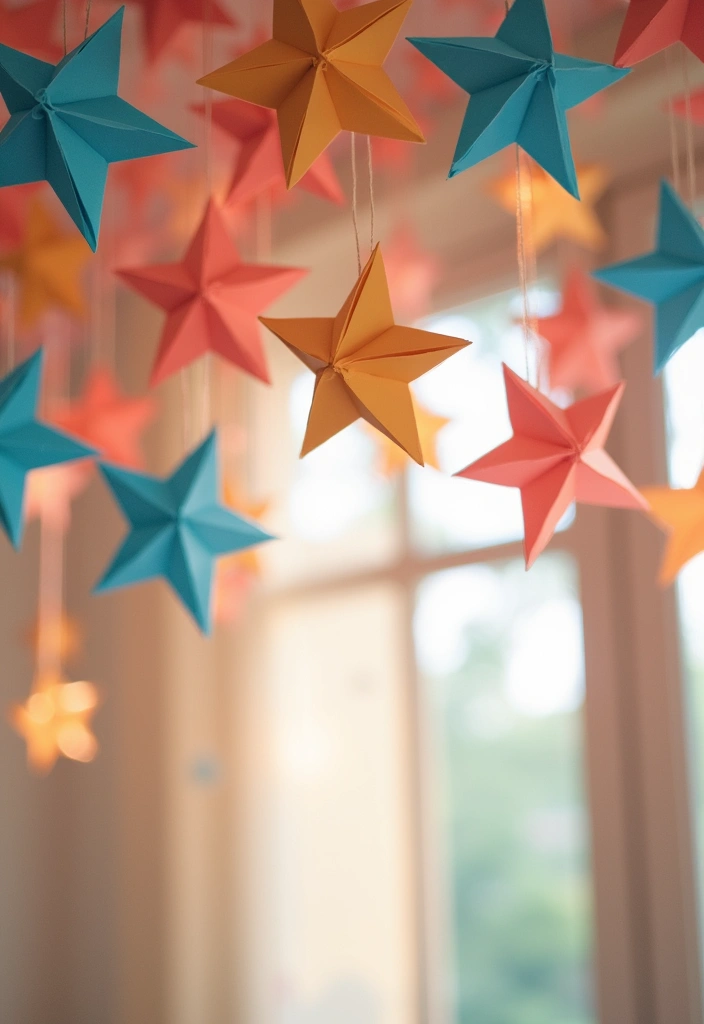
Need a quick way to brighten a room? Paper star decorations do it with little mess. They catch light and add a playful feel. Hang them from the ceiling or stick them on walls. They work for holidays or just a cheerful day at home.
What you need
– Colorful or metallic paper
– Scissors
– Craft glue or clear tape
– Thread, string, or fishing line
– A ruler and pencil
Steps
– Cut strips about 8 to 12 inches long and 0.75 to 1 inch wide.
– Fold a strip into a zigzag and pinch at the center to form a five-point star.
– Glue or tape the ends, then press the center to set the shape.
– Attach a small loop or a thread to the top point.
– Make several stars and line up the garland, or hang each star by its loop.
Display ideas
– Create a ceiling garland by spacing stars at different heights.
– Place a string of stars along a shelf or window sill.
– Add a small star cluster to a wall for a night-sky look.
Tips
– Mix colors and sizes for depth.
– Use lightweight paper to keep stars easy to hang.
– Store flat in a labeled bag for later use.
– Have kids help with tearing paper and sticking glue.
– If space is tight, place a star near a lamp to catch the glow.
@media(max-width:480px){
22. Paper Bookmarks

You want a bookmark that fits your book, lasts, and makes you smile. DIY paper bookmarks do more than mark a page. They add a bit of you to every chapter. They are easy to make and make a nice gift for other readers.
Here is why they shine. They take little time and use items you have. They travel well in bags. Next, how to make them.
What you need
– Paper or cardstock for a sturdy base
– Scissors and a ruler
– Markers, pens, stickers
– Optional: washi tape
– Optional: laminating sheets
How to make them
– Cut a slim strip that fits your book without crowding the page
– Decorate with drawings, quotes, or tiny stickers
– Round the corners for comfy handling
– Punch a hole near the top and thread a tassel
– Laminate the bookmark or cover it with clear tape
Helpful tips
– Personalize each bookmark to match a mood, season, or favorite quote
– Mix simple colors for a clean look
– Let ink dry fully before laminating
– Store finished bookmarks flat so they don’t warp
Why they work
– They are practical and personal
– They keep your place and bring a little craft to reading
– They make thoughtful gifts for friends and book lovers
If you want a quick start, skip lamination. Just seal edges with clear tape for a neat, flexible finish.
23. Paper Flowers for Table Centerpieces

You want a table that pops with color, but real flowers wilt fast. Paper flowers stay bright from start to end. They’re easy to make and you can tailor them to any theme.
Materials
– Crepe or tissue paper in your chosen colors
– Floral wire or thin pipe cleaners
– A small vase, jar, or decorative cup
– Scissors and a bit of tape or glue
This DIY paper flower centerpiece works for birthdays, dinners, or any day you want a bright touch.
Build the look
– Cut soft petals or rounds from the paper. Layer several pieces for a full bloom.
– Curl the edges with a pencil to add life. Hold the curl for a second to set the shape.
– Stack petals, then secure with a strip of tape around a wire stem.
– Add greens or curling ribbons for a natural touch.
– Place the stem in a vase or jar. Fill the base with pebbles or crumpled tissue for stability.
Color and style ideas
– Mix warm reds, sunny yellows, and soft pinks for a lively centerpiece.
– Do all white for a clean, elegant table, or go bold with jewel tones.
– Put different sizes together for a lush, garden-like feel.
Why this works
– No watering, no wilting, and easy cleanup.
– You can reuse pieces for many events.
– It fits holidays, birthdays, or everyday meals.
Move on
– Try two or three different flowers to start.
– Set up a quick practice in 20 minutes, then decorate your table tonight.
24. Paper Gift Wrap
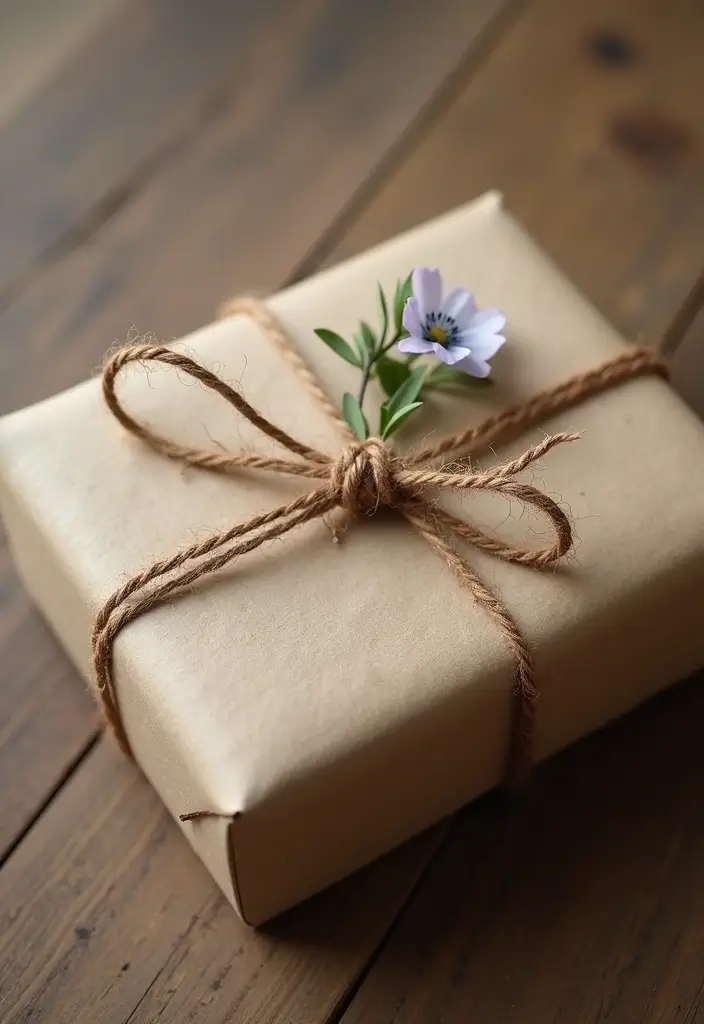
Paper Gift Wrap
Want gift wrap that feels personal and cuts waste at the same time? You can make your own paper wrap that adds your touch. It turns simple scraps into something stylish your recipient will notice.
– Use old newspaper, magazine pages, or craft paper. These options keep costs low and are easy to find.
– Decorate with stamps, drawings, or pressed flowers for a unique finish.
– Tie with twine or ribbon for a neat, finished look.
Here is why this works. It uses scraps you already have. It gives each gift a story. It keeps packaging out of the trash while looking good.
Next, choose a look that fits your gift and your style. A vintage newspaper wrap feels nostalgic. A bold magazine collage creates a modern vibe. Kraft or craft paper stays simple and earthy.
Tips to level up your wrap
– Fold carefully and smooth every crease so the paper lies flat against the gift.
– Add a small tag made from scrap cardboard, with a short, handwritten message.
– Finish with a wax seal or a simple sticker for a nice final touch.
Next steps: try a few styles, mix textures, and keep a stash of scrap paper for quick, chic DIY gift wrap ideas. Your gifts will feel thoughtful and fun to unwrap.
@media(max-width:480px){
25. DIY Paper Tags

If you want a tiny touch that makes gifts feel personal, try DIY paper tags. They are quick to make and cheap. You can use them for gifts, for labeling storage, or as little bookmarks. Here is why these tags work: they are flexible, personal, and practical. They fit many styles, from cute to clean cut. You can grab any color you like and make many at once.
What you need
– Cardstock or colorful paper
– Scissors
– Hole punch
– Twine or ribbon
– Markers, stamps, or stickers
How to make them
– Cut a sturdy tag shape from your paper
– Decorate with simple drawings, stamps, or stickers
– Punch a hole near the top
– Thread twine or ribbon and tie on
Ways to use
– Tie a tag on a gift to show who it is for and what it is
– Label bins, boxes, or shelves at home
– Use as a small bookmark in a book
Tips for style
– Choose thick paper for durability
– Pick two colors that match your wrap
– Let ink dry before handling to avoid smudges
– For a longer life, add a light clear spray or a brush-on seal
Next steps: try a batch in two colors and a few shapes. If you make tags for gifts, write the name and date to stay organized.
26. Mini Paper Notebooks
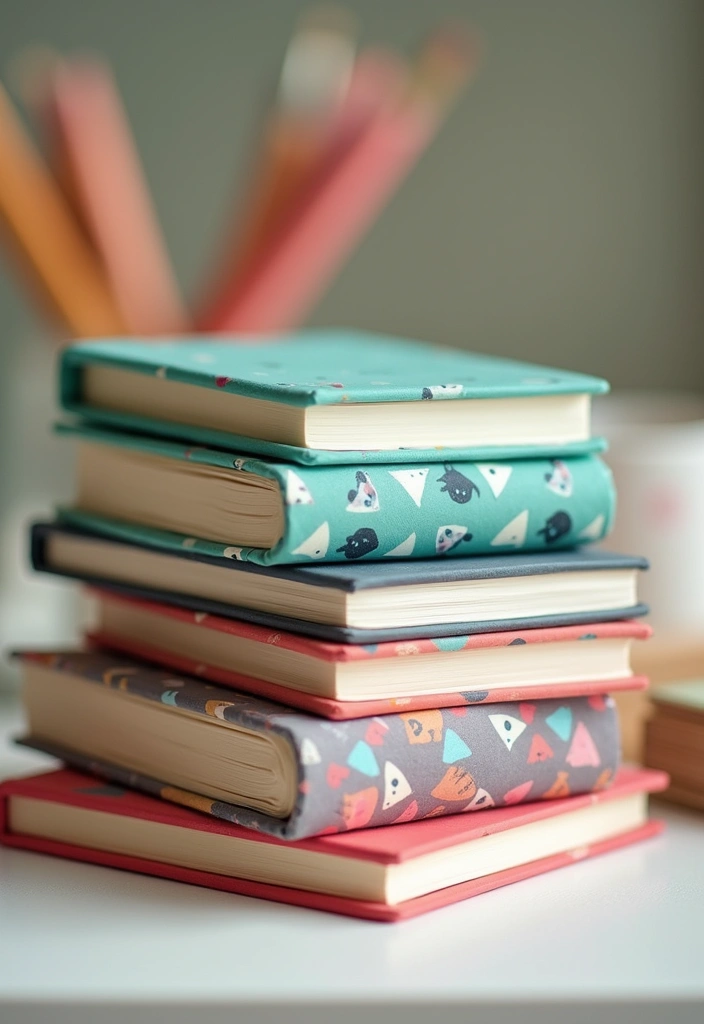
You need a tiny notebook you can carry everywhere. It starts with scrap paper and a little string or glue. This mini keeps notes, ideas, or lists tidy. It’s cheap, quick, and fun to customize.
Materials
– Scrap sheets cut to your desired size
– A cover sheet or thin card stock
– A stapler or needle and thread
– Markers, stickers, or tape for decoration
Steps
1) Fold each sheet in half to make a page.
2) Stack the folded sheets neatly, edges aligned.
3) Bind along the fold with a stapler, or sew a few stitches with thread.
4) Add the cover by folding a thicker sheet in half and fixing it to the spine.
5) Decorate the cover with simple drawings or a label.
Ways to use
– Quick notes, to do lists, or daily goals
– A compact travel diary for trips and classes
– A place for small recipes or shopping ideas
– A thoughtful gift with a personal note inside
Tips
– Reuse old paper to cut waste.
– Try sizes like 3×5, 4×6, or A6.
– If the spine is loose, glue before sewing.
Keep extras in a drawer for quick gifts.
27. DIY Paper Magnets

DIY Paper Magnets
You want a fridge that looks like your own art. You can turn simple paper into tiny magnets that hold notes and bring a smile. It is cheap and easy to do.
– Paper scraps or card stock.
– Small magnet sheets.
– White craft glue.
– Clear sealant.
– Scissors or a craft knife.
How to make them:
– Pick a shape that fits your style.
– Cut the shape from paper with clean edges.
– Glue the paper to the magnet sheet and press flat.
– Seal the piece with a clear coat and let it dry fully.
Tips to get great magnets:
– Apply glue thinly to keep the surface flat.
– Make shapes a touch smaller than the magnet for neat edges.
– Try tissue paper or magazine cutouts for bright color.
– Add a thin outline with a marker to make lines pop.
Ways to use them:
– Create a tiny art wall on your fridge.
– Label jars or spice shelves with cute magnets.
– Make seasonal shapes for holidays.
Next steps:
– Pick a theme, gather scraps, and start a small batch today.
@media(max-width:480px){
28. Paper Tree Decorations
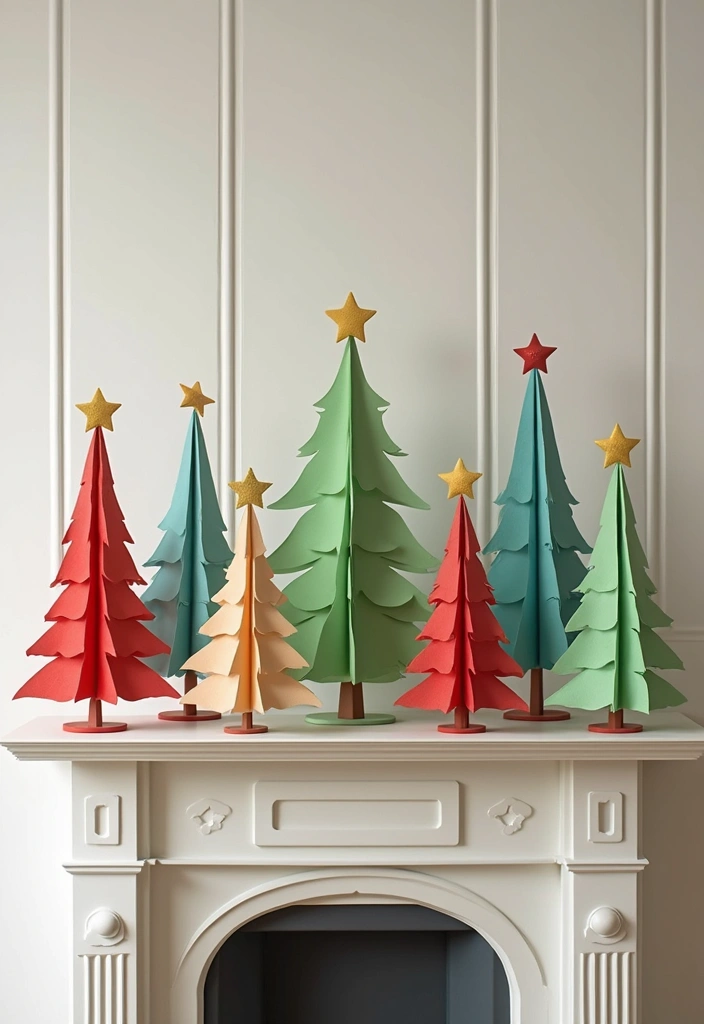
Want a quick, friendly way to refresh a room? Paper tree decorations add color and calm without a lot of fuss. They feel light and natural, and you can change them with the seasons.
Materials you’ll need
– Colored paper or thin cardboard
– Scissors and a pencil
– A ruler for straight cuts
– Glue or double‑sided tape
– A small wooden dowel or stick for a standing tree
– Optional: thread for hanging, tiny embellishments like buttons or sequins
How to make your paper trees
Here is why this works: simple shapes stack into a lively 3D display.
– Cut simple tree shapes from your paper. Make a few in different sizes.
– Layer several trees to build depth, or glue two trees back to back for a fuller look.
– Attach a tiny dowel at the base to help the tree stand, or mount the base on a clear stand.
– Add little details if you like—leaf shapes, glitter, or textured paper give personality.
– Set them on a table, shelf, or use as a festive centerpiece. You can also thread several trees to hang as a garland.
Ways to use them
– Create a mini forest along a wall or windowsill.
– Use as place-setting accents at a party or holiday meal.
– Tilt and stagger different sizes to form a seasonal display on a mantel.
Tips for a sturdy display
– Glue two trees back to back for stability.
– Use a lightweight base or foam disk under the stand.
Care and storage
– Store flat in a sturdy box between uses. Gently press to keep shapes.
Next steps: pick a color palette, gather supplies, and start cutting. Your home will feel warmer with these tiny paper trees in minutes.
@media(max-width:480px){
29. Paper Frame Collages
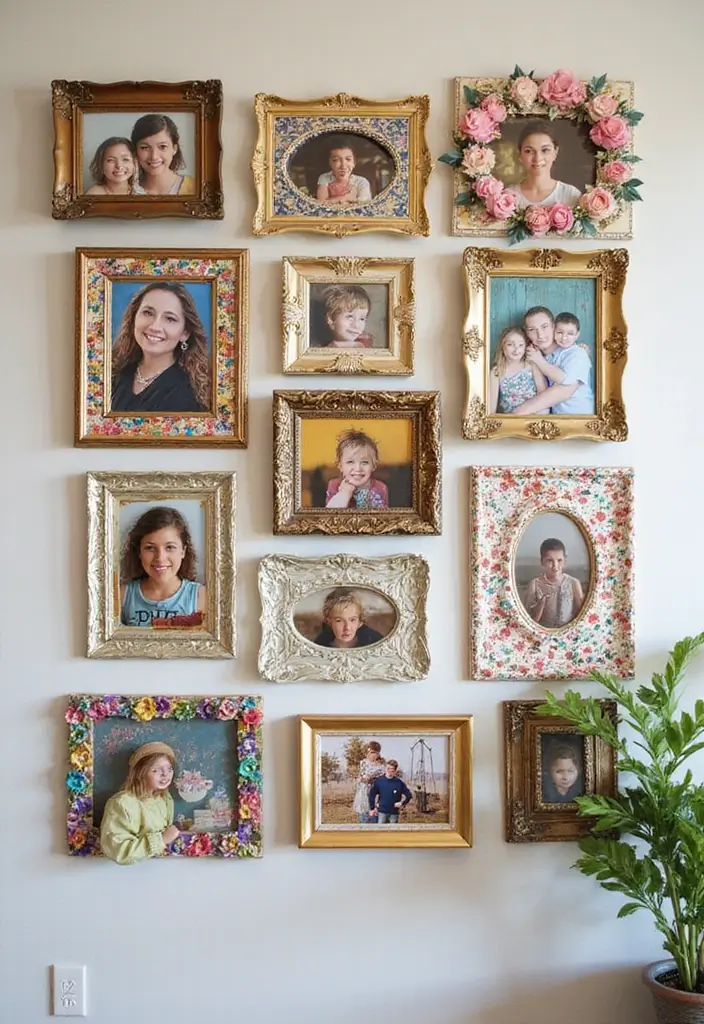
Here is why a paper frame collage works. It blends photos with decorative paper so memories feel fresh on your wall. You can mix bold colors with soft neutrals for the look you want. Now let’s break down how to make one.
– What you need: A plain frame, scrapbook paper, scissors, glue or tape, photos, and a few decorative accents like stickers or cutouts. Foam dots add depth.
– Plan your layout: Pick a color palette. Choose 3–6 photos. Lay them out on a flat surface before sticking anything.
– Create paper designs: Cut shapes, mats, or borders from paper. Build layers to add texture. Keep some space between items so the collage breathes.
– Assemble: Mount photos inside the frame first. Glue paper accents around them. Use foam dots to lift pieces for a 3D feeling.
– Finish and display: Put the back on the frame, insert glass if you have it, and hang where you can see it daily. Use a level to keep it straight.
Next steps: Try a grid for a clean look or a freeform cluster for whimsy. Experiment with seasonal colors to refresh the room.
Conclusion
With these 29 paper craft ideas, your home is bound to feel more vibrant and personalized. Each project not only promotes creativity but also encourages eco-friendly practices by utilizing materials you may already have.
From whimsical decorations to practical items, there’s something here for everyone to enjoy. So gather your supplies and let your imagination run wild – your dream decor is just a craft away!
Note: We aim to provide accurate product links, but some may occasionally expire or become unavailable. If this happens, please search directly on Amazon for the product or a suitable alternative.
This post contains Amazon affiliate links, meaning I may earn a small commission if you purchase through my links, at no extra cost to you.
Related Topics
paper crafts
DIY decoration
eco-friendly crafts
easy tutorials
upcycled decor
beginner friendly
colorful decor
homemade art
whimsical designs
seasonal crafts
creative projects
room makeover