This season has me craving warm, simple lighting for evenings. Paper lanterns glow softly and make a room feel cozy. I made this post to help you get that glow without a big fuss.
If you love easy crafts, cozy gatherings, or turning a porch into a welcoming nook, this one’s for you. Whether you want kid friendly projects or a stylish centerpiece, you will find ideas you can actually finish.
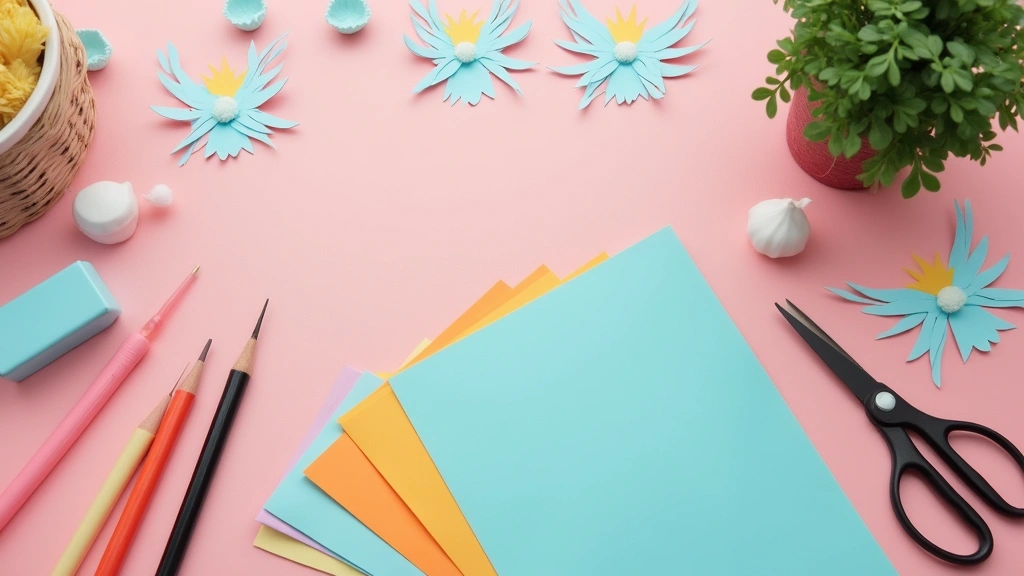
I pulled together 29 paper lantern crafts that cover table settings, porch corners, and wall accents. Each idea uses common supplies and costs little. These ideas are easy, bright, and flexible for many spaces.
You can start with simple tissue paper lanterns and add color with paint or colored paper. Try vellum lanterns for a softer glow. Or use recycled jars with string lights for a cozy look. Many ideas use battery powered lights so you can light up evenings without an open flame.
Think about mood. Warm whites help calm a room. Bold colors spark energy for a party. Neutrals fit a clean, modern space. I’ll show you how to pick sizes, group lanterns, and hang them without making a mess. You’ll also find quick tips for weatherproofing outdoor lanterns.
Best of all, you can make these with things you already have. Starting with one small lantern can spark a bigger project that brightens your whole evening. Try one idea this weekend and see how the glow changes your space. If you test a lantern, tell me which idea you tried and how it looked.
1. Recycled Bag Lanterns
Want a simple, affordable way to light up evenings without waste? Recycled bag lanterns use old plastic bags turned into a warm glow. Here is a practical plan you can follow.
What you need
– Plastic bags, about 6 to 8 in bright colors
– Scissors
– A lightweight frame such as a small wire ring or a balloon used as a mold
– Tape or glue
– LED string lights or fairy lights
Steps
1) Wash and dry the bags.
2) Cut each bag into long strips, about 1/2 inch wide.
3) Build a color full mesh by weaving strips around the frame.
4) Add more strips until the lantern looks full.
5) Secure the ends with a small knot or tape and trim.
6) If you want texture, add a few beads or tassels along the edges.
7) Place LED lights inside or wrap them around the outside for a gentle glow.
Tips
– Choose bright colors to make your lantern pop.
– Use LED fairy lights for a safe, steady glow.
– Add beads or tassels for extra texture.
Care and use: Keep the lantern out of direct rain. They work best in shade or indoor spaces. After the season, store flat to save space.
Next steps: grab some bags and give this a try this weekend.
2. Origami Lanterns
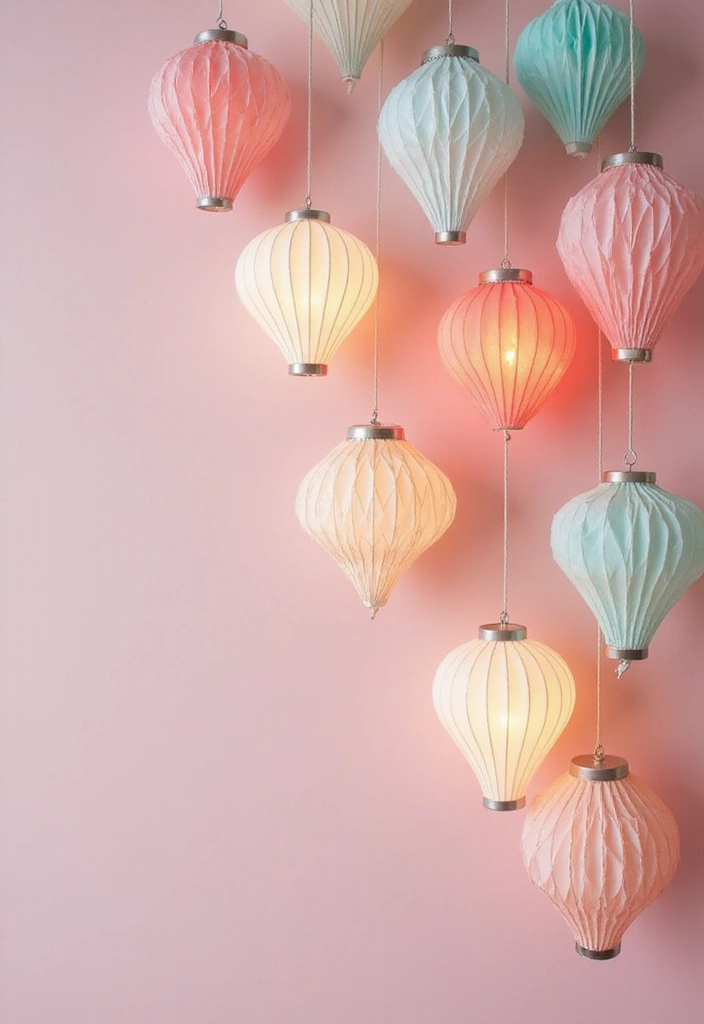
Here is why origami lanterns work for you. They bring soft light and a clean look with almost no cost. You can set a cozy mood for evenings and parties.
Materials
– Square sheets of colorful origami paper or lightweight patterned paper.
– Scissors for small decorative cuts, if you want.
– Tape or glue to seal the seam.
– LED tea lights or string lights for safe, warm glow.
How to make
– Start with a square sheet color side up. Fold it in half lengthwise to crease a long rectangle.
– Open it, then make 6 to 8 vertical accordion folds across the sheet. Each fold should be the same width.
– Roll the sheet into a tube and tape the seam to form a lantern. The paper should hold a gentle curve.
– If you like, cut tiny shapes along the top and bottom edges. Keep the cuts light so the lantern stays sturdy.
– Slip in a small LED light or place a string of lights inside. A gentle glow makes the paper sing.
Tips
– Try different weights of paper for texture. Heavier paper gives crisper lines.
– Mix plain and patterned papers for a playful look.
– Hang lanterns in clusters for big visual impact at parties.
– For safety, use LED lights only and avoid open flames.
Next steps
– Set up a small display on a mantel or table.
– Save a few sheets for seasonal colors and rotate them.
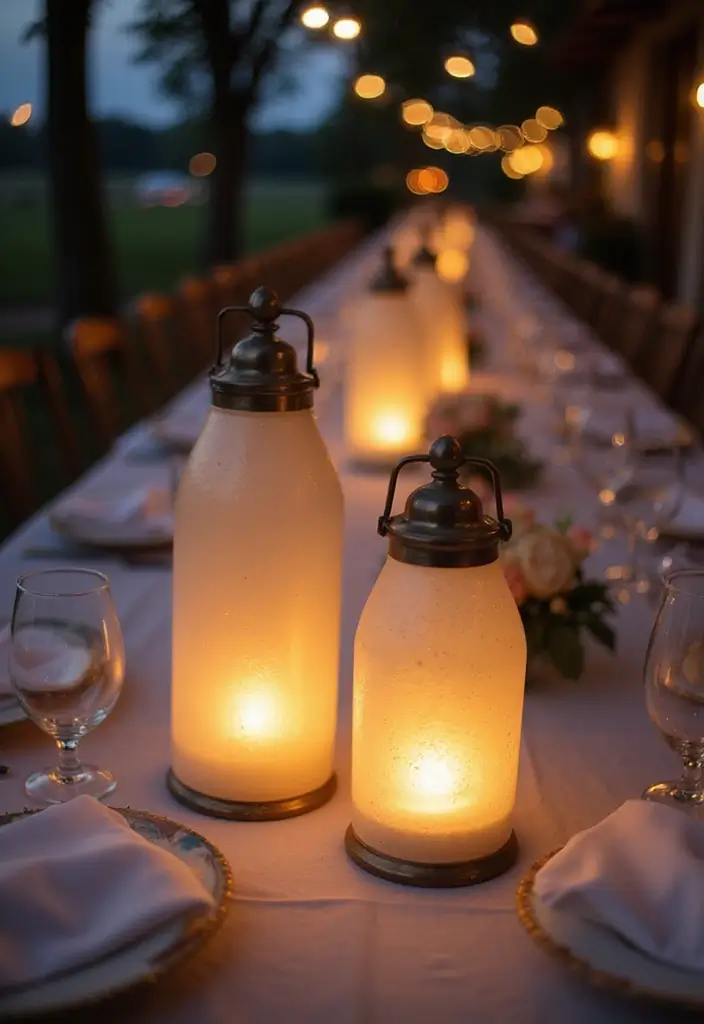
3. Painted Mason Jar Lanterns
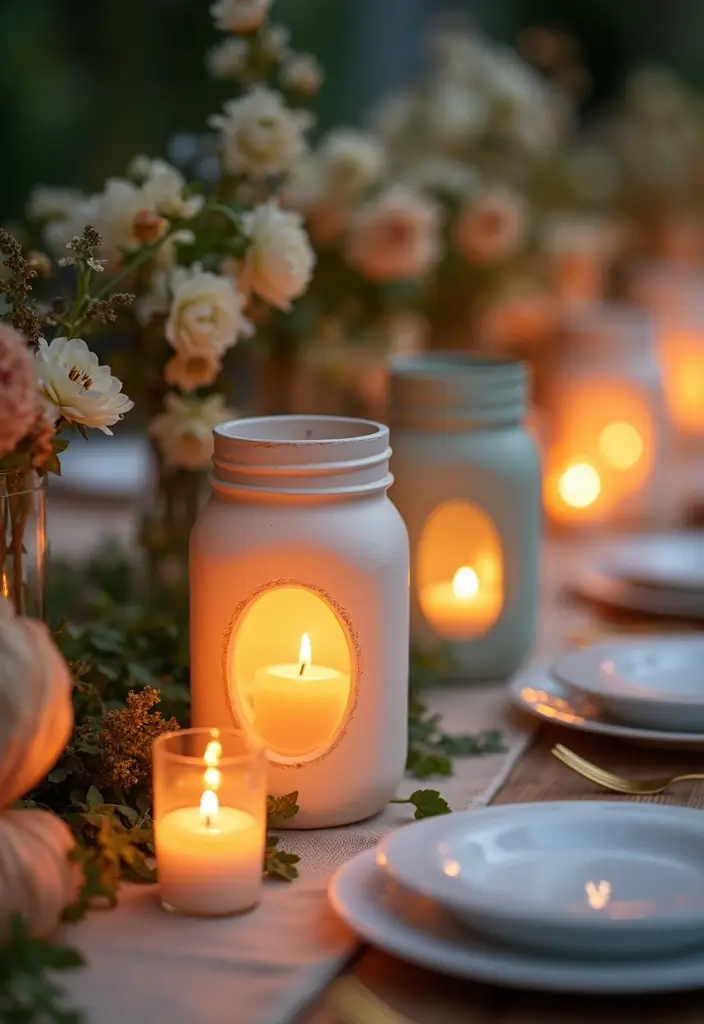
Want a warm glow you can make at home? Painted mason jar lanterns fit the bill. They brighten evenings and add a personal touch to your space.
Here is how to make them.
– Choose 3 to 5 jars in different sizes. Clean them well and let them dry.
– Paint with eco-friendly paint. Start with a light base coat and let it dry fully.
– Try a design. Frosted glow, soft gradient, bold stripes, or tiny shapes all work. Tape helps pull clean lines, and stencils make quick shapes.
– Add a finish. Seal with a clear, water-based spray so the color lasts outside.
– Add the glow. Place a tealight candle or a small string light inside. If you use string lights, coil the cord neatly.
– Add rustic charm. Tie a strand of twine around the neck or wrap lace for a vintage look.
– Mix and match. Vary heights and colors to create depth on a table or shelf.
– Clean and store. When the season ends, wash jars and store them for next time.
Tips
– Frosted paint gives a soft, inviting glow.
– Consider twine or lace for extra texture.
– Jars of different sizes keep the display interesting.
Next steps
Next steps: gather jars and start.
@media(max-width:480px){
Recommended Products

Mason Jar Solar Lights for Outside(Jars Not Included): Made of 30 warm white bright LED beads twisted into silver wire, solar powered panel, the lid is an aluminum structure, and 12 stainless steel handles help you easily hang the assembled mason jar lights on thinner branches, fences, walls and porches, very convenient
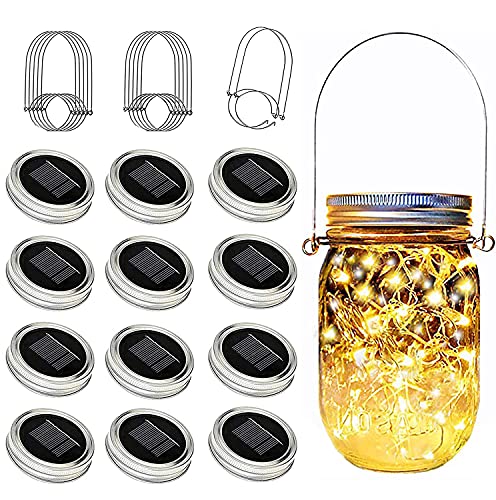
Solar Powered: Fits regular mason jars, no jar included. Solar panel charges during the day for 8-12 hours of nighttime use.

Waterproof Design: The solar powered mason jar lights are waterproof and can be used both indoors and outdoors.
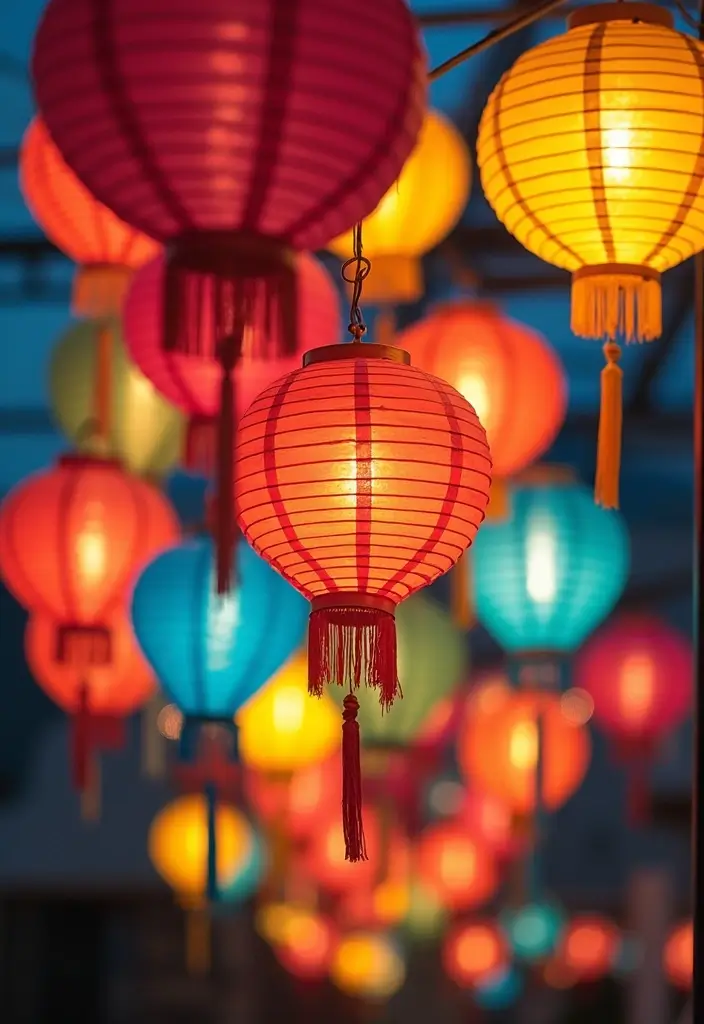
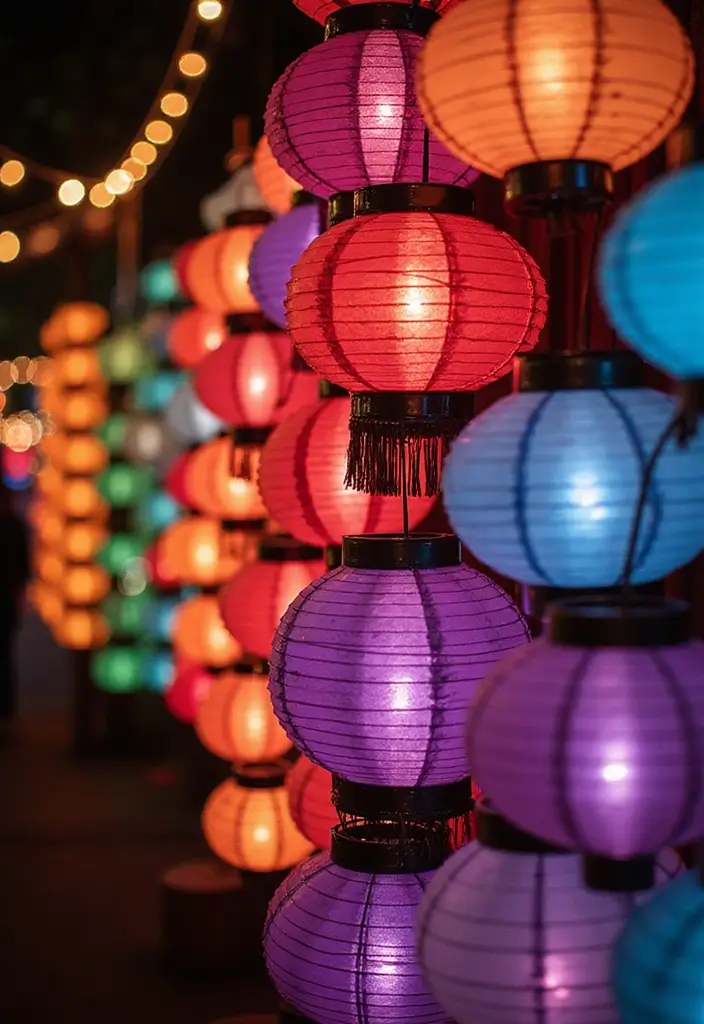
4. Paper String Lanterns
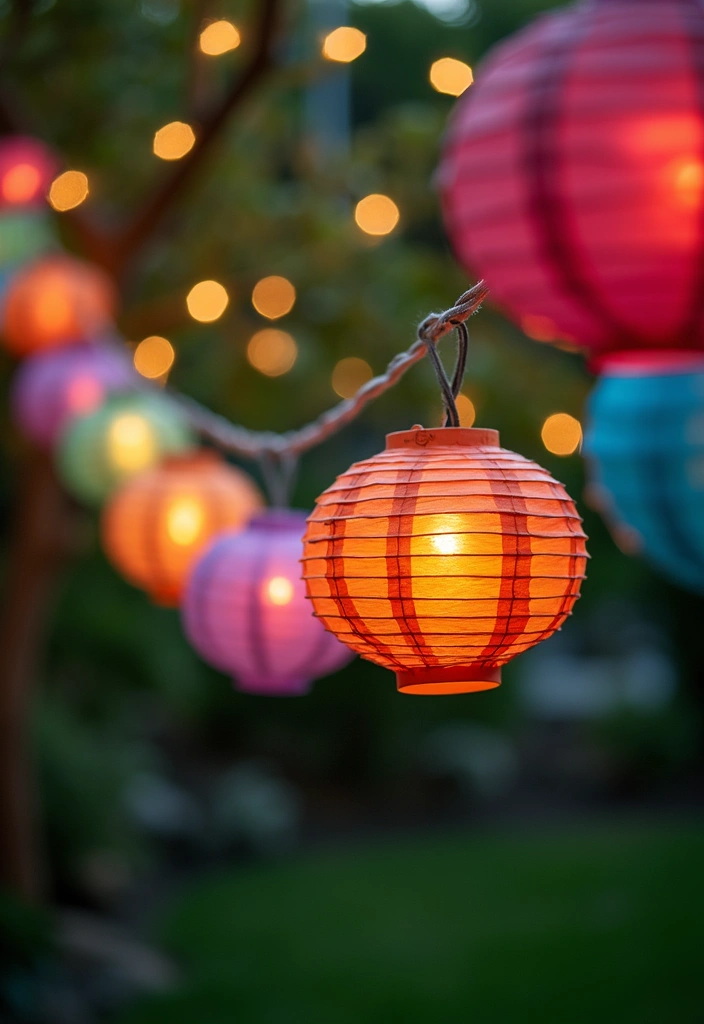
Want a cozy, whimsical glow for your evenings? Paper string lanterns fit the bill.
Cut lightweight paper into shapes such as circles, stars, or hearts.
Make shapes in different sizes to build a lively garland.
String them with twine or ribbon to create a long, flexible chain.
Hang the garland across doorways, along a patio, or in a corner that needs magic.
Tips:
– Mix shapes for a quirky look.
– Choose lightweight paper for easy sway.
– Pair with fairy or warm LED lights for a soft, dreamy glow.
Paper string lanterns brighten celebrations and everyday spaces alike.
They move with the breeze and catch the light just right.
Use them indoors or on a covered porch so they last.
With a little care, they reuse for many events.
Start with a simple kit.
Choose lightweight paper for easy sway.
Gather scissors, thin twine, tape, and a few shapes.
Cut several shapes in different sizes and lay them out so you see the pattern.
Thread the string through small holes or slits in the tops.
Space the pieces apart as you work.
Store the garland flat when not in use.
That keeps colors bright for many seasons.
It also makes cleanup quick.
@media(max-width:480px){
Recommended Products

All-in-One Set: You will have 700 paper chain strips in 10 vibrant rainbow colors, 4 star garlands connected by string, 6 rolls of crepe paper, plus 1 roll of double-sided tape – everything you need for a festive makeover

Black and White Back to School Classroom Party Decoration Kit: you will receive a total of 27 black and white Classroom Decorative, including 4 Black and White openwork paper fans, 6 Black White striped paper fans, 6 Black White Stripe lanterns, 8 Black White honeycomb balls, 2 Black White Garlands String Circle Dot, and 1 Black Triangular Flag; These will meet your back-to-school Classroom and holiday party decoration needs

Boho Inspired Decoration Set – Designed with earthy green, ivory, and gold tones, this party kit brings a chic Bohemian vibe to your celebration. Perfect for boho baby showers, rustic weddings, and stylish birthday parties.
5. Lattice Lanterns

You want a fresh look for your paper lanterns. Lattice lanterns give a clean, modern feel. A simple lattice made from cardstock becomes a frame that light can slip through. The result is soft shadows on walls and tables. Here is why this idea works.
What you need:
– Lightweight cardstock, a sharp ruler, scissors, glue, and a LED tea light
– A basic paper lantern or small jar to hold the light
– A pencil for marking and a few color options for decorating
Next, the steps:
1) Cut thin strips from the cardstock.
2) Build a small square frame as the center.
3) Weave the strips to form a lattice around the frame.
4) Attach the lattice to a lantern base or wrap it around a glass jar.
5) Decorate with paint, markers, or inks.
Safety and setup:
– Use an LED light or candle with a short flame.
– Keep the lantern away from flammable fabrics.
Suggestions:
– Use stencils to add designs or patterns.
– Try different color combos to match your space.
– Add leaves or branches for a nature touch.
These lattice lanterns suit parties and quiet nights at home. They create a warm glow and moving shadows that change as you move. Give it a try.
@media(max-width:480px){
6. Biodegradable Lanterns

If you want a warm, earth friendly glow, biodegradable lanterns fit the bill. They use natural bits that break down over time, so your night light feels cozy without leaving a lot of waste.
What you’ll use
– Clear jars for a clean base
– Natural pieces: leaves, dried petals, tiny seeds, or plant fiber shapes
– A safe light: small LED tealight or a solar light
How to build it
– Place the natural bits inside the jar
– Secure them with eco friendly glue or a short length of natural twine
– Add the light and set the lid if you have one. Leave space around the bulb for air
Tips:
– Clear jars brighten up your space with a simple look
– Use water based glues to keep it eco friendly
– Tie a twine loop for easy hanging
– Keep lanterns dry and sheltered from strong wind
These lanterns work well on patios, decks, or indoors on a coffee table. They suit garden parties or quiet dinners. They last longer with gentle handling and a dry spot.
Next steps: gather materials, assemble a few, and line a walkway or table with their soft, natural glow. Share a photo of your lantern line to inspire friends.
@media(max-width:480px){
7. Paper Doily Lanterns
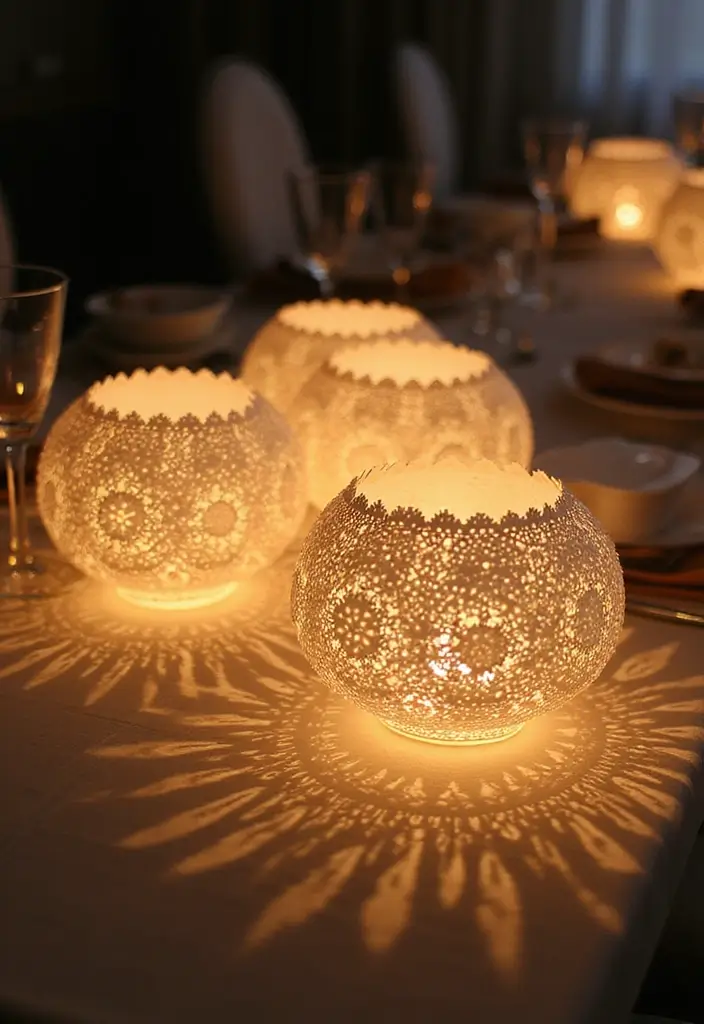
Looking for a soft, elegant light for any occasion? Paper doily lanterns give a lace-like glow that works on a table or at a party. They are simple to make and cheap to run. Here is why you’ll like them: you get warm light and pretty shadows without much fuss.
Wrap lace-patterned paper doilies around a glass jar or a small bulb. When you switch on the light, the cut patterns throw pretty designs on walls and surfaces. You will see soft curves and fine lines dancing in the glow.
If you want a calm vibe, this setup stays neat and easy to reuse. You can swap colors and change sizes to create new looks.
Suggestions:
– Attach doilies with a dab of glue for stability.
– Use colorful doilies to brighten a room.
– Try different sizes to mix shadows and scale.
Next steps: use safe LED tea lights for flameless glow. These lanterns suit weddings, parties, or quiet evenings at home.
What you need and how to set it up
– Glass jar or small shade as a base.
– Lace doilies in white, cream, or soft colors.
– A battery LED light for safe glow.
Layout ideas: line a row on a porch, set them on a table, or hang from a string for a festive look.
8. Fabric Scrap Lanterns
Need a lantern that uses fabric scraps and zero waste? This idea gives your room a cozy glow without costly materials. You can make a lantern that has texture and charm by using scraps you already have. Here is how you do it.
– Blow up a balloon to the size you want.
– Glue small pieces of fabric on the balloon, layer by layer.
– Let the glue dry completely.
– When it is dry, pop the balloon and remove it.
This leaves a hollow fabric shell you can hang. You can place it indoors or outside in a sheltered spot. It feels soft to touch and the light shines through the fabric, creating a warm glow. For kids’ rooms, it adds a playful touch.
Tips:
– Pick bold color mixes to create a lively look.
– Use lightweight fabric so the lantern hangs easy.
– Add ribbons or beads to the fabric for extra texture.
This craft recycles fabric and opens room for many styles. Try stripes, checks, or random patches. It is a simple project that sparks creativity and adds a handmade touch to any space.
If you want a stronger shell, glue two thin fabric layers together.
@media(max-width:480px){
9. Silhouette Lanterns

If you want a wow factor without a big project, silhouette lanterns deliver. Light shines through cutouts and creates bold shadows. They fit themed parties and storytelling nights. Here is why they work: you can change the look in minutes, and they store flat for easy reuse.
Materials
– Black construction paper or sturdy cardstock
– Scissors or a craft knife
– Glue or tape
– LED tea light or a tiny string of lights
– Colored background paper (optional for extra pop)
– Thin wire or a string to hang
Here is how to make them.
– Cut out shapes from the black paper. Keep lines clean and simple.
– Attach the silhouettes to the lanterns, leaving gaps for light to peek through.
– Slip a light inside. If you use a string light, hide the cord so it stays neat.
– Hang your lanterns and watch the room glow with soft shadows.
Let’s break it down with ideas.
– Pick shapes that fit your theme: animals, stars, moons, castles, or fairy-tale figures.
– Use a bright background paper to make the black cutouts stand out.
– Make 3 to 5 lanterns at different heights for a cohesive display.
Next steps: display ideas and tips.
– Line them along a wall, frame a doorway, or suspend over a table.
– Mix sizes and add a few colors for depth.
– Use safe LED lights for indoor use and outdoors on dry days.
Safety first: keep lanterns away from open flames and heat sources.
These lanterns spark imagination and storytelling. Try a small set tonight and expand as you go.
@media(max-width:480px){
10. Nature-Inspired Lanterns
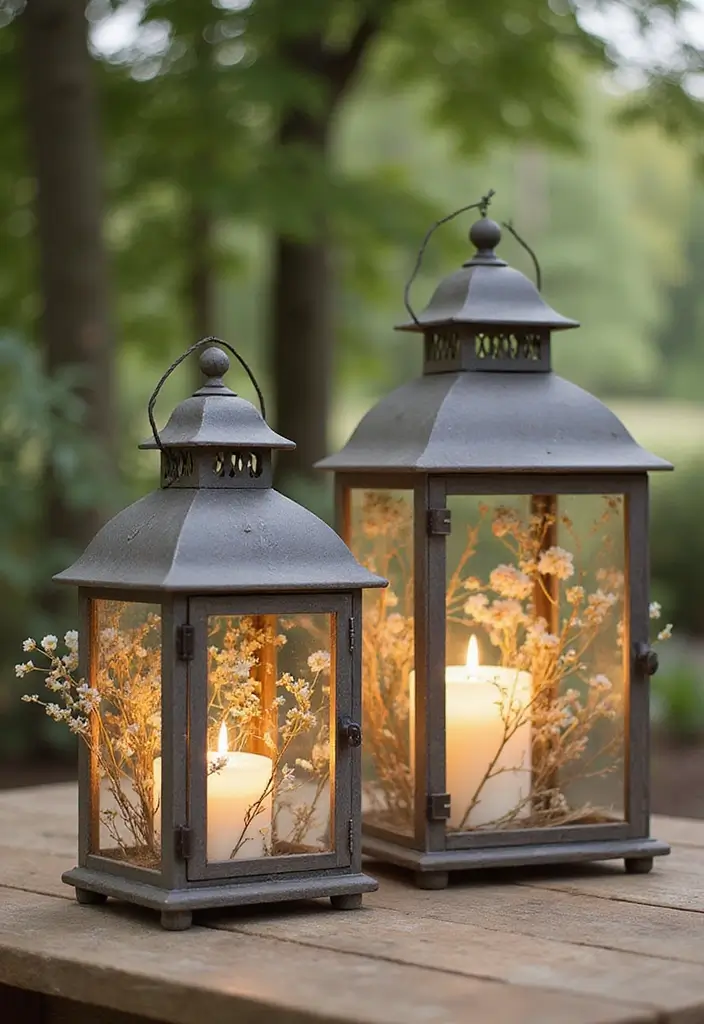
You want a glow that warms your evenings without a big setup. Nature-inspired lanterns give that soft light with a natural look. They mix dried plants with glass and a small LED. Here is why they work: they blend with the outdoors and use things you already have.
What you’ll need
– Clear glass jars or lantern jars
– LED tea lights or little lantern LEDs
– Dried flowers, twigs, pine needles, or fern fronds
– Natural twine or jute for tying
– A small pair of scissors or tweezers
How to make them
– Pick a jar and clean it. Dry it well.
– Arrange one or two kinds of natural elements inside.
– Place an LED light in the center so it shines through the pieces.
– Tie a length of twine around the rim for a rustic touch.
– Set the lantern in a sheltered outdoor spot away from wind.
Tips:
– Use clear containers to let the visuals shine.
– Swap in seasonal materials for a new look.
– Pair with simple twine or burlap for a cohesive style.
Next steps
– Try a trio of jars along a porch railing.
– Move them to a table for a gentle centerpiece.
– If you use real candles, light one only and keep it away from dry elements.
@media(max-width:480px){
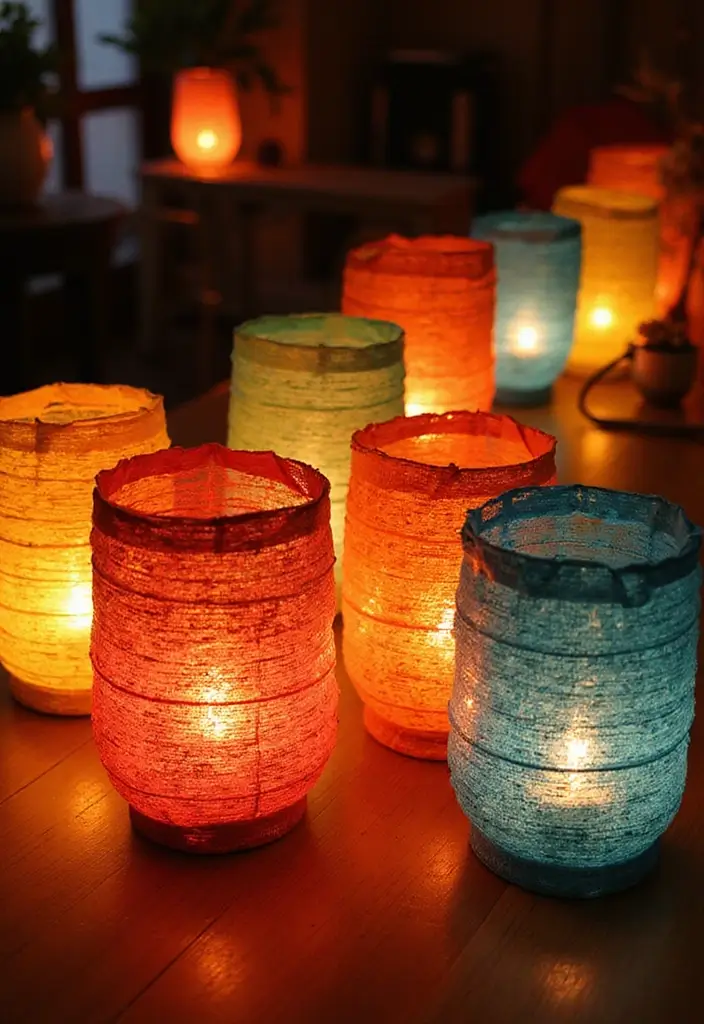
11. Twine-Wrapped Lanterns
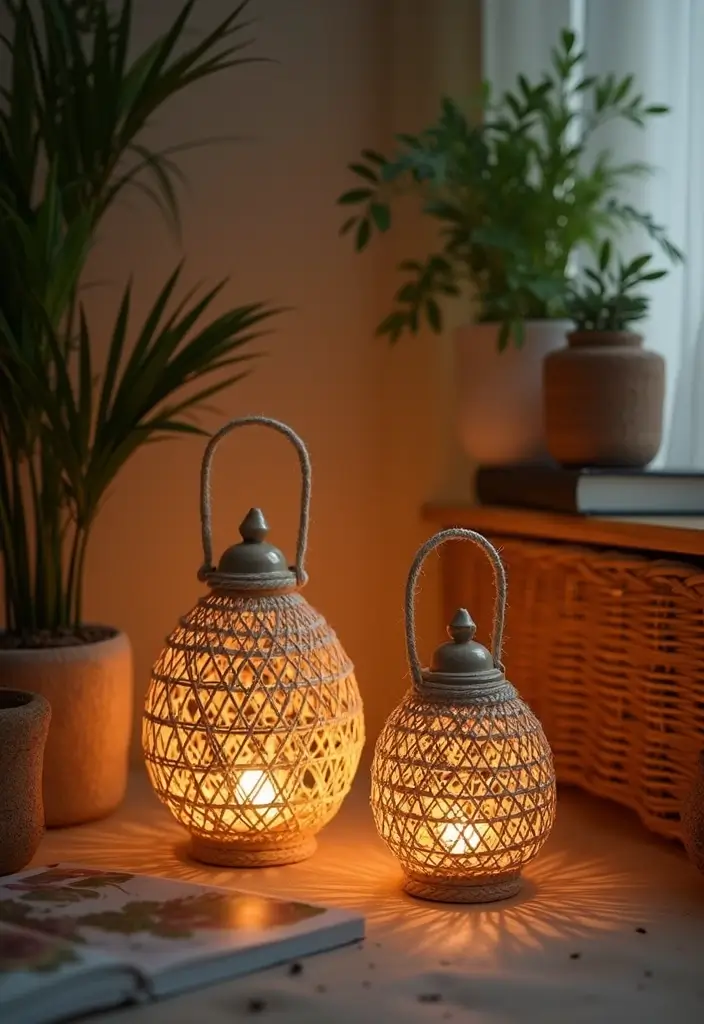
You want a cozy glow that fits any space. Twine-wrapped lanterns give that warm, rustic feel. Use jute or hemp twine wrapped around a glass jar or a blown glass balloon to add texture and charm. The natural fibers soften the light, so the glow feels inviting rather than harsh. These lanterns work just as well on a patio as on a dining table, indoors or out.
Here is how you can make your own twine lanterns.
– Gather your materials: a clean glass jar or a small balloon, jute or hemp twine, a dab of glue, and an LED light that fits inside.
– Secure the start: put a little glue on the edge and press the first bit of twine in place so it won’t slip.
– Wrap with care: keep the twine tight and even as you cover most of the surface. Overlap slightly for texture.
– Finish the top: add a final wrap around the neck or rim to hold the strands in place, then trim the end.
– Light it up: place a small LED light inside and switch it on. LED is safer and lasts longer.
– Let it glow: set the lantern on a table, hang it from a hook, or place it along a doorstep for a welcoming look.
Suggestions:
– Add shells, small buttons, or beads to personalize your piece.
– Use LED lights for safety and longer life.
– Try different twine colors for a lively, layered look.
This quick project brings warm charm to any space with minimal cost and effort.
@media(max-width:480px){
12. Color-Blocked Lanterns
You want a lantern that looks fresh and fits your room. Color-blocked lanterns use bold, contrasting blocks to draw the eye. With clean lines and a simple paint plan, you get a modern look. This DIY fits any space.
Here is why color blocking helps. It adds interest without changing the lantern’s shape. It also lets you use colors you love and balance them with your decor.
Let’s break it down, step by step.
– A plain lantern
– Painter’s tape
– Acrylic craft paints in 2 to 3 colors
– Small brushes
– A clear sealant in gloss or matte
– Prep the lantern by wiping away dust and fingerprints.
– Plan the layout on paper or with a quick tape map on the lantern.
– Tape the lines to keep edges sharp.
– Paint each block in your chosen colors, letting coats dry.
– Apply a sealant to protect color and hold up to light.
Tips:
– Use painter’s tape for crisp edges.
– Try seasonal palettes to shift the look.
– Finish with gloss for a bright shine or matte for a soft feel.
– Consider adding a tiny metallic accent for depth.
Color-blocked lanterns feel modern, but they still show your style. They light up evenings with color you chose and a finish that suits your mood. Try it soon.
13. Glow-in-the-Dark Lanterns

Want a simple way to light up your evenings? Glow-in-the-dark lanterns give a soft, safe glow for outdoor nights. They pair with plain paper lanterns and easy kid crafts.
Here is what you’ll need:
– plain paper lanterns
– glow-in-the-dark paint or stickers
– a small LED tea light or battery light
– a clear sealant to protect the design
Here is how to make them. Let the lanterns soak in sunlight to charge the glow paint. Then add shapes with a glow-stick look: stars, moons, or waves work well. Keep the designs simple so the light can shine through.
– Prep and charge: Charge the painted surface in bright sun for a few hours.
– Design with glow paint: Sketch basic shapes that glow after dark.
– Seal and protect: Apply a light spray of clear sealant.
– Light it safely: Place a small LED inside. Do not use candles.
Keep a close eye on kids when the lights are on to avoid spills. They are easy to store.
Next steps: hang them along a deck, fence, or garden path. They glow best after sunset and create a cozy party vibe. You can swap shapes for seasons or add more lanterns for a bigger glow. If you need more brightness, add a second coat or extra stickers.
Store them flat and dry when you are done. They can last for many seasons with care.
@media(max-width:480px){
Recommended Products

Package contains: The paper lantern kit contains with 20 pieces of neon paper lanterns, including 6 x 10 inch lanterns, 7 x 8 inch lanterns and 7 x 6 inch lanterns. These colorful paper lanterns will provide a variety of backdrops for themed weddings and parties.

NEON GLOW PARTY DECORATION SET INCLUDES: 3 pieces 8 inch and 3 pieces 10 inch green, rose red, yellow, orange paper lanterns, 6 pieces 8 inch and 3 pieces 10 inch green, rose red, yellow, orange pom pom flowers, neon Chinese lanterns and paper pom pom decorations add a festive touch to any themed birthday party

【PACKAGE CONTAINS】You will get 15 paper lanterns of different sizes and colors, 6pcs 10-inch gradient paper lanterns: 2pcs pink + 2pcs yellow + 1pcs green + 1pcs red, 2pcs 8-inch paper lanterns: 1pcs red + 1pcs green, 7pcs 6-inch paper lanterns: 1pcs red + 2pcs greenk + 2pcs pink + 2pcs yellow. These colorful paper lanterns build a multi-layered backdrop for themed weddings and parties, creating the perfect ambiance
14. Patchwork Lanterns
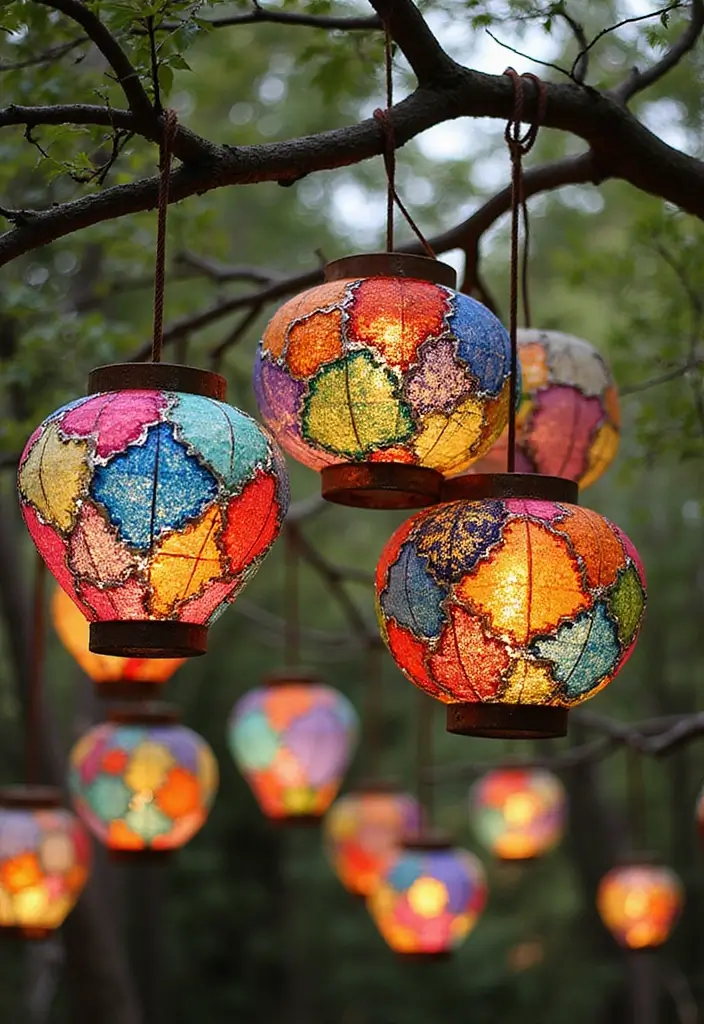
You want a warm, handmade lantern. Patchwork lanterns use fabric scraps for a warm glow. You sew or glue patches on a simple base to create a colorful surface.
Here is why this works. Light shines through the fabric and shows texture and color. It uses scraps you already have. It also shows your sewing or gluing skills.
How to build yours:
– Pick a base. A paper lantern, wire hoop, or mason jar works.
– Gather fabric scraps in colors you love.
– Cut patches to a practical size. Plan a rough layout first.
– Attach patches with craft glue or small stitches. Keep edges neat.
– Add texture with a few buttons or beads if you like.
– Use a light that stays cool, like an LED tealight or fairy lights.
– Check the glow and adjust patches for even light.
Tips:
– Mix patterns for a lively look.
– Use bright colors for a cheerful vibe.
– Add buttons or beads for extra texture.
These lanterns tell a story. They shine on a table, shelf, or porch, making your space feel warm.
Next steps: store scraps, save a few patches, and plan a fall version.
@media(max-width:480px){
15. Simple Cup Lanterns

You want a quick, kid-friendly project that adds a soft glow to evenings.
Simple cup lanterns use common items you already have.
With markers and LED tea lights, you can finish in minutes.
Here’s a plan you can copy today.
What you need
– Grab paper cups in a few sizes.
– Pick markers or paints to decorate.
– Have LED tea lights ready.
– If you want to hang them, grab string.
Decorate the cups with flowers, stars, or simple shapes.
Place an LED tea light inside each cup.
Set the lantern on a table or hang it from a string.
If you want more glow, use two LED tea lights per cup.
Try different colors for a festive look.
Mix small and big cups to create depth.
Draw tiny patterns along the rim for a glow halo.
For holidays, use red, green, or gold accents.
LED lights stay cool and safe for little hands.
Keep them away from real flames.
Let the cups dry and store them flat for reuse.
Next steps
Invite family or friends to a quick lantern party.
This DIY lantern project works for a cozy backyard night or a table centerpiece.
With a small setup, you can light up any party with paper cup lanterns.
@media(max-width:480px){
16. Travel-Inspired Lanterns
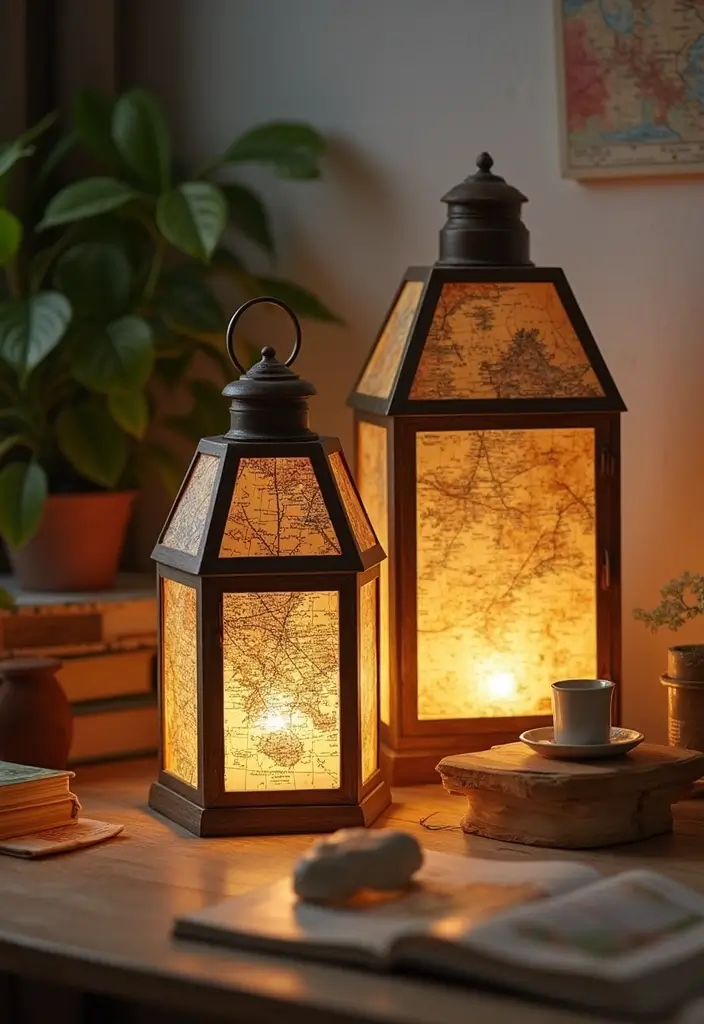
You want lanterns that feel alive. Travel-inspired designs do this. They pull memories from maps, postcards, and brochures into warm light.
Here is why this works: it turns a simple light into a keepsake you can see every night. You can build a jar lantern that carries your favorite trips or hang a paper lantern wrapped in travel art.
– Gather supplies: a clean jar or plain lantern, maps or postcards, travel brochures, a warm LED light, decoupage glue, a brush, scissors.
– Prep the surface by washing and drying the jar; if you use a balloon lantern, keep the light inside.
– Apply travel art: cut pieces to fit, brush glue on, and press them onto the jar, then seal lightly with more glue.
– Light it up: place a safe LED inside so the warm glow makes the art shine.
– Add a personal touch: tuck a note from a trip under the lid.
– Display and care: set it on a shelf and wipe gently to keep colors bright.
Tips:
– Pick destinations with real memories.
– Add short travel notes to spark conversations.
– Pair with other travel decor for a cohesive look.
Travel-inspired lanterns fill your space with warmth and stories.
@media(max-width:480px){
17. Message Lanterns

Want a simple way to add light and words to your room? Message lanterns let you do that in one craft.
Here is why they work: soft glow plus a personal note makes a space feel warm and true.
– Materials Gather thin paper or sheer fabric, scissors, glue, markers or a printer, and a small LED tea light.
– Messages Write a short quote or a personal note you want to remember.
– Fonts and art Use one clear font for legibility and a second style for flair.
– Designs Choose a cylinder, a fan lantern, or a simple folded style so light can pass through.
– Printing or writing Print the message on paper, or write with a steady hand for a handmade feel.
– Assembly Shape the lantern, insert the message inside where it will glow, and glue edges to hold.
– Lighting and display Add a warm LED light inside and place on a shelf, mantel, or table where it’s easy to notice.
Next steps: pick your message, grab your supplies, and make one tonight. Your message lanterns will brighten both the room and the mood.
These lanterns suit many rooms. They are easy to store and make a thoughtful gift. You can swap messages with the seasons. Play with colors to match your decor.
@media(max-width:480px){
18. Edible Lanterns

Here is why edible lanterns fit your party. You want light, color, and a tasty finish. Edible lanterns deliver all three. Pick fruit with a sturdy shell, like thick melons or a pineapple. Carve a small opening at the top and scoop out the flesh. Leave the rind strong so it can hold light.
Light it with a small LED lamp inside. Do not use real candles near food.
Tips:
– Choose thick-skinned fruits to hold the light and keep their shape.
– Pair with themed snacks to tie the look together.
– Use LED lights for safety and easy control.
To finish, cut simple shapes on the rind or go for a sunburst. Place the lantern on a plate of dip or fruit. The glow adds a warm mood to summer evenings.
Practical ideas you can use tonight. Set up a small cluster of lanterns on skewers or a serving board. Garnish with mint, citrus zest, or edible flowers for color and aroma.
After the party, the fruit still shines as a treat. Slice and share the pieces with guests. It doubles as dessert.
Now you know how to make edible lanterns. Try them at your next gathering and see the glow.
@media(max-width:480px){
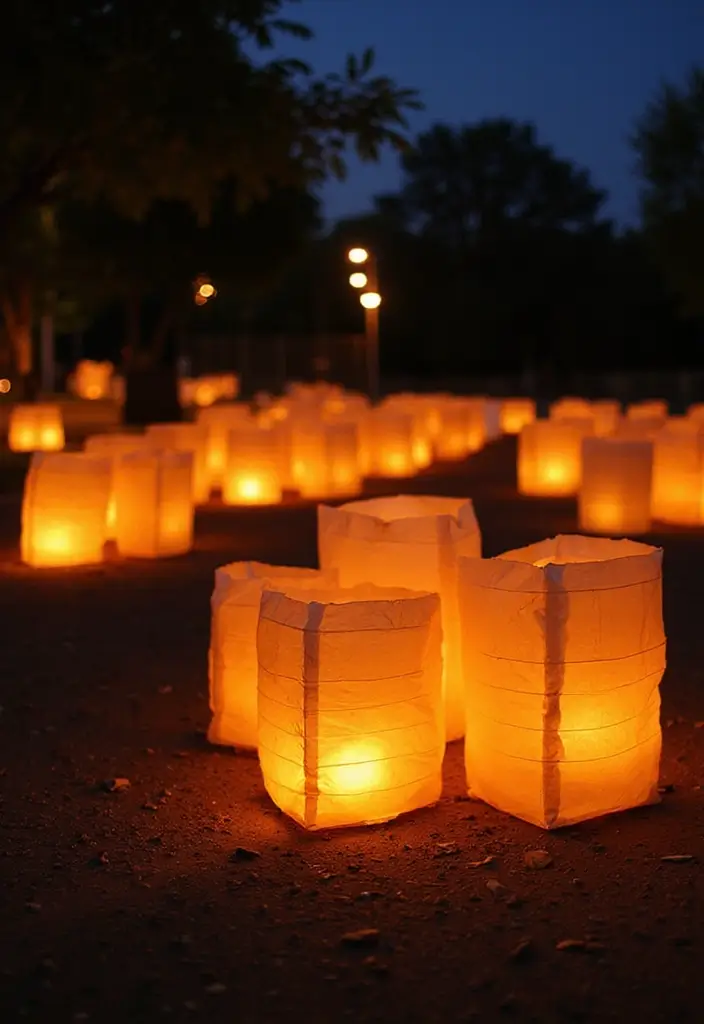
19. Upcycled Lanterns from Cans

Want a quick, cheap way to add warm light to any corner? Try upcycled lanterns made from cans. These DIY can lanterns use old soup or soda cans to cast soft patterns. They glow nicely on a porch or in a living room.
– Step 1: Clean and prep. Rinse the can, remove labels, and dry it completely. A clean can makes neat holes and less mess.
– Step 2: Design and hole punch. Use a hammer and nail to punch simple shapes on the outside. Stars, dots, or simple lines work well. Punch from the outside so the edges stay neat.
– Step 3: Smooth the edges. Fold or sand the rim to remove sharp bits. For extra safety, place a thin strip of tape inside to guard fingers.
– Step 4: Add color. Paint the can with weatherproof paint if you plan to use it outdoors. Let it dry fully before you light it.
– Step 5: Light it up. Put a LED tea light or a small candle inside. LED lights are safer for kids and pets.
– Step 6: Add a handle. Make a small hole near the rim and thread wire or sturdy string so you can hang the lantern.
– Step 7: Set the scene. Line cans on a table or hang them from a porch railing for a soft, cozy glow.
Tips
– Use cans of different sizes for a village look.
– Keep hole patterns simple to punch and to read from a distance.
– Outdoors? seal paint and use LED lights for safety and longevity.
20. Heart-Shaped Lanterns

Want a simple way to add romance to your evenings? Heart-shaped lanterns give a soft, warm glow that fits anniversaries, weddings, or a cozy night at home. With a heart template and a few easy steps, you can craft lanterns that shine with love.
What you’ll need
– Red or pink tissue paper or cardstock
– A heart-shaped template (printable or drawn)
– Scissors and tape or glue
– A lightweight lantern base or sturdy paper ring
– Ribbon or string for hanging
– LED tea lights or small battery lights
Here is why this works. You can create a delicate, eye catching lantern using just a ring and a string of hearts. The soft light shines through the paper, creating a gentle, inviting atmosphere.
How to make
1) Trace and cut 6 to 8 hearts from red or pink paper using your template.
2) Make a ring or use a paper lantern base to hold the hearts.
3) Glue the hearts around the ring so they dangle evenly.
4) Attach a string handle and seal the lantern.
5) Place an LED light inside and test. Add names or dates on a small tag for a personal touch.
Tips:
– Personalize with names or dates for anniversaries or weddings.
– Keep the color scheme simple—red and pink for a classic look.
– Hang them in entryways, windows, or above a table to set a warm mood.
21. Seasonal Lanterns

Are you looking for a way to keep your home bright all year without buying new decor? Seasonal lanterns let you change the look with small swaps, not big redecorating. You keep a single base lantern and update the motif as the year turns.
What to feature
– Winter: snowflakes in white and cool blue.
– Spring: flowers in soft pastels.
– Summer: sun symbols in bright yellow.
– Autumn: leaves in warm orange and gold.
Choose colors that fit the season. This makes the lanterns feel true to the outdoors.
How to build your seasonal set
1) Start with a simple base lantern, like paper or fabric.
2) Make easy motif templates or use removable decals.
3) Paint or apply decals with non toxic paints. Let dry.
4) Attach motifs with removable tabs or Velcro so you can swap them.
5) Put the lanterns in a spot you see daily. Switch motifs each season.
Tips to make it last
– Use LED lights inside. They stay cool and safe.
– For outside use, seal the paint and choose sturdy materials.
– Store off season pieces in a labeled box.
– Try palettes: winter navy and white, spring blush and mint, summer yellow, autumn rust.
Next steps are simple: plan a quick seasonal craft session with a friend to update your lanterns.
Seasonal lanterns add a warm glow to any room year round.
@media(max-width:480px){
22. Starry Night Lanterns

You want a soft glow that feels like a starry night. Starry Night Lanterns give you that calm light without loud colors or clutter.
Materials you need
– Deep blue, navy, or black paper
– Scissors and tape
– A star stencil or star punch
– LED tea light or a small string light
– Glue or tape to hold stars in place
– Optional: a moon cutout or silver thread for extra shine
What you do
– Cut out stars in different sizes. Mix big and small for depth.
– Place stars on the inside of a lantern or around its outside.
– Secure each star with a dab of glue or a strip of tape.
– Create a light pocket for the bulb so the glow shows through the stars.
– Insert an LED light. Turn it on and watch the sky come alive.
– Hang the lantern or set it on a shelf where heat won’t touch it.
Design tips
– Use a mix of large and tiny stars for a natural look.
– Add a moon cutout for extra charm.
– Tie in a string of twinkling fairy lights behind the stars for a subtle shimmer.
Where to use
– In a bedroom for a gentle bedtime glow.
– In a meditation or reading corner for focus and calm.
– In a cozy living room as a soft night light.
Care and safety
– Stick with LED lights; they stay cool.
– Keep paper away from water and heat.
– Store the lantern flat when not in use.
Next steps: Make one tonight and tweak the layout until it feels just right.
@media(max-width:480px){
23. Recycled Book Lanterns
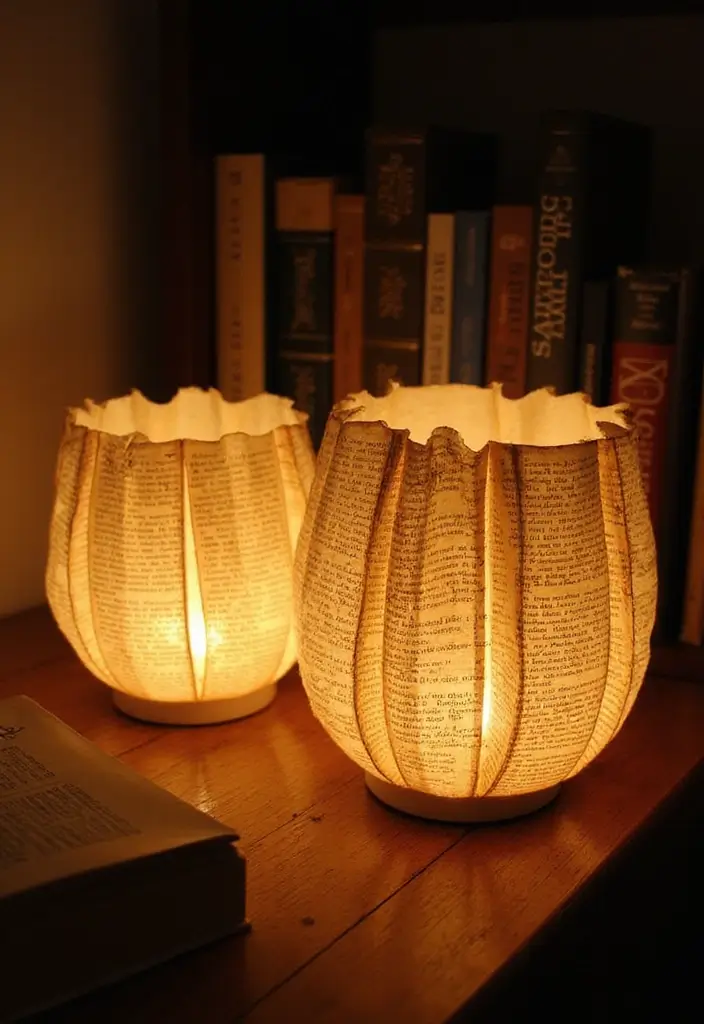
One problem you might have is making lighting warm without buying new decor.
Solution: recycled book lanterns. They turn a shelf into a tiny story.
Here is why this works. The pages catch light softly and create layers that glow.
Here is how you do it:
– Choose old books with art or big prints. The pictures catch the light and tell a quiet tale.
– Pick a clear container, like a glass jar or a small lantern with a transparent body.
– For safety, use a battery LED tea light or a fairy light. Do not use real candles.
Steps:
1) Open the book and pick pages you like. You can use whole pages or thin strips.
2) Clean the container. If you plan to wrap pages, fold and crease lightly so they lay flat.
3) Glue pages to the outside of the container in layers. Leave some gaps so light glows through.
4) Tie a string or wire to hang it. Add a ribbon to hint at your favorite book cover.
Tips:
– Look for pages with soft colors or illustrations for visual appeal.
– Use a clear jar so the light can pass through the pages.
– Place near a cozy chair or on a shelf with other bookish decor.
Recycled book lanterns suit readers who love a warm glow. They bring charm and a touch of library magic to any room.
24. Color-Changing Lanterns
You want lanterns that shift color to set the mood. Color-changing lanterns use LED lights that glide through hues. They turn a simple glow into a small light show. You can buy color-changing bulbs for old lanterns or build a setup from scratch.
– Quick-start: Install a color-changing LED bulb with a remote. Put it in a paper lantern, switch on, and pick a color. Try a steady glow or a soft fade.
– DIY path: For a custom look, tuck in a color-changing LED strip or puck behind the paper. Power with a small battery pack or USB source. Keep wires tidy and away from hot spots. Seal the lantern so it stays safe.
– Practical uses: At a party, let colors move to the beat. For holidays, use theme colors like red and green or blue and silver. For quiet nights, choose gentle fades.
– Tips: Use a remote to switch colors and modes. If your lantern supports music, turn on the rhythm sync. Keep things cool with LEDs, not hot bulbs.
– Care and safety: Check batteries, avoid flames, and keep electronics dry.
– Why it helps: You gain instant mood control with little effort.
@media(max-width:480px){
25. Frosted Glass Lanterns
If you want a soft, romantic glow without bright glare, frosted glass lanterns are a perfect match. They diffuse light just enough to feel calm and cozy. You can use everyday glass containers and turn them into elegant accents for any space.
Here is why it works. Frosted surfaces scatter light, so candles or LEDs don’t create sharp spots. The result is a gentle halo that suits bedrooms, patios, and dining areas.
How to make them. Start with clean glass jars or votives. Choose your method:
– Frosted spray paint: shake well, hold the can about 10 inches away, and apply light coats. Let each coat dry before adding another.
– Glass etching cream: place a stencil, dab on the cream, wait the time on the label, then rinse away. Seal with a soft cloth.
Now light it up. Use warm-white LED string lights or a small LED candle for safe, steady glow. If you want a more rustic look, leave a few clear spots to catch a spark of light.
Tips:
– Use stencils to create delicate patterns.
– Pair with low, warm lighting for a cozy vibe.
– Great for weddings, holidays, or everyday home decor.
Frosted glass lanterns bring a timeless touch to any room.
@media(max-width:480px){
26. Balloon Lanterns
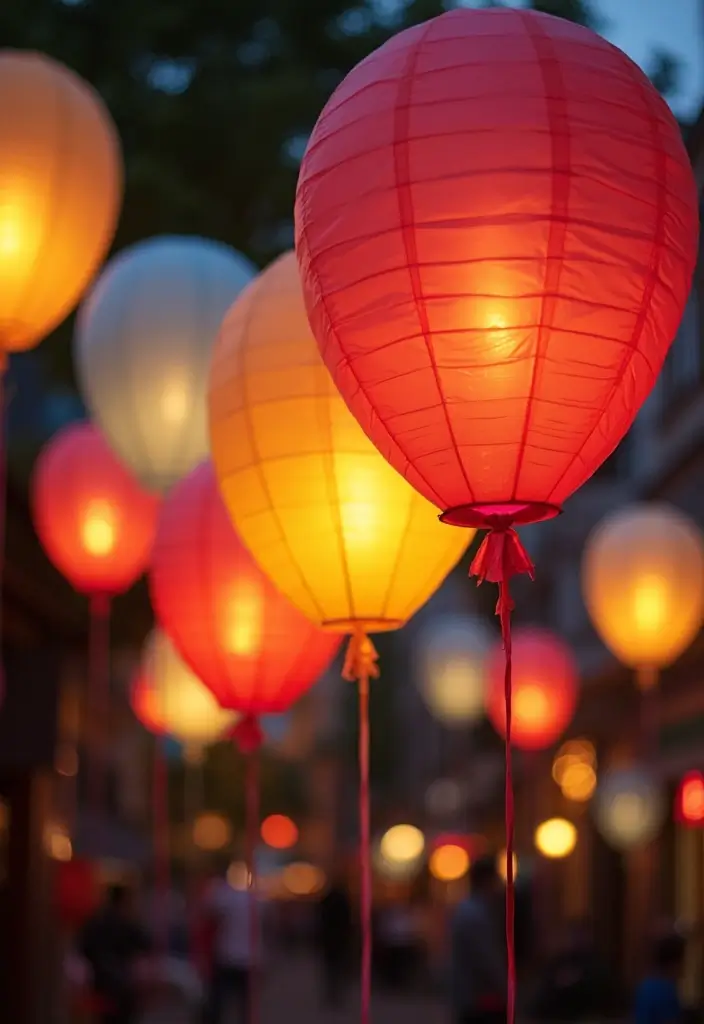
You want a soft glow that invites people to gather. Balloon lanterns give that warm light with a playful look. They’re easy to make and look great in a group.
Materials
– Balloons in different sizes
– Paper strips or torn newspaper
– White glue or flour paste
– Water
– LED fairy lights or a small battery lantern
– Paints and brushes
– String or ribbon to hang
Here is why you start with balloons. They make a hollow shell that dries into a lantern shape.
Steps
1) Inflate a balloon to your chosen size. Leave the knot loose to lift it out later.
2) Mix glue with a splash of water to make a thin paste.
3) Dip paper strips and cover the balloon. Add several coats for strength.
4) Dry fully, then pop the balloon and tuck it out. You’ll keep a round lantern frame.
5) Paint or decorate. Add the LED lights inside and hang with the ribbon.
Tips
– Vary sizes for a fun cluster.
– Seal the surface lightly so colors stay on and rain won’t seep in.
– Use battery LEDs; they stay cool and safe indoors or out.
Uses
Perfect for backyard nights, birthday rooms, or a cozy corner. They store flat and can glow for hours in a windless spot.
Common questions: How long to dry? About 24 to 48 hours. Can you light them with real candles? Not advised. Stick with LEDs.
Recommended Products

Non-blinking. Color Temperature: 3000K (Warm White).

[You will get]: 50pcs warm white mini light beads, Glow mode: steady, no blinking.safe to use indoor and outdoor, LED lights can be hung, fun!

High Quality Materials:The use of high-quality plastics that are non-toxic and tasteless will not cause harm to the human body.It will not be dangerous to children and can be used with confidence
27. Candle Jar Lanterns

Need a soft, cozy glow for evenings at home or a small outdoor gathering? Candle jar lanterns are easy to make and look welcoming.
What you need is simple: glass jars in different sizes, a shallow bed of sand or pebbles for the bottom, and a candle for each jar. Decor is up to you: ribbons, twine, or a splash of paint can add color and style.
How to make them is quick. Clean the jars well. Pour a thin layer of sand or pebbles at the bottom. Place a candle on top. Add a ribbon around the neck, wrap twine, or paint a small design on the jar for a personal touch. If you want less risk, use LED candles for indoor or outdoor use.
Tips:
– Make sure jars are heat resistant and stable.
– Use jars of different sizes for a varied look.
– Outdoor lighting benefits from LED candles and careful placement.
Next steps: set your lanterns where you want the glow most. Line a table for dinner, flank a doorway, or guide guests along a walkway. Indoors, they fit on shelves, coffee tables, or windowsills. Outdoors, they brighten patios, steps, or a garden path.
Candle jar lanterns bring a warm, inviting mood to gatherings without a lot of work.
@media(max-width:480px){
@media (max-width: 600px) {
.normal-quiz-iframe { min-height: 570px !important; height: 570px !important; }
}
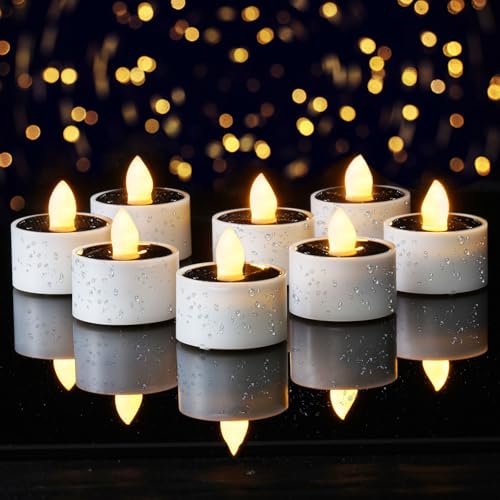
Recommended Products

SOLAR POWER TEA LIGHTS: Only Charge these flameless tea lights candles via Sun during the day and they will light up for 8-10 hours at night or dark, energy-saving and reusable, you don't need manual switch, they will automatically turns on and off
COZY, REALISTIC CANDLE GLOW – Warm white LEDs give a soft, flickering candle-like glow, ideal for Halloween and Christmas lanterns, mason jars, small garden accents and a cozy window sill
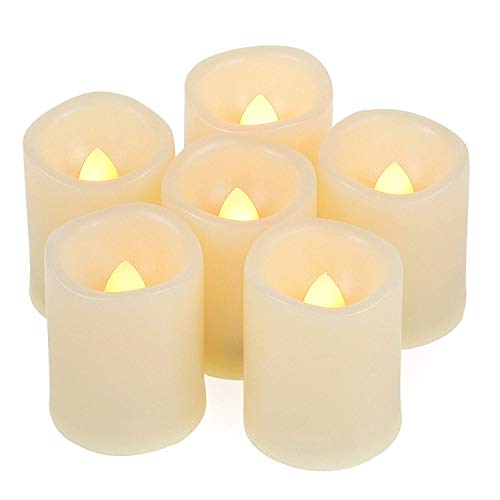
【FLAMELESS LED TEALIGHT CANDLES WITH TIMER】Simply switch on the bottom of the led candle light to start timing program. With timer function(6 hours on, 18 hours off automatically over each 24-hour period), Save the trouble to turn It on and off every day.
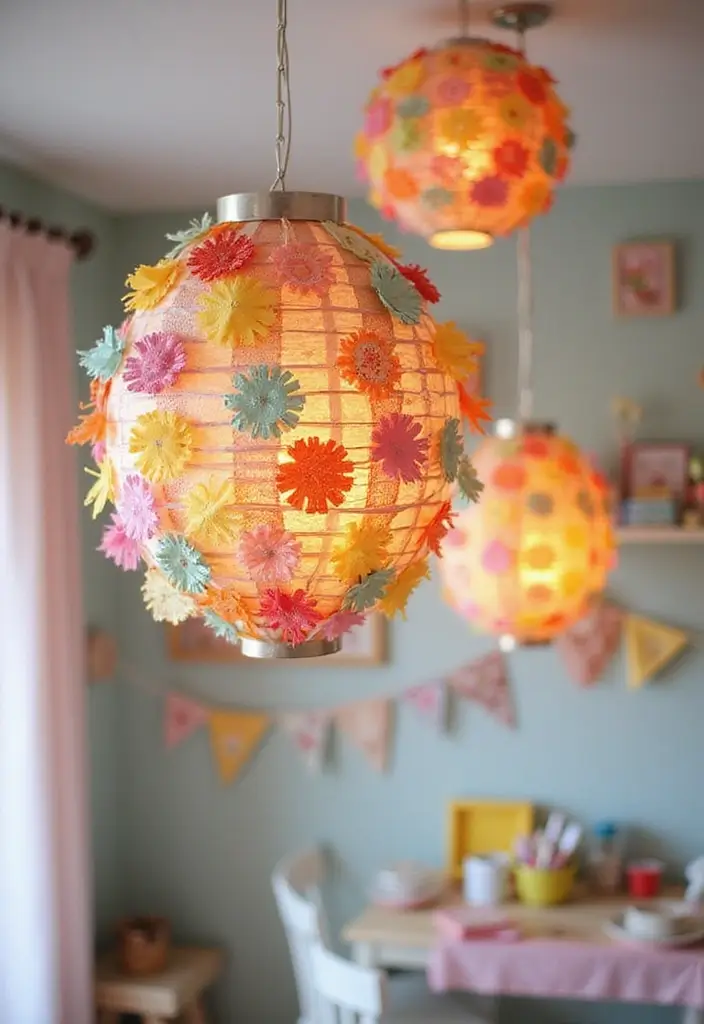
28. LED Flower Lanterns

You want a cozy glow without a flame. LED flower lanterns give you a soft, nature-inspired light that’s safe and easy. This small project fits any room and can be a thoughtful gift.
What you’ll need
– Artificial flowers you love
– A clear jar or mason jar
– Battery-powered LED lights or a string of fairy lights
– A dab of greenery for fullness
– A thin ribbon or twine for a finishing touch
How to build it
1. Put the lights in the jar first. Let the battery pack sit on the bottom so you can reach it later.
2. Tuck larger blooms into the glass. Let petals face outward for a soft halo.
3. Add greenery to fill gaps. This makes the lantern look full and natural.
4. Trim stems as needed. Keep the arrangement balanced around the lights.
5. Choose colors that match your room. Warm whites read cozy; pastels feel playful; bold hues pop.
Here is why this works: LEDs stay cool, so you can place lamps close to fabric or paper without a heat risk. The artificial flowers keep their shape, so your lantern stays charming for months.
Next steps: try different jar shapes or sizes. Mix tiny blooms with bigger buds. Display them in pairs on a dining table, on a shelf, or along a windowsill. They make great gifts too.
@media (max-width: 600px) {
.visual-quiz-iframe { min-height: 995px !important; height: 1100px !important; }
}
29. Geometric Lanterns
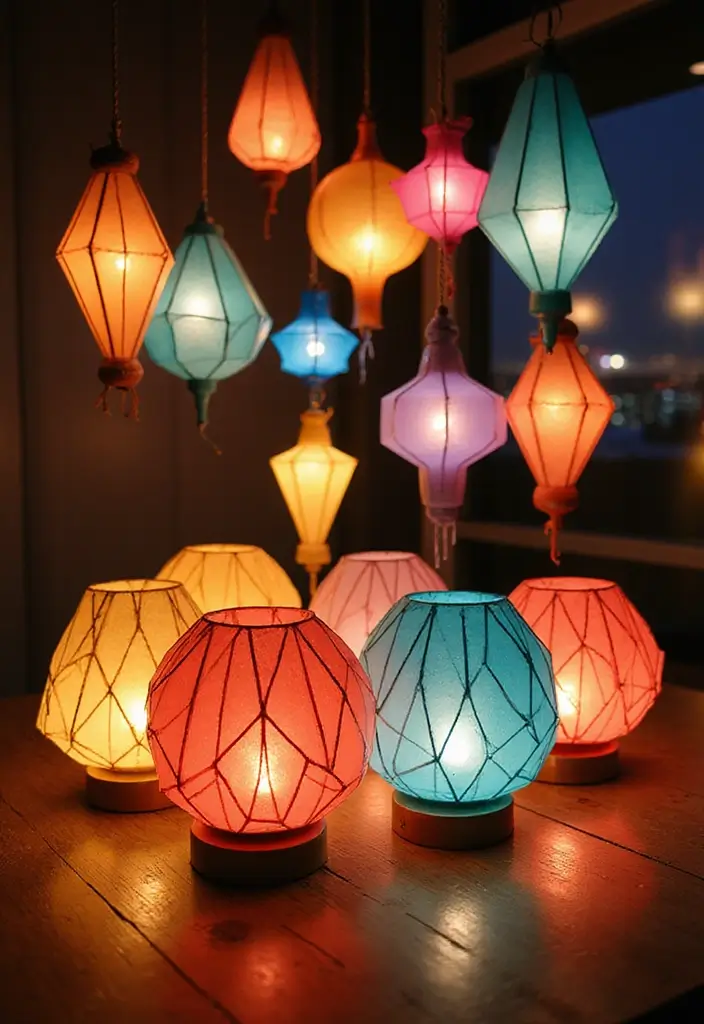
Want a bold finish for your lantern project? Geometric lanterns bring clean lines and a fresh look to any space. Use colorful cardstock or thin cardboard to cut sharp shapes like triangles, diamonds, and hexagons. When they come together, you get a modern, chic glow. For safety, finish with LED lights.
What you need
– Colorful cardstock or thin cardboard
– Scissors and a craft knife
– Ruler and pencil
– Glue or clear tape
– LED tea lights or small string lights
– Optional: metallic paint for extra shine
How to make
1) Draw a simple pattern on your paper. Start with a basic grid and add a few shape cutouts.
2) Cut out the shapes, leaving a sturdy border to keep the frame strong.
3) Score and fold along lines to form a hollow shell.
4) Glue edges and hold until it sticks. Add a hanging string if you want to suspend it.
Keep the shapes evenly spaced so light can peek through in pretty gaps.
Display ideas
Hang a cluster near a doorway or along a balcony railing. Use a single lantern as a table centerpiece with a tiny LED light inside. Indoors or outdoors, these geometric forms catch the eye.
Tips
– Mix shapes and sizes for a dynamic look.
– Paint with bold, solid colors or add metallic accents for shine.
– Use LED lights for a safe, gentle glow.
Conclusion
Crafting paper lanterns not only adds ambiance to your evenings but also allows for personal expression through creativity and recycling.
With these 29 diverse DIY ideas, you can light up your home in unique, eco-friendly ways that reflect your personality and style.
So gather your supplies, unleash your creativity, and create lanterns that tell your story!
Note: We aim to provide accurate product links, but some may occasionally expire or become unavailable. If this happens, please search directly on Amazon for the product or a suitable alternative.
This post contains Amazon affiliate links, meaning I may earn a small commission if you purchase through my links, at no extra cost to you.
Related Topics
paper lantern crafts
eco-friendly decor
DIY home lighting
creative paper crafts
sustainable projects
easy lantern ideas
handmade decorations
recycled materials
cozy ambiance
beginner DIY
seasonal crafts
upcycled lanterns