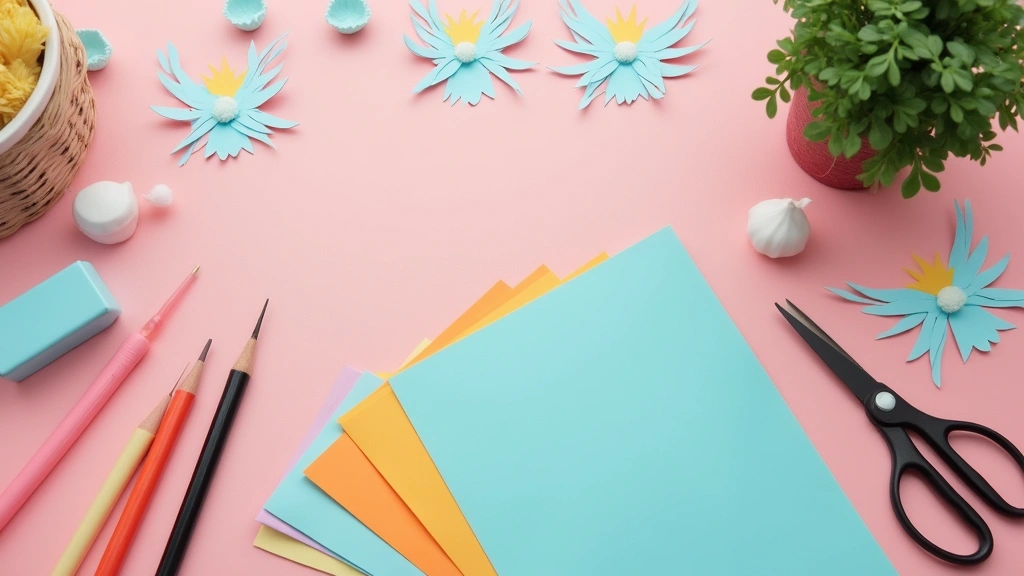
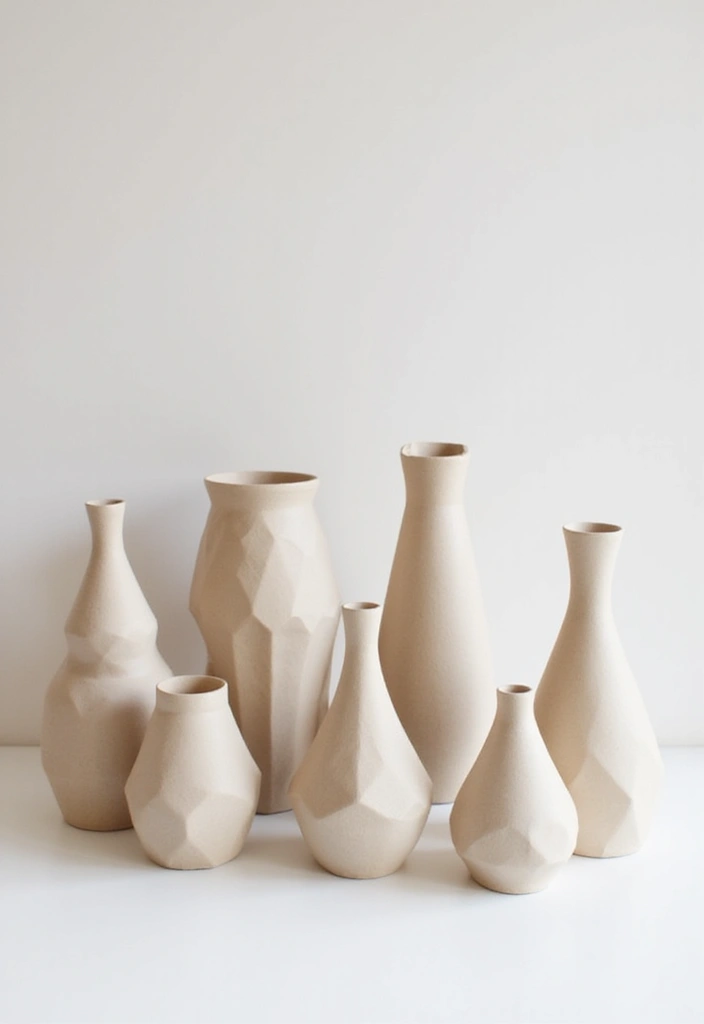
I put this together because simple, elegant decor can lift a room without a big price tag. Paper vase crafts give that chic look with everyday materials. Plus, you can finish projects in just a few hours. That makes it easy to keep creating as your mood changes.
If you love DIY, small spaces, and bright colors, this post is for you. It’s for renters who want temporary but stylish decor. It’s for busy people, students, and anyone who enjoys a quick craft break. If you care about sustainability, these ideas use scrap or recycled paper.
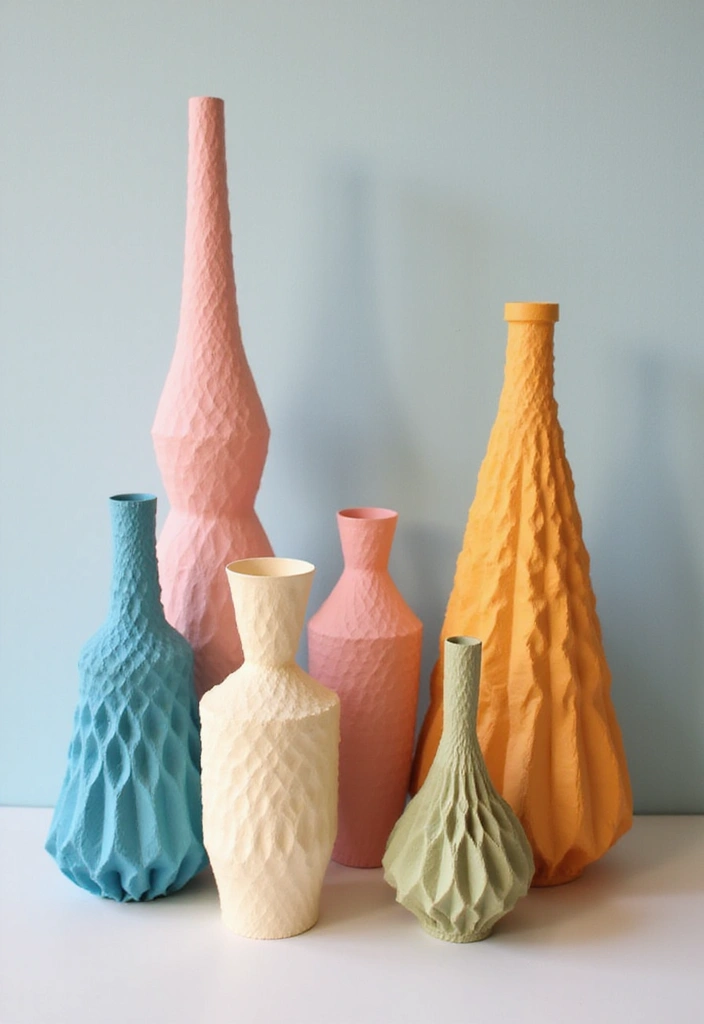
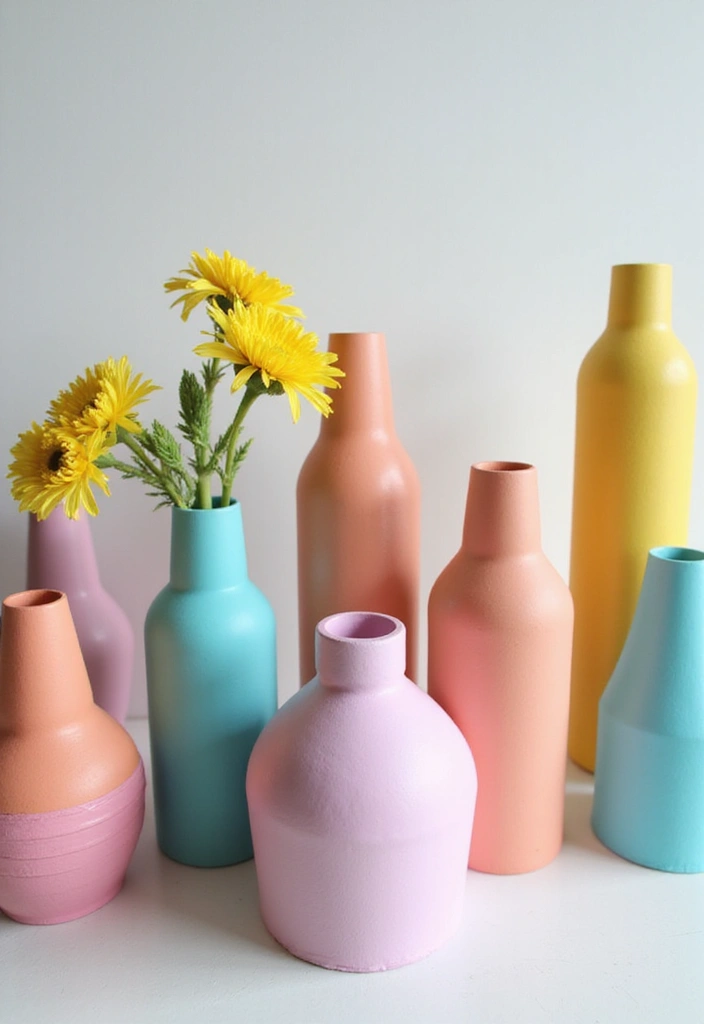
Here you will find 27 paper vase crafts you can make at home. The ideas cover bold modern looks and gentle vintage vibes. Each idea includes clear steps and simple materials. You will learn tips to shape, seal, and customize your vase.
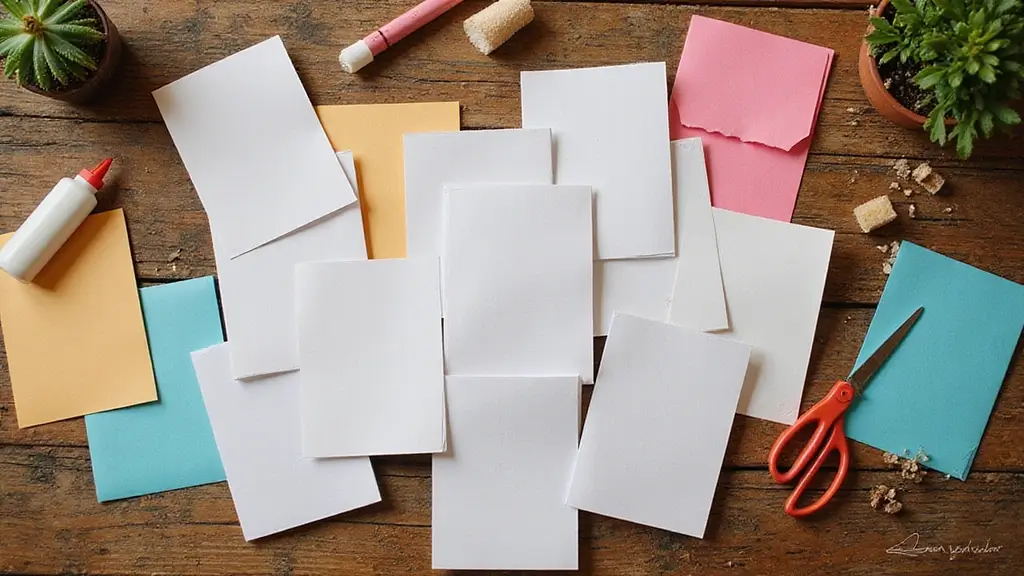
You will see techniques like folding, rolling, decoupage, and painting. I suggest using cardstock or reclaimed magazine paper for strength. For a glassy finish, try a light coat of glue and a clear sealant. For a rustic feel, use twine, kraft paper, and warm colors.
Yes, paper can be fragile, but you can reinforce with a cardboard base. Store finished pieces flat to avoid creases. Keep any real flowers in water in a separate liner vase. Experiment and adjust sizes to fit your containers.
Ready to start? Gather paper, scissors, glue, a paint brush, and a vase. Choose a color story that makes you smile and dive in. If you share a photo of your creation, tag us and inspire others. Let these ideas bring handmade elegance into your space.
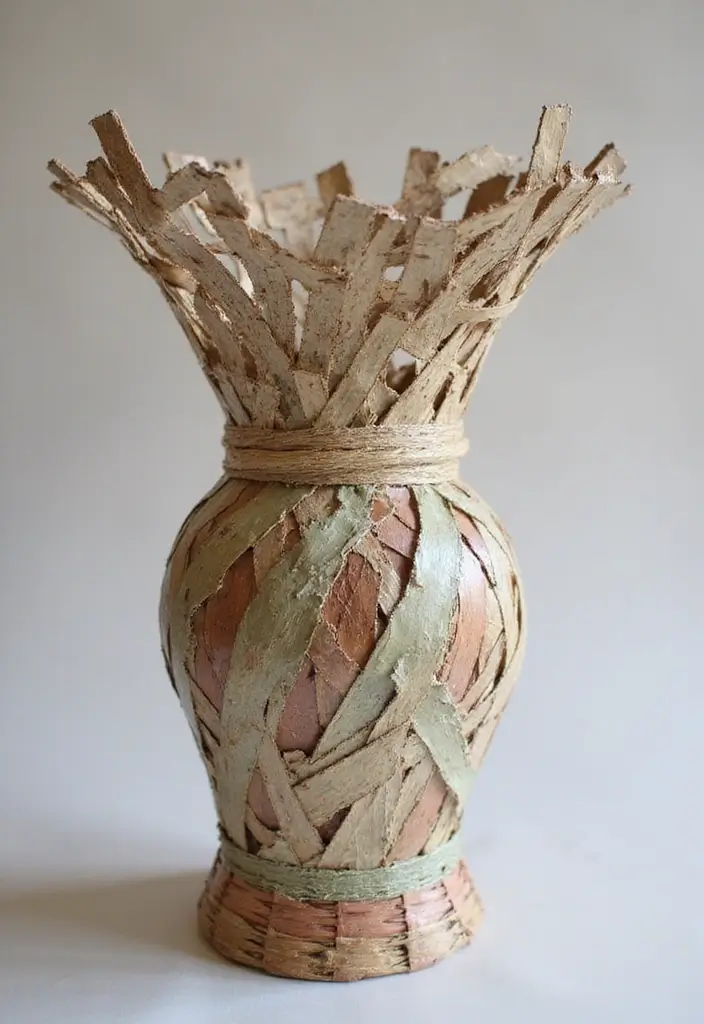
1. Twisted Newspaper Vase
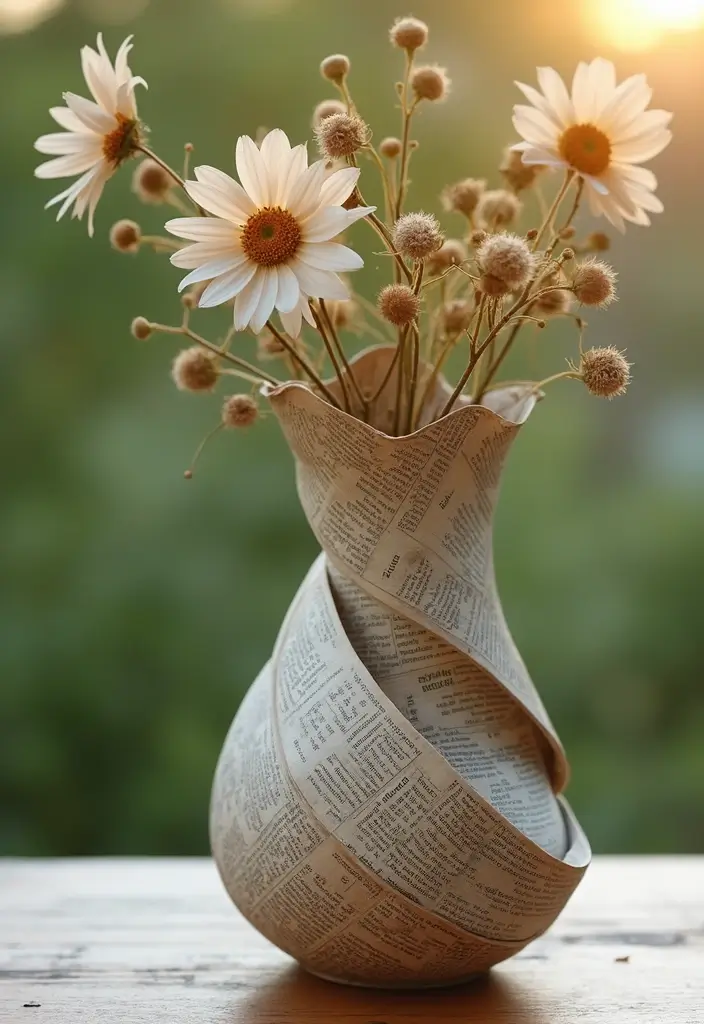
Here’s a quick fix for a dull corner: a vase that’s cheap, eco-friendly, and full of charm. You can make a twisted vase from old newspapers. It looks rustic and suits dried stems or stands as art.
What you’ll need
– Newspaper strips
– White glue or craft glue
– A sturdy cardboard circle for the base
– Scissors
– Paint or a clear sealant (optional)
Here is why this simple method fits your busy life. It uses scraps and adds texture to your space.
Step by step
1) Cut newspaper into strips, about a half-inch to an inch wide.
2) Twist each strip tightly into a long spiral.
3) Dab glue on the ends to lock the spiral.
4) Build the vase by circling strips around the base. Glue as you go.
5) Let the glue dry completely.
6) Paint a soft color or seal it for durability.
7) Use dried flowers or let it stand alone as art.
Tips
– Use different newspaper sections for color.
– A light wash adds vintage charm.
Next steps
Place it on a shelf, or make a smaller version as a gift. It’s quick, cheap, and a neat way to recycle paper.
@media(max-width:480px){
Recommended Products

UNIQUE RETRO DESIGN: This newspaper vase features a wrapped print look with black and white graphics. A playful retro vase that adds eclectic charm and turns fresh stems into an eye catching display.

📰 Retro Newspaper-Inspired Design:Featuring a black and white newspaper pattern with a novelty wrapped-newspaper shape, this ceramic vase blends vintage aesthetics and eclectic home decor. Its unique book-like silhouette (resembling rolled newspaper) adds a funky, artistic touch to tabletops, shelves, or boho living room decor, making it a conversation-starting centerpiece.
2. Colorful Paper Mache Vases

Colorful paper mache vases are a simple way to add texture and color to any room. You get a light, eye-catching piece that’s easy to make at home. Here is how to do it well.
Materials
– Flour and water paste for the base
– Colorful tissue paper, torn into small pieces
– A balloon to shape the vase
– Craft paint for extra designs
– Clear sealant to finish
– Scissors and a brush for neat layering
Steps
– Inflate the balloon to your desired vase size.
– Mix a smooth paste with flour and water.
– Tear tissue paper into tiny bits for easy layering.
– Brush a thin layer of paste on the balloon, then stick tissue pieces on.
– Continue adding paste and tissue until the whole balloon is covered.
– Let the layers dry completely, usually 24 to 48 hours.
– Gently pop the balloon and pull it away to reveal the hollow vase.
– Add painted patterns or shapes with craft paint.
– Apply a clear sealant to protect the surface and give a soft shine.
Tips and tricks
– Mix colors to build soft gradients that draw the eye.
– A coat of sealant makes the vase sturdier and easier to clean.
– Use the vase for real flowers or fake stems to avoid extra care.
– Handle gently; this vase is lightweight but can crack if pressed hard.
– Keep it on a shelf or table where kids won’t bump it often.
Here is why this technique works: tissue layers build a strong yet light shell, and the bright pieces catch light in a charming way. Next steps, try different sizes and shapes to line a window ledge or coffee table with color.
3. Elegant Origami Vases

You want a vase that looks elegant without taking forever to make. Origami can give you a sleek, eye catching piece from a single sheet. You can shape a vase that holds a little water or a sleeve that fits a glass jar for fresh or dried flowers. Start with steady folds and a calm workspace.
What you need
– Quality origami paper in the right weight, about 80–100 gsm
– A small glass inner vase or a waterproof liner
– A color plan using double sided paper for extra depth
Design ideas
– Simple lotus vase: a few clean folds create a soft, flower-like edge
– Geometric shell: fold straight edges into a snug polygon for a modern look
– Tall cylinder: keep edges sharp for a tidy, tall profile
Two ways to hold water
– Put a small glass vase inside the paper shell. Water stays in the inner vase, while the paper stays dry.
– Line the inside with a thin plastic sleeve or apply a clear coating to seal the inner surface. This lets the paper touch water without soaking through.
Finishing touches
– Add beads or a ribbon along the rim for a personal touch
– Pick colors that match your room, then keep the surroundings simple
– Display on a sturdy tray or shelf where it can be admired up close
Next steps: practice a couple of folds, pick a design you love, and start small. Your elegant origami vase is ready to brighten any space.
Recommended Products
![Amazing Origami Kit: Traditional Japanese Folding Papers and Projects [144 Origami Papers with Book, 17 Projects]](https://m.media-amazon.com/images/I/51uEuHVJ-PL._SL500_.jpg)


COLORFUL ORIGAMI SET - Our kid origami kits contains 108 sheets of patterned origami paper with 54 patterns, as well as 130 sheets of blank color origami paper and origami instruction books, which is enough for parents to accompany their children to do handmade origami activities with different patterns and spend a wonderful hour together.
4. Recycled Glass Jar Vases Covered in Paper

Looking for an easy, eco-friendly vase? Start with a clean glass jar and a pile of paper scraps. A paper skin turns a plain jar into a standout piece you can display anywhere.
What you need
– A clean glass jar, washed and dried.
– Scrap paper from magazines or gift wrap.
– Mod Podge or white glue thinned with a little water.
– Optional: twine, lace, or a thin ribbon for embellishment.
How to make it
1) Brush a thin layer of glue on a small patch of the jar.
2) Place a strip of paper on the glue and smooth out air bubbles.
3) Add more strips until the whole jar is covered with paper.
4) Let it dry completely, then apply a second coat of glue to seal.
5) Tie on twine or lace at the rim for a rustic finish.
Style ideas
– Pick a color palette that matches your room.
– Mix different paper patterns for a playful boho look.
– If you want to use real water, add a thin plastic liner inside or place a glass vase inside the jar.
– Try a gradient effect by fading paper from light to dark along the body of the jar.
Uses and care
These paper-covered jars work as vases with dry stems or artificial flowers. You can also use them to hold utensils on a table. To care for them, wipe with a dry cloth and avoid soaking. If the paper peels, re-glue and let it dry again.
@media(max-width:480px){
Recommended Products

1.HIGH QUALITY MATERIAL: Our glass bottles are made of high quality high borosilicate glass and sealed with smooth cork, sturdy to ensure a tight seal.

Complete Glass Vase Craft Kit: Includes 6 clear glass vases designed as a glass decorating kit for DIY painting, creative customization, and decorative home or event use

1.CAPACITY:This mini glass jars with lids holds 5 ml , perfect for storing small quantities of oils, perfumes, or craft materials.
5. Simple Paper Tube Vases

Are you hunting for chic vases without buying new ones? Simple paper tube vases turn everyday tubes into stylish decor. With a few easy tweaks, toilet paper rolls shine on any shelf.
Materials
– Toilet paper rolls
– Decorative paper, fabric, or one coat of paint
– Scissors
– Tape or craft glue
– Ribbons or lace
– Optional: a slim glass or plastic liner for water
Steps
1) Cut several rolls to different heights. This mix of tall and short pieces creates a layered look when you group them.
2) Cover each tube with your material. Wrap tightly for a neat finish or add textured fabric for a softer feel.
3) If you want a bold look, paint the outside and let it dry fully before decorating.
4) Add a trim by tying on ribbons or wrapping lace around the middle. A little shine draws the eye.
5) If you plan to use real stems, insert a slim liner inside each tube to hold water. Set the vases on a tray or in a shallow basket.
6) Arrange the vases in a cluster on a dining shelf, coffee table, or mantel. Vary spacing to keep it lively.
Tips
– Stick to two or three colors for a clean, cohesive display.
– Mix heights and textures for visual interest.
Next steps: try this idea in a kitchen or entryway to welcome guests with handmade charm.
6. Paper Flower Vase Tutorial

You want a centerpiece that looks good and is easy to make. A paper vase with a bouquet of paper flowers fits the bill. Here is how to do it.
Materials
– A sturdy base such as a cardboard form or a clean plastic bottle.
– Decorative paper to wrap the base for color and grip.
– Paper for flowers and floral wire for stems.
– Glue, scissors, and tape to assemble.
– Optional glitter, beads, or a ribbon for accents.
Steps
– Prepare the base by cleaning it and making sure it sits flat.
– Wrap the base with decorative paper and smooth the edges.
– Make the flowers using a simple online tutorial. Use different colors and sizes for a lively bouquet.
– Add stems by attaching floral wire to each flower and shaping the wire to rise.
– Arrange the stems in the vase, pushing them in at different angles for balance.
– Finish with a touch of glitter, beads, or a ribbon.
Tips
– Choose a color theme that matches your room.
– Vary stem heights to add depth.
– Secure each stem with a dab of glue at the base.
– Store the vase in a dry place to keep the paper fresh.
Next steps
– Place the vase on your table or shelf as a ready-made DIY centerpiece.
– Swap in new paper flowers for different seasons or moods.
Recommended Products

Fiesta Centerpiece Set in 8 Styles: Create a stunning tablescape instantly! This complete Mexican party decoration set includes 16 paper flower vases in 8 unique terracotta-inspired designs (two of each). The variety allows for a coordinated yet dynamic look, perfect for building a festive Cinco de Mayo or Mexican-themed party centerpiece effortlessly.
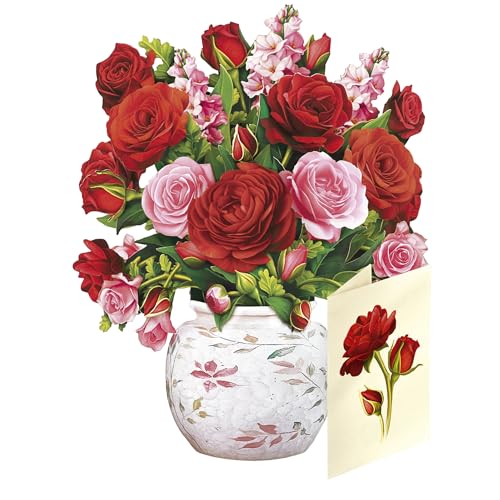
DAZZLING FROM EVERY ANGLE: Luscious garden roses and snapdragons shimmer in shades of pink and red displayed in an ornate watercolor crackle vase. Popped open, this design spans 6" x 5", making a dramatic statement on any table, desk, or shelf.

Lifelike Bouquet: 5pcs Artificial flowers are 29.5 inches tall. Each bundle has 12 flexible stems. Artificial Halloween flowers feature unique floral swirls with small berries at the top of the stems. The attractive hues create multi-colored bouquets perfect for DIY flower arrangements that blend perfectly into your personal décor
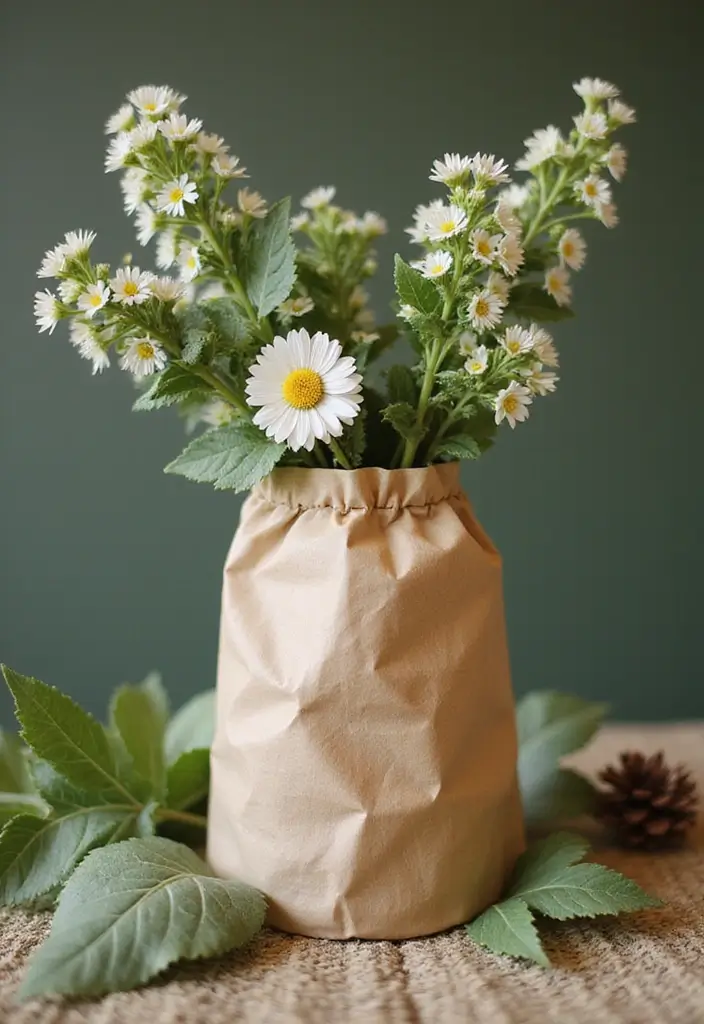
7. DIY Paper Bag Vase
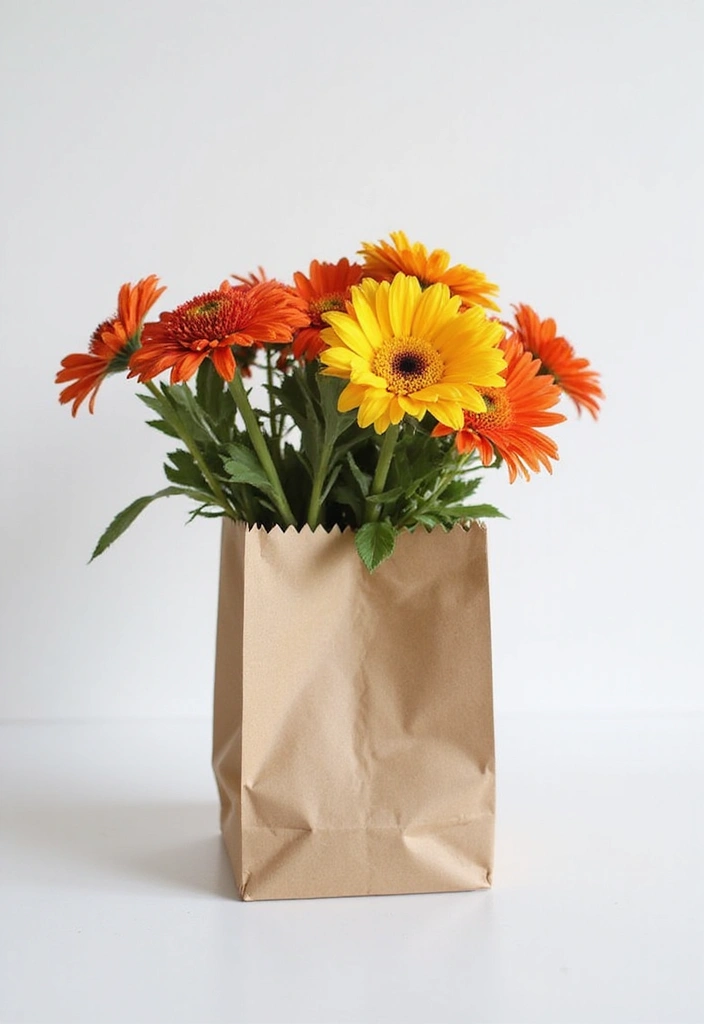
Want a simple, stylish vase without buying one? A sturdy paper bag can do the job. This DIY paper bag vase fits any decor and saves you time.
Here is why this works. Paper bags are strong when you fold them right. They are easy to shape into a vase form. You can recycle the bag later when you are done.
What you need
– A thick paper bag
– Scissors
– Paint, stamps, or markers for design
– A plastic liner or a small bottle to hold water
Step by step
– Pick a bag and decide how tall you want the vase to be.
– Fold the bag to that height and press flat to keep a clean edge.
– Cut the top edge into a straight line or go with a gentle wave.
– Decorate with paint, stamps, or markers to suit your style.
– Place a plastic liner or a small bottle inside to hold water.
Tips to make it last
– Use two bags for extra sturdiness.
– Add a plastic insert to protect the paper from water damage.
Ways to use and style
– Pair it with a few fresh stems for a clean, modern look.
– Try bold colors for a bright room, or soft tones for a calm space.
– Use different heights to create a varied centerpiece.
Next steps: make a few and mix textures like kraft with white or striped paper for a gallery feel. This craft is quick, affordable, and easy to customize for seasons or special events.
8. Painted Paper Vases

Painted Paper Vases
If your plain paper vases feel dull, give them new life with paint. Start with a clean base of white paper mache or sturdy cardboard. Then layer acrylic colors to match your room. You can keep it simple with one solid shade or go bold with patterns.
– Use white paper mache or sturdy cardboard.
– Use acrylic paints in your chosen colors.
– Use brushes and a sponge for texture.
– Use stencils for neat patterns.
– Use a clear gloss spray or varnish to seal.
Here are practical steps you can follow:
– Prepare a clean base and let it dry.
– Paint a base color across the whole vase.
– Add patterns with stencils or freehand lines.
– Add texture by dabbing with a sponge or brush.
– Finish with a glossy coat and let it dry fully.
Design ideas to try:
– A single bold color for a modern look.
– Two tones with a clean line between them.
– Geometric shapes for a graphic vibe.
– Floral or dot patterns for a playful touch.
Tips for better results:
– Use thin coats that dry flat to avoid warping.
– Let each layer dry before adding the next.
– Lightly sand rough spots before sealing for a smooth finish.
With a painted vase, you get a bright piece that fits many styles and rooms. It’s quick to make and easy to change with the season.
9. Woven Paper Vases
If you want a vase with real texture, woven paper vases are a smart choice. You get a handmade look without expensive materials. You’ll end up with a unique decor piece that fits many shelves and tables.
What you’ll need
– Paper strips from old paper bags, craft paper, magazines, or greeting cards
– Scissors and glue
– A mold to shape the vase, like a bottle, tin can, or a rolled cardboard form
– Optional decorations: ribbons, beads, paint, or string
How to make it
– Cut strip pieces about 1/2 to 1 inch wide. Keep them straight for neat weaving.
– Start a simple weave on a flat surface. Weave over and under to form a lattice.
– Wrap the lattice around your mold and glue as you go. This creates the vase shape.
– When the shape is steady, trim any loose ends and add another layer for strength.
– Let the glue dry fully before you remove the mold
Decorating and styling
– Add ribbons, beads, or a coat of paint to give color and shine.
– Mix paper textures, glossy magazine pages with kraft paper, to add depth.
– This style works best with dried flowers, not fresh blooms, because the structure is sturdy but not watertight
Care and tips
– Keep it dry and away from water to protect the paper weave.
– Store it upright so the strands stay aligned.
– For a quick update, swap out the decorations with the seasons
Next steps.
10. DIY Quilled Paper Vases
You want a vase that looks classy without costing a fortune. A quilled paper vase can give you that exact look. It feels like art you made by hand.
Here is why this works. Paper strips curl into soft shapes that catch light. A plain base becomes a small sculpture when you wrap it with color and pattern.
What you need
– A clean vase base. A recycled glass bottle or a light paper mache form works well.
– Quilling paper strips in two or three colors.
– White craft glue or a simple glue bottle.
– A quilling tool or a toothpick for shaping.
– Scissors and a light clear sealant if you want extra protection.
Let’s break it down
Step 1: Prep the base. Make sure it is dry and free of dust.
Step 2: Plan your colors. Use two or three hues for harmony. A quick sketch helps.
Step 3: Make the shapes. Curl strips, then pinch them into teardrops, scrolls, or petals.
Step 4: Attach the design. Glue pieces in rows or wrap them around the vase. Let the glue dry flat.
Step 5: Add a focal point. Place a cluster of flowers or a bold swirl to draw the eye.
Step 6: Finish and care. If the vase will touch water, seal lightly and dust with a soft brush.
Finish with style. Set it on a table, pair with fresh stems, and enjoy your handmade charm.
@media(max-width:480px){
11. Folded Paper Vases
Folded paper vases add a light, handmade feel to any room. They look like tiny origami pieces and work with simple decor. You can make a vase that holds real flowers by lining it with a thin inner container. This project stays calm and satisfying.
Materials
– sturdy craft paper
– scissors
– clear glue or tape
– a ruler
– optional patterned paper or color accents
What to know first
Here is why folded shapes work. The folds build a firm body with a slim top for stems. These vases are best with light blooms or artificial stems.
Steps
– Cut a rectangle or square from your paper.
– Fold to form panels that resemble a vase body.
– Glue or tape the sides to seal the shape.
– Use a liner inside if you want real water. A plastic cup fits well.
– Arrange stems and light flowers inside.
Tips to boost style
– Try a mix of papers for depth.
– Use two or three vases at once for a table display.
– Keep colors soft for a chic look, or mix bright hues for a playful vibe.
Care and display
– Use dry or artificial flowers to avoid water on paper.
– Place on a sturdy base so it won’t tip.
– Let glue dry before moving.
Next steps. Expand with color blocks, different folds, or mini sets to create a cohesive centerpiece.
12. Decorative Paper Vases with Lace
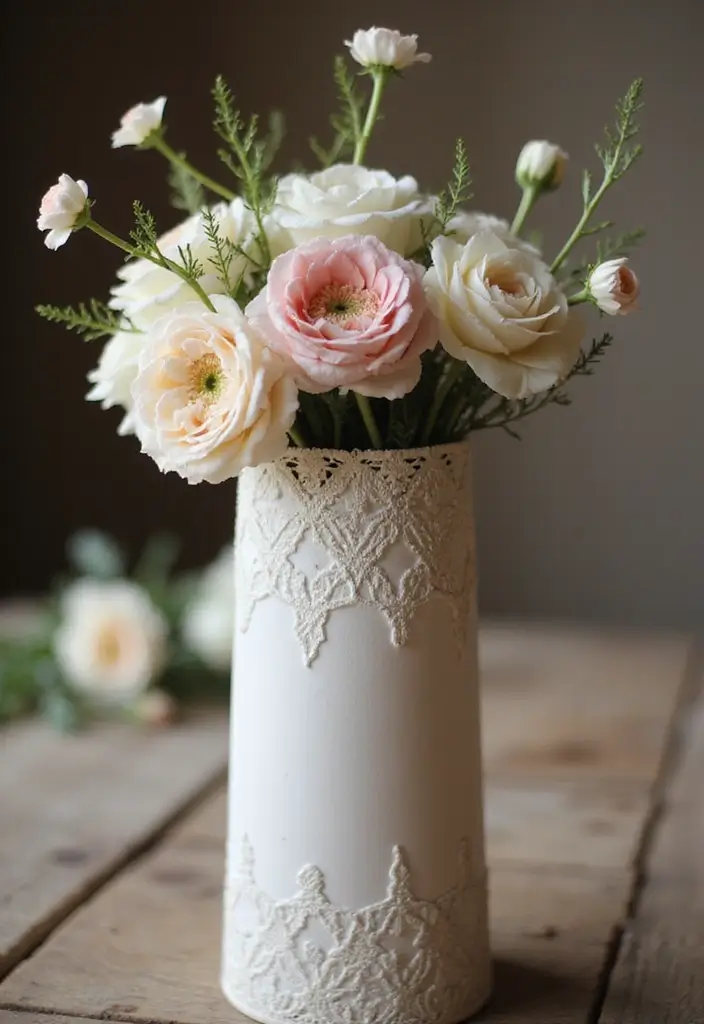
Are you after a soft, elegant look for your paper vases? Lace adds texture and a gentle charm that fits weddings, brunches, or cozy home decor.
Materials
– Plain paper vase or jar
– Lace trim, wide or narrow
– White craft glue
– Scissors
– Optional paint for a light wash
– Clean cloth for smoothing
Steps
1. Prep the base. If you want color, apply a pale wash and let it dry.
2. Measure the lace and cut it to fit. Decide if you want it on the rim or wrapped around the body.
3. Glue the lace in place. Smooth as you go, then press with the cloth to remove bubbles.
4. Let it dry. Add a touch of shade with paint if you like.
Style tips
– Try different lace patterns to match your space. Florals feel airy; geometric lace looks clean.
– Pair with soft blooms or single stems for a refined look.
– Leave the vase mostly bare for a rustic vibe.
Where to use
– Use these vases as table centers, for weddings, or as porch decor. They hold a small bouquet or stand nicely on a tray.
Next steps
– Remember dry time for glue. If you plan to hold water inside, seal the lace with a clear spray.
@media (max-width: 600px) {
.normal-quiz-iframe { min-height: 570px !important; height: 570px !important; }
}
13. Upcycled Book Page Vases
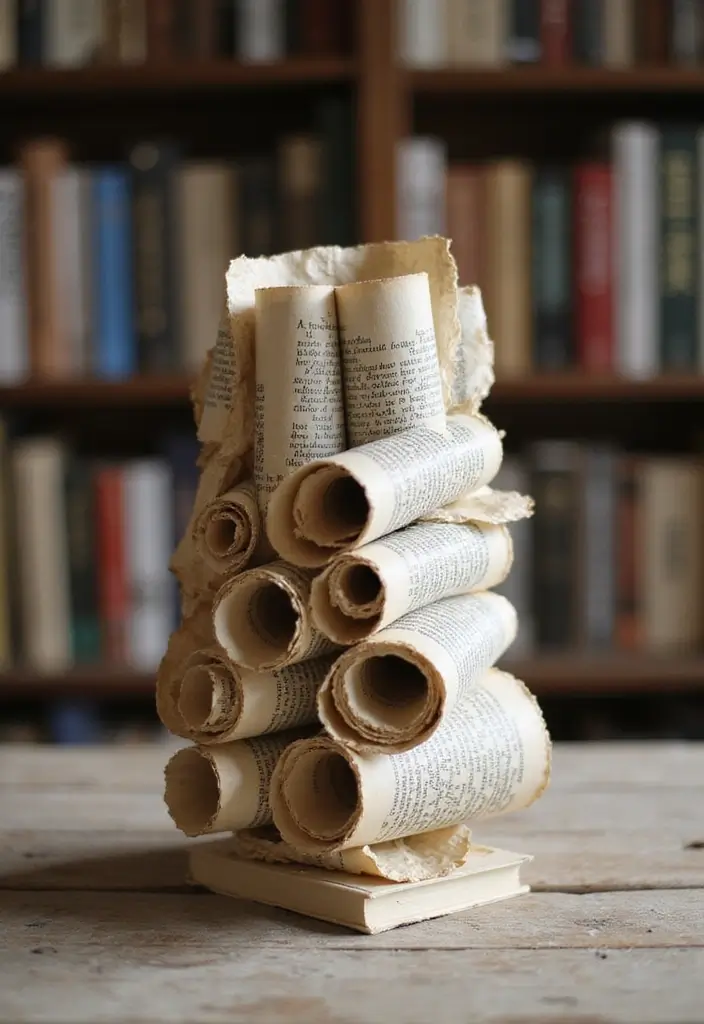
You want a vase that fits your eco goals and your style. Upcycled book page vases mix color, print, and texture for a unique look.
Materials
– An old book with pages you like
– A small glass or plastic insert to hold water
– A lightweight base to steady the shape
– Scissors, ruler, and a craft knife
– Clear sealant spray or matte finish
Here is why these help: the insert keeps water away from the pages, and the pages form the outer cover.
Steps
1. Pick a book that has nice page colors and a cover you love.
2. Cut and roll pages to form a vase body around the insert.
3. Slide the water container inside so your flowers stay hydrated without soaking the book.
4. Adjust the page folds until you have a stable, vase-like shape.
5. Add water and a small bouquet.
To adjust size, add more pages and a taller insert. This lets you make a bigger vase without extra tools.
Tips for best results
– Choose books with bold prints or colorful margins for drama.
– Lightly seal the outer pages to slow wear, not soak the book.
– Use a liner or wax paper to protect the pages from leaks.
– Change water often to keep flowers fresh.
Care and display
– Place away from direct sun to avoid fading.
– Use fresh or faux blooms for longer life.
– A short label with a literary quote adds charm.
14. DIY Paper Towel Roll Vases

You want a simple vase idea that uses items you already have. Turn empty paper towel rolls into pretty vases. This low-cost project saves waste and adds a soft touch to a shelf or table. You can make a row of vases that hold flowers or simple branches. This quick craft is easy for beginners. It can be done in under an hour.
What you need
– Paper towel rolls
– Decorative paper, paint, or fabric
– Washi tape or markers
– Scissors, glue, and a tray
Here is why these materials work: the rolls are light, easy to cut, and the result looks like a vase with little effort.
Step-by-step
1) Cut the rolls to your chosen heights.
2) Cover each piece with paper, paint, or fabric.
3) Add tape or draw simple patterns.
4) Let them dry fully.
5) Use these vases for dried flowers or very light stems to avoid soggy ends.
Craft tips
– Washi tape makes quick, neat wrapping.
– Vary the heights for a playful display.
– Place the group on a tray to keep it steady.
– This project is kid friendly with supervision.
Next steps: style your vases on a windowsill, coffee table, or mantel. Change flowers with the season for an easy refresh. They also make cozy decor for desks and shelves. They make great gifts for birthdays or house warmings. Try fabric wraps for a cozy look.
15. Minimalist Paper Vases
Are you after a chic, calm look for your space that won’t break the bank? Minimalist paper vases give you clean lines and quiet style with almost no effort. You choose the color, the shape, and the size, so your decor feels personal and easy to live with. They shine in modern rooms and work well with one stem or a few sprigs of greenery.
– Materials: sturdy craft paper in a flat color, scissors, a ruler, and glue or tape
– Extras: a small rim ring to reinforce the top edge and a soft cloth for smoothing edges
Here is why this approach works: simple folds create sharp edges that read as modern, even on plain paper.
– Steps: cut a rectangle and fold along clean lines to form the vase body
– Glue the sides to seal the shell
– Add a rim band or base to boost strength
– Smooth any rough edges with the cloth for a neat finish
Display ideas that fit a minimalist room:
– Set one tall vase on a shelf as a single focal point
– Line up two or three vases at different heights for a slim arrangement
– Pair with a single stem or a light splash of greenery
– Place a vase near a lamp to highlight its clean silhouette
Care and refresh:
– Store flat when not in use and re crease folds before displaying
– Swap colors with the season to keep the look fresh
Ready to try? A small batch of minimalist paper vases can elevate shelves quickly and cheaply, with real style.
@media(max-width:480px){
16. Paper Cup Vases

Looking for a quick, affordable way to add a friendly touch to your space or party? Paper cup vases are an easy DIY that pays off fast. Turn everyday cups into small vases you can use again and again.
Here is why this works for you: it’s fast, it costs almost nothing, and you can tailor the colors to your room.
Steps
– Start with plain or patterned paper cups you like.
– Decorate with washi tape or paint in colors you love.
– If you want real flowers, punch a small drainage hole in the bottom and place the cup in a liner or a jar.
– Stack several cups or arrange them in a row for a playful display.
– Try faux stems or dried blooms for a long-lasting look.
Craft Tips
– Choose cups with bold prints or bright colors for extra flair.
– These vases work great for birthday parties, classroom corners, or casual get-togethers.
With a little glue, color, and care, you add a light, friendly touch to any room. It’s a nice project for kids or adults, and you can switch styles as the season changes.
Next steps: grab a pack of cups and try this today.
@media (max-width: 600px) {
.visual-quiz-iframe { min-height: 995px !important; height: 1100px !important; }
}
17. Ripped Paper Collage Vases
Want a vase that feels handmade and cozy? Ripped paper collage vases add texture and warmth with almost no mess.
Here is why this works: torn edges catch light and create depth that flat surfaces miss. You get a unique piece every time. Let’s break it down into a simple plan you can follow.
Materials
– Colored paper in several shades
– A plain vase or jar to cover
– White glue or glue stick
– A small brush or sponge
– A clean, flat workspace
Steps
1) Tear paper into irregular shapes and sizes.
2) Apply a thin line of glue to a small patch and press a piece on the vase. Keep layering as you rotate the vase.
3) Overlap edges to build texture. Let each layer set a moment.
4) Let the vase dry completely. If you want more protection, spray a light coat of clear sealant.
If you want a bolder look, start with a bright base and cover most of it with torn paper. For a softer finish, keep the base color visible.
Tips and style ideas
– Use nature tones or pastels for a soft, calm vibe.
– Pair with simple flowers to let the texture shine.
– Mix textures by combining thick stock with lightweight paper.
This project is great for hands that love to feel the surface and see quick results. Next steps: gather your papers and start your first ripped paper vase.
18. Nature-Inspired Paper Vases
Nature-Inspired Paper Vases
You want decor that feels alive. You can make vases from brown craft paper and real garden finds. The look is calm and earthy, a simple way to bring the outdoors inside.
What you’ll need:
– Brown craft paper
– Leaves, dried flowers, or small twigs
– White glue
– Scissors
– A clear sealant
How to make it:
– Cut a simple vase shape from the paper. Fold it to form a hollow, light container.
– Wrap the paper around the form until it fits your hand and space.
– Glue leaves and twigs on the surface. Try a clean line pattern or a loose mosaic.
– Press pieces flat and let the glue dry completely.
Finishing touches:
– Apply a clear sealant to protect the pieces.
– The seal keeps colors bright and holds pieces in place.
– Use a glass insert inside or place dry stems to avoid water damage.
Pro tips:
– Pick dry, flat leaves and small twigs for a tidy look.
– Seal well to preserve texture and color.
– Keep it away from direct water to prevent warping.
End note:
Grab a few leaves this weekend and start your own nature-inspired paper vase. It makes a thoughtful gift to share.
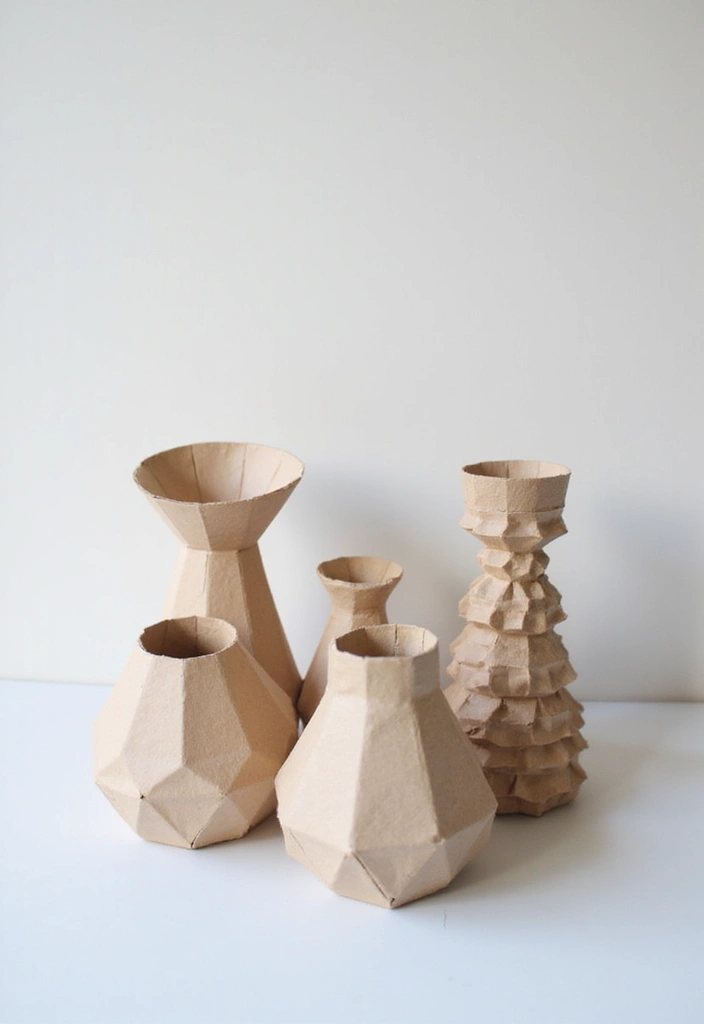
19. Geometric Paper Vases
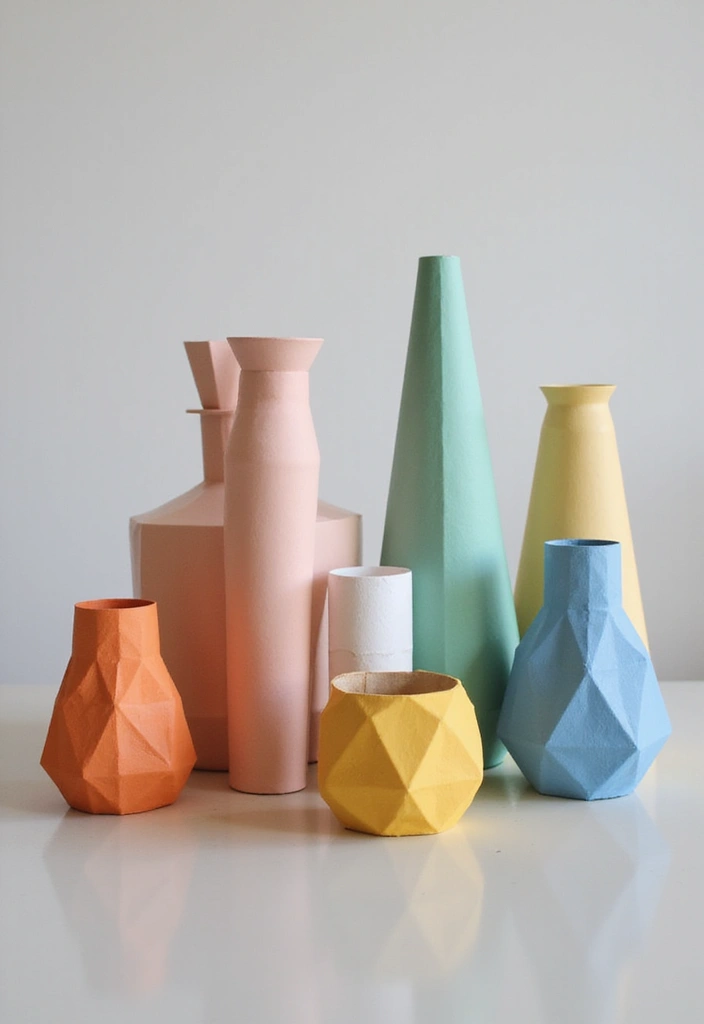
You want a bold decor piece you can make at home. Geometric paper vases give that sculptural look with simple steps. Cut paper into cubes, triangles, hexagons, or a mix, then stack and glue to form a hollow vase. Change sizes to create a little village of vases on the shelf.
What you need
– Colored craft paper or cardstock in your chosen shades.
– Scissors and a ruler for clean cuts.
– Craft glue or double-sided tape for strong holds.
– A cutting mat for safe, steady work.
– A bone folder or dull knife to crease edges.
– An inner vase or jar to hold water if you want real flowers.
How to build
1. Cut paper into geometric shapes such as squares, triangles, hexagons, or diamonds.
2. Lay out a base and begin stacking shapes to form a hollow, vase-like frame.
3. Glue edges with a thin line to keep the walls even and firm.
4. Add more layers until the vase reaches the height you want.
5. Place a glass jar inside to hold water, if you plan to use real stems.
Design ideas
– Pick colors that contrast for a bold look.
– Vary the size of shapes to add depth.
– Add a touch of texture with metallic paint or washi tape patterns.
– Keep a simple two-color scheme for a calm, modern feel.
Care and display
These vases stay light. Show them on a mantel or shelf and pair with faux stems for long life.
20. Layered Paper Vases

Layered Paper Vases
Want a chic centerpiece that costs little and stands out? Layered paper vases give depth and color without breaking the bank. You build from a simple base, then add bands of color in layers. The result has a soft glow and a handmade feel.
– What you need:
– Thick craft paper or cardstock, scissors, glue or double-sided tape, a ruler, a flat brush or sponge, and a clear sealant.
– Choose two to four colors or patterns for depth.
– If you like a soft look, mix translucent papers.
– Steps:
1) Cut a basic vase shape from sturdy paper to serve as the base.
2) Cut several narrow rings or panels in different colors.
3) Glue each layer on top, offsetting edges a bit to show the colors beneath.
4) Try a transparent layer for an airy feel.
5) Apply a light clear coat and let it dry completely.
– Tips:
– Work on a flat surface, keep layers dry before adding the next, and press firmly to seal edges.
– These vases are best for dry arrangements; for water, slip a small glass vase inside and place the stems there.
– Display ideas:
– Line them up on a mantel for a bold look.
– Use as a dining table centerpiece with tall stems.
– Group a few in varying heights for drama.
– Care and limitations:
– Paper can warp in humidity or get damp.
– Keep them away from splashes and dust with a soft brush.
Next steps: start with a two-tone set, then try stripes or polka dots for texture.
21. Festive Paper Vases for Holidays

Want holiday decor that feels warm and fun without much cost? Festive paper vases fit the bill. They work for Christmas, Halloween, and other celebrations. Use seasonal paper to craft a vase that fits your color theme. These vases can hold flowers or small candies, adding a joyful touch to your table or shelves.
Here is why they help. They are light, easy to store, and quick to make.
– What you need
– Choose colored craft paper or cardstock.
– Grab scissors and glue or tape.
– Use a clean jar or bottle as the inner vase.
– Add optional items like string, stickers, or ribbon for flair.
– How to assemble
– Cut a strip of paper and wrap it around the jar.
– Glue or tape the seam to secure the wrap.
– Slip the inner vase inside and fill with flowers or candy.
– Holiday ideas
– For Christmas, pair red and green paper with snowflake stickers.
– For Halloween, mix orange and black with pumpkin shapes.
– For spring holidays, use pastels and dainty florals.
– For a final sparkle, add a touch of glitter along the rim.
– Display tips
– Group a few vases on a table for a bright focal point.
– Place them at different heights to create depth.
These paper vases are easy to make, store flat, and reuse next year.
22. DIY Marble Paper Vases
Want a chic vase you can make from paper? A marbled look adds quiet elegance to any shelf. Here is a simple water marbling method that gives each vase its own swirled pattern.
What you’ll need
– Paper or light cardstock
– A shallow tray of water
– Acrylic paints or marbling paints
– A dropper or toothpick for moves
– A clear spray sealer or gloss finish
– Scissors, glue, tape
– A pencil for outlining the vase shape
Step-by-step guide
1) Cut the paper into a vase shape. Keep edges straight so it folds cleanly.
2) Pour water into the shallow tray. The surface should be calm.
3) Drip colors onto the water. Let colors sit for a moment without stirring.
4) Swirl gently with a stick or toothpick. Aim for soft curves, not tight circles.
5) Dip your paper into the paint. Submerge part of the paper, then lift it out slowly to pick up a marble pattern. Lay the piece flat to dry.
6) When dry, trim any rough edges and glue edges together to form a tube vase. For extra strength, add a second strip and tape the seam. Finish with a clear gloss spray to seal the colors.
Tips for best results
– Try two or three color pairs for contrast.
– Use light and dark shades for depth.
– Keep the water clean and replace it often.
– Spray a thin coat for a smooth, shiny finish.
– If the pattern doesn’t please you, re-dip another sheet to start fresh.
Next steps: repeat with new color sets or switch to thicker paper for sturdier vases. These marbled paper vases look polished and fit many decor styles.
@media(max-width:480px){
Recommended Products

EVERYTHING KIDS NEED - This fun paper-making craft kit includes everything to make and decorate 10 sheets of craft paper: paper pulp, wooden silk-screen mold, silk mesh sheet, tray, sponge, food coloring, 6 paint colors, brush, and palette.

CREATE MESMERIZING MARBLE ART - With this exciting arts & crafts kit, kids can easily make beautiful marbled paint designs, then transfer to the included paper sheets for framing and displaying! Their works of art also make great, personalized gifts!

GLOW WITH CREATIVITY: Let your art shine day and night with our unique glow-in-the-dark paints! This kit allows you to create stunning, luminous, marbled art that glows spectacularly in the dark, making each piece a glowing masterpiece.
23. Interlocking Paper Vases
You want a vase that looks good and lasts long enough to hold flowers. Interlocking paper vases fit the bill. They form a strong frame and a striking wall of color at the same time.
What you need
– sturdy paper or cardstock
– scissors or a craft knife
– a ruler and pencil
– glue or tape
– a small bottle or vase to hold water
– colored paper or paint for contrast
How to build it
1) Plan a simple design. Draw two or three shapes with tabs and slots that will fit together.
2) Cut out the pieces carefully. Keep the tabs small but sturdy.
3) Fold along the lines to make flat panels that can stand.
4) Slide the pieces together. The tabs go into the slots to lock pieces in place.
5) Create a tall ring or a box shape. Add a base so the vase stands upright.
6) Line the inside with a bottle liner if you want to keep water away from the paper.
7) Paint or wrap the outside in colors that contrast. This makes the interlocking pattern pop.
Tips for a tougher vase
– use a thicker paper or double up sheets.
– seal edges with glue for extra strength.
– keep the joints loose enough to slide but snug enough to stay put.
Style ideas
– mix two colors for a bold look.
– try geometric shapes for a modern vibe.
– stack pieces to form a layered, sculptural effect.
Next steps: try a small test set first, then scale up. You can turn DIY paper vase ideas into real decor for shelves, tables, or gift displays.
24. Textured Paper Vases with Fabric Scraps

Textured Paper Vases with Fabric Scraps
Looking to add texture to a paper vase? Fabric scraps are an easy, eco friendly way to warm up your decor.
– Gather scraps in cotton, felt, lace, and thin canvas. Cut them into strips or small squares so you can layer easily.
– Prep your base. A sturdy paper vase works best, or wrap a cardboard tube for a quick project.
– Glue lightly. Use white glue thinned with water or decoupage glue. Brush a thin coat, lay the scrap smooth, and press from the center outward to remove air.
– Build texture. Layer pieces unevenly. Let edges lift for a tactile feel. Mix fabrics with different textures and shades for depth.
– Add color and pattern. Pair solids with stripes, florals, or lace for a delicate touch. Try an ombre look with lighter scraps near the top.
– Seal and protect. Let glue dry, then seal with a clear sealer or varnish to keep fibers in place.
– Finish smartly. Trim stray edges and add a small ribbon near the rim for a polished look.
Textured paper vases with fabric scraps warm up any room. They suit shelves, entry tables, and coffee corners. Next steps: pick a vase, collect scraps, and start layering.
25. Bubble Wrap Paper Vases
Do you want a vase that stands out but stays simple to make? Bubble wrap can do that. It adds texture and a fun look you can’t get with plain paint.
What you’ll need
– A glass or ceramic vase
– Bubble wrap
– Acrylic paints in bold colors
– A paintbrush and a small sponge
– Clear sealant or Mod Podge
– Scissors and a tray to work on
Here is how to make it
– Start with a light coat on the vase. Let it dry.
– Cut a piece of bubble wrap that fits the area you want to cover.
– Paint the bubbles of the wrap with bright colors. Do bold combos for more pop.
– Press the painted wrap onto the vase while the paint is wet. Gently smooth it to transfer the texture.
– Lift the wrap and let the design dry completely.
– Seal with a clear coat to keep the texture and color in place.
Tips for best results
– Choose colors that stand out against your base coat.
– Add a second color for a layered look.
– Try metallic paint on the bubble wrap for a subtle shine.
– Pair the vase with bright flowers to boost the playful vibe.
Why this works
The raised bubbles catch light and create depth. It makes a plain vase feel lively without a lot of time or cost.
Common questions
– Can I reuse bubble wrap? Yes, if you press firmly and the paint dries cleanly.
– Is the sealant necessary? Yes, it protects the design from chips and keeps it easy to clean.
Next steps? Grab supplies, try a small vase first, and then scale up if you love the look.
@media(max-width:480px){
26. Chalkboard Paint Vases
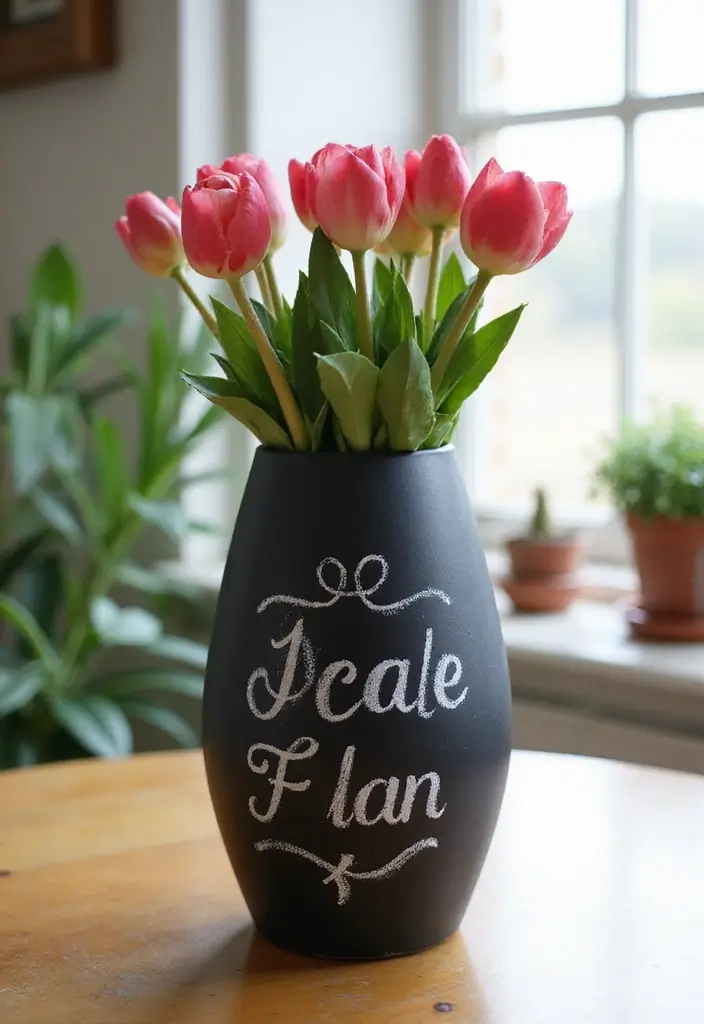
If you want decor you can change on a whim, try chalkboard paint on a paper vase. Cover the vase with matte chalkboard paint. You can write a message or draw a tiny design. When you get bored, wipe it clean and start over. This adds a personal touch and keeps your look fresh.
– Seasonal notes that match the time of year.
– Fun centerpieces for dinner parties.
– Quick reminders or jokes for a family table.
– Kids can doodle, then erase and try new art.
Here is why it works: the surface is easy to rewrite, and you control the color and style of the design. Next, let’s break it down into simple steps.
How to make it last and look neat
– Clean the vase so the paint sticks well.
– Apply 2 thin coats of chalkboard paint, let each coat dry.
– If you want, add one clear sealant for durability.
– Let it cure fully before writing.
Tips you can use right away
– Use washable chalk markers for crisp lines.
– Wipe with a damp cloth to erase.
– Set the vase on a steady tray to avoid spills.
Next steps: place your chalkboard vase on your table, change the look with the season, and enjoy the easy, playful art.
@media(max-width:480px){
27. Repurposed Paper Vases from Gift Wrap
Is there leftover gift wrap piling up? You can turn it into a vase that adds color and charm to any room. This repurposed paper vase idea is simple, low cost, and surprisingly sturdy once you layer it right.
What you need
– Gift wrap scraps in your favorite colors
– A vase form to shape around, like a bottle, jar, or a rolled cardboard base
– White glue or Mod Podge for strong sticking
– Clear sealant to protect the paper finish
How to build your vase
– Cut the gift wrap into strips or small decorative shapes
– Glue the pieces around the form, layering for depth
– Let each layer dry before adding more
– Add several layers to boost stiffness
– Seal with a clear coat for a soft shine or matte look
Craft tips
– Layer wraps from different designs for a unique look
– Use a light coat of sealant to avoid wrinkling
– Place the vase on a tray or shelf to keep it safe from spills
This eco friendly project lets you keep your decor fresh without wasting materials. You get a handmade vase that reflects your style while making good use of what you already have. Next steps: try seasonal wraps for holidays, or matching tones for a cohesive shelf display.
Conclusion
Creating paper vase crafts DIY is a fantastic way to express your creativity while being eco-friendly. Each project allows you to recycle materials and make personalized decor that brings elegance to your space.
Whether you choose to follow a specific tutorial or let your imagination take the lead, the possibilities are endless. These crafts not only beautify your home but also provide a fulfilling crafting experience.
So gather your supplies and dive into these paper vase projects! Share your creations with friends and family, and inspire others to explore the wonderful world of eco-friendly crafting.
Note: We aim to provide accurate product links, but some may occasionally expire or become unavailable. If this happens, please search directly on Amazon for the product or a suitable alternative.
This post contains Amazon affiliate links, meaning I may earn a small commission if you purchase through my links, at no extra cost to you.
Related Topics
paper vase crafts
eco-friendly decor
DIY home decor
handmade vases
paper flowers tutorial
easy crafts
upcycled materials
creative crafting
minimalist design
budget friendly
beginner friendly
seasonal decor