Why I made this post Fairy tale vibes are easy to miss in busy days. I wanted to bring back a soft, slow magic you can touch with your hands. Paper crafts can feel like tiny dream houses when the idea is clear and simple. So I pulled together 30 projects that make a castle feel real, without a big mess or a big price.
Who it’s for If you love cozy corners, storybooks, and easy crafts, this one is for you. You want ideas you can finish on a rainy afternoon or a lazy weekend. You care about looks that spark imagination. You want steps that stay simple.
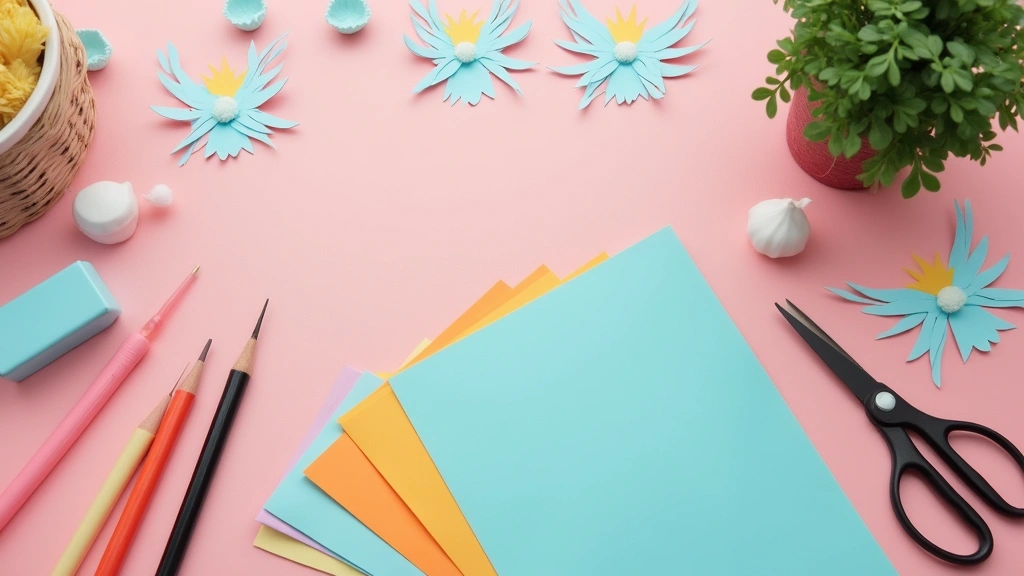
What you’ll get You will get 30 paper castle DIY projects that feel like a fairy tale. Each idea uses common paper, glue, scissors, and a little patience. You will find clear, quick steps that keep you moving. Expect tips to make tall towers, pretty doors, and tiny banners. You will see how to add soft light with string lights or a glow from a lamp.
What you can try at home Some ideas use folded paper, others use cut shapes and tape. You can mix cardstock with tea stained paper for a warm look. Small touches like foil details and ribbon bring magic without a big cost. I share practical examples you can copy or adapt.
Here is how to start Begin with a simple base. Build a small tower with four walls. Then add a door and a window scene. Use a photo or prints to decorate if you like, or draw your own. Finish with a little greenery made from paper or washi tape.
Next steps Not every idea will fit your space, but you can scale it. Try one project this weekend and another next week. Show the kids, or show your friends. You will enjoy the quiet magic of a fairy tale made from paper.
1. Mini Fairy Tale Castle.

You want a small castle that invites stories and art. Here is a quick, sturdy way to make a mini fairy tale castle from cardstock.
What you’ll need
– Heavy cardstock or sturdy craft paper
– Scissors, a ruler, and a pencil
– Markers or small paints
– Craft glue or a hot glue gun
– Optional: tiny beads, foil scraps, fabric scraps for flags
How to build it
1) Sketch a simple base, some towers, and one wall on the paper. Keep shapes easy so you can cut and fold fast.
2) Cut the pieces. Score the fold lines with the ruler for clean bends.
3) Fold and glue the parts into a 3D frame. Use tabs to help hold pieces together.
4) Color and decorate. Add doors, windows, and brick lines with markers or paint. Dab color lightly to keep the paper from tearing.
5) Add tiny details. Clip on flags for the towers and a small drawbridge if you like.
6) Create a base scene. Glue on grass, flowers, or a small moat from scraps to finish the look.
7) Let it dry. If you used a hot glue gun, press gently until it sets.
Why this works
The project is flexible and quick. You can swap colors, add pieces, and fit a shelf or table.
Tips for gifting or display
Work with a grown-up on the hot glue step. This castle makes a sweet desk centerpiece or party favor.
Recommended Products
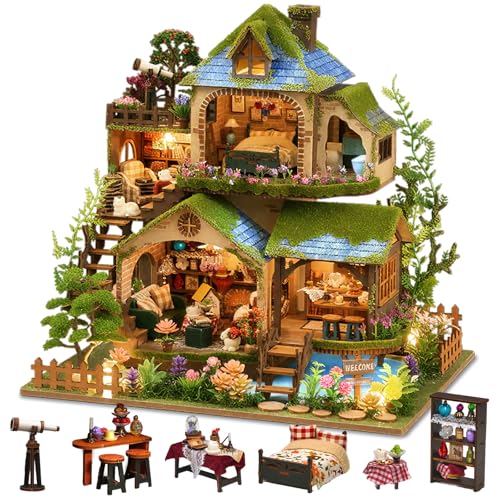
🌲 Forest Adventure Theme– This miniature house kit comes with carefully crafted with fine wood, paper, and fabric to create lifelike furniture, plants, and accessories for a highly detailed finish. A perfect choice for those who love crafts for adults or want to explore the fun of building their own mini house.

【Material list】The assembly is suitable for people older than 14 years and need patience to assemble by yourself! The Kit includes: 1) pre-cut MDF wooden pieces for the house structure and furniture 2) fabric and printed paper for decorations and accessories 3) plexiglass pieces for the dust cover 4) LED light wires and music movement 5) English Manual

Recommended Age: For 14 years old and up. It needs patience to assemble by yourself! Be cautious that: the kit contains sharp tools and small parts!
2. Enchanted Forest Castle.
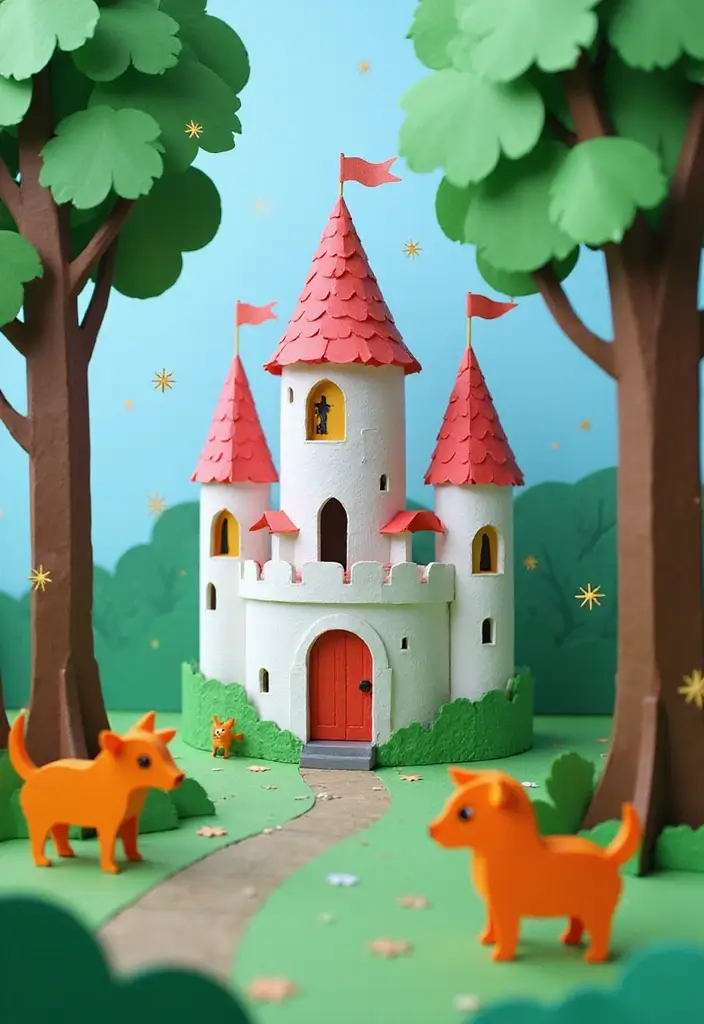
Want a paper castle that feels alive? Build a forest around it and watch the scene come to life.
What you need
– You need a castle template on sturdy paper.
– Cut trees from green and brown craft paper.
– Have scissors and glue ready.
– Gather scraps to shape small forest animals.
– Add glitter or sequins if you want extra sparkle.
– Keep a bright light nearby to make the forest glow.
Steps to build
Here is why a simple setup works. Start with your castle in the middle. Around it, cut lots of tree shapes from green and brown paper. Layer the trees in front, middle, and back to add depth. Attach the trees with glue so they stand up a bit.
Let small animals peek from the forest. Create birds, rabbits, or foxes from scraps. Place them near the trees to tell a story.
To make it sparkle, dab a little glue and sprinkle glitter or press on sequins. It will catch the light and make the diorama glow when you turn on a lamp.
Why it helps learning
This scene invites kids to tell stories. They can describe forest smells or sounds. It also teaches color mixing, layering, and simple cutting.
Display and care
Set the diorama on a shelf or windowsill. Keep it away from water so it lasts longer. When you want a new look, swap animals or tree colors.
Next steps.
Experiment with seasons. Try spring greens or autumn golds. You can also add tiny mushrooms or a paper stream to add more life.
3. Gothic Castle Diorama.
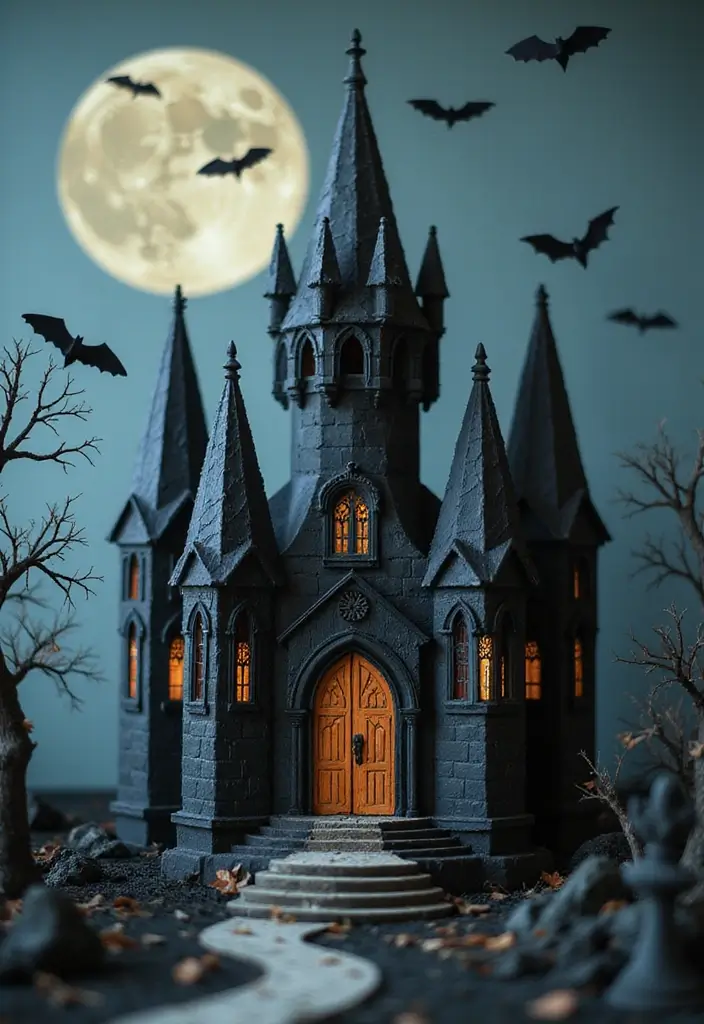
– Color and mood Here is why this Gothic Castle Diorama stands out. Use black and deep purple paper to set a moody base for your project. Cut jagged edges to show a haunted, crumbling wall. Add a crescent moon and a few bats to give the scene instant drama.
– Level and folds This project fits older kids who love careful work. Practice simple, sturdy folds to form towers, arches, and crumbling battlements.
– Lighting tricks Tuck a small LED inside to make the walls glow softly at night. Use a low battery pack and keep wires neat so nothing shows through the paper. Place the light toward the back so the glow comes through windows. Test the glow in a dark room to confirm you like the effect.
– Details that pull it together Add spider webs with white thread or glue for a spooky touch. Fit a tiny gate at the entrance and a few window portholes to invite the viewer in. Let the glue dry completely before moving.
– Display ideas Set the diorama on a shelf or window ledge for a seasonal display. It works as a Halloween centerpiece or a year round spooky accent. Pair it with a night scene card or a small fog effect using cotton. Add a small label with the year for a keepsake.
@media(max-width:480px){
4. Princess Castle Playset.
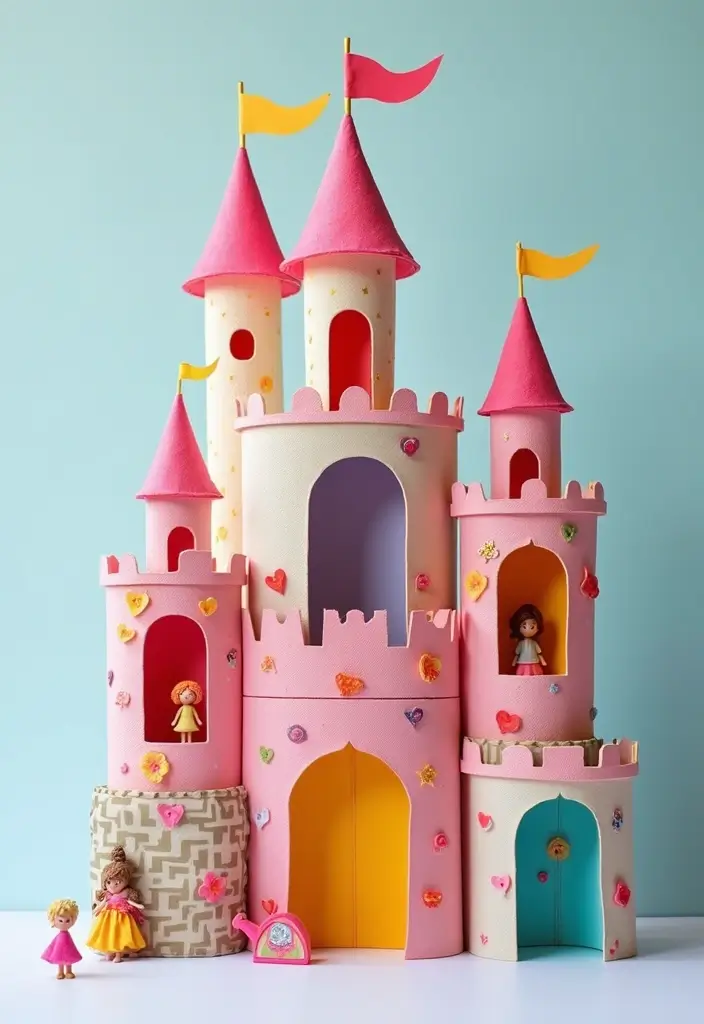
Want a princess castle playset your kids can build with their own hands? This paper craft is a hit for doll lovers. It creates a tall stage for stories and clear rooms to decorate.
Here is why this works. Let’s break it down.
– What you need
Colorful paper, a sturdy base sheet, scissors, glue or tape, fabric scraps, markers, and stickers.
– How to build
Draw a tall plan on the base. Cut wall panels. Add tabs to hold the floors. Glue walls to the base so the castle stands.
– Decorating ideas
Use fabric for rugs, paper for walls, and markers for bright murals. Add ribbons for banners.
– Play ideas
Place dolls inside and tell a story. Let your child run a ballroom scene, a library, and a kitchen.
– Care and timing
Keep pieces dry. Store flat in a box when you are done.
– Next steps
Sit with your child, pick colors, and finish in small blocks. Share photos and adapt the look to your child’s favorite princess.
5. Medieval Castle Siege.
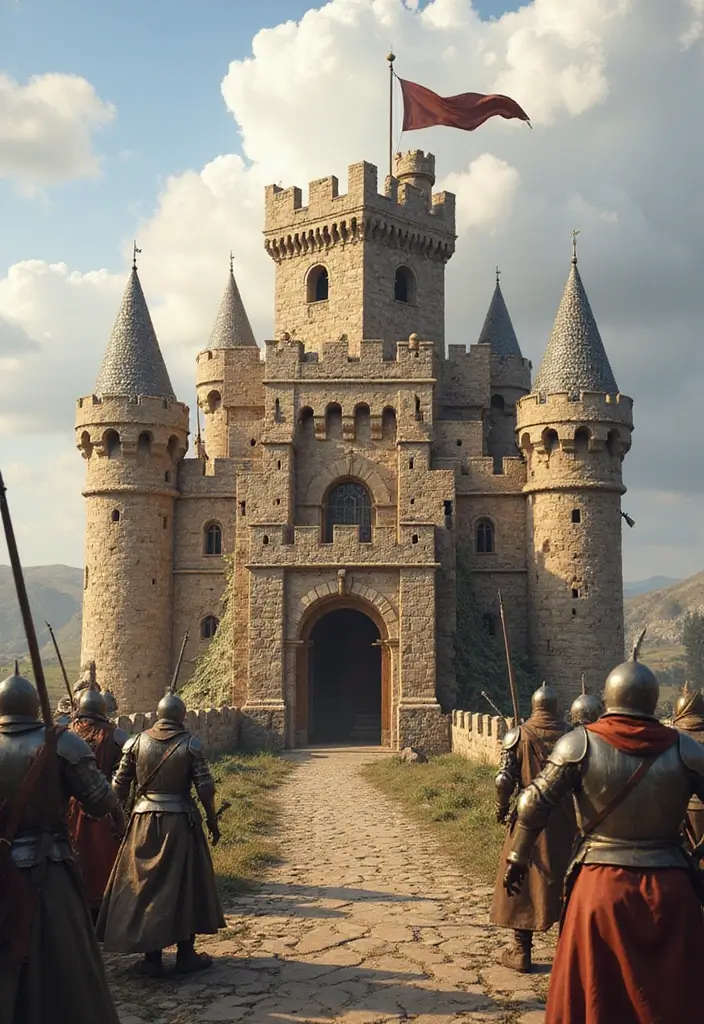
Here is why you should try the Medieval Castle Siege project. You get a hands on craft that teaches history and helps kids plan and work together.
Start with a sturdy base. Use cardboard as a ground. Cut walls, towers, and a gate from brown and grey paper. Tape them to the base so the castle stays strong.
Next add siege features. Build a siege tower and a simple catapult from folded paper and a rubber band. A basic drawbridge makes the scene come alive.
Make the drawbridge work. Use a paper strip and a small fastener for a hinge. Attach it to the gate so it can lift and lower with a pull. It adds a moving part.
Place knights and horses to act out the scene. Color the figures or cut them from paper. Move them as you tell a siege story.
Team up to build. One kid shapes walls, another adds towers, a third handles the drawbridge. You learn to share, plan, and listen.
Keep supplies simple. Pre cut pieces, kid friendly scissors, tape, and glue. Let the kids decorate with markers. Display the finished castle siege so friends can see history come to life.
That’s a solid, history filled project you can finish in an afternoon.
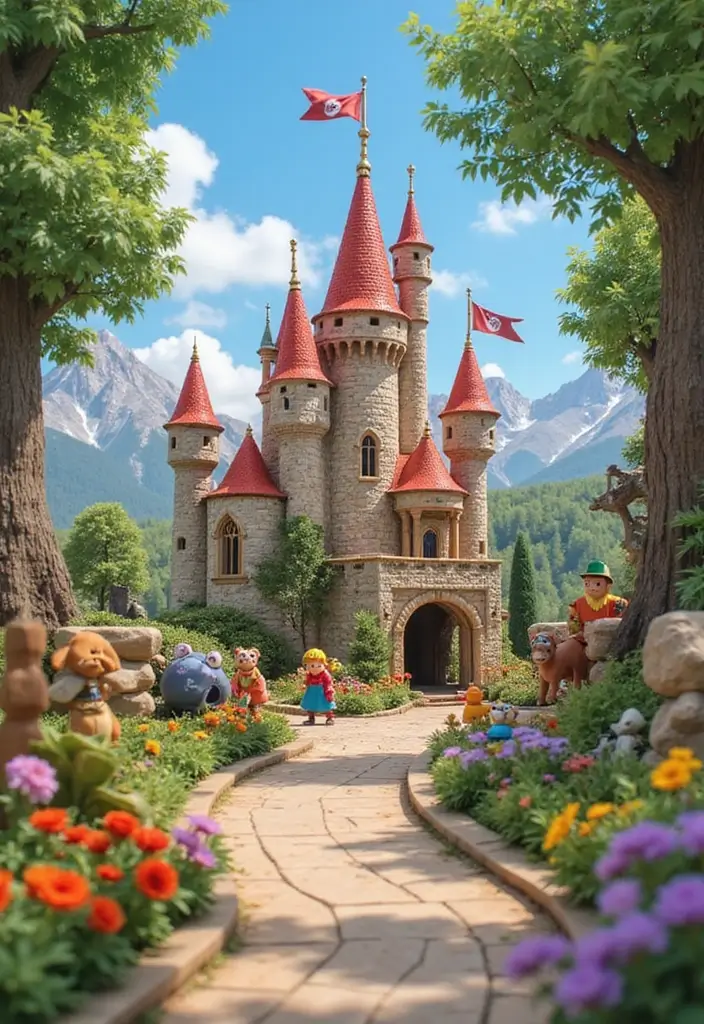
6. Fairytale Landscape.
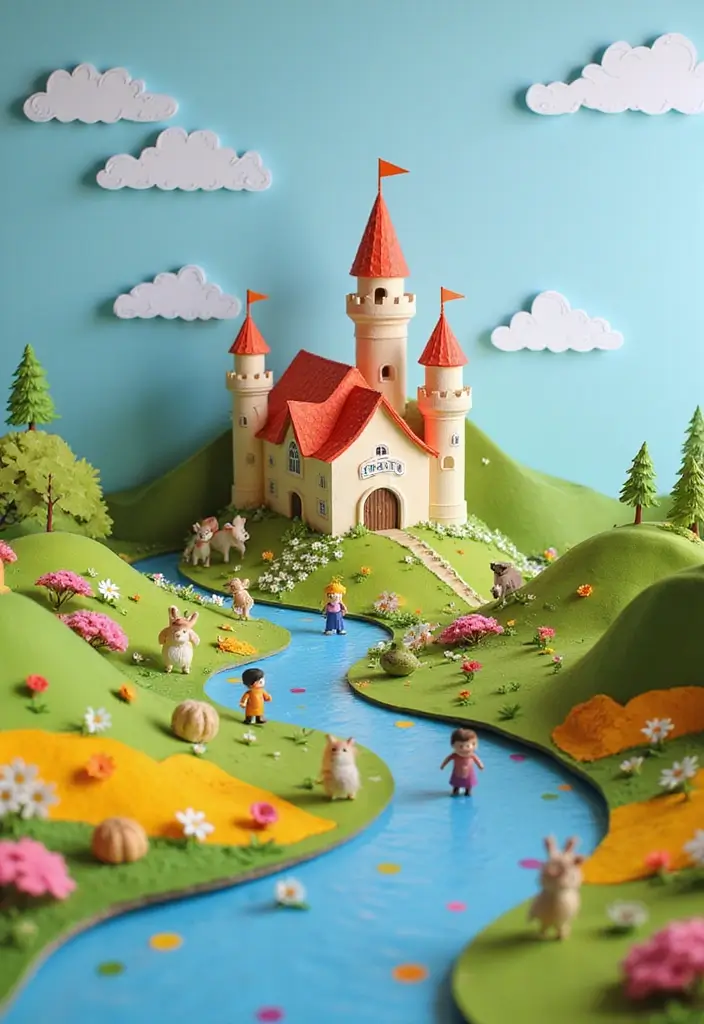
Want a fairytale scene you can touch and proudly display? This project places a castle on gentle green hills beside a winding blue river. It invites kids to tell stories as they add every detail.
– Materials and tools: Green and blue construction paper, a sturdy base, scissors, glue, markers, a yellow sun circle, cotton balls for clouds, and small pieces for flowers and animals.
– Plan your layout: Sketch where the castle sits, where the hills roll, and where the river winds through the scene.
– Make the hills: Cut wavy green shapes, layer lighter greens for depth, and glue them to the base.
– River and water: Create a blue river path with wavy edges, then add lighter blues or white to show highlights.
– Build the castle: Use folded paper or a small box to form the castle, and decorate with markers or paper pieces for towers and flags.
– Add a bridge: Craft a simple bridge from paper strips or sticks that spans the river to the castle.
– Details: Place flowers, trees, fluffy clouds from cotton balls, and a bright sun to bring the scene to life.
– Texture and depth: Layer pieces and add tiny texture with tissue, foil, or crinkled paper.
– Narration prompts: Ask questions like, “Who guards the gate?” and “What happens at sunrise?” to spark stories.
– Display and care: Keep the piece on a stable shelf and store flat when not in use to avoid bending.
Next steps: try new color schemes, switch in other castle designs, or add a night sky with stars for variety.
7. Castle Tower Keepsake Box.

You want a project that is fun and helps kids stay neat. A castle tower keepsake box fits that need perfectly.
Materials
– Gather a sturdy box, cardstock, glue, scissors, and paints.
– Get a roll of washi tape and a few stickers.
– Have markers, a ruler, and a small tray for tiny treasures.
– Keep a clear sealant or spray finish for lasting shine.
Steps to build
– Start with a solid base box as your foundation.
– Cut a slim castle tower from cardstock and attach it to the box top.
– Glue the tower firmly and let it dry completely.
– Decorate with paint, glitter, and washi tape for a bold look.
– Personalize by adding initials or a name in bright letters.
Practical tips
– Let kids choose colors to boost ownership.
– Create a tiny inner tray or dividers with extra cardstock.
– Use a clear coat to help the box handle daily use.
– Check that the tower stays steady before filling it with items.
Uses and display
– Store jewelry, small toys, or craft supplies inside.
– Place it on a desk or dresser for a fairy-tale touch.
Benefits
– You build simple organizational skills with a creative project.
– Your box becomes a proud, personal keepsake to cherish.
8. Snowy Castle Diorama.
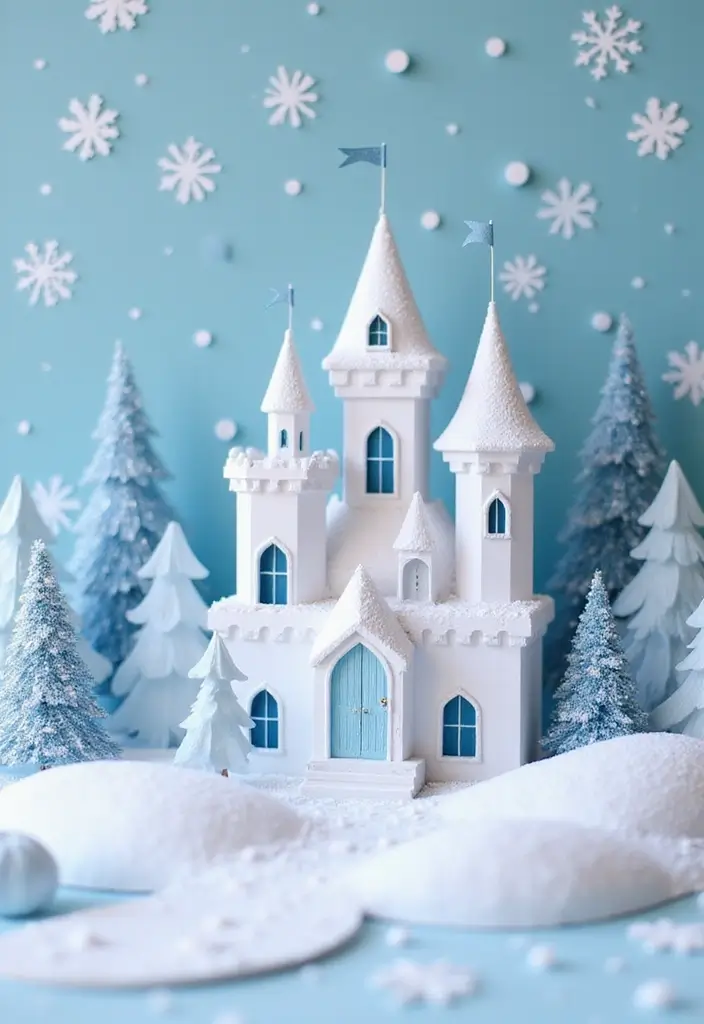
You want a winter scene that kids can make and love. A snowy castle diorama brings a touch of fairy tale magic to your home. It teaches texture and layering, too.
Next steps help you start.
Materials
– Gather white and blue paper for the castle.
– Have glue, tape, and scissors on hand.
– Use cotton batting or white pom-poms for snow.
– Add white glitter for a frosty sparkle.
– Find a sturdy base to hold the scene.
– Include small paper or felt trees and a shimmering background.
– Optional: blue foil or glittery paper for the sky.
Steps
– First, cut a castle shape from white paper.
– Add a few blue accents to show shade.
– Glue the castle to a thick base so it can stand.
– Create snow with cotton on roofs and walls.
– Lightly sprinkle glitter for a frosty sparkle.
– Cut delicate snowflakes from white paper.
– Punch holes in the snowflakes for hanging.
– Hang snowflakes from the top with clear thread.
– Place small trees around the castle and dust them with white.
– Build a shimmering background with blue foil or metallic paper.
– Let glue dry, then display your diorama on a shelf as a centerpiece.
This cozy scene fits any winter decor and invites storytime.
9. Castle Invitation and Party Decor.
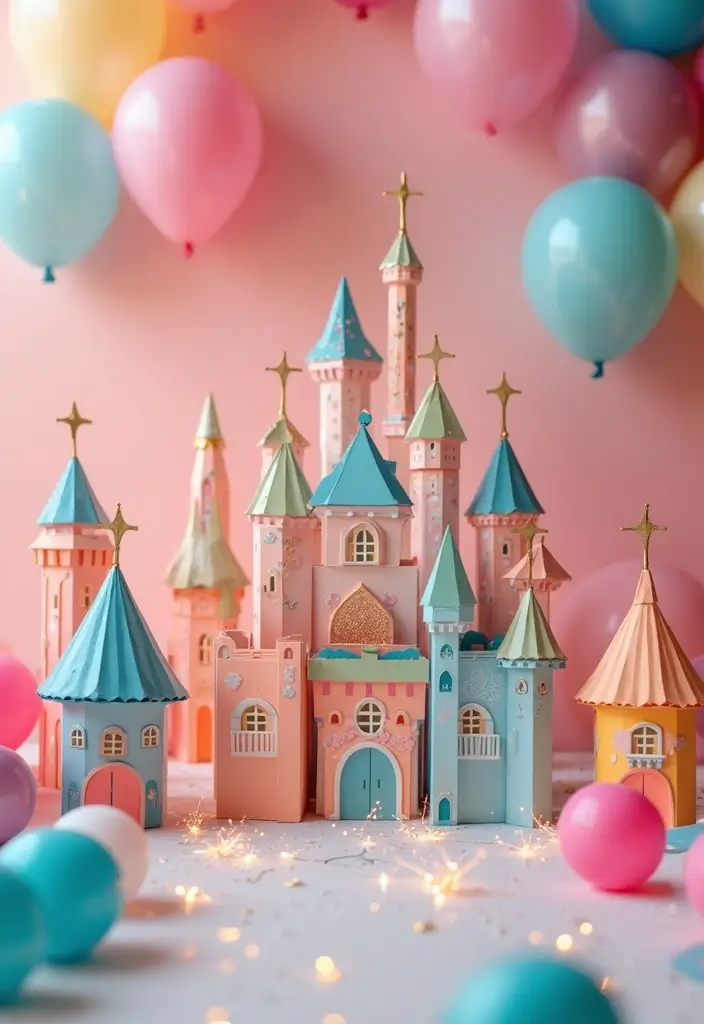
Need ideas that make your party feel like a fairy tale? Castle invitations and party decor set the mood from the first look. You can craft them with simple paper, scissors, and ribbons.
Castle Invitations
– Shape the cards as tiny castles so guests get a hint of the theme.
– Fold neat doors and towers to add depth and charm.
– Decorate with bright paper, markers, and satin ribbons that catch the eye.
– Include clear details for date, time, and place so guests can plan.
Castle Decor
– Create mini castles to scatter on tables or shelves for a playful touch.
– Make larger centerpieces that act as a focal point for meals or dances.
– Use bold colors like royal blue, gold, and pearl to feel magical.
– Add textures with glitter, cardstock windows, and tiny flags to spark wonder.
Tips and teamwork
– Try this as a group project with friends to share ideas and supplies.
– Set up a simple station for cutting, gluing, and tying ribbons, so everyone can join.
Why it works
– Personal invites invite smiles, and quirky decor invites curiosity.
– With basic supplies, you pull off a clean, affordable fairy-tale vibe.
10. Vacation Castle Memories.

– You want a keepsake that lasts after the trip ends. A vacation castle memories scrapbook makes that happen.
– Start by gathering photos from your travels. Pick eight to twelve shots. Print them small so you can tell a story.
– Next, design a castle layout. Think of a page as a tower or gate. Use a sturdy cardstock base and lay out photos first, then add pockets for souvenirs. Choose patterned papers in colors that remind you of each place. Blue for sea towns, green for forests, yellow for sunny cities.
– Add captions that tell the moment. Have kids write a line about what made the trip special. Keep it short. A single sentence can do.
– Embellish with meaning. Stickers, stamps, and washi tape give clues to the places you visited. Include map scraps, ticket stubs, or plane cards in a pocket inside the page.
– Make it easy to finish. Use one page per trip, or group two trips on a spread. Bind the book with rings or a simple spine so you can add pages later.
– Finish by sharing tales. Read the captions aloud and reminisce. This project strengthens memories and turns travel into a story you can revisit anytime.
11. Colorful Castle Garland.
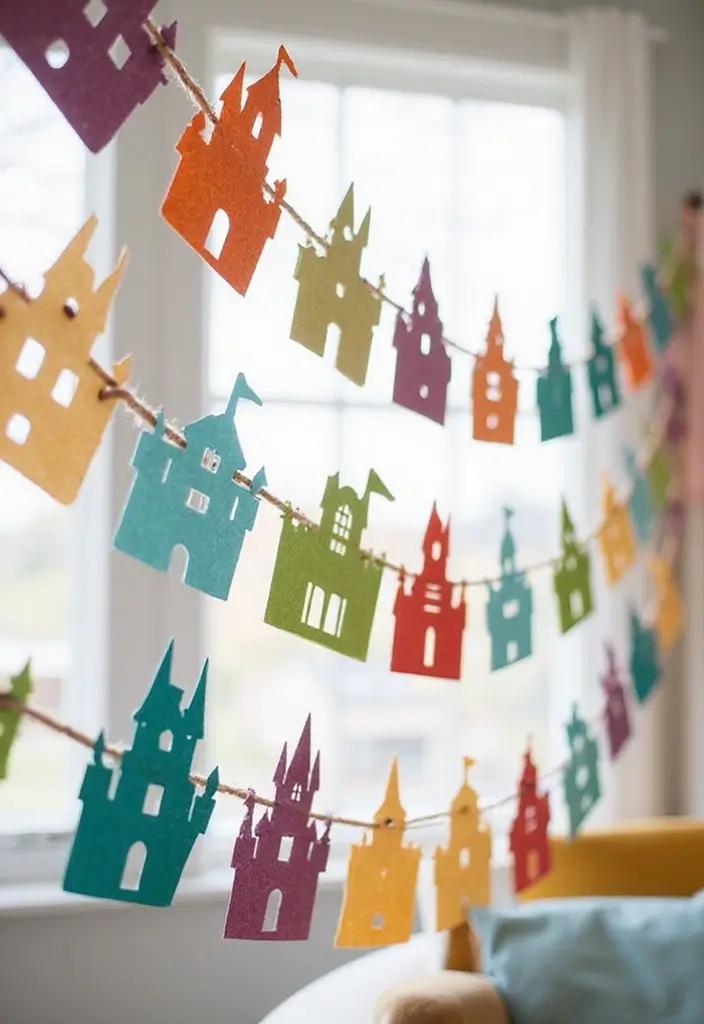
Colorful castle garland brightens any room. You want a quick craft that creates big wow with little work? This project fits.
Here is why it works. It uses simple paper shapes, bright colors, and a string to make a long banner you can admire from across the room.
– Gather supplies: colored paper in several shades, string or twine, kid-safe scissors, white glue or glue sticks, markers, and a few stickers or bits of glitter.
– Draw small castle shapes on the paper. Keep them simple: a rectangle body with two towers and a flag.
– Cut out each castle carefully. Try not to rush.
– Decorate them one by one. Add stripes, polka dots, zigzags, tiny bricks, and tiny flags with a marker or stickers.
– Punch a hole at the top or use tape to thread the string. Slide one castle onto the line, then place the next with even space.
– Hang the garland where it can shine in sunlight or under soft lamps.
– Keep it going by adding new castles for birthdays, holidays, or changing seasons.
– This craft helps kids sharpen cutting and gluing skills, even as they have fun.
– If you want a themed look, try matching colors to a room palette or party theme.
– Save leftover scraps for future castles or a new banner extension.
– For a neater look, trim the edges of each castle with clean lines.
Next steps: hang it, adjust spacing, and enjoy the fairy-tale vibe.
@media(max-width:480px){
@media (max-width: 600px) {
.visual-quiz-iframe { min-height: 995px !important; height: 1100px !important; }
}
12. Pop-Up Castle Card.
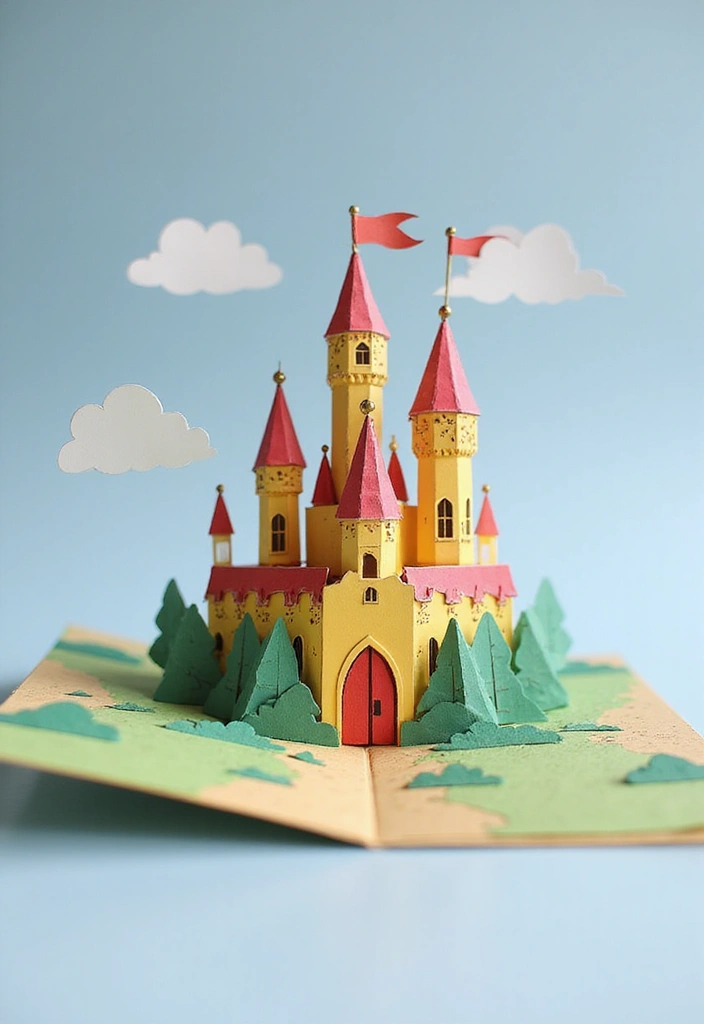
Want to surprise a friend with a card that feels magical? A pop-up castle card does just that. It adds a tiny moment of wonder inside a simple greeting card.
Here is why this project matters. It teaches a simple pop-up trick while giving you a keepsake gift. You gain a handmade card that stands out without huge skill or fancy tools.
– Materials you’ll need
– A sturdy sheet of blank cardstock
– Colored paper for the castle
– Scissors, glue or a glue stick
– A ruler and pencil for clean folds
– Optional: flags, stickers, tiny figurines, or foil accents
– How to make it
– Fold the cardstock in half to make the card base.
– Cut a castle shape from colored paper. Create small tabs to bend so it can rise when the card opens.
– Attach the castle with a tiny glue tab to the inside base. Press gently so it pops up smoothly.
– Decorate with flags, hearts, or a little princess or knight figure. Keep details simple for a neat look.
– Quick tips
– Test your cut on scrap paper first.
– Use 1–2 small tabs for stability.
– Let glue dry before closing the card.
Next steps: write a warm note inside, then fold flat for gifting. Your friend will love the tiny, fairy-tale moment you built into a card.
@media(max-width:480px){
13. DIY Castle Tea Party Set.

You want a tea party that feels royal, but you need a craft you can do with kids. A DIY castle tea party set from sturdy cardstock fits the bill.
Materials
– Sturdy cardstock for cups, plates, and castle pieces
– Scissors and glue or tape
– Markers, colored pencils, or paints
– Stickers, patterned tape, and thin ribbon
– A ruler and pencil for neat edges
What to do
– Pick a color scheme.
– Go with royal tones like gold, purple, pink, or blue.
– Cut tiny cups and plates from cardstock.
– Leave a flat base so they can sit on a pretend table.
– Fold and glue the rims to make small, stackable cups.
– Create mini plates by trimming circles and scoring edges.
– Decorate each piece with windows, flags, and borders.
– Build a castle backdrop with a simple rectangle of paper.
– Add brick lines or a gate to the backdrop.
– Set up the party on a small mat as a pretend table.
– Place cups, plates, and castle props on the mat.
– Invite friends to join the fun and host a pretend tea.
Why this helps
This craft builds hand skills and focus. It also opens doors to sharing, storytelling, and social play.
@media (max-width: 600px) {
.normal-quiz-iframe { min-height: 570px !important; height: 570px !important; }
}
Recommended Products

【Tea Party Cups and Saucers Set】Our set includes 24 pcs 7 oz disposable tea cups with handles, 24 pcs 6 inch saucers. Note: 7oz Maximum Capacity (to the brim); 6oz Recommended Functional Capacity

Tea Party Set: you will receive 36 disposable tea cups with handles, and 36 flower shaped saucers, 72 pieces in total, which can make 36 sets, the semi colored design is suitable for DIY coloring use, kids can use imagination to paint, enough for your daily needs and replacement demands

Mother’s Day Craft Kits: This set includes 56 DIY picture frames—8 styles of picture frames, with 7 frames of each style, and 8 styles of stickers, with 7 stickers of each style. This kit is designed for kids to create personalized Mother’s Day gifts or decorations in the
14. Storybook Castle Diorama.
Want a craft that makes a favorite book feel real? A storybook castle diorama lets you build a tiny scene from a tale you love.
Here is why this project helps you. You see the story in three parts: the castle, the land around it, and the people in it. You work with paper to match moods, from soft pastels to bold dawn colors. You can act out a moment on the stage you make. That helps reading come alive, and your imagination grows as you plan and create.
– Materials you’ll need
– Thick craft paper and cardstock for strong structures
– Scissors, glue, and a clean base board
– Textured papers, tissue, and scraps for landscape
– Markers, paint, and a thin ruler
– Small paper shapes for figures and castle details
– Optional: fabric scraps or foil for extra shine
– Natural light or a tiny LED for a gentle glow
– Steps to build
1) Pick a story and sketch a simple layout. 2) Cut the castle shapes and test fit on the base. 3) Glue pieces in place and add texture with layered papers. 4) Add the land—hills, water, trees—using color and texture. 5) Create paper characters and props that fit the tale. 6) Put the scene together and tell the story with a quick name card or tiny caption.
– Tips for a richer diorama
– Use a mix of smooth and rough papers to feel real
– Let one color dominate the scene to guide the eye
– Add small details like flags, shields, or windows
– Keep glue neat for clean edges and sturdy builds
– FAQ
– How big should I make it? Start small, about a sheet of cardstock, then grow if you like.
– What ages work best? Kids who read or tell stories will enjoy it most.
– How long does it take? Plan a couple of hours for a first try; more for a grand scene.
With a story in your hands and paper at your fingertips, you create a dream you can walk into. This project blends reading with hands-on making, giving you a tangible way to explore any fairy tale.
Recommended Products

Unfinished wooden Castle cutouts are made of quality natural wood for durable use; with smooth surface, easy to paint and write.
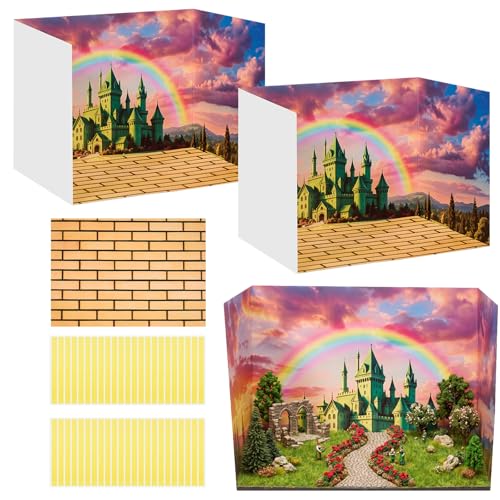
Complete Kit: the set comes with 2 green castle themed cardboard three dimensional model display boxes, 2 pieces of realistic texture cards, and 2 rolls of double sided tape; This all inclusive package ensures you have everything needed to create a sophisticated and appealing display for your projects or action figures

Package Includes - This comprehensive DIY craft set includes 12 set of unfinished castle woodcuts (60 tablets), 12 colors of paint, two brushes, 6 pieces of gold powder glue and 1 packs of diamond stickers. Perfect for birthday parties or classroom activities, this set is designed to unleash unlimited creativity.
15. Magical Castle Puzzle.

Want a quick, hands-on way to mix art with learning? A magical castle puzzle fits. You draw a castle on sturdy cardboard, then cut it into pieces for a kid-friendly jigsaw. Turning a craft into a puzzle keeps small hands busy and minds engaged.
Materials
– Sturdy cardboard or poster board
– Markers, colored pencils, or paints
– Scissors with adult supervision
– Glue or tape
– Optional stickers or foil for shine
Steps
1) Sketch a simple castle with towers and a gate. Bold lines help pieces fit cleanly.
2) Let kids decorate the image before you cut. Each piece gets its own color or design.
3) Cut the drawing into 6 to 12 pieces. Smooth edges keep things safe.
4) Mix the pieces and have kids rebuild the castle. Talk about shapes, sizes, and how pieces fit together.
5) Add a small twist, like racing to finish or hiding a treasure piece for surprise.
Learning benefits
– Shapes, sizes, and spatial thinking
– Fine motor practice from cutting and placing
– Teamwork when friends or family join
Tips
– Start simple if you have younger kids
– Use larger pieces first, then add more pieces for challenge
– Laminate or back with extra cardboard for durability
Variations
– Turn it into a treasure hunt by hiding clues inside pieces
– Create a village scene on separate boards for a mini castle town
Why it helps
This DIY paper castle puzzle blends art and play. It keeps kids curious and gives you a small keepsake to show for the effort.
@media(max-width:480px){
16. Stained Glass Castle Window.
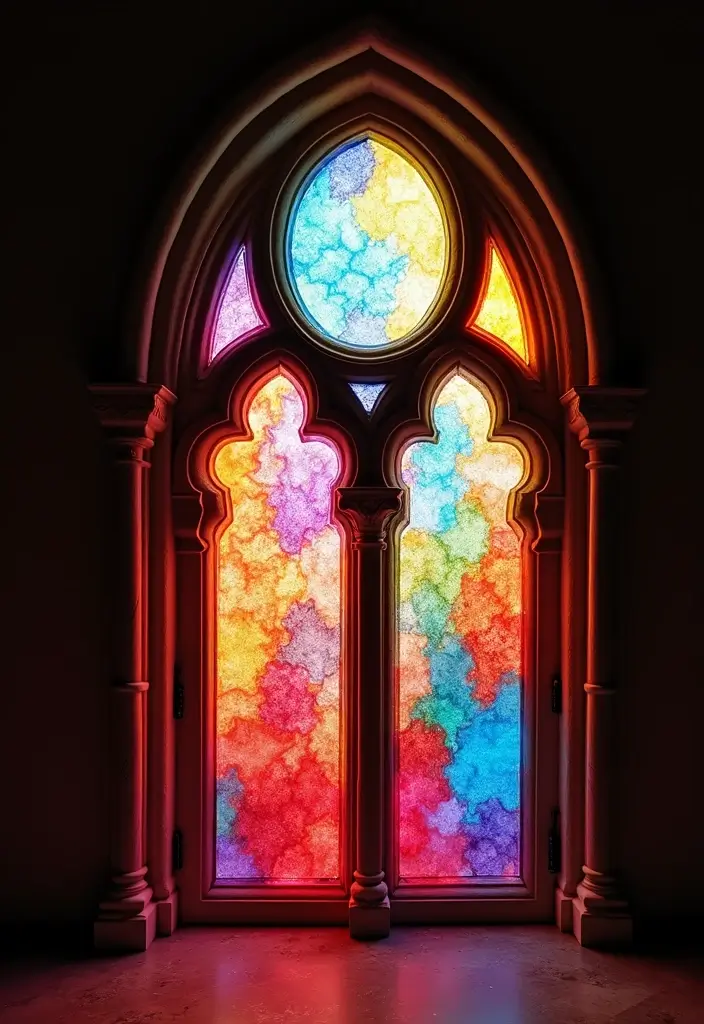
Want a decor piece that adds a fairy-tale glow? A DIY stained glass castle window is bright, simple, and fun to make.
Here is why it works: light passes through tissue between plastic and color, creating a soft, jewel-like glow. The castle shape brings a touch of whimsy to any wall.
What you need
– Clear plastic sheets or old transparencies
– Colorful tissue paper in shades you love
– White glue or glue stick
– Scissors and a pencil
– Tape or string for hanging
– A bright light source to show the colors
Step by step
1) Cut out a simple castle shape from the plastic sheet. Keep the outline clear so it looks like a window in a tower.
2) Plan a few windows or towers inside the shape. Light will shine through them.
3) Tear or cut tissue into small pieces. Glue them inside the castle cutout to form a stained-glass look.
4) Let the glue dry. If you want extra sturdiness, add a second clear sheet on the back.
5) Hang the window in front of a lamp, lamp stand, or sunny spot. The colors will pop as light passes through.
Color tips
– Try a light-to-dark gradient for a sunset feel, or mix warm and cool tones for contrast.
– Stay in the same family of colors for a calm look.
Care and tips
– Wipe dust with a soft cloth.
– Do not soak in water.
– If tissue peels, re-glue gently.
Next steps
This small window brings a gentle glow and a dash of magic to any room. It’s simple to make and great for family moments.
Recommended Products

Stunning Visual Effects: Create mesmerizing effects that change with the light, adding a unique touch to any space, perfect for home decor, offices, and retail displays

【Enchanting Fairytale Castle Design】HOMETITUTE’s static cling window film features a vibrant, stained-glass castle scene, merging fantasy charm with decorative window cling artistry – perfect to bring a magical, whimsical vibe to home or office windows.

Dreamlike Castle Scene: This privacy window film showcases a pastel-toned fantasy castle in delicate stained glass hues, creating a serene backdrop that filters light softly while maintaining your privacy for a tranquil space.
17. Castle Garden Terrarium.

You want a hint of fairy tale life in your room. A Castle Garden Terrarium can give you that and teach a bit about plant care at the same time. It blends art with nature. You end up with a tiny world you can watch grow.
What you’ll need
– Clear glass container with a wide opening
– A tiny castle (polymer clay, a small toy castle, or a resin mini)
– Moss, small ground covers, and a few tiny succulents or ferns
– Miniature figures, stones, or shells
How to build
– Rinse the container and add a light layer of small gravel for drainage
– Place the castle inside. Think of it as a fortress in your garden
– Tuck moss and plants around the castle. Use more soil where you need it
– Add tiny figures and stones to make paths and a yard
Care and display
– Put it where you get bright, indirect light
– Water sparingly. A light mist every couple of weeks works best
– Keep the soil mostly dry between waterings to avoid mold
Here is why this works
– It creates a magical look with real plants
– Kids learn how plants grow and how to care for them
– It’s a small project you can move and rearrange as you like
Next steps
– Try different castle styles or plant mixes
– Change the scene with seasons or new mini figures
18. Castle-Themed Home Decor.

Want a touch of fairy tale charm in your home? Castle themed decor adds magic without a big project. Paper castle silhouettes make a bold statement, and you can switch colors to fit your space. You’ll get texture, depth, and a friendly conversation starter. The result is a castle wall art you can customize for seasons or stories.
– Materials to gather Start with sturdy paper like cardstock and colored craft paper. Tissue adds translucence and metallic sheets shine. Have scissors, glue, a ruler, pencil, and a cutting mat. If you want light, grab a strand of fairy lights.
– Templates and cutting Draw or print simple castle shapes. Cut towers, walls, and flags. Layer pieces to create height.
– Assemble the look Lay pieces on a board or frame. Use foam dots to lift towers. Keep colors in the same family.
– Finish with light Glue pieces in place. Hang on a wall or in a frame. Wrap fairy lights around the edges for a soft glow.
– Where to display Great in a living room, above a sofa, or in a kid’s room.
– Care tips Dust gently with a dry cloth. Keep away from humidity.
This simple project lets you tell a new tale each time you swap colors. You can switch it up anytime.
19. Interactive Castle Play Mat.

Here is why this method works for busy families. If you want a castle play space that stays neat and fuels storytelling, try a castle play mat your kids can touch, move, and care for.
– What you need A large piece of fabric or felt. Patches in different colors. Scissors, glue or a needle. Optional pockets.
– Plan the space Lay out the castle in the center. Add a moat, gardens, and winding paths. Use chalk or a fabric marker to map it first.
– Attach the patches Sew or glue patches to the base. Make the gardens green, the paths brown, and the moat blue. Sew on pockets to hold tiny figures.
– Play ideas Let kids tell a story as they move figures around. Build scenes at the gardens or float toy boats in the moat. Switch patches to spark new tales.
– Care tips Keep a damp cloth for spills. If it washes, launder gently. Let it air dry.
– Why it helps It builds storytelling, small-motor skills, and team play. Kids learn to share space and ideas.
– Quick fixes If edges fray, stitch or add a simple border. Re-sew loose patches as needed.
– Common questions How big should it be? A 3×4 ft mat works well for one child; bigger fits more players. Do patches stay on? Yes, with glue or stitching. Will it slip? Add a non-slip backing or a simple frame.
Next steps: gather materials, set a small layout, and start with a mini castle to test the idea.
@media(max-width:480px){
Recommended Products
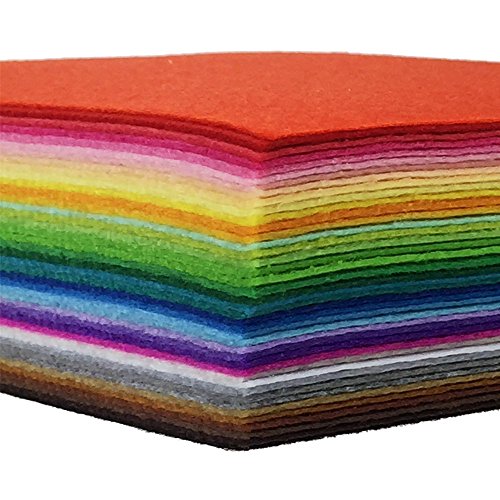
Material: Acrylic Felt Sheets

【Felt Sheet】: Our black single-piece felt measures 72" × 36" (183 cm × 92 cm) with a thickness of 1.4 mm
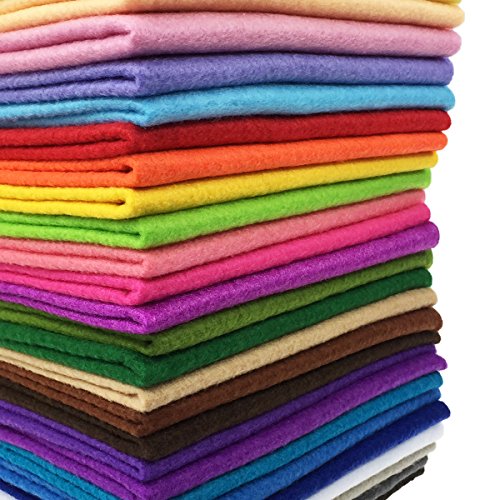
Material: 30% Wool Blend+70% Rayon, High Quality Acrylic Craft Felt
20. Castle Memory Game.

You want a craft that sharpens memory and feels magical. You want a game kids can finish without a big mess. This castle memory game is quick to make and fun to play. It is simple, fast to set up, and adapts to any castle idea you love.
– What you’ll make A castle memory game on sturdy cardstock. Pairs of castle pictures you decorate yourself.
– Materials Cardstock, markers, scissors, and a glue stick. Print or draw 12 to 16 castle designs in different styles.
– How to make the cards Cut out the shapes. Place one castle on the front of each card. Add a matching back so the backs look the same.
– Set up Shuffle the cards. Lay them in a neat grid face down. Start with a small grid to keep it simple.
– How to play Players flip two cards. If they match, remove them. If not, turn them back and try again. Talk about each castle as you play.
– Why it helps The game boosts memory and focus. It also spurs talks about castle styles. History can come up in small chats.
Next steps: try a timed round or add a tiny fact on the back of each card for extra learning. Storage tip: keep the deck in a small tray or box so it stays neat.
@media(max-width:480px){
21. 3D Castle Wall Art.

Here is why you want 3D castle wall art. It adds a fairy tale feel without heavy frames. You use simple supplies and finish fast. You can swap colors to fit your room.
– Materials
Cardstock in several colors.
Foam mounting stickers.
Scissors and glue.
A pencil and ruler.
Optional: a corner rounder or kid-safe craft knife.
Removable wall tabs for easy hanging.
– How to build it
Plan a simple layout on paper.
Trace the base shape on thick paper.
Cut towers, walls, and clouds as separate pieces.
Glue the pieces in layers, using foam stickers to lift each one.
Let the clouds sit above the castle for depth.
Color the parts so the castle looks lively.
Mount the art on the wall with removable tabs.
– Why it helps
It trains your eye for layers and color. You gain a cool focal point for the room.
– Tips to get it right
Choose a wall color that makes the pieces pop.
Use removable adhesive so you can move it later.
Keep edges neat for a clean look.
– Next steps
Try a smaller version for a shelf display.
Add a night sky backdrop or a forest around the castle.
@media(max-width:480px){
22. DIY Castle Hanging Mobile.
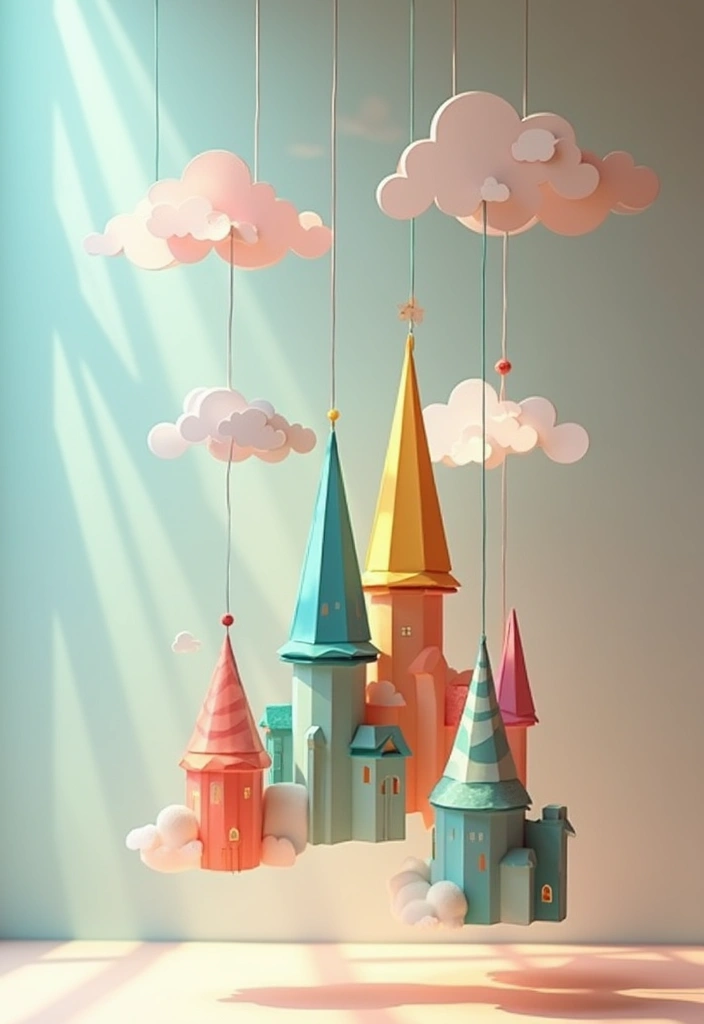
Are you looking for a quiet, fairy tale feeling in your nursery? A paper castle hanging mobile can give it to you. It draws the eye and invites calm as shapes drift above the crib or play mat. Here is why this craft helps: it supports focus, sparks storytelling, and makes a cozy corner.
Materials you’ll need
– Circular base (cardboard or thin wood), plus sturdy string or fishing line
– Paper shapes: castles, clouds, and stars
– Colored paper, scissors, glue or tape, and a hole punch
– Optional: ribbon for extra decoration
Cut and prepare
– Use simple templates for a castle, clouds, and stars. Print or draw, then cut out clean shapes.
– Create a few layers for depth. Stack shapes and glue lightly so they stay flexible.
– Punch small holes at the top of each piece to thread the string.
Build the mobile
– Tie each shape to a piece of string. Vary the lengths for a gentle, staggered drift.
– Attach all strings to the circular base in a loose circle. Space them so the mobile stays balanced.
Where to hang and why
– Put it near a sunny window or where soft light can filter through. The shadows on walls add a dreamy feel.
– Keep the strings short enough for safety if a little one explores. Let the motion calm rather than thrill.
Personalize and story it
– Let kids color the castle, add tiny stickers, or a touch of safe glitter for sparkle.
– Use the mobile to kick off a bedtime tale. Ask, “Where does this castle guard tonight?”
Care and simple fixes
– Wipe dust with a soft cloth. Check strings occasionally for wear and trim as needed.
– If the balance shifts, adjust a few string lengths to restore a smooth swing.
Next steps
– Try a seasonal version with winter stars or autumn clouds.
– Create a mini castle chain along a wall to extend the story theme.
This easy project fits small spaces and little budgets. It invites kids to dream while you add a soft, charming focal point to any room.
23. Castle-Themed Candle Holders.
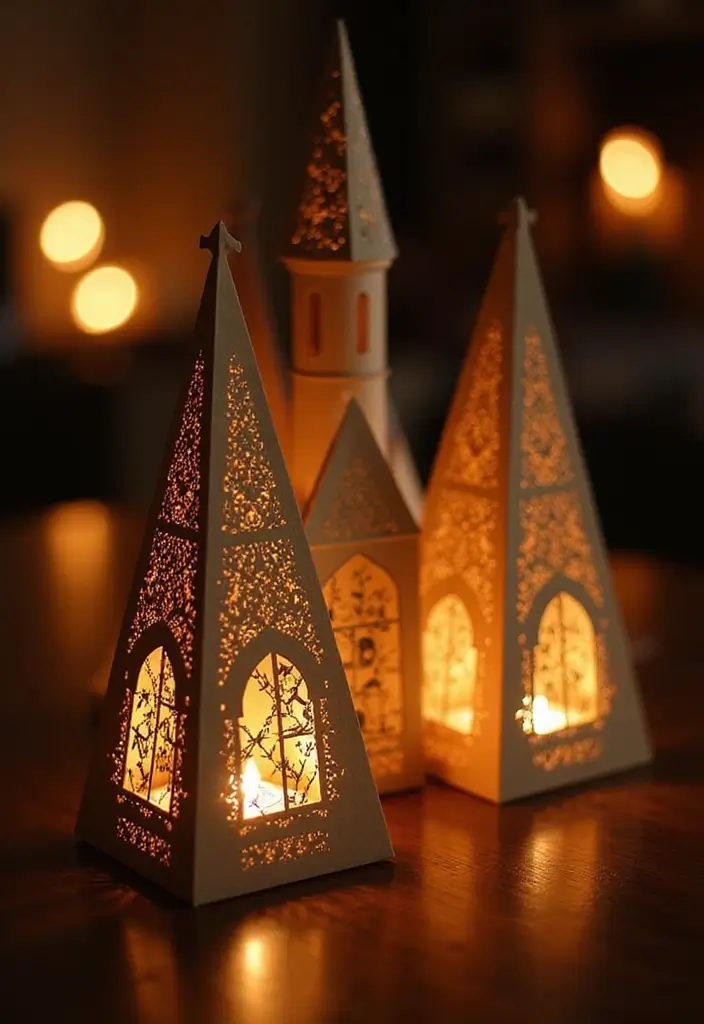
Castle-Themed Candle Holders
You want a soft glow that feels like a fairy tale. Castle-themed candle holders give that mood with a simple paper build.
Here is why this works: sturdy paper holds the shape, and cut windows let the light glow through.
What you’ll need
– Sturdy paper or cardstock so towers stay solid.
– Scissors and glue or tape to assemble.
– A small tealight or LED candle for safe lighting.
– A pencil and ruler for straight lines.
– Optional: color, foil, or tissue paper to add color.
How to build
1. Draw simple castle shapes on the paper.
2. Cut out the walls and towers, keeping tabs for folds.
3. Add windows and doors by cutting small rectangles.
4. Fold and glue the pieces to form a 3D castle.
5. Create a small holder or dish to center the candle.
6. Put the tealight inside and place the castle on a flat, flame-safe surface.
Safety and style tips
– Use flame-safe materials and never leave lit candles unattended.
– Prefer LED tealights to avoid heat and smoke.
– Try different color schemes like pale gray with a pop of blue or pink for a whimsical look.
Next steps: arrange a trio of castles on the table for a magical centerpiece, or line them on a mantel for a gentle glow during dinners and parties.
@media(max-width:480px){
24. Miniature Castle Bookmarks.

Want a way to spark reading? A tiny castle bookmark can turn a book into a small treasure.
What you need
– Stiff paper or light cardboard
– Colored markers or paints
– Scissors
– Glue or tape
– A bit of ribbon or yarn
– A hole punch optional
How to make
– Cut a small castle shape from the paper. Keep it simple with a rectangle base, two towers, and a short battlement line.
– Color the castle. Try blue on one wall, red on another. Add a small flag if you like.
– Glue a thin strip of ribbon at the top so you can grab it easily.
– Punch a tiny hole and knot the ribbon. Let it dry flat.
Ways to customize
– Let kids choose colors they love.
– Add tiny stickers or a name label.
– Try a little foil or tiny glitter, kept neat.
Why it helps reading
– The castle adds a spark of magic each time you reach for a book.
– It stays between pages and marks your spot.
– They make a sweet gift for your friends or classmates.
Tips for use
– Keep a small batch ready in your craft box.
– Slip one into a reading list for your child, or share with classmates.
– Use for themed reading parties and book swaps.
25. DIY Castle Snow Globe.
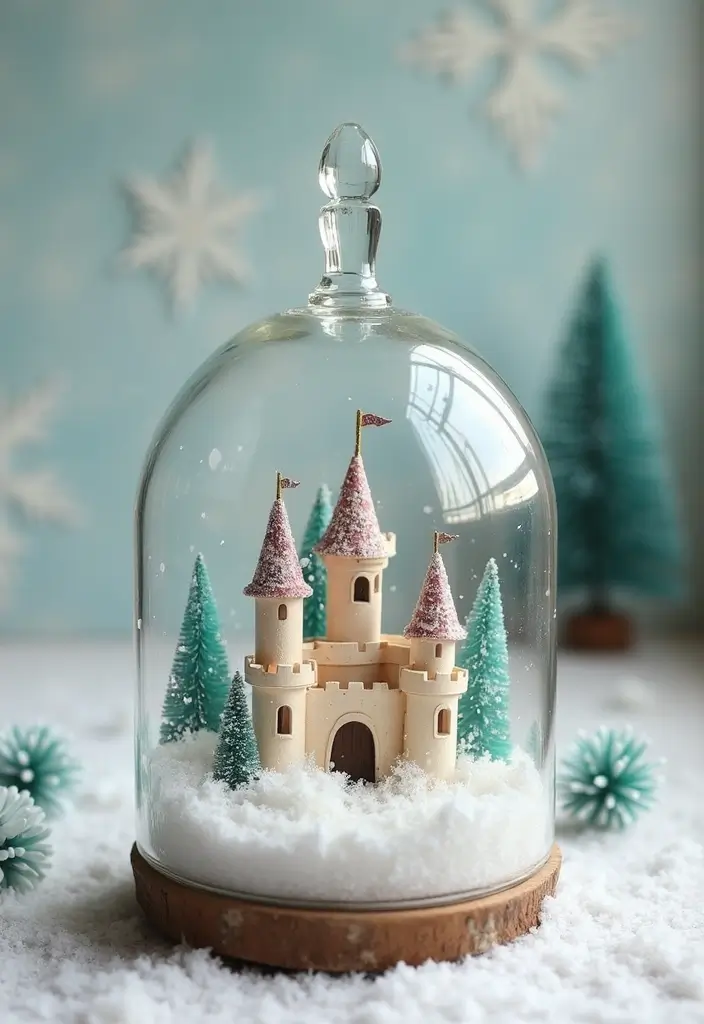
Want a cozy winter craft that doubles as a keepsake? A DIY castle snow globe brings a tiny fairy-tale moment to your shelf. You get a spark of magic and a little science lesson in one project.
What you need
– a glass jar with a tight lid
– paper or cardstock to cut a small castle
– faux snow or white glitter
– tiny trees or figures for around the castle
– glue, clear glue, or glue dots
– water and a splash of glycerin (optional)
– paint or markers for decorating the lid
How to make it
1) Cut a simple castle from the paper. Attach it to the inside bottom of the jar using glue.
2) Add tiny trees or figures to build a tiny scene around the castle.
3) Pour in a little faux snow or glitter to create the snowy ground.
4) Fill the jar with a small amount of water; add a drop of glycerin if you have it to slow the snow’s motion. Seal the lid tightly.
5) Decorate the lid with paint or paper to finish the look. Screw the cap back on snugly and shake.
Here is why this works. The moving snow is pulled by gravity through the water, and glycerin makes it drift more slowly for a smoother swirl. Your castle snow globe becomes a delightful winter display that also shows how simple liquids move ideas around.
Next steps? Personalize with new scenes each season, then store gently until you want to shake up the magic again.
@media(max-width:480px){
26. Castle-Themed Pencil Holders.
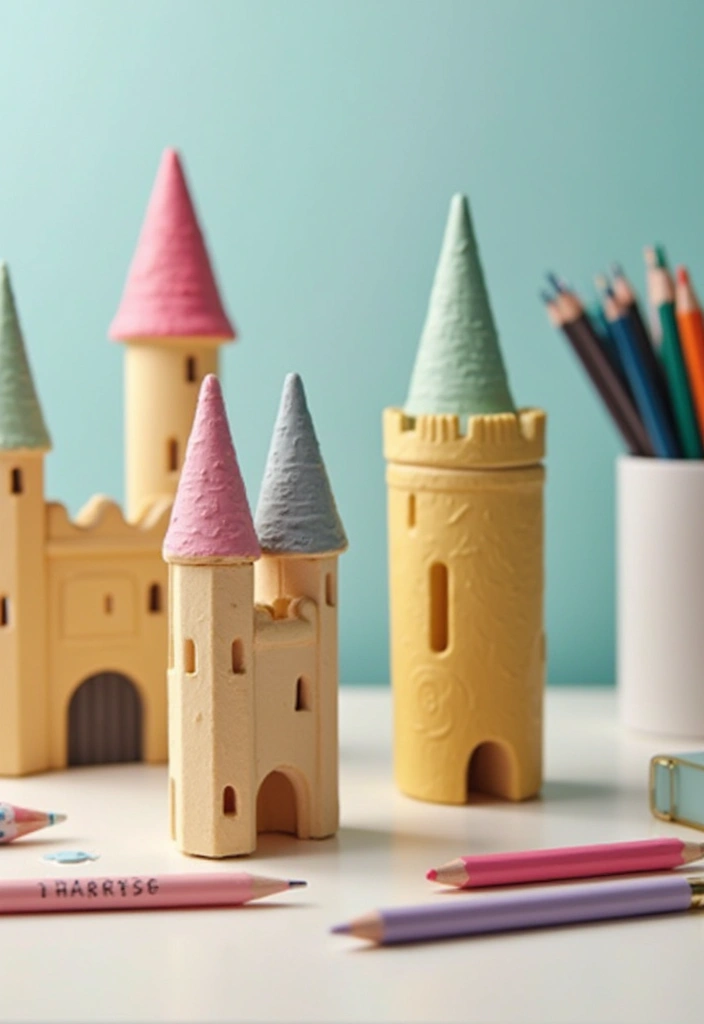
– Two problems you’re solving You want a neat desk. You want a craft you can do with kids.
– Materials you’ll need Cardboard tubes or small cans work as towers. A sturdy base helps them stand. Using recycled tubes keeps the project eco friendly. Colored paper or foam sheets turn the walls into stone. Glue or tape keeps parts in place. Scissors and a ruler help you cut clean edges. Optional stickers add color and texture.
– Steps to build Step 1: Cut a flat base from cardboard. Step 2: Cut two or three tubes for towers. Step 3: Cover the towers with paper to look like bricks. Step 4: Glue towers to the base and add battlements with paper strips. Step 5: Attach doors, windows, and a small flag. Step 6: Let it dry before loading pencils.
– Personalize it Kids can draw a crest or initials and glue it on a shield.
– How to use Place it on your desk to hold pencils, pens, and scissors.
– Care tips Wipe with a dry cloth. If you paint, seal with a clear coat so it lasts. Work with an adult for glue or sharp tools.
– Variations Try a row of mini towers or a single tall tower. Use different color themes for your room.
– Why it helps It frees up space and adds a fairy tale touch to your study.
@media(max-width:480px){
27. Castle-Themed T-Shirts.
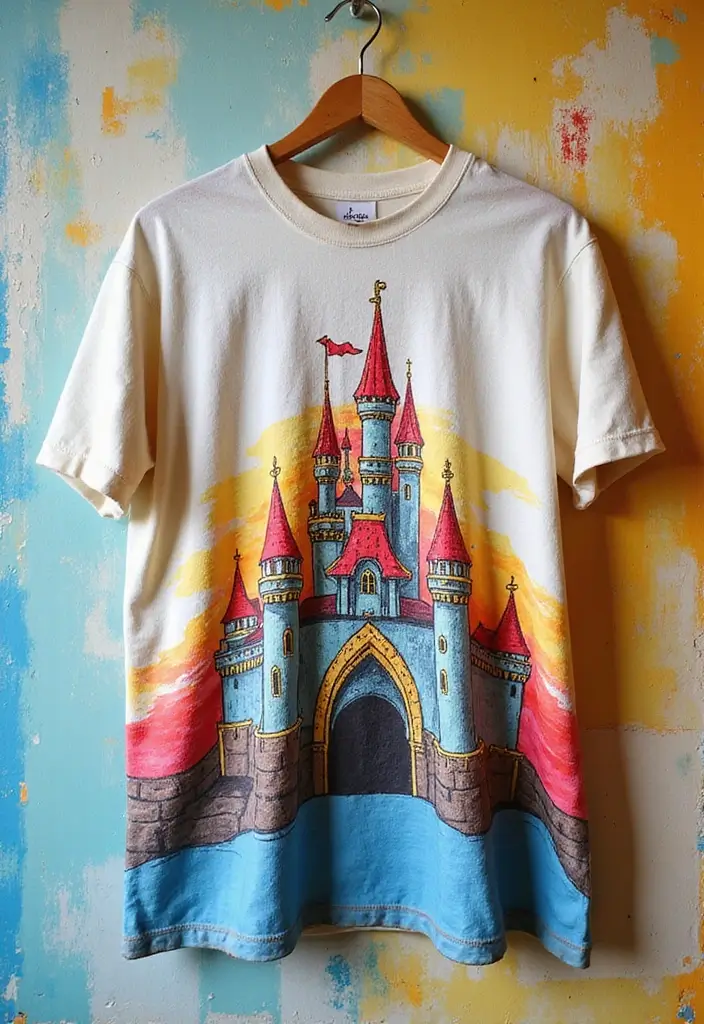
Castle-Themed T-Shirts
You want a quick, fun way to wear your art. Castle-themed T-shirts give that. With fabric paint, a plain tee becomes a tiny fairy tale you can wear.
Choose a cotton shirt in a color that fits your scene. Gather these supplies: fabric paint, brushes and sponges, masking tape, castle stencils, a piece of cardboard inside the shirt, and a warm iron to set the paint. Have a protective sheet ready for the table.
Here is how to do it:
– Plan a simple castle. Think towers, a gate, and a flag.
– Prep the shirt. Put in the cardboard and tape edges to control paint.
– Paint the background first. Sky blue or soft yellow makes the castle pop. Let it dry.
– Add the castle. Draw tall towers, a crenellated top, and a drawbridge. Add windows and a flag.
– Add details. Outline with a darker color. Add stones, a moat, or little stars if you like.
– Set the art. Follow the paint directions and iron from the back side. Let it cool.
Care tips: wash inside out, gentle cycle, air dry.
This DIY T-shirt design sparks creativity. It yields wearable art and makes a charming gift.
Share photos to inspire others.
@media(max-width:480px){
28. Castle Puzzle Box.

Want a craft that doubles as a brain teaser? The Castle Puzzle Box offers both build and reveal.
What you get: a small castle box that opens only after you assemble its pieces. A tiny treasure hides inside. It’s a good challenge for kids and adults who love a smart project.
What you need
– sturdy cardstock or light cardboard
– scissors and a ruler
– glue
– color tools or patterned paper
– a small keepsake
How to build
– Draw a simple castle on the cardstock. Add a lid that slides or a door that swings open.
– Cut out all parts. Fold along the lines and crease well.
– Color and decorate each piece. Try brick patterns, flags, or bright walls.
– Glue the pieces to form the box frame. Let glue dry before moving on.
– Put the treasure inside. Make the reveal feel like a puzzle by adding tabs or a tiny key spot.
– Test the opening. The box should unlock only after the right move or sequence.
Tips
– personalize with a name, favorite colors, or a short story.
– hide a tiny note or reward inside for extra magic.
– keep all pieces in a small bag so nothing gets lost.
What you gain
– planning and measuring become second nature
– you practice patience as glue dries
– you finish with a fun, shareable keepsake
Next steps
– scale up to a bigger castle
– make a mini set for gifts
– film a simple how-to to help others
@media(max-width:480px){
29. Castle-Themed Wall Clock.
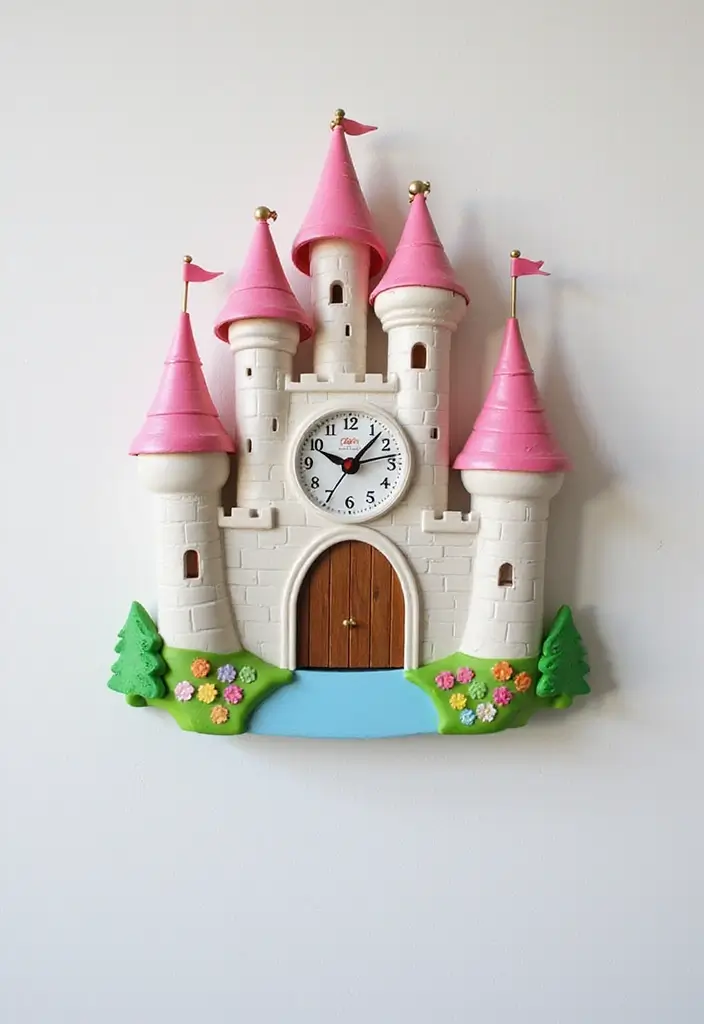
If you want a clock kids will love, this castle wall clock is a great pick. You can finish it in one afternoon. It blends art with a useful habit. Reading time.
– What you’ll need: round base of sturdy paper or cardboard; markers or paints; colored paper; scissors; glue; a ruler; and a clock kit or plain paper clock hands. Use a brad or a small clock mechanism to hold the hands.
– Step-by-step: 1) Cut a clean circle for the base. 2) Draw towers, battlements, and flags around the edge. 3) Place bold numbers or marks for the 12 hours. 4) Add texture with brick lines or stone dots. 5) Make clock hands from paper or use a kit. 6) Attach the hands at the center with a brad. 7) Hang the clock on a wall or place it where everyone can see it.
– Creative twists: let kids pick colors that fit their personality. Add 3D elements like foil windows or tissue flags. Use bright rainbow bricks or a single calm color to suit the room.
– Learning and care: talk about what time it is and why it matters. Choose quiet clock parts so late nights stay peaceful. Keep the mechanism dry and replace batteries when needed.
– Quick variations: make a fridge version with magnets, a small desk clock, or a simple wall piece without moving parts.
This castle clock brightens any room and helps everyone stay on time, while kids gain focus and pride.
@media(max-width:480px){
30. Castle Story Stones.
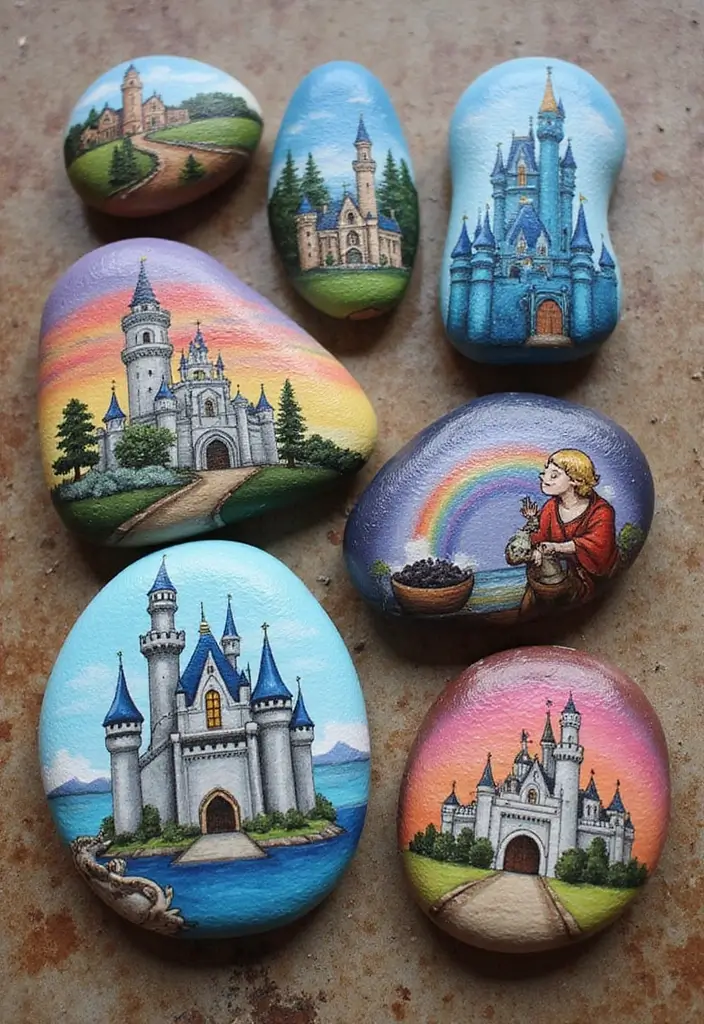
Need a hands-on activity that blends art with storytelling? Castle story stones fit the bill. Paint smooth stones with castle scenes and characters. Use them as prompts for quick, playful stories. Your child will move from stone to stone and weave a new tale each time.
What you need
– Smooth stones ready for painting
– Acrylic paints in bold colors
– Small brushes for detail
– Clear sealant to keep colors safe
– A flat plate or tray to keep supplies tidy
How to play
– Wash and dry the stones first
– Paint a simple castle, a knight, a princess, or a magical creature on each stone
– Let the stones dry completely
– Pick stones at random and tell a story that uses the image on each one
– Keep the tale going by adding new stones as the plot unfolds
Why it helps
Story stones spark focus and language. They help kids practice storytelling steps like beginning, middle, and end. The activity stays fun, because each stone adds surprise.
Themed sets
You can build sets around princesses, knights, dragons, and forest friends. Mix in a villain or two for a quick plot twist. It’s a flexible way to turn craft time into story time.
Tips for success
– Dry paint in a warm, quiet spot
– Store stones in a labeled box for easy play
– Start with 6 to 8 stones and grow the set over time
Next steps
Grab a handful of stones today. Create one scene, then tell a tale. Repeat weekly to grow a tiny castle of stories in your home.
@media(max-width:480px){
Conclusion
Crafting paper castles opens up a world of creativity and imagination for both kids and adults alike.
These 30 projects invite you to explore your artistic side, transforming simple materials into enchanting decor and play items.
So gather your supplies, invite friends or family to join in the fun, and embark on a crafting journey that promises to be as magical as the castles themselves!
Note: We aim to provide accurate product links, but some may occasionally expire or become unavailable. If this happens, please search directly on Amazon for the product or a suitable alternative.
This post contains Amazon affiliate links, meaning I may earn a small commission if you purchase through my links, at no extra cost to you.
Related Topics
paper castle DIY
miniature dioramas
kids crafts
fairy tale decor
creative paper projects
easy DIY
interactive play
whimsical home decor
castle-themed crafts
storytelling activities
DIY castle tutorials
seasonal crafts