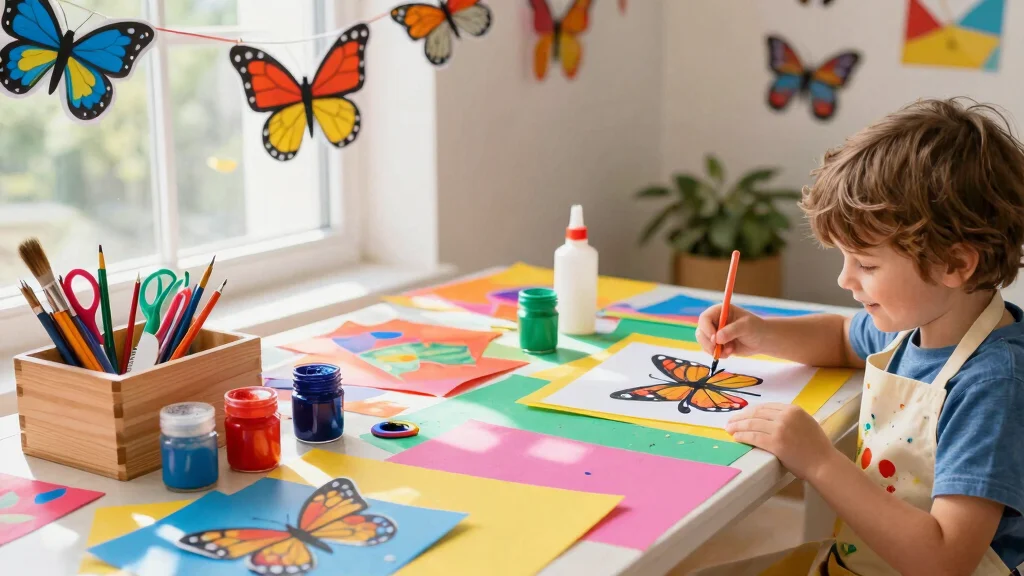
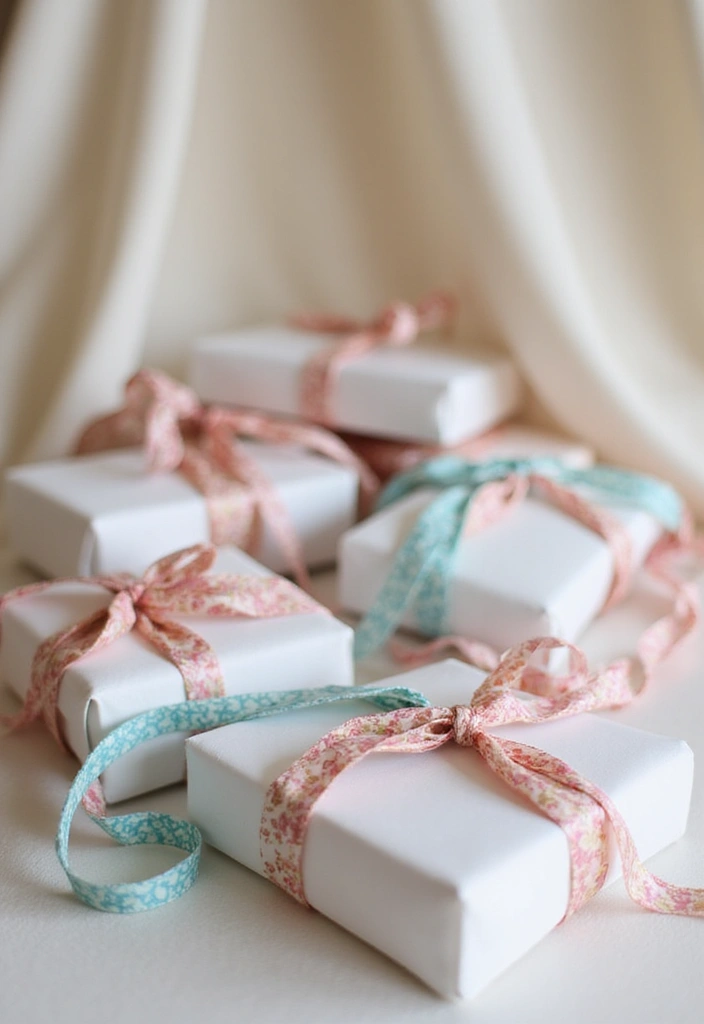
I put this together because wedding paper decorations can look polished without a big price tag. These ideas mix clean lines with soft textures, and you don’t need a pro to pull them off. I wanted to share ideas that feel personal and refined at the same time. If you crave chic details you can actually make, this post is for you.
If you’re planning an elegant wedding on a budget, this will help. If you love simple shapes, gentle colors, and tiny paper accents that spark chatter, you’re in the right place. This is for brides and grooms, planners, and DIY lovers who want a cohesive look from invites to the last chair gift. You can turn plain space into a warm scene with a few well-made pieces.
What you’ll get You’ll find 27 wedding paper decorations you can mix and match across invitations, place cards, photo backdrops, and table decor. Each idea comes with straightforward steps, a quick supplies list, and a simple timing plan. I keep the steps tight so you can finish in an afternoon or over a weekend. Ideas range from delicate paper flowers to crisp bunting and layered vellum accents.
You’ll learn how to pick a color palette that works with your venue. You’ll get tips for choosing the right weight of paper and the finishing touches that look polished. I include tips on cutting, folding, and attaching without tearing. You’ll also find simple ways to reuse leftovers for guest favors or thank you notes.
Paper decor sets a luxe mood without taking over the room. This approach leans on timeless options like ivory, blush, kraft, and soft metallics. If your venue is outdoors, I point out weather-friendly choices and quick fixes. Keep expectations realistic; DIY shines with time and patience.
Ready to start? Grab a pencil, pick a color, and choose one or two projects to test this weekend. As you finish each piece, you will feel your wedding style take shape. These ideas help you create a cohesive look that feels you, not just an Instagram trend. If you want more help, you can tailor ideas to your venue with the tips in this post. Here is why this matters: you can craft a luxe feel without overpriced decor.
1. Elegant Paper Flower Bouquets

Want a bouquet that lasts and fits your color theme? Elegant paper flower bouquets deliver both. Use them as table centerpieces or as your bridal bouquet. They stay vibrant through the night and beyond.
Here is why paper flowers work: they never wilt, they’re easy to shape, and you can match every shade.
Materials Needed:
– colorful craft paper
– scissors
– glue
– floral tape
– wire stems
How to make them:
1) Cut petal shapes from your chosen paper. Use a few sizes for depth.
2) Layer petals to build a full bloom.
3) Add a few leaves with green paper.
4) Put the bloom on a wire stem and wrap the base with floral tape.
5) Group several blooms into a bouquet. Trim stems evenly and wrap with ribbon.
6) Place the bouquet in a vase or lay it on the table to test colors before the big day.
These bouquets can match your wedding colors and you can add patterns that show your style. You can also make matching boutonnières for the groom and chic corsages for guests. Next steps: start with a small practice bouquet, test one color scheme, and then expand to a full set for the party.
Tip: choose a light-weight paper for gentle petals. If you want shine, add a touch of metallic color. Keep extra petals handy to adapt arrangements at the last minute.
Recommended Products

Flower Money Bouquet Kit - You will get 20 sheets black floral wrapping paper, 24pcs butterfly decorations, 100pcs floral pins, 1 roll of 1.5" wide satin ribbon and 90pcs wooden sticks for flower bouquets

【10 Layers Extra Large Size Flower Press】: With an 11 x 11 inches large size, this flower press kit is perfect for preserving wedding bouquets, springtime blooms, herbs and leaves. Create stunning dried floral arrangements for wedding centerpieces, romantic keepsakes, or springtime and Easter crafts—all in one press!
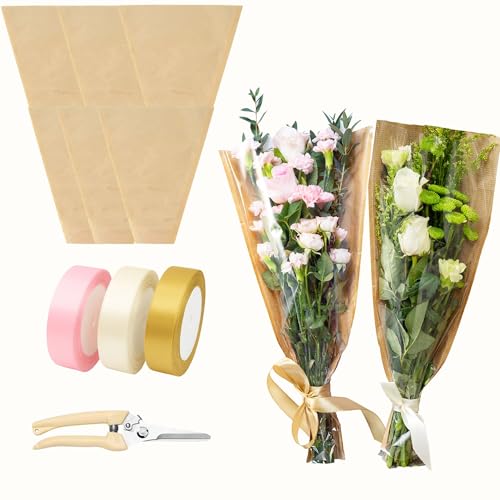
Easy to use for beginners: you can wrap flowers neatly in minutes even if you’ve never done it before, and this all-in-one kit helps you create clean, simple bouquets without special skills or tools. Includes 50 kraft flower sleeves, 3 satin ribbons, and 1 pair of scissors
2. Customized Wedding Banners
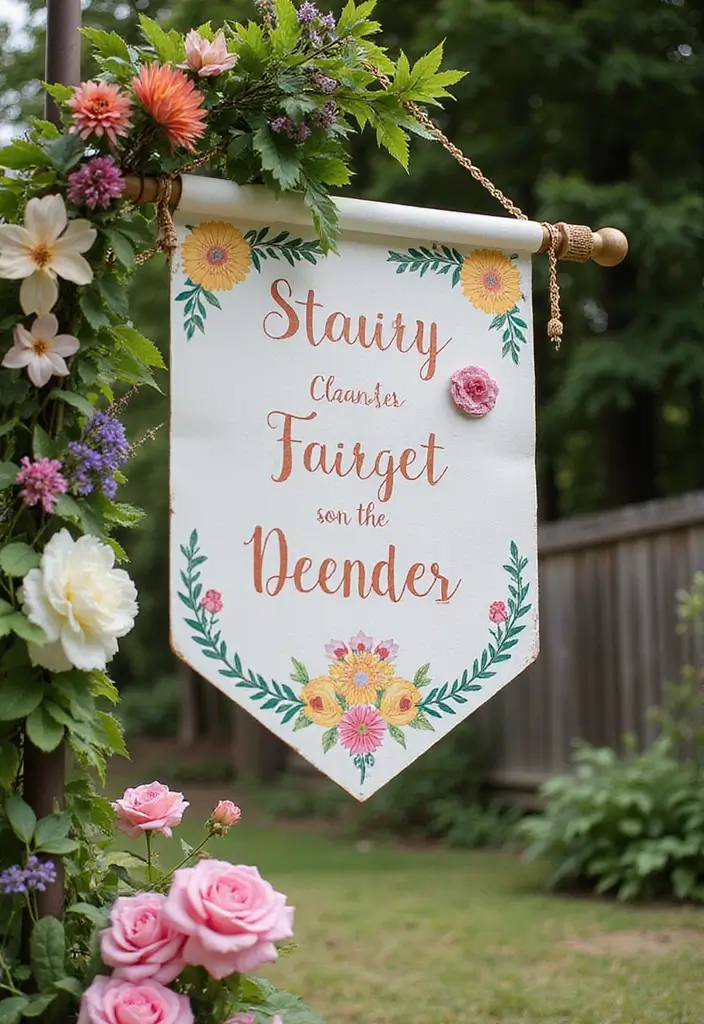
Looking for a simple way to tell your love story at the party? Customized wedding banners do just that. Here is why this works. They stay visible and easy to update. Paper banners are affordable, easy to craft, and photo-ready.
– Materials You’ll need cardstock, scissors, string or twine, and a hole puncher.
– Ideas Create welcome signs for guests. Make a “Just Married” backdrop. Add quotes that reflect your journey as a couple. Use a mix of colors and textures to match your wedding theme.
– How to build Cut out letters or shapes from cardstock. Punch holes at the top. String the pieces together to form words or pictures.
– Placement Hang banners at the entrance, behind the head table, or along the photo wall. They shine in photos and guide guests.
– Tips Vary letter sizes and add small cutouts for a playful look. Mix matte with metallic papers for depth. Store banners flat in a box and label them for future use.
Next steps: plan your color palette, sketch a quick layout, and pick a few banners to start.
How long you spend depends on your design. A single banner can take an afternoon, while a set may need a weekend. If you want budget-friendly options, print letters at home and glue them to cardstock.
Recommended Products

QUALITY DIY BANNER KIT WITH GLITTER LETTERS: Customizable birthday banners are made of quality cardstock with glitter, they are reliable and not easy to fade or tear. You can use these DIY banner kit with glitter letters for a long time.

QUALITY DIY BANNER KIT WITH GLITTER LETTERS: Customizable birthday banners are made of quality cardstock with glitter, they are reliable and not easy to fade or tear. You can use these DIY banner kit with glitter letters for a long time.

Package Content: You will receive 46 pieces of DIY custom banner kit, including 26 stencil letters & 20 blank cardstocks, this combination will meet your decoration needs.
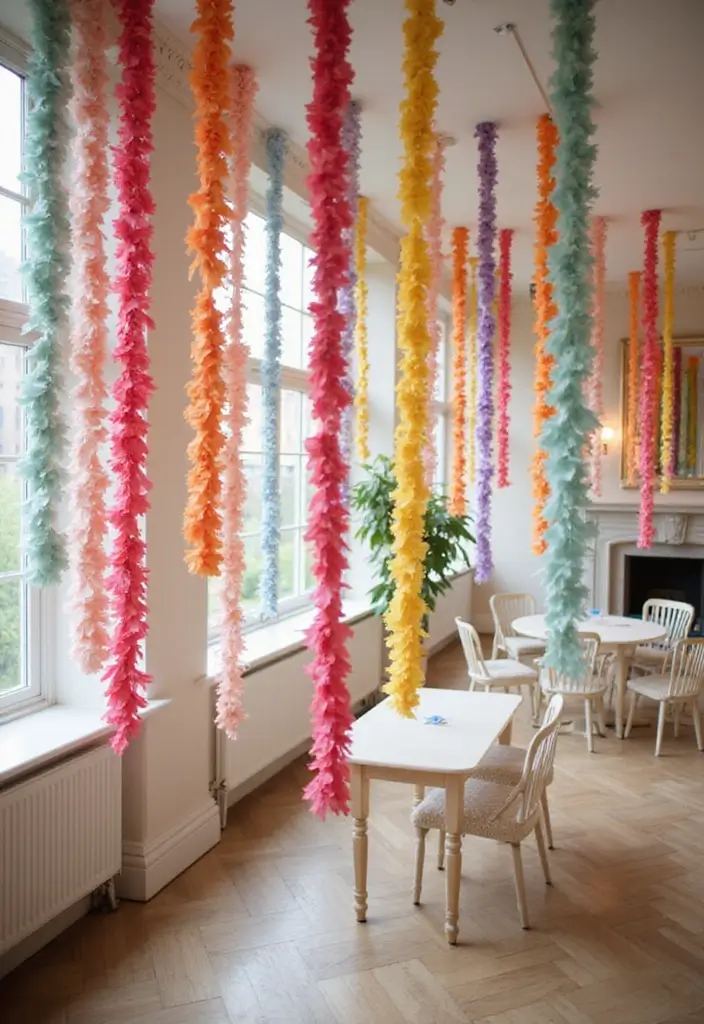
3. Lush Paper Leaf Garlands

You want a natural look that fits your wedding space. Lush paper leaf garlands give you that fresh feel on tables and walls. They’re light, versatile, and easy to adapt to any theme.
– Materials Needed: green craft paper, scissors, string, and glue.
Start by making the leaves. Cut leaf shapes in a mix of small, medium, and large sizes for a layered, real look. Keep the edges a little uneven to mimic nature. Add a tiny hole near the top of each leaf or create a small slit so you can thread them smoothly.
Next, assemble the garland. Thread leaves onto your string or twine. Space them evenly, and leave a little room between each leaf so the garland breathes. Hang the garland as one long strand, or cut it into shorter sections for separate wall decor. You can even glue leaves to a thin rope for a lighter, floaty vibe.
Where to use it. Create a lush backdrop behind the head table. Drape the garland along the wedding arch to frame your vows. Line a long table with leaves to form a soft, green runner.
Color ideas. Use olive, sage, and emerald greens. Mix shades for depth, and add a few gold or white leaves for a touch of shine.
Tips for success. Use different leaf shapes and sizes. Pair greens with a short touch of metallic or light colors. Choose jute twine for a rustic feel. Store flat in a box after the celebration to reuse later.
Next steps. Try this DIY decor to bring a natural, elegant vibe to your day.
4. Intricate Paper Lanterns

Want a soft, wedding glow that feels cozy and safe? DIY paper lanterns fit the bill. They work well in outdoor spaces and add a warm vibe inside.
Materials Needed: patterned paper, scissors, adhesive tape, LED tea lights, and a piece of string. Layer two sheets for extra strength, and pick colors that match your palette.
Choose papers with patterns that match your color theme. Cut shapes, but keep edges strong so the lantern stays sturdy. Leave generous openings so light can shine through.
Fold the sheets and tape the edges to make a 3D form. You can build spheres, cylinders, or hanging orbs. Space lanterns about five to ten feet apart for even glow.
Slip an LED tea light inside. Never use real candles. Turn on the light at dusk with a timer if you like.
Where to place them: Hang lanterns from tree branches for a fairy glow, or set lanterns along tables or down a wedding aisle.
Try different sizes for depth. Mix large lanterns with small ones. Use soft colors like blush, ivory, sage, or gold. Layered lanterns make the glow feel fuller and more romantic.
With a test run, you know it looks right before the big day.
Next steps: Start with a small batch, test wind and weight. Keep extra lanterns handy for quick fixes, and store them flat when not in use.
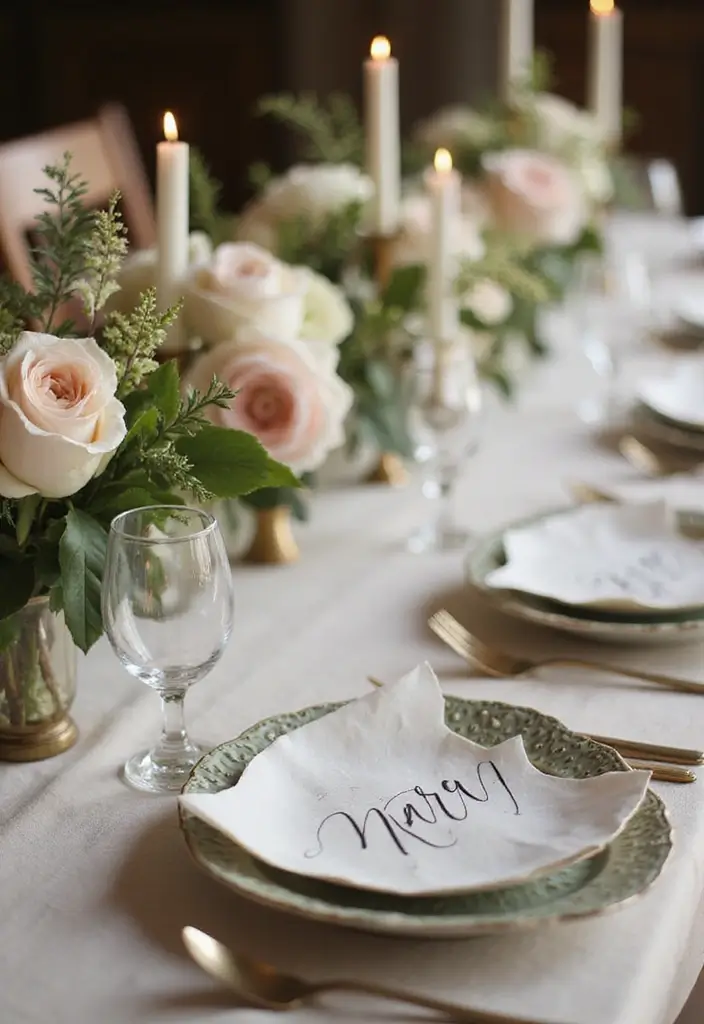
5. Customized Place Cards
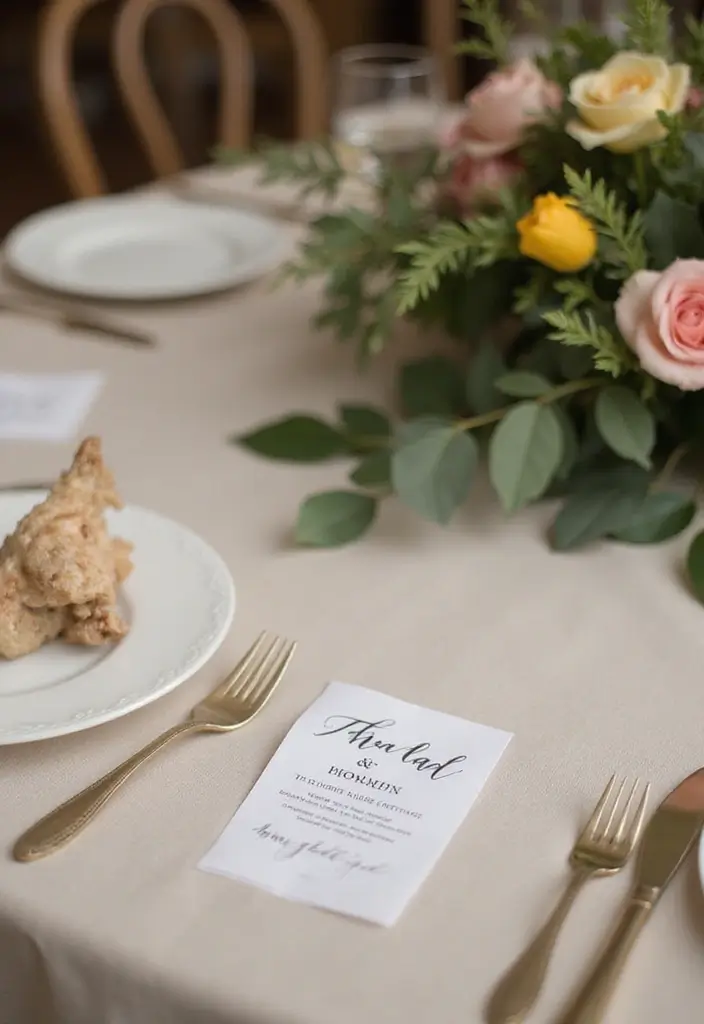
You want your guests to feel welcome and know where to sit. Customized place cards do both. They guide every guest and become a keepsake you’ll treasure after the party.
Materials you’ll need
– sturdy cardstock
– scissors or a craft knife
– a calligraphy pen or fine markers
– decorative touches like washi tape, stamps, tiny paper flowers, or ribbon
– ruler, pencil, and glue or double-sided tape
How to make them
1) Cut shapes that fit your theme. Small rectangles work well, or try fun shapes like hearts or stars. Keep the size just big enough for a name.
2) Write the guest names neatly. A simple script with a calligraphy pen looks classy, or use bold markers for a playful vibe.
3) Add a light touch of decoration. A strip of tape, a tiny flower, or a stamp can give personality without crowding the name.
4) Check readability. Hold the card at table height and read the name from a normal distance. Fix any light ink smears or crowded letters.
5) Set them up. Place cards in a shallow holder or lay them flat so guests can see the names from above.
Tips to make them shine
– Pick a clear font that matches your wedding style and palette.
– Keep color contrast and size in mind so names stay easy to read.
– Make extra cards for last-minute guests or changes.
– Let the cards tie into your decor with one small accent that repeats on other decor pieces.
Next steps: gather supplies, pick a shape and color scheme, then test a sample card to confirm it feels right on your table. Your guests will notice the care you put into these tiny, personal touches.
6. Charming Paper Doily Table Runners

If your tables look flat, turn them into charming, vintage surfaces with DIY paper doily runners. They add texture without a big price tag and are easy to pull off.
– Materials needed: paper doilies in your preferred sizes, clear craft glue or glue sticks, scissors, a ruler or tape measure, and optional double‑sided tape for a clean edge.
– Plan your look: measure the table and decide how long the runner should be. Leave a small margin at each end. Mix doily sizes for a layered feel, or use a single size for a sleeker line.
– Make the base: lay the doilies along the table line. For a simple effect, place them end to end. For more depth, overlap a little and press the edges together.
– Secure or position: glue each piece lightly if you want a permanent look, or leave them free so you can move pieces between settings. Tape can help keep edges tidy.
– Add the finish: top with a low centerpiece or a row of LED candles. A floral touch along the runner can pull the whole room together.
– Care and reuse: handle gently, avoid open flames near paper, and store flat between uses. These runners are lightweight, affordable, and easy to reframe for future gatherings.
7. Whimsical Paper Confetti
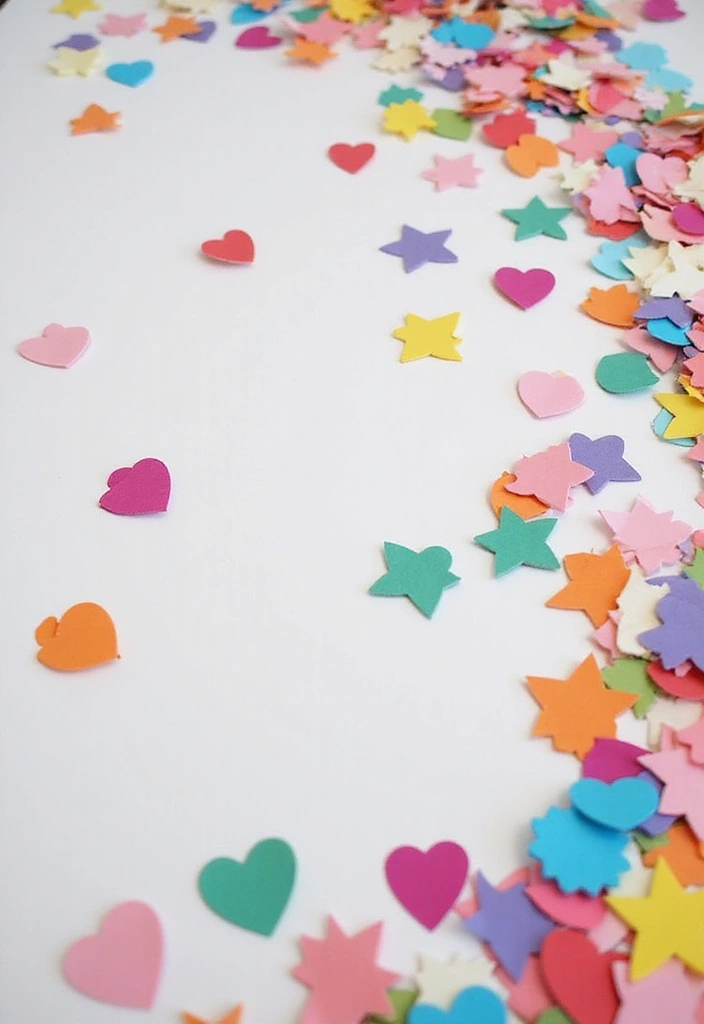
Here is why you should try DIY paper confetti at your wedding. It adds bright color to tables, invites, and even the moment you walk down the aisle. You get a playful look without spending a lot.
– Materials needed: colorful craft paper, a small paper punch, and scissors. Choose 2 to 4 colors that match your palette. Think bold hues and soft shades for contrast.
– How to make it: Use the punch to cut shapes such as hearts, stars, and circles. Punch from different colors for mixed sizes. Keep a tray ready so you can work fast. Save the scraps for a second run if you want more confetti.
– How to use it: Scatter confetti on tables to brighten the scene. Fill small favor bags for guests to shake as you enter the reception. Use a few shapes as a light aisle toss for the couple.
– Cleanup and tips: Craft paper confetti sweeps up quickly with a small broom. If you are outdoors, keep pieces contained until just before use to avoid wind trouble.
– Pro tips: Try a sample card to see how shapes look together. Mix sizes for texture. Store extras in a tight jar for future events.
Next steps: grab your color plan, set aside an hour to punch shapes, and do a quick test on a place card or menu to visualize the final look.
8. Elegant Origami Decorations
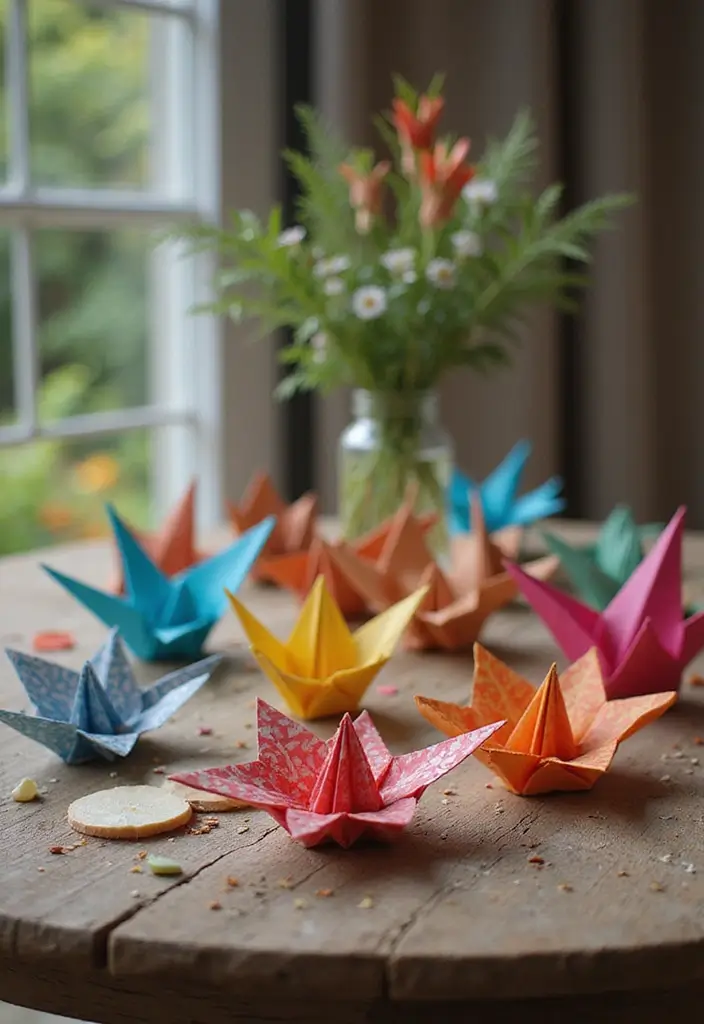
You want decor that feels refined without heavy cost or waste. Elegant origami adds quiet charm to your wedding space. Small folded pieces catch light and draw the eye, yet they stay light on your tables.
– Materials you need
– Origami paper in colors that fit your theme
– A simple folding guide or short video
– Clear thread or thin ribbon for hanging
– A few vases or shallow trays for flowers or flat pieces
– Ways to use origami
– Centerpieces: place several folded flowers in a clear vase to make a soft, graceful statement.
– Hanging decor: thread cranes or blooms on a line and suspend them above tables or the entryway.
– Garlands: string small shapes into a long banner to frame the cake table or photo wall.
– Simple folds to learn
– Crane: a classic fold that looks elegant with practice
– Paper flower: a few quick petals form a delicate bloom
– Waterbomb: a small, sturdy ball that stacks well in groups
– Rosette: a quick flower that adds texture to any display
– Color and care tips
– Pick papers with a matte finish for a soft wedding vibe
– Keep pieces dry and flat until you set them up
– Store in a clean box away from moisture so they stay crisp
Next steps: start with a mini test run. Pick 6 pieces and place them on a mock table. Check how colors look from afar. Then you can scale up for the big day.
9. Paper Heart Garlands
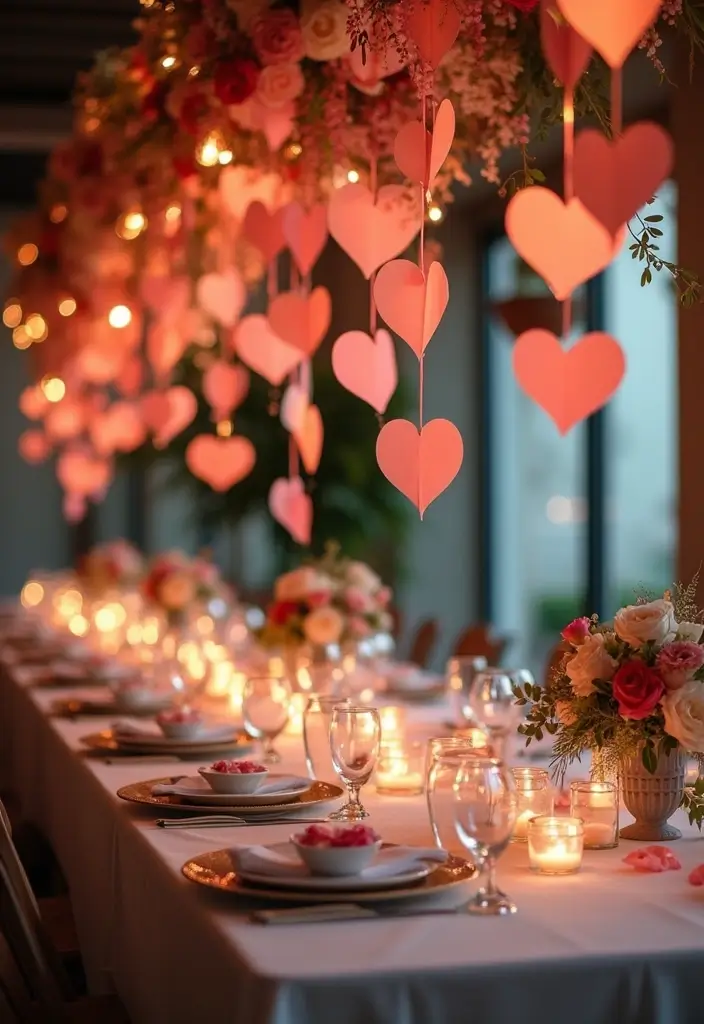
You want a warm, romantic look without a big spend. Paper heart garlands fit that need. They work indoors or outside. You can make them fast and easy.
Materials
– colored paper in a few shades
– scissors
– string, twine, or thin ribbon
– glue or clear tape
– optional: paper punch, pencil, ruler
Here is why this works: it is simple, low cost, and you can tweak colors to match your wedding palette.
1) Cut many heart shapes from your paper. Make some big and some small for visual depth.
2) Pick a palette. Use two to three colors that fit your décor. Mix bold reds with soft pinks or add a touch of cream.
3) Attach to string. Punch two holes near the top of each heart and slide them on. Or use a glued tab to stick hearts to a slim strip of string.
4) Hang with care. Space the hearts evenly. Drape across a doorway, over a table, or along a photo wall.
Tips
– Use double-sided paper so both sides show.
– Add a little sparkle with foil accents on a few hearts.
– Reuse scraps on extra garlands later; this keeps it eco-friendly.
– For wind outdoors, choose a light string and secure ends with small clips or tape.
Next steps: Gather your supplies and start cutting. You will soon see your space fill with cozy charm.
10. Personalized Photo Backdrops

You want a photo backdrop that feels personal and easy to set up. A handmade paper backdrop gives guests a clear spot for pictures and tells your story.
Here is why it works: paper is cheap, light, and you can shape it to fit any wedding theme. It fits on a wall, a door, or a frame.
Materials
– Large sheets of paper
– Scissors
– Adhesive like glue sticks or tape
– Decorative elements such as flowers, ribbons, stamps, or printed patterns
How to make
1) Pick a color palette that matches your wedding.
2) Plan a simple design that reflects your journey as a couple.
3) Cut shapes and assemble a large mural or collage.
4) Glue pieces in place and add small details like initials or tiny hearts.
Setup tips
Find a well lit wall or entryway. Use light tape so you can remove later without damage. Hang the backdrop at a height where guests can stand comfortably for photos.
Ideas to try
Create a map of places you love, a timeline of key dates, or a float of favorite hobbies. Add a few fresh flowers for texture.
Care and reuse
Store flat in a large bag. You can reuse the design at another celebration.
Test a quick shot to see how colors read on camera.
Recommended Products

Traditional Chinese Design: Featuring a classic Chinese-style oiled paper construction, this white paper umbrella exudes cultural charm and elegance, making it a perfect addition to weddings, parties, and themed events

Package Includes: you will get 10 pcs of 3D sunflower rainbow paper flower bulletin board decorations, available in 5 colors, bright red, rose red, lemon yellow, royal blue, and deep purple, and 2 sizes, respectively 9.8 inches and 7.9 inches; Each size corresponds to one color, allowing for multiple size combinations; Additionally, four 4.8 inches leaf patterns are available, with 5 pieces of each pattern for decorating the flowers; Easily create classroom bulletin board decorations
11. Decorative Paper Fans

If you want quick, affordable decor that adds depth to your wedding, decorative paper fans are a smart pick. They work on walls and they stay light enough to move as a centerpiece. The look is warm and inviting, with color and texture that catch the eye.
Materials Needed:
– patterned paper
– scissors
– glue
– brad (optional)
– string or tape for hanging (optional)
Here is why this works. The fans create shape and shade without heavy props. You can mix big and small fans to form your own mini gallery.
How to make them:
– Start with a sheet of patterned paper. Fold it accordion style about 1 inch wide.
– Pinch the folded edge and secure it into a fan shape with glue or a brad.
– Make fans in different sizes by using larger sheets or cutting the paper into circles first.
– Mix colors for visual interest. Let the glue dry fully.
Display ideas:
– Hang fans from the ceiling in clusters for drama.
– Lean them against table settings to add a soft, colorful backdrop.
– Use them as wall art grouped in a gallery-style arrangement.
Next steps: Plan a few color stories. Pair warm tones with white linens, or cool blues with natural wood. This simple craft adds texture without crowding your space.
12. Delightful Paper Mache Décor

Here is the problem you may face: you want wedding décor that feels personal but stays on budget. DIY paper mache fits. It gives texture and charm without expensive material.
Materials
– Strips of newspaper or craft paper
– Glue or a simple flour-and-water paste
– A mold such as balloons, bowls, or cardboard shapes
What you do
– Dip a strip of paper into glue and squeeze out the extra.
– Lay it on your mold. Smooth it so you remove air bubbles.
– Add more layers. Repeat until the piece is sturdy.
– Let it dry completely, then gently remove the mold.
Finish
– Paint your piece in your wedding colors.
– Add metallic accents, tissue, or patterns to suit your theme.
– Seal with a clear, matte finish to protect in heat and humidity.
Where to use it
– Centerpieces on the table
– Decorative bowls for sweets or favors
– Hanging ornaments to add soft light
Here is why paper mache décor gives you a unique texture that looks handmade but is still clean and elegant. It is light, easy to store, and you can batch many pieces at once.
Next steps Plan a small test piece first, then scale up for your venue.
13. Unique Paper Table Numbers
You want table signs that help guests find their seats and look good with your theme. Paper table numbers can do both. They’re easy, affordable, and a fun DIY project you can finish in a quiet afternoon.
– What you need
Cardstock in your chosen colors, sharp scissors, simple embellishments (glitter, washi tape, metallic pens), and a small stand or holder.
– How to make
1) Cut bold numbers from the cardstock. Keep edges neat for a clean look. 2) Decorate. Add a slim glitter edge, a strip of washi tape, or small doodles that match your style. 3) Attach to a stand. Pick a mini easel, a photo holder, or a simple card stand. 4) Place them on each table where friends will gather.
– Tips for a polished look
Stick to two or three colors for a cohesive vibe. Use thin borders that echo your decor. Choose stands that sit flat on the table. If you want extra shine, give the numbers a light seal to prevent smudges.
– Why this works
These signs blend with your decor instead of standing out too loud. Guests spot their table fast and feel part of the theme.
Next steps: pick a font style, test a piece, and plan a quick finish session.
14. Beautiful Paper Petal Confetti

Your goal is a pretty moment that’s easy to clean up. Paper petal confetti can help. It adds color and charm while staying eco friendly. It looks great in photos and feels thoughtful. Here is a simple way to make it and use it during your exit.
– What you need
– colored craft paper in your wedding colors
– scissors for quick cuts
– a hole punch for tiny dashed petals
– small favor bags or paper cones for guests
– ribbon or string to seal bags (optional)
– How to make it
– Cut petal shapes from the colored paper. Aim for 1 to 2 inches wide.
– Use different shades to add depth. Mix light pinks, soft lavenders, and bright blues.
– If you like texture, add a few tiny holes with the hole punch along the edges.
– How to use it
– Fill the bags with petals. Give a bag to each guest as they arrive or as they leave the ceremony.
– At your exit, invite guests to toss on cue. This creates a joyful shower for photos.
– Tips for a smooth exit
– Keep bags light so tossing feels easy.
– Choose biodegradable paper to protect the lawn.
– Sweep or let wind do some of the cleanup.
– Have a quick backup plan for windy days.
15. Dazzling Paper Ribbons
Want a quick, budget-friendly way to brighten your wedding? Dazzling paper ribbons fit the bill. They add a personal touch to favors and table decor without much work. Here is why they work so well.
Materials Needed: colorful paper, scissors, and glue or tape.
– Cut strips about 1 inch wide and 6 to 8 inches long.
– Twist or curl each strip to form a ribbon shape.
– Seal the end with a dab of glue or a piece of tape.
– Tie the ribbons around favor boxes, wrap napkins, or loop them onto place settings for a pop of color.
Next, choose the look you want. Patterned paper creates a lively feel, while solid colors look clean and elegant. Mix widths for depth, or use metallic edges for a hint of shine. You can even layer several ribbons for a fuller effect.
Here is a simple setup you can try. Create a ribbon garland by curling a handful of strips and taping them along a thin string. Drape it above your cake table or across the head table for a cheerful border. These ribbons are easy to mass-produce, so you can decorate many areas without spending hours.
Limitations? They are light and best for wrapping, not heavy decor. Handle gently to keep curls intact. With a little practice, you’ll have bright, cohesive accents that feel personal and polished.
16. Paper Leaf Place Settings
You want a simple, stylish way to seat guests and add a natural feel to your wedding table. Paper leaf place settings give you both. Here is why they work: they’re affordable, eco-friendly, and easy to customize.
Here is how to make them.
– Materials Needed: green craft paper, scissors, and decorative pens.
– Shape the leaves: trace a leaf on each sheet and cut it out.
– Label each leaf: write each guest’s name in clear, legible letters.
– Set them on the table: place a leaf beside each plate and add a tiny bloom for color.
– Look options: pick one green shade or mix two for contrast.
– Practical tips: practice writing on scrap paper first to avoid smudges.
– Time note: labeling many guests takes time, so plan extra minutes or recruit help.
– Next steps: test a sample setup on a small table, then scale up.
– Benefits: low cost, reusable, and fits an eco-friendly wedding theme.
– Limitations: it adds work for large guest lists and careful handwriting.
Plan ahead, gather your leaves, and enjoy a warm, natural tablescape.
17. Lovely Paper Stars

Want a dreamy wedding vibe without a big price tag? Lovely paper stars can do that. They add a celestial feel you can see and touch. You can hang them from the ceiling or tuck them into centerpieces. Here is why they work: the colors pop, the shapes shine in soft light, and they pack flat for easy storage after the big day.
– Materials you’ll need
Colorful paper in different sizes, scissors, string or thin cord, a hole punch or needle. Optional: tape, a template, and a ruler.
– How to make them
Start with a square sheet. Trace a five-point star or use a simple star template. Cut along the lines with clean, steady strokes. Unfold and flatten the star. Repeat with more sheets to get a mix of sizes and colors. Punch a small hole at the top and thread a length of string. Tie off the ends so the star stays in place. If you’re unsure, print a template and trace it first. Here is a simple trick: make two to three stars per color from each sheet to create a fuller look.
– How to hang and arrange
Space stars on strands and hang them at different heights. Create small clusters above tables and bigger groups along entryways. Use clear fishing line for a near‑invisible effect. Pair with warm or cool lights to boost the glow.
– Style tips and practical uses
Mix metallic papers with matte colors for depth. Use bold reds, blush pinks, or icy blues to match your palette. For night events, let lights reflect off the stars for a soft halo.
– Tips to save time
Cut several stars in one go, then finish with the stringing later. Store flat in a labeled box so you can reuse them.
Next steps: gather papers, print a template if you want, and start crafting. Your ceiling will feel magical, and guests will notice the twinkling details.
18. Decorative Paper Table Mats

You want table mats that lift your tables without stealing the show.
Paper mats give color and texture you choose.
Here is why they work: they protect the table, tie your color scheme, and add a warm touch.
– Materials Needed: large sheets of decorative paper, sharp scissors, glue or double-stick tape. Optional: a hole punch, ribbon, or corner accents.
– Cutting the Mats: Measure your plate and add 1/4 inch for a border. Cut the shape you like: rectangle for a modern look, circle for a soft feel, or oval for elegance.
– Layer and Color: Pick two to three patterns that fit your palette. Cut smaller shapes and stack them for depth.
– Finishing Touches: Secure layers with a dab of glue. Add a small edge fold or thread a ribbon through a punched corner.
– Placement and Care: Place the mat under each plate to brighten the table and catch spills. After the event, store flat in a folder or sleeve for reuse, or recycle torn sheets.
Next steps: pair mats with simple napkin rings or a tiny menu card for a complete look.
19. Charming Paper Toppers for Treats

You want a dessert detail that feels personal.
Charming paper toppers do that without a big price tag.
They fit any wedding theme and carry small messages like your initials or “Love” or “Mr. & Mrs.”
Here is how to make them.
Materials needed:
– Use sturdy cardstock.
– Have sharp scissors.
– Use adhesive.
– Add decorative items like ribbons, stickers, and washi tape.
– Have toothpicks or small skewers.
Steps to assemble:
1) Choose shapes that match your theme.
2) Cut shapes from sturdy cardstock.
3) Decorate with ribbons, stickers, or tape.
4) Glue or tape the shapes to toothpicks or skewers.
5) Let the glue dry before you handle them.
6) Place toppers on cupcakes or desserts just before serving.
With a few simple steps you get sweet drama on the dessert table.
Think of colors that fit your palette.
Use clear glue for a clean look or a dab of tape for quick sticking.
You can write a tiny message on the back so guests see a fun note when they bite in.
Prepare extras to cover last-minute needs.
Next steps: arrange toppers in a small vase or keep them flat in a box until the party.
Have fun with them and celebrate.
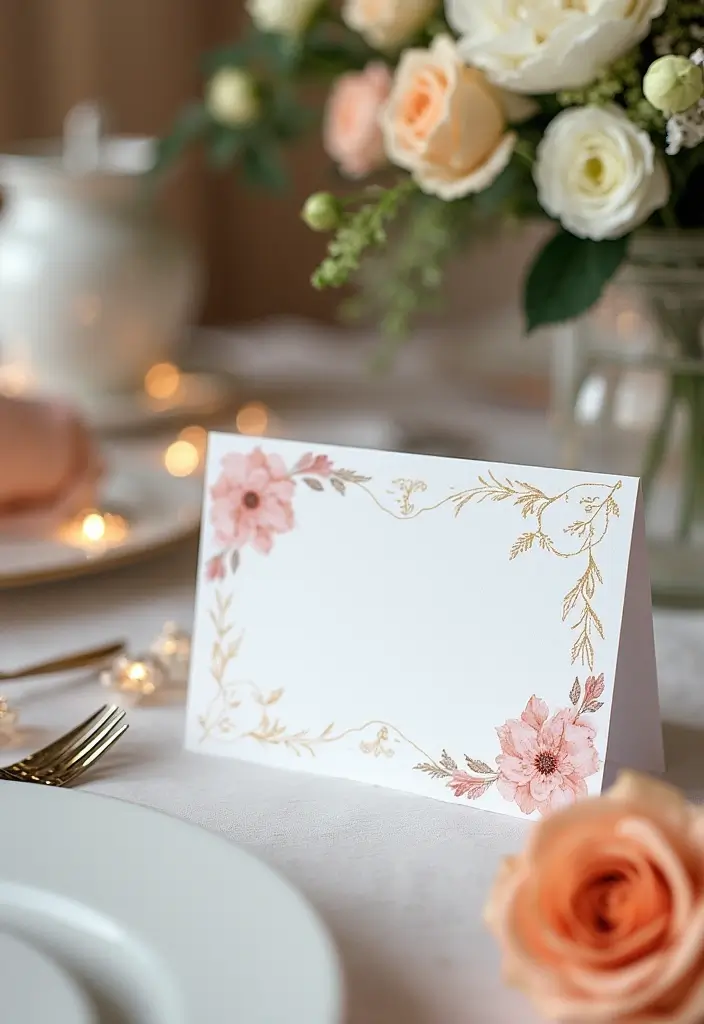
20. Elegant Paper Wedding Programs

You want wedding programs that fit your style and feel special, but you don’t want to break the budget. DIY elegant paper wedding programs give you both. They serve as a guide for the ceremony and become a keepsake guests can treasure.
Materials Needed:
– Crisp cardstock in your chosen weight
– A home printer or access to a local print shop
– Ink or toner, plus a little color if you like
– Decorative touches: ribbons, wax seals, stamps, simple illustrations
– Scissors, a ruler, and a bone folder for clean edges
Design and Print Tips:
– Keep the layout clean and easy to read
– Include the order of events, couple’s names, and any readings or songs
– Use two font styles to separate headings from body text
– Stick to your wedding color palette and a light design border
– Add a small illustration or motif that matches your theme
– Print on sturdy cardstock to give a nice, weighty feel
– If you can, add a ribbon tie or a tiny seal for a touch of charm
How to Use at the Venue:
– Place the programs in a neat basket or on a welcome table
– Have a greeter hand them out with a warm hello
– Let guests keep the programs as a memory of your day
Next steps: pick a style, gather supplies, and print a test copy. Then print enough copies so everyone can follow along with ease.
Recommended Products

Package Includes: You will receive 50 blank menu cards, 50 blank name cards, and 50 ribbons, a sufficient quantity for 50 guests, enough to support your wedding or party

Package Content: you will get 50 sets of wedding fan kit, including 50 white cardstocks, 50 wavy wooden stick fan handles, 50 white bows, and a roll of double sided adhesive tape, Note: the card paper has two sides, the smooth side is suitable for laser printing, and the matte side is suitable for inkjet printing

Give your special day the significance it deserves with the dazzling design of our convenient print at home programs, perfect for weddings, anniversaries and other memorable moments
21. Graceful Paper Chain Decorations
You want a wedding that feels warm and calm. Graceful paper chain decorations do that with little cost and effort. They suit any color scheme and fit many styles. You can make them the afternoon before the big day and still have time for other details.
Here is why they work. Loops move with light. Colors catch the eye without shouting. They bring nostalgia. They add softness to chairs, a head table, or a cake display.
Here is how to do it.
Materials Needed:
– Colored paper in your chosen palette
– Scissors
– Glue or tape
How to make them. Cut strips about one inch wide and six to eight inches long. Thread the end of one strip through the next, then press to seal. Continue looping to grow a chain. Link the pieces until you have a length you like. For a clean look, make the links snug but not tight.
Where to use them. Hang long garlands from the ceiling in soft waves. Drape a chain along the head table or around a backdrop. Create a private corner by looping chains near the dessert bar. They also work well as a photo backdrop.
Tips to thrive. Use two or three tones of your colors for depth. Vary chain lengths for a dynamic feel. Leave a few sections loose so guests notice the texture. After the wedding, save the chains to reuse or repurpose them as party decor.
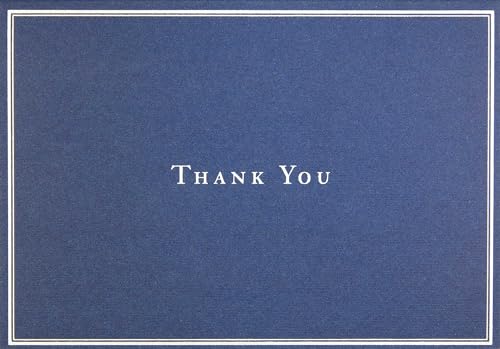
22. Personalized Paper Thank You Cards
Here is why personalized paper thank you cards matter after your wedding. They show you notice every guest and take time to say thanks. They feel warm and personal, even after the party ends.
Here is how to do it well.
– Materials Needed: heavy cardstock, decorative pens in a couple of colors, envelopes, and a ruler. Pick colors that match your wedding theme to keep the look cohesive.
– Templates and design: create a simple card template that echoes your decor. Use your wedding colors, a small motif, and a clean font. This keeps your cards feeling coordinated.
– Personalize each card: add the guest name, a short thanks, and your wedding date. A line about a moment you shared can make it extra meaningful.
– Handwritten messages: write by hand when you can. Your pen strokes add warmth that printed notes lack.
– Finish and seal: add a tiny stamp, seal with a sticker, or tie a ribbon for a finished look.
– Sending timing: mail or hand out cards within 2-3 weeks after the wedding.
Next steps: set up a small writing station, practice your handwriting, and keep a simple list of guests to finish quickly.
Keep a few blank cards ready for quick notes. This saves you time later, too.
Recommended Products

Premium Quality: Crafted with exquisite attention to detail and printed on premium thick cardstock, our floral thank you cards have a non-glossy finish that ensures no smudging or fingerprints.
Premium boxed stationery set comes with 14 note cards and 15 envelopes.

Premium Quality: Crafted with exquisite attention to detail and printed on premium thick cardstock, our thank you cards have a non-glossy finish that ensures no smudging or fingerprints.
23. Unique Paper Wishing Tree

You want a guest activity that doubles as chic decor. A paper wishing tree fits. It invites guests to leave messages or advice for the newlyweds. The result is a warm focal point and a keepsake you can read later.
Materials you need
– Branches or a paper tree design
– Cardstock in your chosen colors
– Twine or thin ribbon
– Scissors and a pen for writing
How to set it up
Choose a sturdy display. Place a vase with real branches or mount a cutout tree on a board. Cut small tags from cardstock. Thread each tag with a short length of twine. Hang the tags from the branches. Tape or pin a note to the front if you like. Put a pen nearby. Invite guests to write wishes, tips, or memories and hang the tags from the branches. Guests love to read the wishes as they mingle.
Tips for best results
Keep tags legible with clear, large print. Add prompts like “Married life tip” or “A memory of the couple.” Use a color scheme that matches your wedding. Consider soft lighting so the tags are easy to read. If outdoors, weigh down the branches or use a sturdy stand.
Why it works
It creates a personal moment for guests. It gives you a colorful, meaningful centerpiece. It stays as a cherished keepsake after the day.
It’s simple to make, fits any theme, and grows with your memories.
24. Lovely Paper Quote Signs
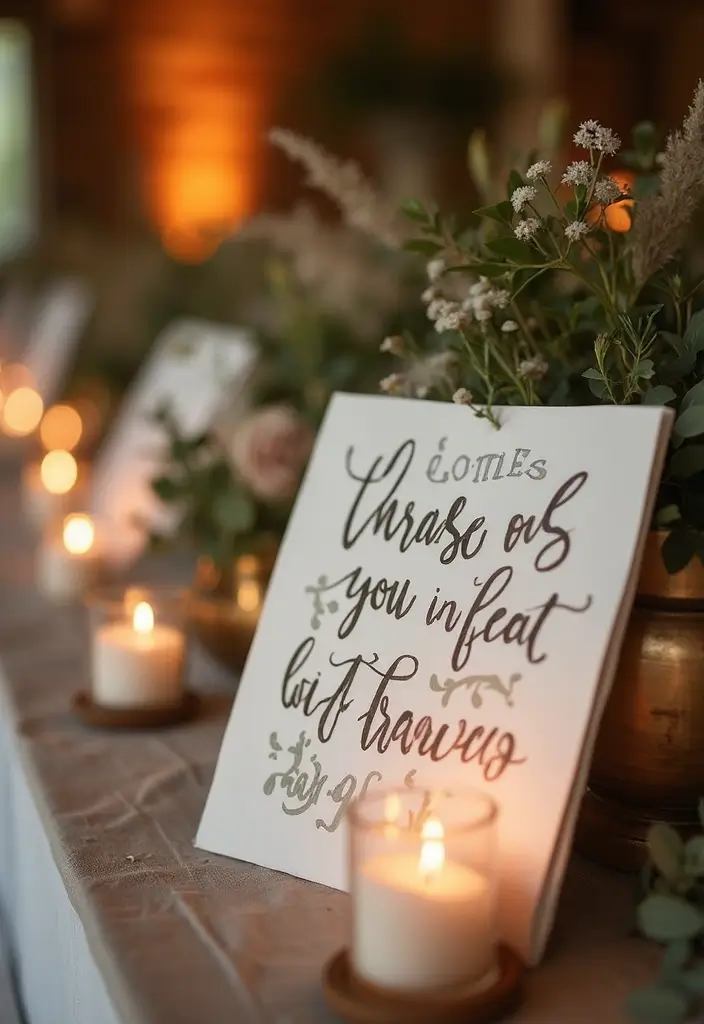
You want decor that adds meaning without crowding the room. Paper quote signs do this fast. They bring warmth and a personal touch to your wedding.
Materials Needed Cardstock, markers, and decorative elements like frames or washi tape. A ruler and scissors help keep lines neat. Pick colors that match your palette so the signs feel part of the theme.
How to Make Them Start with quotes that fit your story or theme. Short lines work best so guests can read them from the back row. Lightly plan the layout on the cardstock with a pencil, then trace over with markers. Use a bold header or a different color for emphasis. If you want a soft look, try a script style with a thin pen.
Decoration Add tiny flowers, simple borders, or color blocks with washi tape. Place the signs in frames or on small easels for easy changes.
Placement Put signs at entry points, near the guest book, by the cake table, and at the couple’s table. Group a few signs to tell a small story.
Tips Check readability from the back row. Use high-contrast colors. Outdoor signs may need a protective spray or sturdier stock. Keep a few extras in your tote for day-of changes.
25. Creative Paper Party Hats
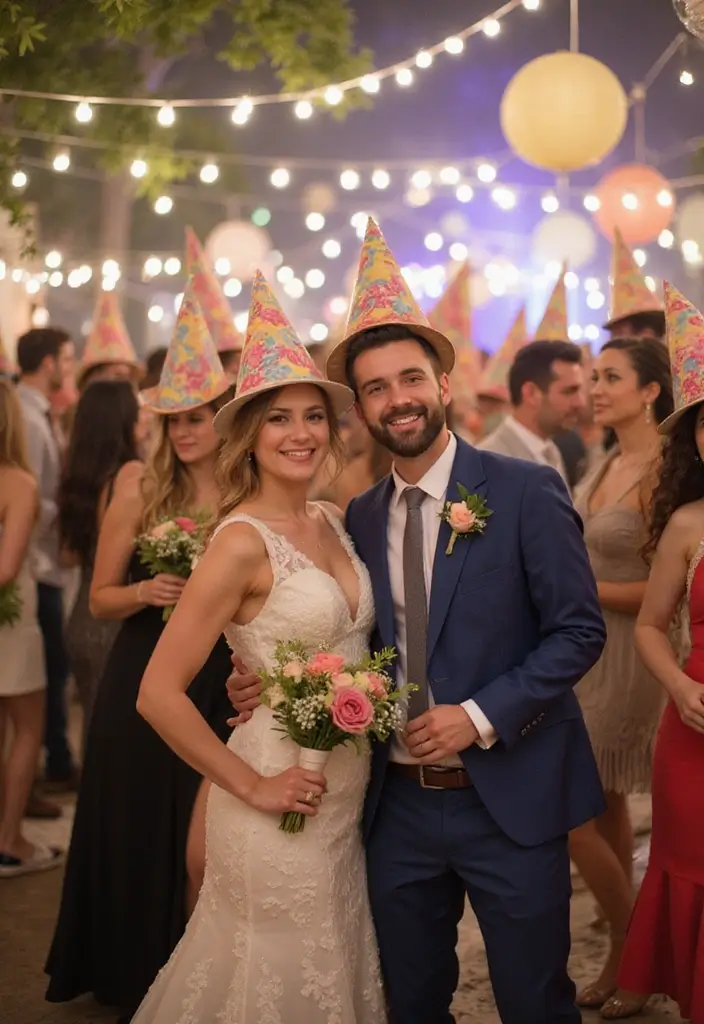
Creative Paper Party Hats
Here is why DIY paper party hats work. They lift mood and give quick photo moments. They fit wedding colors and ideas.
– Materials you need: colored or patterned paper, scissors, clear tape or glue, elastic string or thin ribbon, markers or stickers, glitter or foil accents.
– Make the hat: Cut a circle about 10 inches across. Cut a slit from the edge to the center. Overlap the cut edges to form a cone and tape the seam. This is the hat.
– Decorate: Personalize with initials, the wedding date, florals, or a color pattern.
– Add the strap: Punch two small holes near the rim or tape a strip of elastic inside. Tie the elastic to fit different head sizes.
– Fit tips: Try on a few hats. Trim the rim or elastic for comfort. Keep the edge smooth so it sits well.
– Style ideas: Use metallic paper, pastel tones, or a rustic look with kraft paper and twine. You can also make mini hats for kids.
– Timelines: Make hats a day before or the morning of the event. Store flat until you’re ready to use them.
Next steps: gather supplies, cut circles, shape them, and let guests have fun.
26. DIY Paper Pom-Poms

You want decor that stands out without breaking the budget. DIY paper pom-poms give you color that moves with the air. They look soft and full, and you can tailor them to your wedding style. Hang them from the ceiling for drama or set them on tables as fluffy centerpieces.
Materials Needed:
– Tissue paper or crepe paper in your chosen colors
– Scissors
– Floral wire
Here is how you make them. Layer several sheets of paper. Fold them into an accordion. Secure the center with floral wire. Gently pull the outer layers away from the center to fluff. Add more sheets for larger pom-poms and fewer for small ones. Tie a string to the wire so you can hang them high or at eye level. Mix colors for a soft rainbow, or stick to one shade for a clean look. You can also add a touch of shine with metallic paper.
Next steps: practice with a few test pieces, then make a batch for your ceiling and your tables. Store flat, then fluff before you set them out. With these simple steps, you control the mood and color of your space.
27. Romantic Paper Silhouettes

Want a romantic, personal touch for your wedding decor? Paper silhouettes of you two add a quiet, elegant vibe to any space. Use them as wall art or stand them on a table for a small, meaningful centerpiece. The result is timeless and deeply personal.
Materials you need
– Black cardstock
– Sharp scissors or a craft knife
– A frame for display
How to make them
1) Pick a silhouette idea. Use a photo where you are in profile, or find a simple outline you love. The shapes should be clear and easy to cut.
2) Trace and cut. Tape the outline to the cardstock and trace slowly. Cut along the line with steady hands to keep smooth curves.
3) Clean edges. Check for stray bits and tidy up any rough spots with a careful pass of the blade or scissors.
4) Frame and finish. Slide the silhouette into a frame. A neutral mat can help the black cutout pop.
Display tips you can try
– Hang in a small cluster for a story wall, or place a pair in matching frames on a table.
– Pair black silhouettes with a light wall color to make the shapes stand out.
– Change frames later to keep the piece feeling fresh in future anniversaries.
Next steps: pick a photo, grab your cardstock, and start shaping a keepsake you’ll treasure long after the day ends.
Conclusion

Your wedding day is a celebration of love, and these DIY paper decoration ideas allow you to express your unique style while staying eco-friendly.
From elegant bouquets to whimsical banners, each idea offers charm that enhances the atmosphere of your special day.
Get creative, involve friends and family, and make lasting memories together as you prepare for this beautiful occasion.
Note: We aim to provide accurate product links, but some may occasionally expire or become unavailable. If this happens, please search directly on Amazon for the product or a suitable alternative.
This post contains Amazon affiliate links, meaning I may earn a small commission if you purchase through my links, at no extra cost to you.
Related Topics