I wrote this post because I wanted a simple, joyful way to brighten a home with blooms that last. Paper flowers are playful, easy to customize, and cheap to make. You can switch colors with the season and keep a room feeling fresh without fresh stems.
Here is who this is for: if you love DIY, decorating on a budget, or making spaces feel cozy, this one’s for you. Whether you live in a small apartment or a big house, these ideas fit. You care about color, texture, and little accents that make a room feel alive.
Here is what you’ll get: 28 paper flower making ideas for lovely home décor. I cover a mix of looks, from soft pastels to bold tropical tones. Each idea uses common supplies like tissue paper, cardstock, glue, scissors, and thin wire stems. They work as wall art, centerpieces, or garlands.
These ideas come with practical steps you can follow today. You will learn how to choose color palettes, shape petals, and hang blooms so they look full. You can make a large statement piece above a sofa or a small bouquet on a dining table. The goal is to give you options that fit your space and your time.
Why this matters now? People want spaces that feel warm and real. Paper flowers fit the trend for decor that seems handmade and friendly. The projects are easy, quick to start, and flexible enough to grow as your style changes.
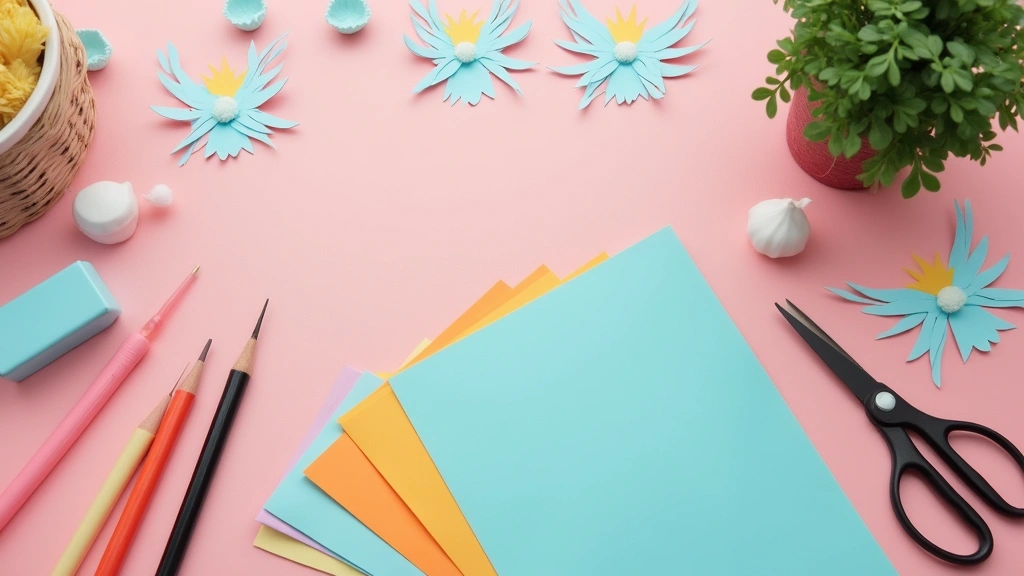
Are you ready to begin? Gather a few sheets of paper, scissors, glue, and string. Pick a color vibe and a room, then dive into the ideas. This introduction is just the start of a playful journey to a fresher home. Next steps are simple: decide where to place your first bloom and how you want to display it.
1. Elegant Paper Roses
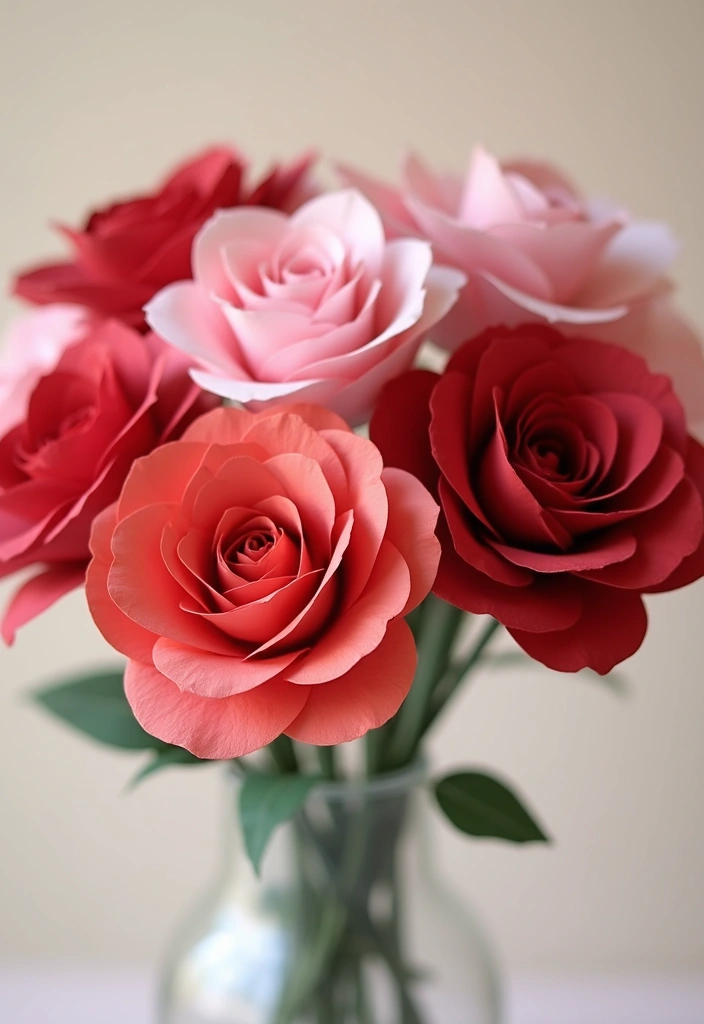
You want a romantic, lasting bloom that fits your room. Paper roses give that look without wilting. They’re easy to customize and budget-friendly.
– Materials
Red or pink cardstock, scissors, a pencil, a small glue dot or glue, green floral wire, green floral tape, textured green paper for leaves.
– Make the petals
Cut petal shapes in several sizes. Stop before the petals become too thin. Lightly crimp the edges with your fingers to mimic real petals.
– Build the bud
Roll a tiny center piece and glue it. Add a few small petals around it to form a tight core.
– Layer the petals
Attach larger outer petals around the center. Overlap slightly to create depth.
– Make the stem
Bend a length of floral wire into a gentle curve. Wrap it with green floral tape as you move toward the bloom.
– Add leaves
Cut leaf shapes from textured green paper. Vein them with a light pencil line for realism.
– Finish
Glue the final petals in place. Optionally color the edges with watercolor for a gradient or add a touch of sparkle.
– Practical uses
Place the roses in a vase, use them as table centerpieces, or gift them for anniversaries or weddings.
– Extra tips
With patience, you can craft a set that fits any style. Give yourself time and enjoy the process.
2. Whimsical Paper Daisies
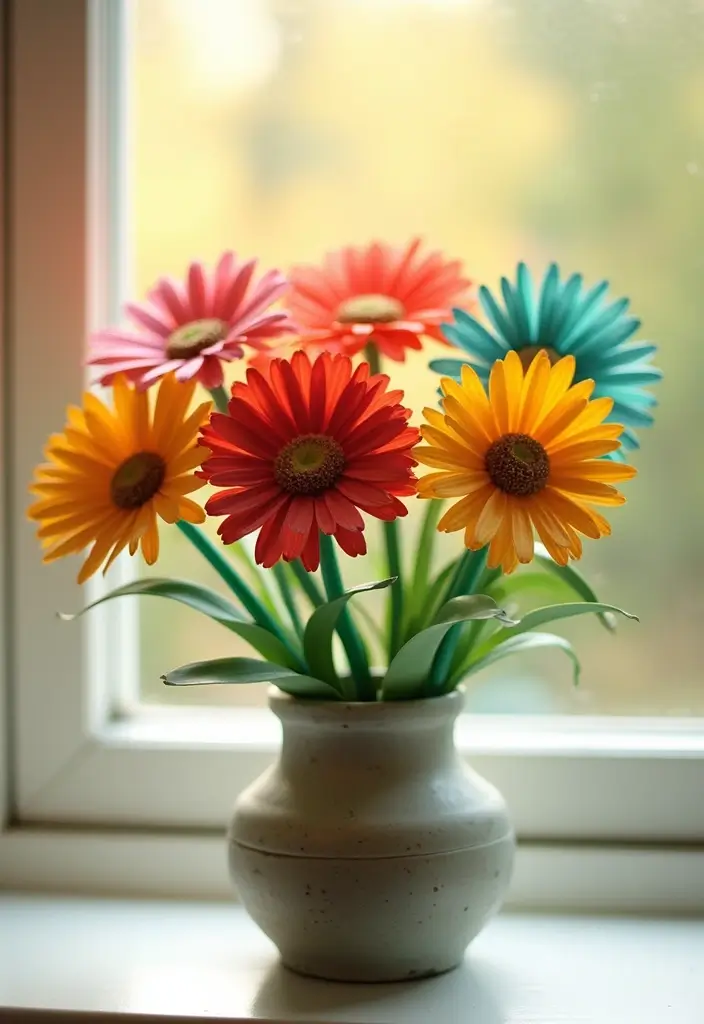
Want a quick way to add sunshine to your space? Whimsical paper daisies are easy to make and they brighten any room. Use yellow and white paper to create blooms that pop. A small bouquet can sit on a table, and a few daisies on a wreath greet guests at your front door.
– Cut petals from white paper with a gentle curved edge.
– Cut a yellow circle for the center.
– Lightly draw outlines with a pencil to keep petals even.
– Cut along the lines, then curl the petal edges slightly.
– Layer petals in a circle around the center until you have a full bloom.
– Make several flowers to form a bouquet or attach them around a wreath base.
Pro Tip: Patterned paper adds whimsy. Use a light green stem or add green paper leaves for a more natural look.
Unique Insight: Vary petal sizes and mix finishes for depth. A mix of matte and glossy papers makes the daisies feel alive.
Practical Application: Use these daisies for spring table settings, birthday decor, or a welcoming front-door wreath. They also make thoughtful, handmade gifts that aren’t loud but always cheerful.
Next steps: gather white and yellow paper, scissors, glue, and a thin wreath form or a vase to start. You’ll finish with a bright, friendly handmade touch.
3. Tropical Hibiscus Flowers
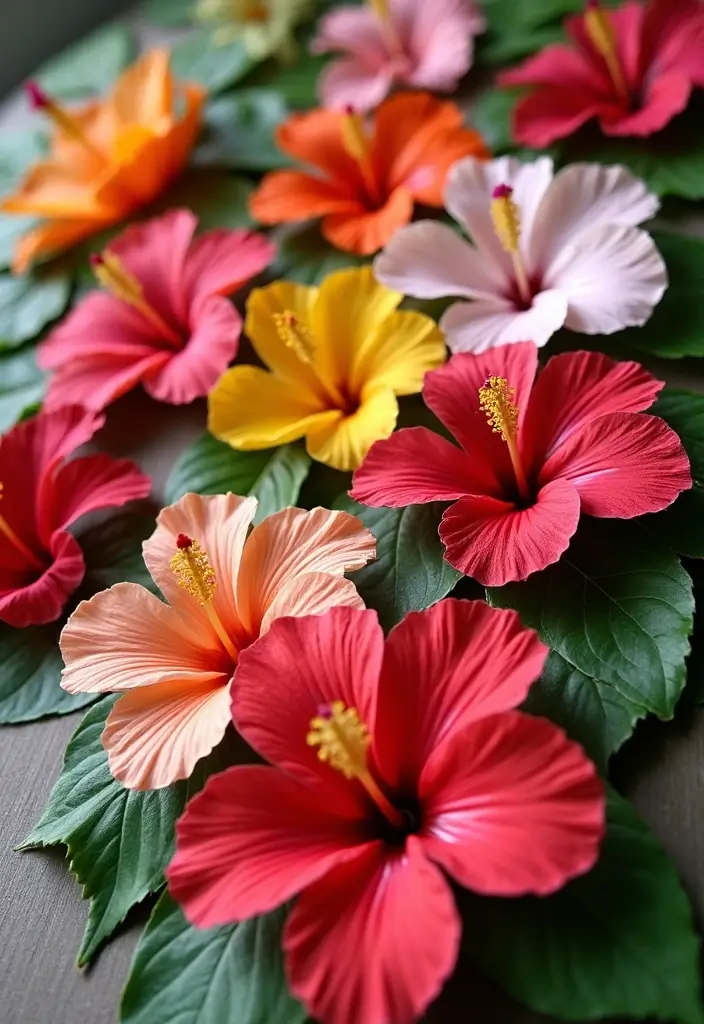
Bright, easy decor idea: paper tropical hibiscus flowers. They brighten walls, garlands, or table settings. Use coral, yellow, and orange to echo summer. This craft suits beginners and adds a friendly tropical vibe to any room. This is a great DIY wall art project.
– Materials: colored craft paper, scissors, glue or glue sticks, a pencil, oil pastels or chalk pastels, and a thin string or wire for hanging.
– Cut the shapes: cut five large petals with rounded tips and one small circle for the center.
– Assemble the bloom: layer the petals in a gentle stack, offset each piece for fullness. Press with your finger to set the glue. Curl the outer edges a touch with a pencil.
– Add the details: cut several thin strips in a contrasting color for the stamens. Glue them at the center and curl the ends for texture.
– Blend color (optional): color the petals with oil pastels, starting near the base and fading to the tip. A soft blend gives a sunlit look.
Here is why these flowers work at home. They are quick to make, inexpensive, and easy to customize with your favorite colors.
– Practical use: mount the flowers on a wall, hang as a mini bouquet, or nestle them into a table centerpiece. Group several blooms for a lively tropical scene.
– Next steps: try different sizes, add green leaves, and string a few into a playful garland.
4. Charming Paper Lilies
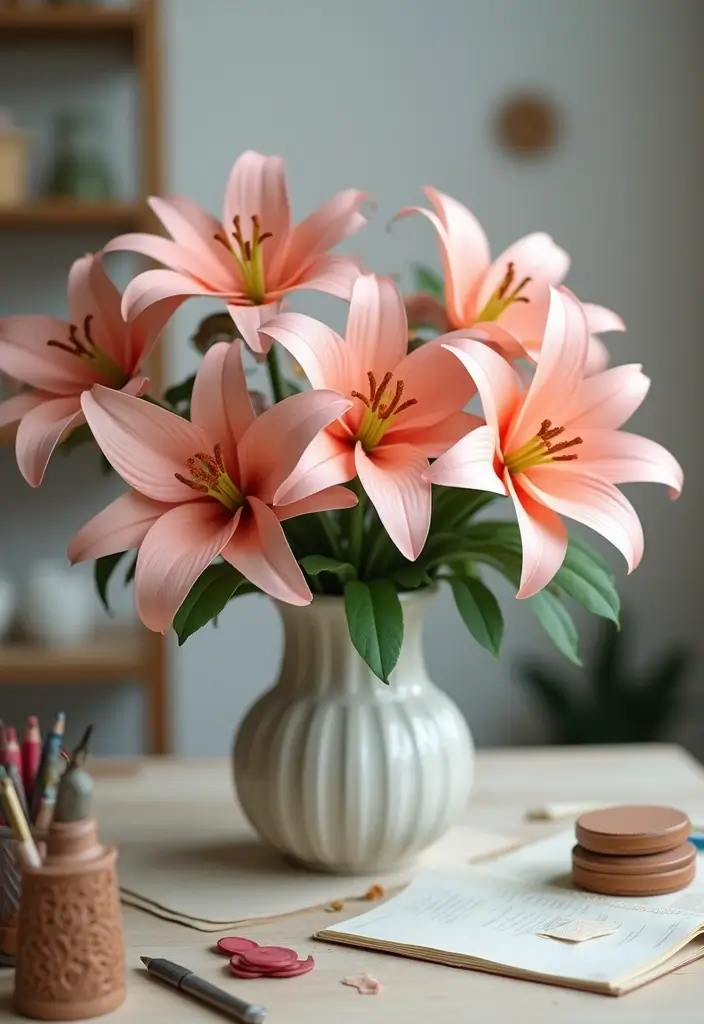
You want lilies that look real and last longer than fresh blooms. Here’s a simple DIY that delivers graceful paper lilies you can place anywhere.
What you’ll need
– Heavy-weight white or soft pastel paper
– Floral wire for stems
– Scissors and glue
– A few scraps of yellow or orange paper for the centers
– Optional: a drop of essential oil for a hint of scent
How to make them
1) Cut long, narrow petals from the thick paper. Aim for a dozen or more per lily.
2) Twist each petal as you glue it to add a 3D lift. Don’t keep them flat.
3) Curve the petal edges slightly. Soft, rounded edges read as lifelike.
4) Create a stem with a sturdy floral wire and bend it to the height you want.
5) Curl a strip of yellow or orange paper into a tight coil for the lily’s center.
6) Layer the petals around the center, starting from the outside and moving in. Secure as you go.
Tips for realism
– Vary petal sizes to mimic natural lilies. Mix a few sizes for a fuller look.
– Use light touches of glue so petals hold but still keep each bloom flexible.
– If you want a subtle scent, dab a tiny amount of essential oil on the paper away from the stems.
Practical uses
– Perfect for bridal tables or a chic home tablescape.
– Combine several lilies for a striking centerpiece that won’t wilt.
5. Rustic Paper Sunflowers
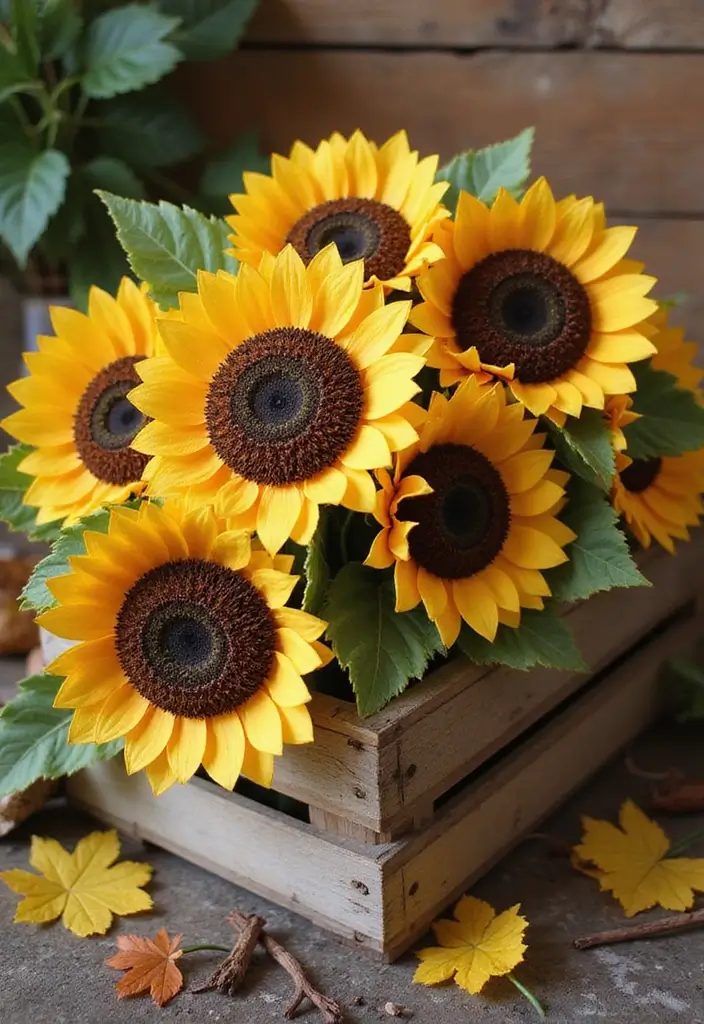
If you want warm, cozy decor that lasts, try rustic paper sunflowers. They bring a soft farmhouse feel when you use brown, yellow, and green paper.
– Materials: You need brown, yellow, and green craft paper, scissors, glue, and a pencil.
– Cut a large circle for the sunflower head.
– Cut several smaller petal shapes in yellow.
– Glue the petals around the center circle.
– Use textured paper for the middle to mimic seeds.
– Attach the center to the head and let it dry.
– Pro Tip: A touch of ink on petal edges gives a vintage, worn look.
– These sunflowers work as wall art, table centerpieces, or a cheerful bouquet substitute.
– Unique Insight: Mix different sizes and heights to create an eye-catching display.
– Practical Application: Place them for autumn gatherings or a farm-style wedding backdrop.
– For extra charm, try recycled paper to feel more earthy.
– This simple project can brighten any room in under an hour.
Next steps: hang them on a wall, set them on a mantel, or prop them on a table to greet guests.
6. Delicate Cherry Blossoms
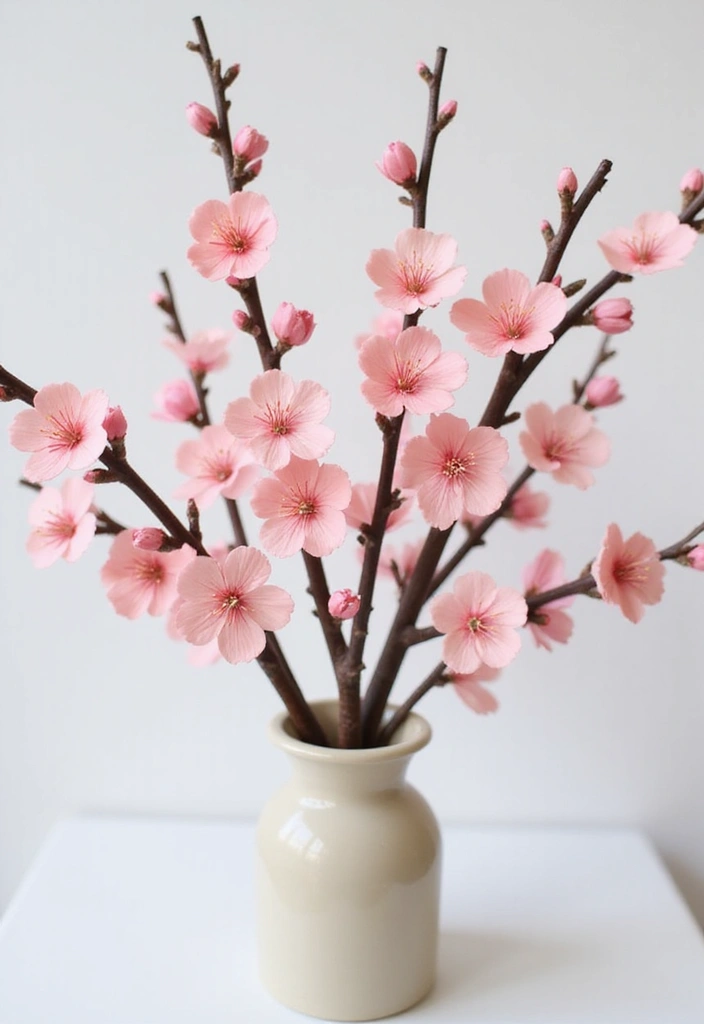
You want a soft spring look in your home. Paper cherry blossoms give that feel with little mess. Make them in pale pinks and white, using simple shapes and smart steps.
What you need
– Pale pink paper in several petal sizes
– Scissors and a glue dot or clear glue
– Thin branches or twigs
– Tissue paper for tiny leaves
– A pinch of fine glitter (optional)
– Floral tape or string for hanging
Step by step
Cut small, medium, and large petals. Vary the sizes to add fullness. Curl the edges softly with your fingers. Layer six to eight petals and glue them at the base. This creates a complete blossom. Add a tiny center with a rolled scrap of paper or a small bead.
To look real, attach blossoms to thin branches. Wrap the branches with tissue leaves and a touch of floral tape. Dust a little glitter on the petals to mimic morning dew.
Practical ideas
Make a branch bouquet for a vase. Hang a string of blossoms on a wall or from the ceiling for a light, airy curtain. Use a few blooms as a spring centerpiece on your table.
Tips to try
Keep stems short for table decor and longer for wall displays. Store flat pieces in a box so they don’t crush. This craft is light, inexpensive, and fits pastel spring decor trends.
7. Bold Paper Peonies
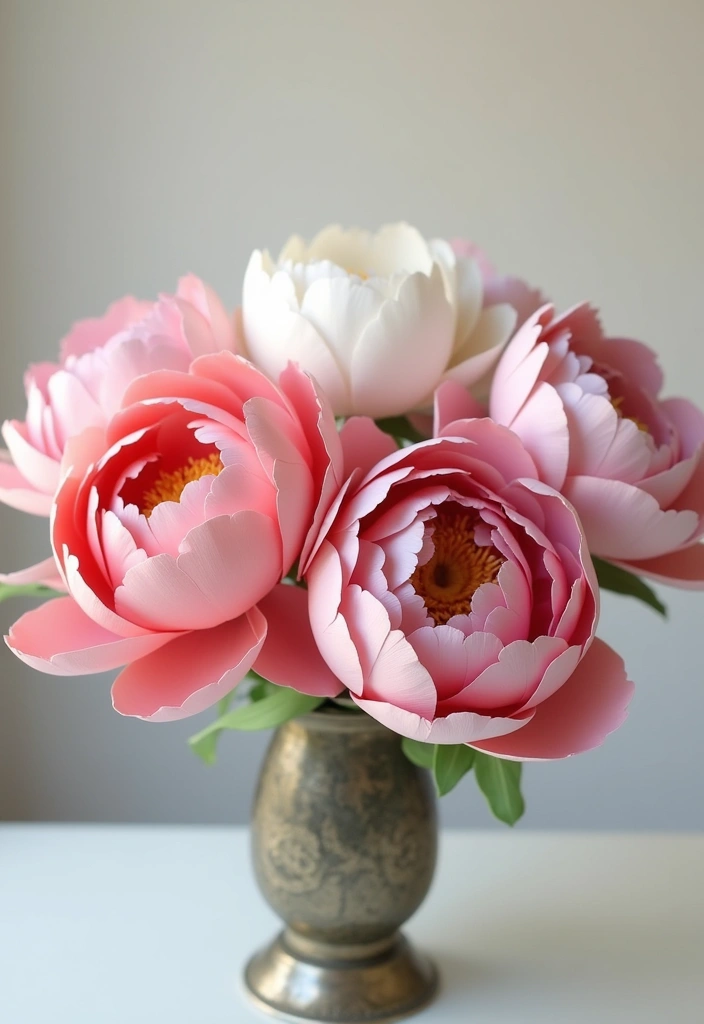
Here is why bold paper peonies work for decor. They look lush and stay bright longer. You can tailor them to any room or event.
What you need:
– Paper in pinks and white, in a few shades
– Deep green leaves or textured greens
– Glue, scissors, and a pencil for curling edges
– Optional: metallic or shimmer paper for a glow
How to build them:
1) Cut several petal shapes in three sizes—large, medium, and small.
2) Curl the edges with a pencil to give each petal a soft, natural curve.
3) Layer the largest petals first, offsetting each layer as you glue. Add smaller petals on top for volume.
4) Slip in a few green leaves behind the bloom to boost contrast.
5) Add a touch of shimmer by using a strip of metallic paper or a light dusting of glitter glue.
Unique Insight: These peonies shine in big arrangements and can work as bridal bouquets or bold focal pieces in your home.
Practical Application: Pair them with other flowers for a springy display. Use several peonies in a vase or place one large bloom as a statement piece on a coffee table.
Next steps: practice with a couple of color blends, then grow your bouquet to fill a corner or doorway.
8. Colorful Paper Tulips
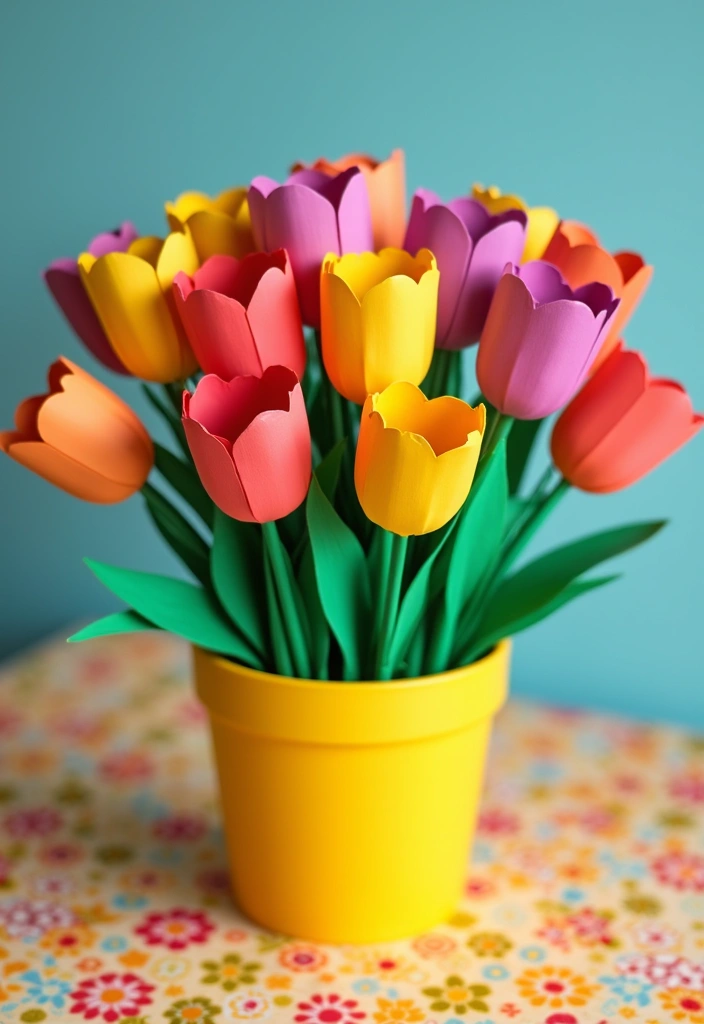
You want bright décor that’s easy to make. Colorful paper tulips fit that need. They’re simple, cheerful, and endure for weeks.
– Materials: colored paper or cardstock in tulip tones; green paper, pipe cleaners, or floral wire for stems; scissors and glue; a pencil; a small round piece of scrap paper for the bloom base; a tiny pot or sturdy container; optional patterned paper for a mixed look.
– Steps:
1) Cut tulip shapes with three curved petals. Vary the size for a natural feel.
2) Shape the petals by bending the inner edges a little to add depth.
3) Glue petals around the base to form a cup.
4) Attach a stem under the bloom. Use a pipe cleaner if you want a bendy, life-like stem.
5) Glue green leaves at the base.
6) Add a few patterned petals for contrast.
– Display ideas: Stand the stems in the pot with tissue or foam to hold them upright. Group several tulips for a bold centerpiece. Give a small bouquet as a homemade gift.
Unique insight: Swap colors to carry the look from spring into summer.
Practical application: Use them as table centerpieces or as thoughtful gifts for friends and family.
Next steps: Make a mini bouquet for a shelf, or a tall bundle for the dining table. Keep edges neat and store flat when not used.
9. Elegant Paper Orchids
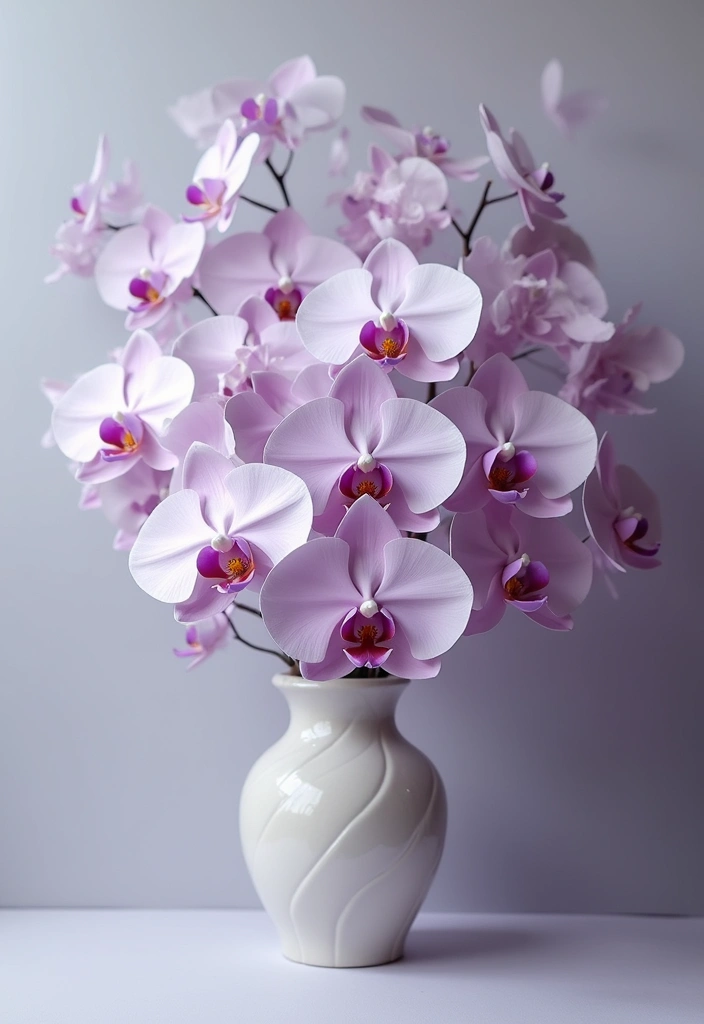
You want paper orchids that feel elegant and real. Here is how you make them.
– Materials: textured paper in white, lavender, or deep burgundy.
– A thin twisted wire for the stem.
– Green floral tape to cover the wire.
– Petals in two or three sizes for depth.
– Faux dew drops for a delicate shine.
Here is how to build them.
– Cut several petal shapes for each orchid.
– Curl the edges with a pencil to give the petals life.
– Layer the petals around a tiny paper center until the bloom looks full.
– Wrap the wire with tape from bottom to top to form a stem.
– Attach the bloom to the stem with tape or glue so it stays put.
– Add a few faux dew drops on the petals for a fresh look.
Here is why this method works. Curling the edges adds shadow and life. Layering the petals makes the bloom look full and real.
Unique Insight: Mix orchids with green leaves or other paper blooms to make a striking centerpiece.
Practical Application: Use these orchids for elegant events or to add a luxury touch to your home.
Next steps: try white for a clean, chic vibe or lavender for a softer feel. Pin these ideas for later.
10. Vibrant Paper Cacti
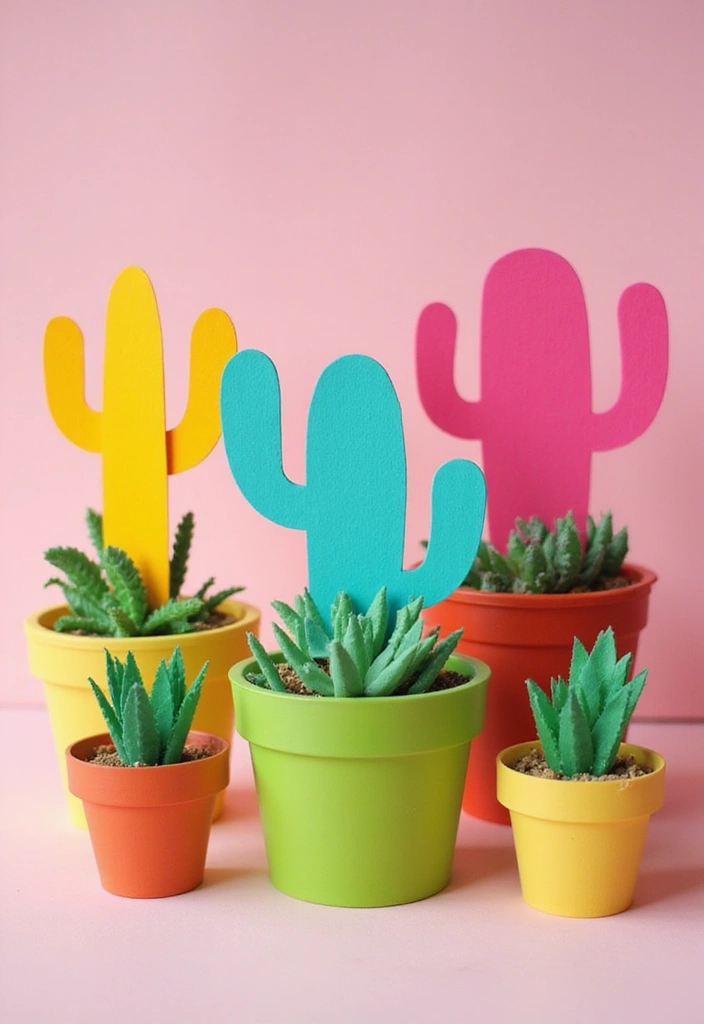
Need a quick project that adds a fun desert vibe to your space? Try making bold paper cacti. They’re simple, colorful, and stay bright day after day.
Materials
– Cardstock in greens plus a few bright color accents
– Sturdy bases such as wood blocks or thick cardboard
– Glue and scissors
– Colored paper for tiny flowers
– Optional faux soil or sand for the base
– Small cups or jars for a quirky planter look
Here is why this works: cut shapes are easy, and you can mix tall and short cacti for a lively group.
Next steps: cut several cactus shapes from the green cardstock. Keep the edges flat so they glue well to the base. Use the scissors to add a few rounded arms for variety.
Let the cacti dry, then place small paper flowers on top or along the arms. A sprinkle of colored paper petals makes them look like they’re bursting with bloom. If you like a touch of realism, pile faux soil or sand at the base to anchor your cacti.
Display ideas: line them on a shelf, sit them on a windowsill, or scatter them across a desk. For a quirky twist, swap in mismatched cups or jars as planters.
Practical apps: gift these to a plant lover who wants color without care, or brighten a child’s room with a playful, easy craft.
Next steps: gather supplies, pick your color mix, and start building your mini desert scene.
11. Beautiful Paper Lillies of the Valley
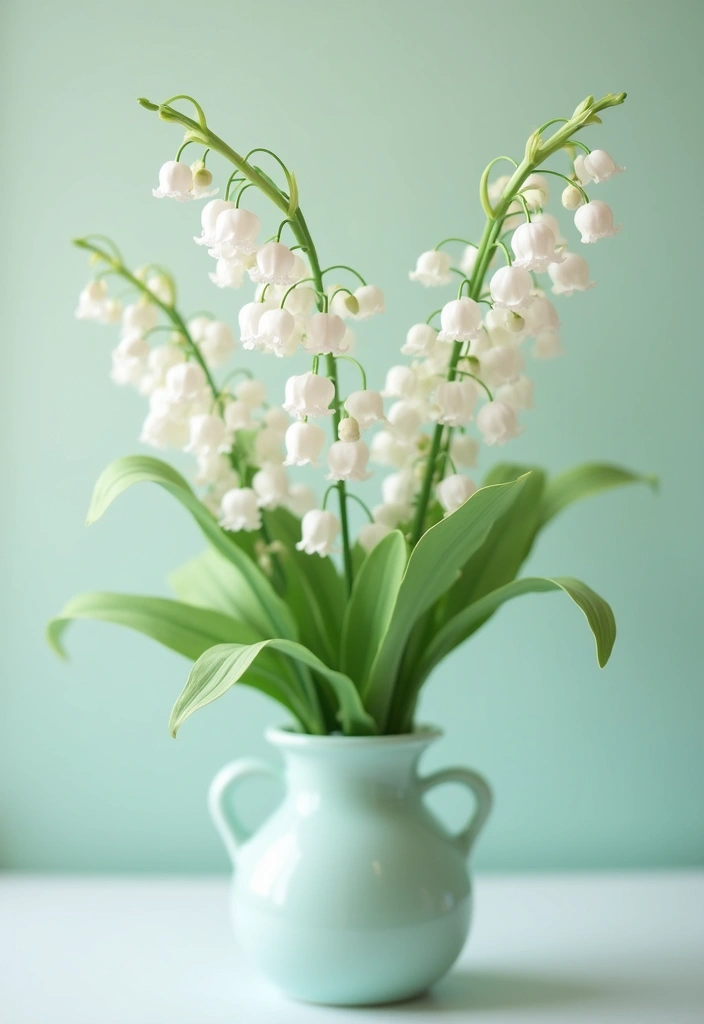
Want a spring feel that lasts without care? Paper lilies of the valley give a soft, timeless look you can keep year after year.
Materials
– White craft or copier paper
– Green floral wire and floral tape
– Scissors, pencil, ruler
– White glue or glue stick
– Optional: a light spray of scent (essential oil diluted) for a fresh touch
Steps to form the blooms
– Cut six bell-shaped petals per flower.
– Curl the petal edges to create a delicate bell.
– Layer petals, tiny gaps between them, and glue at the base to form the bloom.
– Bind the bloom to a piece of green floral wire with tape to make a stem.
– Add a small leaf or two from green paper for realism.
Assemble the bouquet
– Make 3–6 blooms and cluster them on one stem or several short stems.
– Arrange the stems in a vase or pinched bouquet for a dressy look.
– Keep shapes light and airy for a classic valley vibe.
Unique Insight:
A soft spritz of diluted scent on the petals adds a fresh mood without overpowering.
Practical Application:
Use these blooms in wedding table décor, centerpieces, or a charming kitchen corner display. They pair nicely with greenery and simple glass vessels.
12. Festive Paper Poinsettias
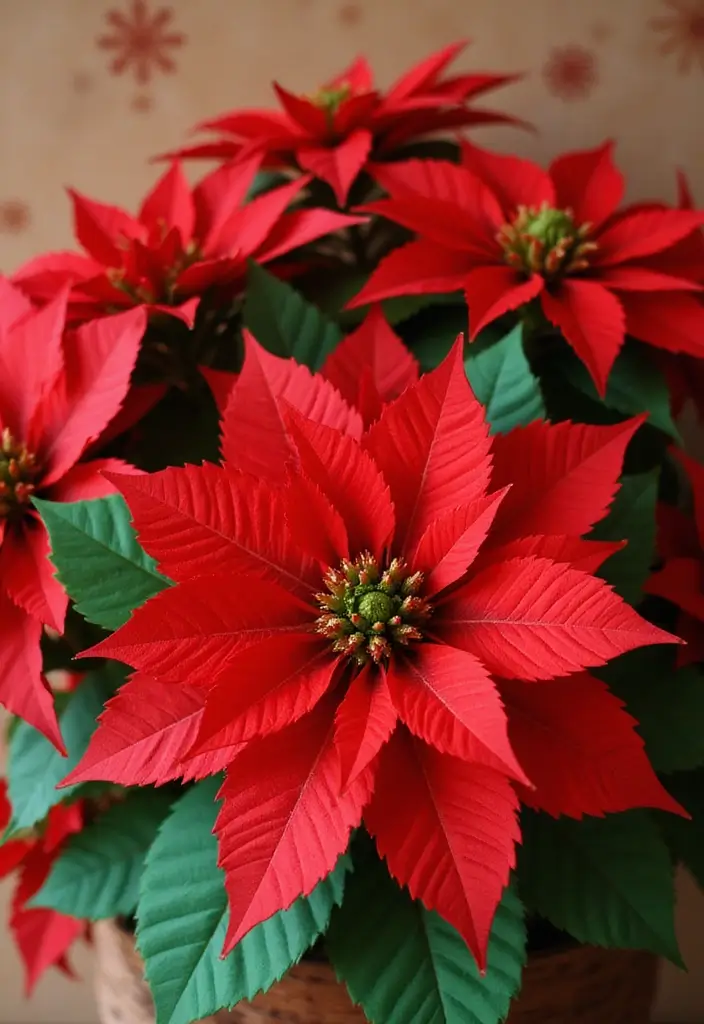
If you want holiday decor that shines without a big mess, try festive paper poinsettias. You can make them in bold reds and greens. They look rich when you stack several layers of paper and curve each petal a bit.
Materials
– Red and green paper in several thicknesses
– Sharp scissors and glue
– A circular center cut from paper
– Optional glitter or frost effect
– Textured paper for leaves
– Fine thread or fishing line for hanging
Steps
– Cut petal shapes from your paper. Use star-like edges for a lifelike look.
– Stack the petals around the center.
– Glue each layer flat, then fan the petals outward to form a puff.
– Add glitter or a frosted edge for a snowy feel.
– Cut leaf shapes from textured paper and glue them to the back for support.
Display ideas
– Place a bouquet on your holiday table.
– Hang small poinsettias on garlands or a bare wall.
– Create a wreath by fastening several blooms around a ring.
Pro tips
– Let glue dry before adding the next layer.
– Use different sizes for depth.
– A few blooms on a string create a simple garland.
Next steps: mix these with other paper flowers to build a warm, festive scene.
13. Glistening Paper Snowflakes

Not all flowers need a stem to shine. Paper snowflakes bring a soft, wintry glow to your space. Use white or light blue paper to cut delicate patterns. Hang them in windows or from the ceiling for a airy, fairy-tale look. A light sprinkle of glitter makes them catch the light.
Materials
– White or pale blue paper
– Scissors and a pencil
– String, thread, or clear fishing line
– Optional glitter or metallic pens
– Tape or a tiny hook for hanging
How to make
– Start with a square sheet of paper. Fold it in half to form a triangle, then fold again to a smaller triangle.
– Draw a simple design on the folded edge. Keep cuts away from the outer edges.
– Snip tiny shapes along the folded edge. Unfold slowly to reveal a snowflake.
– If you want more sparkle, dab a little glue and sprinkle glitter. Let it dry before you hang.
Here is why this works: the folds create radiating patterns that look intricate even with simple cuts. The white and blue shades read as crisp winter decor, not busy craft.
Display ideas
– Drape them across a window frame for a frosty border.
– Create a snowflake garland by linking several with string.
– Turn a few into a kid’s mobile by suspending them at different heights.
– Layer different sizes to build a tiny winter scene.
Tips and tweaks
– Use lightweight paper for easy folding.
– Try different sizes for depth.
– Use invisible thread for a subtle hang.
Next steps: experiment with shapes, add a touch of glitter, and craft a glow that fits your home’s winter mood.
14. Minimalist Paper Succulents
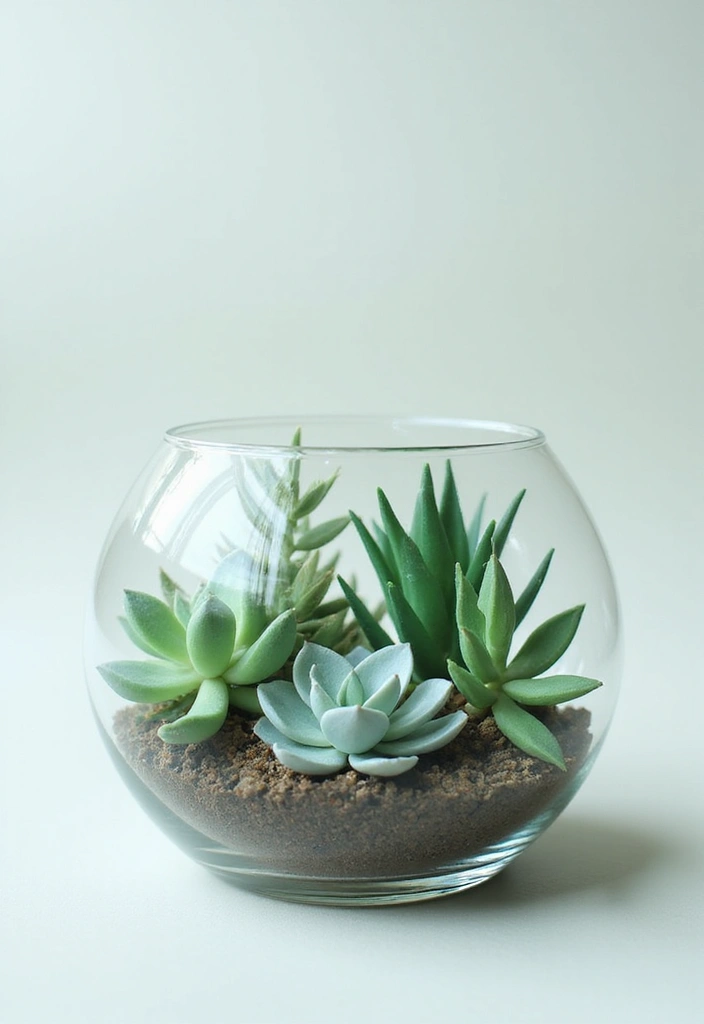
If you want a simple, stylish decor piece, try minimalist paper succulents. They stay fresh-looking without upkeep. Pick shades of green, teal, or deep purple. Cut a few leaf shapes that feel like real succulents—teardrops, rounded ovals, and tiny triangles all work. A little goes a long way, and one small plant can make a big impression.
Here is why layering matters. When you stack different leaf shapes and sizes, the plant gets depth and texture. Start with a tiny base and place leaves around it in a circle. Add a few larger leaves first, then tuck smaller ones in behind. Alternate colors for contrast. Glue each leaf in place and let it dry. The result looks full without being busy.
Materials
– Colored paper in greens, teal, and purple
– Scissors and clear craft glue or glue dots
– Small bases like corks, clay pots, or glass jars
– Tweezers or a toothpick for precise placement
Steps
1) Cut several leaf shapes from your chosen papers.
2) Glue the leaves in layers around the base to form a rosette.
3) Add varied sizes and colors to build texture.
4) Let it dry, then place in a mini container or terrarium.
Display ideas
– Set two or three on a windowsill for a calm, green touch.
– Use them as low-maintenance gifts for plant lovers or coworkers.
– Tuck a few into a clear glass bowl with pebbles for a modern centerpiece.
Next steps: tweak colors to match your room and experiment with different leaf shapes. You’ll gain a clean, stylish look that lasts.
15. Festive Origami Flowers
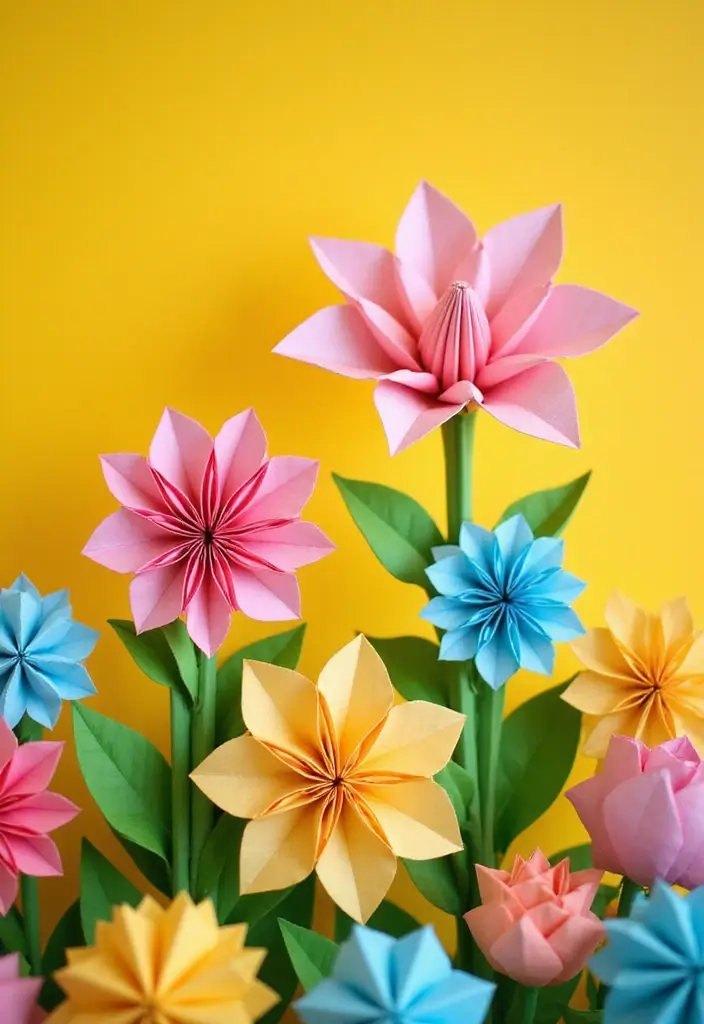
Here is why festive origami flowers fit your home decor. They bring color, texture, and a simple craft you can finish in an afternoon.
– Materials you need: square origami paper in a few colors, a flat workspace, optional washi tape for the center.
– Easy blooms to try: lotus and tulip shapes that hold form well and glow when placed in light.
– Steps to follow:
1) Pick two or three colors that match your room.
2) Use a few basic folds to shape petals.
3) Gently press the bloom to set the form.
4) Add a small band of washi tape at the center for a bright touch.
– Family tips: start with simple folds. Keep scissors away and work on a clean mat. Let kids swap colors to make a tiny bouquet.
– Decor ideas: group several blooms in a glass bowl for a centerpiece, string some on a thread for a garland, or give a bouquet as a gift.
– Next steps: begin with two shades, then add a third. You will enjoy a quick, tactile craft that brightens your space.
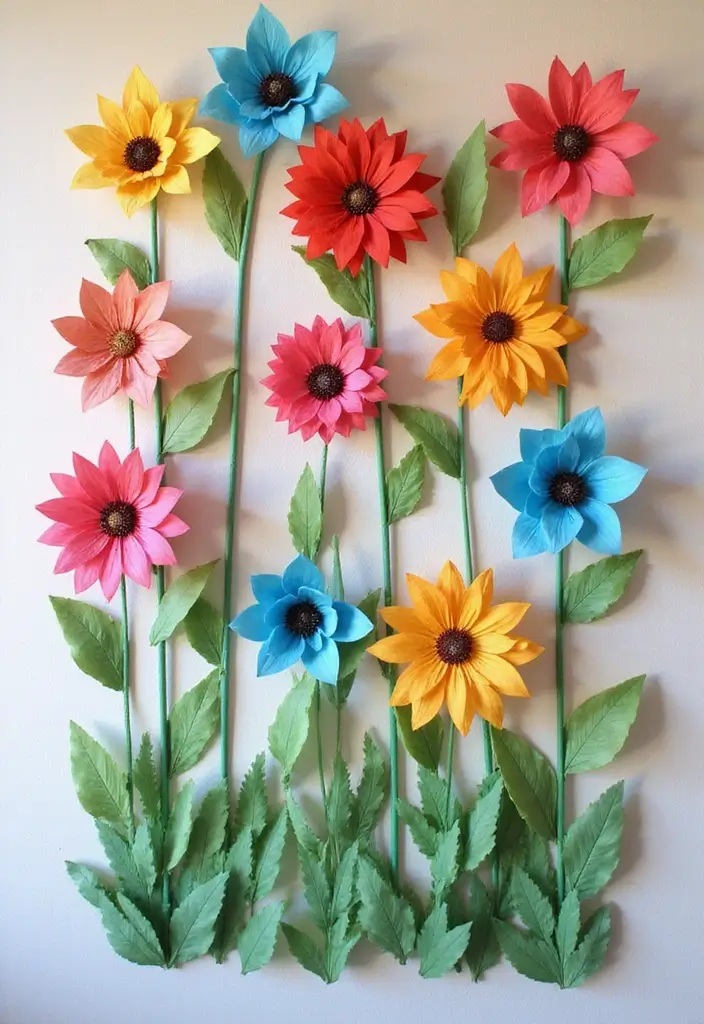
16. Paper Flower Wall Art
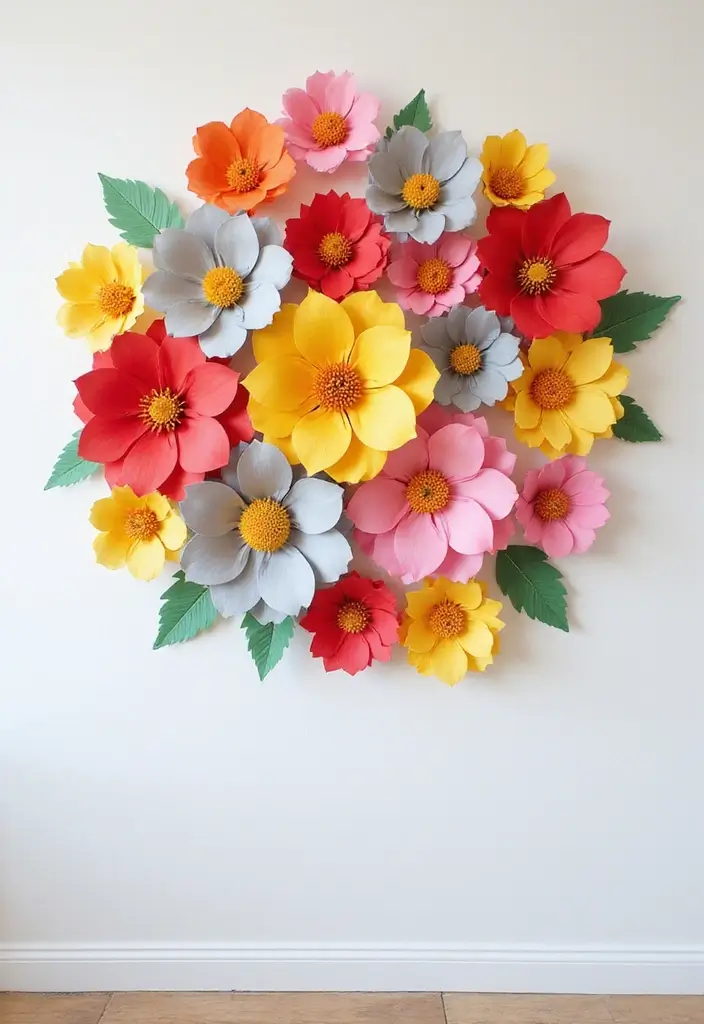
You want a wall that pops with color but you don’t want to break the bank. Paper flower wall art is your answer. It adds texture and life with simple shapes and bold colors.
– Materials you’ll need:
Colored craft paper, scissors, glue, and removable wall strips or tape. Thick backing like foam board or a sturdy poster board helps. Add green paper leaves or pipe cleaners for stems if you want extra depth. A pencil and ruler keep things neat.
– How to build the blooms:
Cut petals in different sizes and shapes. Curl the edges slightly to give each flower a soft, real look. Make a small circle from paper for the center, then glue petals around it. Layer petals to create fullness. Attach leaves and a few stems for a natural feel.
– Arranging on the wall:
Lay out your design on the floor first. Try clusters in one corner or a spread across the wall. Start with larger flowers, then fill spaces with smaller ones. Use removable strips to keep it easy to move as you refine the layout.
– Colors and style:
Pick a palette that matches your room. Soft pastels work in nurseries; bright tones lift living rooms. Mix big blooms with many tiny ones for texture and rhythm. Keep some white or light centers to balance the colors.
– Creative twist:
Here is why this idea shines. You can turn the wall into a flower growth chart for kids. Each bloom marks a milestone, like a birthday or a new skill.
– Practical applications:
This works well in kids’ rooms, nurseries, and hallways that need color. It also serves as a playful photo backdrop.
– Next steps:
Gather supplies, cut and shape blooms, then test layouts. Mount the final design with removable strips and enjoy a fresh, DIY focal point.
Recommended Products

THE SUMMER ACTIVITY KIDS ACTUALLY WANT TO DO — Put down the tablets. This DIY giant paper flower kit gives kids a hands-on creative project that holds their attention, builds something real, and ends with something beautiful on their bedroom wall. Pre-cut petals, centers, and leaves are ready to glue straight from the box — no scissors, no prep, no fuss. Flowers assemble in about 15 minutes per bloom, making it perfectly sized for a child's attention span. Craft glue or glue gun required — not included. .
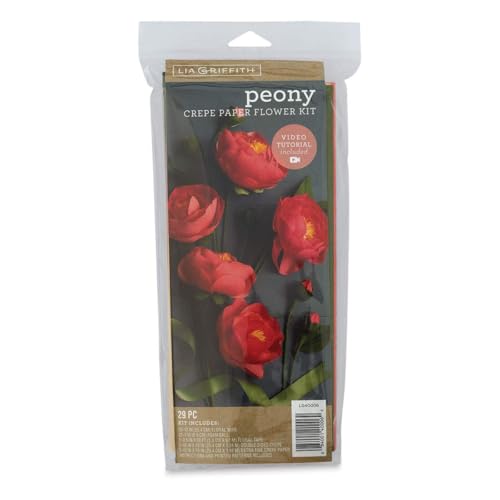
Craft your own gorgeous blooms with our easy to assemble paper flower kit

Beautiful blossoms don't require a green thumb when you make them from paper!
17. Paper Flower Bouquets
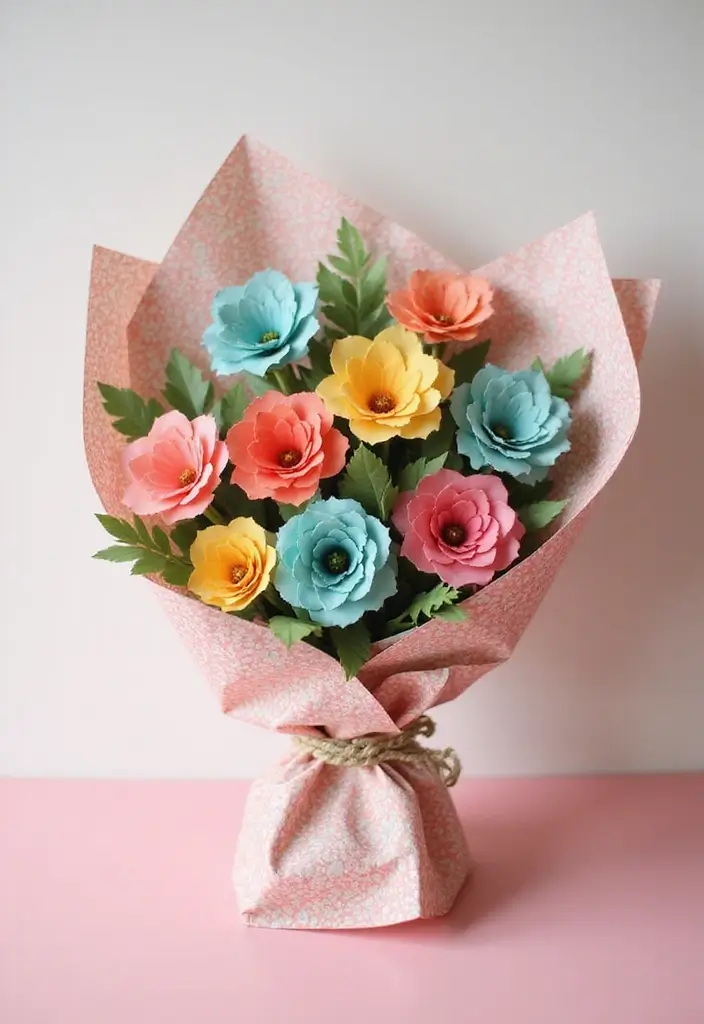
You want a bouquet that lasts and keeps its color. A paper flower bouquet gives you that long life with less waste. You can mix different paper blooms and styles to suit any home or gift. Here is a simple, repeatable method to craft your own DIY paper bouquet you can reuse year after year. You will find these DIY bouquets easy to make, even if you are new to crafts.
– Choose a mix of blooms and textures to add depth to your bouquet and keep it lively.
– Pick a color palette that fits the mood and the space.
– Craft the stems by curling edges and shaping petals for a natural look.
– Assemble the bouquet by grouping five to nine blossoms with a few filler greens.
– Wrap it nicely with decorative paper or a ribbon to finish and protect the petals.
– Size matters; make small centerpieces or large gift bouquets.
– Add a personal touch with a hand-written note or tiny charms tucked among petals.
– Use it for many occasions with birthdays, anniversaries, or a thoughtful surprise for someone special.
– Care and display with a note: keep your bouquet out of direct sun, away from moisture, and store it flat when not on display.
Give it a try this weekend and see how it brightens a room.
Recommended Products

Thoughtful Mothers Day Handmade Gift Create a sweet and meaningful bouquet with this Mothers Day flower bouquet craft kit, perfect as a thank you gift for mom, grandma, wife, teacher, or someone special who loves handmade floral gifts.

Complete Commemorative Craft Set: Celebrate Mother's Day and the graduate with our all-in-one DIY floral kit. Includes 28 premium flower cards, 28 kraft papers, 112 structural supports, 130 adhesive dots, and a 75.5ft gold ribbon. Perfect for creating professional-looking, personalized bouquets that capture lasting memories.

18. Paper Flower Crowns
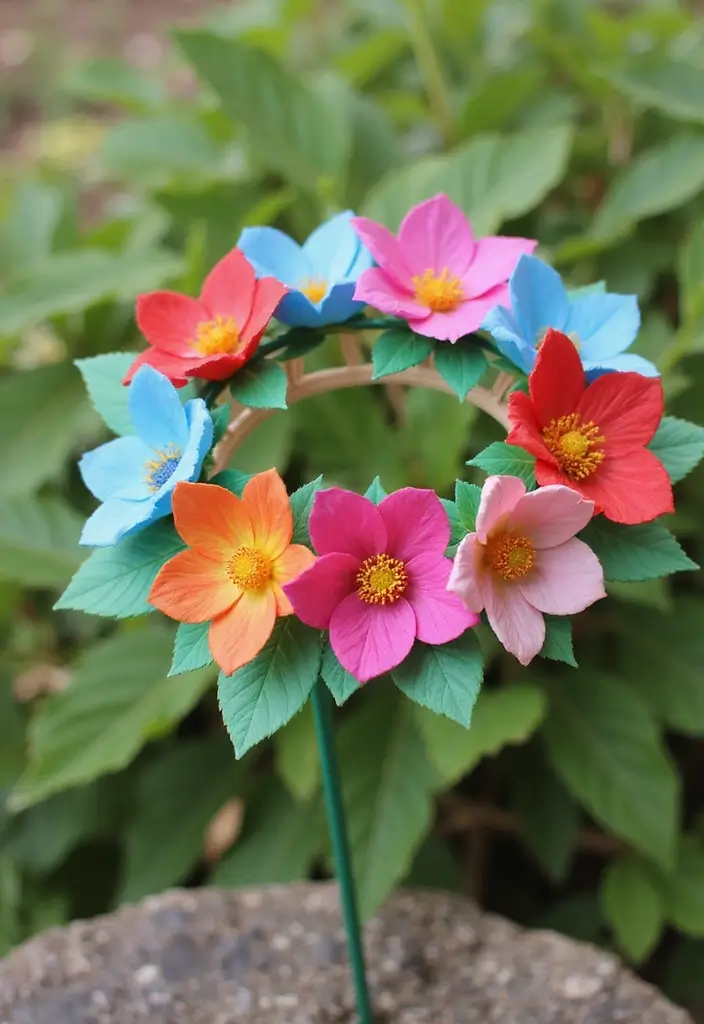
You want a paper flower crown that looks stylish and stays put. It’s a simple way to add charm to a party, festival, or a quiet day at home. You’ll craft blooms from colored paper and mount them on a flexible base. The result feels light on your head and comfy to wear.
Materials you’ll need:
– Colored craft paper in a few shades
– Floral wire or a comfy headband
– Scissors, glue, tape
– A pencil and a ruler
– Optional: green paper for leaves, small beads for centers
How to make it:
1) Create simple flowers. For daisies, cut small circles and add petal shapes around the edge. For roses, cut a long, thin strip, roll it up, then twist the end. Keep shapes basic for quick results.
2) Build the crown base. Shape the wire into a head loop or use a ready headband. Wrap the base with tape so it’s smooth and won’t poke you.
3) Attach the flowers. Glue or wrap stems to the base. Space blooms evenly and mix big and small to add depth.
4) Add leaves and color. Tuck green pieces between blooms to fill gaps and make it look natural.
Personalize it:
– Try season colors: warm tones for fall, soft pastels for spring.
– Match a theme: party, festival, or a fairy-tun look.
Next steps:
Test the fit, adjust if needed, and wear your crown with confidence.
19. Handmade Flower Gift Tags

Want a simple way to add a personal touch to gifts? Handmade flower gift tags do it fast and feel special. A tiny paper bloom can turn a plain package into a warm hello.
What you need
– Colored craft paper in a few shades
– Scissors, a pencil, and a glue stick
– A hole punch or a needle and thread
– Ribbon, twine, or a small clothespin
– Markers or gel pens for writing
How to make them
– Cut small flower shapes from your paper to form the base.
– Add a few layered petals for a fuller bloom.
– Punch a hole at the top and thread your string through it.
– Write a short message on the back of the tag.
– Add a leaf or a contrasting backing color for depth.
Choose the flower by the moment
– Roses for romance and special nights
– Daisies for bright, friendly vibes
– Sunflowers for happy, sunny days
– Lavender or lavender-inspired colors for calm, warm notes
Here is why these tags work: they catch the eye, they tell a tiny story, and they show you care. They also give your gift a personal touch that wrapping alone can miss.
How to attach and finish
– Place the tag on the ribbon or wrap the string around the gift once, then tie.
– Clip the tag with a mini clothespin for a playful look.
– If the wrap is busy, write in a dark pen so your message stands out.
Tips you can use today
– Use recycled kraft paper for a natural feel that suits many gifts.
– Keep a small supply of pre-cut flower shapes for last-minute gifts.
– Use high-contrast ink on light paper so words are easy to read.
Next steps
– Pick a color set and cut a few tags in different blooms.
– Write quick messages for several occasions.
– Practice a simple tag kit you can grab before every gift.
20. Colorful Paper Flower Garlands
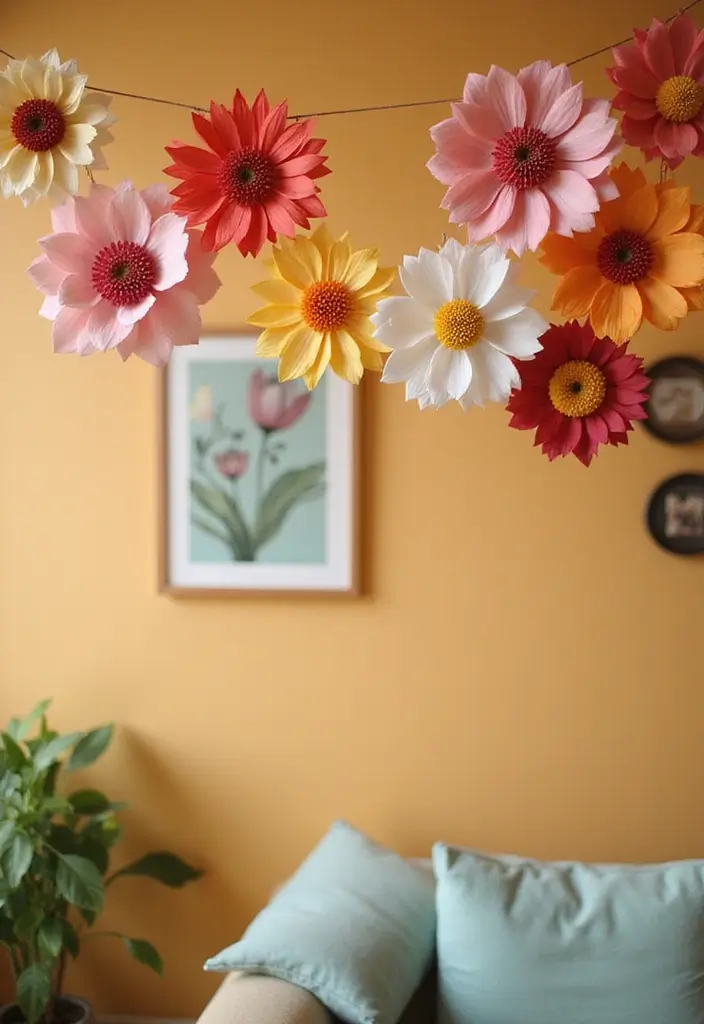
You want warm decor that is easy to make. Colorful paper flower garlands fit. They brighten a room, a party, or a wedding. Mix colors, sizes, and shapes to match your mood. Here is why they work: they are light, cheap, and easy to store.
What you need
– You will need colored craft paper in several shades.
– Use scissors that cut cleanly.
– Have glue or clear tape on hand.
– Choose a long piece of string or twine.
– Keep a hole punch or a needle to thread.
– Optional extras include green leaves or small faux foliage.
– A stapler can speed up the process.
How to make them
– Cut several flower shapes from your paper.
– Use simple shapes like circles with petals or layered petals.
– Punch a hole in the center of each flower.
– Thread the flowers onto the string, spacing them as you like.
– Add a small dab of glue at the back to keep each bloom in place.
– Tie the ends of the string so you can hang it.
Style and variations
– Mix colors, sizes, and flower types for depth.
– Add green leaves between blooms for a natural look.
– Alternate a full bloom with a single-petal flower.
– Create garlands of different lengths for walls, mantels, or ceilings.
Practical uses
– Hang above a mantel or kitchen island for a sunny feel.
– Use as party decor or a backdrop for photos.
– Store flat in a box and reuse for future celebrations.
Next steps
– Start with two colors and two sizes.
– Add leaves and stretch the length as you gain confidence.
– Share a photo of your garland in your space.
Recommended Products

Multiple Sizes and Colors: Our flower stems are 35cm long and come in three basic sizes - 50 pieces of 16 gauge (0.6 inches) 、50 pieces of 18 gauge (0.054 inches)and 100 pieces of 26 gauge (0.027 inches) - to give you the flexibility you need for a variety of craft projects. There are four vibrant colors to choose from: green, white, light green, and brown. With a large number and a variety of colors, these flower stems are perfect for adding a touch of color and creativity to any arrangement or craft


Package include :10 pcs flower,7 inch*5pcs and 9inch*5pcs.Colour in pink, light blue,hot pink,orange and light purple.Big size is suit for decorating a large area
21. Adorable Paper Flower Magnets
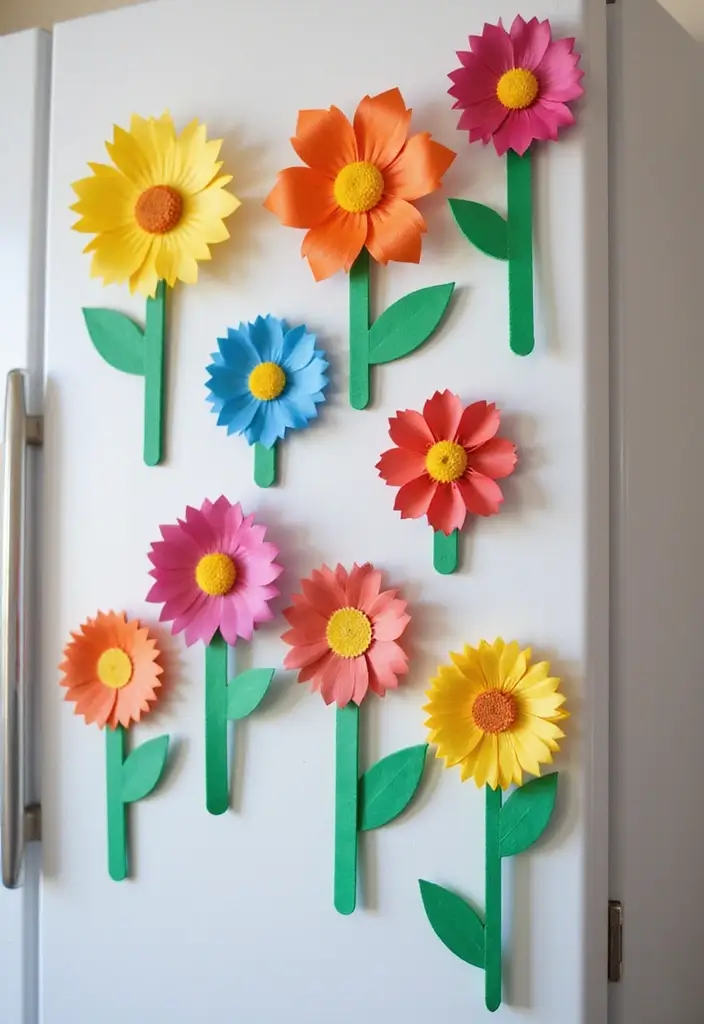
You want a quick, cute way to brighten your fridge or desk. Adorable paper flower magnets fit the bill. They are easy to make and you can tailor them to your color mood.
– Materials you need:
– Paper or cardstock in colors you love
– Scissors and glue
– Small fridge magnets
– Optional sealant for durability
– How to make them:
1) Cut tiny flower shapes from your paper.
2) Glue a magnet to the back with a thin dab.
3) Let them dry before you handle them.
4) Add a second color or a leaf for depth if you want.
– Why this works:
simple shapes look clean on any surface. You control the look with color, size, and number of petals. Mix big and small flowers to create a mini bouquet.
– Practical uses:
– Decorate your kitchen, study corner, or craft table.
– Give a handmade gift that shows you care.
– Create seasonal sets by swapping colors with the year.
– Quick tips:
– For stronger hold, use a touch of hot glue at the back corner.
– Seal the faces with a light clear spray if you plan to store them.
That’s it. You can finish this in an afternoon and enjoy cute, personal art every day.
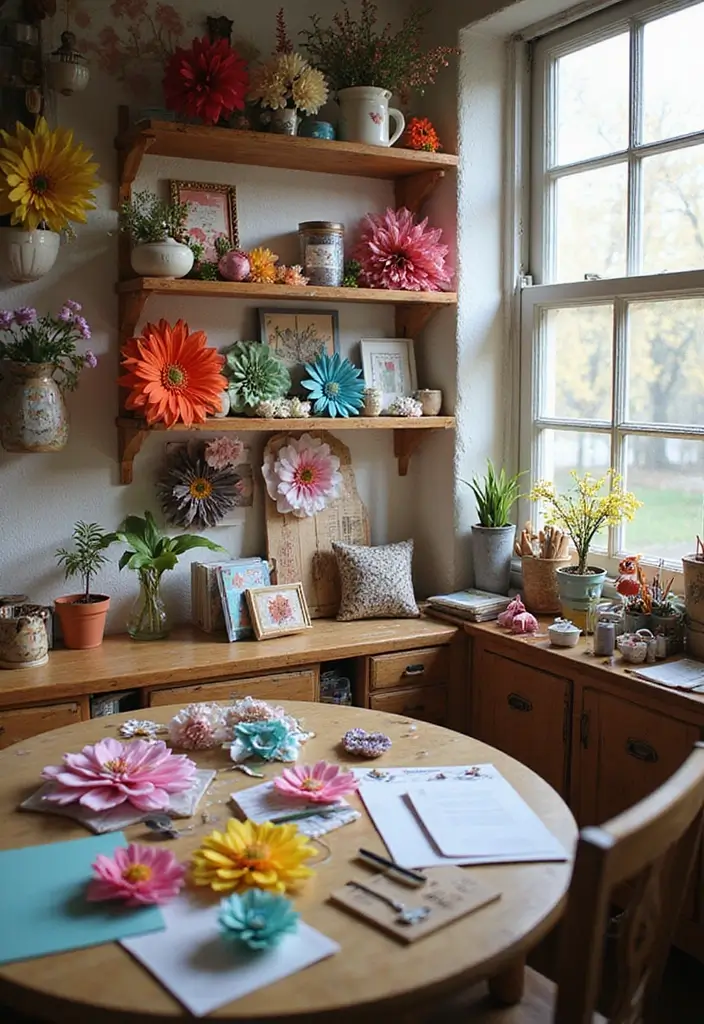
22. Stunning Paper Flower Centerpieces
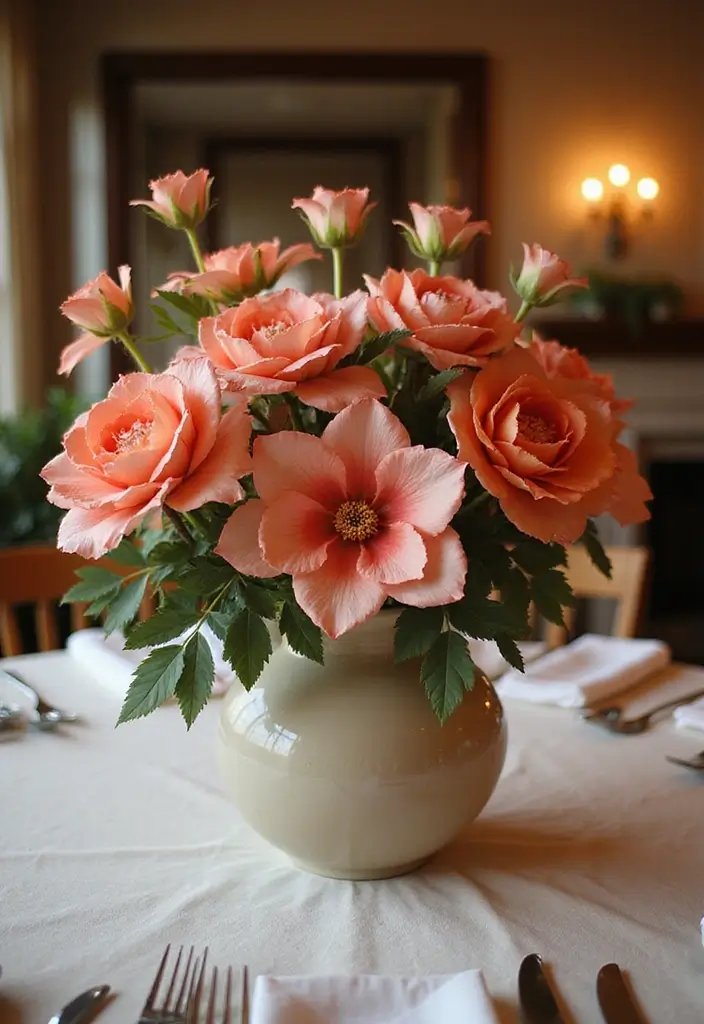
Want a centerpiece that looks lush without costing a fortune? You can craft paper flower centerpieces that brighten meals and events. Mix several paper blooms you already made, add greens, and tuck in a few recycled-fiber fillers. Put everything in a vase that fits your room, and you have a vibrant display. Here is how it helps: it lasts longer than real flowers and you can store it for future gatherings.
What you need
– A vase that fits your décor
– Paper blooms you made
– Greens or recycled fillers
– Glue or tape
– Ribbon for finish
How to build it
1) Start with the tallest blooms in the center.
2) Add medium blooms around them at varied angles.
3) Slip in greens to hide stems and add texture.
4) Place a few lighter fillers for air and balance.
5) Tie a simple ribbon to hide the base and tie the look together.
Tips to tailor your centerpiece
– Match the vase to your style, whether glass, ceramic, or metal.
– Pick a color story that suits the room: soft pastels or deep tones.
– Keep paper away from humidity and direct sun for longer life.
Where to use this
Great for dinners, family gatherings, birthdays, or a bright everyday table.
Recommended Products

Elegance in Every Corner: you will receive 6 pcs tea party decorations, these tea party supplies are crafted to beauty from sturdy white cardboard with exquisite floral patterns, bringing a touch of elegance to most events; These tea party supplies set a nice theme, making them the suitable wonderland themed gatherings and princess centerpieces for tables; They can leave unforgettable memories


PINK PAMPAS GRASS DECOR: Pack of 50 artificial pampas grass stems, each 21.6 inches. Sized for creating stunning, full arrangements in table or floor vases (Please note: vase not included)
23. Dreamy Paper Flower Chandelier
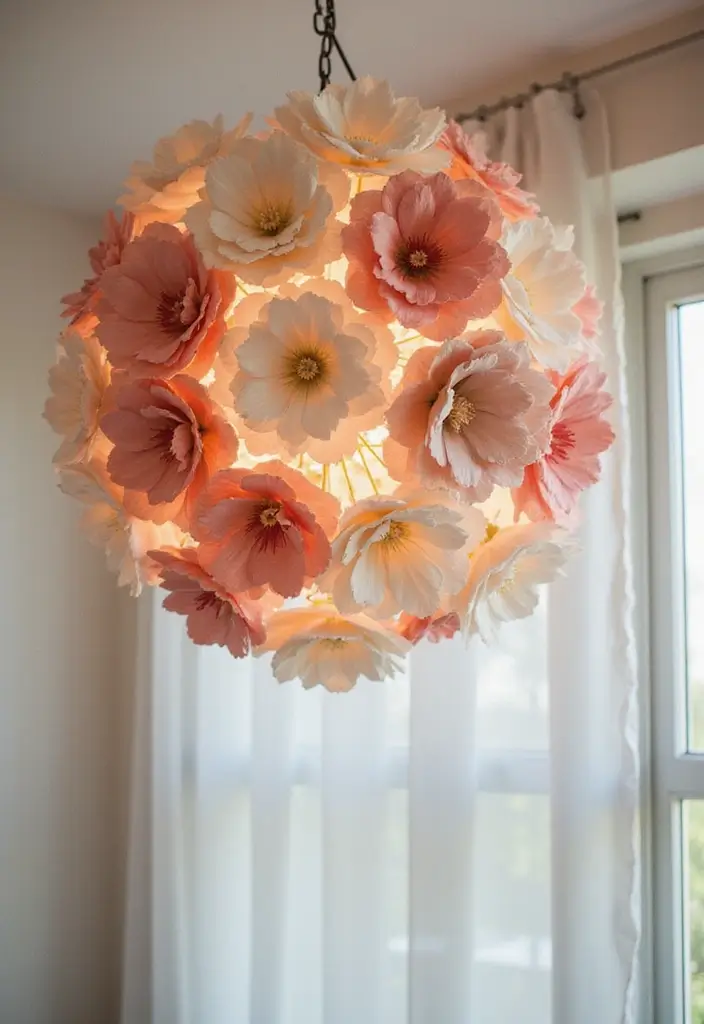
– What you get You want a dreamy focal piece that fits your space. A paper flower chandelier adds soft color and gentle movement. It can be big or small, bold or light, depending on your room.
– What you need Circular base (a hoop or foam ring), paper flowers in chosen hues, floral wire or paper ribbons, glue, scissors, string, tape. Keep a hot glue gun handy if you have it.
– How to build Fix flowers to the base using wire or ribbon. Create clusters or spread them evenly. Let some petals dangle to add depth. Layer flowers by size for texture. Decide on height and add strands accordingly.
– Design ideas Mix rose and peony shapes for an organic look. Or pick a color family for calm, cohesive vibes. You can vary size and density to fit your room.
– Practical tips Use light-weight paper so the chandelier sways softly in air. Add a warm light behind or around for glow. Secure pieces well to avoid droop. Measure height before hanging.
– Where to use it Great over a dining table, as a wedding backdrop, or as a focal point in a living area.
– Next steps Sketch your plan, cut petals, assemble, and test hang height before finalizing.
– Safety and care Use a secure hook rated for weight. Test hang with items before full setup. Handle heavy pieces gently. Dust gently with a soft cloth. Replace any loose petals promptly. Experiment with balance to fit your room.
Recommended Products

These beautiful Paper Flower decorations are perfect for weddings, birthday parties, christenings, nurseries, bedrooms, gazeboos, marquees, churches, fashionshows, even photo shoots and shop displays! Whether suspended from the ceiling, strung on a garland or scattered around a room, paper flowers add that extra touch to your celebration and are perfect for any event making them ideal for weddings and events abroad.


Complete Set Includes: 9 piece paper flower fan set: contains 3x14-inch, 3x10-inch, and 3x8-inch sizes, with 9 golden floral centers. Perfect for creating elegant and natural party decorations
24. Layered Paper Flower Boxes
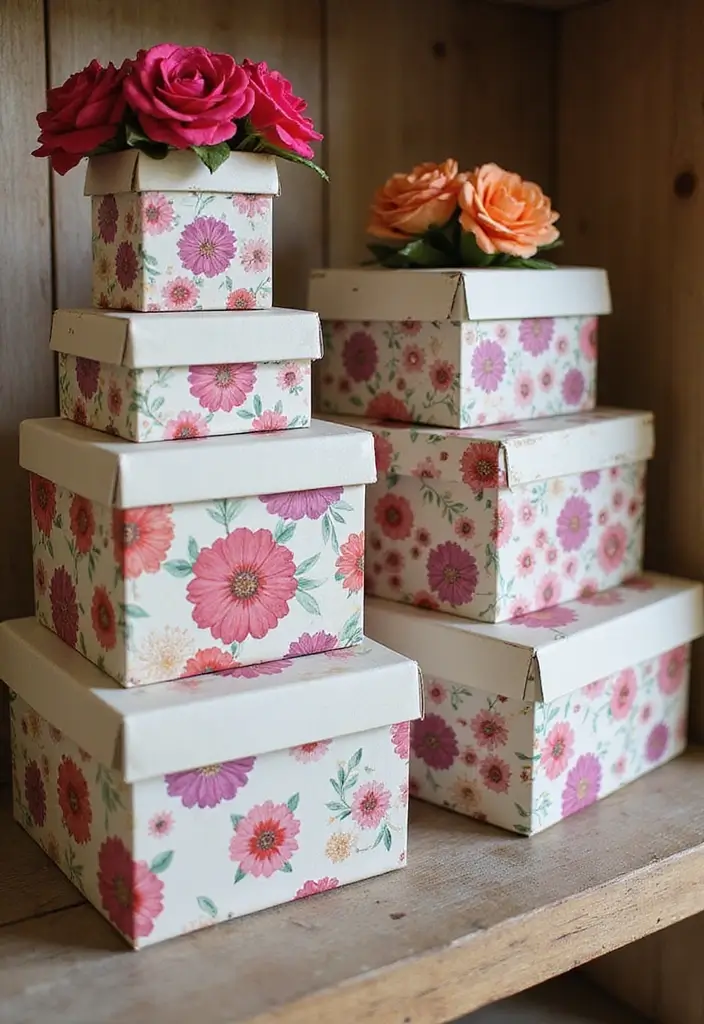
Are you looking for storage that also adds color to your shelves? Layered paper flower boxes give you both. They turn plain small boxes into mini displays with petals along the sides. You get a tidy place for odds and ends and a cheerful look you can enjoy every day.
Eco tip: Use recycled boxes and scrap paper to cut petals. This keeps the project kind to the planet and gives each box a unique texture.
Practical use: These boxes work well for craft supplies, jewelry, or tiny gifts. You can stack them on a dresser or tuck them on a shelf.
Here is why it works. The petals catch light and add depth to a simple box. The colors make a bouquet that lasts.
– Gather a few lightweight boxes, colored paper, scissors, and glue.
– Cut petal shapes, stack them, and glue a center bead or button to finish each flower.
– Attach two or three flowers along each side. Mix sizes for a lively look.
– Seal with a light coat of craft spray or clear glue so petals last.
Next steps: Place the boxes where you need small storage. Let the colors set the room’s mood, then swap papers for a quick seasonal refresh.
25. Beautiful Paper Flower Invitations
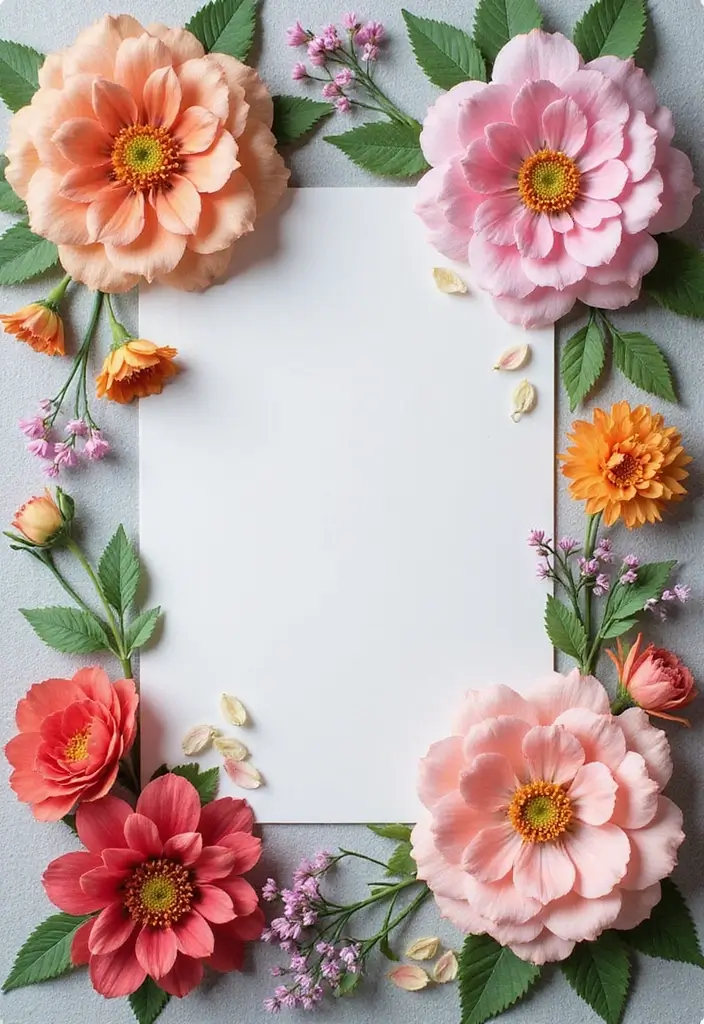
You want invitations that set the mood and feel personal. Paper flower invitations do that with easy charm. Cut one bloom or a small cluster in colors that fit your theme, then attach them to a sturdy card. You can keep the design simple or layer petals for a fuller look. This handmade touch makes guests smile before the day begins.
Here is why they work. They instantly show the vibe of your event and stand out in a stack of plain cards. The flowers can be kept as a keepsake in photos long after you send them.
– Design idea Pick one flower style and two colors to keep the look cohesive.
– Seeded option Embed tiny seeds in the paper so guests can plant it later.
– Practical steps Cut blooms with clean edges, glue to the card, and press to dry.
– Materials tips Use sturdy cardstock and clear-drying glue for a neat finish.
– Color and scent Match colors to your venue and add a light fragrance if you like.
– Size and placement Choose a bloom size that fits the card without covering text.
– Delivery Send by mail or hand deliver to keep petals safe.
Next steps: pick a color palette, gather supplies, and test a sample on a spare card.
26. Paper Flower Coasters
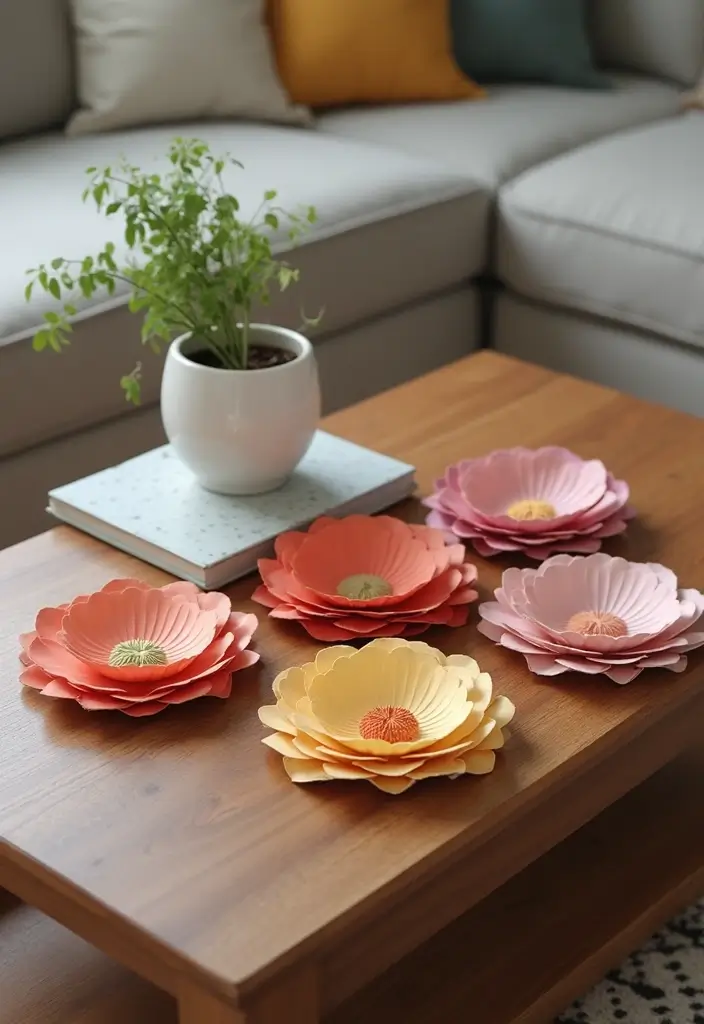
Feeling like your coffee table could use a brighter touch? Paper flower coasters bring color and charm without much fuss. They’re easy to make, and you can tailor them to your room in minutes.
– What you’ll need: thick cardstock or craft paper, scissors, glue, a clear seal or laminate, and a soft backing like cork or felt.
– Step-by-step:
– Cut a few flower shapes from sturdy cardstock.
– Layer pieces to give the coaster a bit of depth.
– Laminate or seal the top for moisture protection.
– Attach a cork or felt backing to keep the table safe and steady.
– Design ideas:
– Use bright colors for a playful look that pops against a neutral table.
– Create a seasonal set, such as pastel blooms for spring or warm tones for autumn.
– Mix different petal shapes to add visual texture.
– Why this works:
– They protect your surfaces from heat and spills.
– They spark quick conversations when guests notice the floral details.
– They’re inexpensive and easy to swap out as trends or moods change.
– Tips for longevity:
– Add a thin clear coat to lock in color.
– Let glue dry fully before sealing.
– Clean with a light, damp cloth to avoid moisture damage.
Next steps: choose colors that fit your space, cut your petals, and start layering. Your table will look inviting and tidy in no time.
27. Adorable Paper Flower Bookmarks
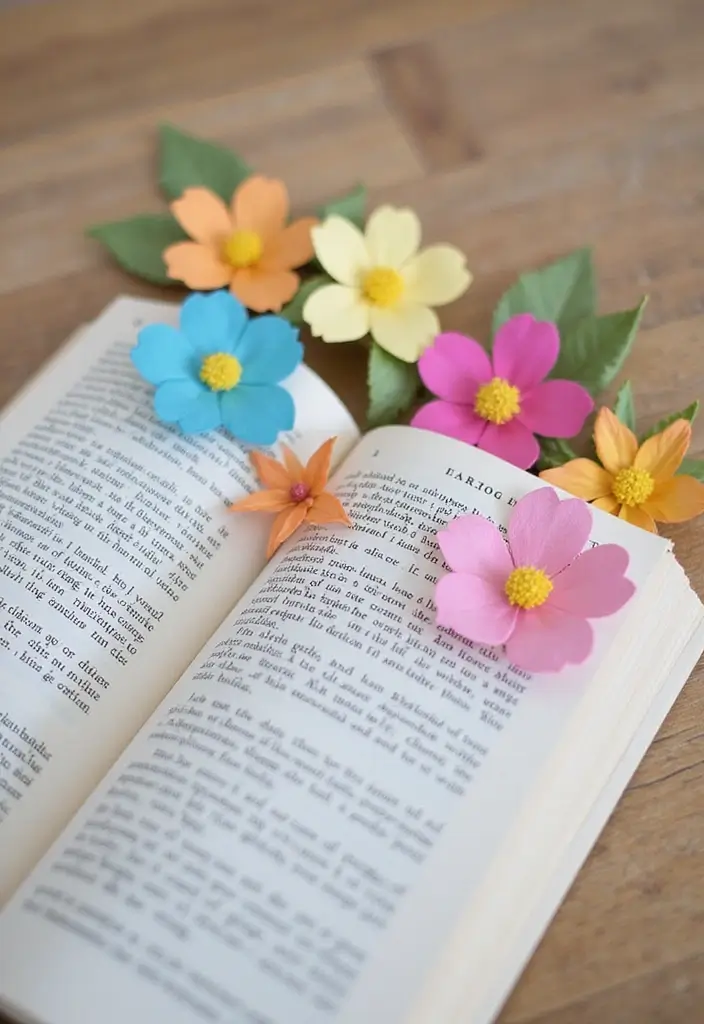
Are you looking for art that fits in a book? These paper flower bookmarks add charm to any page. They’re cute, easy to make, and useful.
What you’ll need:
– Scrap paper or old book pages
– Colored paper or tissue for petals
– Scissors
– Glue or a glue stick
– A hole punch
– A tassel or string for a tail
– Optional markers for names
Here is why they work: turn scraps into blooms. Layer them for depth and keep flat in the spine.
Simple steps:
1) Cut a few flower shapes. Stack 2-3 layers for dimension.
2) Glue layers so the petals lift a bit.
3) Punch a small hole at the top edge.
4) Thread a tassel through the hole and knot.
5) Add a tiny name tag if you want to personalize.
Smart ideas:
– Use recycled paper to tell a story with color.
– Try old magazine pages for bold, bright blooms.
– Mix big petals with small ones for a fuller look.
Practical uses:
– These bookmarks make thoughtful gifts for readers.
– Personalize with initials or a short note.
– They help you find your place fast and add a little joy to any book moment.
Next steps: make a few in different colors and pick your favorite.
28. Eco-Friendly Paper Flower Art
Need wall art that looks fresh and gentle on the planet? Eco-friendly paper flower art uses old magazines or newspapers. Cut pages into flower shapes. Glue them to a canvas or thick board to form a bright bouquet on your wall.
Here is why. It recycles paper and makes a one-of-a-kind piece. Real pages give real color and texture. It’s a simple way to add life to a room.
What you need
– Old magazines or newspapers
– Clear-drying glue
– Scissors or a craft knife
– A canvas, wood board, or thick cardboard
How to make it
1. Choose pages with colors that fit your space.
2. Cut basic flower shapes.
3. Layer petals to add depth.
4. Glue petals in clusters on the backing.
5. Let it dry, then add a light seal if you want extra hold.
Style and display
Mix big blooms with small ones. Curl petal edges for a natural look. Combine pages with different textures for contrast. Leave white space around groups to echo a garden.
Care and use
Keep it out of direct sun. Use a non-yellowing glue to slow fading. Frame under glass or mount on a sturdy backing.
It’s a friendly project you can finish in an afternoon. Invite a friend to help and share.
Next steps: start small, then build a bigger wall piece as a DIY project.
Conclusion
Paper flower making is a fantastic way to combine creativity with sustainability, allowing you to bring beauty into your home without harming the environment. From vibrant bouquets to stunning décor pieces, these projects offer endless possibilities for customization and personal expression.
So grab your crafting supplies and let your imagination bloom with these delightful paper flower ideas!
Note: We aim to provide accurate product links, but some may occasionally expire or become unavailable. If this happens, please search directly on Amazon for the product or a suitable alternative.
This post contains Amazon affiliate links, meaning I may earn a small commission if you purchase through my links, at no extra cost to you.
Related Topics