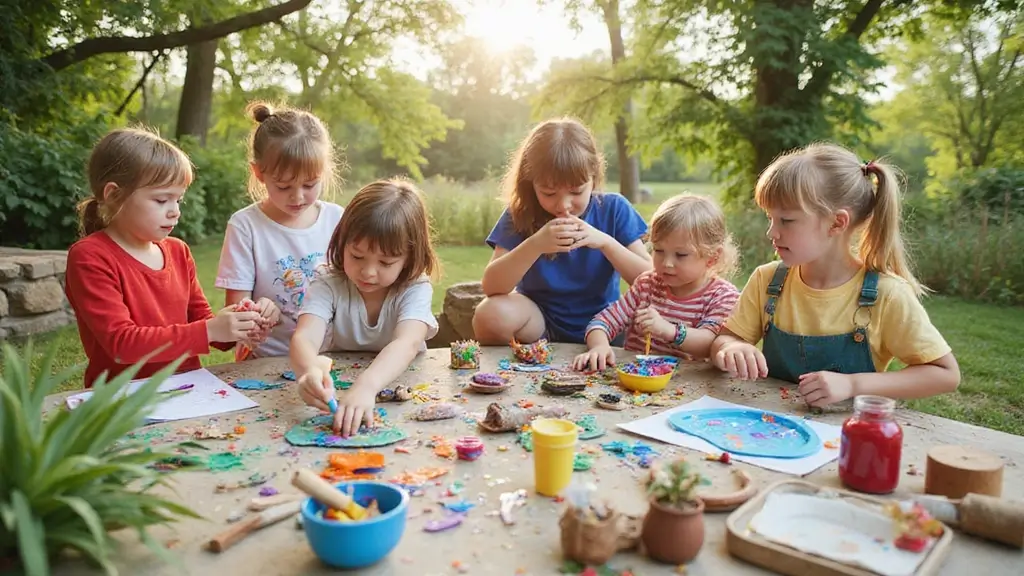
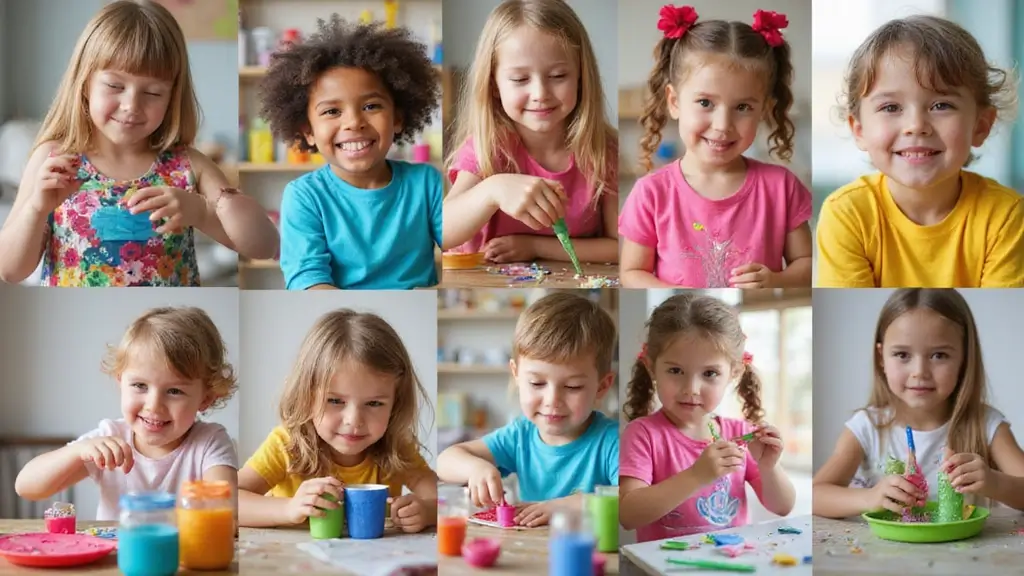
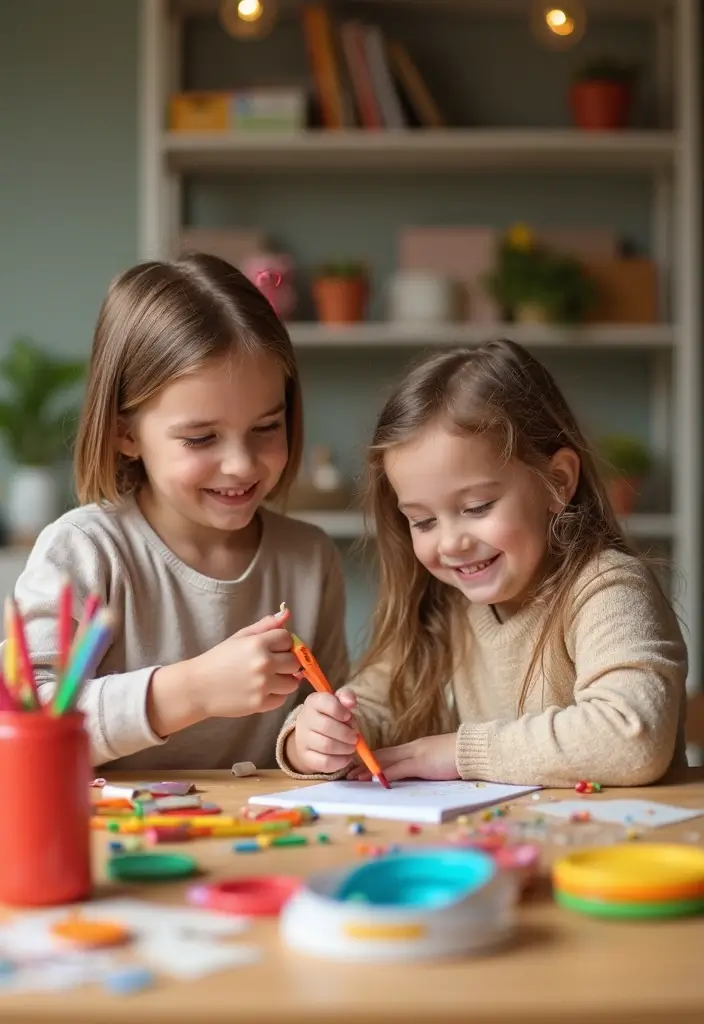
Why I made this post I hear from families who want crafts that fit a busy day. They want ideas that are simple, cheap, and quick to clean up. This collection is built to meet that need.
Who it’s for This is for parents, caregivers, teachers, and grandparents who want kids to learn and play without chaos. If you care about safety, affordable supplies, and activities that grab a kid’s attention, this is for you. You might have children from preschool to early elementary at home or help with after school.
What you’ll get Here are 30 simple kids crafts DIY projects that anyone can try at home. I pulled together ideas that are easy to gather, quick to finish, and fun to share. Each project uses common things like paper, glue, tape, and cardboard. You’ll find clear, short steps. There are tips to adjust for different ages and spaces.
Practical tips These projects focus on real life at home. No fancy tools needed. Most ideas work with supplies you already have. You’ll find kid-friendly tips for safe cutting, glue use, and decorating. Variations let you scale up or down for younger tots or older kids. Cleanup ideas are included so mess stays manageable.
What this means for you You get a steady stream of ideas that keep little hands busy and little minds curious. Craft time can become a small, calm ritual rather than a rush to finish. The list blends color, texture, and pretend play to spark imagination. It also fits different spaces, from a kitchen table to a small classroom corner. Here is why this matters. Hands-on activities build focus, confidence, and pride in making something.
Next steps Let’s break it down. Pick a project that fits your day. Gather simple supplies like blunt scissors, glue, crayons, and scraps. Set a 15 to 30 minute window. Start with something small, then grow. Share what you try and how it goes. If you keep it simple, craft time becomes something you both look forward to.
1. Recycled Paper Beads

You want a simple craft that keeps kids busy and helps the planet. Recycled paper beads fit perfectly. They turn scrap paper into bright jewelry you can wear or share.
Materials:
– Old magazines or newspapers
– Scissors
– Glue
– String or thread
– Optional: paint, markers
– Optional: clear nail polish for a shiny finish
Here is how to do it. Cut long triangular strips from the paper. The longer the strip, the bigger the bead. Roll the strip tightly from the wide end to the tip. Glue the edge to seal. Place beads on a flat surface to dry.
After they dry, you can add color. Paint or color the beads, and let them dry again. A coat of clear nail polish adds a glossy look that lasts.
String the beads into a necklace or bracelet. Use a simple knot or a bead stringing needle if you have one.
Pro Tip: Mix colors and bead sizes for a lively pattern. Try light and dark papers together to make stripes.
Why do this? It builds small muscles, sparks creativity, and pushes recycled paper into something usable. It’s a quick, affordable project you can finish in one sitting.
@media(max-width:480px){
2. Egg Carton Critters
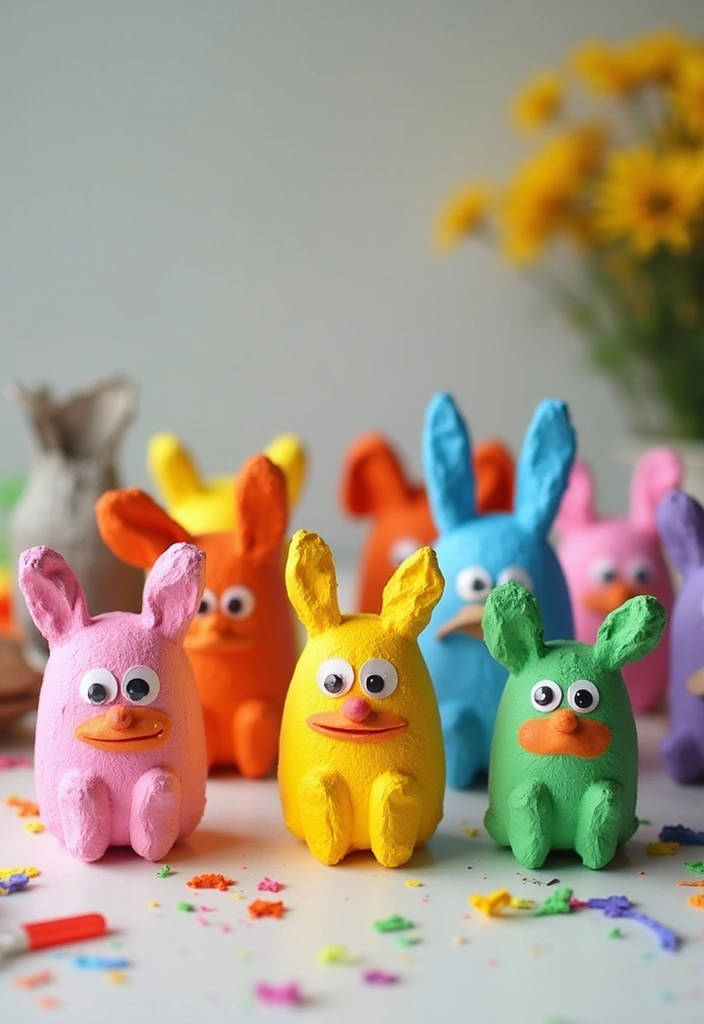
You want a quick, kid-friendly craft that uses things you already have. Egg carton critters fit. They turn simple cups into cute creatures with paint, pipe cleaners, and googly eyes.
Materials:
– Egg cartons
– Paints and brushes
– Scissors
– Pipe cleaners
– Googly eyes
– Glue
What you’ll make
Butterflies, caterpillars, tiny dinosaurs, and other small friends.
How to make it
– Cut apart the cups. Each cup can be a creature or several linked for a longer body.
– Paint the cups. Use bright colors. Let each coat dry completely.
– Add faces and features. Glue on eyes and pipe cleaners. Bend the pipe cleaners for antennae or legs.
– Add variety. Make wings from extra pieces, or use cups stacked side by side to form a worm or dinosaur shape.
– Display your critters. Set them on a shelf or hang them with string.
Why you’ll love it
Children build fine motor skills when they cut, paint, and glue. They solve problems as they decide how to turn a cup into a character. They also tell stories about their friends.
Next steps
Try mixing in bottle caps for noses, or add paper scales and texture for a new look.
Tips for best results
– Keep a small tray for paints and a damp cloth to wipe hands.
– Invite kids to name each creature and tell a tiny story about it.
@media(max-width:480px){
3. Nature Collage

If you want a calm, creative craft that links outdoor exploration to art, try a nature collage. You pick up leaves, twigs, flowers, and other natural finds. Then you turn them into a piece you can keep or share.
Materials: Natural materials, cardboard or sturdy paper, glue
Here is how to do it:
– Go on a short nature walk and collect a mix of shapes and colors.
– Arrange your items on the cardboard first to plan your design.
– If possible, press or lay items flat for a few hours so they glue down cleanly.
– Glue one piece at a time. Start with bigger background shapes, then add texture with smaller bits.
– Let the glue dry completely. Frame it or hang it on a wall for a quick display.
Kids benefit: This project teaches about nature, colors, and textures. It also builds hand strength and focus as they place pieces.
Nature collage for kids blends art with nature study.
Seasonal twist: Make a new collage for each season to show how nature changes. You can swap in different leaves, berries, or pine needles.
Tips: Keep a tray or lid to catch loose pieces. A light spray of clear matte sealant can help keep it longer if you want it to last.
@media(max-width:480px){
4. DIY Bird Feeders
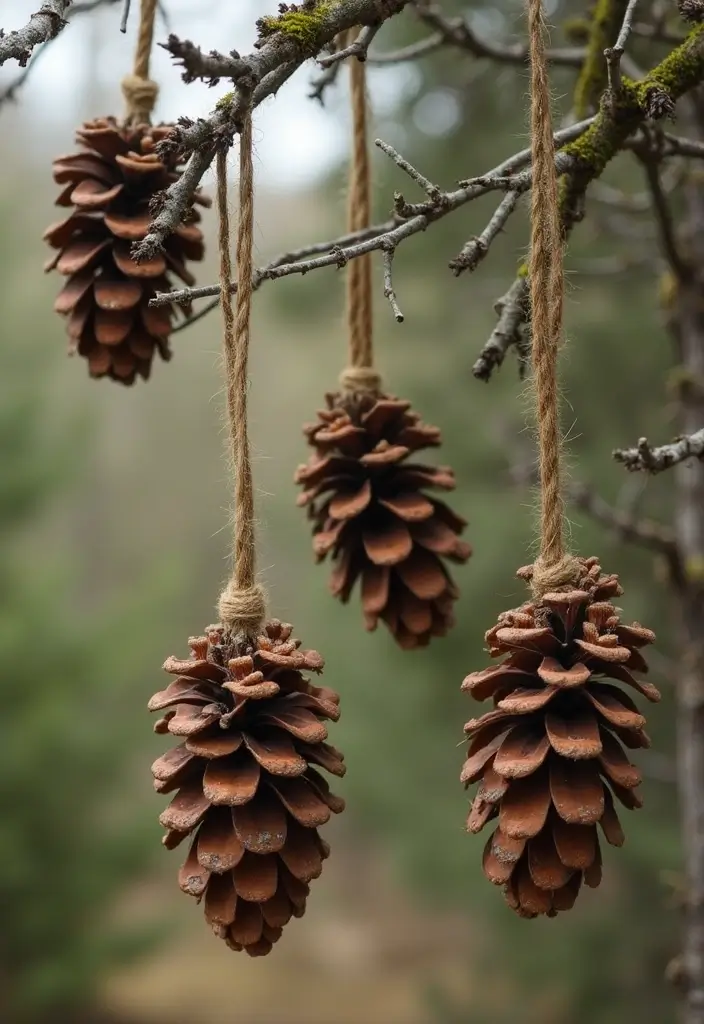
Want a quick, kid-friendly project that helps birds and teaches kids about nature. The pine cone bird feeder is easy to make and great to watch from a window.
– Materials: pine cone, peanut butter, birdseed, string
– Step 1. Lay the pine cone on a plate. Spread a thin layer of peanut butter over its scales.
– Step 2. Roll the cone in birdseed until the seeds cling to the butter.
– Step 3. Tie a string around the top and make a small loop so you can hang it.
– Step 4. Hang the feeder from a sturdy tree branch, where birds can reach it and it stays safe from wind.
– Step 5. Watch birds visit and snack. Kids learn patience as they observe gentle fluttering visits.
– Quick tip. If a peanut allergy is a concern, use sunflower seed butter or plain oats as a coating.
– Seed swap. Try sunflower seeds or millet to attract different birds.
– Safety note. Start with a low height and check the feeder often for mold or soggy seeds.
Next steps. Keep a simple bird guide nearby to compare visitors. Talk about how birds help the garden and why animals need food in winter.
5. Homemade Playdough
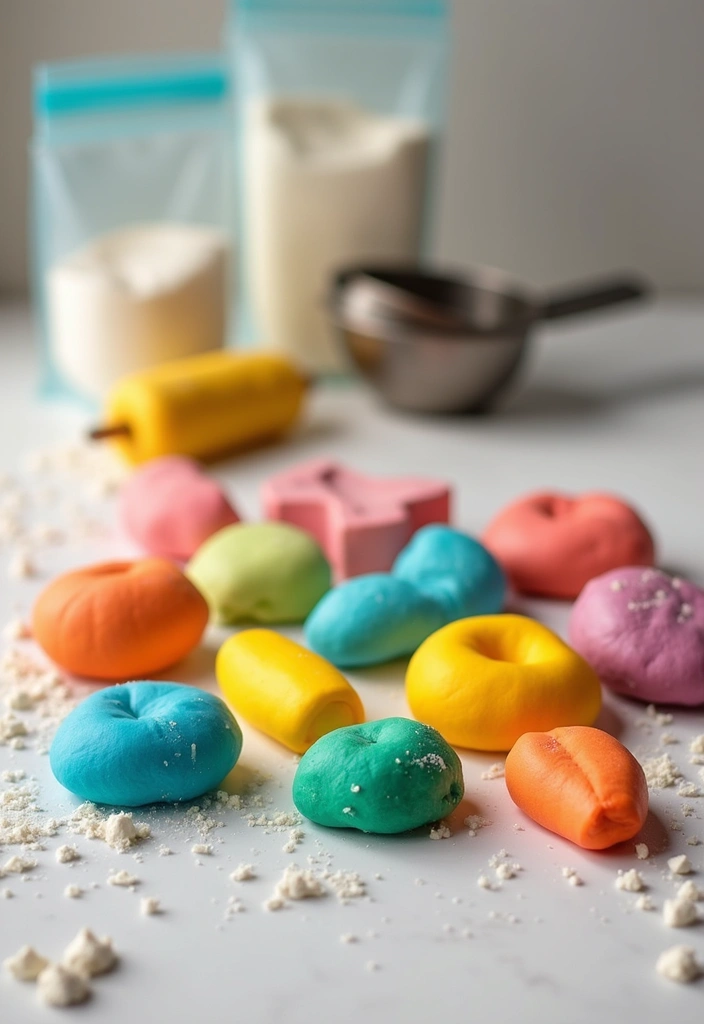
You want a simple, safe craft that keeps kids busy and happy. This homemade playdough does just that. It feels soft in little hands and invites big ideas. Here is why it works: it strengthens fingers, supports color mixing, and turns a quick kitchen project into a mini art studio.
What you need
– 2 cups flour
– 2 cups water
– 1 cup salt
– 2 tablespoons vegetable oil
– Food coloring
– Optional: a pinch of cream of tartar for extra texture
How to make it
1) In a pot, whisk together flour, water, salt, and oil.
2) Heat over medium heat and stir until the dough thickens and pulls away from the pan.
3) Let it cool just enough to handle, then knead until smooth.
4) Divide the dough and add different colors to each lump. Let kids mix and shape their own creations.
Here is why you should let kids lead. They decide colors, shapes, and tools. They learn counting by measuring, and they practice fine motor skills as they roll, pinch, and sculpt. Sensory play stays engaging as the dough changes texture with each move.
Fun ideas to try
– Build letters, animals, or tiny pizzas.
– Create patterns by rolling thin snakes and weaving them together.
– Add scent with a drop of vanilla or citrus oil (if you’re sure there are no allergies).
Storage and safety tips
– Keep leftovers in an airtight container to stay soft.
– Not meant to be eaten. If it dries out, add a splash of water and knead again.
– It’s a kid-friendly DIY project that stays fresh for days with careful storage.
Next steps
– Try a color mixing challenge to make new shades.
– Turn playdough into a quick science mini-lesson by predicting which colors blend best.
– Jot down favorites and reuse your dough for a new craft session soon.
@media(max-width:480px){
6. Rock Painting

Rock painting is a simple activity that brightens a dull day. You mix color with a touch of nature. It is perfect for kids and adults who want a quick, calm project.
– Materials: Smooth stones, kid-safe acrylic paint or markers, small brushes, a cup of water, and paper towels.
– Prep tips: Wash stones to remove dust. Dry them fully. Pick stones with flat surfaces for easy drawing.
– What to paint: Try friendly faces, animals, hearts, or short words. Use bold colors for visibility. You can copy patterns you spot outside.
– Next steps:
1) Plan designs on paper first, then paint onto rock.
2) Apply thin coats. Let each layer dry before the next.
3) When done, seal with a clear spray or sealant labeled kid-safe if you want them outdoors.
– Display ideas: Line a path, set rocks in pots, or tuck them into a garden bed as color markers.
– Treasure hunt twist: Hide painted rocks around your yard or neighborhood. Friends and neighbors can search for them. It spreads smiles and builds a tiny sense of community.
Rock painting gives you a chance to slow down, practice focus, and connect with nature while you create. It’s a simple project you can finish in an afternoon. Plus you create memories while you craft.
7. DIY Tie-Dye T-Shirts

Want a kid-friendly craft that turns into wearable art? DIY tie-dye T-shirts are perfect for home. They’re colorful, hands-on, and easy to share with friends.
– Materials: White t-shirts, fabric dye, rubber bands, gloves, plastic wrap or a tray, and old towels to protect your space.
– What you do
1) Prep the shirt by washing it first and keeping it damp.
2) Pick a pattern. Try a spiral, a bullseye, or a simple crumple fold.
3) Bundle the shirt with rubber bands. The bands create color blocks.
4) Add color. Use squeeze bottles or cups and apply colors in different sections.
5) Set and rinse. Wrap the shirt in plastic and let it sit for 6 to 8 hours. Rinse under cool water until the water runs clear. Then wash alone in cold water and dry.
– Tips and safety
Protect your workspace with plastic. Wear gloves. Use old clothes and a plastic sheet. Rinse colors separately to keep them bright.
– Why you’ll love it
It sparks creativity and makes wearable art you can wear or trade.
– FAQs
Can kids do this alone? Supervised help makes it safer.
What patterns work best? Spirals and bullseyes pop the most.
@media(max-width:480px){
8. Paper Mache Masks

Need a simple DIY that kids can do at home with minimal mess and big rewards. Paper mache masks fit the bill. They mix art with play and end in something your child can wear.
Materials: Newspaper, flour, water, balloons, paint, optional decorations like feathers or ribbon.
Here is why this project works: it uses common scraps, builds patience, and results in a wearable piece kids are proud of. Next steps make the creation flow smoothly.
Steps
– Inflate a balloon to the size you want for the mask.
– Mix a paste: 1 cup flour with 1 cup water until smooth. Adjust with a splash more water if needed.
– Tear newspaper into thin strips, about 1 inch wide.
– Dip a strip in the paste, wipe off the excess, and lay it on the balloon. Cover the whole surface with several layers.
– Let the layers dry as you add more. When the shell is stiff, gently pop the balloon and lift off the mask.
– Paint the mask with bright colors. Add feathers, yarn, or glitter for texture.
Next steps: lay the mask flat to dry completely. Then try a new look—face, animal, or a superhero. This project teaches planning, balance, and hand control while giving you a fun, ready-to-wear craft.
@media(max-width:480px){
9. Sensory Bottles
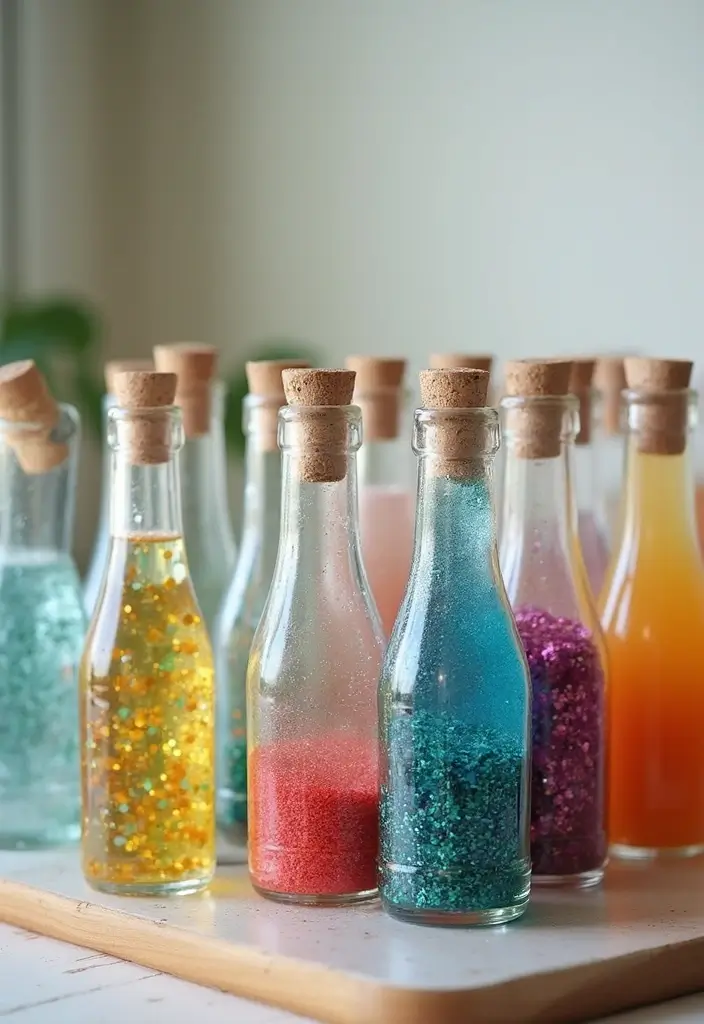
If your child feels restless, a simple sensory bottle can help. It offers a calm scene and a quick path to focus. Use it during quiet time, transitions, or when stress sneaks in.
Materials: Empty plastic bottles, water, glitter, food coloring, small toys or beads
Here is why it works. The glitter catches the eye. The slow swirl slows the mind. A sealed bottle keeps pieces safe and easy to handle.
1) Fill the bottle with water.
2) Add a few drops of food coloring to tint the water.
3) Pour in glitter and small toys or beads.
4) Seal the lid tightly with glue or strong tape.
5) Let your child shake the bottle and watch.
Kids love the look of colors and the movement. It becomes a quiet, helpful tool for relaxation or a tiny science moment.
Next steps: invite your child to pick colors by mood. A color choice can mark a switch from calm to focused or just plain fun. You can keep a few bottles ready for different needs.
Safety and care: supervise younger kids. Watch for small pieces that could pose a choking risk. If the lid loosens, add a line of glue around the rim.
This little project is easy, inexpensive, and ready to reuse anytime.
@media(max-width:480px){
10. Flower Pot Painting
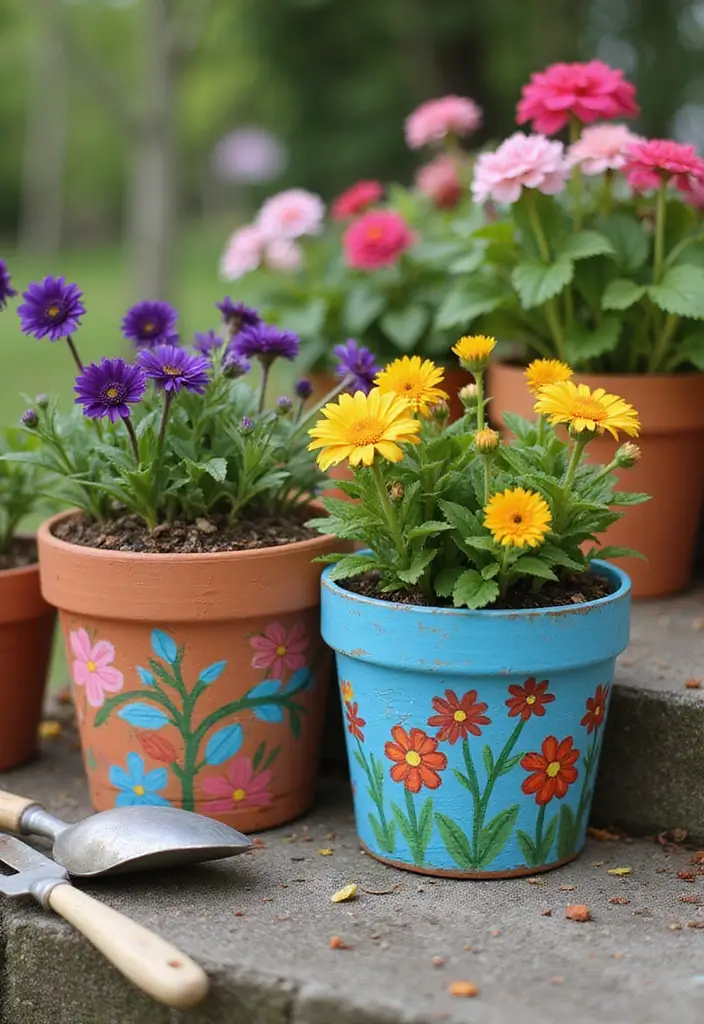
Looking for a kid-friendly project that doubles as home decor? Flower pot painting fits the bill. It sparks creativity and teaches a bit about gardening, all in one simple craft.
Materials: Clay pots, acrylic paint, brushes, clear sealant, water cup, paper towels
Here is why you should start with these supplies. The pots are easy to grip. Acrylic paints come in bright colors. A clear sealant makes the design last. Keep a cloth handy for messy moments.
Steps to try:
1) Wash the pots and let them dry.
2) Pick a base color and cover the pot with a smooth coat.
3) Let the first layer dry.
4) Add patterns, stripes, dots, or cute cartoon shapes.
5) Add a second coat if the color looks uneven.
6) Seal the pot with a clear coat in a well-ventilated area.
7) Let the sealant dry completely before planting or displaying.
Tips and variations:
– Use masking tape to create clean lines.
– Try stencils for young painters.
– Draw a simple scene like sunflowers or smiling animals.
– If the pot sits outside, use weatherproof sealant and let it cure longer.
Next steps: plant herbs, flowers, or keep the pot as a bright organizer. Every time you water, your child remembers this creative day.
11. DIY Friendship Bracelets

Need a kid-friendly project that fits into one afternoon? DIY friendship bracelets work well. They’re colorful, simple, and ready to wear or gift. Here is why you can start today: you see results fast, you can pick colors you love, and you make a small keepsake with a friend.
Materials
– Embroidery floss or soft yarn in 6 to 8 colors
– Scissors
– Tape or a flat table edge
How to make them
1) Cut 6 to 8 strands, about 12 inches long. Line up the colors you want.
2) Tie a small knot at the top and tape the knot to the table.
3) Choose a pattern. Try a simple braid, a fishtail, or a square knot.
4) Weave or braid until the bracelet fits a wrist. Tie off the ends and trim.
Why this helps
This activity strengthens small hand muscles and focus. It teaches patience as you repeat patterns. Personalization shines when you pick colors that match a friend’s favorites. It also makes a quick, thoughtful gift idea for birthdays or just because.
Tips and twists
– At a party, have each kid make two bracelets and swap one. It sparks a friendly exchange.
– Try color blocks, a gentle gradient, or small charms for extra flair.
– Keep leftovers in a pouch so your next project is ready.
Start small: pick colors, choose a pattern, and begin. Share photos of your creations to inspire others.
12. Fabric Scrap Art
You want a craft that uses fabric scraps and keeps mess small. Fabric scrap art fits. It turns old scraps into color and texture you can hang at home.
Materials: Fabric scraps, canvas or sturdy cardboard, glue, scissors
Here is why this works for kids. It is simple, not costly, and you can see progress fast. Let your child plan a design first. Look at the scraps and pick big shapes, then add smaller pieces.
Let’s break it down with steps:
– Start by arranging pieces on the surface. Try a few layouts before sticking anything down.
– Use denim for a rough, chunky look, cotton for smooth areas, and felt for bright accents.
– Glue in place one piece at a time. Press firmly so it sticks.
– Trim edges to keep lines neat. A clean edge makes the art feel finished.
– If you want extra grip, add a few simple stitches along the edges.
Let it dry. Then display it on a wall, a cork board, or a shelf. Your home gains warm color and unique texture.
Next steps: experiment with fabric animals, abstract shapes, or landscapes. Keep scraps sorted by color to speed up the next project.
It’s a simple way to recycle, learn, and create together. Want to try it this weekend?
@media(max-width:480px){
@media (max-width: 600px) {
.visual-quiz-iframe { min-height: 995px !important; height: 1100px !important; }
}
13. DIY Wind Chimes
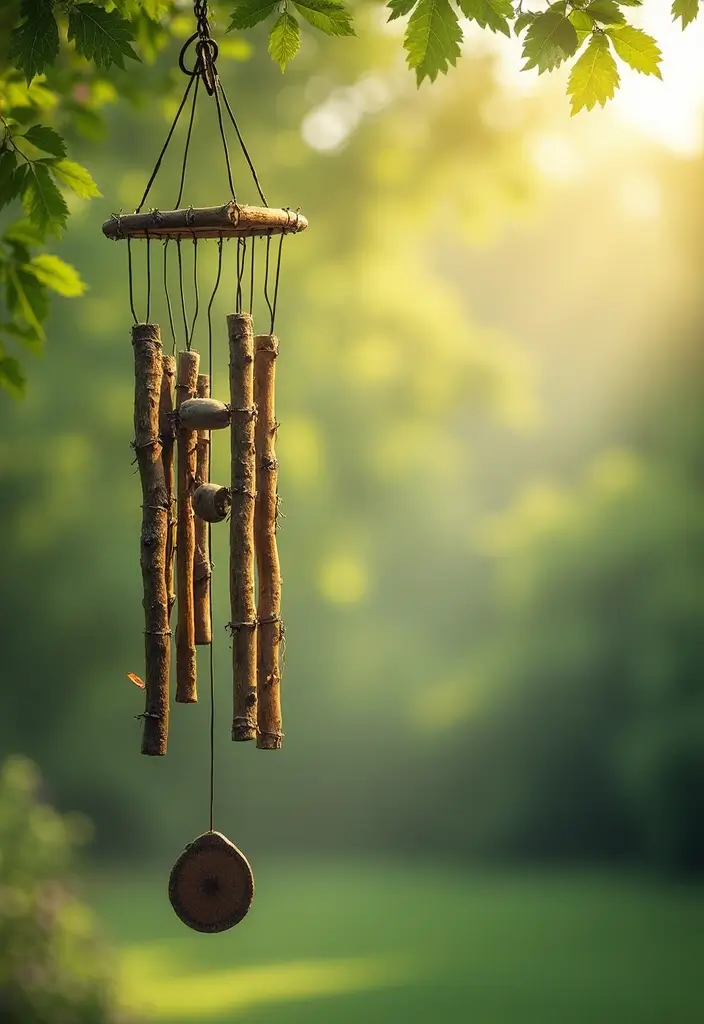
You want a simple craft that sounds nice outside and is easy for kids. DIY wind chimes use natural pieces and small trinkets to make music in the breeze. Here is how to do it with your family.
Materials
– Twigs or small branches
– String or thin cord
– Beads, shells, and bells
Steps
1) Gather 4 to 6 twigs and tie them into a flat base with a sturdy knot.
2) Attach strings to the base at even spots. Add a bead or shell to each string, then finish with a bell or charm.
3) Tie a longer string to the center to make a hanger. Let the strands hang at different lengths for a gentle rhythm.
4) Hang the wind chime outside where the breeze can move it. Good spots include a porch, a tree branch, or a garden gate.
Tips and learning
– This project shows how sound works. Light wind makes soft tinkles, stronger wind creates a chorus.
– Let kids pick colors and items that mean something to them. Paint the twigs for a bold look if you like.
Next steps
– Enjoy the tiny concert in your yard. Rotate pieces if some weathered or faded over time.
@media(max-width:480px){
14. DIY Photo Frames

Are you looking for a kid-friendly craft that doubles as a memory keeper? DIY photo frames let kids design frames for their favorite photos or artwork, so every moment feels special.
– Materials: Plain wooden or cardboard frames, paint, stickers, glitter. You can add glue and a small photo or drawing if you like.
– Steps:
1) Pick a frame and talk about colors your child loves.
2) Paint the frame with a base color. Let it dry for about 15 minutes.
3) Add stickers, glitter, or simple drawings. Press firmly so they stay on.
4) Glue on natural touches like a tiny twig or a dried flower for a rustic look.
5) Slip in a favorite photo or kids’ art. Set the frame up so the picture is easy to swap later.
6) Display your finished frames on a shelf or hang them in a sunny spot.
– Why this helps: It builds hand strength and focus. It sparks pride when kids see their photos on the wall. It also makes great gifts for family and friends.
– Tips:
– Use safe, washable paints to cut mess.
– Dry time helps avoid smudges. Plan a short break between steps.
– Keep a small container of water for brushes.
– FAQ and ideas:
– What frames work best? Flat frames are easiest for kids to decorate.
– How to keep glue from peeling? Let it dry fully before moving the frame.
– Quick display ideas: a kid-made photo wall or a rotating gallery.
Next steps: gather materials, pick a photo, and start decorating together. Your home, plus a cherished memory, in one simple craft.
15. Homemade Soap

You want a bath time project your kids will enjoy and you can do at home. Homemade soap makes bath time feel like a small, hands-on activity. You pick the scents, colors, and shapes, and your child learns by doing.
Materials
– Melt and pour soap base
– Soap molds
– Essential oils or kid-safe scents
– Food coloring
– Dried flowers or safe glitter
Here is why these tools help. The melt and pour base is easy to handle. Molds give little shapes your child can recognize. Colors and scents spark the senses. Decorations add a personal touch.
Steps
– Melt the base in a heat-safe bowl using a microwave in short bursts or a double boiler
– Stir in a few drops of scent and a tiny bit of color
– Pour into molds and add a tiny decoration if you like
– Let the soap harden completely
– Pop out the bars and use them at home or wrap them as gifts
Next, you can talk about why soap feels smooth and smells nice. Your child practices patience while it sets, and you both plan which shapes to try next.
Safety tip: an adult should handle heat, and choose mild scents and gentle colors. Start with small batches so it stays fun, simple, and safe.
@media(max-width:480px){
16. DIY Terrariums

Here is why a DIY terrarium works for kids. It turns a simple jar into a tiny living world. Your child watches a plant grow and learns how water, light, and soil work together. It blends science with art. Small hands, big ideas.
Materials:
– Clear jars or containers
– Small plants or succulents
– Pebbles or gravel
– Potting soil
– Decorative items like small figures or shells
What to do:
– Layer the bottom with pebbles for drainage.
– Add a thin layer of soil on top.
– Pick plants that fit your jar and place them gently.
– Tuck in moss for a soft, green look.
– Add your decorations to tell a story.
– Leave a little space for growth.
Care tips:
– Put the terrarium in bright, indirect light.
– Water sparingly; you may use a spray bottle.
– If you keep the lid on, water less often.
– Use easy plants like small succulents or moss.
– Check for soggy spots and remove excess moisture.
Why it helps:
– Kids take pride in a living project they care for.
– They learn plant needs, balance, and change over time.
– It creates a calm, creative space on a shelf or desk.
Next steps: pick a jar, choose a few plants, and build your tiny garden today.
Have fun, and share your tiny garden photos today.
@media(max-width:480px){
17. Cardboard Box Forts

Looking for a kid-friendly project that fits any home? Cardboard box forts give fun for a small cost. Here’s why this works. They spark play, teamwork, and a cozy space to read or relax.
Materials
– Cardboard boxes
– Tape
– Scissors (child-safe)
– Markers and stickers
You can transform plain boxes into a castle, a spaceship, or a hideout. Let your child pick the theme and begin the build.
How to build
– Open boxes and cut doorways or windows.
– Tape boxes together to make a larger room. Use color tape for a bold look.
– Let your kid decide where walls go. Keep the layout simple.
– Add a floor with a cardboard sheet or a rug for comfort.
Decoration and play
Markers and stickers bring the fort to life. Your child can draw a map, add windows, or paint a simple control panel. Then the fort can be a cozy reading nook.
Pro tip
Try different themes for fun: jungle base, rocket ship, or pirate fort. Reuse boxes for new adventures on rainy days.
Safety and tidy up
Check edges, keep scissors away from small hands, and plan a wrap-up time to take the fort apart or store it flat.
That’s it. Playtime in one afternoon.
@media(max-width:480px){
@media (max-width: 600px) {
.normal-quiz-iframe { min-height: 570px !important; height: 570px !important; }
}
18. DIY Candle Making

– Materials: Wax such as soy or beeswax, a wick, candle molds or clean jars, essential oils, and a little candle dye or food coloring
– A small pot for melting, a spoon or stirring stick, and a heat‑safe surface to work on
– Optional supplies: a thermometer, scissors to trim the wick, and protective paper towels
– What you’ll do: You mix scent and color, pour into a mold, and let it set
– Here is why it works: wax holds scent and light, so you can create a cozy glow at home
– Step by step: set up your space, wash your hands, and keep hair away from the flame
– Steps:
1) Melt the wax slowly in a double boiler on low heat
2) Stir in essential oils and a few drops of color until you like the look and smell
3) Position the wick in the center of your mold or jar
4) Pour the warm wax carefully, keeping the wick upright
5) Let the candle cool completely, then trim the wick to about a quarter inch
– Tips: Layer colors for stripes or a gradient by letting each layer set before adding the next
– Start with a small amount of oil to keep scents gentle
– If the color pools, pour a thin layer first, then fill the rest after it hardens
– Safety and uses: Always have an adult present, avoid touching hot wax, and never leave melting wax unattended
– When done, use the candles as gifts or as a warm decor piece for your room
– Next steps: try a three‑color candle or a coconut‑scent blend for a new twist
@media(max-width:480px){
19. DIY Suncatchers
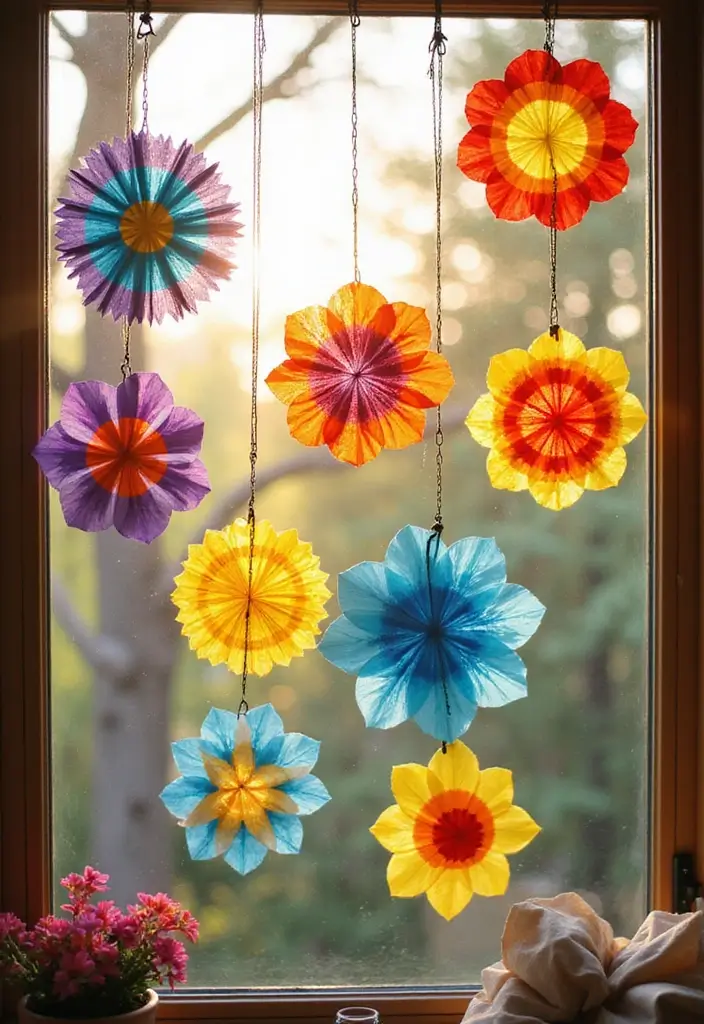
Want a quick, bright kids craft that uses scraps and brings sunshine indoors? Try DIY suncatchers.
– Materials: Plastic lids or clear contact paper, tissue paper, scissors
Cut tissue paper into small shapes and colors. Lay the shapes on a plastic lid or peel the backing from contact paper. If you use lids, cover with another lid or a clear sheet so the colors stay put. If you use contact paper, press the tissue onto the sticky side and seal with another sheet.
– Steps:
1) Pick a sunny window. 2) Arrange shapes into a pattern you like. 3) Press flat and secure with tape or a dab of glue. 4) Hang with string or a ribbon.
Light passes through the tissue. You’ll see bright colors dance on walls and floors. The look shifts as the sun moves, giving you new patterns without extra work.
– Design ideas:
Try a rainbow arc, a smiley, or fall leaves. Mix warm and cool tones for a soft glow. Overlap pieces for a stained-glass feel.
– Tips and limits:
Small shapes fit lids. Thin tissue lets more light through. Put suncatchers where kids can reach them safely. They fade in sun, so refresh them.
Next steps: Save lids and start today. It’s a simple way to explore color.
20. DIY Bookmarks
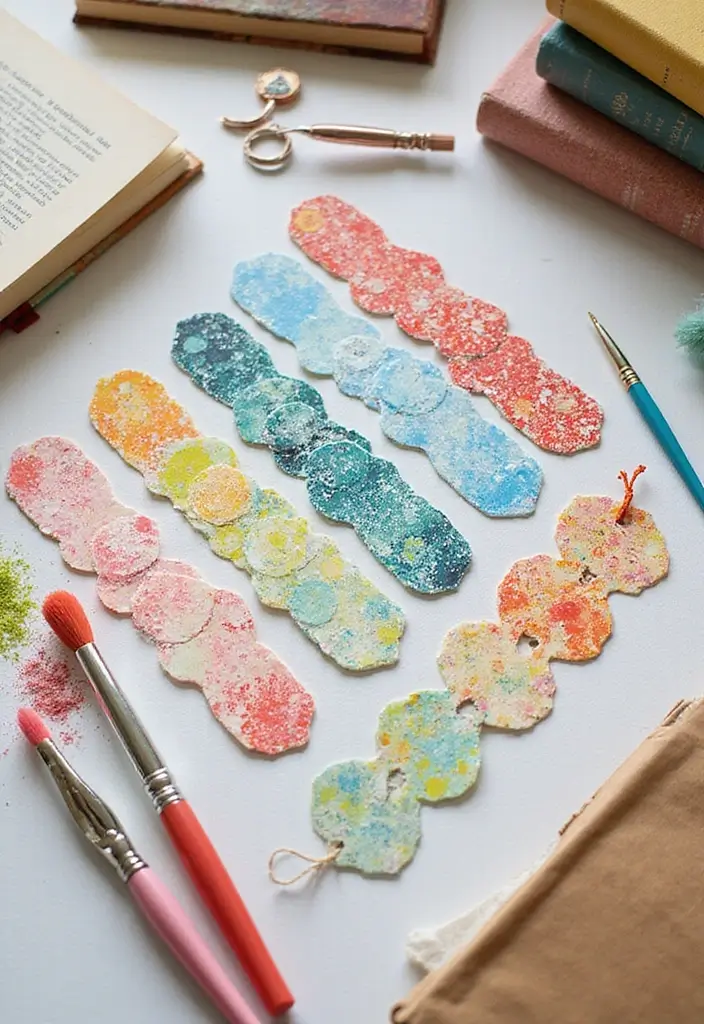
Struggling to keep reading fun for your kids? DIY bookmarks turn a small item into a big joy. They fit any reading habit and spark a bit of creative flow.
Materials: Cardstock or old greeting cards, markers, stickers, laminating sheets (optional)
– Cut the cardstock into shapes your child loves. Stars, hearts, animals, or simple rectangles all work.
– Let kids color and decorate with markers and stickers. They can add favorite lines or quotes from books they’ve read.
– If you have laminating sheets, seal the finished bookmarks to make them sturdier. Laminated edges last longer and resist wrinkles.
– If you want a finishing touch, punch a tiny hole at the top and loop a short piece of string or yarn for a little tassel. This step is optional but adds flair.
Why this helps you and your child
– It builds small muscle control as they cut, color, and decorate.
– It gives kids a way to show their personality in a bookish accessory.
– It creates a handy gift idea for friends and family who love to read.
Next steps
– Make a few bookmarks at once to stock up for back-to-school or library visits.
– Swap designs with a friend to share ideas and keep the craft fresh.
– Display a mini gallery of your bookmarks on a corkboard or a reading corner shelf.
With these DIY bookmarks, reading becomes a personalized, shareable habit you can build together.
21. Salt Dough Ornaments
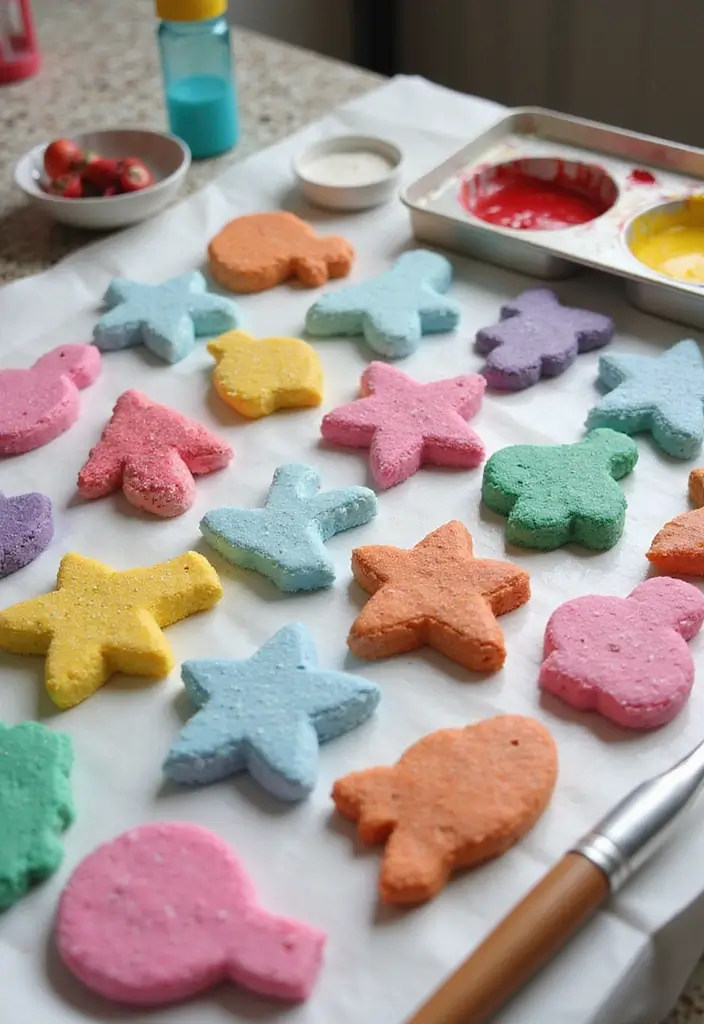
Salt dough ornaments are a simple, satisfying project you can do at home. They’re cheap, forgiving, and fun for kids. You mix, roll, and cut with everyday tools. The result is a real keepsake you can treasure for years.
Materials:
– Flour
– Salt
– Water
– Cookie cutters
– Paint
– String or ribbon for hanging
How to make them
– Mix two cups flour, one cup salt, and one cup water until the dough holds together.
– Knead it a few minutes. If it sticks, add a little flour; if it’s too dry, a touch of water helps.
– Roll the dough to about a quarter inch thick. Use cookie cutters to carve shapes.
– Punch a hole near the top for a ribbon before baking.
– Bake on a sheet at a gentle heat until the shapes feel hard. Let them cool completely.
Finish and display
– Paint with kid-safe paints. Add names, dates, or simple patterns.
– Let the paint dry. For extra protection, seal lightly with a clear coat.
Skills and uses
– Kids learn measuring and mixing as they work.
– They practice patience while the pieces dry.
– These ornaments make thoughtful gifts or festive home decor.
Next steps: thread a ribbon, hang them on a tree, or tuck a few in a gift box for a personal touch.
@media(max-width:480px){
22. DIY Scrapbook
Want a project that helps kids save memories and stay neat? A DIY scrapbook does both.
Materials: Blank scrapbook or sturdy cardstock, photos, stickers, markers, glue sticks, scissors.
Here is why you should try it: kids pick what matters, tell a simple story, and see a small book grow.
– Gather memories: ask your child to choose photos, ticket stubs, drawings, and keepsakes from a day out.
– Pick a theme: vacations, birthdays, or a month of moments to keep pages tidy.
– Plan a page: decide what goes on the page, then leave space for a caption.
– Create and decorate: glue items, draw borders, add stickers, and write a short note.
– Add notes: include details like who, where, and when.
– Protect pages: slide each page into a protector or use a pocket.
Next steps: start with one page today. Set aside 15 minutes, then add more pages as you collect memories.
Tips:
– Write a sentence about the moment on each page.
– Take a quick photo of the page for a digital copy.
– Store the scrapbook in a cool, dry place.
This project builds organization and storytelling. It also strengthens patience and invites family time. It’s beginner friendly and easy to adapt.
@media(max-width:480px){
23. DIY Greeting Cards

Want a quick, meaningful craft that kids can finish in one sitting? DIY greeting cards fit. They suit birthdays, holidays, or simply saying hello, and they spread kindness.
Materials
– Cardstock or thick paper
– Markers or colored pencils
– Stickers, stamps, or washi tape
– Ribbons, glue, and any favorite decorations
How to make
1) Fold a sheet of cardstock to create a card.
2) Let your child draw a scene or write a message on the front.
3) Add stickers, stamps, or tape for color and texture.
4) Glue on ribbons or small decorations for a 3D touch.
5) Write a warm note inside and sign it at the bottom.
Why it helps
Here is why this matters for kids. Cards build handwriting skills and neat thinking. They boost fine motor skills as little hands cut, glue, and press. Personal messages grow empathy and bring smiles to others.
Smart ideas to try
– Make a batch for a class, family, or neighbors.
– Try themes: birthday, thank you, get well, or holiday cards.
– Use a grid layout for a clean look, or pour extra color into a doodle card.
Tips
– Use scraps of paper to limit mess.
– Let kids choose color combos they love.
– Keep a small card rack for easy gifting.
Creative twists
– Attach a small photo on the front.
– Add a handprint or footprint for a playful touch.
– Make a mini collage with magazine scraps for a fresh look.
Time and steps
– A simple card takes about 15–25 minutes.
– Set up a tray for glue and glitter to cut mess.
– Save extra decorations for future cards.
@media(max-width:480px){
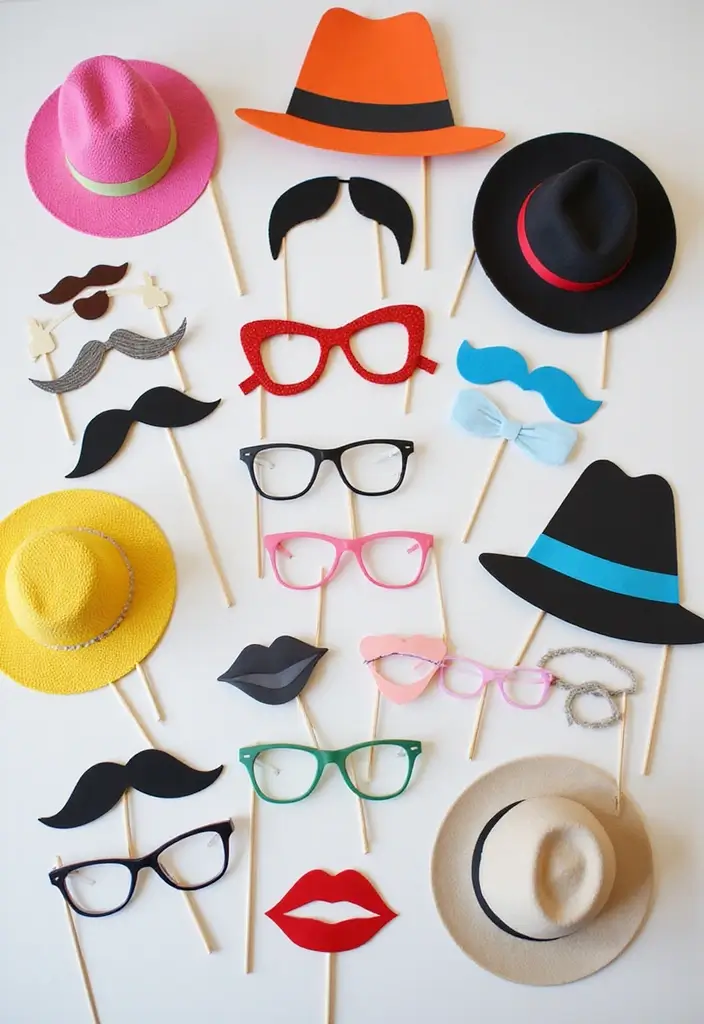
24. DIY Photo Booth Props
Want a playful activity for parties or family photos? DIY photo booth props are a simple, fun choice you can make with your kids at home. Here is why you should try them today.
Materials:
– Cardboard from scraps or a small box
– Markers, crayons, or paints
– Scissors (adult supervision for cutting)
– Sticks or sturdy straws to hold the props
– Tape or glue
– Optional: stickers, colored tape, glitter, string
How to make them
– Cut easy shapes from the cardboard. Think funny hats, oversized glasses, silly mustaches, and goofy ears.
– Decorate the shapes with bright colors. Let kids draw faces, patterns, or write names.
– Attach a stick or straw to the back with tape or glue. Make sure the fit is secure so it won’t spill during a photo.
– Try on the props as a quick test. Adjust size if a piece feels wobbly.
Here is why this works: kids get creative control, you get ready-made props, and photos instantly feel livelier. Next steps are quick and simple.
Set up a mini photo booth at home
– Pick a bright spot or hang a simple backdrop so photos pop.
– Put the props on a small table within easy reach. A basket helps keep things neat.
– Use a phone or camera at eye level. A phone on a few books works great.
– Add good lighting from a window or a lamp. Soft light makes smiles shine.
Next, snap away. Plan a few quick prompts like “funny face,” “silly hat,” or “glasses pose.” Kids will love trying different looks, and you’ll get goofy, memorable pictures.
Tips for a smooth setup
– Age and safety: younger kids may need help with cutting. Keep corners rounded and avoid sharp edges.
– Reuse and store: flatten the props after use and store in a labeled box for next time.
– Quick cleanup: wipe surfaces if paint or marker rubbed off. Have a damp cloth handy.
Common questions you might have: How long does this take? Usually 30 to 60 minutes from start to finish. Will they last? Cardboard props hold up for a few parties if handled gently. Can you scale it? Yes. Make more designs or add seasonal shapes for holidays.
Next steps: gather materials, brainstorm prop ideas, and set up a cozy home photo booth. You’ll create a fun activity and capture each kid’s playful energy in photos.
@media(max-width:480px){
25. DIY Music Shakers
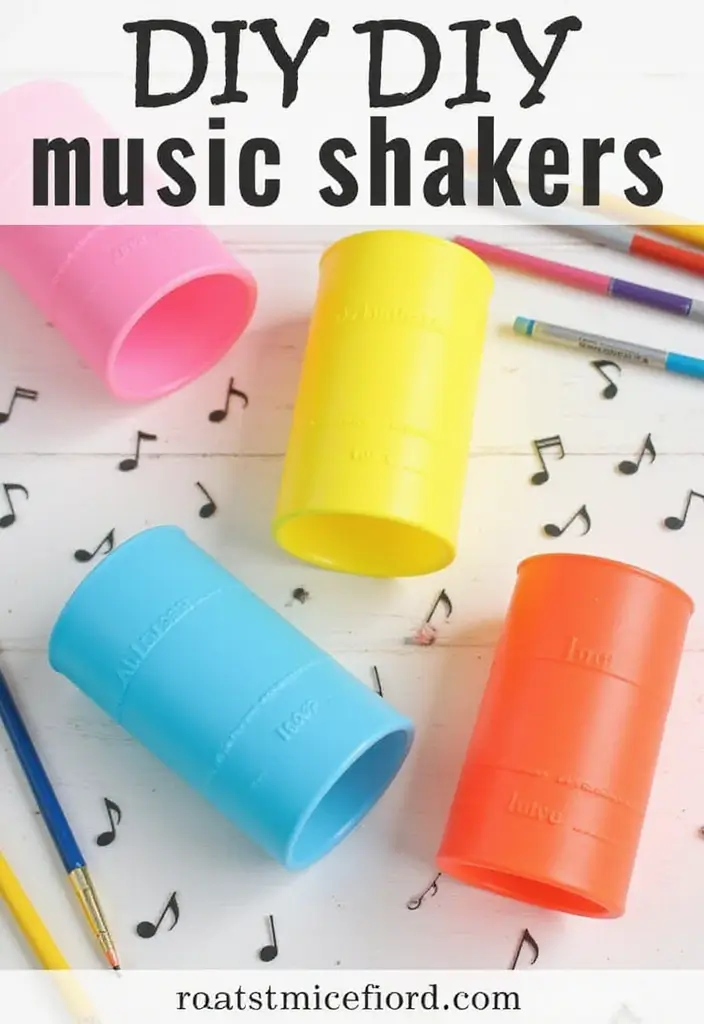
Here is why DIY music shakers are worth a try. They give your child a simple way to hear, feel, and move to sound.
– Materials: Empty bottles, rice or beans, tape. Optional extras: markers or stickers to decorate.
– What you do: Fill each bottle with a scoop of rice or beans. Cap and seal it tight with tape. Add another layer of tape so the cap stays on during kid shakes. Shake and listen. Vary the amount inside to get louder or softer sounds.
– Make it your own: Let kids decorate the outside with paint, markers, or stickers. They can mix colors, draw faces, or add patterns. A shaker with bright colors is easy to spot in a pile.
– How to use: Hold the bottle by the neck and shake for a quick beat. Use it during dance time, songs, or story breaks. Bump up the fun by tapping a beat on a drum or clapping along.
– Safety and tips: Check the lid is tight. Use dry ingredients to avoid soggy caps. Wash hands after crafting. Clean up with a cloth after play.
Next steps: Try beads, pasta, or sand for new sounds. Compare outcomes and pick the best shaker for your next jam. Record your notes in a simple log. Note which fillings you liked best and why.
@media(max-width:480px){
26. DIY Miniature Gardens
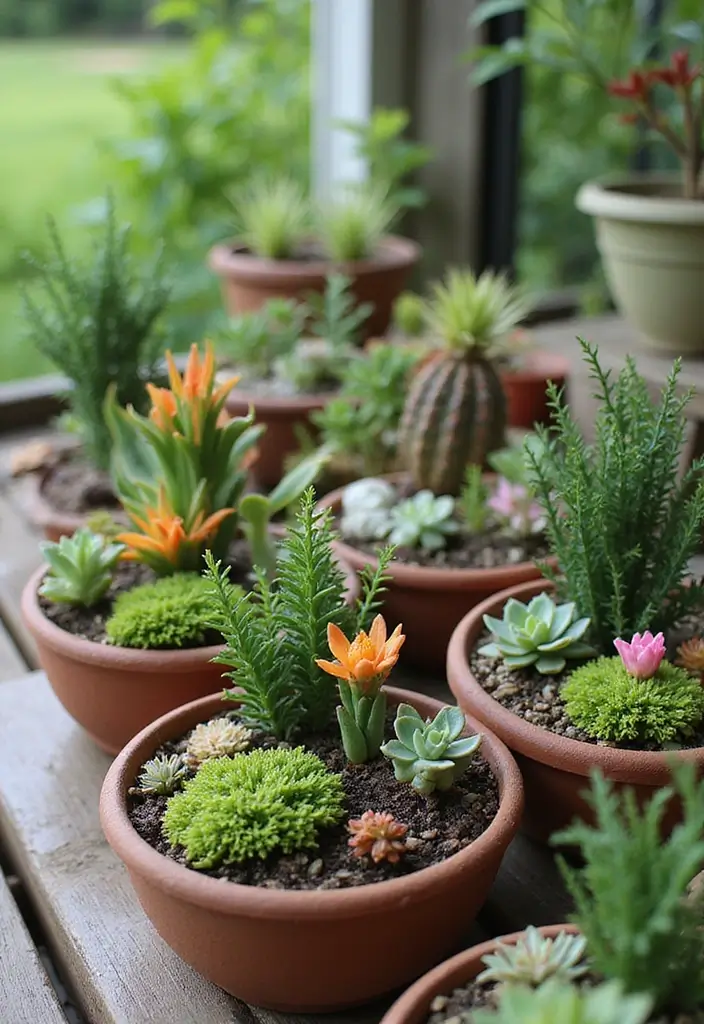
Here is why you should try a DIY miniature garden with kids. It blends crafting with a tiny bit of gardening. It feels calm and exciting to see tiny life grow. Kids love to watch colors and leaves change as days pass.
Materials you’ll need
– Small containers or trays
– Potting soil or fresh soil
– Tiny plants, cuttings, or seeds
– Decorative stones, shells, or mini figures
– A small spray bottle or watering cup
Here is how to set it up
1) Choose a container that fits your space.
2) Add a thin layer of soil and pat it flat.
3) Place seeds or tiny plants in the soil.
4) Decorate with stones, figurines, or tiny furniture to tell a story.
5) Water lightly with the spray bottle so the soil stays damp, not soggy.
What you’ll learn and enjoy
– Responsibility: kids care for living things and stick to a watering routine.
– Observation: they notice growth, leaves, and color changes.
– Creativity: themes make the garden a living scene you can update.
Make it your own
– Pick a theme like dinosaurs, fairies, or underwater scenes.
– Move it to a sunny, safe spot and watch it change.
Next steps
– Try a new theme next weekend.
– Share photos with family to celebrate growth.
@media(max-width:480px){
27. DIY Magic Wands

You want a simple craft that sparks imagination and fits into a busy day. DIY magic wands give kids a tool for imaginative play and storytelling. This project uses common supplies you likely have at home. Here is why it helps kids grow as they design, decorate, and pretend. It is a small, doable activity with big creative payoff.
– Materials
– Sticks, ribbons, glitter, glue (non-toxic)
– Optional extras: beads, paint, tape
– Steps
– Step 1: Pick a sturdy stick that fits in your hand, and make sure it feels smooth and safe to touch.
– Step 2: Tie a bright ribbon around the top to form a comfy grip that spins and dances as you move.
– Step 3: Dab a touch of glue on the wand and sprinkle glitter, then shake off the excess so the sparkle sticks without a huge mess.
– Step 4: Add a bead or small charm if you have one, and let the wand dry completely in a sunny spot.
– Safety tips
– Choose non-toxic glue and washable glitter to keep cleanup easy.
– Let each wand dry fully before you start your pretend adventures.
– Play ideas
– Use the wand to cast pretend spells during story time and bedtime reads.
– Lead a mini wand parade at a family gathering or party.
– Bring a book to life by acting out a scene with your wand as a prop.
Organize a small wand party so everyone can share their creations. It ties crafts to reading and adds a dash of magic to any home.
@media(max-width:480px){
28. DIY Colorful Lanterns

You want a simple craft that lights up your evenings and keeps everyone safe. DIY colorful lanterns do just that. They turn plain jars into glowing art you can share at home or for a party.
Materials
– Clean glass jars
– Tissue paper in bright colors
– Craft glue or Mod Podge
– Battery-operated tea lights or LED candles
Steps
1) Wash and dry the jars.
2) Cut tissue paper into small pieces.
3) Brush glue on the jar and press tissue pieces on top. Let colors overlap to make a rainbow.
4) Add a light inside. If you want a stronger glow, seal the paper with a thin coat of glue and let it dry.
5) Use more tissue on the outside to create patterns, then place the LED light inside and switch it on.
Tips
– Try color themes: sunset oranges, ocean blues, or party pinks.
– Use LED lights to stay safe around tissue.
– For extra shine, add a second layer of tissue or a clear sealant after it dries.
Why do this
Kids learn color mixes while making a useful decor piece. These lanterns work indoors or on a calm outdoor night. They’re quick, inexpensive, and reusable.
Keep a small box of extra tissue scraps for quick touch ups.
@media(max-width:480px){
29. DIY Painted Rocks for Garden Markers
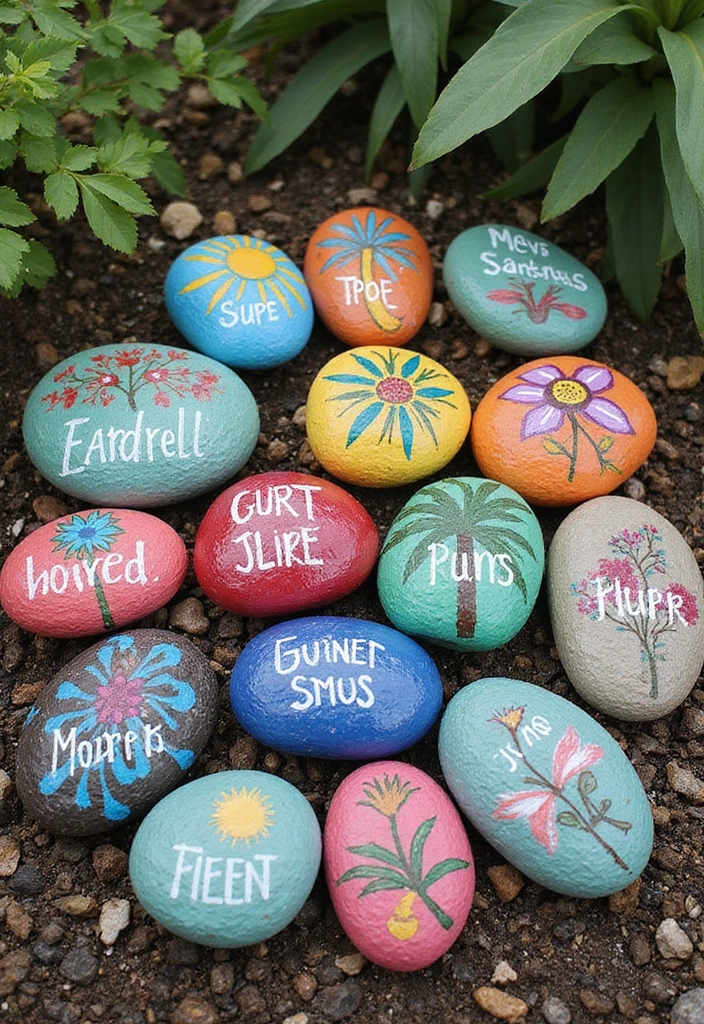
Want an easy way to label your garden and spark a little creativity at the same time? DIY painted rocks for garden markers fit the bill. They stay put, are kid friendly, and add cheerful color to plant beds.
Materials
– Smooth rocks
– Non-toxic acrylic paint
– Small brushes
– Clear sealant
– Optional: a fine liner for neat lettering
Here is why these basics work: smooth surfaces grip paint better, and non-toxic supplies protect kids, soil, and pollinators. Choose colors that stand out against the rock color so labels stay readable from a distance.
Steps
1) Wash rocks and let them dry completely. A clean surface helps paint cling.
2) Plan your design. Decide if you want plant names or simple plant icons.
3) Paint a base color and let it dry. A bold background helps letters pop.
4) Add names or simple drawings. Keep letters large and clear. Use a darker color for contrast.
5) Seal the rock. Apply one or two coats and let it dry fully before placing in the garden.
Next steps: place markers near herbs, tomatoes, or flowers. A row of rocks guides kids as they water and weed, and the markers fend off guesswork about what’s growing where. For a quick change, repaint any marker as plants move through the season.
@media(max-width:480px){
30. DIY Snow Globes

You want a simple craft kids can finish in one sitting. DIY snow globes fit. They spark imagination and become a cute keepsake or gift.
Here is why this works for you. They use common supplies and clean up fast. You can do it with one adult and one kid or a small group.
Materials:
– Mason jars with lids
– Small figures or plastic toys
– Water
– Glitter
– Glycerin (optional; helps the snow fall slowly)
Steps:
1) Clean the jar and dry it well. A dry surface helps the seal stay tight.
2) Glue the figure inside the lid. Let it dry so it looks like it stands in snow.
3) Fill the jar almost to the top with water and add glitter.
4) If you have glycerin, add a few drops to slow the glitter.
5) Screw the lid on tight. Wipe the rim and seal with tape for protection.
6) Tighten and shake. Watch the glitter swirl into a winter scene.
Tips:
– Personalize with themes like holidays, seasons, or favorite characters.
– Let kids choose colors and figures to make it theirs.
– Use a clear sealant so the globe lasts longer.
Next steps: display on a shelf, table, or desk. These make nice gifts and simple decor.
@media(max-width:480px){
Conclusion
Crafting with children is not just about keeping them entertained; it’s a powerful way to encourage creativity, confidence, and fine motor skills.
These 30 simple kids crafts DIY projects offer a variety of fun options that can be easily done at home using materials readily available. Whether it’s turning recyclables into art or creating homemade gifts, each craft is a step into a world of imagination and learning.
So gather up those supplies and let the crafting begin! You’ll not only create wonderful memories but also wonderful treasures to cherish for years to come.
Note: We aim to provide accurate product links, but some may occasionally expire or become unavailable. If this happens, please search directly on Amazon for the product or a suitable alternative.
This post contains Amazon affiliate links, meaning I may earn a small commission if you purchase through my links, at no extra cost to you.
Related Topics
simple kids crafts
eco-friendly DIY
easy crafts for kids
budget-friendly projects
fun DIY activities
creative kids crafts
quick crafts
homemade art
nature-inspired crafts
sensory activities
recycled materials
hands-on learning