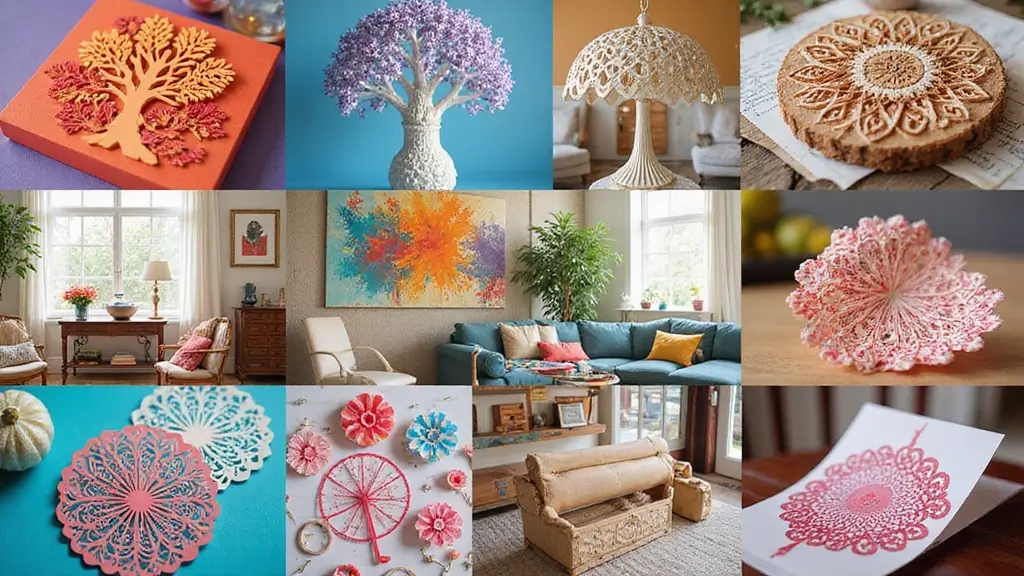
Why I made this post I wanted a calm, hands-on way to make art at home. Paper cutting lets you shape light and shadow with just scissors and paper. It feels slow and satisfying. A small cut, a delicate curve, and you see a scene emerge. I pulled this collection of 27 paper cutting crafts to spark artistic inspiration and give you doable projects for busy days.
Who it’s for If you’re into DIY projects for home decor, gifts, or classroom activities, this one’s for you. You don’t need fancy tools or a big budget. You just need patience, a flat surface, and a spare hour or two. That makes these ideas friendly for beginners and satisfying for seasoned crafters.
What you’ll get 27 ideas that cover wall art, cards, garlands, and gift tags. Each idea comes with simple steps, a basic materials list, and tips to switch colors or sizes. You’ll learn easy techniques like negative space, layered silhouettes, and shadow-friendly mounting. It will feel like a mini workshop you can run at home.
How to approach Start with easy shapes like leaves, stars, or hearts. Trace or draw the outline, then cut slowly with a sharp blade on a cutting mat. Test color combos on scrap paper before committing. Use white space to your advantage. Layer paper on a contrasting background to add depth. Let each piece dry before you mount or string it.
Materials and uses You can use simple colored or white paper, kraft stock, a sharp pair of scissors, a craft knife, cutting mat, glue, and string. These crafts work for greeting cards, wall hangings, and gift details. They fit into seasonal decor and everyday moments.
Next steps Pick one idea tonight and start. Gather a few sheets of paper and a glue stick, a small cutting mat, and a tool you like. If you try a piece, share a photo in the comments or tag us. I love seeing how different colors or sizes play out. This is your chance to create something uniquely yours and let it spark more DIY ideas.
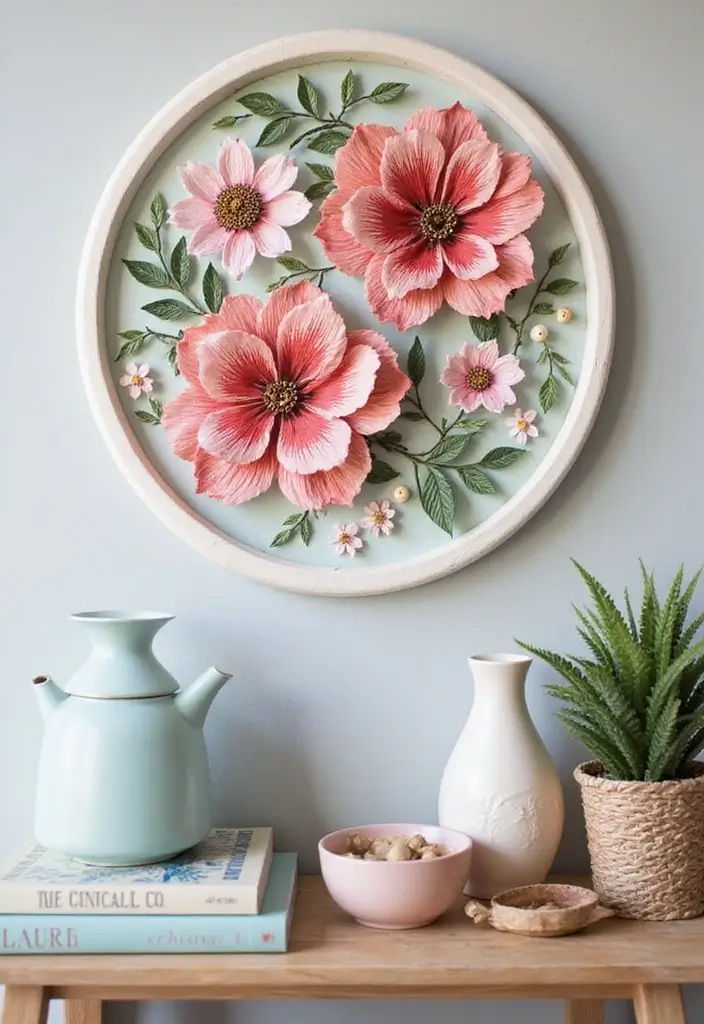
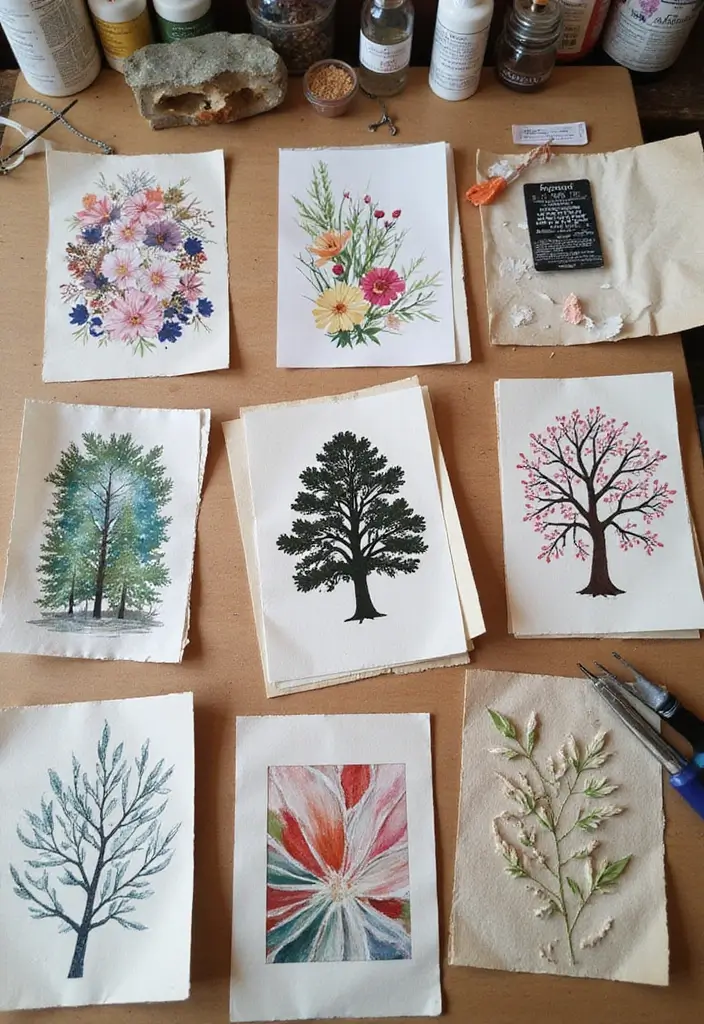
1. Floral Silhouettes for Wall Art

You want wall art that pops but is easy to make. Floral silhouettes fit that goal. Here is how to do it simply.
– Choose one or two flowers to keep the shape clear and striking, not crowded.
– Cut the outline from sturdy paper with a sharp craft knife for clean lines.
– Layer different colors of paper to add depth, placing lighter sheets behind darker ones.
– Place the silhouette on a bold backdrop or frame it for a crisp finish.
– Work in scales to control mood, with large blooms making a bold statement.
– Large blooms give drama; tiny ones read as delicate accents.
– Try textured or patterned papers to add extra interest and touch.
– Mount the cut on a strong backing and frame for a polished look.
– This project makes a thoughtful gift for friends who love art.
– Choose color schemes that fit your space, like navy and white.
– Use a cutting mat to protect surfaces and keep blades sharp longer.
– Back the cut with a light board so shapes glow against the page.
– Seal edges with glue so the silhouette stays flat and tidy.
– Safety first: cut away from you and swap dull blades.
– Frame the piece or mount it in a shallow shadow box.
@media(max-width:480px){
2. Intricate Mandala Designs
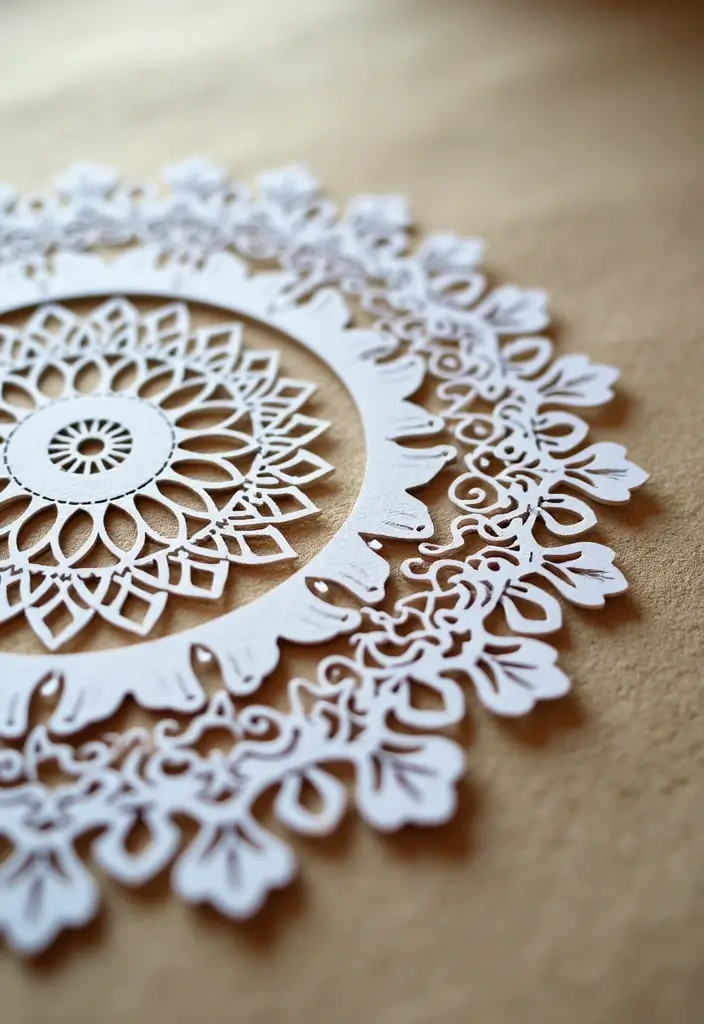
If you want art that calms your mind and brightens a room, try mandala designs. These round patterns pull the eye in and slow your breath. You can layer colors to boost detail.
Here is why mandalas fit this craft. They guide your hands and set a clear path.
– Start simple. Draw a clean circle with a compass and a light pencil line. Place a tiny center dot to guide symmetry.
– Build rings. Add petals, dots, and small shapes in each ring. Keep spacing even and mirror segments for balance.
– Use stencils. A stencil helps keep straight edges and precise curves. If you lack one, fold the paper to create a quick mirror.
– Color in layers. Start inside with cool tones, then warmer shades outward. A bright center point draws the eye.
– Cut with care. Use a sharp blade on a cutting mat. Cut slowly and let the edge stay crisp.
– Frame it. Mount the finished mandala on a mat and frame it. It becomes a quiet focal point.
– Tools you need. Paper, pencil, compass, ruler and protractor, scissors or knife, cutting mat, and colors.
Next steps: practice a little each day. You will notice steadier hands and a calmer space.
Tips for success: keep the scale small at first, then grow the pattern. Test your cuts on scrap paper to learn color blends.
End note: this paper art blends focus and beauty and fits small spaces or busy walls.
@media(max-width:480px){
3. Seasonal Decor with Paper Leaves

You want a quick, budget-friendly way to bring the season into your home. Paper leaves fit the bill. They’re light, easy to store, and you can swap them with any season.
What you’ll need
– colored craft paper or scrap magazines
– sharp scissors and a ruler
– string or twine
– glue or tape
– a shadow box or simple frame
– optional fairy lights for a soft glow
Ways to use them
– Garlands: cut leaves in various sizes and colors. For fall, pick browns, oranges, and golds. Spring calls for greens, pinks, and yellows. String them with even gaps.
– Table accents: lay a bed of leaves in a shallow tray. Add a small candle or a tiny plant for life.
– Wall art: press leaves in a frame or stack them in a shadow box with translucent layers to add depth.
How to make it quick
1) choose colors
2) cut 8–12 leaf shapes
3) attach with glue or string
4) place where people will notice
Care and storage
Keep leaves flat, away from moisture. If you want longer life, seal with a spray and store flat between seasons.
This simple craft gives you a visible seasonal touch without a big spend. It’s easy, fun, and ready in an afternoon.
@media(max-width:480px){
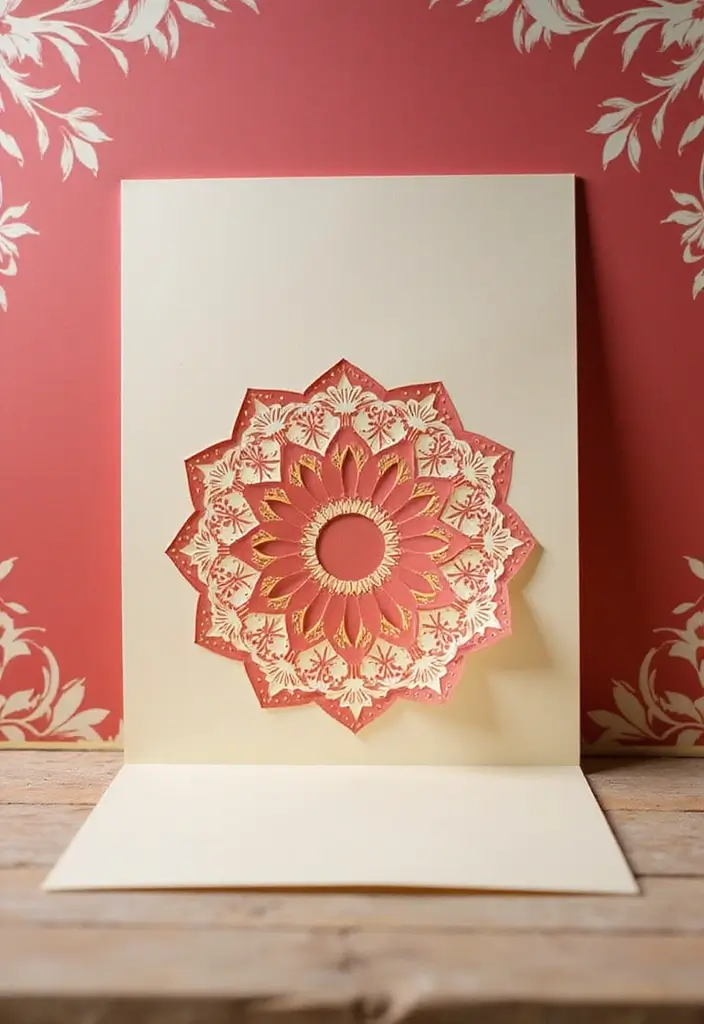
4. Unique Greeting Cards
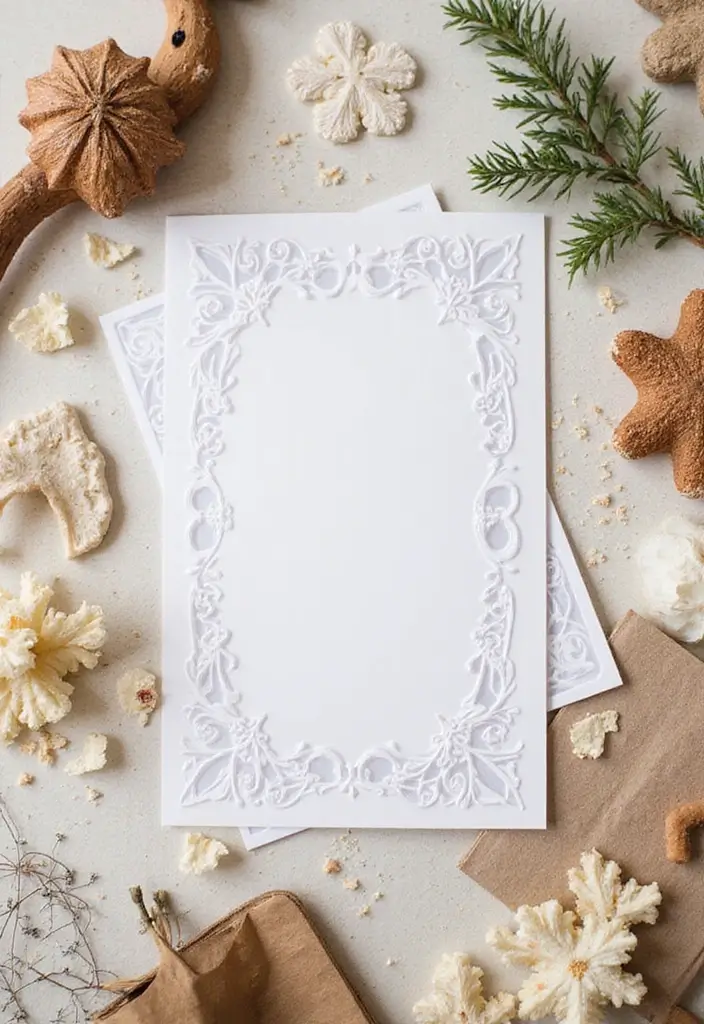
Why choose handmade greeting cards
You want a card that fits your mood and style. Handmade paper cutting lets you turn a plain greeting into a small piece of art. With clean cuts and smart layering, you share feeling in a fresh, personal way.
What you need
– sturdy card stock in a color you love
– patterned paper for texture
– vellum for soft overlays
– scissors and a craft knife
– cutting mat
– glue or double-sided tape
– small punch or edge scissors
– fine-liner pen for tiny details
How to do it
1) Pick a theme and color set.
2) Sketch a simple cut on lighter paper.
3) Cut carefully with a steady hand.
4) Layer pieces on the card base to build depth.
5) Add ink lines or tiny accents.
Personal touch and uses
Add the recipient’s name or a short message. Use colors tied to a memory or their favorite motif. These cards work for birthdays, holidays, or just because. They fit in a standard envelope and feel like a small gift. Plus, you can keep the designs as keepsakes.
Simple tips
Here is why this works. Start with thick stock so layers stay strong. Use a mix of textures for depth. Next steps: practice on scrap, keep blades sharp, and store patterns flat.
@media(max-width:480px){
5. Shadow Boxes with Silhouettes
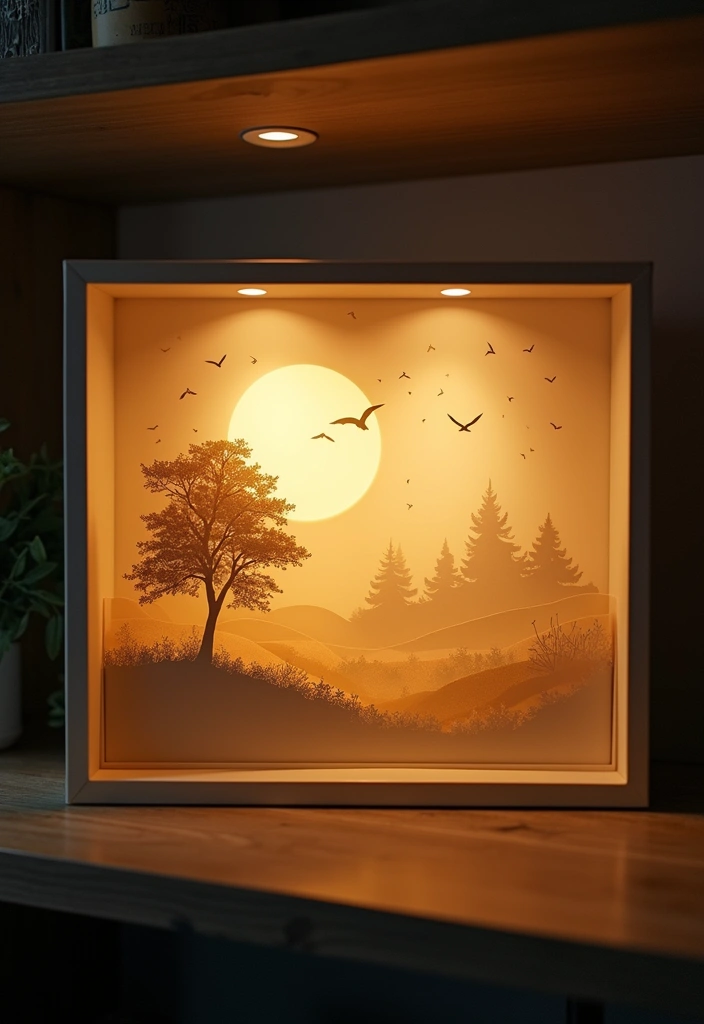
Shadow Boxes with Silhouettes
If you want wall art that feels alive, shadow boxes are a smart choice. You create a layered scene by cutting paper silhouettes and placing them inside a shallow frame. The result looks three dimensional, even in a small box.
Here is why this method works. Light moves through the layers and makes the shapes stand out without heavy color. It fits many rooms and styles and stays fresh with little work.
Here is how to make it easy
– Choose papers with different colors and textures to add depth.
– Cut clean silhouettes and stack layers using tiny foam dots to leave space for light.
– Use a soft backlight, like a small LED strip or clip-on light, to bring out the shadows.
– Pick themes that reflect your interests or memories for a personal touch.
– Try translucent vellum for soft edges.
– Use a glass shadow box to protect the pieces and keep dust away.
Next steps and quick tips. Work in a bright, clean area so you can see tiny details. Place the box where the light hits in the evening for best glow. Dust lightly with a soft brush and swap in new silhouettes to refresh the look.
6. Creative Paper Stencils for DIY Projects
If you want clean patterns on walls, fabric, or wood, try paper stencils. Cut a design into sturdy paper and you gain a reusable guide.
– What you need: heavy card stock or thin cardboard, a sharp craft knife, tape, and the paint or ink you plan to use.
– How to make: draw a bold shape. Cut it out with care. Test on scrap first. Big solid shapes work best for clear edges.
– How to use: tape the stencil to the surface. Apply color in light layers. Dab or pounce, not brush hard. Keep the stencil flat as you work. Peel away slowly while the paint is still tacky to avoid chips.
– What to expect: you can reuse the stencil several times if you wash it soon after painting.
– Care tips: rinse the stencil after use. Let it dry flat. Store flat to avoid bends.
– Surface ideas: try walls for a bold pattern. Use fabric for a pillow. A wooden tray looks nice with a border. Glass jars can get simple accents.
With this approach you can change a room in minutes. Start with one bold pattern and add a few more later for a cohesive look.
@media(max-width:480px){
7. Personalized Name Signs
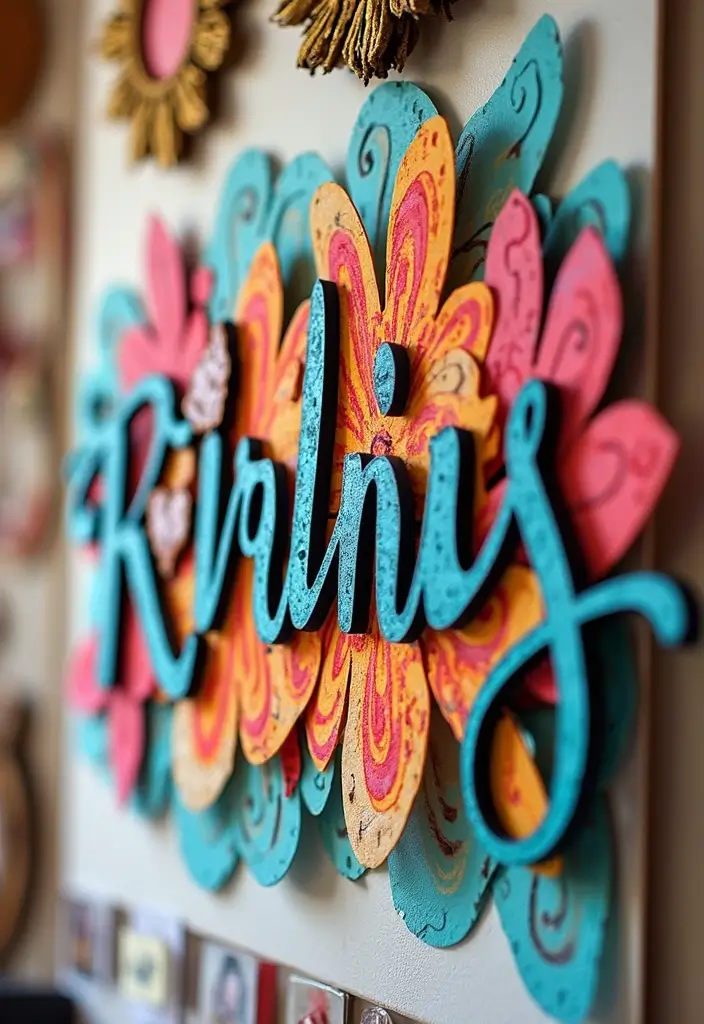
You want a name sign for a kid’s room. A paper cutting sign can do that. It’s simple and special.
What you’ll need:
– colored paper in two colors
– a backing sheet, like white card stock
– sharp scissors or a craft knife
– a cutting mat
– glue or tape
– a frame or board
Here is how to make it:
– Choose a name in a clear, block font. Easy letters are your friend.
– Cut the letters from your chosen paper. Take your time at the edges.
– Layer the pieces. Add two background colors for depth.
– Add small symbols showing what your child loves. A star, a heart, or a tiny animal works well.
– Mount and frame the sign. A simple frame makes the piece feel finished.
Tips to try today:
– Readable letters beat fancy scripts for kids’ rooms.
– High contrast colors help the name stand out.
– A darker shadow behind the letters can look slick.
– Measure your space so the sign fits well.
Why it matters:
– It gives a personal touch to bedrooms and nurseries.
– It makes a thoughtful gift for new parents.
Next steps:
– Sketch a few color combos.
– Practice on scrap paper first.
– Cut the final signs and frame them.
@media(max-width:480px){
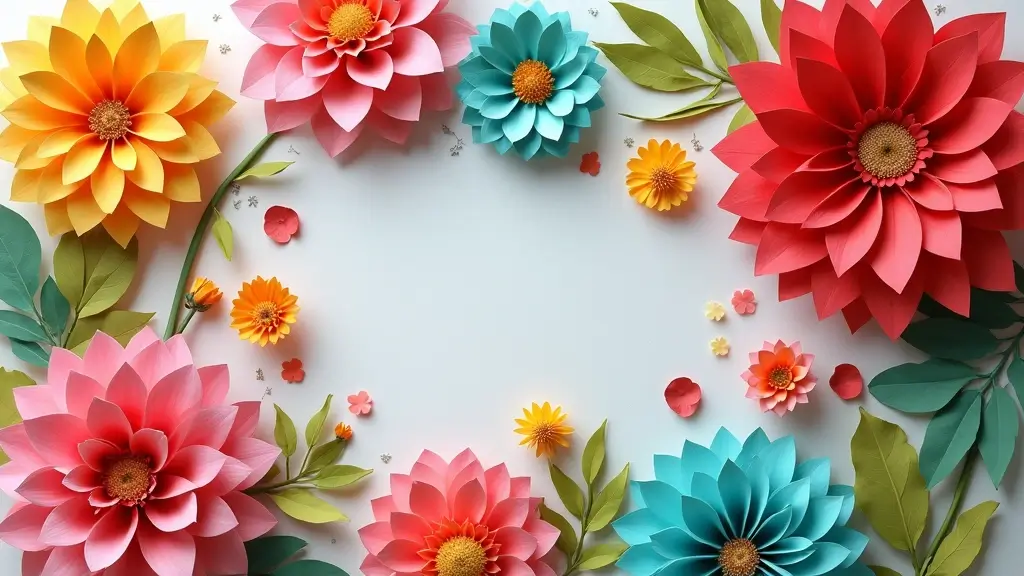
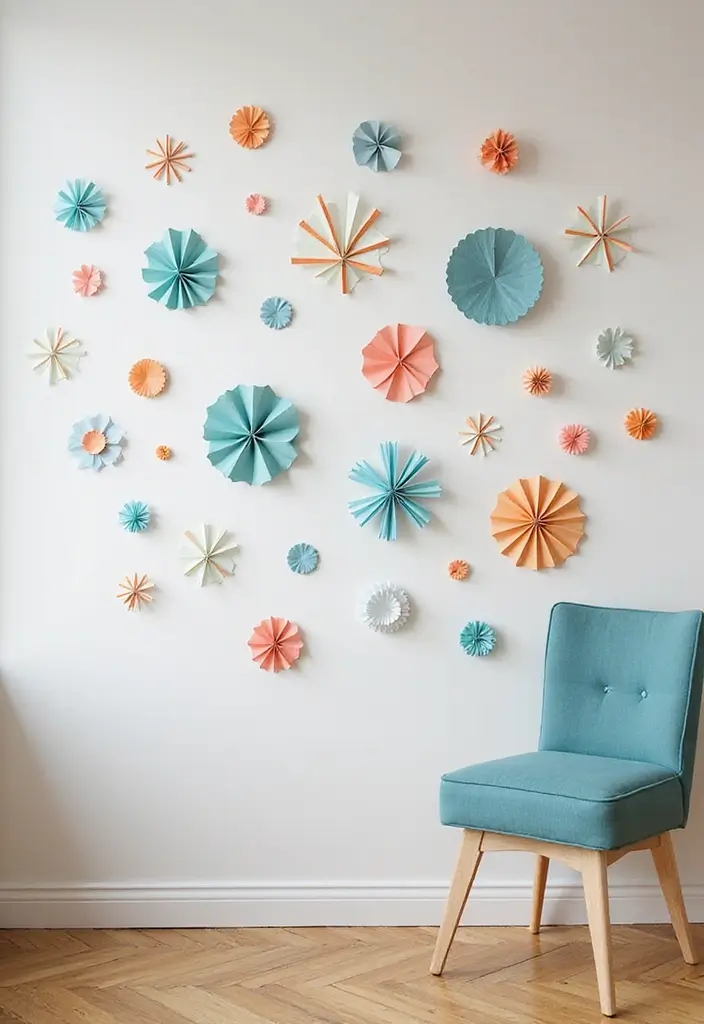
8. 3D Paper Flowers
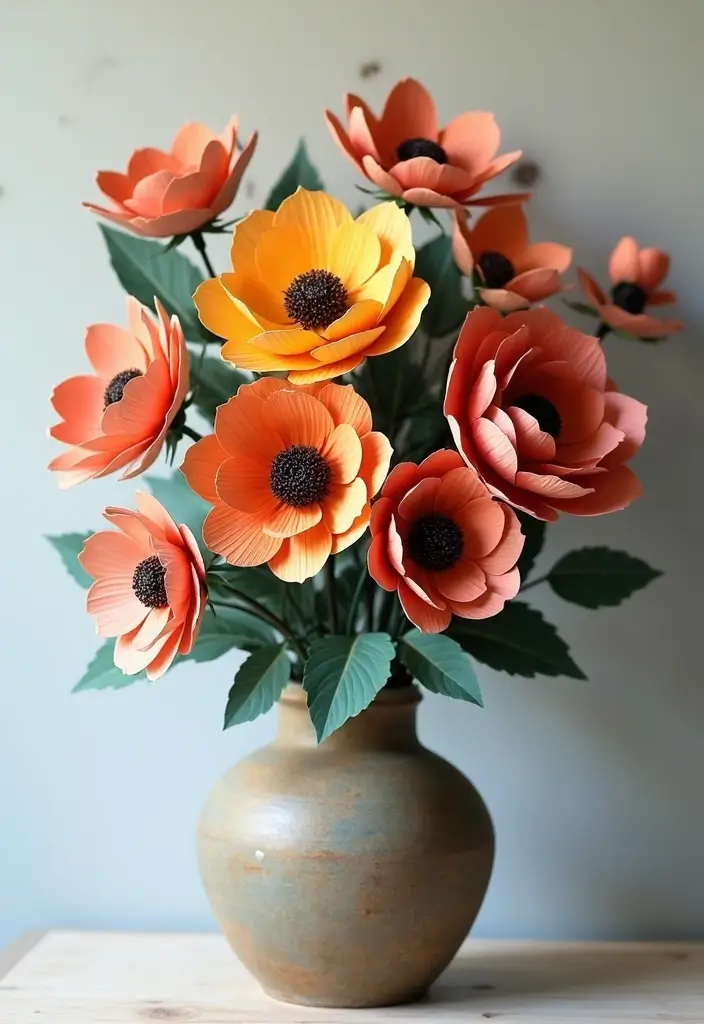
You want decor that stays fresh without daily care. 3D paper flowers give you a bright touch that lasts and adapts to any room.
Materials
– Cardstock or heavy paper for sturdy petals.
– Scissors, glue, and a light pencil for shaping.
– Optional: floral wire or a thin stick for stems.
Crafting tips
– Use cardstock for sturdier petals.
– Layer different sizes and colors for a lush look.
– Mix several flower styles to form a full arrangement.
Here is why this works: the petals hold shape, and you can reuse the bouquet for many events.
How to build them
– Cut simple petal shapes from colored paper.
– Curl edges slightly to add depth.
– Glue petals around a small circle to form blossoms.
– Attach the blossoms to a stem or wire.
Display ideas
– Create a tray of blooms for coffee tables.
– Use them as decor for a wedding, party, or home shelf; keep colors soft or bold.
– Group several stems on a wall frame for a 3D wall art piece.
Care and storage
– Keep away from moisture to avoid curling.
– Store flat or in a box if you need to pack them away.
Next steps: pick a color scheme that matches your space and start cutting.
@media(max-width:480px){
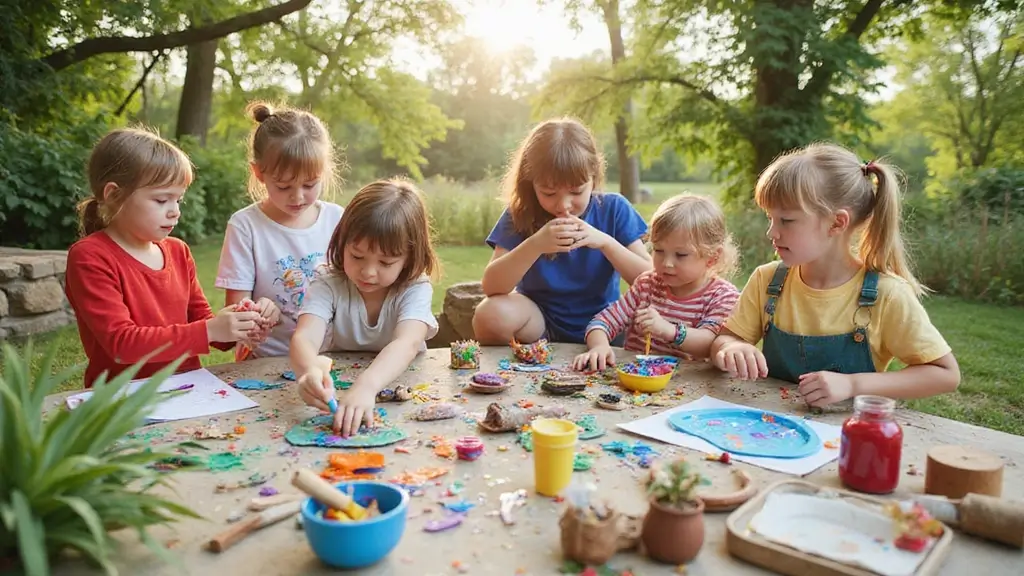
9. Paper Cutting Art for Children’s Rooms
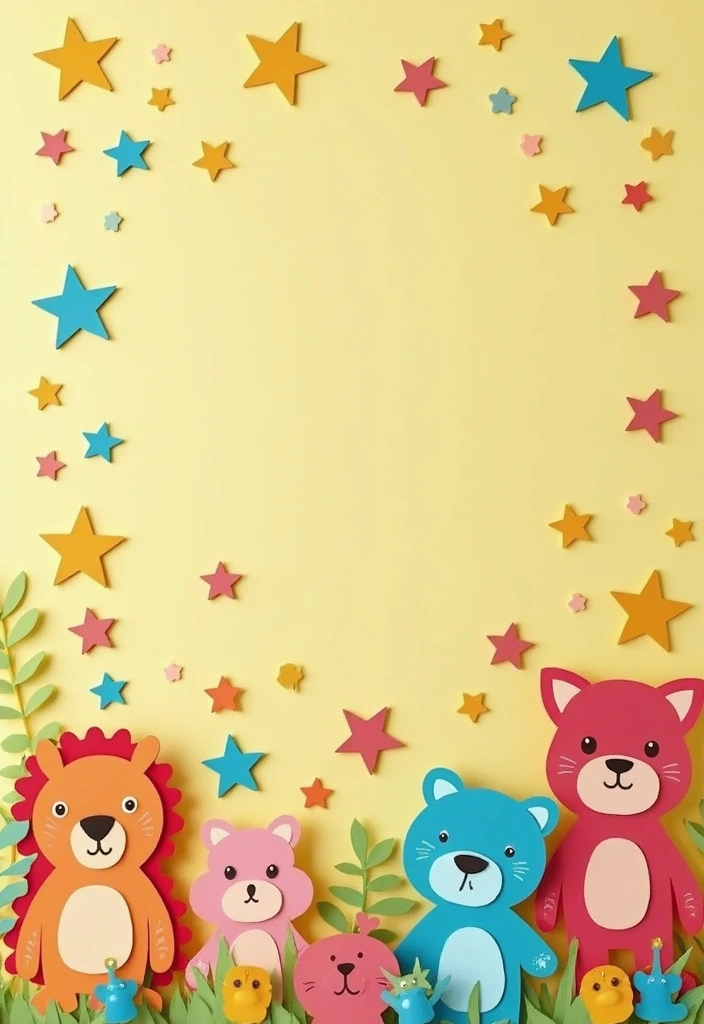
You want a kid’s room that feels magical without a lot of fuss. Here is why this works: paper cutting art uses simple shapes and quick steps. It costs little and can be changed as kids grow. Let’s break it down.
– Mobile ideas: Create a mobile that hangs from the ceiling. Light paper shapes sway with air and catch soft light.
– Story wall art: Cut a small group of shapes that tell a tiny tale. Arrange them in a line to invite curious eyes.
– Cozy family project: Let kids help with tracing, cutting, and tying string. You guide them, so the work becomes a shared memory.
Next, gather your supplies and plan your design.
– Materials: thick craft paper, child-safe scissors, soft string, removable wall tape, pencil, ruler.
– Steps: pick a theme (animals, stars, or leaves). Trace the shapes. Cut with a steady hand. Punch holes for threading. Tie shapes to a string or mount as wall art.
– Execution tips: choose 2 or 3 colors for calm. Keep shapes medium size for balance. Hang away from direct sun to avoid fading.
Safety and care: supervise early cuts. Store finished pieces flat or rolled to prevent bends.
Next steps: try one quick project this week to refresh a room and spark imagination.
@media (max-width: 600px) {
.normal-quiz-iframe { min-height: 570px !important; height: 570px !important; }
}
10. Decorative Paper Lanterns
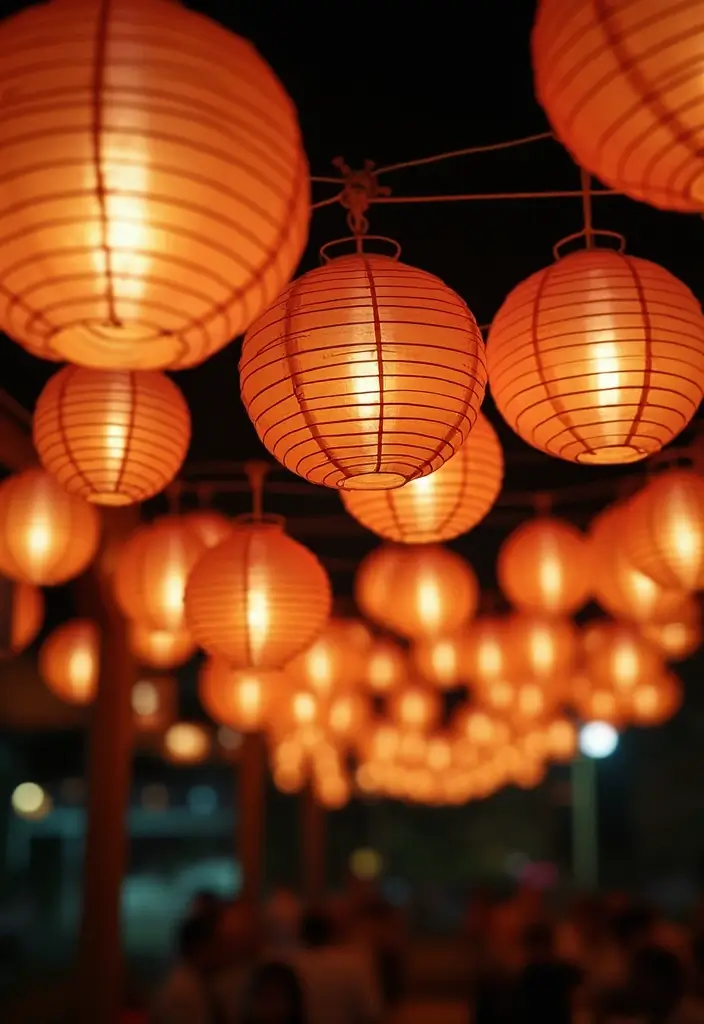
Decorative paper lanterns offer a quick mood boost. They fill rooms and patios with warm light and a friendly feel. You can use them indoors or outdoors, and they cost little to make.
Why they work
– They are fast to craft. Fold, cut, and place a light inside.
– They cast pretty shadows. Cut shapes like stars, petals, or circles so light shines through.
– They fit many moods. Colorful papers lift a party; plain tones calm a room.
What to gather
– Colored or white craft paper, tissue paper, or thin paper
– A lightweight frame or string to hold the lantern
– An LED bulb or battery tea light (never use real flames)
– Scissors, a pencil, and a hole punch or craft knife
Design ideas
– Use different sizes to make a visual rhythm
– Layer shapes to add depth
– Mix warm yellows and oranges for sunset vibes, blues and greens for a cool night look
Placement ideas
– Line a stairwell, patio edge, or window ledge with lanterns
– Hang from the ceiling for cozy ambient light
– Group a few in a corner to add warmth
Next steps
– Storage tips: Flatten and store flat to save space
– Quick fix: If a lantern looks flat, add a second layer behind the cutouts
@media(max-width:480px){
11. Elegant Gift Wrap Ideas
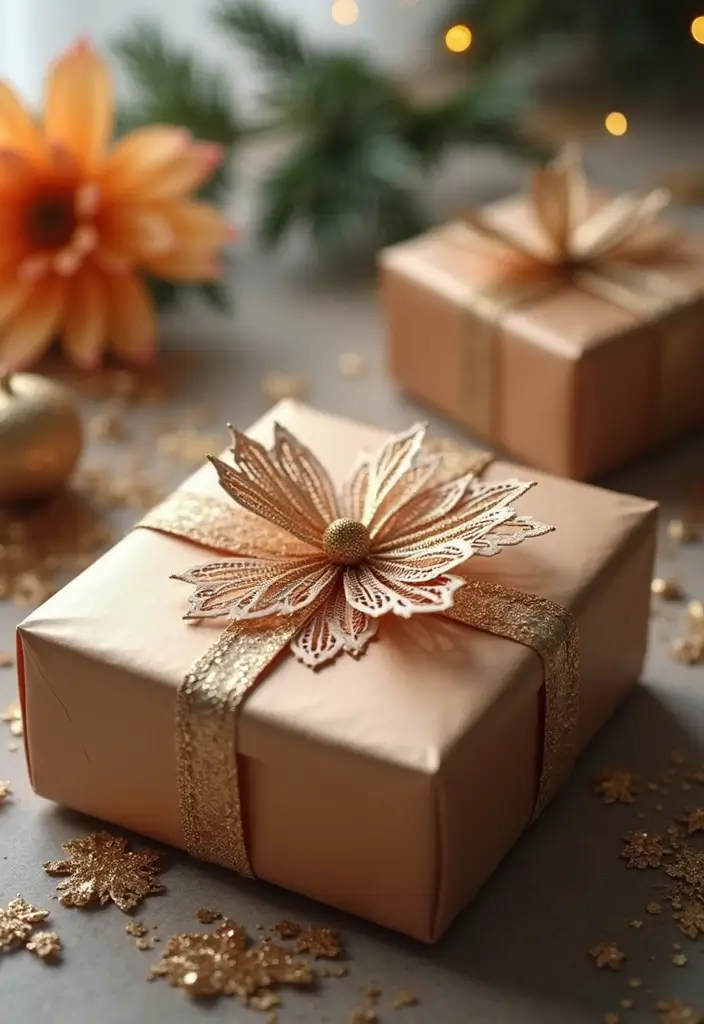
Want gifts that wow before they are opened? Elegant paper wrap with neat cuts can do that. A simple box becomes art. You can do this with common paper and a few tools.
Here is why this works: cut patterns add texture, show care, and keep the wrap sturdy while still looking delicate.
Next steps:
– What you need: sturdy craft paper, a ruler, a craft knife or sharp scissors, a cutting mat, a pencil, a ribbon or twine, and a small tag.
– Edge the wrap: draw a lace edge. Cut slowly away from your hands. Circles, scallops, or leaf shapes look like lace.
– Color harmony: choose two colors that go with your ribbon and the gift. Use one for the cuts and the other for a backing layer.
– Layer for depth: wrap the box in the main paper, then add a thin inner sheet in a contrasting color. A peek of color makes it special.
– Finish with a touch: tie a bow or twine. Add a small tag cut from the same paper or a matching card.
– Tips: practice cuts on scrap first. Keep the pattern simple for small gifts.
With these steps, your gift wrap feels thoughtful and personal.
@media(max-width:480px){
12. Artistic Bookmarks
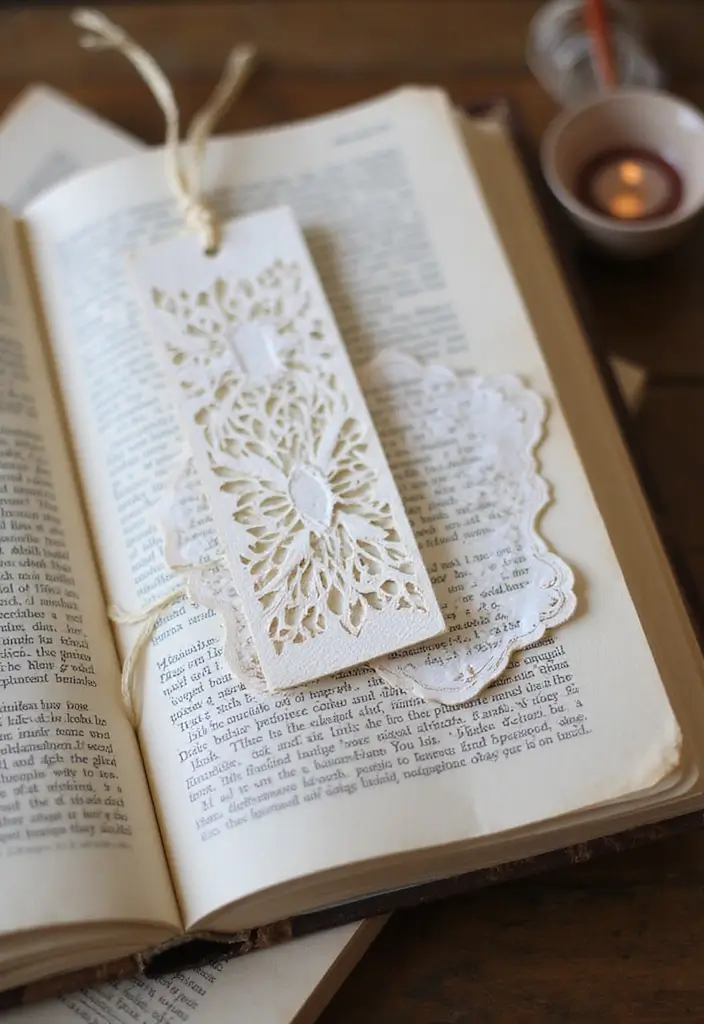
You love reading, but boring bookmarks can dull the joy. You want something that fits your style and lasts through many chapters. Artistic bookmarks do that. They stay in your book and show a bit of you each time you open a page.
Here is why these tiny paper cuts shine. They are easy to make, and you can adjust them to any book or mood. The pictures and quotes feel personal. Plus, they’re light enough to carry in a backpack or a tote.
Let’s break it down. Here are practical ideas you can try today.
Materials
– Thick cardstock or sturdy scrapbook paper
– A sharp craft knife or good scissors
– A cutting mat and a metal ruler
– Color pens, pencils, or markers
– Clear tape or a simple seal like laminate
– Optional: washi tape, fine stickers, or a stamp
Design ideas
– Cut out quotes that you love and keep them in mind while you read
– Create silhouettes of trees, birds, or initials
– Make small shapes like moons, stars, or hearts
– Mix tiny doodles with larger shapes for contrast
How to make
– Pick a theme and size that fits your book, then draw lightly on cardstock
– Use a craft knife along the lines on a cutting mat
– Add color or shading with markers for depth
– Seal the edges with tape or a thin laminate to prevent tearing
– Slide the finished bookmark into your book and mark your spot
Care and gifting
– Handle with clean hands to avoid smudges
– Store bookmarks flat so they don’t bend
– They make thoughtful, affordable gifts for friends who love to read
Next steps
Choose a design, gather supplies, and start a bookmark today. Your next page will feel a little more special.
13. Wall Hangings with Paper Quilling
Wall Hangings with Paper Quilling
You want a wall piece that feels alive. Mix paper cutting with quilling to add texture and depth. The combo makes flat lines pop on any wall.
Here is why it helps your decor. A simple cut outline gives a clear shape. Quilled coils and teardrops fill the space with soft dimension. The result is a focal point that stays interesting.
Here is how to make it.
– Start with a clean cut outline on sturdy paper. A simple silhouette works best.
– Fill the inside with small quilled shapes. Roll tight spirals, teardrops, and little coils to fit.
– Pick a color palette that fits your room. Use two main colors and a few neutrals.
– Mount the piece on a light backing. Frame it for a finished look, or hang it as a single panel.
– Seal the surface lightly to keep colors fresh without glare.
Next steps: place your wall hanging where it can be seen from across the room. Use gentle lighting to bring out the quilled texture. Step back often to check balance with other art.
Care tips: store extra quilled pieces flat, and keep them away from direct sun.
@media(max-width:480px){
14. Themed Party Decorations
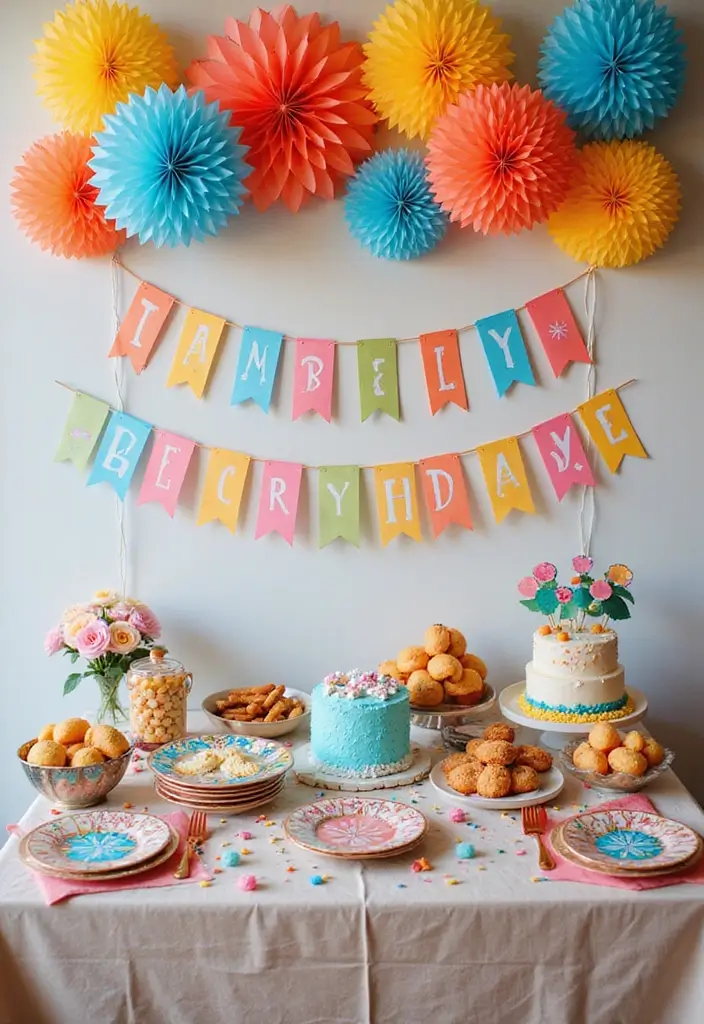
You want party decor that pops without draining your wallet. Themed paper cutting can give you that look fast. Here is how to plan and make it.
– Pick a clear theme and stick to it; the cuts will feel like one story, not a mix of random pieces.
– Choose colors that match the mood and the venue, not every shade you own.
– Cut banners, garlands, and table pieces from sturdy colored paper. Keep shapes simple for quick cuts.
– Layer shapes to add depth and use string or twine to hang banners along a wall or above a doorway.
– Turn place cards into tiny cut designs so guests feel seen, even at a big party.
– Create centerpieces by stacking circles, leaves, stars, or blossoms into a tidy column.
– Add small accents at the napkin, chair, or cake table edge to tie the room together.
– Light the space with string lights or warm bulbs to make shadows move on the walls.
This approach saves money and gives your event a unique style that fits your vision.
Next steps: gather paper, scissors, glue, and a simple ruler; sketch one main shape and a few related pieces; test a small display before the party.
15. Pop-Up Cards for Special Occasions
Pop-up cards add a bright moment to any celebration. You can make one that fits the person and the event, turning a simple greeting into a keepsake.
What you’ll need
– Sturdy card stock
– Scissors or a craft knife
– Glue or double-sided tape
– Colored paper and markers
– Ruler and pencil
– Optional extras: washi tape, small stickers, glitter glue
Easy steps
– Plan a simple pop-up shape that is easy to cut and fold
– Cut the shape and the card base on a flat surface
– Score a clean fold line so the pop-up opens smoothly
– Attach the pop-up to the base with a thin hinge
– Decorate with bold colors that create strong contrast
– Write a short, warm message inside
Tips to make it stand out
– Keep the pop-up light and sturdy at once
– Use contrasting colors for visibility
– Test the card as you go by closing it gently
– Let ink and glue dry before packing it away
Fast ideas for occasions
– Balloon bouquet for birthdays
– Cake slice for anniversaries
– Flower sprig for spring events
– Congrats initials for graduations
Pop-up cards are tiny magic. A handmade touch lasts longer than a store greeting.
@media(max-width:480px){
16. Personalized Photo Frames

You want frames that feel like you. A personalized paper-cut frame does that in a simple, stylish way. It makes your photos pop and adds a tiny piece of art to your wall. Here is why this works: you control the colors, shapes, and mood.
What you’ll need
– colored or white cardstock
– a cutting mat, sharp craft knife, or small scissors
– ruler and pencil
– glue or double-sided tape
– a backing board and frame that fits your photo
– patience and a steady hand
Design ideas that fit any photo
– Cut a silhouette that matches a theme you love, like bikes, flowers, or music notes.
– Build a layered edge. Make a bold outer border, then add a delicate inner cut for depth.
– Use two colors that clash on the edges and bring your photo forward.
– Create a mini collage inside the frame by placing several small cut shapes around the main photo.
– Leave negative space to let light hit the cut design and shine.
Step-by-step how to do it
– Plan your layout on scrap paper. Decide where the photo sits and which cut shapes surround it.
– Lightly mark the frame with a pencil. Keep lines simple so you can cut cleanly.
– Cut the edge first, then the interior shapes. Check alignment as you go.
– Glue pieces to the backing, then fix the photo on top with a light touch.
– Press flat and let the glue dry. Mount the finished piece in the frame.
Tips to get great results
– Practice on a scrap sheet before your final cut.
– Use sharp blades for clean lines. Dull blades can snag paper.
– Work in good light and keep fingers away from the blade.
– Seal fragile edges with a tiny dab of glue to prevent lift.
Next steps: try a small frame today. Swap in a new photo when you want a fresh look.
@media(max-width:480px){
17. Decorative Table Runners
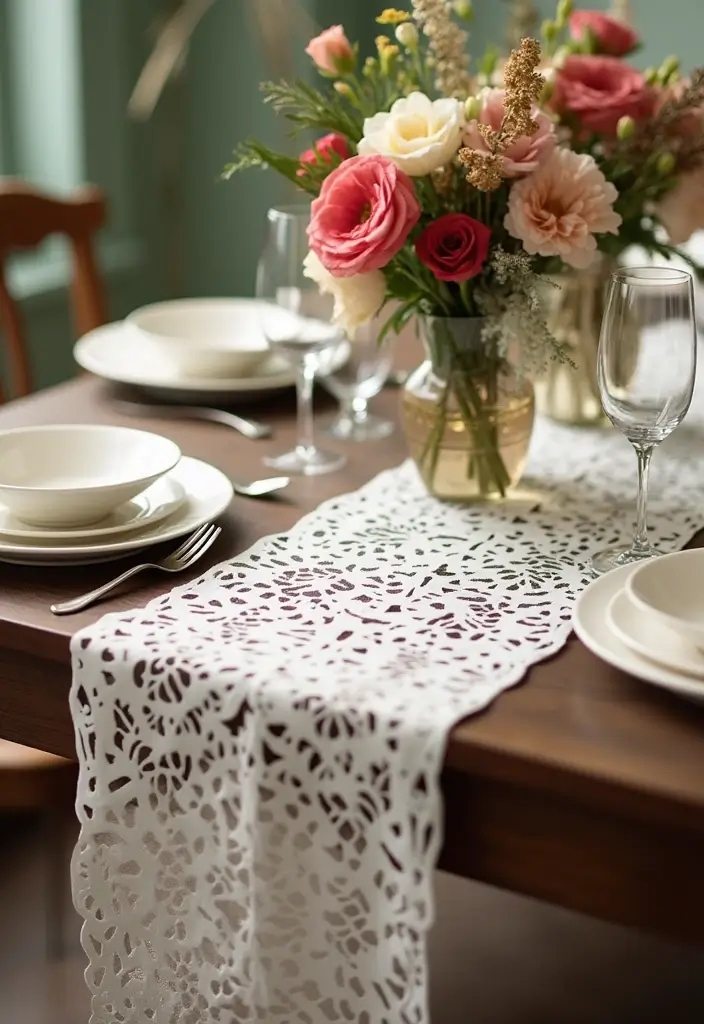
Here is why decorative table runners made from paper cuts can elevate your dining space. They’re affordable, quick, and stylish. You get a custom look without heavy work. You can swap designs to fit any event.
– Choose designs that match your dinnerware for a cohesive feel.
– Layer different cuts to add depth and texture.
– For outdoor meals, use waterproof paper so the pattern stays crisp.
How to make it
Here is a simple plan you can follow.
– Measure your table and decide how long your runner should be.
– Cut a long strip or join a few pieces to reach the length you need.
– Add a delicate border or repeating motif along the edges for a finished look.
Tips for best results
– Pick a calm color palette to keep things modern.
– Let a plain cloth show through busy cuts.
– Tape pieces on the back or glue for a firmer runner.
– Indoors, a light spray seal can help edges stay neat.
Care and storage
– Store flat in a folder or between sheets of paper so they don’t bend.
– Swap to new designs as seasons change for a fresh table mood.
@media (max-width: 600px) {
.visual-quiz-iframe { min-height: 995px !important; height: 1100px !important; }
}
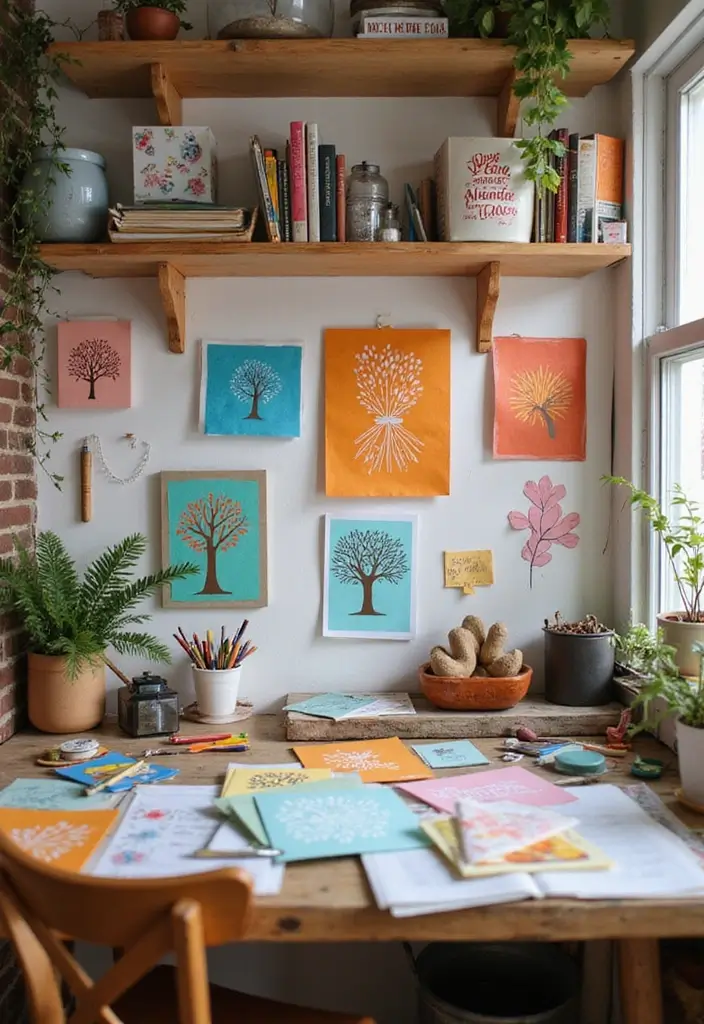
18. Creative Wall Decals
Here is why you should try paper cutting wall decals. They brighten a room fast and keep walls safe. They are light and easy to move, so you can test new styles without risk. For renters, this is a smart choice.
– Supplies you need: removable adhesive paper, a sharp craft knife, a cutting mat, a ruler, and a clean card to press.
– Pick your design: cut out quotes, simple shapes, or small nature icons. Start with a simple plan on paper before you cut.
– Plan the layout: measure the wall, draw a rough map, and arrange pieces in a mix of big and small shapes. A gallery wall looks bright when you vary sizes and spaces.
– Apply with care: peel the backing slowly, lay from center outward, and press with a card to remove air. Smooth edges for a neat look.
– Care and removal: when you want to move, peel at a shallow angle. Any glue residue wipes away with a damp cloth.
– Quick design tips: go light with pale colors for a soft vibe, or pick bold dark tones for contrast.
Next steps: sketch your idea, gather supplies, and start cutting. Try a word like “breathe” or “create” in bold letters to anchor your wall. This method fits quick updates as trends change.
@media(max-width:480px){
19. Paper Cutting Techniques to Learn

If you want sharper cuts and cleaner shapes in paper cutting, start with the basics. You will gain control, speed, and confidence. Here is why these techniques matter:
– Basic outline cut: Cut along the outer edge of a simple shape to form a clean silhouette. Use a smooth, steady stroke.
– Reverse cutting: Cut around the outside of the design, not into it. This creates bold negative space and a striking look.
– Layered cuts: Make the same cut on several sheets. Stack them to add depth. Align edges so the layers line up.
– Perforation and texture: Add tiny, light cuts to create texture. Keep pressure gentle so the paper holds together.
– Fine-detail trimming: Use a sharp blade for tiny lines. Practice first on scrap paper before the final piece.
– Stitch and lace effects: Draw short curved lines like stitches. It adds charm without heavy cuts.
– Template-guided cuts: Trace a pattern lightly, then cut along the lines. Templates help keep shapes even.
– Negative-space design: Plan the space around the shape. Cutting to leave the surface as a frame makes a bold look.
Tools make the task easier: a sharp craft knife, good scissors, a cutting mat, and smooth card stock.
Next steps: practice on scrap card stock, then test on a single sheet you want to display. With time, you will craft lacey borders and bold silhouettes for cards and wall art.
20. Cut-Out Window Treatments

You want windows that feel like art and still let light peek through. Cut-out window treatments use lightweight paper to make patterns and shadows. On sunny days the cutouts cast moving silhouettes on your walls.
What you need
– Lightweight paper such as copy paper or vellum
– Scissors and a pencil
– A ruler for straight lines
– Removable tape or washi tape
– A few simple patterns to begin with
How to make them
1. Pick a design that fits your skill. Simple shapes cut clean.
2. Draw the pattern on the paper. Keep it small for easy handling.
3. Cut the shapes slowly. Clean edges matter.
4. Layer two or more sheets for depth. Vary opacity for richer shadows.
5. Attach the top edge to the window frame with tape. Let the bottom edge free to pass light.
6. Watch the light move with the sun. Adjust size or spacing to change silhouettes.
Layered designs are a popular look.
Design ideas
– Leaves, stars, or a skyline create natural shadow play.
– Geometric lattices give a modern look.
– Floral silhouettes work in bedrooms and kitchens.
Tips and limits
Sunlight can fade paper over time. Replace worn pieces. Store designs flat so they stay crisp.
21. Unique Calendar Designs
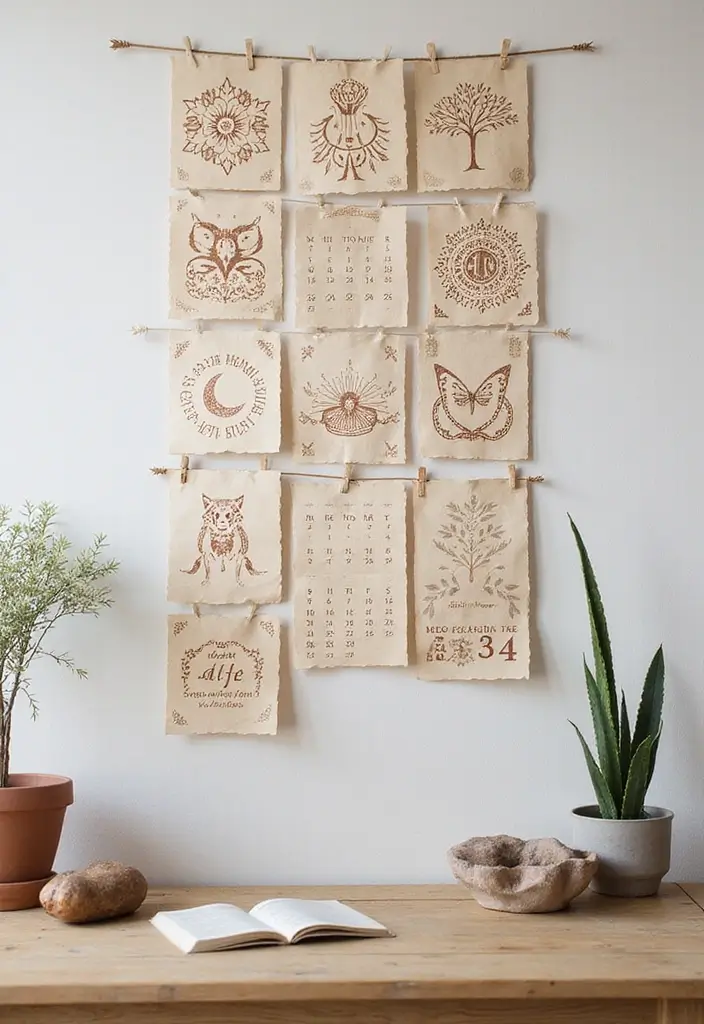
In this section you learn to turn a simple calendar into art with paper cutting. You get a tool that helps you stay on track with dates and moods all year.
– Theme first pick one idea for the whole year. Nature, quotes, or a color story tie everything together.
– Month by month draw a cut design for each month. Use leaves, birds, moons, blossoms, or clean geometric shapes. Leave space for the date grid.
– Materials and tools choose sharp scissors or a craft knife, a cutting mat, strong paper, a ruler, pencil, glue, and tape. A simple blade makes neat edges.
– Cut with care take slow, steady steps. Small, precise cuts feel rough at first but pay off with clean lines. Layer paper for depth if you like.
– Assemble and finish put the months together on one page or stack them in a frame. A clear glass frame shows off the white paper cutouts.
– Display ideas hang it in your kitchen or above your desk. Pick a frame color that makes the cuts pop.
– Care tips wipe dust gently. If you use a glass frame, you can erase dates with a dry erase marker.
This method blends craft and order. Your calendar becomes a vivid wall piece and a practical planner.
22. Decorative Gift Tags

Want small details that make gift wrap feel extra special? Decorative gift tags cut from paper add charm without costing a lot. They bring a warm, handmade feel to any present.
– Materials: scrap paper or old cards, scissors, a pencil, a hole punch or needle, string or twine.
– Quick options: use plain tag shapes and cut a simple pattern, like a border or a tiny shape in the corner.
– Designs to try: stars, hearts, leaves, or initials. You can even make a tiny window by cutting out a small shape inside the tag.
How to make them:
1) Cut a sturdy tag base from scrap paper.
2) Carve your design on top, keeping edges neat.
3) Punch a hole near the top and thread a string.
4) Write the name and a short message with a dark pen.
Personal touches:
– Add the recipient’s name for warmth.
– Add a year or a small motif that fits the gift.
Tips to work fast:
– Reuse leftover paper to keep waste low.
– Keep designs simple when you need many tags.
– Store finished tags flat so they stay clean.
Why this helps: it boosts the care you put into gifts, saves paper, and makes each wrap feel personal. These simple tags spark smiles everywhere.
23. Handcrafted Journals
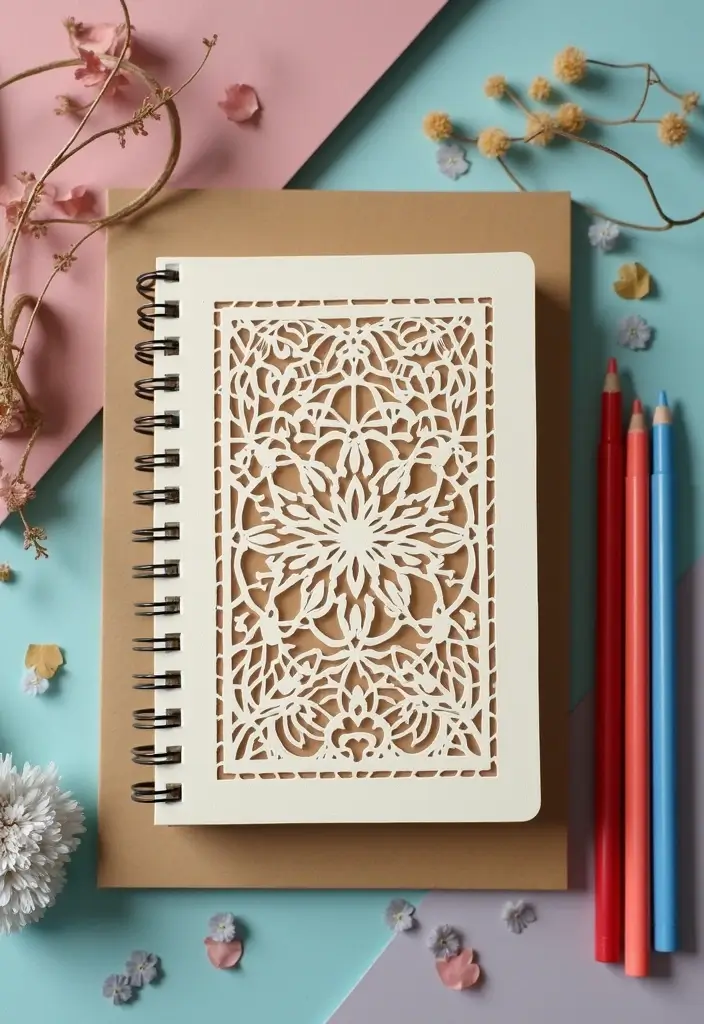
You want a journal that fits your voice and your art. Paper cutting crafts let you build a handcrafted journal that feels like you.
Here is why this approach works: it blends writing with cut-out art, gives you a cover you love, and turns a simple notebook into a daily creative ritual.
What you’ll create
– Choose a notebook that is sturdy enough to handle light cutting and glue.
– Gather papers in a mix of patterned and solid colors to keep the cover lively.
– Plan a cover idea first. Pick a motif you love, like leaves, wings, or initials, and sketch a light outline.
– Cut the design on a cutting mat with a sharp craft knife for clean lines.
– Attach and layer the cutouts with glue or a simple stitch to add depth.
– Add a small pocket inside the front cover to tuck tips, tickets, or note cards.
– Start filling the journal with your thoughts, doodles, and dreams as they come.
Next steps: keep the tools safe, store spare blades, and set a small weekly time to add a new cutout or page.
The result is a unique keepsake that supports your writing habit and sparks daily inspiration.
Give it space to grow with you.
@media(max-width:480px){
24. Paper Cutting for School Projects

You want a school project that catches the eye. Paper cutting can help you reach that goal. It adds shape, color, and focus to posters, boards, and slides.
Here is how you can use it well.
– Theme and design: Pick a theme that fits your project. For science, cut leaf veins or planet rings. For history, silhouettes of people work well.
– Paper and color: Use sturdy construction paper or light cardstock. Choose colors that stand out on your board.
– Tools and safety: Use safety scissors for younger students. Older readers can use a craft knife with supervision. Keep fingers away from the blade.
– Plan your cuts: Sketch a light outline first. A quick plan saves time and avoids mistakes.
– Cutting technique: Trace lines with a pencil. Cut slowly, in small snips. Work on a flat surface for crisp edges.
– Depth with layering: Layer lighter shapes over darker ones to add depth. Glue pieces to a backing so they stay flat.
– Finishing and display: Trim stray bits. Mount on a clean background. Add a caption to explain it.
Next steps: practice a small design, then build up. Test colors and detail. With time, your cuts look neat and ready for class.
25. Fun Educational Tools with Paper Cutting
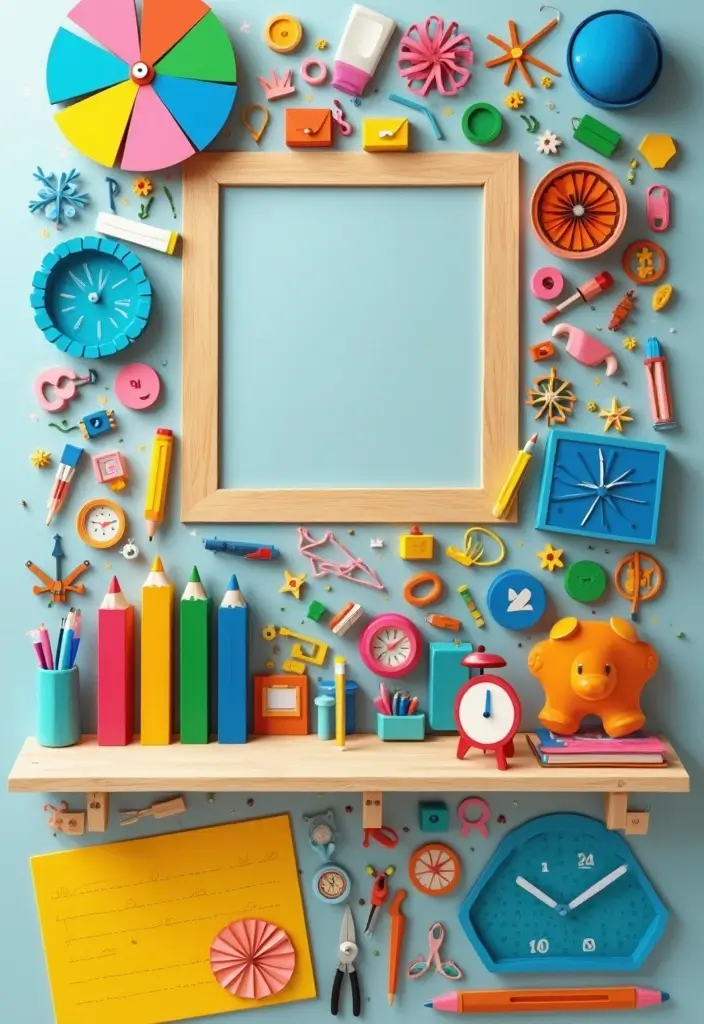
If you want lessons to click, make them into cut and paste projects. Paper cutting crafts turn dry facts into real, touchable pieces. You, your students, or your kids get to handle colors and shapes. This hands-on approach helps memory and focus.
Here is why these tools work in class and at home. They cost little to start. They are quick to change for new topics. You can reuse them after a lesson. They look bright on walls or desks.
– Cut out shapes to show math ideas.
– Create colorful flashcards for vocabulary.
– Build layered posters to demonstrate steps or concepts.
– Make interactive posters with pull tabs or flaps.
– Design printable game cards for quick review.
Tip: use safe scissors and sturdy glue to keep pieces in place.
Store finished tools in a small box for quick reuse next time.
They work well in science, reading, and art too.
Give it a try this week.
Next steps. Gather colors, scissors, glue, and a board or wall. Pick a topic. Draft shapes on paper first, then cut. Arrange layers or flashcards in a neat grid. Try a small learning station in your classroom or home. Test with a real lesson and tweak.
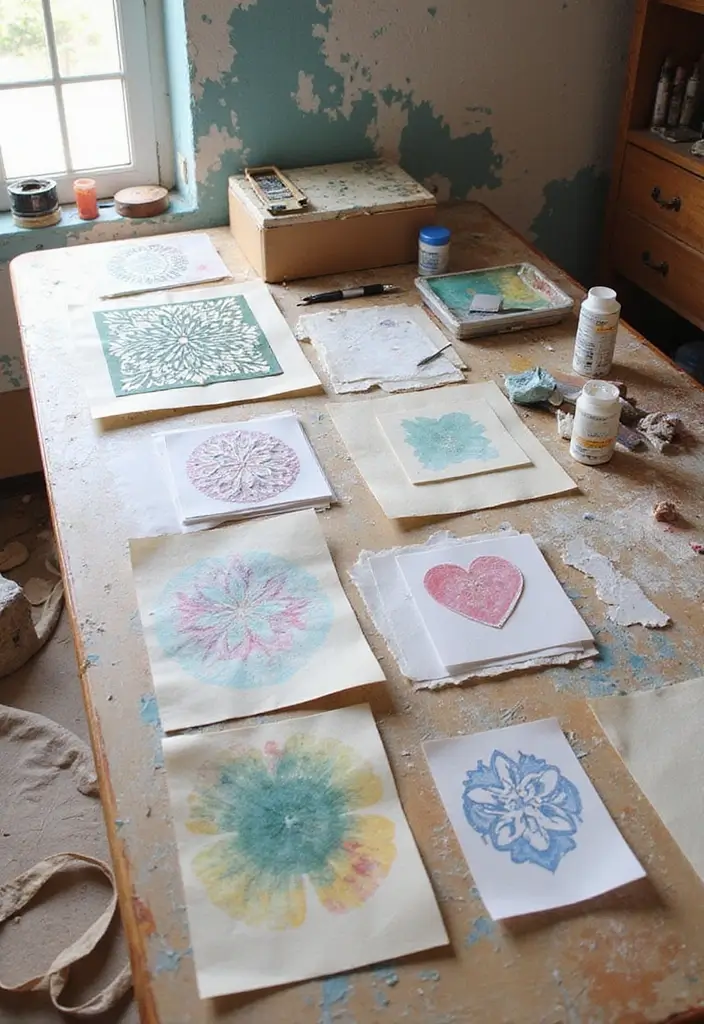
26. Mixed Media Projects
Mixed media with paper cutting can make your art feel alive. You add depth, color, and texture that plain cuts can’t have. Here is why this works and how to do it.
– Start with a solid base. Use thick paper or a lightweight board. Paint the base first so your cuts sit on a colored ground.
– Layer textures. Glue in fabric scraps, lace, or tissue behind your shapes. Let edges peek through for a tactile feel.
– Add color carefully. Apply light washes of paint or ink behind the cut pieces. Work in faint layers so the paper still shows its edges.
– Include photos or found textures. A small photo behind a leaf cut adds mood. You can press a pressed flower under a clear layer for natural beauty.
– Keep cuts simple at first. Bold shapes read well in mixed media. You can add fine line details later as you gain confidence.
– Finish and frame. Seal with a thin matte coating. Frame the piece to give it a ready-to-hang look.
Next steps: experiment with different mixes and observe what each choice does to light and shadow. With practice, you’ll discover new ways paper cuts can tell a story.
@media(max-width:480px){
27. Cultural Art Inspirations

You want papercut art that feels real. Cultural art gives you ideas that carry a thread from many places. You can make cuts that honor a tradition while still showing your own hand.
– Research traditional designs and study the lines, borders, and shapes. Here is why: classic motifs teach you balance and rhythm, so your cuts look clean and calm.
– Add elements from your heritage into your pieces. Pick symbols that speak to you and blend them with your own style. Start with one small motif, then layer it with simple silhouettes.
– Share your work to celebrate culture. Tell the story behind each piece. A short note helps others learn where the design came from and why it matters.
Next steps:
Pick a culture or region that resonates with you. Gather a few images, then sketch a simple scene on scrap paper. Try a two-layer silhouette to give depth. Use good craft paper, a sharp knife or scissors, and a cutting mat. This keeps your lines crisp and your hands safe.
A gentle reminder: you can mix ideas, not copy them. Respect matters as you grow your own style.
@media(max-width:480px){
Conclusion
These 27 paper cutting crafts invite you to unleash your creativity and explore the incredible possibilities of DIY paper art. As you embark on your crafting journey, remember that each piece you create is a reflection of your unique style.
Don’t hesitate to experiment with different techniques and designs! By incorporating your personal touch, you can create art that not only beautifies your home but also tells your story.
Note: We aim to provide accurate product links, but some may occasionally expire or become unavailable. If this happens, please search directly on Amazon for the product or a suitable alternative.
This post contains Amazon affiliate links, meaning I may earn a small commission if you purchase through my links, at no extra cost to you.
Related Topics
paper cutting crafts
DIY home decor
creative paper designs
handmade gifts
easy paper projects
seasonal decor
paper art techniques
personalized decor
beginner friendly
artistic inspiration
unique greeting cards
mixed media crafts