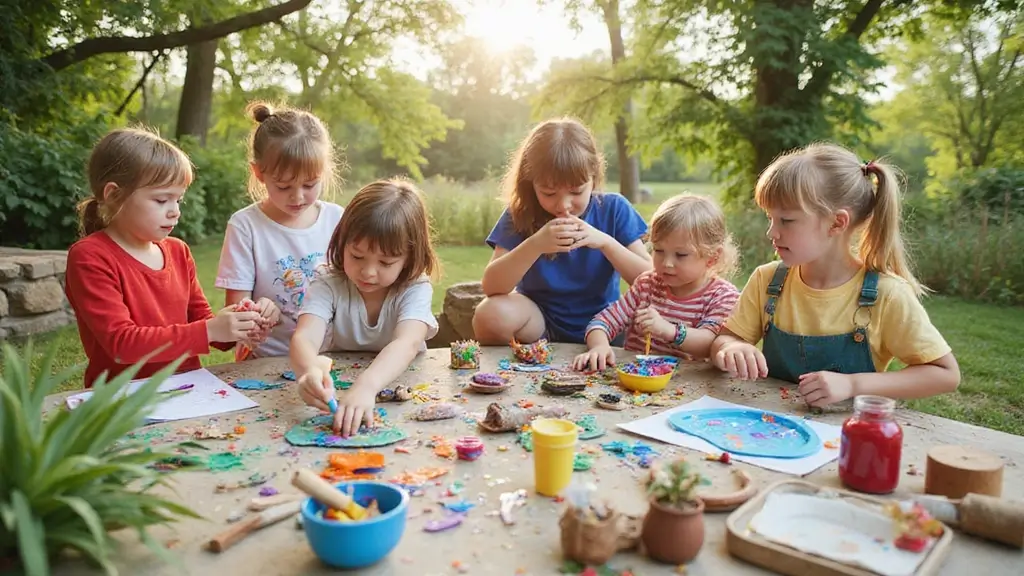
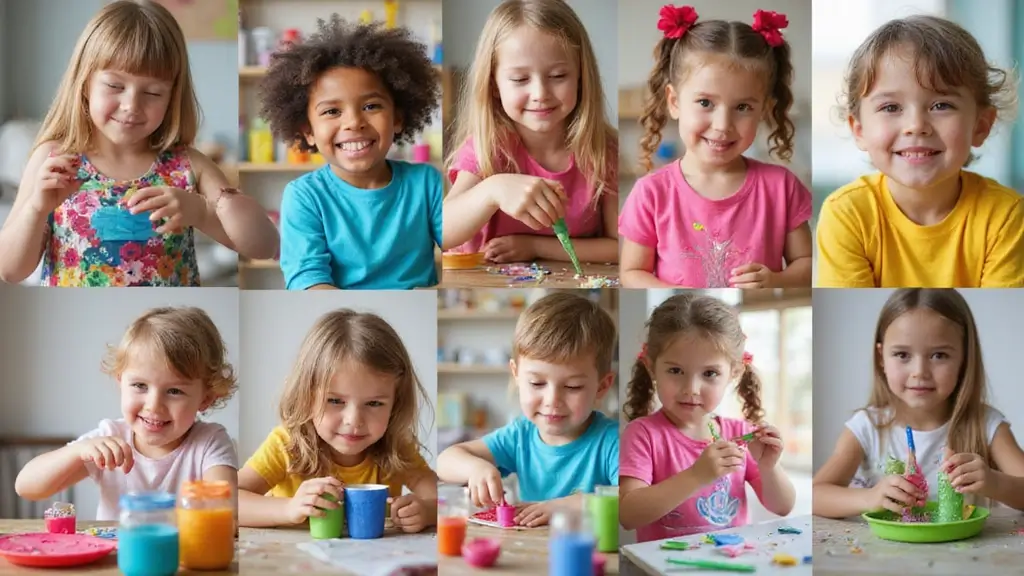
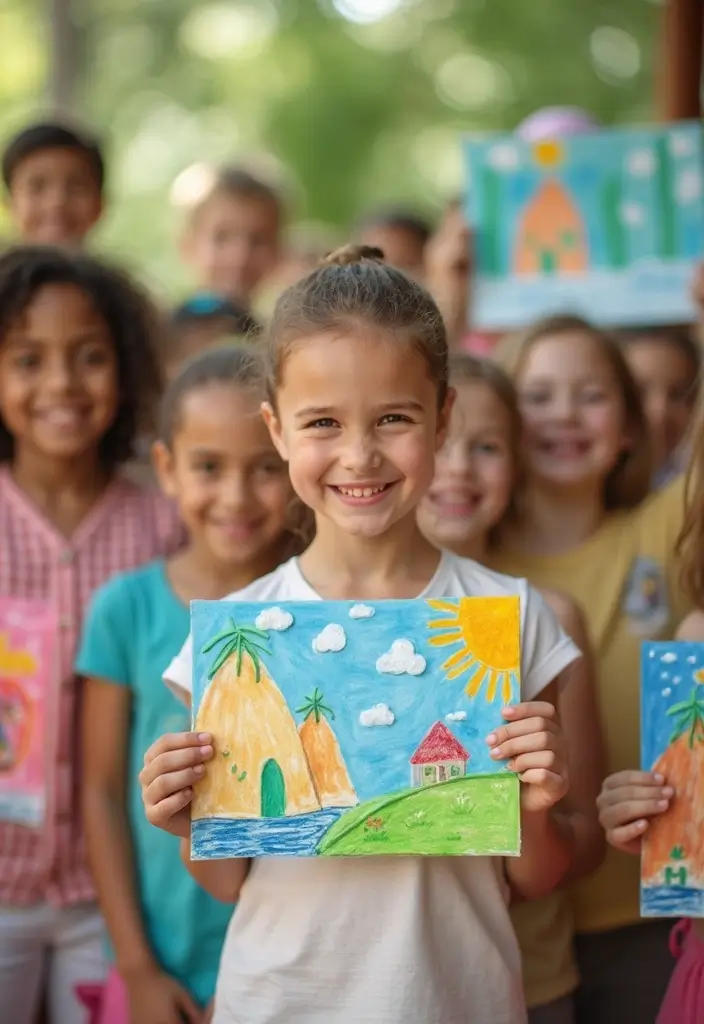
I put this together because I want to help busy families find quick, joyful art moments together. I see kids light up when they make something with their own hands, and I know days are full. This post shares 25 easy art projects you can start with items you already have at home.
Who is this for? If you are a parent, caregiver, or teacher who wants low mess and big smiles, this is for you. If your kids love color, texture, and free play, you will find ideas that work for different ages and spaces.
What you’ll get is clear and practical. 25 ideas that you can actually finish in under 30 minutes. Each idea comes with simple steps, a quick materials list, and tiny tweaks to fit your child’s age and interests. I also share tips to cut mess and speed cleanup so you can keep creation going.
Here is why these projects matter. Art helps kids grow in confidence, planning, and sensory awareness. The projects use common things like cardboard, paper plates, yarn, and paints, so you can grab them from a closet or recycling bin. The activities are flexible, so you can swap in items you have and still get a great result.
To use this guide, set up a small art station and pick a session goal. You can do one project at a time or turn it into a tiny art week. If a project looks messy, cover the table with a big sheet of paper and let your child lead.
Ready to start? Choose a theme, gather a few supplies, and dive in. This is about simple joy and real progress, not perfection, and it helps your child think, create, and shine. Save favorites and reuse ideas for future days, and you will build a little library of kid friendly crafts that bring smiles.
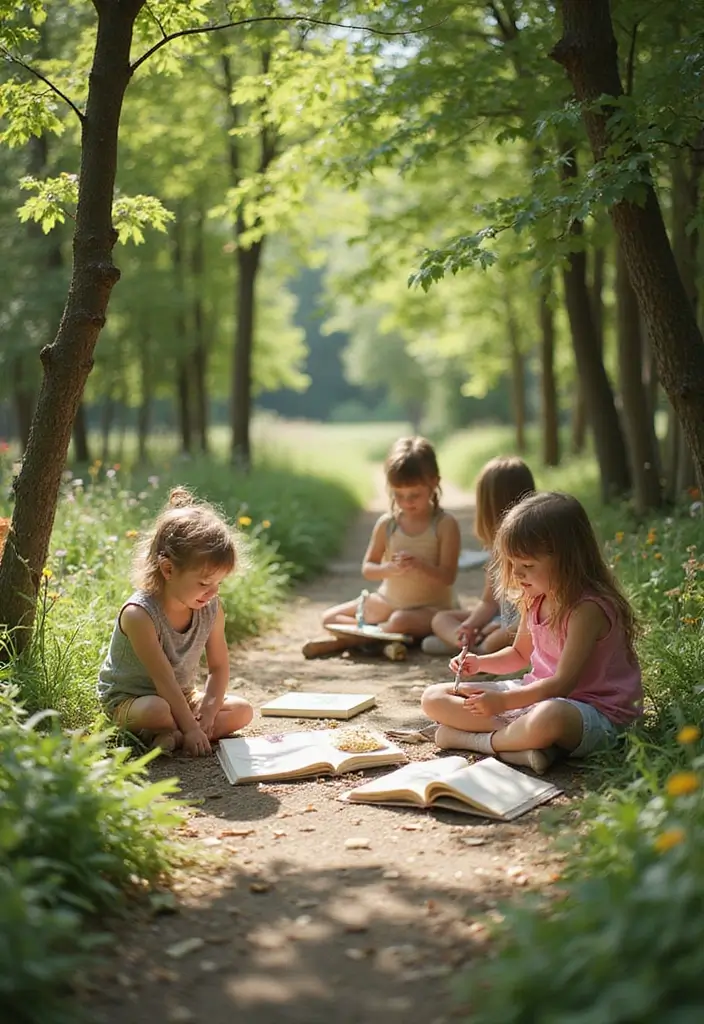
1. Nature Collage

Nature collage for kids
Looking for a calm, creative art activity that uses what you find outside?
A nature collage is a great fit. It brings color and texture from the yard or park into your home.
Here is how to do it.
Materials
– Cardboard or thick paper as a sturdy base
– Glue sticks or white glue
– Leaves, flowers, twigs, seeds, and small natural bits
– Optional: tape, a small rolling pin, or a heavy book to press items flat
Steps
– Go outside with a bag and collect a few items. Pick shapes, colors, and textures you like.
– Dry or press delicate pieces if you want a flat finish.
– Lay out your design on the base. Try layers: big pieces first, then smaller pieces on top for depth.
– Glue each piece in place. Press gently to help it stick.
– Show your work to a friend or family member. Talk about what you chose and why
Tips and variations
– Try a seasonal theme, like autumn leaves or spring blossoms.
– Create a pattern by repeating shapes or colors.
– Use the collage as a mini nature journal page by labeling items with simple words
Why you’ll love it
This project builds small hand skills and sparks curiosity about nature. It’s easy to adapt for any age and space, and it opens a quick chat about conserving resources.
@media(max-width:480px){
2. Recycled Paper Mache

Here is why you should try recycled paper mache. You want a cheap, easy project that turns trash into art. It helps you stay creative without new materials. Your child will see scraps become creatures, masks, or fun sculptures.
Here is how to do it:
– Gather strips of newspaper or scrap paper.
– Make a paste with flour and water, smooth; or use diluted white glue.
– Dip a strip in the paste and wipe off the extra.
– Layer strips over a balloon, a mold, or a simple frame.
– Let the pieces dry completely before adding more layers.
Next, color it. Paint with kid-safe paints or use natural dyes from fruits and vegetables. Try beet juice for red, spinach for green, turmeric for yellow, or blueberry juice for blue.
Finish with a light glue seal or a clear varnish. This project shows recycling in action. It builds patience.
Quick tips to improve results:
– Smooth edges with a damp sponge.
– Use small strips in tight spots.
– Add texture with torn pieces.
Want more ideas? Try a paper mache mask or a small animal sculpture. With practice, you can mix colors, add details, and share your art with family.
@media(max-width:480px){
3. Leaf Rubbings

Leaf rubbings
If you need a quick, crafty activity that doubles as a tiny science lesson, leaf rubbings fit the bill. They are simple to set up and show kids how leaves look in a fresh, colorful way.
– Collect leaves of different shapes and sizes
– Grab sturdy paper and a clean workspace
– Use crayons or colored pencils
– Have a flat surface for rubbing
How to do it
– Lay the paper over a leaf on the table
– Press the leaf gently so it sits flat
– Rub the side of a crayon or colored pencil across the paper
– Use light, even strokes to reveal the leaf’s outline and veins
– Try several colors and layer rubbings on one page
Why it helps
– Children see textures and shapes up close
– They learn basic leaf names and parts as they discuss what they find
– It blends art with simple science in one activity
Extensions
– Create a leaf rubbing book and label each page with the leaf name
– Frame a favorite rubbing or glue several into a mini art journal
– Talk about where you found each leaf and why it looks different
Next steps
– Let kids choose the colors and leaves they like
– Keep a small collection for ongoing fun
– Spin in seasonal ideas, like autumn colors or spring greens, to keep it fresh
@media(max-width:480px){
4. DIY Bird Feeders

DIY Bird Feeders are a good mix of art and nature. You give kids a chance to reuse junk and watch birds visit your yard. This DIY project is simple and cheap, and it helps backyard birds.
Choose a base that fits your home. Pine cones, cardboard tubes, or a cleaned milk carton work well. Clean them first. Then spread a thin layer of peanut butter. Roll or press the base in birdseed. The seeds cling, and the colors pop.
To finish, tie a string or pipe cleaner. Hang the feeder in a tree where sun hits it in the morning. A branch near a window lets you watch without moving. Your garden comes alive.
Here is why families like this craft. Kids learn about wildlife by seeing birds in real life. They practice fine motor work as they spread cream and seeds. They get pride in a craft that helps birds.
Next steps: start a little birdwatching party. Invite pals, set a notebook, and jot down which birds show up. Compare colors, sizes, and songs. You can guess who you saw from a field guide.
– Use recycled materials for feeders.
– Decorate with peanut butter and seeds.
– Hang in visible places.
– Observe and discuss bird species.
5. Painted Rocks
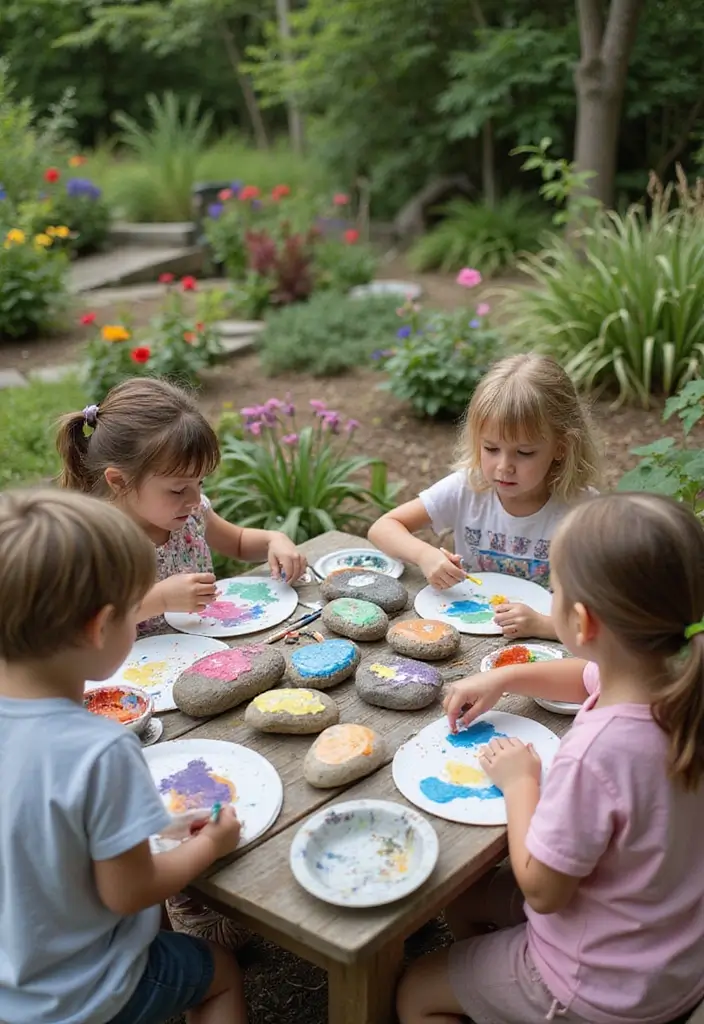
Your kids want outdoor art that is easy and fun. Painted rocks fit that need perfectly. They let children color, imagine, and feel proud of what they make. This activity is simple to set up and quick to finish.
Here is why it works. It uses everyday stones. It uses bright colors. It stays in your yard or garden for days.
What you’ll need
– Collect smooth rocks.
– Use eco-friendly, water-based paint.
– Paint brushes and a few small cups for colors.
– Clear, water-based sealant to protect designs.
How to do it
– Wash rocks and dry them well so paint sticks.
– Let kids sketch ideas with pencils or freehand.
– Apply layers of color, letting each layer dry.
– Add faces, patterns, or short messages for charm.
– Finish with a light coat of sealant when dry.
Fun ideas
– Place finished rocks along a garden path to guide visitors.
– Create a tiny rock garden in a bed or planter.
– Host a rock painting party and add each rock to a community garden.
Next steps
Painted rocks are affordable, low mess, and inviting. They spark color in outdoor spaces and give kids a sense of ownership. You can reuse this idea for birthday parties, school projects, or family time.
@media(max-width:480px){
6. Eggshell Mosaic Art
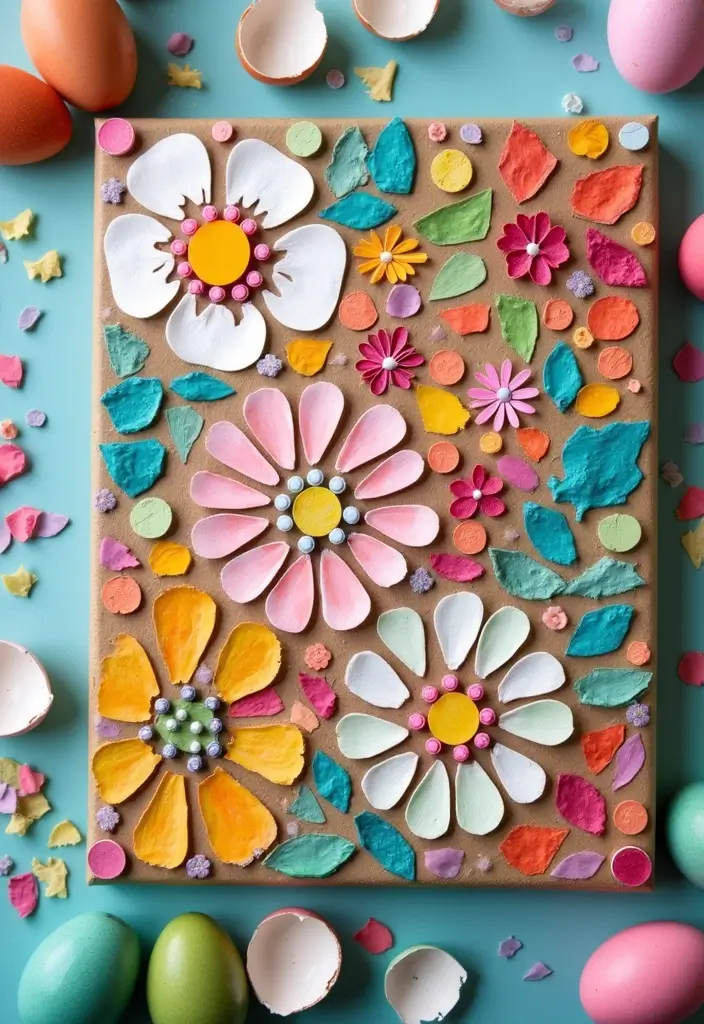
Looking for a simple, screen-free art project that kids will love and you can feel good about? Eggshell Mosaic Art fits the bill. It turns kitchen scraps into bright, kid-friendly pictures.
Here is why this project works for you. It uses materials you already have. It teaches patience as shells are placed piece by piece. It shows how small parts can make a big, colorful image. And it invites hands-on creativity.
Next steps to try. Start with washed, dried eggshells from cooking. Save the shells, rinse them well, and dry completely. Break them into small pieces. Grab a sturdy base like canvas or thick paper. Use white glue to attach each shell piece in a pattern or image. Press gently and let the glue dry. The finished mosaic shines in light and makes you want to show it off.
This craft also fits a lesson in repurposing waste. You turn leftovers into art, and your child learns about reuse. For a final touch, frame the mosaic or gift it to someone special.
– Gather washed eggshells from cooking
– Break into tiny pieces and plan a simple design
– Glue pieces onto a sturdy base and let dry
– Frame or gift the finished art
@media(max-width:480px){
7. Recycled Crayon Art
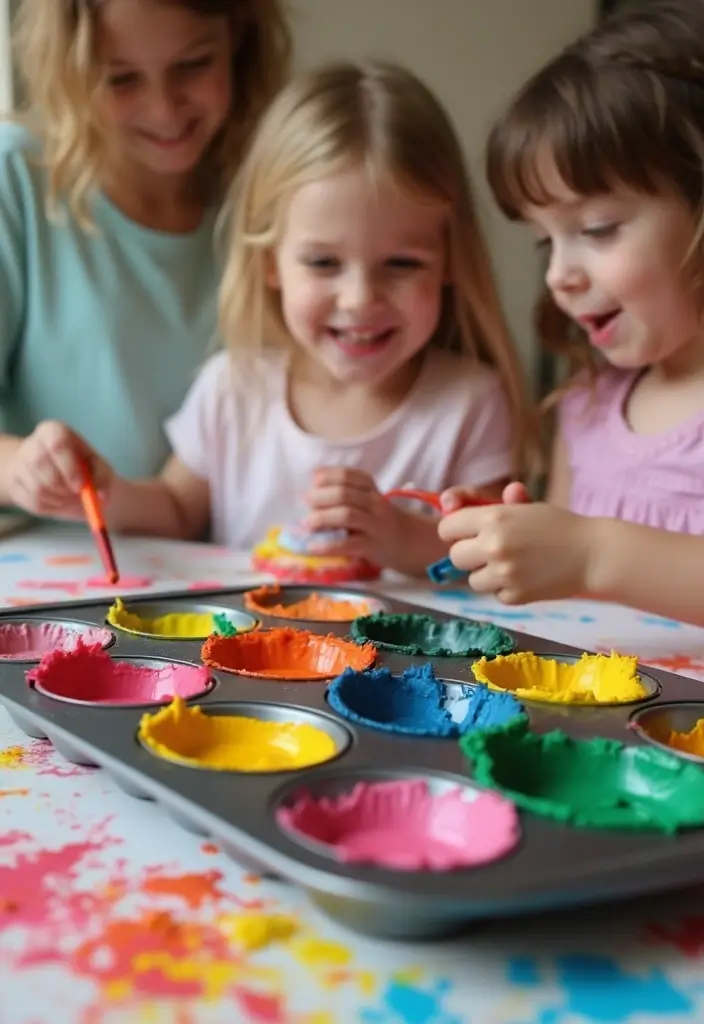
Recycled Crayon Art
You want a quick way to reuse old crayons and spark your kid’s imagination. This project does that. It also teaches a simple lesson about recycling.
Here is why it helps. Kids mix colors. They learn patience while wax cools.
Step by step:
– Collect broken crayons. Gather tiny pieces from drawers, bins, and boxes. Clean wrappers if you can.
– Melt in safe molds. Line a muffin tin with paper cupcake liners. Place crayon pieces inside. Adult supervision is a must when melted wax is involved. Use a warm water bath rather than direct heat.
– Let cool completely. When the wax hardens, pop out the new crayons.
– Try color mixing. Show how red and blue make a purple, or how yellow and blue make green. The bars create different textures on paper.
– Make a mini art day. Set up paper and your new crayons, then let kids create and share their drawings. Take photos to save the memories.
Next steps are simple. It fits in a busy afternoon or a quiet weekend. Keep a small bin of broken crayons for the next round. You can rotate in new molds and swap designs to keep it fresh.
You can use this idea again with new colors.
@media(max-width:480px){
8. Tie-Dye T-Shirts
You want a project that fuels creativity and stays safe. Tie-dye t-shirts fit. They’re colorful, hands-on, and end with a wearable piece of art your child will wear with pride. Use plain cotton shirts and non-toxic dye for peace of mind. A family tie-dye day becomes a cheerful memory.
– Materials
– Plain cotton T-shirts
– Non-toxic fabric dye in several colors
– Rubber bands or string
– Plastic gloves and a protective table cover
– Plastic bins or trays for dye and old towels
– Setup
– Wash shirts first so the color sticks well
– Cover your work area. Lay down a tarp or old sheet
– Create the design
– Wet the shirt. Pinch a spot and twist for a spiral, or fold into sections for stripes
– Secure with rubber bands. The bands create the shapes
– Apply color
– Dye different sections with different colors
– Try colors that mix to make new shades, but keep some edges clean
– Set, rinse, and dry
– Let the dye set as the kit says, usually several hours
– Rinse in cold water until clear, then wash separately and dry
– Share the fun
– Explain color mixing to kids. A short lesson helps them see how colors combine
– Turn the day into a small family event by making several shirts and sharing colors and ideas with joy
@media(max-width:480px){
9. Clay Sculptures

Clay Sculptures
Are you looking for a kid-friendly craft that is easy to set up and plenty of fun? Clay sculptures fit the bill. Your child can turn a simple idea into a tangible shape with their own hands.
Start with the basics. Use air-dry clay or salt dough. Show your child how to pinch, roll, and press. Let them shape animals, monsters, or a tiny figure from a story. Let curiosity lead and be okay with imperfect lines.
When the pieces are built, let them dry completely. This can take a day or two, depending on thickness. Then add color with paints that are eco-friendly and safe for little hands. Decorate with natural bits like beads, seeds, or leaves for texture and scent.
– Use air-dry clay or salt dough.
– Encourage creative forms and stories.
– Paint with eco-friendly materials.
– Consider an exhibition of their work.
A simple storytelling trick helps kids grow. Ask them to name each sculpture and tell a short tale about it. This builds memory and language and makes the project feel like a tiny show. Set up a home gallery and invite family to view and chat about the art. Rotate displays so the kid notices progress.
Tips you can use tomorrow. Cover the table. Keep tools within reach and let the child guide the pace.
This art activity strengthens fine motor skills and fuels imagination while staying doable in a busy day. You can store the dried sculptures for a future show.
@media(max-width:480px){
10. DIY Wind Chimes

DIY Wind Chimes
Wind chimes blend art with nature. You can turn simple objects into a musical sculpture. Start with items you already have. Old keys, shells, beads, or small bells work well. Use a sturdy branch or a recycled hanger as the base. Tie on pieces with strong string so they hang safely in the breeze. Let your kid pick colors to make it theirs. Here is why this project matters: it teaches sound and space and it adds outdoor charm.
Here is what you need:
– Use old keys, shells, beads, or small bells.
– Choose a sturdy base, like a branch or recycled hanger.
– Use strong string or twine to hang pieces.
– Have scissors and a bit of glue for extra hold.
– Add paint or markers for decoration.
How to make it:
1. Knot a long string to the base.
2. Clip on pieces at different lengths for variety.
3. Decorate each piece with color.
4. Tie the strings into a loop to hang.
Next steps:
– Let the breeze test the sound. If the pieces hit, swap lengths.
– Hang it where you can see and hear it from a seating area.
– Explain to your kid how air carries sound and why tones rise or fall.
Tips for success:
– Recycled materials spark creativity.
– Encourage unique designs and colors.
– Hang in a visible spot so you can enjoy the music.
11. DIY Flower Pots

DIY Flower Pots is a simple project that blends art with nature. You can turn old cans or plastic bottles into tiny garden homes for kids to enjoy.
First, pick safe containers. Clean them well. If the rims are sharp, tape them or sand the edge so little fingers won’t get cut. Choose sizes that fit a small plant or a cluster of seeds.
Next, decorate with your kid. Use bright paints, markers, or natural bits like twine and leaves. Wrap twine for a rustic look. Try dots, stripes, or faces for a playful vibe. You can glue on leaves for texture. The goal is to make each pot feel special.
Fill the pots with soil. Lightly pack it so seeds or roots have room to grow. Plant a few seeds or one seedling per pot. Water gently, then place the pots where they will catch sun.
Watch and learn together. Your child will see roots grow, leaves unfurl, and seedlings drink water. Talk about sunlight, water, and soil. This becomes a small science moment as they care for their plants.
Variations add fun. A metal can looks chic on a sunny windowsill. A plastic bottle can be cut and painted for a bright, kid-friendly pot. Position the pots in a sunny spot and enjoy your tiny garden.
– Use recycled containers for pots.
– Encourage various decorating styles.
– Discuss plant care and growth.
– Organize a mini-gardening workshop.
@media(max-width:480px){
@media (max-width: 600px) {
.normal-quiz-iframe { min-height: 570px !important; height: 570px !important; }
}
12. DIY Candle Making

DIY candle making
Looking for a kid-friendly craft that teaches quiet focus and a little science? Candle making fits. With eco-friendly wax, you melt, pour into molds, and wait. You also add natural pigments and a small touch of scent from essential oils or herbs. The result is a colorful, useful craft you can gift or decorate a room with.
What you need
– Eco-friendly wax (soy or beeswax)
– A double boiler or a safe heat setup
– Molds or jars
– Wicks and wick holders
– Thermometer
– Natural colorants or safe crayons
– Fragrance from essential oils or dried herbs
– Stirrer and paper towels
How to do it
1) Prep your work surface and fix the wick in the mold or jar.
2) Melt the wax to about 170–180 F.
3) Stir in color until you like the shade.
4) Add a small amount of scent.
5) Pour slowly and let the candle rest until fully solid.
Why it helps
– You learn about melting points and mixtures by doing.
– You create a keepsake for gifts or your room.
– It builds patience as you wait for cooling.
Safety and tips
– Always have a grown-up nearby when the wax is hot.
– Start with small batches and clean spills right away.
Next steps
– Make a mini gift set by labeling scents.
– Try different mold shapes for variety.
@media(max-width:480px){
13. Nature Paintbrushes

Nature paintbrushes bring texture and surprise to simple strokes. You use leaves, flowers, twigs, and pine needles as brushes. Dip them in kid-friendly paints and a cup of water. Create art with the touch of the outdoors.
Here is why it works: kids see textures they can feel, from smooth leaves to rough twigs. Colors mix with nature.
What you need:
– Natural materials: leaves, petals, twigs, needles
– Kid-friendly paints and water
– Paper or canvas, tape
How to make and use:
– Clean the materials. Dry them well.
– Tie leaf or twig to a stick with string or tape. Keep it light so kids can handle it.
– Dip gently in paint. Try a sweep, a dab, or a smear.
– Press leaves to stamp patterns for extra texture.
Activities and tips:
– Take a nature walk to collect supplies. Talk about colors you see and how they mix.
– Test brushes on scrap paper first.
– Rinse brushes after use and lay flat to dry.
Limitations: brushes wear fast. Have a few extras ready, and be careful with sharp edges.
This activity sparks curiosity about nature. Have fun exploring together.
Try this again with new leaves next week.
@media(max-width:480px){
14. DIY Stamped Art

You need a kid-friendly art project that is easy to pull off and stays tidy. DIY stamped art fits that need. It lets your child print colors and build patterns with simple stamps.
What you’ll need
– Foam stamps or slices of potato or apple for homemade stamps
– Eco-friendly paints in kid-friendly colors
– Paper or sturdy craft paper
– A shallow tray for paint
– Paper towels and a cup of water for quick cleanups
– An apron or old shirt to protect clothes
How to do it
1) Pick stamps and colors your child loves.
2) Pour a small amount of paint onto a plate.
3) Dip the stamp and tap off the excess paint.
4) Press the stamp straight onto paper to lift the print.
5) Lift the stamp and let the print dry.
6) Repeat with other stamps and colors to build a pattern.
Creative ideas
– Stamp in a grid to form a scene.
– Fold the paper to create symmetry and mirrored prints.
– Layer colors by starting with a light shade, then add a darker one for depth.
Why kids love it
– Here is why stamping works well for kids.
– It strengthens small hand muscles.
– It invites color exploration.
– It shows results fast.
– Cleanup stays simple with a washable setup.
Display and care
– Let pieces dry flat before framing or taping them up.
– Rinse stamps with warm water and mild soap after use.
– Store paints and stamps in a cool, dry place.
Next steps
Ready to try it? Set up a mini stamping station and watch the art grow.
@media(max-width:480px){
15. DIY Bookmarks
If you want a quick, affordable way to boost a kid’s love of reading, try DIY bookmarks. They are simple to make and big on fun. Using recycled paper makes this project easy on your budget and good for the planet. Your child can turn a plain page into a mini canvas.
Here is what you’ll need:
– Recycled paper (old drawings, used notepads, scrap sheets)
– Scissors and a ruler
– Crayons or markers
– Stickers, stamps, or pressed flowers
– A hole punch and a length of ribbon
– Glue or clear tape
– Optional: laminating sheets or clear contact paper for durability
How to make them:
– Cut a 2 by 6 inch rectangle from your paper. A neat, uniform shape makes it easy to slip into a book.
– Decorate with colors, doodles, or a favorite quote. Add stickers or pressed flowers for a natural touch.
– Punch a small hole at the top and tie a bright ribbon through it. The ribbon adds a splash of color and a handy pull.
– Seal the design by taping both sides with clear tape or by laminating. This helps it last through lots of reading.
– Use the bookmark in your own books or share them with friends and family.
Why this works: kids express themselves, reading stays exciting, and you reuse materials. Next steps: create themes like nature, space, or animals, and mix in simple patterns or tiny drawings.
@media(max-width:480px){
16. Sea Shell Art

Sea shell art helps you keep a beach trip close. You feel the sand, you hear the waves. This makes a simple art project that kids love.
Steps to make sea shell art
– Gather shells during beach visits: washed and safe to handle.
– Pick a base: canvas, poster board, or a small wood panel.
– Plan your design: lay shells out first to see the look you want.
– Glue shells in place: use craft glue and press gently. Let it dry.
– Add color: paint shells with acrylics or color the background to echo the sea.
– Finish and display: a light coat of clear sealant helps colors stay bright. Frame or set on a shelf.
– Add a memory note: write the place and date on the back.
Sea shell art can be a shell mosaic or shell collage. You can mix in tiny beads for sparkle or bits of shell to add texture. Try painting a row of shells to create a rainbow or arrange shells to mimic a sunny scene.
Be kind to nature. Take only shells washed ashore. Do not disturb living creatures. Check local rules before collecting.
Next steps: gather your shells, choose your base, and start gluing. It’s a fun, calm way to save beach memories.
@media(max-width:480px){
17. Upcycled T-Shirt Tote Bags
Upcycled T-Shirt Tote Bags
Want a craft that is easy for kids and kind to the planet? Upcycled t-shirt tote bags fit the bill. They turn worn shirts into useful bags and cut trash in the process. You get a practical tote, and your child gets a sense of pride.
Here is why this project works for kids:
– It’s quick to finish
– It uses items you already own
– It invites creativity without a big cleanup
What you need:
– Old t-shirts
– Scissors
– Fabric markers or fabric paint
– String, yarn, or ribbon for handles
Here is how to do it:
1) Cut off the sleeves and the neckline. Leave the body of the shirt as a pouch.
2) Knot the bottom of the shirt to seal the bag. Trim extra fabric if needed.
3) Turn the bag right side out. Tie in a second knot if you want a deeper bag.
4) Let kids decorate the outside with fabric markers or paint. They can add pockets, patterns, or letters.
Next steps:
– Plan a tote bag party so everyone shows off their creation.
– Talk about reuse and why it saves resources.
– Use the new tote for groceries, library books, or swim gear.
Plus, it shows a simple reuse habit kids can carry forward.
@media(max-width:480px){
18. DIY Photo Frames

DIY photo frames your kids will love
You want a simple, budget-friendly way to display your kid’s memories. DIY photo frames let them pick colors and shapes. They use recycled cardboard or popsicle sticks to keep it easy and affordable. This project helps kids value memories while they shape art. Here is what you need.
– Recycled cardboard or popsicle sticks
– Glue and scissors
– Paints and brushes
– Stickers, markers, or washi tape
– Leaves, twigs, or buttons for texture
– Photos to frame
How to make it
Cut a frame window from the cardboard or build a border with sticks. Glue a back piece to hold the photo in place. For popsicle sticks, lay a border around a photo size and glue the sticks together. Let the frame dry before you add the photo.
Decorate
Paint bright colors, stamp designs, and press on natural bits for texture. Add stickers or simple drawings. Keep the design kid-friendly and easy to clean.
Display and care
Attach the frame to the wall with removable strips or lean it on a shelf. Use tape corners to secure the photo, then switch pictures as you grow.
Next steps
Create a family memory wall by hanging several frames together. This teaches kids to preserve memories and take pride in their creations.
@media(max-width:480px){
19. DIY Friendship Bracelets

DIY Friendship Bracelets
You want a small craft that kids can finish and share. It uses simple knots and bright colors, and it turns into a gift your child will be proud to give.
Here is why it works: kids practice focus, patience, and generosity. They choose colors that stand for each friendship. They learn to follow steps and see something grow from tiny threads.
Next steps. Gather these basics:
– Colorful embroidery floss or yarn
– Scissors
– Tape or a clip to hold the bracelet while they work
– A friend to swap with or to give the finished piece
Then make a basic bracelet in four easy moves:
– Line up six strands and secure the top with a knot or tape
– Pick the leftmost strand and loop it over the next strand, pulling tight to form the first knot
– Repeat with the next strand to the right, building a simple braid of knots
– Stop when it looks long enough for a wrist, then tie a sturdy knot at the end
Personalize every bracelet by arranging colors in a way that tells a little story. Pack a few extra strings in the colors you choose so you can adjust as needed.
Finally, plan a small exchange party where friends trade bracelets.
20. DIY Decorative Jars

DIY Decorative Jars
Are you looking for a quick, fun craft that also helps tidy up your space? These decorative jars are just the thing. They use recycled jars, simple paints, and natural bits to spark imagination without a big mess.
Here is how you do it:
– Gather empty jars, kid-safe paints, brushes, cloth scraps, buttons, pine needles, and ribbons.
– Set up a clean workspace. Put down paper or old sheet and keep glue and brushes ready.
– Let kids choose a look. Paint stripes, polka dots, or little scenes. Glue on buttons, shells, or bits of fabric.
– Try decoupage by layering tissue paper or drawings. Finish with a light wipe of sealant on the outside only.
– Use the jars right away. They can hold treasures, pencils, snacks, or gifts.
This project teaches simple skills. You learn to choose colors, work neatly, and store things better. It also shows how to reuse items instead of tossing them.
Next steps you can take:
– Create a jar showcase. Line up finished jars and snap a quick photo.
– Sort jars by use. One for art supplies, one for tiny treasures, one for party favors.
– Add a label or color code so everyone knows what goes inside.
With a little time, you turn plain jars into useful art. Your kids gain style, organization, and pride in their handmade décor.
@media(max-width:480px){
21. DIY Stained Glass Art
DIY stained glass art can brighten a window and spark curiosity. You can do this with simple, kid friendly steps. The goal is to learn about light while making something pretty you can hang up.
– Materials: transparency sheets or wax paper, water-based eco-friendly markers, scissors, tape, and a sunny window.
– Design plan: have your child pick a simple motif like a sun, heart, or flower. Sketch it lightly on the sheet if you like.
– Coloring: color each shape with bold, saturated markers. Use strong contrasts so the sun brings out the shade.
– Assemble: cut shapes and lay them on the window, leaving small gaps for light to pass through. Tape the edges flat.
– Display: put the finished art where the sun shines. The pieces glow and cast a soft hue across the room.
– Learning: talk about how light changes color as it passes through the paper. Compare daylight with morning or afternoon sun.
– Tips: test colors on scraps first. Clean up with a damp cloth. Rotate designs every few weeks to keep things fresh.
Next steps: invite a friend to make their own piece and create a mini gallery on a sunny wall.
@media(max-width:480px){
22. Nature Journals
Nature Journals
Nature journals help kids notice the world around them. You give them a plain notebook and a few simple art tools. They draw plants, animals, and the little moments they find on a walk. The page becomes a map of their outdoor day. Here is why: art and writing grow together when you record what you see. You can press a leaf, color a sketch, or write a short note about a sound you heard. This small habit builds focus and curiosity.
Next steps: set up a simple kit. A plain notebook, a pencil, a colored pencil or crayon, a glue stick for leaves, and a ruler to measure. Create a regular time, like after a park visit or on weekends.
– Use plain notebooks as journals – keep them lightweight and easy to carry.
– Encourage drawing, writing, and creativity – mix sketches with short notes.
– Add natural elements – press a flower, dry a leaf, or tape in a shell.
– Plan short nature walks for inspiration – ask questions that spark observation.
This project blends art with literacy. Kids reflect on their day, stay connected to nature, and build a simple record they can look back on. If weather changes, switch to indoor nature prompts like herb jars or tiny herbarium cards.
@media(max-width:480px){
23. DIY Snow Globes

You want a kid-friendly project that feels magical and teaches a tiny science lesson. DIY snow globes fit the bill. They turn a glass jar into a small world. You shake them and watch “snow” drift down. It’s easy to do and keeps kids busy.
What you’ll need
– Glass jars with lids
– Small figurines or trees
– Glitter and water
– A little glycerin or clear glue to slow the glitter
– Waterproof sealant or strong glue
– Adult help for attaching the figure to the lid
Here is why these supplies matter. Glass jars keep things sturdy. Glitter creates the snow. Glycerin or glue makes the snow fall slowly. A tight seal stops leaks. With the right setup, you can reuse jars for many themes.
Step-by-step
– Clean and dry the jar. Let it sit until it’s completely dry.
– Glue the figurine to the jar lid. Let the glue dry so the figure stays in place.
– Fill the jar almost to the top with water. Drop in glitter.
– Add a small amount of glycerin or clear glue to slow the glitter’s fall.
– Screw the lid on tight. Seal the rim with glue so it doesn’t leak.
– Turn the jar over and shake. Watch the snow swirl.
Learning moments
This project blends art with simple science. Kids see density and how viscosity changes how things move. They can explain why the snow falls at different speeds in different globes.
Tips and variations
– Try jars of different sizes for variety.
– Let kids pick a theme: winter woodland, underwater world, or space.
– Plan a little gift swap day with family and friends.
Next steps
Display the globes on shelves or desks.
@media(max-width:480px){
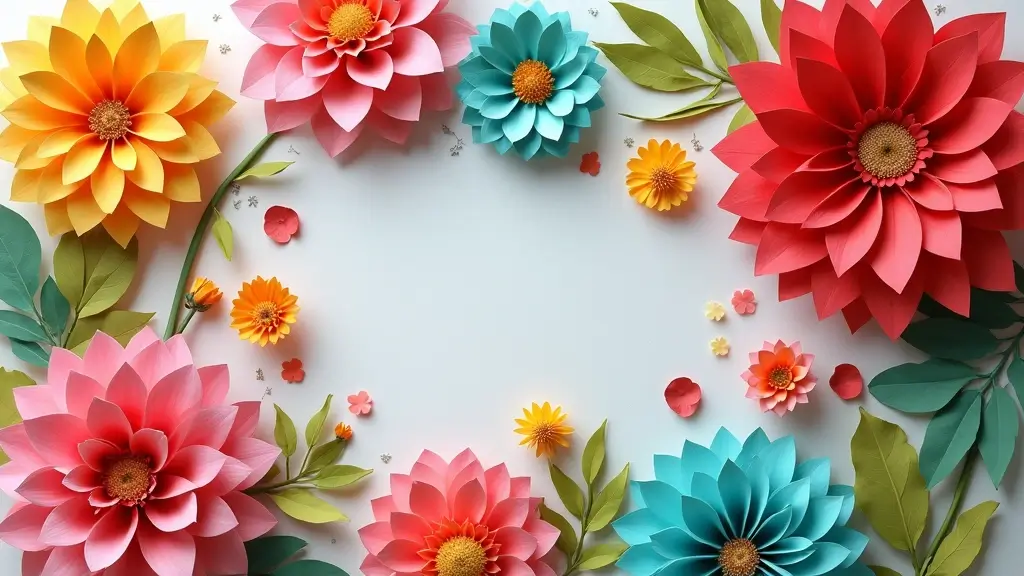
24. DIY Paper Flowers

DIY Paper Flowers are a bright, kid-friendly craft that adds color and texture to any room.
Here is how to make them with simple scraps.
– Materials: recycled paper or old magazines, colored paper, scissors, glue, a pencil, and a thin stick or green pipe cleaner for a stem.
– Steps: cut small petal shapes, then curl the edges. Layer petals around a tiny circle to form a bloom. Add a small center dot. Attach the flower to a stem.
– Finish: arrange blooms in a jar or vase to make a cheerful bouquet.
This project builds fine motor skills as little hands pinch, fold, and glue. Kids learn color mixing by pairing bold hues. It also teaches about flowers and how nature grows. The best part is that it uses recycled papers, so you breathe new life into old scraps.
Plan a flower day where everyone makes and shares their arrangements. Gift the blooms to family or brighten a room with a handmade centerpiece.
– Use recycled materials for flowers.
– Try different color combos and petal shapes.
– Talk about real flowers.
– Host a short flower show to swap designs.
– Share photos of your bouquet with friends.
@media (max-width: 600px) {
.visual-quiz-iframe { min-height: 995px !important; height: 1100px !important; }
}
25. Eco-Friendly Scrap Paper Art

Eco-Friendly Scrap Paper Art
You want a fun art project that uses what you have and keeps waste down. Scrap paper art fits. It turns leftovers into bright, new pieces. Kids learn to see value in scraps and get a chance to be clever and bold.
Here is how to do it.
– Gather scraps: bits of colored paper, old cards, tissue, magazine cutouts, even ribbon. Keep a big tray so everything is easy to reach.
– Sort and prep: group pieces by color and texture. Tear or cut into simple shapes. It goes fast if you keep it simple.
– Create a collage or abstract piece: lay shapes on sturdy paper. Try a loose plan, then let kids move pieces around. Press pieces down with a glue stick.
– Add texture and detail: layer papers for depth. Use white space to make a focal point. A bold circle or stripe can tie the piece together.
– Talk and reflect: tell kids why reuse helps the planet. It saves trees and lowers trash.
– Display your work: make a mini gallery at home. Use a corkboard, clips, or a cheap frame. Change pieces to keep the display fresh.
What you gain: creativity, patience, and a simple way to explain recycling. It’s a small project with a big impact.
@media(max-width:480px){
Conclusion
These 25 easy DIY art projects are just the beginning of a world filled with creativity and fun! Each project not only engages children in hands-on activities but also teaches valuable lessons about sustainability and resourcefulness.
Encourage your kids to explore their artistic abilities, experiment with different materials, and share their creations with family and friends. Who knows—these simple projects could spark a lifelong love for art and the planet!
Note: We aim to provide accurate product links, but some may occasionally expire or become unavailable. If this happens, please search directly on Amazon for the product or a suitable alternative.
This post contains Amazon affiliate links, meaning I may earn a small commission if you purchase through my links, at no extra cost to you.
Related Topics
easy art projects diy
kids craft activities
eco-friendly crafts
simple DIY art
fun art projects
creative crafts for children
hands-on art projects
nature-based art
recycled materials
screen-free activities
budget-friendly crafts
quick art projects