Looking to breathe new life into your walls? With the right DIY wall painting ideas, you can easily transform any small space into something fresh and exciting. I created this post because I know how challenging it can be to make a room feel unique and reflective of your personal style, especially when you’re working with limited square footage. If you’ve been daydreaming about creative wall art or wanting to embark on a home decor project that doesn’t break the bank, you’re in the right place!
This guide is perfect for anyone who loves DIY projects or simply craves a cozy, stylish environment. Whether you’re a seasoned crafter or just starting out, you’ll find something here. I’ve gathered 18 DIY wall painting ideas that are fun, affordable, and perfect for your next DIY room makeover. From mesmerizing geometric patterns to playful ombre effects, these ideas will inspire your inner artist and help you craft a space that feels like home. Let’s dive in and explore these budget-friendly crafts that can turn your walls into the standout feature of your home!
Key Takeaways
– Discover 18 creative DIY wall painting ideas that suit small spaces, perfect for anyone looking to refresh their home decor.
– Learn about various painting techniques, including stenciling and color blocking, that can add depth and personality to your walls.
– Explore how budget-friendly crafts can help you achieve a stylish look without overspending, making decorating more accessible.
– Find tips for creating accent walls and unique textures, offering practical applications to enhance your design vision.
– Get inspired by nature-inspired murals and hand-painted quotes, bringing a personal touch to your living space while keeping it cozy and inviting.
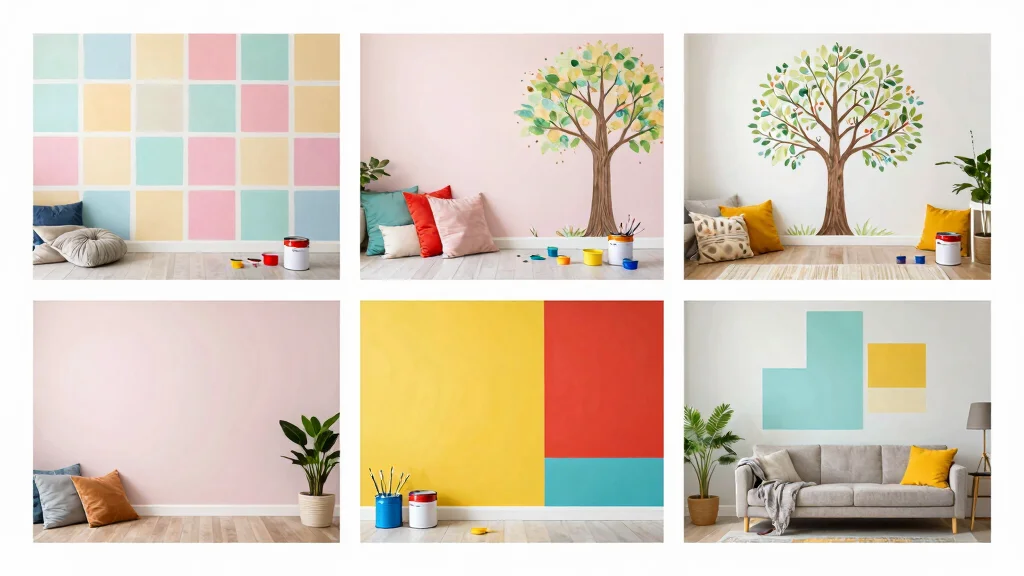
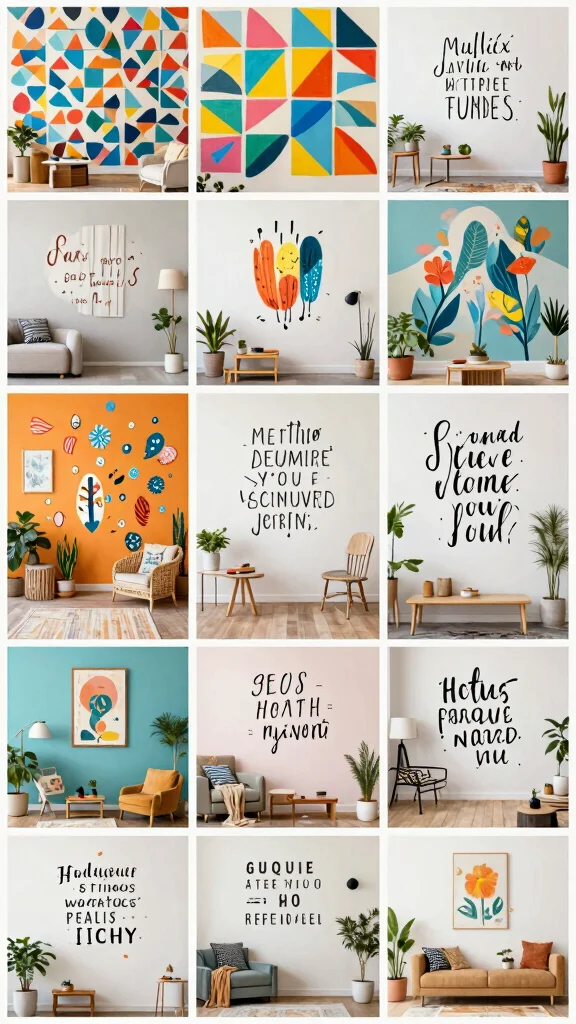
1. Geometric Patterns
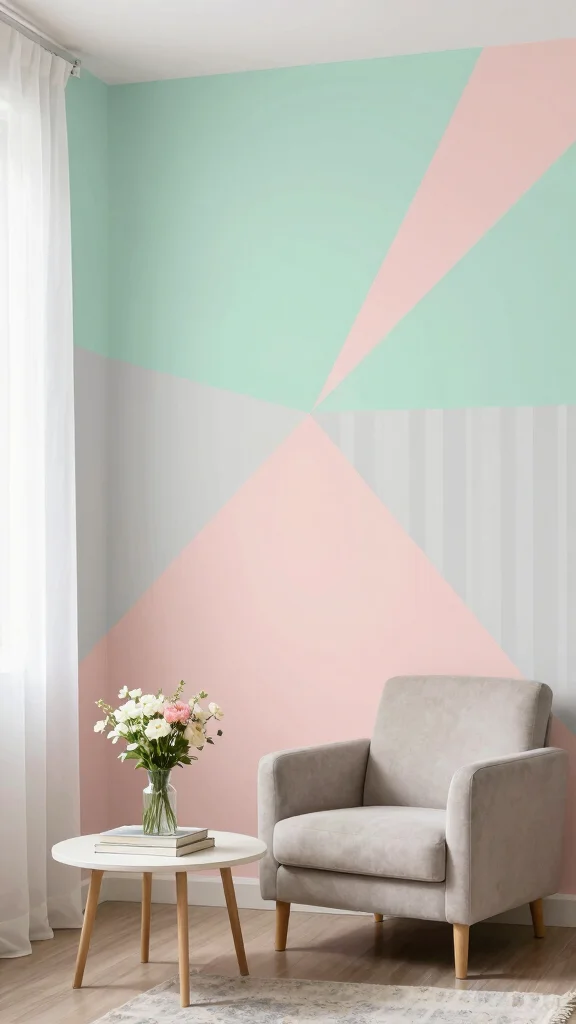
Geometric patterns breathe modernity into any room, and they’re not just a trend—they’re a style staple! When you incorporate sharp lines and angles, you create a sense of structure that can work wonders in small spaces. Imagine crisp triangles in soft pastels or bold rectangles in vibrant hues, each adding a dynamic touch to your walls. Using painter’s tape helps achieve those immaculate lines, so your design looks polished and professional.
To make these patterns work for you, consider planning your design carefully and selecting colors that complement your existing decor. This technique is budget-friendly, as you can even use leftover paint from previous projects. By embracing geometric shapes, you can transform your space and keep it fresh and exciting.
Here are some ways to implement geometric patterns:
– Pair triangles with a neutral background for a striking contrast.
– Install horizontal stripes for a sense of spaciousness.
– Use painter’s tape to create sharp, clean edges.
– Incorporate various shapes to keep it visually interesting.
This approach not only enhances the overall aesthetic but also invites a playful yet sophisticated vibe into your home.
🎨 Transform Your Space Like a Pro
Unlock the secrets to stunning DIY makeovers with our expert guide and elevate your wall painting skills today!
2. Ombre Effect

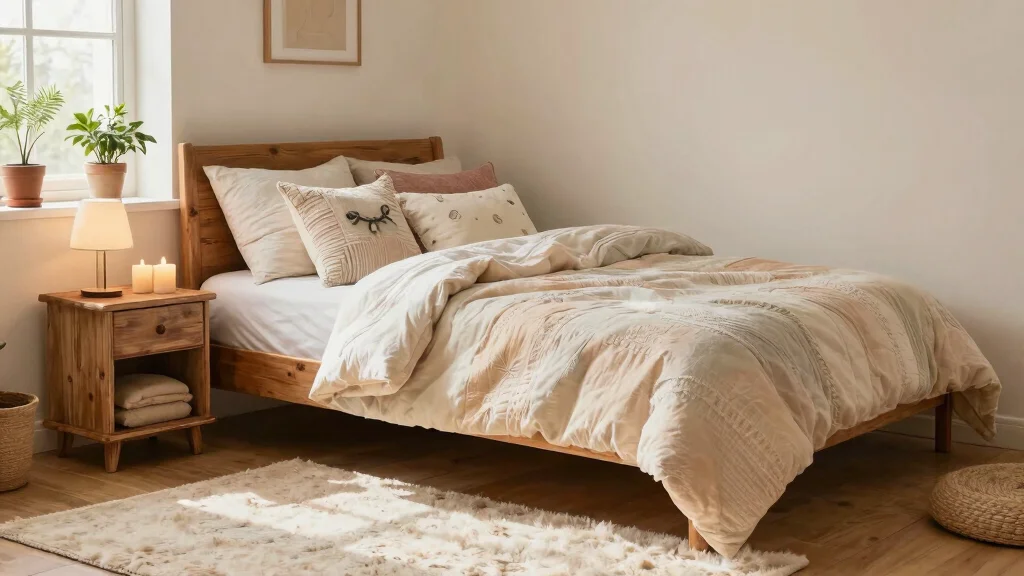
The ombre effect is an enchanting way to add depth and dimension to your walls, making any room feel more expansive. This technique features a smooth gradient transition from dark to light, creating a stunning focal point that draws the eye. Shades of calming blues or gentle pinks can foster a serene atmosphere, perfect for bedrooms or cozy spaces.
To achieve this beautiful look, start with a darker hue at the bottom and blend it gradually into a lighter shade at the top. Using a dry brush technique helps create a seamless transition, adding to the overall softness. This effect pairs beautifully with simple decor, enhancing the tranquil feel of the room.
Here are ways to implement the ombre effect:
– Start with a base layer of the darker shade.
– Use a sponge or brush to blend colors smoothly.
– Incorporate floating shelves to complement the gradient.
The ombre technique provides a gentle yet striking upgrade to your walls, creating a calm and inviting space that is anything but ordinary.
3. Whimsical Murals
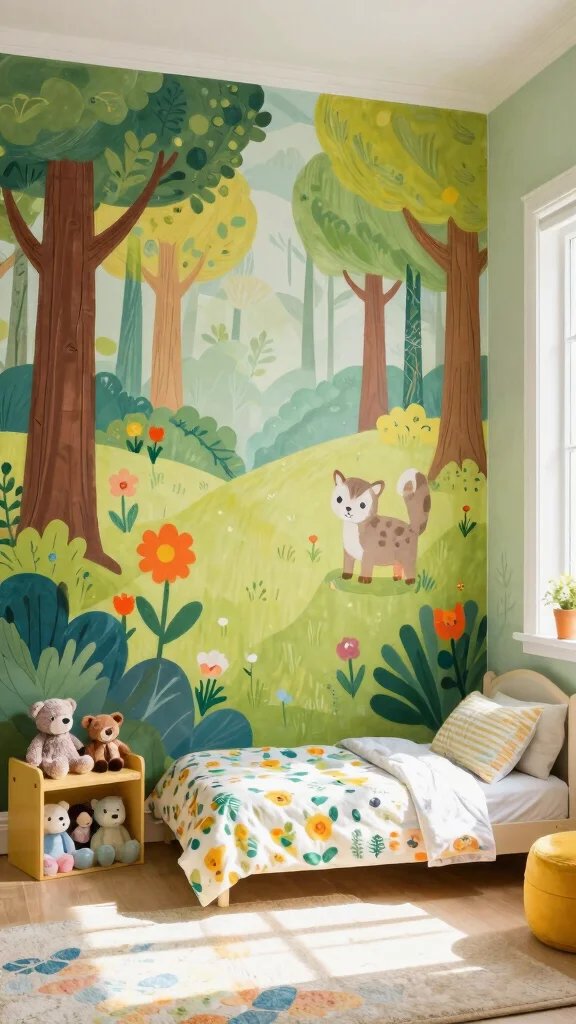
Whimsical murals can turn your walls into a canvas of creativity! These playful designs are not just for kids’ rooms; they can add a unique touch to any space. Whether you choose a fantastical forest or abstract shapes, a mural can reflect your personality and spark joy in your home.
Planning your mural is essential for success. Start by sketching your idea on paper to visualize it before committing. Removable vinyl stencils can help you achieve intricate details without a permanent commitment. Choose a color palette that harmonizes with your room to ensure a cohesive look.
Consider these tips for your mural:
– Sketch your design on paper before painting.
– Use stencils for precision and easy detailing.
– Select colors that blend well with your existing decor.
A mural can transform any plain wall into a captivating work of art, making your space feel more personal and inviting.
4. Color Blocking
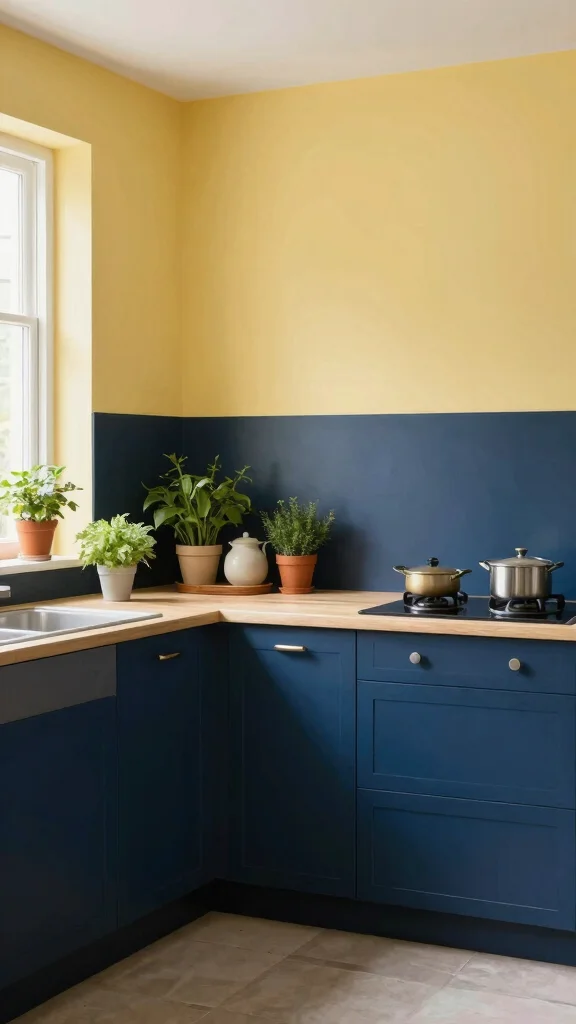
Color blocking is a bold technique that can redefine the energy of your room! By painting blocks of color, you create visual interest and division, helping smaller spaces feel larger and more dynamic. This method allows you to play with lighter shades to open up areas while adding darker blocks for emphasis.
For effective color blocking, start by selecting two to three complementary colors to create harmony. Painter’s tape can be your best friend for achieving clean lines. Mixing finishes like matte and gloss can also add an extra layer of texture to your design.
Here’s how to master color blocking:
– Choose colors that work well together for a cohesive look.
– Use tape to create distinct sections.
– Mix different paint finishes for added depth.
This technique not only brings a modern flair but also ties your decor together, making your space feel both stylish and inviting.
5. Chalkboard Paint

Chalkboard paint is a playful and versatile way to unleash your creativity on your walls! This fun finish allows you to turn any flat surface into a writable canvas, perfect for jotting down notes or expressing your artistic side. Imagine a small wall in your kitchen becoming a hub for grocery lists or doodles—it’s both functional and fun!
To use chalkboard paint, select a smooth wall for the best results. After priming, follow application instructions carefully for a flawless finish. Chalk markers offer vibrant colors and easy cleanup, making them a great alternative to traditional chalk.
Here are some ideas for using chalkboard paint:
– Create a mini message center in your kitchen.
– Use it in kids’ rooms for creative expression.
– Frame sections to showcase seasonal designs.
This creative approach adds a casual, interactive vibe to your space, allowing for change whenever inspiration strikes!
6. Stenciled Designs

Stenciled designs are perfect for those who love intricate patterns but may not feel confident in freehand painting! This technique can transform your walls into stunning backdrops with detailed designs that suit your style. Stencils make it easy to add beauty to small spaces without overwhelming them with too much detail.
To get started, pick a stencil that resonates with your design aesthetic. Secure it to your wall with painter’s tape to prevent any slipping while you paint. Using a sponge or roller ensures quick and even coverage for beautiful results.
Consider these steps for effective stenciling:
– Select a stencil that matches your style; floral or abstract works well.
– Secure the stencil for precision while painting.
– Use a sponge for an even finish.
With patience and creativity, stenciled walls can elevate your home decor, offering a unique touch that captivates every visitor.
Did you know? A single stencil kit under $20 can cover up to 100 sq ft, letting you create intricate designs on small walls without the fuss. Stenciled designs cut painting time and boost style in minutes.
7. Textured Walls

Textured walls introduce a captivating dimension to your small spaces! By employing various tools, such as sponges or brushes, you can create unique textures that make a room feel layered and inviting. This technique distracts from the dimensions of the space, giving it a warm and welcoming atmosphere.
To achieve textured walls, start with a base coat of paint before mixing in your chosen texture medium. Experiment with different tools for varied effects—rags create softness, while brushes can produce bolder lines. A subtle texture can add visual interest without overwhelming the space.
Here’s how to create your textured walls:
– Apply a base color before adding texture.
– Experiment with tools for diverse effects.
– Choose subtle textures to keep the space inviting.
This approach not only enhances beauty but also conceals imperfections, resulting in a polished look that feels intentional and cozy.
8. Accent Walls

An accent wall is a straightforward method to infuse character into your small space! By focusing on one wall with a bold color or striking pattern, you create a captivating focal point that breathes new life into the room. The contrast can completely transform the dynamics, making your area feel lively and engaging.
When choosing an accent wall, select a wall that naturally draws the eye, such as one with a fireplace or large window. Opt for a darker shade to create depth or a vibrant color to energize your space. Incorporate decor that complements your accent wall for a cohesive look.
Here are some tips for creating an accent wall:
– Pick a wall that stands out naturally.
– Use a bold color to create visual contrast.
– Accessorize with art that matches the accent color.
This stylish technique is budget-friendly and allows you to refresh a room with minimal effort, making it a fantastic choice for any decor enthusiast!
Difficulty Rating & Requirements
Overall Difficulty Rating: Medium
DIY wall painting ideas can range from easy to challenging based on the technique you choose. Many of these creative projects are suitable for beginners who enjoy home decor projects. However, some styles, like whimsical murals or textured walls, may require more skill and practice.
Time Estimate:
⏱ Estimated time: 2-7 days, depending on the project.
– Preparation Phase: 1-2 days for planning and gathering materials.
– Painting Phase: 1-3 days to complete the painting, allowing for drying time.
– Finishing Touches: 1 day for final details and clean-up.
Skill Requirements:
– Required skills: Basic painting skills, measuring, and some artistic ability for intricate designs.
– Beginner-friendly: Yes, for most projects. Simple techniques like color blocking or stenciling are great for those just starting out.
– Skills that can be learned: Techniques like ombre effects and washi tape designs can easily be picked up with practice. More complicated murals require some experience or artistic talent.
Tools & Materials Needed:
🧰 Essential items checklist:
– Paint brushes (required)
– Painter’s tape (required)
– Drop cloths (required)
– Paint (required, choose quality for best results)
– Stencils or templates (optional for some designs)
– Level and ruler (optional for precision)
– Sponges or rollers (optional for texture)
– Chalk or pencil for drawing outlines (optional)
Step-by-Step Overview:
1. Planning (1-2 days): Decide on a design and gather materials. Research techniques and gather inspiration from online resources. Make sketches if needed.
2. Preparation (1 day): Clear the area and protect furniture with drop cloths. Tape edges to ensure clean lines.
3. Painting (1-3 days): Start applying the base coat, allowing ample time for drying. Add layers and details as needed. This phase varies based on the complexity of your design.
4. Finishing Touches (1 day): Remove painter’s tape carefully. Touch up any areas that need refining. Clean tools and the workspace.
Cost Comparison: Professional vs DIY:
Hiring a professional to paint a room can cost anywhere from $300 to $800, depending on size and complexity. DIY painting can be budget-friendly, often costing just $50 to $200 for materials. If you enjoy hands-on projects and want to save money, tackling a DIY wall painting project can be a fulfilling option. However, if you’re looking for intricate designs or lack time, hiring a professional may be the best route.
9. Washi Tape Designs

If you adore patterns but want to skip the mess of paint, washi tape is your go-to solution! This decorative tape is available in countless colors and patterns, making it ideal for adding designs without the commitment of paint. It’s perfect for renters or those who enjoy changing their decor frequently.
To use washi tape creatively, consider crafting stripes, polka dots, or even intricate shapes on your walls. Layering different colors can yield a unique and playful look, while using it to frame artwork adds a lovely touch.
Here are some fun ways to use washi tape:
– Create playful patterns like stripes or shapes.
– Layer colors and patterns for a custom design.
– Frame mirrors or art pieces for added flair.
This budget-friendly option makes it easy to refresh your space, allowing your walls to reflect your evolving style and creativity!
10. Nature-Inspired Murals

Bring the tranquility of the outdoors inside with nature-inspired murals! These designs can create a refreshing atmosphere, especially in small spaces where a serene vibe is desired. Murals depicting trees, waves, or mountains can transform walls into calming backdrops that enrich your daily life.
As you plan your mural, select a theme that resonates with your personal style, whether it’s a lush tropical scene or a peaceful forest. Experiment with colors that align with your existing decor for a harmonious feel. You can even create a border of plants or flowers to enhance the illusion of space.
Consider these points when creating nature-inspired murals:
– Choose a theme that speaks to you.
– Match your color palette with current decor.
– Create plant borders to enhance the mural’s effect.
Nature-inspired murals evoke a sense of calmness, making them an excellent choice for relaxation and harmony in your home.
11. Metallic Accents

Metallic accents can add a splash of glam to your DIY wall painting projects! By incorporating metallic paints or foils, you introduce a hint of luxury that can brighten any small space. A touch of gold or silver reflects light beautifully, creating an inviting atmosphere that feels larger and more open.
Here are some creative ways to include metallics in your design: Start by creating geometric patterns with metallic outlines against vibrant colors. You might also paint a few stripes of metallic on an accent wall for a bold statement. For an elegant touch, consider using metallic wallpaper as a stunning feature.
Ways to incorporate metallic accents:
– Create geometric designs with metallic outlines.
– Add metallic stripes for a striking effect.
– Use metallic wallpaper for a luxurious finish.
This technique elevates your decor, adding sophistication while maintaining a modern touch, perfect for anyone looking to shine!
12. Seasonal Themes

Embrace the changing seasons by incorporating a rotating theme on your walls! With removable decals or paint, you can easily switch your designs to match the time of year, keeping your space lively and fresh. This approach allows for an easy refresh without the need for a complete makeover.
To implement seasonal themes, consider floral designs or soft pastels in spring. As autumn arrives, opt for rich oranges and browns to create a warm atmosphere. Winter can bring snowy scenes or icy tones that evoke a cozy feel.
Here are some ideas for seasonal themes:
– Use florals and pastels for spring decor.
– Incorporate warm colors and leaf motifs for fall.
– Create winter vibes with snowy scenes or icy colors.
This flexible approach to decor allows you to express your creativity throughout the year, keeping your home feeling vibrant and engaging!
13. Plank Wall

A plank wall offers a rustic yet modern charm that can enhance any space. By painting wooden planks or using a faux wood technique, you can create a cozy atmosphere in even the smallest areas. This approach adds character and warmth without overwhelming your decor.
To create a plank wall, consider using reclaimed wood for an authentic feel, or opt for faux wood panels for a more accessible solution. Stain or paint the wood in colors that complement your existing decor, and leave slight gaps between planks for a dynamic effect.
Here are ways to create your plank wall:
– Use reclaimed wood for a genuine rustic look.
– Stain or paint the wood to match your decor.
– Leave space between planks for added interest.
This technique brings warmth and charm, ensuring your small space feels inviting and homey, perfect for creating a relaxing retreat.
14. Hand-Painted Quotes

Personalize your space with hand-painted quotes that resonate with you! This technique allows you to express your thoughts and values on your walls, making your home feel uniquely yours. A well-placed quote can uplift the mood of any room, serving as a daily reminder of what inspires you.
To create your hand-painted quote, select a font style that speaks to you or go for playful typography. Choose a color that stands out against your wall while coordinating with your decor. If you’re unsure about freehanding, using stencils can help you achieve a polished look.
Consider these tips for hand-painted quotes:
– Select a font that matches your style.
– Choose a contrasting color for visibility.
– Use stencils for precision if needed.
This DIY project adds a meaningful touch to your home, allowing you to showcase your personality and creativity beautifully!
15. DIY Wallpaper

Creating your own wallpaper is a fun way to infuse your small space with unique flair! You can utilize stencils, stamps, or even fabric to achieve captivating designs that resonate with your overall decor theme. DIY wallpaper is not only more affordable but also allows for complete customization, making it a wonderful option for creative souls.
To get started, plan your design and gather the necessary materials. If you’re renting, consider using removable adhesive for less commitment. Mix patterns or colors to create a one-of-a-kind look that reflects your personality.
Here’s how to embark on your DIY wallpaper project:
– Design and plan your wallpaper carefully.
– Use removable adhesive for flexibility.
– Get creative with patterns for a unique touch.
This technique makes a bold statement, adding personality to your walls and transforming your space into something truly special!
Did you know DIY wallpaper can refresh a cramped wall in minutes? It’s affordable, customizable, and you can swap fabrics, stencils, or prints anytime—perfect for small spaces and creative souls embracing DIY wall painting ideas.
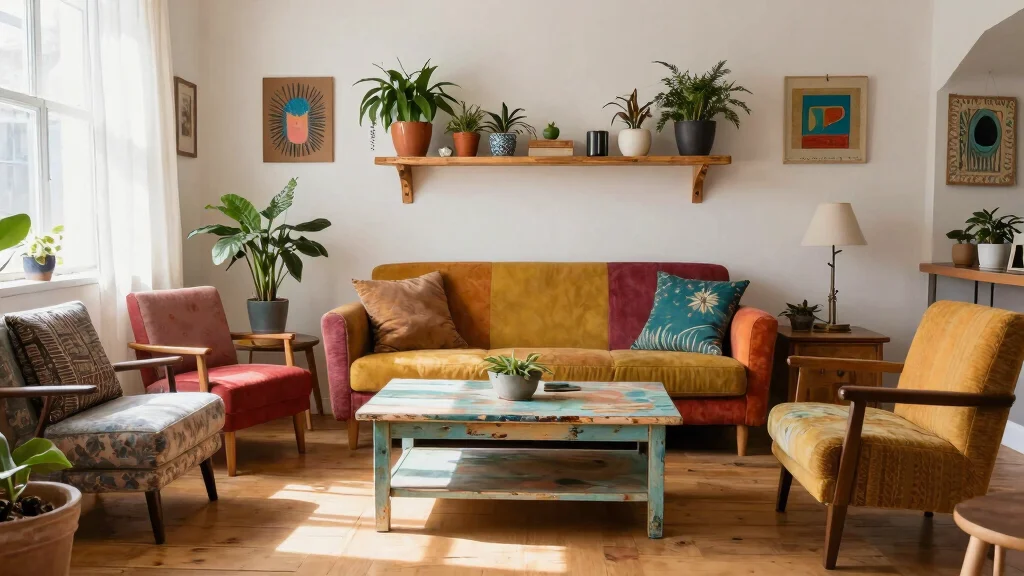
16. Paint Dipped Furniture
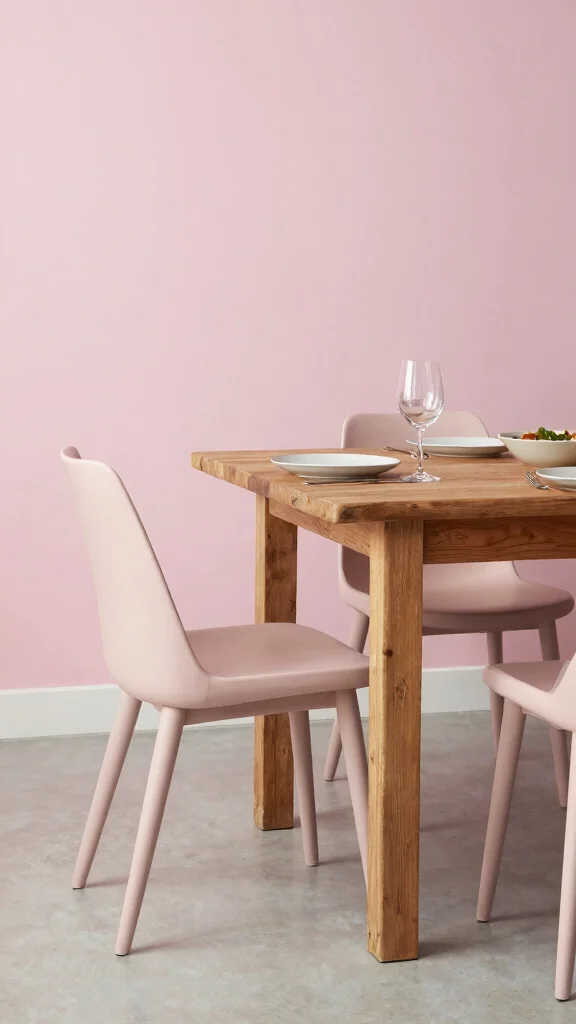
Extend your DIY wall painting ideas to your furniture with paint-dipped styles! This technique creates a cohesive look throughout your space by painting the legs or parts of furniture to match or contrast with your wall colors. It’s especially effective in small areas where bulky furniture can feel overwhelming.
To execute this idea, select functional and visually appealing furniture pieces. Choose a color palette that coordinates with your walls for a unified design. Painter’s tape can help you mark off areas you want to paint, ensuring clean lines and a professional finish.
Consider these steps for paint-dipped furniture:
– Choose furniture that enhances your decor.
– Coordinate colors with your wall palette.
– Use painter’s tape for precise application.
This approach ties your room together, making it feel polished while adding a stylish and unique touch to your home.
Turn tiny spaces into a cohesive story with diy wall painting ideas like paint-dipped furniture. A few bold dip details on legs or edges can unite walls and pieces in minutes—no heavy renovations needed. Pro tip: use painter’s tape for clean lines and confidence.
17. Wall Art Collage

Creating a wall art collage is a fantastic way to decorate small walls! This technique involves grouping various art pieces, photographs, and personal mementos into a visually cohesive display. It’s a perfect way to showcase your personality and interests without committing to a single large piece.
To design your collage, lay out your art pieces on the floor first to find the ideal arrangement before hanging them on the wall. Mixing and matching frames can create an eclectic look, while uniform frames offer a modern touch. Using double-sided tape or picture hanging strips makes repositioning easy.
Here’s how to create your wall art collage:
– Arrange art pieces on the floor for layout ideas.
– Mix frame styles for an eclectic vibe.
– Use hanging strips for easy adjustments.
This technique transforms bare walls into vibrant storytelling spaces, infusing small rooms with character and charm!
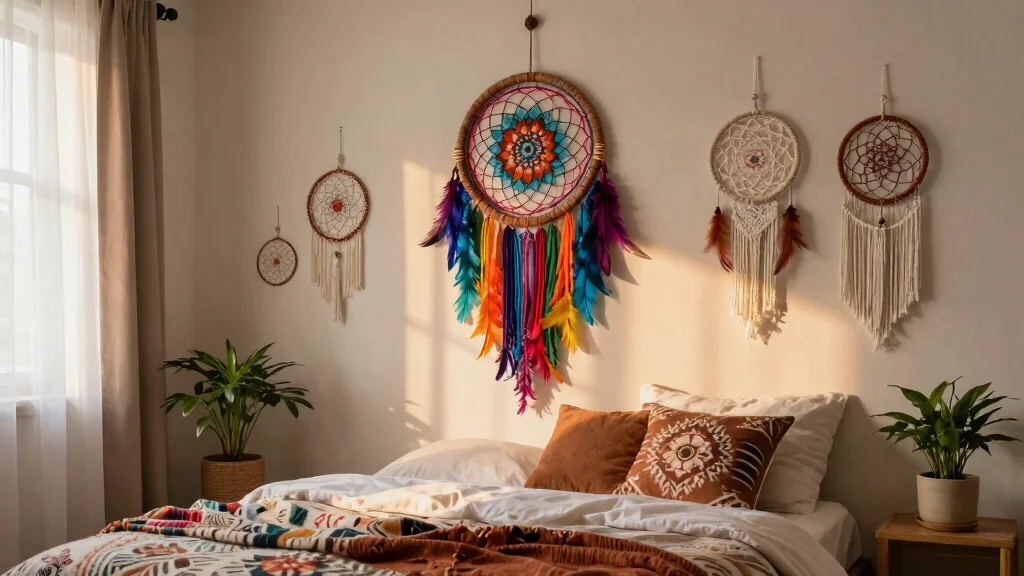
18. Wall Tapestry
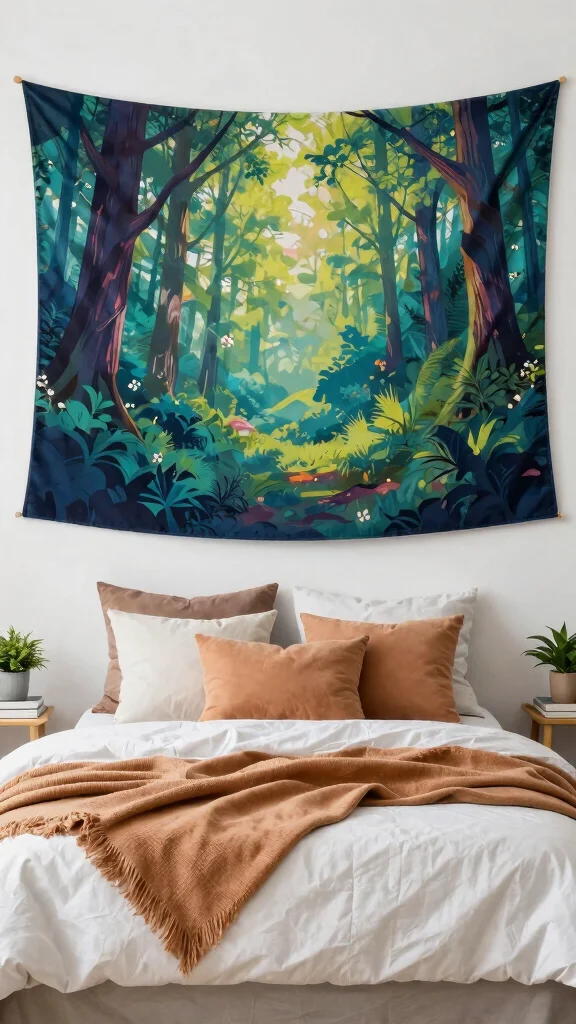
Wall tapestries offer a trendy and practical decor solution for small spaces! They add texture, color, and warmth without requiring permanent wall changes. With countless designs available, it’s easy to find one that perfectly matches your style and enhances your decor.
To hang a tapestry, consider using a rod and brackets for a simple, removable setup. Layering multiple tapestries can create a bohemian look that feels cozy and inviting. If you’re renting, adhesive hooks are a great option to avoid making holes in the walls.
Here are some tips for incorporating wall tapestries:
– Use a rod and brackets for easy hanging.
– Layer tapestries for a bohemian vibe.
– Consider adhesive hooks for damage-free hanging.
This effortless approach creates a cozy atmosphere, allowing you to change your decor with the seasons or your mood!
Conclusion
With these 18 DIY wall painting ideas, you’re ready to unleash your creativity and transform your small spaces into something truly special.
Whether you choose to go bold with color or create a serene mural, the options are limitless. Think about what resonates with you and let your walls tell your story. Happy painting!
Frequently Asked Questions
What are some easy diy wall painting ideas for small spaces?
For small spaces, try diy wall painting ideas that visually expand the room. Horizontal stripes, color blocking, and a subtle ombre fade add dimension without clutter. Create a gallery-style look by painting a geometric grid or using a stencil pattern to achieve creative wall art on a budget. These budget-friendly crafts still feel polished and work great in a DIY room makeover.
How do I pick colors and painting techniques for small spaces to avoid overwhelming the room?
Start with a light base color to open the space, and reserve one bold accent shade for a focal wall or details; use painting techniques like crisp tape lines or soft gradients to keep the look cohesive. Test swatches on poster boards or a hidden spot and check in different lighting. Pair with creative wall art and simple home decor projects to tie the room together.
What are budget-friendly diy wall painting ideas that still look high-end?
Use painter’s tape to create clean lines and negative space for an upscale vibe without expensive materials. Try a metallic glaze or brush-on patina on a single feature wall for a Luxe effect on a budget. Reuse leftover paints or buy small sample cans to try several painting techniques and combine with budget-friendly crafts and DIY room makeover ideas.
What tools and prep steps are essential before starting a wall painting project?
Gather drop cloths, painter’s tape, quality rollers and brushes, sandpaper, spackle, and primer—these basics prevent drips and ensure even coverage. Clean walls, fill holes, sand rough patches, and prime if you’re painting over dark colors or glossy surfaces. Protect floors and furniture, work in a well-ventilated space, and have a plan for cleanup—your future self will thank you for the planning.
How can I combine wall painting ideas with other decor for a cohesive DIY room makeover?
Start with a mood board featuring your creative wall art, color palette, and existing furniture to see how everything fits. Use one unifying color or finish across walls and accents to tie the space together, then layer with home decor projects like artwork, textiles, and plants. Focus on the wall as the centerpiece for a DIY room makeover and keep accessories minimal but intentional.
Related Topics