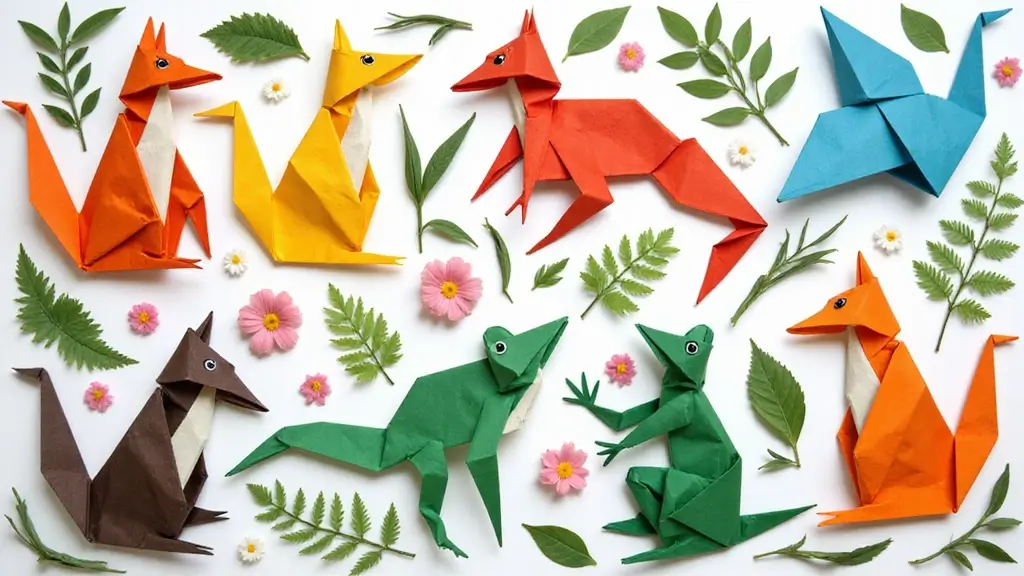
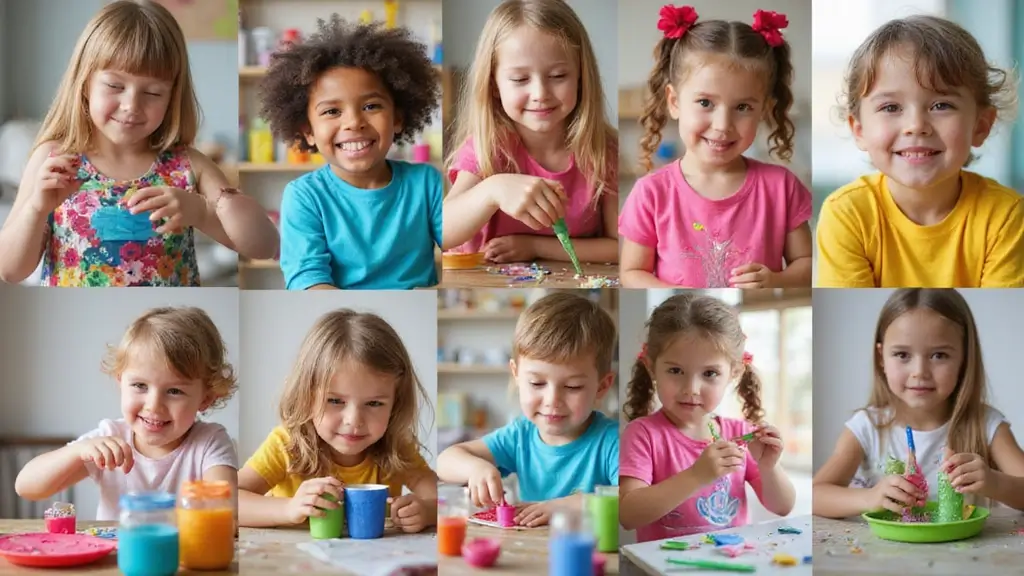
Here is why I made this post. Lately I crave small crafts you can finish in one quiet afternoon. Origami lets you turn a plain square of paper into a lively animal with just a few folds. I wanted a guide that makes 26 different origami creatures easy to pick up, try, and finish, no matter your skill level.
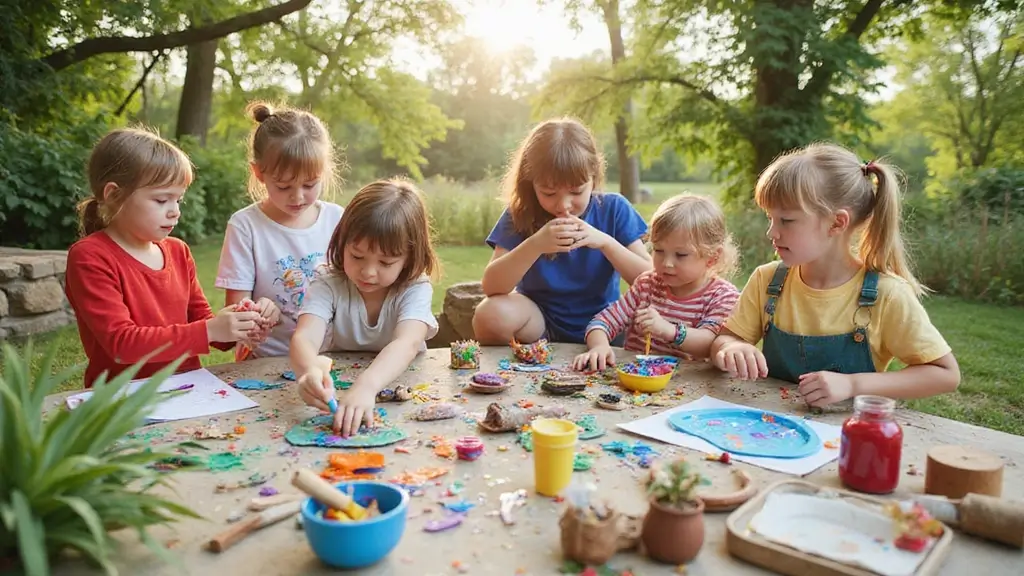
Who it’s for. If you love hands-on tasks, you teach kids, you want a calm hobby, or you simply want something you can do beside a cup of tea, this one is for you. Whether you are a beginner or you have folded before, these projects are friendly and doable.
What you’ll get. You’ll find 26 ideas with simple steps that walk you through the folds, one by one. You’ll learn tips on paper choices, how to pick sizes, and how to shape the final model so it fits on a shelf or in a card. These projects are quick enough for a lunch break and fun enough to save for a weekend session.
Practical tips and setup. Start with large, bright sheets to practice the first few animals. Keep your workspace clean and your hands steady. A pencil, a flat table, and a little patience will carry you through. Each model uses a few easy folds and a gentle crease to make the form pop.
Expect a bit of magic. Watching a flat sheet become a bird, a cat, or a fish is oddly satisfying. You’ll feel calmer as you fold, and you’ll have cute pieces you can put on a desk, pin to a card, or gift to a friend.
Next steps. Ready to dive in? Pick the first animal, grab some square paper, and start folding. If you try a model and share your progress, I’d love to see it. This is a friendly invitation to make paper come alive in your space.
1. Origami Crane – The Classic Symbol of Peace
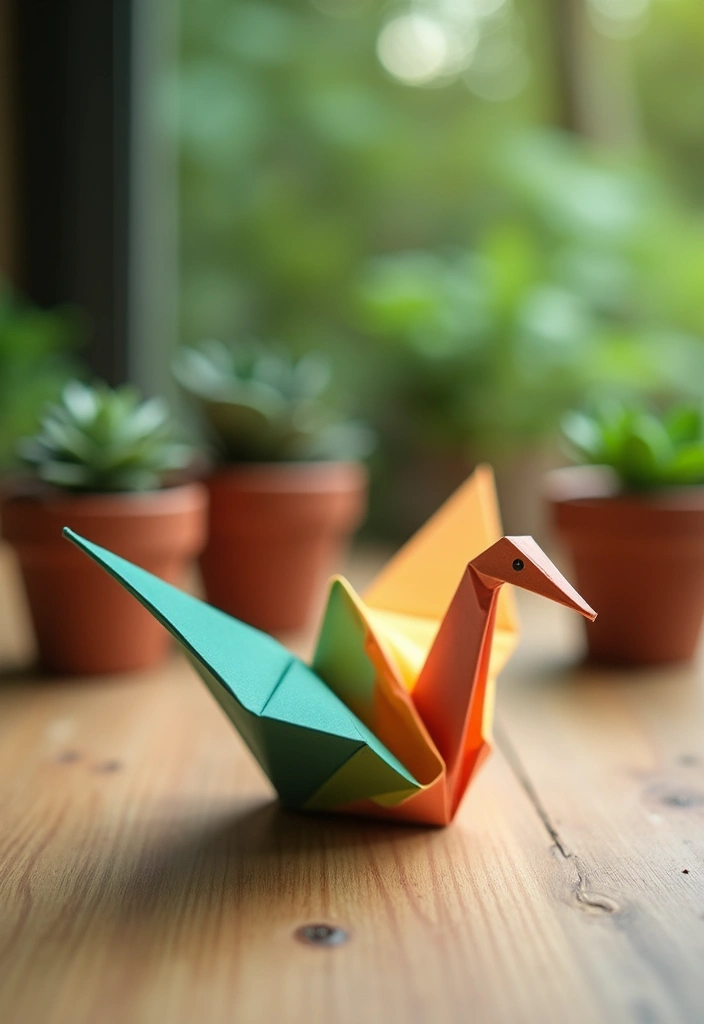
1. Origami Crane — The Classic Symbol of Peace
If you want a small, meaningful craft that looks great on a shelf or as a gift, the origami crane is a perfect pick. It carries the peace symbol everywhere you place it. You can fold it from recycled paper or smooth origami paper. Make it tiny for decor or bigger as a keepsake.
Here is what you’ll need:
– Materials: a square sheet of lightweight paper (recycled works fine)
– Optional: colors or patterns to add style
– A clean, flat surface to work on
Here is how to build a crane. Let’s break it down so it’s easy to follow.
1) Start with the square, color side up.
2) Fold diagonally in half to make an X crease; unfold to reveal the guides.
3) Turn the paper over. Fold the left and right corners toward the center to form a tall diamond shape. This is the starting base.
4) Fold the bottom tip up toward the center to begin the neck and tail. Do the same on the other end for balance.
5) Shape the head by making a small forward fold at one end. Give the beak a tiny fold for detail.
6) Gently pull the wings down to set the body. Let the crane rest and stand on its own.
Ways to display:
– Thread several cranes on a string to make a mobile
– Place a few in a bowl for a simple centerpiece
– Gift a single crane in a card for a thoughtful touch
Tips to make it easier:
– Use lightweight paper; it folds cleanly.
– Before folding, draw a small design or message on the paper.
– Try different colors and patterns to create a colorful family of cranes.
With a little practice, you’ll fold cranes fast and clean. They make charming accents and teach patience with every crease.
@media(max-width:480px){
2. Playful Frogs – Jumping into Fun

Here is a simple plan for a fun origami frogs project. If you want a quick paper craft that kids can do and watch move, try origami frogs. They fold fast and jump when you press their backs. You get a lively toy and a neat centerpiece all in one.
– Start with a square sheet of recycled paper, about the size of a coaster.
– Fold it in half diagonally to form a triangle, then unfold.
– Fold the two top corners down to the base of the triangle.
– Flip the paper over and fold the bottom edge up to make the legs.
– A few final folds finish your jumping frog.
These little frogs are perfect for table fun and small gifts. They also spark friendly races to see whose jumper can leap the farthest.
– Suggestion: Use patterned paper for more personality.
– Kids can decorate their frogs with markers after folding for extra flair.
– Try making a whole pond of frogs to create a lively display.
Next steps: set up a small play area, invite friends, and watch the frogs spring to life. You can reuse scraps for more creatures later, keeping the project simple and satisfying.
@media(max-width:480px){
3. Charming Foxes – Whimsical and Cute

You want a quick, charming origami project that uses scraps and brings smiles. A paper fox fits perfectly. It’s easy to fold, yet looks playful and cute.
How to fold a charming fox
– Start with a square sheet of recycled paper.
– Fold diagonally to form a triangle.
– Fold down the top corners to create the fox’s ears.
– Fold the bottom tip up to shape the snout and body. Tweak the folds so the fox sits with a friendly stance.
– Do two tiny snips on the ear edges to add fluffy fur.
– Add eyes with a marker or a sticker to give the fox its personality.
Make it yours
Use orange and white paper to keep the classic fox colors. If you only have plain paper, color accents with markers or pencils. Position each fox with a slight tilt to feel curious. You can also add a small white dot on the snout for extra charm.
Ways to use your foxes
– Create a woodland display on a shelf or table.
– Give them as cute party favors at a forest-themed party.
– Line a string with several foxes for a playful garland.
– Build a tiny scene with trees and rocks to set the mood.
Tips and notes
Recycle paper when you can. Eyes really bring them to life, so don’t skip the markers or stickers. This simple origami fox makes a cheerful craft that’s easy to repeat and share.
@media(max-width:480px){
4. Elegant Butterflies – A Touch of Beauty
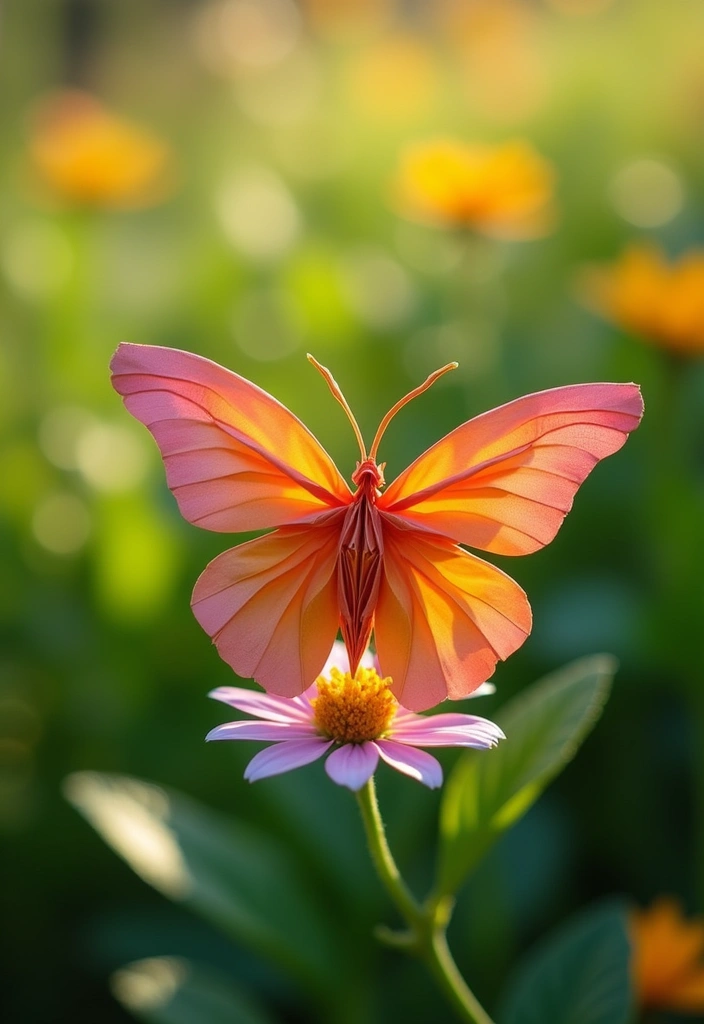
You want a pretty butterfly that fits in your hand and comes from paper you already have. A recycled origami butterfly adds color to gifts and any corner of your room. It feels light, moves with the breeze, and shows how paper can come alive.
How to fold
– Start with a square piece of recycled paper.
– Fold it in half diagonally, then unfold.
– Bring the two corners to the center so the paper makes a tiny diamond.
– Flip the paper over.
– Fold the sides in to form two wings.
– Fold the top layer tips toward the center to make the body.
– Gently crease and adjust the wings so they stand a bit.
Finish and functions
– Pinch the center to puff the body for a fluttery look.
– Open the top layer a touch to give curved wing edges.
– Flatten the bottom edge so it can rest on a page or a branch.
Next steps: make a few butterflies in different colors to test how they look on gifts.
Ways to use
Butterflies brighten gift wrap, cards, jars, or a small mobile. Clip one to a ribbon, tape one to a gift tag, or string several for a tiny fluttering garden.
Smart tips
– Try different textures, from plain to patterned recycled paper.
– Use bright colors for a mini butterfly garden.
– A touch of glitter or stickers adds shine without much mess.
@media(max-width:480px){
5. Delightful Penguins – The Arctic Cuties
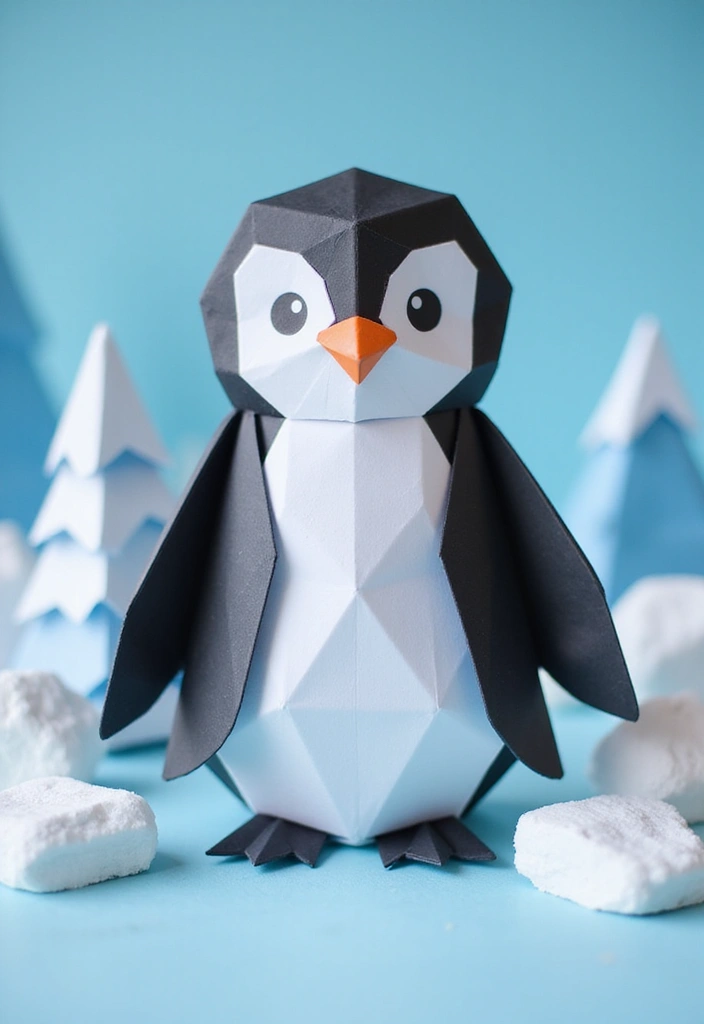
Delightful Penguins – The Arctic Cuties
You want a quick, cute craft that adds charm to your space. A penguin origami piece does that. It’s simple, ties in with a winter vibe, and uses paper you already have. With black and white paper, these little birds look almost real.
Here is what you’ll need: a square sheet of paper. Recycled paper is a plus. If you can, use black on one side and white on the other to get the penguin’s look without extra colors.
Here is how to fold a penguin that stands on your desk. Step 1: place the square so the colors face the side you want to show. Step 2: fold in half to make a tall rectangle. Step 3: fold the top corners down to form the head. Step 4: do a couple of small folds for the body to shape the belly and back. Step 5: tuck a tiny beak with a small triangle fold. Step 6: adjust the wings and base so it sits upright.
Next steps are simple and quick.
Tips and ideas to make it yours:
– Tip: add a tiny paper scarf or hat for personality.
– Tip: make a family of penguins for a cute display.
– Tip: Try colorful paper for a playful twist.
These penguins make great gifts for friends or classroom buddies, and they work well as party favors or desk decor. They fold fast, so you can make several at once.
6. Sweet Kittens – Feline Fun
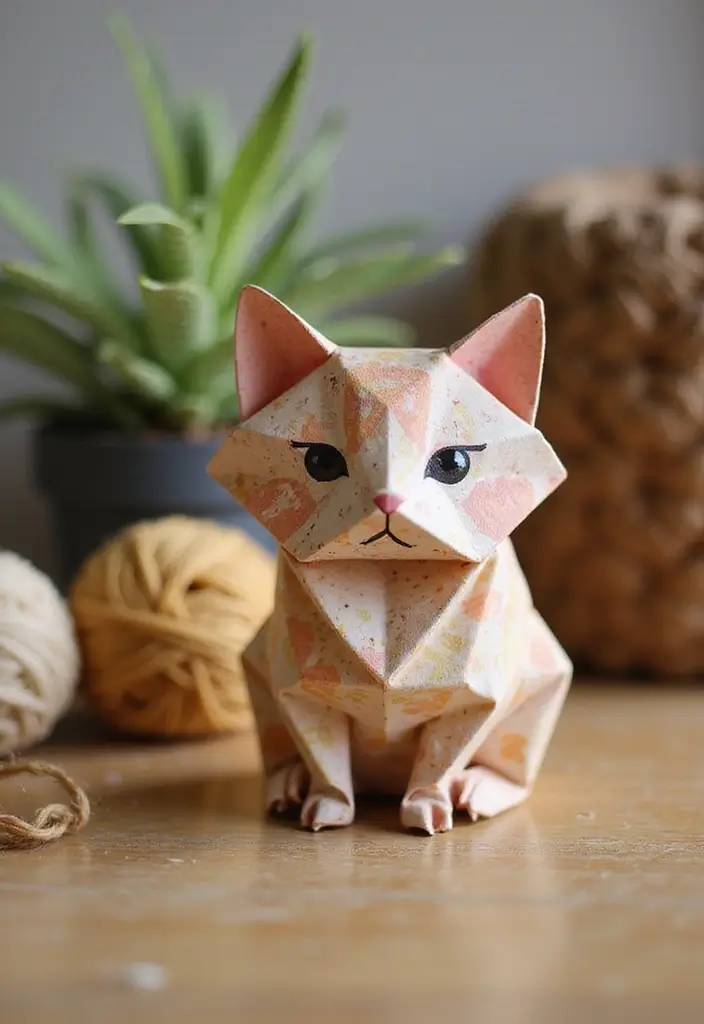
If you want a cute, quick origami project, a kitten is a perfect pick. It’s small, charming, and easy to place on a desk or shelf. You’ll learn a simple fold that results in a friendly, cat-shaped decoration you can gift or keep.
Here is a beginner-friendly way to fold a tiny origami cat:
– Start with a square piece of paper, colored side up. Fold it in half diagonally to form a triangle. Crease well, then unfold.
– Fold the top corners down toward the center to shape two pointy ears. Smooth the edges so the head shows clearly.
– Fold the bottom tip up a little to create a short neck and a rounded body. A tiny back flap can stand in for a tail.
– Flip the figure over. Add a dot for a nose and light whiskers with a marker, or glue on two small googly eyes for life-like charm.
Here is why this works: big ears and a soft body give a friendly cat look in a single fold. It’s satisfying to see the result take form.
Tips and variationsnn
– Use patterned or pastel paper to imitate different cat coats and breeds.nn
– Try a trio of colors to make a little litter for display or a cute gift tag.nn
– Keep a few on hand for quick presents at a party or as goodie bag accents.
@media(max-width:480px){
7. Majestic Elephants – Symbols of Strength

Want a strong, wise symbol that fits any space? Try an origami elephant. It’s simple, uses recycled paper, and makes a calm statement on a shelf or desk.
Here is why you’ll love it. Elephants stand for strength and memory. A small origami elephant carries that message in your room.
What you need
– A square sheet of paper (preferably recycled)
– A smooth, clean workspace
– Optional: grey paper for a classic look or bright paper for a playful touch
How to fold it
– Start with the square and fold diagonally to form a triangle.
– Fold the top point down to the center.
– Fold the sides in to create the head and ears.
– Make a light fold to form the trunk, then shape the trunk and ears with gentle tweaks.
– Press softly so the elephant can stand on its own.
Finish and display
– Pinch the trunk to give it a slight curl.
– Smooth the body and adjust the legs so it sits upright.
– If you want a touch of life, tilt the ears a bit to give it character.
Ways to use this origami elephant
– Create a small herd for a striking display on a mantel.
– Gift it to animal lovers or students who love crafts.
– Add tiny origami flowers around it to craft a tiny habitat.
Next steps: try different colors or sizes. You can make a family of elephants and watch them bring your space to life.
@media(max-width:480px){
8. Playful Dolphins – Ocean Wonders
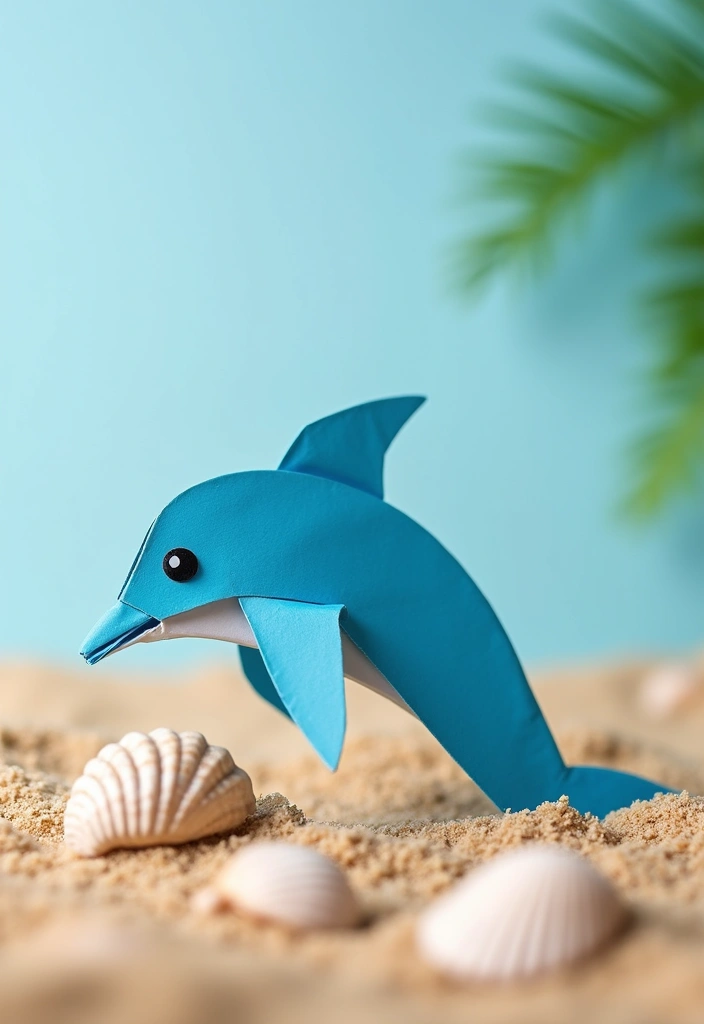
You want an easy origami dolphin that brightens your space. This simple paper dolphin uses recycled paper and adds life to desks, shelves, or party tables.
Here is why this craft works. It relies on a few steady folds and small tweaks that turn a flat sheet into a playful swimmer.
Let’s break it down.
– Start with a square sheet. Fold it in half diagonally to form a triangle, then press the crease.
– Make a couple of gentle folds to shape the nose and the tail. A light pinch at the front and a tiny bend at the back give the dolphin its friendly profile.
– Finish with one tiny crease to set the back and let the body hold its curve. You should see a compact silhouette ready to jump.
Materials and color ideas: use recycled paper or old magazines for texture. Blue or turquoise paper gives the best ocean vibe, but you can mix shades for a lively school of dolphins.
Applications: place the dolphins on a shelf for a room accent, or lay them on a blue mat to create a mini ocean scene. They also work as cute decor for an ocean-themed party.
Creative twists: let kids color the folded dolphins after they dry. Add gloss with a marker for shine, or tie several into a garland.
Next steps: try a pod of four or six. Arrange them to swim across a wall, table, or window.
With practice, you can add more fins and a bigger tail. Display them with a blue cloth so they look like they swim.
@media(max-width:480px){
9. Majestic Owls – Wisdom in Paper

You want a paper owl that stands out. It should be made from recycled paper. It can teach you folding rules and make a nice gift. Origami owls carry wisdom and calm.
Here is why this little project shines: it uses simple folds, it looks bold on a shelf, and it feels good to reuse paper.
Start with a square sheet. Fold it diagonally to form a triangle. Next, fold the edges in to shape the wings. Then more folds give the body, the small beak, and round eyes. Keep the folds crisp with a gentle crease. You can add tiny ear tufts by a couple of extra folds.
Display ideas: place the owl on a bookshelf, or set several on a window sill to watch the night light. You can stage a mini night scene with a trio of owls for a cozy display.
Tips
– Use patterned or colored paper to let the owl stand out.
– Try different eye colors for character.
– Add a soft shadow behind them to echo a moonlit scene.
Next steps: practice with plain white paper to learn the shaping, then switch to recycled paper that has texture. With patience, you’ll create a row of owls that feels alive.
@media(max-width:480px){
10. Adorable Bunnies – Springtime Joy
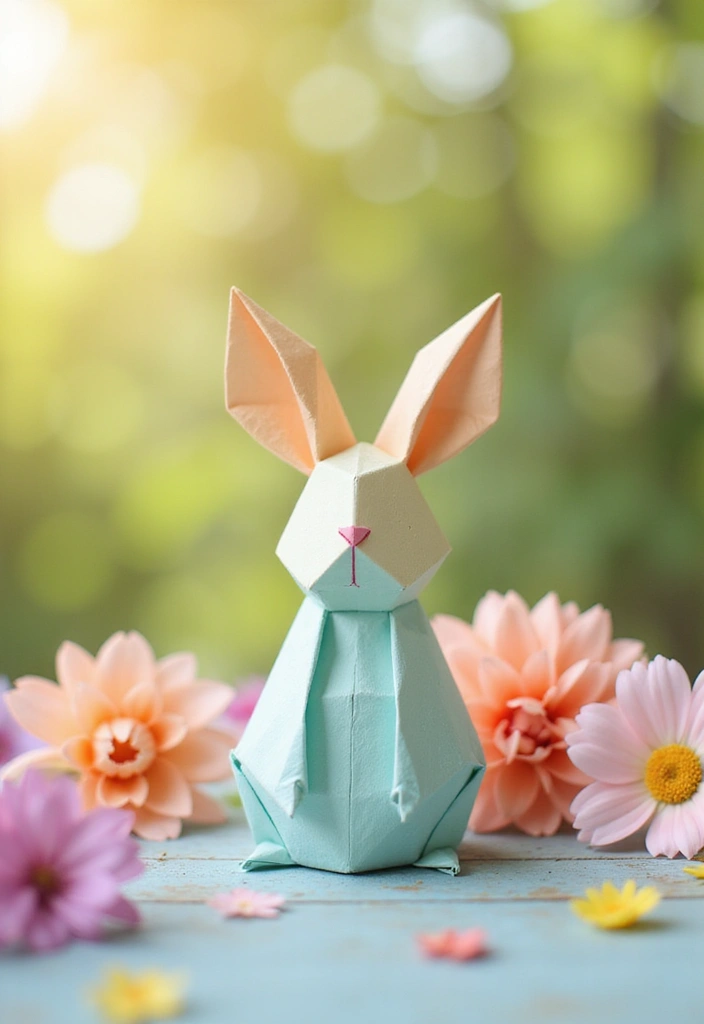
You want a spring craft that kids love. Origami bunnies fit. They use recycled paper. They look cute in many poses. You can build a family of bunnies for a bright display.
Materials
– Square paper (recycled if you have it)
– Markers or stickers for decorating
– A flat table or placemat for folding
Steps to fold a cute sitting bunny
– Start with a square sheet. Fold it diagonally to make a triangle.
– Fold the top corner down to form long ears.
– Make a few small folds to shape the ears and head.
– Fold the bottom edge up to create the body.
– Gently open the ears and adjust the bunny into a sitting pose.
You can finish a bunny in minutes. If you want a hopping look, add a tiny crease at the back for a lean pose. Try using different sizes to make a larger bunny or a tiny desk bunny.
Decoration ideas
– Use pastel colors for a soft spring vibe.
– Add eyes, a nose, and whiskers with a marker.
– Draw tiny flowers or dots on the body to soften the look.
Ways to use your bunny crew
– Line them on a shelf for a sweet display.
– Hang them as a mobile for a spring party.
– Gift a cute bunny to a friend with a short note.
Next steps: make a whole family of bunnies and arrange them in a row. You will see how a simple paper craft can bring spring to life.
@media(max-width:480px){
11. Cute Hedgehogs – Quirky and Fun
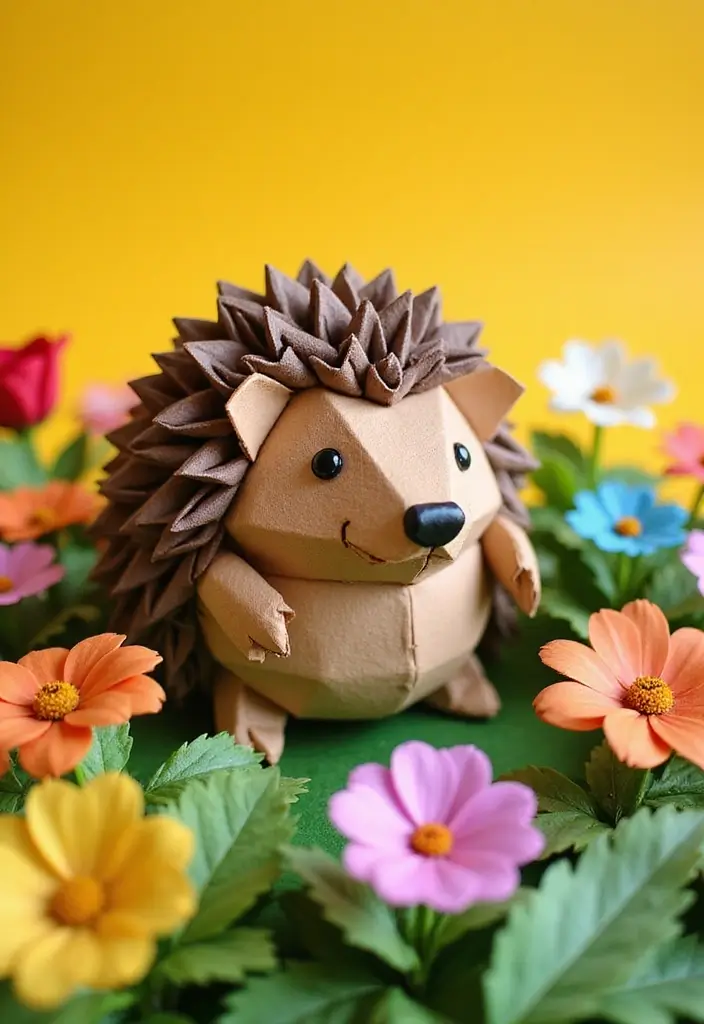
You want a cute hedgehog you can make with your own hands. This origami hedgehog uses recycled paper and a few simple folds. It sits on your shelf or desk with charm. You pick the color and the size. The result is playful and easy to show off. Use scraps from old mail or magazines to keep waste low. Recycled paper holds its shape when you crease it.
How to fold a hedgehog in simple steps
– Start with a square sheet of paper. Keep it crisp and flat.
– Fold it in half diagonally to form a triangle. Crease firmly.
– Fold the tip of the triangle down a little to make the head.
– Flip the model over. The body will be ready to shape.
– Pinch the sides to create a rounded body. This gives your hedgehog its belly.
– Make tiny feet by tiny folds along the bottom edge.
– Make the quills by a few light folds along the back.
– Do not overdo it.
– Draw a face or stick on googly eyes.
– A small nose finishes the look.
– Stand it on a flat spot and adjust so it sits evenly.
Next steps: place several hedgehogs in a row to form a tiny hedge garden. It looks fun on a desk or on a windowsill.
Tips for best results
– Use brown or tan recycled paper for a classic look. You can also try bright colors for a quirky scene.
– Add tiny googly eyes for extra charm.
– Experiment with different sizes. A trio can make a cute display.
Why this craft works for you
– It teaches simple origami folds you can reuse in other projects.
– It makes a friendly, handmade gift that costs little to create.
– It adapts to your style with color, size, and placement options.
@media(max-width:480px){
@media (max-width: 600px) {
.normal-quiz-iframe { min-height: 570px !important; height: 570px !important; }
}
12. Fancy Peacocks – Colorful and Regal
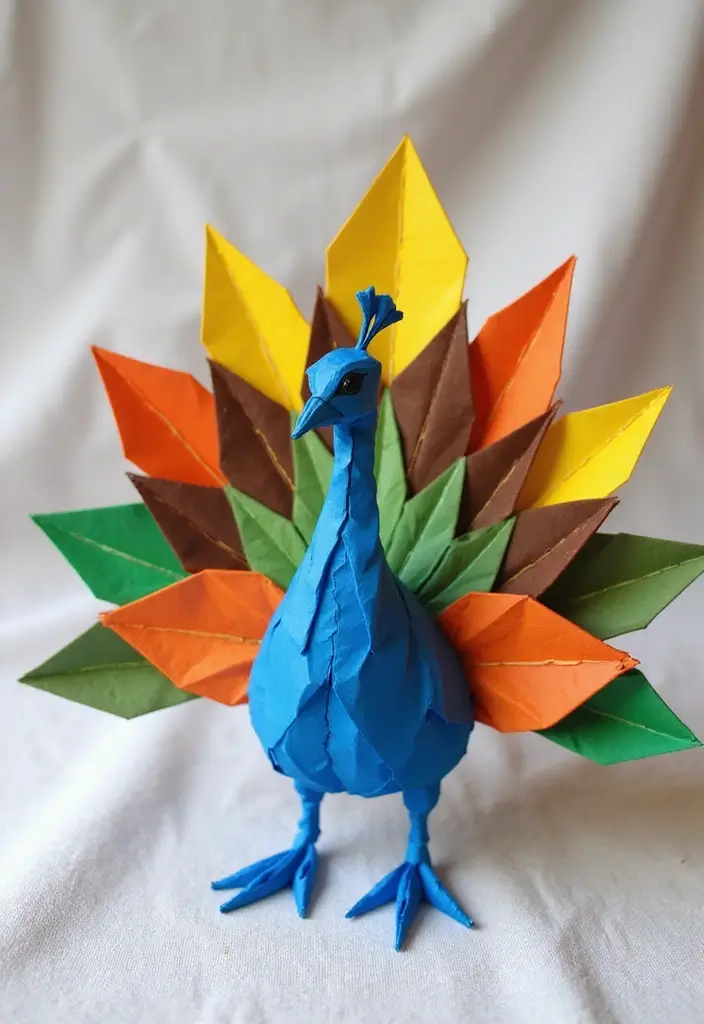
If you want a paper bird that grabs attention, try a fancy peacock origami. It looks tricky, but you can pull it off with calm folds and bright colors. Recycled paper makes it eco-friendly and the finished bird shines in any room.
What you’ll need
– Square sheet of sturdy paper (recycled if you like)
– Colored scraps or markers for the body and tail
– Glue or tape for stable folds
– A small felt tip or pen for the eye
How to build it
1) Start with a square in your chosen color.
2) Fold in half to form the main body.
3) Create the tail by making a series of long, fan-like folds at the back.
4) Add the neck and head with simple folds, then dot the eye and a tiny beak.
5) Color accents on the neck and chest to mimic peacock patterns.
Display ideas
– Set it on a shelf where light hits the tail just right
– Pair several peacocks in different sizes for a little parade
– Place near plants or a window to catch color as you move by
Tips
– Use a mix of colored papers for the feathers to brighten the fan.
– Try different sizes for a lively arrangement.
– Make a small family for an impressive display.
13. Energetic Sharks – Ocean Predators

You want a shark that looks alive on a shelf. Origami sharks bring sea life to any room. They’re easy to make from recycled paper. They work as party decor or a kid’s desk buddy.
Here is why this craft fits your needs: quick to learn, cheap, and repeatable. Use grey or blue paper for a realistic look, or pick bright colors for a playful feel.
Let’s break it down with simple steps.
1) Gather a square sheet of paper. Color the outside if you want a cleaner look.
2) Fold in half diagonally to make a triangle. Crease well.
3) Fold the tip down a bit to form the snout and mouth line.
4) Make the dorsal fin. Fold a small triangle from the top edge toward the center and press flat.
5) Shape the tail. Fold the back corner up to create a tail fin.
6) Add the eye with a marker. A tiny dot gives your shark character.
7) Adjust the fins so the model sits balanced on a shelf.
For more fun, make sharks in different blues to form a school.
Tips Keep folds sharp with a fingernail. Recycled paper helps the planet. Draw tiny gill lines or a smile for personality. Display ideas: line a row on a shelf, place a few on a desk, or hang one from a string as a mobile.
Next steps: Try a larger sheet for a bigger shark or mix colors for a coral reef look.
14. Majestic Horses – Symbols of Freedom
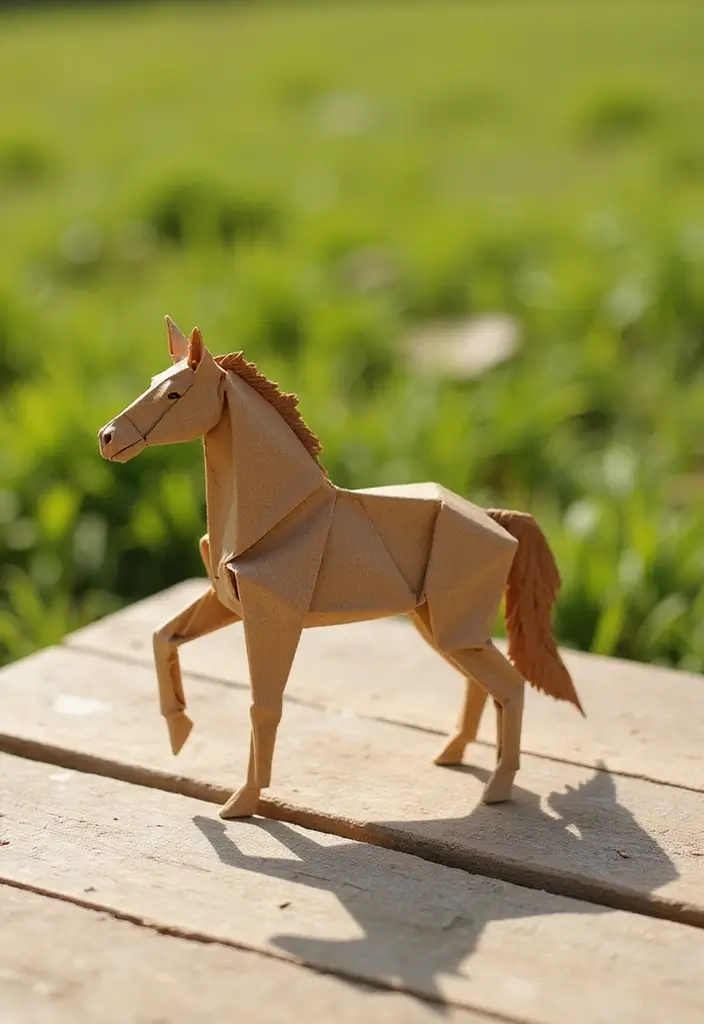
You want a craft that is quick, sturdy, and feels alive. Origami horses fit that goal. They show strength and grace in a few folds. Use recycled paper to keep things simple and planet friendly. If you love horses, this little sculpture will bring a smile. It trains your eye for symmetry and calm. You can practice without glue or special tools.
– Materials – A square sheet of recycled paper. Brown or black gives a realistic look. Other colors work too for a herd.
– Getting started – Place the square on the table. Make a small nose and neck fold to begin the head.
– Form the body – Fold to shape a slim body. Pinch the bottom to create legs, keeping the back straight so it can stand.
– Finish – Round the head with a couple small folds. Bend the tail and smooth the edges. A light crease can hint at a mane.
– Tips – Color choices change the mood. Display several horses for a lively herd.
Place your origami horse on a shelf, desk, or windowsill. It makes a thoughtful gift or a cheerful desk companion. Try a mini herd by folding several horses in different colors. Kids enjoy adding tiny personal touches.
Next steps: add eyes with a pen, draw a mane, or add tiny stickers for personality.
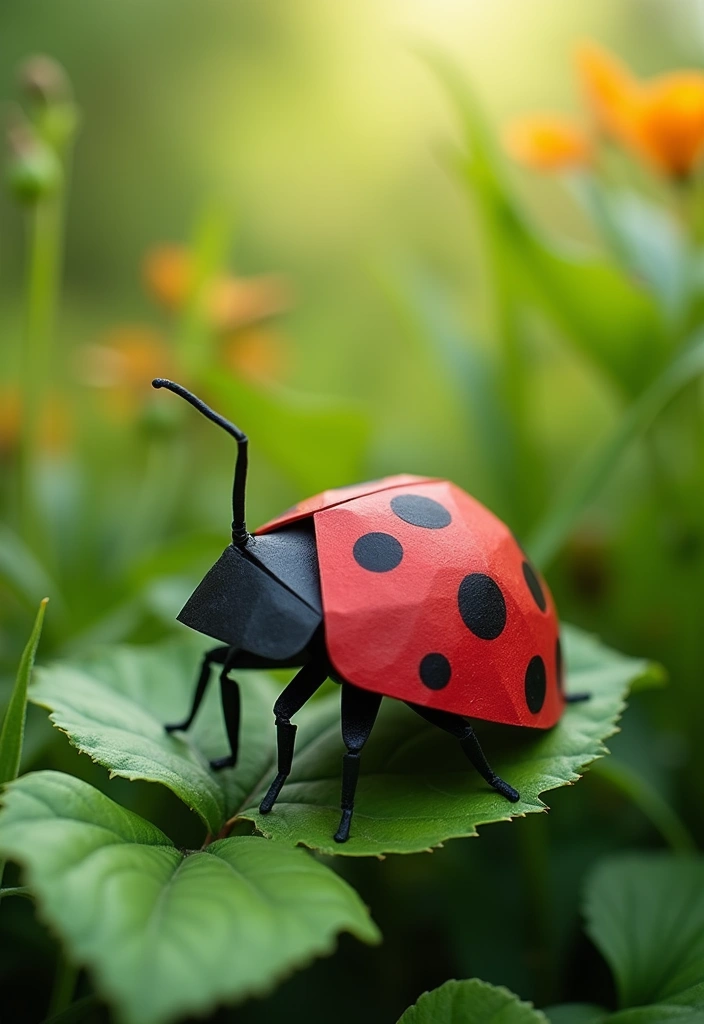
15. Cheery Ladybugs – Good Luck Charms

If you want a fast, friendly craft you can do with kids of any age, try origami ladybugs. They fold from a simple square sheet and can be made from recycled paper to save waste. Once you finish, these bright bugs sit nicely on a windowsill, in a garden bed, or on a bulletin board. They feel like tiny good luck charms you can gift or decorate with.
Here is why this works. The steps stay clear, and the result is cheerful and colorful. You get a keepsake you can make in minutes. It’s easy to adjust size and color for variety, too.
What you’ll need
– Square sheet of paper (preferably recycled)
– Red paper for a classic look (optional)
– Black marker or small black stickers
– Scissors (for trimming wings if you want a neater finish)
– Glitter or stickers (optional for extra sparkle)
How to make one
– Start with a square sheet. Fold diagonally to form a triangle.
– Fold the two bottom corners up toward the center to shape the body.
– Fold the top point down a little to create the head.
– Use a marker to add black spots on the wings. If you have stickers, place a few dot shapes for the same effect.
– If you used plain paper, you can glue on a small red wing piece to enhance the look. Add a touch of glitter if you like.
Next steps. Display your ladybugs near sunny spots or in a garden tray. Give a few as bright gifts to friends and family. You can even make a little “ladybug garden” by repeating the process in different sizes.
Tips to make it shine
– Use red paper for a classic vibe.
– Sprinkle a bit of glitter on the wings for extra sparkle.
– Create a whole garden by making many ladybugs in varying sizes and colors.
@media(max-width:480px){
16. Wise Turtles – Ocean Guardians
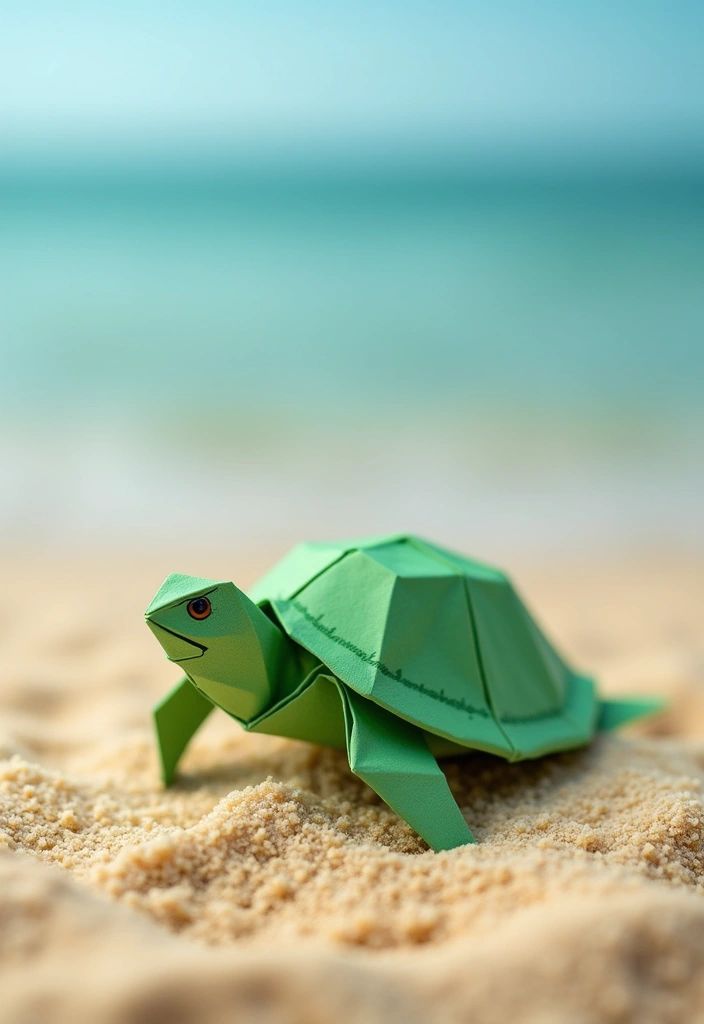
You want an easy, eco-friendly craft that fits a sea theme. Origami turtles fit the bill. They fold from recycled paper and are simple for beginners.
What you need
– One square sheet of recycled paper
– A marker for eyes (optional)
Steps
1. Start with a square sheet.
2. Fold it in half to make a slim base, then unfold to form a shell crease.
3. Fold the corners to shape a rounded shell. Add small flippers on the sides.
4. Fold a tiny head forward and tuck the tail so the figure can stand.
Tips
– Use green or blue paper to look like a real turtle.
– Add a bit of sparkle with a sticker or glitter.
– Make a small family of turtles for a lively display.
Why this helps
– It adds a cute ocean decor piece for any room.
– It teaches kids about marine life through a quick, hands-on project.
– It uses recycled paper, which is kinder to the environment.
Next steps: Try different colors or sizes. Create a tiny turtle parade on a shelf.
17. Beautiful Goldfish – Underwater Delights

Want a quick craft that brings a little ocean life to your room? Try origami goldfish. It uses simple folds and recycled paper, and you can make many.
Materials
– A square sheet of paper. Recycled paper works great.
– Optional markers to add details.
– A flat surface for folding.
How to fold
1) Start with your square sheet. Fold it in half diagonally to form a triangle.
2) Fold the tip of the triangle back toward the base to shape the fish head.
3) Make a small reverse fold at the end to form the mouth and a soft nose.
4) Pinch and crease the sides to create a tail and a pair of fins.
5) Lay it flat and adjust creases so the fish sits nicely.
Ways to use
– Decorate a kid’s room with a school of goldfish on a string.
– Add a few as a bright corner in a bulletin board.
– Use them in a sea themed collage or diorama.
Tips
– Use orange or gold paper for a classic look.
– Let kids add color with markers.
– Try different sizes to build a mini fish tank feel.
Display ideas
– Make a mobile by hanging five fish from a twig.
– Line them along a string to make a bright wall border.
– Glue them into a kid’s diorama of a pond or coral corner.
18. Cheerful Snails – Slow and Steady

Fans of cute, easy crafts, this section is for you. Origami snails bring a friendly charm to desks, shelves, and garden pots. They’re quick to fold from recycled paper and make thoughtful gifts.
Materials
What you need: a square sheet of paper (recycled works best), colors you like, and either googly eyes or a marker to draw eyes. Optional: a touch of glue to fix the eyes.
Steps
– Start with the square, color side down. Fold in half to crease, then unfold.
– Fold the top corner toward the center to hint the spiral shell.
– Make small folds along the edge to form a loose spiral shell. Leave a small bottom tab for the body.
– Fold the bottom edge up a bit to shape the snail’s body. Gently curl the front to make a neck.
– Add eyes on the head with glue or draw them. Attach two tiny antennae.
– Place your snail on a leaf, book, or pot rim for a cute display.
Tips
– Use bright paper to add cheer.
– Double-sided paper shows a shell pattern.
– Handle folds gently to keep the spiral neat.
– Let it dry if you use glue.
Display ideas
Line up several snails on a windowsill, or create a mini garden scene in a planter.
19. Lively Parrots – Tropical Vibes

Looking for a quick way to add tropical charm to your space? Origami parrots do just that. They’re colorful, easy to fold, and made from recycled paper. With a little care, a plain square becomes a cheery parrot that sits on your desk or shelf.
What you need
– A square sheet of recycled paper
– Markers, crayons, or stickers for eyes and feathers
– A bit of patience for careful folds
Easy folding steps
– Start with the paper colored side up. Fold diagonally to make a triangle, crease well, then unfold.
– Fold the top corner down toward the center to form a beak and pinch to shape a short point.
– Bring the left and right edges toward the center to create the wings. Press the folds flat.
– Fold a small point at the bottom to become the tail and make a tiny fold near the head to finish the bird.
Color and display ideas
– Choose bold colors such as red, green, yellow, and blue to echo tropical birds.
– Add eyes and feather details with markers or stickers to give each parrot its own look.
– Make a flock by folding several parrots in different colors. Hang them as a garland or place them on a string for a playful scene.
Tip: Origami parrots are delicate. If you use thick paper, they hold their shape longer. Handle with care.
20. Sweet Chicks – Springtime Joy
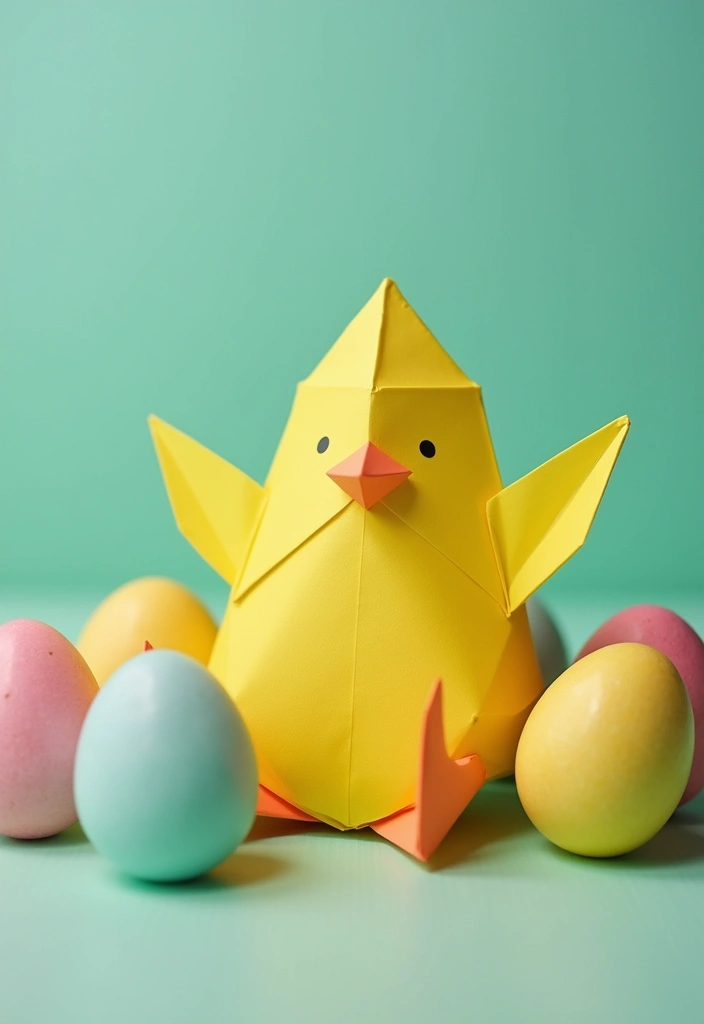
Want a tiny spring craft you can finish in one sitting? Origami chicks add bright, sunny charm to any room.
Folded from recycled square paper, these chicks are easy for you and great for Easter or spring decor.
Here is a simple, kid-friendly approach you can try today.
Materials
– Recycled square paper in yellow (classic chick)
– Small piece of orange paper or a marker for the beak
– Black marker or eye stickers for the eyes
– Flat work surface and a bit of patience
Steps
– Start with a square sheet of paper
– Fold it in half to form the body
– Make a couple of gentle folds to create the wings
– Add a beak and eyes with color or marker
– Gently crease and set the chick to stand
Decoration ideas
– Try pastel colors like pink, mint, or light blue
– Let your kids draw dots or stripes for personality
– Use tiny stickers for extra charm
– Attach them to a garland for a spring banner
Display ideas
– Place chicks in a small basket for a cute centerpiece
– Scatter on a table for spring color
– Hang a few on a thread to make a spring garland
Care and storage
– Keep flat in a folder to reuse next year
– Re-fold fresh chicks for next season
@media (max-width: 600px) {
.visual-quiz-iframe { min-height: 995px !important; height: 1100px !important; }
}
21. Energetic Ants – Nature Workers
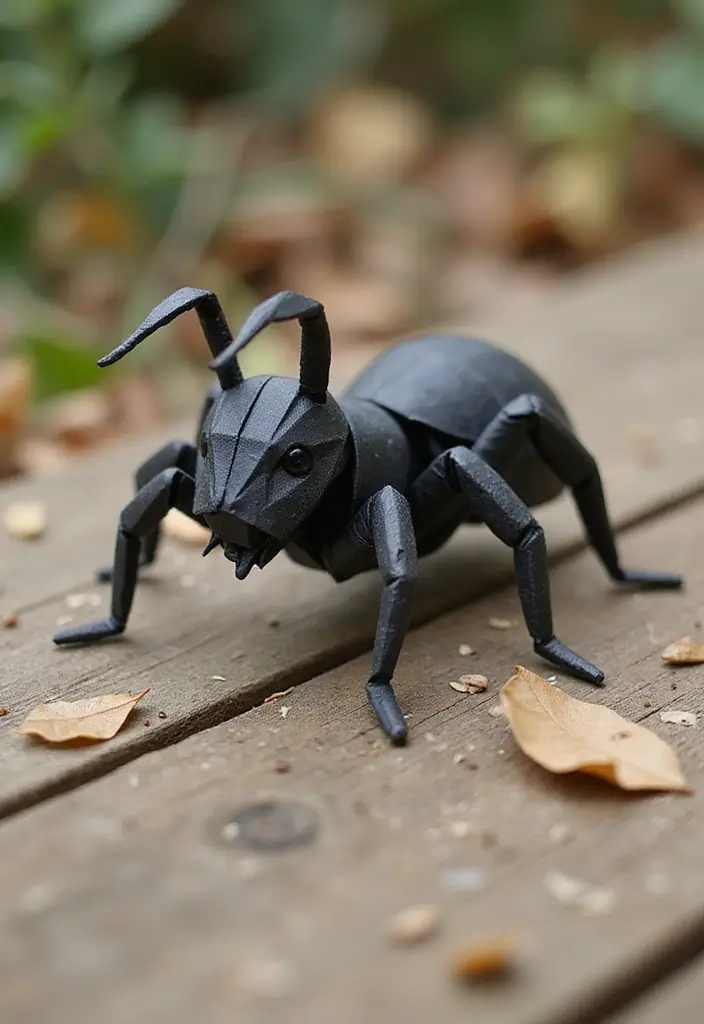
Why this helps
You want a simple craft that teaches kids about nature. Origami ants fit. They reuse paper and fold up fast. A small colony becomes a fun display or game.
What you need
– A square piece of recycled paper
– Optional: black or dark paper for a realistic look
How to make one ant
– Start with the square. Fold it in half to make a rectangle, crease, then unfold.
– Fold the top corners toward the center to shape a head and first body part.
– Fold the sides down to form two legs on each side.
– Pinch the middle to create two body segments and a rounded rear.
– Make two tiny antennae with a light fold at the front.
– Fold a small tail and curl the antennae a bit for a natural look.
– Press the creases to make the ant lie flat. Repeat to build a small colony.
Ways to use your ants
– Use them in nature games or science talks about ants as workers.
– Race them on a simple path and cheer when the first finishes.
– Display a whole ant colony on a shelf or in a classroom setup.
– Create a tiny trail with crumbs to show foraging habits.
Tips
– Black paper looks most like real ants.
– If folds resist, place a light book on top to set the shape.
Next steps
– Try different sizes. Large ants make a bold display; small ones fit into dioramas.
– Share photos with friends or host a mini science talk about ant teamwork.
@media(max-width:480px){
22. Cheerful Ladybugs – Nature’s Good Luck
You want a quick craft that adds color and luck. Cheerful origami ladybugs fit. They use recycled paper and lift a plain space with bright spots.
Materials
– A square sheet of paper is best with color on one side.
– A marker or pen for dots works well.
– Optional glitter or tiny eyes can add character.
– A flat work surface helps you fold cleanly.
Steps
– Place the paper color side down and fold in half to form a triangle.
– Fold the sides into the center to shape the body and wings.
– Tap the edges to create the beetle shape and flatten it.
– Dot the wings with the marker to resemble spots.
– Add a head dot and optional antennae lines.
Tips
– Try different color combos for a display.
– Let kids add glitter for extra sparkle.
– Make a large ladybug to serve as a centerpiece.
Uses
– Scatter them on a shelf for nature.
– Gift a set to friends for a tiny good luck charm.
– Hang a few as ornaments.
Made from simple square sheets, this craft is friendly for classrooms and at home.
It keeps kids busy, teaches folding steps, and builds motor skills.
Give it a try today. You can do it.
23. Happy Giraffes – Tall and Graceful
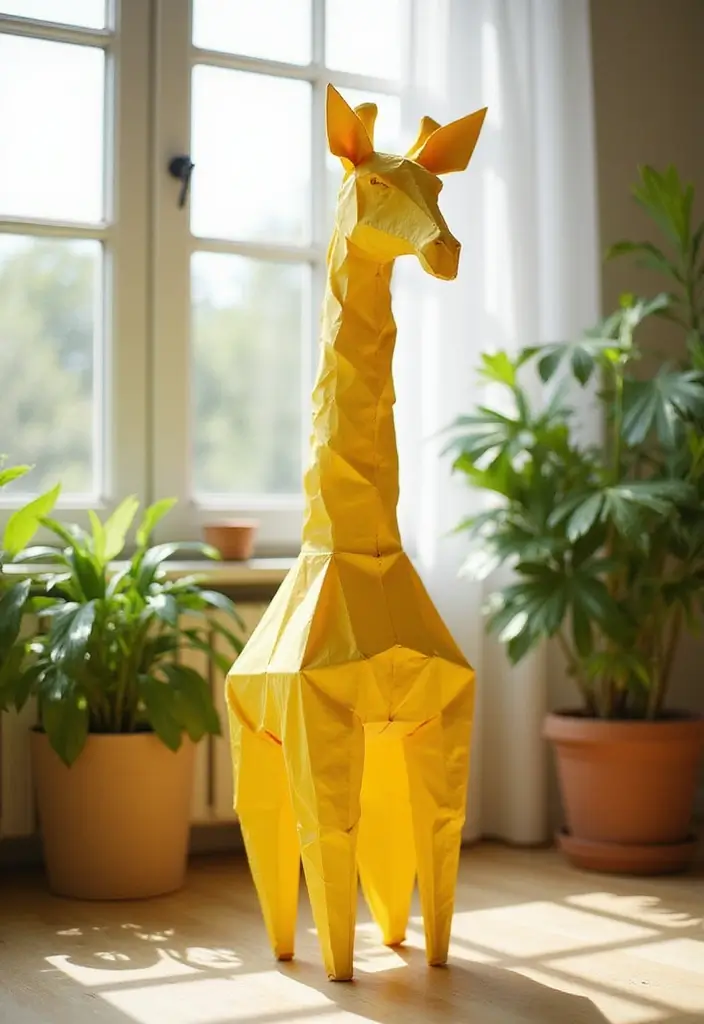
What you need
– One square piece of paper (recycled paper works well)
– Optional markers or paint to add spots
– A splash of color such as yellow or light tan
Preparing
Here is why this trick works. A square sheet folds into a long neck and slim legs with careful creases. You keep the model light and easy to adjust.
Step-by-step
1) Start with the square facing you.
2) Fold a long neck by making a narrow strip from top to bottom.
3) Shape the head and ears with small folds.
4) Create the legs by folding the bottom corners into slim shapes.
5) Adjust the model so it can stand on its own and hold its pose.
Finishing touches
Let kids add spots with markers or paint after the folds. If you used yellow paper, brown or orange spots look good. You can set a few origami animals next to the giraffe to form a tiny safari scene.
Why you’ll love it
This origami giraffe is a fun décor piece and a thoughtful handmade gift for animal lovers. It uses simple folds and recycled paper, so you can make a small collection without much cost.
Next steps
Try different colors or make a taller stack of giraffes to create a playful display. Practice, then share your craft with friends.
@media(max-width:480px){
24. Spirited Cows – Farmyard Fun

You want a simple, fun craft that adds farm charm. Origami cows fit the bill. They’re easy to make and great for kids learning about farm life. Using recycled paper adds an eco friendly touch.
What you need
– Square sheet of paper. Recycled paper works well.
– White is classic. Black markers or stickers add spots and eyes.
– A smooth table or desk for precise folds.
How to fold
– Start with a square. Fold it in half to guide your folds, then unfold.
– Shape the body and head in one move. Keep the folds neat so the cow stands up.
– Make two small ear folds on top.
– Add spots with a marker. You can go for the traditional white cow with black patches, or mix colors for a fun look.
– Give it a face. Draw eyes and a smile. If you want, add a tiny tail.
Tips for making it fun
– Use white paper with bold black spots for a classic cow.
– Let kids decorate with markers. Each cow becomes unique.
– Make a little mooing family by crafting several cows in different sizes and lining them up.
Where to use your cow art
– Farm themed party decor or classroom displays
– Cute decorations for shelves, desks, and windows
– Gift tags or small keepsakes for friends and family
Here is why this works: it is quick, inexpensive, and satisfying. You get a gentle intro to folding, plus a cute result. Ready to start folding?
25. Happy Goats – Farmyard Charm
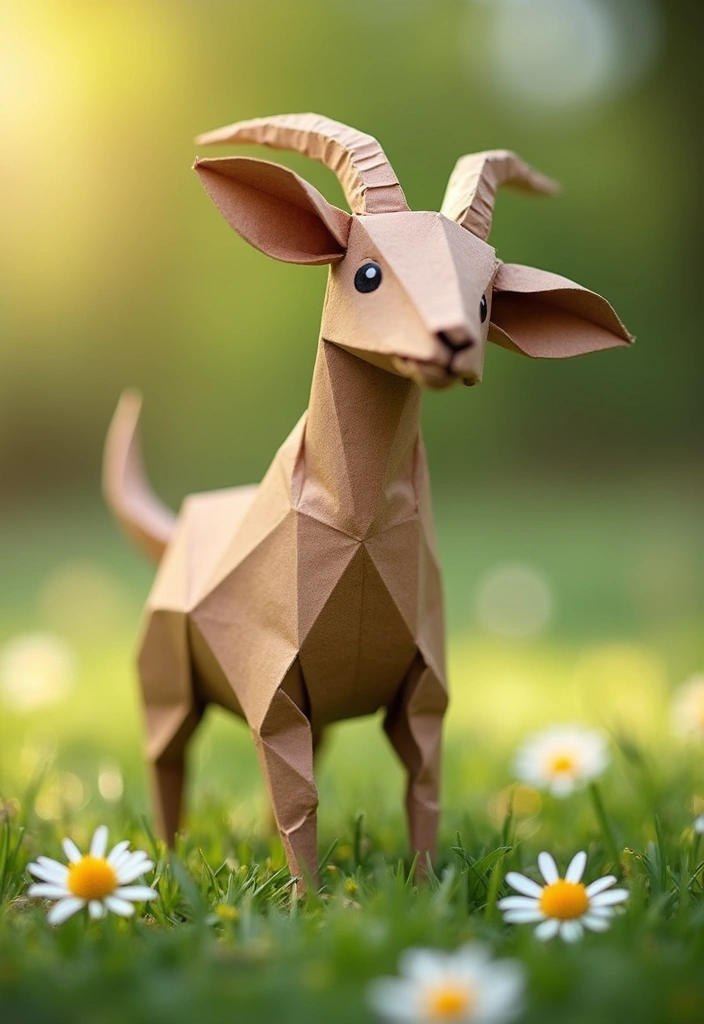
You want a farmyard charm you can finish fast. Happy goats made from paper fit that need. They’re easy for kids and grownups to enjoy.
What you need
– A square sheet of recycled paper
– Paper in brown, tan, or white for a real look
– A marker to draw a friendly face
– A clean, flat workspace
Let’s break it down
– Start with a square paper. Keep folds neat and crisp.
– Fold to shape a rounded body first. This gives a sturdy base.
– Add a small head at the top. Make it proportionate to the body.
– Create two tiny horns from the top corners. A simple pinch or fold works.
– Tuck a short tail under the back. Keep the line tidy.
– Use a marker to draw eyes and a smile. A simple face makes it look lively.
Suggestions for real charm
– Use brown paper for a more lifelike look.
– Let kids add faces with drawings. Big eyes and a goofy grin work well.
– Put several goats together. A small herd on a shelf feels like a real farm.
Display ideas and gifts
– Clip goats to a string to make a cute mobile.
– Give a goat as a lightweight, handmade gift for animal lovers.
– Arrange a tiny barn scene with a few goats and a folded fence.
Next steps
Try a mix of browns and sizes. A little group can brighten any desk or shelf.
26. Joyful Bears – Nature’s Giants
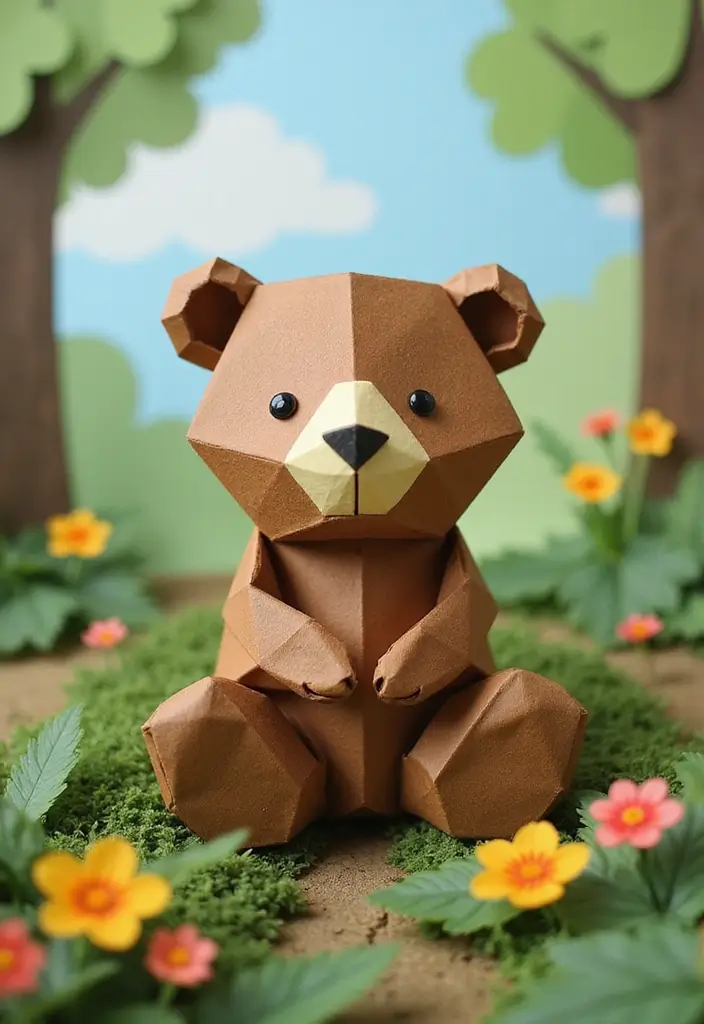
26. Joyful Bears – Nature’s Giants
Want a quick, kid-friendly craft that turns scraps into a warm, playful figure? Joyful Bears let you reshape a simple square of recycled paper into a friendly, paper bear. They brighten shelves and make thoughtful, handmade gifts.
Here is how you start. Grab one square sheet of recycled paper. Any color works, but brown or tan helps with a realistic look. Make a few easy folds to create the head, the body, and the short legs. Use smooth, careful folds to get round cheeks and sturdy limbs. No glue or scissors needed—just your hands and focus.
Here is why this works. Simple folds keep the bear sturdy. The square shape is forgiving, so beginners can finish a small bear in a short time. The result is a cozy creature kids love to cuddle in imagination and sit on a shelf as nature’s giants.
Uses and display ideas. Place a trio of bears by a window, on a desk, or in a plant nook. They also make friendly party favors or small gifts for friends, teachers, or family.
Tips for best results:
– Color and look: Brown or black paper gives a realistic bear vibe.
– Face features: Let kids draw eyes and a smile with a marker.
– Group display: Create several bears for a charming woodland scene.
Next steps: grab your square paper and start your first joyful bear today.
@media(max-width:480px){
Conclusion
With these 26 DIY origami animals, you can transform recycled paper into delightful creations that add charm and creativity to your life!
From playful frogs to majestic elephants, this crafting journey demonstrates the beauty of paper folding art while supporting eco-friendly practices. Embrace your creativity and try out these different animal origami patterns; you never know which might become your new favorite!
Share your creations and inspire others to engage in creative paper crafts too.
Note: We aim to provide accurate product links, but some may occasionally expire or become unavailable. If this happens, please search directly on Amazon for the product or a suitable alternative.
This post contains Amazon affiliate links, meaning I may earn a small commission if you purchase through my links, at no extra cost to you.
Related Topics
diy origami animals
recycled paper crafts
beginner origami
animal origami patterns
eco-friendly crafts
quick paper projects
folding techniques
creative paper art
kids crafts
simple origami
afternoon projects
playful paper designs