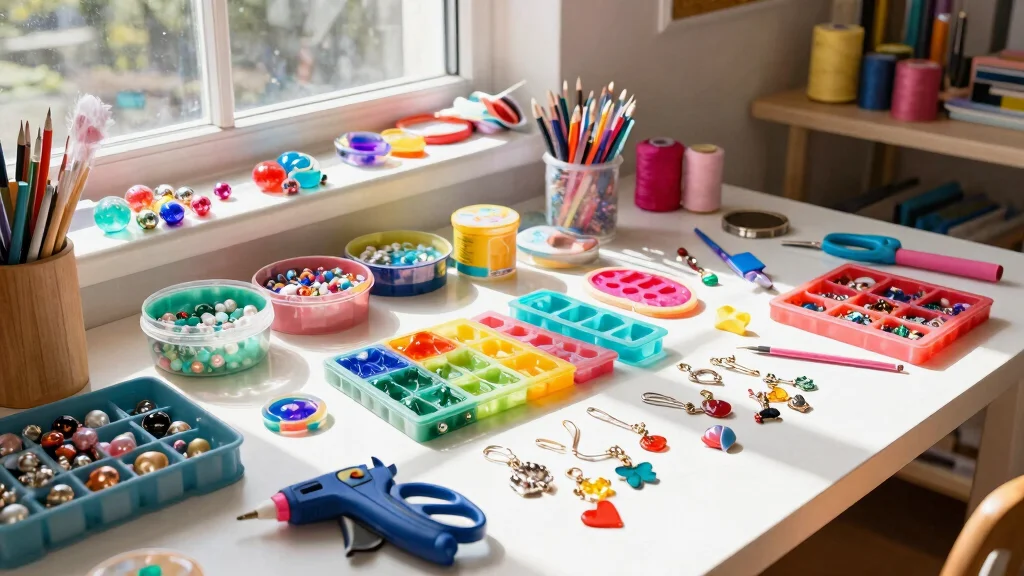
Creating unique jewelry pieces is a delightful way to express your personal style. If you’re looking for inspiration, you’ve come to the right place! This post is packed with 17 DIY necklace pendant making ideas that will ignite your creativity and help you transform everyday items into stunning accessories. Whether you’re a seasoned crafter or just starting out, these ideas are designed to be both fun and achievable.
If you love getting hands-on with projects, especially ones that allow you to repurpose materials, this guide is perfect for you. You’ll discover how to turn vintage buttons, broken jewelry, and even recycled plastic into beautiful pendant designs. Each idea is not only a chance to craft something special but also a way to reduce waste and embrace sustainability.
By following these DIY necklace pendant making ideas, you’ll gain the skills and confidence to create something truly unique. From whimsical mini terrarium necklaces to elegant wire-wrapped crystal pendants, each project offers a fun way to personalize your jewelry collection. So grab your supplies, and let’s dive into these creative necklace pendant ideas!
Key Takeaways
– Discover 17 unique necklace pendant ideas using upcycled materials that add charm to your jewelry collection.
– Each project uses simple techniques, making it easy for beginners and fun for experienced crafters alike.
– Learn how to repurpose everyday items like buttons and broken jewelry to create stunning pendants.
– Explore various styles, including natural stone pendants and whimsical terrarium designs, that showcase your personal flair.
– Enjoy crafting with sustainable materials while creating beautiful handmade jewelry that tells your story.
1. Vintage Button Pendants
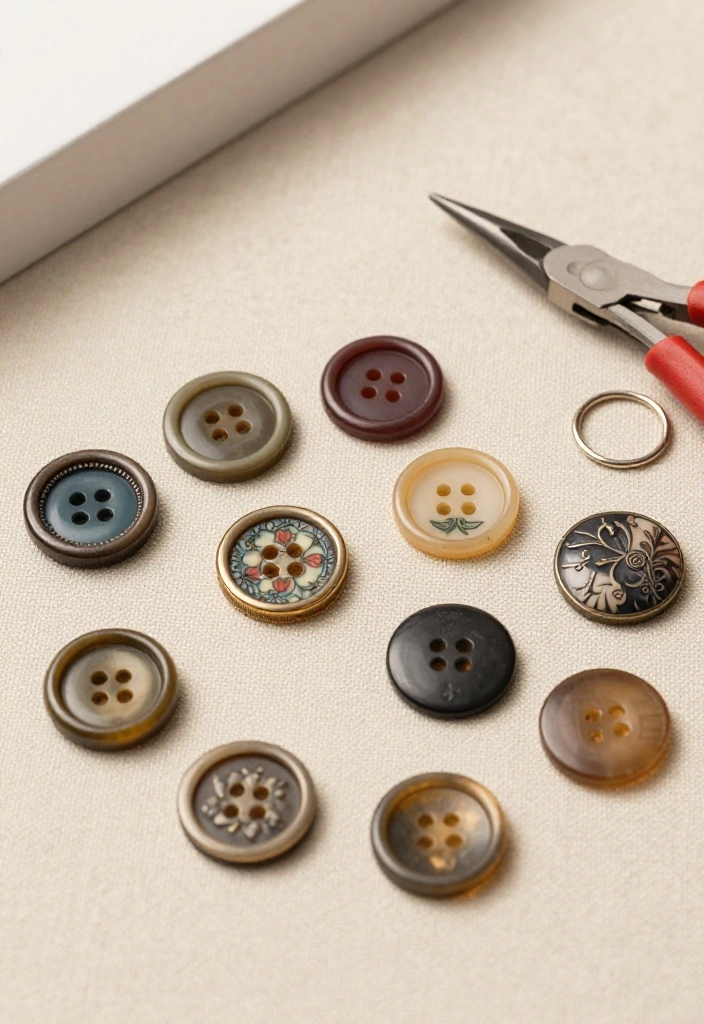
Revamp your old buttons into charming pendants! Vintage buttons come in a delightful array of colors, shapes, and sizes, making them ideal for crafting unique jewelry. By threading a few selected buttons onto a chain or leather cord, you can create a stylish, retro accessory that speaks to your personal flair. This project beautifully combines upcycling with a dash of whimsy, making it a fun fashion statement.
Outfit Pieces:
– Assorted vintage buttons (consider buttons with unique patterns or textures)
– Chain in golden or silver tones (or a natural leather cord)
– Jump rings for secure attachment
– Pliers for easy assembly
Styling Tips:
– Arrange buttons by size and color for a balanced yet playful look.
– Consider using a mix of glossy and matte buttons to add depth.
– Match the metal of your chain to other jewelry for a cohesive appearance.
– Layer with other necklaces for a trendy, stacked effect.
This necklace is perfect for casual outings, adding a playful touch to your everyday wear. Swap it out for a sleek chain for a more polished look during evening events.
2. Broken Jewelry Assemblage
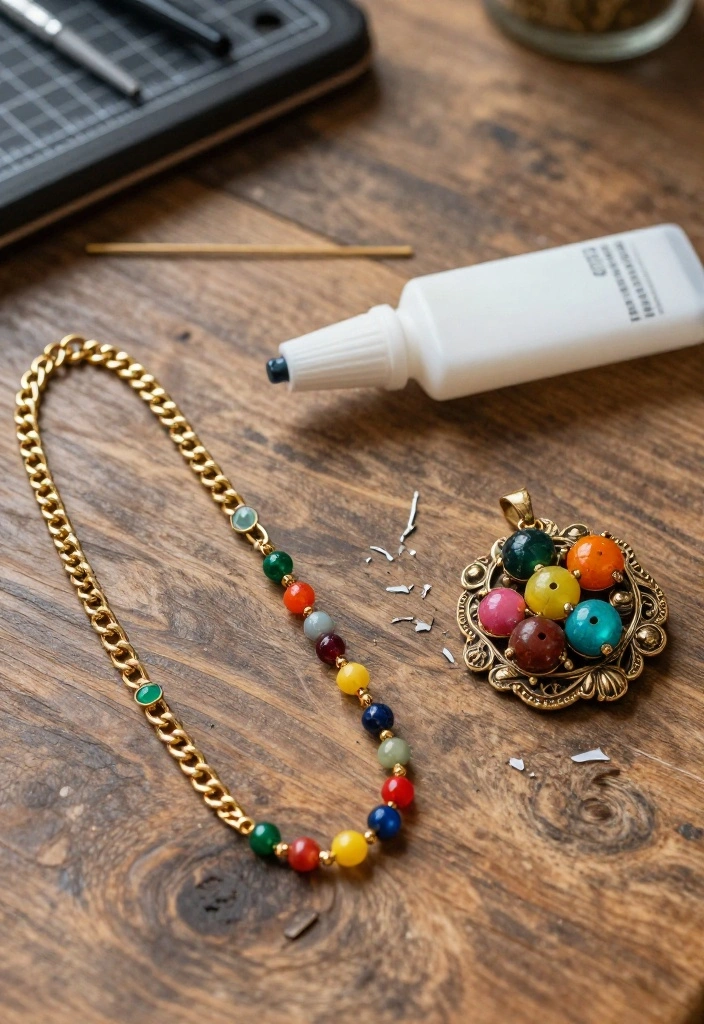
Have broken jewelry pieces lying around? Instead of discarding them, why not combine those treasures to create a stunning assemblage pendant? Mixing various styles and textures allows you to craft a unique piece that tells your story. This project is a creative way to breathe new life into forgotten pieces, blending nostalgia with modern flair.
Outfit Pieces:
– Assorted broken jewelry pieces (like necklaces and earrings)
– Base pendant (choose between metal or wood as a foundation)
– E6000 glue or a strong adhesive
– Optional charms and beads for extra embellishments
Styling Tips:
– Arrange pieces on your base before gluing to find the perfect layout.
– Layer different elements for a more dynamic look.
– Use colorful beads to create pops of color that brighten the design.
– Allow plenty of drying time for durability.
This project beautifully showcases your personality and style, making it an excellent conversation starter at gatherings or casual meet-ups.
✨ Transform Your Space Today!
Unlock your creativity with our DIY guide to stunning home makeovers using upcycled materials and expert tips.
How To Choose the Right Materials for DIY Necklace Pendants
When creating your own DIY necklace pendants, the materials you choose can make all the difference. Here are some key factors to consider when selecting what you’ll use for your unique designs:
1. Material Type
Think about the type of materials you want to work with. Options include metal, wood, plastic, glass, or fabric. Each material has its own look and feel. If you’re after a rustic vibe, wood might be perfect. For a sleek, modern look, consider metal or glass. Always choose materials that resonate with your personal style.
2. Weight
Consider how heavy the materials are. Heavier materials, like metal or glass, can make a statement but may also be uncomfortable to wear for long periods. Lighter materials, like fabric or thin wood, can be more comfortable. If you’re unsure, aim for a balance; you want a pendant that’s eye-catching but not burdensome.
3. Durability
Think about how much wear and tear your necklace will endure. Some materials, like certain plastics, can scratch easily, while metals and certain woods can withstand more abuse. If you plan to wear your necklace frequently, choose materials known for durability to ensure it lasts.
4. Color and Finish
The color and finish of your materials matter a lot. Bright, bold colors can grab attention, while neutral colors might complement various outfits. Glossy finishes can provide a polished look, while matte finishes offer a more rustic feel. Make sure the colors align with your wardrobe and personal style.
5. Cost
Consider your budget when selecting materials. Some materials can be expensive, while others are quite affordable. If you’re just starting in DIY jewelry, you might want to choose budget-friendly options to practice. You can always invest in higher-quality materials as your skills improve.
6. Sustainability
With a growing focus on sustainability, consider using upcycled or recycled materials. Not only does this give your necklace a unique twist, but it also helps reduce waste. Look for old jewelry, fabric scraps, or even items around your home that can be repurposed into beautiful pendants.
Pro Tip: Start with a small set of materials for your first few projects. Experiment with different combinations until you find what feels right. As you gain confidence and skills, expand your material choices!
By considering these factors, you can select the best materials for your DIY necklace pendants. Each choice you make will lead you closer to creating stunning, personalized jewelry that expresses your unique style. Happy crafting!
3. Mini Terrarium Necklaces
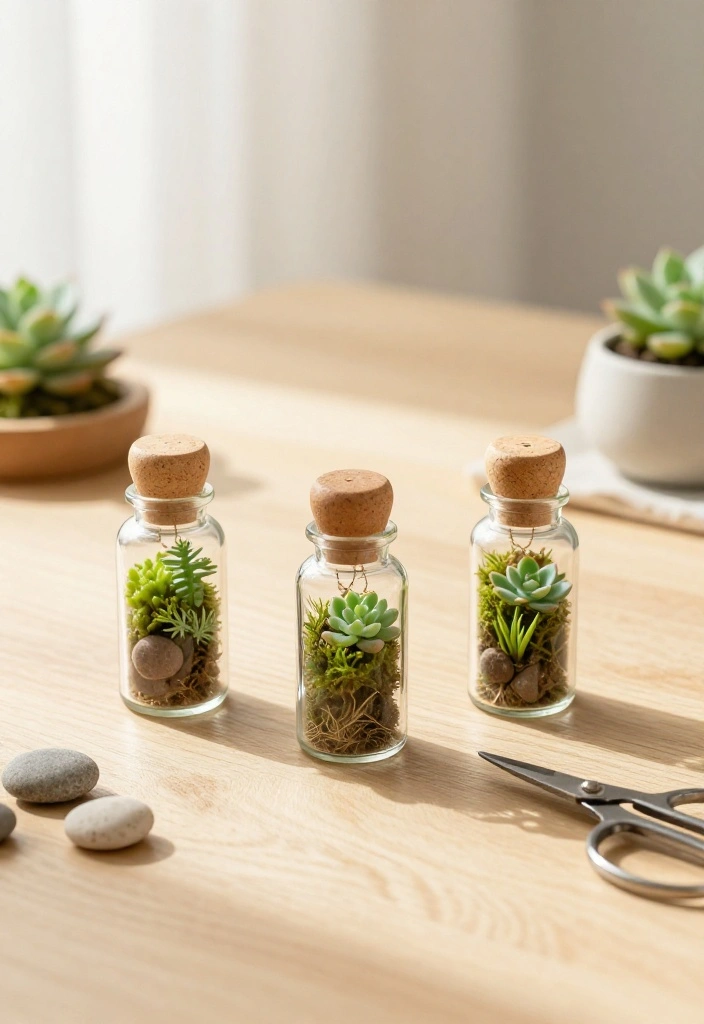
Bring a slice of nature with you by crafting mini terrarium necklaces! These charming accessories feature small glass vials that house tiny ecosystems, letting you wear a piece of the earth. With minimal materials needed, this project results in a beautiful piece of jewelry that resonates with nature lovers.
Outfit Pieces:
– Small glass vials with cork tops (look for unique shapes)
– Dried moss, tiny succulents, or air plants (choose your favorites)
– Decorative stones or sand for layering
– A chain or cord to complete the look
Styling Tips:
– Add a layer of decorative stones first for a polished base.
– Keep your plant choices small to fit comfortably inside the vial.
– Decorate the outside of the vial with washi tape or paint for a personal touch.
– Use a delicate chain to keep the focus on the terrarium.
These necklaces are not just eye-catching but also spark conversations, making them perfect for casual outings or nature-themed events.
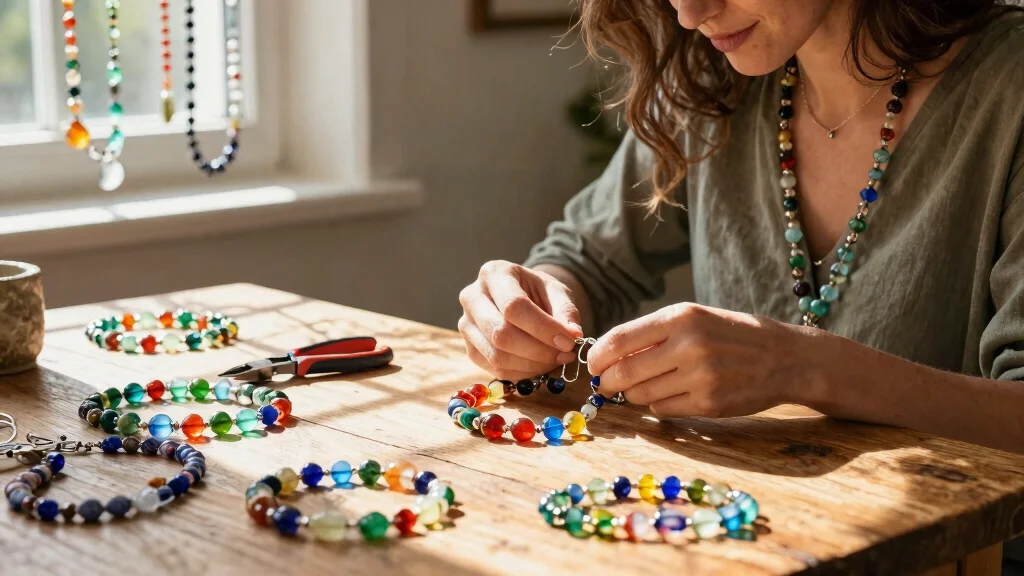
4. Bead and Wire Pendants

Unleash your creativity with bead and wire pendants! This project allows you to shape and twist wire into unique designs, enhanced by colorful beads. The options are limitless, enabling you to create personalized jewelry that truly reflects your style and personality.
Outfit Pieces:
– Craft wire (choose copper or aluminum for different looks)
– Colorful beads in various sizes (mix and match for interest)
– Wire cutters for neat finishes
– Round-nose pliers to shape the wire
Styling Tips:
– Cut wire to your desired length and shape it into a creative design.
– Secure beads at intervals for a balanced look.
– Finish with a loop at the top for chain attachment.
– Experiment with different wire gauges for diverse textures.
This pendant is a fantastic way to express your artistic side, making it an eye-catching accessory for both casual and dressy occasions.
Fun fact: a single bead and wire pendant can be completed in about 8–12 minutes with the right tools. Each twist shapes a unique piece, turning DIY necklace pendant making into a quick, creative habit you’ll actually wear and share.
5. Fabric Scraps Pendants
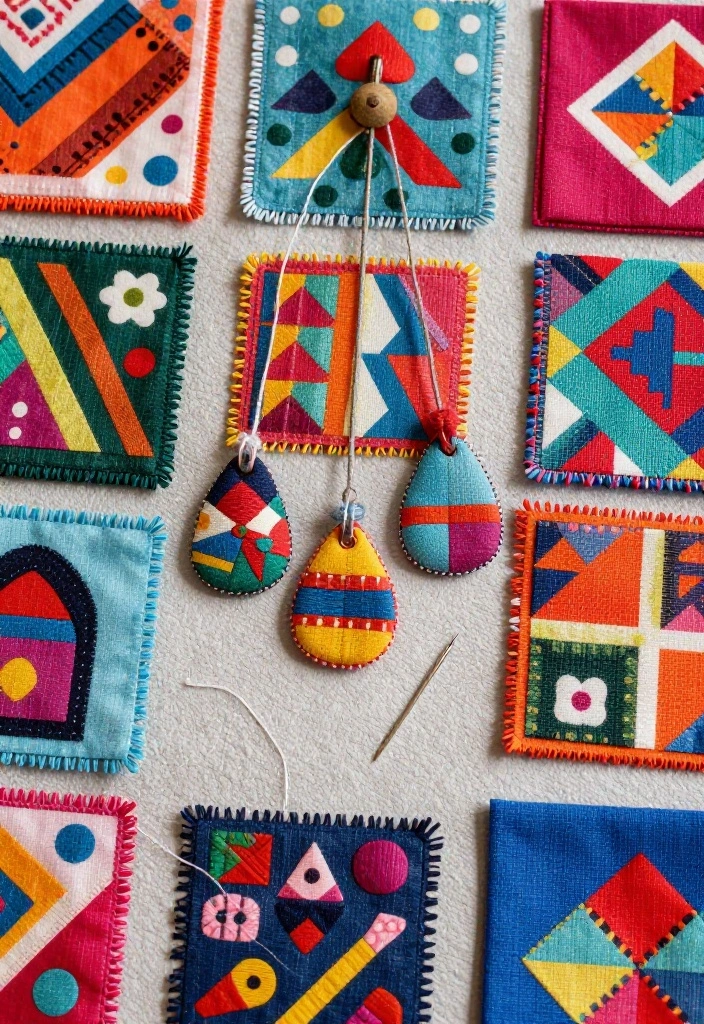
Transform your fabric scraps into delightful pendants! This straightforward technique lets you create soft, colorful designs that showcase your personality. With just a few sewing supplies, you can craft lightweight pendants that are ideal for any occasion.
Outfit Pieces:
– Fabric scraps in various patterns and colors
– Felt or cardboard for backing (to provide structure)
– Needle and thread or fabric glue for assembly
– Chain or cord for wearing
Styling Tips:
– Cut fabric into fun shapes like hearts or flowers for a unique look.
– Mix patterns and colors for an eclectic vibe.
– Add embellishments like beads or buttons to enhance your design.
– Ensure that the backing is sturdy to hold the fabric securely.
These fabric pendants not only offer a pop of color but also bring a charming touch to any outfit, making them a go-to accessory for everyday wear.
Did you know that upcycling fabric scraps into pendants can cut textile waste by up to 40%? For diy necklace pendant making, grab scraps, backing, and thread— and you’ll craft lightweight, colorful pieces that showcase your personality in minutes.
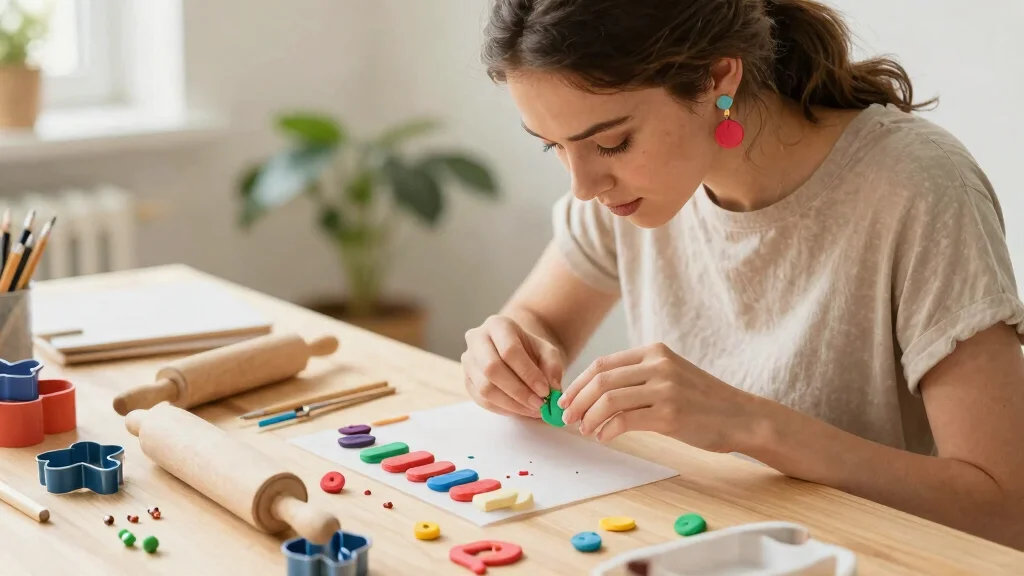
6. Clay Pendant Creation
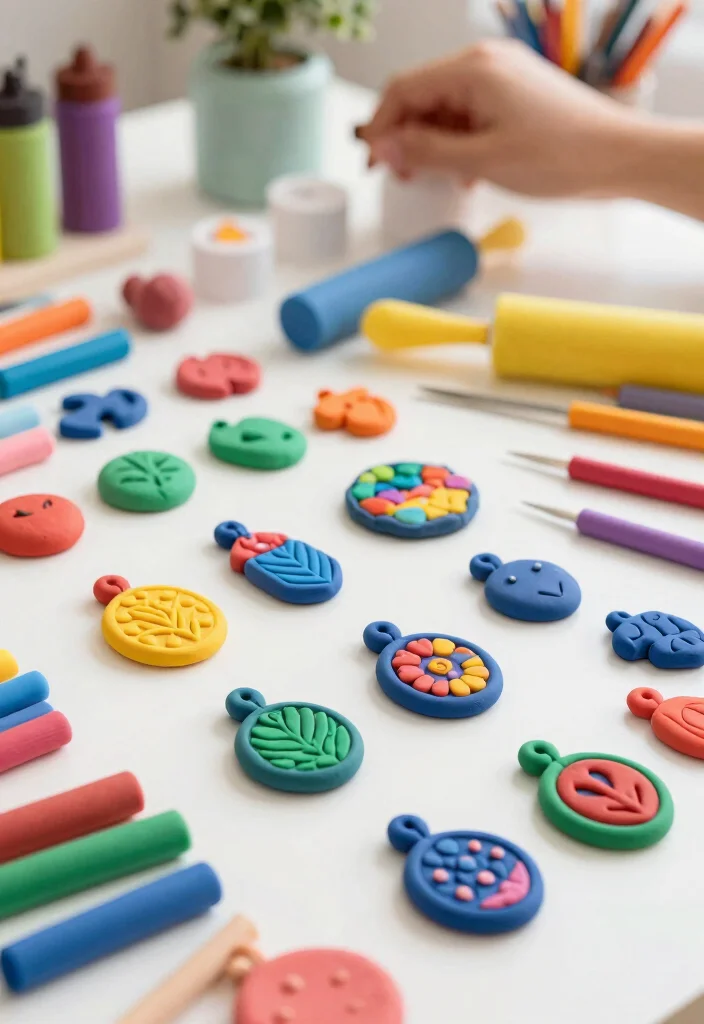
Get creative with polymer clay to design your own pendants! This versatile material can be molded into virtually any shape, allowing you to express your personality. From simple forms to intricate designs, the possibilities are endless with this fun crafting project.
Outfit Pieces:
– Polymer clay in various colors (mix and match for unique looks)
– Clay tools (like rollers and cutters for precision)
– Oven for curing the clay
– Jump rings and chain for easy wearing
Styling Tips:
– Condition clay until soft for easy shaping.
– Use cookie cutters for uniform shapes or your hands for freeform designs.
– Layer colors for a marbled effect, adding depth.
– Attach a jump ring once baked for easy chain attachment.
Clay pendants are a fun way to showcase your creativity, making them excellent gifts or delightful personal keepsakes.
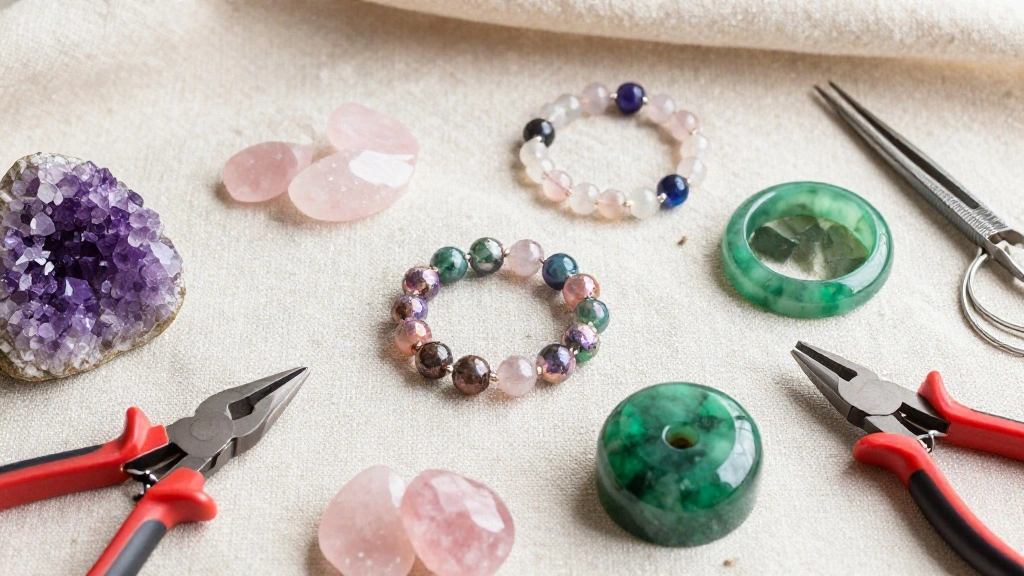
7. Natural Stone Pendants
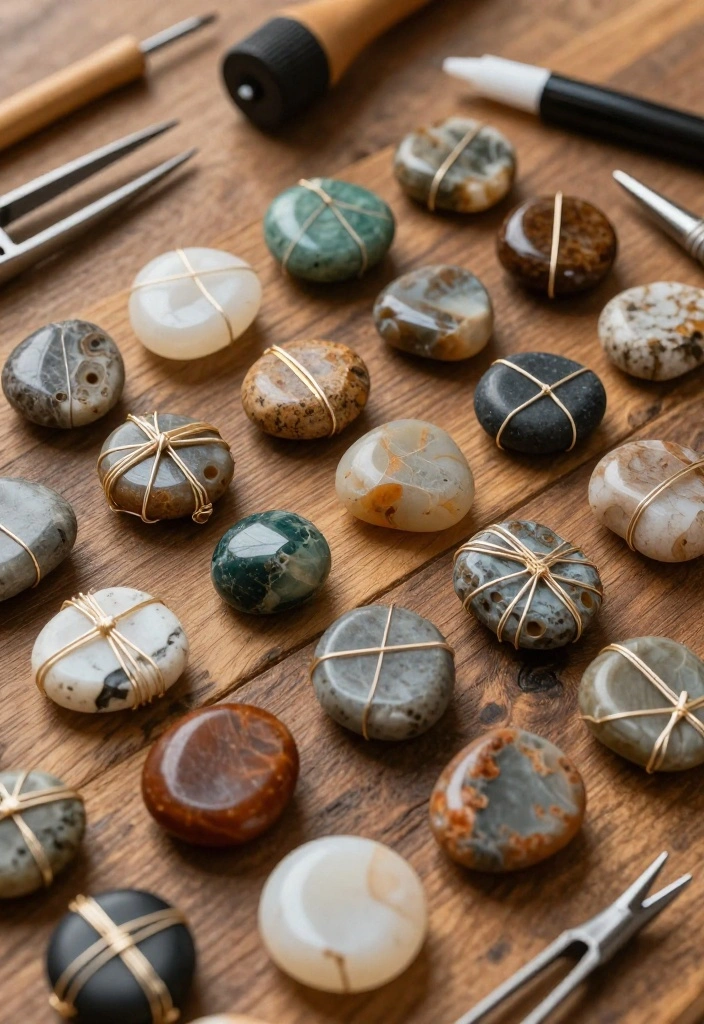
If you adore the look of natural stones, why not create your own pendants? Making natural stone jewelry is easier than you think. Beautiful stones can be sourced from craft stores or found in nature, and with a bit of wrapping or gluing, you can craft stunning pieces of wearable art.
Outfit Pieces:
– Natural stones (like crystals or pebbles)
– Wire for wrapping (if desired)
– Chain or cord for wearing
– Strong adhesive (if not wrapping)
Styling Tips:
– Choose stones with interesting shapes for visual appeal.
– If wrapping, cut wire to create a secure wrap around the stone.
– If gluing, attach a jump ring at the top for hanging.
– Consider adding complementary charms for a stylish touch.
These pendants beautifully capture nature’s essence, making them perfect for anyone who appreciates the great outdoors.
8. Recycled Plastic Pendants
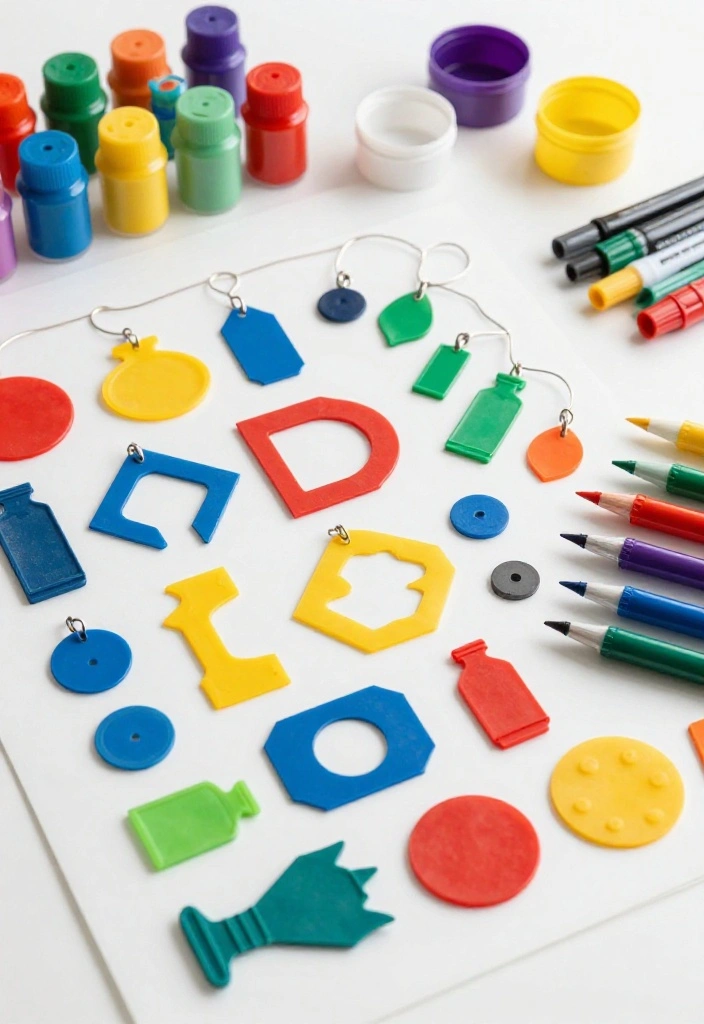
Give new life to plastic by transforming it into stylish pendants! Using recycled materials, you can create lightweight, colorful jewelry that’s both eco-friendly and fashionable. This project is a fantastic way to repurpose leftover plastic, ensuring nothing goes to waste while showcasing your creativity.
Outfit Pieces:
– Recycled plastic materials (like bottles or containers)
– Scissors or a craft knife for cutting
– Paint or permanent markers for decoration
– Jump rings and chain for assembly
Styling Tips:
– Cut plastic into fun shapes like circles or teardrops.
– Decorate with paint or markers for a personal touch.
– Create holes for jump rings before attaching to your chain.
– Layer multiple pieces for a dimensional look.
These recycled pendants promote sustainability while letting you express your style, making them a creative addition to any outfit.
9. Paper Mache Pendants
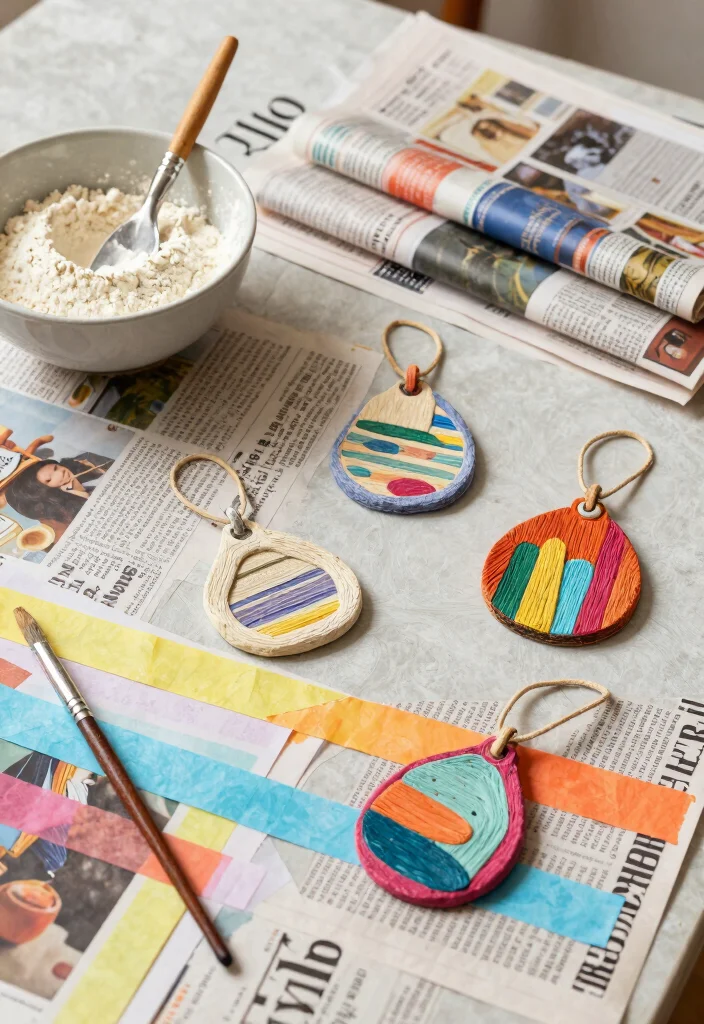
Explore your artistic side with paper mache pendants! Using old newspapers or magazines, you can create lightweight yet durable jewelry pieces that boast unique textures. This project is perfect for those who enjoy painting and decorating, as the final product can be tailored to your taste.
Outfit Pieces:
– Old newspapers or magazines for material
– Flour and water for paste preparation
– Paint and brushes for decoration
– Chain or cord for wearing
Styling Tips:
– Tear paper into strips for easy application.
– Mix flour and water to create your paste.
– Layer strips over a mold to form your desired shape.
– After drying, paint or embellish your pendant for a personal touch.
These paper mache pendants are artistically lightweight, making them perfect for everyday wear or special occasions, adding a unique flair to your style.
10. Upcycled Spoon Pendants

Transform old spoons into stunning pendants! This project takes ordinary cutlery and turns it into a stylish accessory with a bit of bending and shaping. Create beautiful, functional art that’s bound to spark conversations every time you wear it.
Outfit Pieces:
– Old spoons (any style you prefer)
– Pliers for bending
– Jump rings and chain for assembly
– Optional paint or embellishments for customization
Styling Tips:
– Bend the spoon’s handle into an interesting shape for a unique pendant.
– Create a loop at the end for attaching to a chain.
– Optionally paint or embellish for added personality.
– Experiment with different spoon styles for diverse looks.
These spoon pendants not only recycle items but also become unique accessories that bring creativity to your wardrobe.
11. Leather Scraps Necklaces

Utilize leftover leather scraps by crafting elegant leather pendant necklaces! Leather adds a touch of sophistication, perfect for making distinctive jewelry pieces. This straightforward project lets you showcase your crafting skills while creating stylish accessories.
Outfit Pieces:
– Leather scraps in various colors and textures
– Scissors for cutting
– Hole punch for creating attachment holes
– Chain or cord for wearing
Styling Tips:
– Cut leather into desired shapes for a personalized look.
– Use a hole punch to create holes for the chain.
– Mix textures for a layered effect.
– Add metal accents for a chic touch.
Leather pendants offer versatility, easily dressed up or down, making them a staple accessory for any outfit.
12. Felted Wool Pendants
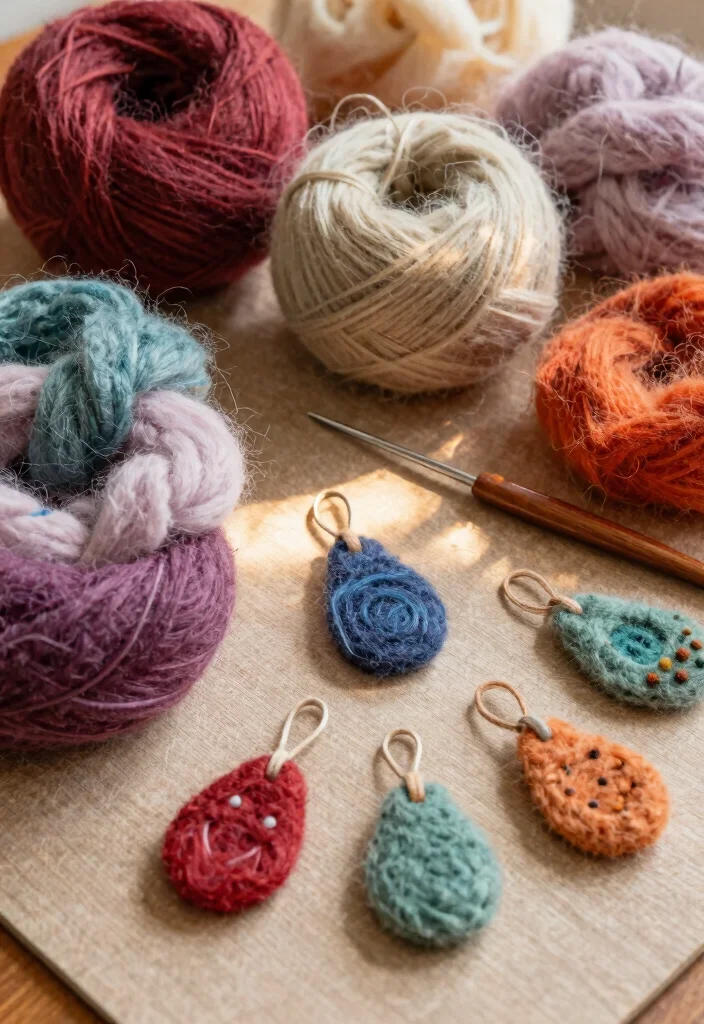
Create cozy and charming felted wool pendants perfect for colder months! Using wool roving, you can shape stunning designs that add warmth and character to any outfit. This project is great for showcasing your creativity while crafting unique accessories.
Outfit Pieces:
– Wool roving in various colors (choose your favorites)
– Felting needle for shaping
– Felt backing (optional for added structure)
– Chain or cord for wearing
Styling Tips:
– Shape wool into your desired design for a unique look.
– Use a felting needle to secure the wool in place.
– Attach to felt backing if desired for extra stability.
– Add beads or embellishments for creativity.
These felted wool pendants are perfect for adding a warm touch to your winter outfits, making them wonderful gifts or personal delights.
13. Keychain to Necklace Conversion
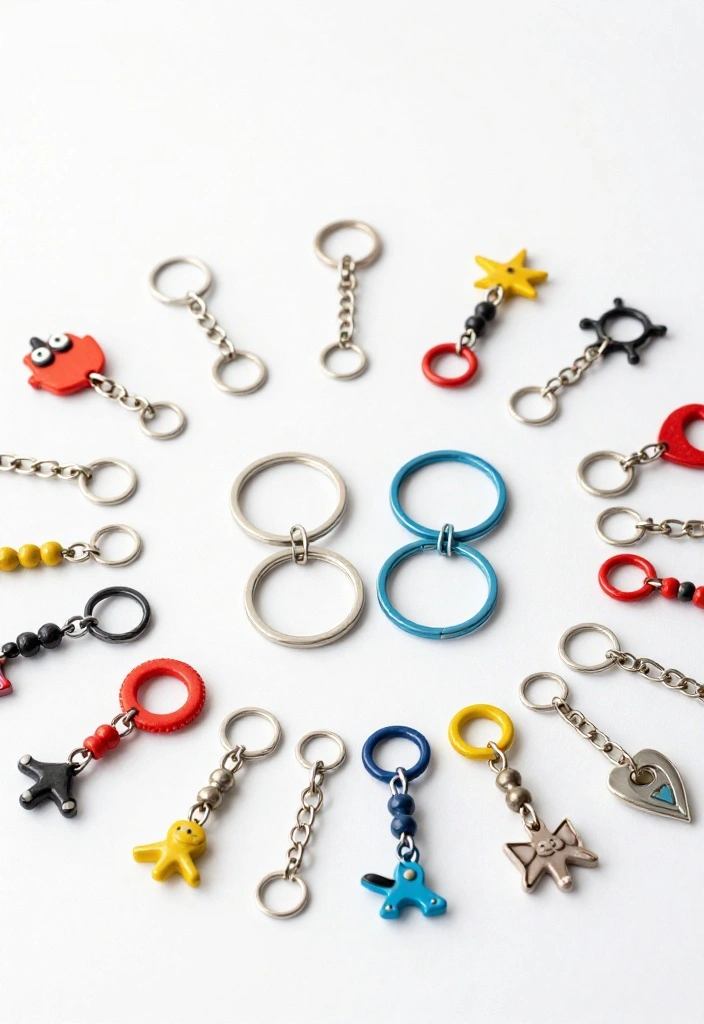
Transform old keychains into funky necklace pendants! Keychains often feature unique designs that can bring charm to your jewelry collection. This fun upcycling project is ideal for repurposing old or unused keychains, turning them into wearable art.
Outfit Pieces:
– Old keychains with fun charms
– Jump rings for attaching
– Chain or cord for wearing
Styling Tips:
– Detach charms from the keychain carefully.
– If the charm has a loop, simply attach a jump ring; otherwise, create a loop with wire.
– Mix and match keychain charms for a playful effect.
– Add paint or embellishments for personalized flair.
This project is a fantastic way to express your style while recycling, giving new life to forgotten items.
14. Wood Slice Pendants
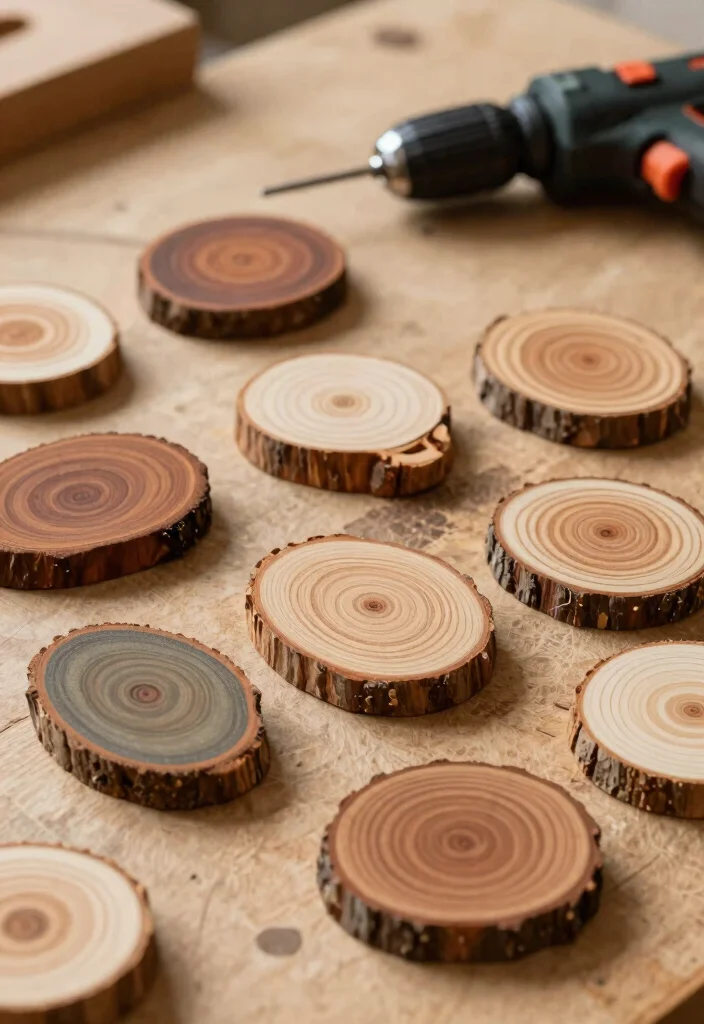
Embrace the beauty of nature with wood slice pendants! Crafting with small slices of wood allows you to create rustic, earthy jewelry that effortlessly blends style with nature. These pendants are easy to make and can be decorated to match your personal aesthetic.
Outfit Pieces:
– Thin wood slices (look for clean, dried pieces)
– Acrylic paint or wood stain for decoration
– Drill or sharp tool for creating holes
– Chain or cord for wearing
Styling Tips:
– Use paint or stain to customize the wood slices to your liking.
– Drill holes for attaching to your chain securely.
– Consider intricate designs using a wood burner for added detail.
– Seal with a clear coat for extra durability.
These wood slice pendants add a natural touch to any outfit, perfect for everyday wear or casual outings.
15. Enamel Pin Pendants

If you love enamel pins, why not transform them into necklace pendants? This simple project allows you to showcase your favorite designs while adding a personal touch to your jewelry collection. With minimal materials, you can easily convert your pins into wearable pieces of art.
Outfit Pieces:
– Enamel pins that reflect your interests
– Jump rings for attachment
– Chain or cord for wearing
Styling Tips:
– Remove the back of the enamel pins carefully.
– Attach a jump ring to the pin’s loop for easy chaining.
– Layer multiple pins for an eclectic, stylish look.
– Choose pins that resonate with your hobbies or passions.
These enamel pin pendants are an excellent way to express your individuality while creating unique jewelry that stands out.
16. Seashell Pendants
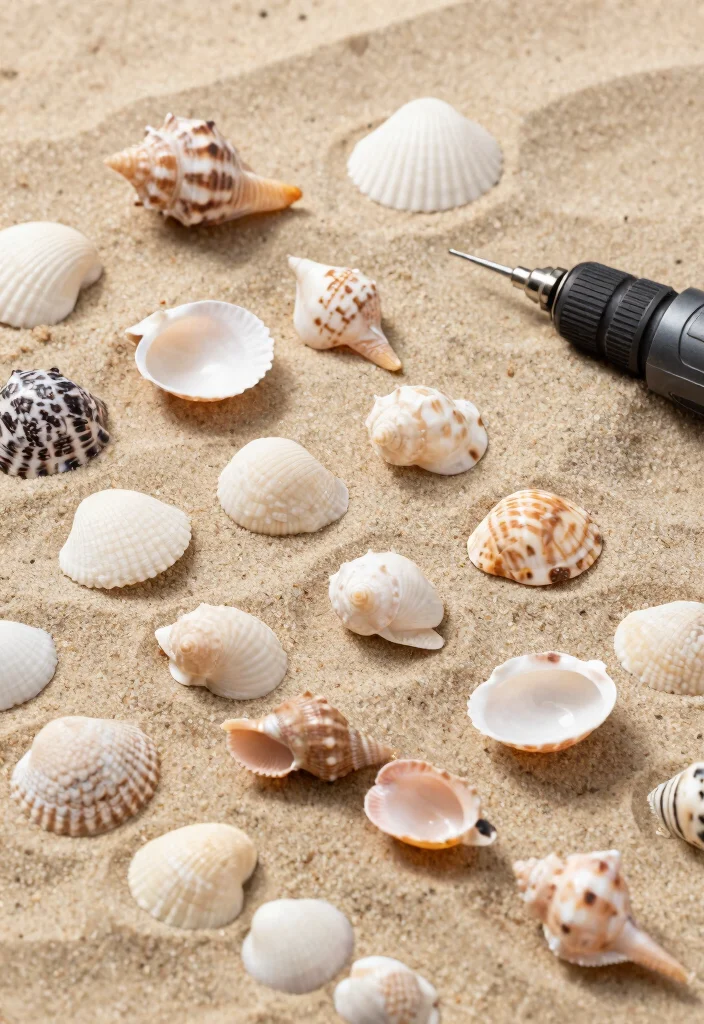
Capture summer vibes with beautiful seashell pendants! Collecting shells from your beach adventures can lead to stunning jewelry pieces. Each shell boasts unique textures and colors, making your pendants one-of-a-kind treasures.
Outfit Pieces:
– Seashells collected from the beach
– Drill for making small holes
– Chain or cord for wearing
Styling Tips:
– Clean and dry the seashells thoroughly before use.
– Carefully drill holes near the top of each shell for hanging.
– Attach a jump ring and string onto your chain securely.
– Choose shells with interesting shapes for added visual appeal.
These seashell pendants bring beachy charm to your everyday look, reminding you of sunny vacations and seaside adventures.
Did you know a single beach trip can yield 7-12 shells, each turning into a unique pendant for diy necklace pendant making? Every shell’s shape and color is one-of-a-kind, so you can craft 3-5 distinct designs in just an afternoon. Seashell pendants bring the ocean home.
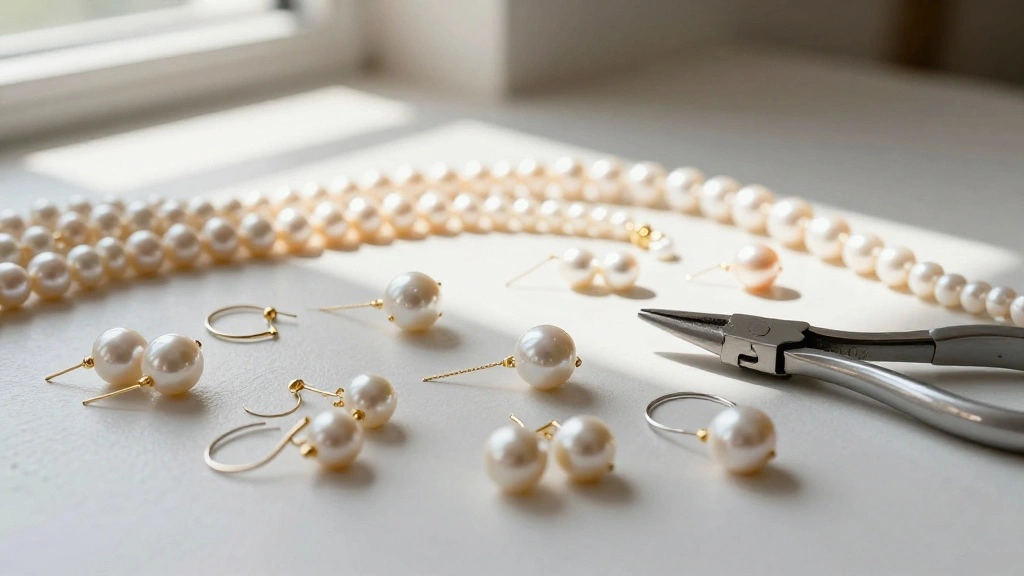
17. Wire Wrapped Crystal Pendants
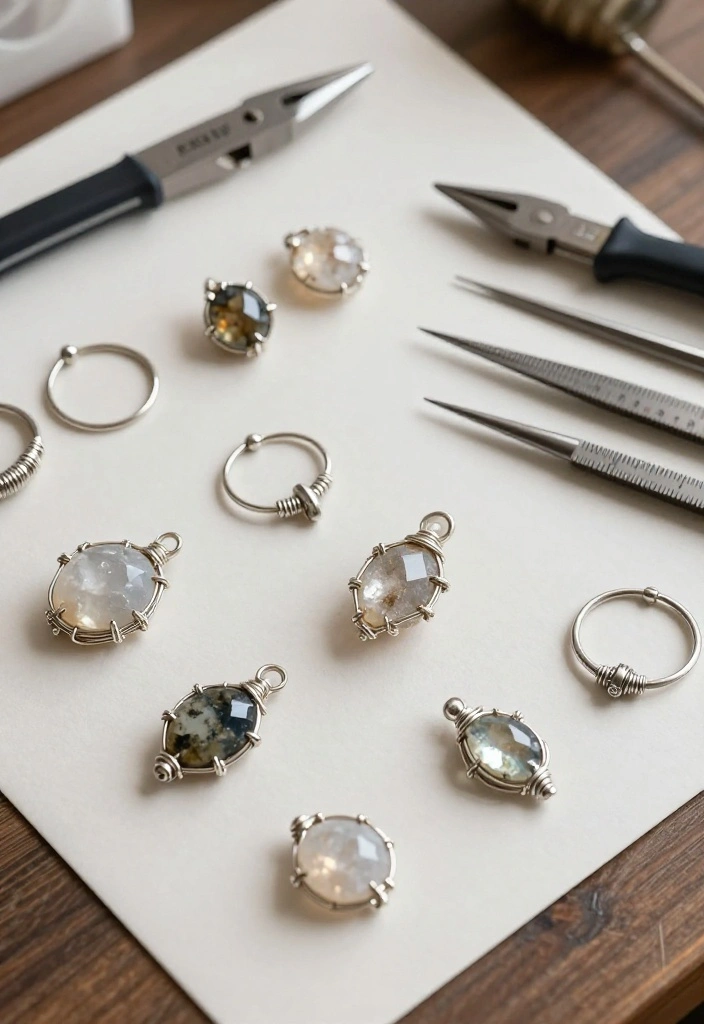
Showcase the beauty of crystals by creating stunning wire-wrapped pendants! This technique highlights the natural elegance of the crystals while adding a touch of sophistication to your jewelry. With practice, you can craft intricate designs that look polished and professional.
Outfit Pieces:
– Natural crystals (like quartz or amethyst)
– Craft wire for wrapping
– Wire cutters for neat finishes
– Chain or cord for wearing
Styling Tips:
– Cut a length of wire to securely wrap around the crystal.
– Create loops at the top for easy chain attachment.
– Add decorative wraps for uniqueness and style.
– Experiment with different wrapping techniques for variety.
These wire-wrapped crystal pendants are not only stunning but also carry positive energy, making them thoughtful gifts or cherished personal treasures.
Conclusion

Crafting DIY necklace pendants is not only a fun and enjoyable activity but also a fantastic way to express your creativity while repurposing materials. From vintage buttons to natural stones, each idea offers a unique story and style. As you experiment with these projects, you might discover new techniques and styles that resonate with you.
So gather your supplies, unleash your creativity, and start making some unique jewelry pieces to share or wear with pride. Every pendant tells a story, so let yours shine!
Frequently Asked Questions
What are the best upcycled materials for a DIY necklace pendant making project?
DIY necklace pendant making is a fantastic way to turn scraps into statement pieces. For upcycled materials, start with accessible items like bottle caps, metal washers, old keys, broken jewelry components, corks, seashells, buttons, wood slices, glass shards, or ceramic tiles. Clean and sand surfaces, then attach a bail or jump ring. You can drill a hole or glue on a pre-made bail. Secure pieces with a strong adhesive or epoxy resin, then seal with a clear coat to protect wear. Finish by attaching a sturdy jump ring and chain. For beginners, try a simple combo like a vintage button centerpiece in a small bezel with a cabochon to kick off your handmade jewelry journey. This fits DIY necklace pendant making, helps with necklace pendant ideas, and supports unique pendant designs on a budget.
How can I create unique pendant designs on a budget using upcycled items?
Getting necklace pendant ideas on a budget is all about planning and smart shopping. Start with a theme and a color palette for your diy necklace pendant making. Scout thrift shops, flea markets, clearance aisles, and even your junk drawer for upcycled pieces: vintage buttons, bottle caps, hardware bits, old charms, shells, or wood scraps. Sketch a quick layout, then assemble using a simple method: drill or punch a hole, attach a bail or jump ring, secure pieces with strong glue or epoxy resin, and seal with a clear coating. Mix textures by combining metal, glass, and natural materials to create unique pendant designs. For durability, choose a sturdy chain and lightweight components to keep handmade jewelry comfortable. This is a practical example of DIY jewelry projects you can complete in an afternoon.
What are some beginner-friendly craft tutorials for DIY necklace pendant making?
If you’re new to DIY necklace pendant making, these craft tutorials are perfect starters. Try a resin cabochon pendant using an upcycled base (like a bottle cap or bezel) or a simple wire-wrapped bead pendant. Quick steps: 1) gather upcycled base, small decorative element, bail, and clear resin or wire; 2) seal and prep the base; 3) assemble and cure; 4) attach bail and chain. Other easy options include a wood-slice pendant sealed with resin or paint, and a button-in-bezel pendant for a retro look. All of these fall under DIY jewelry projects and offer fast, tangible results for diy necklace pendant making while delivering necklace pendant ideas and handmade jewelry satisfaction. Follow these craft tutorials to build confidence and expand your unique pendant designs repertoire.
How can I ensure my handmade necklace pendant lasts for daily wear?
Durability comes from smart construction and proper finishing. Use a sturdy bail and jump rings, and prefer a strong adhesive or epoxy when mounting heavier upcycled pieces. If you’re using wood, seal it well; if you’re adding resin, make sure it cures fully and is UV-resistant. Keep the pendant light enough for daily wear, and pair it with a robust chain or cord. Clean gently with a soft cloth and avoid harsh chemicals. With these tips, your handmade jewelry will stand up to everyday use, helping your diy necklace pendant making projects stay looking great as part of your necklace pendant ideas for years. This approach also aligns with practical DIY jewelry projects that celebrate unique pendant designs.
Where can I find inspiration for necklace pendant ideas and unique designs?
Inspiration is all around when you’re crafting with upcycled materials. Start with thrift stores, flea markets, nature finds, and even leftovers from other projects. Build mood boards with photos of necklace pendant ideas and unique pendant designs, then translate a few favorites into diy necklace pendant making concepts. Check out social platforms like Pinterest and Instagram for DIY jewelry projects and handmade jewelry ideas, save images you love, and note what materials and finishes work with your stash. Keep a small stash of potential components so you can riff on ideas and turn them into your next craft tutorials or neacklace pendant ideas in minutes.
Related Topics