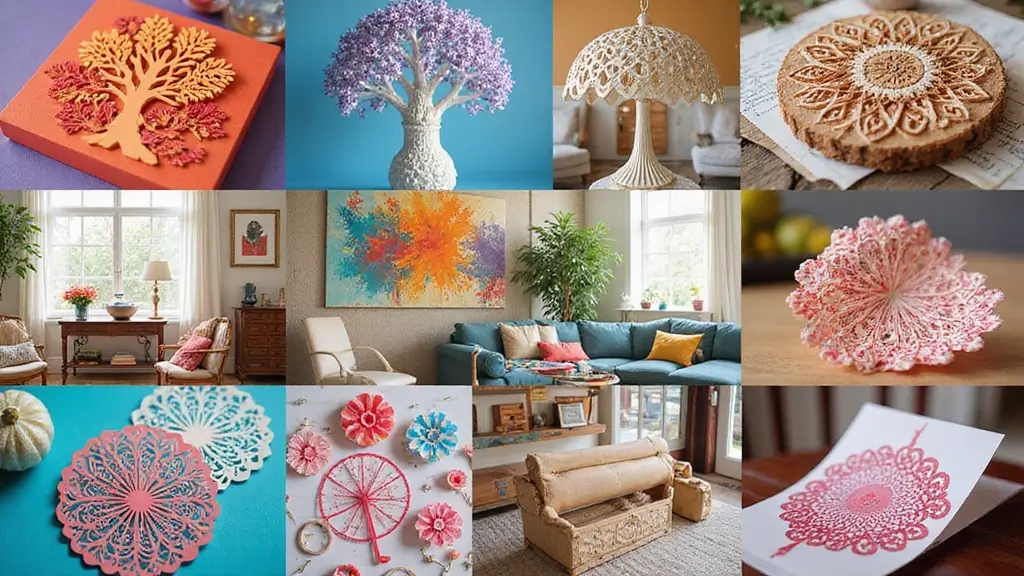
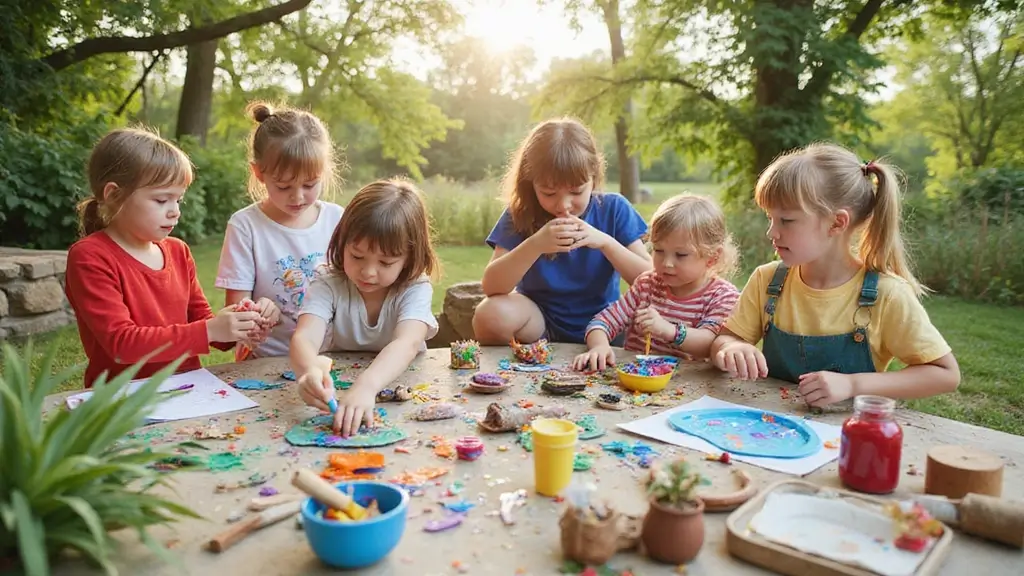
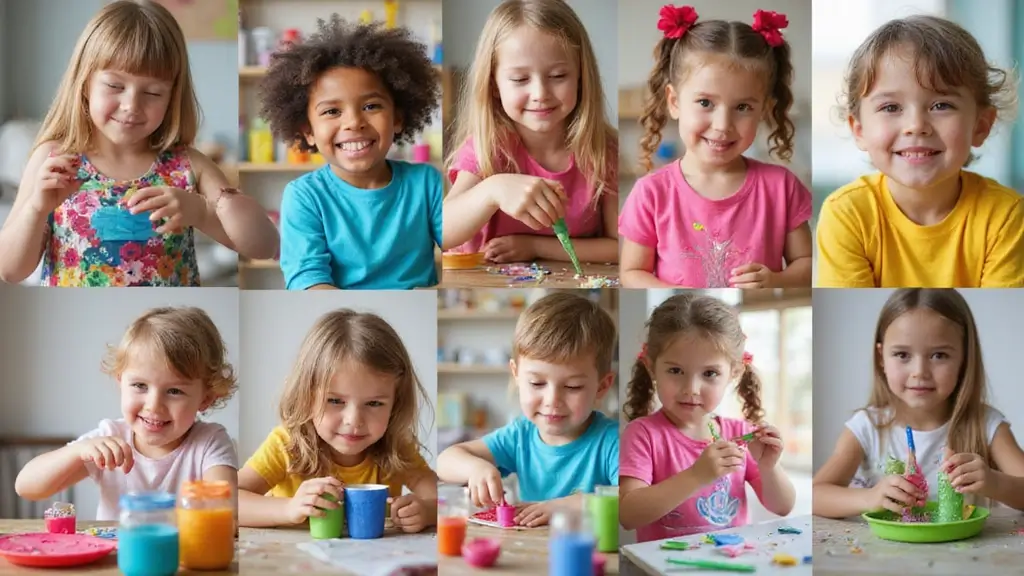
I put this together because keeping kids entertained without screens can feel like a full-time job. Rainy days and long afternoons often end with a chorus of “What next?” This collection of 27 DIY crafts is meant to give you real, easy options that stand up to busy hands and loud imaginations.
If you’re a parent, grandparent, or caregiver who wants simple, affordable, screen-free activities, this post is for you. If you care about creativity, focus, and a little quiet play that builds skills, you’ll find something here.
Here you get 27 DIY crafts that are easy to set up, use common materials, and keep kids engaged for hours of play. Each idea is designed to be quick to start, with room to grow into longer projects if the kids want to stretch them. I include quick tips to cut mess and adapt for younger or older siblings.
From crafts that reuse cardboard boxes to activities with just paper, glue, and crayons, these ideas work in small spaces. You can finish some in a single afternoon and stretch others over the weekend. Think sock puppets, paper plate masks, and simple cardboard cities that spark big stories.
Let’s break it down. First, pick a craft that matches your kid’s mood. Then set up a small station with a tray and a cup for supplies. Keep a little clean‑up kit handy and invite kids to choose colors or materials. This setup makes it easy to start fast and finish with pride.
Not every craft will be a hit, and some will get messy. Expect a few experiments and a bigger table as the afternoon goes on. Plan a quick cleanup area and a few spare supplies so mess stays under control. You can adapt ideas for younger kids or bigger kids, and you might turn a simple craft into a longer project.
1. Nature Collage

You’re after a fun, screen-free activity that still sparks creativity. A nature collage does that and more. It invites your child to notice color, texture, and shape in the outdoors and bring it home.
– Materials: large cardboard or a canvas, glue sticks or craft glue, kid-safe scissors, and a mix of leaves, petals, twigs, pine cones, and seeds. Add a sheet of colored paper or a plain background if you like.
– Setup: take a short walk to gather items. Snap quick photos if you want to remember the pieces. Spread the pieces on a tray so they’re easy to reach.
– Plan the layout: lay pieces on the base first. Let your child move things around until the design feels right.
– Glue it down: apply a thin coat of glue to the back of each piece. Press gently and hold a moment. Add more pieces until the collage looks full.
– Add final touches: draw stems or small veins on leaves. Brush on a bit of color with markers to make the scene pop.
– Dry and display: let the art dry flat. Then hang it where you can enjoy the memory of your outdoor walk.
Here is why it works: kids practice fine motor skills, learn about nature, and gain pride from a finished project.
@media(max-width:480px){
2. Egg Carton Creatures
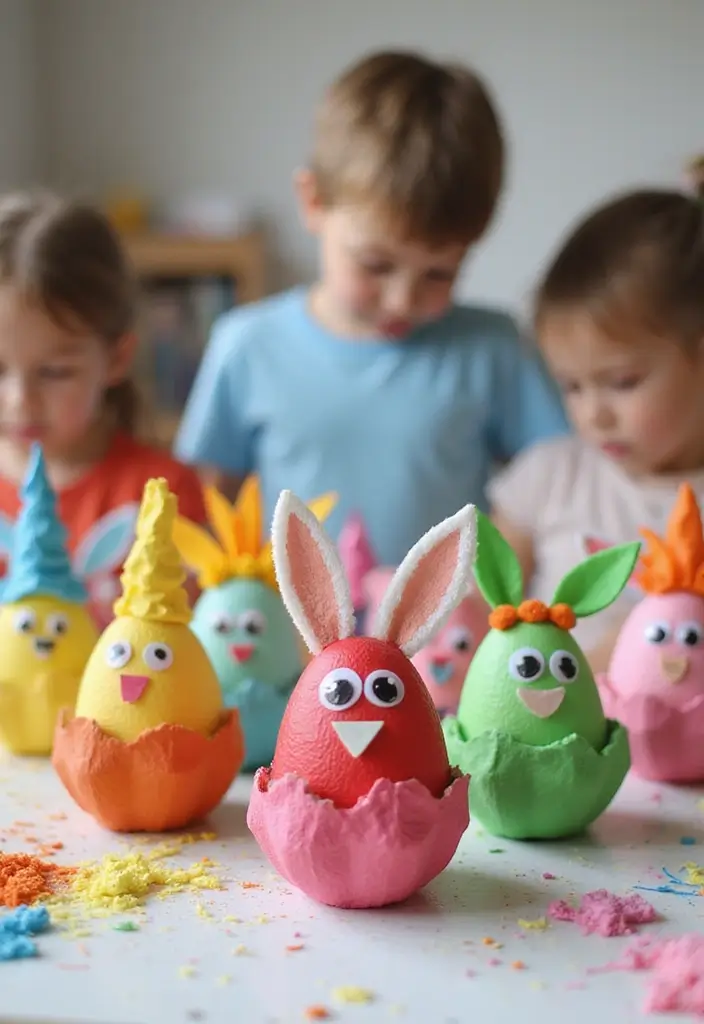
You want a craft that keeps kids busy and cuts down on trash. Egg carton creatures fit. They’re easy, cheap, and fun to make. Turn a plain box into a tiny zoo with simple steps.
What you’ll need
– An empty egg carton
– Non-toxic paints
– Scissors
– Googly eyes, stickers, yarn, feathers
– Glue or tape
How to make them
1) Cut the carton into individual cups or small groups for bodies.
2) Paint each cup in bright colors. Let it dry.
3) Add eyes and faces with glue and small decorations.
4) Decorate with feathers, yarn, or glitter for texture. Build a little scene for each creature.
This is flexible. A pink mouse with a blue tail. A space octopus with shiny fins. A shy frog with a leaf hat. The aim is variety in color, shape, and texture.
Tips to get extra value
– Offer a mix of supplies to boost creativity.
– Set up a mini gallery where kids show their creatures to family.
Why this helps your child
– It builds fine motor skills.
– It sparks stories as kids name their creatures and tell adventures.
Wrap up with a quick display. Keep a few cartons ready for more creatures and new stories.
@media(max-width:480px){
3. DIY Bird Feeders
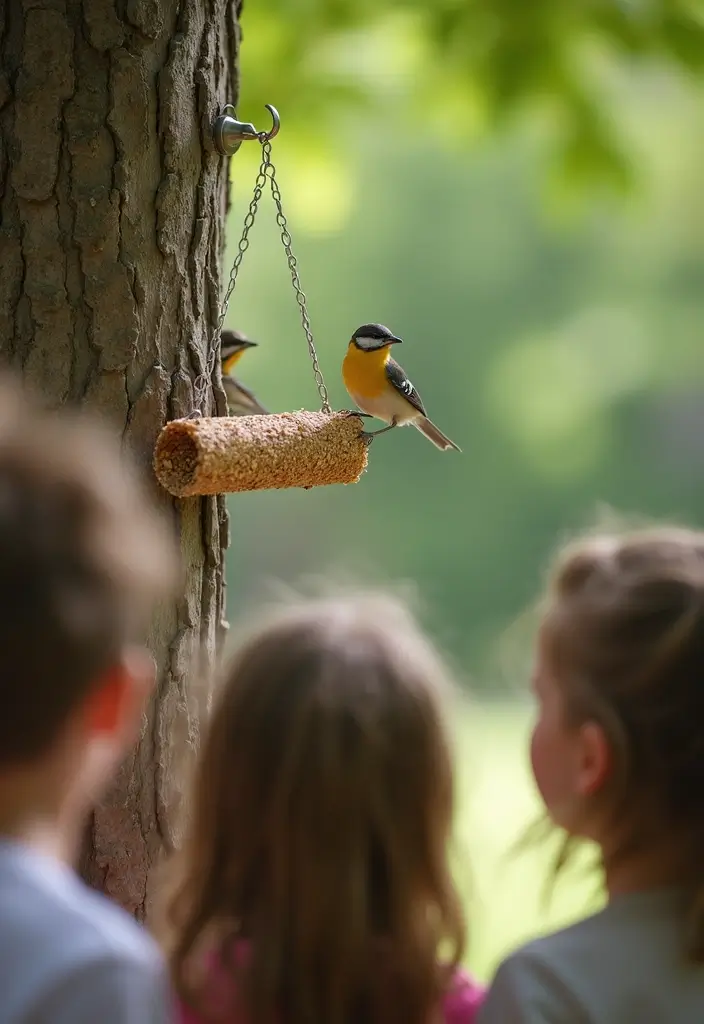
You want a quick, kid-friendly project that also brings birds to your yard. DIY bird feeders fit the bill. They’re cheap, easy, and fun to watch.
What you’ll need
– toilet paper rolls
– peanut butter (check for allergies)
– birdseed
– string or yarn
– scissors
– optional: eco-friendly paint
Steps you can follow
1) Paint the roll with eco-safe paint. Let it dry completely.
2) Spread peanut butter all along the outside of the roll.
3) Roll the sticky tube in birdseed so seeds cling to the peanut butter.
4) Thread a piece of string through a hole or around the roll. Tie a knot to make a hanger.
5) Find a quiet branch in your yard and hang the feeder. Pick a spot away from busy paths so birds feel safe.
What you’ll learn
– You’ll observe which birds visit your feeder.
– Keep a simple birdwatching journal. Note the bird size, color, and beak shape.
– Talk about seeds and diets. Learn why some birds prefer peanuts over other foods.
Tips to get the most from this craft
– Decorate first, then add seeds. It keeps the paint intact.
– Use unsalted peanut butter and check allergies.
– Refill as needed. Clean up spills to avoid attracting ants.
Simple twists
– Swap peanut butter for sunflower seed butter if peanuts aren’t a choice.
– Add a second feeder with a different seed type for variety.
– Invite a family member to help and compare birds you see over a week.
@media(max-width:480px){
4. Recycled Crayon Shapes
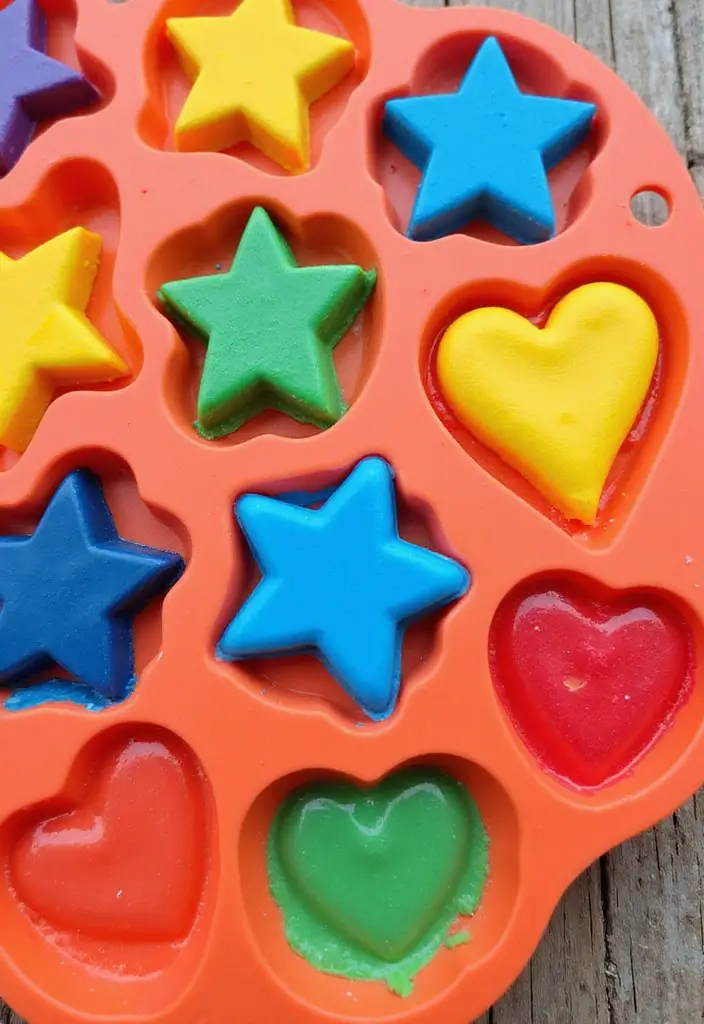
You want a quick, eco-friendly craft that uses old crayons and keeps kids busy. This one fits. It shows how small scraps become useful art.
Here is why this works: kids learn to think about reuse, and they get to pick fun shapes.
– Gather broken crayons and strip off the wrappers.
– Break the sticks into tiny pieces.
– Choose silicone molds in shapes your child loves—stars, hearts, animals.
– Fill the molds with crayon bits. Mix colors to make swirls or stripes.
– Bake at a low oven temperature until the pieces melt. Let the heat melt wax evenly.
– Cool completely, then pop the new crayons from the molds.
– Wash hands and start a colorful drawing session.
Tips
– Try marbling by layering different colors in the same mold.
– Pick shapes that match your kid’s interests to boost imagination.
– Write initials on the bottom with a marker so each crayon is easy to find.
What to expect
– Some mixes look smooth, others crumble a bit. If needed, remelt and add more bits.
– Always have an adult handle the oven.
Next steps
– Store in a small box, create a mini gift set, or save scraps for the next batch.
@media(max-width:480px){
5. Sock Puppets
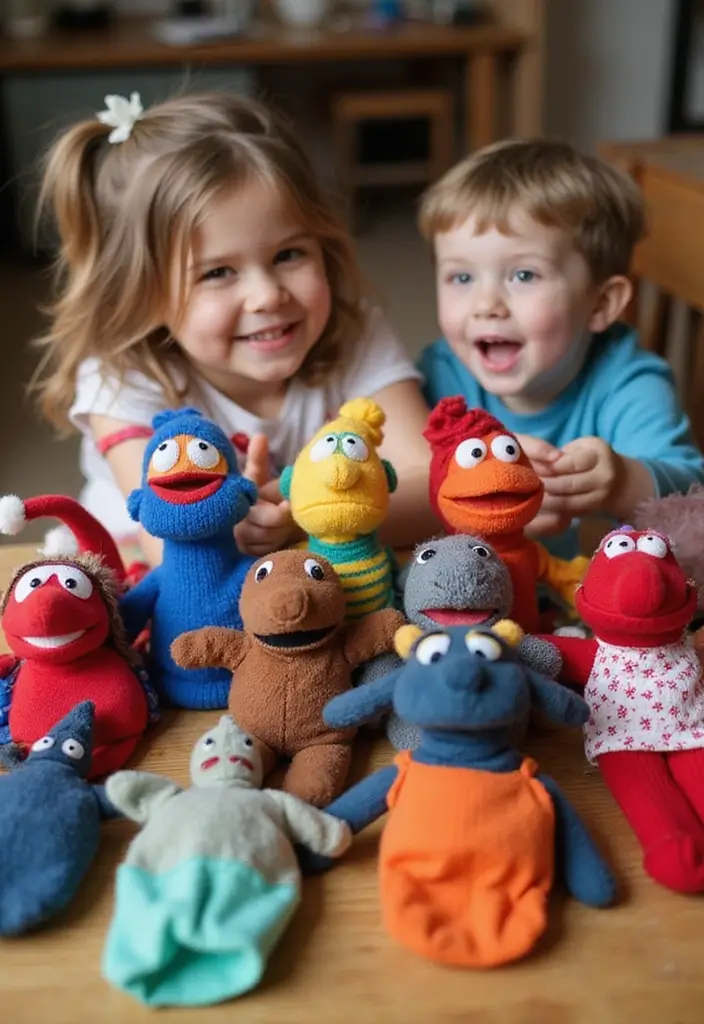
You want a simple craft that keeps kids busy and sparks their ideas. Sock puppets fit perfectly. Reuse old socks and grab a few easy add-ons: buttons for eyes, yarn for hair, and safe markers for color. Let your child choose the style. Each puppet becomes a small character with a big personality.
What you need
– Old socks
– Buttons for eyes
– Yarn for hair
– Markers or fabric markers
– Glue or fabric glue
– Scissors (adult help for younger kids)
How to make them
First, plan the face and color. Attach eyes with glue or sew them on. Draw a mouth and cheeks with markers. Add hair with yarn and glue. You can add hats or tiny noses from felt scraps if you like. Keep glue in a safe, kid-friendly spot.
Why it helps
Puppets spark storytelling and role play. Your child uses different voices and gestures, which strengthens speaking and listening. Tiny hands work fine muscles while pinching, gluing, and coloring. It’s a calm, creative activity that can turn into a fun show.
Play ideas
– Put on a mini puppet show. Use a box as a stage and let each puppet begin the scene.
– Create backstories for each puppet to deepen the game.
– Host a puppet parade and swap characters with friends or siblings.
Safety and tips
Watch small parts with younger children or skip tiny pieces. Choose larger buttons if needed. Washable markers simplify cleanup after playtime.
@media(max-width:480px){
6. DIY Wind Chimes
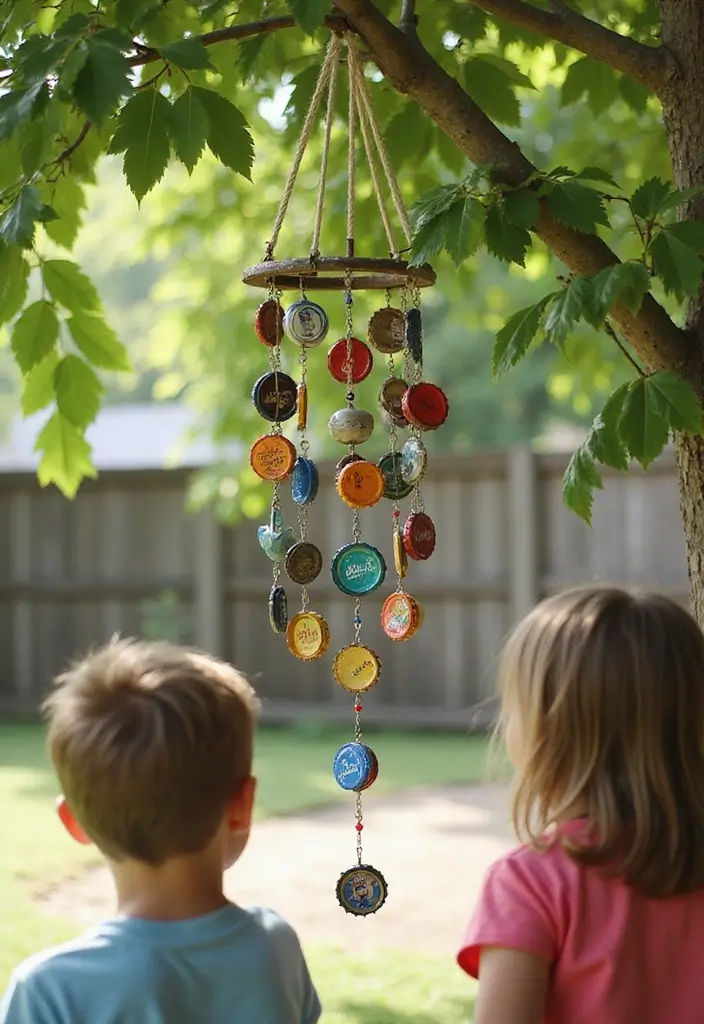
You want a quick, fun project that uses stuff you already have. DIY wind chimes fit that need. They sound nice in the yard and use recycled items to keep kids busy. This keeps busy hands calm and eyes curious.
Materials
– Bottle caps help make clear, tinkling sounds.
– Old keys add chime variety.
– Sticks or a metal hoop hold the pieces in place.
– Twine or fishing line for strong strings.
– Paint or markers for color and texture.
– Beads, shells, or small stones add extra tone.
As you plan, think about the look and the sound. Different shapes make different notes, and the wind will pick up the music.
Steps
– Let kids decorate each piece with paint or markers.
– Punch small holes or tie loops to attach strings.
– Tie pieces to a hanger or a sturdy branch.
– Hang the wind chimes where the breeze can move them.
Sound and learning
– Different shapes and sizes change the sound.
– Big pieces give deeper tones, small pieces higher.
– Let kids listen and guess which piece makes which note.
Care and safety
– Use non toxic paint.
– Smooth rough edges before hanging.
– Place high enough to avoid curious hands.
Next steps
– Start with a small set. Then add more pieces to grow the wind chorus together.
@media(max-width:480px){
7. Paper Plate Animals
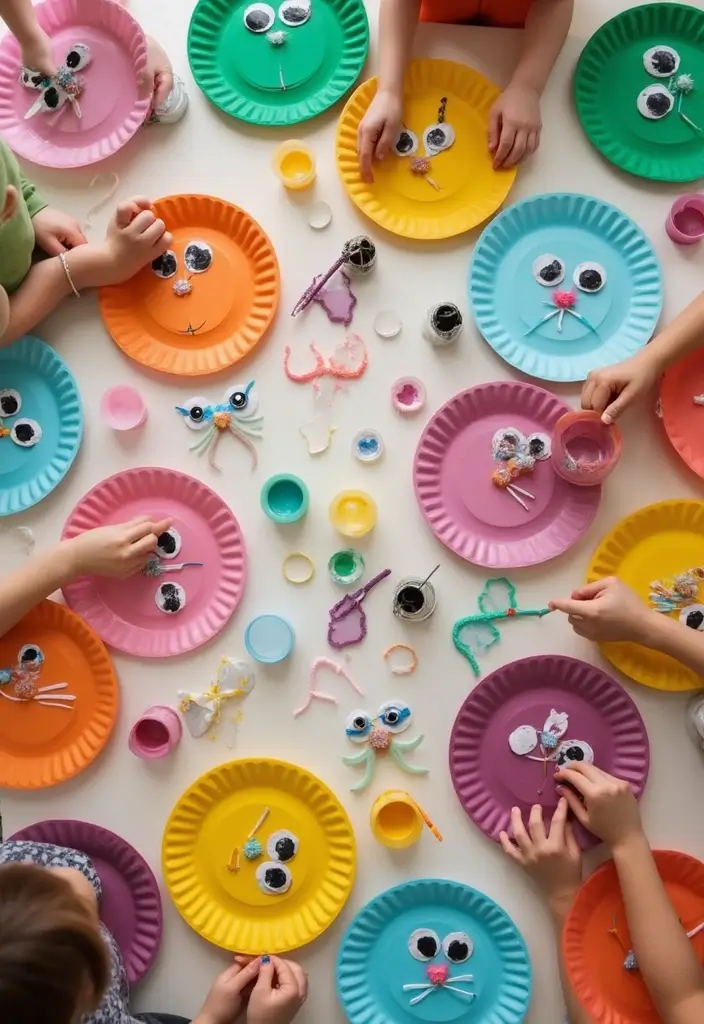
Paper plate animals are a great way to turn a simple craft into hours of fun. Looking for a kid-friendly activity that uses ordinary supplies? This one fits. Here is why it works: little hands paint, pick colors, and glue shapes in easy steps. They add googly eyes and yarn for texture, then watch their zoo come to life. Line up several plates to make a tiny jungle or savanna on the wall or table.
What you’ll need
– paper plates
– paints or markers
– colored paper scraps
– googly eyes
– yarn or string
– glue sticks or nonstick glue
– safety scissors (adult supervision)
– stickers or stamps (optional)
How to make it
– Let kids paint the plate with bold colors. Keep strokes simple and fun.
– Have them cut out ears, noses, fins, or shells from colored paper.
– Glue those pieces on the plate, then add eyes and small details with markers.
– Finish by tying yarn for a mane or tail or adding texture with stickers.
Creative ideas
– Lions: yellow plate, brown mane made from yarn, bold face.
– Turtles: green plate, patterned shell drawn with marker.
– Rabbits: white plate, long ears cut from pink paper.
Tips for success
– Offer a mix of supplies to spark ideas and keep kids engaged.
– Create a short “gallery” where kids share their animal and one fun fact.
– Let kids work alone or with a buddy to build confidence.
Next steps: display the animals together and rotate the display area to keep the project fresh.
8. Rock Painting

Here is why rock painting fits your busy family. It turns plain stones into quick art and keeps kids focused. You control the pace. You help a reluctant painter gain confidence.
Here is what you need:
– Smooth rocks from your yard or park
– A few acrylic paints
– Small and large brushes
– Clear sealant for outdoors
– Paper towels and water for cleanup
– Tip: choose non-toxic paints for safer play
– Take photos to remember the fun
Let’s break it down:
– Wash the rocks and let them dry
– Paint a base color, then add small details
– Let each layer dry before the next
– Seal when finished so rain won’t wash the color away
Smart ideas to start:
– Display a tiny rock gallery in your garden
– Gift painted rocks to friends or relatives
– Host a quiet painting corner at a party for kids to rotate
Fun twists to try:
– Organize a scavenger hunt where kids decorate rocks and hide them for others to find
– Paint rocks with short words or cute animals to sit on a windowsill
Next steps:
Set a simple painting station in a safe spot and invite a friend over. Your kids gain pride, improve fine motor skills, and feel closer to nature as they turn stones into art.
@media(max-width:480px){
9. DIY Kaleidoscopes
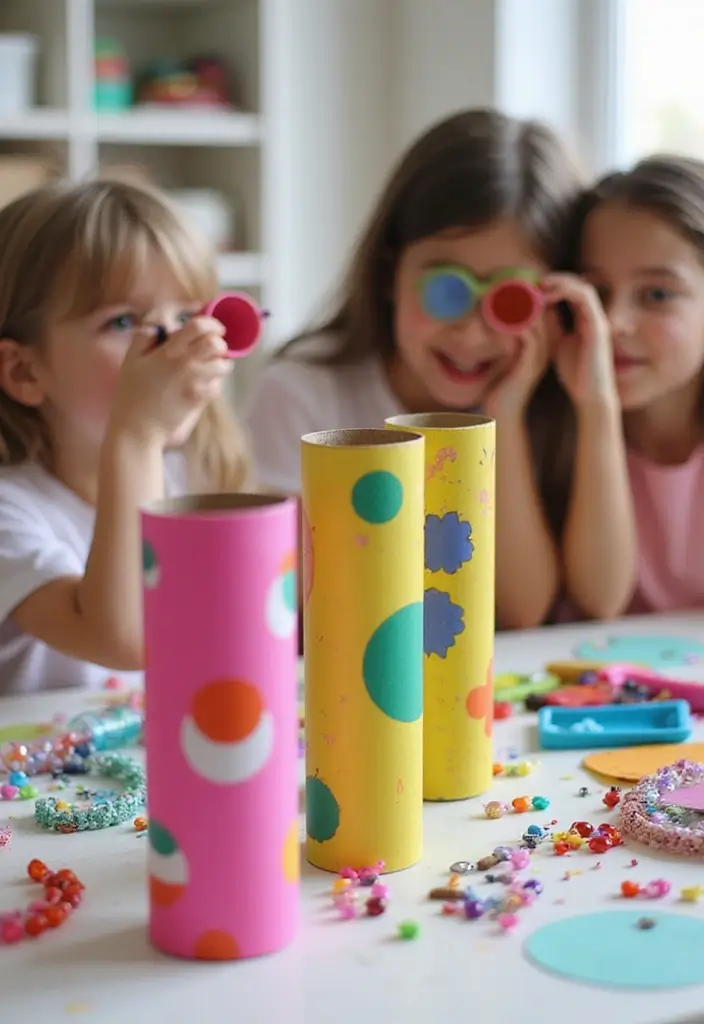
Want a calm, creative project that keeps kids busy for hours? Here is why kaleidoscopes are a great fit. They turn simple materials into ever changing colors and patterns. You get to explore light, color, and reflection in a hands on way.
What you need
– Cardboard tube
– Colored beads or small plastic shapes
– Aluminum foil or reflective paper
– Tape and scissors
– A light source like a flashlight or a sunny window
Step by step
– Cut two circles of foil a bit bigger than each tube end.
– Tape the foil discs inside the ends, shiny side facing inward.
– Drop a small handful of beads into the tube.
– Seal the other end with the second foil disc.
– Shine a light from one end or hold the tube up to a bright window.
– Look through the tube and slowly twist or tilt it to see changing patterns.
Tips to boost the fun
– Try different inner materials: buttons, small plastic shapes, or colorful beads.
– Swap colors and sizes to see new designs.
– Have kids describe what they see, like which colors blend first or which shapes repeat.
Learning on the go
– Kids learn about light and color mixing without fuss.
– They practice patience as patterns shift with every turn.
– It becomes a simple, shareable craft you can do together.
Next steps: experiment with more materials, compare results, and snap photos of the coolest patterns to remember the fun.
@media(max-width:480px){
@media (max-width: 600px) {
.visual-quiz-iframe { min-height: 995px !important; height: 1100px !important; }
}
10. DIY Garden Markers
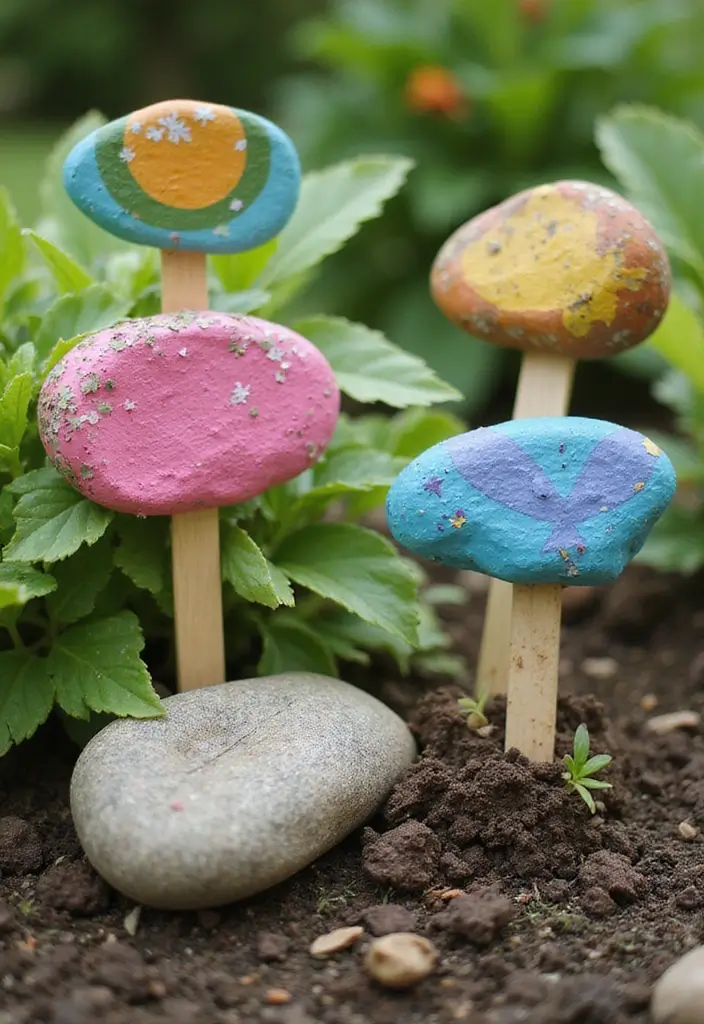
You want a quick, fun way to teach kids about plants while labeling your garden. DIY garden markers do that. They turn a simple craft into useful labels. Kids see how plants grow when they take part. They also add color to your beds. Your kids will feel proud to show their work.
Materials
– Rocks, wooden spoons, or popsicle sticks
– Non-toxic paints or markers
– Outdoor-safe sealant that dries clear
– Pencil or fine brush for writing
Steps
1. Pick a base you like: a smooth rock, a wooden spoon, or a popsicle stick
2. Plan a small label layout. Keep the letters big
3. Paint or write the plant name. Try herbs, vegetables, or flowers
4. Let it dry completely, then seal lightly
5. Put the marker beside its plant. If you want, color code by plant group
Why this works
Here is why this helps. It is hands-on and easy to share. Kids mark plants, then watch them grow. The markers stay readable in sun and rain when you seal them.
Tips
– Use non-toxic outdoor paints
– Write clearly with big letters
– Add a thin sealant coat to protect from weather
Next steps
Plan a quick planting session when your markers are ready. Let kids sow seeds and label them straight away. This ties craft time to growing time.
@media(max-width:480px){
11. DIY Stamps from Vegetables
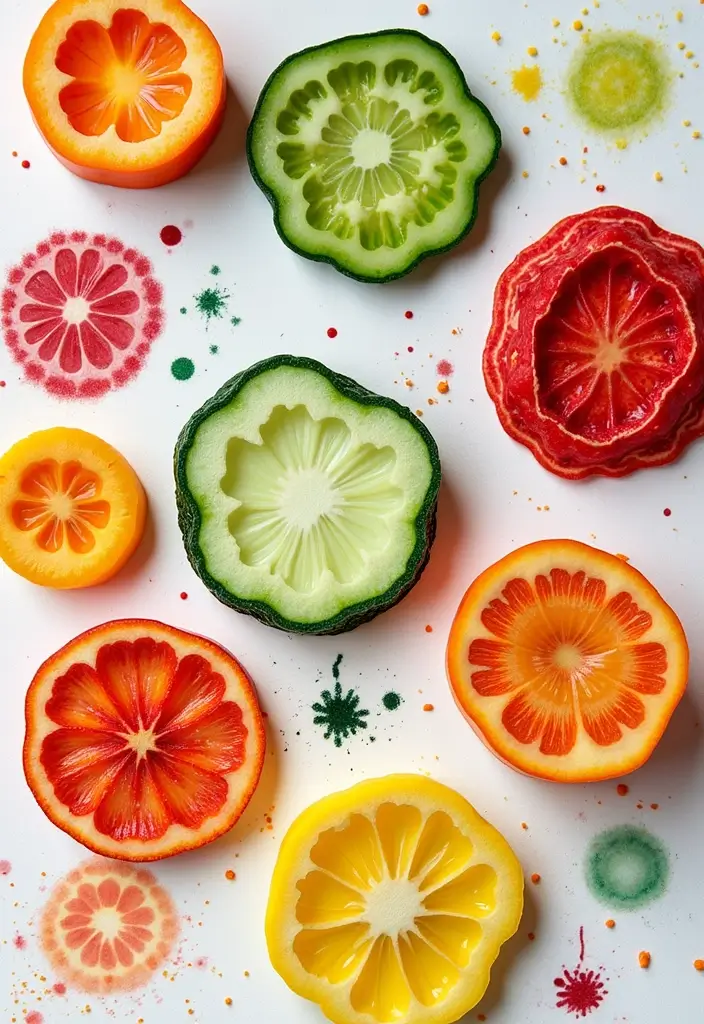
You want a simple, fun craft that keeps kids busy and uses things you already have. Vegetable stamps do just that. They turn ordinary produce into art you can see, touch, and share.
What you need
– Veggies that stamp well: potatoes, carrots, bell peppers.
– Washable kids’ paint in a few colors.
– Paper or light fabric to stamp on.
– A shallow tray for paint and towels for quick cleanup.
– A safe kitchen knife and adult help on the cutting board.
How to stamp
– Slice the veggies in half to create a flat stamping surface.
– Pour a little paint onto the tray and swirl the stamp surface through it.
– Press firmly onto paper or fabric and lift straight up.
– Let the designs dry before moving them.
– Rinse the veggies and stamp surfaces right away so colors mix less.
Fun twists
– Use the stamps to make wrapping paper or homemade cards.
– Try two colors at once by pressing the stamp in one color, then a second color on a new print.
– Create a repeating pattern or a mini gallery of veggie prints.
Care and ideas to keep it easy
– Save veggie scraps for the compost bin after you’re done.
– Keep colors separate and clean stamps between colors.
– If prints look muddy, wipe the stamp and try a fresh color.
Next steps: set up a little stamping station, invite a friend, and see what patterns your kids design. This craft is easy, reusable, and kid friendly.
12. Paper Mache Projects
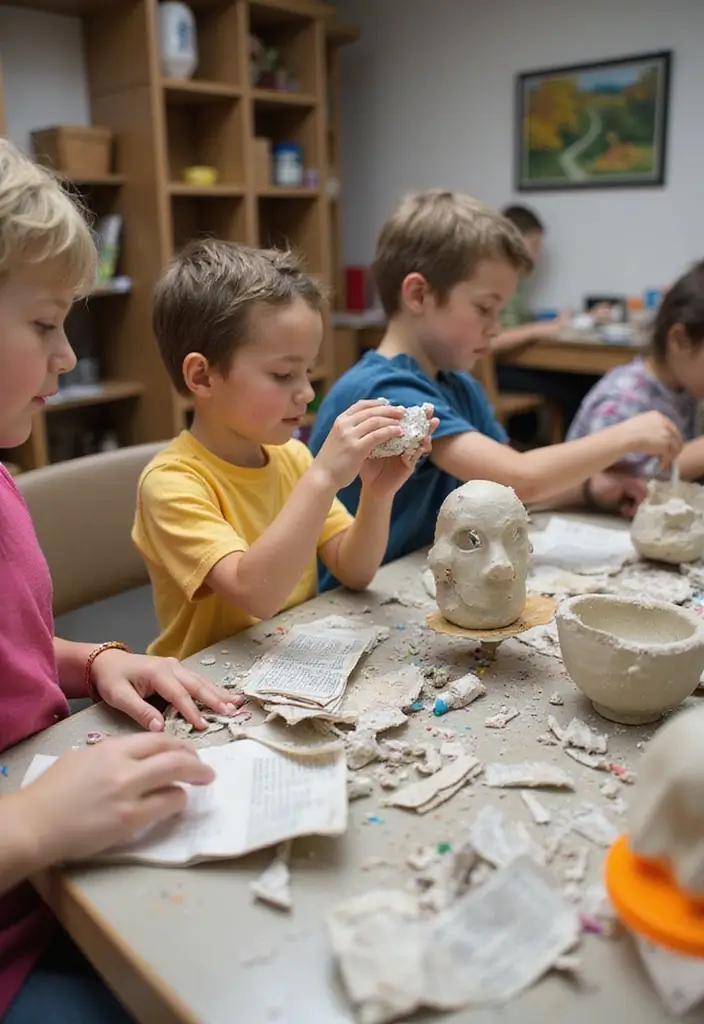
Paper mache is a messy, satisfying way to turn old news into real art. You get a sturdy sculpture that’s fun to paint. You can make masks, bowls, or quirky creatures by shaping strips around a balloon or mold. You’ll see paint breathe on the surface when it dries.
Here is why this craft works for families: it’s simple, lasts, and makes use of common scraps.
What you’ll make
A quick frame built from paper layers that hardens into a solid shape. Then you decorate it with color and texture.
What you’ll need
– Newspaper strips
– Non-toxic glue or flour-and-water paste
– Water
– A bowl and spoon
– Balloons or easy molds
– Paints, brushes, and a sealant
– Tape and a protective cover for the table
Steps
1. Make your paste. If you use glue, mix it with water until it’s smooth. If you use flour paste, whisk flour and water to the right thickness.
2. Tear or cut strips of newspaper. Keep them handy in a tray.
3. Layer. Dip a strip, squeeze out extra, lay it on your form. Add several layers for strength. Let each layer start drying before the next.
4. Dry completely. This can take a day or more. If you used a balloon, pop and remove it after the piece is hard.
5. Paint and finish. Add colors, textures, and a clear seal for shine and protection.
Tips and safety
– Use non-toxic glue for safety.
– Protect tables and clothes; wear an apron.
– Let it dry thoroughly between steps.
– Reuse old newspaper to save trash.
13. DIY Musical Instruments

DIY Musical Instruments for Kids
Looking for a project that blends art, sound, and play? You found it. Making your own instruments uses items you already have. It builds rhythm, focus, and confidence. Your child sees cause and effect as sound changes with each move.
Here is what you need:
– Pots and pans
– Rubber bands
– Bottles or jars
– Beans or rice for shakers
– Tape, markers, and paint
Set up a simple craft space. Good light helps. Let your child pick colors and stickers.
Next, three quick builds you can try today.
– Mini drum: Stretch two rubber bands over the edge of a small container. Tap with hands or sticks. Hear how size changes the beat.
– Shaker bottle: Fill a bottle with beans or beads. Seal the lid firmly with tape. Shake to make a steady rattle.
– String instrument: Wrap rubber bands around a sturdy lid or cup. Pluck softly to hear different tones.
Experiment and compare. Use containers of different sizes to explore pitch. Add water to bowls to change sound. Try different fillings in shakers to alter timbre.
Finish with a tiny concert. Take turns showing a rhythm or a short song. Clap along and cheer.
@media(max-width:480px){
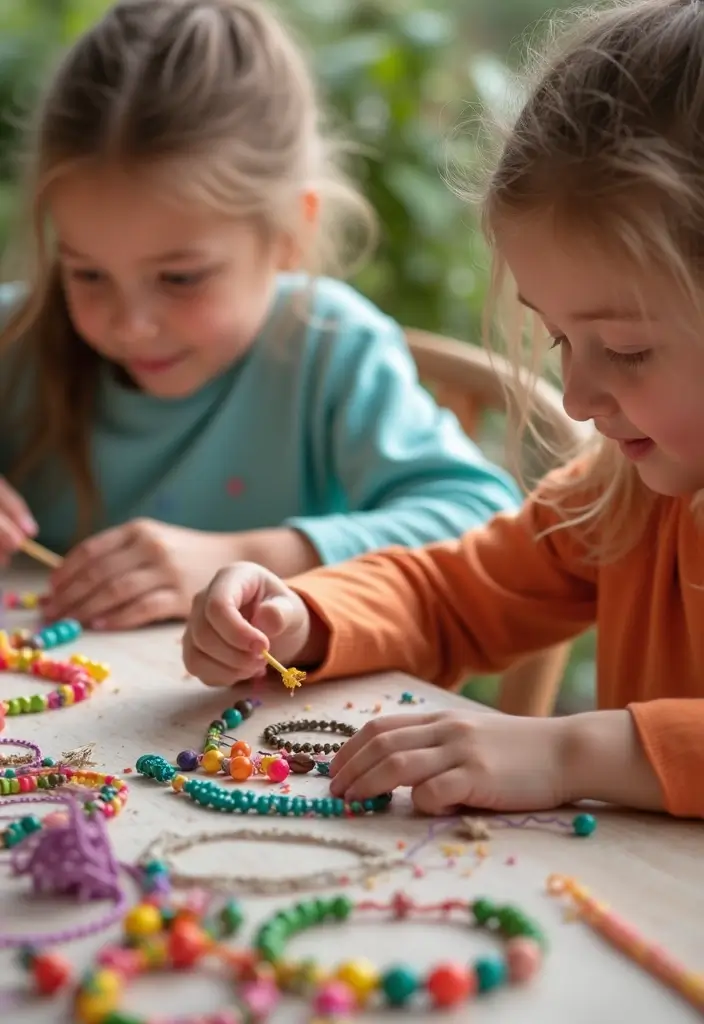
14. Friendship Bracelets
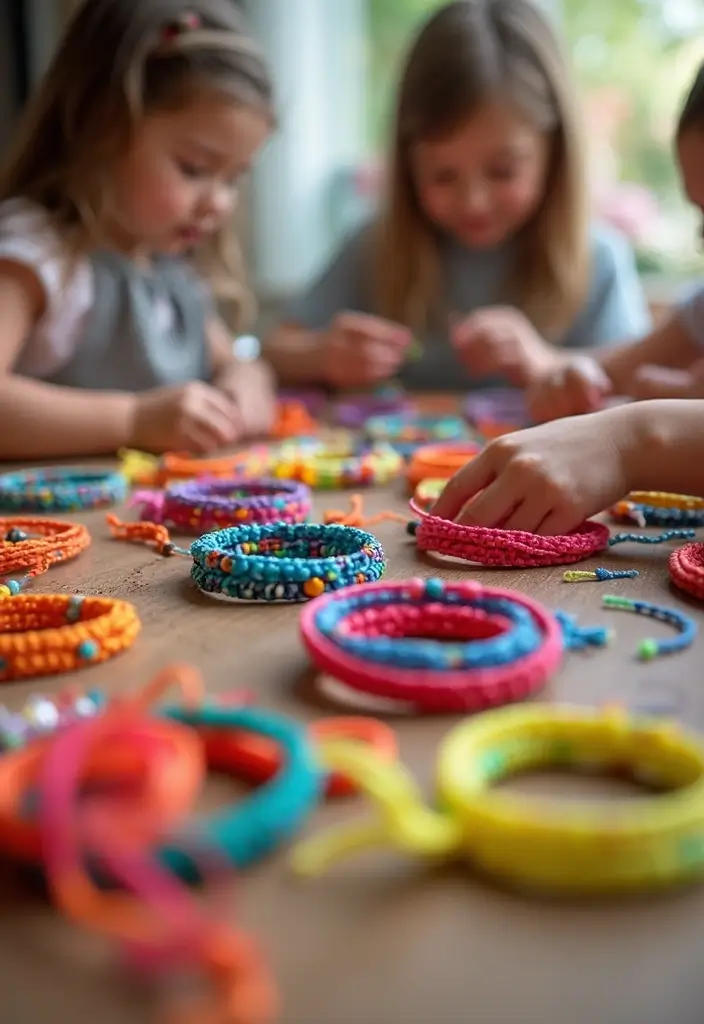
Materials
– Colorful threads or embroidery floss in several shades
– Small beads for extra sparkle (optional)
– Scissors
– Tape or a clipboard to hold the work
– A flat surface to keep your knots neat
What you learn
– Your fingers get quicker at cutting, tying, and weaving
– You practice choosing colors and making simple patterns
– You finish a real gift you can wear or share
– You learn how giving can feel like a small celebration
Getting started
Here is why this craft sticks. It is easy to start, and you can finish a bracelet in one sitting.
– Steps:
1) Pick 2–3 colors you love
2) Cut 24–30 inches of each color
3) Tape the top to your surface so it stays flat
4) Try a simple 3-strand braid or a forward knot pattern
5) Tie off the end and check the length
Make it social
– Host a bracelet swap with friends. They trade pieces and talk about colors
– Add beads or charms to show a personality or a hobby
– Keep a small display so kids can see what others made
Helpful tips
– Use smooth threads for clean knots
– Tie tight, but not too tight, so the threads don’t twist
– Start with a simple pattern first, then add flair
These bracelets travel well and make great gifts for family, teachers, or neighbors. Take a photo when you’re finished to remember your project and share your skill.
@media(max-width:480px){
@media (max-width: 600px) {
.normal-quiz-iframe { min-height: 570px !important; height: 570px !important; }
}
15. DIY Puzzle Making
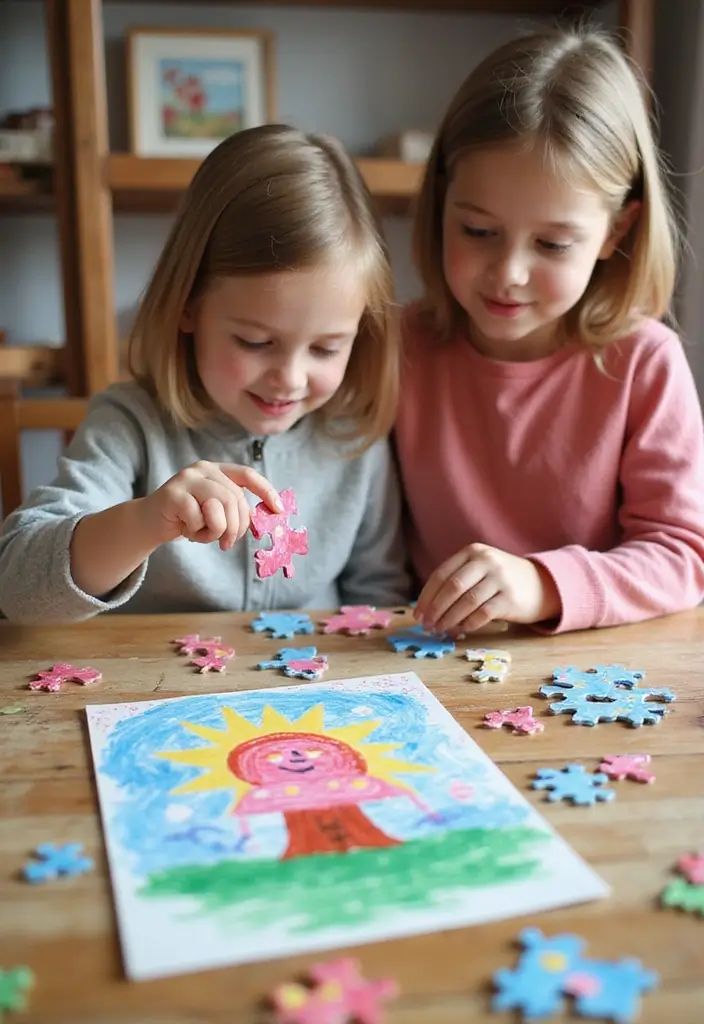
Here is why puzzle making helps. It gives your kid a quiet task that tests thinking and builds motor skills. It also fuels pride when a picture comes together. Let’s break it down into simple steps.
Next steps:
– Gather thick cardboard or a wood base.
– Let your child choose a theme and draw a picture they love on the base.
– With adult supervision, cut the drawing into puzzle shapes with a craft knife or scissors.
– Mix the pieces and test the fit. If a piece is too hard or easy, adjust shapes.
– Have fun solving together, then swap puzzles with friends for added game time.
Tips:
– Pick themes that spark interest, like animals, space, or favorite heroes.
– Laminate the pieces or slide them into a simple folder to keep colors bright and pieces from tearing.
– Make a few pieces smaller or larger so younger kids can start easy.
– Store puzzles in a labeled bag or box so pieces stay together.
Another benefit: you can reuse the base. Clear cardboard from a box works well. This activity blends art with problem solving and gives kids a sense of accomplishment.
If you want, add a design to hide cuts and feel new.
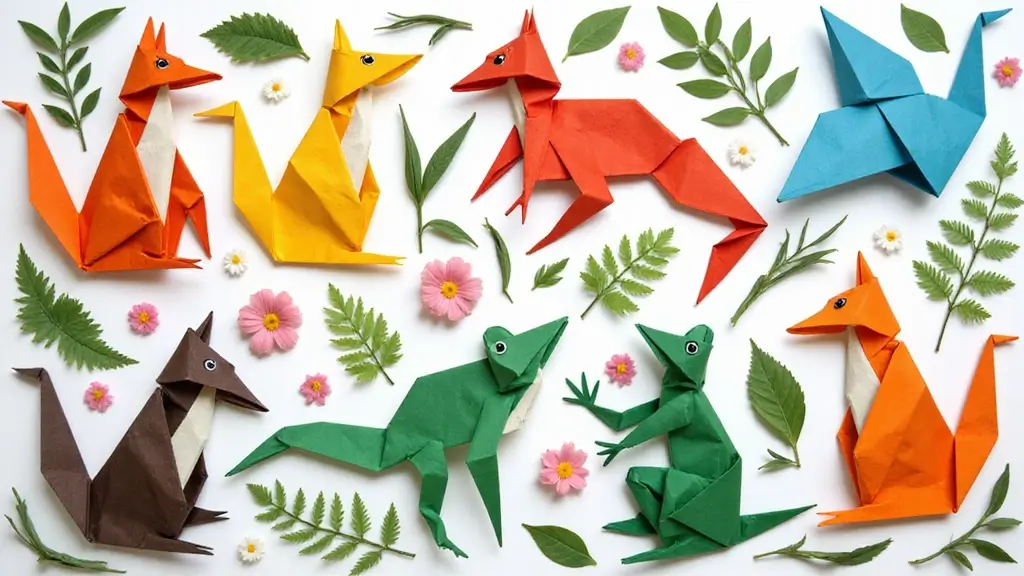
16. Simple Origami

You need a calm, easy activity that still feels like a win. Origami fits. A few folds turn simple paper into tiny works of art. It starts simple and stays doable.
Here is why origami helps your child: it sharpens focus and finger strength. Each fold teaches patience as a crease settles.
Let’s break it down. Next steps:
– Gather: square paper, no glue, a flat table, and bright colors to spark interest.
– Start with cranes or boats. Classic, simple, rewarding.
– Learn by doing: show one fold, then the next. Keep it steady.
– Check the result: crisp folds feel satisfying and show progress.
Here is a quick plan to grow confidence: begin with two easy designs. Add one tougher shape when your child is ready. Let them set the pace.
Tips for success:
– If a fold goes wrong, flatten and retry.
– Keep a small tray for finished pieces.
– Turn folding into a tiny story. Each piece becomes a character.
Try a short origami day. Kids display their work, share a quick tale about each piece, and smile. You can use origami to decorate gifts or make a simple mobile for their room.
@media(max-width:480px){
17. DIY Snow Globes
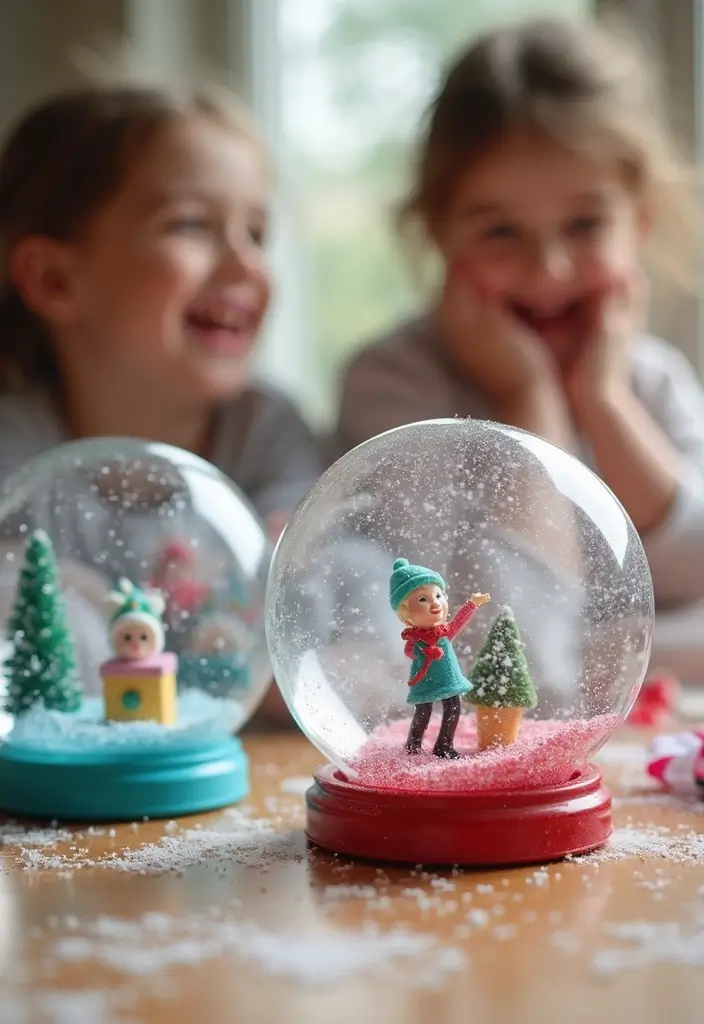
If you want a cozy, hands-on activity that kids can finish in one sitting, try DIY snow globes. They turn a plain jar into a tiny world you can shake and enjoy. This craft builds focus and lets your child see how a season can look in a small scene.
Materials
– Mason jar with lid
– Tiny figurine or small toy
– Water
– Glitter or white confetti shapes
– Glycerin or clear glue (optional)
– Waterproof glue or hot glue
– Scissors and a paper towel
Here is why this setup works: you get a simple tray of items that kids recognize, and the jar keeps everything inside the world you create.
Steps
1) Clean the jar and lid well. Let them dry completely.
2) Glue the figurine to the inside of the lid. Press and hold until it sticks. Let the glue cure a bit.
3) Fill the jar almost to the top with water. Add glitter and small shapes. You can add a photo for a personal touch.
4) If you want the snow to fall slowly, add a few drops of glycerin or a small bit of clear glue to the water. This step is optional but makes a big difference.
5) Screw the lid on tight. Wipe the rim clean. Let any glue dry fully before you flip the globe.
6) Turn the globe right side up and shake gently. Watch the glitter drift like real snow.
Tips for personalization
– Use a photo or a toy that means something to your child.
– Mix glitter colors for a unique look, like iridescent with white.
– Add tiny faux snow or sparkly beads for extra texture.
Quick ideas and safety
– Make an ocean globe by using blue water and sea creature figures.
– Create a winter forest scene with white glitter on a clear base.
– Keep the project away from very young children; lids can be a choking hazard.
– If the globe leaks, re-seal the rim with glue and let it dry overnight.
Wrap-up
A set of DIY snow globes makes a fun, repeatable activity. You get a keepsake, a small stage for stories, and a quick craft that teaches patience and planning. Gather a few jars, pick a theme, and start shaking.
@media(max-width:480px){
18. Paper Bag Puppets

Need a quick, engaging craft that keeps kids busy and builds their storytelling skills? Paper bag puppets fit the bill. They’re simple, affordable, and spark hours of pretend play.
What you need
– Brown paper bags
– Markers or crayons
– Glue, tape, and kid-safe scissors
– Small scraps of fabric, yarn for hair, buttons or googly eyes
– Optional stickers or textured paper for outfits
Here is why they work: the supplies are easy to find, cleanup is simple, and kids see a bag turn into a character fast.
How to make
1) Open the bag and flatten it. Draw a face on the bottom third.
2) Add eyes, a nose, and a mouth with markers. Glue on hair or a hat from scraps.
3) Dress your puppet with fabric or paper pieces. Glue on eyes or buttons for texture.
4) Let color dry. Fold the top edge to create a mouth flap if you want a talking puppet.
5) Put your hand inside and bring the character to life with simple moves.
Let’s break it down: keep a few puppets ready for quick storytelling prompts or a mini show with a friend.
Ways to use
– Put on a tiny puppet show with a pair of siblings
– Create a short, silly story and act it out
– Record a quick video to share with family
Tips to boost learning
– Give each puppet a tiny problem and a clear lesson
– Use dialogue to practice speaking and listening
– Switch roles to build empathy and collaboration
Next steps: set up a little stage with a blanket and a lamp for cozy performances. Enjoy the creative flow.
19. DIY Flower Pots
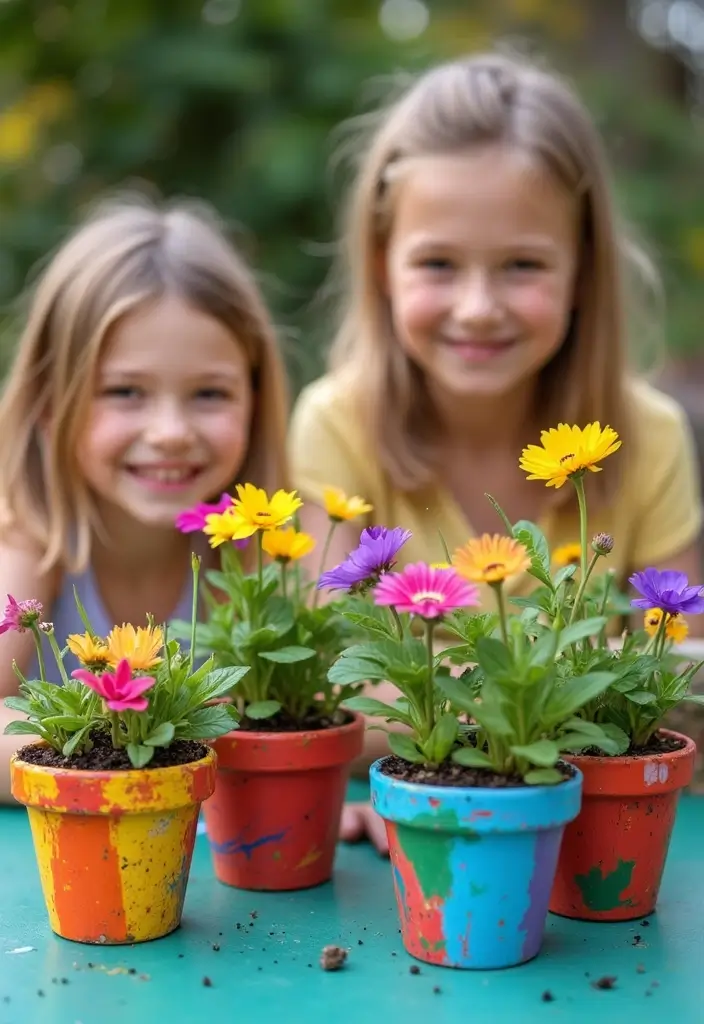
You want a project that keeps kids busy and adds color to your garden.
DIY Flower Pots offer that. They are easy, fun, and you can reuse old pots.
Here is why this works: kids learn to paint neatly, place plants, and care for growing greens.
What you need
– Plain terracotta pots
– Non-toxic acrylic paints
– Paint brushes in small and large sizes
– Stickers, tissue, or decoupage paper
– Mod Podge or craft glue
– Clear sealant (weatherproof)
– Soil and small seeds or starter plants
Steps to make it
– Wash the pots and let them dry completely.
– Apply a base color. Leave room for designs.
– Add designs with brushes, stickers, or decoupage. Let layers dry between steps.
– Seal the surface so it handles rain and sun.
– Fill with soil, then plant flowers or herbs. Water gently.
Here is how to get the most from this project: involve kids in color choices, talk about plant care, and set up a small show area for finished pots.
Next steps: set up a mini garden contest, or line a sunny window with a row of bright pots. This keeps kids engaged and gives your garden a fresh, friendly look.
A big smile comes with the first sprout.
@media(max-width:480px){
20. DIY T-Shirt Art

You want a fun activity that fits into a busy day. DIY t-shirt art lets your kids express themselves and walk away with something they can wear proudly.
Here is why it works. It’s quick, hands-on, and kids feel like real artists. The shirts become a canvas they can wear and show off. Simple tools mean big results.
What you need
– Plain t-shirts in different colors
– Fabric paints or fabric markers
– Cardboard to slip inside the shirt
– Paper and a pencil for sketches
– Stencils (optional) to help small children
Steps to make it
1. Prep the shirt. Put cardboard inside to keep paint from bleeding through.
2. Plan the design. Have your child sketch ideas on paper first, then pick the best one.
3. Paint with care. Use thin layers and let each layer dry before adding more. For sharp lines, try stencils or masking tape.
4. Dry and wear. Let the shirt air dry fully. A quick heat set can help color stay on after washing.
Tips for success
– Let kids choose a theme they love, like dinosaurs or flowers.
– Start with light colors first, then add bold accents.
– Use fabric markers for fine details and small touches.
– Protect surfaces and wash gently when clean-up time comes.
Next steps: hang the shirts to dry, snap a photo, and plan your next DIY t-shirt art project with new colors and ideas.
@media(max-width:480px){
21. DIY Picture Frames

Want a fast, kid-friendly craft that doubles as a keepsake? DIY picture frames let your child turn art and photos into bright, display-worthy frames.
– Materials you need: recycled cardboard or popsicle sticks, glue or tape, paints, stickers, glitter, and a photo or artwork to frame.
– Shape the frame: Cut cardboard into a window frame or lay sticks to form a border. If you are short on cardboard, use a thick backing from an old cereal box.
– Secure the frame: Glue the pieces together and add a back stand so it sits up. Let the glue dry before you add the photo.
– Decorate: Paint, then add stickers or a little glitter. Choose colors that match your space.
– Attach the photo: Use a touch of glue or double-sided tape to hold the picture in place. Press gently to avoid wrinkles.
– Display ideas: Hang it on a wall in a gallery style or set frames on a shelf. A few frames make a big impact at a family event.
Engagement ideas:
– Plan a mini photo day so your kids snap simple pictures. Ask them to pose in fun ways.
– Display the frames in a gallery at home or for a family gathering. Rotate favorites weekly.
That is why this works. Kids stay engaged and proud of their own art. It is easy to reuse supplies for new frames. Plus, you can do this in a rainy afternoon.
@media(max-width:480px){
22. DIY Tie-Dye

DIY tie-dye is a bright way to turn plain fabric into wearable art. It works with white cotton shirts, pillowcases, or tote bags. A few colors and simple folds let your kids create bold patterns.
What you need
– White cotton shirts, pillowcases, or tote bags
– Kid-safe dyes or dye kits
– Rubber bands and gloves
– Plastic cover and a large tray or basin
– Water and a pinch of salt (optional)
Steps
– Wash the fabric first so colors grab on.
– Pick a pattern. Twist, crumple, or fold, then secure with rubber bands.
– Apply color. Squeeze dye onto sections. Try a spiral, bullseye, or striped layout.
– Let colors set. Leave the bundle for about 6 to 12 hours. Cover with plastic.
– Rinse and wash. Remove bands, rinse with cold water until the water runs clear. Wash colors separately the first time.
– Dry and wear. Air dry or tumble on low.
Tips
– Wear gloves and old clothes.
– Use small cups for neat color control.
– Keep colors separate to avoid bleeding.
Next steps: hang finished pieces to dry, then wear or share. It’s a simple, creative activity that keeps kids busy and proud of their art.
@media(max-width:480px){
23. DIY Bookmarks

You want kids to love reading more. A simple DIY bookmark can help. It costs little and is easy to do after school.
What you’ll need
– colorful paper or cardstock
– an old gift card or sturdy cardboard
– markers, crayons, stickers
– ribbons, yarn, or a small tassel
– clear tape or a glue stick
How to make them
1) Cut a bookmark shape from the paper. A standard size is about 6 inches long and 2 inches wide.
2) Decorate with drawings, stickers, or doodles. Use bright colors to catch the eye.
3) Add edges by sealing with a thin line of tape or a glue stick so the art stays on.
4) Make a hole and thread a ribbon or tassel if you want a fringe.
5) Personalize each one. Write a favorite quote or the book title.
Smart ideas to use them
– Swap bookmarks with friends in a mini book club.
– Try a monthly theme, like animals or space.
– Let kids sign their name and doodle a tiny scene.
Tips for lasting fun
Keep a small supply stash in a reading corner. Let kids refresh designs when they finish a book. Read together and compare bookmarks.
Best of all, you can reuse old cards and scraps. It saves money and sparks pride when they show off their work to friends.
@media(max-width:480px){
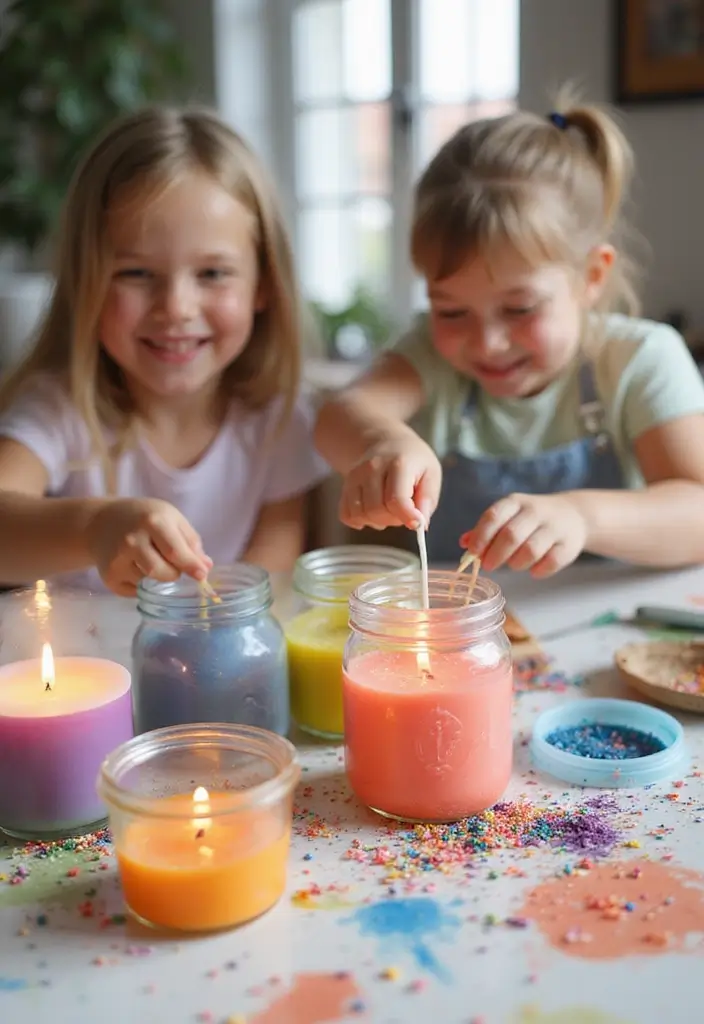
24. DIY Candle Making
What you need
– Wax beads or pellets
– Cotton wicks with holders
– A clear jar or silicone mold
– Color chips or safe dye
– A small pot and a heat-safe pitcher
– A wooden stir stick
– Paper towels and a tray for spills
– A safe scent or fragrance
Safety first
– Have an adult supervise every melt
– Keep hot wax away from skin and hair
– Work on a heat-safe surface
Steps to do together
– Set up the station and prep jars
– Melt wax slowly with adult help
– Stir in color and scent after the wax melts
– Place the wick in the center of the jar
– Pour the wax and let it cool fully
– Trim the wick and decorate the outside with labels or ribbons
Why it works
– Kids learn about melting and solidifying directly
– They pick colors, scents, and shapes
– The final candle gives a sense of achievement
Common tips
– Don’t rush cooling; patience makes crisper edges
– Store in a cool place away from direct sun
Great for party activities or a quiet afternoon at home.
@media(max-width:480px){
25. DIY Shadow Boxes
You want a craft that keeps kids busy and lets them tell a story. A shadow box does that. A shoebox becomes a tiny stage for memories. You can layer art and tiny items to add depth and life to the scene.
What you need
– A shoebox with lid (or use the box without the lid)
– Background paper or fabric
– Photos, drawings, small keepsakes
– Glue, tape, scissors
– Foam dots or small cardboard pieces for depth
– A pen or marker for captions
How to make it
– Step 1: Pick a theme. Vacation memories, a pet, or a favorite hobby work well.
– Step 2: Decorate the inside back wall with your background. Fit colors to the story.
– Step 3: Build depth. Glue some pieces flat and raise others on foam dots.
– Step 4: Place items inside. Layer photos, drawings, and small finds so the story reads clearly.
– Step 5: Add a title or caption. Put it where you can see it when you open the lid.
Creative ideas
– Themed boxes like a day at the zoo, a sports game, or a family trip
– Mix texture: fabric, paper, shells, or pinecones
Tips for success
– Keep the scene simple so the story shines
– Have your kid explain the box to family or friends
– Let it rest on a shelf or hang on a wall
@media(max-width:480px){
26. DIY Jewelry Making
Your child wants a craft they can finish fast and wear with pride. DIY jewelry making fits that need. It helps them plan and express style.
What you’ll need
– Kid-friendly beads (big plastic beads) and wooden beads for texture
– Elastic cord or braided string, plus clasps for a simple close
– Child-safe scissors, a ruler, and small bowls to sort colors
– A flat work surface and a soft mat to keep beads from rolling
Keep the space neat. A tidy area helps kids focus and finish faster.
How to start
– Pick a bracelet or a short necklace
– Cut a cord a bit longer than needed
– Tie a knot, then thread a few beads
– Add beads, pushing them toward the knot
– Finish with a tight knot and trim
Here is why this works: kids see quick results, stay steady, and build planning skills.
Fun ideas and tips
– Create themed sets, like ocean blues or forest greens, to plan colors
– Host a small jewelry swap day where friends trade pieces
Safety and perks
– Small beads can be a choking risk for young kids. Supervise and pick age-appropriate pieces
– For older kids, try wire and crimps with blunt pliers to make sturdier pieces
Store finished pieces in labeled boxes so you can reuse them later. This project is quick and rewarding.
@media(max-width:480px){
27. DIY Holiday Decorations
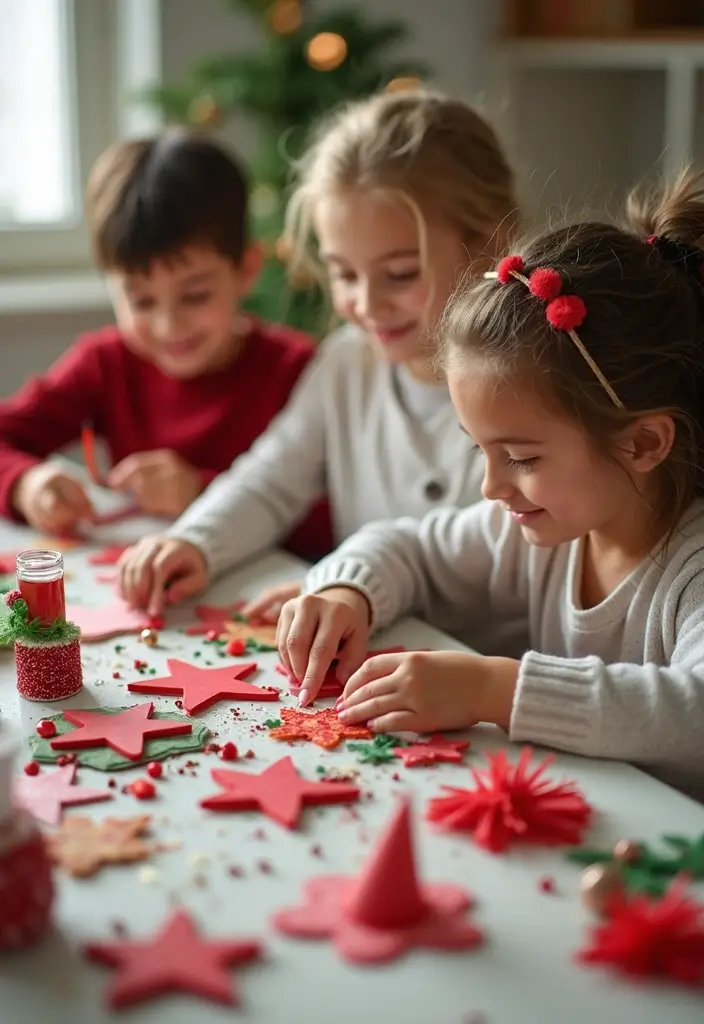
You want kids to stay busy and happy during the holidays without screens. DIY holiday decorations can help. They build skills, save money, and bring your family together. With simple supplies, you can make ornaments, garlands, and centerpieces that fit any season.
What you need
– Cardboard, thick paper, or felt
– Fabric scraps, ribbon, and string
– Glue, scissors, tape, and markers
– Safe paints or coloring tools
– Natural pieces like pinecones, cinnamon sticks, dried citrus
– Battery lights or tea lights (optional)
Three easy ideas
1) Ornaments: cut simple shapes, color them, and write a name or date on the back. Hang them on the tree or on a string.
2) Garlands: thread paper circles or fabric strips onto twine. Drape along a mantel, doorway, or window.
3) Centerpiece: fill a clear jar with string lights, pinecones, and dried fruit for a warm table glow.
Family night tips
Pick a date, set up a clean workspace, and assign roles. Let kids choose a project and lead a step. Keep sessions short and fun so everyone stays excited.
Personal touches
Add names or the year to each piece. Reuse scraps and recycled bits to cut waste and save money. Use non-toxic glue and safe scissors for little hands.
@media(max-width:480px){
Conclusion
Crafting provides endless opportunities for children to learn, explore, and express themselves.
These 27 DIY kids crafts not only keep them entertained for hours but also promote creativity and environmental consciousness.
Get started on these projects, and watch as your kids unleash their inner artists while creating memories that will last a lifetime.
Note: We aim to provide accurate product links, but some may occasionally expire or become unavailable. If this happens, please search directly on Amazon for the product or a suitable alternative.
This post contains Amazon affiliate links, meaning I may earn a small commission if you purchase through my links, at no extra cost to you.
Related Topics
diy kids crafts
eco-friendly crafts
fun crafts for kids
easy DIY projects
creative craft ideas
homemade toys
screen-free activities
outdoor crafts
rainy day projects
simple art activities
upcycled crafts
kids art projects