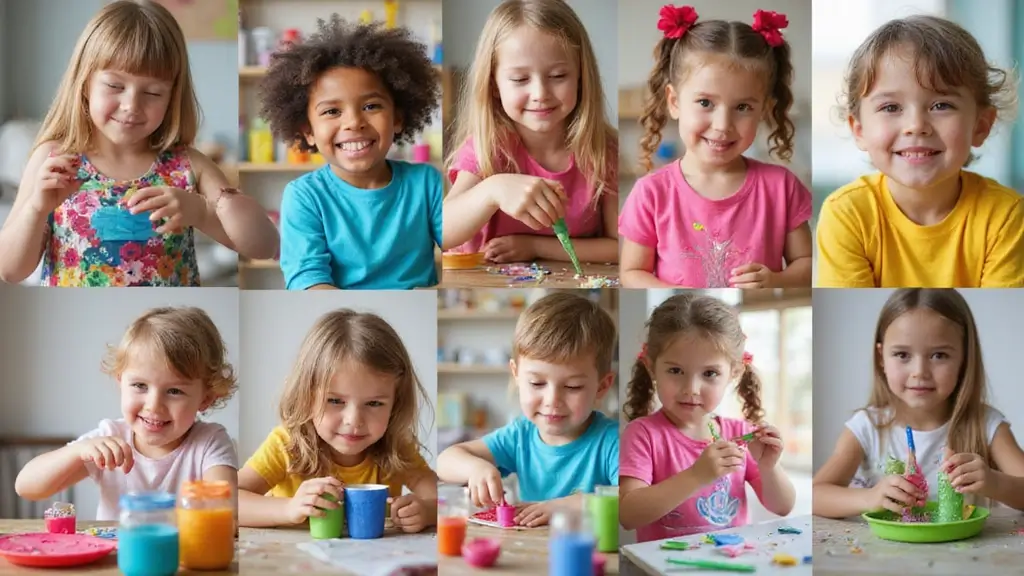
Why I made this post Learning should feel natural, not forced. Lately, families tell me they want kids to grow through play, not just worksheets. I wanted to give you a simple way to mix curiosity with everyday moments. So I pulled together 29 DIY projects that are fun, doable, and educational. They use common materials and fit into busy days, during a lunch break, a rainy afternoon, or a quick weekend spark.
Who it’s for If you are a parent, caregiver, or teacher who loves hands on learning, this is for you. You care about curious minds, practical skills, and keeping the day lively. The projects work for a wide range of ages, with easy tweaks for younger kids and older ones.
What you’ll get You will get 29 projects that mix craft, science, math, and design. Each project shows what to gather, the steps to try, and the learning goal in simple terms. The activities are short enough to finish in one sitting, but flexible enough to stretch or repeat. They use inexpensive or reused materials and invite kids to test ideas and adjust as they go.
Here’s a taste of what you’ll find. A cardboard tube marble run teaches counting and gravity. A bottle rain gauge helps kids read measurements and predict weather. A wind kite or paper pinwheel shows how air moves. Simple math games built with cards and blocks turn learning into a quick race. Each idea is easy to set up and finish in under 30 minutes.
How to use them Start with one project. Set up a tiny space with just a few common tools: tape, scissors, markers, and recyclable bits. Let kids lead and adjust. You can work together or let them try alone with a bit of adult help. Tie projects to daily routines, like measuring vegetables or planning a tiny garden. The goal is to build confidence and a love of discovery, not to rush.
What you’ll gain More than crafts, you gain calm, focus, and ideas to spark curiosity. You also get a library of activities you can pull from again and again. This post is a starting kit for hands-on learning that fits real life and real budgets. Ready to pick one project and start today? Grab a few simple supplies and watch curiosity grow.
1. DIY Lava Lamp
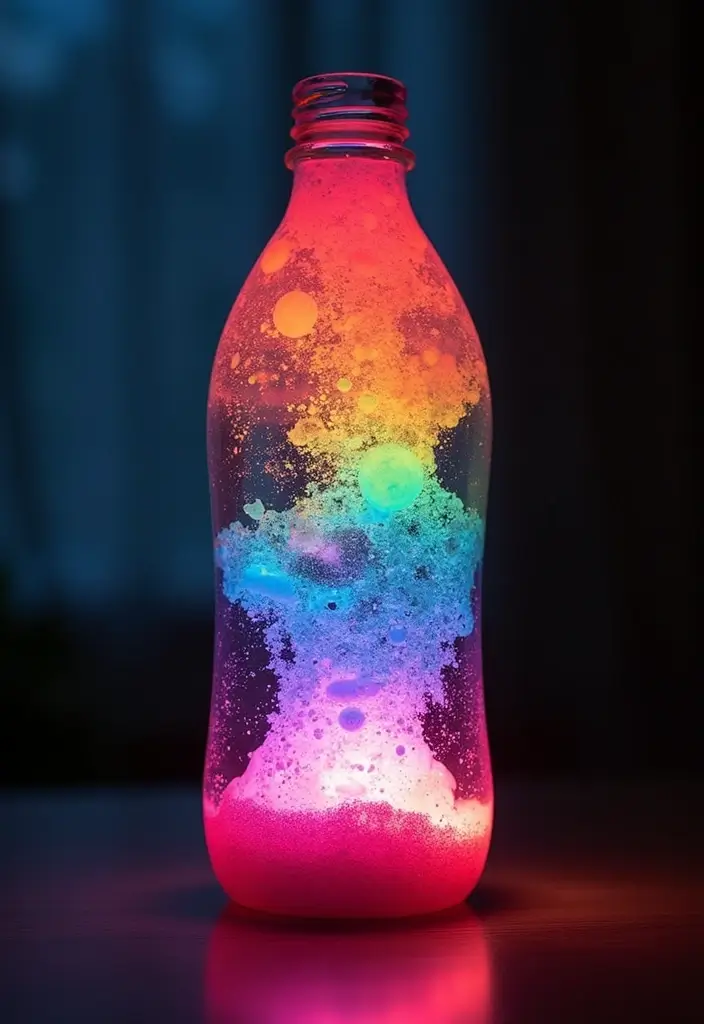
You want a quick, safe way to show kids science at home. The DIY lava lamp does that with a clear, hands-on demo of density and chemical reactions. It’s simple to set up and you can reuse everyday items.
What you need
– A clear plastic bottle with a wide neck
– Water
– A few drops of food coloring
– Vegetable oil
– A fizzy tablet such as Alka-Seltzer
Here is how to build it. Fill the bottle halfway with water. Add color to the water. Pour oil into the bottle until it is almost full. Leave a little space at the top. Drop in the tablet and watch the bubbles form and rise.
Here is why this works. Water and oil do not mix. Water is heavier, so it stays at the bottom while oil stays on top. When the tablet dissolves, it makes gas. Gas bubbles lift colored water into the oil. The bubbles rise, then pop and sink. You get a lively display that teaches about density, liquids, and reactions.
Tips for Success:
– Use a bottle with a wide opening to add ingredients easily
– Try different colors and tablet sizes to see new patterns
Next steps. Talk with your child: Why do bubbles float? How does changing the water or oil change the show? Keep the demo on a safe surface and have fun exploring.
@media(max-width:480px){
2. Balloon-Powered Car

Want a quick project that blends play with learning? A Balloon-Powered Car does just that. You get a small, moving toy and a few simple ideas about air, motion, and design. It’s a hands on way to see how choices change speed and direction.
What you’ll need
– A piece of cardboard cut into a car shape
– Bottle caps or small wheels
– A couple of straight straws
– Tape and scissors
– One balloon
How to build it
– Cut the cardboard into a car shape. Keep edges smooth so nothing sharp sticks out.
– Fix the wheels to the sides with tape. Use the bottle caps or small beads as wheels.
– Poke a straw through the balloon’s opening. Tape the straw to the back of the car so air can push from the balloon along the straw.
– Inflate the balloon, then pinch or seal the end to hold the air in. Let go to see it zoom forward.
Here is why this works
When you release the balloon, air rushes out. That air push gives the car thrust. The faster the air comes out, the stronger the push. This is propulsion in action. You’ll see how wheel size, weight, and straw length change how fast or slow the car goes.
What you can change
– Try bigger or smaller wheels for a different feel.
– Use lighter cardboard to speed up the car.
– Decorate the body to add your own style.
Next steps
– Race two cars on the same track to compare speed.
– Try curved tracks to test steering with minimal rules.
– Keep a simple journal of what changes help most.
This project blends DIY fun with science, giving you a clear look at motion and design through play.
@media(max-width:480px){
3. Solar Oven S’mores
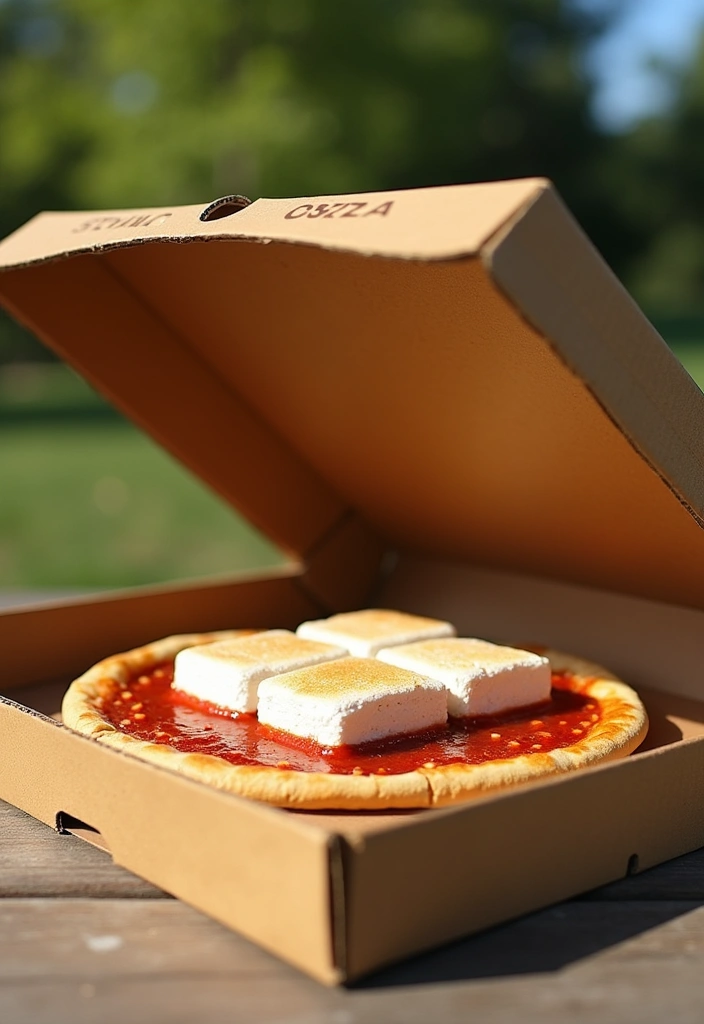
You want a fun project that teaches and tastes good. A Solar Oven S’mores kit gives both in one sunny afternoon.
Materials
– Pizza box
– Aluminum foil
– Plastic wrap
– Tape
– Marshmallows and chocolate
– Optional: graham crackers or extra treats
How to build and use it
1) Line the inside of the box with aluminum foil. Keep it smooth so the sun reflects well.
2) Open the lid and cover the opening with plastic wrap. Seal the edges so heat stays in.
3) Place a few marshmallows and chocolate on a safe tray inside.
4) Close the box and set it in direct sun. Tilt the box toward the sun a little.
5) Wait as the sun heats the box. The chocolate will melt and the marshmallows soften. This can take 15 to 30 minutes.
6) Use tongs to remove the tray when the s’mores are ready. Let them cool a moment before eating.
What you learn
– How solar energy heats a closed box.
– How a shiny foil surface helps heat transfer.
– The basics of heat transfer and renewable energy.
Tips and safety
– Wear gloves when handling hot parts.
– Check the box regularly. If it gets too hot, move to a cooler spot.
– Clean up by recycling foil and storing the box for another sunny day.
Variations
– Try different fillings and toppings.
– Do a taste test with friends or family.
Next steps: plan a mini sunny science day with two ovens side by side for more data and more fun.
4. DIY Circuit Cake
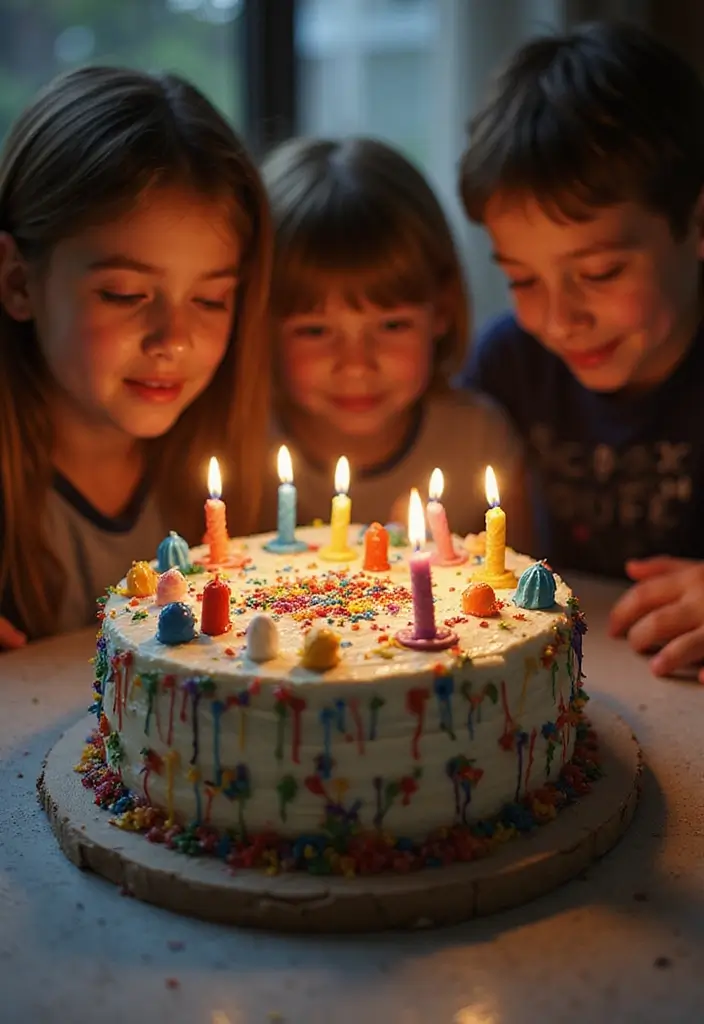
You want a project that blends tasty fun with real science. A DIY Circuit Cake does just that. It turns baking into a small engineering project you can taste and see.
What you need
– A cooled cake shaped like a circle or square
– Colored frosting in several shades
– A few safe LED lights and a tiny low‑voltage battery pack
– Clear tape or edible glue to keep things in place
– Toothpicks or piping bags to draw circuit paths
– Optional: a simple paper plan for your circuit map
Here is why this works. The cake becomes your canvas. Frosting lines act as circuit paths. The LEDs bring a glow to the design while you learn how circuits carry power.
Steps
– Bake and cool the cake, then plan a simple circuit map on top
– Pipe or draw bright paths for power, ground, and signals
– Place LEDs along your paths and tuck the wires safely behind the cake
– Attach a small battery pack in a safe spot and test the lights
– Tidy up with extra frosting and shine a light on the finish
Safety tips
– Use low‑voltage LEDs and supervise all wiring
– Keep all wires hidden from little hands
– Let an adult handle battery connections
Learning ideas
– Color codes help kids see power versus ground
– Talk about how circuits light up in daily devices
– Try a parallel path to keep lights bright if one LED fails
Finish with a small party to celebrate their design and basic engineering skills.
@media(max-width:480px){
5. DIY Seed Bombs

You want a hands-on activity that teaches kids about plants and care while they play outside. DIY seed bombs fit that need. They blend clay, compost, and seeds to make tiny seed capsules. The project is fun, eco-friendly, and grows with time.
– 1) In a bowl, combine equal parts clay, compost, and seeds.
– 2) Add a little water and knead until you have a firm dough.
– 3) Pinch off small balls, about the size of a marble.
– 4) Set the balls on a tray and let them dry in the sun for a day or two.
When dry, toss them into a garden bed or a bare patch. Rain or a light watering will soften the coating and let the seeds slip free to grow. You’ll see sprouts in a few weeks if the soil is right.
This activity builds outdoor skills, plant knowledge, and a sense of care for the environment. It also shows how small choices help local ecosystems.
Helpful Tips:
– Choose native wildflower seeds to support local ecosystems.
– Talk about pollinators and biodiversity as you work.
Turn seed bombs into a garden day by watching blooms appear and inviting birds and bees to visit. Keep the seeds away from roads and pets, and supervise younger kids.
@media(max-width:480px){
6. DIY Hypothesis Experiment
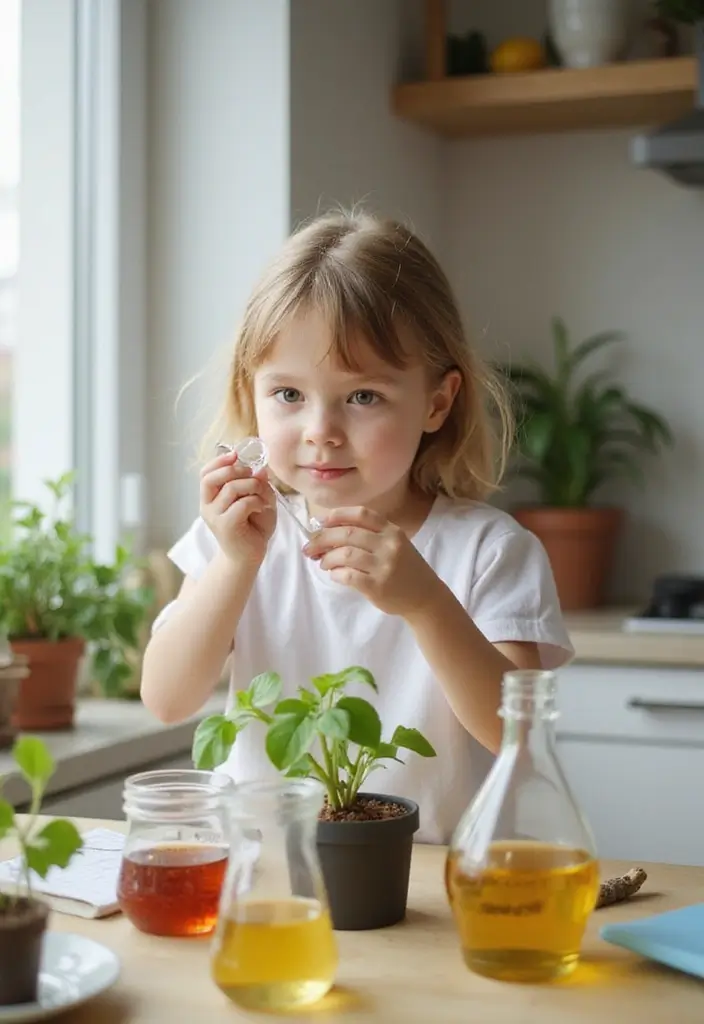
You want a simple, fun way to teach thinking and science at home. This activity does that by turning a question into a small test. You can use items you already have. It feels like real science, but it is easy to run.
Here is how you can set it up. You ask a question you care about. Then you make a guess, or hypothesis, based on what you know. For example: I think a plant grows taller when watered with plain water rather than soda.
What you will need:
– Two identical plants or two pots with the same plant
– Same soil and same sun
– Water and a tasting-safe liquid (like soda or juice)
– A ruler or tape measure
– A notebook and a pencil to record notes
Steps to Engage:
– Clarify your question and your guess. Say it out loud.
– Set up two equal plants. Keep sun, soil, and pot size the same.
– Change one thing. Use water on one plant and the other liquid on the second.
– Observe daily. Measure height and count leaves. Write it down.
– Compare results. Did the plant with plain water grow more?
This process teaches the scientific method in a bite-sized way. It builds critical thinking and keeps learning hands-on. If you track what happens in a simple journal, you turn curiosity into a real learning journey.
@media(max-width:480px){
7. Colorful DIY Crayon Melting
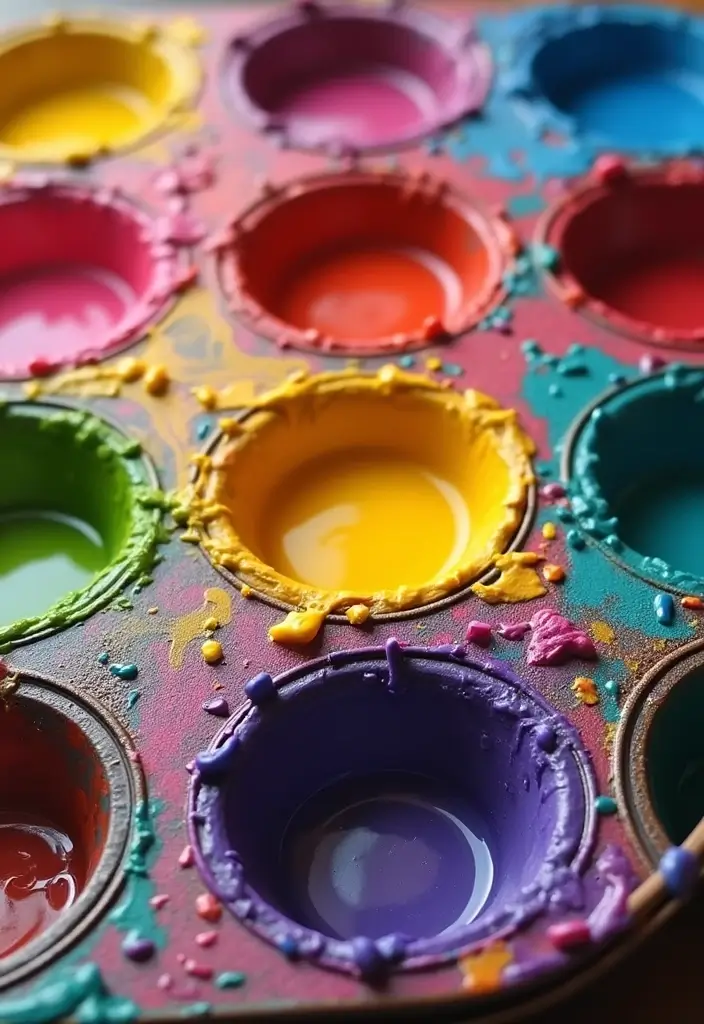
You want a fun way to recycle old crayons and boost creativity. Colorful DIY Crayon Melting lets you turn scraps into new, bright crayons you can use right away.
What you need
– Broken crayons
– A muffin tin or silicone molds
– An oven set to a low heat
– A tray to catch spills and oven mitts
How to do it
1) Preheat the oven to about 250°F. This gentle heat lets wax melt slowly.
2) Break the crayons into small pieces and fill the molds. Mix colors or keep them separate, your call.
3) Bake for 6 to 8 minutes. Watch for swirls as the pieces melt and blend.
4) Let the tray cool completely, then pop the shapes out. If edges feel rough, a quick trim helps.
What you learn
– You see how heat moves wax and blends colors.
– You gain patience as the shapes harden.
Tips and ideas
– Use silicone molds for shapes like stars or hearts.
– Talk with kids about temperature changes and how heat changes materials.
Next steps
Show off the new crayons and add them to your art box. This project recycles waste while giving you a colorful tool for drawing, coloring, and learning together.
@media(max-width:480px){
8. DIY Shadow Box Diorama

Want a calm, creative project that blends art, storytelling, and hands-on learning? Try a DIY Shadow Box Diorama. A shoebox becomes a stage where your child can tell a story with color, texture, and moveable parts.
What you need
– A shoebox
– Paper, cardboard, clay or playdough
– Glue, tape, scissors
– Paints or markers
– Small toys or figurines
– Natural materials like leaves, sticks
– Fabric scraps or felt
– A small LED light for mood lighting (optional)
Steps to build
1) Pick a scene and a short story. Forest, sea, or space work well.
2) Plan the layout on paper. Decide back, middle, and foreground.
3) Make a back wall with painted cardboard or paper.
4) Create 3D elements. Layer pieces, cut shapes, or sculpt tiny figures.
5) Place characters and glue them in place. Add depth with extra layers.
6) Add finishing touches like trees, waves, stars, or clouds.
7) If safe, add gentle lighting to make the scene glow.
Tips
– Let your child tell the story. A clear idea helps them stay focused.
– Use natural materials for texture.
– Keep glue easy for little hands to use.
Display ideas
– Set it on a shelf or desk. Then talk about the scene and ask, “What happens next?”
This project grows with your child as they add scenes and tell richer stories.
@media(max-width:480px){
9. DIY Marble Run

You want a project that blends play with learning. A DIY marble run fits that need. It uses simple supplies and quick testing. You will see ideas click as you build.
– Materials: Cardboard tubes, tape, marbles, scissors, markers, a sturdy base.
– Set up: Build a flat start. Tape tubes to the base so nothing shifts.
– Plan the path: Sketch a route. Decide where the marble starts and how it moves. Add a ramp here, a bend there.
– Test and tweak: Drop a marble and watch gravity at work. If the marble stalls, add a gentler slope or a longer run. If it zips too fast, add curves or a slower section.
– Make it a challenge: Try to design the longest track with a few pieces. Small changes can change the whole ride.
– What you learn: Gravity, motion, and friction become real as you test and adjust. You’ll predict outcomes and solve small problems on the fly.
– Family twist: Turn it into a friendly design race. See who creates the smoothest path. Keep safety in mind.
All in all, this DIY marble run shows how a plan, a few tweaks, and steady testing make a fun ride. You gain practical thinking and problem-solving skills.
@media(max-width:480px){
10. DIY Paper Mache Volcano

Looking for a kid-friendly science project that you can do at home with simple stuff? A DIY Paper Mache Volcano fits the bill. Build a hollow volcano with a balloon core, then layer it with paper strips and flour-and-water paste. Let it dry well so it stays strong. Once dry, paint the mountain and add lava details. When you’re ready, trigger a safe eruption with baking soda and vinegar.
Here is why this works. The balloon gives you a smooth inside. The paste makes the paper grip the surface. The layers create a sturdy mountain you can paint and decorate. The baking soda and vinegar show a real chemical reaction that spits out foam, like lava bursting from the crater.
Next steps are simple. You can tweak the look, use different paints, or turn this into a quick total-class demo.
Materials you’ll need
– Balloon
– Newspaper strips
– Flour and water for paste
– Food coloring or paints
– Paint brushes
– Baking soda
– Vinegar
– Optional dish soap to slow the eruption
Steps to build
1. Inflate the balloon and attach it to a stable base.
2. Make a smooth paste by mixing 1 cup flour with 1 cup water.
3. Dip paper strips and cover the balloon in thin, even coats.
4. Let it dry overnight. Pop the balloon, then paint your volcano.
5. Add a crater color and lava streams with bright paints.
Fun Variations:
– Use red, orange, and yellow for the lava flow.
– Talk about real volcanoes and how they shape land and climate.
This project can be a bit messy, but that’s part of the learning. You’ll see how a simple recipe and a few steps explain a big science idea.
@media(max-width:480px){
11. DIY Water Cycle in a Bag

You want a quick, hands-on science project that shows the water cycle in action. This DIY Water Cycle in a Bag makes evaporation, condensation, and precipitation real and easy to see.
Materials
– Ziplock bag
– Water
– Marker
– Optional blue food coloring
– Tape or string to hang the bag
How it works
The sun warms the water inside the bag. Water turns to vapor and rises in the small space of the bag. Vapor sticks to the inner walls and cools. Tiny droplets form. Those droplets slide down and may fall like rain inside the bag. You watch evaporation, condensation, and precipitation all at once.
Step-by-step
1) Pour a small amount of water into the bag, about one third full.
2) Add a drop of blue food coloring so you can see the water clearly.
3) Seal the bag tightly to trap the air and water.
4) Tape or tie the bag to a sunny window where it can heat up.
Observation and discussion
– Look for foggy air near the top, then tiny droplets on the walls.
– Notice droplets growing and sometimes running downward.
– Talk about the terms evaporation, condensation, and precipitation. Here is why: they explain how water moves around our planet.
Tips and quick extensions
– Track changes each day in a notebook.
– Compare a bag in direct sun to one in shade to see the difference.
– Try adding more water or color to see how the cycle changes. Next steps keep this simple yet meaningful.
@media(max-width:480px){
12. DIY Nature Scavenger Hunt
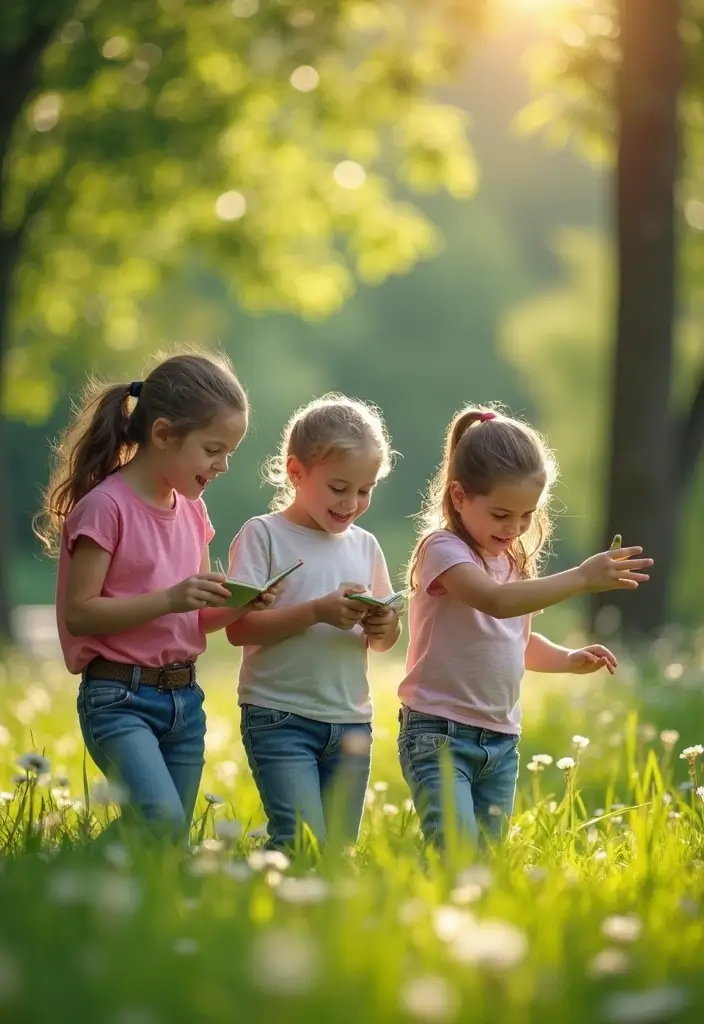
If you want kids who move, look closely, and think on their feet, try a DIY Nature Scavenger Hunt. It works in a backyard, a park, or along a trail. A short quest turns a simple walk into a small adventure. Children sharpen observation, learn about nature, and stay active at the same time.
How to set it up:
– Pick a small loop or path in your yard or park.
– Create a simple list of items to find. Examples: a leaf with a jagged edge, a smooth rock, a bright flower, something rough, something curling, something that smells nice, something that rattles, something smaller than a coin.
– Give each kid a bag, a pencil, and a quick checklist.
– Let them hunt solo or in teams. Set a time limit of 10 to 15 minutes.
– Do a quick safety check. Remind kids to be gentle with plants and to ask before touching animals.
What to do during the hunt:
Kids search, compare finds, and talk about what they see. Ask simple questions like why a leaf looks a certain way or how a rock feels in your hand. This keeps curiosity high and helps focus.
Tips for a Successful Hunt:
– Hand out magnifying glasses for close-up work.
– Talk about how each item could be used or why it matters in nature.
This activity brings smiles, gets bodies moving, and ends with a quick share where everyone shows their best find and what they learned.
@media(max-width:480px){
13. DIY Scratch Art

You want a fast art project that teaches color and how things layer. Scratch art fits that need. It gives a bold look with simple steps.
– Materials: sturdy paper, crayons, black paint, a small pointed tool (toothpick works well). Optional: oil pastels for brighter lines, and a drop cloth for mess control.
– Getting ready: pick heavy paper so colors stay smooth. Set out colors that contrast for the best reveal.
– How to make: you color the page with bright layers of crayon. Keep colors in blocks so lines show clearly when scratched. Paint over the crayon with a thick coat of black.
– Reveal: let the black paint dry completely. Scratch lines, dots, and shapes with the pointed tool. The colors pop as you scratch away.
– Display ideas: line up several pieces in a mini home gallery. Pair a scratch art piece with a caption or theme.
– Learn and play: you see how color layering works. You practice steady hands and plan your design.
Next steps: start with simple shapes, then try themed drawings like animals or letters. If you want less mess, use washable paints and a washable mat.
@media(max-width:480px){
14. DIY Nature Art Collage
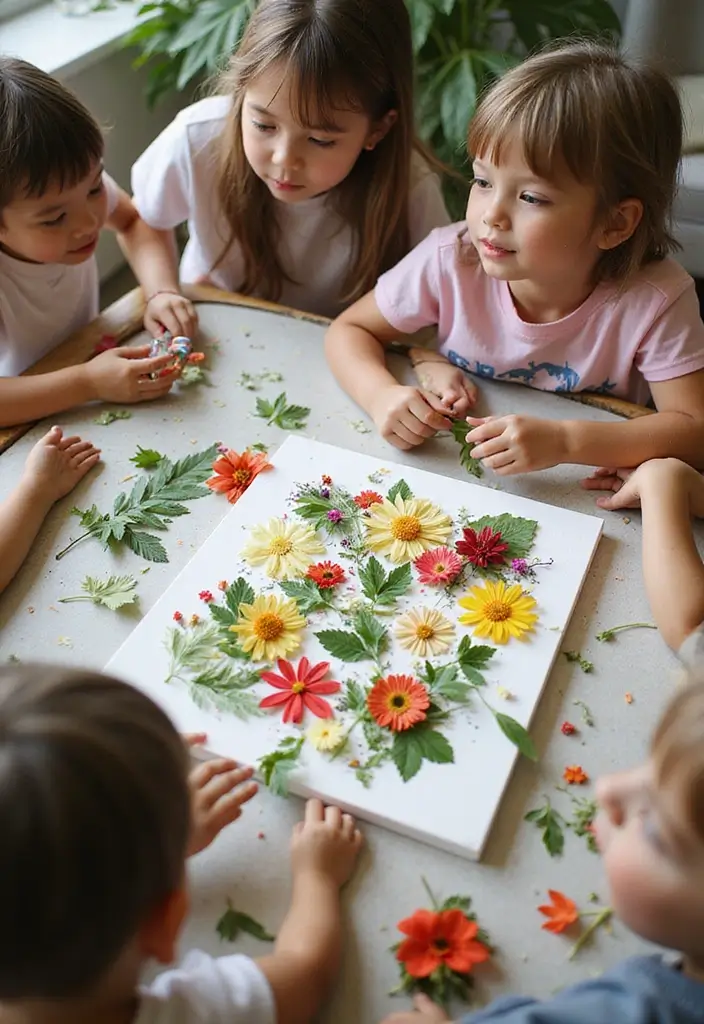
You want a kid-friendly art project that blends learning with play. Here is why this works: it keeps hands busy, eyes curious, and minds exploring nature. This DIY Nature Art Collage is a simple, fun option.
Take a nature walk with your child. Collect fallen leaves, petals, pine needles, twigs, and small bark pieces. Choose items with interesting textures and colors. Back home, set up a simple craft space with paper or a canvas, glue, scissors (for adults or older kids), and a towel to catch drips.
Start your collage by laying out shapes first. Try a landscape, a face, or a story scene. Glue each piece in place, pressing gently so it sticks. You can add color by painting a background, then layering natural items on top. Let the collage dry completely before adding more details.
Helpful Tips:
– Talk about nature care. Use only items that have fallen naturally or started to dry. Do not pick live plants.
– Build a theme or short story for the collage to boost storytelling.
– Display the finished art in a shared space to celebrate their work.
Next steps: ask your child to describe their art, point out different plant parts, and name colors you see. This project keeps kids curious about the outdoors and gives a simple keepsake to enjoy.
@media(max-width:480px){
15. DIY Paper Airplane Challenge
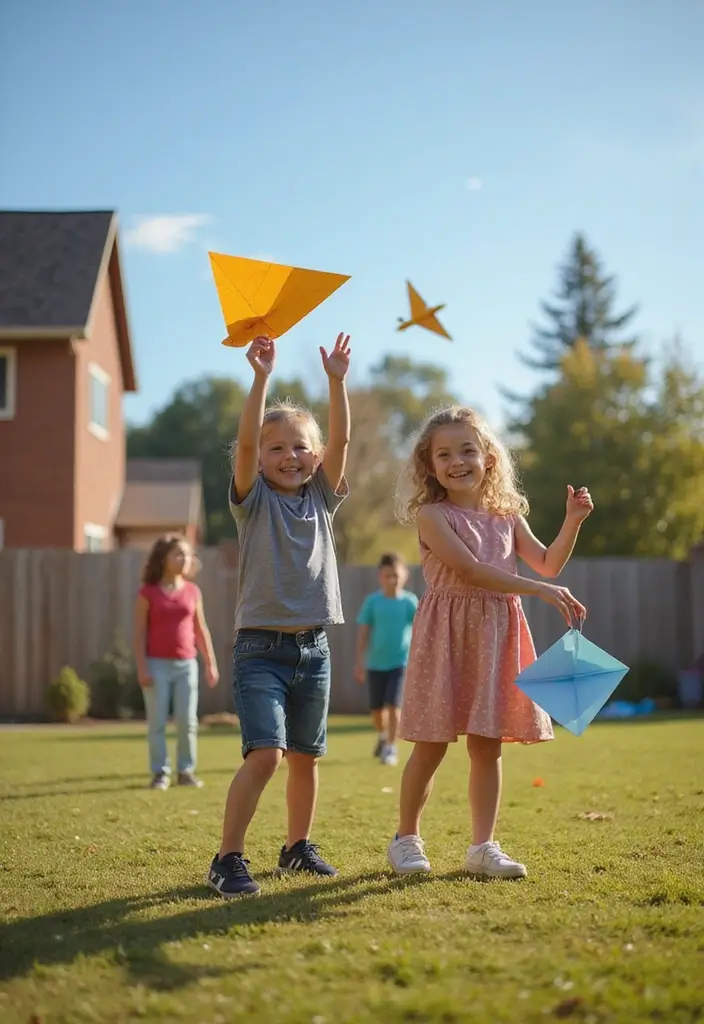
Want a quick, hands-on activity that pairs play with science? The DIY Paper Airplane Challenge is perfect. You give kids several kinds of paper and a clear goal: build planes that fly the farthest. They test designs, watch how small folds change the glide, and learn along the way.
Tips for the Best Results:
– Talk about what makes a plane fly well, like weight and wing shape.
– Let kids try several folds and keep a simple log of results.
– Turn it into a friendly family contest to add motivation.
What you’ll need
– Plain copy paper, colored construction paper, or index cards.
– A tape measure or ruler to measure distance.
– A notebook or sheet of paper for notes.
– A clear, open space for flying.
How to run the challenge
– Choose three or four simple plane designs to test.
– Fold each design with easy, repeatable steps.
– Mark a start line and throw from the same spot every time.
– Measure where it lands and write it down.
– Compare results and talk about which ideas work best.
Next steps
– Reflect on what moved the flight farther.
– Try new folds or weight tweaks to see what happens.
@media(max-width:480px){
16. DIY Magnetic Slime
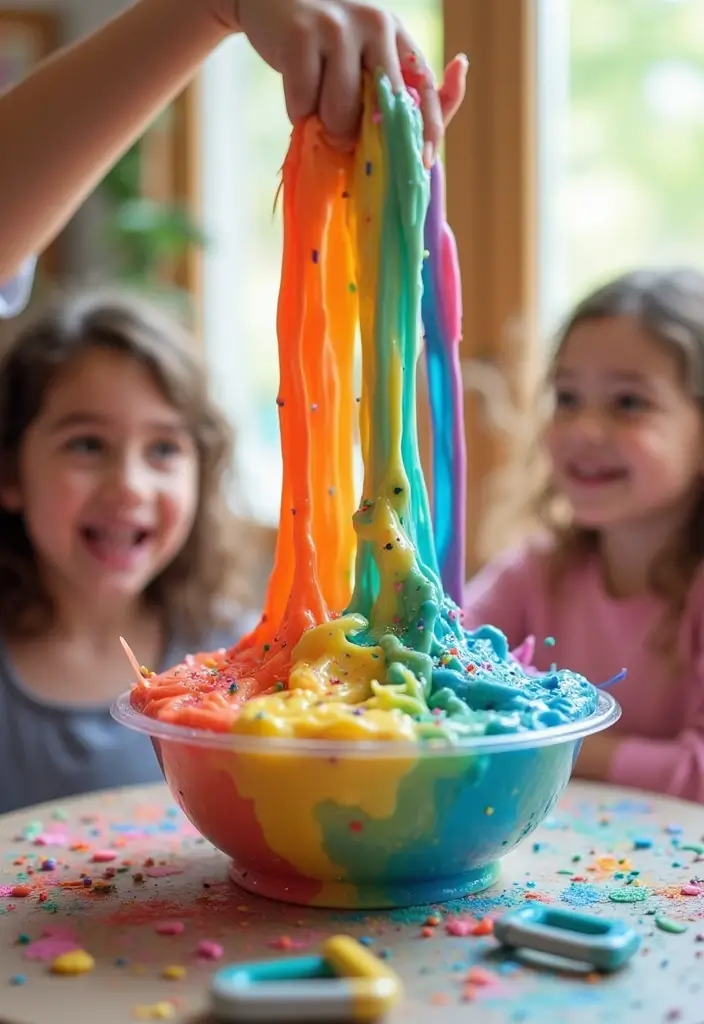
Looking for a hands on project that blends touch, science, and a bit of sparkle? DIY Magnetic Slime fits the bill. You start with glue and a pinch of baking soda to make a soft, stretchy base. Then you fold in iron filings. The slime stays pliable as the filings respond to magnets. It’s a simple show of magnetism you can feel with your hands.
– What you need
glue (clear or white works well)
baking soda
iron filings (tiny ones from a craft store)
a couple of small magnets
a mixing bowl and a spoon
optional: plastic gloves and a towel for easy clean up
– How to do it
1) In a bowl, pour glue and shake in baking soda. Stir until smooth.
2) Add a small amount of iron filings. Start small, then add more if you like a stronger pull.
3) Mix until the slime forms. It should be soft and not sticky.
4) Bring a magnet close and move it around the slime. Watch the filings slide and snag toward the magnet.
– What you learn
Magnetism is the pull of a magnetic field. Iron filings follow these invisible lines. You can explain with a simple idea: magnets like to reach iron.
– Tips to try
Use two magnets for different pulls. Change the amount of filings to change texture. If it sticks to your skin, rinse with water and mix a bit more glue.
– Safety and care
Iron filings can stain fabrics. Supervise younger kids. Keep slime off carpet and furniture. Wash hands after playing.
– Next steps
Take a quick photo of the slime and magnets in action. Write a short note about what you saw and what you would test next.
@media(max-width:480px){
17. DIY Glow in the Dark Jars
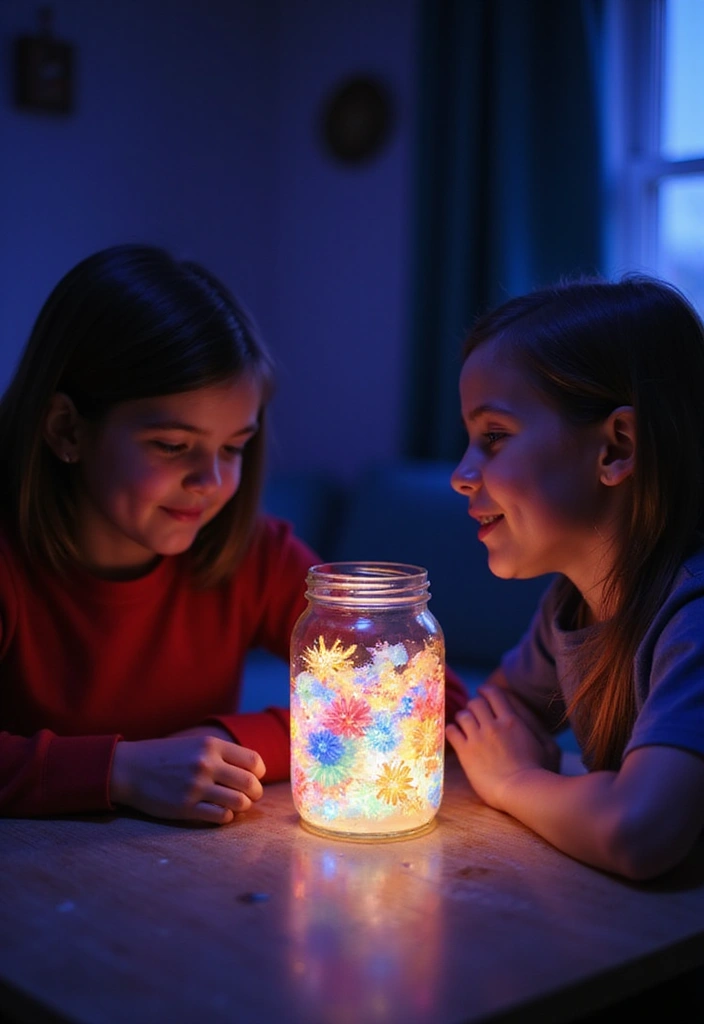
Want a simple project that blends play with light ideas? Try glow in the dark jars. They’re easy, cheap, and a little magical. Here is a quick reason to try it: kids see energy in action when the light fades and the jar glows.
What you need
– Clean glass jar with lid
– Glow-in-the-dark paint that works on glass
– Water
– A sunny spot for charging
– Optional decorations like glitter or small beads
Steps to make
1) Wash the jar and dry it well.
2) Use a thin brush to paint the inside of the jar. Create stripes, dots, or a simple scene. Let the paint dry completely.
3) Pour water into the jar until it is about three quarters full.
4) Place the jar in direct sun for 15 to 30 minutes. The sun charges the glow paint.
5) Turn off the lights. Watch the jar glow softly in the dark.
If you want more glow, add a second coat after the first dries.
Tip
– You can add glitter or tiny things inside to make it extra pretty.
Why this helps learning
– Children see how light stores energy and then shines in the dark.
– The jar can become a nightlight, a science demo, or part of a cozy room display.
– It opens doors to talk about colors, glow pigments, and safety with glass.
Next steps
– Make jars for holidays or themes, like stars for a night sky or pumpkins for fall.
@media(max-width:480px){
18. DIY Friendship Bracelets
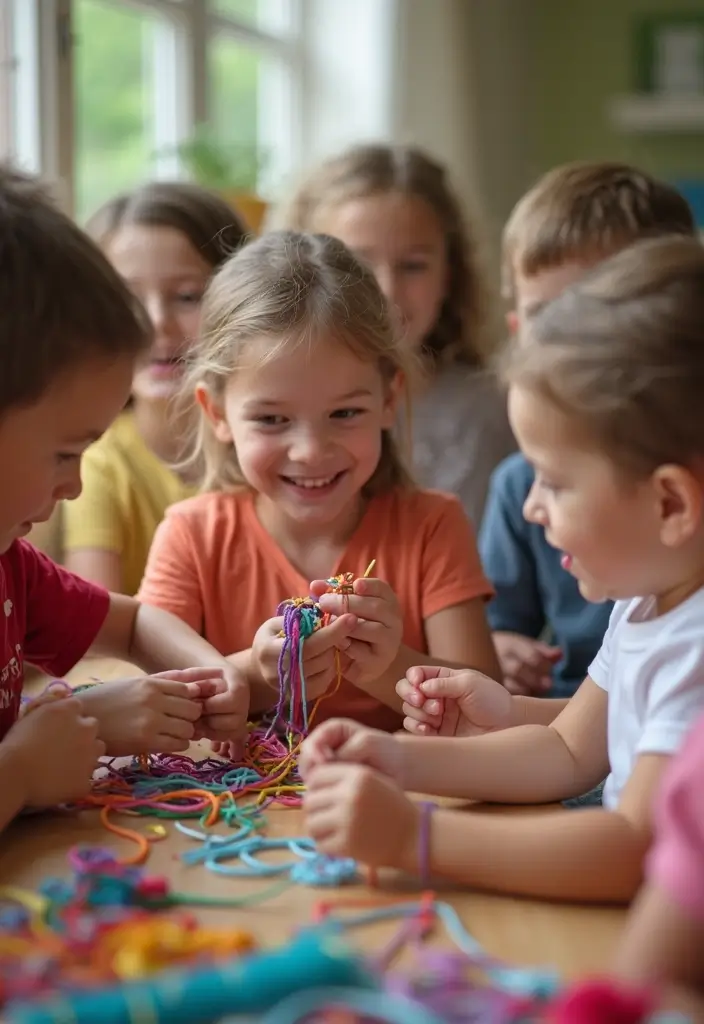
If you want a simple, kid-friendly craft that builds focus and kindness, try DIY friendship bracelets. They teach pattern, hand control, and care for others. The result is a bright piece you can wear or share.
Here is why this activity helps. Kids build fine motor skills with careful thread work. They learn to plan colors and patterns. Making with a friend adds teamwork and a chance to say thanks. It’s a calm, screen-free break that still feels exciting.
Let’s break it down. Gather:
– Embroidery floss in several colors (six colors works well)
– Scissors
– Tape or a clipboard to anchor your work
– Optional beads or charms for extra flair
Next, start small.
– Line colors in a neat stack.
– Tie a loose knot and tape the end to your table.
– Pick a simple pattern, like a fishtail or chevron.
– Knot steadily and keep the thread taut but not tight.
– When you finish, knot the ends, trim tails, and wear or wrap the bracelet.
Helpful Ideas:
– Teach kids different weaving techniques to create new looks.
– Talk about friendship while you weave together. These bracelets glow with color and show the care you share.
Next steps: wear your creation, give it away, or start a friendly bracelet swap at home or in class with your friends.
@media(max-width:480px){
@media (max-width: 600px) {
.visual-quiz-iframe { min-height: 995px !important; height: 1100px !important; }
}
19. DIY Ice Cream in a Bag

Is your kid craving a tasty treat and a quick science lesson? DIY Ice Cream in a Bag gives you both. You mix milk, sugar, and vanilla in a small zip bag. In a larger bag, fill ice with salt, then place the small bag inside. Seal the big bag and shake hard for four to six minutes. Open for creamy ice cream you can scoop.
Here is why this works: salt lowers the freezing point of ice. The ice becomes colder than 0 C, so the milk mix firms up as it meets that chill. You learn a simple science rule while you play.
What you need
– 1/2 cup milk
– 1 tablespoon sugar
– 1/2 teaspoon vanilla
– 1 small zip bag
– 1 large zip bag
– Ice
– 1/4 cup salt
How to do it
1) Put milk, sugar, vanilla in the small bag. Seal tight.
2) Fill the big bag with ice and salt. Seal it.
3) Put the small bag inside the big bag. Shake until the mix firms.
4) Wipe, open, and scoop.
Fun Tips
– Try new flavors: cocoa powder, fruit puree, or crushed fruit.
– Talk about freezing point and how salt makes ice melt differently.
Next steps: repeat with a new flavor and compare texture. It’s a tasty way to learn and stay cool.
@media(max-width:480px){
@media (max-width: 600px) {
.normal-quiz-iframe { min-height: 570px !important; height: 570px !important; }
}
20. DIY Egg Drop Challenge
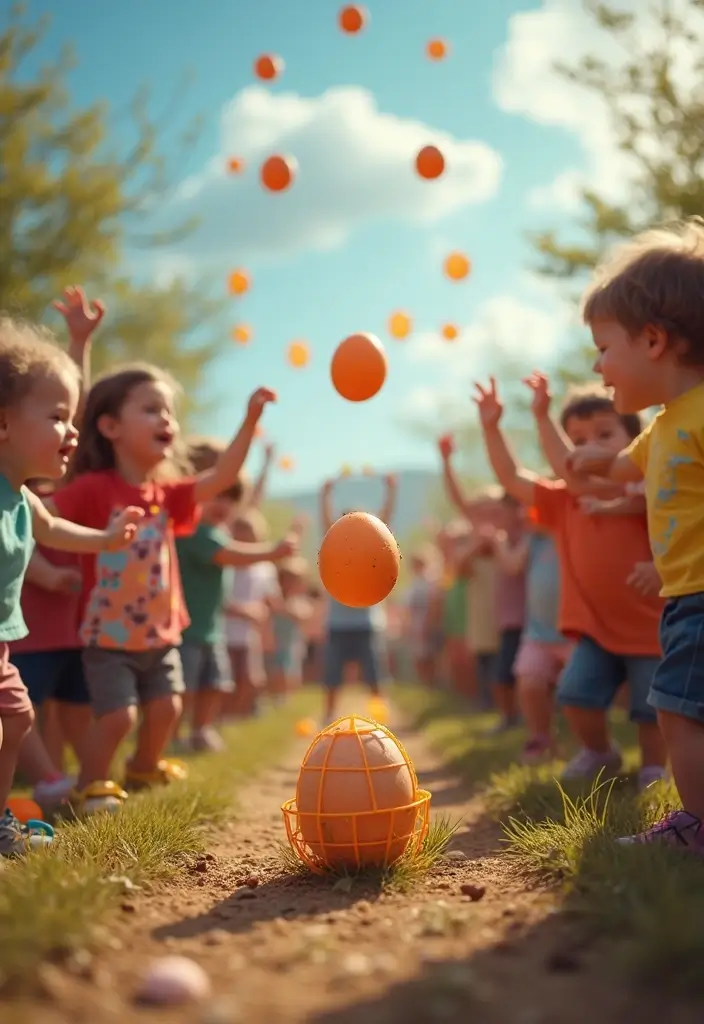
You want a fun way to teach kids how things move and how to protect something from a fall. The DIY Egg Drop Challenge gives you that in one simple, hands on project. It’s easy to set up, and kids get to test ideas, learn from mistakes, and feel the win when the egg stays whole.
What you need
– One raw egg
– Straws, cotton balls, and tape
– A small box or plastic cup to hold the carrier
– Scissors for grownups to supervise
How to run the challenge
– Plan first: talk about gravity and how a big impact hurts the egg. Decide on a height to start.
– Build next: make a light, padded shell. Use straws to brace the egg and cotton balls for soft landings. Secure everything with tape.
– Test and test again: drop from a chair or a low table. Check if the egg survived. If it doesn’t, tweak the design.
What you’ll observe
– Does padding slow the fall enough to save the egg?
– Which shapes and layers worked best, and why?
Here is why this works: gravity pulls the egg down. Padding and a gentle spread of impact force keep the egg safe. Testing lets kids spot what helps and what doesn’t.
Next steps
– Raise the drop height and compare results.
– Try a smarter wrap or a different carrier style.
– Keep a quick log: design, test result, what you’d change.
Safety first: handle the egg with care, and supervise cutting and tape work.
@media(max-width:480px){
21. DIY Bubble Solution and Wands

Want a simple, affordable activity that blends outdoor play with a science lesson? DIY Bubble Solution and Wands gives you big bubbles and a quick STEM moment. You’ll see kids curious, moving, and asking why bubbles act the way they do.
Here is why bubbles work. Soap makes a thin film that stretches. When air pushes on that film, a bubble forms.
Let’s break it down into steps you can try today.
What you need
– Warm water
– Dish soap
– Corn syrup or glycerin
– Pipe cleaners
– Straws
How to mix the bubble solution
– In a cup, pour warm water.
– Add a squirt of dish soap and stir gently.
– Pour in a bit of corn syrup or glycerin and stir slowly.
– Let the mix rest 10 to 15 minutes.
Crafting wands
– Twist pipe cleaners into loops.
– Clip the loop to a straw.
– Make two sticks connected by a string.
Play and learn
– Dip and blow slowly to form big bubbles.
– Compare shapes. Which wand makes the largest bubble?
– Talk about surface tension and why some bubbles stay longer.
Tips for success
– Use fresh soap and warm water.
– Don’t stir too hard; gentle mixing works.
– Keep the solution in a shallow tray.
– Play outside and clean up when you’re done.
Next steps: gather your supplies and start bubbling.
@media(max-width:480px){
22. DIY Recycled Bird Feeders
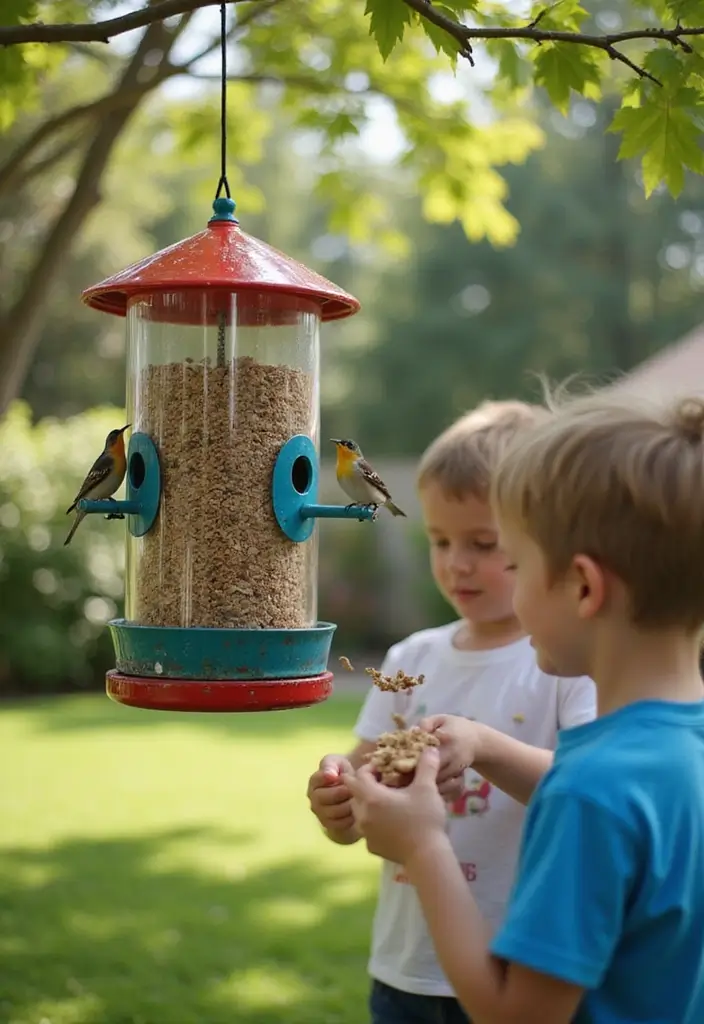
You want a quick, affordable project that helps birds and teaches kids about reuse. DIY Recycled Bird Feeders fit the bill. You can start with a toilet paper roll or a plastic bottle. Coat them with peanut butter and roll in bird seed. Then hang the feeder in your yard and watch the birds arrive.
This activity builds care for nature and shows how small choices cut waste. It turns trash into a learning tool.
What you’ll need
– Empty toilet paper roll
– Plastic bottle
– Peanut butter
– Bird seed
– String or twine
– Scissors or kid-safe knife
– Tape or glue
How to make it
– Toilet paper roll feeder: Clean the roll. Rub peanut butter on the outside. Roll in bird seed until coated. Poke a small hole near the top and thread string. Tie a knot and hang from a branch.
– Plastic bottle feeder: Rinse bottle. Cut two small windows near the bottom to create feeding slots. Spread peanut butter on outside. Press seed onto the sticky surface. Thread string through the cap or neck, then hang.
What your kids learn
– Birds help gardens by eating pests and spreading seeds.
– Reusing items reduces waste in your home.
– You can keep a simple bird log to note visitors.
Tips for success
– Place feeders in a shady spot to slow spoilage.
– Check weekly for mold and clean with soap and water.
– Use a short notebook to record dates and which birds you see.
Quick questions
– Q: Can I use other foods? A: Yes. Try sunflower seeds, cracked corn, or peanuts (unsalted).
– Q: How long does it last? A: With good care, a feeder can work for several weeks. Swap seed as needed.
@media(max-width:480px){
23. DIY Feathered Memory Game

Feeling stuck on a simple, hands-on activity that also boosts memory? Try a DIY Feathered Memory Game. It blends color, texture, and thinking in one easy project you can do together.
Materials
– Colorful feathers (real or craft) or feather stickers
– Card stock or sturdy index cards
– White glue or glue dots
– Scissors
– Markers or stickers
– Clear tape or a small laminator sheet for durability
– A small bag or box to keep the cards
Steps
1) Make pairs. Cut cards to a uniform size. For each pair, attach or draw the same feather design on two cards.
2) Decorate. Let kids add colors or tiny patterns around the feather. This builds fine motor skills and color recognition.
3) Dry and protect. Let glue dry fully. Cover with a little tape or laminate if you like extra durability.
4) Play. Lay all cards face down. Take turns flipping two cards to find a matching feather. If you match, keep the pair. If not, flip them back and try again. You can track scores if you want a friendly challenge.
Play ideas
– Add textures by mixing fabric scraps or sandpaper patches with feathers.
– Use color clues during the hunt. Name colors and talk about shapes as you go.
– Try a quick time trial to beat your best score, or play solo and beat your own time.
Tips and limitations
Feathers shed some dust or fringe. Keep a clean work area. If allergies are a concern, swap in printed feather images or faux feathers.
Next steps: once you’ve made one set, try a second round with different designs or switch to feather shapes like wings or leaves for a fresh challenge.
@media(max-width:480px){
24. DIY Marble Painting
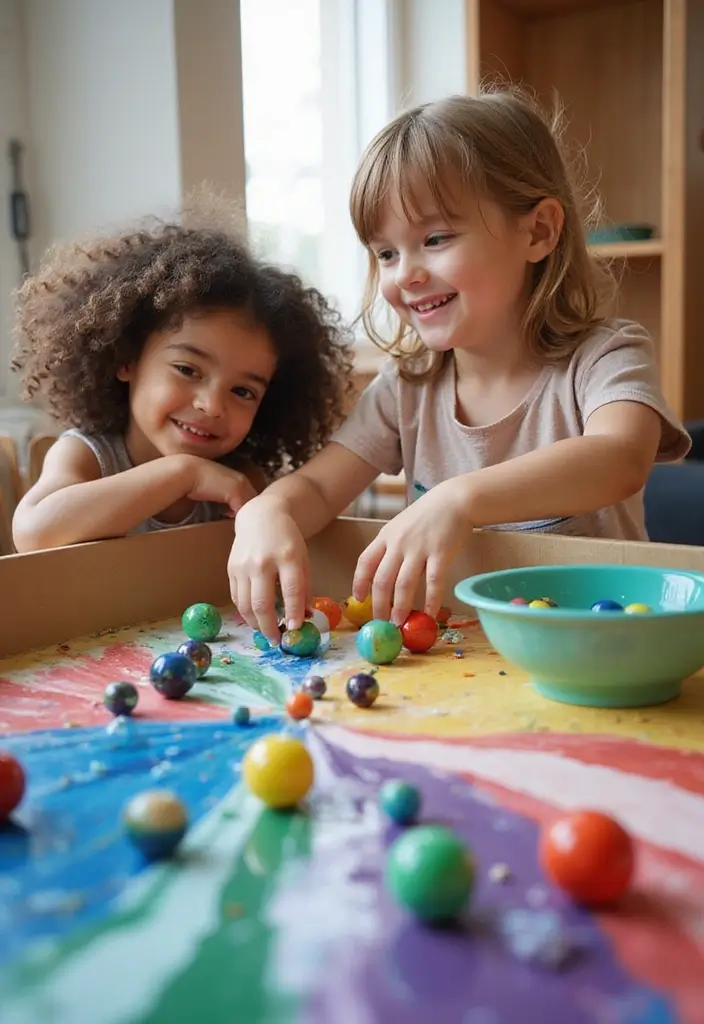
Looking for a messy but memorable art project? DIY Marble Painting gives you that. It blends color, motion, and hands-on learning in one game-like activity. Here is how to run it.
What you need
– Thick paper or card stock
– A shallow tray or box
– Clean marbles
– Washable paints in a few colors
– A cup of water and a cloth for quick cleanups
How to do it
– Put the paper in the box.
– Dip marbles in paint.
– Place them on the paper and tilt the tray to roll them around.
– Stop when patterns please you. Lift the paper to dry.
What kids learn
– Fine motor skills grow as little hands grab, roll, and press.
– They see how motion changes art and how colors mix on contact.
Tips for success
– Use thin paint so it moves smoothly. Add a drop of water if needed.
– Try two or three colors at once for layered looks.
– Talk about speed and direction as marbles roll.
– Cover the table and let the mess stay on the tray to keep cleanup quick.
Next steps: swap in bigger or smaller marbles, change paper size, or try circular trays for different patterns.
Have fun, and let the art surprise you.
@media(max-width:480px){
25. DIY Pom Pom Launchers
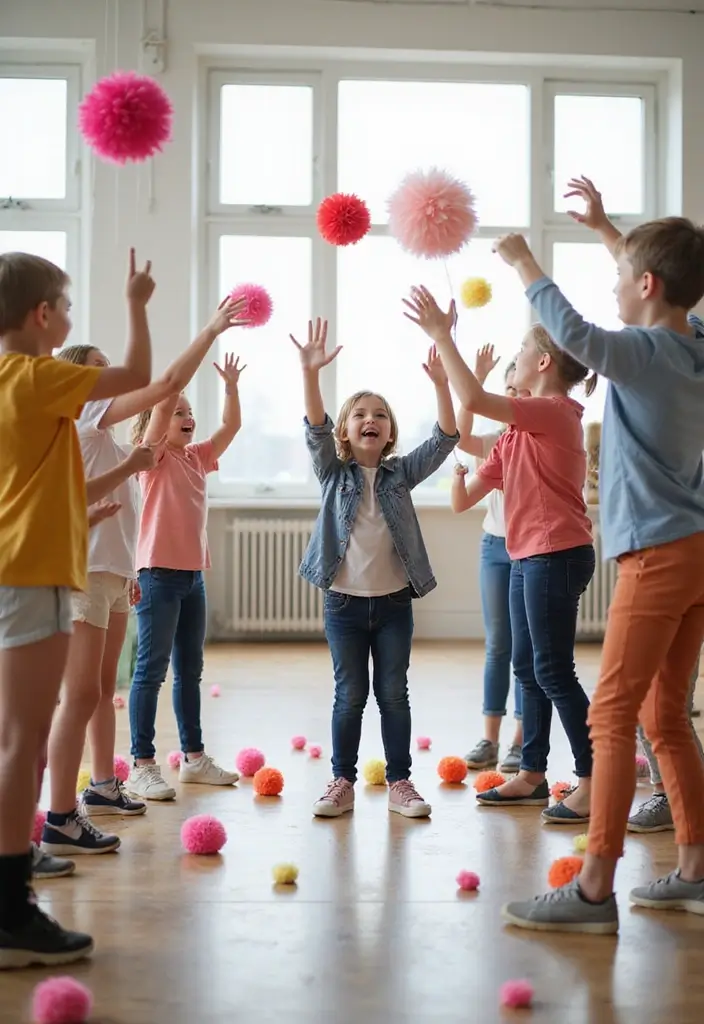
You want a kid-friendly project that blends play with learning. A pom pom launcher fits. It uses simple parts and shows how force and direction work in a safe, hands-on way. Here is why this works and how you can do it.
Materials you need
– Plastic cup
– Scissors
– Balloon
– Small pom poms
– Optional markers to decorate
How to build it
1) Cut the bottom off the cup. This gives you an open pocket for the balloon to stretch over.
2) Rinse the rim of the cup and dry it. A clean edge helps the balloon stay in place.
3) Tie a knot in the balloon’s end. Stretch the balloon over the cup opening so the knot sits inside.
4) Drop a pom pom inside the cup, near the balloon edge.
5) Pull the balloon back and let it go. The air pushes the pom pom forward.
Next, try different angles and distances. Use markers to make targets. Measure how far you can shoot a pom pom and adjust the angle to hit each target.
What you learn
This little launcher shows force, motion, and trajectory in real time. You’ll see how a stronger pull sends the pom pom farther. You’ll compare straight launches with angled ones and notice the difference.
Tips for safer play
– Supervise younger kids.
– Use soft targets and keep hands away from the opening when releasing.
– Clear a small space to avoid bouncing pom poms off walls.
Here is why you should try it: you get a quick build, a clear science lesson, and a lot of play time all in one.
@media(max-width:480px){
26. DIY Terracotta Pot Painting
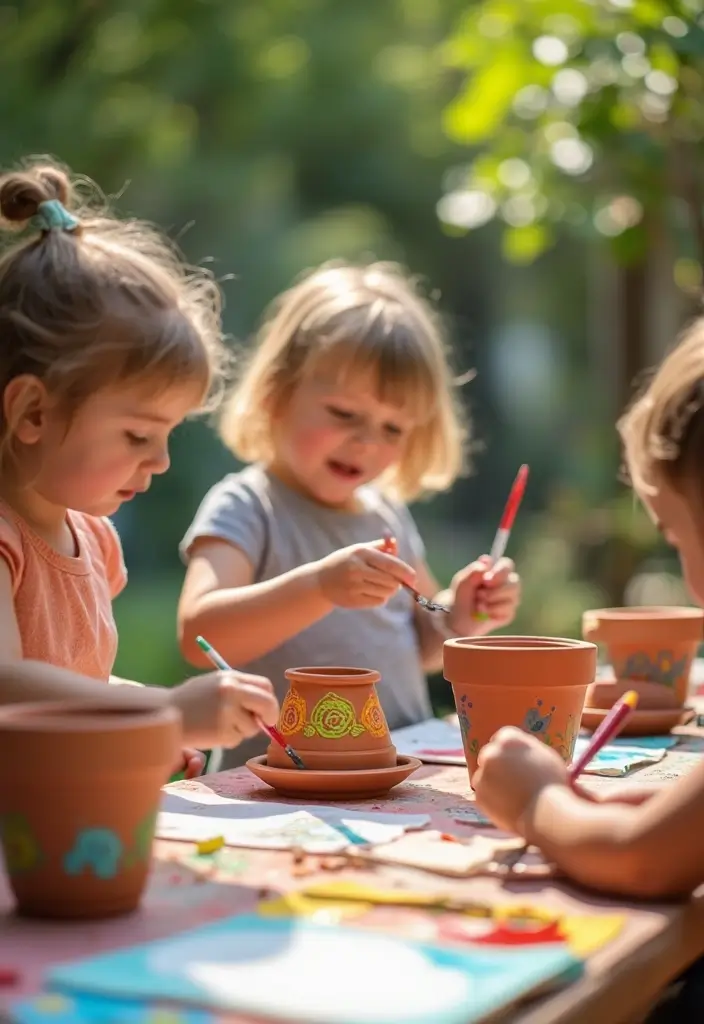
If your child loves art and plants, DIY Terracotta Pot Painting is a great project.
Gather plain terracotta pots, water-based acrylic paints, brushes, a pencil, and a clear sealant.
Wash the pots.
Dry them well.
Wipe away dust so paint sticks.
Have your child plan a design.
Let them sketch light lines first.
They can fill in bold colors and add stripes, dots, or small shapes.
Let each coat dry before adding another.
Seal the finished pot to protect it outside.
Plant flowers or herbs to bring the art to life.
Helpful Ideas:
– Talk about plant needs and how different conditions affect growth.
– Host a small pot display at home to show off their artwork.
Next, add a care chart next to the pots to track watering days with your child.
If you want more texture, try stamps or sponges for patterns.
Chalk markers give removable designs.
Common questions you might have are: How long does the paint take to dry? What cleaner works for brushes?
Use water-based paints and soap, and plan about 24 hours of dry time.
Be honest about limits. The paint can chip in wet weather. Bring pots indoors during cold spells and reapply sealant if needed.
Start with 2–3 pots and add more as interest grows.
This simple project brightens a windowsill and teaches basic gardening and responsibility.
@media(max-width:480px){
27. DIY Nature Journaling

Want a simple way to spark curiosity in kids? DIY nature journaling gives them a hands-on path to observe, write, and create. All you need is a blank notebook, a pencil, and a small bag. They draw what they see, jot a caption, and press leaves between pages. This habit builds writing, sharpens observation, and grows love for nature.
Tips for Engaging Journals:
– Encourage your child to describe how nature makes them feel as well as what they notice.
– Use prompts like “What do you hear?” and “What colors stand out today?”
– Keep entries short; one page per outing helps.
– Talk about journaling as a way to remember moments later.
– Try a leaf press: place clean leaves between blotting paper, then press with a heavy book for 24–48 hours.
What to include in each entry:
– Date and place.
– A quick drawing or caption.
– One line about a sound or feeling.
– A label for a plant or bug you know.
Leaf-press tips:
– Collect safe, common leaves.
– Dry between paper towels, then press with a book for 24–48 hours.
Next steps:
– Choose a journal you like and pack a small kit.
– Plan a short, nearby walk.
– After your walk, jot three details.
This routine fits busy days and helps kids slow down to notice the world around them.
@media(max-width:480px){
28. DIY Plant Terrarium
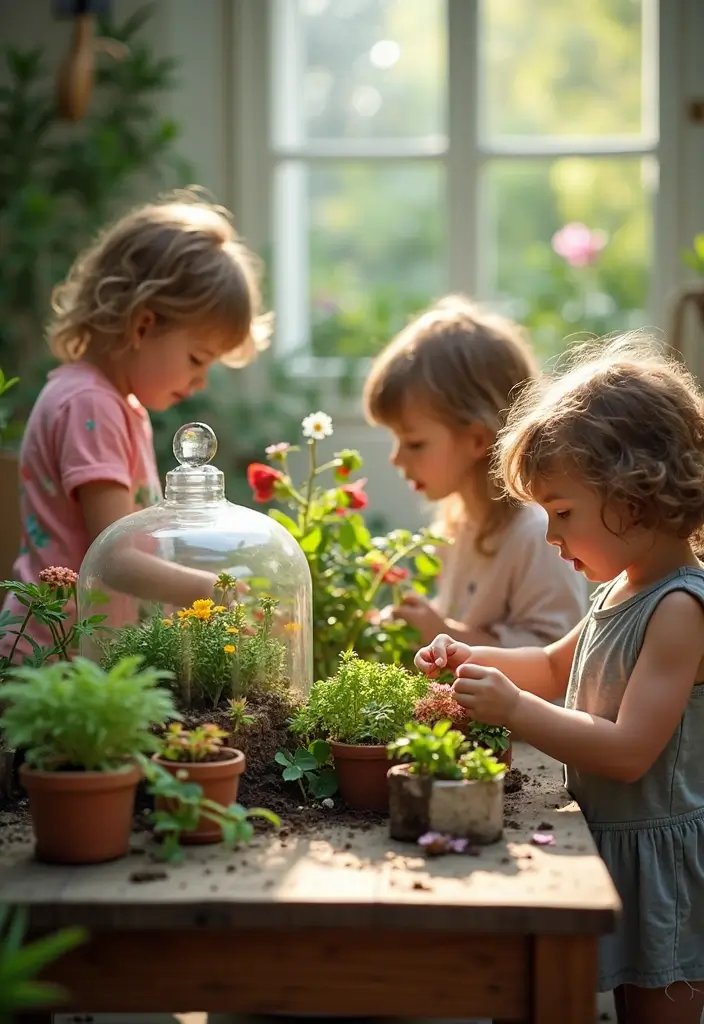
You want a simple project that teaches science and keeps kids curious. A plant terrarium lets you grow a tiny world inside glass. It is easy, hands-on, and fun.
Here is why this works. Kids pick plants, place them in a clear container, and watch nature unfold. It shows how living things share space and depend on light, air, and water.
What you need
– Glass container or jar
– Soil and a pinch of sand
– Small plants or succulents
– Stones, shells, or tiny figurines
– A spray bottle for gentle watering
Let’s break it down
1) Rinse the container.
2) Add a thin bed of gravel for drainage.
3) Put a light soil layer on top.
4) Plant the greens.
5) Decorate with stones or toys.
What your child learns
This terrarium becomes a tiny ecosystem. Your child sees how plants need sun, water, and air to grow. They learn care by watering and keeping the mix clean.
Document and watch
Keep a simple notebook. Record plant height and changes every week. Take photos to compare later.
Next steps
Place the terrarium where kids can see it daily. Talk about weather, seasons, and how plants respond. Try new shapes, different plants, or a larger container.
This is a nice way to bring nature indoors and grow a garden mindset.
@media(max-width:480px){
29. DIY Glow Stick Science Experiment
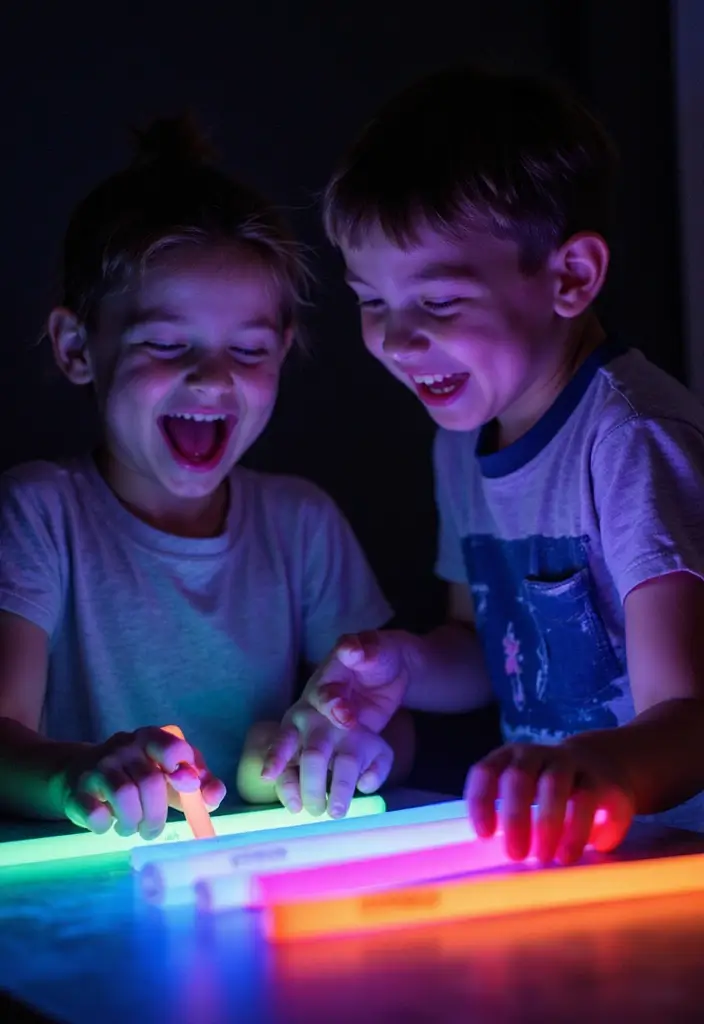
Want a glow night that teaches while you play? Try a Glow Stick Science Experiment. You’ll see light come from a chemical reaction, not a flame. Let’s break it down.
Materials you’ll need
– Store-bought glow sticks from two or three brands
– Clear cups or jars
– A dim room or a flashlight for comparison
– Paper and pencils for quick sketches
– Gloves or a cloth to protect hands
– Adult supervision
How to set it up
– In a quiet, dark space bend each stick to start the glow
– Put sticks in cups to watch colors and brightness side by side
– Have a plan to note what you see
What to do
– Observe which brand glows brighter and lasts longer
– Draw what you notice
– Try warming or cooling a stick and see what changes
What you learn
– You learn about luminescence and chemiluminescence in simple terms
– Energy changes to light, not heat
– You practice careful observations
Safety tips
– Do not puncture the sticks; wash hands after handling
– Keep glow sticks away from eyes and mouth
– Ask an adult to help with any warm tweaks
Next steps
– Test temperature effects with warm and cold water
– Compare more brands and share findings
@media(max-width:480px){
Conclusion
These 29 DIY fun kids projects not only keep young minds engaged but also foster creativity, curiosity, and learning through play. By blending education with hands-on activities, kids can explore science, art, and nature in exciting ways.
Encourage your little ones to try out these projects at home, and watch their imaginations soar. Each project is a stepping stone towards building essential skills while having loads of fun!
Note: We aim to provide accurate product links, but some may occasionally expire or become unavailable. If this happens, please search directly on Amazon for the product or a suitable alternative.
This post contains Amazon affiliate links, meaning I may earn a small commission if you purchase through my links, at no extra cost to you.
Related Topics
DIY fun kids projects
educational crafts
STEM activities
hands-on learning
creative kids activities
interactive play
easy DIY crafts
outdoor projects
science experiments
art and craft
family bonding
quick crafts