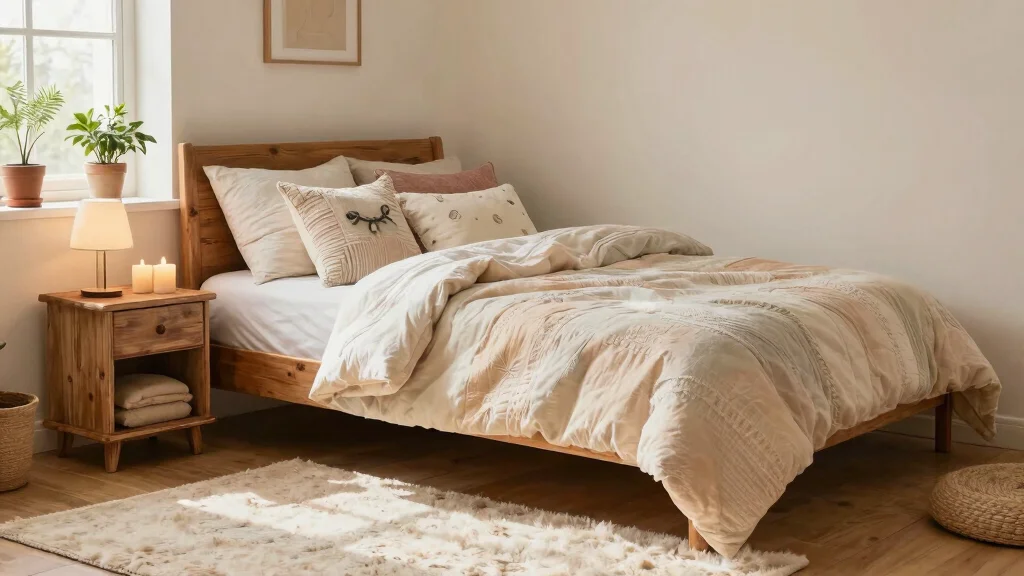
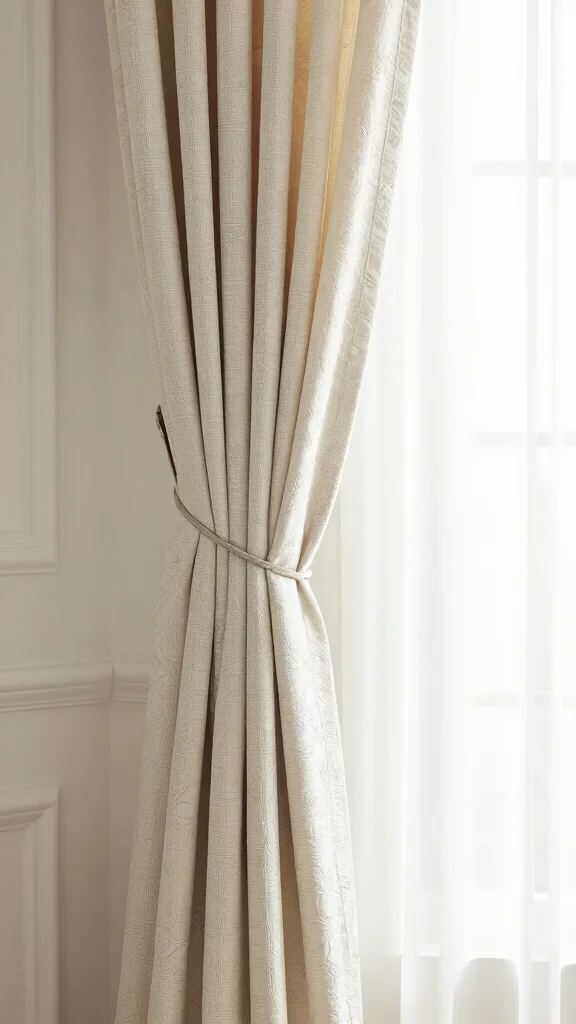
Are your windows feeling a bit bare? If so, you’re not alone. Many of us overlook the finishing touches that can truly elevate our window decor. This post is all about DIY curtain tiebacks, and I’m excited to share these creative ideas with you! Whether you’re looking to spruce up your living space or embark on a fun crafting project, this guide is designed for anyone wanting to add a personal touch to their curtains.
If you enjoy home improvement projects or love fabric crafts, you’re in the right place. This blog is perfect for DIY enthusiasts, interior design lovers, and those who appreciate handmade accessories. You’ll discover 16 unique curtain tieback ideas that not only enhance your windows but also allow you to express your style. From upcycled materials to simple knots, these projects are fun, achievable, and perfect for transforming your space without a hefty price tag.
By the end of this guide, you’ll be inspired to create your own stunning curtain tiebacks. Imagine how your windows will shine with these handmade accessories! Get ready to dive into the world of DIY curtain tiebacks that will boost your home decor and showcase your personality.
Key Takeaways
– Discover 16 unique DIY curtain tiebacks that add style and personality to your windows, using various materials and techniques.
– Learn how to repurpose upcycled materials like twine, leather, and fabric scraps for a sustainable approach to home decor.
– Find step-by-step ideas that cater to all skill levels, making it easy for anyone to create beautiful window accents.
– Enhance your interior design with these handmade accessories that suit different styles, from rustic to modern.
– Enjoy a budget-friendly home improvement project that not only beautifies your space but also provides a sense of accomplishment.
1. Twine and Driftwood Tiebacks

Embrace the beauty of nature with twine and driftwood curtain tiebacks. This pairing captures rustic charm while adding a coastal feel, perfect for beachside homes or those seeking tranquility. The natural texture of jute twine wraps around unique driftwood, enhancing visual appeal and creating a soothing atmosphere. Imagine the soft hues of driftwood contrasting with sunlight streaming through your windows, creating a serene environment.
To implement this design, gather driftwood pieces in various shapes and sizes for a personalized touch. Consider budget-friendly alternatives by sourcing driftwood from local beaches or craft stores. This project connects to broader trends emphasizing organic materials and eco-friendly decor.
Consider these elements for your tiebacks:
– Pair driftwood with natural jute twine for a cohesive look
– Install using simple knots for easy adjustment
– Use lighter fabrics to ensure the tiebacks hold curtains without sagging
– Incorporate driftwood with interesting textures for added character
This design not only adds style but also enhances the room’s warmth through its organic materials.
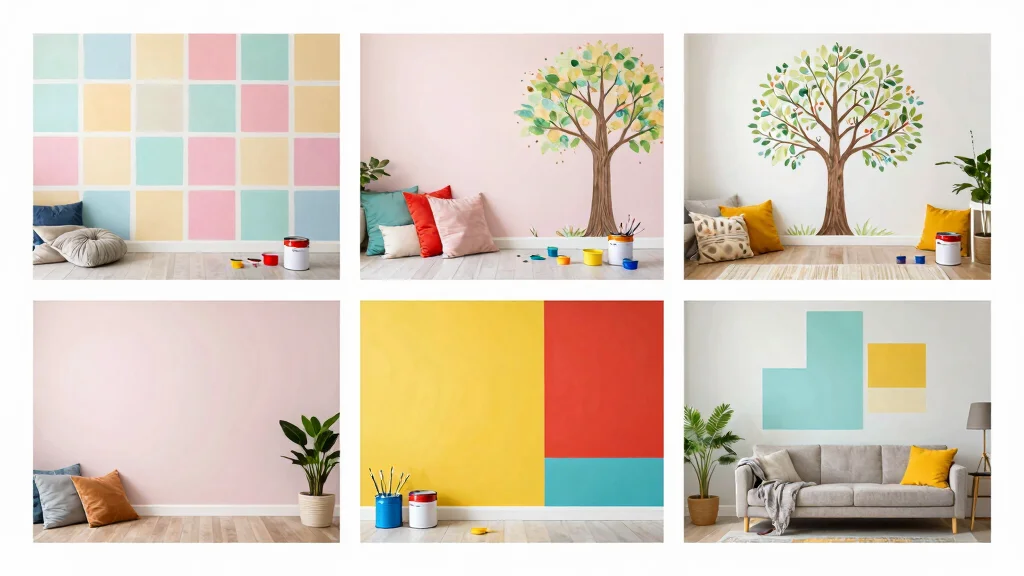
🏠 Transform Your Space Like a Pro
Unlock your creativity with this 60-page guide to stylish DIY home makeovers using budget-friendly ideas and upcycled materials.
Difficulty Rating & Requirements
Overall Difficulty Rating: Medium
Creating DIY curtain tiebacks is rated as a medium-level project. This is suitable for those who have some crafting experience but are not necessarily experts. If you’ve worked with fabric or simple tools before, you’ll feel right at home with these fun designs. However, if you’re completely new to DIY and crafting, you might find some projects a bit challenging.
Time Estimate:
⏱ Estimated time: 1 to 3 hours depending on your choice of tieback design.
– Planning and gathering materials: 30 minutes
– Execution: 1 to 2 hours
– Drying or setting time (if applicable): 30 minutes
Skill Requirements:
– Required skills: Basic sewing, knot tying, and crafting techniques.
– Beginner-friendly: Yes, especially for projects like twine or fabric scrap tiebacks. Many DIY tiebacks only require simple tools and skills.
– Skills that can be learned include using sewing machines and crafting knots, while some projects may require prior experience with more complex materials like macrame or leather.
Tools & Materials Needed:
🧰 Essential items checklist:
– Fabric or twine (required)
– Scissors (required)
– Hot glue gun or sewing machine (optional for beginners but highly recommended for durability)
– Ruler or measuring tape (required)
– Decorative elements like beads or buttons (optional for personal flair)
– Rope or leather straps (required for specific designs)
– Mason jar lids or driftwood (required for certain projects)
– Yarn or wool (optional for additional texture and design)
Step-by-Step Overview:
1. Planning & Design (30 minutes): Choose the style of tieback you want to create. Sketch your ideas and gather necessary materials.
2. Cutting & Measuring (30 minutes): Measure the length needed for your tiebacks and cut your materials accordingly. Take your time to ensure accurate measurements.
3. Assembly (1 hour): Start crafting! Secure your materials with knots, glue, or sewing as per the instructions of your chosen design.
4. Finishing Touches (30 minutes): Add any decorative elements, like beads or buttons, to personalize your tiebacks.
5. Installation (if required): Hang your new tiebacks on your curtains and adjust them to ensure they look just right!
Professional vs DIY:
Professional: Hiring a professional could cost you anywhere from $50 to $150 per set, depending on the materials and labor involved. They offer a polished look but may not give you the unique touch of a DIY project.
DIY: You can create beautiful tiebacks for under $20, depending on the materials you choose. Plus, you gain the satisfaction of making something with your own hands! If you enjoy crafting, this is a fun project to tackle yourself. However, if you feel overwhelmed or lack the time, hiring a professional may be the better option.
2. Fabric Scraps Tiebacks
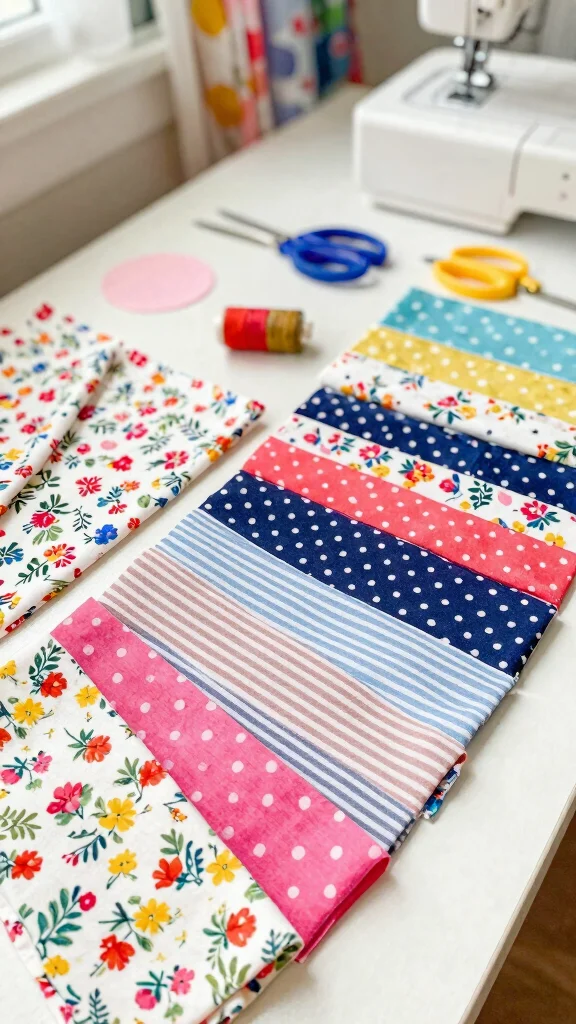
Unleash your creativity by transforming leftover fabric scraps into vibrant curtain tiebacks. This project celebrates personalization, allowing you to mix and match patterns, colors, and textures for unique decor. From cheerful florals to bold geometrics, the variety of fabric options makes each tieback a reflection of your style. This DIY is a delightful way to repurpose remnants while injecting color into your window treatments.
For practical execution, gather scraps that complement your existing decor. You can skip sewing by using fabric glue for a quicker alternative. This project aligns with the current trend of sustainability by making the most of what you already have.
Here are some implementation tips:
– Cut fabric into 3-inch wide and 20-inch long strips
– Sew strips together to create longer lengths for a dynamic look
– Fold and sew edges to create loops for easy attachment
– Attach ribbons for a secure and stylish fastening
By infusing your space with colorful tiebacks, you’ll create a lively atmosphere filled with warmth and character.
3. Upcycled Leather Straps
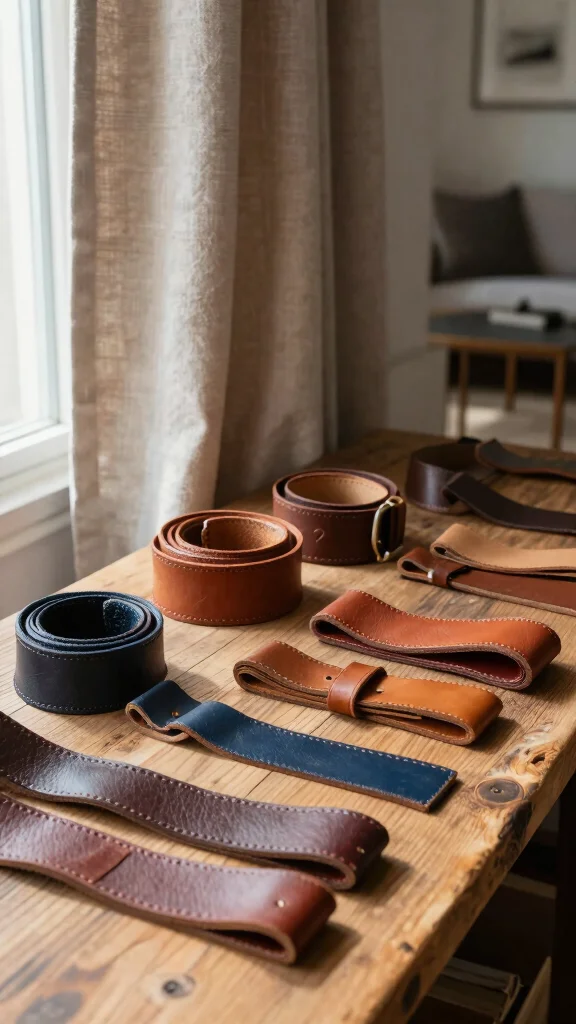
Revitalize old leather belts or scraps by crafting elegant leather strap curtain tiebacks. The rich texture of leather adds sophistication and a modern touch to your decor. Not only is this project stylish, but it also promotes sustainability by repurposing items that might otherwise go to waste. Imagine the luxurious feel of leather contrasting with soft curtains, creating a chic aesthetic in any room.
To execute this idea, find old leather belts at thrift stores or from your own collection. You can also consider budget-friendly alternatives by sourcing leather scraps from local craft stores. This trend reflects the growing interest in eco-conscious home decor.
Consider these steps to create your tiebacks:
– Cut leather into strips about 2 inches wide
– Use a belt buckle for easy fastening or attach snap buttons
– Secure the leather pieces around curtains for a polished look
– Choose contrasting colors for a bold statement or go monochromatic for subtlety
By integrating leather into your decor, you’ll enhance the overall elegance and texture of your living space.
4. Beaded Tiebacks

Infuse your curtains with bohemian flair using beaded tiebacks. This project allows for endless customization with wooden, glass, or natural stone beads, bringing vibrancy and texture to your home. Picture colorful beads creating a playful focal point that draws the eye and enhances your window decor. Each tieback can be a unique expression of your personality and style.
For practical implementation, gather assorted beads and strong string. This DIY is budget-friendly as you can use leftover craft supplies. Incorporating this project taps into broader design trends favoring handmade and personalized touches.
Here are some tips for your beaded tiebacks:
– Cut twine to about 24 inches for optimal length
– Thread beads onto the twine in a desired pattern
– Tie loops at each end to secure the design
– Mix different bead types for a unique look
These beaded accents not only add charm but also introduce layers of texture, enhancing the overall aesthetic of your space.
Beaded tiebacks bring bohemian flair with upcycled beads you already have. These diy curtain tiebacks mix wooden, glass, or natural stone beads for a vibrant focal point—no two are alike. Practical tip: use sturdy string and a simple knot to keep curtains secure.
5. Rustic Tape Measure Tiebacks

For those who love DIY and home improvement, repurposing an old tape measure into curtain tiebacks is a clever and stylish choice. The industrial look of metal adds a unique touch to both modern and rustic decor. This quick project makes a bold statement while maintaining practicality, showcasing your creativity in a functional way.
To bring this idea to life, cut the tape measure to your desired length. You can easily find colorful tape measures at hardware stores, making it a cost-effective option. This stylish design connects to trends that embrace functional decor items.
Consider these steps for your tiebacks:
– Cut the tape measure to a length that suits your space
– Attach ends to curtain hooks or clips for secure hold
– Clip the tiebacks to curtains for a polished finish
Utilizing a tape measure not only adds a playful element but also enhances the functionality of your window treatments.
6. Mason Jar Lid Tiebacks
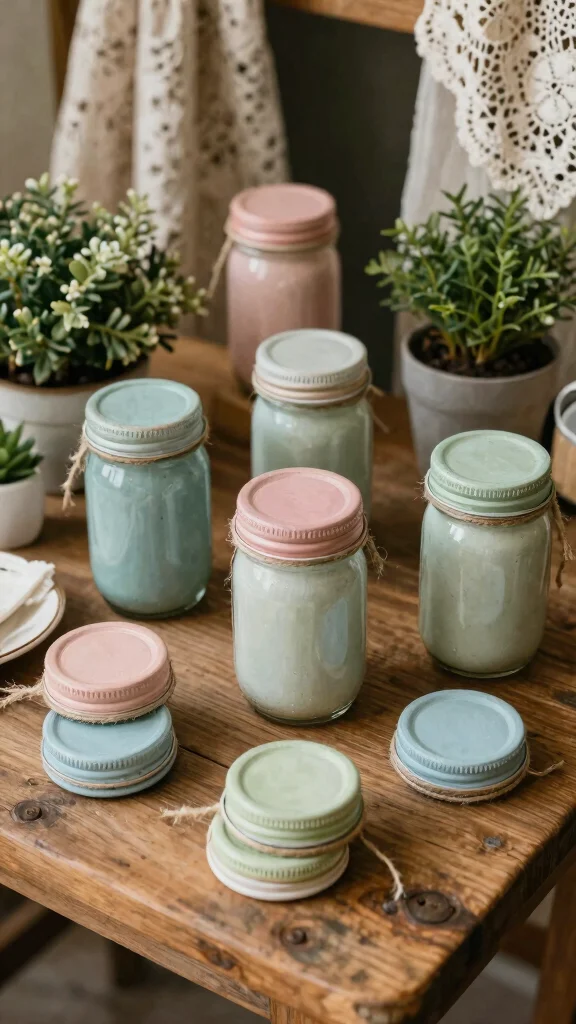
Transform ordinary mason jar lids into charming curtain tiebacks that bring a touch of farmhouse flair to your space. These versatile lids can be painted or left in their natural state, offering various aesthetics to suit your decor. This simple project adds a delightful twist to standard tiebacks, making them a unique conversation piece.
To create these tiebacks, gather mason jar lids and consider painting them to match your color scheme. This DIY is budget-friendly since many households have mason jars on hand. This trend reflects a growing appreciation for rustic and vintage-inspired decor.
Here are some ideas to implement this project:
– Paint or stain lids to coordinate with your decor
– Attach ribbon or twine through the lid for easy wrapping
– Use loops to tie around curtains for a secure hold
These mason jar lid tiebacks not only enhance visual interest but also introduce a rustic charm to your window treatments.
7. Macrame Tiebacks

Macrame curtain tiebacks are the epitome of bohemian style, adding intricate designs to your windows. Crafted from cotton cord, these tiebacks serve as functional art pieces that enhance the beauty of your curtains. The airy feel of macrame complements light fabrics, creating a relaxed atmosphere in your home.
To get started, cut lengths of macrame cord to your desired size. This project is perfect for those looking to embrace current trends in handmade decor. You can find tutorials online to guide you through various knot techniques.
Consider these tips for creating macrame tiebacks:
– Cut cord to your preferred lengths for customization
– Secure strands to a wooden dowel for easy knotting
– Create patterns using popular macrame knots
– Incorporate beads for added flair and detail
With macrame tiebacks, you’ll infuse your space with texture and a relaxed vibe, enhancing the overall aesthetic of your decor.
8. Knitted Wool Tiebacks

Cozy knitted wool tiebacks bring warmth and texture to your curtains, creating an inviting atmosphere. Using chunky yarn, you can craft tiebacks that not only hold your curtains but also add a touch of comfort to your decor. This handmade accessory is perfect for colder seasons, making your space feel homier and more welcoming.
To create these tiebacks, select yarn that complements your color palette. This DIY project allows for creativity, as you can experiment with different stitch patterns. Knitted items are trending as homeowners seek to add personal touches to their spaces.
Here are some steps to make your tiebacks:
– Choose yarn thickness and corresponding needles for knitting
– Cast on stitches and knit to your desired length
– Trim and fasten off excess yarn for a clean finish
– Use loops to secure around your curtains
These knitted accents not only add warmth but also enhance the overall comfort and style of your home.
Turn your windows into cozy focal points with knitted wool tiebacks for DIY curtain tiebacks. Pick chunky yarn in colors that match your palette, then try a simple garter stitch—fast, warm, and ready to hug your curtains. A handmade touch beats store-bought every time.
9. Vintage Button Tiebacks

For a whimsical and vintage-inspired touch, consider using old buttons to create unique curtain tiebacks. This delightful project breathes new life into your button collection, allowing you to match or contrast with your curtains for added charm. The playful aesthetic of buttons adds a nostalgic feel, making your window decor stand out.
To implement this idea, select buttons of various sizes and colors. This project is not only budget-friendly but also encourages creativity by using materials you already have. Vintage-inspired designs are gaining popularity as people seek character in their decor.
Here are some tips for your button tiebacks:
– Cut string long enough to wrap around curtains
– Secure buttons onto the string with knots for stability
– Arrange buttons in a visually pleasing pattern
These button tiebacks will introduce a fun, eclectic vibe to your space while enhancing the overall decor.
10. Colorful Yarn Tassel Tiebacks
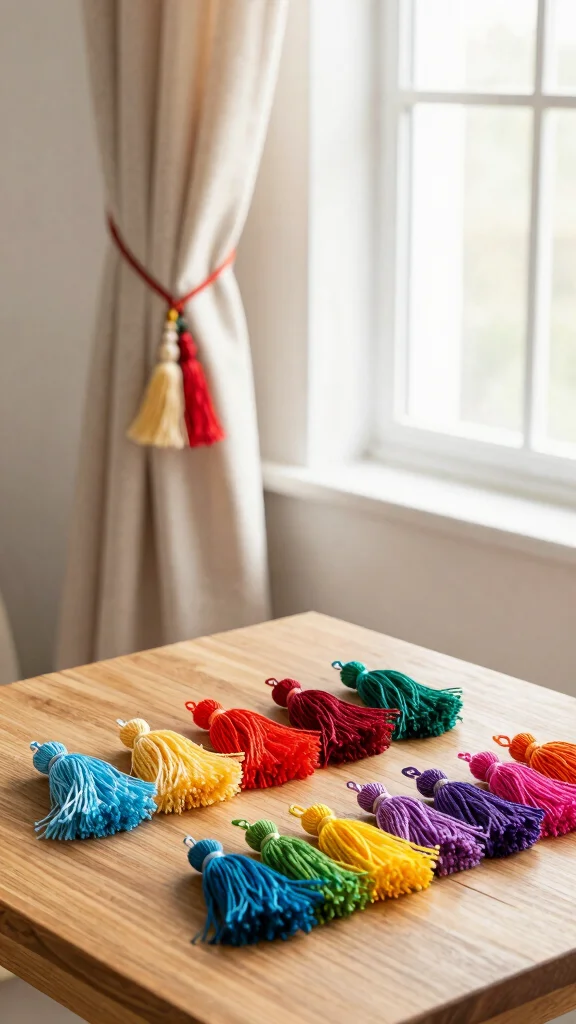
Yarn tassel tiebacks are a vibrant way to add flair to your curtains. These playful creations can brighten up your window treatments, making a cheerful statement in any room. The simple process of making tassels only requires yarn and scissors, allowing for quick and enjoyable crafting.
To craft your tassels, gather assorted yarn colors that complement your decor. This DIY project is perfect for adding a festive touch, particularly in children’s spaces or lively living areas. Tassels are trending as a fun way to personalize home accents.
Consider these steps for your tiebacks:
– Cut yarn to your desired length for creating tassels
– Wrap strands together and tie in the middle
– Trim ends to achieve a uniform tassel shape
– Secure tassels to curtains using strong string or twine
These colorful tassels not only enhance your curtains but also contribute to a joyful, inviting atmosphere in your home.
11. Painted Wood Blocks Tiebacks

For a minimalist yet stylish approach, painted wooden blocks can serve as unique curtain tiebacks. This simple DIY project allows for creativity while adding a pop of color and texture to your window decor. It’s a great way to express your design style while keeping things clean and modern.
To create these tiebacks, select small wooden blocks and paint them in colors that suit your decor. This project is budget-friendly and suitable for all skill levels, making it accessible for anyone looking to enhance their space. Minimalist designs are on the rise as people favor simplicity and elegance.
Here’s how to implement this idea:
– Choose your paint colors and apply to wooden blocks
– Attach ribbon or twine loops for easy securing
– Wrap the ribbon/twine around curtains for a polished look
These painted wooden blocks not only add a chic element but also enhance the overall aesthetic of your window treatments.
12. Felt Flower Tiebacks

Introduce a whimsical touch to your curtains with delightful felt flower tiebacks. This charming DIY project is perfect for floral lovers, allowing you to create vibrant flowers that brighten your space. The colorful felt adds a playful element, making these tiebacks ideal for children’s rooms or feminine decor.
To start this project, gather assorted felt sheets and cut them into petal shapes. This craft is budget-friendly, especially if you have felt remnants at home. Floral designs are trending as they bring a fresh and cheerful vibe to interiors.
Here are the steps to create your tiebacks:
– Stack petal layers and glue them together
– Add buttons or beads to the center for detail
– Attach flowers to twine or string for easy wrapping
These felt flower tiebacks will not only enhance your curtains but also create a joyful atmosphere throughout your home.
Fun fact: a single sheet of felt yields dozens of petals, letting you craft 3-5 vibrant felt flower tiebacks for under $5. These diy curtain tiebacks add whimsy fast—just cut, glue, and attach.
13. Repurposed Sash Curtains
Give old sash curtains a new purpose by transforming them into stylish tiebacks for your current curtains. This upcycling project saves money while creating a vintage-inspired look that is truly unique. The flowy nature of sash curtains adds elegance, turning your window decor into an art piece.
To execute this idea, cut the sash curtains into strips that can wrap around your curtains. You can leave the ends frayed for a bohemian feel or hem them for a more polished finish. This trend reflects the desire to incorporate sustainable practices in home decor.
Consider these tips for your tiebacks:
– Choose sash curtains with interesting patterns or colors
– Tie strips around curtains, securing as needed
These repurposed tiebacks will not only enhance visual interest but also create a charming, personalized touch to your window treatments.
14. Simple Knotted Rope Tiebacks

For a rustic yet chic option, consider creating simple knotted rope tiebacks. This straightforward project requires minimal materials and adds a lovely textured look to your curtains. The natural fibers of rope lend themselves beautifully to both coastal and farmhouse styles, making them versatile for any room.
To bring this idea to life, cut a length of natural jute or cotton rope to your desired size. This DIY is budget-friendly and allows for creativity in design, making it accessible to all skill levels. Rustic accents are trending as they offer warmth and charm to interiors.
Here are some steps to create your tiebacks:
– Tie knots at both ends of the rope to form a loop
– Wrap knots around curtains for secure hold
These knotted rope tiebacks will not only enhance your decor but also introduce a cozy, rustic touch to your living space.
15. Embroidered Tiebacks

Elevate your sewing skills with beautiful embroidered curtain tiebacks. This handcrafted project allows you to showcase intricate designs and patterns, adding a refined touch to your windows. Embroidered tiebacks can be customized to perfectly coordinate with your decor, making them a rewarding way to personalize your space.
To get started, cut fabric strips for tiebacks and prepare your favorite embroidery thread. This DIY is perfect for those who enjoy crafting and want to add unique elements to their home. Handcrafted items are increasingly sought after for their personal touch and artistry.
Here’s how to create your embroidered tiebacks:
– Cut fabric strips 3 inches wide and 20 inches long
– Embroider designs onto the fabric for a personalized touch
– Attach strong string or ribbon for securing around curtains
These embroidered accents will enhance both the elegance and character of your window decor.
16. Wire and Fabric Combo Tiebacks

For a creative twist, combine wire and fabric to craft unique curtain tiebacks. This DIY merges the structure of wire with the softness of fabric, allowing for artistic shapes and designs. The contrast between hard and soft materials brings an edgy vibe to your decor while maintaining elegance, perfect for modern spaces.
To implement this idea, cut wire to your desired length and shape. This project is budget-friendly, especially if you have leftover fabric scraps. Mixing materials is a growing trend as homeowners seek to add depth and interest to their spaces.
Consider these steps for your tiebacks:
– Cut wire and form loops or twists as desired
– Cut fabric into strips to wrap around the wire
– Secure fabric to wire with tape or glue
These wire and fabric tiebacks will not only make a bold statement but also enhance the overall aesthetic of your window treatments.
Conclusion

Creating your own DIY curtain tiebacks not only enhances your window decor but also allows you to express your individuality and creativity with upcycled materials.
From vibrant yarn tassels to elegant macrame, these projects are perfect for every skill level and style preference. Embrace your crafty side, and give your curtains a personalized touch that’s both beautiful and eco-friendly.
Frequently Asked Questions
What are some easy upcycled diy curtain tiebacks to add style to your windows?
Absolutely! Here are some beginner-friendly upcycled ideas for diy curtain tiebacks that still look stylish and hold back your curtains.
Gather items like old belts, chunky rope, denim scraps, tassels from thrifted textiles, or metal hardware from thrift stores to boost your window decor.
Pick a style: simple wrap, loop-and-knot, or tassel-wrapped cord.
Prep materials by cleaning, trimming, and reinforcing fabric or leather where needed.
Assemble your tiebacks by braiding rope, turning belts into decorative straps, or attaching a tassel to a cord.
Install with removable hooks (great for renters) or small screws for a permanent look, and finish with a quick color boost using fabric paint or dye.
With these ideas, your windows gain a unique handmade accessories vibe without breaking the budget.
Which materials work best for diy curtain tiebacks using upcycled items?
Choosing the right materials is key for durable diy curtain tiebacks. Look for materials that can handle weight and look good with your interior design. Good options include sturdy rope, leather scraps, fabric belts, metal hardware, wooden beads, or macrame cords.
Consider weight and finish: heavier tiebacks for heavier drapes, lighter ones for sheers. For fabric crafts projects, reinforce with a fabric backing or lining to prevent fraying.
To keep things cohesive in your room’s interior design, match hardware finishes (brass, matte black, nickel) to other fixtures.
How can I pair diy curtain tiebacks with different interior design styles?
Match your tiebacks to your room’s vibe: boho loves macramé and natural fibers; industrial pairs with metal chains or leather straps; coastal works with rope and light colors; traditional rooms can use tassels or braided cords.
Steps: 1) pull a color palette from your curtains or walls; 2) choose a hardware finish (matte black, brass, bronze); 3) scale the tieback to the window size (bold for large windows, subtle for small). For window decor that feels cohesive, aim for a single material family (rope, leather, or woven fabric) and a consistent finish.
Can I customize diy curtain tiebacks for seasons or occasions?
Absolutely. Seasonal tweaks can refresh your window decor without a full makeover.
Tip 1: swap color ribbons or tassels to match holidays or moods.
Tip 2: add removable charms or attachable tassels on a detachable cord.
Tip 3: use magnets or button loops so you can switch adornments in minutes.
Quick plan: keep a neutral base tieback and store seasonal adornments with your other handmade accessories for easy rotation.
How do I install and care for handmade diy curtain tiebacks to ensure durability?
Installation is a simple home improvement project. Mark where you’ll mount, drill pilot holes, and use wall anchors if you’re not screwing into studs. Attach eye hooks or small screws that fit your tieback hardware, then adjust length for a secure hold.
Care depends on the material: fabric crafts ties should be spot-cleaned and air-dried; rope and macrame can be wiped down and kept dry; leather needs occasional conditioning; metal hardware should be checked for rust and tightened as needed.
By treating your handmade curtain tiebacks with care, you’ll keep your windows looking polished for years of window decor and interior design impact.
Related Topics