Why I made this post I put this together because I keep craving easy DIY crafts that use paper and spark creativity. Paper is cheap, versatile, and forgiving. You can start with scraps and a simple pair of scissors and end with something you want to show off. I wanted a list that feels doable, not overwhelming, and that fits into a busy day.
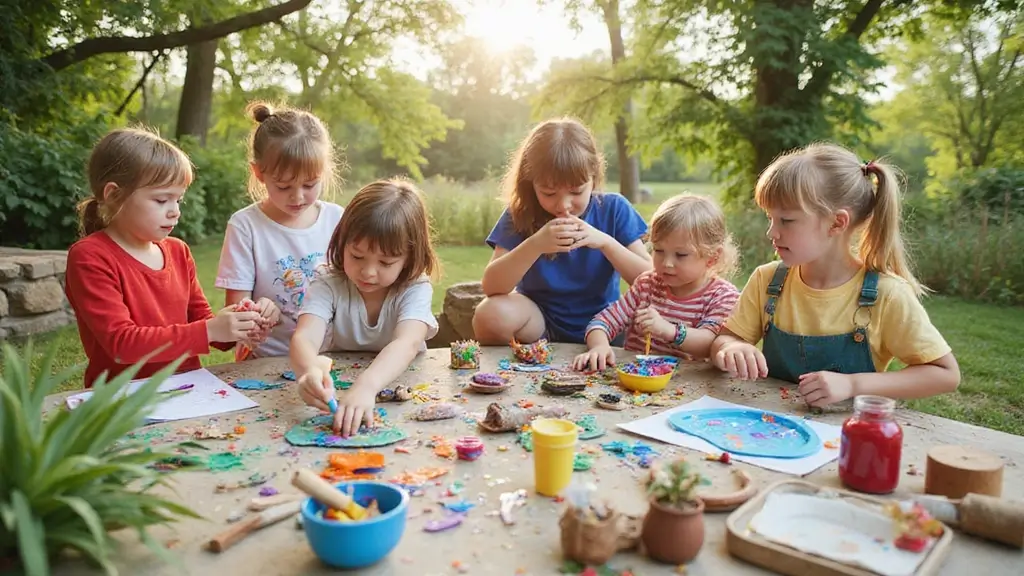
Who it’s for If you love simple crafts, home projects, kid activities, or gift ideas, this one is for you. No fancy tools required—just calm hands, a bit of glue, and a page of color. This is for crafters who want quick wins and a little creative spark in their day.
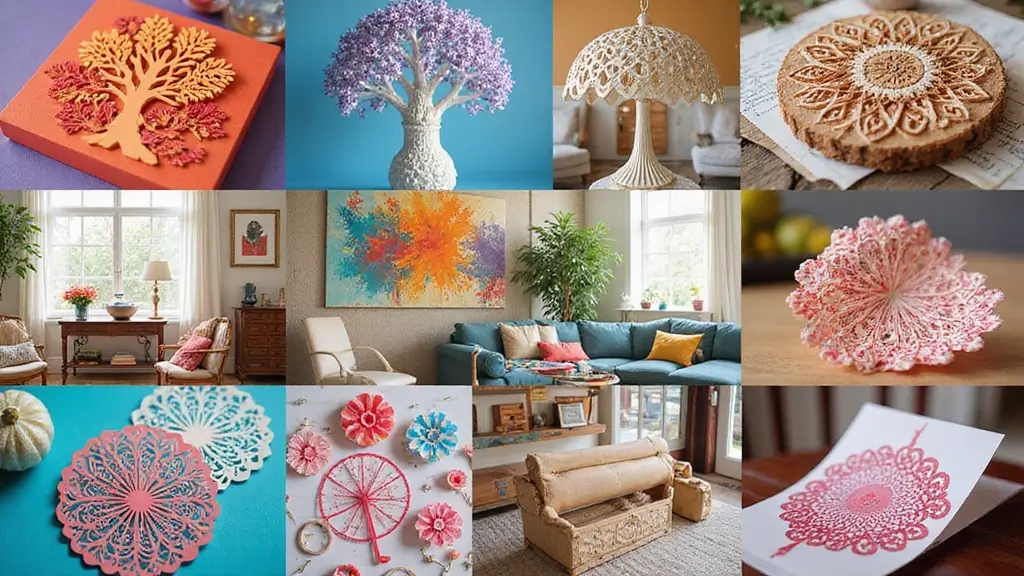
What you’ll get You will find 29 paper crafts that cover greeting cards, garlands, paper flowers, decoupage accents, and mini origami pieces. Each idea uses common supplies like scissors, glue, tape, and scrap paper you already have. The projects are designed to be doable in a short session and easy to scale up or down.
You’ll see how these paper crafts can fit real life. Use them to decorate a room, wrap a gift with a handmade touch, or give kids a satisfying activity that stays away from screens. You’ll learn practical techniques for clean folds, color layering, and turning scraps into wow touches. The ideas fit small spaces and busy schedules, so you can create something meaningful without a big mess.
Not every project will be perfect the first time, and that is fine. Paper crafts teach patience and curiosity. If you get stuck, switch to a simpler step or choose a different project. The goal is to start, have fun, and end with something you can be proud of.
Ready to dive in? Gather some paper, scissors, glue, and a little tape. Pick a project that matches your mood and try it this weekend. Use these ideas as a starting point, then mix and match to make them yours. Next steps: choose one project, give it a try, and share your results so others can get inspired.
1. Recycled Paper Beads
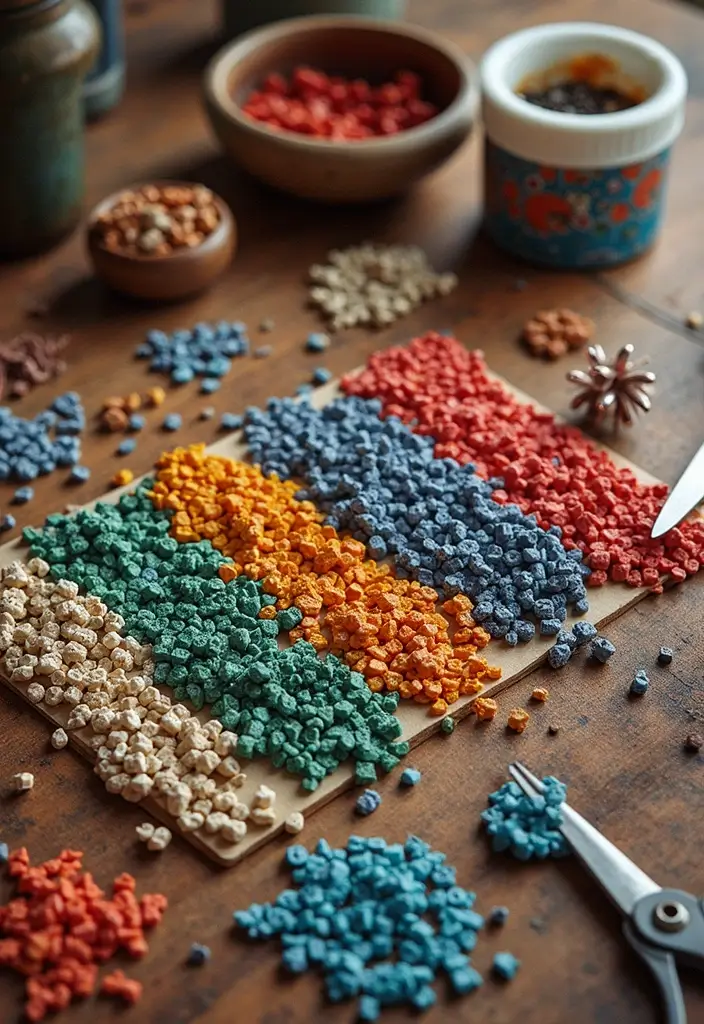
You want a quick, eco-friendly craft that looks fresh. This DIY paper beads idea turns old magazines into bright, lightweight jewelry you can wear every day. It’s a simple, satisfying project you can start now.
What you need
– Old magazines or scrap paper
– White craft glue
– Toothpicks or skewers
– Scissors
– A clear finish like spray varnish or brush-on sealant
– Optional paints or washi tape for color
Step-by-step
– Cut a long paper strip, about 1 cm wide and 6–8 cm long.
– Start at the end of a toothpick and roll tightly with clean fingers.
– When you finish the strip, seal the edge with glue.
– Slide the bead off the stick and let it dry.
Decoration ideas
– Paint the bead in bold colors or wrap with washi tape for texture.
– Add tiny dots or stripes with a marker.
– Make many beads in different sizes for a layered necklace.
Finish and care
– Coat with a clear finish to keep colors strong.
– Let your beads dry fully before stringing.
Why it helps
– This recycled craft uses waste but yields stylish pieces. You gain a small, creative win and a new accessory you can wear or gift.
Next steps
– Start with a small batch, then mix colors and sizes for bracelets or a real necklace.
2. Paper Mache Bowls
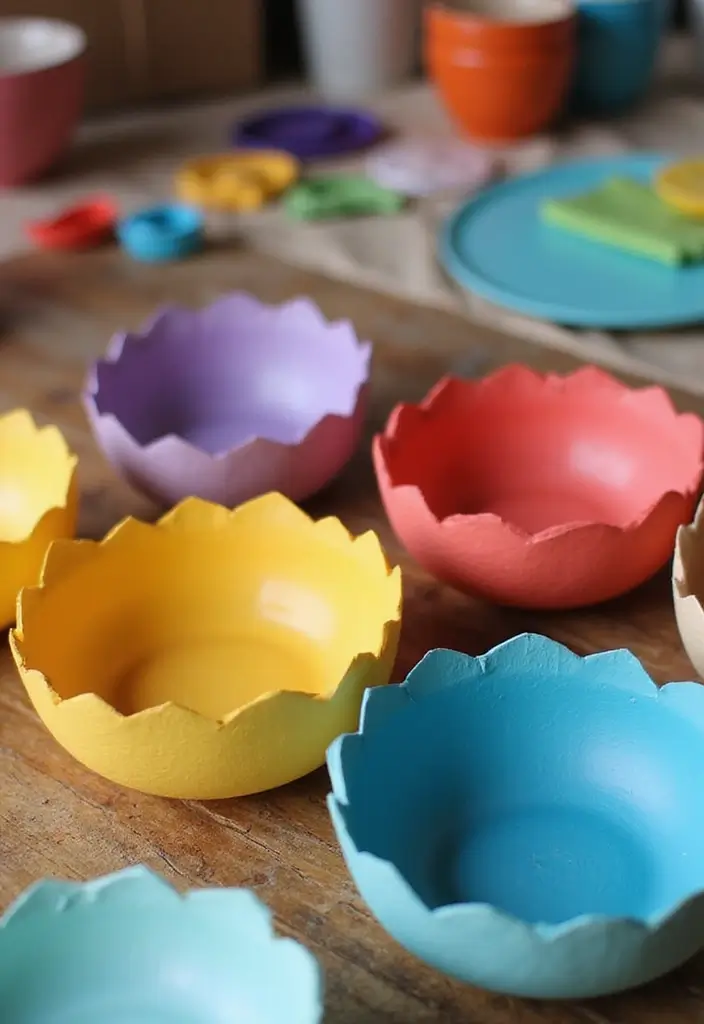
Want a sturdy, stylish bowl you can make at home? Paper mache bowls fit the bill. They can be simple or fancy and match any shelf or table. This project is calm, fun, and full of small wins.
Here is how it works:
– Choose a mold. A balloon makes a round bowl; a clean plate or bowl works too. Inflate to your desired size.
– Make a paste. Mix equal parts white glue and water until smooth.
– Tear paper. Strips of newspaper give a classic look; colored paper adds texture.
– Apply strips. Dip a strip, wipe off the excess, and place it on the mold. Smooth as you go.
– Build and dry. Do 5 to 8 coats for real strength. Let the bowl dry fully, ideally overnight.
– Finish. Gently remove from the mold, trim rough edges, then paint or seal with a clear finish. If you want a bowl for food, seal the interior with a food‑safe coating and line it.
Pro Tips
– Use a mix of papers to get rich texture.
– A tiny splash of acrylic tint in the paste can surprise you.
– Seal well for water resistance, but only use a food-safe interior if you plan to hold food.
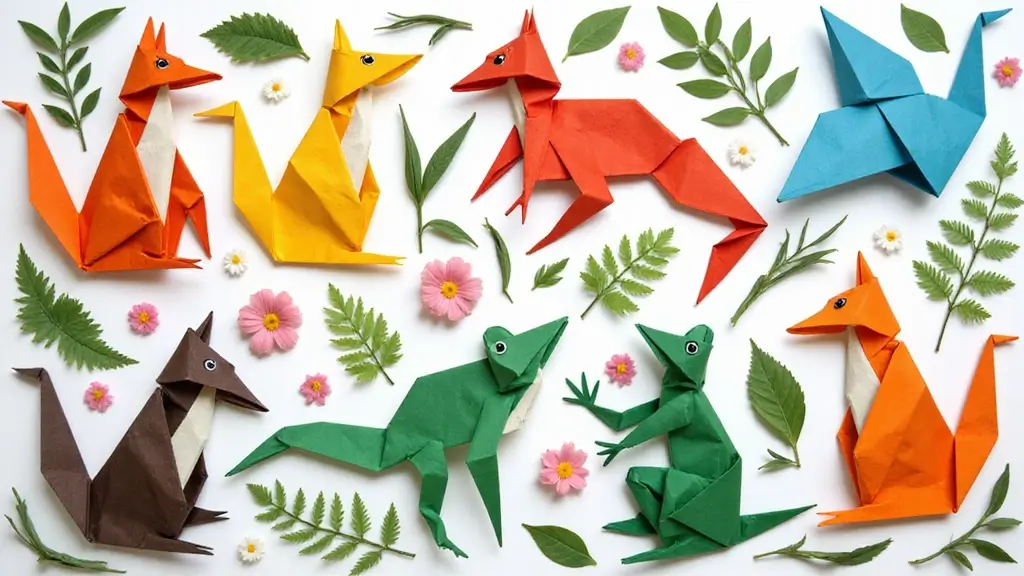
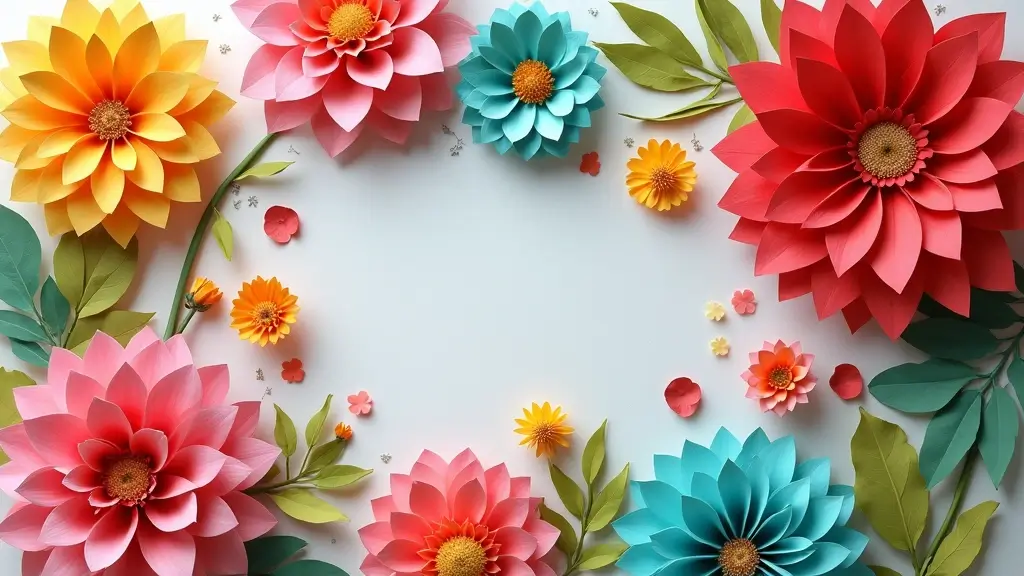
3. Origami Flower Arrangements
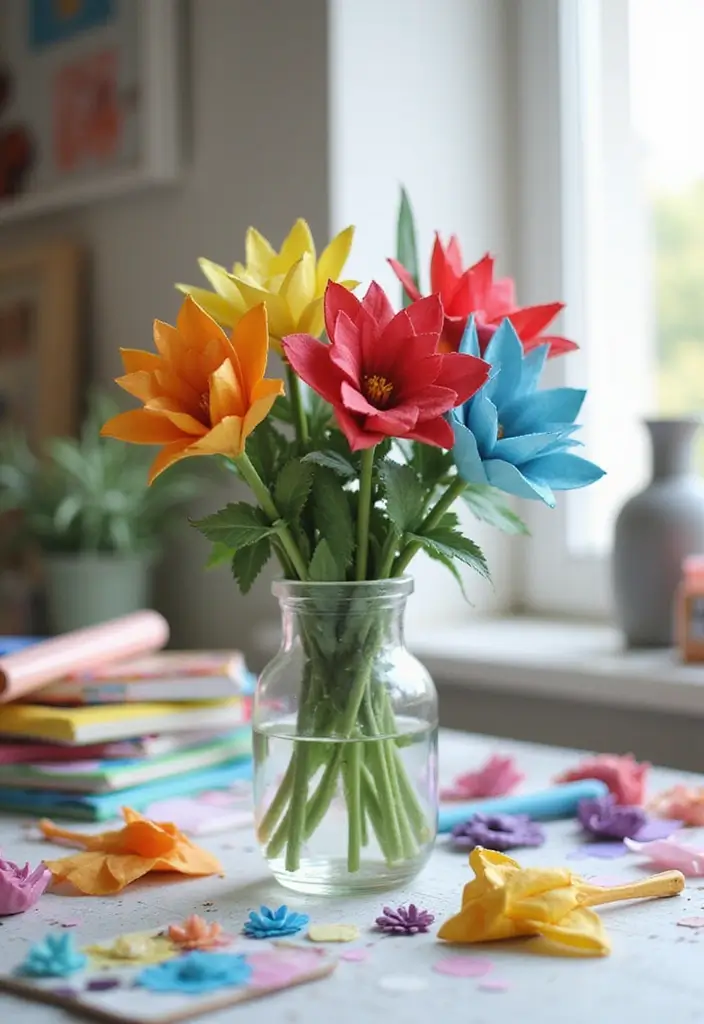
Want a floral display that lasts and looks fresh every day? Origami flower arrangements give you color you can cherish long after you finish the folds. This craft uses paper, not real petals, so your bouquet won’t wilt or fade quickly.
What you need
– Origami paper in a few colors
– Floral tape
– Thin floral wire
– Scissors
– A vase
How to create it
1) Choose two to three colors. Use lighter paper for soft petals and a heavier sheet for sturdier blooms.
2) Find a beginner-friendly origami flower tutorial. Practice a simple blossom until your folds feel steady.
3) Make the stems. Cut a piece of wire about 6 inches long. Attach the folded flower to the wire and wrap the base with floral tape.
4) Arrange in a vase. Place taller stems toward the back and shorter ones in front. Add a few leaves for a natural touch.
Helpful tips
– Mix paper weights for a layered look.
– Try different flower designs for variety.
– Thesemake thoughtful gifts or eye-catching home decor.
– This project can calm the mind when you fold slowly and focus on each crease.
Care and display
– Keep the arrangement away from moisture and direct sun.
– Store flat in a box to prevent creases when you’re not using it.
With origami flowers, you get a bright, lasting bloom you can customize for any room. Enjoy the craft and the calm focus it brings.
4. Paper Quilled Art
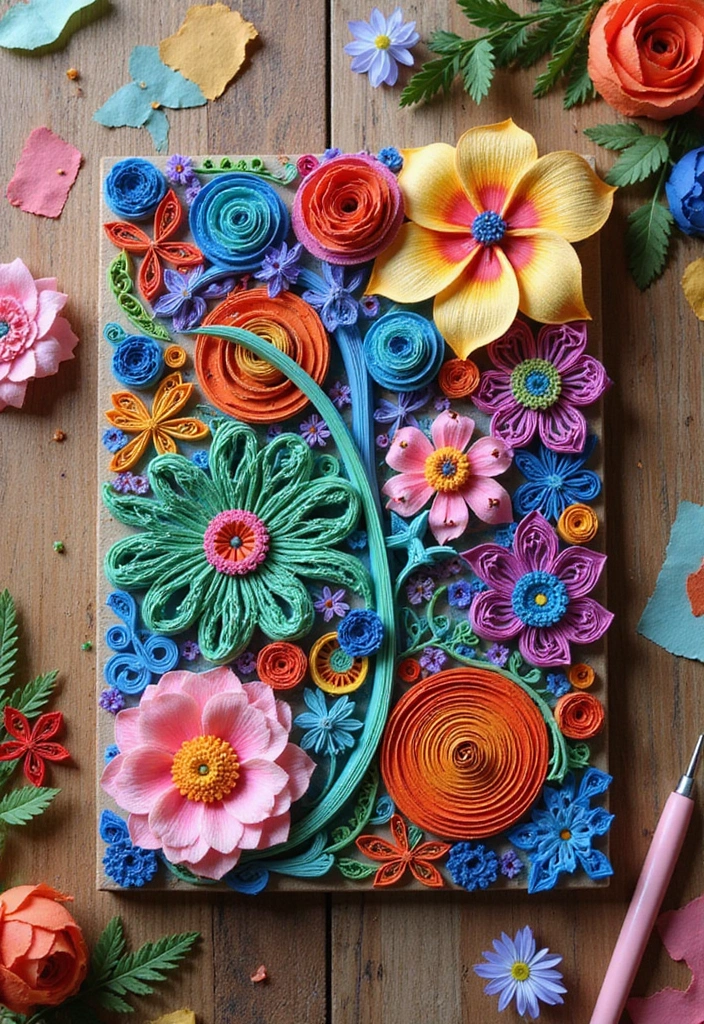
If you want a craft that looks special but stays simple, try paper quilling.
Quilling uses thin paper strips you roll, shape, and glue into small designs. You can make cards, wall art, or decorations with it. Here is why it works for beginners. You can make a lot with a few basics.
What you need
– Colored paper strips in thin widths.
– A quilling tool to roll the strips.
– Glue and a small pin or toothpick to place shapes.
– A clean, flat work surface.
How to start
– Roll a strip to form a tight coil.
– Gently pinch the coil to make a teardrop or other shape.
– Glue the pieces where you want them.
– Create more shapes by bending or curling the ends.
Tips for a better look
– Layer shapes to add depth.
– Use metallic or glitter paper for a sparkle.
– Work in small sections and let glue dry.
Projects to try
– A simple quilled flower on a card.
– A border for a photo frame.
– A tiny wall ornament with spirals.
Practice and care
– Practice a little each day to gain control.
– Keep strips flat and store them.
– Let glue dry before handling.
Next steps: start with a tiny card and build up. Have fun with it.
5. Handmade Greeting Cards
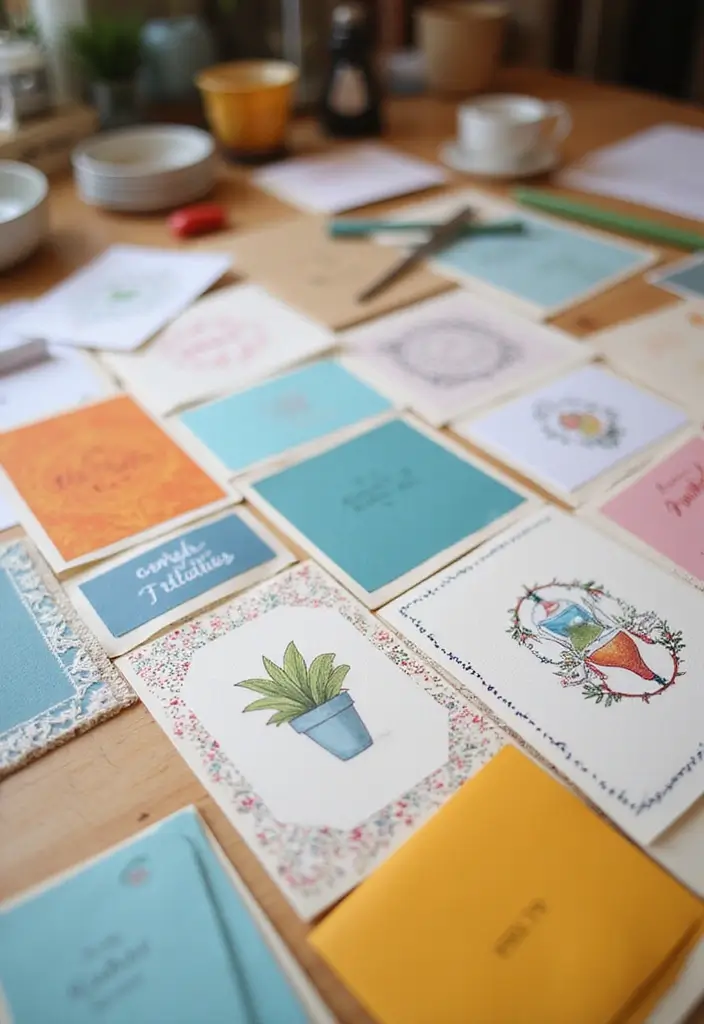
Handmade Greeting Cards
You want to show you care in a simple, personal way. A handmade greeting card can do that better than a store card. You only need a few basics: paper, scissors, and glue. Then you can add your own touch.
Here is how you can make cards that fit any occasion:
– Layer different papers to create depth. Try a bold color behind a soft pattern.
– Add small embellishments like buttons, ribbons, or stickers. A tiny charm can stand out.
– Use watercolors or markers to draw a quick scene or message. Soft washes give a warm look.
– Include natural pieces such as dried flowers or pressed leaves for texture.
Quick Tips to level up:
– Recycle old paper and scrap bits to keep costs low.
– Make a matching set of 4 or 6 cards to give as gifts.
– Keep a supply kit ready in a drawer so you can craft fast.
Why this helps you? It lets you say how you feel with words and art. Cards you make feel warmer and more real.
Want a quick plan? Pick a theme, cut two card panels, layer one on top, add a small accent, and write your note inside.
@media(max-width:480px){
6. Paper Wall Art

You want a wall that feels alive. You want a project you can finish in a weekend. This DIY wall decor project gives color and texture without a big mess. Paper wall art can be made with scraps and a few simple tools. Just you, paper, and a plan.
Materials
– old magazines
– scrap paper or colored cardstock
– glue, tape
– optional frames or nails
– stencils for shapes
Steps
– Pick a theme. Think shapes, colors, or a nature idea.
– Cut shapes. Circles, triangles, leaves, or letters.
– Make elements 3D. Fold small pieces to lift off the wall.
– Use stencils to get neat edges.
– Try a grid, a spiral, or a loose collage.
Display ideas
– Frame some pieces for a neat look.
– Hang rows of shapes directly on the wall for a casual vibe.
– Mix big and small pieces for depth.
– Change the display with the seasons or moods.
Tips
– Use strong glue or mounting tape so pieces stay put.
– Glue on a backing sheet to keep edges flat.
– Label and rotate to keep it fresh.
Next steps
– Gather supplies and start with a simple shape set.
– It is okay to start small and grow your wall later.
7. Paper Gift Wrap and Tags
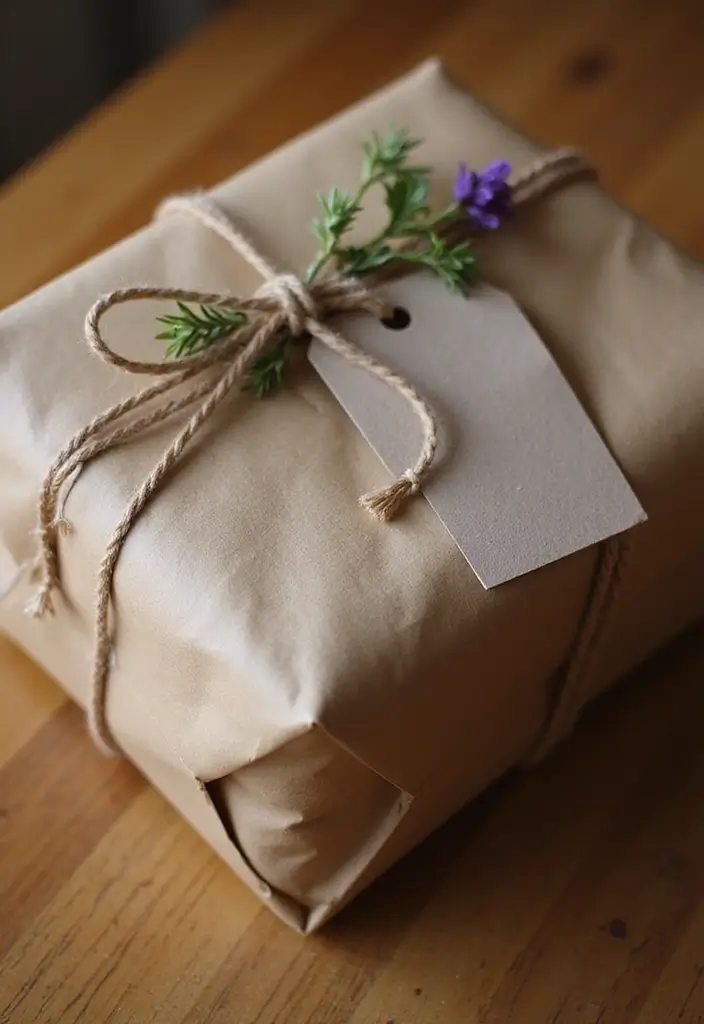
Paper Gift Wrap and Tags
Want gift wrap that feels personal and eco friendly? Handmade paper wraps and tags do the trick. Skip store wraps and use paper you already have. It saves money and makes your gifts stand out. Here is why this works for you.
– Base wraps Use plain paper as a canvas. Reuse newspapers, scrap paper, or old book pages to cover your gift. Mix prints with solid colors for depth. Add a thin strip of fabric for texture. These ideas look artsy and feel thoughtful.
– Decoration A rubber stamp creates clean patterns on plain paper. You can draw simple doodles with a marker or crayon. Keep colors coordinated with the gift theme. Small details catch the eye.
– Finishing touches Attach a tiny paper flower as a charming accent. Make the bloom from folded paper and a short stem. It adds charm without much cost.
– Tags and labeling Cut matching gift tags from leftover paper. Punch a hole and thread a string or twine. Write the name and a short message. You can print a tiny date or quote for a personal touch.
Together, these wraps cut waste and give your gifts character. You get a fresh, handmade look without buying new materials. Plus, this trend helps the planet, one wrap at a time. That simple routine fits busy days and keeps gifts personal.
@media (max-width: 600px) {
.normal-quiz-iframe { min-height: 570px !important; height: 570px !important; }
}
8. Paper Collage Artwork
Here is why paper collage can be the right craft for you. It blends color, texture, and memory into one piece you can hold and display. You can use scraps from old books, magazines, tissue paper, fabric, or even pressed flowers. The process is simple, fun, and steady. You control the look, the mood, and the pace.
Let’s break it down into simple steps.
– Gather materials: colorful paper, magazines, tissue, fabric scraps, scissors, a glue stick for quick hold, a bottle of white glue for strength, a brush or card to press, and a frame if you want a polished finish.
– Plan design: you can sketch a rough layout or just start layering. Try a landscape, a bold pattern, or a collage of shapes that spell out a word.
– Layer and glue: place large shapes first, then tuck in small pieces. Use the glue stick to tack pieces, then add a light dab of liquid glue on the edges for staying power. Press each piece flat with a clean cloth.
– Add texture and depth: mix matte and gloss papers. Add a scrap of fabric for weight, or a dried petal for a natural touch.
– Finish and display: seal lightly if you want, then frame it. A simple frame makes it feel gallery ready.
Tips: Texture and contrast matter. Placement guides the eye. Care keep out of direct sun to prevent fading.
Next steps: try a small card collage, then move to a bigger board. You’ll feel calm, focused, and proud of what you create.
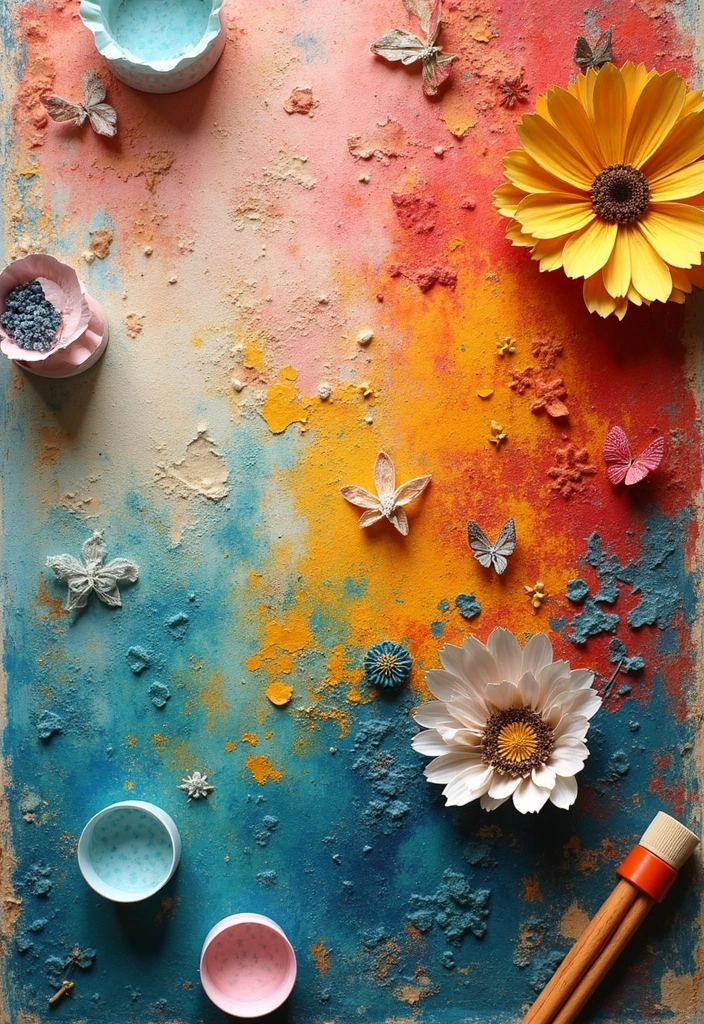
9. Eco-Friendly Party Decorations
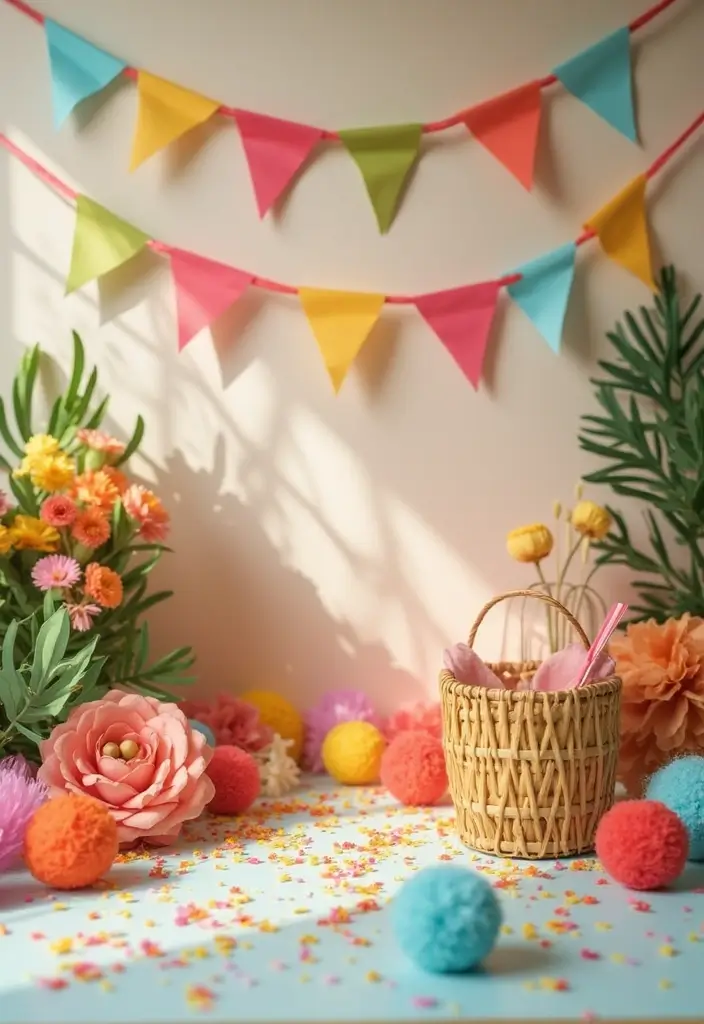
Are you hoping for party decor that shines without creating waste? You can reach that with simple paper crafts. Use recycled sheets and kraft paper, then recycle or compost the leftovers after the celebration.
You can craft banners, pennants, and table centerpieces from material you already have. Color them with natural dyes or plant-based paints. When the party ends, scraps go back to the bin or compost.
Here is how to start.
– Paper choices: Pick recycled paper, post-consumer scraps, or kraft stock. These keep costs down and waste low.
– Textures: Mix tissue paper with kraft for depth and contrast.
– Colors: Try natural dyes from beets, turmeric, spinach, or onion skins for soft, earthy tones.
– Kids’ help: Let kids cut shapes, punch holes, and thread pieces onto strings.
Projects you can try this weekend
– DIY pennant banner: Cut triangles from recycled colored paper. Punch two holes at the top. Thread with string and hang along a wall or doorway.
– Rosette centerpiece: Fold paper into small fans or rosettes. Secure to a lightweight base or vase for a simple table focal point.
– Circular garland: Gather scraps, cut circles, punch holes, and string in a repeating pattern.
Sustainability tips
– Reuse decorations at future parties. Store flat, then unfold and hang again.
– Tie pieces with twine instead of plastic fasteners.
– Label scraps so they go to the right bin: compost for organic scraps, recycle for paper.
Limitations you should know
Natural dyes may fade with sun. Light colors can stain if exposed to moisture. The look may be softer than new plastic decor, but it beats waste.
Next steps
Pick a color palette, grab recycled paper, and start crafting. Your party will look fresh, and the planet will thank you.
@media(max-width:480px){
@media (max-width: 600px) {
.visual-quiz-iframe { min-height: 995px !important; height: 1100px !important; }
}
10. Paper Suncatchers
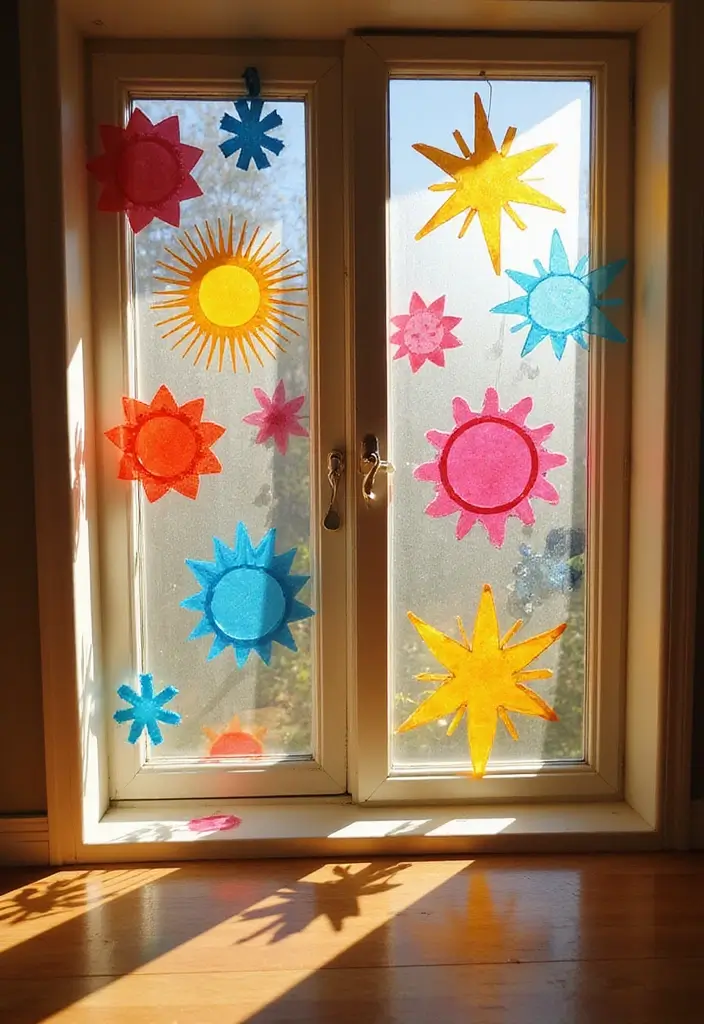
Want a quick, cheerful decor project you can finish in one afternoon. Paper suncatchers catch sunlight and spill color across your windows.
Materials
– Colored tissue paper in several shades
– A clear sheet such as wax paper or thin plastic
– White glue or clear craft glue mixed with a touch of water
– Scissors and string for hanging
– A flat workspace
How to make them
1) Cut or tear tissue into small shapes. Keep shapes simple.
2) Brush a thin layer of glue on the clear sheet. Lay color pieces on top. Press gently.
3) Let the glue dry completely. Cut out the shape you want. Attach a string and hang in a sunny window.
Tips for best results
– Layer colors for deeper tones.
– Choose shapes that fit your window size.
– Use pastels for a soft glow or bright primaries for a bold look.
– Try hanging a few in a row for a mini rainbow.
Why this works
– Tissue paper is affordable and easy to layer.
– The sun makes the colors pop and creates a stained-glass feel.
– The project is safe for kids but still satisfying for adults.
Next steps
– Try seasonal shapes like stars or hearts.
– Store scraps for quick updates later.
– If you want added durability, seal with a clear sheet before cutting.
Give it a try this weekend.
11. Paper Flower Wreaths
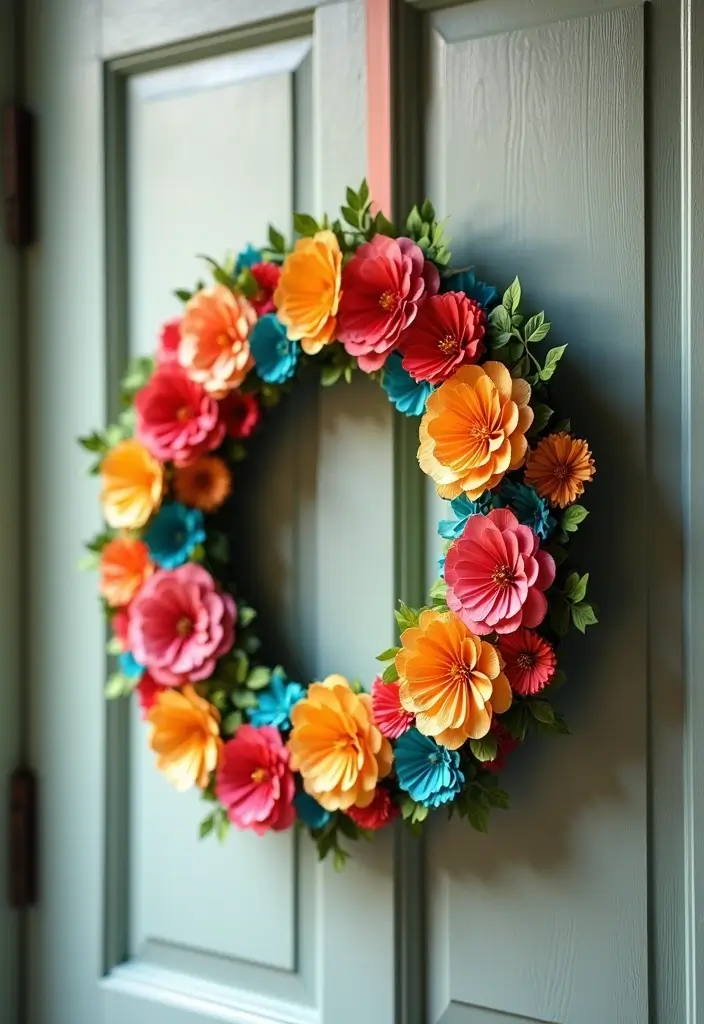
Thinking of door decor that fits every season? Paper flower wreaths bring color and charm to your home in a simple, affordable way. They’re light enough to hang easily and quick to refresh when the weather changes.
Here is why this craft works for busy homes:
– Low cost and no fuss.
– Quick to finish, even on a weekend.
– Simple to customize with your favorite colors.
– Lightweight, so it’s easy to hang on any door.
Materials
– Foam wreath base or sturdy cardboard ring
– Colorful cardstock or scrapbook paper in your chosen palette
– Scissors and a circle punch (optional)
– Craft glue or hot glue gun
– Natural touches like twigs, leaves, or small pinecones
– Ribbon or string for hanging
Steps
1) Cut paper into flowers in different sizes.
2) Make blooms by layering petals for depth.
3) Place the largest flowers first on the wreath as anchors.
4) Fill gaps with smaller blooms and a few natural accents.
5) Glue everything in place and add a ribbon loop for hanging.
6) Finish with a light spray or seal to help colors last.
Seasonal ideas
– Spring: pastel blossoms for a fresh look
– Summer: bright, bold colors for sunny days
– Fall: warm tones and leaf accents
– Winter: soft whites with a touch of metallic
Tips
– Vary flower sizes and colors for a dynamic feel.
– Use a foam base for easy attachment and support.
– Add twigs or leaves for a rustic touch.
Next steps: gather supplies, pick a color scheme, and start crafting your own seasonal wreath.
12. DIY Paper Coasters

Want a simple way to protect your table and add style? DIY paper coasters from cardboard or thick paper do the job. They’re cheap, easy to make, and you can match them to any room.
What you need
– sturdy paper or thin cardboard
– scissors
– glue
– a sealant to make them last
– decorations: magazine clippings, photos, patterned paper, or plain paint
– optional cork or felt backing
How to make
Here is why this works. Cut your shapes first. Layer papers for texture if you like. Glue pieces down flat and press to remove air pockets. Let the glue dry a bit before moving on.
Finish and personalize
Next steps. Coat with a waterproof sealant to stop spills from soaking in. You can spray or brush on a thin layer. Let it dry completely. Add a personal touch, like initials or a short message, to turn a coaster into a gift.
Tips for eco friendly crafts
Reuse scraps and opt for recycled magazines. Glue a cork or felt pad on the bottom to protect tables. Store coasters flat so they stay straight.
These coasters brighten a room and protect surfaces. They work with many styles and are easy to make on weekends.
13. Handmade Notebooks and Journals
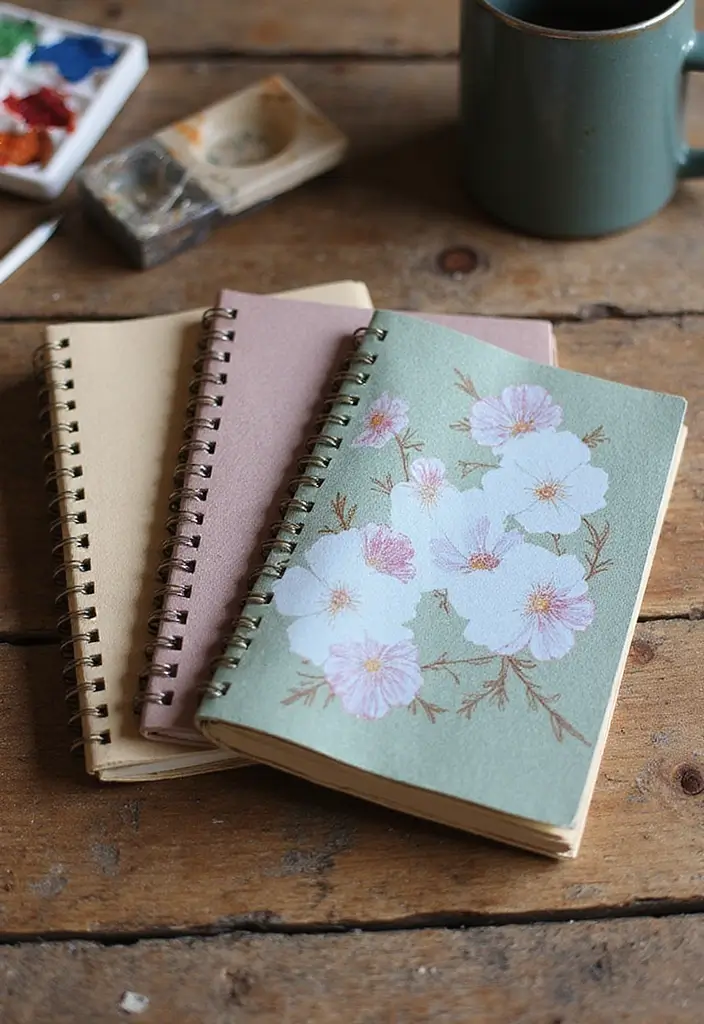
Want a notebook that fits your life and lasts through your ideas? A handmade notebook does just that. It uses pages you choose and a cover you design. Scrap paper for pages gives texture. Decorative cardstock for covers adds color and strength. You decide how thick it is. You control the look. Let’s break it down.
Here is why this works. The notebook matches your style. The process is calm and rewarding. You hear the stitch or the bind, and it feels real.
What you need
– Scrap or printer paper for pages
– Decorative cardstock for covers
– A binding option: needle and thread, staples, or glue
– Simple tools: scissors, ruler, and a pen
How to put it together
– Gather pages in the right order
– Trim edges for neat margins
– Bind with your chosen method. Staples are fast. A pamphlet stitch is simple. Glue is quiet but sturdy
Decorate the covers
– Draw a scene, collage photos, or stamp patterns
– Add a title, your name, or a small motif
– Seal with a light spray or clear tape to protect the art
Next steps
– Try mixed papers for lively pages
– Reuse old magazines or folders to save materials
– Carry your notebook with a pen in a pocket sleeve
This is not just practical; it’s a fun, satisfying craft you can finish in an afternoon.
14. Paper Stencils
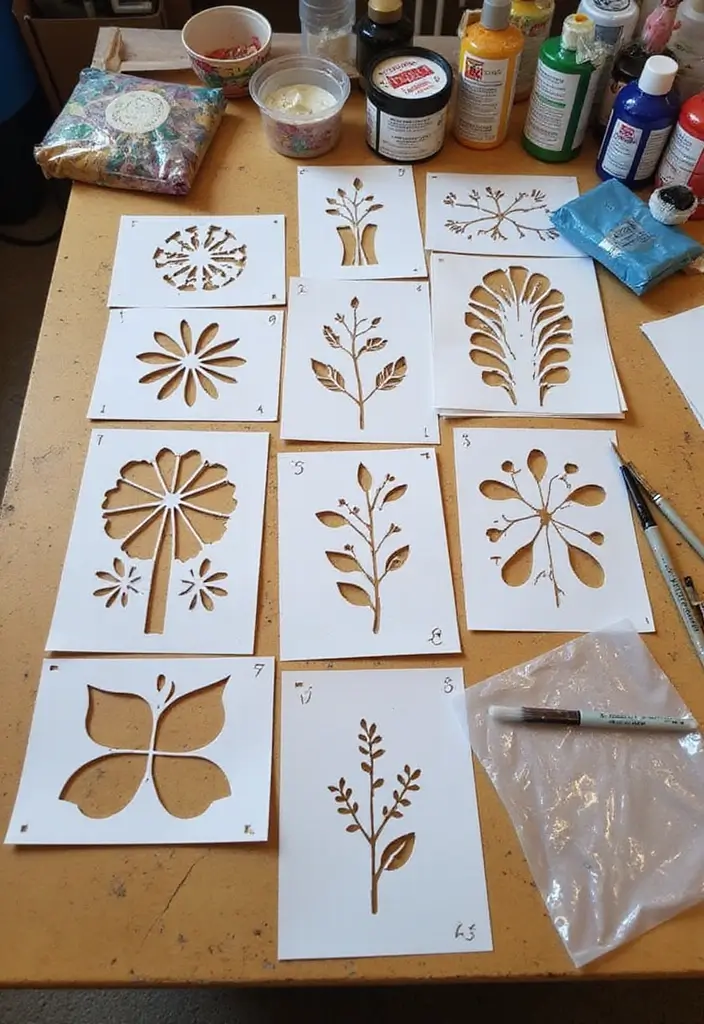
You want to add pattern to your crafts without buying new stencils. Paper stencils cut from lightweight cardstock give you clean shapes you can reuse. This DIY stencil idea lets you choose the look, from bold lines to soft hints. You gain control and save money.
Materials
– Lightweight cardstock
– Sharp craft knife
– Cutting mat
– Stencil brush or sponge
– Painter’s tape
– Spray paint or regular craft paint
How to make a stencil
1) Sketch a simple shape on paper or print a design.
2) Place the cardstock on a cutting mat.
3) Cut along the lines slowly with a sharp knife.
4) Lift the cut piece and test the stencil on scrap paper.
5) If needed, trim extra bits for a clean edge.
Creative ideas
– Layer several stencils for depth and texture.
– Lightly spray for quick color; press more for stronger shade.
– Use negative space to reveal the base surface.
– Try mixed patterns on one project for a custom look.
Storage
Keep stencils in a binder with page protectors. Label by design so you can find them fast. Store flat to avoid warping.
Where to use
Apply them to cards, fabric, wood, or walls. Hold it flat, dab gently, and lift straight up.
Clean with mild soap after use.
15. Paper Dolls and Figures
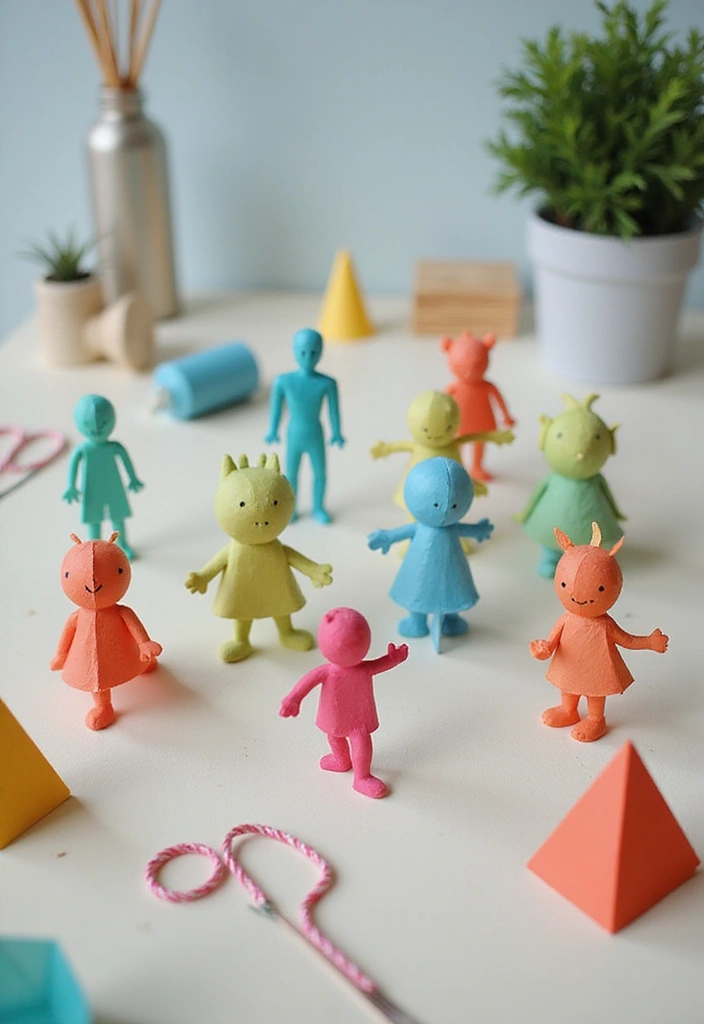
You want a craft that sparks imagination and feels doable. Paper dolls and figures fit the bill. They work for kids and for adults who love a simple project.
Here is why this works: it uses easy supplies, quick finishes, and room to tell a story.
– Start options: pick a template you like or draw your own characters. A friend’s favorite hero, a tiny animal, or a fashion figure: anything goes.
– Build with paper: cut shapes from colored paper. Use markers to add faces, clothes, and tiny details. Glue or tape to layer pieces for depth.
– Add texture: try scraps of fabric, yarn, or stickers. Keep shapes simple so it’s easy to finish.
– Make it magnetic (optional): attach a small magnet with tape or glue so figures cling to a fridge or board.
– Set a scene: create a backdrop. Draw a room, a stage, or a park setting. A scene adds story power and makes display fun.
Next steps: set up a mini studio. Invite friends for a show-and-tell or a mini fashion week using the dolls.
– Tips:
– Keep supplies kid-safe and easy to handle.
– Use reusable storage for outfits and props.
– Capture ideas by photographing the set.
The payoff is clear. You’ll see imagination bloom, better fine motor skills, and more storytelling play. This craft stays simple, adaptable, and fun.
If you’re in a hurry, finish one doll in under 15 minutes. If you have time, grow a full cast and a little town.
16. Paper Mosaics

You want a craft that fits any skill level and helps you focus. Paper mosaics give you that. Tiny bits of color come together into a big picture you can hang. This project can feel soothing and fun at the same time.
What you make
A mosaic uses many small shapes glued to a sturdy base. You arrange pieces to create a picture or pattern.
Here is why it works. Big tasks become small steps, so you stay steady and proud.
What you need
– Colorful paper in different textures
– Scissors and a clean workspace
– White glue or a glue stick
– A thick base like poster board
– Tweezers for tiny scraps (optional)
– Pencil and ruler for quick guides
How to build it
– Start with a simple idea, such as a sun, leaf, or abstract shapes
– Lightly plan the layout by placing pieces on the base without glue
– Add depth by mixing textures and overlapping edges
– Glue pieces edge to edge and press until they sit flat
Here is a clean way to think about it: work from one corner toward the opposite side so nothing shifts.
Next steps
– Let the glue dry completely
– Frame the piece or mount it on a mat for a neat display
Common questions
– What size base works best? A 6 by 6 inch square is a good starter
– How do I keep pieces from shifting? Use a light touch and steady presses
– Can I reuse scraps? Yes, save leftovers for future mosaics
End result: a personal, textured artwork you can proudly display.
17. Paper Jewelry
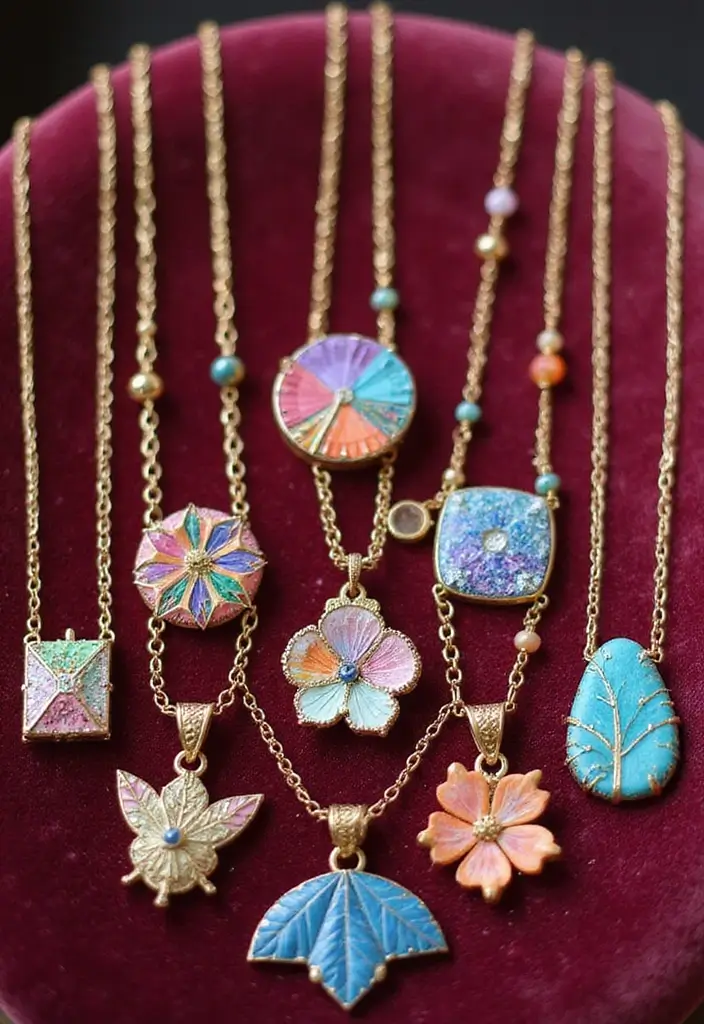
Paper Jewelry That Means Style Without Waste
You want jewelry that looks great and respects the planet. DIY paper jewelry fits. It’s light to wear, cheap to make, and easy to customize.
Here is why it works for you. You can turn everyday paper into tiny beads. You can craft necklaces, earrings, and bracelets from the same method. Now, let’s break it down into steps.
– Pick paper: Choose metallic or patterned paper for shine. Double sided paper looks good on both sides.
– Cut and roll: Cut thin strips, about 1 cm wide. Roll tight to form beads. Glue to hold.
– Seal and protect: Apply two light coats of varnish. Let dry between coats. Seal keeps frays away and adds strength.
– Assemble: String beads on sturdy thread or thin wire. Add a few beads or a small wire accent to finish a necklace or earrings.
– Finishing touches: Mix in beads or charms for a polished look. Create matching sets for gifts or special occasions.
Be honest about limits. Paper jewelry may not stand up to heavy water or rough play. Treat it well, and it shines.
Next steps: start with a simple pair of earrings to practice.
Here are quick variations you can try today. Add tiny square beads, long tubes, or flat pendants. Use spring colors or bright metallics.
@media(max-width:480px){
18. Mini Paper Notebooks
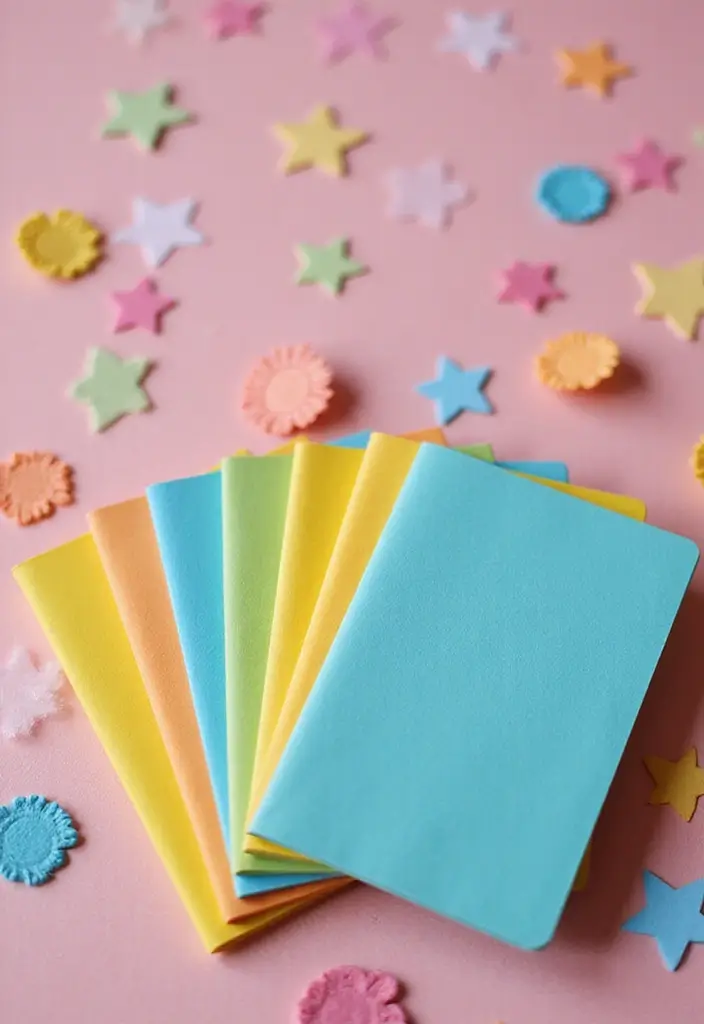
Do you need a tiny notebook you can grab on the go? Mini paper notebooks give you a place to jot thoughts, lists, or doodles anywhere. They reuse scrap paper and leftover card stock, so you waste nothing. Here is how to make them.
What you need
– You can use scrap paper kept in your stash.
– Leftover card stock can serve as a cover.
– A stapler is needed.
– Scissors or a craft knife help.
– Optional: washi tape, markers, or doodles for decorating.
How to do it
1) Fold a stack of pages in half to your desired size.
2) Cut the stack to the exact width you want for the spine.
3) Stack pages flat, place the cover on top, and staple along the spine.
4) Trim any loose edges.
Creative twists
– Decorate the cover with washi tape or simple doodles.
– Pick themed papers for weddings, holidays, or gifts.
– Make a family set in different sizes and colors.
Why you’ll love it
– Easy to make, cheap, and portable.
– Encourages daily note taking and creativity.
– It makes a thoughtful, handmade gift.
Use it for quick journaling, to-do lists, or small recipe ideas. Slide a note under the cover or tuck a tiny pencil in the spine so you never hunt for a pen. You can bundle a few as a neat gift for birthdays or holidays.
Next steps
Grab papers you already saved, try two sizes, and see which works best for you. Try two different sizes and compare how they feel.
@media(max-width:480px){
19. Paper Animal Masks

Want a quick, fun mask project you can finish in one sitting? You’ve got it. Paper animal masks are perfect for a party or a cozy afternoon at home. They’re easy to tailor with colors and textures, and they look great in photos.
What you’ll neednn- Colored paper in bright shadesn- White or black paper for eyes and nosesn- Scissors and glue or tapen- Elastic cord or ribbon to wear the maskn- Markers, crayons, or paintn- Decorative bits like sequins, buttons, or googly eyesn- Optional textures: faux fur, felt, or feathersnnHow to build itnn- Step 1: Pick an animal and plan a simple base shape. A circle can be a fox’s face or a bear’s head, while an oval works for a cat or dog.n- Step 2: Cut the base from colored paper. Add ear shapes from extra paper and glue them on top.n- Step 3: Glue on a nose, eyes, and a mouth. Draw details with markers for tiny whiskers or fur lines.n- Step 4: Decorate with texture. Tear small strips of paper for fur, glue on faux fur patches, or add feathers for a bird mask.n- Step 5: Attach a strap. Punch two holes on the sides or tape an elastic cord. Put it on and measure to fit your head.n- Step 6: Let the glue dry, then try the mask on again. Make any tiny tweaks so it sits comfortably and stays in place when you move.nnTips to shine a bit brighternn- Mix flat color with texture to add depth. A furry patch here and a shiny sequin there catch the eye.n- Use safe scissors and help little ones with cutouts. Keep the activity kid-friendly.n- Host a mask-making mini party. Put out colors, papers, and strings, and invite friends to trade ideas and designs.nnWays to use your masksnn- Great for costume parties, photo booths, or pretend play at home. Kids love acting out animals for stories or skits.n- A simple, evergreen craft that fits birthdays, school projects, or rainy days. It’s easy to save a mask as a keepsake for later.nnNext steps: pick a favorite animal, gather supplies, and start cutting and decorating. You’ll have a fun, wearable piece in no time.
@media(max-width:480px){
20. DIY Paper Puppets
Want a quick, fun way to tell stories at home? DIY paper puppets bring your tales to life in minutes. You can use a paper bag as a body or a popsicle stick as a frame. Then you act with the puppet and your imagination.
Here is why this works for you:
– It costs little and uses simple, common materials.
– It travels well for playdates or car rides.
– It builds focus, storytelling, and control of your hands.
Let’s break it down into two simple builds.
Materials
– Paper bags or popsicle sticks as bases
– Construction paper for heads and bodies
– Markers, crayons, or paint
– Glue, tape, scissors
– Recycled scraps like fabric bits, bottle caps, yarn
Bag puppet steps
– Cut a head from paper and glue it to the bag
– Add a body and sleeves with extra paper
– Color the face and clothes with markers or paint
– Add simple details with scraps
Stick puppet steps
– Cut head and body shapes and tape to a popsicle stick
– Draw eyes, nose, and mouth
– Dress with scraps or paper clothes
– Let dry before playing
Next steps
– Stage a small show on a box
– Practice a short script and give each puppet a voice
– Store your puppets in a small box
@media(max-width:480px){
21. Papercraft Models

You want papercraft models that look neat and real. You want a project that fits your schedule. Papercraft can work with a simple plan. Here is a path you can follow.
– Materials
Heavier paper or cardstock (160–220 gsm). Printable templates or a page to draw your own design. A sharp hobby knife, a metal ruler, and glue. Markers or paint for finishing touches. Optional extras: cutting mat, scoring tool, and double-sided tape.
– Steps
Pick a template or sketch a small scene. Print on sturdy paper. Cut along the lines. Score folds, then fold and glue the tabs to form the shape. Do a dry fit before you glue to check.
– Tips
Use thick paper for stability. Score lines for crisp folds. Add tiny details after with a fine marker or dab of paint. Keep edges clean by trimming carefully. Masking tape can hold parts as glue dries.
– Community
Join online papercraft groups. See other builds, share yours, and ask for tips. Look at Pinterest boards or YouTube tutorials to gain ideas.
– Reality
Some models take time. Mistakes happen. Start easy, then move to tougher designs as you learn.
With practice, you will build fast and clean.
22. Paper Bible Journaling

If you want a calm, creative way to study faith, this is for you. Paper Bible journaling blends reflection with simple art. You turn verses into pages you can read again.
Here is why it helps: it slows you down, keeps a moment of prayer, and makes your notes easy to revisit.
What you’ll need
– A Bible with wide margins or a plain notebook
– Glue or tape, pencils, and a small brush for color
– Washi tape, stickers, and light scraps for collage
– Color tools like colored pencils or watercolors
Steps to start
1) Choose a verse that speaks to you. Read it slowly.
2) Plan the page with a light pencil. Decide where the verse sits and where a small image fits.
3) Add color and art. Try a tiny doodle, a border, or a soft color wash.
4) Write a short reflection, prayer, or takeaway next to the verse.
5) Date the page and keep it with your Bible or journal.
Tips to keep it simple
– Frame lines with washi tape.
– Test colors on scrap first.
– Use light layers to protect thin pages.
– Keep sessions short if you’re busy.
Theme ideas
– Focus on one book or story, page by page.
– Try monthly themes like gratitude or trust.
Common questions
– Do I need a fancy Bible? Not necessary. A regular Bible works, or use a separate journal.
Next steps
– Set a tiny goal each week. One page, one verse.
– Snap a photo of your page to share with friends.
@media(max-width:480px){
23. Paper Photo Frames
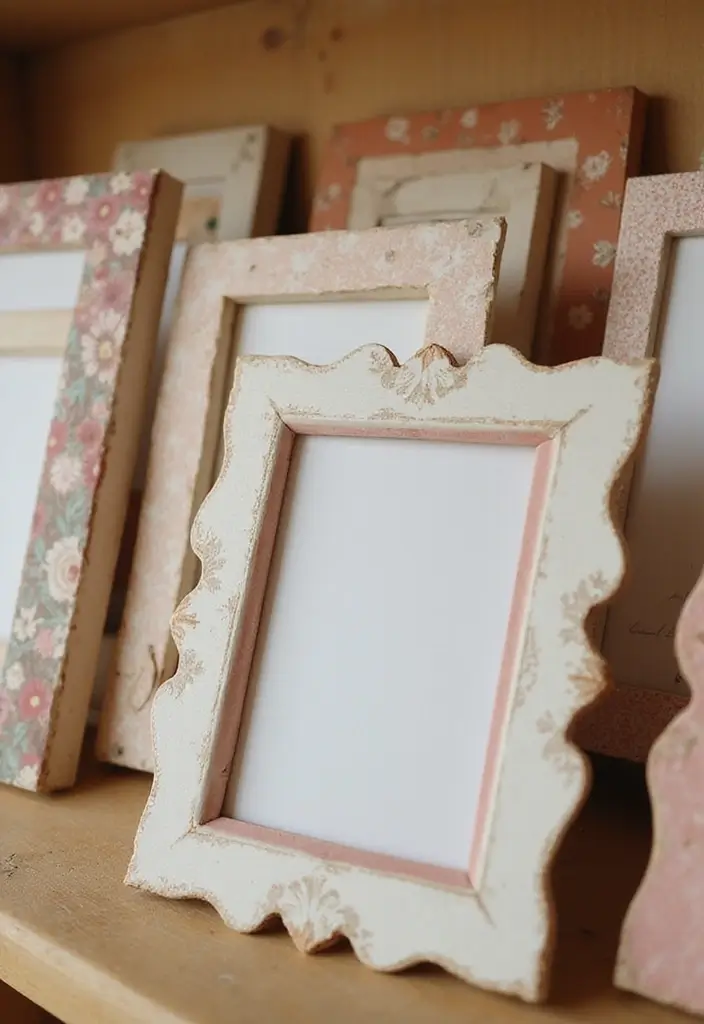
You want a quick, affordable way to show your memories without buying new frames. Paper photo frames are simple to make and easy to tailor to your style.
What you need
– sturdy cardboard or thick cardstock
– scissors and glue
– decorative paper, paint, markers, or stickers
– a photo or two you want to display
– optional: ribbon, washi tape, or twine for hanging
How to make them
1) Cut a piece of cardboard a bit larger than your photo. Then cut a window in the center that leaves a one- to two-inch border.
2) Glue a backing piece of cardboard to hold the photo. If you want the photo to spin or sit, use a small stand or a folded tab on the back.
3) Decorate the front. Try paint, collage paper, doodles, or floral prints. Let it dry.
4) Add the photo and seal with a clear sticker or thin tape. Hang or place your frame where light hits softly.
Here is why this works: paper frames are light, cheap, and quick to swap as your photos change. Try different shapes—circle, heart, or square—for variety. Create a set of matching frames to build a mini gallery wall.
Next steps: pick a corner of your room, mount frames with a simple string or command hooks, and swap photos as memories grow. This project blends craft with everyday display.
@media(max-width:480px){
24. DIY Paper Magnets

Want a fresh look on your fridge? DIY paper magnets let you show art, notes, and photos in a snap. You pick colors and shapes, and swap them anytime. They spark ideas for both kids and adults. Here is why they work: they use scraps you already have, they are fast to make, and they stick to metal firmly.
Materials you need
– Small magnet sheets cut to your size.
– Colorful scrap paper from old cards, gift wrap, or magazines.
– Strong craft glue or double-sided tape.
– A clear sealant to protect the surface.
How to make them
– Cut the paper and magnet to the same shape.
– Glue the paper to the magnet with a thin, even layer.
– Layer two papers for depth if you like.
– Let it dry completely.
– Experiment with different shapes like circles or hearts.
Design ideas
– Seasonal sets: leaves and snowflakes.
– Photo or word magnets: tiny quotes.
– Tiny art: doodles or mini drawings.
Next steps
– Gather scraps and magnets, and make a themed set this weekend.
– Show your work to friends and trade ideas.
Care tips
– Let glue dry completely before use.
– Keep magnets dry to avoid rust.
– If edges lift, reattach with a thin layer.
– Reuse scraps for new magnets later.
25. Paper Table Centerpieces

Want a dinner table that feels fancy without a big price tag? Paper centerpieces can do that. They catch the eye and set a warm mood for any meal, party, or special night. Here is why this works: you can mix colors, shapes, and lights to fit your scene. Let’s break it down and make your table shine.
What you need
– Heavyweight paper or cardstock for stability
– Scissors and glue or tape
– A sturdy base like a small foam block or bottle cap craft stand
– Tiny LED lights or fairy lights
– Colorful accents such as metallic paper or ribbons
Style ideas to try
– Paper flowers that rise in height
– Lanterns cut from thin paper with a simple fold
– Themed cutouts like leaves for fall or stars for a party
– Soft color palettes with a hint of shine for a modern look
Smart setup tips
– Use pieces at different heights for depth
– Place lights inside or behind the paper for a gentle glow
– Keep bases steady so the centerpiece won’t tip
– Match colors to your tablecloth and guests’ outfits if you can
Step by step
1) Cut simple shapes and curl the edges for real texture
2) Build small stacks or fans to add height
3) Attach pieces to the base with glue or tape
4) Add a battery LED light for a warm glow
Next steps. You’re ready to create a beautiful, reusable centerpiece that fits any gathering.
@media(max-width:480px){
26. Paper Newsletters and Journals
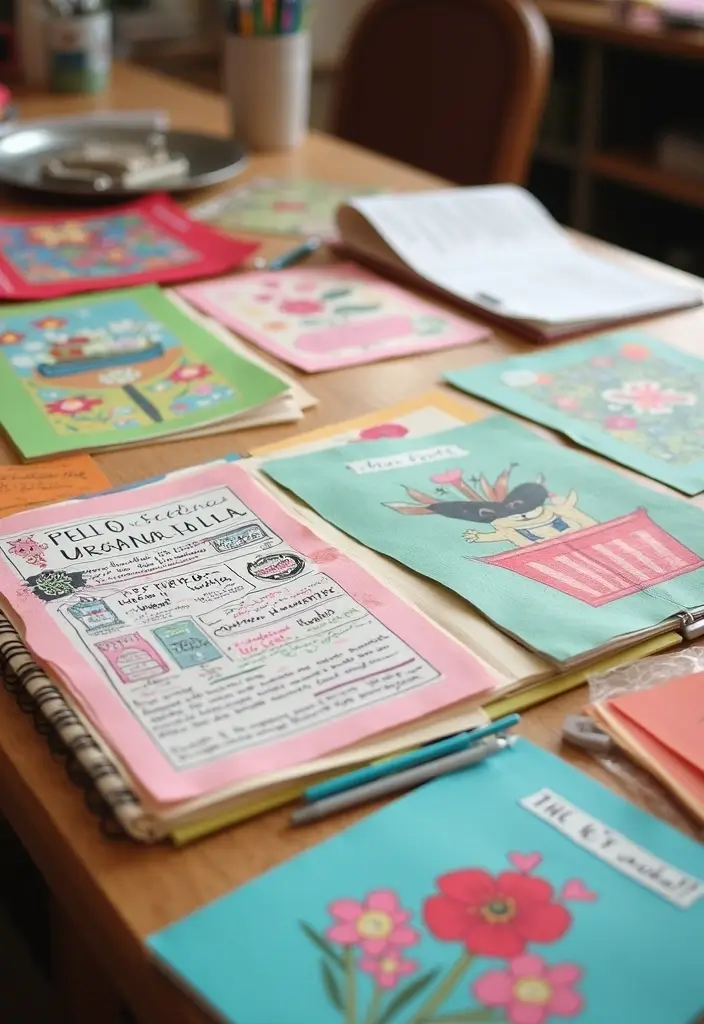
Want a simple way to share ideas and stay close with friends? A paper newsletter or journal can do it. It brings a hands-on feel to news, art, and notes. You create something you can touch and share.
Here is why this project works. It is cheap, flexible, and friendly to beginners. You choose the size, colors, and pace. People notice the craft as much as the words.
What you need
– Colorful sheets of paper or a small notebook
– Glue, scissors, ruler, stamps, markers
– A stapler or needle and thread for binding
– A pen or printer for text
How to make it
– 1. Pick a size and layout.
– 2. Draft a few columns for news and a little art.
– 3. Add quotes, doodles, or photos.
– 4. Invite family or friends to contribute.
– 5. Print, fold, and bind.
Ways to share
– Local cafes, library cork boards, or community centers
– Your social feeds, email, or a mini blog
– A monthly or weekly rhythm to keep it alive
Tips to boost engagement
– Include a reader page for letters
– Mix news with art for variety
– Keep issues light and positive
Keep expectations realistic and fair. A paper zine grows slowly.
Next steps
Next steps: Grab paper and start. Sketch a two-page mockup. Ask a friend to submit a piece. Pick a publish date and go.
@media(max-width:480px){
27. DIY Paper Chains

DIY Paper Chains: Quick, Colorful Garlands
Need a fast, affordable way to decorate for a party or brighten a room? DIY paper chains are perfect.
What you need
– Colored paper strips
– Scissors
– Tape or glue
– A ruler and pencil (optional)
– String or fishing line to hang
How to make them
– Cut strips about 1/2 to 3/4 inch wide and 8 to 12 inches long.
– Form a loop with one strip and tape the ends.
– Thread the next loop through the first and pull tight so the links stay together.
– Repeat to create a chain of any length you want.
Tips and ideas
– Make color bands by arranging strips in a chosen order.
– Create a gradient by fading from light to dark.
– Use different strip sizes for a full look.
– Try double layers for more strength.
Ways to use this craft
– Drape the garland across a wall, mantel, or under a ceiling.
– Hang from the ceiling for a party mood or as a photo backdrop.
– In classrooms, use the chains to teach counting, colors, or sequencing.
Safety and age range
– This project works for many ages, with adult help for younger kids.
Next steps
– Pick your color scheme, gather supplies, and start linking. You’ll have a quick decoration that you can reuse for many occasions.
@media(max-width:480px){
28. Paper Scrapbook Pages
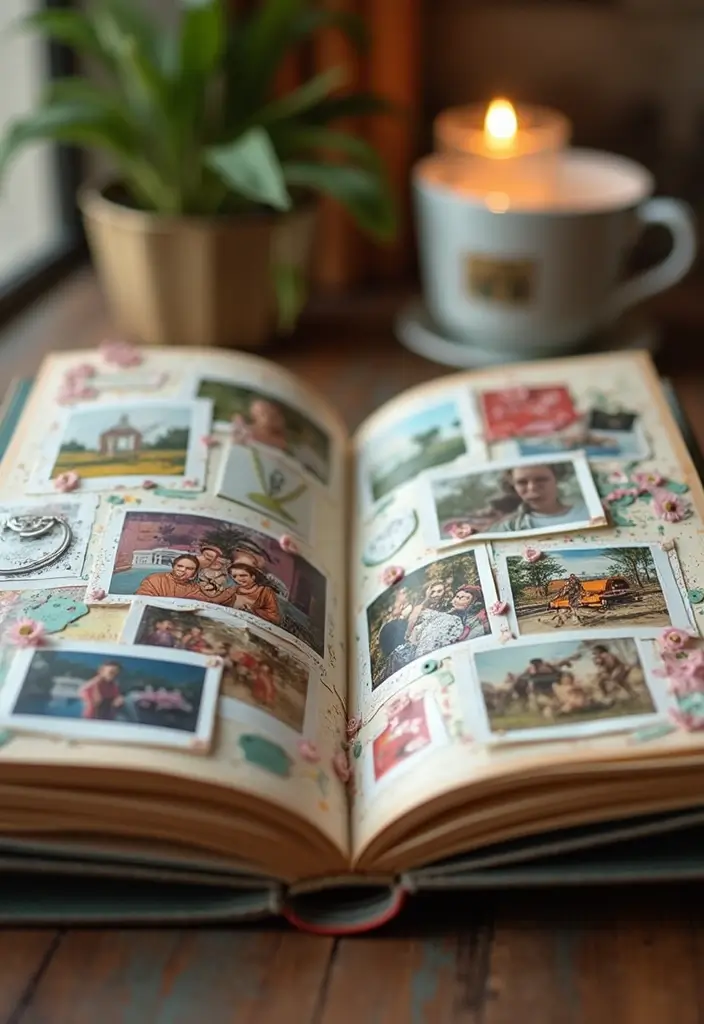
You want pages that turn photos into a story you can relive. Paper scrapbook pages do that with color, texture, and words. This guide shows simple steps to build memory pages you can be proud of.
What you need
– Use acid-free materials to protect photos over time, so your memories stay bright for years.
– Choose patterned paper to set mood and tone, from soft pastels to bold prints.
– Gather personal photos that tell your moment, not just random shots.
– Add stickers and small embellishments for detail, but keep the look balanced.
– Use safe adhesives that won’t damage pictures or lift edges.
Steps to create a page
Here is why this works: simple layouts let memory shine and keep your page easy to read.
– Pick one memory you want to showcase to start your page.
– Choose a photo and matte it with a strip of patterned paper to create a border.
– Arrange the focal photo first, then layer more paper for depth and movement on the page.
– Add journaling a short note about the moment so the memory speaks aloud.
– Sprinkle a few accents like a sticker, a ribbon, or a tiny tag, but keep it balanced.
– Finish with a bold title and the date to anchor the story.
Design ideas
– Use a grid layout for a tidy, modern look that is easy to skim.
– Try travel pages with map scraps, ticket bits, and stamped routes.
– Do a birthday page with bright colors, confetti stickers, and a playful font.
– Create a clean page with lots of white space to let photos breathe.
Next steps
– Start small: finish one page this week and slide it into your album.
29. DIY Paper Christmas Ornaments
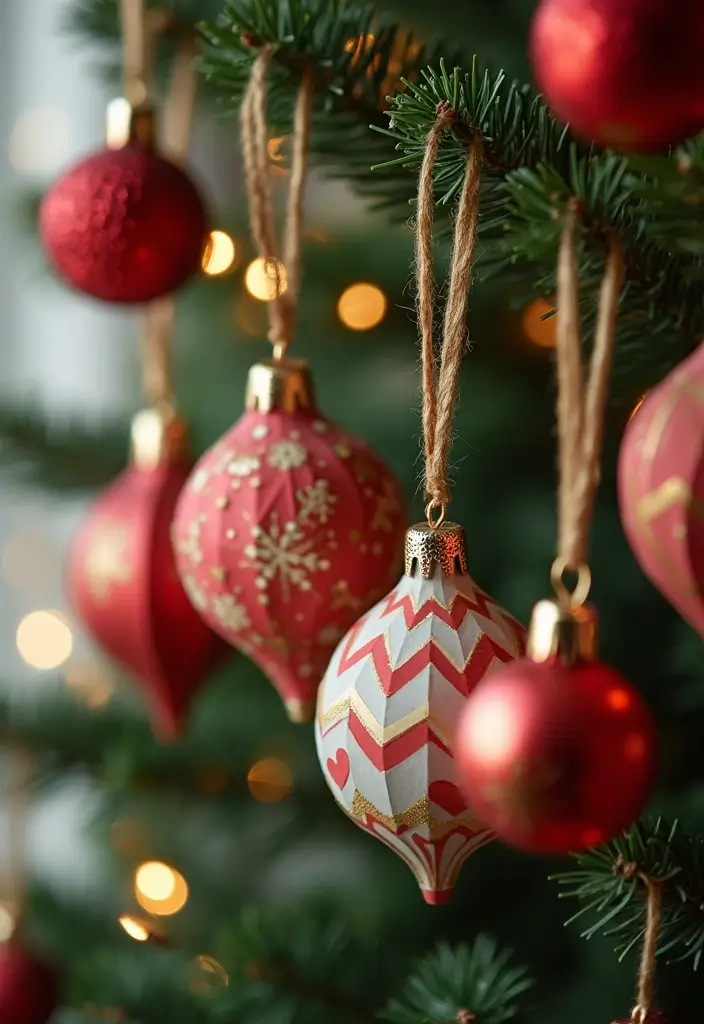
You want easy, bright decorations that won’t cost a lot. DIY paper Christmas ornaments fit the bill. They’re simple, quick, and full of charm. You can work alone or with family and friends. Shape, color, and hang them with pride.
Materials
– Colored or patterned paper
– Scissors and glue
– Glitter, paint, or markers
– Hole punch or a small punch
– Twine, ribbon, or string
– Optional: dried fruit slices or a pine sprig for a natural touch
Steps
– Pick a shape like a star, snowflake, or mini tree.
– Cut two copies of the shape from paper.
– Decorate one side with color, glitter, or paint.
– Glue the two shapes together for sturdiness, if you like.
– Punch a hole at the top.
– Tie a short string and hang on the tree.
Tips
– Keep a color theme to match your tree.
– Add natural bits for a rustic look.
– Use patterns on both sides for a full finish when you only show one side.
– Let the glue dry before you hang the ornaments.
Why try this? It’s a simple way to add a personal touch to your holiday decor. It also makes a great family activity that’s easy for kids to join. And when you’re done, you have a charming set you can reuse next year.
@media(max-width:480px){
Conclusion

Embrace the creativity that paper crafts offer and let your imagination soar!
These 29 eco-friendly DIY projects are just the beginning—each one presents an opportunity to make something beautiful and unique while caring for the planet.
So gather your supplies, invite friends to join in, and start crafting today! You never know what amazing ideas you might come up with.
Note: We aim to provide accurate product links, but some may occasionally expire or become unavailable. If this happens, please search directly on Amazon for the product or a suitable alternative.
This post contains Amazon affiliate links, meaning I may earn a small commission if you purchase through my links, at no extra cost to you.
Related Topics
eco-friendly crafts
paper jewelry
beginner projects
handmade gifts
quick DIY
paper art
recycled materials
home decor
creative paper projects
sustainable crafting
DIY wall decor
easy paper crafts