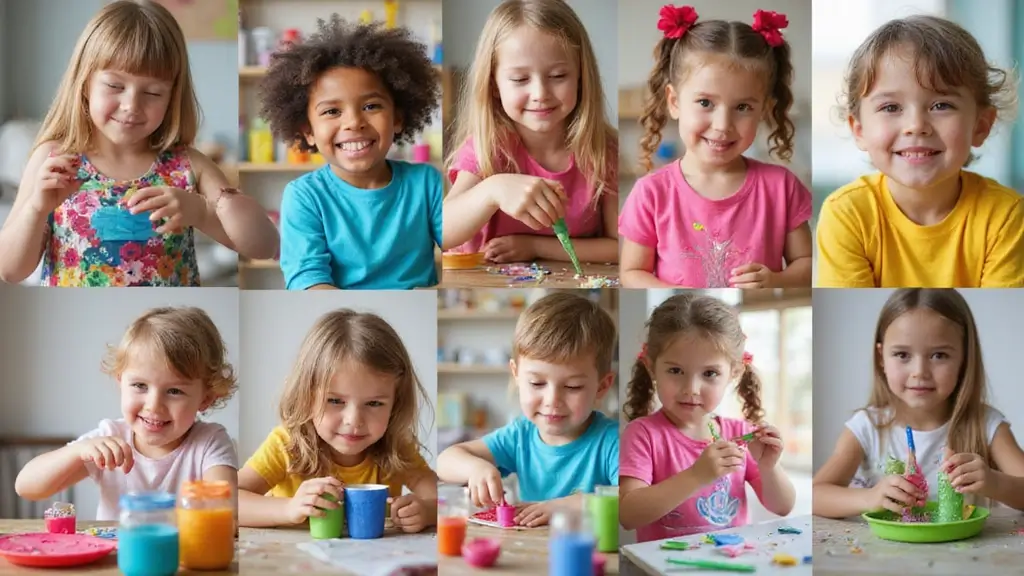
This season has me craving simple, joyful crafts that kids can start and finish in one sitting. I made this post to save you time and give you solid ideas you can trust. These 28 DIY crafts use everyday supplies and ask for little cleanup, so you can fit crafting into a busy day.
Who it’s for You’re a parent, caregiver, teacher, or grandparent who wants kids to stay curious and proud of what they make. You care about safety, clear steps, and projects that are fun but not messy. You want ideas that work in a cramped kitchen table or a sunny living room with a timer in hand.
What you’ll get Here you’ll find 28 crafts that are easy to pull off, quick to finish, and fun to share — simple projects that spark creativity and fun. They use paper, glue, tape, buttons, fabric scraps, and other things you already have. Each idea comes with simple steps and room for your kid to add their own twist.
Crafts like these help kids build small muscles, color sense, and a plan for a project. They also sharpen focus and patience, and they give a real sense of pride when something is done. A tiny story or a dash of silly detail can turn a regular craft into a memorable moment you both enjoy.
To get the most from this list, pick a project by time, by space, or by materials you have. Set up a small craft corner with a tray and a towel to catch spills. Use washable glue and markers to keep cleanup easy. Let your child pick colors and add little extras to make the project theirs.
Ready to start? Scroll through, choose a project, gather what you need, and go. Tell me which ideas your kids loved and share a quick photo of the result. Let this week be a little brighter with creativity and fun.
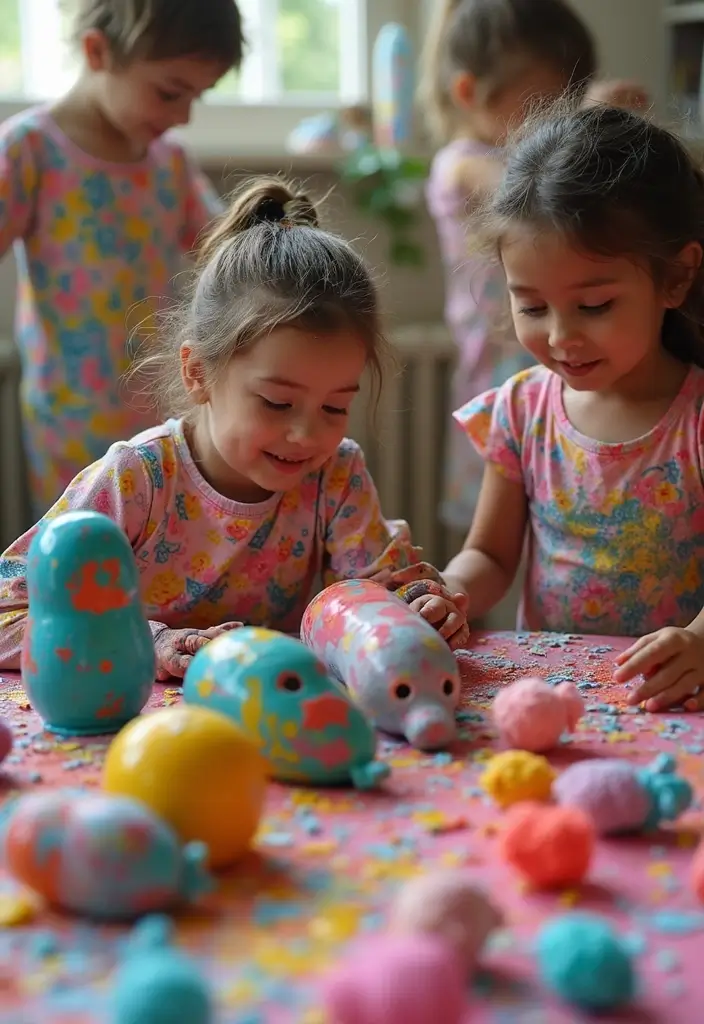
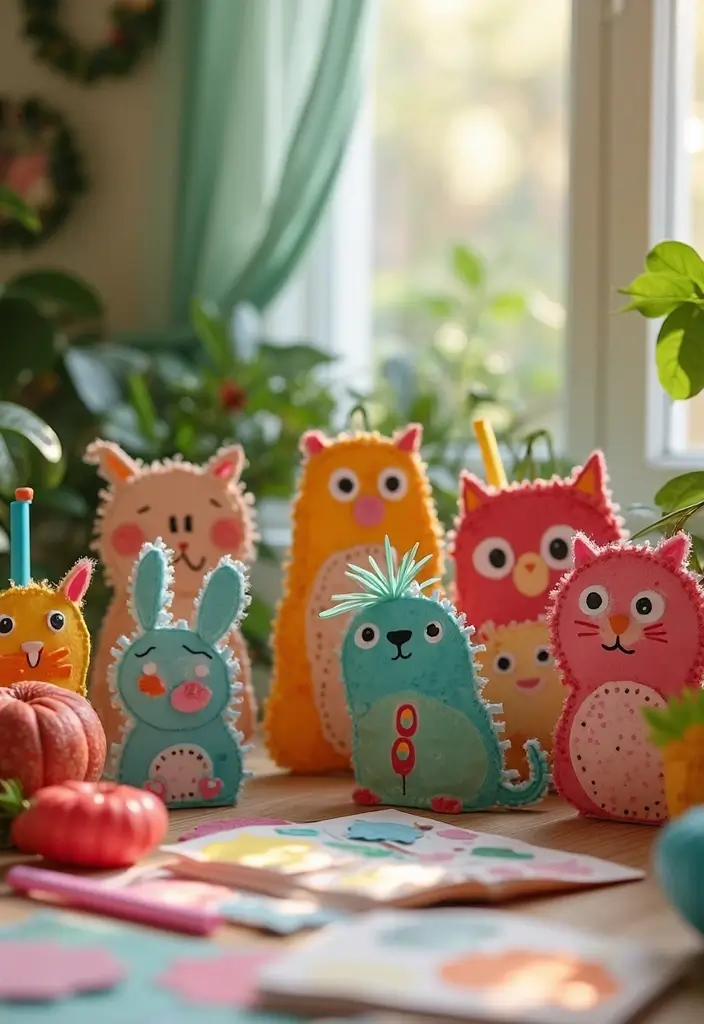
1. Upcycled Egg Carton Animals

Need a quick, kid-friendly craft that is easy to clean up and kind to the planet? Upcycled egg carton animals fit the bill. You turn a common kitchen item into a cute zoo of creatures with color, texture, and a lesson about reuse. It’s a simple project that helps kids imagine while they learn.
Here is why this works. It stays within reach for little hands and broadens their view of recycling. Best of all, it invites baby steps in creativity that you can build on later.
– Supplies Needed: Egg cartons, kid-safe paint, scissors (for grown-ups or with supervision), googly eyes, pipe cleaners, markers, and any other decorative items you have.
– What to Do:
1) Cut the carton cups apart so you have separate mini cups.
2) Paint the cups in bright colors and let them dry.
3) Glue on eyes, add noses or mouths with markers, and twist pipe cleaners for ears or antennae.
4) Add feathers, buttons, or bits of fabric for extra texture.
5) Display your mini zoo in a sunny window or on a shelf.
– Tips: Mix colors to sharpen fine motor skills. Let kids invent new animals by blending features. Talk about how recycling helps the Earth as you work.
– Unique Insight: This craft keeps waste out of the trash while turning everyday items into playful learning moments.
@media(max-width:480px){
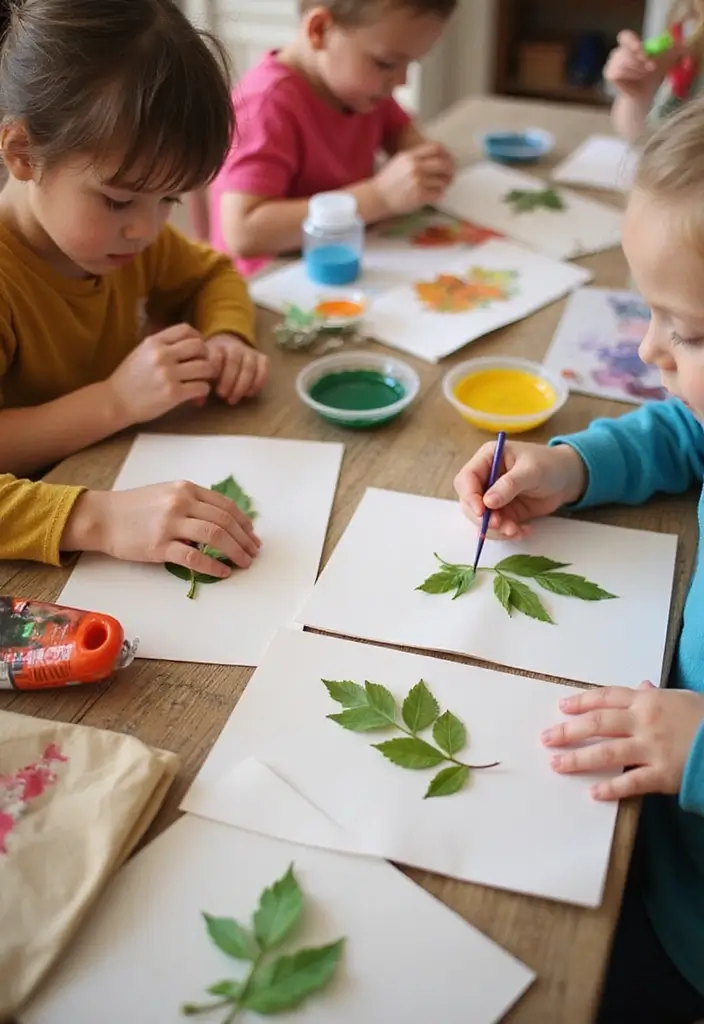
2. Nature-Inspired Leaf Prints
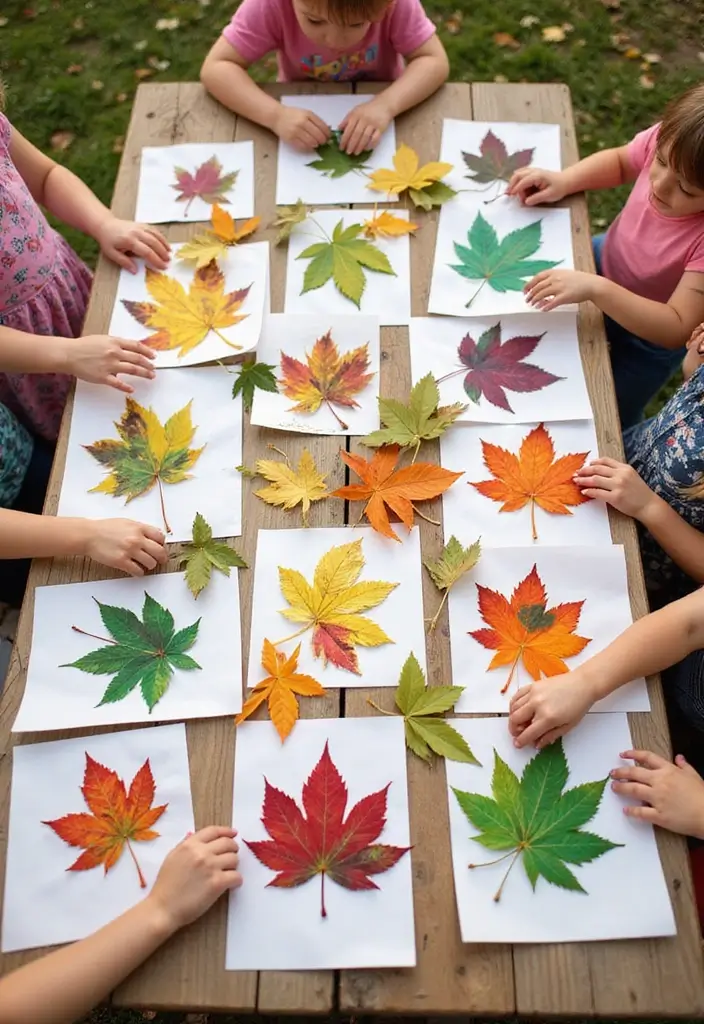
Want a craft that brings the outdoors into your art? Nature prints are simple and fun. You gather leaves from your yard or a park, then turn them into unique designs on paper. Each print looks different because leaves vary in shape, size, and texture.
Here is how to do it:
– Collect leaves of many kinds. Look for big and small, smooth and jagged.
– Put a thin layer of non-toxic paint on one side of a leaf.
– Press the painted side onto a sheet of paper. Press straight down, then lift to see the print.
– Try several leaves and colors to fill a page with patterns.
– Let the prints dry before displaying or saving them.
Supplies Needed: Leaves, non-toxic paints, paintbrushes or sponges, and paper.
Tips: Mix bright colors for a lively autumn scene. Use a single color for a simple, clean look. Talk about leaf shapes as you work to sneak in a quick nature lesson.
Unique Insight: Using real leaves helps kids notice tiny patterns in nature and see how art and the environment grow together.
@media(max-width:480px){
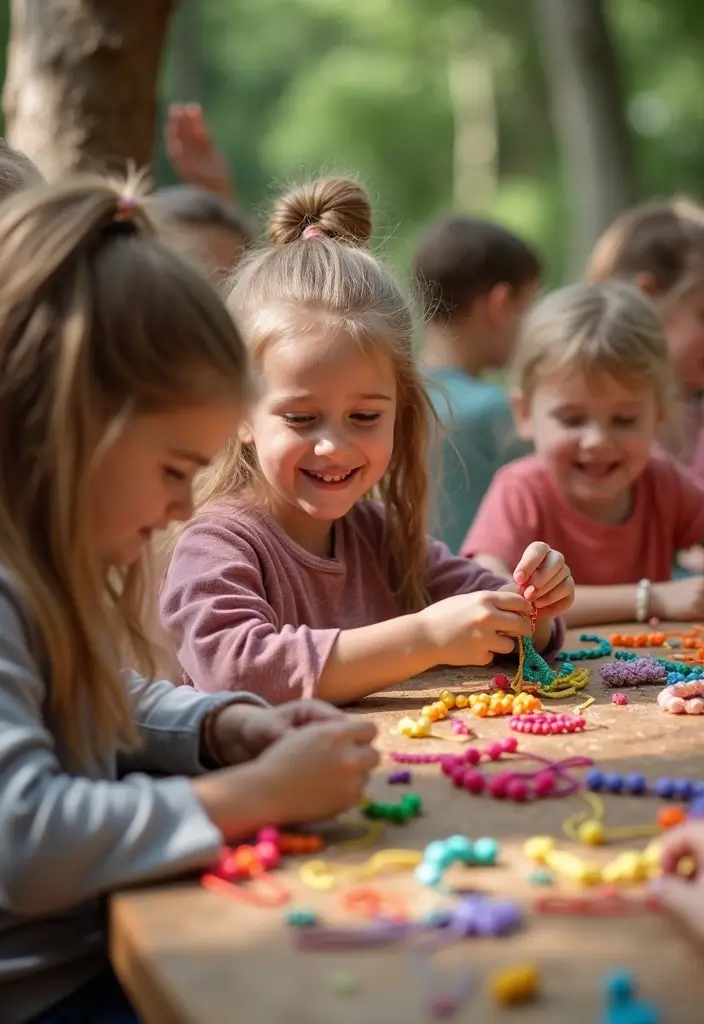
3. DIY Recycled Paper Beads

Here is a kid friendly craft that uses scraps and teaches recycling. You get a pretty result with little waste. Turn old magazines into tiny beads.
What you do
– Cut the paper into small triangles. Keep the edges neat.
– Roll a triangle around a toothpick or a small dowel. Press gently to seal with a dab of glue.
– Let the beads dry before you remove the toothpick. You can also slide on a string while still tacky.
Finish and shine
– Paint the beads for color, then seal with a clear varnish.
– After they dry, thread them on string to make a necklace, bracelet, or keychain.
Why this helps
– It shows you can reuse paper instead of throwing it away.
– It sparks color choices and pattern ideas. Mix bold and soft hues for a fun look.
– You can try different shapes and sizes for big or small beads.
Supplies Needed: Old magazines or newspapers, scissors, toothpicks or a dowel, glue.
Tips: Let kids pick colors. Try round beads by curling paper differently. Use different bead sizes for variety.
Unique Insight: This craft teaches reuse and lets kids show their style at the same time.
@media(max-width:480px){
4. Tin Can Wind Chimes
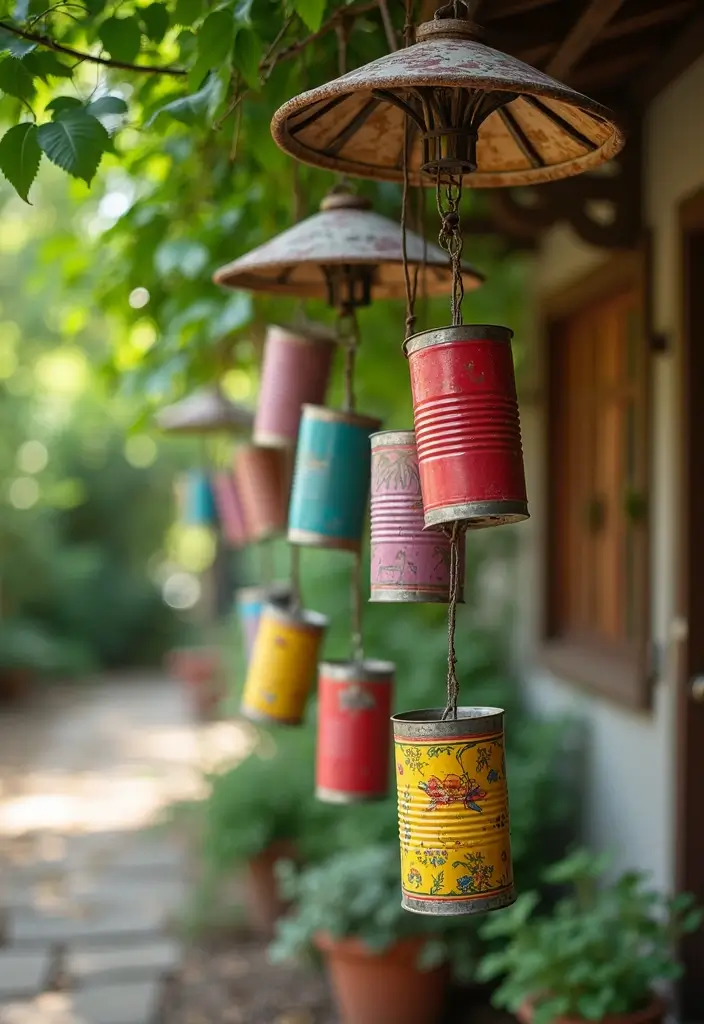
Want a simple craft that adds color and gentle music to your yard? Tin can wind chimes fit the bill. They reuse cans you already have and let kids create tunes as the breeze moves through them.
Supplies Needed:
– Empty tin cans, cleaned and dried
– Paint or markers
– String or fishing line
– Beads, shells, or other small decorations
– A hammer and nail for holes
– Scissors or tape for finishing touches
Steps:
– Wash and dry the cans.
– Let kids paint both sides. Keep it simple with bold stripes or dots.
– With adult help, punch a hole near the rim on each can.
– Thread string through the holes and add beads or charms for sparkle.
– Tie the strings to a hanger, stick, or sturdy branch so the wind can move them freely.
Tips:
– Pick colors that match your garden or patio.
– Use different can sizes to create a mix of tones.
– Space holes and decorations so the chimes swing evenly.
– Hang where wind reaches but doors or pets stay clear.
What you learn: you see how air and wind make music, and you practice safe tool use. This small project boosts creativity and offers a calm, hands-on moment with nature.
Next, try more ideas with different shapes. Share your finished wind chime with family and listen to the breeze.
@media(max-width:480px){
5. Cardboard Box Forts

Want a low-cost play space that sparks imagination and teamwork? A cardboard box fort fits. Grab old boxes, kid-friendly scissors, tape, paint, and decorations. With some planning, you can build a pirate ship, a castle, or a secret lair. It’s about the story you create together, not the size.
Supplies Needed:
– Cardboard boxes of different sizes
– Kid-safe scissors and tape
– Paints, markers, or crayons
– Decorations like stickers, fabric scraps, strings, cushions, and blankets
How to build it:
– Pick a space and settle on a theme with your child
– Open and flatten boxes; cut doors and windows as you like
– Tape boxes together to form walls and a roof
– Add a doorway and extra rooms if you want
– Decorate the outside and inside with color, drawings, and fabric
– Lay down blankets and cushions for a comfy floor
– Check stability and adjust any loose parts
Tips:
– Start simple and add rooms as you go
– Let kids lead the idea and you handle the build
– Talk about safety and make sure everything feels sturdy
Unique Insight: Fort building boosts teamwork and storytelling. Kids learn to share ideas and cooperate in a safe space.
6. Eco-Friendly Tie-Dye T-Shirts
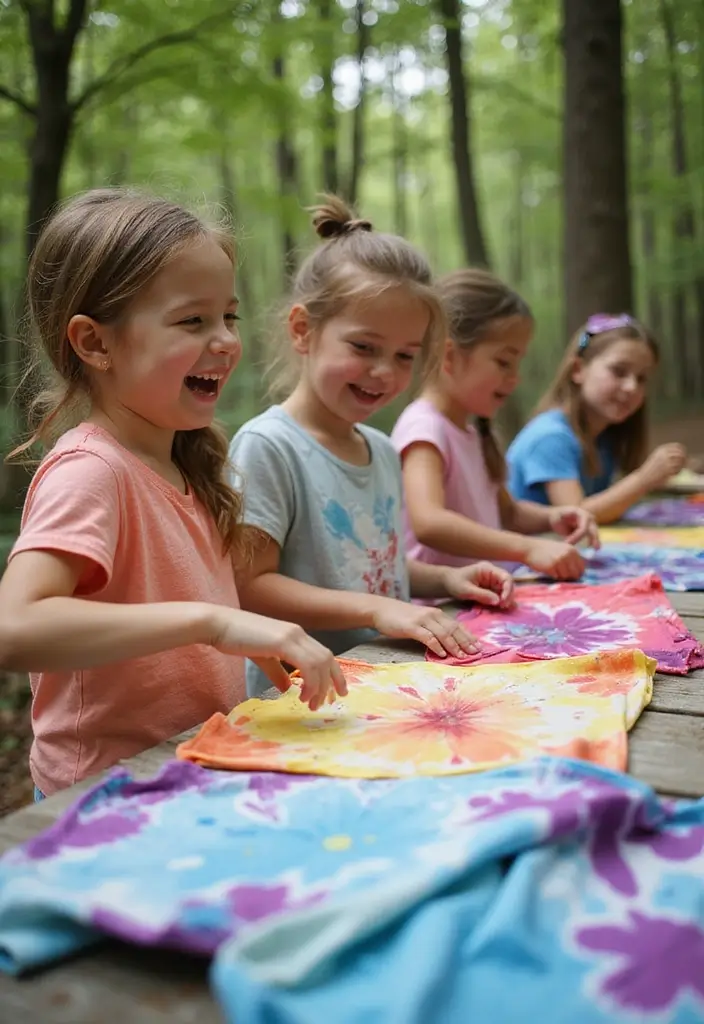
Here is a kid-friendly way to dye shirts using nature. You get bold colors without harsh chemicals. It also helps you see how plants color fabric. Let’s break it down.
Supplies Needed:
– Plain cotton t-shirts
– Natural dyes from beets, turmeric, blueberries
– Rubber bands
– Bowls or jars for dye
– Gloves and old towels to keep things clean
– Water for rinsing
Step-by-step:
1) Prep your shirt. Wash and dampen it. This helps colors soak in.
2) Make the dyes. Simmer chopped beets for pink, turmeric for yellow, blueberries for blue. Strain the liquid into bowls.
3) Create your pattern. Twist, fold, and wrap with rubber bands to form stripes, spirals, or checkers.
4) Apply color. Dip or squeeze each folded section into a dye bowl. Leave some areas blank for contrast.
5) Set the dye. Wrap the shirt in plastic and let it sit for 2–6 hours.
6) Rinse and dry. Rinse until water runs clear, then air dry or tumble dry on low.
Tips:
– Wear gloves and work in a protected space.
– Mix colors on different shirts to see how shades change.
– Test small scraps first to predict outcomes.
Unique Insight:
You mix art and science. Natural dyes teach how plants color materials and why safer options matter.
@media(max-width:480px){
7. Painted Rock Garden Markers
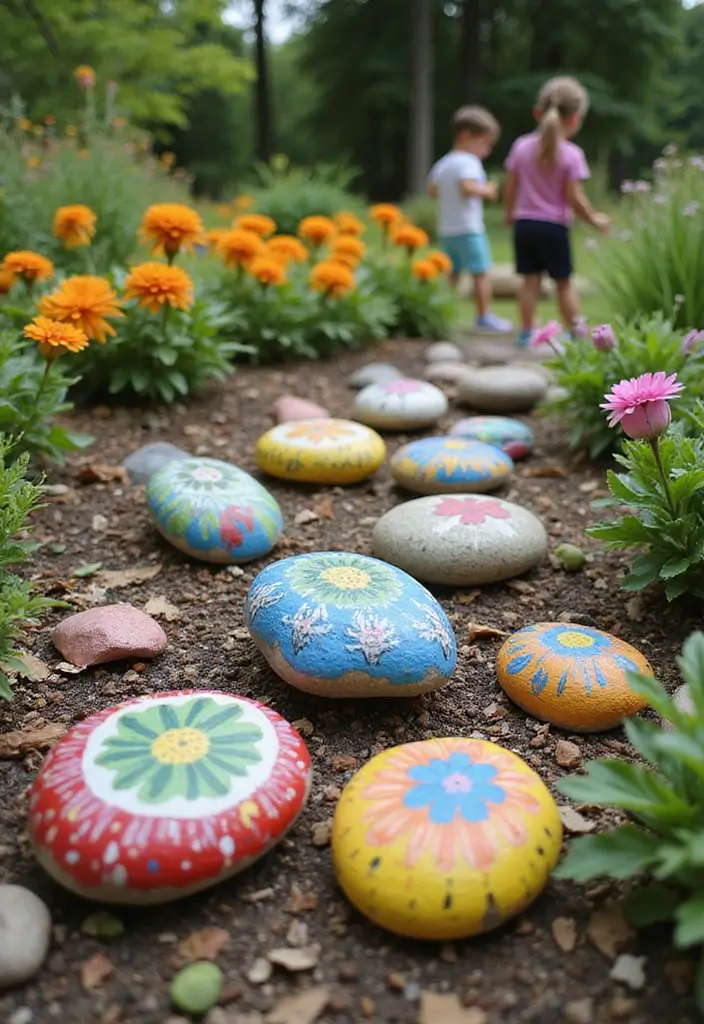
You want a garden project that is simple for kids and full of color. Painted rock garden markers fit. They turn plain stones into small signs for herbs and veggies, or just bright accents in your beds.
Supplies Needed:
– Smooth rocks from the yard or a local park
– Acrylic paints in bold colors
– Small brushes and paint pens
– A clear sealant to protect the art
How to do it:
– Wash the rocks gently and let them dry completely.
– Start with a base color if you like, then add extra layers for solid coverage.
– Write the plant names with a fine paint brush or a paint pen.
– Add simple designs such as a flower, leaf, or sun to make each rock unique.
– Allow each coat to dry before adding the next, then seal the finished markers.
Tips:
– While you craft, chat about how plants grow and why they need sun and water.
– Bring the project outside and plant a few herbs or flowers to match your markers.
Unique Insight:
Creating personalized garden markers helps kids take care of living things and feel a closer bond with nature.
8. Recycled Plastic Bottle Planters
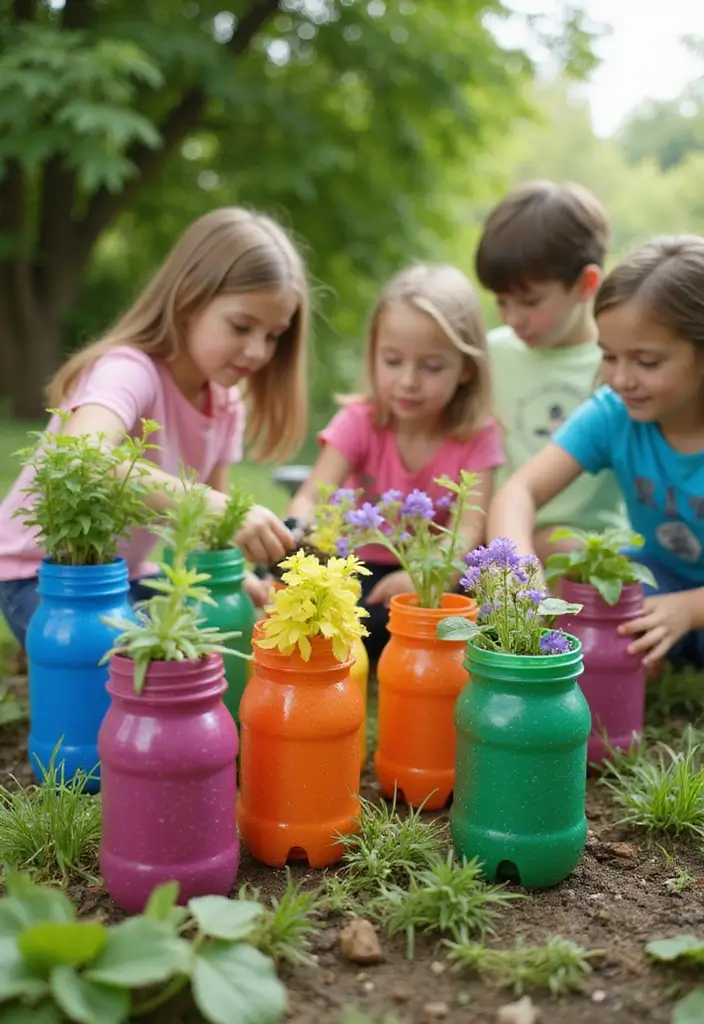
Here is a kid friendly, eco friendly way to recycle and grow at the same time. Recycled Plastic Bottle Planters turn a used bottle into a tiny garden you can carry around. It’s a quick project that blends art, care for the planet, and hands on learning. Your child will see a bottle become soil, roots, and green growth, all in one small stage.
Supplies Needed: Empty plastic bottles, paint or markers, soil, seeds or a tiny seedling, scissors.
How to do it:
– Rinse the bottle and remove labels.
– Cut the bottle in half. An adult can help with the scissors if needed.
– Let your kid decorate the outside with color. Give it a minute to dry.
– Fill the bottom with soil, press in a seed or seedling, and cover lightly.
– Water gently and set the planter in a sunny spot.
Tips: Use this as a lesson in recycling. Talk about why bottles get reused and what waste means. Let kids pick herbs or flowers they want to grow. This makes watering and sun checks feel like a real job.
Unique Insight: This craft shows growth from a simple object. It builds responsibility and gives a clear, daily reminder that care and patience help something small become alive.
Keep watching.
@media(max-width:480px){
9. DIY Fabric Scraps Bunting
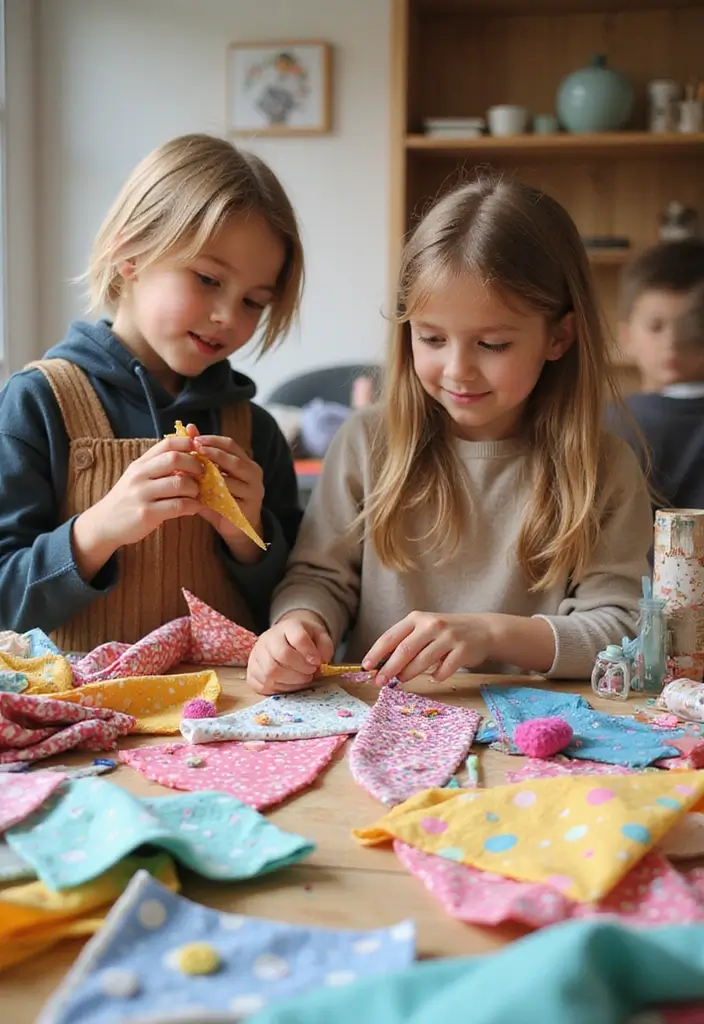
You want a quick, budget-friendly way to boost creativity for kids. Fabric scraps can do the job. Make a bunting that brightens a room and teaches reuse at the same time.
Supplies Needed:
– Fabric scraps
– Scissors
– Yarn or string
– Glue or a sewing machine
– Optional: needle and thread, safety pins
Steps:
Here is how to do it in simple, kid-friendly steps.
1) Pick a color plan. Decide if you want a rainbow look or a theme that matches a room.
2) Cut shapes from scraps. Flags, triangles, circles, or squares work well. Keep shapes small so they fit on the string.
3) Attach shapes to the string. Stitch, glue, or tie them. Let kids choose the method.
4) Space shapes evenly. A couple of inches between pieces helps it hang tidy.
5) Hang the bunting. Tie or tape the ends to a wall, bed frame, or window.
Tips:
– Let kids pick colors and patterns. It builds decision skills.
– Use kid-safe glue and let pieces dry before moving them.
– Reuse old fabrics from shirts, sheets, or curtains. It shows recycling in action.
– Mix textures and shades for more depth.
Variations:
– Try mini buntings for shelves or gifts.
– Add letters or simple shapes to spell a name.
– Use different shapes like pennants, circles, or stars.
Here is why it helps. It builds fine motor skills, planning, and pride in your finished decorations.
Next steps: plan a spot in your home to display your bunting.
@media(max-width:480px){
10. Silhouette Art from Nature

You want a craft that sparks imagination and fits any table. Silhouette art from nature makes that happen.
Here is why this works. Kids collect leaves and twigs, then form a scene on a sheet of paper. They paint over the whole surface. When the paint dries and the pieces are lifted away, bold silhouettes appear. It blends outdoor stuff with indoor art. The result is a unique scene every time.
– Supplies Needed: Leaves or twigs, paper, paint, brushes.
– How to do it: Gather pieces from your backyard or park. Arrange them on the paper to build a simple landscape or a playful scene. Paint over the whole sheet in a thin, even layer. Let it dry, then lift the natural pieces gently to reveal the shapes.
– Tips: Talk about the plants you used. Name leaves, seeds, or bark, even if you are not sure. Try different colors and layer pieces for depth. Experiment with negative space by moving the pieces around before you paint.
– Unique Insight: This project shows how art comes from the world around you. It helps kids see patterns in nature and trains the eye to notice shape and light.
Next steps: display the art, or use it as a cover for a storybook. Clean up, then try a new scene with different plants.
@media(max-width:480px){
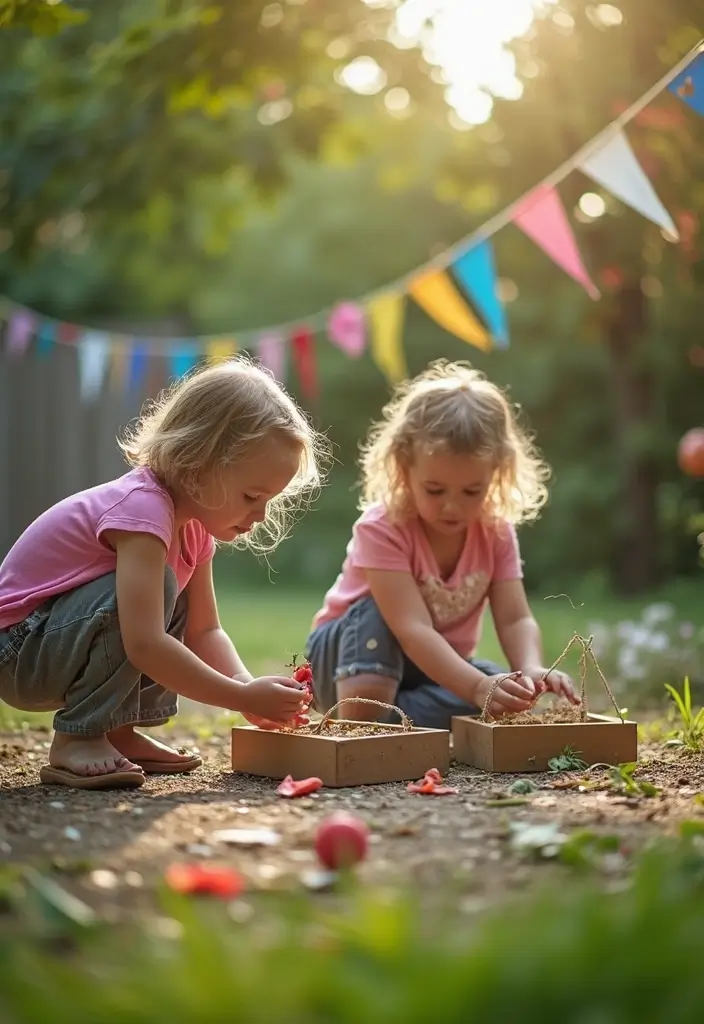
11. DIY Seed Bombs

You want a quick, hands-on project that teaches kids how plants grow. DIY seed bombs fit the bill. They turn clay, compost, and seeds into a playful activity that ends with bright blooms or tasty veggies.
Here is why it works: kids mix, roll, and see how tiny seeds wait to wake up.
– Supplies Needed: Compost, clay, seeds, water.
– Steps to make seed bombs:
1) In a bowl, combine clay and compost with enough water to make a thick dough.
2) Stir in seeds so they spread evenly.
3) Pinch off small bits and roll balls the size of marbles.
4) Let the balls dry for a day on a tray.
5) Toss dry bombs into bare soil or a pot and wait for rain to wake them.
– Tips: Talk about the seeds and what plants need to grow. It can be muddy. Wear old clothes and have a towel handy.
– What kids learn: They see how plants start from a tiny seed, learn about pollinators, and feel responsible for nature.
Next steps: try seeds from flowers, herbs, or veggies you already love. Store a few dry bombs for rainy days.
12. DIY Nature Journals

You’re looking for a project that blends writing with outdoors time. A DIY nature journal gives kids a place to record what they notice. It combines art, words, and nature into one simple habit.
Supplies Needed:
– Old notebooks or cereal boxes for covers
– Scissors to trim and shape
– Glue to attach decorations
– Markers, crayons, or paints for color
– Craft scraps or nature stickers to personalize
What to do
– Let your kid pick a cover that feels right to them
– Decorate with color, textures, and recyclable materials
– Add a title page with name and date
– On nature walks, sketch one thing and jot a short note about it
– Tuck in a pressed leaf or a small photo from the day
Tips:
– Try different styles: a quick drawing, a few lines of writing, or a tiny poem
– Keep entries short. Five minutes is plenty
– Use simple prompts: color of the sky, a sound you heard, a smell in the air
– Show pages to a family member to build a daily habit
Unique Insight:
This craft links reading and art with mindful time outside. It helps kids notice details, practice clear writing, and build a personal reflection space.
13. Recycled Cardboard Games
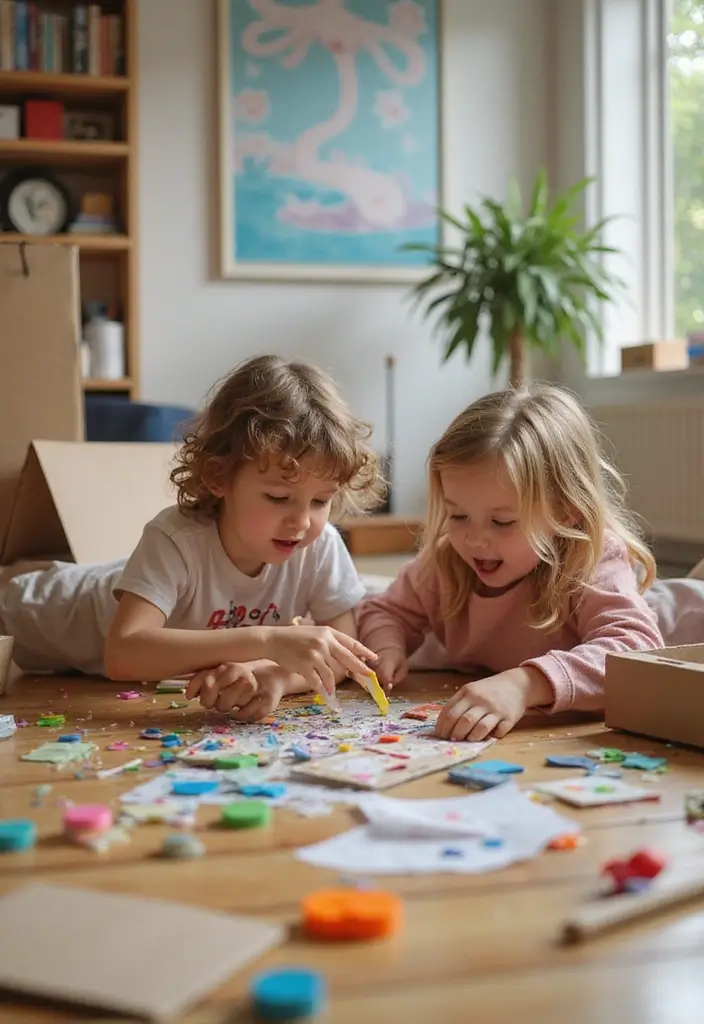
If you want cheap, hands-on play that sparks imagination, recycled cardboard games are a win. You get to design, build, and play all in one session. It’s a simple way to keep kids busy and thinking at the same time.
– Tic-tac-toe on the go. Cut a square, draw a three-by-three grid, and use bottle caps or paper tokens as marks. It travels well and takes only minutes to set up.
– A tiny board game you design yourself. Draw a winding path with spaces and color-code some spots. Use coins or small buttons as game pieces. The goal is to reach the end first.
– A mini-golf course made from lanes and a hole. Use curved ramps, cardboard walls, and a cup as the final hole. A soft push is all you need to start.
Supplies Needed: Cardboard, scissors, paint or markers, glue or tape, simple game pieces (caps, buttons, beans), and a small ball or marble for golf.
How to build:
– Make a Tic-tac-toe board. Flatly cut cardboard and draw the grid. Use tokens ready to move.
– Create a board game path. Cut a strip, mark spaces, and decorate. Place start and finish labels.
– Build a mini-golf lane. Shape walls, a ramp, and a hole. Test with a gentle tap.
Tips: Let kids plan the rules together. Try short play rounds and adjust as needed. Link the games to lessons about strategy and fairness.
Unique Insight: Building games from scratch helps kids think through rules, foresee moves, and cooperate as a team.
@media(max-width:480px){
14. DIY Wind Sock from Recycled Materials

You want a quick, kid-friendly craft that uses recycled stuff and adds color to your day. A wind sock made from reused materials fits that goal. It watches the wind move and helps you learn wind direction in a simple, hands-on way.
Supplies Needed: Plastic bags, scissors, a round base such as a paper plate, string or yarn, and decorations like markers or stickers.
Steps to make it:
– Cut long, colorful strips from the plastic bags. Leave some space at the top to attach to the base.
– Attach the strips to the rim of the round base. Tie them or tape them so they hang freely.
– Make a hang loop. Poke a small hole in the plate and thread the string through, then tie a knot.
– Decorate. Add markers, stickers, or paint to each strip for a bold look.
– Hang it up. Put it where the wind can reach it and watch it flutter.
Here is why this matters: The wind sock makes wind visible. It turns moving air into a colorful display you can see and study.
Tips: While you craft, talk about how wind direction affects the weather. Try different color combos to see how the sock looks in sun and shade. Kids love watching the tails flutter in a gentle breeze.
Unique Insight: This project blends art and science. It helps kids see wind, air flow, and weather patterns while staying creative.
Next steps: Swap in fabric strips or colored magazine pages for a fresh look on your next wind sock.
15. DIY Mosaic Art Using Recycled Materials

– You want a creative craft that uses things you already have at home.
– Supplies Needed: Old magazines or colored paper, scissors, glue, and a sturdy canvas or cardboard.
– What to do: Tear or cut small pieces and test layouts before gluing.
– Arrange the pieces on the canvas to form your design, starting with big shapes.
– Glue each piece down firmly and let the glue dry.
– You can sketch a bright animal, a busy city scene, or a bold abstract pattern.
– Tips: Pick a color scheme ahead of time and stick to it.
– Mix warm colors with cool colors for contrast and depth.
– Talk about mosaic art in kid friendly terms, like tiles making a big picture.
– Mosaic art began long ago in places like temples and ancient walls.
– Unique Insight: This project sharpens fine motor skills and shows how small scraps become art.
– Add texture by layering fabric scraps, ribbon, or bottle caps for different feels.
– For display, glue the finished piece onto a thicker board or frame it for a neat wall look.
– Next steps: take a photo, share it with family, or start a tiny home gallery.
16. DIY Paper Mache Sculptures
Looking for a kids craft that is messy in a good way and sparks ideas fast? Paper mache fits. It turns simple materials into sturdy sculptures you can paint and show off.
– Supplies Needed: Newspaper, flour, water, and paint. Optional: a bowl, a spoon, tape, and a balloon or cardboard for forming shapes.
– How to Make It: You tear long strips of newspaper. You mix flour and water until you have a smooth paste. You dip a strip, remove the extra, and press it onto a form. You layer up to build the shape. Let each coat dry before adding more. When done, peel away the form and let your sculpture dry completely. Then paint.
– Tips: Talk about texture as you add color. Smooth some strips for a clean look and rough others for grip. Add a simple story as you shape it, maybe a dragon, a mask, or a creature from your imagination.
– Unique Insight: Paper mache turns a simple mix into a real sculpture. Here is why this works for kids: the paste dries into a light shell that holds firm and lets paint pop.
Next steps: let imagination guide the form, then share the sculpture with family for a mini art show.
@media(max-width:480px){
@media (max-width: 600px) {
.normal-quiz-iframe { min-height: 570px !important; height: 570px !important; }
}
17. Eco-Friendly Candle Making

Looking for a kid-friendly craft that lights up a room and respects the planet? This Eco-Friendly Candle Making uses natural wax and simple scents, perfect for curious hands. You’ll melt, pour, and watch a glow grow from your own tray.
Supplies Needed:
– Soy wax or beeswax
– Wicks
– Containers (mason jars, teacups, or small tins)
– Essential oils or natural scents
– Dried flowers or herbs
Here is why this works. Natural wax is safer to touch and burn. You control every scent and color, so the result fits your taste. It also teaches patience as you wait for the candle to harden.
Let’s break it down. First, melt the wax in a double boiler until it is liquid. Second, add a few drops of essential oil and stir gently. Third, center the wick in the container and pour the warm wax slowly. Fourth, let the candle set, then trim the wick and decorate with dried flowers for a natural finish.
Tips:
– Use a thermometer to stay safe around heat.
– Try mixing citrus with lavender for a fresh outdoorsy scent.
– Rinse and reuse jars to make keepsakes.
This project shows how natural ingredients work and why mindful choices matter. Next steps could be a family candle night with a simple starter kit.
18. DIY Friendship Bracelets from Natural Twine
Here is why this project works for kids. It uses natural twine with a rough, earthy feel. Beads add color and a soft clink as you move. You end with a bracelet you can wear or share.
Supplies needed:
– Natural twine
– Beads
– Scissors
This setup fits kids. The twine is easy to knot and beads come in many colors and shapes.
Let’s break it down
Next, we walk through the steps in simple moves.
1) Pick two to three colors. Lay out beads to match.
2) Cut three strands of twine about 60 cm long. If the wrist is small, 50 cm works.
3) Gather ends and tie a small knot at one end. Leave a short tail. Tape the other end to the table.
4) Start with a simple square knot. The left strand goes over the middle, under, then the right over and through. Repeat a few times.
5) Slide beads between knots as you go. Stop when the bracelet reaches the right length.
6) Tie a final knot. Trim the tails.
Tips
– Gift the bracelet to a friend or family member. It spreads kindness.
– Talk about what friendship means while you craft.
– Add a short note to go with the bracelet.
Takeaway
This craft blends art with social moments. Kids learn to show care through color, texture, and small beads.
@media(max-width:480px){
19. DIY Painted Wooden Spoons

Brighten your kitchen and spark a love for cooking with a DIY painted wooden spoon. This small project gives kids a chance to mix art with real tools they can use during meals.
Supplies Needed: Wooden spoons, food-safe paints (prefer water-based paints labeled safe for surfaces that touch food), small brushes, masking tape or stencils, and a clear food-safe sealant if you want a long-lasting finish.
How to do it: Here is why you should start. 1) Wash the spoons well and dry them completely. 2) Tape off the ends or designs you want to keep bare. 3) Apply a thin coat of paint and let it dry. 4) Add a second coat for even color and cover any gaps. 5) Let everything dry fully, then seal with a food-safe finish if you choose. 6) Wait the recommended cure time before using the spoons.
Tips: Let kids pick colors that match a meal plan or kitchen theme. Use simple patterns like stripes or dots. Use masking tape for clean lines, or try stencils. Name each spoon to make it a tiny brag item in the drawer. Cover the work area with old newspaper.
Unique Insight: This craft blends art with everyday life. Kids learn color, pattern, and patience while caring for tools they will actually use in cooking.
@media(max-width:480px){
20. DIY Bird Feeders from Recycled Materials
You want a kid-friendly craft that helps birds and shows you care for the planet. A DIY bird feeder from recycled materials fits. It’s simple and fun, and it keeps kids involved from start to finish.
Here is why this works. You reuse plastic bottles and crates. Kids see real birds up close and learn to care.
Supplies Needed:
– Plastic bottle or wooden crate
– Birdseed
– Non-toxic paints and brushes
– String, twine, or sturdy wire
– Scissors or a craft knife (adult help)
– A pencil or drill for safe holes
How to Make It:
1) Clean the container and let it dry.
2) Poke feeding holes and a perch where birds can land.
3) Decorate with bright colors that won’t fade in sun.
4) Fill with seed and seal the top if you used a bottle.
5) Hang the feeder on a branch or hook.
Tips:
– Talk about local birds and what they eat while you work.
– Check the feeder every few days; refill with fresh seed.
– Move the feeder seasonally to protect shy birds.
– Place the feeder away from windows to keep birds safe.
Unique Insight:
This project ties kids to nature and helps them care. Kids watch birds come and go as seasons change.
@media(max-width:480px){
21. DIY Cardboard Tube Binoculars

Want a quick craft that makes a nature walk feel like an adventure? Build DIY Cardboard Tube Binoculars. Here is how you can do it with simple supplies and big smiles.
Supplies Needed:
– Cardboard tubes
– Tape
– Paint or markers
– Stickers or decorations
– Optional: string for a neck strap
1) Tape two toilet paper rolls side by side and secure them at the back. Keep the seam tight so they stay as one pair.
2) Decorate the tubes. Use bright paint, stickers, or doodles. Make patterns you love.
3) Add a neck strap if you want. Tie or tape a short piece of string to the ends so you can wear them.
Next steps help you turn this into a real adventure. Try them on a backyard stroll or a park visit and look for birds, bugs, leaves, and shapes.
Tips:
– Talk with your kid about what they notice. Describe colors, patterns, and tiny details.
– Use the binoculars during a simple nature walk or a scavenger hunt in the yard.
Unique Insight: This small project sparks curiosity. It blends creative play with careful observation, turning everyday sights into science at eye level.
@media(max-width:480px){
22. DIY Nature Collage Art
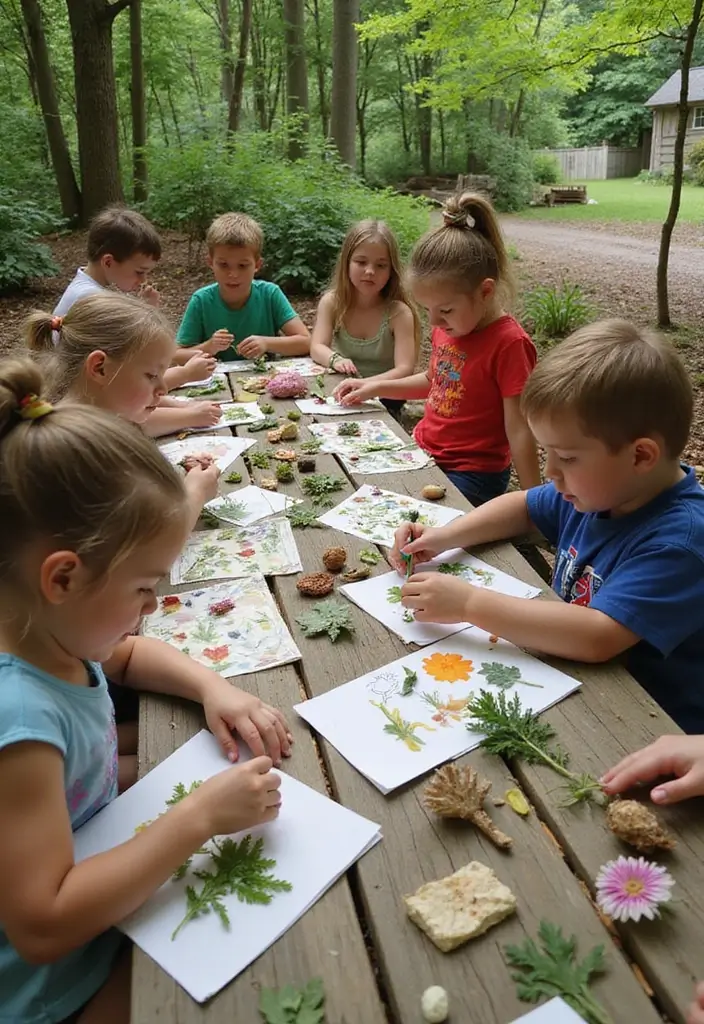
You want a calm, creative activity that uses what you find outside. A nature collage for kids fits that need. It’s simple and fun to start.
Here is a simple way to make a nature collage you’ll love.
– Gather supplies on a short walk. Look for big leaves, petals, twigs, and sturdy paper.
– Lay out your found items on the page. Move things around until the design looks right.
– Glue everything in place. Press gently so it sticks without tearing.
– Add final touches if you like. A simple outline with a pencil or marker can finish the piece.
– Share your work with family. Talk about what you chose and why.
Why this works. It helps your eyes notice small details. It builds hand strength as you press items flat. It sparks curiosity about the outdoors.
For younger kids, use bigger pieces and less glue. For older kids, try layered pieces and a color hint with crayons.
Display ideas. Tape the collage to a wall or fridge.
Supplies Needed: Leaves, flowers, twigs, glue, and paper.
Tips: Talk about textures and colors, and ask about local plants.
Unique Insight: This craft helps kids slow down and notice the world around them. It builds focus and care.
23. DIY Travel Scrapbook
Do you want a simple way to keep trips alive in your home? A travel scrapbook does that. It turns photos, ticket stubs, and bits from magazines into a story you can read again. You and your kids get to relive moments and stay organized at the same time.
Supplies Needed:
– Old magazines
– Photos
– Scissors
– Glue
– A scrapbook or binder
What you do:
1) Gather mementos from your trip.
2) Pick a page theme or a whole book style.
3) Cut pictures and color bits from magazines.
4) Glue items on pages and leave space for captions.
5) Write short captions or tiny stories under each photo.
6) Decorate with stickers, doodles, or washi tape to finish.
Here is why this works. It invites kids to tell a tale with their own words and pictures. They learn to date pages and organize keepsakes. The act of writing captions builds simple writing skills while the book grows.
Tips:
– Let kids write a line about why the moment mattered.
– Keep sections by trip or outing to stay tidy.
– Keep it simple; a few strong pages beat a crowded book.
Unique Insight: This craft trains storytelling and memory recall in a fun, hands-on way.
Next steps: Pick a trip you want to save, gather items, and start the first page.
24. DIY Stamped Cards from Nature
Here is why this craft works for kids. It makes pretty cards and it uses items from nature. You get to see art turn into a friendly note.
Let’s break it down.
Supplies Needed:
– Blank cards
– Leaves, flowers, or slices of fruit
– Non-toxic paint
– Paper towels for cleanup
– Scissors (optional)
How to stamp:
– Pick clean nature items. Rinse if they look dirty.
– Press leaves flat with a book for a few minutes or just hold them steady.
– Pour a dab of non-toxic paint on a plate.
– Brush or roll paint onto the stamp lightly.
– Press the item onto the blank card, then lift straight up.
– Re-dip and repeat with other shapes for a mixed design.
– Let prints dry before stacking.
Creative ideas:
– Try a thank-you card with a leaf print and a short message.
– Make invitations with a petal design around the edge.
– Mix colors for a rainbow card.
Next steps: Gather a few nature pieces and stamp two or three cards this afternoon.
Tips:
– Think about the event you are making the card for and customize it.
– Add a small drawing or a handwritten message.
– Use this as a chat time to teach kindness and gratitude.
Unique Insight:
Nature stamping blends art with sharing. It helps kids show feelings in handwritten cards, not just texts.
Keep a tiny card kit on hand for quick, kind notes.
@media(max-width:480px){
25. DIY Bath Bombs with Natural Ingredients
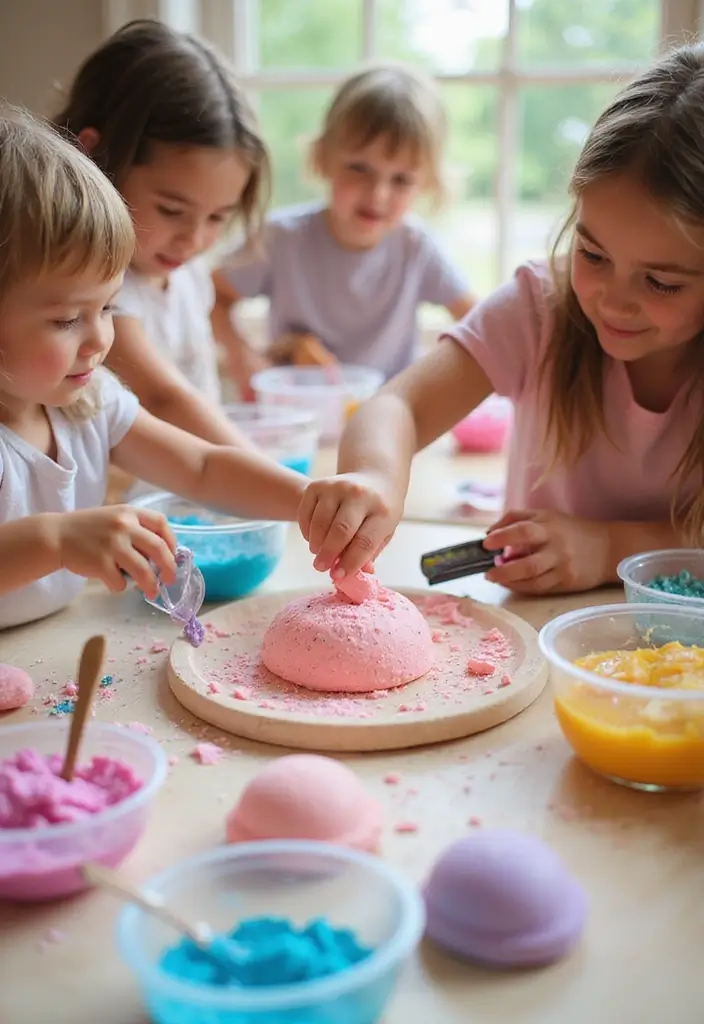
Want bath time that feels calm and fun? DIY bath bombs let you mix scents and colors yourself.
These little bombs use simple, natural stuff. When you drop them in water, they fizz and release a soft smell. Your kid can pick the look and feel of the bath.
Supplies Needed:
– Baking soda
– Citric acid
– A few drops of kid-safe essential oil
– Bath colorant or food coloring
– Molds (silicone shapes or an ice cube tray)
– A spoon and small bowl
Next steps make sense: you keep it simple and safe.
Steps:
1) In a bowl, whisk 1 cup baking soda with 1/2 cup citric acid until fluffy.
2) Add 5 to 8 drops of essential oil and a tiny bit of color. Stir gently.
3) Mist with water from a spray bottle, little by little, until the mix clumps when pressed.
4) Pack into molds, press hard, and let dry for about 24 hours. Unmold and store.
Tips:
– Here is why they fizz: water lets the acid and base react.
– Try two colors and compare how they look in the bath.
– Use mild scents for sensitive skin.
– Make shapes for gifts or party favors.
Why it matters: This craft blends hands-on science with a calm self-care moment. Kids see a tiny chemistry demo and feel proud of their bath time.
@media(max-width:480px){
26. DIY Snow Globes with Recycled Jars

Want a cozy winter activity that uses things you already have? DIY snow globes with recycled jars are perfect. A tiny scene, a shake, and snow swirling inside can spark big imagination. This project moves fast, costs little, and leaves you with a keepsake to treasure forever.
Supplies Needed
– Recycled jars with lids
– Small figurines or photos
– Glitter or fake snow
– Water
What it does for you
This craft builds fine motor skills and planning. It also invites your child to tell a tiny winter story. Plus, it is a gentle way to talk about winter themes.
How to Make It
1) You choose a tiny scene.
2) You place it in the jar.
3) You add the figurine.
4) You sprinkle glitter.
5) You fill with water, leaving space at the top.
6) You screw the lid on tightly and shake to test for leaks.
Tips
– Let kids pick a theme they love to show in their globe.
– Explain the basic idea of a snow globe: water makes the glitter move when you tilt or shake.
– If leaks happen, tighten the lid and recheck the seal.
Keepsake
This little globe can be displayed, gifted, or saved for years. It can also sit on a shelf as a winter display. You can make a few to gift to friends.
@media(max-width:480px){
27. DIY Nature Wreaths
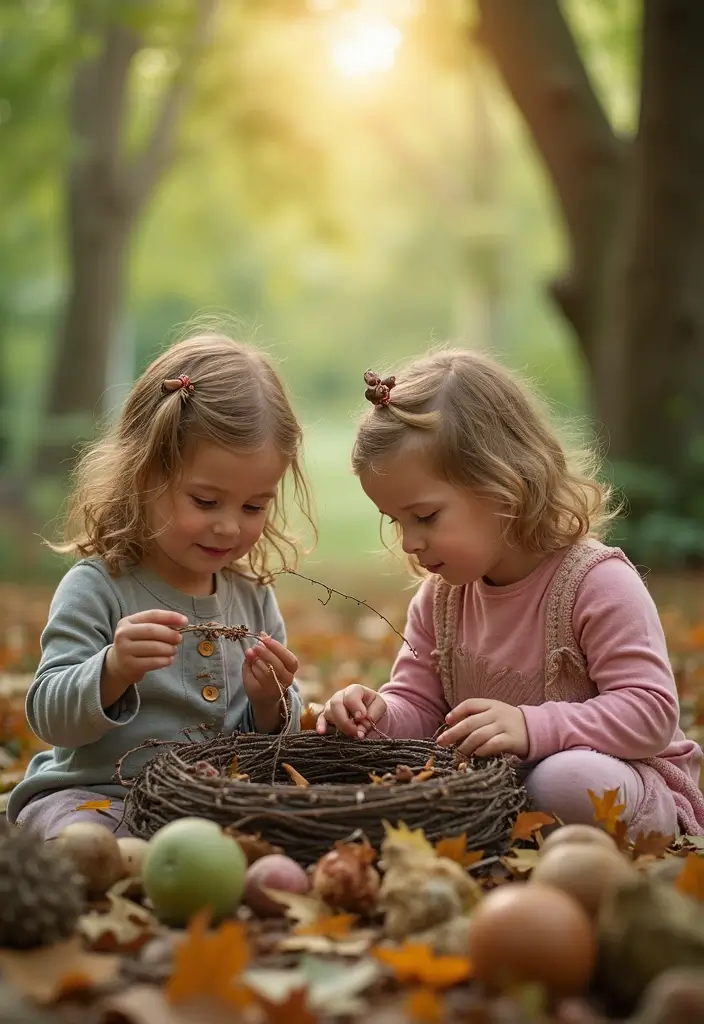
Want a simple way to bring nature indoors and spark creativity? This DIY wreath project does both. It uses items you can find outside and helps kids see the seasons in a new light.
Here is why it works: kids pick pieces, arrange them, and finish with a neat circle they can hang anywhere.
– Supplies Needed: A base (cardboard circle or paper plate), twigs or small branches, leaves, flowers or pine needles, glue, and string or a ribbon for hanging.
– How to make it:
1) Gather and sort. Choose sturdy pieces that will hold up.
2) Build the frame. Place big pieces around the edge first.
3) Attach pieces. Glue each piece and press until it sticks.
4) Fill and spark. Add leaves, petals, or berries to fill gaps and add color.
5) Hang. Tie a loop on top and place the wreath where it can be seen.
– Tips: Talk about how the weather changes colors and textures. Tie the craft to a holiday or season for extra fun. Let kids switch the look with different materials each month.
– Unique Insight: This project helps kids notice textures, smells, and the way nature changes, turning a simple craft into a mini nature study.
Next steps: hang the wreath, snap a photo, and try a new material next weekend.
@media(max-width:480px){
28. DIY Flower Crowns
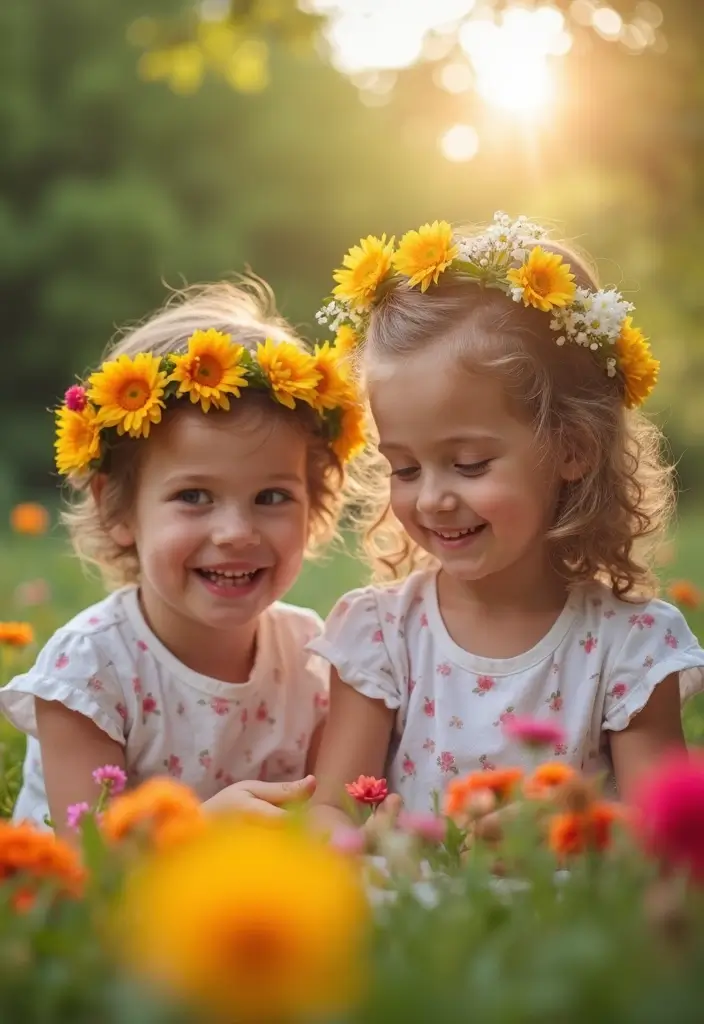
Looking for a fast, kid-friendly craft that uses real flowers? Try a DIY flower crown. It sparks imagination and looks fun on any child.
Supplies Needed:
– Flowers that aren’t too fragile
– Flexible twigs, floral wire, or a soft garland
– Scissors
– Optional ribbon to finish the ends
Here is why these tools work. The base fits around a head and stays comfy. Wire or twigs bend easily for a snug fit.
Steps to make it:
1) Gather bright blooms and a few leaves. Pick stems that stay steady when you bend them.
2) Form a circular base that fits the head. Join the ends with a light twist.
3) Weave or press petals onto the base. Leave space for fullness.
4) Secure the crown. Add a ribbon if you want extra color and tie the ends to keep it tight.
Tips:
– Use non thorny stems for little hands
– Talk about color choices and where you will wear the crown
– Try different looks: sunny mix, pastel blend, or wildflower style
Unique Insight: This craft blends outdoor exploration with art. Kids notice smells, textures, and the season as they create a wearable piece.
Next steps: Take a quick photo with the crown on a friend or stuffed toy. Check the fit and adjust if needed.
@media(max-width:480px){
@media (max-width: 600px) {
.visual-quiz-iframe { min-height: 995px !important; height: 1100px !important; }
}
Conclusion
These 28 DIY crafts are more than just fun activities; they’re opportunities for learning, creativity, and connection with nature.
By engaging in these eco-friendly projects, kids not only develop their artistic skills but also grow an appreciation for the environment around them. Encourage your little ones to get crafty and explore the endless possibilities of creativity while being kind to our planet.
Let these projects inspire joyful memories and foster a lifetime of creativity!
Note: We aim to provide accurate product links, but some may occasionally expire or become unavailable. If this happens, please search directly on Amazon for the product or a suitable alternative.
This post contains Amazon affiliate links, meaning I may earn a small commission if you purchase through my links, at no extra cost to you.
Related Topics
eco-friendly crafts
kids art projects
simple DIY
creative activities
nature crafts
recycled materials
easy crafts for kids
fun craft ideas
upcycled projects
seasonal crafts
quick crafts
hands-on learning