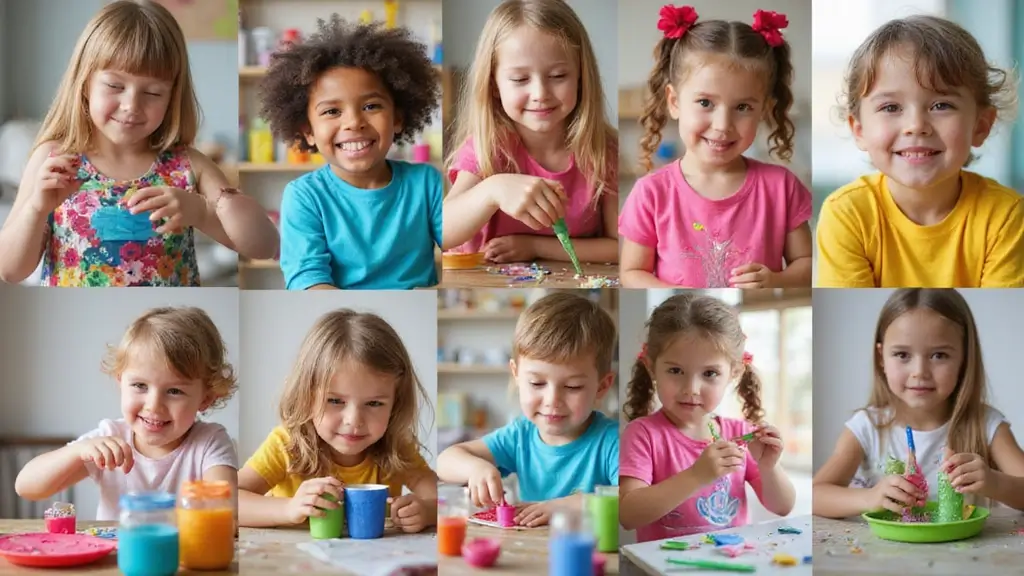
Here is why I put this together. I want to help families make art time easy and joyful. Kids learn best when creativity comes with simple prep. This post collects 27 ideas that fit into busy days.
If you’re a parent, caregiver, or teacher who cares about hands-on learning, this is for you. If your kids love colors, textures, and making things with their hands, you’ll find something they enjoy.
Here you’ll find 27 art and craft ideas for children that inspire young artists. They use common materials—crayons, paper, glue, recycled items—and they stay doable. Each idea includes simple steps and quick setups.
You’ll get tips to adapt these ideas for different ages, spaces, and energy levels. Set up a small art station with a tray, wipes, and a bowl of water to keep it easy. Think in terms of color, texture, and story so kids see the art as a way to express themselves.
The ideas reflect current trends like upcycling and nature-inspired art, but they stay friendly and safe for little hands. They blend pattern and play with room for a child’s own twist. You can mix painting, collage, and simple sculpture to keep art time fresh.
My hope is you try a few this week and see what lights your kid up. Start small with a fifteen-minute session and a single project. If you want, share what worked and what you changed so other families can borrow ideas.
1. Nature Art Collage
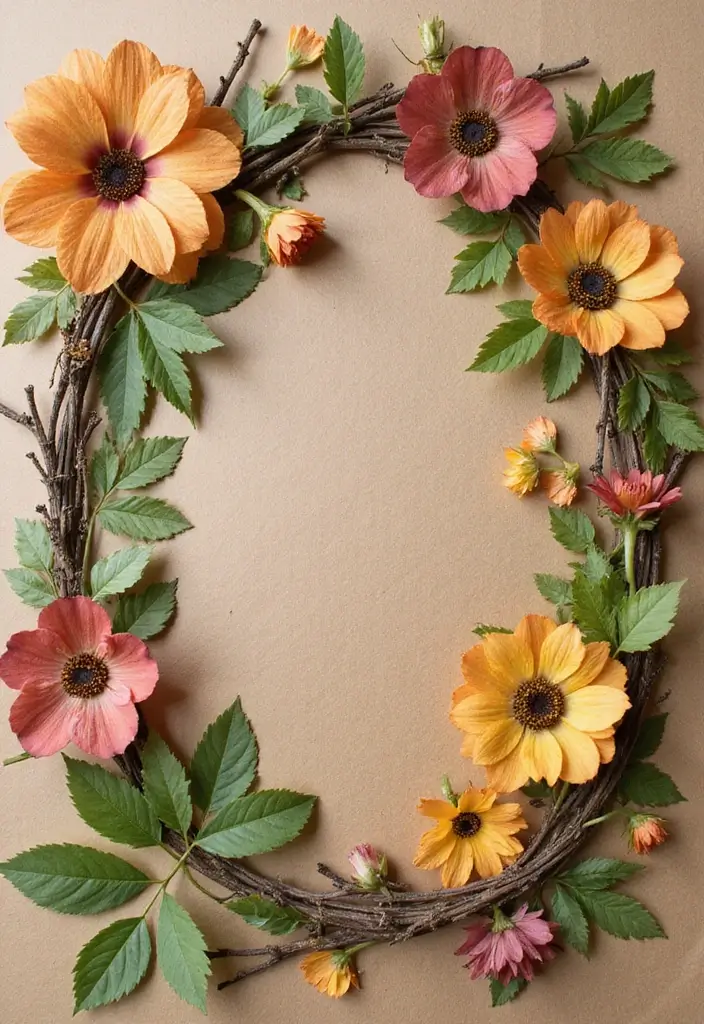
Want a simple art project that gets kids outside and sparks ideas? A nature art collage fits. You grab leaves, petals, and twigs. Then you glue them to a sturdy base. The result is a bright leaf collage you can show off.
What you’ll need
– Cardboard or thick paper
– Leaves, petals, and small twigs
– Glue: school glue, plus a touch of flour glue for a fun twist
– Optional: a recycled frame or a plain board for display
Steps to create
– Take a quick nature walk to collect items. Notice color and shape.
– Arrange pieces on the base first. Move them until the look feels right.
– Glue items down. Press gently so they stay flat.
– Let it dry. If you want, place it in a frame after it dries.
Tips to make it shine
– Choose a color theme, like greens and browns or warm tones.
– Mix textures: smooth petals with rough bark.
– Display with a recycled frame or a simple board.
Next steps
– Protect the collage with a light seal if you have adult help.
– Share the art at home or school, and hang it where sun can play on the leaves.
With practice, your child will plan layouts faster and pick bolder colors.
@media(max-width:480px){
2. DIY Paper Mâché Creations
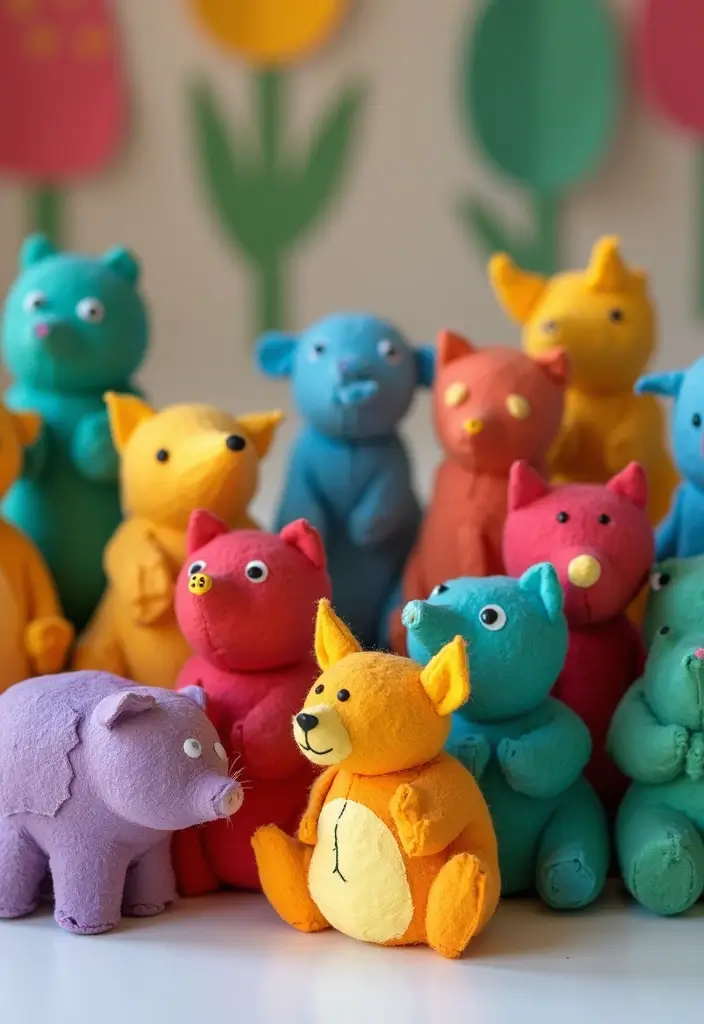
Looking for a messy but rewarding craft that recycles old paper and sparks imagination? DIY paper Mâché Creations give kids a chance to turn scraps into unique art while learning patience.
What you’ll need
– Newspaper strips torn into lightweight pieces
– Flour and water to make a smooth paste
– A balloon, cardboard bowl, or small mold as a base
– Eco-friendly paints for bright finishes
– Natural decorations like seeds, dried petals, or small shells
– A brush and a bowl for glue and paint
Step by step
– Step 1: Make the paste. Stir flour into water until it’s a thin, gluey mix. A pinch of salt helps it keep longer.
– Step 2: Prep the form. Inflate a balloon or set a mold on a plate. This is your sculpture’s shape.
– Step 3: Layer with strips. Dip a strip in paste, wipe off the excess, and lay it on the form. Overlap strips to build strength. Let each layer dry before adding the next.
– Step 4: Dry completely. This can take a day or two. A fan can help move air and speed things up.
– Step 5: Paint and finish. Once hard, paint with bold colors. Seal with a clear finish if you like.
Creative twists
– Make animals, masks, or favorite characters by adding small paper features.
– Try textures with seeds, petals, or cork bits for a tactile feel.
– Create a mini sculpture garden or a user-friendly pinata.
This project blends imagination with recycling. It teaches patience and care as the layers dry, while letting kids proudly display their one-of-a-kind art.
@media(max-width:480px){
3. Eco-Friendly Paints
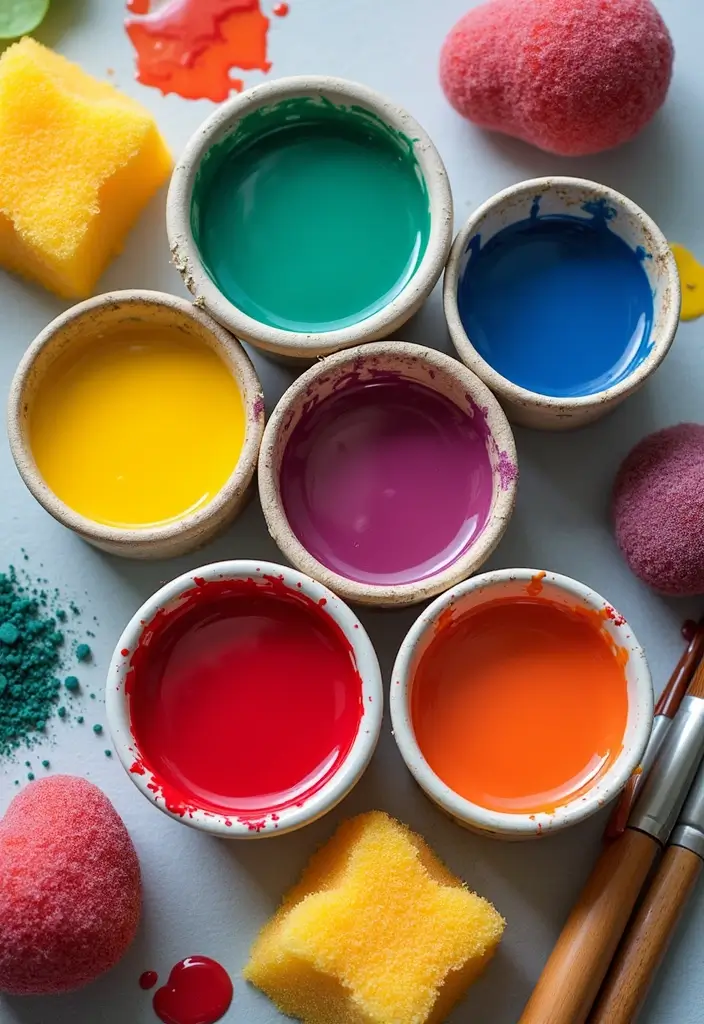
You need a paint option that is safe for kids and gentle on the environment. This DIY mix uses everyday kitchen staples and natural color not synthetic dyes. It sparks curiosity and helps your child learn how colors blend while painting with care.
What you need
– 1 cup flour
– 1 cup water
– 1/4 cup salt
– Natural color sources: beet juice, turmeric mixed with water, spinach juice, blueberry mash, or other real-food colors
Here is how to do it
– In a bowl, whisk together 1 cup flour, 1 cup water, and 1/4 cup salt until smooth.
– Split the paste into small containers for each color you want.
– Add a few drops of your natural color in each container. Start light and add more to deepen the shade.
– Stir well. If you want texture, keep some thicker and thin others with a splash of water.
Tips for best results
– Use brushes, sponges, or fingers to explore marks and patterns.
– Mix colors to see how orange becomes brown or green when you combine yellow and blue.
– If the paste thickens, add a little water until you reach the right consistency.
Storage and safety
– Keep finished paints in airtight containers. Store in the fridge for up to 3 days.
– Stir before using again. If it smells off, discard and make a fresh batch.
Next steps: lead your child through a mini color-mixing project and watch creativity grow with safe, eco-friendly paints.
@media(max-width:480px){
4. Recycled Crayon Art

Here is a quick fix for a common kid mess: broken crayons pile up and waste color. Recycled Crayon Art turns scraps into bright new tools. It helps the planet and sparks play. You will see the smell of warm wax as colors melt and glow on the table.
Here is why it works. Kids watch colors live on after a crayon breaks.
– Gather and sort: Collect all broken pieces and sort by color groups like reds, blues, and greens. This makes mixing easy and fun.
– Prep your melt station: Set up a heat‑safe bowl over gently simmering water or use short microwave bursts. Stir with a wooden stick. Place silicone molds on a tray so they stay steady.
– Fill and swirl: Break pieces to fit, melt until smooth, and pour into molds. Add a drop of another color to swirl. Tilt the tray slightly to spread patterns.
– Cool and shape: Let the wax harden, then pop out the new crayons. Try shapes like stars, hearts, or tiny letters for extra flair.
– Use and share: Kids color with the new crayons. Bold swirls and soft blends make drawing feel fresh again.
Next steps: let kids pick colors and design a mini set to gift. This simple craft turns waste into play and gives you a colorful, low‑cost art option.
@media(max-width:480px){
5. DIY Seed Bombs

You want a craft that kids enjoy and that helps the garden. Seed bombs made from recycled paper do both. They turn scraps into living gifts and show how small acts grow.
What you need
– torn recycled paper
– warm water
– seeds (wildflowers work great)
– a bit of flour mixed with water to make a paste (optional)
– a tray or rack to dry on
Steps
– Tear paper into tiny bits.
– Soak the bits in warm water until soft.
– Drain and mash the soggy paper into a soft pulp.
– Stir in seeds until they spread through the mix.
– Scoop out small lumps and roll them in your hands to make balls.
– Place the balls on a tray and let them dry in the sun for 1–2 days.
– Plant the bombs by pressing them into soil or dropping them into a pot. Water gently.
Here is why this helps
– Use wildflower seeds for a bright display.
– Host a seed bomb swap party with friends.
– Label each bomb with the plant name so kids learn as they grow.
– Talk about care: sun, water, and how rain helps seeds sprout.
Next steps
– Try a small batch this weekend.
@media(max-width:480px){
6. Upcycled Bottle Planters

If you want a quick craft that grows a small garden, this one fits. You turn plastic bottles into mini planters for herbs or flowers. It is easy, fun, and teaches reuse at the same time.
Here is how to do it:
– Cut a bottle in half to use as the planter.
– Poke a few small drainage holes in the lid and sides to keep roots happy.
– Decorate the outside with non toxic paints or wrap with fabric scraps.
– Fill with soil and a seed or a tiny plant.
– Water gently.
Tips to make it last
– Use eco friendly paints or cover the surface with recycled paper for color.
– Let kids choose plants that fit their space, like basil, mint, lavender, or small flowers.
– Keep the planters in a sunny spot and check moisture daily.
– Label each bottle so you remember what you planted.
Why this works for kids
– It builds care habits, as kids water and watch growth.
– It shows how reuse can spark creativity.
– It gives a visible result you can share with family and friends.
Next steps: set up a little herb corner on a windowsill or balcony. You will see tiny green changes every day.
Your kids will love the tiny garden they built.
@media(max-width:480px){
7. Nature Scavenger Hunt Art

Nature Scavenger Hunt Art
You need a simple, hands-on activity that links outdoor exploration with art. A nature scavenger hunt turns a walk into a creative session your kids will love. It builds focus, curiosity, and texture sense as they work with natural pieces. You control the pace and the amount of time spent outside.
What you’ll need
– A short list of items to find is leaves, stones, petals, pinecones, or small twigs.
– A bag or tray collects pieces.
– Paper, glue, crayons or paints, and a flat surface to work.
How to run it
– Set a time frame and a quick list. Kids mark off each item as they spot it.
– Let them choose pieces carefully. Ask them to feel bark, trace patterns, or listen for birds.
– Return to a table and pick a project: a collage, a leaf print, or a nature sculpture.
– Attach or arrange the found pieces to create art. A leaf can be pressed with crayon to make a print; sticks can frame a picture; petals can color a painted sky.
Story time and sharing
– Ask, “Where did this piece come from?”
– What story does it tell?
– Sharing stories adds meaning to the art.
Benefits in short
– This activity blends movement with creativity.
– It strengthens observation skills and invites kids to try new materials and ideas.
@media(max-width:480px){
8. Salt Dough Sculptures

If your child loves to shape and color but you want a cheap project, salt dough is a perfect fit. It is soft.
What you need:
– 2 cups flour
– 1 cup salt
– 1 cup warm water
– Optional: color
How to make:
– Stir the flour and salt in a bowl.
– Pour in warm water and mix until a ball forms.
– Knead for 3–5 minutes. The dough should feel smooth and slightly firm.
Shape and dry:
– Let your kid roll, press, and mold into animals, stars, or characters.
– Use cookie cutters for quick shapes.
– For color, mix in turmeric for yellow or cocoa powder for brown.
– Here is why: shaping by hand builds grip and control.
Drying options:
– Air dry 1 day or more, depending on thickness.
– Or bake gently at a low heat around 200°F until hard.
Paint and seal:
– Once cool, paint with acrylics or tempera paints.
– Add a clear sealant to protect the sculpture.
Tips and ideas:
– Tell a story about each piece.
– Keep pieces small so they dry evenly.
– Store unused dough in an airtight bag.
This project boosts fine motor skills and confidence. Next steps: start mixing, shaping, and sharing. It’s a simple, fun project to share.
@media(max-width:480px){
9. Recycled Paper Beads
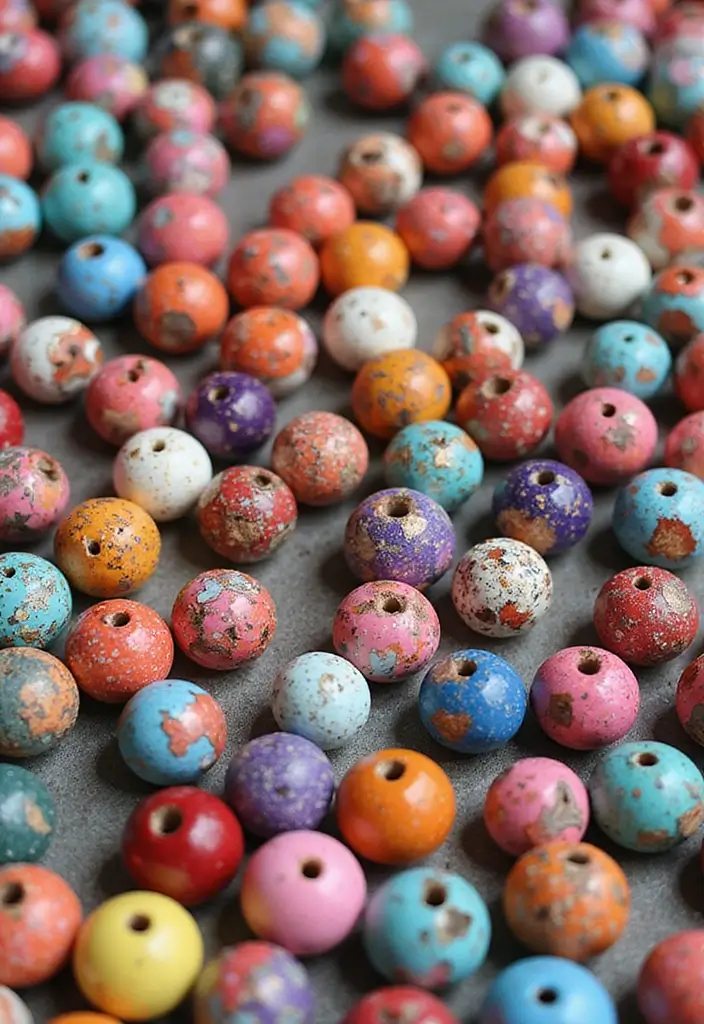
Need a kid-friendly craft that helps the planet and sparks pride? Recycled paper beads do just that. You take old magazines or newspapers and turn them into tiny beads you can string into jewelry or use to decorate gifts.
Here is why this works. It is simple, cheap, and kind to the planet.
Materials
– Old magazines or newspapers
– Scissors
– A glue stick or craft glue
– Toothpicks or thin wooden skewers
– String, thread, or embroidery floss
– Markers or paints
– Optional: clear glue for sealing
How to make
– Cut the paper into triangles about two inches tall. Keep the edges neat so the beads roll smoothly.
– Roll each triangle tightly around a toothpick. Seal the tip with a dab of glue.
– Let the bead dry a bit, then decorate the outside with markers or paint. Press on stickers if you like.
– When many beads are ready, slide them onto string. Tie knots to secure the ends.
– Try different paper patterns or sizes to see new looks, from tiny seed beads to chunky beads.
Ways to use
– Make a necklace or bracelet. Kids love wearing their own art.
– Use beads to embellish gifts or cards. A bead strand around a jar lid makes a cute topper.
– Mix with plain beads for contrast.
Tips
– Use glossy magazines for shiny beads. Matte paper stays smooth with a light coat of glue.
– Let glue dry fully to avoid bends. Store beads in a small box.
@media(max-width:480px){
10. Colorful Sand Art
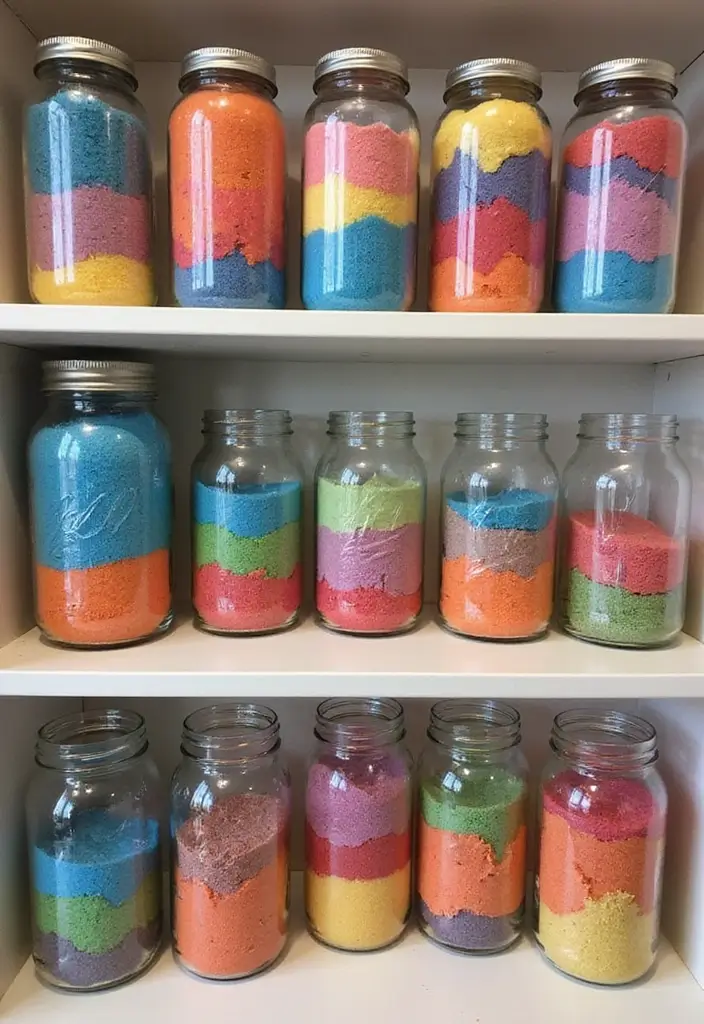
If you need a quick, calm craft that sparks creativity, try colorful sand art. It uses simple supplies and makes bright, neat patterns in a bottle or jar. You’ll see kids focus as they build layer after layer of color. Here is how to get started.
What you need
– Clear glass or plastic bottles or jars
– Eco-friendly colored sand from natural dyes
– A small funnel or folded paper for guiding sand
– A stick or ruler to help tap and level
– A spoon for gentle pouring
How to layer
– Start with a thin base color. Pour slowly.
– Add the next color in a clean layer. Tap gently to settle it.
– Repeat to make stripes, waves, or a simple gradient.
– Try curves by tilting the bottle a bit as you pour.
Creative ideas
– Build a beach scene with blues, tans, and whites.
– Create a rainbow by stacking red through violet.
– Make a geometric pattern by stacking short, even blocks.
Tips that help
– Keep sand dry to prevent mixing.
– If colors merge, pause, wipe the rim, and re-layer.
– Seal the lid tightly to keep dust out.
Display and care
– Stand bottles on a shelf where light makes the colors glow.
– Want a new look? Rinse, dry, and start again.
Next steps: After you finish, take a quick photo to save your pattern for later.
@media(max-width:480px){
11. DIY Leaf Rubbings

If you want a quick, nature-friendly craft, leaf rubbings fit the bill. Leaf rubbings let kids see texture and shape in a simple, quiet way. This art form needs little prep, so you can start right away.
What you’ll need
– Paper for drawing
– Fresh leaves with clear veins
– Non-toxic crayons
– Tape or a lightweight clipboard to hold the paper
Optional: a small splash of watercolor for soft touches
How to do it
– Choose leaves with interesting shapes.
– Place the leaf under your paper.
– Color over the leaf with the crayon, using the side.
– Lift the paper and peek at the leaf pattern.
– Repeat with more leaves to fill a page.
Tips to try
– Try many leaves from the same tree for subtle changes.
– Use several colors for a rainbow effect.
– Press leaves flat for crisper edges.
– Create a small nature gallery on a wall.
Display ideas
– Turn rubbings into cards or a poster.
– Label each piece with leaf name or color.
– Lay out a nature theme and add captions.
Safety and care
– Use clean paper and wash hands after.
– Store rubbings flat to keep creases away.
Why this works
– Focusing on a leaf helps kids slow down.
– They watch the veins and edges as the color shows.
– That tiny result boosts pride and curiosity.
– Plus, it turns a simple walk outside into art.
– Kids learn to mix colors by layering on one page.
12. Painted Rock Art

Painted Rock Art
You want a simple craft that sparks creativity in kids. Painting rocks gives that spark with little mess and big payoff. No special tools needed, just smooth stones and color. You can do this indoors or outside, rain or shine.
What you need is easy: smooth rocks, non-toxic paints, brushes, and a sealant if you want them to last. You can start with a small pile from the yard or park. Wash and dry them first. Let each rock dry before painting.
Why this works: it blends art with nature. It builds focus and pride when a design is finished. It also invites kindness when you hide rocks for others to find.
Here is why you should try it:
– Use eco-friendly paints or natural dyes to stay green.
– Create a garden rock collection with happy messages.
– Hide painted rocks in parks or around your home for a little treasure hunt.
Tips for success: keep designs simple.
– Start with dots, stripes, or smiley faces.
– Use a clear sealant so colors last.
– If you miss a spot, fix it with a second coat.
Next steps: display your best rocks on a shelf or start a small rock gallery in your yard. It’s a kind, creative habit that kids can repeat any time.
@media(max-width:480px){
@media (max-width: 600px) {
.visual-quiz-iframe { min-height: 995px !important; height: 1100px !important; }
}
13. Sensory Art with Natural Materials

Are you looking for a kids’ art activity that’s easy, calming, and full of discovery? Try sensory art with natural materials. You’ll use what you find outside to spark touch, sight, and even scent, turning a simple project into a small nature exploration indoors.
– Gather items like sand, leaves, flowers, pinecones, bark, sticks, and moss.
– Make a simple glue with flour and water, or use a safe, natural paste you already have.
– Set up a sensory art station with a low tray, a few jars, and cloths for clean hands.
Here is why it works. The hands stay busy, which strengthens small muscles. Language grows as kids name how each item feels and looks. The outdoor touches a kid’s curiosity, too. Let the session be a calm, creative time rather than a race to finish.
Try these concrete activities.
– Leaf rubbings: place a leaf between paper and run a crayon across the top.
– Nature prints: brush a small amount of paint on a leaf, then press it onto paper to leave a print.
– Texture collage: spread a thin layer of glue and lay down different natural pieces to form a picture.
Next steps keep things fresh. Switch in pine needles, petals, or seed pods. Invite kids to describe changes in color and texture as they go. This simple approach keeps art fun, messy in a good way, and deeply connected to nature.
@media(max-width:480px){
14. Upcycled T-Shirt Tote Bags
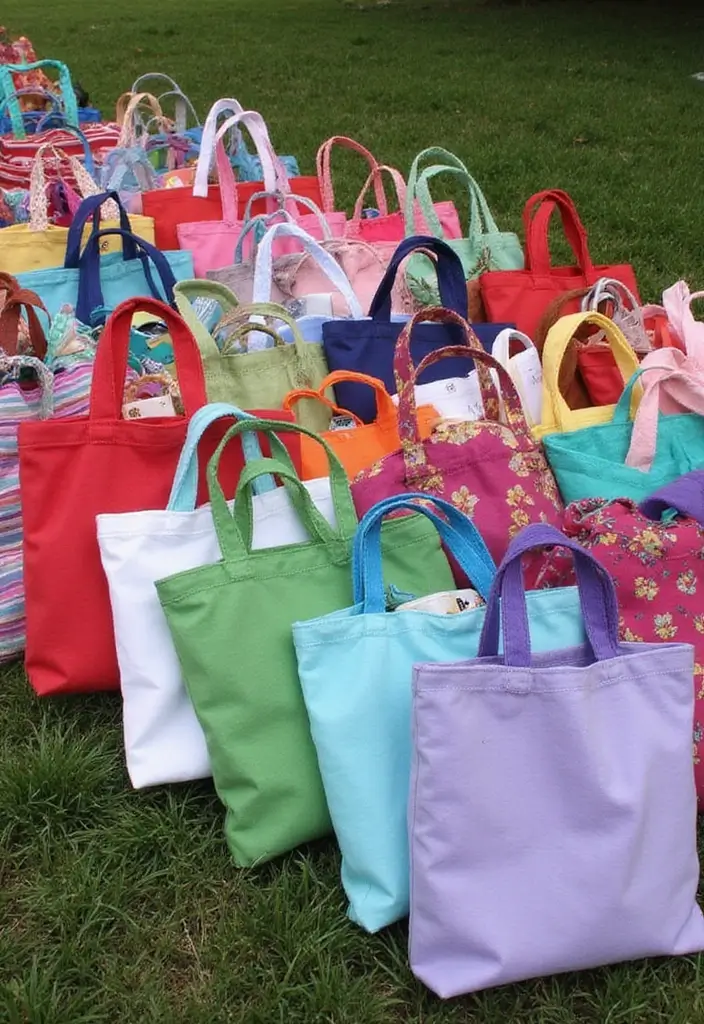
Here is why this project fits your needs. It is quick. It uses a worn shirt. It teaches reuse. It gives kids a real, usable bag.
Here is how it works.
– Pick a soft old t-shirt. Look for colors your child likes.
– Lay it flat. Cut off the sleeves and the neckline so the body becomes a bag shape.
– Turn it inside out. This hides rough edges and makes the bag neat.
– Tie the bottom. Make a knot at the hem to form the base. A second knot adds sturdiness.
– Turn it right side out. You now have a tote you can use.
– Decorate. Use fabric paints or markers. Add patches if you want.
– Use and talk. Take the bag to the grocery store, library, or park. It helps cut plastic waste and shows care for the planet.
Next steps: wash the bag and use it again and again. A simple craft like this builds a real skill and a habit of reuse.
@media(max-width:480px){
@media (max-width: 600px) {
.normal-quiz-iframe { min-height: 570px !important; height: 570px !important; }
}
15. Nature Inspired Mandalas

You want a calm, creative activity that keeps kids focused and connected to nature. Nature inspired mandalas fit. They blend art with quiet thinking and hands on motion each day.
Materials and setup
Gather eco friendly items: smooth stones, colorful leaves, petals, and pinecones. Choose a small patch of ground for a circle or lay a clean mat indoors. Make the mandala temporary so the space can breathe again.
Steps to create
1) Collect items during a short nature walk.
2) Pick a center and draw a light circle as a guide.
3) Place items in a circular pattern, matching colors and shapes.
4) Check balance and symmetry as the design grows.
5) Add a final touch to join ideas into one big piece.
Tips to boost learning
– Eco friendly materials: use items that won’t harm nature.
– Group project: make one large mandala together.
– Cultural meaning: share what mandalas symbolize in different cultures and why symmetry is used.
Why it helps and what you’ll notice
This activity feels calm and bright. Kids notice textures, like smooth stone and soft leaf, plus the scent of fresh air. They learn spacing, patterns, and patience. It becomes art that grows with them. It fits many classrooms and after school programs. Share photos of the finished mandalas to celebrate progress and inspire others.
16. Eco-Friendly Stamps

Want a simple, green way to spark your kid’s art? These DIY stamps use potatoes, sponges, and scraps from your kitchen. They print on paper and fabric.
– What you need: a few potatoes, a sponge, a small knife with supervision, a shallow tray, washable non toxic paint, paper or fabric, and an old apron.
– How to make: cut a potato in half. Carve a simple shape with a safe, smooth edge. For sponges, cut out a shape from a reuse or new sponge. Press the stamp into paint, then onto paper to print. Wash between colors.
– How to use: stamp small shapes for patterns or big shapes for bold prints. Try layering by adding a second stamp on top while the first is wet. Let prints dry flat.
– Learning bits: talk about recycling as you reuse leftovers. Show how scraps can become art instead of trash. If you use fabric, it can be a tiny design on a tote bag or pillow cover.
– Safety and care: kids should handle the stamps with clean hands. Rinse stamps after use and air dry.
This activity gives hands-on craft and a reuse lesson. It is simple and fun.
Want more texture? Stamp on fabric with light paint, then let it dry flat.
17. Recycled Material Sculptures
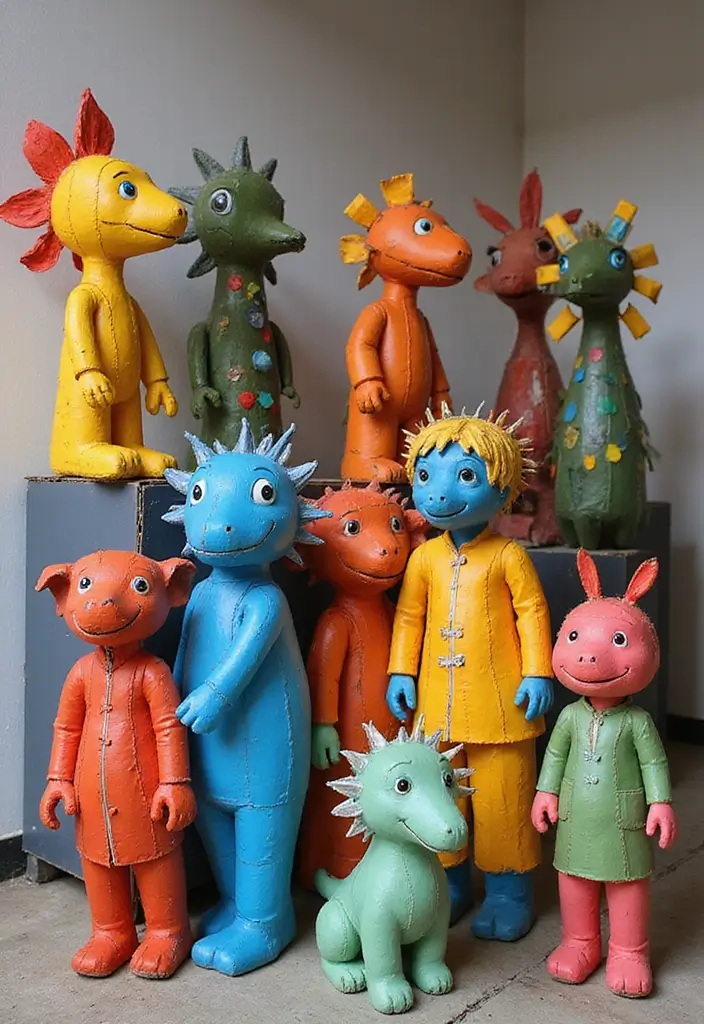
You want a low-cost project that lets kids make real art. Recycled material sculptures do that and teach hands-on skills.
What you’ll gather
Safe scraps: cardboard boxes, clean plastic bottles, and tin cans. Remove labels and lids, and cover sharp edges with tape.
Plan a theme
Choose a simple idea for your project: animals, vehicles, or sea life. A plan helps your child shape their work.
Build together
Start with a cardboard base, add pieces with glue or tape, and press pieces into place. Your child learns to plan, measure, and share ideas.
Finish with color
Let them paint or add texture. Try bright colors and simple patterns. Glue small bits like dots or yarn for variety.
Display and share
Create a small show area on a shelf or wall. Put finished work on display so family and friends can see it.
Teamwork
Invite a small group to work on a larger piece. A dragon or ship made from many parts grows with everyone’s effort.
Tips for success
– Keep edges safe with tape.
– Stick to one clear theme.
– Plan where to display as you go.
– Clean up together to care for space and tools.
These sculptures show how everyday items can become art. It saves materials and sparks pride in your young artist.
Invite your kids to reuse new scraps next week to keep the gallery growing.
@media(max-width:480px){
18. Eco-Friendly Glitter

Eco-Friendly Glitter: DIY Sparkle from Nature
Looking for sparkle you can trust for kids’ crafts? You can make glitter from leaves, petals, or salt. It adds color without plastic waste.
Here is how you do it:
– Gather dry leaves, dried petals, or sea salt.
– Have a small grinder or mortar and pestle ready.
– Have a fine sieve handy.
– Make sure everything is bone dry.
– Crush into a fine, powdery dust.
– Add color with natural dyes: a few drops of beet juice for red, turmeric for yellow, spinach for green.
– Stir until the color is even.
– Add a pinch of cornstarch or baking soda to help the glitter dust stay light.
– Sift out lumps.
– Put the powder in a clean jar with a lid.
– Keep in a cool, dry place.
How to use it
– Dip a brush in glue and sprinkle the powder onto cards, frames, or any paper craft.
– Let it dry, then shake off the extra dust.
Tips
– Mix colors for a one-of-a-kind look.
– Use on eco-friendly paper for cards or decorations.
– Talk with your kids about natural materials and why they matter.
This glitter is a bright, kid-friendly alternative to plastic sparkles.
19. Flower Pressing Art

Flower Pressing Art
Are you looking for a calm crafts project that lets kids slow down and treasure nature? Flower pressing turns found flowers into keepsake art. It teaches patience and makes a tiny gallery from the outdoors.
Here is what you need and how to do it.
What you need
– Fresh flowers picked on a dry day
– Parchment paper or blotter sheets
– Heavy books or a simple flower press
– Glue, tape, or double sided tape
– Card stock, blank cards, or a small frame
– Optional: a small notebook for a memory page
How to do it
– Place a flower between two sheets of parchment. Add another pair of sheets on top.
– Stack the sheets in a heavy book or a press. Leave it for about 1 to 2 weeks.
– Check if the petals feel dry and flat. If not, give it more time.
– If you lack a press, use a DIY press: two boards, a stack of magazines, and rubber bands.
– When dry, trim the flowers and attach them to a card, bookmark, or frame with glue or tape.
– Add a note in your memory book with the flower’s name and what it reminds you of.
Tips to make it richer
– Use many colors and textures from different flowers.
– Talk about plant life stages like bud, bloom, and seed.
– Create a memory page for each flower with a meaning or memory.
Next steps: press a bouquet for a small art show or a greeting card set. A simple, lovely way to keep nature close.
20. Watercolor Nature Art

Watercolor Nature Art
Want a simple, nature inspired art project for kids? Watercolor nature art blends paint with the outdoor world. Kids collect leaves or flowers and use them as stencils. They can also paint what they see around them. This activity strengthens observation and sparks creativity. It’s easy to do with simple materials and a big dose of curiosity. Try it with friends for a small outdoors art session.
Here is how to do it well.
– Use eco-friendly watercolor paints to keep colors bright without harming the water.
– Gather leaves, petals, and small sticks to create natural stencils and textures.
– Try brush techniques such as a soft wash, a light dry brush, and gentle strokes for different effects.
– Encourage kids to observe first, then translate what they see into color and shape.
– Let colors blend on the paper to mimic skies, gardens, and distant hills.
– Ask them to share their art with family and friends to celebrate effort.
– Let the painting dry on a flat surface away from direct sun.
Watercolor nature art offers a calm yet lively way to connect with nature and grow art skills. Grab your brushes and head outside to try it today. You will see color mix in new ways and keep nature close.
@media(max-width:480px){
21. DIY Tie-Dye with Natural Dyes

You want a kid-friendly craft that teaches color and care for the planet. DIY Tie-Dye with Natural Dyes lets your child create bright patterns using foods from your kitchen. Beets give pink or red, turmeric gives yellow, blueberries and red cabbage can bring purples and blues. This project is more than fun; it shows how colors mix and how plants color fabric.
Materials and setup
– White cotton items: shirts, scarves, or napkins work best
– Rubber bands or strings, bowls, and a pot for dye
– Natural sources: beets, turmeric, blueberries, spinach, red cabbage, onion skins
– Salt and white vinegar to help color take
– Gloves, a tray, and a drying rack
How to do it
– Prep the fabric. Wet it and wring out excess water
– Make dye baths. Simmer chopped ingredients in water, then strain out solids
– Tie the fabric. Use different folds and knots to make patterns
– Dye. Submerge tied fabric in the bath and simmer 20 to 40 minutes
– Rinse and dry. Let it air dry on a rack
Tips for great results
– Test colors on small swatches first
– Wear gloves and work in a space you can clean
– Rinse until the water runs clear to set color
– Explain the plant parts used for dye
Next steps
– Try two colors on one piece. Watch how they meet and make new hues
22. Creating Postcards with Nature
Looking for a simple art project that helps your child slow down and connect with the outdoors? Create nature postcards that blend craft with care for the planet.
What you need
– Card stock or blank notecards
– Leaves, pressed flowers, or small twigs
– Glue or glue sticks
– A pen for short messages
How to make them
– Gather a few pieces from nature on a calm day.
– Dry delicate items by pressing them between paper for a day or two.
– Arrange the items on a card, then glue them in a simple design.
– Write a quick note about the nature walk and sign your name.
– Let the glue dry completely before mailing or gifting.
Creative twists
– Add stamps or stickers to dress up the card.
– Write the location where you found each item on the back.
– Turn several cards into a small nature postcard book.
Tips
– Store finished cards in a dry, cool place.
– Test any sealant on a tiny corner first to avoid smudges.
– Be honest about limits; fragile items may fade, but they still shine.
Why it works
– It builds fine motor skills as kids press glue and place items.
– It sparks stories as they talk about where items came from.
– Sending cards helps friends and family feel connected.
Give this a try after a nature walk and watch your child smile at each new card.
@media(max-width:480px){
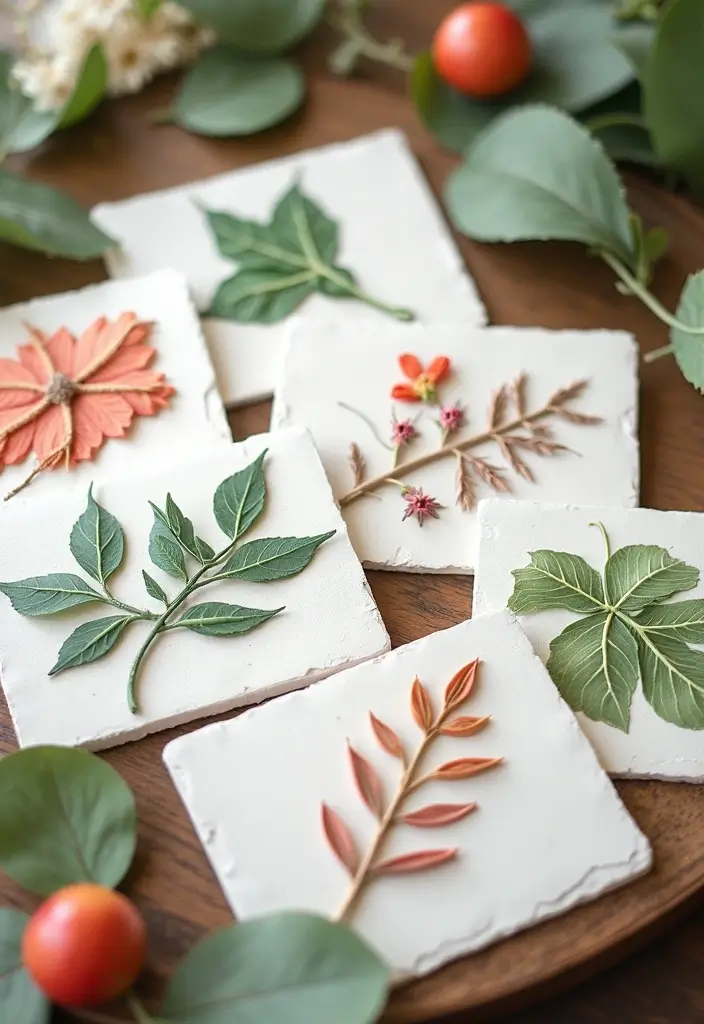
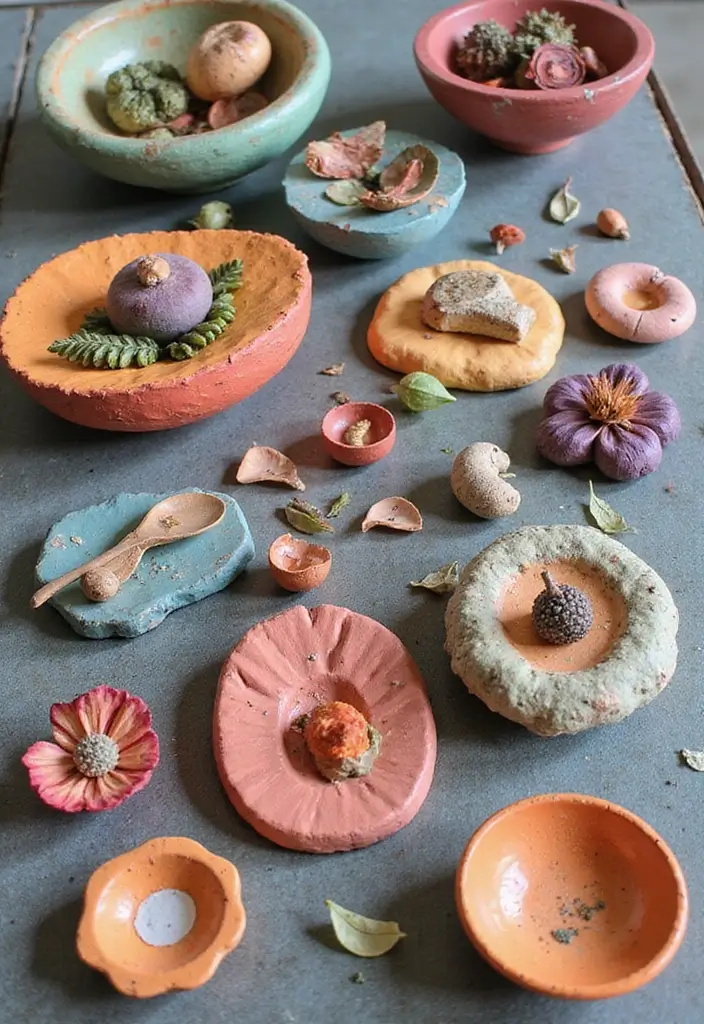
23. Fun with Clay and Natural Objects
Here is why this activity works for you: it taps into kids’ love for textures and nature, and it stays simple.
– Start with air-dry clay. No oven needed. Roll a thin sheet, then press in leaves, flowers, or shells to leave big, clear prints. When you lift them, you see ridges and tiny patterns.
– Let the pieces dry. Then paint with water-based, earth-friendly paints. The colors look bright on the natural surfaces.
– Create a nature scene, like a tiny landscape or a group of animals made from the same clay. You can add a simple background with soft hills or a sky painted after drying.
Here is how to make it extra fun: turn the art into a short story. Ask your child what story the natural object tells. A shell can be a boat, a leaf a sail, a pine cone a sleeping bear. Let the tale guide color choices and placement.
Next steps and tips
– Use biodegradable clay for a green option.
– Choose natural objects with interesting textures to print.
– Keep a quick note of what you pressed and the story it inspired.
This approach blends nature with craft. It builds fine motor skills, focus, and imagination without a big mess or setup.
@media(max-width:480px){
24. Pinecone Bird Feeders

Why this idea helps kids
You want a simple craft that teaches care and nature. Pinecone bird feeders give that. Here is why they work: pinecones are easy to find. A pinecone becomes a tiny ready-made feeder. The scent of peanut butter and seeds fills the air as kids press and roll. Birds show up, and kids feel a sense of help.
What you’ll make
A pinecone coated with peanut butter and seeds. You hang it outside for birds to munch.
Let’s break it down
Materials
– Pinecones
– Natural or organic peanut butter
– Birdseed
– String or yarn
– Scissors
Steps
1. Hold the pinecone and dab peanut butter into the scales.
2. Roll it in birdseed until it sticks all around.
3. Tie a string to the top and loop the other end around a branch.
4. Hang where birds can reach and pets or kids are safe.
Tips to boost fun
– Use organic peanut butter to keep it eco-friendly.
– Watch the birds visit and notice colors, shapes, or songs.
– Start a simple bird log. Note the date and which birds you saw.
Next steps
Make a few feeders, compare which birds come to which trees, and feel proud of your own wildlife helpers.
You’ve helped nature.
@media(max-width:480px){
25. DIY Eco-Friendly Christmas Ornaments

Want easy, eco-friendly Christmas ornaments you can make with your kids? Turn simple natural finds into keepsakes that smell like the holidays.
What you need
– Dried orange slices
– Cinnamon sticks
– Pinecones
– Biodegradable twine
– Non-toxic glue
– Scissors
How to make
– Dry orange slices in sun for a few days, or bake at a low heat (about 200°F) for 2–3 hours. Turn them over halfway.
– Clean pinecones and let them dry completely.
– Tie a small loop of twine at the top. For a simple ornament, wrap a cinnamon stick with twine and add an orange slice.
– Glue can help, but it’s not required. Let decorations dry before hanging.
– Make a set of three for a coordinated look or group by a theme, like winter woods.
Design ideas
– Forest vibe: mix pinecones, orange slices, and a leaf.
– Winter sun: pair a slice with a stick to resemble a glowing orb.
– Keep it natural: skip glitter and use only natural colors.
Tips
– Hang with biodegradable twine.
– Pick a theme before you begin.
– Create a small craft station and store finished pieces in a labeled box.
Common questions
– How long do they last? A few weeks to a season if kept dry.
– Can kids help? Yes, they can cut, thread, and decorate.
– What if slices don’t dry evenly? Try different natural shapes like pinecones or dried herb bundles.
Next steps
Choose your materials, set up a mini craft station, and host a family ornament night this week.
26. Wind Chimes from Recycled Materials

You want a craft that is simple and green. Wind chimes from recycled items fit the bill. They mix art with sound in a small, easy project.
What you will need
– Old keys
– Bottle caps
– Wooden sticks
– String or thin twine
– Eco-friendly paint or natural decorations
How to make them
– Clean all items. Dry them well.
– Decorate each piece with paint or natural bits like leaves or shells.
– Cut strings to different lengths. This makes a range of tones.
– Tie strings to a sturdy ring or a thick wooden stick. Leave space so pieces can swing.
– Lightly test the sounds. Move pieces closer or farther apart to change the rhythm.
Tips for better sound and safety
– Use lightweight items so the wind moves them easily.
– Avoid very small parts. They can be a choking hazard for young kids.
– Hang chimes where wind can reach, away from crowded doors or sidewalks.
Why this works
– You turn scraps into art that you can hear.
– The project builds hand-eye coordination and listening skills.
– It adds a cheerful, musical touch to a porch, garden, or window.
Next steps: hang your chimes outside and listen for the changing chorus as the wind shifts.
@media(max-width:480px){
27. Sand Art Terrariums

You want a kid-friendly craft that teaches while it keeps you busy. Sand art terrariums in jars let you build a tiny living world you can see and touch. Here is a simple way to make them. Next steps keep you moving.
What you need
– A clear glass jar with a lid.
– Colored sand in a few shades.
– Small pebbles or gravel.
– A thin layer of soil or a patch of moss.
– Tiny plants, like a small succulent or moss.
– A small spoon or funnel to place sand.
– A spray bottle for a light mist.
– Natural decorations like shells or sticks.
Steps
– Step 1. Clean the jar thoroughly and dry it.
– Step 2. Add pebbles for drainage, then the soil or moss base.
– Step 3. Layer colored sand to form simple patterns.
– Step 4. Place the plants on top and tuck them in gently.
– Step 5. Mist lightly and set the terrarium in bright, indirect light.
Care and learning
Here’s why this works. It shows how a small ecosystem fits in a jar. You can talk about water needs, sun, and how to keep plants healthy. Keep the jar away from direct sun to preserve the sand colors.
Make it yours
Personalize with shells, stones, or tiny figurines. Switch colors for the season or keep one calm shade for a clean look. This project blends art with nature in a fun, simple way.
Conclusion

With these 27 art and craft ideas, young artists can unleash their creativity while being kind to the planet!
From creating stunning pieces with natural materials to upcycling everyday items, every project not only nurtures artistic skills but also instills a love for sustainability.
Encourage your kids to dive into these fun activities and see where their imagination takes them!
Note: We aim to provide accurate product links, but some may occasionally expire or become unavailable. If this happens, please search directly on Amazon for the product or a suitable alternative.
This post contains Amazon affiliate links, meaning I may earn a small commission if you purchase through my links, at no extra cost to you.
Related Topics
eco-friendly crafts
kids art activities
easy DIY projects
nature-inspired art
recycled materials
fun crafts for children
creative projects for kids
simple art ideas
educational crafts
outdoor activities
quick crafts
hands-on learning