Vintage jewelry has a charm that’s hard to resist. Whether it’s a delicate locket passed down through generations or a bold statement piece from a flea market, these treasures tell stories. This post comes from my love for all things vintage and a desire to inspire your creativity. If you’re someone who enjoys DIY projects and values unique, handmade items, this collection of DIY vintage jewelry ideas is perfect for you.
In this guide, you’ll find 18 captivating projects that breathe new life into vintage materials. From antique buttons to watch parts, these ideas are not only fun but also allow you to create stylish, one-of-a-kind accessories. Imagine wearing a piece of jewelry that you crafted yourself, connecting you to a time long gone while making a statement today. You’ll discover how easy it is to transform everyday items into beautiful, wearable art that reflects your unique style.
So, whether you’re a seasoned crafter or just starting your journey in DIY jewelry making, get ready to dive into a world of creativity. Let’s uncover these timeless vintage jewelry projects that are sure to inspire your own crafting adventures.
Key Takeaways
– You’ll learn how to create unique pieces of jewelry using everyday vintage materials like buttons, spoons, and jewelry parts, making each item a standout in your collection.
– This guide includes clear DIY jewelry tutorials that help you craft accessories step-by-step, ensuring that you can follow along easily, even if you’re a beginner.
– Each project is designed to embrace upcycled materials, promoting sustainability while letting your creativity shine, which is great for the environment.
– The vintage jewelry ideas range from fun and playful pieces like fabric and bead bracelets to elegant items like lace and pearl earrings, catering to various tastes.
– By crafting handmade vintage accessories, you not only express your personal style but also create meaningful gifts for friends and family, making each piece special.
1. Antique Button Bracelets
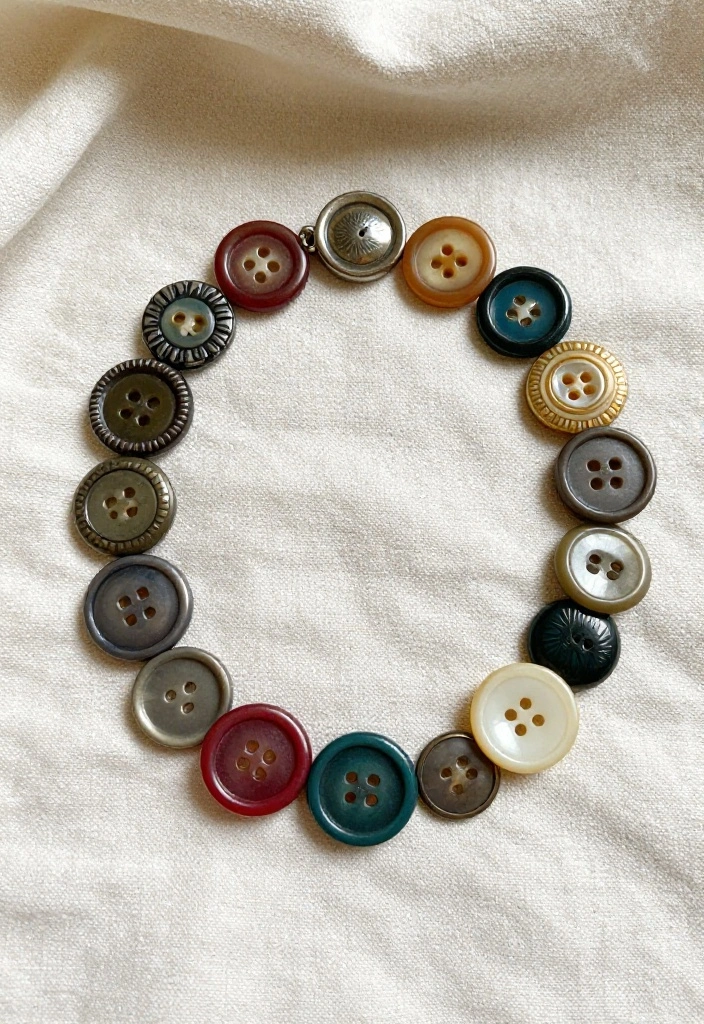
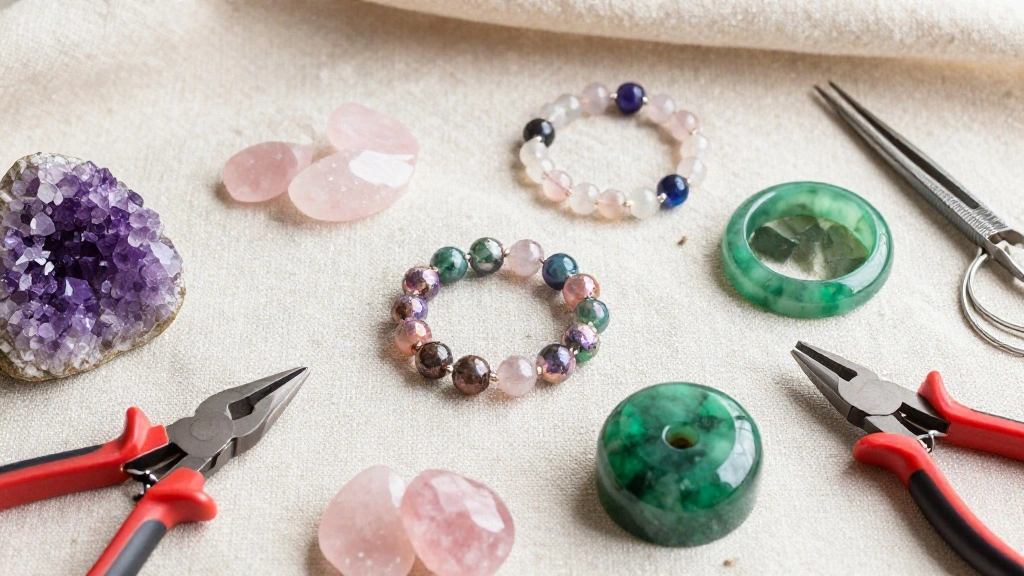
Get ready to unleash your creativity with antique buttons! These charming pieces can be transformed into unique bracelets that showcase your personal style. By using buttons in different sizes, colors, and shapes, you’ll create delightful accessories that stand out.
Mixing various styles and textures adds depth to your look, making these bracelets not just accessories, but statements. They easily pair with casual outfits or can elevate a more polished ensemble.
Outfit Pieces:
– Assorted antique buttons in various colors and sizes
– Sturdy elastic cord (clear or colored)
– Scissors
– Needle for threading the cord through buttons
Styling Tips:
– Lay out your buttons in a pattern before starting to visualize your design.
– Cut the elastic cord a bit longer than your wrist size for a comfortable fit.
– Secure buttons tightly on the cord to avoid any slipping.
– Consider creating multiple bracelets for a trendy stacked look.
Your handmade bracelet will be a conversation starter, perfect for casual outings, parties, or even as a thoughtful gift. Feel free to swap in different button styles for a fresh look every time!
Buttons are tiny time machines—wear a story on your wrist. With diy vintage jewelry ideas, mix sizes and textures to craft bracelets that feel bold yet effortless. Your personal touch turns each upcycled piece into timeless style.
Recommended Products

Package includes: package comes with 50 pieces antique sliver buttons and 30 pieces antique bronze buttons

12 Pieces in a package
✨ Transform Your Space Effortlessly
Unlock your home’s potential with this DIY guide for stunning makeovers that complement your vintage jewelry creations.
2. Upcycled Brooch Necklaces
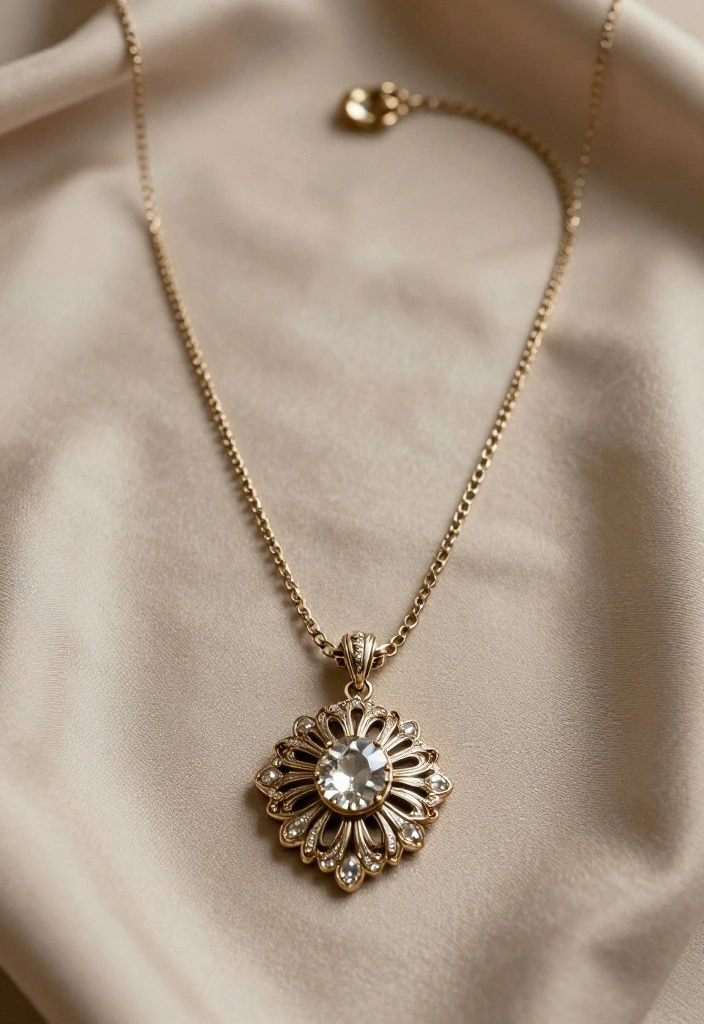
Revamp your jewelry collection with upcycled brooch necklaces! These vintage treasures can be easily transformed into elegant necklaces that exude charm and personality. Attaching a brooch to a simple chain or ribbon creates a stunning focal point for your outfit.
This DIY project works beautifully because it combines nostalgia with modern flair, perfect for both casual and formal occasions.
Outfit Pieces:
– Vintage brooches (your favorites)
– Simple chain (silver, gold, or colored)
– Velvet ribbon (optional)
– Jump rings
– Pliers for assembly
Styling Tips:
– Choose a brooch that resonates with your personal style for a unique touch.
– Use pliers to securely attach jump rings to the brooch clasp for durability.
– Adjust the chain or ribbon length to suit your outfit and neckline.
– Pair your necklace with a simple top or dress to let it shine.
This necklace is perfect for enhancing everyday outfits or adding a touch of elegance to evening wear. Layer multiple necklaces for a fashion-forward statement!
Recommended Products

【Package Includes】You will receive 12 necklace brooch converters, available in two classic colors: gold and silver, 6 of each color, simple yet elegant, to meet your various crafting needs.

Brooch to Pendant Converter: Transform your favorite brooches into stunning pendants with Ymapinc's 12pcs converter set, designed to meet all your DIY pendant needs

PRODUCT CONTENT: You will receive 6 necklace brooch converters, which include two classic colors of gold and silver, 3 of each color, which are simple yet elegant and can meet your various handmade needs
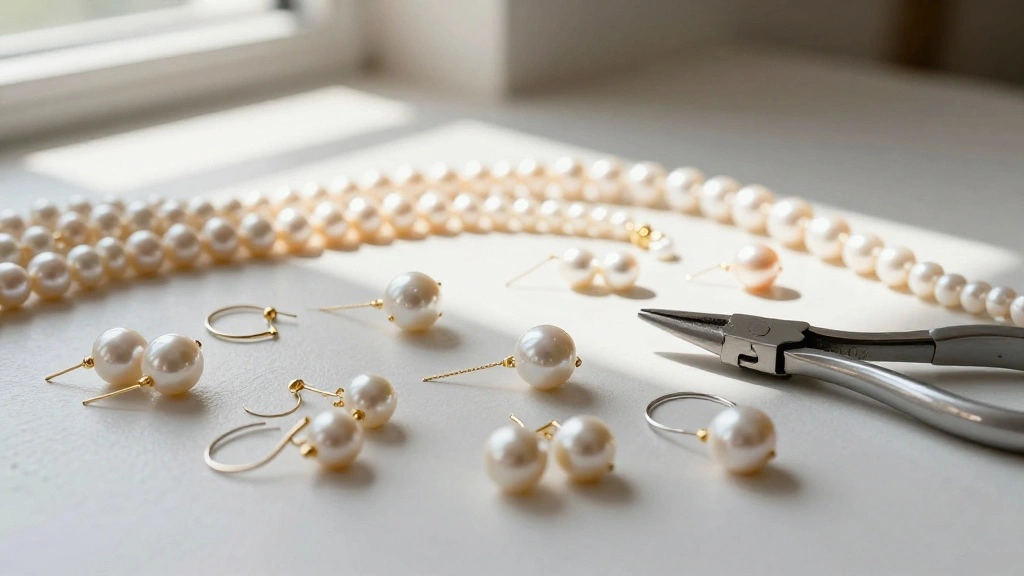
3. Lace and Pearl Earrings
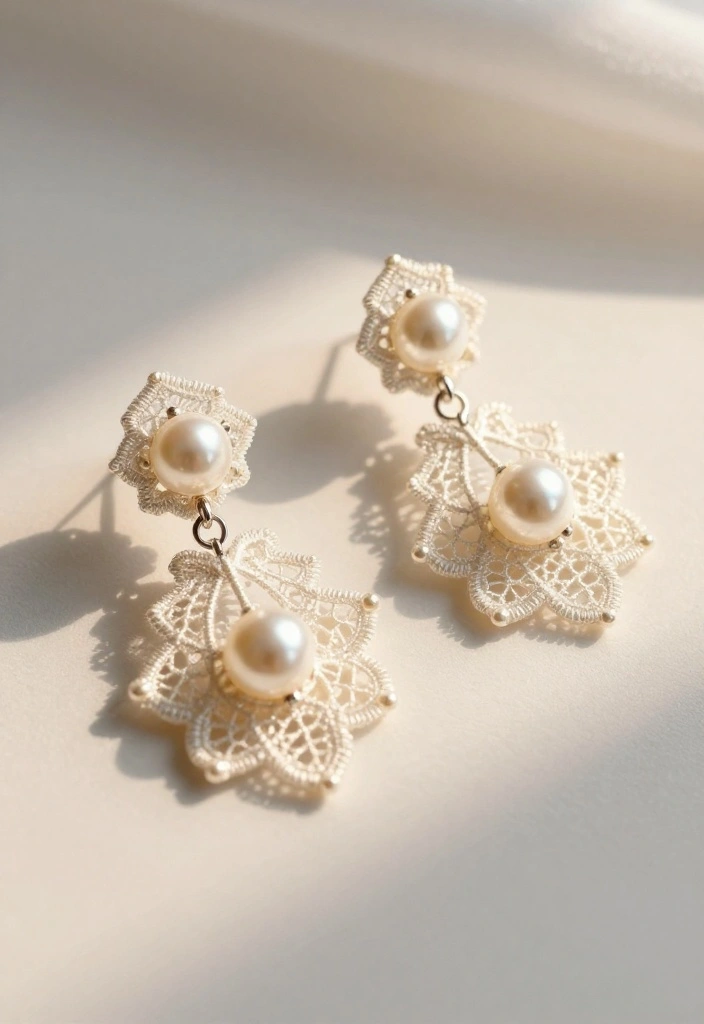
Elevate your accessory game with lace and pearl earrings for a romantic vintage vibe! These delicate earrings blend elegance and whimsy, making them perfect for any occasion. The soft texture of lace paired with the shine of pearls creates a beautiful contrast that catches the eye.
These earrings are versatile enough to complement both daytime and evening outfits, adding a touch of sophistication.
Outfit Pieces:
– Vintage lace (white or pastel colors)
– Faux or real pearls (varied sizes)
– Earring hooks
– Strong glue for assembly
Styling Tips:
– Cut the lace into shapes like teardrops for a classic look.
– Space out the pearls evenly on the lace for a balanced design.
– Attach the lace securely to the earring hooks to ensure durability.
– Consider dyeing the lace in your favorite colors for a personalized touch.
These earrings will be a stunning addition to your collection, perfect for weddings, brunches, or date nights. You can also mix and match sizes for a playful yet elegant look!
Recommended Products

Pearl Hoop Earrings:Gold pearl earrings are hung with our fresh-water pearls, and the classic hinge small gold hoop earrings design makes these gold dangle earrings for women swing when hanging, adding cuteness and beauty to your outfit
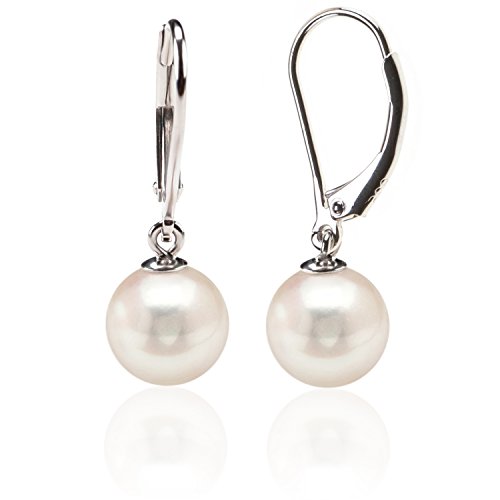
HIGHLIGHTS: These lever-back earrings feature 925 sterling silver posts and 6mm simulated shell pearls, lab-created from mother of pearl, shaped into round beads, and coated with natural nacre for a brilliant glow.

ELEGANT DESIGN : Pearl earrings feature a sophisticated combination of Water drop earrings and lustrous pearls, that complements both casual and formal outfits.
4. Vintage Spoon Rings
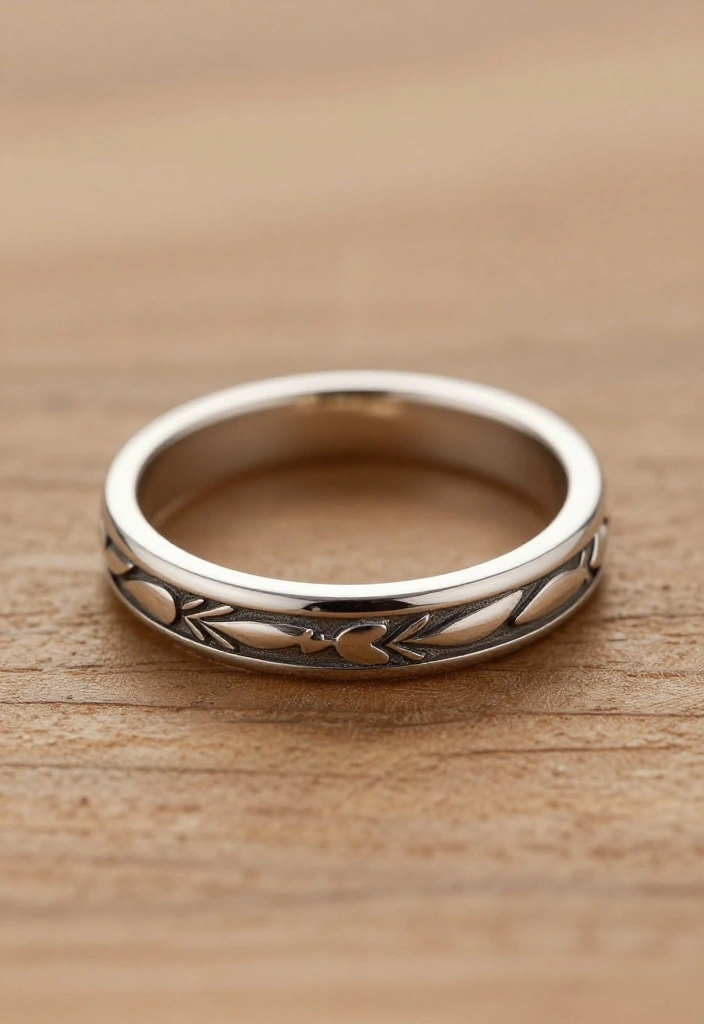
Transform old spoons into eye-catching rings, adding a personal touch to your jewelry collection! Spoon rings not only showcase trendy design but also carry a rich history, making them unique conversation pieces. They’re a fantastic way to incorporate vintage charm into your everyday style.
This DIY project brings creativity and functionality together, ideal for casual outings or special occasions.
Outfit Pieces:
– Old spoons with unique patterns
– Ring mandrel for shaping
– Hammer for flattening
– Sandpaper for finishing touch
Styling Tips:
– Choose spoons with interesting designs for added appeal.
– Flatten the handle gently to maintain its integrity while shaping.
– Adjust the size carefully on the mandrel for a perfect fit.
– Sand any rough edges for comfort when wearing.
Your vintage spoon ring will be a standout piece, great for everyday wear or as a thoughtful gift. Mix different designs for a stacked effect that’s both trendy and personal!
5. Vintage Watch Parts Jewelry
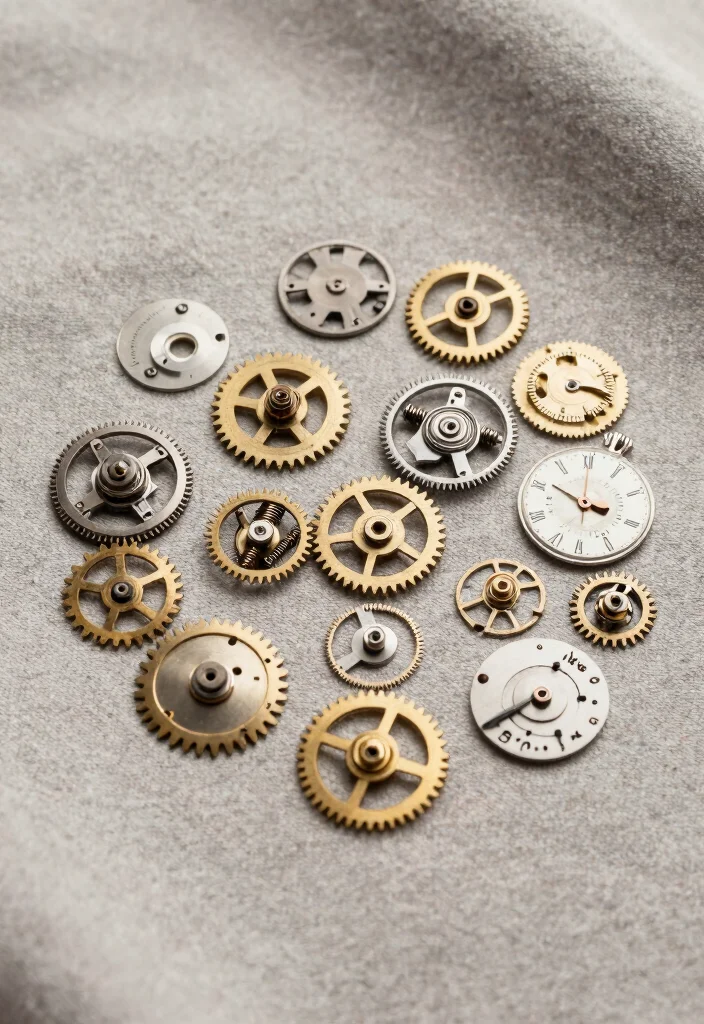
Dive into the world of steampunk aesthetics by repurposing old watch parts into unique jewelry! The intricate gears and dials add a mechanical charm that stands out in any accessory collection. This creative approach allows you to wear a piece of history while showcasing your individual style.
These pieces are perfect for those who love to make bold statements or appreciate the art of craftsmanship.
Outfit Pieces:
– Old watches (that are no longer functional)
– Jewelry pliers for assembly
– Chains or earring hooks for attachment
Styling Tips:
– Carefully disassemble the watch to source interesting parts.
– Choose components that complement each other for a cohesive look.
– Securely attach parts to chains or hooks with pliers for durability.
– Mix watch parts with other vintage elements for an eclectic style.
Your watch parts jewelry will be an eye-catching addition to any outfit, ideal for casual wear or themed gatherings. Each piece tells a story, making it a conversation starter wherever you go!
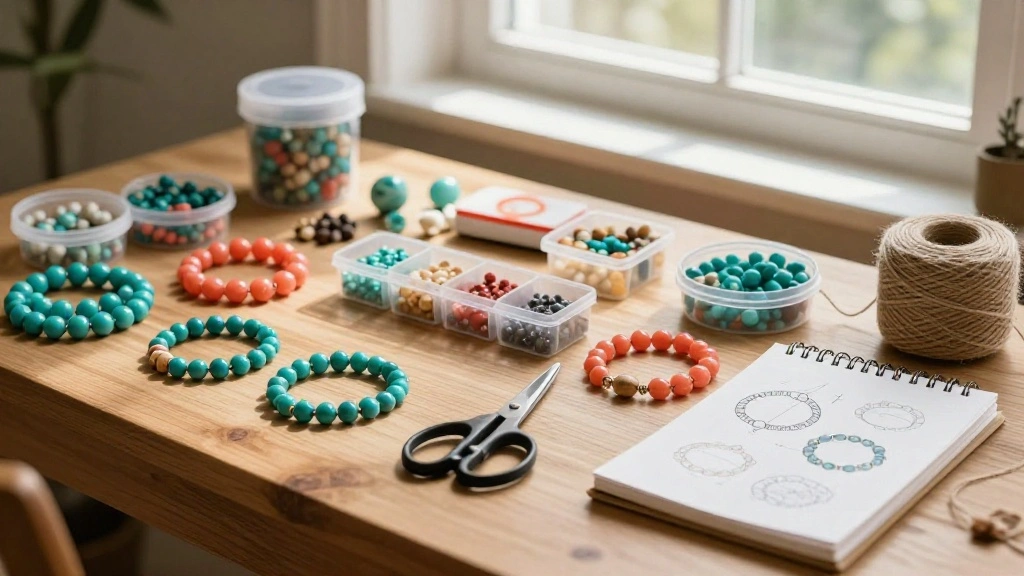
6. Fabric and Bead Bracelets
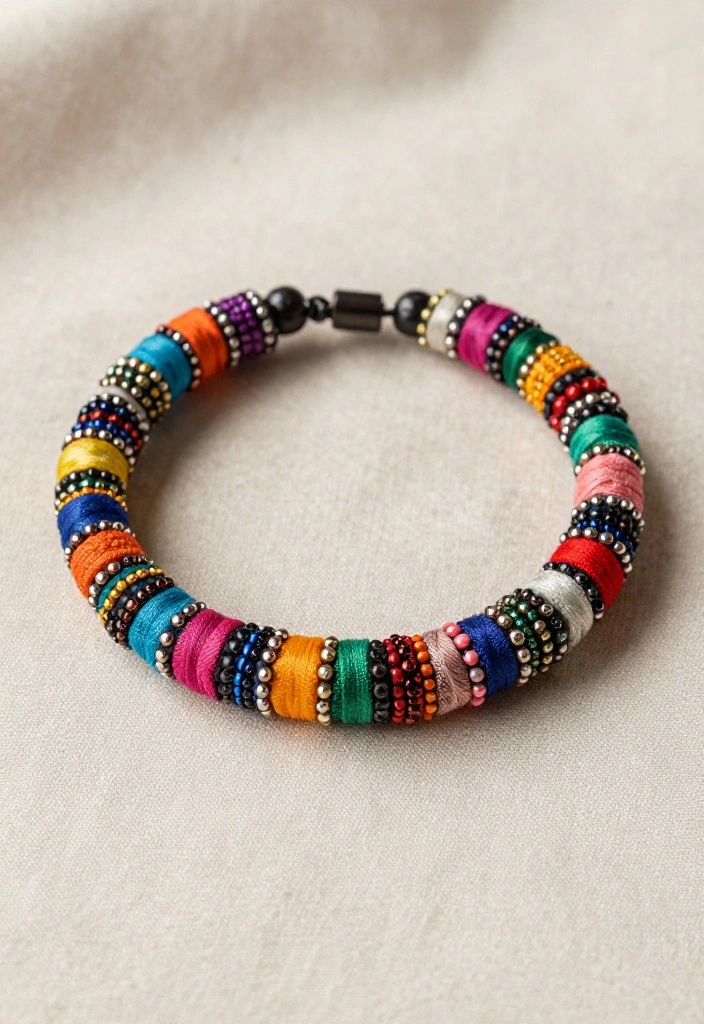
Transform remnants of vintage fabric into beautiful, textured bracelets that are both eco-friendly and stylish! The combination of fabric and beads adds a burst of color and personality to your wrist, making these accessories truly one-of-a-kind.
This DIY project is not only fun but also a sustainable way to create jewelry that can fit any outfit.
Outfit Pieces:
– Vintage fabric scraps (varied patterns)
– Beads (wooden, glass, or ceramic)
– Scissors for cutting
– Clasp (optional) for easy wear
Styling Tips:
– Cut fabric strips ensuring they are long enough to wrap around your wrist comfortably.
– String beads onto the fabric before tying the ends together.
– Tie securely or use a clasp for a polished finish.
– Experiment with different fabric and bead combinations for a signature style.
Your fabric and bead bracelet can be worn solo or stacked with others for a trendy look. It’s perfect for casual outings, beach days, or even as a thoughtful gift for friends!
7. Brooch Bouquet Pendants
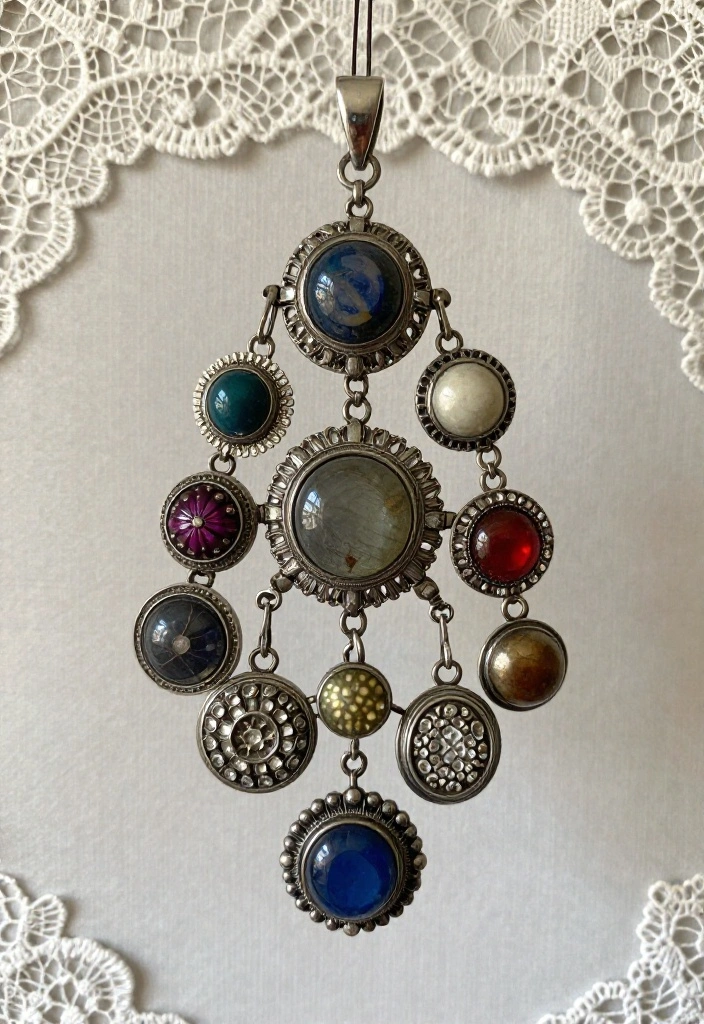
Transform an old brooch bouquet into a stunning pendant that captures cherished memories! This project is ideal for special occasions, allowing you to wear a piece of history close to your heart. The mix of textures and styles creates a unique accessory that tells a personal story.
Such a keepsake can serve as a beautiful reminder of love and nostalgia, perfect for both everyday wear and special events.
Outfit Pieces:
– Old brooches with sentimental value
– Pendant base for mounting
– Jewelry glue for securing
Styling Tips:
– Choose brooches that have special meaning to you or match your outfit.
– Arrange brooches in a bouquet style for a visually appealing design.
– Allow glue to dry completely for durability before wearing.
– Attach a chain that complements the pendant for a finished look.
This pendant will add a sentimental touch to your outfits, making it perfect for weddings, anniversaries, or any special celebration. You can also mix metals for a more eclectic vibe!
With these diy vintage jewelry ideas, turning a brooch bouquet into a pendant gives you a wearable memory you can treasure daily. Pick sentimental pieces, layer textures, and seal the story into a pendant you’ll wear for life.
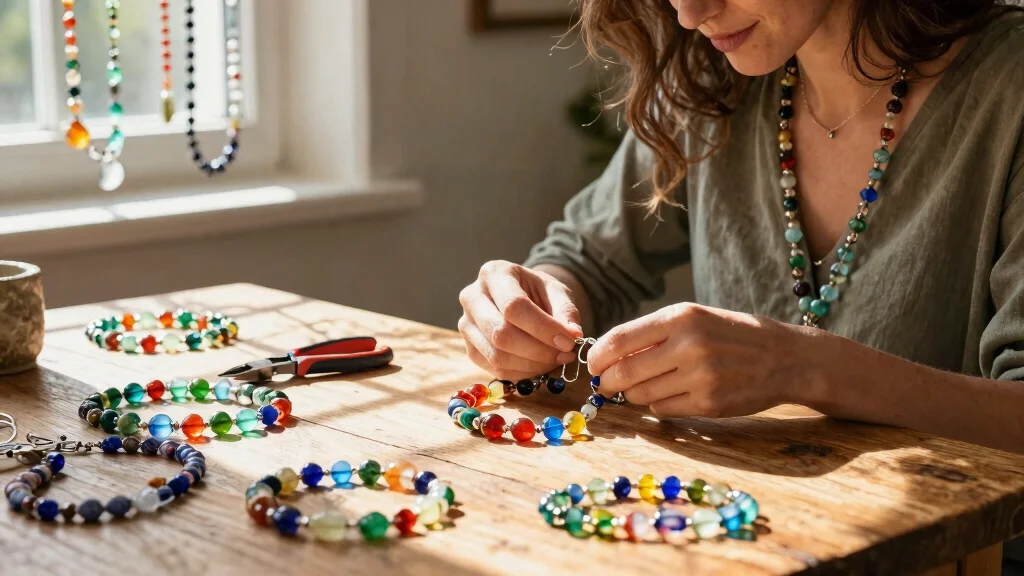
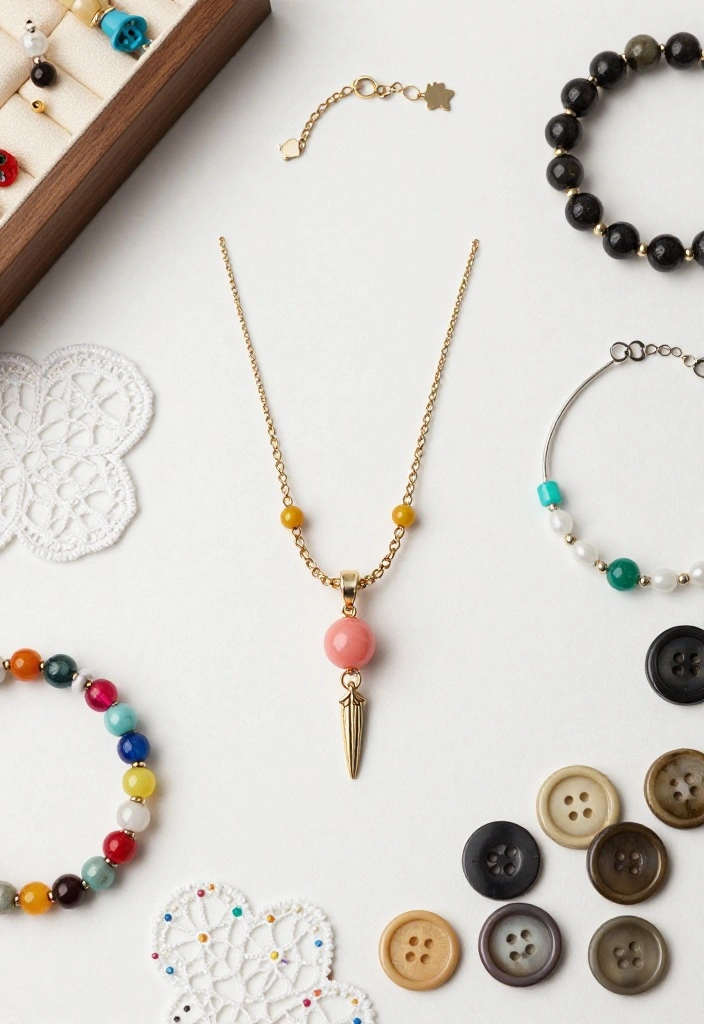
8. Vintage Glass Bead Necklaces
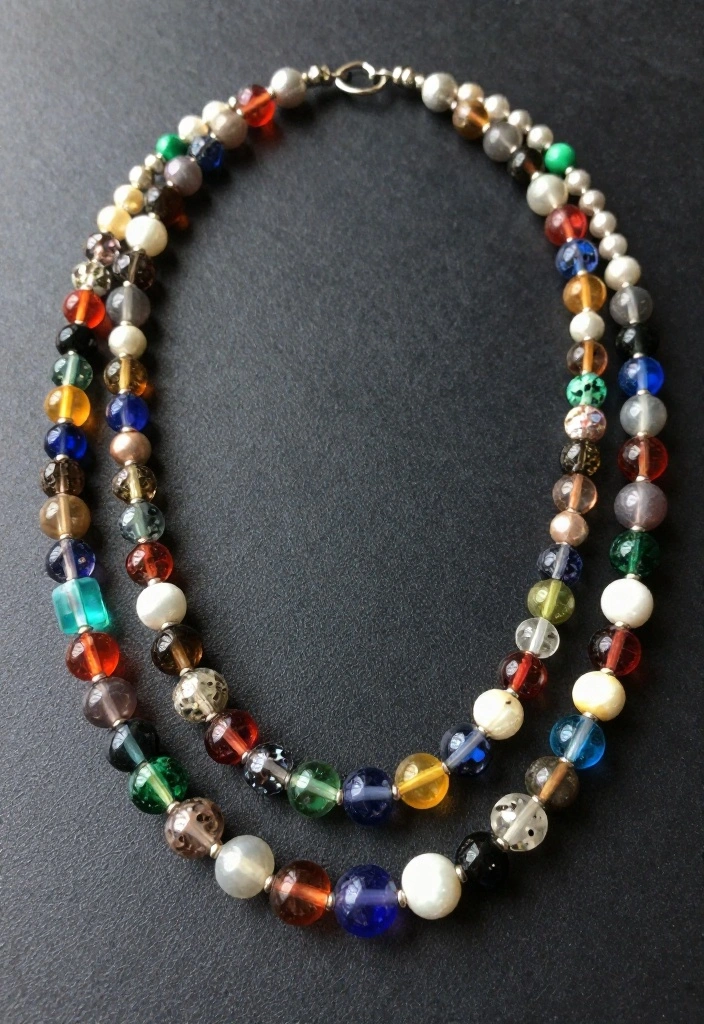
Create stunning necklaces with colorful vintage glass beads that add charm and elegance to your accessory collection! Stringing these beads together can transform them into a captivating piece that draws attention and compliments your style. Their rich colors and textures make them perfect for layering or wearing solo.
These necklaces are versatile and can elevate both casual and formal looks, making them a must-have.
Outfit Pieces:
– Vintage glass beads in various colors
– Fishing line or jewelry cord for stringing
– Clasps for securing
Styling Tips:
– Select a mix of glass beads in complementary colors for a cohesive look.
– Cut the fishing line or cord to your desired length before stringing.
– Secure the ends with a clasp to ensure durability.
– Layer different lengths of necklaces for a trendy, stacked effect.
Your vintage glass bead necklace will be a vibrant addition to any outfit, perfect for day or night. Feel free to mix different bead shapes to enhance visual interest!
How To Choose Vintage Materials for DIY Jewelry Projects
When embarking on your journey into DIY vintage jewelry, selecting the right materials can make all the difference. The right choice not only elevates your design but also ensures the finished piece has character and charm. Here are some key factors to consider when choosing your vintage materials.
1. Condition of Materials
Examine the condition of each vintage item closely. Look for any scratches, tarnishing, or damage that might affect the overall look of your piece. Items that are in good condition will give you a polished result. If you’re working with beads or buttons, ensure that they are intact and usable. Vintage materials often have a unique charm, but quality should still be a priority.
2. Type of Material
Different materials lend themselves to various styles. Consider using metals like brass or copper for a rustic feel. Alternatively, glass and ceramic offer a more elegant touch. Fabric remnants can add a soft, playful vibe to your jewelry. Choose materials that match the aesthetic you want to achieve for your finished product.
3. Color Palette
Think about the color scheme you want to work with. Vintage items can come in a wide variety of colors, from muted tones to vibrant shades. Selecting a cohesive color palette will help unify your design. You can classify your materials by color to help visualize how they’ll work together in your final piece.
4. Size and Scale
The size of your materials matters. Large, bold pieces can serve as statement items, while smaller elements work well for layering. Measure each component to ensure they fit well together. A good rule of thumb is to balance larger items with smaller accents to create visual interest.
5. Crafting Techniques
Consider the techniques and tools you’ll use for assembly. Some materials might require specific tools or methods, like soldering for metal components or special adhesives for certain fabrics. Familiarize yourself with the techniques needed so you can select materials that fit your skill level.
6. Budget
Setting a budget is essential. Vintage materials can vary widely in price. You might find affordable options at thrift stores, flea markets, or online marketplaces. Stick to your budget by prioritizing items that give you the best value for your project.
Pro Tip: Visit local flea markets or estate sales for unique finds. You can often discover hidden treasures that make your DIY vintage jewelry one-of-a-kind without breaking the bank! Look for versatile pieces that can be repurposed in multiple designs to maximize your investment.
By keeping these criteria in mind, you can curate a collection of vintage materials that perfectly aligns with your vision for stunning handmade accessories. Happy crafting!
Recommended Products

VERSATILE FOR JEWELRY MAKING: Heather's cf Metal Spacer Beads are ideal for any DIY jewelry project. These assorted spacer beads are great for custom bracelets, necklaces, earrings, and more, giving a stylish touch to your creations. Whether you're a hobbyist or professional, these beads provide balance and elegance, complementing a variety of styles from minimalist to vintage-inspired designs. Elevate your jewelry with these durable spacer beads.
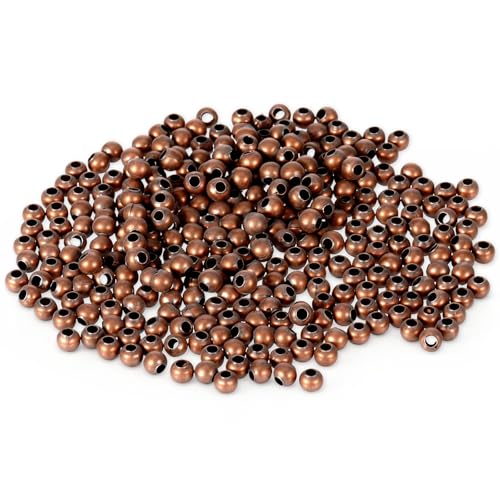
【Durability Material】Crafted from durability iron, these antique bronze round spacer beads will ensure your jewelry making projects last and retain their vintage charm

Our exclusive NEW deluxe assortment of Bali style solid metal alloy bead caps in a great array of designs and sizes
9. Vintage Leather and Charm Bracelets
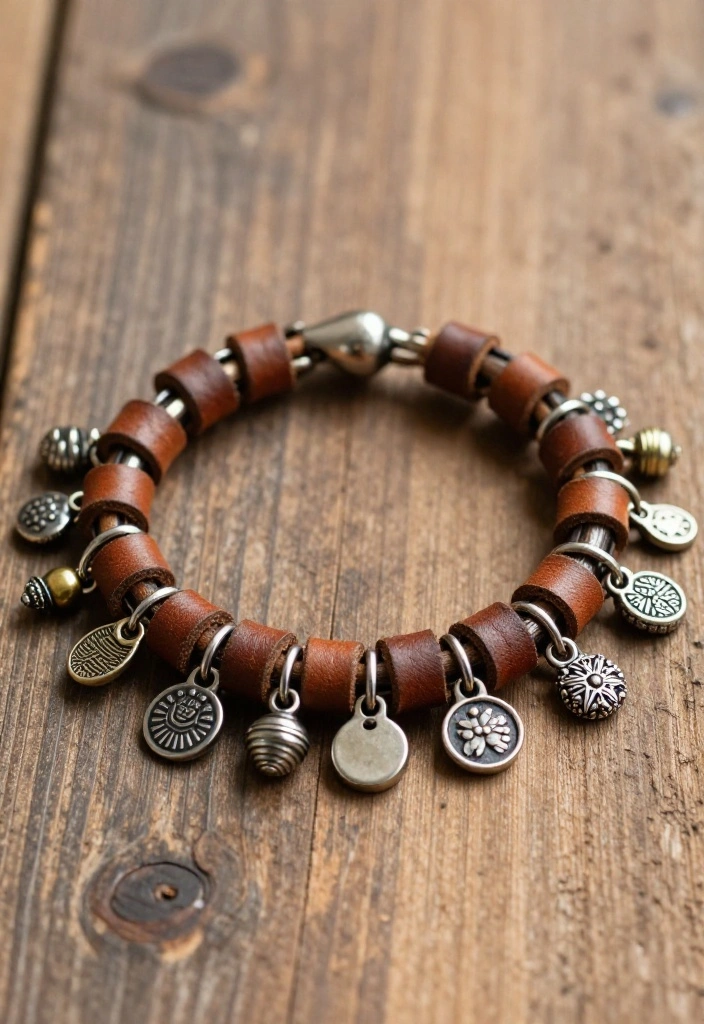
Embrace a bohemian flair with leather bracelets adorned with vintage charms! By choosing charms that resonate with your personal story, you can create a unique accessory that showcases your individuality. The soft leather combined with meaningful charms creates a rustic yet stylish look.
These bracelets are ideal for casual wear, festivals, or anytime you want to express your unique style.
Outfit Pieces:
– Vintage charms (old keys, coins, or lockets)
– Soft leather cords in various colors
– Scissors for cutting
– Clasps for securing
Styling Tips:
– Cut leather cord to your desired length for a comfortable fit.
– Attach charms using jump rings, spacing them evenly along the cord.
– Tie the ends securely or use a clasp for a polished look.
– Mix and match different charms for an eclectic vibe.
Your leather and charm bracelet will tell your story, making it a great conversation starter. Whether you wear it alone or stack it with others, it’s perfect for casual outings or special events!
10. Vintage Crystal Hairpins
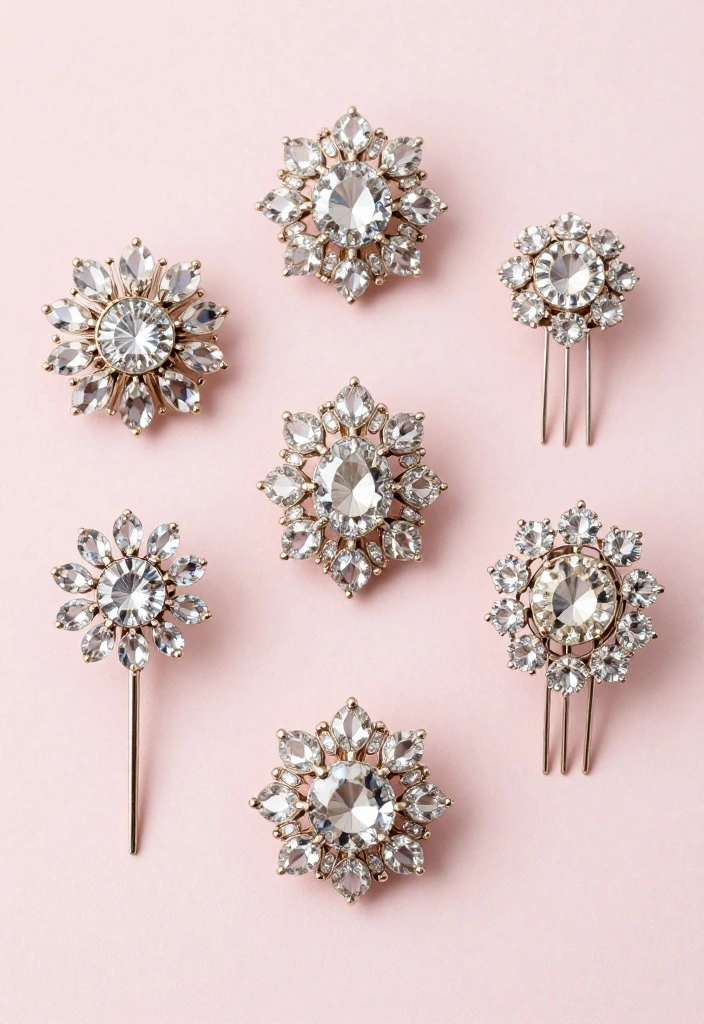
Enhance your hairstyle with vintage crystal hairpins that add glimmer to any look! These sparkling accessories can be easily crafted from old brooches or loose crystals, making them both beautiful and functional. They effortlessly elevate casual styles or complement elegant updos.
These hairpins are perfect for weddings, parties, or everyday wear when you want to feel a little extra special.
Outfit Pieces:
– Old brooches or loose vintage crystals
– Hairpins for attaching
– Strong jewelry glue for assembly
Styling Tips:
– Remove the pin back from brooches for easier attachment.
– Secure crystals to hairpins using glue, ensuring they’re well-placed.
– Allow to dry completely before using to ensure durability.
– Mix different shapes and sizes for a dynamic look.
Your vintage crystal hairpins will add a touch of elegance to your hairstyle, making them great for special occasions or as thoughtful gifts for friends who love vintage style!
11. Vintage Map Jewelry
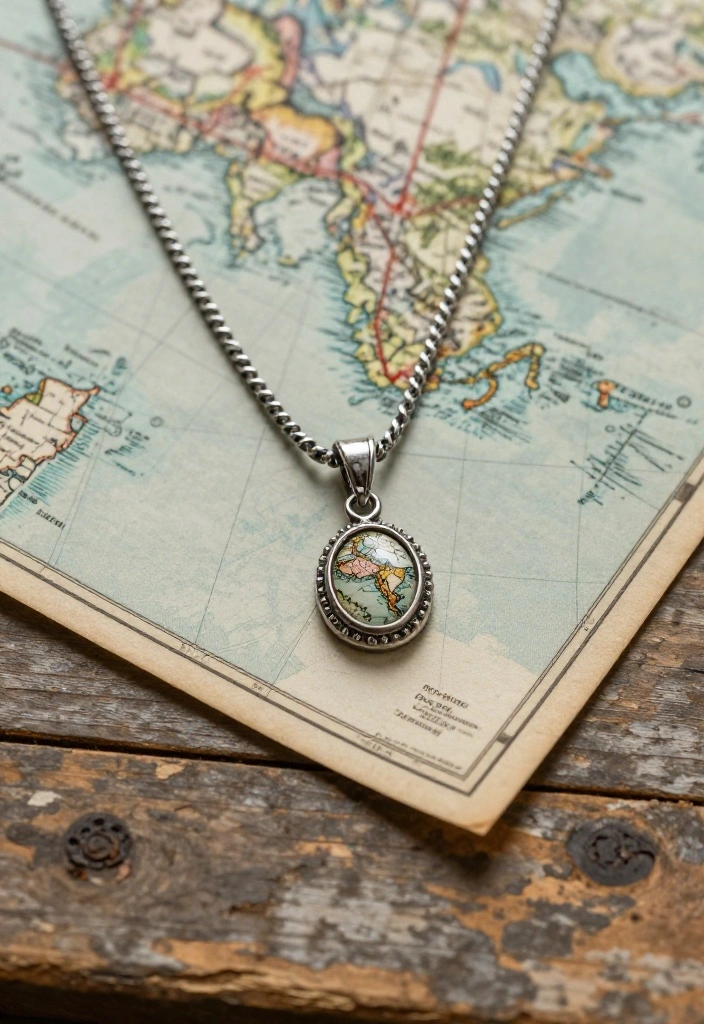
Showcase your love for travel by creating jewelry from vintage maps! These pieces serve as reminders of cherished locations or adventures, allowing you to wear your wanderlust in style. The intricate designs and colors of maps create unique and eye-catching accessories.
This DIY project is perfect for travel lovers and adds a personal touch to any outfit.
Outfit Pieces:
– Vintage maps from places you’ve visited
– Jewelry bezels for encasing
– Resin for sealing
– Earring hooks or chains for wearing
Styling Tips:
– Cut map pieces to fit snugly into your bezels for a clean finish.
– Secure the map with resin, allowing it to set completely.
– Attach earring hooks or chains to create wearable pieces.
– Use maps from special places for a more personal touch.
Your vintage map jewelry will capture memories and spark conversations, making it perfect for casual outings or as a unique gift for a fellow traveler!
12. Vintage Charm Necklaces
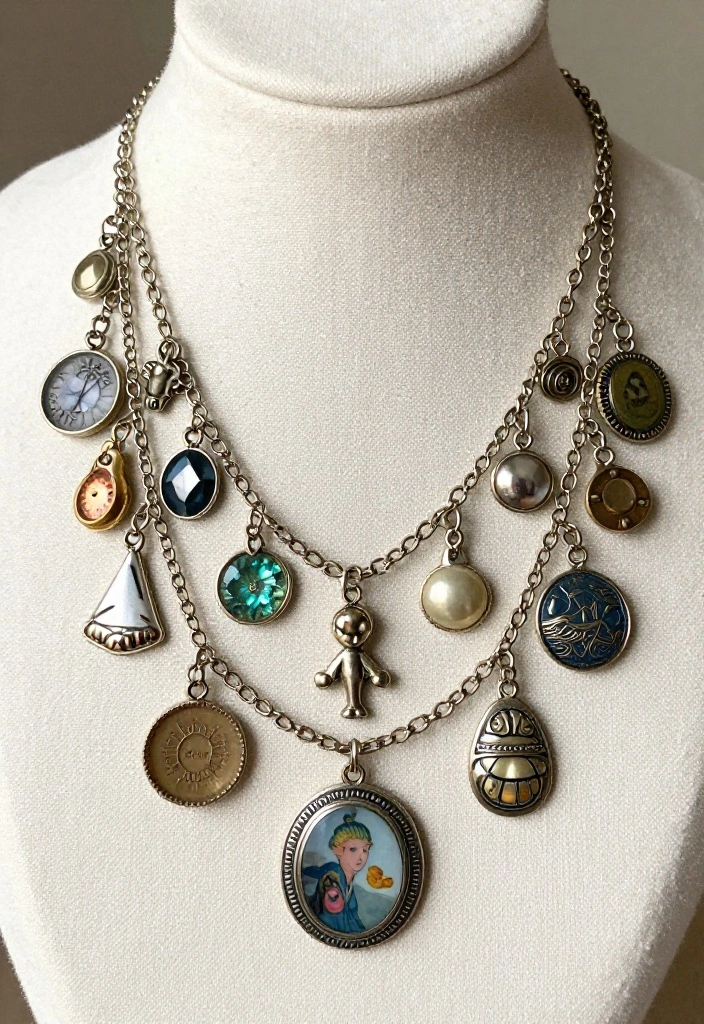
Celebrate your memories by creating charm necklaces from old trinkets and mementos! This DIY project allows you to curate a collection of charms that tell your unique story. Each charm adds a personal touch, making the necklace truly one-of-a-kind.
These necklaces are great for layering and can enhance any outfit, making them perfect for everyday wear or special occasions.
Outfit Pieces:
– Vintage charms (keys, pendants, coins)
– Chains for stringing
– Jump rings for attaching
– Pliers for assembly
Styling Tips:
– Gather charms that resonate with your experiences or interests.
– Use pliers to attach charms securely to the chain with jump rings.
– Arrange charms in a way that feels personal and meaningful.
– Layer your charm necklace with other delicate chains for a trendy look.
Your vintage charm necklace will be a delightful addition to your jewelry collection, perfect for showcasing your personality or as a heartfelt gift!
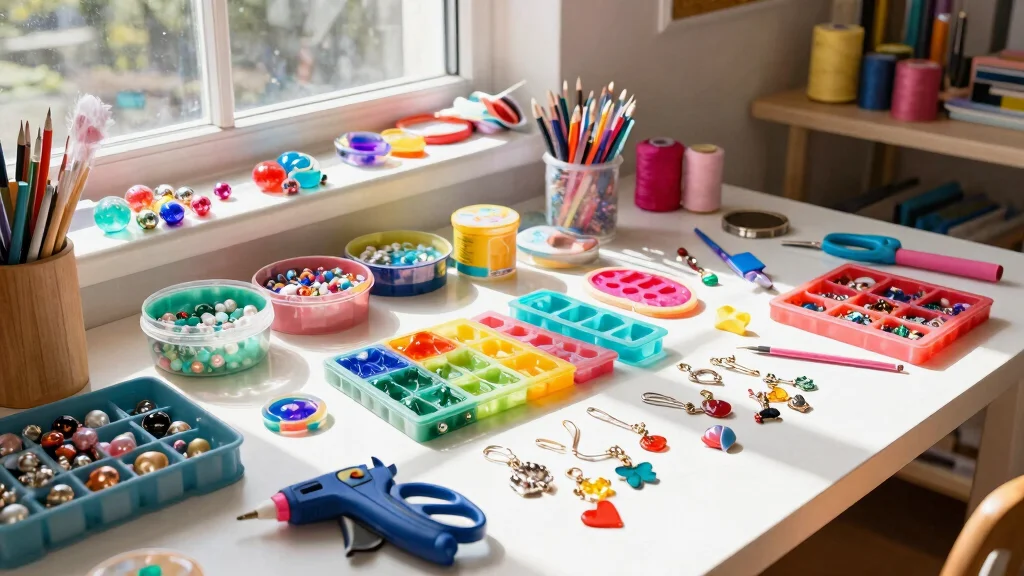
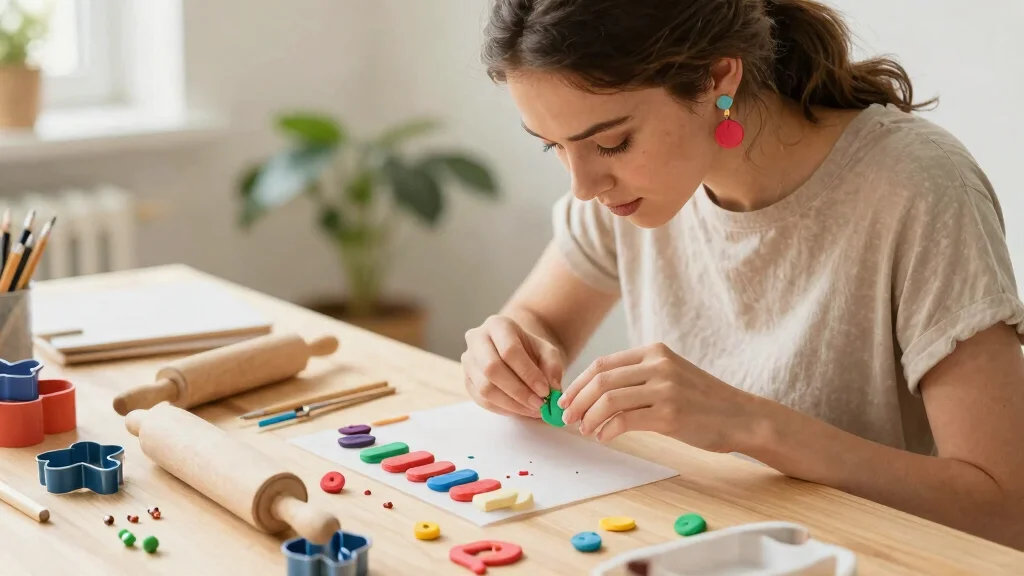
13. Vintage Clay Bead Jewelry
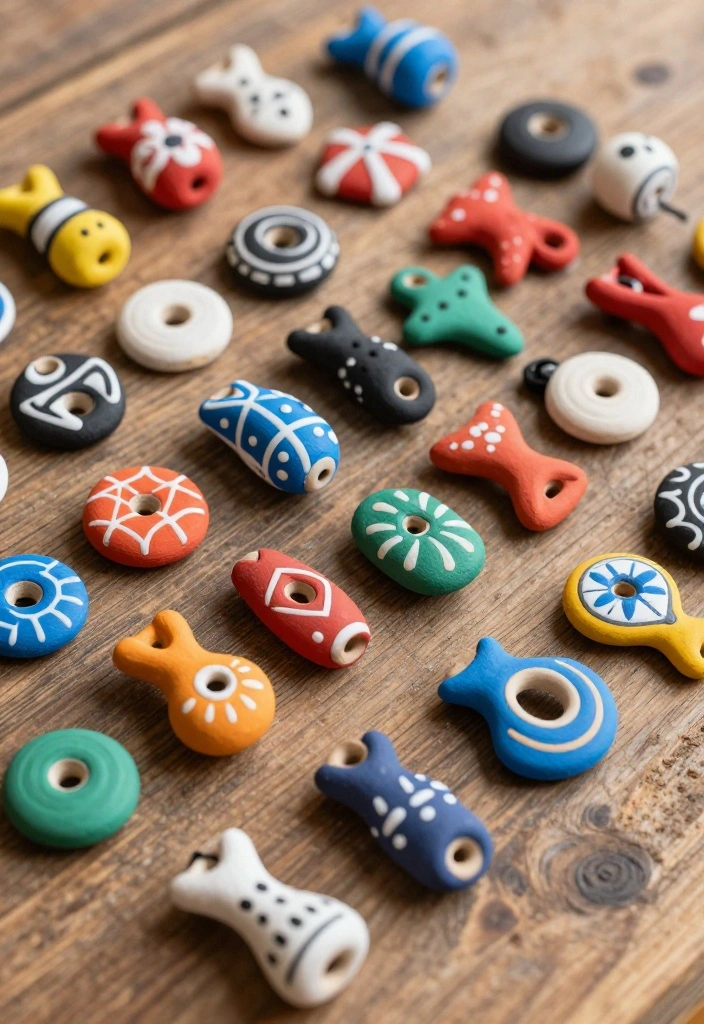
Unleash your creativity by crafting vintage-inspired beads from polymer clay! These unique beads can mimic vintage designs and offer a playful outlet for your artistic side. With endless possibilities for patterns and colors, you can create pieces that perfectly match your personal style.
This DIY project is not only fun but also allows for customization, making it ideal for expressing your creativity.
Outfit Pieces:
– Polymer clay in various colors
– Baking sheet for curing beads
– Jewelry findings for assembly
Styling Tips:
– Shape and design clay into beads that reflect vintage aesthetics.
– Bake according to package instructions for durability.
– Attach beads to chains or earrings using jewelry findings.
– Experiment with marbling different colors for a unique effect.
Your vintage clay bead jewelry will be a colorful addition to your collection, perfect for casual wear or as a special gift for a friend who loves handmade items!
14. Vintage Silk Ribbon Necklaces
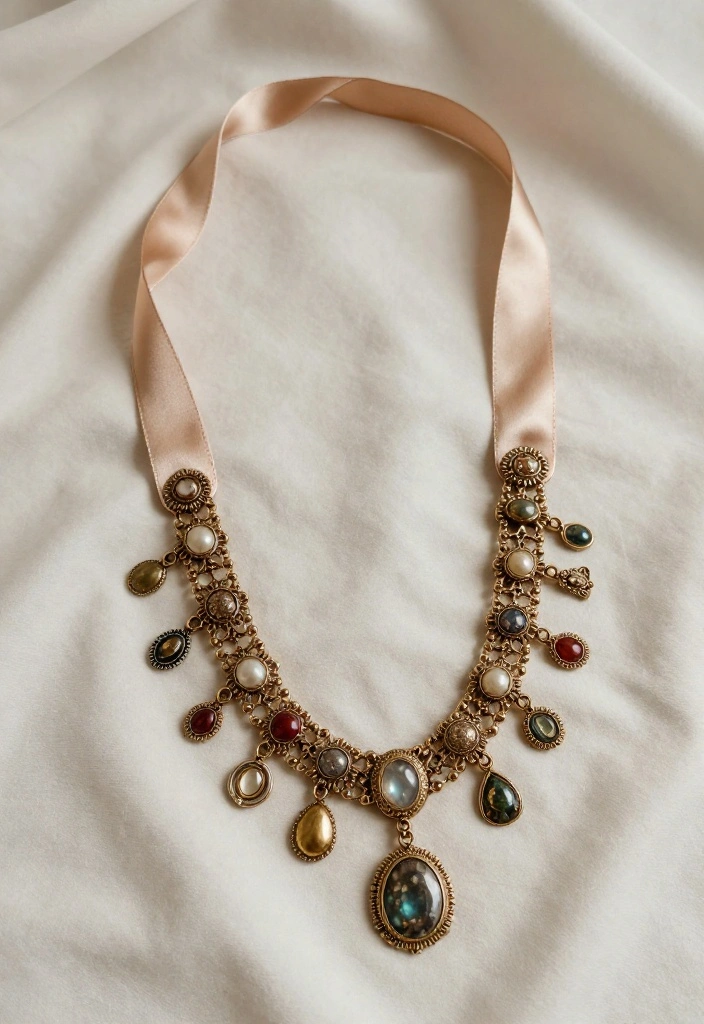
Capture timeless elegance with silk ribbon necklaces that offer a unique twist on traditional jewelry! Pair them with vintage pendants, charms, or even flowers for a whimsical touch. The softness of silk adds a delicate charm, making these necklaces versatile for any occasion.
These necklaces are easy to personalize, making them perfect for expressing your unique style.
Outfit Pieces:
– Vintage silk ribbon in your choice of color
– Charms or pendants for embellishment
– Scissors for cutting
Styling Tips:
– Cut a length of silk ribbon that suits your desired necklace length.
– Attach your chosen pendant or charm securely to one end.
– Tie a knot or use a clasp to secure the other end for a finished look.
– Experiment with different lengths and tying styles for variety.
Your vintage silk ribbon necklace will add a touch of elegance to your outfits, perfect for casual outings, bridal events, or as a heartfelt gift!
Recommended Products

Complete Set of Necklace Cords: Includes 10pcs mixcolor 4+1 voile ribbon necklace cords measuring 17.5 inches in length with extender for adjustable sizing

CORD WITH CLASP BULK: Selizo necklace cord bulk includes 100 pieces assorted colors satin silk necklace cord with clasp that are enough for necklace making and jewelry making

【You Will Receive】- 100PCS necklace strings, 10colors(Random) ,each color 10pcs, perfect for DIY jewelry making, add some pendants, beads, charms to DIY your unique necklace or craft creations.
15. Vintage Floral Hair Combs
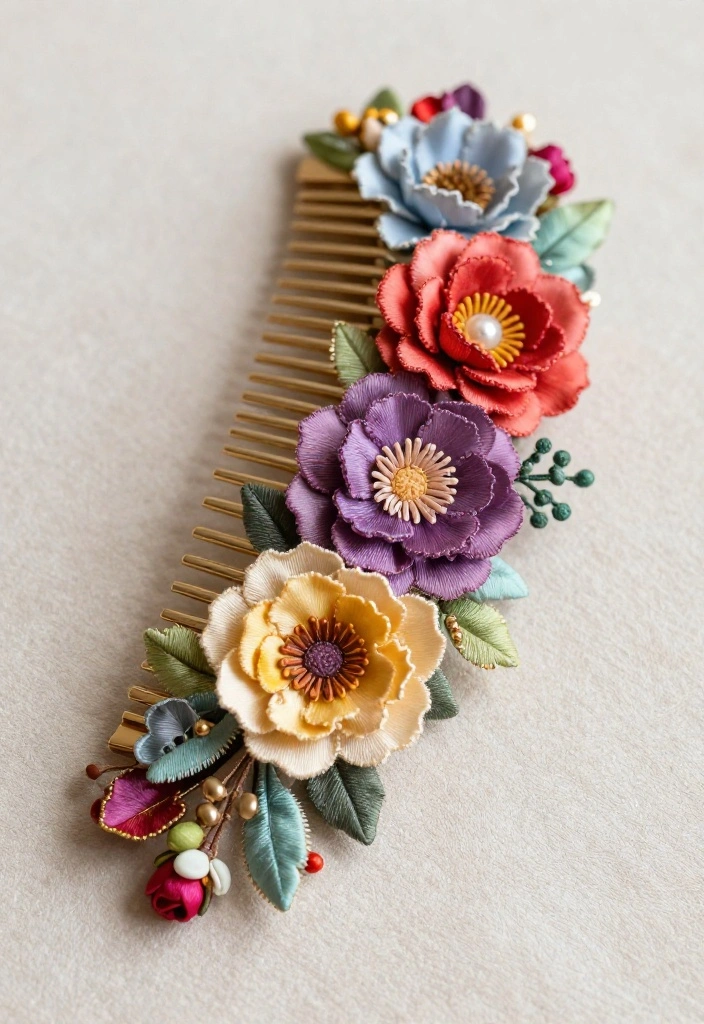
Embrace your inner bohemian with vintage floral hair combs made from delicate fabric or silk flowers! These charming accessories can elevate any hairstyle, adding a touch of whimsy and elegance. They are perfect for special occasions or everyday wear, making your hairstyle truly stand out.
Creating these hair combs allows for personalization, making them a great addition to your accessory collection.
Outfit Pieces:
– Vintage fabric or silk flowers in assorted colors
– Hair combs for mounting
– Strong glue for assembly
Styling Tips:
– Cut fabric flowers or select silk flowers that complement your style.
– Arrange the flowers on the hair comb for an aesthetically pleasing design.
– Use glue to secure the flowers in place and allow to dry completely.
– Mix different flower sizes and colors for added depth and visual interest.
Your vintage floral hair combs will add a unique touch to your hairstyle, perfect for weddings, festivals, or everyday elegance!
Did you know that a single vintage silk flower can be turned into a standout hair comb in under 20 minutes? With these diy vintage jewelry ideas, your everyday look becomes boho-chic in moments.
16. Vintage Candlestick Holder Jewelry Displays
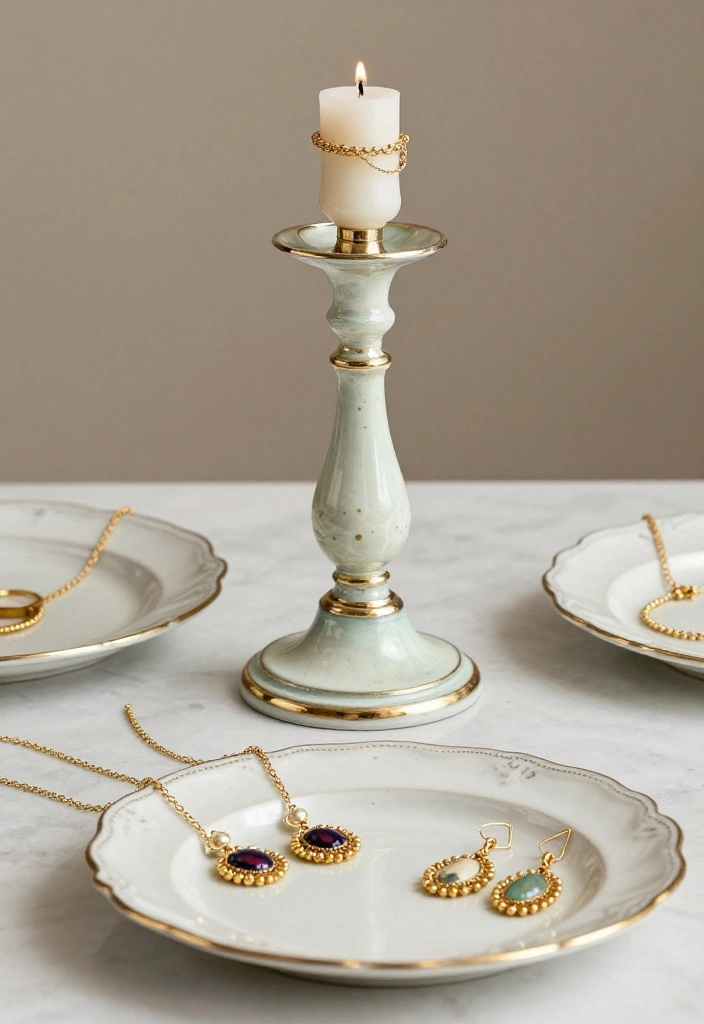
While not jewelry itself, transforming a vintage candlestick holder into a stunning jewelry display offers a creative way to showcase your DIY creations! This decorative piece brings vintage flair to your vanity, turning your jewelry into art.
It’s a unique way to display your handmade pieces while adding character to your space.
Outfit Pieces:
– Vintage candlestick holder
– Paint (optional) for customization
– Small plates or bowls for holding jewelry
Styling Tips:
– Clean the candlestick holder and consider painting it for a fresh look.
– Attach small plates or bowls to the top for practical use.
– Arrange your DIY jewelry on the display for an aesthetically pleasing showcase.
– Use different candlestick holders to create varying heights for visual interest.
Your vintage candlestick holder display will not only organize your jewelry but also serve as a charming decorative element in your home!
17. Vintage-Inspired Cuff Bracelets
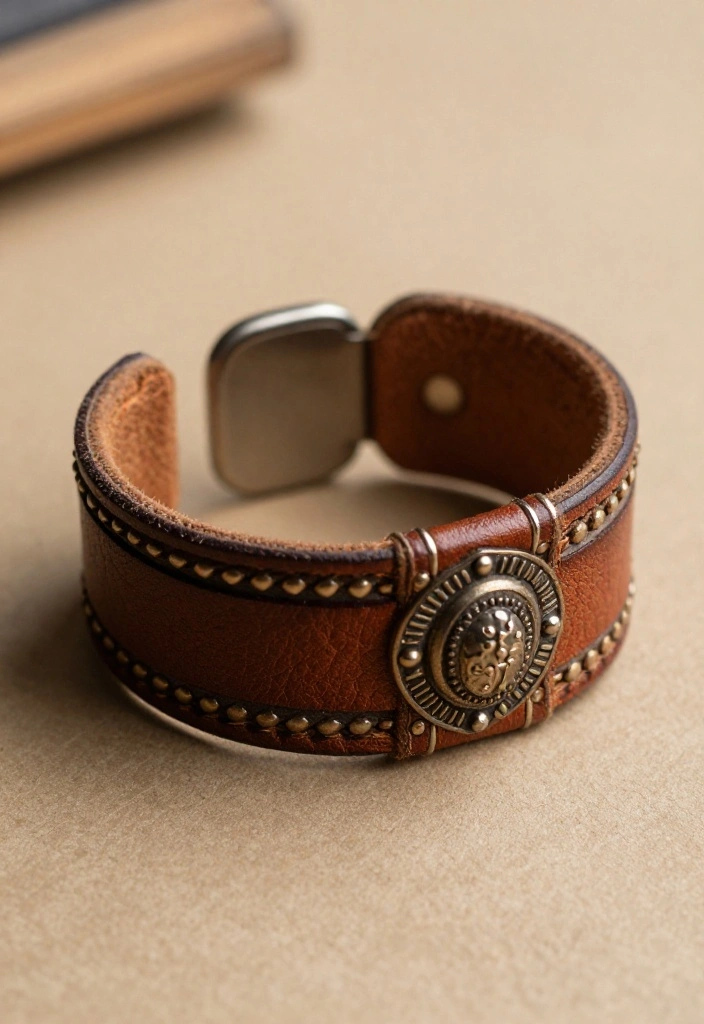
Crafting cuff bracelets from vintage materials is a fantastic way to express your creativity and personal style! Using old leather, fabric, or metal allows you to create bold pieces that capture the essence of vintage aesthetics. These cuffs can become signature accessories, making them perfect for any outfit.
Each cuff tells a story, making them ideal for casual wear or as standout pieces for special occasions.
Outfit Pieces:
– Old leather or metal sheets
– Scissors for cutting
– Embellishments (beads, charms) for personalization
Styling Tips:
– Cut leather or metal to your desired cuff shape and size for comfort.
– Add embellishments to create a unique design that reflects your style.
– Secure everything tightly to ensure durability while wearing.
– Layer multiple cuffs for a bolder look that showcases your creativity.
Your vintage-inspired cuff bracelet will be an eye-catching addition to your collection, perfect for everyday wear or special occasions!
18. Vintage-Inspired Shell Jewelry
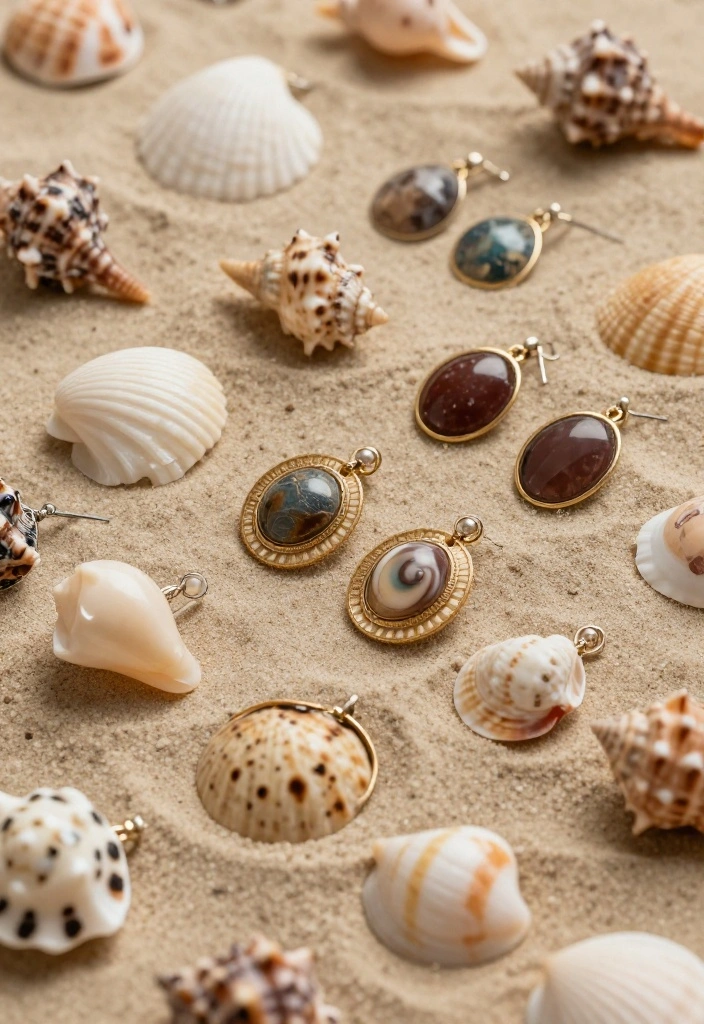
Capture the essence of summer with stunning shell jewelry that brings beach vibes to your collection! Using vintage shells allows you to create unique pieces that evoke memories of sun-soaked days by the ocean. This DIY project not only showcases your style but also adds a touch of nature to your accessories.
These pieces are perfect for casual outings, beach days, or simply to remind you of your love for the sea.
Outfit Pieces:
– Vintage shells in various shapes and sizes
– Jewelry findings for attachment
– Strong glue for securing
Styling Tips:
– Choose shells that vary in size and shape for visual interest.
– Attach findings securely to the shells using glue, allowing them to dry thoroughly.
– Consider incorporating beads or other embellishments for added flair.
– Wear your shell jewelry as a reminder of sunny days and ocean adventures.
Your vintage-inspired shell jewelry will be a beautiful addition to your collection, perfect for summer outings or as thoughtful gifts for friends who love beach vibes!
Conclusion
Creating your own vintage jewelry is a delightful way to express your individuality and bring new life to forgotten pieces. Each project tells its own story and can reflect your style and personality.
Whether you choose to upcycle old materials or craft something entirely new, the possibilities are endless when it comes to DIY vintage jewelry. Jump into these projects and let your creative spirit shine!
Frequently Asked Questions
What are some beginner-friendly diy vintage jewelry ideas to start with for timeless style?
Begin with simple, high-impact pieces to build confidence in diy vintage jewelry ideas. Try a pendant necklace using a single vintage button or cabochon set in a bezel and attached to a chain. Use basic tools: pliers, jump rings, and a clasp. Clean and prep your vintage finds, assemble, and finish with a light antique patina to achieve an authentic look. This upcycled jewelry designs approach keeps costs down and adds genuine character. If you want more step-by-step guidance, check out DIY jewelry tutorials and beginner-friendly guides for more ideas.
How can I turn old pieces into upcycled jewelry designs without losing their charm?
Gather old earrings, brooches, keys, buttons, or charms and plan a cohesive design that preserves their story. For example, set a vintage key into a bezel for a pendant, or combine mismatched beads with a single focal piece. Use bead caps, wire wrapping, and a light patina to unify metals. This approach embraces upcycled jewelry designs and crafting with vintage materials. Step-by-step: 1) sort materials 2) sketch a layout 3) assemble and seal. You’ll create something unique without discarding history.
For more ideas, explore vintage jewelry projects and handmade vintage accessories tutorials.
Where can I find reliable DIY jewelry tutorials and vintage projects to make handmade vintage accessories?
Look for detailed DIY jewelry tutorials and vintage jewelry projects on craft blogs, YouTube channels, and maker magazines. Start with beginner-friendly guides that show you how to clean, prep, and reassemble pieces using crafting with vintage materials. Build a small collection of materials and test different finishes to create handmade vintage accessories you’ll love.
Pro-tip: create an ideas board of the diy vintage jewelry ideas you want to try and gather a shopping list before you start.
What tools and materials are essential for popular diy vintage jewelry ideas?
For most diy vintage jewelry ideas, you’ll want a basic toolkit: pliers, flush cutters, jump rings, headpins, and a clasp; a beading mat helps keep everything organized. Materials to stock include metal bases in antique finishes (brass, copper), glass cabochons, vintage buttons, beads, and bezel settings. Add patina and sealants to create authentic aged looks. This is a great way to explore upcycled jewelry designs while you practice crafting with vintage materials.
Pro tip: pick a cohesive metal finish to keep your vintage jewelry projects looking unified.
How can I personalize diy vintage jewelry ideas to fit my style and wardrobe?
Make it yours by choosing finishes, colors, and charms that reflect you. Mix metals sparingly, pick a signature focal piece, and tailor sizes to your wardrobe—delicate necklaces for daily wear or bold bracelets for special occasions. Incorporate meaningful charms or pieces from your own collection to make each piece truly handmade vintage accessories. This ties into crafting with vintage materials while staying true to diy vintage jewelry ideas.
Quick tip: maintain a small core of 2–3 versatile pieces and refresh accents seasonally for a timeless look.
Related Topics