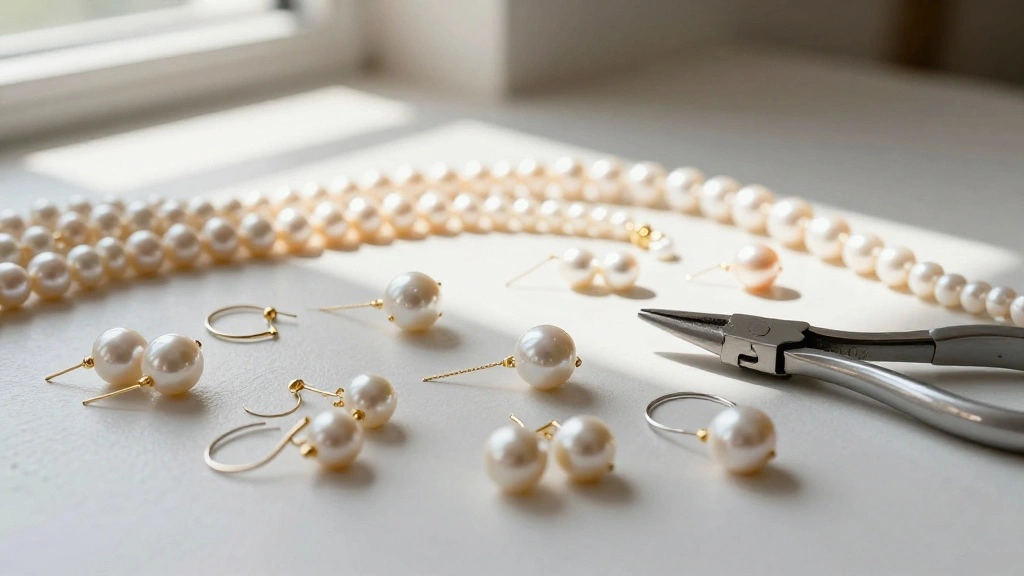
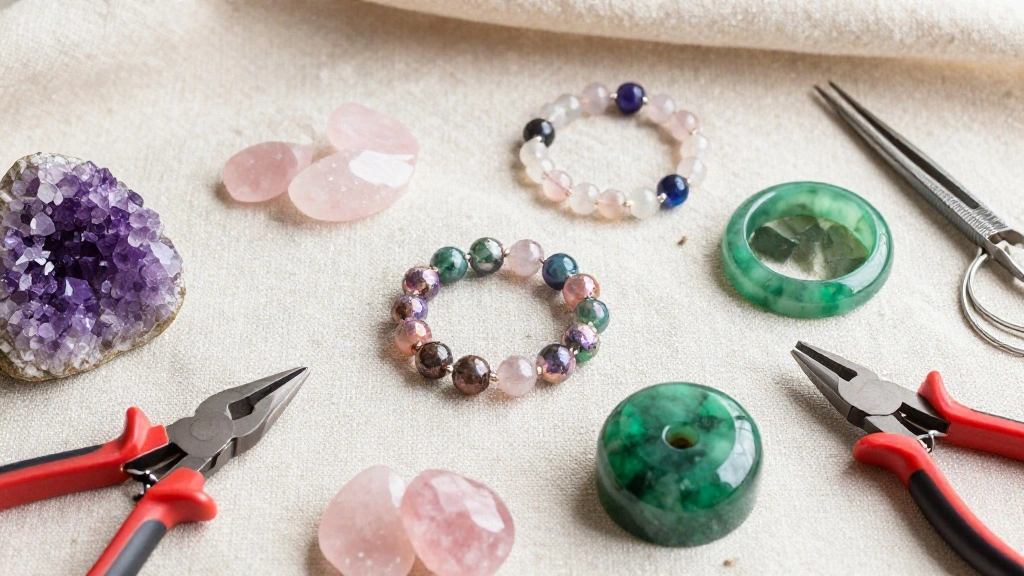
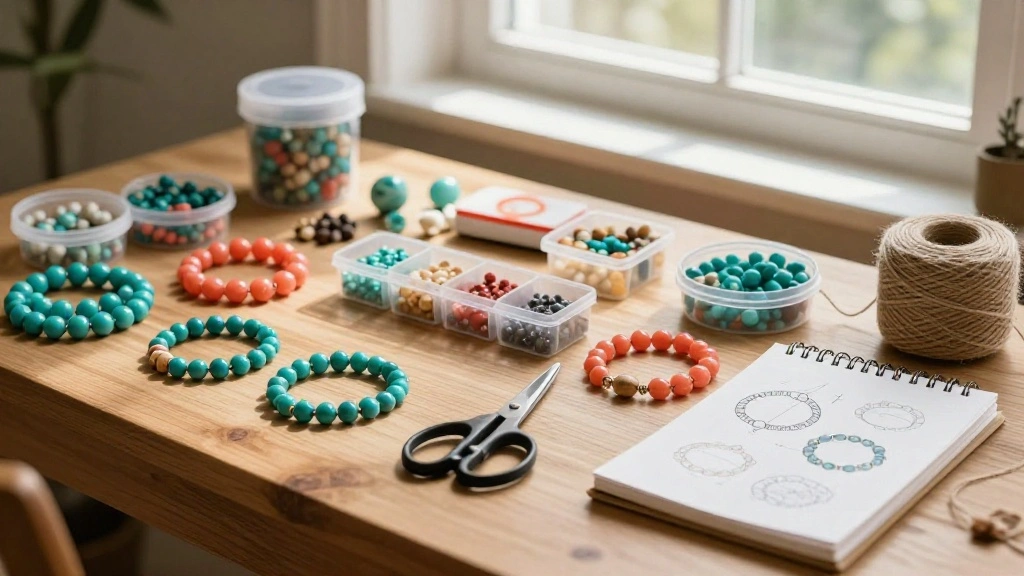
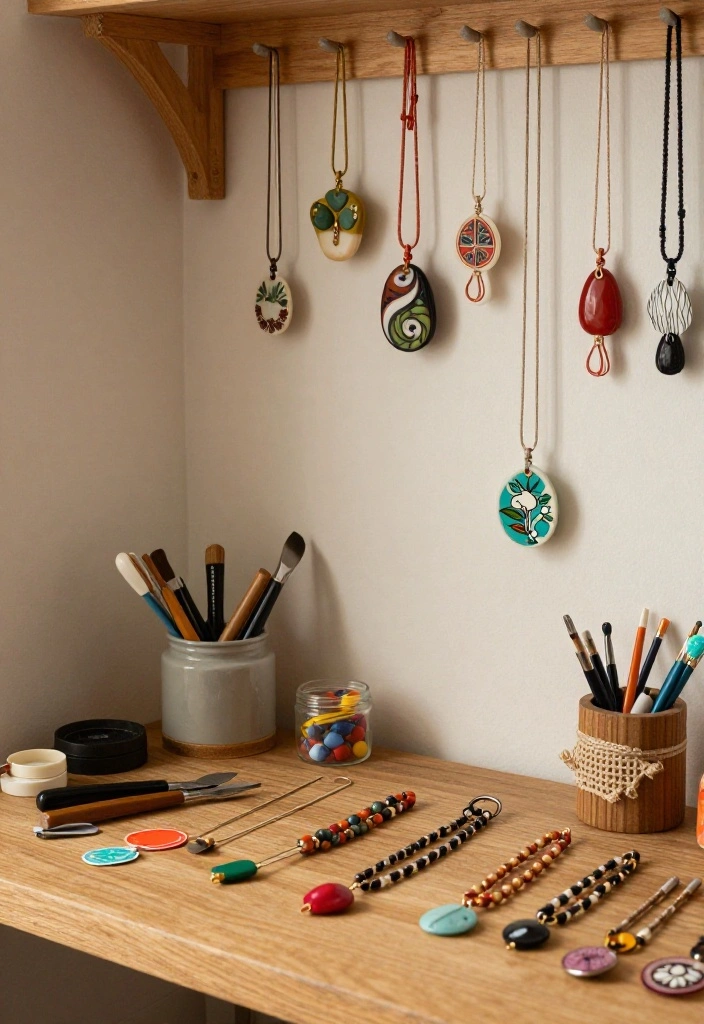
Creating your own jewelry can be one of the most rewarding experiences. As I’ve dived into the world of DIY, I’ve found myself craving unique, stylish pieces that reflect my personality. That’s why I compiled these 18 DIY pendant necklace ideas. They’re not just beautiful; they’re also a fun way to express your creativity while using upcycled materials.
If you’re someone who enjoys crafting, loves fashion, or wants to add a personal touch to your outfits, this post is for you. Whether you’re a seasoned crafter or a beginner, these pendant necklace tutorials will spark joy and inspiration. You’ll discover easy necklace crafts that fit right into your everyday style, all while being eco-friendly.
By the end of this guide, you’ll have a treasure trove of handmade jewelry ideas that are simple to follow and perfect for any occasion. From fabric scraps to vintage buttons, each project will help you unleash your creativity while contributing to sustainability. Let’s dive into the art of making beautiful pendant necklaces that you can wear with pride!
Key Takeaways
– Explore 18 unique DIY pendant necklace ideas that are stylish and sustainable, perfect for adding flair to your wardrobe.
– Discover step-by-step tutorials for crafting pendants from materials like fabric scraps, vintage buttons, and natural stones, making it easy for anyone to get started.
– Learn about the benefits of upcycling materials, turning what would be waste into stunning pieces of jewelry that tell a story.
– Get tips on incorporating different jewelry making techniques, ensuring your handmade creations are not just beautiful, but also well-made.
– Find inspiration for easy necklace crafts that are perfect for casual wear or special occasions, allowing you to express your personal style effortlessly.
1. Fabric Scrap Pendant
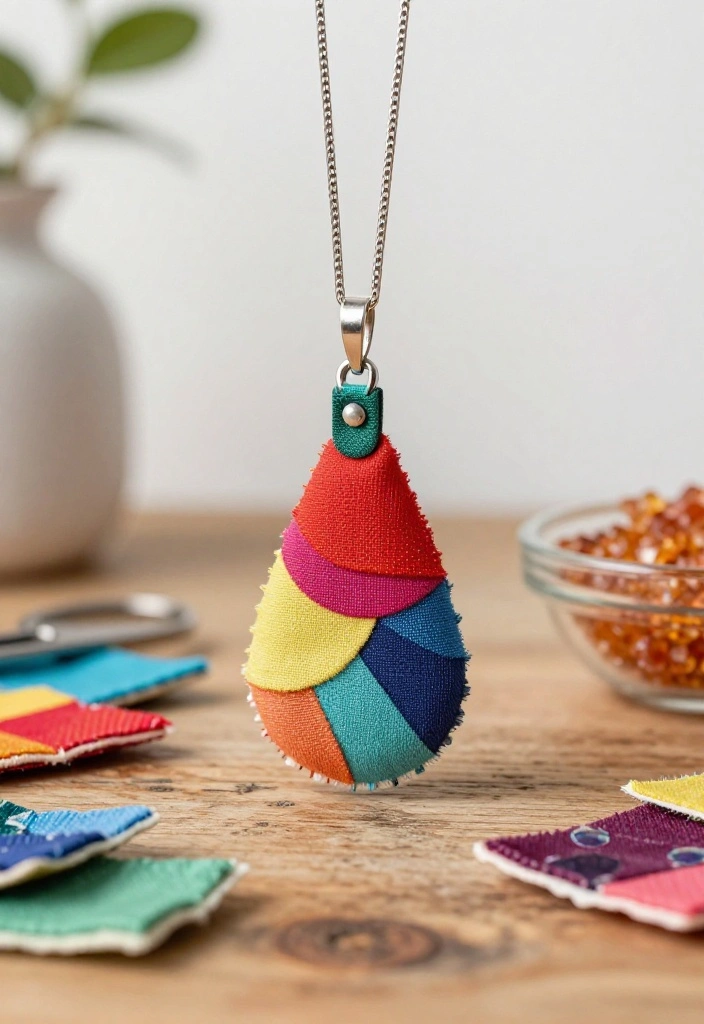
Transforming fabric scraps into a striking pendant necklace is a creative way to breathe new life into leftover fabric. By cutting these remnants into playful shapes, you can layer them, adding depth and texture. This project is great for showcasing vibrant fabrics you just can’t throw away.
You’ll need:
– Fabric scraps in assorted colors
– Scissors
– Clear resin epoxy
– Necklace chain
– Jump rings and pliers
Instructions:
1. Cut your fabric into your preferred shapes.
2. Layer the pieces for a unique design.
3. Mix the resin as instructed.
4. Pour over the fabric and let cure.
5. Once hardened, attach a jump ring and chain.
6. Wear your new statement piece!
– Choose fabric with funky patterns for an eye-catching effect.
– Use fabric stiffener for added durability.
Frequently Asked Questions:
– Can I use different types of fabrics?
Yes! Mixing cotton, denim, or silk can create interesting textures.
🌿 Transform Your Space Creatively
Discover innovative DIY techniques to elevate your home decor while embracing eco-friendly practices with this comprehensive guide.
2. Vintage Button Pendant
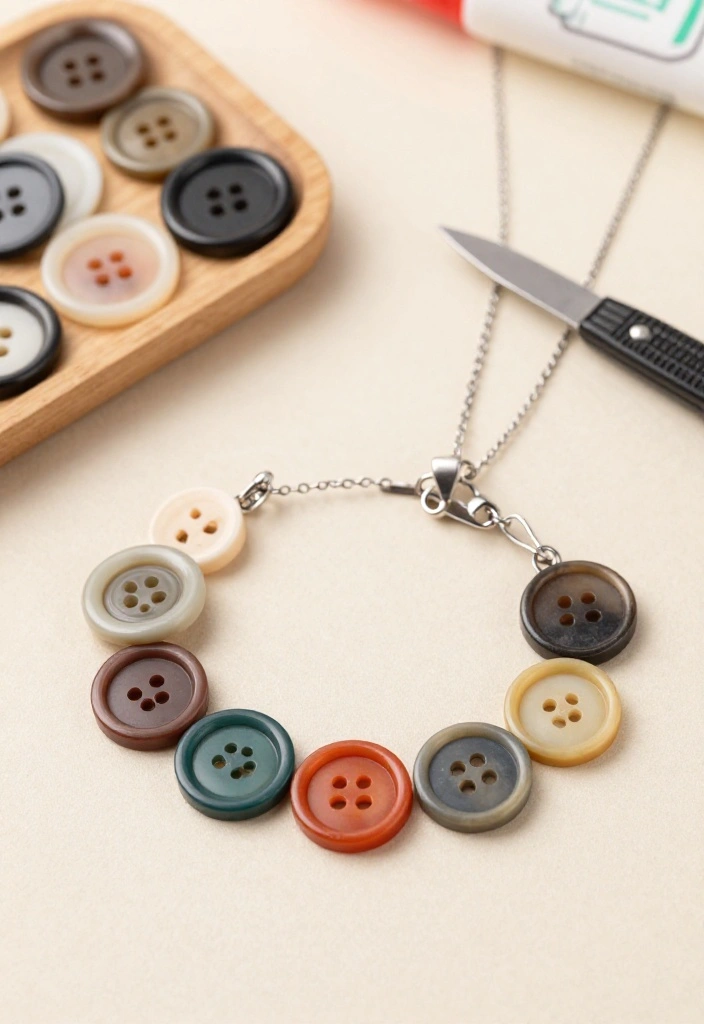
Searching through your Grandma’s button jar can lead to creating a delightful vintage button pendant necklace. This charming project is not only easy but also allows you to tell a personal story. Using buttons of different sizes and colors adds character and dimension, making each piece unique.
You’ll need:
– Assorted vintage buttons
– Base material (wood or metal)
– Strong adhesive
– Chain or cord
– Clear varnish
Instructions:
1. Arrange buttons on the base.
2. Secure each button with adhesive.
3. Seal with clear varnish.
4. Attach chain or cord.
5. Enjoy your special vintage piece!
– Mix styles like floral and geometric for a fun variety.
– Add a bail for easier attachment to the chain.
Frequently Asked Questions:
– Can I use new buttons?
Absolutely! They can create a modern twist.
3. Natural Stone Pendant
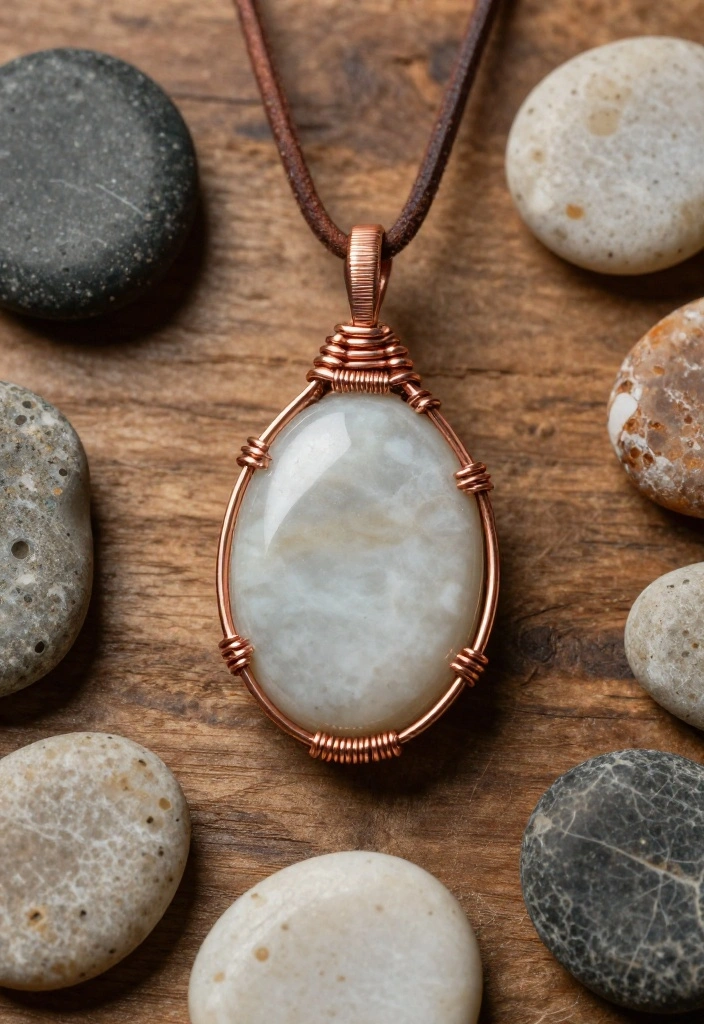
Crafting a natural stone pendant lets you carry a piece of nature with you. This earthy necklace is perfect for everyday wear, highlighting the raw beauty of the stones you find. Utilizing simple wire wrapping techniques elevates the elegance of this style.
What you’ll need:
– A natural stone (smooth or rough)
– Jewelry wire (copper or silver)
– Wire cutters and round-nose pliers
– Chain or cord
Instructions:
1. Choose a stone that speaks to you.
2. Cut a 24-inch wire and wrap it around the stone, leaving a loop at the top.
3. Secure the wire and trim excess.
4. Attach to the chain.
5. Wear your nature-inspired jewelry!
– Pick stones with unique shapes for added interest.
– Try different wire wrapping techniques for variety.
Frequently Asked Questions:
– Can I swim with this necklace?
It’s best to avoid water to protect the stone.
4. Upcycled Plastic Pendant
Give new life to old plastic by creating a stylish upcycled plastic pendant. This fun project helps reduce waste while allowing you to craft colorful jewelry. Simply cut the plastic into various shapes and personalize it with paint or markers. A protective finish ensures durability.
You will need:
– Clean, empty plastic bottles
– Craft scissors
– Acrylic paint or permanent markers
– Clear sealant spray
– Chain or cord
Instructions:
1. Cut plastic into fun shapes.
2. Decorate with paint or markers to express your style.
3. Let dry, then seal for protection.
4. Attach to a chain or cord and wear your eco-friendly accessory.
– Layer shapes for a dimensional effect.
– Use stencils for intricate designs.
Frequently Asked Questions:
– How do I clean the plastic?
Rinse and dry thoroughly before crafting!
5. Shell Pendant Necklace
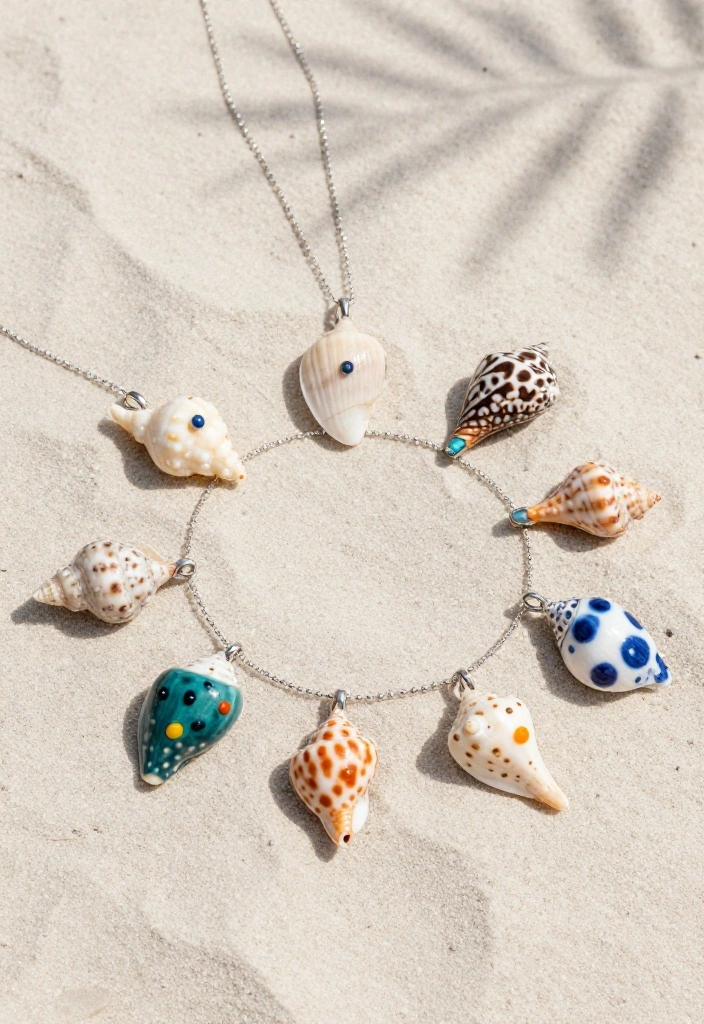
Create a beautiful shell pendant necklace that captures the spirit of the beach. This project is perfect for summer and brings back wonderful seaside memories. Gather shells and attach them to a chain using jump rings, or embellish them for a personal touch.
Materials you need:
– Assorted seashells
– Jump rings
– Chain or cord
– Optional: paint, beads, or twine
Instructions:
1. Select your favorite shells.
2. If painting, let the first coat dry.
3. Secure a jump ring through each shell.
4. Attach to the chain.
5. Add embellishments as desired.
– Combine different shell types for uniqueness.
– Use sealant for painted shells.
Frequently Asked Questions:
– Can I use any shell?
Yes! Just make sure they’re clean and sand-free.
Turn seaside memories into a DIY pendant necklace—snap a shell onto a chain with jump rings and add a pop of color with paint or beads. Pro tip: sealing painted shells with clear polish can help color stay beach-bright.
6. Recycled Paper Bead Pendant
Turn discarded paper into a chic recycled paper bead pendant. Using old magazines or wrapping paper, you can roll strips into colorful beads that become stunning jewelry pieces. This project is not only eco-friendly but also a great conversation starter.
You’ll need:
– Old magazines or wrapping paper
– Scissors
– Glue or mod podge
– Clear sealant
– Chain or cord
Instructions:
1. Cut paper into long strips.
2. Roll each strip tightly and secure with glue.
3. Let dry and seal.
4. String multiple beads onto a chain for a statement necklace.
– Use colorful paper for vibrant designs.
– Combine different sizes for visual interest.
Frequently Asked Questions:
– How long should I let the beads dry?
At least an hour before sealing!
7. Wood Slice Pendant
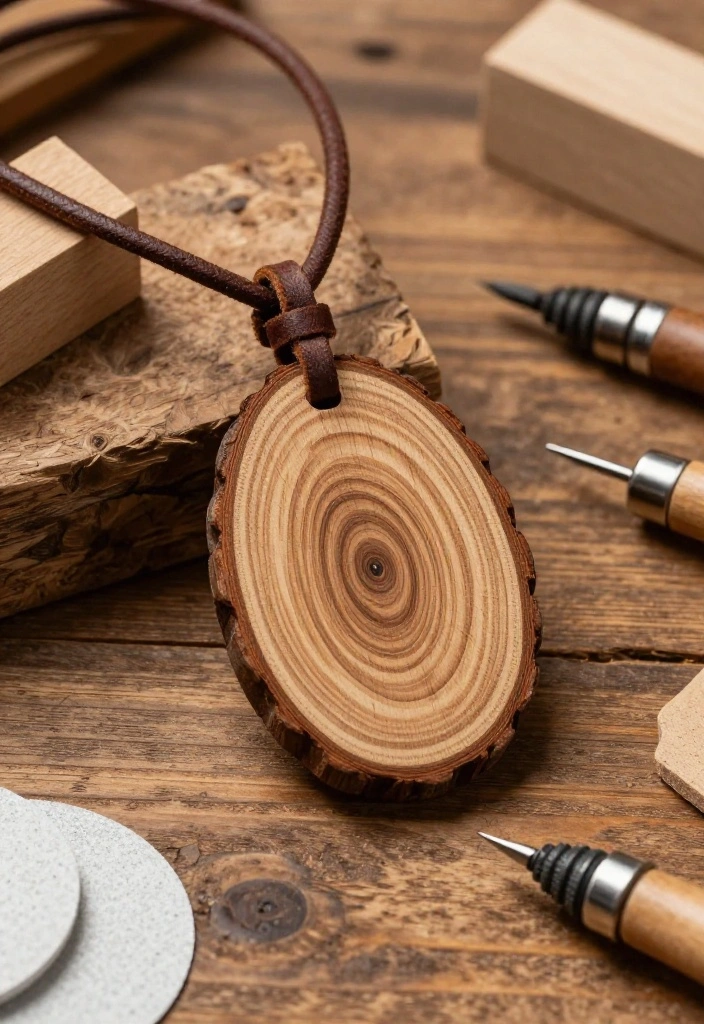
Embrace the beauty of nature with a rustic wood slice pendant. This elegant piece is simple to create! Cut thin slices from a branch, smooth the edges, and add paint or wood-burning designs for a personal touch. Attach it to a sturdy chain for a natural look.
Materials required:
– A small branch
– Saw for slicing
– Sandpaper
– Paint or wood burning tool
– Chain or cord
Instructions:
1. Cut thin slices from the branch.
2. Sand the edges for smoothness.
3. Decorate with paint or designs.
4. Attach to a chain or cord.
– Choose branches with unique knots or colors.
– Seal with varnish for protection.
Frequently Asked Questions:
– How do I store the wood slice pendant?
Keep it in a cool, dry space to avoid warping.
Fun fact: upcycled wood slice pendants turn a branch into a chic DIY pendant necklace with almost zero waste. Sand the edges, add a light finish, and thread a sturdy cord for an effortless, nature-inspired style.
8. Wire Wrapped Crystal Pendant
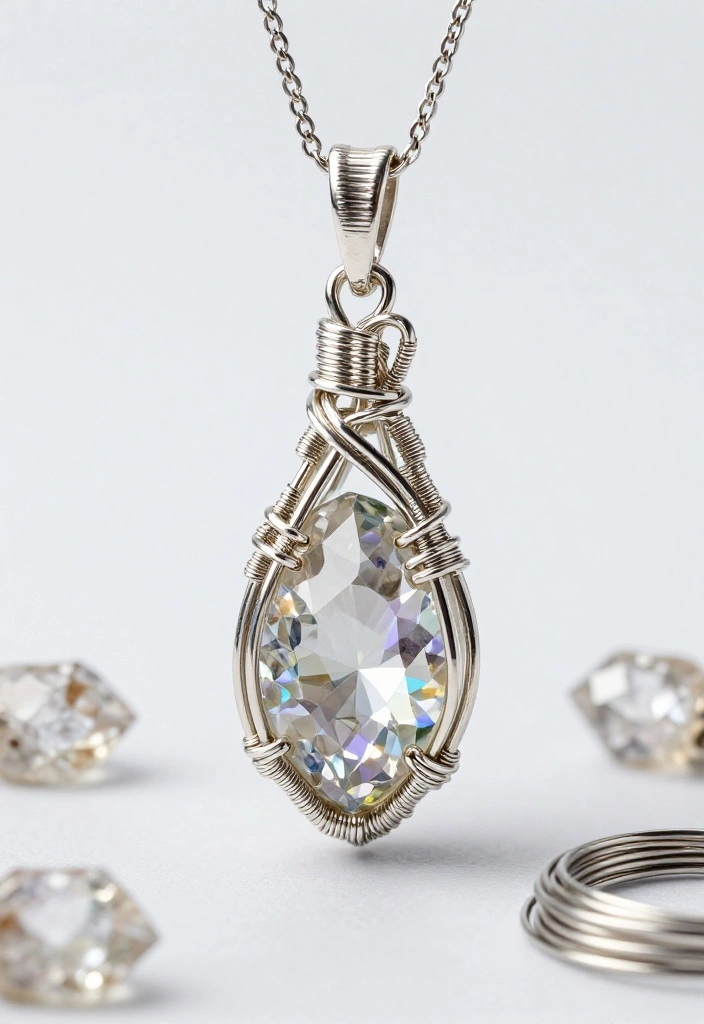
If you enjoy a bit of sparkle, a wire wrapped crystal pendant is an ideal DIY project. Select crystals that catch your eye and wrap them in wire to create a stunning accessory. This technique showcases the stone’s beauty while adding a personal touch through the wire.
You need:
– Crystal or stone
– Jewelry wire
– Wire cutters and pliers
– Necklace chain
Instructions:
1. Cut a 24-inch wire.
2. Position the crystal and wrap wire around its edges, forming a secure casing.
3. Create a loop for the chain.
4. Trim excess wire and secure.
5. Enjoy your elegant crystal pendant!
– Try different wire wrapping styles for uniqueness.
– Use contrasting wire colors for added appeal.
Frequently Asked Questions:
– Can I wrap any crystal?
Yes, just ensure it has a stable shape.
Recommended Products

Adequate quantity and styles: you will receive 16 pieces of hexagonal pillar crystal pendants in different colors; You can mix and match them according to your preferences and need to create appealing pieces

Meaningful Usage: Our electroplated natural crystal, using natural quartz crystal, natural crystal crystal can keep you calm and relaxed, help you focus, keep your brain awake, bring you power, let you always feel the inner peace of mind.

【Package Included】: You will receive 20 pieces of quartz crystal pendants, a wrapped bubble bag and a plastic box, which can protect the product well and be convenient for you to store and carry. Please note: Product does not include chain, and the product is irregular natural stone, the surface is not smooth, please note that before purchasing.
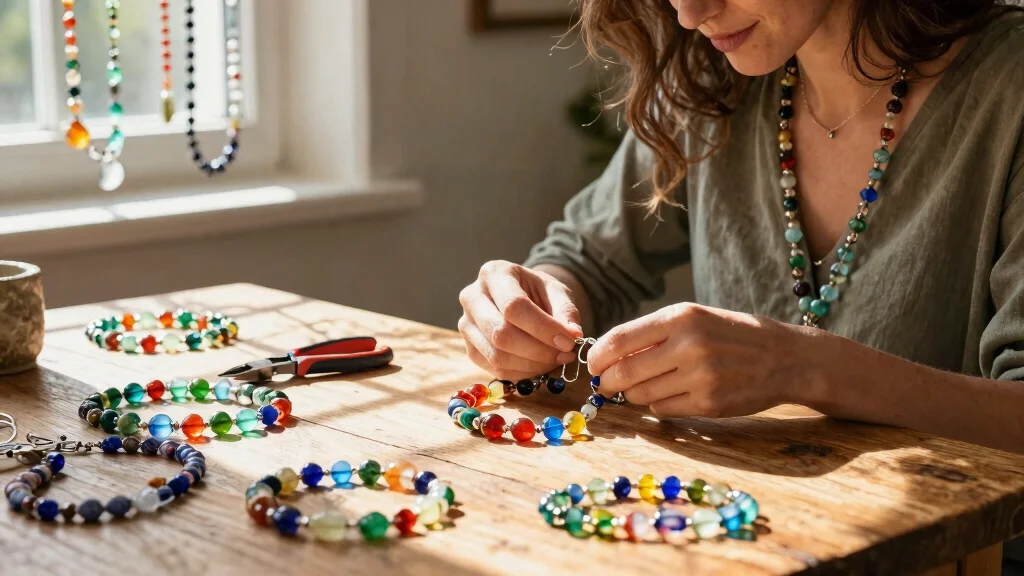
9. Bead and Wood Combination Pendant
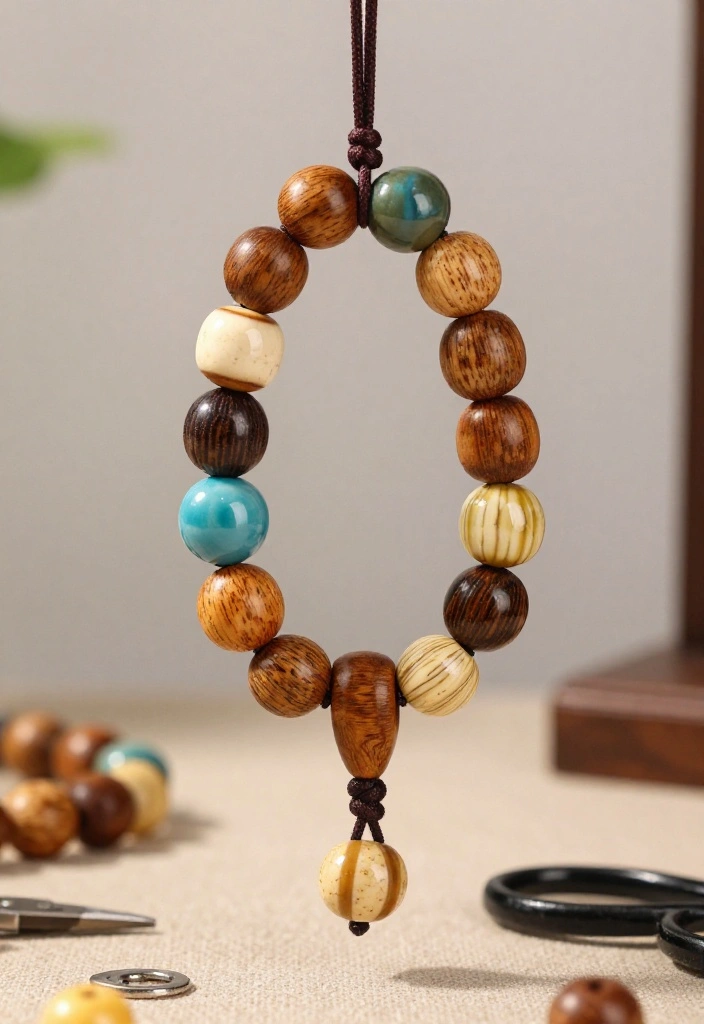
Combine textures by creating a bead and wood pendant that stands out. Using wooden beads or slices alongside colorful glass or ceramic beads allows for a beautiful blend of natural and vibrant elements. This style enhances visual interest and creativity.
Materials required:
– Wooden beads or slices
– Colorful beads (glass, ceramic)
– Strong string or wire
– Clasp for closure
Instructions:
1. Select wooden and colorful beads.
2. String them in your favorite pattern.
3. Secure ends with a clasp.
4. Enjoy your vibrant creation!
– Mix bead sizes for a dynamic look.
– Experiment with different stringing patterns.
Frequently Asked Questions:
– Will wood beads fade?
Yes, store them away from direct sunlight for longevity.
Difficulty Rating & Requirements
Overall Difficulty Rating: Medium
Creating a DIY pendant necklace can be a fun yet challenging project. The overall difficulty rating is medium, making it suitable for individuals with basic crafting skills. While beginners can attempt many of these projects, some may require prior experience with specific techniques, such as wire wrapping or embroidery.
Time Estimate:
⏱ Estimated time: 2 to 5 hours
The time needed will vary based on the complexity of the pendant you choose. Simple designs, like the fabric scrap pendant or vintage button pendant, may take around 2 hours. More intricate designs, such as the wire-wrapped crystal or mixed media pendant, might take up to 5 hours.
Skill Requirements:
– Required skills: Basic crafting, cutting, gluing, and possibly sewing or wire wrapping.
– Beginner-friendly: Yes, with some projects easier for newcomers. For instance, fabric and button pendants require minimal skills, while more complex designs like polymer clay or leatherwork might need some practice.
– Skills that can be learned include simple bead stringing and basic sewing techniques, whereas wire wrapping and more advanced techniques will require some prior experience.
Tools & Materials Needed:
🧰 Essential items checklist:
– Scissors (Required)
– Glue gun and glue sticks (Required)
– Jewelry wire (Required for some designs)
– Beads or buttons (Required)
– Pliers (Required for wire projects)
– Leather or fabric scraps (Optional)
– Paint or ink for embellishments (Optional)
– String or chain for hanging (Required)
Step-by-Step Overview:
1. Design Selection (30 minutes): Choose which pendant necklace you want to create. Look through all 18 ideas and select one that matches your skill level.
2. Gathering Materials (30 minutes): Collect all necessary materials based on your selected tutorial. Ensure you have everything on the checklist for a smooth crafting session.
3. Assembly Process (1 to 3 hours): Follow the chosen tutorial step-by-step. Focus on mastering each technique as you go along, such as stringing beads or wrapping wire.
4. Finishing Touches (30 minutes): Add any embellishments or final adjustments to your pendant. Make sure everything is securely attached and looks polished.
5. Clean Up (30 minutes): Organize your workspace and ensure safety by putting away sharp tools and leftover materials.
Professional vs DIY:
Creating your necklace can cost between $5 and $20, depending on materials. In contrast, a professional pendant necklace can range from $30 to $100 or more, especially if it features unique designs or high-quality materials. If you enjoy crafting and have the time, making your own is a rewarding option. However, if you’re looking for a special occasion piece or lack confidence in your skills, consider hiring a professional jeweler.
Recommended Products

Package Include: The pendant trays comes with everything you will need. Each pendant trays kit include 70 pcs high quality pendant trays with 7colors(Silver, Bronze, Antique silver, Gun black, Antique red bronze, Gold, White), 70 pcs clear glass dome tiles and 70 pcs black necklace cords. Such a large quantity tray charms bulk can satisfy your most jewelry making needs.
💰 COMPLETE KIT INCLUDES 11 pendant trays, 11 glass cabochons, 4 beads, 5 necklace chains, 4 string necklaces, 1.75 yard cord, glue, 200+ image sheets and instructional guides.
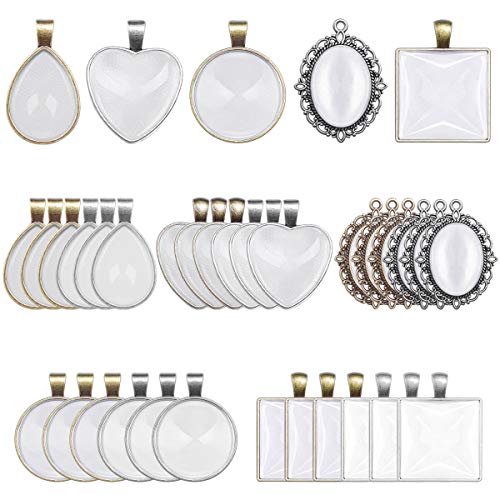
PENDENT TRAYS: Package comes with 30 pieces 5 different styles pendant trays and 30 pieces glass cabochon dome tiles. Totally 30 sets of variety cabochon settings for pendants making and jewelry making
10. Leather and Metal Pendant
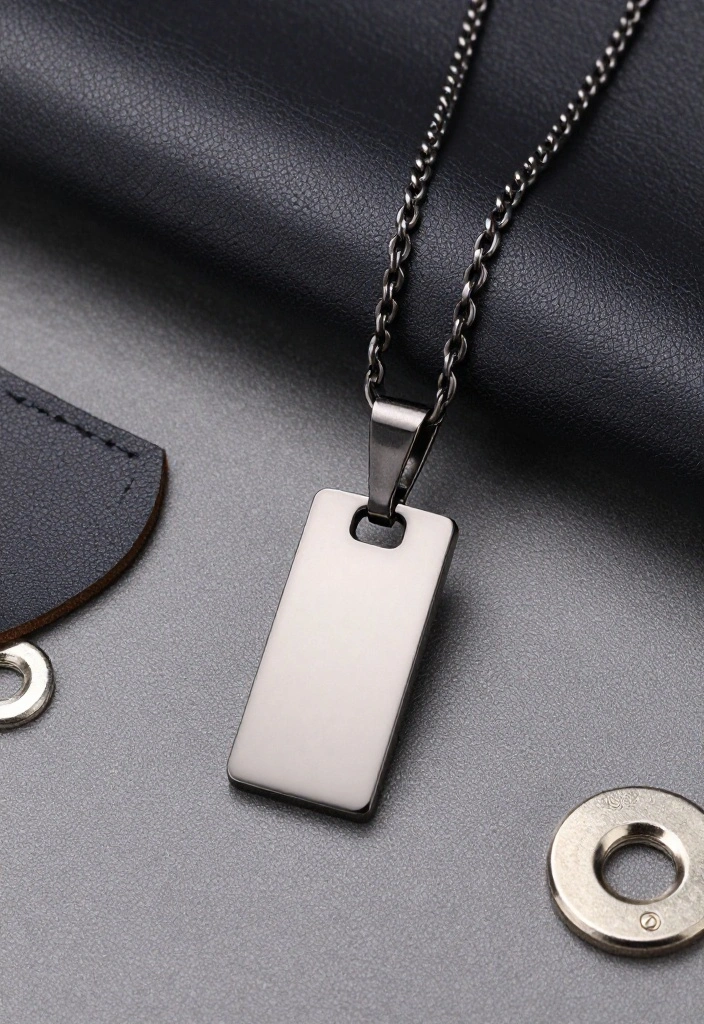
A stylish leather and metal pendant makes a bold accessory. By using scrap leather combined with metal pieces, you can craft a modern pendant that’s perfect for daily wear. Cut the leather into unique shapes and add metal accents for a trendy finish.
You will need:
– Leather scraps
– Metal pieces (like washers or charms)
– Craft glue
– Chain or cord
Instructions:
1. Cut leather into your desired shape.
2. Attach metal pieces with strong glue.
3. Let dry completely.
4. Attach to a chain or cord.
– Try different leather textures for depth.
– Layer pieces for a unique design.
Frequently Asked Questions:
– Can I use faux leather?
Definitely! Faux leather works beautifully.
Recommended Products

QUANTITY: Selizo necklace cords includes 100 pack black necklace cords that are enough for making necklaces, bracelets and other DIY jewelry projects

Package Contents: With 10 pieces included, you'll have plenty of cords to work with for all your making needs, ensuring you always have the perfect cord on hand

NECKLACE CORD: Total 48pcs 50cm/20inch necklace strings, 6 colors, each color 8pcs. The necklace cord for beads is in black, coffee, light brown, army green, beige and gray.
11. Charm Pendant Necklace

Creating a charm pendant necklace is a beautiful way to display your charm collection. Choose pieces that have special meaning or reflect your personality. Simply attach various charms to a chain or cluster them for a layered effect.
Materials needed:
– Assorted charms
– Chain or cord
– Jump rings
– Pliers
Instructions:
1. Select meaningful charms.
2. Use jump rings to attach each to the chain.
3. Cluster smaller charms around a larger one for layering.
4. Wear it with confidence!
– Mix metal tones for an eclectic vibe.
– Arrange charms by theme for fun.
Frequently Asked Questions:
– Where can I find unique charms?
Craft stores, flea markets, and online shops are great places!
12. Leather Fringe Pendant

Craft a bohemian leather fringe pendant for a stylish, easy-to-make accessory. Cut strips of leather and attach them to a circular base for a fun design. Adding beads or charms enhances the pendant’s flair, making it perfect for layering.
Materials required:
– Leather strips
– Circular base (wood or metal)
– Beads or charms
– Chain or cord
Instructions:
1. Cut leather into long strips for fringe.
2. Attach strips to the base using glue or stitching.
3. Add beads or charms for decoration.
4. Attach a chain or cord to wear.
– Vary fringe lengths for added interest.
– Use assorted colors for a lively piece.
Frequently Asked Questions:
– Can I use faux leather?
Yes, it works beautifully!
Fun fact: Upcycling leather scraps into fringe can cut waste by up to 60% and still yield a bold, on-trend diy pendant necklace. A single base and a few strips let you mix beads and charms for endless layering ideas. Small changes, big eco-style impact.
Recommended Products

100 PCS LEATHER NECKLACE CORD WITH CLASPS: Our rope necklace string includes 100 pcs 5 colors necklace cord with clasp that are enough for making necklace, bracelets and other DIY jewelry projects. Great value bulk necklace chains for jewelry making supplies.
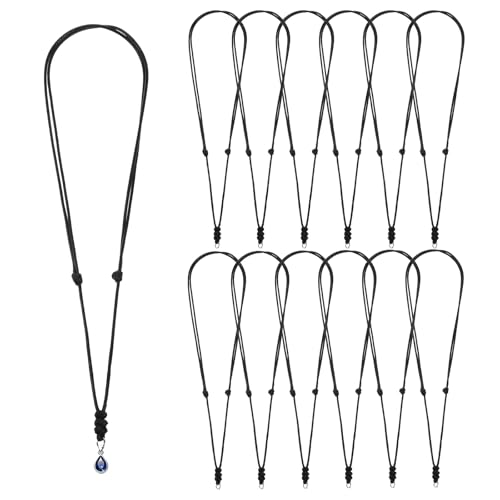
Reliable Material: Our black necklace cord is made from high-quality PU leather and stainless steel. It has a smooth surface, is comfortable to wear, and does not fade easily. It is also durable and can be worn for a long time.

20-Pack Value + Black & Multicolor Assortment - Includes 20 pre-finished necklace cords in 10 classic black + 10 assort multicolors — enough for bulk jewelry making, gifting, or testing pendant designs. No need to buy single cords or mix colors separately—this set covers neutral staples (black for everyday wear) and trendy tones (multicolor for seasonal styles)
13. Mosaic Pendant
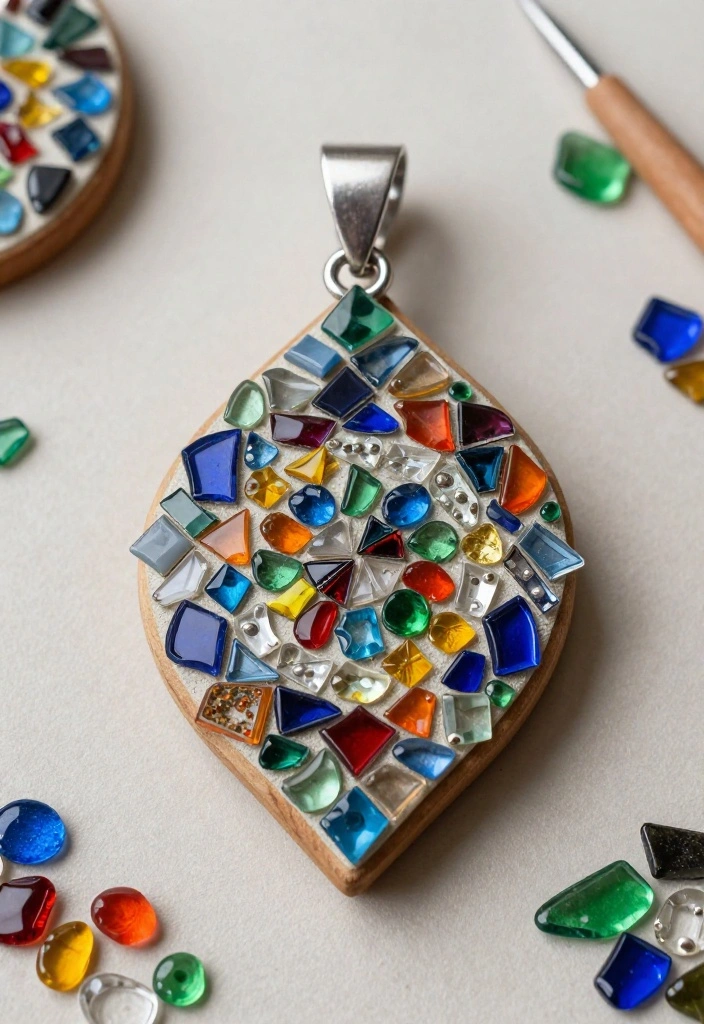
Unleash your creativity with a mosaic pendant! Using small pieces of colored glass, tile, or paper, you can design intricate and stunning jewelry. The process is enjoyable, and the end result is a wearable piece of art.
Materials you’ll need:
– Small mosaic pieces (glass, tile, or paper)
– Strong adhesive
– Base material (wood or ceramic)
– Grout (optional)
– Chain or cord
Instructions:
1. Arrange your mosaic pieces on the base to visualize your design.
2. Glue each piece securely.
3. If using grout, fill in spaces once the adhesive dries.
4. Attach a chain or cord for wearing.
– Explore color schemes that showcase your personality.
– Take your time arranging pieces for the best outcome.
Frequently Asked Questions:
– Can I use broken dishes?
Yes! They can add character and uniqueness.
14. Felted Wool Pendant
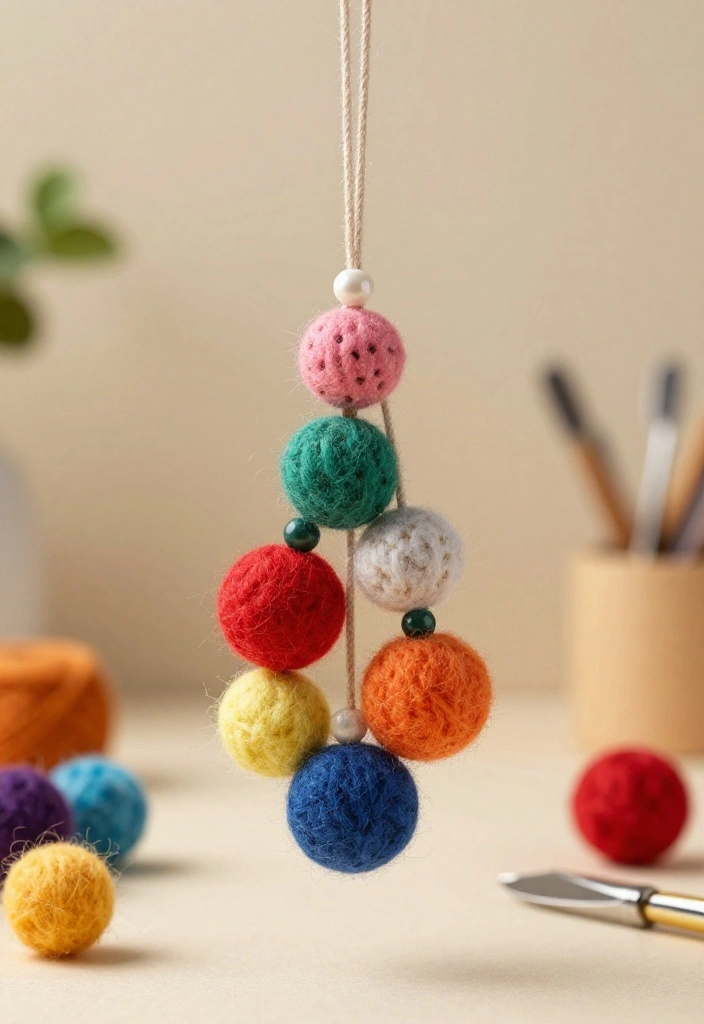
Experience felting by creating a felted wool pendant. This soft and striking project allows for whimsical designs with felted wool balls and beads. The necklace exudes comfort and creativity, making it a lovely accessory.
Materials needed:
– Wool roving
– Felting needle
– Strong thread
– Beads or charms
– Chain or cord
Instructions:
1. Felt wool roving into small balls with a felting needle.
2. String the balls together with beads for added flair.
3. Secure everything with strong thread.
4. Attach to a chain or cord.
– Experiment with colors for playful designs.
– Consider adding a tassel for extra charm.
Frequently Asked Questions:
– Is felting hard?
It takes practice, but it’s a fun skill to learn!
15. Upcycled Glass Bottle Pendant
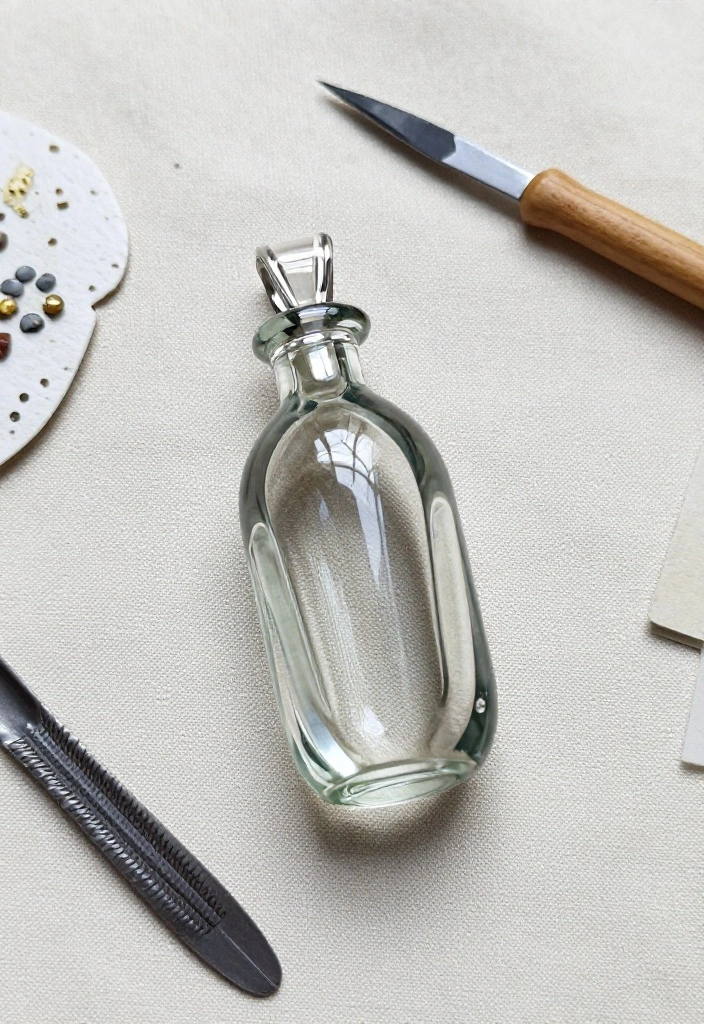
Turn a glass bottle into a stunning pendant necklace! This creative project adds an artistic flair to your look. Cut the bottle into interesting shapes or use the base for a unique design. Paint or decorate to enhance its beauty.
Materials required:
– Clean glass bottle
– Glass cutter
– Paint or decorative materials
– Chain or cord
Instructions:
1. Carefully cut the glass bottle with a glass cutter.
2. Smooth edges to avoid sharpness.
3. Decorate as desired and let it dry.
4. Attach to a chain or cord for wearing.
– Layer glass pieces for depth.
– Use frosted paint for a softer look.
Frequently Asked Questions:
– Can I use any glass bottle?
Yes, but be cautious when cutting.
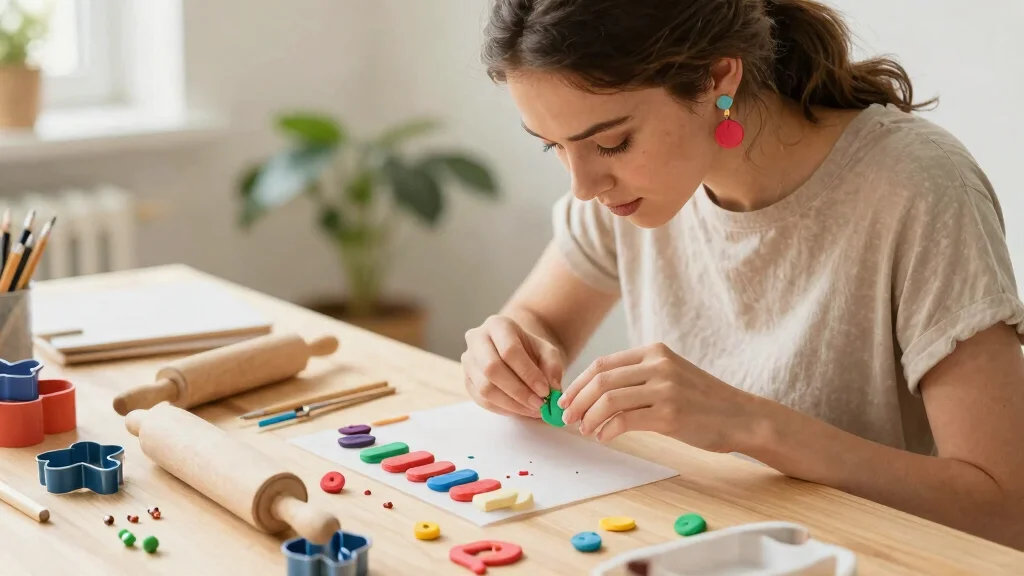
16. Polymer Clay Pendant
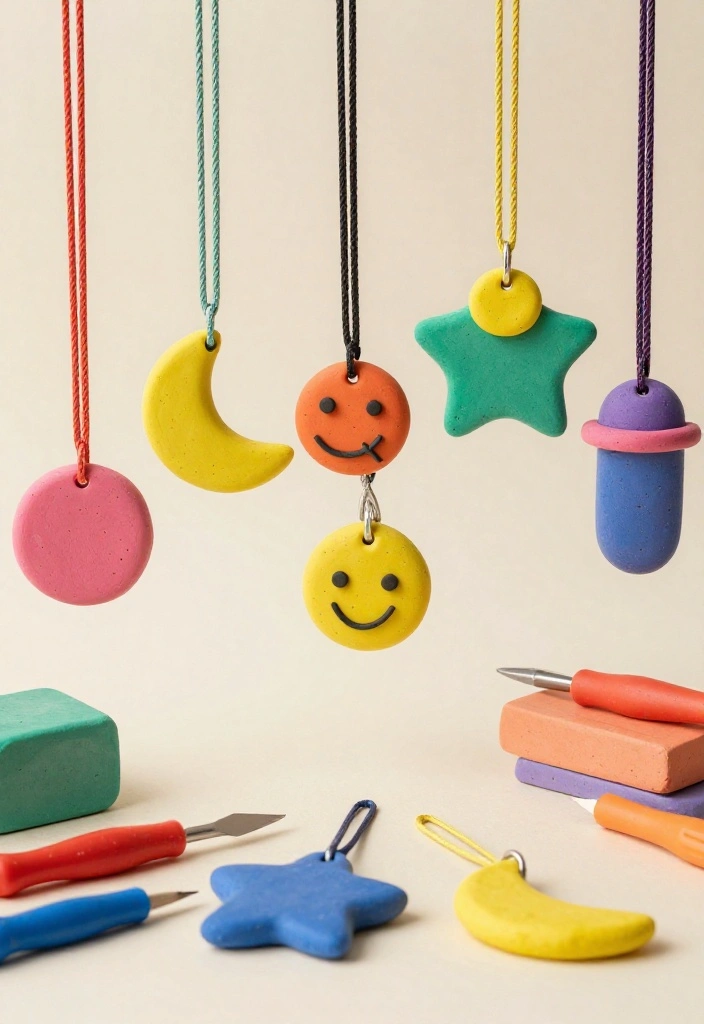
Get creative with a polymer clay pendant! This versatile material can be shaped into any design you imagine. From intricate patterns to playful beads, the possibilities are endless. Once baked, your clay creations become durable and ready to wear.
You’ll need:
– Polymer clay in various colors
– Clay tools for shaping
– Oven for baking
– Chain or cord
Instructions:
1. Shape the clay into your desired designs.
2. Bake according to the package instructions to harden.
3. After cooling, attach to a chain or cord.
– Mix colors for unique patterns.
– Use cookie cutters for uniform shapes.
Frequently Asked Questions:
– How do I store unused clay?
Keep it sealed in an airtight bag in a cool, dry place.
Recommended Products

Comes with 8 colors of polymer clay, 3 pendants, 12 charms, 99 beads, 2 clay cutters, roller, 3 necklaces, bracelet cord, bead rod, cutting tool, and instructions

EVERYTHING YOU NEED INCLUDE, WELL ORGANIZED IN 6 BOXES - The Clay beads bracelet making kit contains 19,000pcs clay beads in 120 different colors and 1000+ accessories. The rich accessories include letter beads, heart beads, evil eyes beads, smile face beads, square beads, star beads, pendants and charms, lobster clasps, etc. More than ten kinds of accessories to make your design more exciting. (Everything shown on the picture contains)

All You Need Included: You will get 480pcs polymer clay beads charms in 24 different styles, and all the clay beads are packed in a plastic gift box, the beaded set is also equipped with two rolls of 5m crystal elastic strings and a pair of exquisite scissors, which can meet all your needs for DIY jewelry production!
17. Embroidered Pendant
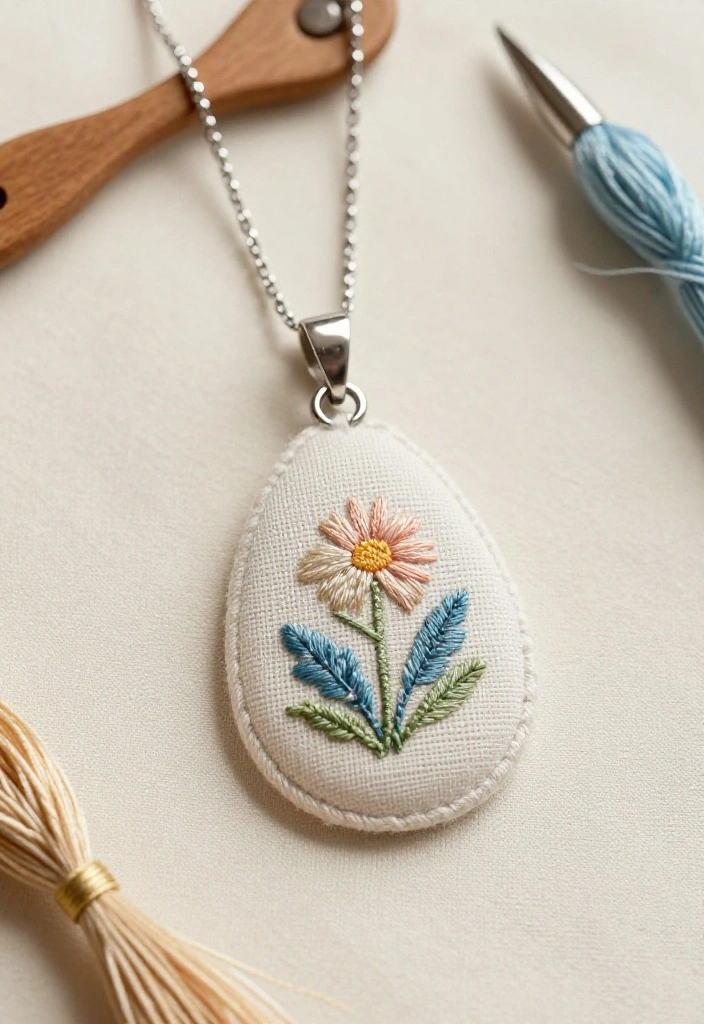
Explore embroidery with a stunning embroidered pendant. This project allows you to showcase your stitching skills while creating wearable art. Use fabric as a base, embroider beautiful designs, and frame it for a unique pendant.
Materials required:
– Fabric for embroidery
– Needle and thread
– Embroidery hoop
– Chain or cord
Instructions:
1. Place fabric in an embroidery hoop.
2. Embroider your design with creativity.
3. Trim the fabric and attach to a pendant back.
4. Add your necklace chain.
– Choose designs that reflect your style.
– Experiment with stitches for texture.
Frequently Asked Questions:
– Can I wash the pendant?
It’s best to spot clean to protect the embroidery.
18. Mixed Media Pendant
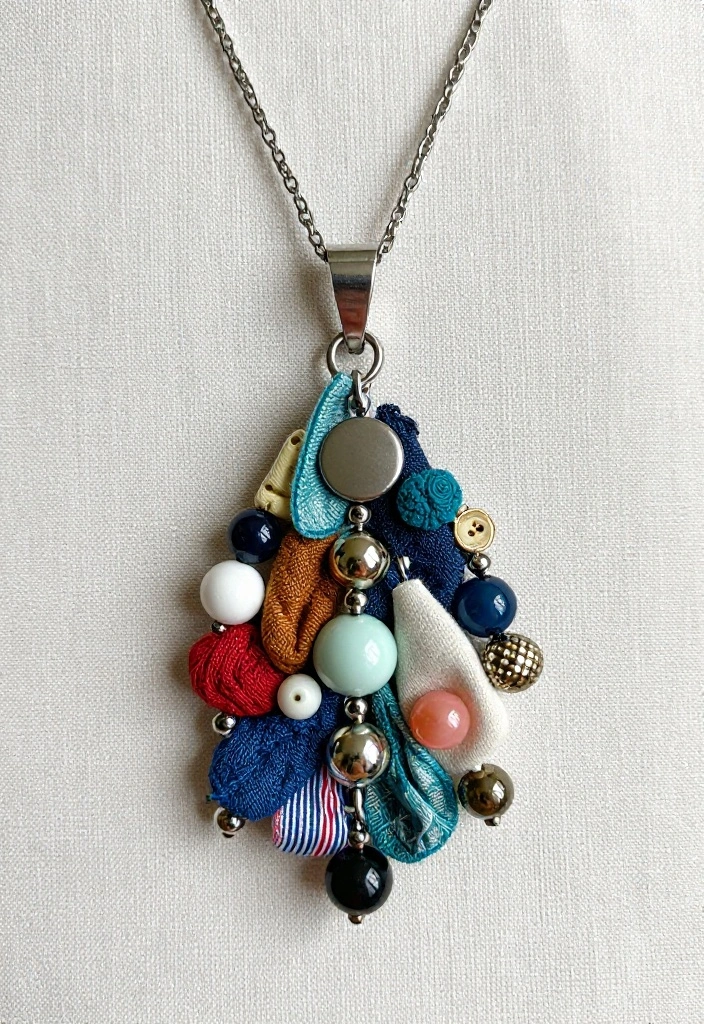
Let your creativity flow with a mixed media pendant! Combine various materials—from fabric to metal, beads to wood—to create a truly unique piece. This approach allows for great freedom in design and a chance to express your personal story.
Materials required:
– Assorted materials: fabric, metal, beads, etc.
– Adhesive or sewing tools
– Base for the pendant
– Chain or cord
Instructions:
1. Choose materials and design your pendant.
2. Attach to the base using glue or stitches.
3. Allow to dry before adding a chain.
– Keep a cohesive color palette for harmony.
– Experiment with textures and shapes for creativity.
Frequently Asked Questions:
– Can I use any materials?
Yes! This project is all about letting your creativity shine.
Conclusion
Crafting your own DIY pendant necklaces not only fosters creativity but also promotes eco-friendly practices by utilizing upcycled materials. Each piece you create carries a personal story and a unique flair that mass-produced jewelry simply can’t replicate.
As you explore these 18 ideas, let your imagination run wild and don’t hesitate to mix and match techniques and materials. Start your jewelry-making adventure today and wear your creations with pride!
Frequently Asked Questions
What eco-friendly materials work best for a diy pendant necklace using upcycled items?
Think upcycled basics like wood slices, bottle caps, ceramic shards, glass beads, metal washers, old jewelry charms, and fabric scraps. Start by cleaning and drying the material, then seal porous surfaces with a clear sealant to prevent staining. Drill a small hole or attach a bail if needed, then string with leather, waxed cord, or recycled chain. Finish with a sturdy clasp and optional protective coating if desired. This approach yields a durable, comfortable diy pendant necklace you can wear every day.
How can I start with pendant necklace tutorials using upcycled materials?
Begin with a simple plan: pick one upcycled material, sketch a design, and gather supplies. Look for beginner-friendly pendant necklace tutorials that cover basics like wire-wrapping, bead-stringing, and attaching bails. Assemble a small toolkit, wear safety gear when drilling, and practice on scrap pieces before you commit. Document your progress to build a library of handmade jewelry ideas and refine your jewelry making techniques.
What are some easy necklace crafts I can do as craft projects for adults using upcycled pieces?
Here are beginner-friendly ideas you can tackle in a weekend:
Bottle-cap pendant with resin;
Button-and-bead pendant;
Key pendant wrapped in wire;
Fabric-wrapped bead pendant;
Wood slice pendant with epoxy;
Metal washer pendant with stamped word. These projects are perfect for craft projects for adults and require minimal tools while delivering stylish, eco-friendly results.
How can I ensure my diy pendant necklace is durable and comfortable to wear?
Choose skin-friendly, durable cords (waxed cotton, leather, or nylon) and a sturdy clasp with secure jump rings. Seal porous components with a clear epoxy or resin to protect against wear. When stringing, leave a little slack for movement, and balance the pendant so it sits comfortably. Finally, test the finished piece by gently tugging and wearing it around the house to catch any weak spots, and apply a light protective coating if needed.
Where can I find inspiration for handmade jewelry ideas and pendant necklace tutorials?
Scroll through Pinterest boards, Instagram feeds, and craft blogs for eco-friendly pendant ideas. Search for pendant necklace tutorials, handmade jewelry ideas, and easy necklace crafts to see how others upcycle materials and what designs you love. Create a mood board from your favorite finds, then adapt the concepts to your own upcycled materials and techniques.
Related Topics