Creating your own DIY wooden beads bracelet is more than just a fun craft; it’s a journey into nature’s beauty and your own creativity. In a world that often feels fast-paced, there’s something truly calming about working with natural materials. Wooden beads, with their earthy tones and unique textures, bring a warm vibe that can elevate any outfit. This post is inspired by the desire to encourage people to embrace eco-friendly jewelry making while keeping their personal style at the forefront.
If you’re someone who loves handmade jewelry or enjoys crafting, this collection of bracelet ideas is just for you. Whether you’re a seasoned DIYer or just starting out, these wooden bead crafts will ignite your imagination. You’ll discover designs that reflect your personality and let you explore your artistic side. From boho bracelet designs to minimalist charm, there’s something here for everyone who appreciates natural materials in their accessories.
Get ready to dive into 15 creative DIY wooden beads bracelet ideas that are not only beautiful but also simple to make. You’ll learn how to incorporate various elements like tassels, geometric shapes, and even dried flowers into your designs. These handmade jewelry ideas will help you create unique pieces that resonate with your love for nature. So gather your materials and prepare to craft something special!
Key Takeaways
– Discover 15 unique DIY wooden beads bracelet ideas that reflect natural vibes and personal style.
– Explore various techniques like incorporating tassels, dried flowers, and geometric shapes to enhance your designs.
– Find inspiration in boho bracelet designs and other creative DIY accessories that are easy to make.
– Learn about using various textures and colors, such as paint-dipped beads and clay accents, to create standout pieces.
– Embrace eco-friendly jewelry making and enjoy the therapeutic benefits of crafting with natural materials.
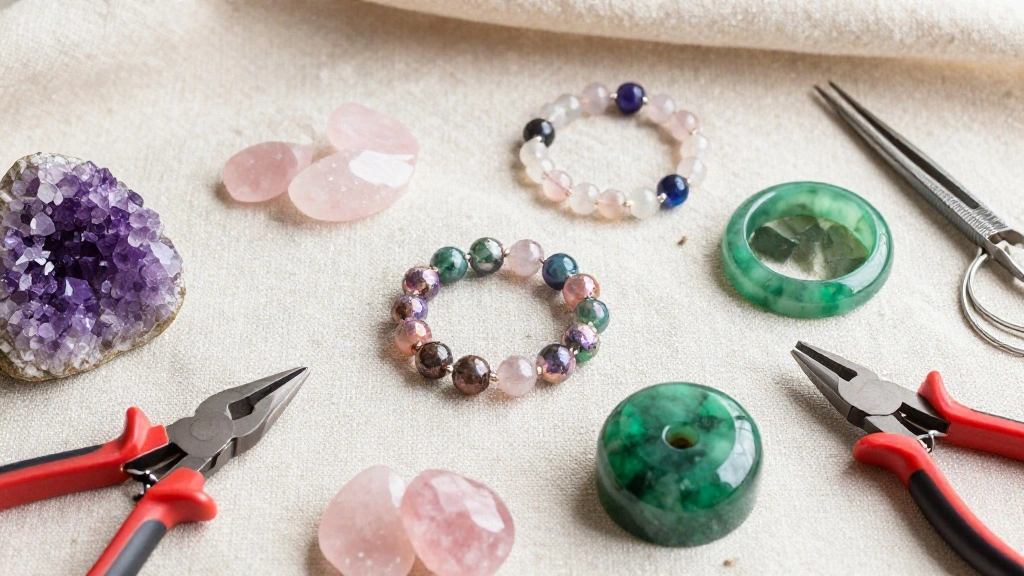
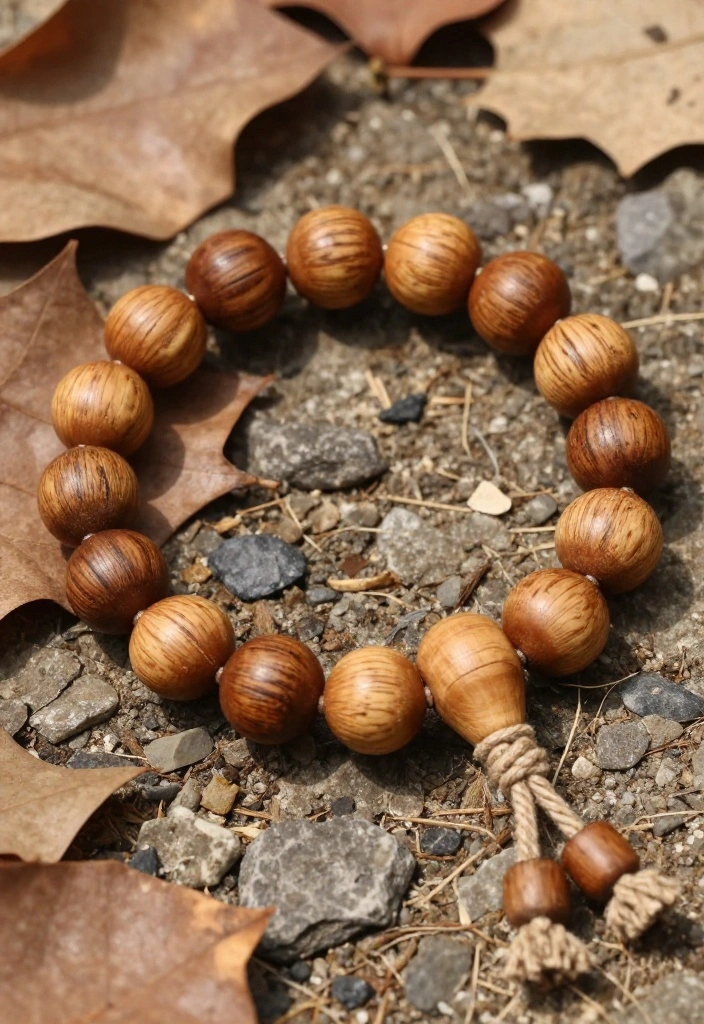
1. Earthy Elegance with Natural Wood
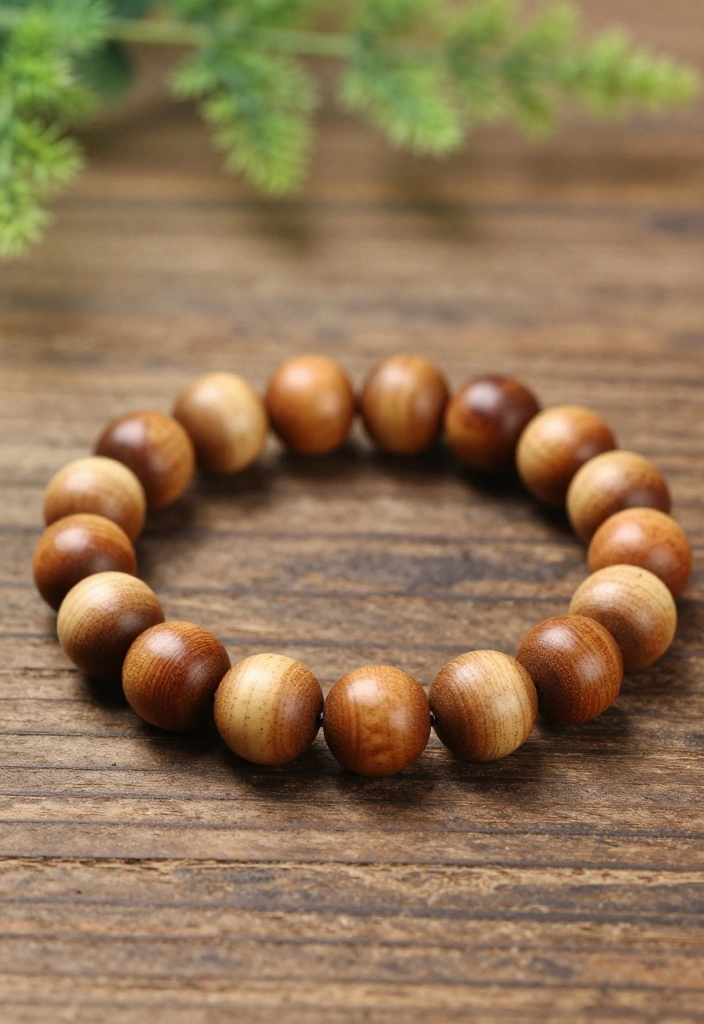
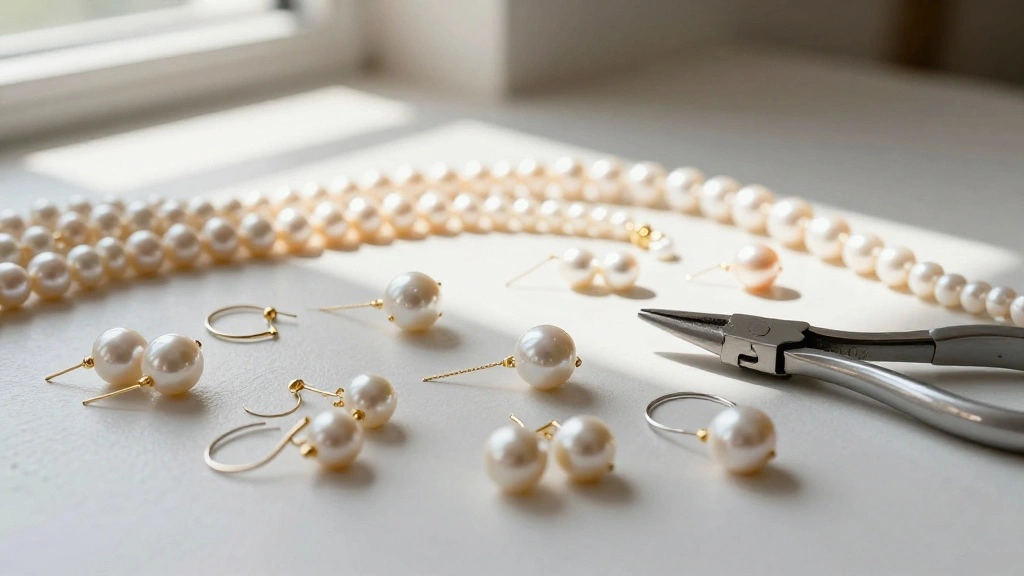
Kick off your crafting adventure with a beautifully simple bracelet made from polished wooden beads. The natural hues of walnut, maple, or birch create a serene aesthetic reminiscent of the great outdoors. With a stretchy elastic cord, this piece is a breeze to wear and remove, offering a perfect blend of comfort and style.
Adding charms made from natural stones or metals enhances its charm, making it an ideal accessory for casual outings or a subtle yet chic statement piece for special events.
Mix different bead sizes for added texture and visual interest. Play with spacing to design unique patterns that reflect your personality.
1. Gather your materials: polished wooden beads, elastic cord, scissors, and charms.
2. Cut the elastic to your wrist size, ensuring you have extra for knots.
3. Arrange your beads in a pattern you like.
4. String the beads onto the elastic cord.
5. Tie secure knots and trim any excess cord.
6. Enjoy wearing your new accessory!
Recommended Products

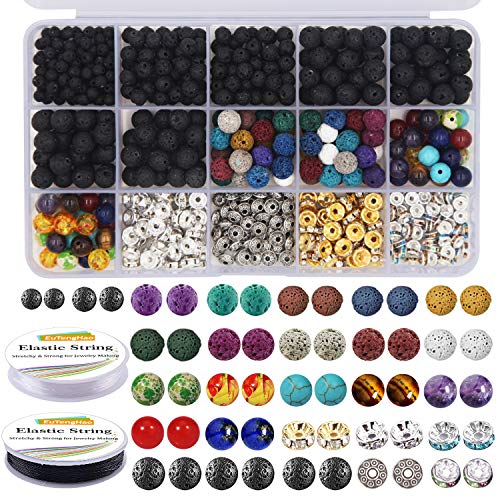
Made of superior wood material with a smooth surface, Excellent Polishing. Quantity will only be more, not less. Seven sizes to choose from: 6mm, 8mm, 10mm, 12mm, 15mm, 18mm, 20mm; nine kind of wood to meet the needs of your different crafting projects.

Made of superior wood material with a smooth surface, Excellent Polishing. Quantity will only be more, not less. Seven sizes to choose from: 6mm, 8mm, 10mm, 12mm, 15mm, 18mm, 20mm; nine kind of wood to meet the needs of your different crafting projects.

COMPLETE SET: Includes 4 distinct men's beaded bracelets featuring natural lava stone, black onyx, matte agate, and tiger eye stones for versatile styling options
🌟 Transform Your Space Today
Unleash your creativity and elevate your home decor with expert DIY tips and stunning makeover ideas.
2. Boho Chic with Tassels
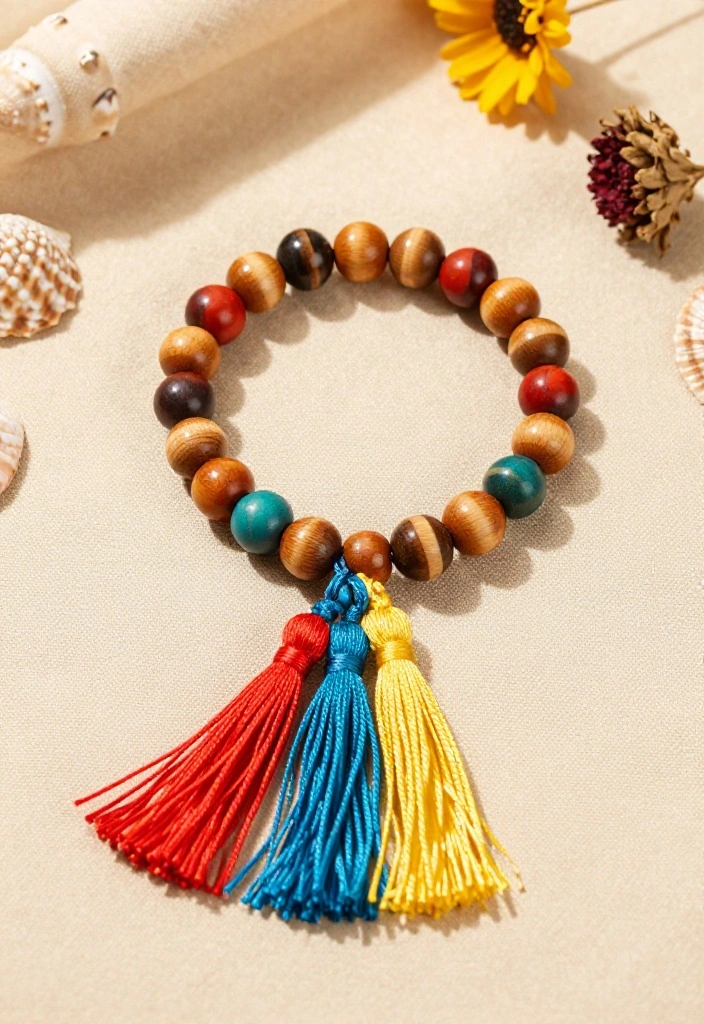
Unleash your bohemian side by adding colorful tassels to your wooden bead bracelet! Pair neutral wooden beads with vibrant tassels in shades like deep turquoise, sunny yellow, or fiery red for a striking contrast. This combination creates a visually stunning effect that is sure to catch the eye.
The playful movement of tassels enhances the overall aesthetic, making this bracelet perfect for summer festivals or beach outings, ensuring you stand out in the crowd.
Choose lightweight tassels to keep the bracelet comfortable. Make tassels using embroidery thread to match your color palette!
1. Collect wooden beads, colorful embroidery thread, and stretchy cord.
2. Create tassels by wrapping the thread, cutting the ends, and tying them off.
3. Arrange your beads and tassels on the cord.
4. String them together, ensuring tassels are spaced as desired.
5. Tie the ends securely and trim any excess cord.
6. Wear your boho masterpiece with pride!
Fun fact: Tassels on a diy wooden beads bracelet grab 2x more attention in photos. Add 3 colorful tassels with neutral beads for a striking contrast that fans notice at a glance.
3. Minimalist Charm with Geometric Shapes

Embrace minimalism with a chic wooden bead bracelet featuring geometric shapes. Use a mix of square, triangle, and round wooden beads to create a captivating visual interplay. A monochromatic color scheme in shades like matte black, pure white, or earthy greys delivers an ultra-modern vibe.
This design effortlessly transitions from day to night, making it versatile for various occasions. It’s a perfect reminder that sometimes, less is more!
Maintain a simple and balanced design; intentional asymmetry can add character without overwhelming the piece.
1. Gather your materials: geometric wooden beads, elastic cord, and scissors.
2. Measure and cut the elastic to fit your wrist.
3. Lay out your bead design.
4. String the beads onto the elastic in your chosen configuration.
5. Knot securely and trim any excess cord.
6. Flaunt your minimalist creation!
How To Choose the Right Wooden Beads for Your DIY Bracelet
When it comes to creating your very own DIY wooden beads bracelet, choosing the right beads is essential for achieving the perfect look and feel. Here are some criteria to consider when selecting your wooden beads:
1. Size
The size of your beads can drastically change the overall appearance of your bracelet. Larger beads can create a bold statement piece, while smaller beads lend themselves to delicate, intricate designs. For a standard bracelet, consider beads around 8-12 mm in diameter, as these sizes are popular and easy to work with. Think about how you want your bracelet to feel on your wrist and how it will fit with your style.
2. Material Type
Not all wooden beads are made equal. Different types of wood offer various textures, colors, and durability. Common woods like bamboo, maple, and walnut all have distinct appearances. Choose lightweight beads if you prefer a more comfortable wear. Also, be on the lookout for beads that are treated with eco-friendly finishes to keep your project sustainable.
3. Color and Finish
Natural wood beads come in various shades and can be left raw or finished. Raw beads highlight the beauty of the wood grain, while painted or stained beads can add a pop of color to your bracelet. If you’re going for a boho or earthy vibe, consider mixing different shades of browns and greens. For a more modern look, opt for beads painted in bright colors or with a glossy finish.
4. Bead Shape
Bead shapes can significantly affect the style of your bracelet. Round beads create a classic look, while geometric shapes such as cubes or triangles can add modern flair. Consider using a combination of shapes for a more dynamic design. For instance, pairing round beads with flat or oval-shaped ones can create interesting contrasts and textures.
5. Stringing Method
Different stringing methods require different types of beads. If you plan to knot your beads, ensure they have larger holes. If using elastic cord, opt for beads that can accommodate stretchy materials easily. Some beads have small holes, which might limit your design options. Before you purchase, check that the beads you like will work with your chosen stringing technique.
6. Budget
Finally, consider how much you want to spend on your beads. Wooden bead prices can vary widely based on size, type of wood, and craftsmanship. Set a budget before you start shopping, and don’t hesitate to explore online shops or local craft stores for deals. Purchasing in bulk can often save you money, especially if you plan to make multiple bracelets.
Pro Tip: When starting, purchase a variety of sizes, colors, and shapes. This way, you can experiment with different designs without committing to a single style. Keep your leftover beads for future projects; they can inspire new creations down the line!
Recommended Products

Abundant Quantity:600Pcs natural colors large hole wood beads,The abundant quantity is sufficient to meet your various handicraft needs.

Package include - 1000pcs 10mm wooden beads.

Packaging content: Approximately 500pcs 5-color vintage wooden beads
4. Nature’s Touch with Dried Flowers

Infuse your wooden bead bracelet with the beauty of dried flowers! Opt for small wooden beads and use transparent beads to encase tiny dried flowers like lavender or daisies. This delightful combination creates an enchanting effect, connecting nature’s essence directly to your wrist.
Perfect for nature lovers, these bracelets offer a fresh, romantic vibe and make thoughtful gifts or personal accessories.
Ensure the flowers are completely dry to avoid moisture damage. Jewelry resin can be used for added durability!
1. Gather dried flowers, small wooden beads, transparent beads, and stretchy cord.
2. Cut your elastic cord to the desired length.
3. Arrange the flowers and wooden beads in your preferred design.
4. String the beads, encasing the flowers as desired.
5. Secure knots and trim any excess cord.
6. Enjoy your floral masterpiece!
Recommended Products

Value Pack: This set contains 300 vivid mini dried flowers for resin in a variety of shapes and colors to meet all your crafting and decorating needs

【Products Size】The Diameter of These Beads is 0.62inch/ 16mm,The Aperture is Approximately 0.09inch/2.5mm.Can Meet Your Various Needs,Enough for Your Spare and Replacement.

5. Color Pop with Paint Dipped Beads
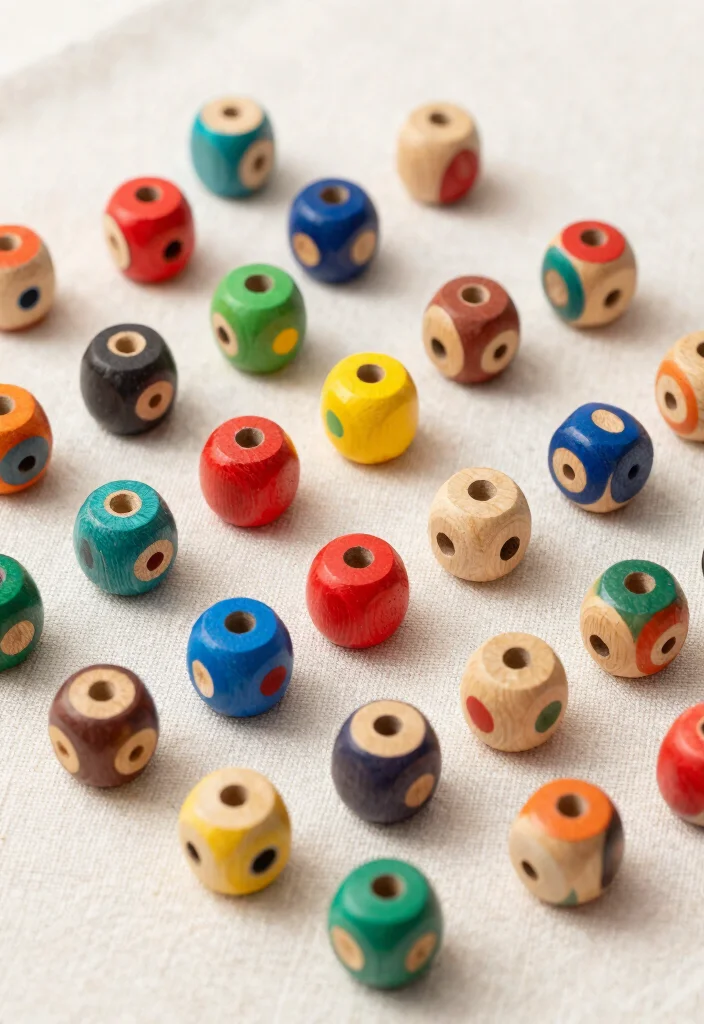
Transform your wooden beads into a canvas with vibrant paint-dipped designs! Select a variety of wooden beads and paint the bottom half in lively colors like coral, teal, or mustard yellow. This playful twist not only adds personality but also allows for unique customization of each piece.
These vibrant bracelets can be layered with other designs for a boho vibe, perfect for anyone who loves to express their individuality!
Use non-toxic paint for an easy cleanup. Make sure the paint dries completely before stringing the beads.
1. Gather wooden beads, paint, a paintbrush, and elastic cord.
2. Paint the bottom half of each bead in your chosen colors.
3. Allow the paint to dry thoroughly.
4. Cut the elastic to wrist size, then string the beads.
5. Tie securely and trim any excess cord.
6. Layer with other bracelets for a fun, creative look!
6. Twisted Rope and Wooden Beads
Enhance your DIY skills by incorporating twisted rope into your wooden bead bracelet! A thick, natural rope adds rustic charm that beautifully complements wooden beads. Choose beads in varying sizes for a playful twist to your design. This style is ideal for those who appreciate a rugged, outdoor aesthetic.
Pair this bracelet with natural fabrics for a cohesive look, making it a must-have accessory for casual outings or adventures.
Ensure the rope is tightly twisted for durability. Consider adding a clasp for easy wear.
1. Gather twisted rope, wooden beads, and a clasp.
2. Cut the rope to fit your wrist, adding extra for knots.
3. String wooden beads onto the rope in your desired design.
4. Tie secure knots at both ends and attach the clasp.
5. Enjoy your rustic accessory!
7. Mixed Media Marvels
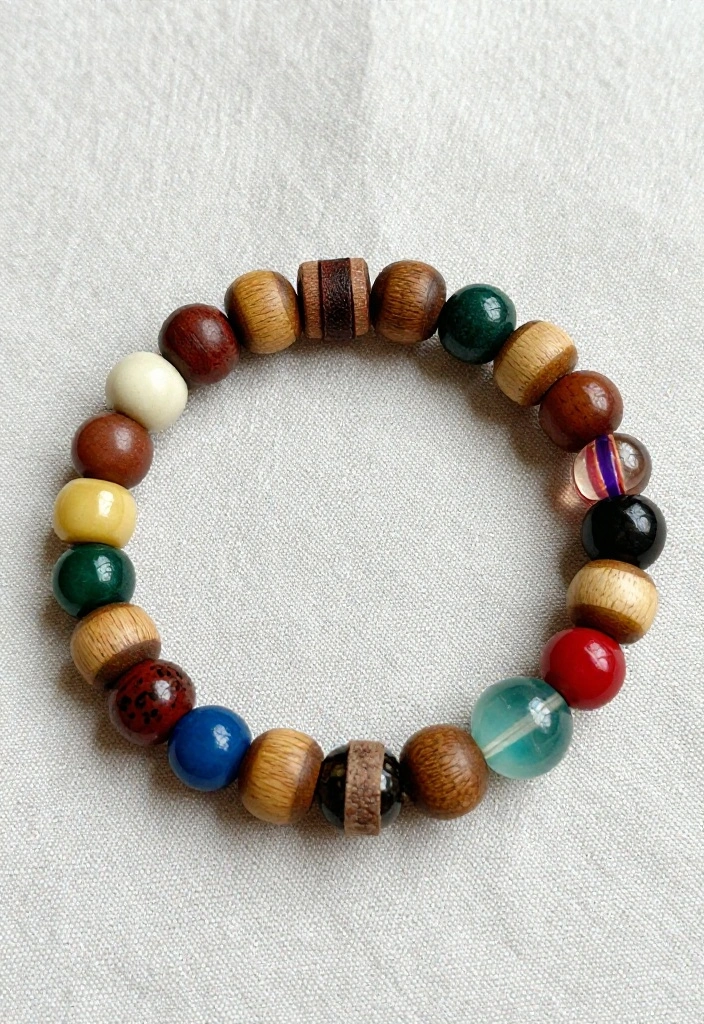
Create a stunning mixed media bracelet by combining wooden beads with other materials! Incorporate elements like leather, hemp, or glass beads for a unique twist. This eclectic mix allows you to experiment with textures and colors, resulting in a one-of-a-kind accessory. Perfect for showcasing your personal style, this bracelet can seamlessly transition from casual to elegant.
Use a neutral base to let colorful accents pop. Be mindful of bead sizes to ensure even distribution throughout the design.
1. Gather wooden beads, leather strips, hemp cord, and decorative beads.
2. Cut materials to your desired lengths.
3. Start with a wooden bead base and alternate other materials in your design.
4. String beads onto the cord or leather, tying securely.
5. Trim off any excess materials and enjoy your mixed media masterpiece!
8. Layered Natural Vibes
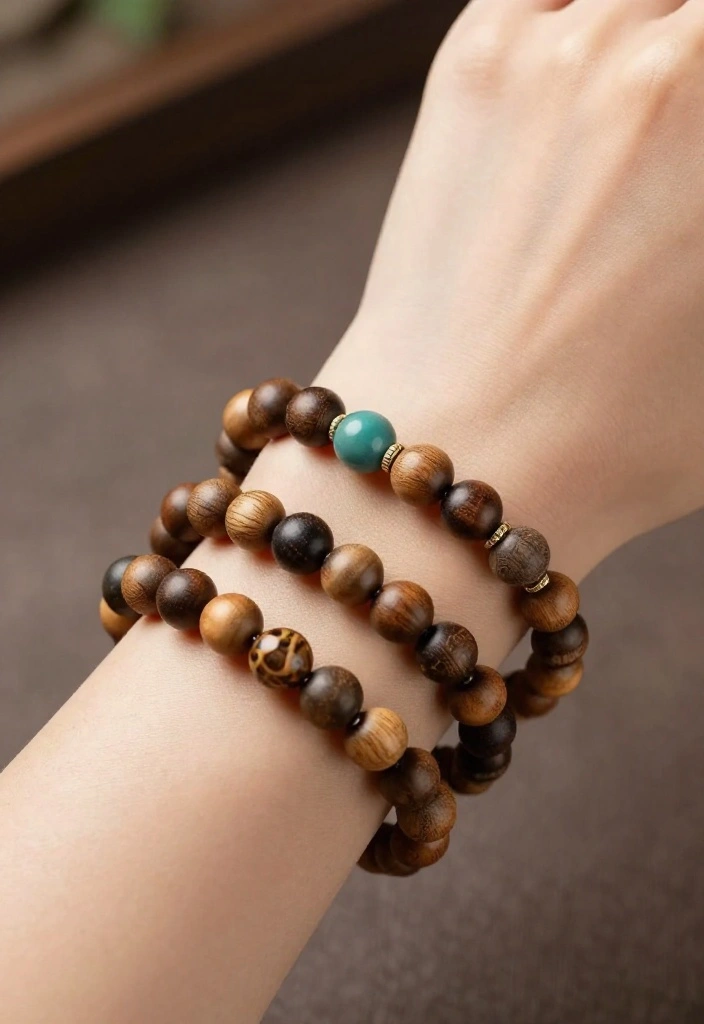
Why choose just one bracelet when you can create a stunning stack? Layer wooden bead bracelets in different sizes and colors for an effortlessly chic look. Mix colorful painted beads with earthy tones or alternate textures to keep things interesting. This trend is perfect for style enthusiasts who love to experiment!
Each bracelet can tell its own story while collectively creating a harmonious vibe on your wrist.
Maintain a balance in thickness and color; too many bold pieces can clash.
1. Make multiple individual bracelets using various designs and colors.
2. Ensure they complement one another in color and texture.
3. Layer them on your wrist for a fun, boho-inspired look!
4. Adjust as needed for comfort and style.
❝ Fun fact: A trio of layered diy wooden beads bracelet stacks creates 75% more visual impact than a single piece. Color variety and varied bead sizes keep the eye moving and the vibe natural. ❞
9. Personalized Initial Beads
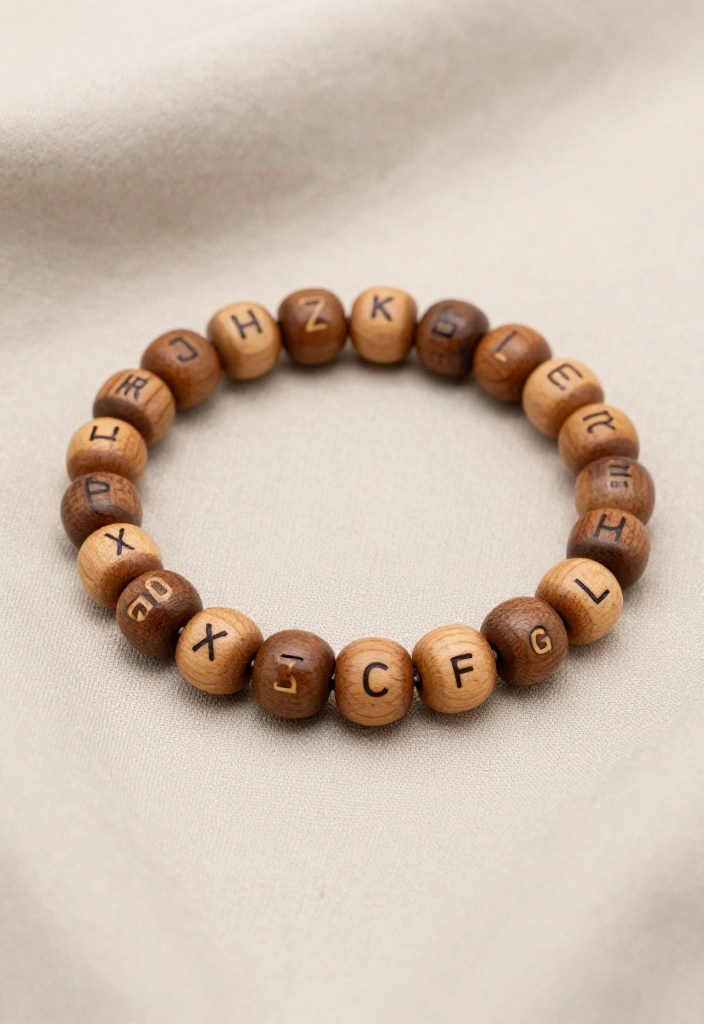
Add a special touch to your wooden bead bracelet with custom initial beads! Choose wooden beads that can be painted or stamped with initials, words, or motivational quotes. This personalizes the piece, making it a thoughtful gift or a cherished keepsake. It’s a beautiful way to carry your values while enjoying the beauty of handcrafted jewelry.
Customize the colors and sizes to fit your unique style!
Use waterproof paint or sealant for added durability. Plan your layout before starting to ensure a balanced design.
1. Gather wooden beads, paint, or stamp materials.
2. Create initials or words on selected beads.
3. Cut elastic cord to your desired length.
4. String beads onto the cord in your planned arrangement.
5. Tie securely and trim any excess cord.
6. Wear your personalized piece with pride!
10. Vintage Revival with Distressed Beads
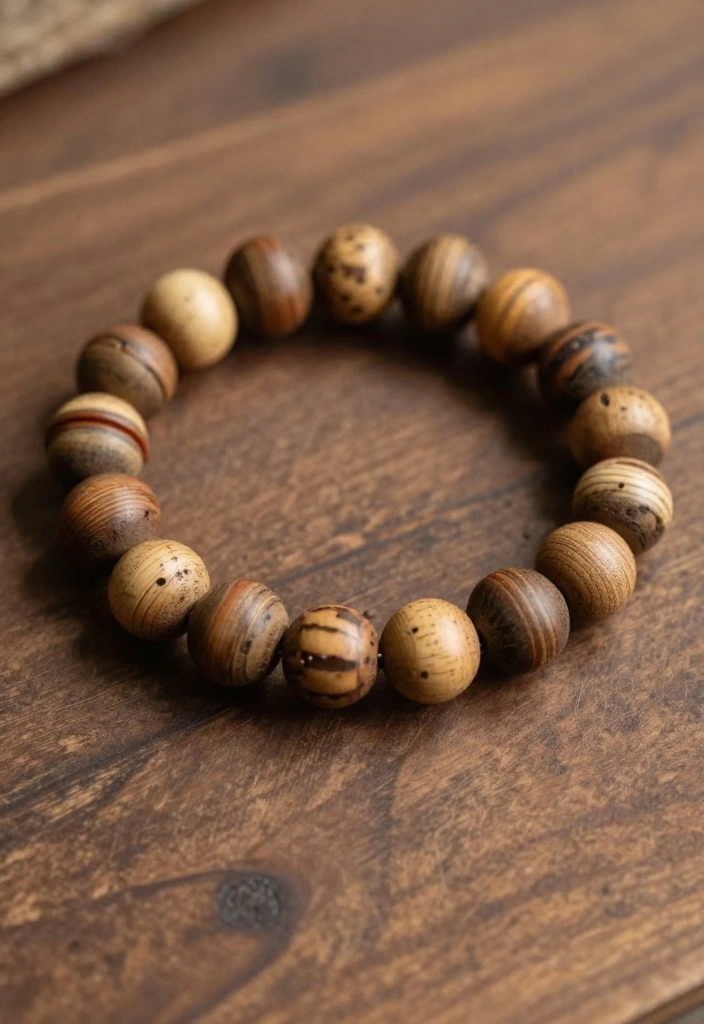
Embrace a vintage feel with lightly distressed wooden beads! Using beads with a rustic finish adds character to your bracelet, showcasing the beauty of imperfection. Opt for muted tones like grey, brown, or cream to complete the vintage aesthetic. This design is perfect for both casual and semi-formal occasions.
Mix sizes and shapes for a more authentic vintage vibe. Pair with antique-style charms for extra flair.
1. Choose a variety of distressed wooden beads.
2. Cut elastic cord to your wrist size.
3. String the beads in a pleasing design.
4. Secure knots and trim any excess cord.
5. Wear your vintage-inspired bracelet proudly!
11. Statement Pieces with Oversized Beads
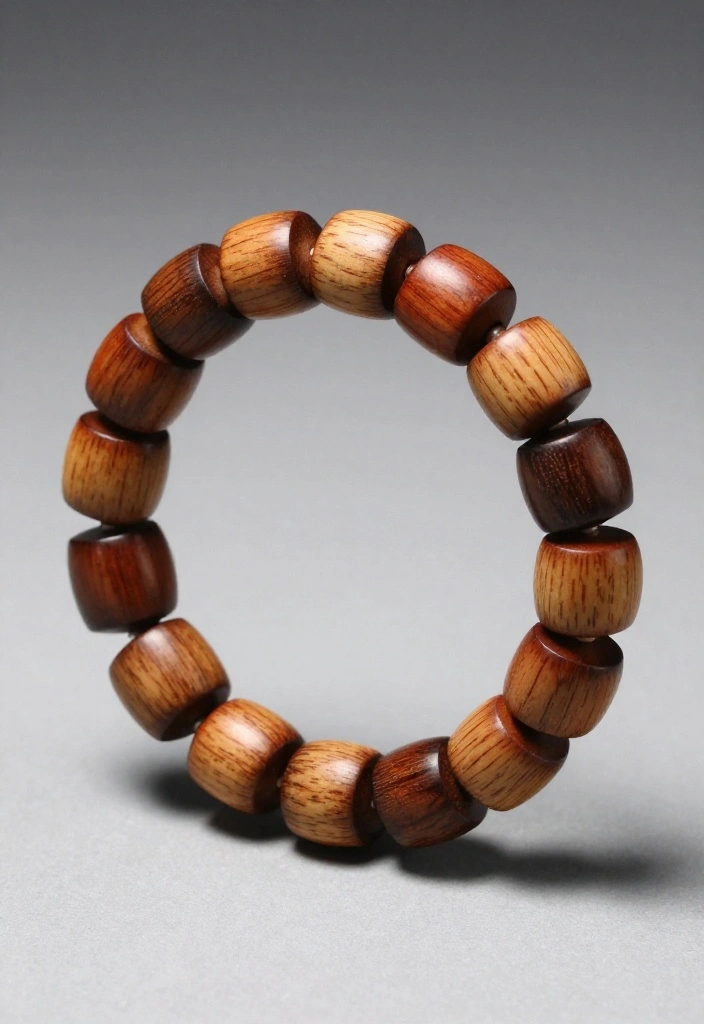
Make a striking statement with oversized wooden beads that demand attention! These chunky pieces serve as the focal point of your accessory, drawing the eye. Choose large beads in contrasting colors or simple natural wood tones for a bold visual impact. This style is perfect for events or as a standout accessory, exuding confidence!
Balance oversized beads with smaller elements for a cohesive look. Opt for a sturdy elastic cord to support the weight of larger beads.
1. Select oversized wooden beads and smaller accents.
2. Cut elastic cord to fit your wrist size.
3. String the oversized beads first, followed by smaller ones.
4. Secure knots and enjoy your statement piece!
12. Nature-Inspired Themes with Ferns
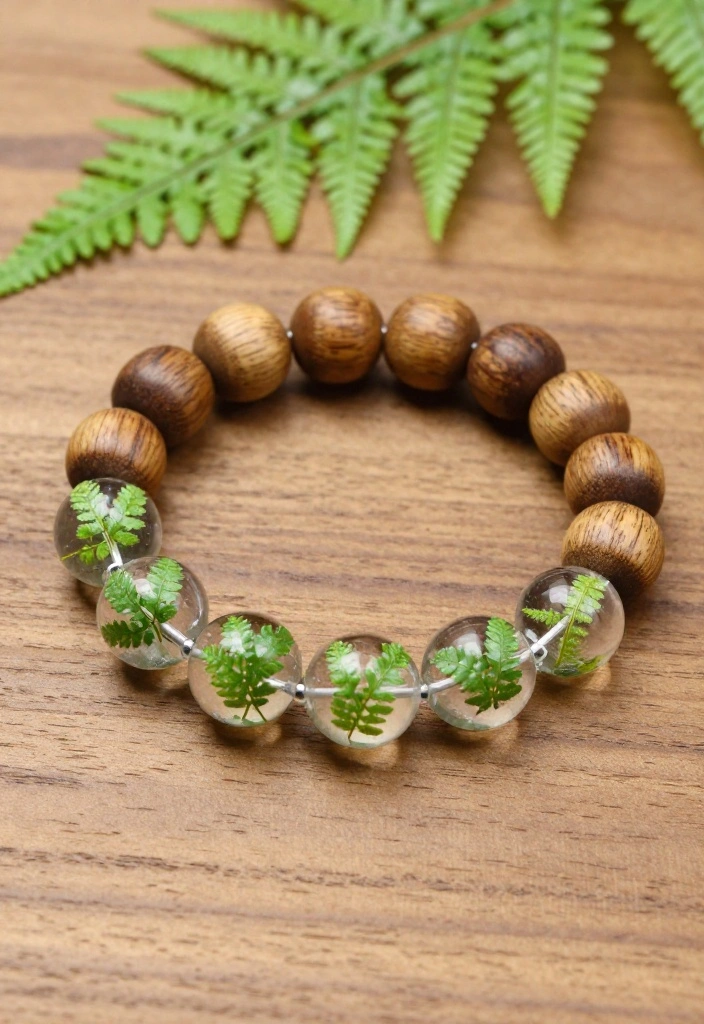
Connect with nature by integrating miniature ferns or leaves into your wooden bead bracelet! Use transparent resin to encase these natural elements, allowing their beauty to shine through. This creative design brings the essence of the forest to your wrist, ideal for nature enthusiasts.
It tells a story of harmony between the natural world and the art of crafting.
Ensure all organic materials are completely dry before embedding in resin. Exercise patience with the drying process for a flawless finish.
1. Collect miniature ferns or leaves, wooden beads, and resin materials.
2. Prepare the resin according to the package instructions.
3. Layer ferns into the resin and add wooden beads.
4. Allow to cure in a safe area.
5. String onto a cord and wear your nature-inspired bracelet!
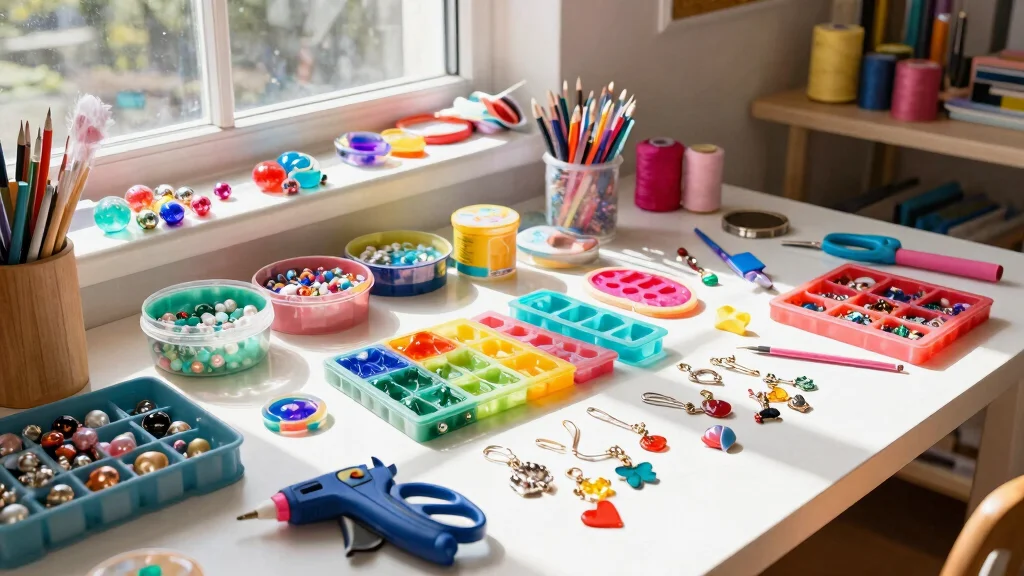
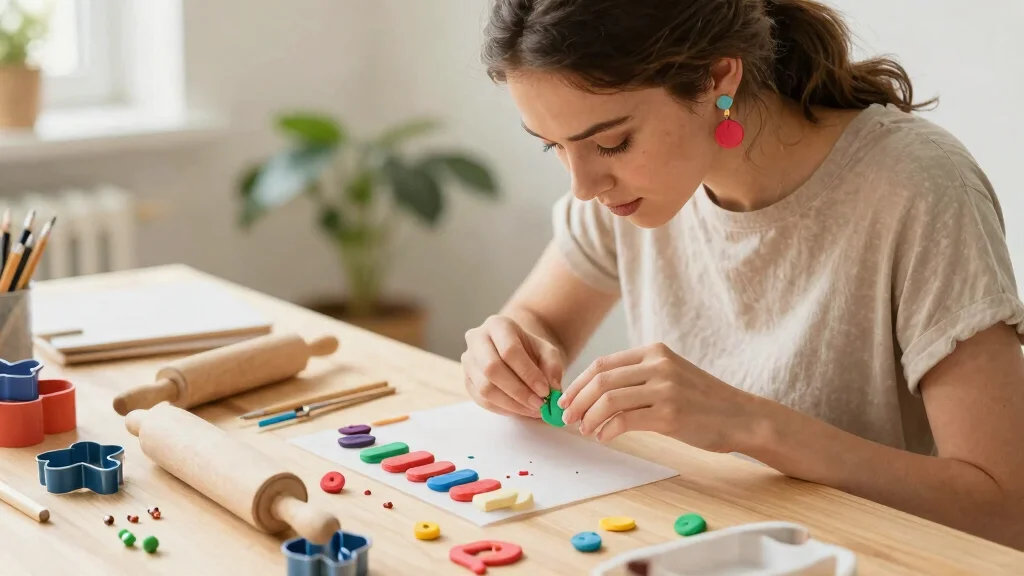
13. Earthy Tones with Clay Accents
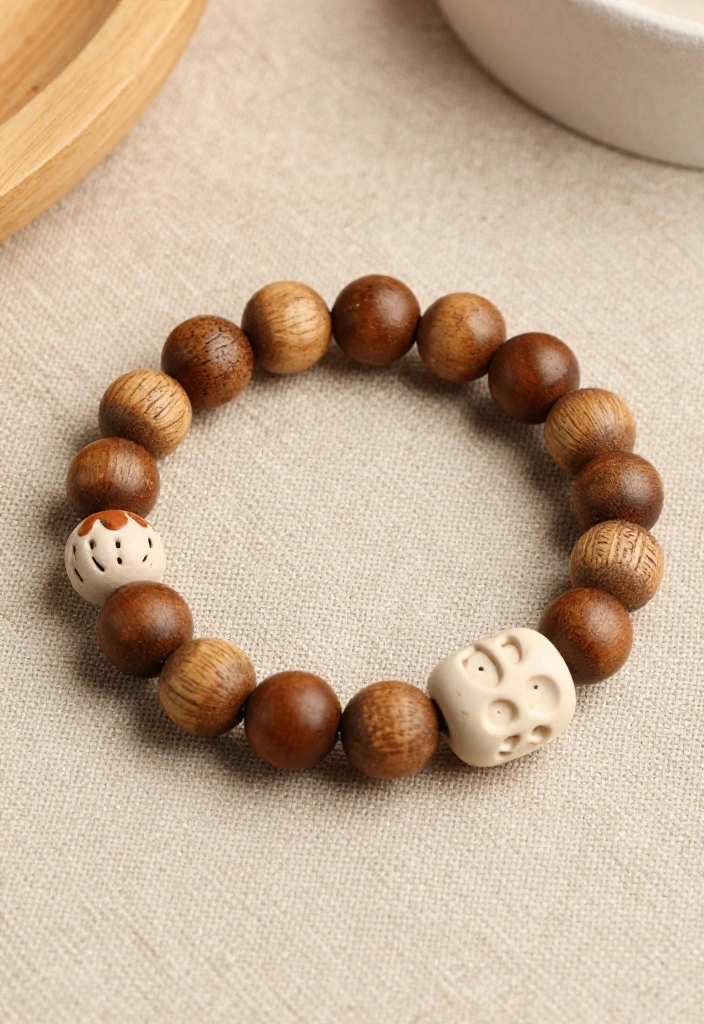
Combine wooden beads with handmade clay accents for a unique, earthy vibe. Using clay beads in natural colors like terracotta or ochre beautifully complements the wood, resulting in a harmonious accessory. This design allows for personal expression and artistic flair, making every piece special.
Experiment with shapes and patterns on the clay beads for an added creative touch!
Allow clay beads to fully dry and cure before stringing. Balance sizes for a smooth, even flow.
1. Gather wooden beads, clay, and elastic cord.
2. Form clay beads into desired shapes and colors, then let them dry.
3. Cut elastic cord to size and lay out an arrangement.
4. String beads in your chosen design.
5. Knot securely and wear your unique piece!
Recommended Products
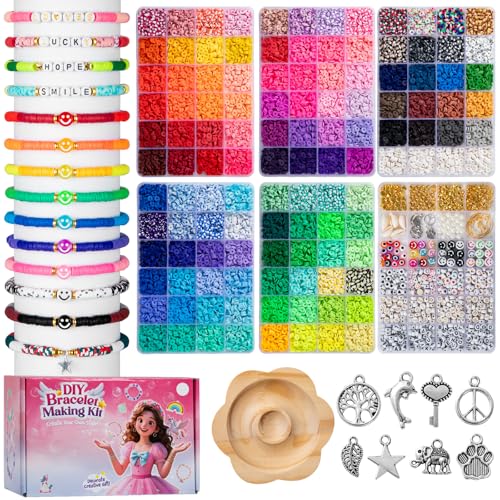
Adult-Oriented Jewelry Assembly Components: This beaded bracelet assembly set includes curated polymer clay beads, pearl beads, letter beads, and minimalist accent pieces, designed for adult users interested in personal jewelry styling and light creative assembly.

Western cowboy style: Each bracelet in this 7-pack set features rustic brown wooden beads, earthy clay beads, and a charming "Cowboy Howdy" accent bead, perfect for boho, western, or country fashion lovers.

1. 【Fashionable and More】 : Our clay beads for bracelet making kit are made with this year's popular fashion elements, giving you more creativity and style in color matching. And 20% more than other beads, can make more jewelry, bracelets, necklaces.
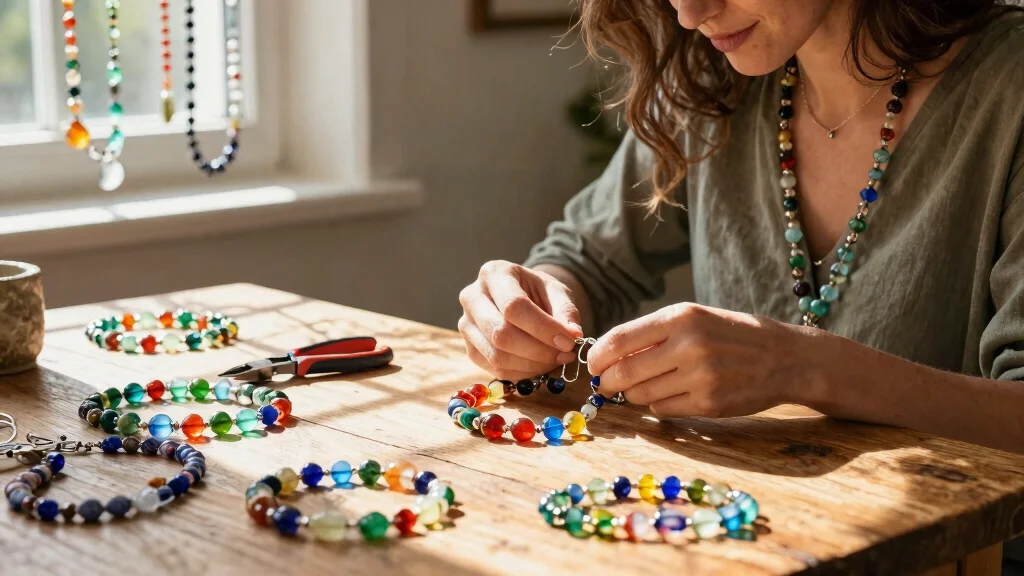
14. Colorful Seed Beads and Wooden Mix
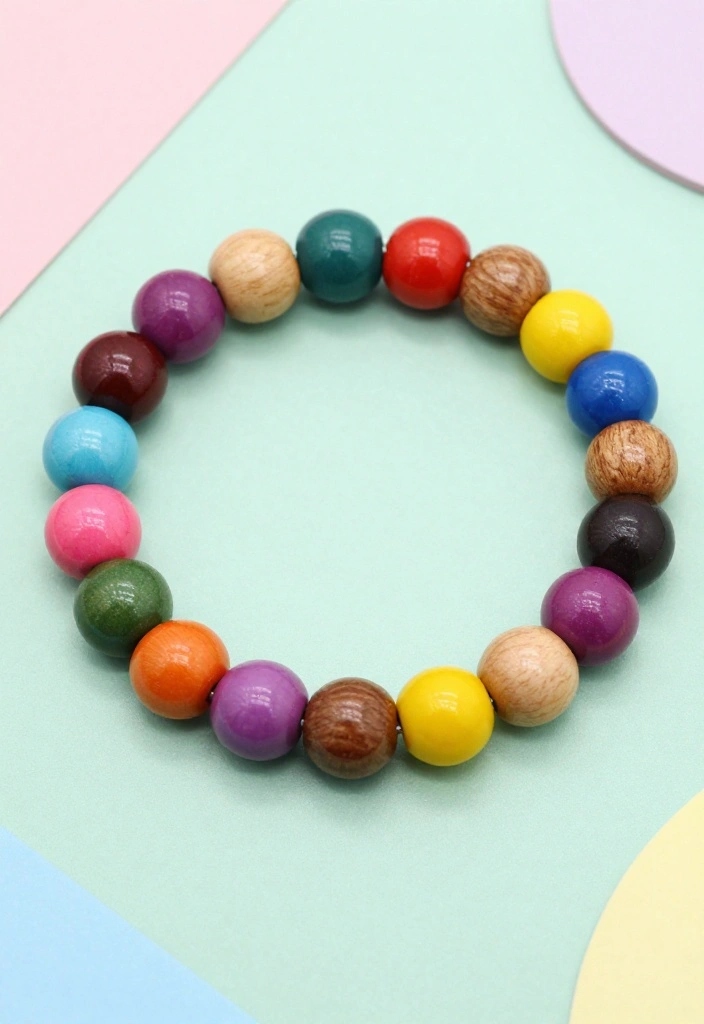
Brighten up your design by incorporating colorful seed beads with wooden beads for a vibrant, playful look! Small seed beads add pops of color and texture to your bracelet. Use a variety of colors to create patterns or gradients, making your piece truly unique and expressive. This design resonates well with cheerful, fun-loving individuals!
Play around with different color combinations and patterns to find your perfect style. Mixing sizes can add intrigue to your design.
1. Gather wooden beads, seed beads, and elastic cord.
2. Decide on a pattern or color scheme that excites you.
3. Cut elastic to your desired length and string the beads alternately.
4. Secure knots and enjoy your vibrant creation!
Color is the smile you wear on your wrist. Mix colorful seed beads with wooden beads for a vibrant, playful look, then try patterns and varying sizes to find your signature diy wooden beads bracelet style.
15. Shell-Inspired Wooden Beads
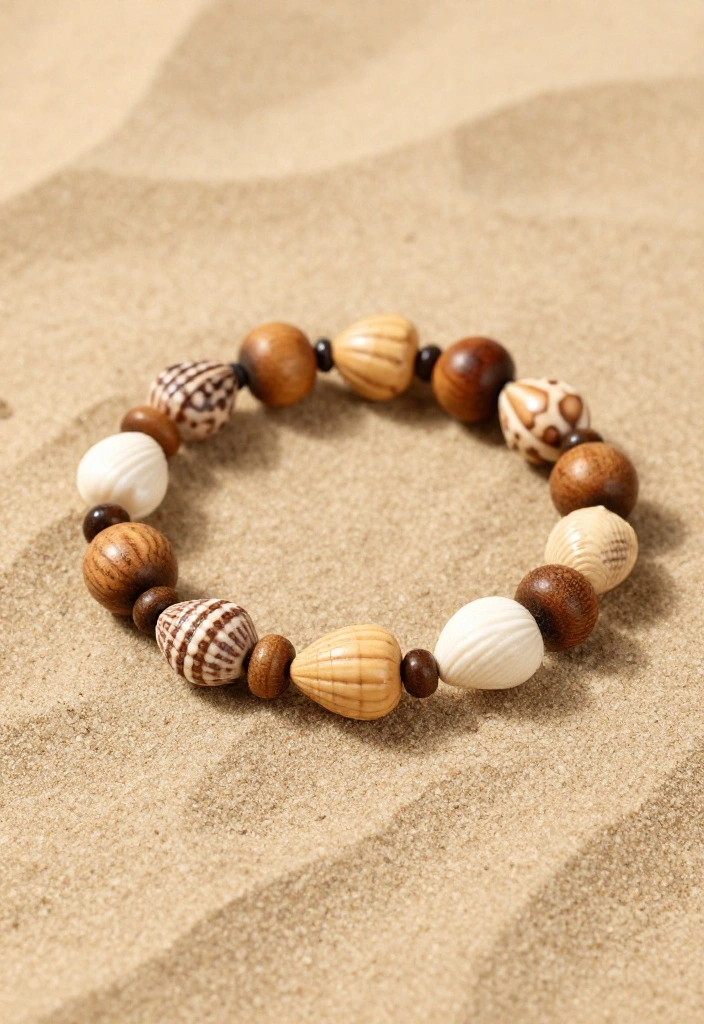
Wrap up your DIY journey by crafting a shell-inspired bracelet with wooden beads! Choose wooden beads shaped like seashells and pair them with natural colors to evoke beach vibes. This bracelet is ideal for summer outings or beach parties, making it a fantastic accessory for warm weather. It serves as a beautiful reminder of seaside adventures!
Limit your design to a few statement-shell beads for balance and harmony.
1. Gather shell-shaped wooden beads, elastic cord, and any additional decorative elements.
2. Cut the cord to fit your wrist size.
3. String the beads in your desired arrangement.
4. Secure knots and trim any excess cord.
5. Enjoy your beachy bracelet!


Conclusion
Each of these 15 DIY wooden beads bracelet ideas tells a unique story, inviting you to express your creativity and passion for nature.
Whether you prefer vibrant colors, earthy tones, or personalized designs, there’s a style for everyone to enjoy. So, grab your materials and let your imagination run wild! Your new eco-friendly accessories are just a craft away.
Frequently Asked Questions
What are the best beginner-friendly diy wooden beads bracelet ideas for a natural vibe?
Starting with diy wooden beads bracelet basics is easy and fun. Here are a few beginner-friendly ideas you can try today:
1) Minimalist single-strand on natural hemp cord — a few wooden beads and a simple knot for a clean, natural look.
2) Boho macrame wrap — wrap the cord several times around the wrist with wooden beads placed along the strands for texture, finished with a sliding knot for adjustable wear.
3) Adjustable bead bracelet — string beads on elastic or knotted cord with a small bead stopper so you can resize without a clasp.
4) Layer-ready multi-bead design — mix bead sizes and tones on a longer cord so you can stack with other bracelets for a true natural materials projects vibe. Tip: seal rough edges and play with warm wood tones to enhance the boho bracelet designs feel.
How do I choose sustainable wooden beads for eco-friendly jewelry making?
For a genuinely eco-friendly look, choose beads from sustainably sourced woods like bamboo, cork, or reclaimed pieces. Look for natural finishes or ones sealed with non-toxic oils to keep things nontoxic and beautiful. Avoid dyed or plastic beads if you want the wooden bead crafts aesthetic. Practical steps: 1) check the supplier’s sustainability statements, 2) inspect holes for clean edges and consistent sizing, 3) pick bead sizes that suit your pattern, 4) decide on a finish (beeswax or mineral oil work well). This keeps your handmade jewelry ideas authentic and friendly to the planet.
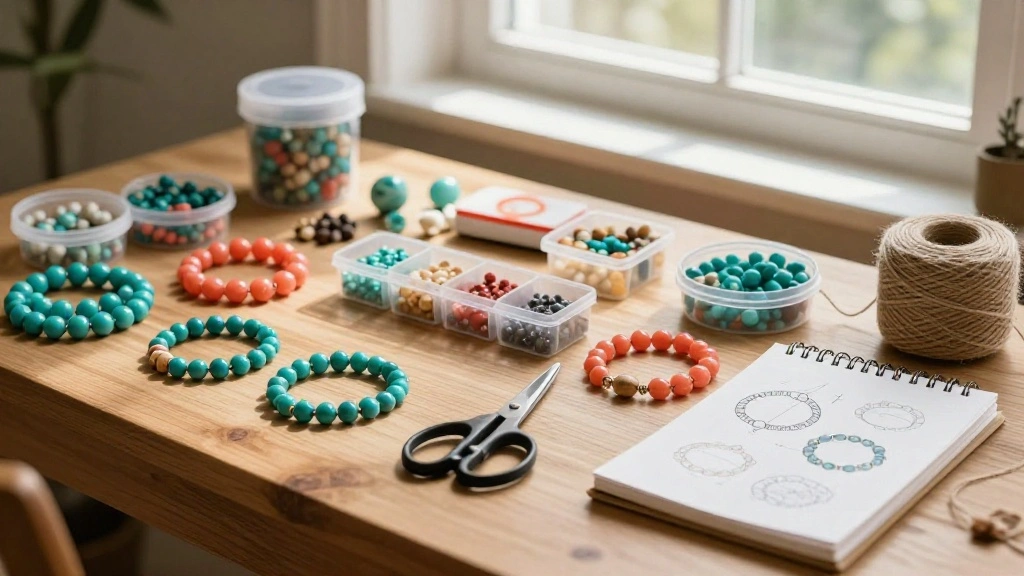
What tools and techniques do I need to assemble a diy wooden beads bracelet at home?
You don’t need a studio to start—just a few common tools and a dash of patience. Essentials: bead thread or elastic cord, scissors, measuring tape, a bead needle (optional), a thin bead awl, jump rings, and a clasp or an adjustable knot setup. Techniques: cut the cord to size, string your beads, finish with a secure knot or crimp, add a clasp or create a sliding knot, then trim and seal if desired. With these basics, your creative DIY accessories repertoire grows every afternoon.
How can I customize diy wooden beads bracelet for different outfits or occasions?
Play with bead size, tone, and cord type to match outfits or moods. For a boho bracelet designs, mix light and dark woods on a multi-strand or wrapped design and add tassels or charms. For minimalist looks, use a single strand with uniform beads on a neutral cord. Try different closures—sliding knots for adjustable wear or a simple clasp for a polished finish. This is where your handmade jewelry ideas shine as creative DIY accessories.
How should I care for wooden bead crafts to keep the natural vibe lasting?
Wood loves a little upkeep. After wearing, wipe with a dry, soft cloth and avoid soaking in water. Every few months, nourish the wood with a light coat of beeswax or mineral oil to maintain moisture and prevent cracking. Store your bracelets away from direct sunlight and extreme heat, and check bead holes for wear. With these simple steps, your natural materials projects stay vibrant and your diy wooden beads bracelet looks handmade for years.
Related Topics